

Craftsman 137219090 Owner’s Manual

®
CAUTION:
Before using this Drill Press,
ream this manua_ and follow
a_l its S Rules and
Operating instructions°
Sears° Roebuck and Co. Hoffman Estates, IL 60179 USA
Part No. 157219090001
Installation
Operation
Maintenance
Parts List

_Ft .............. 120V, _ NZ, 2.2 AMP& Yo_r d_ press is _red _t _e _o_ _r _20V ope_on,
HO_8_P_ ........ 1_ HP (M_. D_) _nr_ to_ 120V, 15 AMP branch _r_ _n_ u_
TA_L_ $_E .......... 7o5/64" X 7o3/4" _5 AMP _ime de_ayfuse or circuit breake_oTo avoid shock
or _re_ rep_ _er co_ }mm_iete_y _ it'_sworn, cut or
Safety is a combination of common sense, staying atert
and knowing hew to use your drdl press.
I4. REPROVEADJUSTINGKEYSANDWRENCHES.
Fromthehabitofchecking;e seethatkeysaed
adjustingwrenchesareremovedfromthetoolbefore
NEVER LEAVE TOOL RUNNING UNATTENDED.
TURN THE POWER "OFF". Don't teave _hetoot until
it comes _o a comDle_e stop.
_b avoid mistakes that could cause serious _ntury, do not
plug the drHipress in unti_ you have reaa and understood
1. READ and become familiar with this entire instruction 17. DON'T OVERREACH. Keep proper footinq ano
manual LEARN the t_l's appii_tions, limitations and balance at a_l times.
possible hazards.
2. KEEP GUARDS IN PLACE and inworking order.
DON'T USE IN A DANGEROUS ENVIRONMENT.
Don't use power toots in dame or wet locations, or
exeese them to rain Keep work area well lighted.
DO NOT use power tools _nthe presence of flammable
liquids Or gases.
5 KEEP WORK AREA CLEAN. Cluttered areas and
benches invite accidents.
6. KEEP CHiILDREN AWAY. All visitors should be kept at
a safe distance from the work area,
DON'T FORCE THE TOOL. It win do the job better
and safer at the rate for which ff was designed.
USE THE R_GNT TOOL. Don't force tool or the
attachment to do a job for which it was net designee.
g. WEAR PROPER APPAREL, DO NOT wear _oose
c_othing, g}oves, neckties rings, bracelets, or other
jewelry which may get caught in moving par_s.
Nonslip footwear is recommended. Wear protective
hair covering to contain Jong hair,
16,
NEVER STAND ON TOOL. Serious injury could occur
if the toot is tipped or if the cutting _oo_is unintentionally
contacted.
18. _aA_NTAIN TOOLS W_TN CARE. Keep tools shard
and clean for best and safest pedormance. Follow
instructions for lubricating and changing accessories.
19
CHECK FOR DAY,AGED PA_S. Before further use of
the tool. a guard or other part that is damaged should
be carefully checked to determine [hat it wi# f_rate
propedy and aertorm its intended function. Check for
alignment of moving pa_ts, binding d moving part&
breakage of pars. mounting, and any other conditions
_hatmay affect its operation. A guard or other part that
/s damagea should be proper_y _paired or replaced.
20, MAKE WORKSHOP K_DPR_F with padlocks, master
switches, or by removing starter keys.
21 DO NOT operate the tc©_ityou are under the _nfluence
d any drugs, alcehol or medication that could affect
your ability to use the too_properJy.
22_
Dust generated from certain materials can be
hazardous to your heaffh. Always operate the drill
#ross lea weIFventi_ated area and provide to[ proper
dus[ removal. Use dust collection systems whenever
11. D_SCONNECTTOOLS before servicing, and when
changing accessories such as blades, bits, cutters
and the like.
12. REBUCETNE R_SKOF UNiNTENTiONAL STA_NG,
Make sure the switch _sin _'OFF" position before
plugging in
l& USE RECOMMENDED ACCESSOR_ESo Consult the
owner's manual for the recommenae_ accessories.
Th_ use of improper accessories may cause risk of
injury to persons.
SAVE THESE NSTRUCT ONS
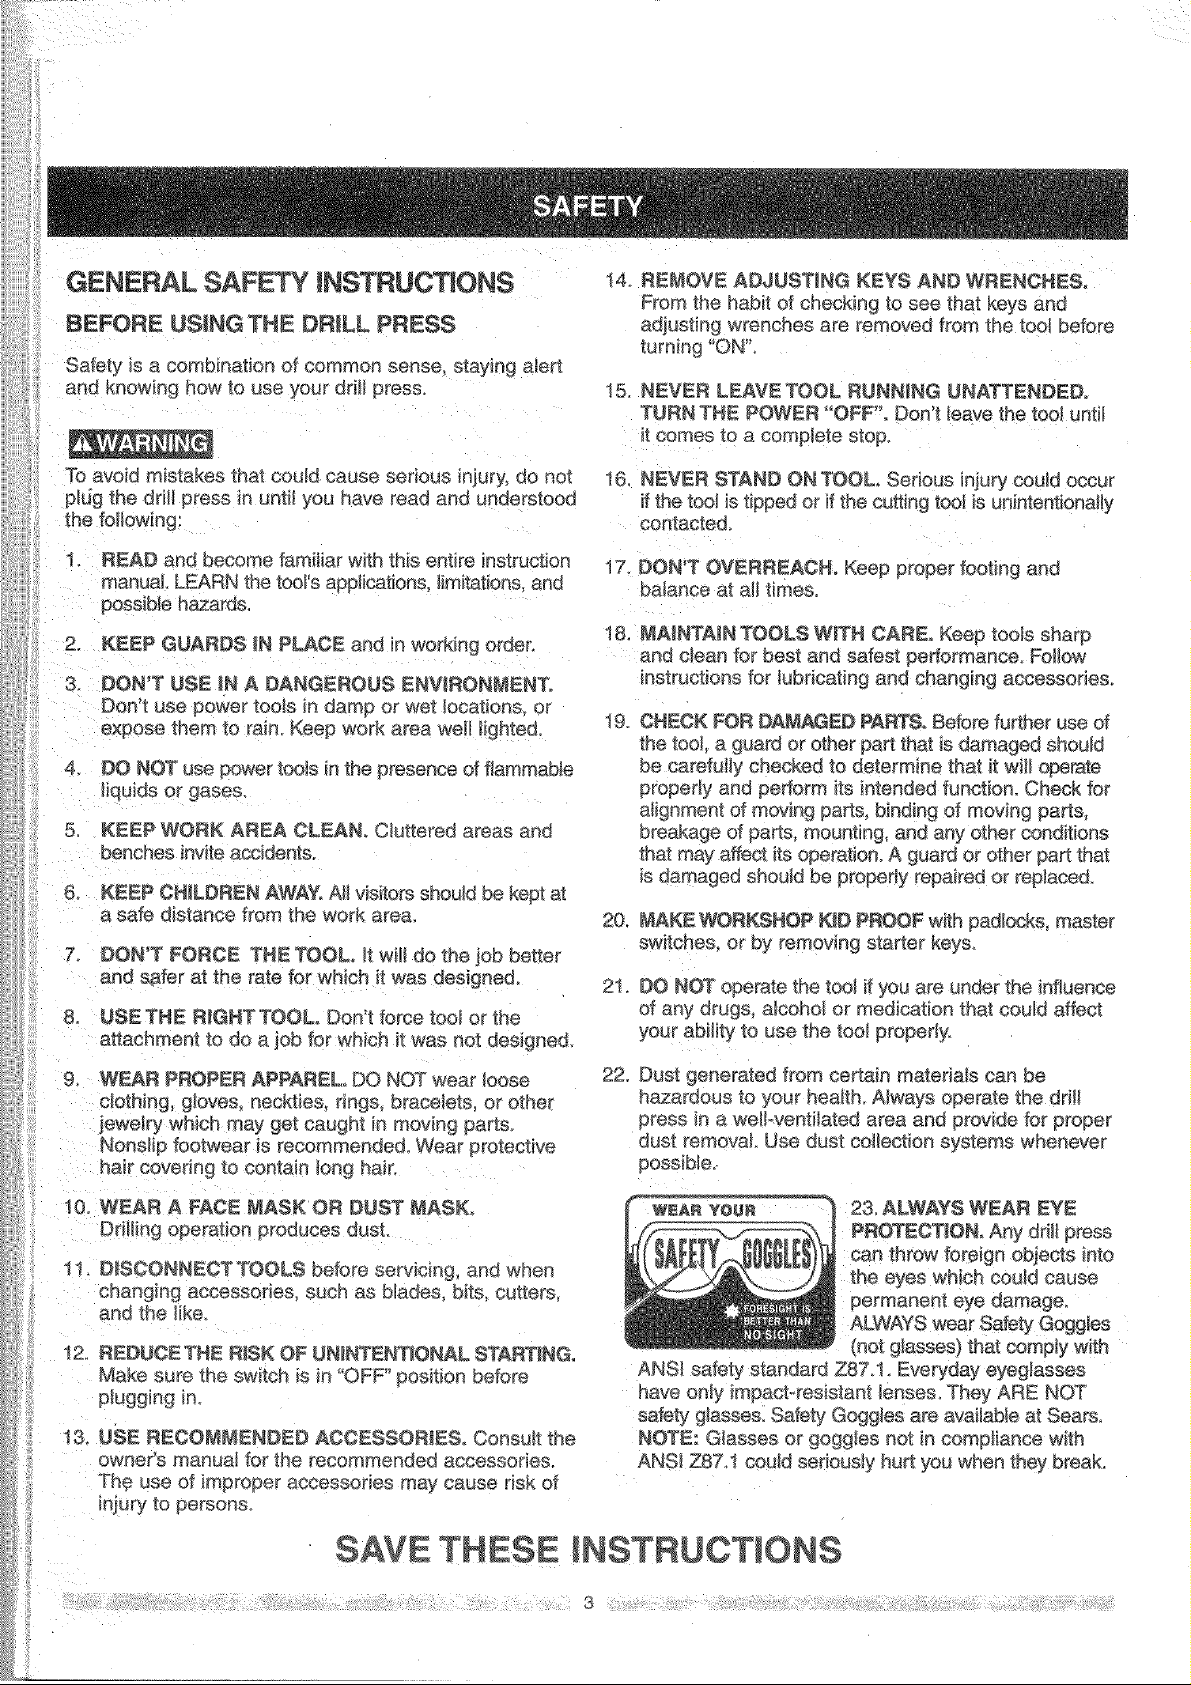
2& ALWAYS WEAR EYE
the eyes which could cause
permanent eye damage_
ALWAYS wear Safa#¢ G_ggles
(not g}a_es) that comply with
ANS_ safety standard Z87.1. Everyday eyeglasses
have only impact_resistaet lenses. They ARE NOT
safety gta_eso Safety Goggles are available at Sea_.
NOTE: Glasses o_-Doggies not in compliance with
ANSi Z87.1 could seriously hu_ you when they break.

SPECiFiC SAFETY NSTRUCTJONS
FOR THE DRILL PRESS
R_r your _n sabLv, _ not try to use your ddit press
or plug i_in until ff is completely &ssembled and isstailed
a_o_ing © the i_stmctions, arm uctil you have read and
u this instrd_on manual:
YOUR DR_LL PRESS _UST BE 8OLTE# securely
_e a workbench. _nadditioe, if there is any tendency
for your ddl_ press to move during certain operations
bolt the workbench to the floo£
2.
THiS DRILL PRESS is intended for use tn dry
conditions, indoor use oniyo
3_
WEAR EYE PROTEO[ION. USE race or dust mask
a_ong with safe_ goggles ff ddlJing operation is dusty_
USE ear prote_ore, esp_ialIy dudng extended periods
4 DO NOT wear #Joves, neckties or I_se c_othing.
5 DO NOT tr_ to dril_ materia_ too small m be securely
held.
6 ALWAYS keep hands out ot tb_ path of a drill bit.
Avoid awkward hand positions where a sudden slip
coupe cause your hand to move into the dd_ bit.
7_
DO N_ install or use any drill bit that exceeds
175 mm _7") in length or ex_ends 150 mm {6"} be{ow
the chuck }aws_They can suddenly bend outward o_
break
8. _ NOT USE wire wheels router b_ts sneer c_ers
circ_e (fly) cubers, or rotary p_aners on th_s dr#| pre_
14 SECURE WORK. Use damps or a vise to hold the
work when pract}caL ft's safer than using your hand
and ff frees both hands to operate tool
15.
WHEN using a ddll press vise, always fasten to the
_Me.
16. P_AKE SURE aHclamps and _ocks are firmly
17.
SECURELY LOC_ THE HEAD and fable support to
the column, and the taMe 'tothe table support before
o_ratin_ the drill press.
18.
NEVER turn your ddll press on before deadng the
taMe of a_lobjects (tools, scraps of wood, etc.)
19.
BEFORE STARTING the operation, jog the motor
switch to q_ake sure the ddH bit does not wobble or
vibrate,
20.
LET TR_ SPINDLE REACH FULL SPEE# before
Starting to rid& ff yourdd_! press makes an unfamiliar
noise or ff it vibrates excessively, stop immediately,
turn the dd_lpre_ off and unplug. Do not restart until
the proMem is corrected
21.
DO NOT pediorm _ayout assemMy or set up work on
the table while the ddtl press is in operation.
22,
USE RECOMMENd# _EED for dntl accessory and
matedaL SEE t NS that come
23.
WHEN DRILUNG large diameter ho}es,clamp the
woCKpiecefirmly to the table. Otherwise, the b_ may
grab and spin the workpiece at high speed. DO NOT
USE fly c_e_ or multiple-part hole cubers, as they
can come _art or become unbatan_ in use.
9. WNE_ t cu_ing a large piece of mateda_ make sure it
_sfu#y supported at the table height.
I0. DO NOT pedorm any o#eration _reehand, ALWAYS
ho_dthe workpiece firm{y a£ainst the tame se it will
r_o[_ck or twist. Use c_amps or a wse for unstable
_vorKi )i_es.
_ _A_.E SUR_ there are no na_s _r _oreign objects in
the part ot the wor_piece to be dd_led,
2. C_P WOR_P_ECE OR BRACE against the _e/t
side ot the column to prevent rotation, ff it is t(_ shod
or the table is fl_tedoc_amp solidly to the table and
use the fence provided.
_, _FTHE WOR_P_KCK overhangs the tame such Ihat
it will fa_ or t_# _1not he_d, c_amp it to the ,taMe or
provide auxiliary suppor_,
SAVE THESE NSTRUCT ONS
24° _AKE 8NR_ the spind}e has come to a complete
stop before toucMng the workp_ece.
25. _ AVO_# I_NJURYfrom accidenta_ starting, aiways
turn _e switch "OFP ano unplug the dd_press before
installing or removing any accessory or a#.achmenl
or making any adjus_mento
26. _EP GUARDS _NPLACE and in working order.
27. _8E ONLY SELFoEJECT_NG _P_ CHUC_ _EY as
provided with the ddll press.
GROUNDING INSTRUCTIONS
iN THE EVENT OF A MALFUNCTBON OR BREAKDOWN,
grounding provides a path of least resistance for etectdc
current andreduces the risk of electric shock. This tool
is equippea with an electric cord that has ar equipment
grounding conductor and a grounding plug. The pJug
MUST be plugged m_o a matching receptacle that is
propedy installed and grounded in accordance with ALL
local codes and ordinances
DO NOT MODIFYTHE PLUG PROVIDED. ff itWill no[ fit the
receptacle, have the prober receotae{e installed by a
This toot is ntended for use on a circuit [hat has a
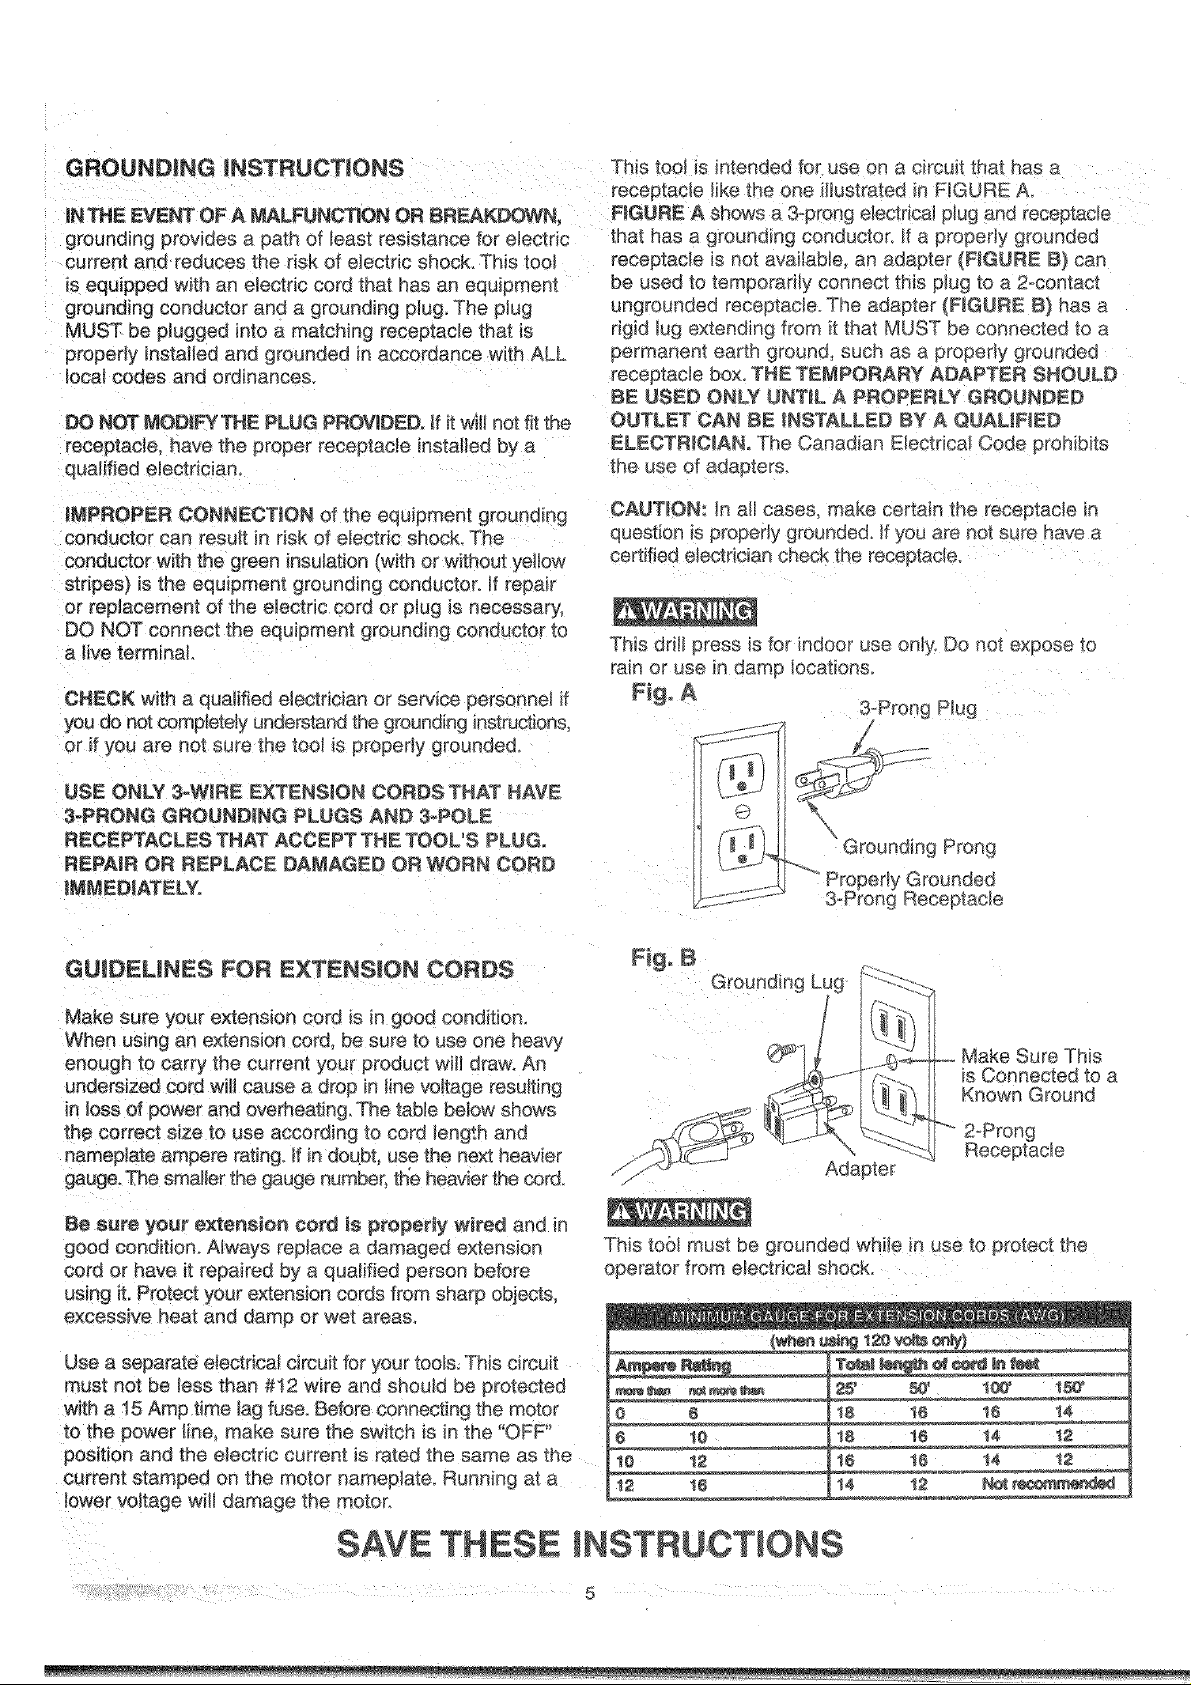
receptacle _ikethe one i_ustrated in FIGURE A.
FIGURE, A shows s 3-prong electrica; plug and receptaae
that has a grounding conductor_ ff a properJy grounded
receptacle is qo_available an adap[er (FIGURE B} can
be used to Temporarily connect this p_ug to a 2-contact
ungrounaea receetacle. The adapter (FIGURE B) has a
rigid _ug extending from it that MUST be connected to a
permanent earth ground, suet as a propedy grounded
receptacle box, THE TEMPORARY ADAPTER SHOULD
BE USED ONLY UNTIL A PROPERLY GROUNDED
OUTLET CAN BE iNSTALLED BY A QUALIFIED
ELECTRICIAN. The Canadian Hectdcal Code orohibits
the use of adapters.
iMPROPER CONNECTION of the equIpment grounding
conductor can result in risk of electric shock. The
conductor with the green insulation (with or without yel!ow
stripes) is the equipment grounding conductor, If repair
oFreplacement of the electde cord or plug is necessary,
DO NOT connect the eeuipment grounding conductor to
a live terminal.
CHECK with a oualified electrician er se_tce oersonnel ,_
you do not completely undePstandthe grounding instructions
or if you are not sure the tool is propedy grounded,
USE ONLY 3oWIRE EXTENSION CORDS THAT HAVE
3-PRONG GROUNDING PLUGS AND 3*POLE
RECEPTACLES THAT ACCEPT THE TOOL'S PLUG,
REPAIR OR REPLACE DAMAGED OR WORN CORD
IMMEDIATELY°
GUIDEL_NES FOR EXTENS!ON CORDS
Make sure your extension cord _sin good condition
When using an extension cord. be sure to use one heavy
enough to carry the current your product wit/draw. An
undersized cord wi_lcause a drOP in Hnevoltage resulting
in loss of power and overheating, The table below shows
the correct size to, _seaccordino to cord _ength and
nameplate ampere rating. # in doqbt, use the next heavier
gauge. The smaller the gauge number, taleheavier the _rd.
CAUTION: in a_ cases, make certain the receptacle in
question is propedy grounded, ff you are not sure have a
ceRified electrician check the receptacle_
This ddR press is for indoor use only. Do not expose to
rain or use in dame locations
/
_nd_ng Pronq
-"" Properly Grounded
3-Prong Receptacle
Grounding Lug
Sure This
is Connected to a
Known Ground
g
Receotacle
Be s#re your extension cord is p_perly wired and in
good condition. A_ways reolaee a damaged extension
cord or have it repaired bV a qualified person before
using it. Protect your extension cords from sharp objects.
excessNe heat and damp or wet areas
Use a separate electrical circuit for your tools. Th_sc_rcuit
must not be tess than #12 wire and shoutd be #roteeted
with a 15 Amp time lag fuse. Before connecting the motor
to the power _ine.make sure the switch is in the "OFF"
position and the electric current is rated the same as the
current stamped on the motor nameplate. Running at a
lower voltage win damage the motor_
SAVE THESE NSTRUCT ONS
This too_ must be grounded while in use to protect t#e
operator from electdca! shocK.
1_ 14
I8 18 14 12
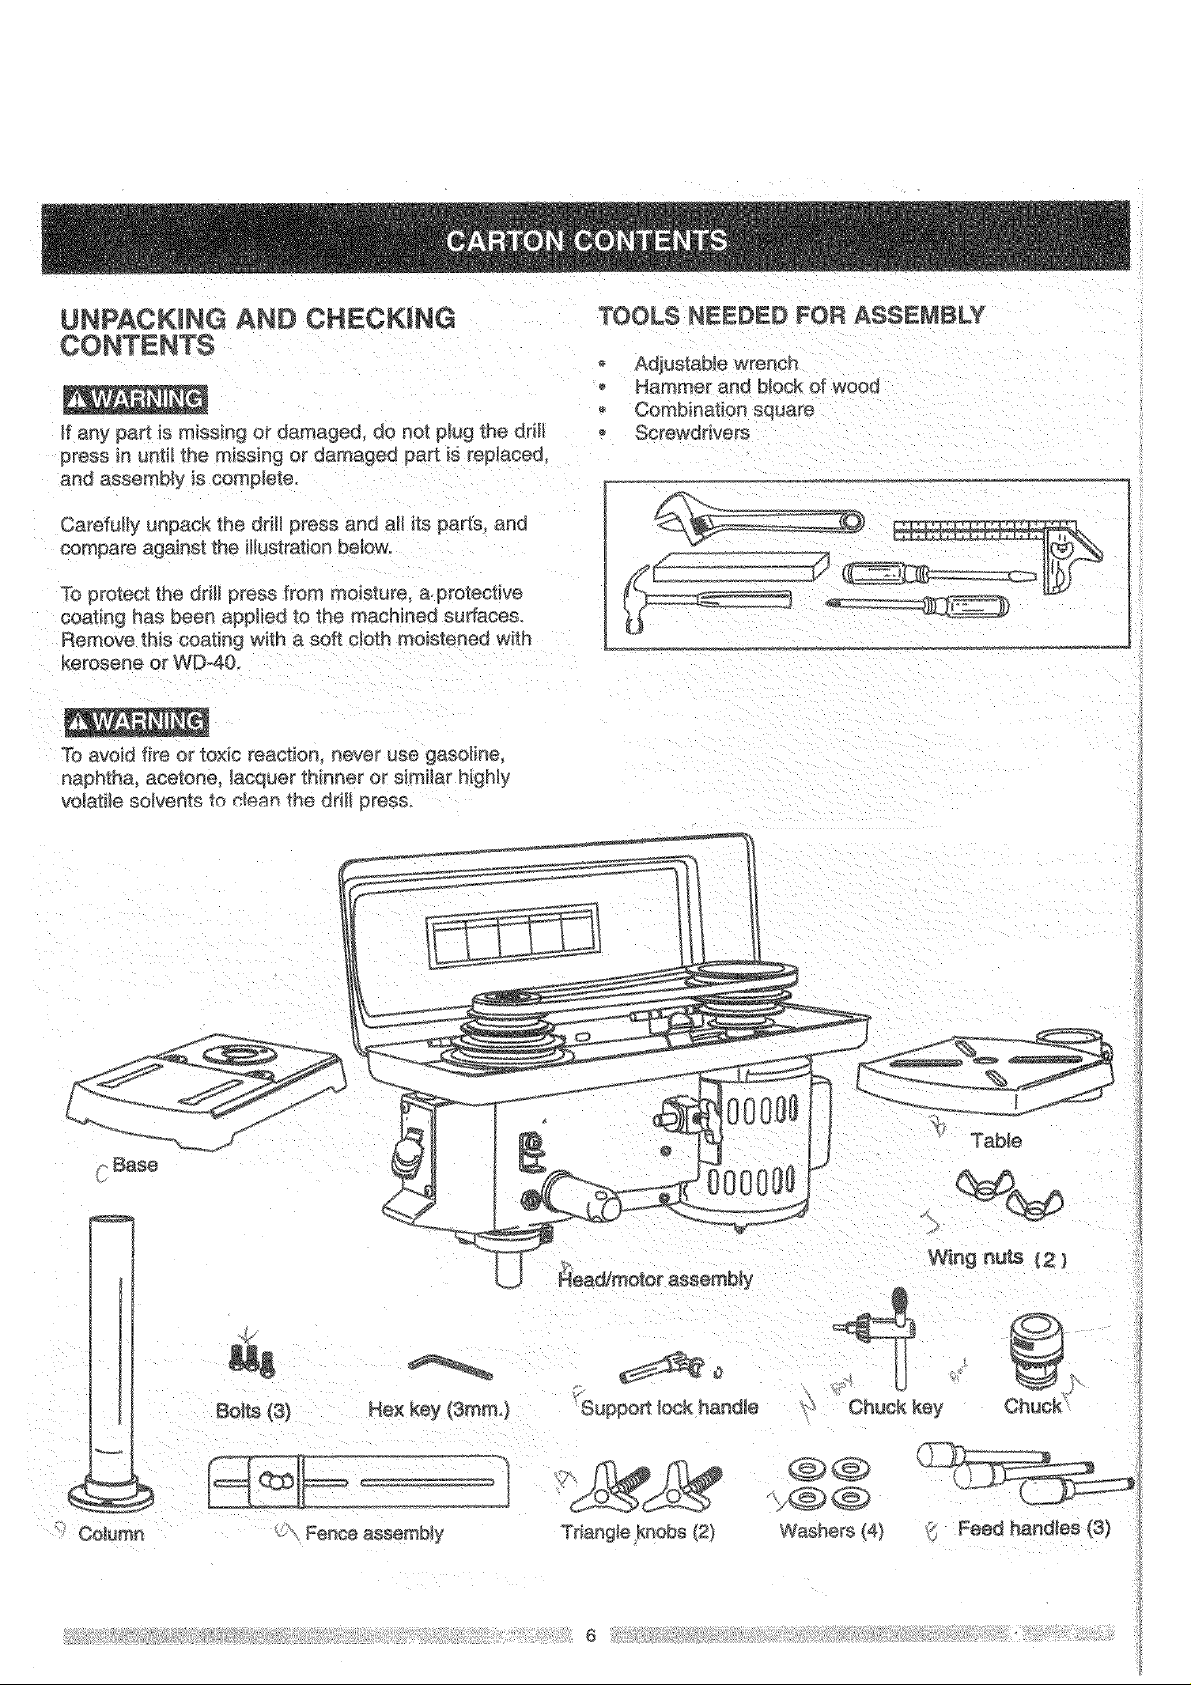
UNPACKING AND CHECKING
TOOLS NEEDED FOR ASSEMBLY
CONTE NTS
Hammer and block of wood
o Combination square
If any part is missing or damaged dO nol plug the ddll Screwdrivers
press in until the missing or damaged parl is replace&
and assemb|y is complete_
Carefully unpack the ddH press ann all its paris, and
compare against the illustration h÷low.
To protect the dr#! press trom moisture, a protectwe
coating has been applied to the machined surfaces.
Remove this coating with a soft cloth moiste;ned with
kerosene or WD-40.
To avoid tire or toxic reaction, never use gasoline,
naphtha_ ace[one, lacquer thinner or s_mHarhigh y
volatfle solvents T_ clean the drilt press=
BAse
Column
Bo_s (3}
Fence assembly
Read/motor assembbJ
J
Triangle '(hobs (2)
Washers f4_
Table
Feed handles {3)
suppotl
Motor
pulley
Depth stop
f
/
/
\
/
Support lock handle
Base
Bevel I_k
TabJe
Fence backstop
Chuck
Column supporl
Headlock
Column
support
screw
 Loading...