

Page 1
Performance Hardware
User’s Guide
H o w T o O p t i m i z e
y o u r S S D B o o t D r i v e
A guide showing a few simple steps to optimize the performance of your SSD
boot drive.
Version 1.0 July, 2010
Page 2
How to Optimize your SSD Boot Drive
Introduction
SSDs are the fastest drives available for desktop and portable computers.
However, modern operating systems, programs, and games can quickly
take up a huge amount of storage. One very popular set-up these days is
for users to use an SSD for their boot drive and use standard hard drives for
data storage space. Therefore, it’s wise to optimize the SSD space that you
have when using an SSD as your boot drive.
There are a few simple things you can do to get the most performance out
of any SSD. Outlined in this guide are the steps we took to achieve maximum results without impacting performance while also saving on disk
space. Our guide was assembled using the Force series F40 SSD and the
information here applies to all of the SSDs in our lineup.
Page 3
How to Optimize your SSD Boot Drive
Disable Hibernation
1
If your system isn’t a laptop or netbook then you probably won’t ever need
hibernation. While hibernation is turned on your system keeps a file on the
root of your drive where it saves information about what you’re currently
doing on your computer. Disabling hibernation is easily accomplished with a
simple command line and will save you several GB’s of space. On our F40
we found that disabling Hibernation saved us roughly 8GB of space (20%)!
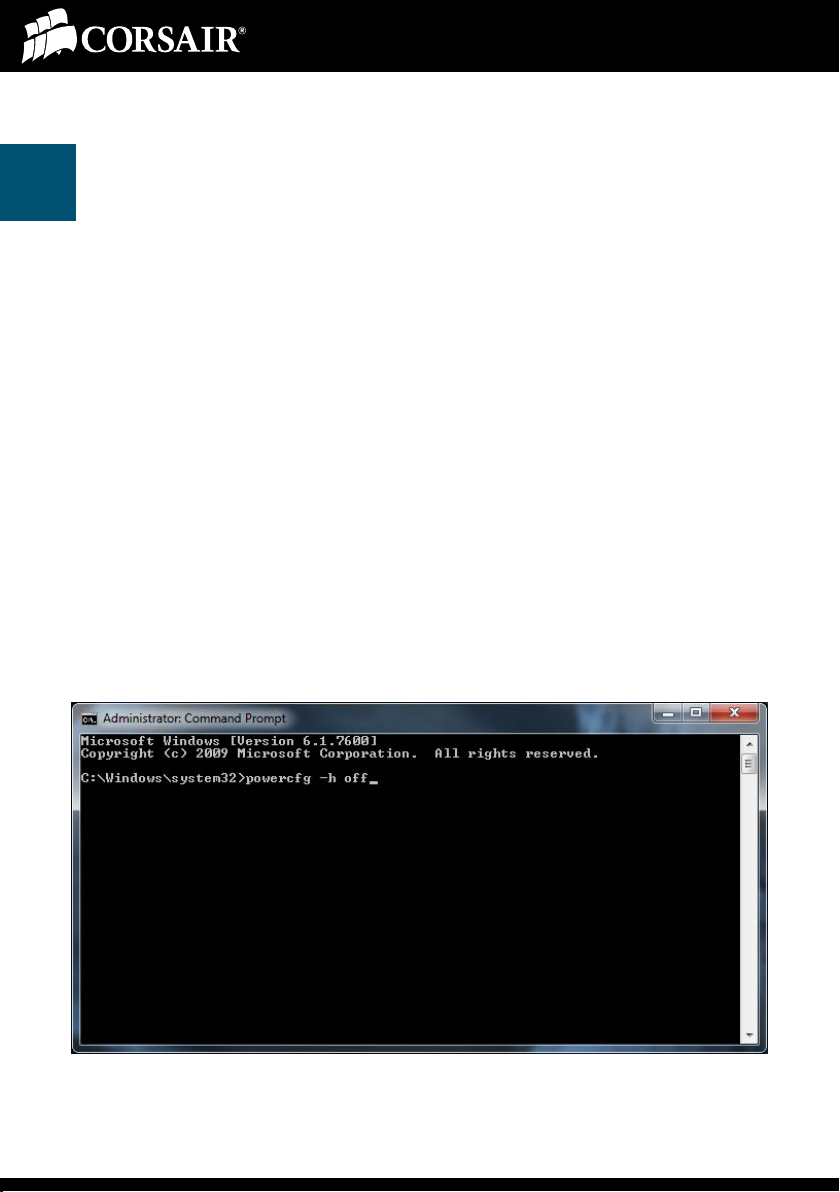
Here are the steps we followed:
1. Click on the “Start” button (Window’s logo icon in the lower left
hand corner of your desktop) and type “command” into the
search field.
2. Right click on “Command Prompt” at the top of your search
results and choose “Run as Administrator”.
3. In the DOS window enter the following command: powercfg –h
off
4. Close the command window.
Page 4
2a
How to Optimize your SSD Boot Drive
Change your Page File Settings
The primary purpose of your page file is to act as virtual memory. Windows
7 primarily uses it for a couple of things; first off it acts as a staging area for
information the OS thinks it might need next (think cache) and as a backup
in case you don’t have enough physical memory (DRAM). Additionally
some applications are written to utilize the page file and may refuse to work
correctly without one being present.
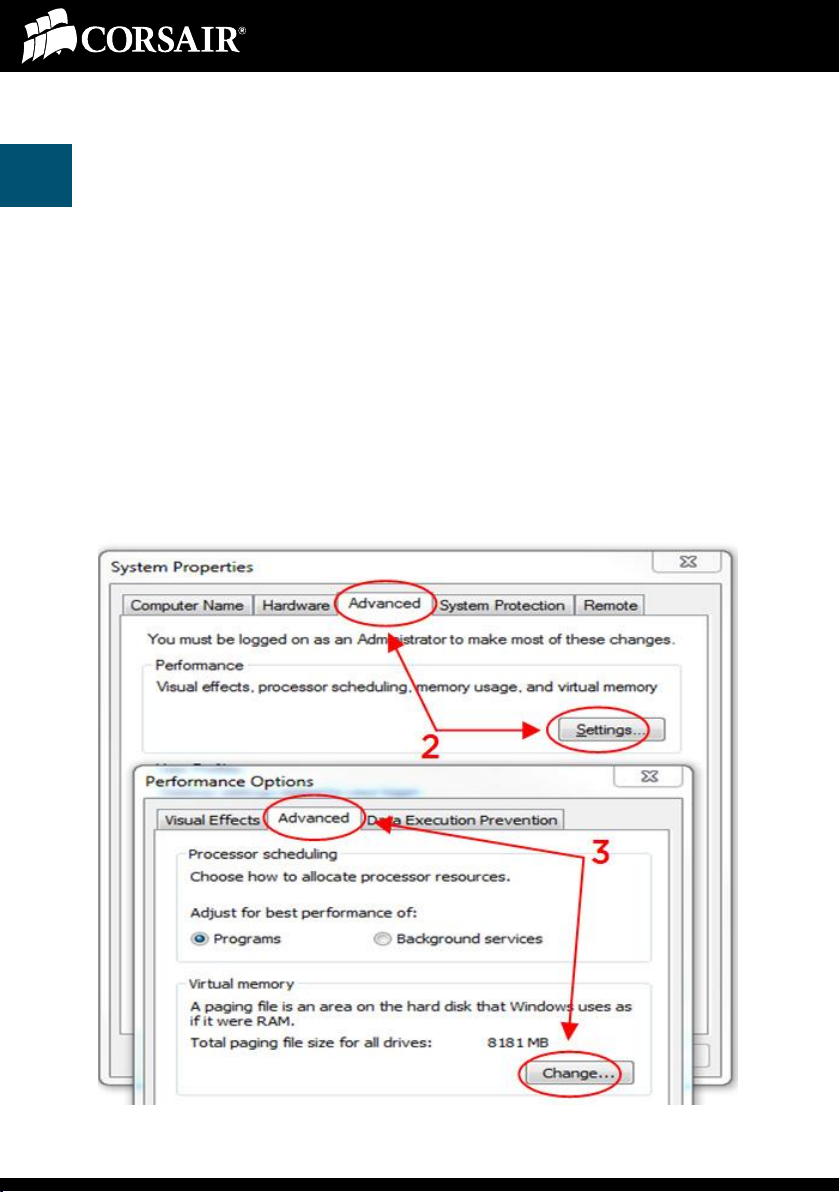
Here are the steps we followed in Windows 7 to change the page file settings:
1. Click on the Start button then right click on “My Computer” and
choose “Properties”.
2. In the left pane, click “Advanced” then click on “Settings” under
“Performance”.
Page 5

2b
How to Optimize your SSD Boot Drive
Change your Page File Settings
The steps continued:
3. Select the “Advanced” tab and click on “Change” in the “Virtual
Memory” section.
4. Uncheck the box at the top and select your SSD.
5. Click on “No paging file” then click on “Set”. Ignore any warn-
ings, we’re simply relocating the pagefile.
With so much system memory in today’s computers you might think that
you could get away just turning off your page file. However, we have experimented with various page file settings and found that you get better
performance by relocating the page file to a storage drive and believe this
option is the best solution. In our testing the performance difference using
this solution was barely measureable.
Page 6

2c
How to Optimize your SSD Boot Drive
Change your Page File Settings
The steps continued:
6. Select your secondary drive and click on “System managed
size”.
7. Click on “Set” then “OK”.
8. Reboot your computer and confirm that everything is where it
should be. The pagefile.sys is a system file so you won’t be
able to see it till you’ve changed your file view properties.
The nature of the page file means that your OS is going to be constantly
writing to it and while we don’t need to worry about fragmentation on an
SSD like we would on a traditional hard drive we do need to take into consideration the impact constant writes to the page file will have on the lifespan of your SSD.
Feel free to experiment with different settings; what works best on your
system might be different, and you can always go back to an earlier setting.
Page 7
3a
How to Optimize your SSD Boot Drive
Turn off Indexing
Indexing is a trick Windows uses to speed up the search for information on
your hard drive. This helps on rotating media (HDD’s) but doesn’t provide
any benefit on an SSD, and only increases CPU overhead. Indexing can be
disabled in Windows Services.
Page 8

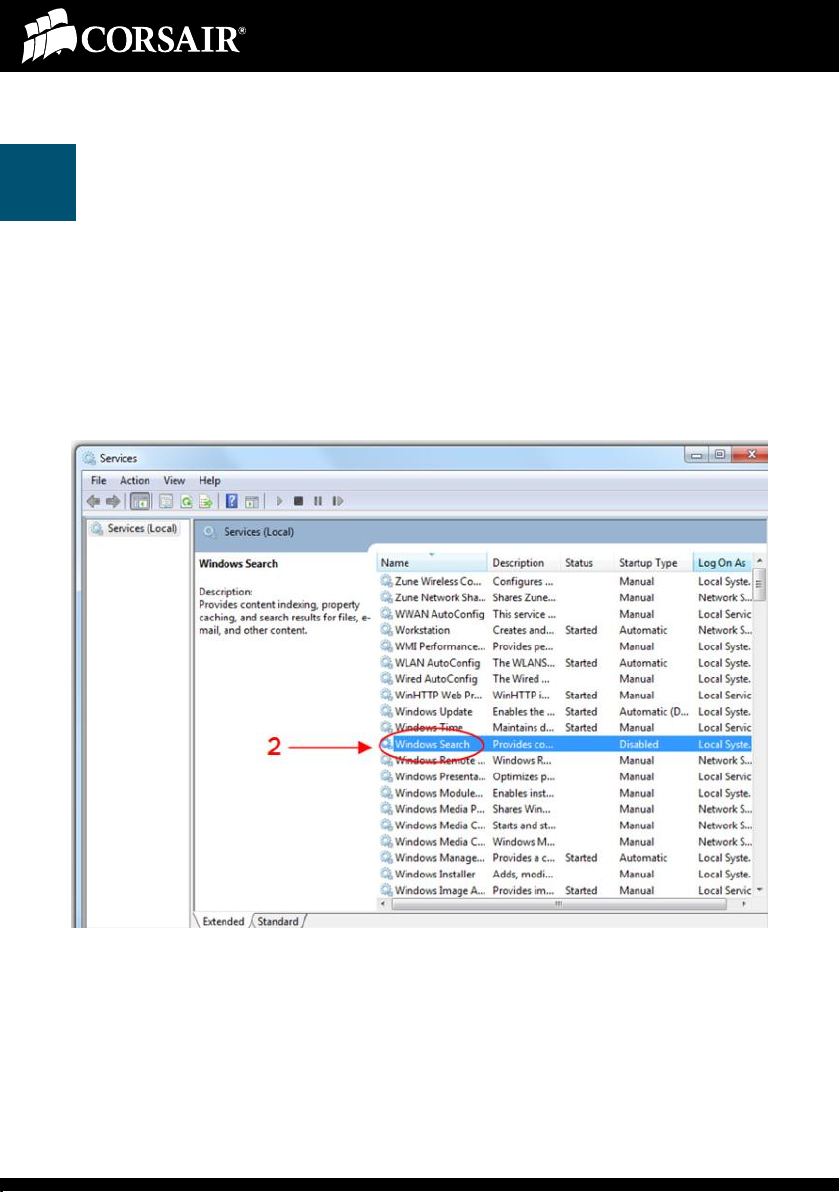
3b
How to Optimize your SSD Boot Drive
Turn off Indexing
Here are the steps we followed to turn it off:
1. Click on the “Start” button and type “services” into the search
field then click on the “Services” program in the results field.
2. Double-click on “Windows Search”. (tip: sort by name)
3. Change “Startup type” to “Disabled” and click on “Stop” to turn
off the service currently running.
Page 9

4a
How to Optimize your SSD Boot Drive
Modify Windows System Restore
While you could turn this function off entirely we feel that it’s worth keeping
around. After all, as good as Windows 7 is, it still occasionally encounters
problems, and being able to roll back your OS to an earlier version could
save you the headache of having to reinstall everything from scratch. By
default, System Restore will reserve between three and five percent of your
drive, which means that your system is setting aside at least 1GB.
Here are the steps we followed to modify System Restore:
1. Click on the Start button then right click on “My Computer” and
choose “Properties”.
2. In the left pane, click “System protection”.
3. Under “Protection Settings”, click on your SSD then click
“Configure”
Page 10

4b
How to Optimize your SSD Boot Drive
Modify Windows System Restore
The steps continued:
4. Under “Disk Space Usage” move the slider all the way to the
left.
According to Microsoft you’ll need to allow the system to reserve at least
300MB (http://windows.microsoft.com/en-US/windows7/How-much-disk-
space-does-System-Restore-require). Fortunately, you control the percent-
age of reserved space with a slider bar, so it’s impossible to go below that
barrier.
Page 11

How to Optimize your SSD Boot Drive
Game and Program Files and the Completed
5
While installing and running your games and programs on your SSD will be
quickest, you’ll want to determine on a case by case basis which ones are
important enough to reside on your SSD. Programs such as Outlook rely on
a database file and really benefit from the increased IO of an SSD while
most other programs aren’t going to see the same level of benefit and basi-
cally just take up space.
Today’s games usually run 5GB or more (Starcraft II takes 10.5GB!). So
you’re not going to be able to install many games on your boot drive at the
same time if you are using a smaller SSD such as the F40 used here.
Installation
Our Windows 7 Ultimate 64bit installation after using this guide takes up
10.4GB. And once you’ve installed Outlook 2010 (all files and programs run
from disk) your total installation is 13.2GB. This leaves you with 23.9GB of
super-fast SSD to get your game on with!
Page 12
How to Optimize your SSD Boot Drive
Resources
Corsair SSD Product Page:
http://www.corsair.com/products/ssd_home.aspx
Corsair Blog, SSD section:
http://blog.corsair.com/?cat=7
Corsair Support and Discussion Forums:
http://forum.corsair.com/v3/index.php
Microsoft Knowledge Base, System Restore:
http://windows.microsoft.com/en-US/windows7/How-muchdisk-space-does-System-Restore-require
© August, 2010, Corsair Memory, Incorporated. All rights reserved. All trademarks and registered
trademarks are the property of their respective owners in the United States and/or other countries.
 Loading...