

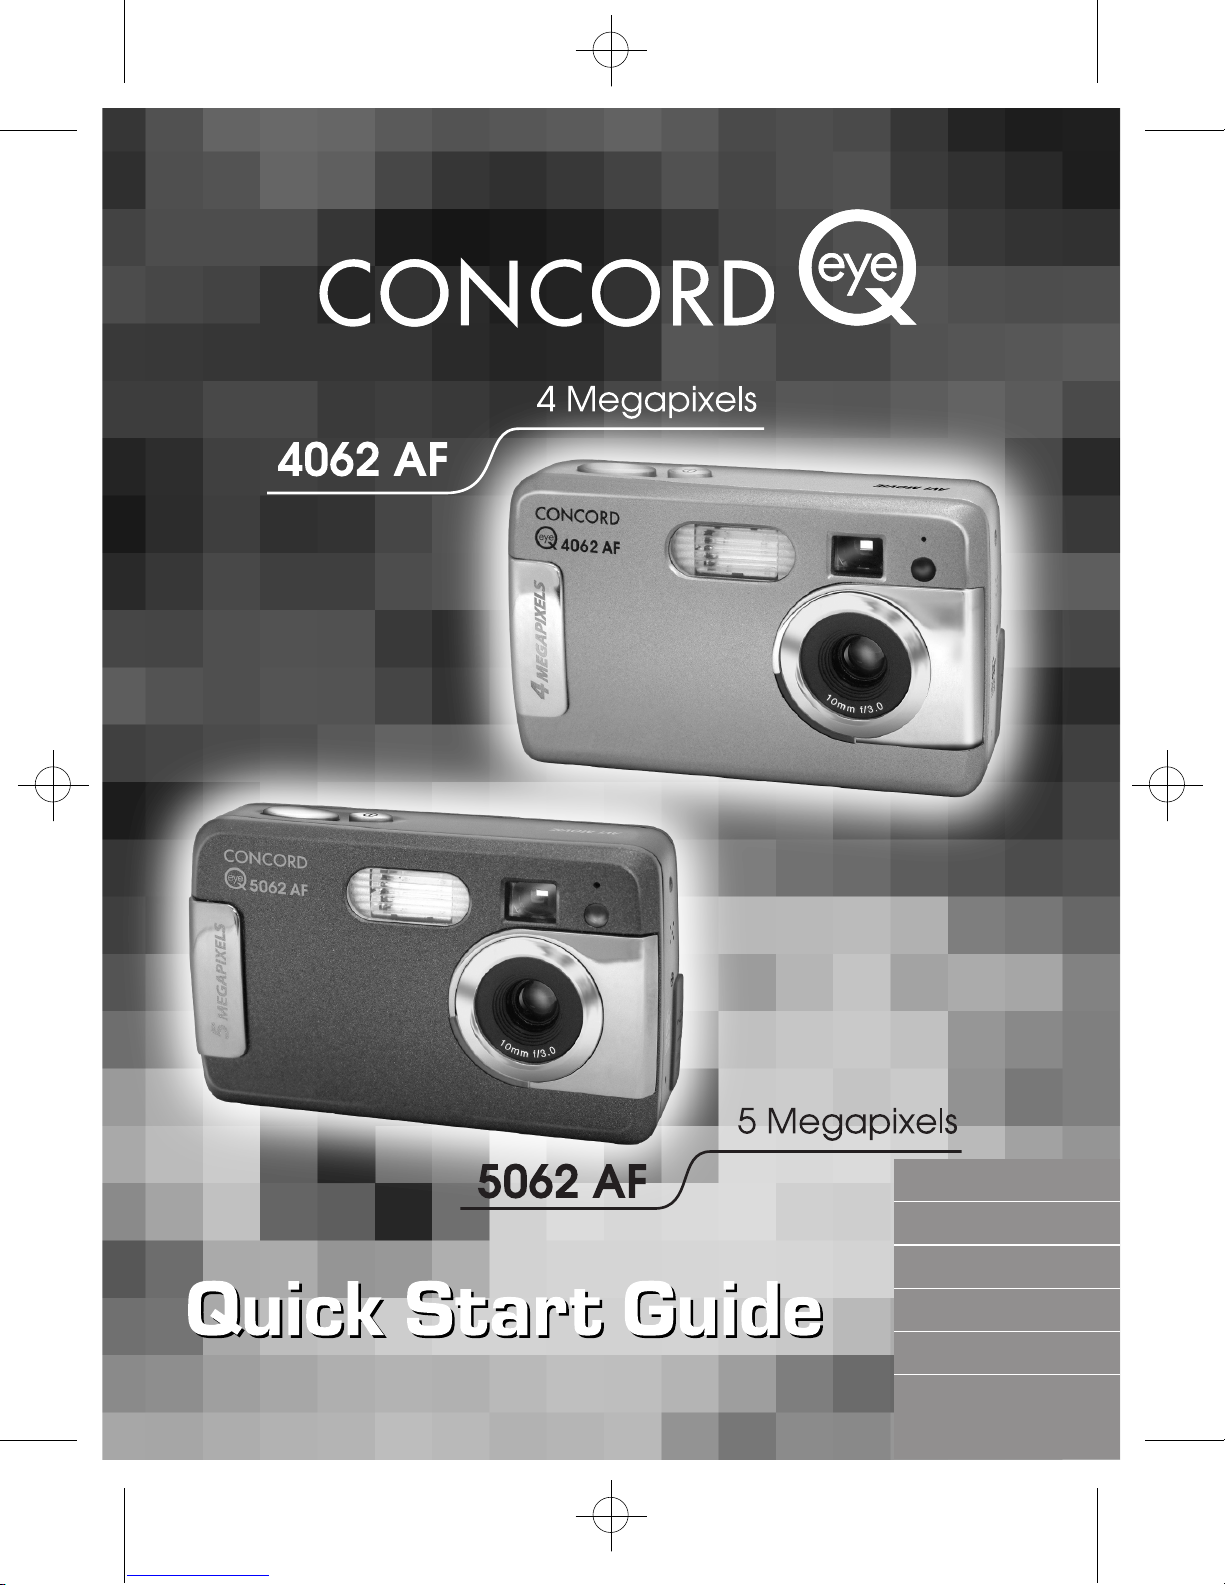
CONCORD Eye-Q 4062 AF, Eye-Q 5062AF, 5062 Quick Start Manual
• ENGLISH
• FRANÇAIS
• DEUTSCH
• ESPAÑOL
www.concord-camera.com
• ITALIANO
•
NEDERLANDS
ENGLISH
FRANÇAIS
DEUTSCH
ESPAÑO
ITALIANO
NEDERLANDS
LANGUAGES
CONCORD Eye-Q 4062 AF/5062 AF
Quick Start Guide
DZ5062 QSG(514174-00)-E 111 5/31/04, 4:13:38 PM

1
En
This Quick Start Guide provides a quick reference for operating your
new digital camera. Refer to the User’s Guide, which can be found on
the CD-ROM and a hard copy in your Concord Eye-Q 4062 AF/5062 AF
box, for detailed instructions on how to use all of your camera’s features.
Before using the camera, make sure to read all safety instructions and
precautions outlined in the User’s Guide.
QUICK START GUIDE
1
DZ5062 QSG(514174-00)-E 1 5/31/04, 4:13:39 PM
2
En
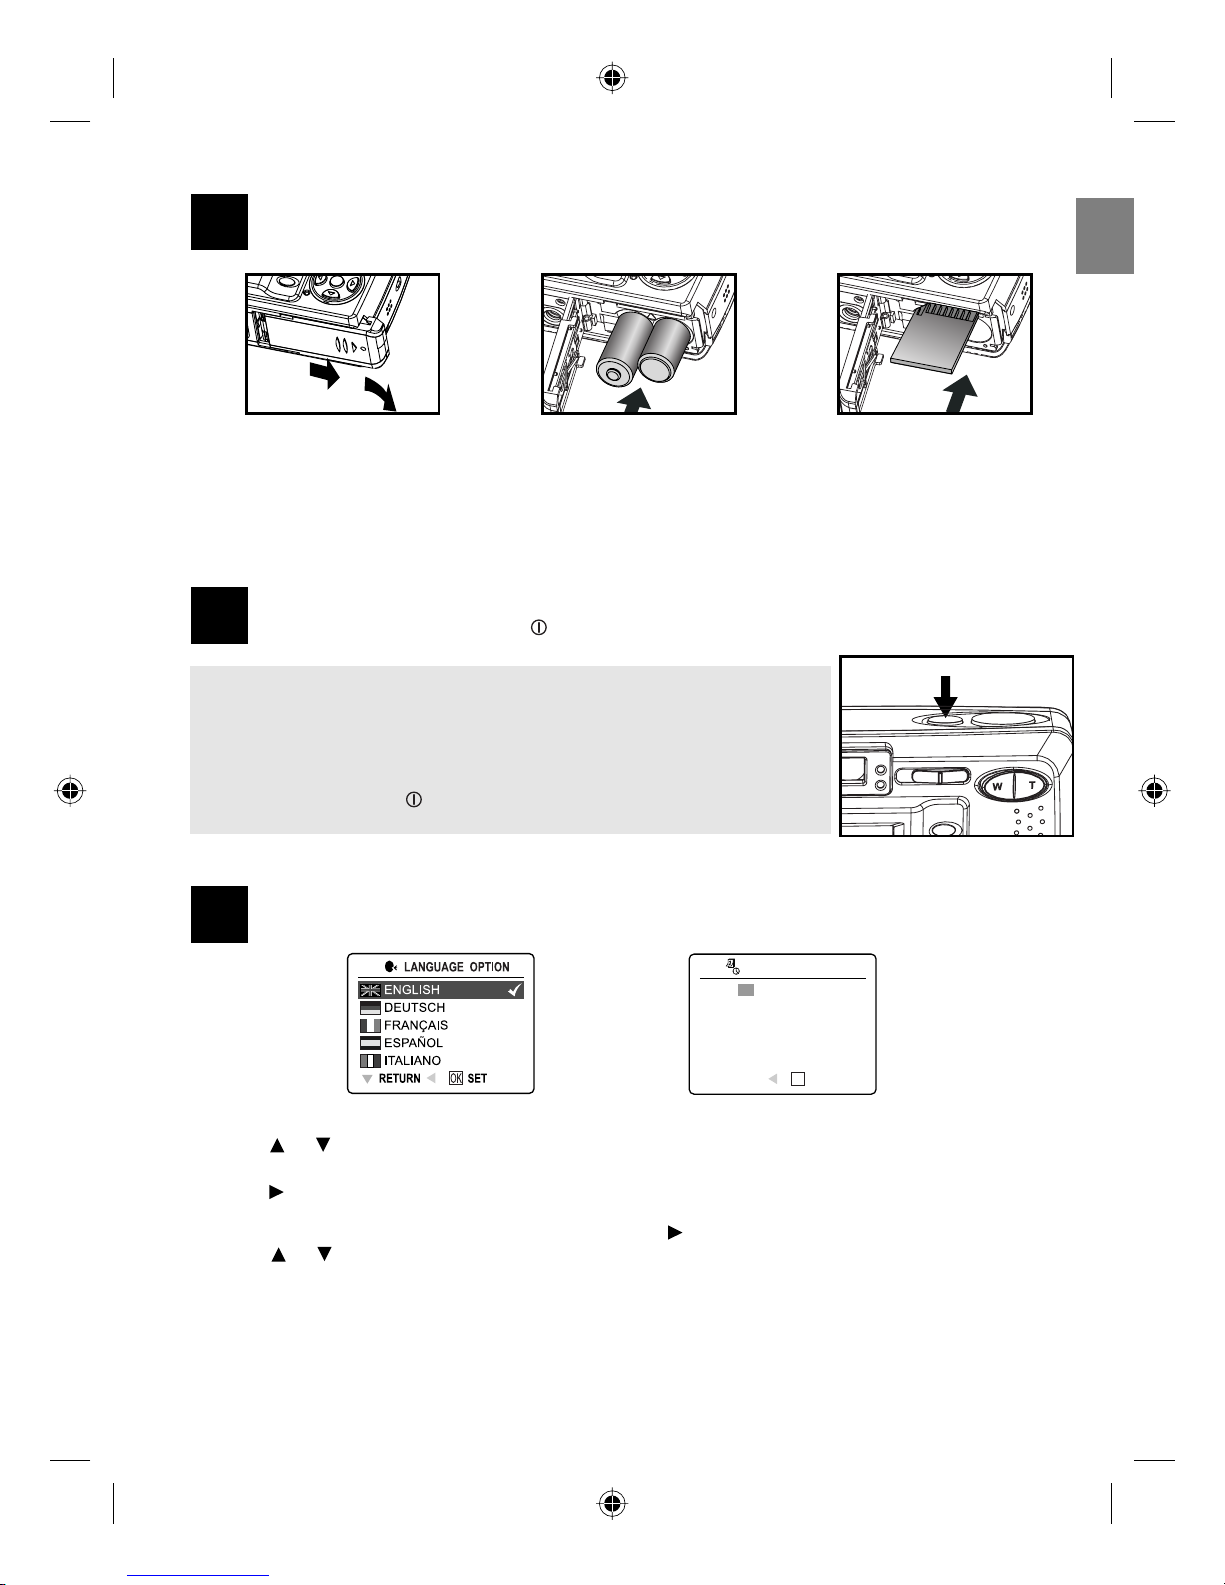
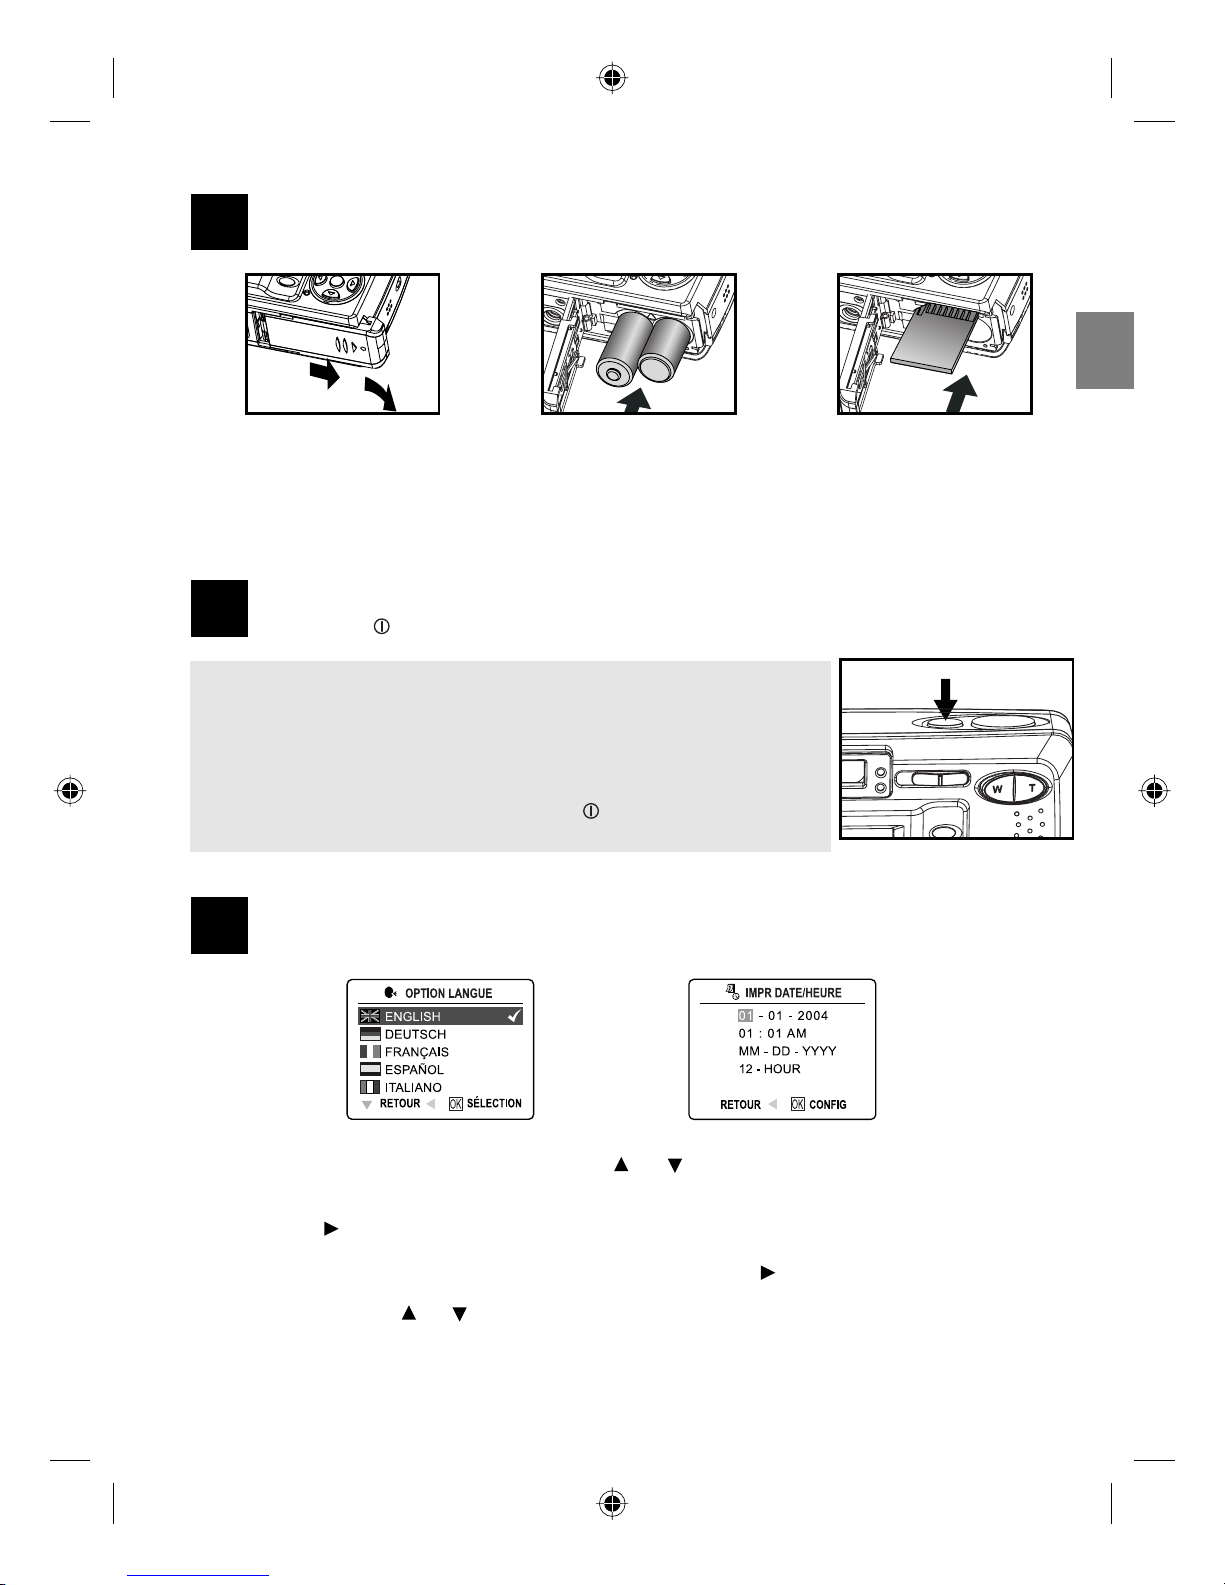
LOADING THE BATTERIES AND THE SD MEMORY CARD
1. Open the Battery/Memory Card door. (fig.1.1)
2. Insert the batteries and the SD memory card (sold separately). (fig.1.2-1.3)
3. Close the door.
TURNING THE CAMERA ON
Press and hold the Power button ( ) for about 1 second to turn the camera on.
Note: To extend battery life,
• The LCD will be off after 1 minute of inactivity. After the LCD is
automatically turned off, the Flash Ready LED blinks. Press any button to
reactivate the LCD.
• The camera will automatically power off after 2 minutes of inactivity. Press
and hold the Power ( ) button for about 1 second to turn the camera
back on.
SETTING THE LANGUAGE, DATE AND TIME
When the camera is powered on for the first time, the Language, Date and Time menus will appear.
1. Press or to highlight the language you would like to use. (fig. 1.1)
2. Press the OK button to select. The next screen shows date/time setup page. (fig. 1.2)
3. Press to highlight the Date field, the Time fields, the Date Format field or the Time Format field. The
selected segment will blink.
• When the Time Format field is reached, keep pressing , the cursor will return to the date field.
4. Press or to change the number in the blinking position.
5. Press the OK button to exit date/time setting. The next screen displays live viewfinder.
fig.1.1 fig.1.2 fig.1.3
A
⁄ ⁄
A
AWB
⁄ ⁄
A
⁄ ⁄
3
2
DATE/TIME SETUP
OK
01 - 01 - 2004
01 : 01 AM
MM - DD - YYYY
12 - HOUR
RETURN SET
3
2
fig. 1.1 fig. 1.2
1
2
3
DZ5062 QSG(514174-00)-E 2 5/31/04, 4:13:39 PM
3
En
3
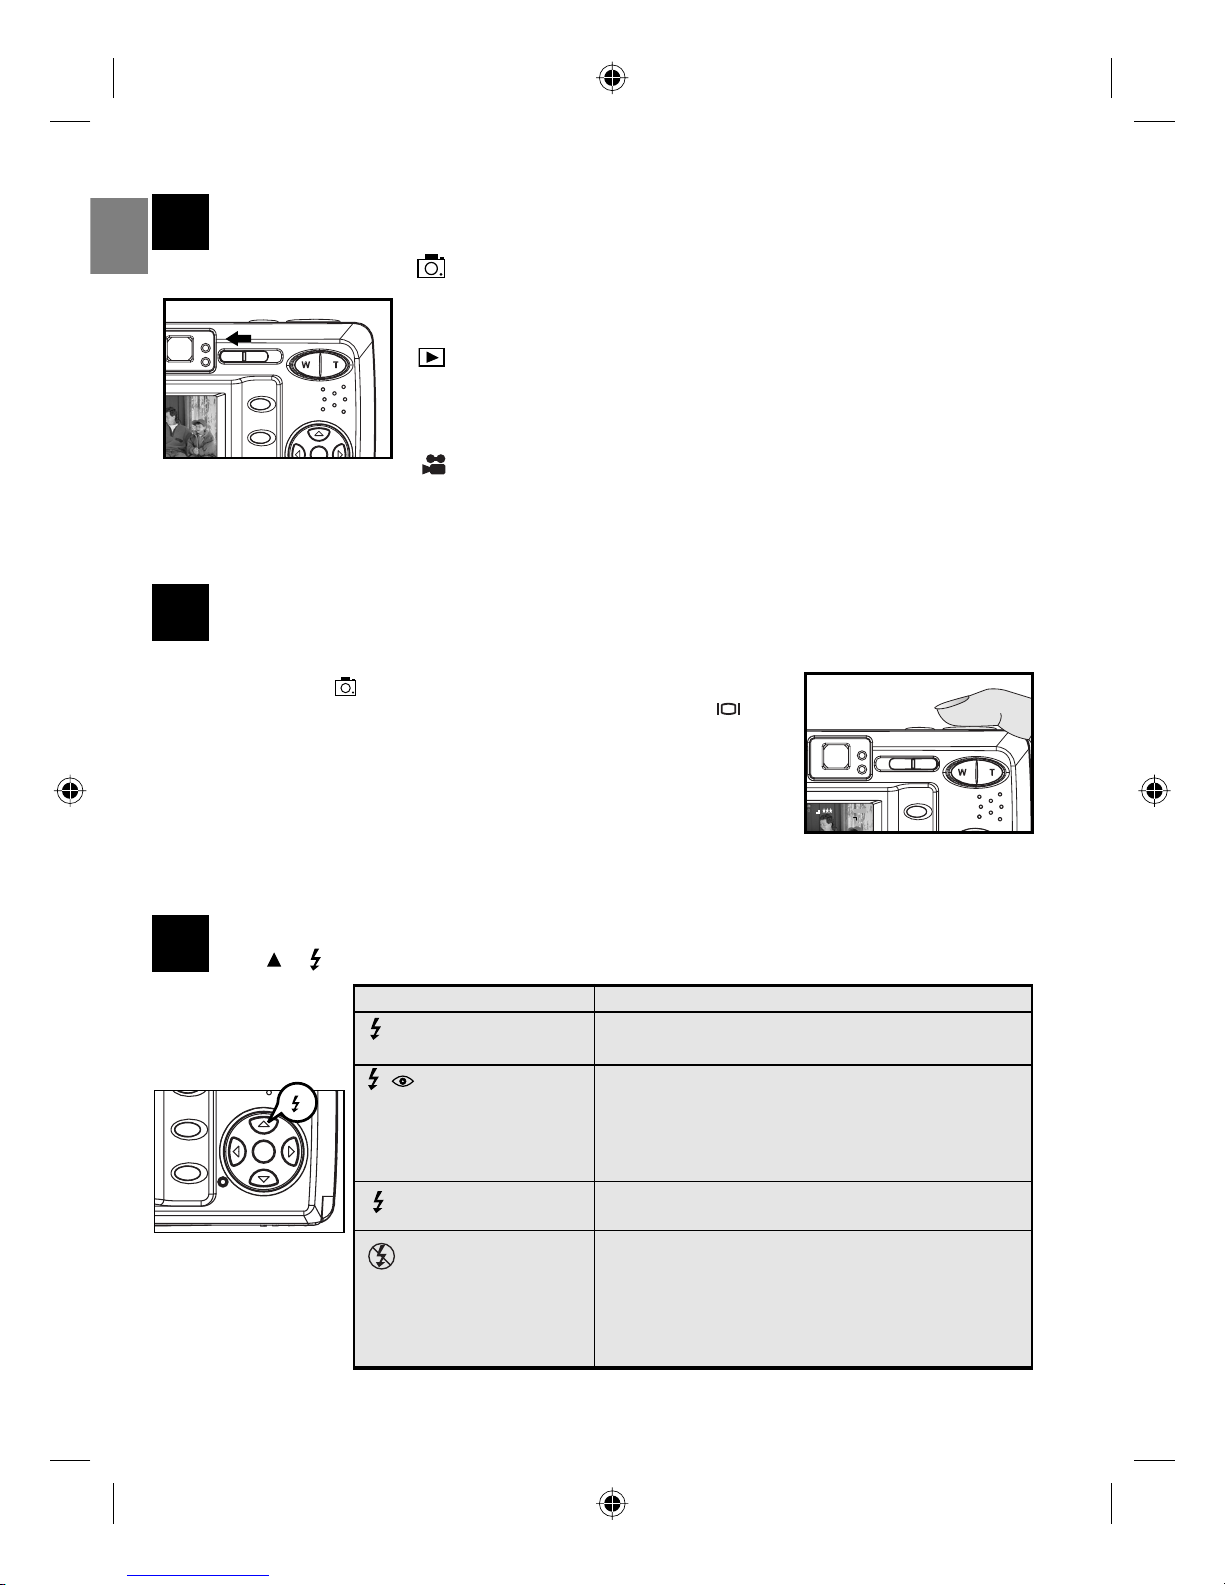
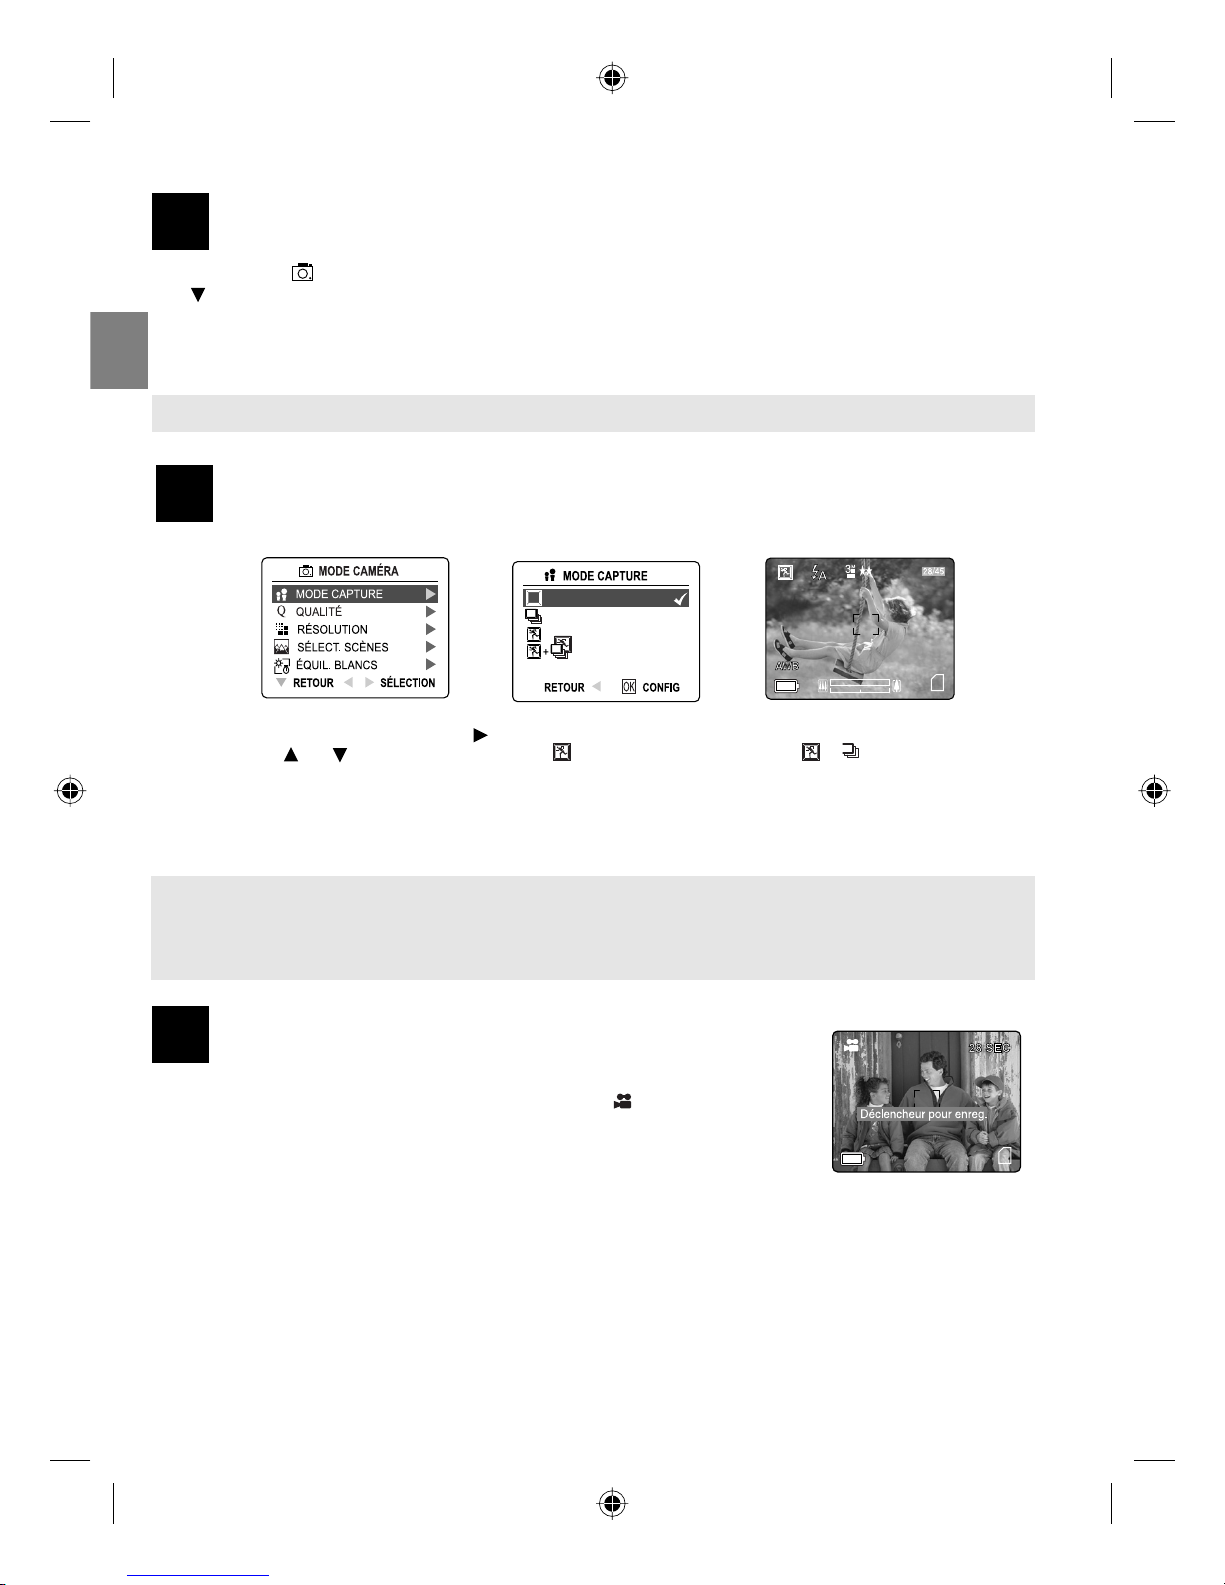
SETTING THE CAMERA’S OPERATIONAL MODE
To change the camera operational mode, slide the mode switch horizontally to the corresponding
position.
TAKING PICTURES
1. Turn the camera on.
2. Set the camera to ( ) Camera mode.
The LCD can be switched off to save battery power by pressing the ( )
button.
3. Frame the subject in the viewfinder or LCD.
4. Press the shutter button half-way to activate the auto-focus until the green AF
LED stops blinking and the AF frame turns green.
5. Press the shutter button fully to capture the image.
• When the image has been captured, the Flash Ready LED next to the
viewfinder will blink to indicate that the image is being stored.
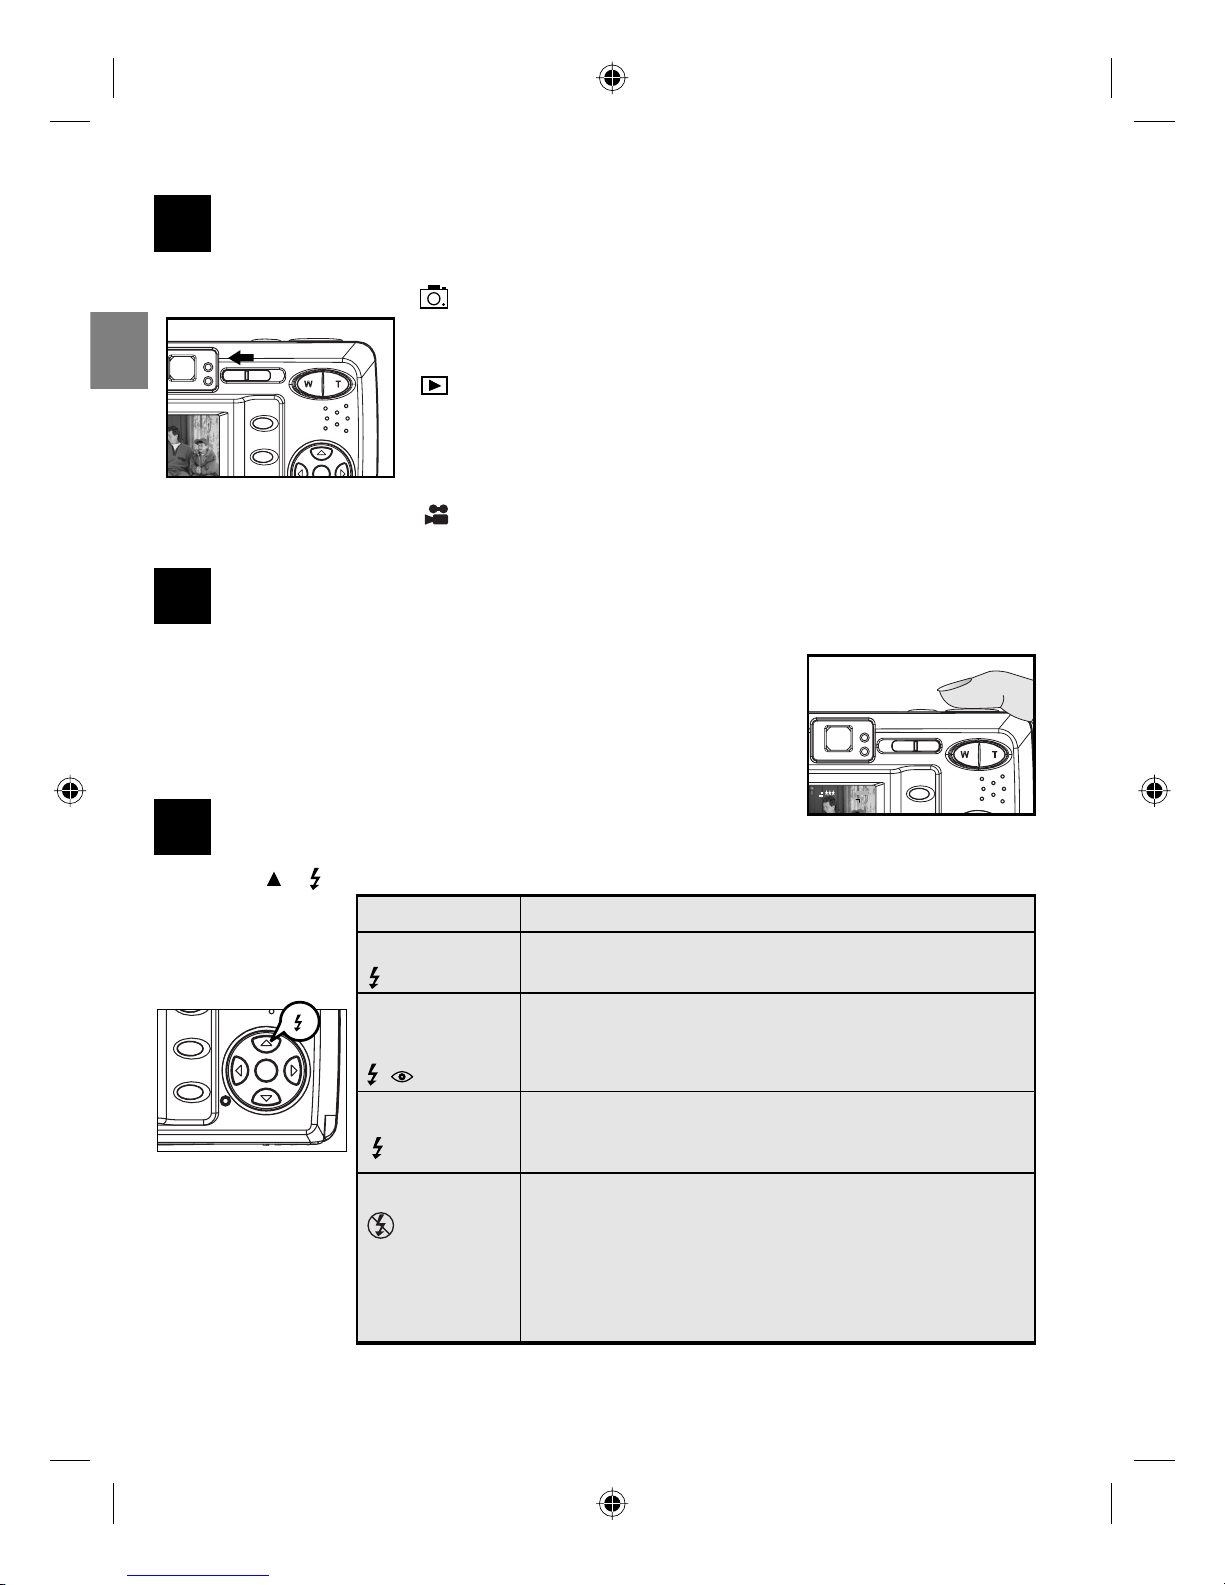
SETTING THE FLASH
Press / repeatedly until the desired indicator appears on the LCD.
A
AWB
A
AWB
A
AWB
⁄ ⁄
A
AWB
⁄ ⁄
A
AWB
A
AWB
⁄ ⁄
Camera Mode
Use the camera mode to take pictures or to customize your camera settings
for picture taking.
Review Mode
Use the review mode to browse through images and video clips, to delete
images and video clips, to play a slide show, or to transfer the images/video
clips from the internal memory to the SD card.
Video Clip Mode
Use video clip mode to capture video clips with sound or to customize your
camera settings for video clip recording.
4
M
28/45
A
A
4
5
6
Flash Mode Description
Auto Flash (Default) The camera judges if a flash is required. If the
environment is too dark, the flash will file.
Auto + Red-Eye Use this mode to significantly reduce the
occurrence of “red- eye” in flash photography.
The camera will automatically detect when the
flash is needed and the flash will fire after a short
delay.
Flash On Flash will fire in any lighting condition.
The “red-eye” reduction function is included also.
Flash Off The flash will not fire in this mode. Please use
this mode if you want to capture the mood of the
ambient lighting or to use the available light in
places where flash photography is prohibited,
such as museums.
DZ5062 QSG(514174-00)-E 3 5/31/04, 4:13:52 PM
4
En
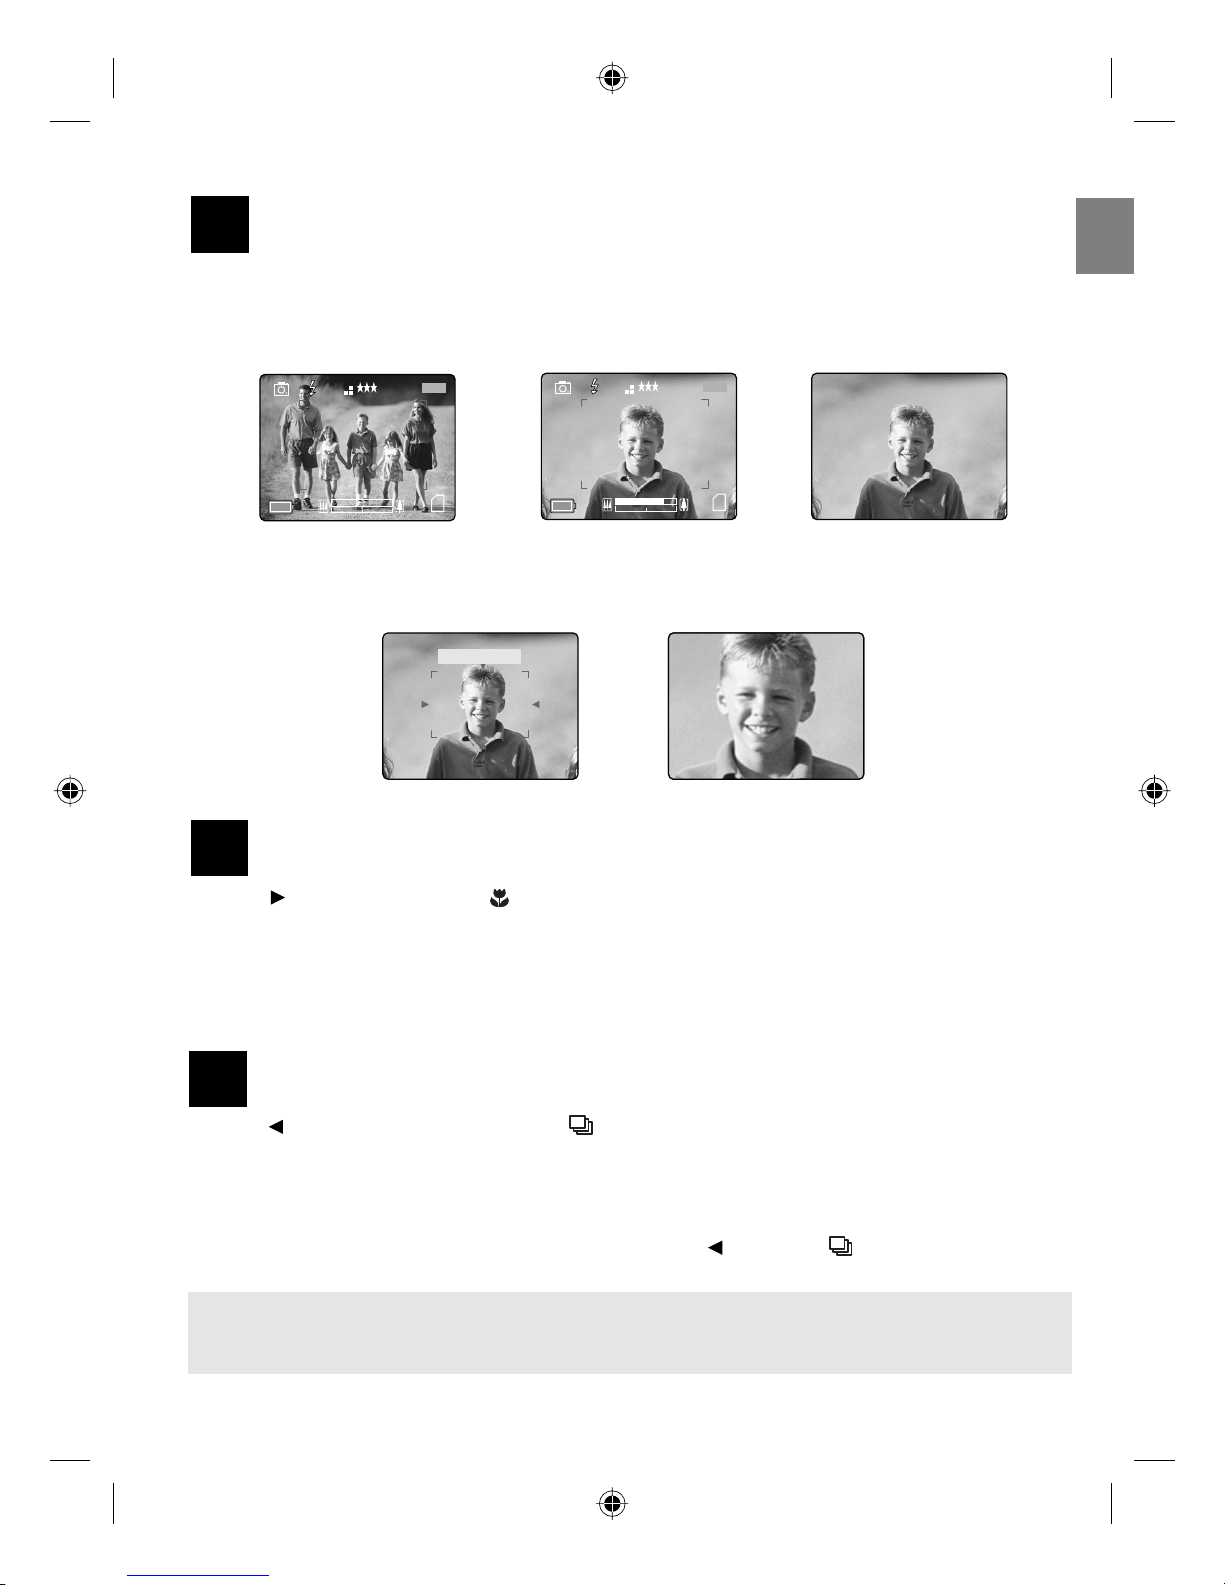
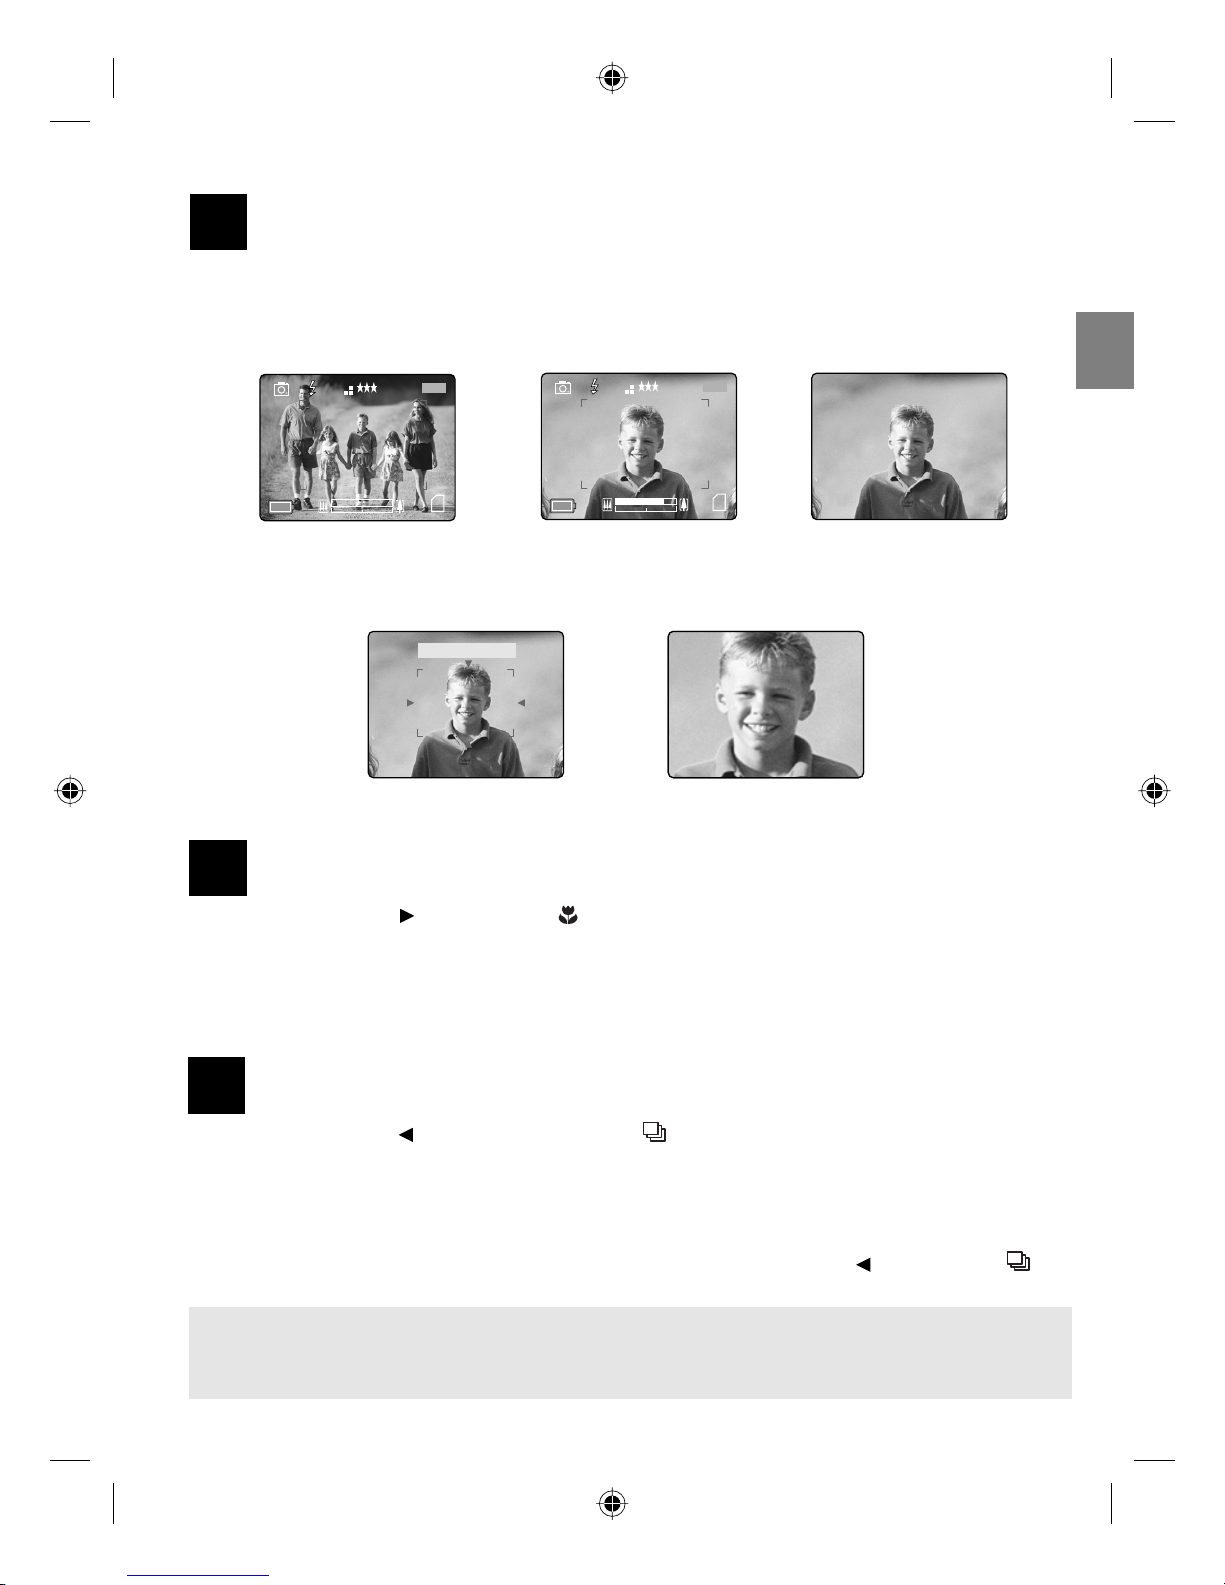
USING THE ZOOM
Press T (tele) to zoom in your subject, and press W (wide) to zoom out or return to the normal mode.
1x - 4x Zoom
The image increases in size on the LCD.
6x Digital Zoom
The image contained within the red frame is the image recorded.
CLOSE-UP SHOOTING
1. Press button. The Macro icon ( ) will be displayed on the LCD.
2. Frame the subject in the LCD.
• The best shooting range is from 15 cm to 70 cm. (6 in. – 28 in.)
3. Press the shutter button half-way to activate the focus until the green AF LED stops blinking and the AF
frame turns green.
4. Press the shutter button fully to take the picture.
TAKING CONTINUOUS PICTURES
1. Press button. The Continuous Shot icon ( ) will be displayed on the LCD.
2. Frame the subject in the LCD screen and press the shutter button half-way to activate the focus until the
green AF LED stop blinking and the AF frame turns green.
3. Press the shutter button fully to capture the pictures.
• The camera will automatically capture 7 continuous images at approximately 3 images per second in 1600
x 1200 resolution.
4. If you do not want to take continuous pictures anymore, press button until disappears from the LCD.
Note:
• In continuous shooting mode the flash is disabled as the recharging time will slow it down.
• The LCD will be blank when the images are taken in the Continuous Shooting Mode.
A
AWB
4
7
8
9
LCD Display Actual Image Recorded
Original Size Actual Image Recorded4x Zoom LCD Display
A
AWB
4
M
28/45
A
AWB
4
M
28/45
A
AWB
6x Digital Zoom
DZ5062 QSG(514174-00)-E 4 5/31/04, 4:14:23 PM

5
En
TAKING PICTURES WITH SELF-TIMER
1. In ( ) Camera Mode, press button, the self-timer icon ( ) appears on the LCD.
2. Place the camera on a flat surface or tripod.
3. Use the LCD to compose the picture, and then press the Shutter button to activate the Self-Timer.
The Self -timer LED will blink slowly for 7 seconds, faster for the remaining 3 seconds and then the image will
be captured.
Note: The Self-Timer is automatically deactivated once the image is taken.
TAKING PICTURES IN SPORT MODE
This mode is used to shoot sports and other high-speed activities. The camera will automatically choose
a higher shutter speed and wider aperture to capture fast-moving action without blur.
1. In the main menu, press to enter the capture mode submenu.
2. Press or to highlight Sport ( ) or Sport + Continuous shot ( + ).
3. Press OK to enter the mode.
4. Frame the subject in the LCD.
5. Press the shutter button half-way to activate the focus until the green AF LED stops blinking and the AF
frame turns green.
6. Press the shutter button fully to take the picture.
Note:
• Flash will be turned off when Sport mode is selected.
• Hold your camera steady to prevent blurriness. It is recommended to either place your camera on a
steady surface or use a tripod.
TAKING VIDEO CLIPS
The camera can capture video clips with sound.
1. Slide the Mode Switch to ( ) Video Clip Mode.
2. Position the subject in the LCD.
3. Press the shutter button half-way to activate the focus until the green AF LED
stops blinking and the AF frame turns green.
4. Press the shutter button fully to capture a continuous video clip. The time
recorded will be shown on LCD. The camera can take video until the memory is full.
To stop recording:
1. Press the Shutter button again to stop recording.
OR
2. The camera will continue recording until the memory limit has been reached.
A
AWB
CAPTURE MODE
QUALITY SETUP
IMAGE SIZE
SCENE SELECTION
WHITE BALANCE
RETURN SELECT
CAMERA MODE
Q
A
AWB
A
AWB
3
M
28/45
A
AWB
CAPTURE MODE
OK
+
RETURN SET
28 SEC
1 SEC
A
AWB
Press Shutter to Record
28 SEC
11
12
10
DZ5062 QSG(514174-00)-E 5 5/31/04, 4:14:33 PM
6
En
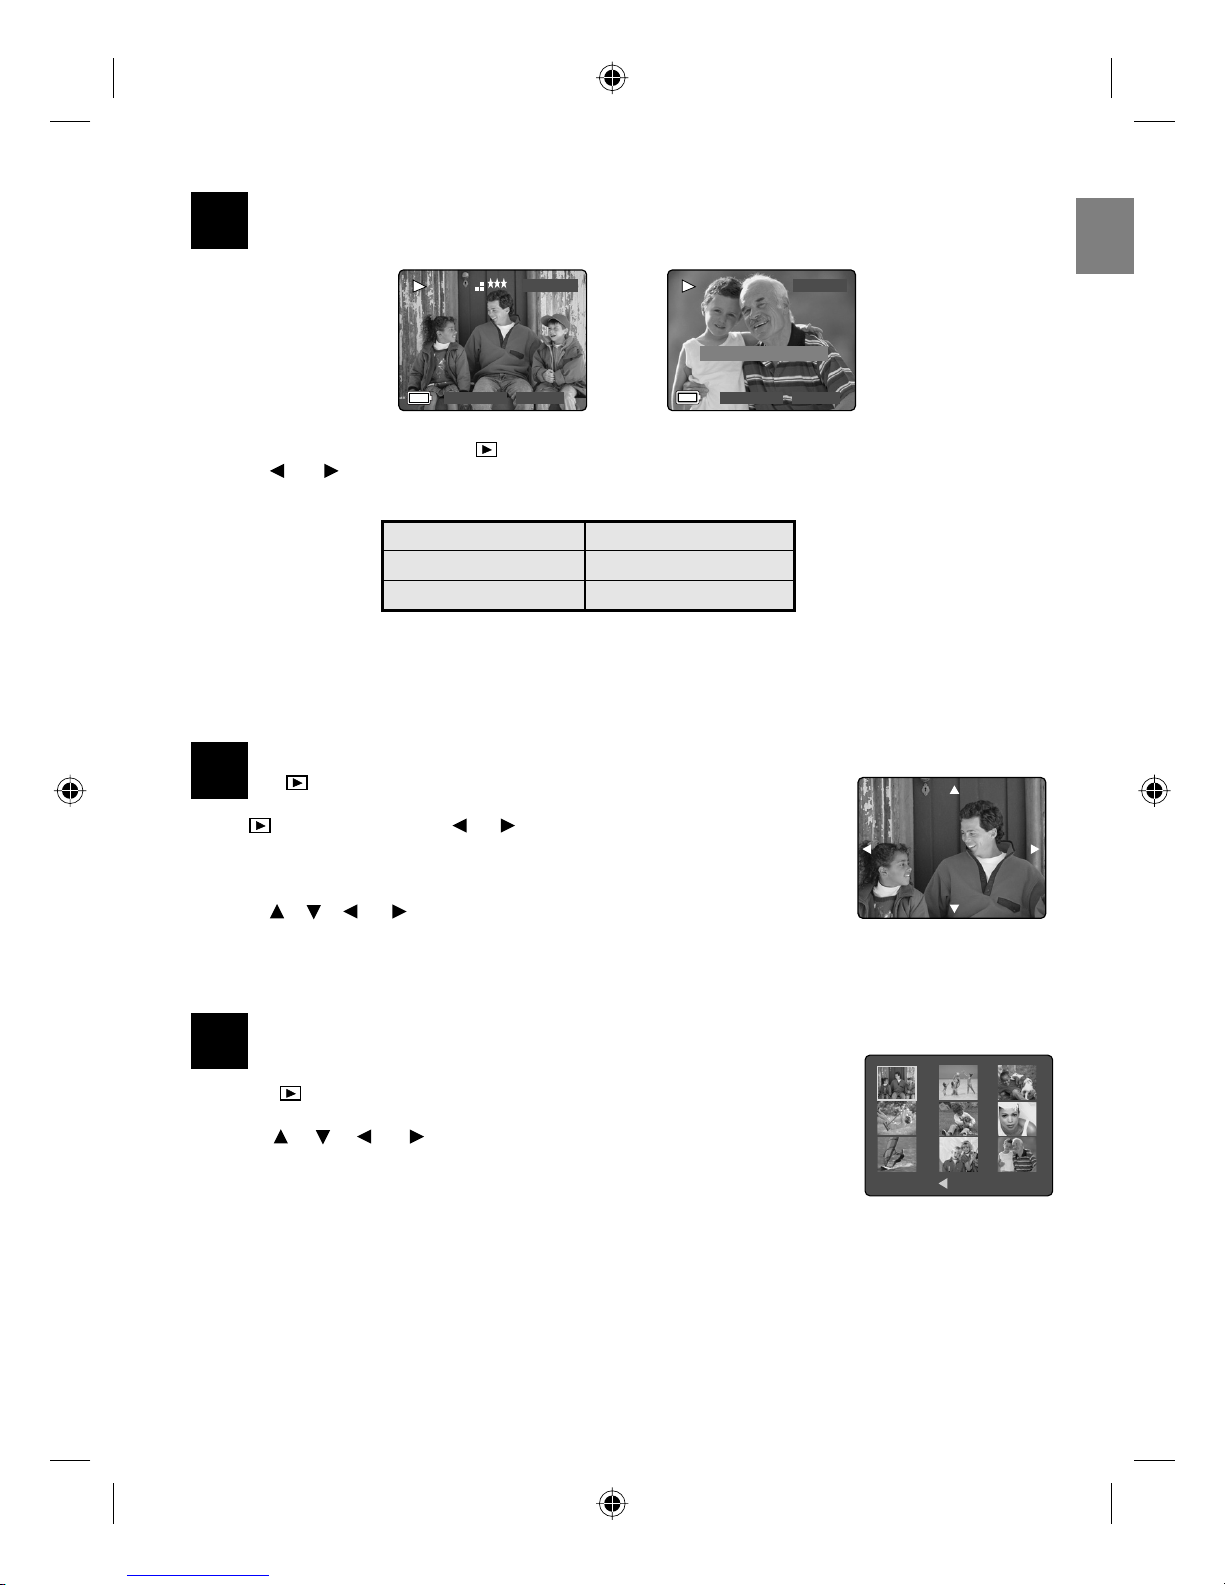
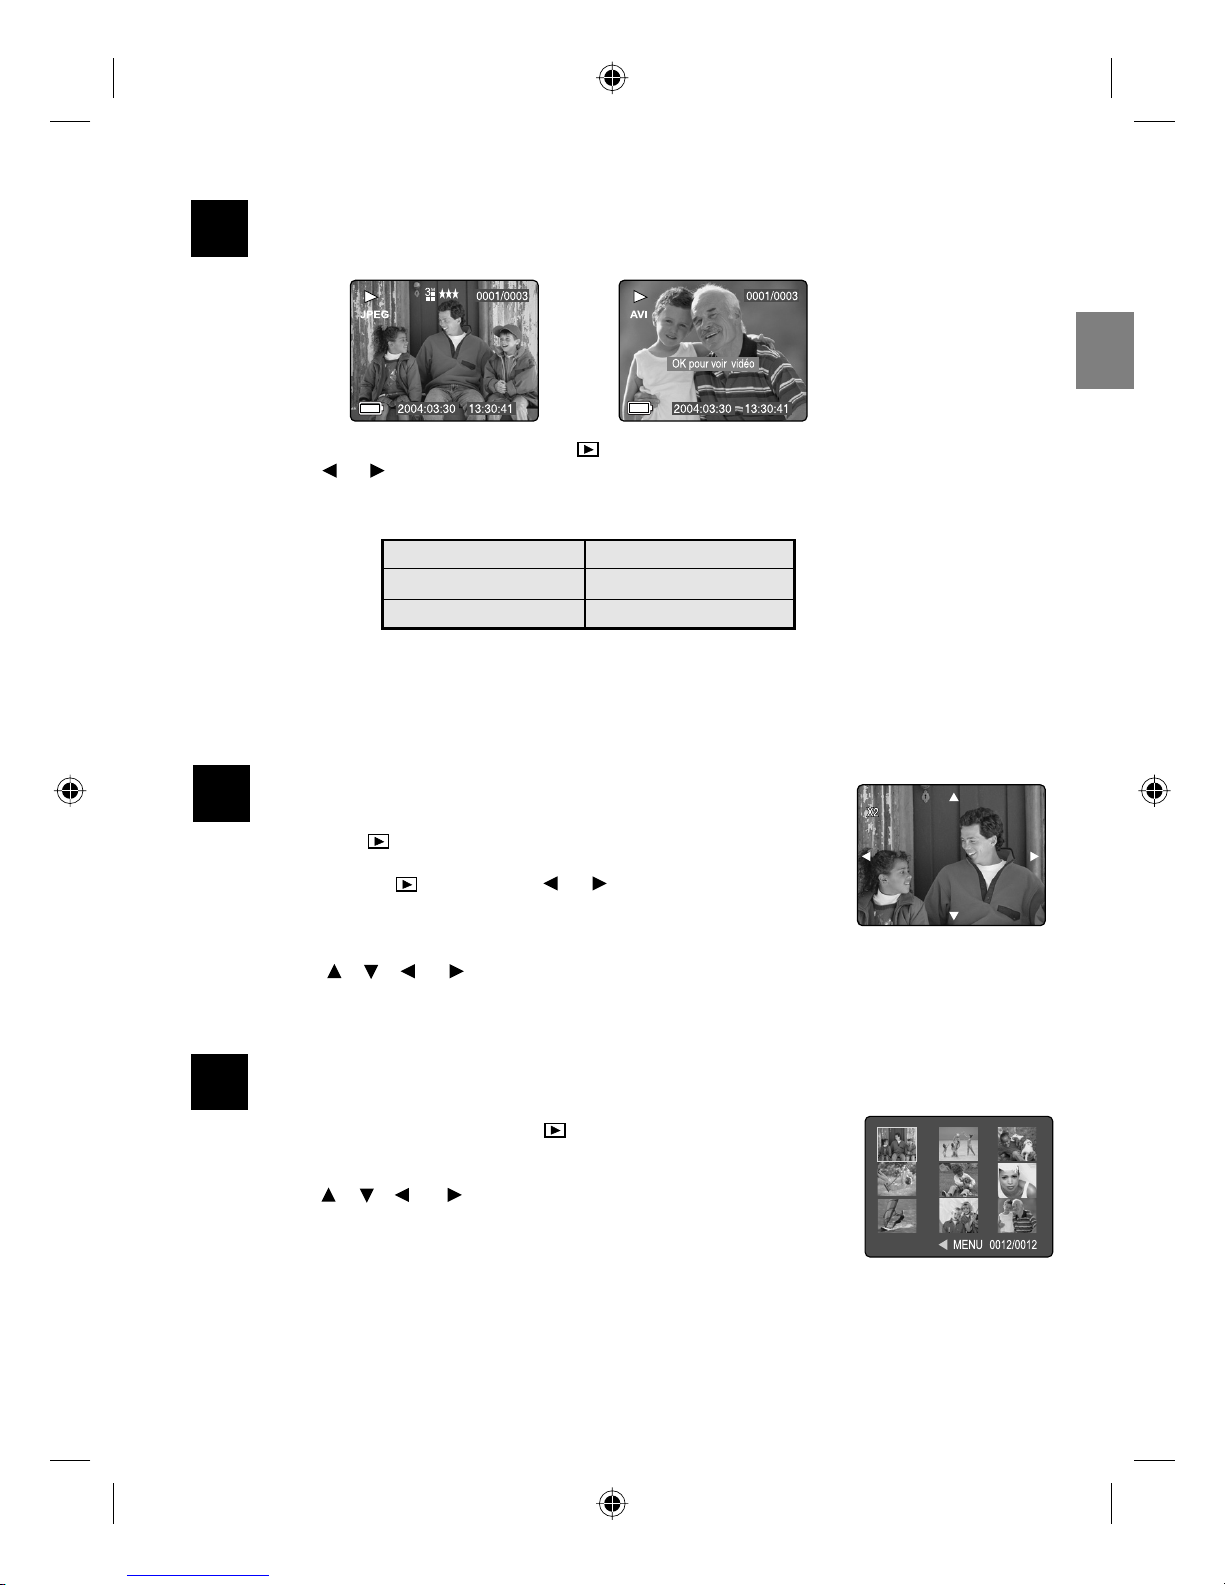
REVIEWING THE PICTURES/VIDEO CLIPS
1. Slide the Mode Switch towards ( ).
2. Press or or to scroll through each file.
• The file type and frame counter will be displayed on the LCD.
File Indication File Type
JPEG Still Picture
AVI Video Clip
3. When a video clip icon (AVI ) is displayed on the LCD, press the OK button to play the video clip.
Note: You may press the OK button to pause and resume playing video clip.
ENLARGING THE PICTURES
In ( ) Review Mode, you can enlarge your pictures to take a closer
look at the subject on the LCD.
1. In ( ) Review Mode, press or to scroll through the stored pictures
and video clips.
2. While viewing a stored still picture, press the T button to get different
magnifications.
3. Press , , or to navigate in the picture. When the picture can pan
no farther in one direction, the directional arrow will disappear.
4. Press W button to zoom out.
REVIEWING YOUR FILES IN THUMBNAIL
1. In the ( ) Review Mode, press W button, nine thumbnail images or video
clips will appear on the LCD display in a few seconds.
2. Press , , or to look through all the pictures and video clips. The
selected picture or video clip will have a red border.
3. Press the OK button to view the picture or video clip in full screen.
0001/0003
2004:03:30 13:30:41
A
AWB
3
M
28 SEC
0001/0003
Press OK to view Video
2004:03:30 13:30:41
A
AWB
X2
A
AWB
X2
28 SEC
MENU 0012/0012
A
AWB
13
14
15
DZ5062 QSG(514174-00)-E 6 5/31/04, 4:15:07 PM
7
En
Are You Sure?
No
Yes
SELECT
OK
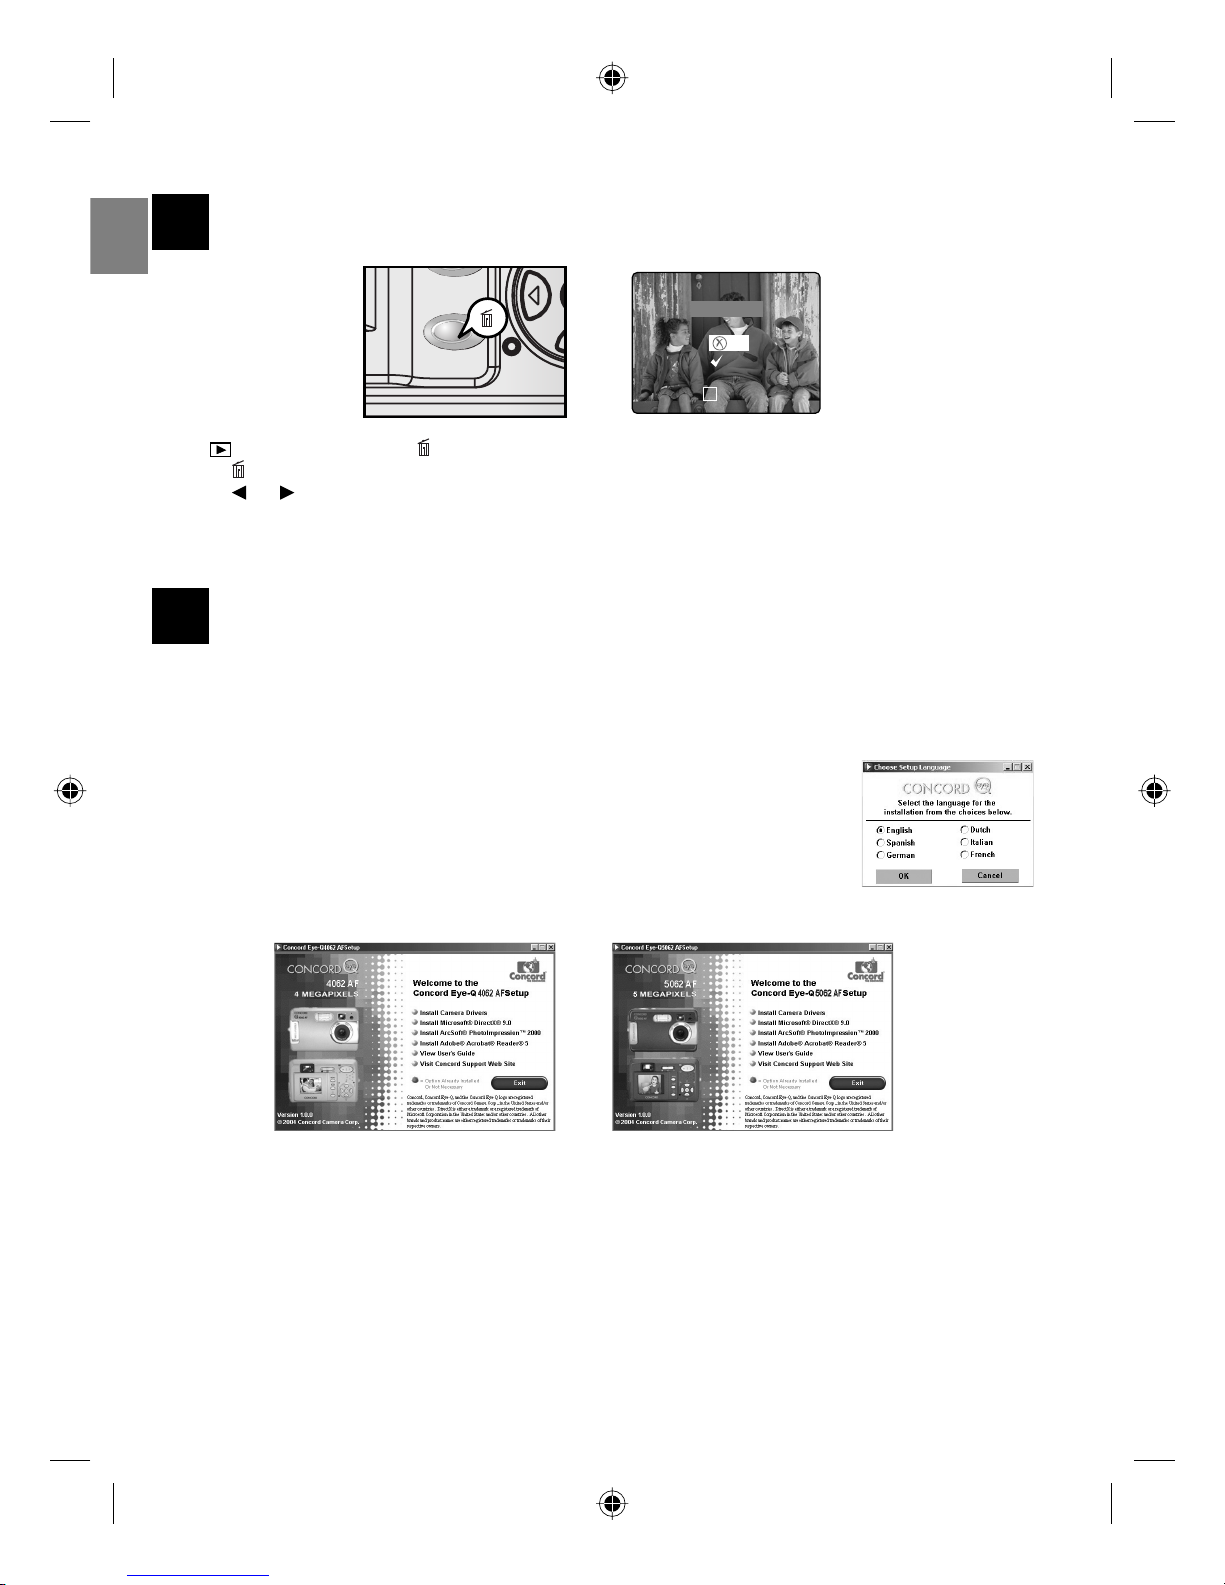
DELETING YOUR FILES
1. In ( ) Review mode, press button once, the screen will read “Are you sure?”
Press button twice, the screen will read “Delete All Are you sure?”
2. Press or to highlight No or Yes.
3. Press the OK button to select.
• If No is selected, no change will be made.
• If Yes is selected, the file will be deleted.
SOFTWARE INSTALLATIONS (WINDOWS)
1. Insert the CD-ROM included in your camera’s packaging into your computer’s CD-ROM drive.
The language selection screen pops up.
Note: If the installer does not start automatically within 30 seconds after the CD-
ROM has been inserted, click on “My Computer” either on the Desktop or in the Start
Menu and locate the CD-ROM Drive, then double click on the CD-ROM Drive icon.
2. Select the language. Click [OK]. The installation screen will appear.
3. Click on the items to be installed and proceed to the installation by following the
splash screen.
16
17
(Concord Eye-Q 4062 AF) (Concord Eye-Q 5062 AF)
DZ5062 QSG(514174-00)-E 7 5/31/04, 4:15:50 PM
8
En
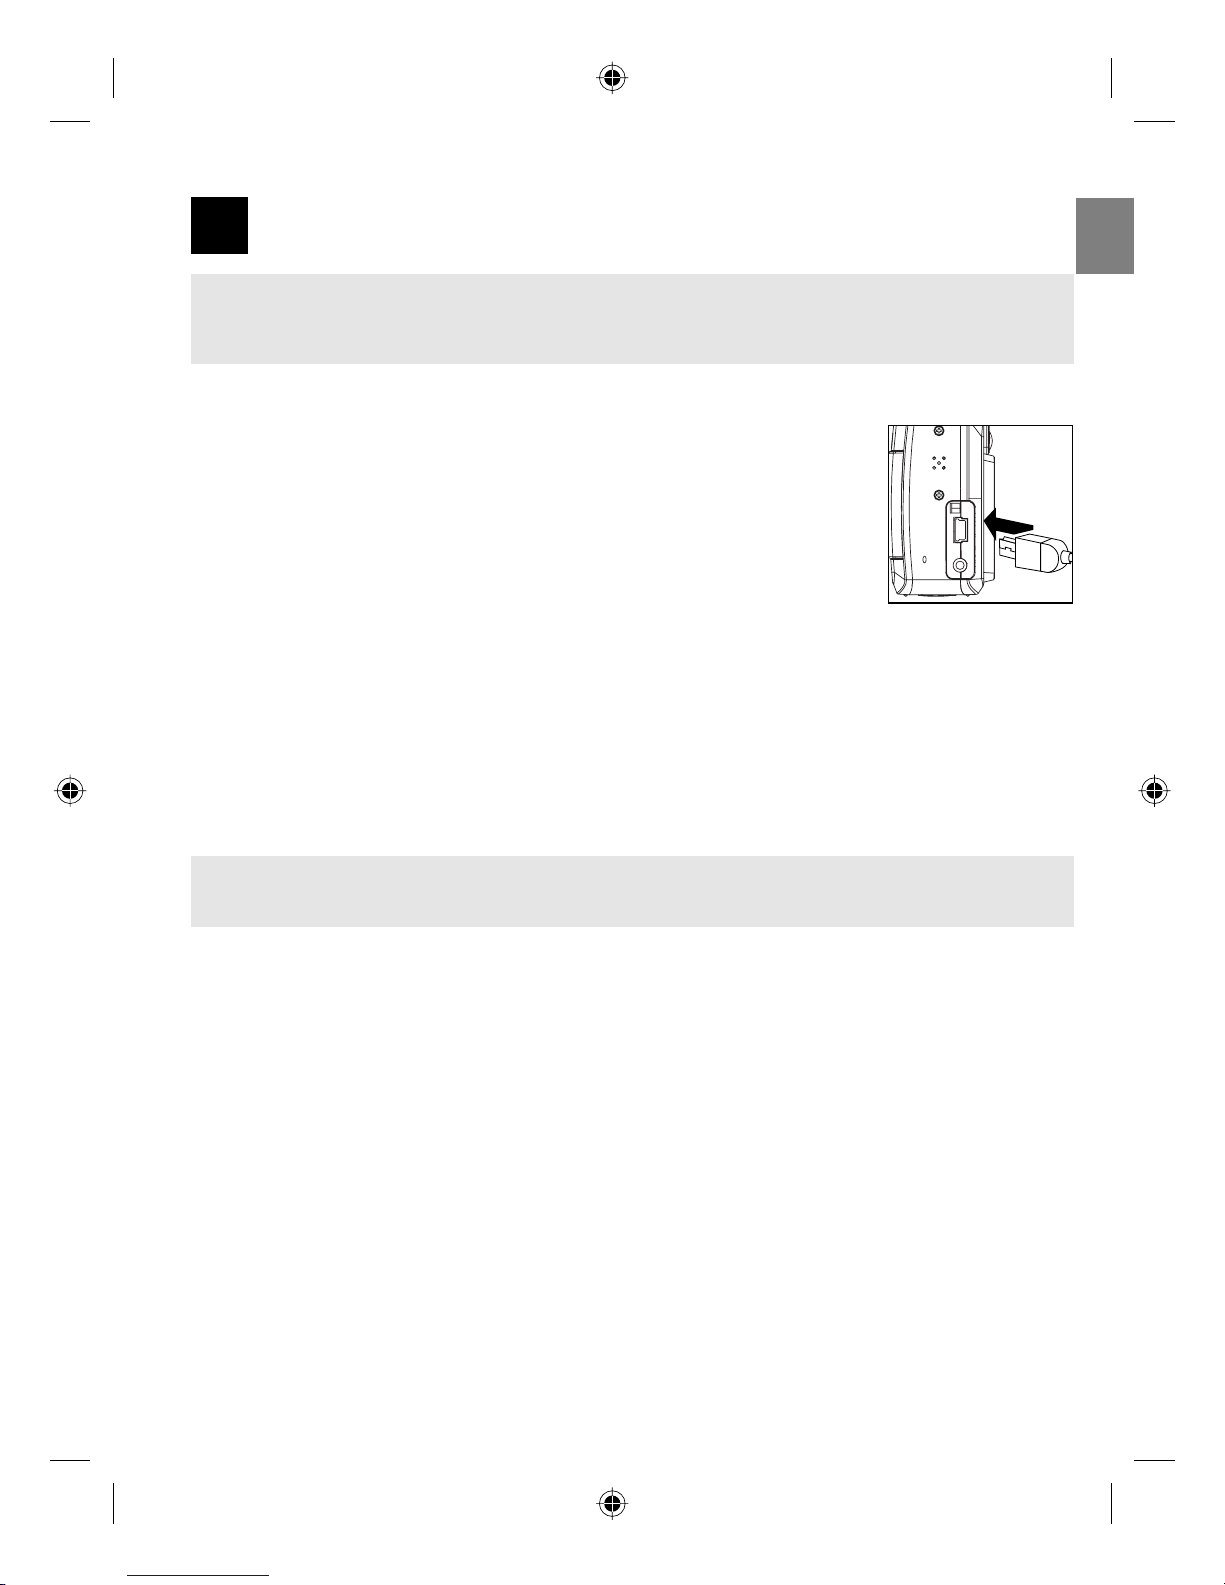
DOWNLOADING PICTURES/VIDEO CLIPS ONTO YOUR COMPUTER
Note: Windows 98/98SE users must install the camera driver and DirectX first in order to download the files
and to view video clips on the computer. Windows 2000 users must install DirectX in order to view video clips
on the computer. Please refer to the Installation Guide on page 45 in the User’s Guide for more information.
FOR WINDOWS USERS
1. Connect the camera to the computer.
2. Double-click on My Computer.
3. Double-click Removable Disk.
4. Double-click DCIM.
5. Double-click 100_4062 (for 4062 AF) / 100_5062 (for 5062 AF).
• The pictures (JPEG) and video clips (AVI) stored in the memory card will be
displayed.
6. Click and drag the files into a directory in your computer to save them.
• To select all files, click Edit > Select all.
FOR MACINTOSH USERS
1. Connect the camera to the computer.
• After a few moments, the external hard drive will appear on the desktop.
2. Double-click the “CONCORD” removable drive that is on your desktop.
3. Double-click DCIM.
4. Double-click 100_4062 (for 4062 AF) / 100_5062 (for 5062 AF).
• The pictures (JPEG) and video clips (AVI) stored in the memory card will be displayed.
5. Drag and drop the image you want to save in the computer.
• To select all files, click Edit > Select all.
Note: You may also transfer the stored pictures and video clips on your memory card onto your computer
by using a memory card reader. (Sold separately)
Concord, Concord Eye-Q and the Concord Eye-Q logo are registered trademarks or trademarks of Concord Camera Corp., in the United States
and/or other countries. Microsoft and Windows are either registered trademarks or trademarks of Microsoft Corporation in the United States
and/or other countries. Mac and Macintosh are registered trademarks or trademarks of Apple Computer, Inc. in the U.S. and other countries. All
other brands and product names are either registered trademarks or trademarks of their respective owners.
18
DZ5062 QSG(514174-00)-E 8 5/31/04, 4:16:03 PM

1
Fr
Les références de ce guide de démarrage rapide vous permettent
d’utiliser rapidement votre nouvel appareil digital. Pour des explications
plus détaillées sur toutes les caractéristiques de votre appareil, veuillez
lire le guide de l’utilisateur qui se trouve sur le CD-ROM situé dans le
coffret du Concord Eye-Q 4062 AF/5062 AF. Avant d’utiliser l’appareil,
veuillez lire toutes les instructions de sécurité et de précaution décrites
dans ceguide.
GUIDE DE DEMARRAGE RAPIDE
1
DC5062 QSG(514174-00)-F 1 5/31/04, 4:26:19 PM
2
Fr
CHARGEMENT DES PILES ET DE LA CARTE MÉMOIRE SD
1. Ouvrez le volet du compartiment de la carte mémoire/des piles. (fig.1.1).
2. Insérez les piles et la carte mémoire SD (vendu séparément). (fig. 1.2 – 1.3)
3. Fermez le volet du compartiment.
MISE SOUS TENSION DE L’APPAREIL
Le bouton de ( )mise en marche se trouve sur le dessus de l’appareil.
Remarque : Les fonctions suivantes permettent d’augmenter la durée de vie
des piles :
• L’écran s’éteint après 1 minute d’inactivité. Après l’extinction automatique
de l’écran, le voyant d’enclenchement du flash clignote. Appuyez sur un
des boutons pour réactiver l’écran.
• L’appareil photo s’éteint automatiquement après 2 minutes d’inactivité.
Appuyez sur le bouton de mise en marche ( ) et maintenez-le enfoncé
pendant environ 1 seconde pour remettre en marche l’appareil photo.
RÉGLAGE DE LA LANGUE, DE LA DATE ET DE L’HEURE
Les menus Langue, Date et Heure s’affichent lors de la première mise en marche de l’appareil photo.
1. Pour sélectionner la langue à utiliser, appuyez sur ou . (fig. 1.1)
2. Appuyez sur le bouton OK pour la sélectionner. L’écran suivant affiche la page de configuration de la date/
heure. (fig. 1.2)
3. Appuyez sur pour sélectionner le champ Date, Heure, Format de date ou Format d’heure. Le segment
sélectionné clignote.
• Lorsque le champ Format d’heure est atteint, maintenez le bouton enfoncé : le curseur entourera
le champ Date.
4. Appuyez sur le bouton ou pour modifier les chiffres qui clignotent.
5. Appuyez sur le bouton OK pour quitter le réglage de date/heure. L’écran suivant affiche le viseur direct.
fig.1.1 fig.1.2 fig.1.3
A
⁄ ⁄
A
AWB
⁄ ⁄
A
⁄ ⁄
fig. 1.1 fig. 1.2
1
2
3
DC5062 QSG(514174-00)-F 2 5/31/04, 4:26:20 PM
3Fr3
RÉGLAGE DU MODE DE FONCTIONNEMENT DE L’APPAREIL PHOTO
Pour choisir un autre mode de fonctionnement, faites glisser le commutateur de mode horizontalement
jusqu’à la position correspondante.
PRISE DE VUES
1. Cadrez le sujet dans le viseur ou de L’ACL.
2. Pour activer le Focus automatique, appuyez à mi-course sur le déclencheur
jusqu’à ce que le témoin vert de Focus automatique arrête de clignoter et que
le cadre de Focus automatique passe au vert.
3. Appuyez à fond sur le déclencheur pour prendre la photo.
RÉGLAGE DU FLASH
Appuyez sur ( / ) jusqu’à ce que le mode souhaité s’affiche au moniteur ACL.
Mode flash
Auto-flash A
Automatique
avec suppression
des yeux rouges.
Flash ON
Flash éteint
A
AWB
⁄ ⁄
A
AWB
A
AWB
⁄ ⁄
A
AWB
⁄ ⁄
A
AWB
⁄ ⁄
A
AWB
⁄ ⁄
Mode Appareil photo
Utilisez le mode Appareil photo pour prendre des photos ou personnaliser les
paramètres de votre appareil pour prendre des photos.
Mode Visionnage
Utilisez le mode Visionnage pour passer d’une image ou d’un clip vidéo
à l’autre, pour supprimer des images et des clips vidéo, pour lancer un
diaporama ou pour transférer des images/clips vidéo de la mémoire interne
vers la carte SD.
Mode Clip Vidéo
Utilisez le mode Clip vidéo pour enregistrer des clips vidéo avec son ou pour
personnaliser les paramètres de votre appareil pour l’enregistrement de clip
vidéo.
4
M
28/45
A
A
4
5
6
Description
L’appareil juge de lui-même si un flash est requis. Si
l’éclairage est insuffisant, le flash se déclenchera.
Servez-vous de ce mode pour réduire considérablement les «
yeux rouges » lorsque vous prenez une photo à l’aide d’un flash.
L’appareil détectera automatiquement lorsque le flash est requis et
le flash se déclenchera au bout de quelques secondes.
Le flash se déclenche dans n’importe quelle condition d’éclairage.
La fonction de réduction de l’effet « yeux rouges » est également
activée.
Dans ce mode, le flash ne se déclenchera pas. Veuillez utilisez
ce mode si vous désirez saisir la lumière ambiante ou pour utiliser
l’éclairage disponible lorsque l’utilisation d’un flash est interdite
comme, par exemple, dans les musées. _ Afin d’empêcher que les
images ne soient floues en raison du manque d’éclairage, assurezvous de ne pas bouger l’appareil lorsque vous enfoncez le bouton
d’obturateur ou montez l’appareil sur un trépied.
DC5062 QSG(514174-00)-F 3 5/31/04, 4:26:33 PM
4
Fr
UTILISATION DU ZOOM NUMERIQUE
Appuyez sur T (télé) pour faire un zoom avant sur le sujet et appuyez sur W (large) pour faire un zoom
arrière ou pour revenir à une prise de vue normale.
Zoom 1x - 4x
L’image augmente en taille sur l’écran LCD.
Zoom 6x
L’image contenue dans le
rouge correspond à l’image enregistrée.
PRISES DE VUES EN MODE MACRO
Ce mode permet de prendre des photos à courte distance.
1. Appuyez sur le bouton . L’icône Macro ( ) s’affiche à l’écran.
2. Cadrez le sujet à l’écran.
• La meilleure distance de prise de vues se situe entre 15 cm et 70 cm. (6 pouces – 28 pouces.)
3. Pour activer le Focus, appuyez à mi-course sur le déclencheur jusqu’à ce que le voyant vert de Focus
automatique arrête de clignoter et que le cadre de Focus automatique passe au vert.
4. Appuyez à fond sur le déclencheur pour prendre la photo.
PRISE DE VUES CONTINUE
1. Appuyez sur le bouton . L’icône de prise continue ( ) s’affiche à l’écran.
2. Cadrez le sujet à l’écran et appuyez à mi-course sur le déclencheur pour activer le Focus jusqu’à ce que le
voyant vert de Focus automatique arrête de clignoter et que le cadre de Focus automatique passe au vert.
3. Appuyez à fond sur le déclencheur pour prendre les photos.
• L’appareil prend automatiquement 7 images successives à une vitesse d’environ 3 images par seconde en
1600 x 1200.
4. Si vous ne souhaitez plus prendre de photos successives, appuyez sur le bouton jusqu’à ce que
disparaisse de l’écran.
Remarque :
• En mode Prise continue, le flash est désactivé car son temps de rechargement le ralentirait.
• Lors des prises de vues dans ce mode, l’écran est vide.
4
7
Ta ille originale
Image réelle enregistrée
Ecran LCD Zoom 4x
9
8
Ecran LCD
Image réelle enregistrée
A
AWB
A
AWB
4
M
28/45
A
AWB
4
M
28/45
A
AWB
Zoom Numérique 6x
DC5062 QSG(514174-00)-F 4 5/31/04, 4:27:02 PM
5
Fr
PRISE DE VUES AVEC LE RETARDATEUR
1. Presser vers ( ) pour enclencher le retardateur.
( ) s’affiche sur l’écran LCD lorsque le retardateur est enclenché.
2. Placez l’appareil sur une surface plate ou fixez-la à un trépied.
3. Utilisez l’ACL pour composer l’image, puis enfoncez le bouton de l’obturateur afin d’activer leretardateur.
Le témoin de la minuterie automatique clignote lentement pendant sept secondes, puis plus rapidement
pendant trois secondes, avant de saisir l’image.
Remarque:Le retardateur est automatiquement désactivé dès que la photo a été prise.
PRISE DE VUES EN MODE SPORT
Ce mode est utilisé pour photographier du sport et autres activités à grande vitesse. L’appareil choisit
automatiquement une vitesse de déclenchement plus élevée et une ouverture plus grande pour
photographier des sujets se déplaçant à grande vitesse sans flou.
1. Dans le menu principal, appuyez sur pour entrer dans le sous-menu du mode Prise de vue.
2. Appuyez sur ou pour sélectionner Sport ( ) ou Sport + Prise continue ( + ).
3. Appuyez sur OK pour activer ce mode.
4. Cadrez le sujet à l’écran.
5. Pour activer le Focus, appuyez à mi-course sur le déclencheur jusqu’à ce que le voyant vert de Focus
automatique arrête de clignoter et que le cadre de Focus automatique passe au vert.
6. Appuyez à fond sur le déclencheur pour prendre la photo.
Remarque:
• Le flash est désactivé si le mode Sport est sélectionn.
• Maintenez l’appareil photo immobile pour éviter des photos floues. Placez pour cela votre appareil sur une
surface stable ou un trépied.
PRISE DE CLIPS VIDÉO
L’appareil photo peut enregistrer des clips vidéo avec son..
1. Faites glisser le commutateur de mode sur Clip vidéo ( ).
2. Cadrez le sujet à l’écran.
3. Pour activer le Focus, appuyez à mi-course sur le déclencheur jusqu’à ce que le
voyant vert de Focus automatique arrête de clignoter et que le cadre de Focus
automatique passe au vert.
4. Appuyez à fond sur le bouton déclencheur pour enregistrer un clip vidéo continu. La durée enregistrée
s’affiche à l’écran. L’appareil peut filmer jusqu’à ce que la mémoire soit pleine.
Pour arrêter l’enregistrement :
1. Appuyez sur le bouton Déclencheur pour arrêter l’enregistrement.
OU
2. L’appareil continue à enregistrer jusqu’à ce que la limite de la mémoire soit atteinte.
A
AWB
A
AWB
A
AWB
11
12
10
DC5062 QSG(514174-00)-F 5 5/31/04, 4:27:12 PM
6
Fr
VISIONNAGE DES PHOTOS/CLIPS VIDEO
1. Faites glisser le commutateur de mode vers ( ).
2. Appuyez sur or pour faire défiler les fichiers.
• Le type de fichier et le compteur de poses s’affichent à l’écran.
Indication de fichier Type de fichier
JPEG Image fixe
AVI Clip vidéo
3. Lorsqu’une icône de clip vidéo (AVI) est affichée à l’écran, appuyez sur le bouton OK pour lire ce clip vidéo.
Pour arrêter la lecture du clip vidéo, appuyez de nouveau sur le bouton Déclencheur.
Remarque : Vous pouvez appuyer sur le bouton OK pour suspendre et reprendre la lecture du clip vidéo.
AGRANDISSEMENT DES PHOTOS
En mode Visionnage ( ), vous pouvez agrandir les photos pour prendre une
vue plus rapprochée du sujet à l’écran.
1. En mode Visionnage ( ), appuyez sur ou pour faire défiler les images
et les clips vidéo mis en mémoire.
2. Lors du visionnage de l’image fixe enregistrée, vous pouvez effectuer
différents agrandissements en appuyant sur le bouton T.
3. Appuyer sur , , ou pour naviguer sur l’image. Lorsqu’il n’est
plus possible de se diriger dans une direction dans l’image, la flèche de direction disparaît.
4. Appuyez sur le bouton W pour effectuer un zoom arrière.
VISIONNAGE DE VOS FICHIERS SOUS FORME DE VIGNETTES
1. Lorsque vous êtes en mode Visionnage ( ), appuyez sur le bouton W pour
afficher en l’espace de quelques secondes neuf photos ou clips vidéo sous
forme de vignettes sur l’écran.
2. Appuyez sur , , ou pour passer d’une photo ou d’un clip vidéo à
l’autre.
3. Appuyez sur le bouton OK pour visionner la photo ou le clip vidéo en plein
écran.
A
AWB
13
15
14
DC5062 QSG(514174-00)-F 6 5/31/04, 4:27:48 PM
 Loading...