

Page 1
2007 - 2010
INSTALLATION &
OPERATION
MANUAL
CHEVY TAHOE LIGHT
BAR ROOF MOUNT
ADAPTOR BRACKET
AND LIT3 MOUNTING
FEET
CHEVY TAHOE
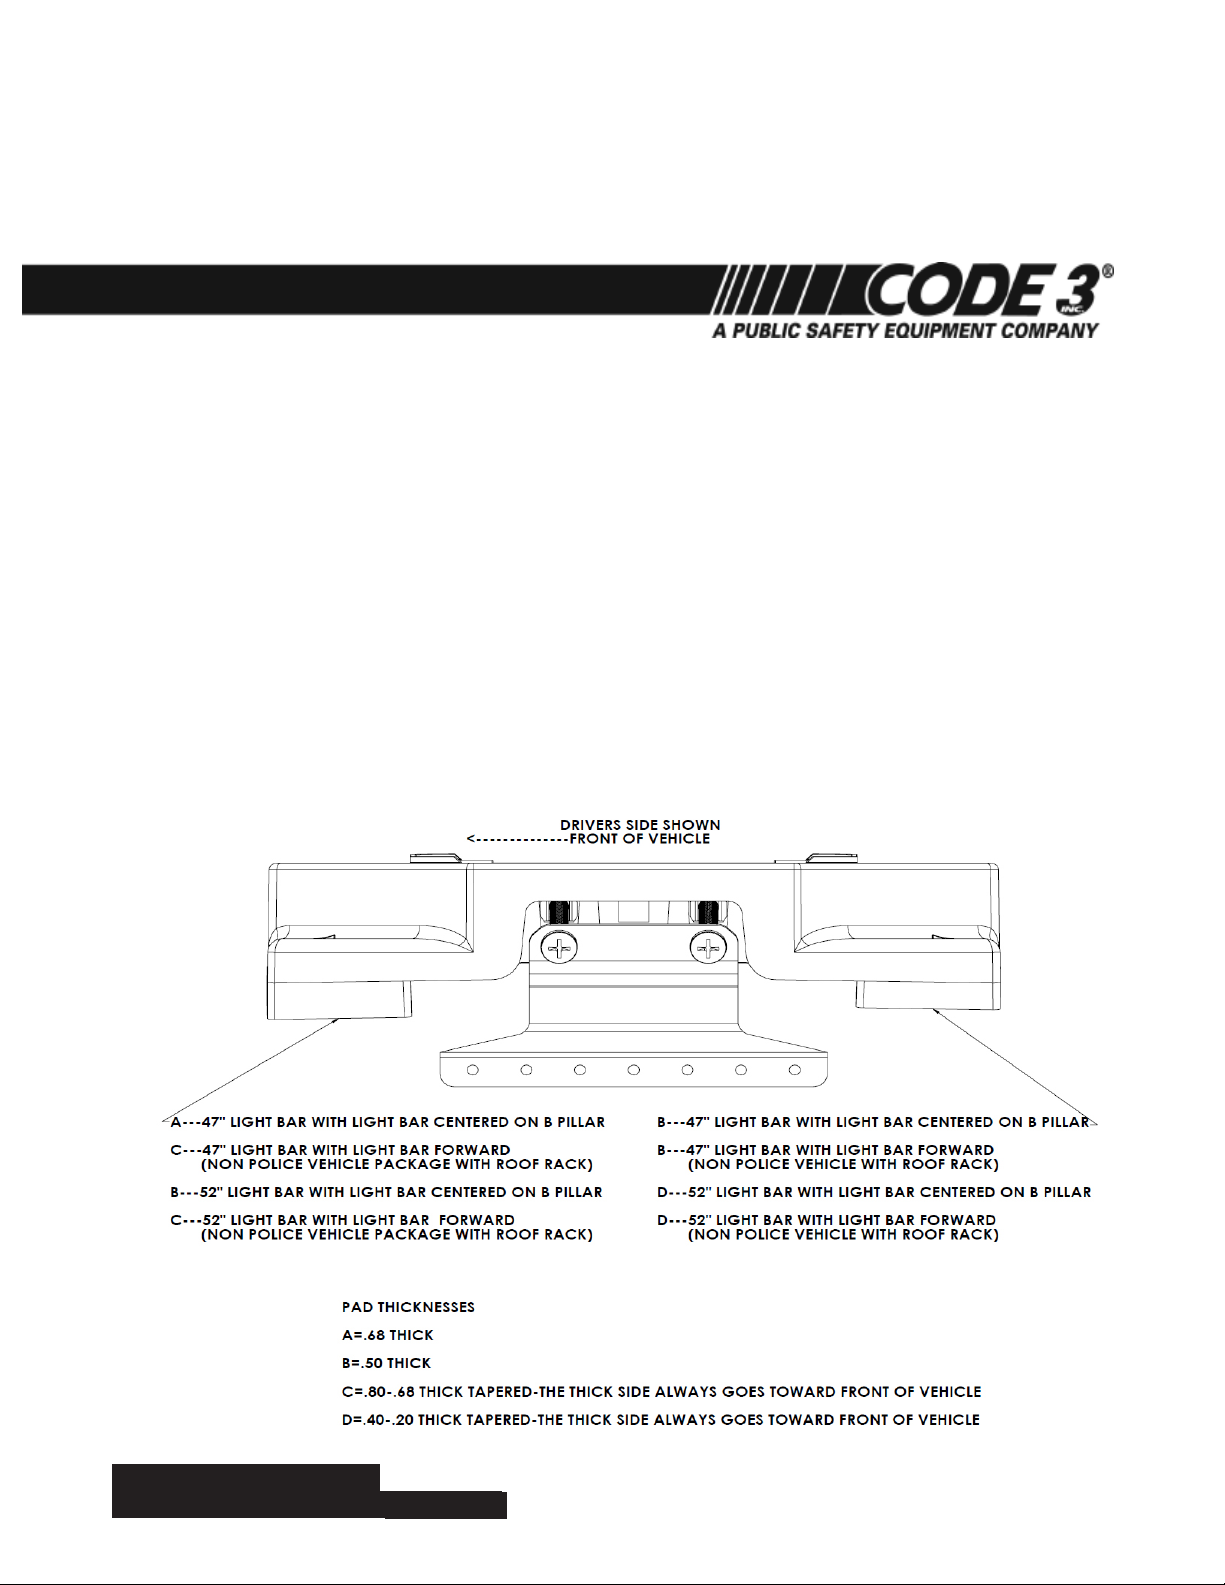
1. Adjust the mounting feet out so the face of the mount is even with the outside end of the light bar lens of
your 47" light bar or 1 5/8" in from the end of the lens for your 52" light bar.
2. Install the rubber pads onto the LIT 3 mounting feet with the thicker edge of the pad facing outboard on the
mounting feet.
3. Choose the proper rubber pads based on the desired mounting position (see Figs 1, 2 & 3). The pads are
marked A, B, C & D per the chart below.
4. Install the thicker mounting pads in the front position on the LIT3 foot (one each side of vehicle) see Fig 1.
5. Install the thinner mounting pads at the rear position of the LIT3 foot (one each side of vehicle) see Fig 1.
6. Center light bar onto roof of vehicle. The outboard roof stiffener ridge should be located at the transition
point of the LIT 3 mounting foot.
7. Position DS and PS brackets onto roof edge of vehicle and mark screw installation points on the vehicle
door frame areas. Use the drill point screws provided with the installation hardware.
NOTE: Use of a punch to center screw locations will also provide greater holding power to screw threads.
8. Install two 3" phillips head SS mounting bolts through mounting brackets and into the cage nut on each
mounting foot. Tighten screws alternately between DS and PS of vehicle until light bar is securely held in the
center of the rooine. The nal torque should be 18 inch lbs for each of the four screws. Do not over tighten.
IMPORTANT:
IMPOR-
Fig 1
Read all instructions and warnings before installing and using.
This manual must be delivered to the end user of this equipment.
INSTALLER:
INSTALLER:
1
Page 2
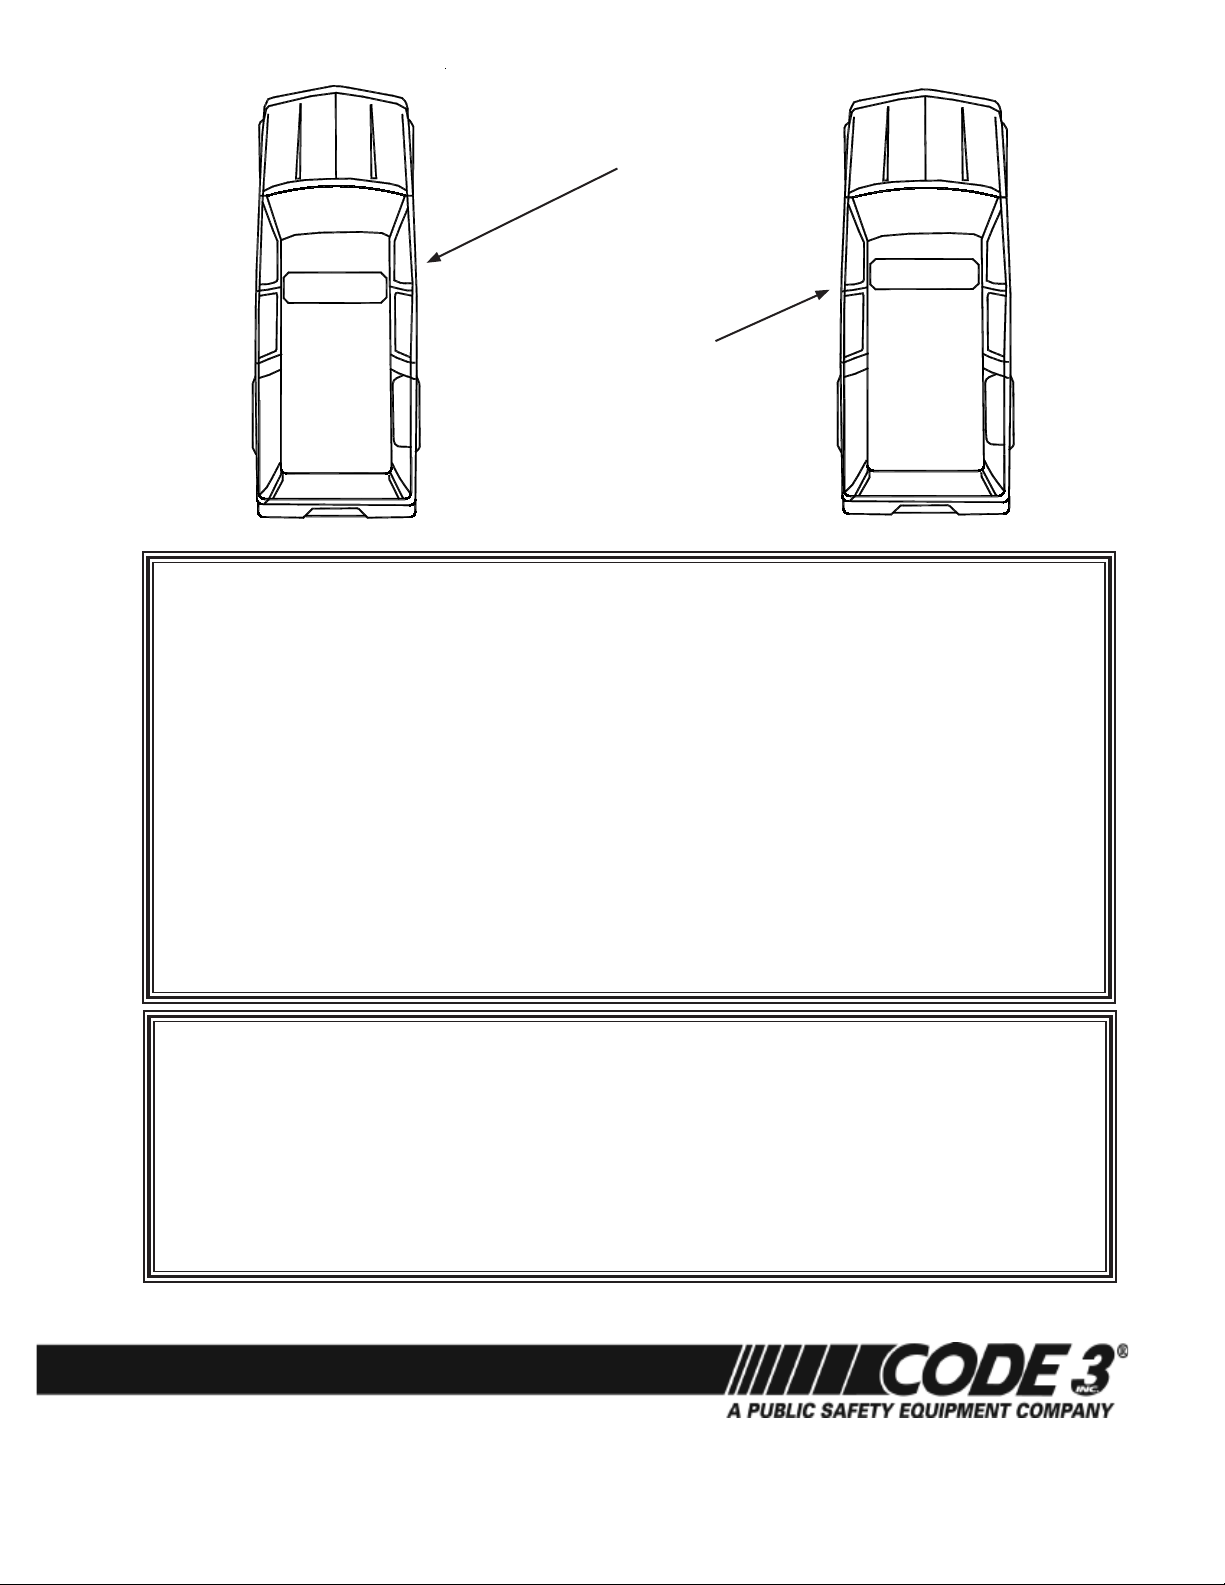
Light Bar Mounted Centered on B-Pillar
Light Bar Mounted Forward of B-Pillar
Fig 2
Fig 3
WARRANTY
Code 3, ®Inc.'s emergency devices are tested and found to be operational at the time of manufacture. Provided they are installed and
operated in accordance with manufacturer's recommendations, Code 3, Inc. guarantees all parts and components except the lamps to a period
of 1 year (unless otherwise expressed) from the date of purchase or delivery, whichever is later. Units demonstrated to be defective within the
warranty period will be repaired or replaced at the factory service center at no cost.
Use of lamp or other electrical load of a wattage higher than installed or recommended by the factory, or use of inappropriate or inadequate
wiring or circuit protection causes this warranty to become void. Failure or destruction of the product resulting from abuse or unusual use and/or
accidents is not covered by this warranty. Code 3, Inc. shall in no way be liable for other damages including consequential, indirect or special
damages whether loss is due to negligence or breach of warranty.
CODE 3, INC. MAKES NO OTHER ExPRESS OR IMPLIED WARRANTY INCLUDING, WITHOUT LIMITATION, WARRANTIES OF
FITNESS OR MERCHANTABILITY, WITH RESPECT TO THIS PRODUCT.
PRODUCT RETURNS
If a product must be returned for repair or replacement*, please contact our factory to obtain a Return Goods Authorization Number
(RGA number) before you ship the product to Code 3, Inc. Write the RGA number clearly on the package near the mailing label. Be sure you
use sufcient packing materials to avoid damage to the product being returned while in transit.
*Code 3, Inc. reserves the right to repair or replace at its discretion. Code 3, Inc. assumes no responsibility or liability for expenses incurred for the removal and /or reinstallation of products requiring
service and/or repair.; nor for the packaging, handling, and shipping: nor for the handling of products return to sender after the service has been rendered.
PROBLEMS OR QUESTIONS? CALL OUR TECHNICAL ASSISTANCE HOTLINE (314) 996-2800
Code 3® is a registered trademark of Code 3, Inc., a subsidiary of Public Safety Equipment, Inc.
WWW.CODE3PSE.COM
2
Code 3®, Inc.
St. Louis, Missouri 63114-2029—USA
Ph. (314) 426-2700 Fax (314) 426-1337
10986 N. Warson Road
Part No. T57034 Rev. 1 12/2010
©2007, 2010 Code 3, Inc
 Loading...