

Page 1
44679-05-WAC 2647 10.03.2004 12:41 Uhr Seite 1
Bedienungsanleitung/Garantie
Gebruiksaanwijzing/Garantie • Mode d’emploi/Garantie
Instrucciones de servicio/Garantía • Manual de instruções/Garantia
Istruzioni per l’uso/Garanzia • Instruction Manual/Guarantee
Instrukcja obsługi/Gwarancja • Návod k použití/Záruka
A használati utasítás/garancia • Mod de întrebuinflare/Garanflie
Руководство по эксплуатации/Гарантия
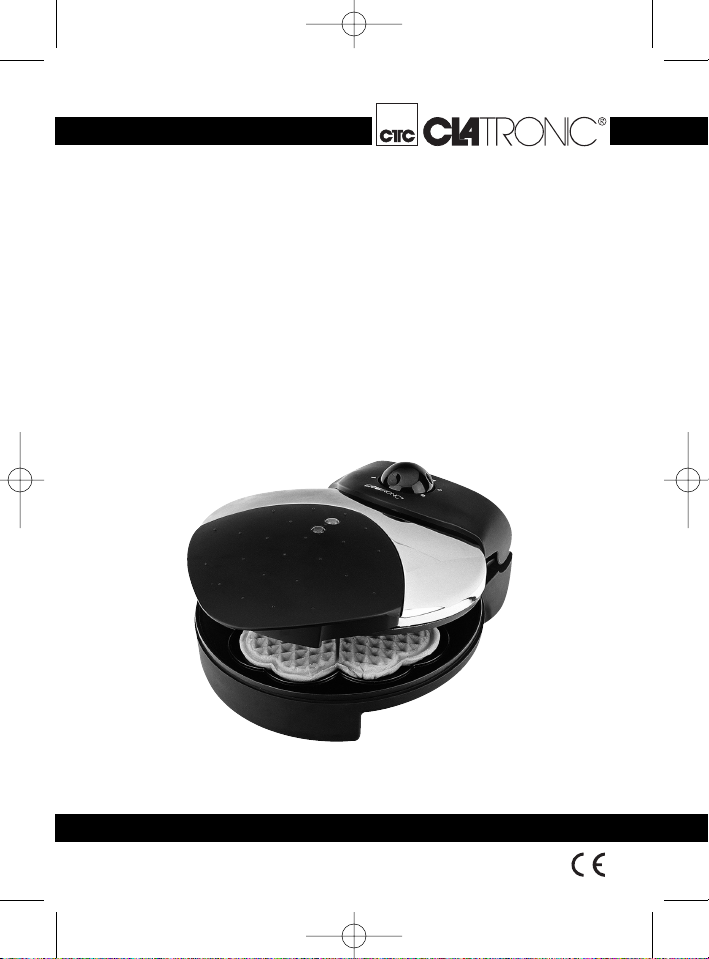
Waffelautomat
Aparato para hacer waffels • Máquina automática de wafers
Macchina automatica per cialde • Wafer making machine
wafelautomaat • Gaufrier électrique
Automat do wafli • Automat na výrobu waflí
ostyasütő automata • Aparat automat pentru vafe
Автоматическая вафельница
WAC 2647
Page 2

44679-05-WAC 2647 10.03.2004 12:41 Uhr Seite 2
Inhalt
Contents • Spis treści • Obsah • Tartalom • Conflinut • Содержание
Übersicht Bedienelemente . . . . . . . . . . . . . . . . . . . . . . . . . .Seite 3
D
Bedienungsanleitung . . . . . . . . . . . . . . . . . . . . . . . . . . . . . . .Seite 4
Garantie . . . . . . . . . . . . . . . . . . . . . . . . . . . . . . . . . . . . . . . .Seite 5
Overzicht bedieningselementen . . . . . . . . . . . . . . . . . . . . . .Pagina 3
NL
Gebruiksaanwijzing . . . . . . . . . . . . . . . . . . . . . . . . . . . . . . . .Pagina 7
Garantie . . . . . . . . . . . . . . . . . . . . . . . . . . . . . . . . . . . . . . . .Pagina 9
Aperçu des éléments de commande . . . . . . . . . . . . . . . . . . .Page 3
F
Mode d’emploi . . . . . . . . . . . . . . . . . . . . . . . . . . . . . . . . . . .Page 10
Garantie . . . . . . . . . . . . . . . . . . . . . . . . . . . . . . . . . . . . . . . .Page 12
Vista de conjunto Elementos de mando . . . . . . . . . . . . . . . .Página 3
E
Instrucciones de servicio . . . . . . . . . . . . . . . . . . . . . . . . . . . .Página 13
Garantia . . . . . . . . . . . . . . . . . . . . . . . . . . . . . . . . . . . . . . . .Página 15
Vista geral dos elemntos de comando . . . . . . . . . . . . . . . . .Página 3
P
Manual de instruções . . . . . . . . . . . . . . . . . . . . . . . . . . . . . .Página 16
Garantía . . . . . . . . . . . . . . . . . . . . . . . . . . . . . . . . . . . . . . . .Página 18
I Descrizione dei singoli pezzi . . . . . . . . . . . . . . . . . . . . . . . .Pagina 3
Istruzioni per l’uso . . . . . . . . . . . . . . . . . . . . . . . . . . . . . . . . .Pagina 19
Garanzia . . . . . . . . . . . . . . . . . . . . . . . . . . . . . . . . . . . .Pagina 21
Control element overview . . . . . . . . . . . . . . . . . . . . . . . . . . .Page 3
GB
Instruction Manual . . . . . . . . . . . . . . . . . . . . . . . . . . . . . . . . .Page 22
Guarantee . . . . . . . . . . . . . . . . . . . . . . . . . . . . . . . . . . . . . .Page 23
Przegląd elemetów obsługi . . . . . . . . . . . . . . . . . . . . . . . . .Strona 3
PL
Instrukcja obsługi . . . . . . . . . . . . . . . . . . . . . . . . . . . . . . . .Strona 25
Gwarancja . . . . . . . . . . . . . . . . . . . . . . . . . . . . . . . . . . .Strona 27
Přehled obsluhovací prvky . . . . . . . . . . . . . . . . . . . . . . . . . .Strana 3
CZ
Návod k použití . . . . . . . . . . . . . . . . . . . . . . . . . . . . . . . . . .Strana 29
Záruka . . . . . . . . . . . . . . . . . . . . . . . . . . . . . . . . . . . . .Strana 31
A hasznalt elemek megtekintése . . . . . . . . . . . . . . . . . . . . .Oldal 3
H
A hasznalati utasítás . . . . . . . . . . . . . . . . . . . . . . . . . . . . . .Oldal 32
Garancia . . . . . . . . . . . . . . . . . . . . . . . . . . . . . . . . . . . . . . . .Oldal 34
Privire de ansamblu al modului de întrebuinflare . . . . . . . .Paginæ 3
RO
Mod de întrebuinflare . . . . . . . . . . . . . . . . . . . . . . . . . . . . . .Paginæ 35
Garanflie
Обзор управляющих элементов . . . . . . . . . . . . . . . . . . . .стр. 3
RUS
Руководство по эксплуатации . . . . . . . . . . . . . . . . . . . . . .стр. 38
Гарантия . . . . . . . . . . . . . . . . . . . . . . . . . . . . . . . . . . . . . . . . .стр. 40
Inhoud • Sommaire • Indice • Índice • Indice
. . . . . . . . . . . . . . . . . . . . . . . . . . . . . . . . . . . . . .
Paginæ 37
Page 3
44679-05-WAC 2647 10.03.2004 12:41 Uhr Seite 3
21
3
4
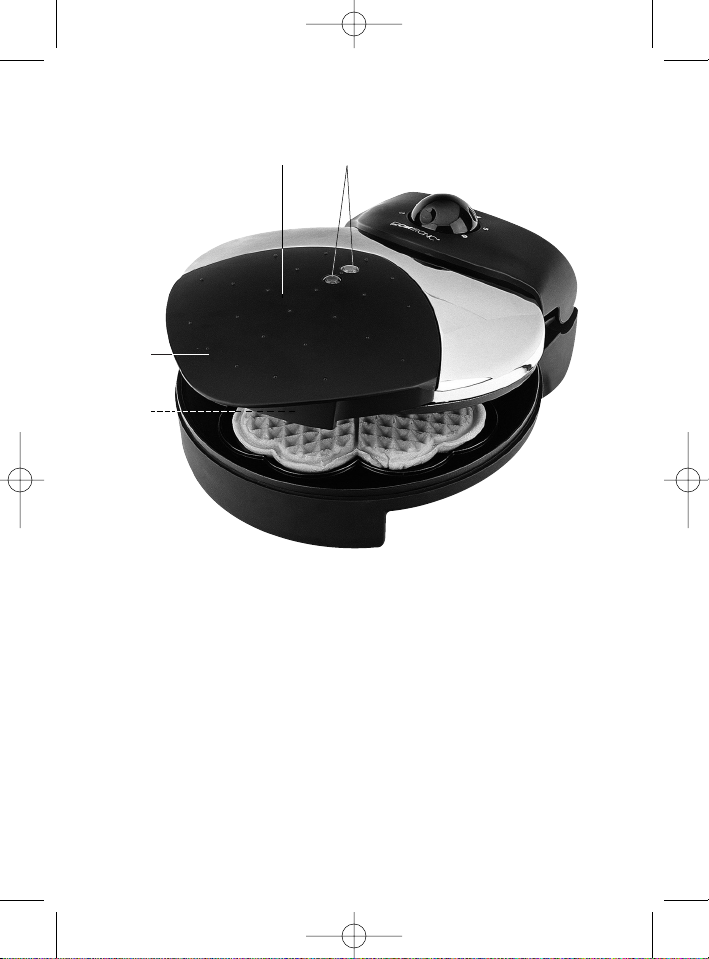
Darstellung der Bedienelemente
1 Deckel
2 Kontrollleuchte
3 ”Cool Touch” (wärmeisolierte) Griffe
4 Verriegelungssystem
3
Page 4

44679-05-WAC 2647 10.03.2004 12:41 Uhr Seite 4
D
• Lesen Sie vor Inbetriebnahme dieses Gerätes die Bedienungsanleitung sehr
sorgfältig durch und bewahren Sie diese inkl. Garantieschein, Kassenbon und
nach Möglichkeit den Karton mit Innenverpackung gut auf.
• Benutzen Sie das Gerät ausschließlich für den privaten und den dafür
vorgesehenen Zweck. Dieses Gerät ist nicht für den gewerblichen Gebrauch
bestimmt. Benutzen Sie es nicht im Freien (außer es ist für den bedingten
Einsatz im Freien vorgesehen). Halten Sie es vor Hitze, direkter
Sonneneinstrahlung, Feuchtigkeit (auf keinen Fall in Flüssigkeiten tauchen) und
scharfen Kanten fern. Benutzen Sie das Gerät nicht mit feuchten Händen. Bei
feucht oder nass gewordenem Gerät sofort den Netzstecker ziehen. Nicht ins
Wasser greifen.
• Schalten Sie das Gerät aus und ziehen Sie immer den Stecker aus der
Steckdose (ziehen Sie am Stecker, nicht am Kabel) wenn Sie das Gerät nicht
benutzen, Zubehörteile anbringen, zur Reinigung oder bei Störung.
• Lassen Sie das Gerät niemals unbeaufsichtigt. Um Kinder vor Gefahren
elektrischer Geräte zu schützen, sorgen Sie bitte dafür, dass das Kabel nicht
herunter hängt und Kinder keinen Zugriff auf das Gerät haben.
• Prüfen Sie Gerät und Kabel regelmäßig auf Schäden. Ein beschädigtes Gerät
bitte nicht in Betrieb nehmen.
• Reparieren Sie das Gerät nicht selbst, sondern suchen Sie bitte einen autorisierten Fachmann auf. Um Gefährdungen zu vermeiden, ein defektes Netzkabel
bitte nur vom Hersteller, unserem Kundendienst oder einer ähnlich qualifizierten
Person durch ein gleichwertiges Kabel ersetzen lassen.
• Verwenden Sie nur Original-Zubehör.
• Beachten Sie bitte die nachfolgenden ”Speziellen Sicherheitshinweise...”.
Allgemeine Sicherheitshinweise
Spezielle Sicherheitshinweise
• Die Backflächen werden sehr heiß! Fassen Sie nur die Griffe an.
• Stellen Sie das Gerät auf eine hitzebeständige Unterlage!
• Um einen Hitzestau zu vermeiden, das Gerät nicht direkt unter einen Schrank
stellen. Sorgen Sie für genügend Freiraum!
• Achten Sie beim Öffnen der Backflächen auf den austretenden Dampf.
• Brot ist brennbar. Deshalb das Gerät nie in der Nähe oder unterhalb von
Gardinen und anderen brennbaren Materialien verwendet werden!
Inbetriebnahme des Gerätes
• ANTI-HAFTBESCHICHTUNG
Fetten Sie die Backflächen vor dem 1. Gebrauch leicht ein. Betreiben Sie das
Gerät mit geschlossenen Backflächen ca. 10 Minuten (siehe Benutzung des
Gerätes). Danach mit einem feuchten Spültuch nachwischen.
• Die ersten Toasts/Waffeln bitte nicht verzehren.
4
Page 5

44679-05-WAC 2647 10.03.2004 12:41 Uhr Seite 5
Benutzung des Gerätes
1. Stecken Sie den Stecker in eine vorschriftsmäßig installierte
Schutzkontaktsteckdose 230 V, 50 Hz. Die orangefarbene und die grüne
Kontrollleuchte leuchten auf.
2. Drehen Sie das Thermostat auf die gewünschte Stufe (Zum Aufheizen i.d.R. auf
Stufe 6).
3. Halten Sie während der Aufheizzeit die Backflächen geschlossen. Wenn die
grüne Kontrollleuchte erlischt, ist die Backtemperatur erreicht.
4. Öffnen Sie den Deckel, geben Sie den Teig in die Mitte der Backfläche. Um
gleichmäßige Waffeln zu erhalten, können Sie den Teig etwas verteilen.
5. Deckel sanft schließen. Die grüne Kontrollleuchte leuchtet nach einigen
Sekunden wieder auf.
6. Mit dem Regler können Sie die gewünschte Backtemperatur einstellen. Werden
Ihre Waffeln zu dunkel, drehen Sie den Regler auf eine niedrigere Stufe.
7. Erlischt die grüne Kontrollleuchte erneut, ist der Backvorgang beendet (Dies
kann je nach Dicke bzw. Beschaffenheit der Waffel variieren).
8. Deckel öffnen und die fertige Waffel mit einer Holzgabel o. ä. entnehmen. Keine
scharfen oder schneidenden Gegenstände benutzen, so dass die Beschichtung
der Backflächen nicht beschädigt wird. Legen Sie die fertige Waffel auf eine
Servierplatte oder einen Teller und streuen Sie ein wenig Puderzucker darüber.
9. Die Backflächen sollten in den Backpausen immer geschlossen sein.
Rezept für Biskuitwaffeln
5 Eigelb, 5 El heißes Wasser, 100 g Zucker und 1 geriebene Zitronenschale
schaumig schlagen und mit einer Mischung von 1/2 Tl Backpulver und 150g Mehl
unterrühren. 5 Eiklar steif schlagen und unter den Teig ziehen.
Weitere Rezepte entnehmen Sie bitte Rezeptbüchern oder verwenden Sie
Backmischungen.
Dieses Gerät entspricht den einschlägigen CE-Richtlinien und
ist nach den neuesten sicherheitstechnischen Vorschriften gebaut.
Technische Änderungen vorbehalten!
Garantie
Wir übernehmen für das von uns vertriebene Gerät eine Garantie von 24 Monaten
ab Kaufdatum (Kassenbon).
Innerhalb der Garantiezeit beseitigen wir unentgeltlich die Mängel des Gerätes oder
des Zubehörs*), die auf Material- oder Herstellungsfehler beruhen, durch Reparatur
oder, nach unserem Ermessen, durch Umtausch. Garantieleistungen bewirken
weder eine Verlängerung der Garantiefrist, noch beginnt dadurch ein Anspruch auf
eine neue Garantie!
D
5
Page 6

44679-05-WAC 2647 10.03.2004 12:41 Uhr Seite 6
Als Garantienachweis gilt der Kaufbeleg. Ohne diesen Nachweis kann ein kosten-
D
loser Austausch oder eine kostenlose Reparatur nicht erfolgen.
Im Garantiefall geben Sie bitte das Grundgerät in der Originalverpackung zusammen
mit dem Kassenbon an Ihren Händler.
*) Zubehörteile unterliegen der gesetzlichen Gewährleistungspflicht ( 6 Monate)
und führen nicht zum kostenlosen Umtausch des kompletten Gerätes. In diesem
Fall nicht das Gerät, sondern nach Absprache mit unserem Kundendienst, nur das
defekte Zubehörteil einschicken bzw. bestellen! Glasbruchschäden sind grundsätzlich kostenpflichtig!
Sowohl Defekte an Verbrauchszubehör bzw. Verschleißteilen (z.B. Motorkohlen,
Knethaken, Antriebsriemen, Ersatzfernbedienung, Ersatzzahnbürsten, Sägeblättern
usw.), als auch Reinigung, Wartung oder der Austausch von Verschleißteilen, fallen
nicht unter die Garantie und sind deshalb kostenpflichtig!
Die Garantie erlischt bei Fremdeingriff.
Nach der Garantie
Nach Ablauf der Garantiezeit können Reparaturen kostenpflichtig vom entsprechenden Fachhandel oder Reparaturservice ausgeführt werden.
Service
Verschleißteile (soweit diese nicht vom Fachmann ausgewechselt werden müssen),
Ersatzkannen, Staubsaugerfilterbeutel usw. können Sie mit Angabe des Gerätetyps
unter folgender Telefon-Hotline bestellen:
0 21 52 / 2006 –888
Für die Bestellung via Internet haben wir für Sie folgende e-mail-Adresse
eingerichtet:
Interessieren Sie sich für weitere Clatronic-Produkte?
Besuchen Sie doch einmal unsere Homepage unter
www.clatronic.de oder www.clatronic.com
hotline@clatronic.de
6
Page 7

44679-05-WAC 2647 10.03.2004 12:41 Uhr Seite 7
Algemene veiligheidsinstructies
• Lees vóór de ingebruikname van dit apparaat de handleiding uiterst zorgvuldig
door en bewaar deze goed, samen met het garantiebewijs, de kassabon en zo
mogelijk de doos met de binnenverpakking.
• Gebruik het apparaat uitsluitend privé en uitsluitend voor de voorgeschreven
toepassing. Dit apparaat is niet geschikt voor commercieel gebruik (tenzij het
bedoeld is voor beperkt gebruik in de buitenlucht). Bescherm het tegen hitte,
directe zonnestralen, vocht (i geen geval in vloeistoffen dompelen) en scherpe
kanten. Gebruik het apparaat niet met vochtige handen. Bij vochtig of nat geworden apparaat onmiddellijk de stroomtoevoer onderbreken. Niet in het water grijpen.
• Schakel het apparaat uit en onderbreek altijd de stroomtoevoer (trek aan de
steker, nooit aan de kabel) wanneer u het apparaat niet gebruikt, hulpstukken
aanbrengt, reinigt of wanneer storingen optreden.
• Laat het apparaat nooit ingeschakeld zonder toezicht. Bescherm kinderen tegen
gevaren en zorg ervoor dat kabels nooit los omlaag hangen en dat het apparaat
buiten het bereik van kinderen blijft.
• Controleer regelmatig of het apparaat beschadigingen vertoont. Een beschadigd apparaat mag niet in gebruik worden genomen.
• Repareer het apparaat nooit zelf, maar breng het naar een geautoriseerde vakman. Voorkom gevaren en laat een defecte kabel altijd alleen door de fabrikant,
onze technische dienst of een eender gekwalificeerde persoon vervangen door
een soortgelijke kabel.
• Gebruik alleen originele reserveonderdelen.
• Neem de onderstaande “Speciale veiligheidsinstructies“ in acht.
Speciale veiligheidsinstructies
• De bakplaten worden zeer heet. Pakt u alleen de grepen beet.
• Plaatst u het apparaat op een hittebestendige ondergrond.
• Om een opeenhoping van hitte te voorkomen, mag u het apparaat niet direct
onder een kast plaatsen. Zorgt u voor voldoende ventilatieruimte.
• Past u bij openen van de bakplaten op voor de vrijkomende damp.
• Brood kan ontbranden. Plaats het apparaat dus nooit in de nabijheid van of
onder gordijnen en andere brandbare materialen!
NL
Overzicht van de bedieningselementen
1 Deksel
2 Controlelamp
3 „Cool Touch„ (warmtegeïsoleerde) handgrepen
4 Vergrendelingssysteem
7
Page 8

44679-05-WAC 2647 10.03.2004 12:41 Uhr Seite 8
NL
• NIET HECHTENDE LAAG
Vóór de eerste ingebruikname vet u de bakplaten enigszins in. Laat het apparaat ca. 10 minuten ingeschakeld met gesloten bakplaten (zie “Bediening van
het apparaat”). Daarna veegt u het schoon met een vochtige doek.
• De eerste wafels zijn niet geschikt voor consumptie
Ingebruikname van het apparaat
Bediening van het apparaat
1. Sluit de steker aan op een correct geïnstalleerde en geaarde contactdoos
230 V, 50 Hz. De oranje en de groene controlelamp branden nu.
2. Draai de thermostaat naar de gewenste stand (voor het verwarmen gewoonlijk
stand 6).
3. Houdt de bakplaten gesloten tijdens het verwarmen. Zodra de groene controlelamp dooft, is de baktemperatuur bereikt.
4. Open het deksel en giet het deeg in het midden van de bakplaat. Om gelijkmatige wafels te verkrijgen, kunt u het deeg iets verdelen.
5. Sluit het deksel rustig. Na enkele seconden brandt de groene controlelamp
weer.
6. Met de regelaar kunt u de gewenste baktemperatuur instellen. Zet de regelaar
op een lagere stand wanneer de wafels te donker worden.
7. Zodra de groene controlelamp opnieuw dooft, zijn de wafels klaar (al naargelang de dikte van de wafels kan de tijd variëren).
8. Open het deksel en verwijder de wafel met een houten vork of iets dergelijks.
Gebruik geen scherpe of snijdende voorwerpen en voorkom zo beschadiging
van de beschermlaag op de bakplaat. Leg de wafels op een bord of een serveerschaal en bestrooi ze met een beetje poedersuiker.
9. De bakplaten moeten tijdens de bakpauzes altijd gesloten zijn.
Recept voor biscuitwafels
5 Eidooiers, 5 eetlepels heet water, 100 g suiker en 1 geraspte citroenschil tot
schuim kloppen en met een mengsel van
mengen. 5 Eiwitten stijf kloppen en onder het deeg roeren. U kunt uiteraard andere
recepten uit kookboeken of een voorbereide bakmix gebruiken.
1
/2 theelepel bakpoeder en 150 g meel
Dit apparaat is in overeenstemming met de CE-richtlijnen t.a.v. ontstoring en lage
volt-veiligheid en is geconstrueerd conform de allerlaatste veiligheidstechnische
voorschriften.
8
Page 9

44679-05-WAC 2647 10.03.2004 12:41 Uhr Seite 9
Garantie
Voor het door ons geleverde apparaat verlenen wij een garantie van 24 maanden
vanaf koopdatum (kassabon).
Eventuele gebreken aan het apparaat of aan het toebehoren*) die zijn ontstaan
door productie- of materiaalfouten verhelpen wij binnen deze periode kosteloos
door middel van reparatie of, naar ons oordeel, door vervanging. Eventuele garantiegevallen verlengen noch de geldigheidsduur van de garantie, noch begint daardoor een nieuwe garantieperiode!
Het koopbewijs geldt als garantiebewijs. Zonder dit bewijs kan geen kosteloze
reparatie of vervanging plaatsvinden.
In geval van garantie dient u het apparaat in de originele verpakking met bijvoeging
van het koopbewijs af te geven bij uw handelaar.
*) Toebehoren valt onder de wettelijke garantieplicht (6 maanden) en leidt niet tot
kosteloze vervanging van het complete apparaat.Stuur of bestel in dit geval niet het
complete apparaat, maar - in overleg met de handelaar - alleen het defecte hulpstuk! De vervanging voor glasbreukschade geschiedt altijd tegen berekening!
Niet defecten aan de hulpstukken of aan de slijtende onderdelen (bijv. koolborstels,
deeghaken, drijfriemen, reserveafstandsbediening, reservetandenborstels, zaagbladen enz.), maar ook reiniging, onderhoud of de vervanging van slijtende delen
vallen niet onder de garantie en geschieden altijd tegen berekening!
Bij ingrepen door derden komt de garantieverlening te vervallen.
Na de garantieperiode
Na afloop van de garantieperiode kunnen reparaties tegen berekening worden uitgevoerd door de betreffende vakhandelaar of de technische dienst.
NL
9
Page 10

44679-05-WAC 2647 10.03.2004 12:41 Uhr Seite 10
F
• Lisez attentivement ce mode d’emploi avant de mettre l’appareil en marche
pour la première fois. Conservez le mode d’emploi ainsi que le bon de garantie,
votre ticket de caisse et si possible, le carton avec l’emballage se trouvant à
l’intérieur.
• N’utilisez cet appareil que pour un usage privé et pour les taches auxquelles il
est destiné. Cet appareil n’est pas prévu pour une utilisation professionnelle. Ne
l’utilisez pas en plein air (sauf s’il est indiqué que vous pouvez le faire).
Protégez-le de la chaleur, des rayons directs du soleil, de l’humidité (ne le plongez en aucun cas dans l’eau) et des objets tranchants. N’utilisez pas cet
appareil avec des mains humides. S’il arrive que de l’humidité ou de l’eau atteignent l’appareil, débranchez aussitôt le câble d’alimentation. Ne touchez pas
les parties mouillées.
• Arrêtez l’appareil et débranchez toujours le câble d’alimentation de la prise de
courant (tirez sur la fiche, pas sur le câble) si vous n’utilisez pas l’appareil, si
vous installez les accessoires, pour le nettoyage ou en cas de panne.
• Ne laissez en aucun cas l’appareil fonctionner sans surveillance. Pour protéger
les enfants des risques engendrés par les appareils électriques , veillez à ce
que le câble ne pende pas de l’appareil et que l’appareil ne soit pas à portée
des enfants.
• Contrôlez régulièrement l’appareil et le câble. Ne mettez pas l’appareil en marche s’il est endommagé.
• Ne réparez pas l’appareil vous-même. Contactez plutôt un technicien qualifié.
Pour éviter toute mise en danger, ne faites remplacer le câble défectueux que
par un câble équivalent et que par le fabricant, notre service après-vente ou
toute personne de qualification similaire.
• N’utilisez que les accessoires d’origine.
• Respectez les „conseils de sécurité spécifiques à cet appareil“ ci-dessous ...
Conseils généraux de sécurité
Conseils spécifiques de sécurité
• Les plaques de cuisson deviennent brûlantes. Ne touchez que les poignées.
• Placez l’appareil sur une surface résistant aux températures élevées.
• Ne mettez pas l’appareil sous un meuble afin d’éviter toute accumulation de
chaleur. Prévoyez un espace libre suffisant.
• Faites attention aux vapeurs qui se répandent lorsque vous ouvrez les plaques
de cuisson.
• Le pain est inflammable. Il est donc formellement déconseillé d'utiliser l'appareil
à proximité ou en dessous de rideaux ou de tout autre matériau inflammable !
10
Page 11

44679-05-WAC 2647 10.03.2004 12:41 Uhr Seite 11
Liste des différents éléments de commande
1. Couvercle
2. Lampe témoin
3. Poignées "Cool touch" (résistant à la chaleur)
4. Système de verrouillage
Avant la première utilisation
• COUCHE ANTIADHESIVE
Graissez légèrement les plaques de cuisson avant la première utilisation. Laissez fonctionner l’appareil env. 10 minutes, en laissant les plaques de cuisson
fermées (voir Utilisation de l’appareil). Essuyez ensuite avec un torchon humide.
• Ne consommez pas les premiers sandwichs / gaufres.
Utilisation de l'appareil
1. Branchez l'appareil dans une prise de courant en bon état de fonctionnement
de 230 V, 50 Hz. Les lampes témoin de couleur orange et verte s'allument.
2. Tournez le thermostat sur la position désirée (sur 6 normalement pour le
préchauffage).
3. Laissez l'appareil fermé pendant le préchauffage. La température de cuisson
est atteinte lorsque la lampe verte s'éteint.
4. Ouvrez le couvercle, versez la pâte au milieu de la surface de cuisson. Pour
obtenir des gaufres plus uniformes, vous pouvez étaler la pâte sur la plaque de
cuisson.
5. Refermez le couvercle doucement. La lampe verte s'allume à nouveau après
quelque secondes.
6. Vous pouvez régler la température de cuisson désirée à l'aide du thermostat. Si
les gaufres deviennent trop foncées, tournez le thermostat sur une température
plus basse.
7. Les gaufres sont cuites lorsque la lampe verte s'éteint à nouveau (cela peut
varier selon l'épaisseur et le consistance des gaufres).
8. Ouvrez le couvercle et retirer les gaufres avec une spatule en bois ou tout autre
ustensile similaire. N'utilisez en aucun cas d'ustensiles pointus ou coupant de
façon à ne pas endommager le revêtement anti-adhésif. Déposez les gaufres
dans un plat ou une assiette et saupoudrez légèrement de sucre glace.
9. Les plaques de cuisson doivent rester fermées entre deux cuissons.
F
Recette des gaufres
Mélangez 5 jaunes d’oeuf, 5 cuil. à soupe d’eau chaude, 100 g de sucre et 1 zeste
de citron jusqu’à ce que le mélange deviennent mousseux. Ajoutez
de levure et 150 g de farine préalablement mélangés. Montez les 5 blancs d’oeuf
en neige et mélangez à la préparation.
Pour d’autres idées, référez-vous à un livre de recettes ou utilisez des sachets de
préparation.
1
/2 cuil. à café
11
Page 12

44679-05-WAC 2647 10.03.2004 12:41 Uhr Seite 12
Cet appareil satisfait aux directives CE pour l'antiparasitage et pour la sécurité
F
basse tension et a été conçu selon les toutes récentes prescriptions techniques de
sécurité.
Sous réserve de modifications techniques.
Garantie
Nous accordons une garantie de 24 mois à dater de la date d’achat (ticket de
caisse) pour l’appareil que nous vendons.
Pendant la durée de la garantie, nous éliminons gratuitement les défauts de l’appareil ou des accessoires *) découlant d’un vice de matériau ou de fabrication au
moyen d’une réparation ou, selon notre estimation, au moyen d’un remplacement.
Les prestations dans le cadre de la garantie n’entraînent aucune prorogation de la
durée de garantie et ne donnent pas droit à une nouvelle garantie !
Le justificatif de garantie est le reçu. Sans ce justificatif, aucun remplacement
gratuit ni aucune réparation gratuite ne peuvent être effectués.
En cas de garantie, veuillez remettre l’appareil de base dans l’emballage d’origine
ainsi que le ticket de caisse à votre commerçant.
*) Les accessoires sont soumis à l’obligation légale de garantie (6 mois) et ne provoquent pas le remplacement gratuit de l’appareil complet. Dans ce cas, ne pas envoyer l’appareil mais, après accord de notre service clientèle, uniquement l’accessoire
défectueux ou le commander ! Dans tous les cas, les bris de verre sont payants !
Les défauts sur les accessoires ou les pièces d’usure (p.ex. les charbons de
moteurs, crochets, courroies d’entraînement, télécommande de rechange, brosses
à dents de rechange, lames de scies etc.) ainsi que le nettoyage, l’entretien ou le
remplacement de pièces d’usure ne sont pas garantis et sont donc payants !
En cas d’intervention étrangère, la garantie devient caduque.
Après la garantie
Après écoulement de la durée de garantie, les réparations peuvent être effectuées,
contre paiement, par le commerce spécialisé ou le service de réparation.
12
Page 13

44679-05-WAC 2647 10.03.2004 12:41 Uhr Seite 13
Indicaciones generales de seguridad
• Antes de la puesta en servicio de este aparato lea detenidamente el manual de
instrucciones y guarde este bien incluido la garantía, el recibo de pago y si es
posible también el cartón de embalaje con el embalaje interior.
• Solamente utilice el aparato para el uso privado y para el fin previsto. Este
aparato no está destinado para el uso profesional. No lo utilice al aire libre
(en excepto que esté destinado para el uso limitado al aire libre). No lo exponga al calor, a la entrada directa de rayos de sol, a la humedad ( en ningún caso
sumerja el aparato en agua) y a los cantos agudos. No utilice el aparato con las
manos húmedas. En caso de que el aparato esté húmedo o mojado retire de
momento la clavija de la caja de enchufe. No tocar el agua.
• Desconecte el aparato y siempre retire la clavija de la caja de enchufe (tire de
la clavija no del cable), cuando no quiera utilizar el aparato, montar piezas o en
caso de limpieza o defectos.
• Nunca deje el aparato sin supervisión de una persona. Para evitar que los
niños se hagan daños eléctricos, siempre tenga atención, que el cable no cuelgue hacia abajo y que los niños no tengan acceso al aparato.
• Controle regularmente si el aparato o el cable tiene defectos. No ponga en servicio un aparato defecto.
• No repare el aparato por su cuenta, sino vaya a un establecimiento autorizado.
Para evitar peligros, deje sustituir un cable defecto por uno de la misma calidad
solamente por el fabricante, nuestro servicio al cliente o una similar persona
cualificada.
• Solamente utilice accesorios originales.
• Por favor tenga atención a las “Indicaciones especiales de seguridad…“
indicadas a continuación.
Indicaciones especiales de seguridad
•
Las planchas de horneado se tornan bien calientes. Tocar solamente las manillas.
• Colocar el equipo sobre un apoyo resistente al calor.
• Para evitar acumulación de calor, no colocar el equipo directamente debajo de
un armario. Proveer de suficiente espacio libre.
• Tener cuidado del vapor saliente al abrir las planchas de horneado.
• El pan es un producto inflamable. Por lo tanto, ¡no utilice el equipo cerca o
debajo de cortinas u otros materiales inflamables!
Representación de los elementos de mando
1. Tapa
2. Lámpara de control
3. Asideros "cool touch" (con aislamiento térmico)
4. Sistema de enclavamiento
E
13
Page 14

44679-05-WAC 2647 10.03.2004 12:41 Uhr Seite 14
E
• RECUBRIMIENTO ANTI-ADHERENTE
Engrasar ligeramente las planchas de horneado antes de usarse la primera
vez. Utilice el aparato unos 10 minutos con las caras de cocción cerradas (ver
instrucciones del equipo). Después limpiar con un paño de enjuague húmedo.
• Se ruega no consumir las primeras tostadas/los primeros barquillos.
Puesta en operación del equipo
Uso del aparato
1. Enchufe el aparato en una caja de enchufe con puesta a tierra de 230 V, 50 Hz.
Se enciende la lámpara de control anaranjada y la lámpara verde.
2. Gire el termóstato al escalón deseado (para calentar, por lo general al escalón 6).
3. Mantenga cerrados los moldes durante el período de calentamiento.
4. Abra la tapa, vierta la masa en el centro del molde.
Para obtener barquillos uniformes puede repartir un poco la masa.
5. Cerrar suavemente la tapa.Vuelve a encenderse la lámpara de control verde
después de algunos segundos.
6. Puede ajustar la temperatura de panificación deseada con el regulador. Si los
barquillos son muy oscuros gire el regulador a un bescalón más bajo.
7. Si se apaga nuevamente la lámpara de control verde, concluyó el proceso de
preparación (esto puede variar en función del espesor o del estado del barquillo).
8. Abra la tapa y saque el barquillo preparado con un tenedor de madera, etc. No
utilizar para ello objetos puntiagudos o cortantes a fin de no dañar la superficie
del molde. Coloque el barquillo preparado sobre una bandeja para servir o un
plato y espolvoree el barquillo con un poco de azúcar en polvo.
9. En las pausas de preparación, los moldes siempre deben estar cerrados.
Receta para waffels de biscocho
Batir hasta espumar 5 yemas de huevo, 5 cucharas de agua caliente, 100 g de
azúcar y una concha de limón molida, y adicionar a una mezcla con
de polvo de hornear y 150 g de harina. Batir 5 claras de huevo y vertirlas debajo de
la masa. Tomar recetas adicionales de recetarios o utilice mezclas/masas para
hornear.
1
/2 cucharilla
Este aparato responde a las directivas de CE para la supresión de interferencias y
la seguridad de baja tensión y ha sido construido según las últimas prescripciones
de seguridad técnica.
No reservamos el derecho de efectuar modificaciones técnicas.
14
Page 15

44679-05-WAC 2647 10.03.2004 12:41 Uhr Seite 15
Garantía
Para el aparato comercializado por nosotros nos responsabilizamos con una
garantía de 24 meses a partir de la fecha de compra (factura de compra).
Durante el período de garantía nos encargamos gratuítamente de los defectos del
aparato y de los accesorios*), que se hayan originado por defectos del material o
de la fabricación. Dependiendo de nuestra estimación se realizará una reparación
o un cambio. ¡Los servicios de garantía no prolangan la garantía, ni se incia por
ello un período nuevo de garantía!
Como comprobante para la garantía es válido la factura de compra. Sin este comprobante no se podrá realizar un cambio o una reparación gratuíta.
En el caso de garantía lleve el aparato base en el embalaje original y la factura de
compra a su concesionario.
*) Los accesorios se someten a la obligación legal de cambio (6 meses) y no conllevan al cambio gratuíto del aparato entero.¡En este caso no se debería envíar el
aparato entero, sino, trás ponerse en contacto con su concesionario, solamente
enviar o pedir el accesorio defecto! ¡Respecto a roturas de cristal no se hará cargo
el fabricante !
Defectos en los accesorios de uso o en las piezas de desgaste (p.ej. escobillas de
carbón del motor, varillas amasadoras, correas de transmisión, mando a distancia
de repuesto, cepillos de dientes de repuesto, hojas de sierra etc.), como también la
limpieza, mantenimiento o el recambio de piezas de desgaste no recaen en la
garantía e irán al cargo del cliente!
En caso de intervención ajena se expira la garantía.
Después de la garantía
Después de haber expirado la garantía se pueden realizar las reparaciones por el
concesionario o por el servicio de reparaciones. Los gastos irán al cargo del cliente.
E
15
Page 16

44679-05-WAC 2647 10.03.2004 12:41 Uhr Seite 16
P
• Antes de pôr este aparelho a funcionar, leia muito atentamente as instruções
de emprego e guarde-as muito bem, juntamente com o talão de garantia, o
talão de compra e, tanto quanto possível, a embalagem com os elementos interiores.
• Utilize o aparelho exclusivamente para fins privados e para a finalidade para a
qual o mesmo foi concebido. Este aparelho não se destina a fins comerciais.
Não o utilize ao ar livre (a não ser que o mesmo possa ser usado ao ar livre
sob determinadas condições). Mantenha-o protegido do calor, de irradiação
solar directa, da humidade (não o imergir de forma alguma em quaisquer líquidos) e de arestas aguçadas. Não utilize o aparelho com as mãos molhadas. No
caso de o aparelho ficar húmido ou molhado, retire imediatamente a ficha da
tomada. Não tocar na água.
• Sempre que não utilizar o aparelho, ou desejar montar acessórios, ou queira
limpá-lo, ou ainda em caso de avarias, deverá desligá-lo e retirar a ficha da
tomada (puxe pela ficha e não pelo fio).
• Nunca deixe o aparelho sem vigilância. Para proteger as crianças dos perigos
relacionados com aparelhos eléctricos, nunca deixe os fios pendurados e atente em que as crianças não possam chegar a tais aparelhos.
• Verifique regularmente se o aparelho ou o fio têm alguns danos. Nunca ponha
a funcionar um aparelho com quaisquer danos.
• Não tente reparar o aparelho, dirija-se a um técnico da especialidade, devidamente autorizado. Para evitar quaisquer perigos, é favor substituir um fio danificado por um fio da mesma qualidade. Tal deverá ser efectuado pelo fabricante,
pelos nossos serviços de assistência ou por outra pessoa com as mesmas
qualificações.
• Utilize apenas acessórios de origem.
• É favor observar as seguintes „Instruções especiais de segurança...“.
Instruções gerais de segurança
Instruções especiais de segurança
• As superfícies de cozedura ficam muito quentes. Tocar apenas nas pegas.
• Colocar o aparelho sobre uma superfície resistente ao calor.
• Para se evitar uma acumulação de calor, não colocar o aparelho directamente
por baixo de um armário. É necessário espaço livre suficiente.
• Cuidado ao abrir as superfícies de cozedura: haverá saída de vapor muito
quente.
• O pão poderá arder. Por essa razão, a sanduicheira nunca deverá ser utilizada
perto ou por baixo de cortinas ou de outros materiais inflamáveis!
Elementos do aparelho
1. Tampa
2. Lâmpada de controle
3. Pegas „Cool Touch“ (isoladas)
4. Sistema de bloqueio
16
Page 17

44679-05-WAC 2647 10.03.2004 12:41 Uhr Seite 17
Primeira utilização do aparelho
• REVESTIMENTO ANTIADERENTE
Untar ligeiramente as superfícies de cozedura antes de se usar o aparelho pela
primeira vez. Pôr o aparelho a funcionar, com as superfícies de tostagem
fechadas, durante aprox. 10 minutos (consultar a rubrica sobre a utilização do
aparelho). Limpar em seguida com um pano húmido.
• Não comer por favor as primeiras torradas / waffles.
Utilização do aparelho
1. Introduzir a ficha numa tomada com protecção de contactos de 230 V, 50 Hz,
convenientemente instalada. As lâmpadas de controle cor-de-laranja e verde
iluminar-se-ão.
2. Gire o termostato para o escalão desejado (para aquecer, geralmente no
escalão 6).
3. Durante o período de aquecimento, mantenha as placas de cozedura fechadas.
Quando a lâmpada de controle verde se apagar, terá sido atingida a temperatura necessária para a preparação das waffles.
4. Abra a tampa, deite a massa no meio da placa. Para se obterem waffles homogéneas, espalhar um pouco a massa.
5. Fechar a tampa suavemente. A lâmpada de controle verde tornará a acenderse poucos segundos depois.
6. Através do selector, poderá ajustar a temperatura pretendida. No caso de as
waffles ficarem demasiado escuras, gire o selector para um escalão mais
baixo.
7. Logo que a lâmpada de controle verde se torne a acender, a waffle estará
pronta. (A duração da cozedura depende da grossura e composição da waffle).
8. Abra a tampa e retire a waffle, usando uma espátula de madeira, ou outro
objecto semelhante. Não utilize objectos aguçados nem cortantes, para não se
danificar o revestimento das placas. Coloque a waffle numa travessa ou num
prato e polvilhe-a com um pouco de açúcar em pó.
9. Durante os intervalos, as placas deverão ficar fechadas.
Receita para crepes à alemã
Bater 5 gemas, 5 colheres de sopa de água quente, 100 de açúcar e raspa de 1
limão, até ficar uma massa com um pouco de espuma. Juntar 150g de farinha com
meia colher de chá de fermento em pó. Bater 5 claras em castelo e misturar cuidadosamente à massa.
Para outras receitas, consultar livros de cozinha ou comprar misturas já prontas.
P
Este aparelho obedece às normas da CE para eliminação de interferências e
segurança de baixa tensão e foi fabricado de acordo com os regulamentos mais
recentes da técnica de segurança.
Reserva-se o direito de alterações!
17
Page 18

44679-05-WAC 2647 10.03.2004 12:41 Uhr Seite 18
P
O aparelho vendido pela nossa empresa tem uma garantia de 24 meses a partir
da data da compra (talão).
Durante o período de garantia, procederemos à remoção grátis - por reparação,
ou, segundo a nossa decisão, por substituição - das deficiências do aparelho ou
dos acessórios*) que provenham de erros de material ou de fabricação. A prestação de serviços relacionados com a garantia não prolongarão a mesma, nem
iniciarão um novo prazo de garantia!
O talão de compra consistirá prova desta garantia. Sem o mesmo, não será possível proceder-se a qualquer troca ou reparação grátis.
No caso de querer fazer valer a garantia, é favor entregar o aparelho básico, dentro
da embalagem original e juntamente com o talão de compra, na loja onde aquele
tenha sido comprado.
*) Os acessórios estão sujeitos à legislação sobre garantia (6 meses) e não implicarão a substituição grátis do aparelho completo. Neste caso, após se ter contactado os nossos serviços de assistência técnica, enviar para a fábrica ou encomendar
apenas o acessório defeituoso! Danos em peças de vidro deverão em princípio ser
pagos pelo cliente!
Não estão incluídos na garantia quaisquer defeitos de acessórios ou de peças que
se desgastem (como, por exemplo, carvões do motor, varinhas, correias do motor,
telecomandos, escovas de dentes, folhas de serra, etc.), nem a limpeza, a manutenção ou a substituição de peças que se desgastem, devendo tais despesas ser
reembolsadas!
A garantia terminará sempre que tenha havido intervenção alheia nos aparelhos.
Garantia
Após a garantia
Após a expiração do prazo de garantia, poderão ser efectuados arranjos por pessoal especializado, ou pelos nossos serviços de reparações, contra reembolso.
18
Page 19

44679-05-WAC 2647 10.03.2004 12:41 Uhr Seite 19
Norme di sicurezza generali
• Prima di mettere in funzione questo apparecchio, leggere molto attentamente le
istruzioni per l’uso e conservarle con cura unitamente al certificato di garanzia,
allo scontrino e, se possibile, alla scatola di cartone con la confezione interna.
• Utilizzare l’apparecchio esclusivamente per scopi privati e conformemente al
tipo di applicazione previsto. Questo prodotto non è stato concepito ai fini di un
impiego in ambito industriale. Non utilizzarlo all’aperto (a meno che non sia
contemplato un particolare tipo di uso all’aperto nel rispetto di specifiche
condizioni). Proteggerlo dal calore, nonché dall’esposizione diretta ai raggi solari e dall’umidità (non immergerlo mai in sostanze liquide) e tenerlo a distanza
da oggetti con spigoli affilati. Non utilizzare l’apparecchio con le mani umide.
Nel caso in cui si bagni o si inumidisca l’apparecchio, staccare immediatamente
la spina. Evitare il contatto con l’acqua.
• Disattivare l’apparecchio e staccare sempre la spina dalla relativa presa
(si raccomanda di afferrare il connettore e non il cavo quando si effettua questa
operazione) allorché non si utilizza l’apparecchio, quando si applicano degli
accessori oppure nel caso in cui lo si debba pulire o si siano manifestate
anomalie.
• Non lasciare mai l’apparecchio incustodito. Allo scopo di proteggere i bambini
contro i pericoli che possono derivare dagli apparecchi elettrici, accertarsi che
non vi siano cavi pendenti e che i bambini non possano accedere in alcun
modo all’apparecchio stesso.
• Controllare periodicamente l’apparecchio per verificare che non vi siano danni.
Non mettere in funzione l’apparecchio nel caso in cui sia guasto.
• Non tentare di riparare l’apparecchio, bensì rivolgersi a un tecnico autorizzato.
Al fine di evitare l’insorgere di situazioni di pericolo, si raccomanda di contattare
il costruttore, il nostro servizio di assistenza tecnica o un tecnico ugualmente
qualificato per la sostituzione del cavo di alimentazione difettoso con un cavo
equivalente.
• Utilizzare esclusivamente accessori originali.
• Rispettare le seguenti “Speciali norme di sicurezza...“.
Avvertenze di sicurezza
• Le piastre di cottura diventano estremamente calde. Maneggiarle solamente
con le apposite maniglie.
• Porre l’apparecchio su una superficie resistente al calore.
• Per evitare un eventuale blocco termico, non mettere l’apparecchio direttamente
sotto un mobile. Assicurarsi che ci sia spazio libero sufficiente.
• Fare attenzione alla fuoruscita di vapore quando si aprono le piastre di cottura.
• Il pane è combustibile, quindi non utilizzare mai l’apparecchio in prossimità o
sotto tende e altri materiali combustibili!
I
19
Page 20

44679-05-WAC 2647 10.03.2004 12:41 Uhr Seite 20
Elementi di comando
I
1. Coperchio
2. Indicatore luminoso di funzionamento
3. Manici termoisolanti „Cool Touch“
4. Sistema di blocco
Messa in funzione dell’apparecchio
• RIVESTIMENTO ANTI-ADERENTE
Ungere leggermente le piastre di cottura prima di usare l’apparecchio per la
prima volta. Mettere in funzione l' apparecchio solo con le piastre di cottura chiuse per ca. 10 min (vedi Uso dell’apparecchio). Pulire poi con una pezza umida.
• Non consumare i primi toast / le prime cialde.
Uso dell’apparecchio
1. Infilare la spina in una presa, regolarmente installata, con contatto di terra da
230 V, 50 Hz. Gli indicatori luminosi arancione e verde si accendono.
2. Girare il termostato sul livello desiderato (per riscaldare di solito sul livello 6).
3. Durante il riscaldamento tenere le piastre chiuse. Quando l’indicatore luminoso
verde si spegne, la temperatura di cottura è raggiunta.
4. Sollevare il coperchio, versare la pasta al centro della superficie di cottura. Per
ottenere cialde omogenee si può distribuire un po’ la pasta.
5. Chiudere delicatamente il coperchio. Dopo alcuni secondi l’indicatore luminoso
verde si riaccende.
6. Con la manopola di regolazione si può impostare la temperatura di cottura desi-
derata. Se le cialde diventano troppo scure, mettere il termostato su un livello
più basso.
7. Quando l’indicatore luminoso verde si spegne, la cottura è terminata (questo
lasso di tempo può variare a seconda dello spessore o delle caratteristiche
della cialda).
8. Sollevare il coperchio e prelevare la cialda pronta con una forchetta di legno o
qualcosa di simile. Non usare oggetti taglienti al fine di non danneggiare il rivestimento delle superfici di cottura. Mettere la cialda pronta su un vassoio o un
piatto e cospargerla di zucchero a velo.
9. Durante le pause di cottura le superfici dovrebbero essere sempre chiuse.
Ricetta per cialde
Mescolate bene 5 tuorli d’uovo, 5 cucchiai di acqua calda, 100 g di zucchero e 1
buccia di limone grattuggiata ed aggiungete 150 g di farina con _ cucchiaino di lievito per dolci. Montate a neve 5 albumi ed aggiungeteli all’impasto. Per avere ulteriori ricette consultate per cortesia un ricettario oppure utilizzate miscele già pronte.
20
Page 21

44679-05-WAC 2647 10.03.2004 12:41 Uhr Seite 21
Questo apparecchio corrisponde alle norme CE per i disturbi radio e la sicurezza
contro le correnti a basso voltaggio ed è stato costruito in base alle più recenti
norme tecniche di sicurezza.
Con riserva di apportare modifiche tecniche.
Garanzia
Per l’apparecchio da noi messo in commercio ci assumiamo una garanzia di
24 mesi dalla data di acquisto (scontrino).
Durante la garanzia noi ci impegniamo ad eliminare gratuitamente i guasti dell’apparecchio o degli accessori*), dovuti a difetti di materiale o di fabbricazione, riparandoli o, a nostra discrezione, sostituendoli. Le prestazioni in garanzia danno luogo a
una proroga della garanzia né danno diritto ad una nuova garanzia!
Per la garanzia è sufficiente lo scontrino di acquisto. Senza questo scontrino non
sussiste il diritto né ad una sostituzione né ad una riparazione gratuita.
In caso di garanzia consegnare al vostro rivenditore l’apparecchio base nell’imballaggio originale unitamente allo scontrino.
*) Gli accessori sottostanno all’obbligo di garanzia legale (6 mesi) e la loro sostituzione non comporta la sostituzione gratuita di tutto l’apparecchio. In questo caso
non inviare tutto l’apparecchio ma, d’intesa con il nostro servizio assistenza, ordinare / inviare solo l’accessorio difettoso! Le sostituzioni di pezzi in vetro sono sempre
a pagamento!
La riparazione di pezzi d’uso ovvero soggetti a logoramento (cursori, ganci impastatori, cinghie di trasmissione, telecomandi di ricambio, spazzolini di ricambio,
lame di seghe ecc.) come anche operazioni di pulizia e manutenzione o la sostituzione di pezzi soggetti a logoramento non rientrano nella garanzia e quindi sono a
pagamento!
La garanzia si annulla nel caso di intervento da parte di terzi.
Dopo la garanzia
Al termine della garanzia le riparazioni possono essere eseguite dietro pagamento
dal corrispettivo negozio specializzato o servizio riparazioni.
I
21
Page 22

44679-05-WAC 2647 10.03.2004 12:41 Uhr Seite 22
GB
• Read the operating instructions carefully before putting the appliance into ope-
ration and keep the instructions including the warranty, the receipt and, if possible, the box with the internal packing.
• The appliance is designed exclusively for private use and for the envisaged pur-
pose. This appliance is not fit for commercial use. Do not use it outdoors (except
if it is designed to be used outdoors). Keep it away from sources of heat, direct
sunlight, humidity (never dip it into any liquid) and sharp edges. Do not use the
appliance with wet hands. If the appliance is humid or wet, unplug it immediately. Do not put it in water.
• When cleaning or putting it away, switch off the appliance and always pull out
the plug from the socket (pull on the plug, not the cable) if the appliance is not
being used and remove the attached accessories.
• Never leave the appliance unsupervised. To protect children from the dangers
posed by electrical appliances, make sure that the cable is hanging low and that
children do not have access to the appliance.
• Check the appliance and the cable for damage on a regular basis. Do not use
the appliance if it is damaged.
• Do not try to repair the appliance on your own. Always contact an authorized
technician. To avoid the exposure to danger, always have a faulty cable be
replaced only by the manufacturer, by our customer service or by a qualified
person and with a cable of the same type.
• Use only original spare parts.
• Pay careful attention to the following “Special Safety Instructions“.
General Safety Instructions
Special safety notes
• The baking surfaces get very hot. Touch the handles only.
• Put the unit down onto a heat-resistant surface or mat.
• In order to prevent heat from building up, do not put the unit directly underneath
a cupboard. Ensure that there is enough space all around.
• Beware of steam coming out when you open the baking section.
• Bread can burn. Never place the device near or under curtains and other
flammable materials!
Overview of the Components
1Lid
2LED
3 „Cool Touch“ (thermo-insulated) handle
4 Lock system
22
Page 23

44679-05-WAC 2647 10.03.2004 12:41 Uhr Seite 23
Starting-up the unit
• NON-STICK COATING
Lightly grease the baking surfaces before the unit is used for the first time. Use
the appliance for about 10 minutes with the toasting surfaces closed (see "Using
the unit"). Then wipe it down with a damp cloth.
• Do not eat the first waffles.
Using the device
1. Insert the plug in a duly installed 230V/50Hz protective contact socket. The
orange and green LED’s light up.
2. Turn the thermostat to the desired temperature (for heating usually level 6).
3. Keep the baking surfaces closed while heating.When the green LED switches
off, the baking temperature is reached.
4. Open the lid and pour the dough in the middle of the baking surface. To obtain
even waffles, spread the dough.
5. Close the lid delicately.The green LED lights up after a few seconds.
6. The desired baking temperature can be set with the selector. When the waffles
are dark enough, turn the selector to the lowest level.
7. The green LED switches off again. The baking is now over. (It can vary depen-
ding on the thickness and consistency of the waffles).
8. Open the lid and remove the waffles with a wooden fork or a similar tool. Do not
use sharp objects to avoid ruining the coating of the baking surface. Serve the
waffles on a tray or in a disk and coat with some powdered sugar.
9. The baking surfaces must always be kept closed during pauses in the baking.
Recipe for waffles
5 egg yolks, 5 dessertspoons of hot water, 100 g sugar and 1 grated lemon peel
should be mixed together until frothy and then a mixture of 1/2 teaspoon baking
powder and 150 g flour should be stirred in. Beat the 5 egg whites stiff and fold
them into the batter.You can find further recipes in our recipe books or else you can
use a ready-made baking mix.
GB
This appliance conforms with the CE directives for radio interference suppression
and low-voltage safety and has been built to meet current safety requirements.
Subject to technical changes without prior notice!
Warranty
The device supplied by our Company is covered by a 24 month warranty starting
on the date of purchase (receipt).
23
Page 24

44679-05-WAC 2647 10.03.2004 12:41 Uhr Seite 24
During the life of the warranty any fault of the device or its accessories *) ascribable
GB
to material or manufacturing defects will be eliminated free of charge by repairing
or, at our discretion, by replacing it.The warranty services do not entail an extension of the life of the warranty nor do they give rise to any right to a new warranty!
Proof of the warranty is provided by the proof of purchase. Without proof of purchase no free replacement or repair will be carried out.
For repairs or replacement during the life of the warranty return the device in its original packing together with the proof of purchase to your dealer.
*) Accessories are subject to the legally envisaged warranty obligation (6 months)
and do not entitle to the free replacement of the entire device. In this case, only the
faulty accessory will be sent in or ordered with the agreement of our customer service! Damages to glass parts are not free of charge!
Defects to consumables or parts subject to wearing (e.g. motor pistons, kneading
blades, drive shafts, spare remote control, spare toothbrushes, saw blades, etc.) as
well as cleaning, maintenance or the replacement of said parts are not covered by
the warranty and hence are to be paid!
The warranty lapses in case of unauthorized tampering.
After the expiry of the warranty
After the expiry of the warranty repairs can be carried by the competent dealer or
repair service against the payment of the ensuing costs.
24
Page 25

44679-05-WAC 2647 10.03.2004 12:41 Uhr Seite 25
Ogólne wskazówki bezpieczeństwa
• Przed uruchomieniem urządzenia proszę bardzo dokładnie przeczytać
instrukcję obsługi. Proszę zachować ją wraz z kartą gwarancyjną,
paragonem i w miarę możliwości również kartonem z opakowaniem
wewnętrznym.
• Proszę wykorzystywać urządzenie jedynie dla prywatnego celu, jaki został
przewidziany dla urządzenia. Urządzenie to nie zostało przewidziane do
użytku w ramach działalności gospodarczej. Proszę nie korzystać z
urządzenia na zewnątrz (chyba że w określonych warunkach). Proszę
trzymać urządzenie z daleka od ciepła, bezpośredniego promieniowania
słonecznego, wilgoci (w żadnym wypadku nie zanurzać w substancjach
płynnych) oraz ostrych krawędzi. Proszę nie obsługiwać urządzenia
wilgotnymi dłońmi. Jeżeli urządzenie jest wilgotne lub mokre, proszę
natychmiast wyciągnąć wtyczkę. Nie sięgać do wody.
• Jeżeli nie korzystacie Państwo z urządzenia, jeżeli chcecie Państwo
zamontować jakieś akcesoria, w celu wyczyszczenia lub w przypadku
jakichkolwiek zakłóceń, proszę zawsze wyłączyć urządzenie i wyjąć wtyczkę
z gniazdka (proszę pociągnąć za wtyczkę, nie zaś za kabel).
• Proszę nigdy nie pozostawiać urządzenia bez nadzoru. Aby uchronić dzieci
przed niebezpieczeństwem związanym z elektrycznymi urządzeniami, proszę
zadbać o to, aby kabel nigdy nie wisiał luźno, oraz aby dzieci nie miały
dostępu do urządzenia.
• Proszę regularnie kontrolować urządzenie pod kątem uszkodzeń. Proszę nie
uruchamiać uszkodzonego urządzenia.
• Proszę nie naprawiać urządzenia samemu lecz skorzystać z pomocy
autoryzowanego specjalisty. Aby uniknąć niebezpieczeństw, proszę dopilnować, aby jedynie producent, nasz serwis firmowy lub osoba o podobnych
kwalifikacjach zastąpiła uszkodzony kabel kablem o takiej samej jakości.
• Proszę stosować tylko oryginalne akcesoria.
• Prosimy pamiętać o podanych dalej „Specjalnych przepisach
bezpieczeństwa...“.
Wskazówki dotyczące bezpieczeństwa obsługi
• Powierzchnie smażące stają się bardzo gorące. Używać wyłącznie uch-
wytów.
• Urządzenie stawiać na odpornej na ciepło podkładce.
• Aby uniknąć nadmiernego nagrzewania, nie stawiać bezpośrednio pod szaf-
ką. Zadbać o odpowiednią przestrzeń.
• Uwaga na wydostającą się w chwili otwarcia parę.
• Chleb jest artykułem palnym. Dlatego urządzenie nie może być nigdy stoso-
wane w pobliżu firan lub pod nimi bądź też obok innych materiałów łatwopalnych!
PL
25
Page 26

44679-05-WAC 2647 10.03.2004 12:41 Uhr Seite 26
Schemat elementów obsługi
PL
1. Pokrywa
2. Kontrolka
3. Uchwyty z izolacją termiczną
4. System blokowania
Przygotowanie do użytkowania urządzenia
• POWIERZCHNIA NIEPRZYWIERAJĄCA
Natłuścić lekko powierzchnie smażące przed 1. użyciem. Na około 10
minut włącz urządzenie z zamkniętymi powierzchniami zapiekającymi (patrz
użytkowanie). Następnie przetrzeć wilgotną szmatką.
• Proszę nie spożywać pierwszych wafli.
Używanie urządzenia
1. Kabel zasilania proszę podłączyć do przepisowo zainstalowanego gniazda z
zestykiem ochronnym 230 V, 50 Hz. Kontrolka zielona i pomarańczowa
włączy się.
2. Proszę ustawić termostat na wybranym stopniu (przy rozgrzewaniu z reguły
na stopniu 6).
3. W trakcie rozgrzewania proszę utrzymywać powierzchnie do pieczenia zamknięte. Gdy zielona kontrolka zgaśnie oznacza to, że osiągnięta została
właściwa temperatura do pieczenia.
4. Proszę otworzyć pokrywę i umieścić ciasto na środku formy do pieczenia.
Aby uzyskać równomierne wafle, można lekko rozprowadzić ciasto.
5. Lekko zamknąć pokrywę. Zielona kontrolka włączy się ponownie po kilku
sekundach.
6. Za pomocą pokrętła można ustawić odpowiednią temperaturę do wypiekania. Gdy wafle są za ciemne, należy przekręcić regulator na mniejszy stopień.
7. Gdy zielona kontrolka ponownie zgaśnie, proces pieczenia został
zakończony (może być różne w zależności od grubości i struktury wafli).
8. Otworzyć pokrywę i wyjąc gotowy wafel za pomocą drewnianej łyżki lub
podobnego przyrządu. Proszę nie używać ostrych lub tnących przedmiotów,
aby nie uszkodzić powłoki powierzchni do wypiekania. Gotowe wafle proszę
położyć na ozdobnej tacce lub talerzu i lekko posypać cukrem pudrem.
9. Powierzchnie wypiekania w przerwach między wypiekami powinny pozostawać zawsze zamknięte.
Recepta na wafle biszkoptowe
5 żółtek, 5 łyżek stołowych wody, 100gr cukru i 1 startą skórkę od cytryny
ubić na pianę oraz dodać mieszankę 1/2 łyżeczki proszku do pieczenia z 150gr
mąki, zmieszać. 5 białek zbić na sztywno i przepuścić przez ciasto.
Inne recepty znajdziecie Państwo w książkach kucharskich lub używajcie gotowych mieszanek.
26
Page 27

44679-05-WAC 2647 10.03.2004 12:41 Uhr Seite 27
Niniejsze urządzenie odpowiada normom CE sieci tradiowo-telewizyjnej i
bezpieczeństwa niskonapięciowego oraz zbudowane jest według najnowszej
techniki bezpieczeństwa pracy.
Zastrzega się prawo do zmian technicznych!
WARUNKI GWARANCJI
Przyznajemy 24 miesięcy gwarancji na produkt licząc od daty zakupu.
W tym okresie będziemy bezpłatnie usuwać w terminie 14 dni od daty dostarczenia wadliwego sprzętu z kartą gwarancyjną do miejsca zakupu wszystkie uszkodzenia powstałe w tym urządzeniu na skutek wady materiałów lub wadliwego
wykonania, naprawiając oraz wymieniając wadliwe części lub (jeśli uznamy za stosowne) wymieniając całe urządzenie na nowe.
Sprzęt do naprawy powinien być dostarczony w komplecie wraz z dowodem
zakupu oraz z ważną kartą gwarancyjną do sprzedawcy w miarę możliwości w
oryginalnym opakowaniu lub innym odpowiednim dla zabezpieczenia przed uszkodzeniem. W razie braku kompletnego opakowania fabrycznego, ryzyko uszkodzenia sprzętu podczas transportu do i z miejsca zakupu ponosi reklamujący.
Naprawa gwarancyjna nie dotyczy czynności przewidzianych w instrukcji obsługi,
do wykonania których zobowiązany jest użytkownik we własnym zakresie i na
własny koszt.
Gwarancja nie obejmuje:
• mechanicznych, termicznych, chemicznych uszkodzeń sprzętu i wywołanych
nimi wad,
• uszkodzeń powstałych w wyniku działania sił zewnętrznych takich jak wyładowania atmosferyczne, zmiana napięcia zasilania i innych zdarzeń losowych,
• nieprawidłowego ustawienia wartości napięcia elektrycznego, zasilanie z nieodpowiedniego gniazda zasilania,
• sznurów połączeniowych, sieciowych, żarówek, baterii, akumulatorów,
• uszkodzeń wyrobu powstałych w wyniku niewłaściwego lub niezgodnego z
instrukcją jego użytkowania, przechowywania, konserwacji, samowolnego
zrywania plomb oraz wszelkich przeróbek i zmian konstrukcyjnych dokonanych
przez użytkownika lub osoby niepowołane,
• roszczeń z tytułu parametrów technicznych wyrobu, o ile są one zgodne z
podanymi przez producenta,
• prawidłowego zużycia i uszkodzeń, które mają nieistotny wpływ na wartość
lub działanie tego urządzenia.
Karta gwarancyjna bez pieczątki sklepu, daty sprzedaży, nie wypełniona, źle
wypełniona, ze śladami poprawek, nieczytelna wskutek zniszczenia, bez
możliwości ustalenia miejsca sprzedaży oraz dołączonego dowodu zakupu jest
nieważna.
Korzystanie z usług gwarancyjnych nie jest możliwe po upływie daty ważności
gwarancji. Gwarancja na części lub całe urządzenie, które są wymieniane kończy
się, wraz z końcem gwarancji na to urządzenie.
PL
27
Page 28

44679-05-WAC 2647 10.03.2004 12:41 Uhr Seite 28
Wszystkie inne roszczenia, wliczając w to odszkodowania są wykluczone chyba, że
PL
prawo przewiduje inaczej. Roszczenia wykraczające poza tą umowę nie są
uwzględniane przez tą gwarancję.
Gwarancja oraz zawarte w niej warunki obowiązują na terenie Rzeczpospolitej
Polskiej.
28
Page 29

44679-05-WAC 2647 10.03.2004 12:41 Uhr Seite 29
Všeobecné bezpečnostní pokyny
• Před uvedením tohoto přístroje do provozu si velmi pozorně přečtěte návod
k obsluze a tento návod spolu se záručním listem, pokladním blokem a
podle možností i s obalem a vnitřním vybavením obalu dobře uschovejte.
• Používejte tento přístroj výlučně pro soukromou potřebu a pro stanovené
účely. Tento přístroj není určen pro komerční použití. Nepoužívejte jej v
otevřeném prostoru (s výjimkou přístrojů, které jsou podmíněné používání
venku určeny). Chraňte jej před horkem, přímým slunečním zářením, vlhkostí (v žádném případě jej neponořujte do kapalin) a stykem s ostrými hranami. Nepoužívejte přístroj v případě, že máte vlhké ruce. Jestliže dojde k navlhčení nebo namočení přístroje, okamžitě vytáhněte zástrčku ze zásuvky.
Vyvarujte se styku s vodou.
• Přístroj vypněte a vždy vytáhněte zástrčku ze zásuvky (tahejte jen za zástrčku, nikdy ne za kabel), jestliže nebudete přístroj používat, chcete-li
namontovat příslušenství, přístroj vyčistit nebo v případě poruchy.
• Nikdy nenechávejte přístroj bez dozoru, jestliže je v provozu. Abyste ochránili děti před riziky spojenými s elektrickými přístroji, postarejte se o to, aby
kabel nevisel dolů a děti na přístroj nedosáhly.
• Pravidelně kontrolujte přístroj a přívodní kabel z hlediska poškození. Jestliže
přístroj vykazuje nějakou závadu, neuvádějte jej do provozu.
• Neopravujte přístroj vlastními silami, nýbrž vyhledejte autorizovaného
opraváře. Abyste eliminovali rizika, nechejte poškozený přívodní kabel
nahradit kabelem se stejnými hodnotami a to jen výrobcem, naším servisem
pro zákazníky nebo jinou kvalifikovanou osobou.
• Používejte jen originální příslušenství.
• Respektujte, prosím, následující „Speciální bezpečnostní pokyny ...“.
Speciální bezpečnostní pokyny
• Pečící plochy se velmi silně zahřívají. Při manipulaci používejte vždy jen ruko-
jeti.
• Instalujte přístroj na žáruvzdorný podklad.
• K zamezení městnání tepla nesmí být přístroj zabudován přímo do nábytku,
ale vždy kolem něho musí být dostatečný volný prostor.
• Mějte na paměti, že při otevírání pečících ploch dojde k úniku páry.
• Chléb je hořlavý. Přístroj proto nesmí být nikdy používán v blízkosti záclon
nebo pod nimi nebo v blízkosti jiných hořlavých materiálů!
Vyobrazení ovládacích prvků
1. Víko
2. Kontrolní svítilna
3. Tepelně izolované rukojeti („cool-touch“)
4. Zajišťovací systém
CZ
29
Page 30

44679-05-WAC 2647 10.03.2004 12:41 Uhr Seite 30
CZ
• ANTIADHÉZNÍ VRSTVA
Před prvním použitím pečící plochy lehce potřete tukem. S uzavřenými
pečícími plochami smí být přístroj v provozu ca. 10 minut (viz kapitola
Používání přístroje). Poté je otřete
vlhkým hadříkem.
• První toasty/vafle nejezte.
Uvedení přístroje do provozu
Používání přístroje
1. Zastrčte zástrčku do předpisově instalované zásuvky s ochranným kolíkem
230 V, 50 Hz. Rozsvítí se oranžová a zelená kontrolní svítilna.
2. Otočte termostatem na požadovaný stupeň (pro předehřátí zpravidla na stu-
peň 6).
3. Během doby zahřívání dbejte na to, aby pečící plochy byly uzavřeny. Jakmile
zelená kontrolní svítilna zhasne, je to znamení, že bylo dosaženo pečící
teploty.
4. Otevřete víko a do středu pečících ploch dejte těsto. Aby byly vafle rov-
noměrné, můžete těsto poněkud rozdělit.
5. Víko jemně uzavřete. Zelená kontrolní svítilna se po několika sekundách opět
rozsvítí.
6. Regulátorem můžete nastavit požadovanou pečící teplotu. Jestliže jsou Vaše
vafle příliš tmavé, otočte regulátorem na nižší stupeň.
7. Jakmile zelená kontrolní svítilna opět zhasne, je proces pečení ukončen.
(Doba pečení se může lišit v závislosti na tloušťce, resp. povahy vaflí.)
8. Otevřete víko a hotové vafle vyjměte pomocí dřevěné vidličky nebo podobné
pomůcky. Nepoužívejte žádné ostré předměty nebo předměty, které by
mohly poškodit potah pečících ploch. Hotové vafle položte na servírovací tác
nebo na talíř a trochu je posypte práškovým cukrem.
9. V přestávkách mezi pečením by pečící plochy měly být vždy zavřeny.
Recept na piškotové vafle
5 vaječných žloutků, 5 polévkových lžic vřelé vody, 100 g cukru a nastrouhanou
kůru z 1 citrónu vyšlehejte do pěny, přidejte půl čajové lžičky prášku do pečiva a
150 g mouky a zpracujte do těsta. 5 vaječných bílků utřete do tuha a vmíchejte
do těsta. Další recepty si najděte, prosím, v receptáři nebo použijte prodávané,
již připravené směsi.
Tento přístroj odpovídá směrnicím Evropské společnosti pro odrušení a
nízkovoltovou bezpečnost a je sestaven podle nejnovějších předpisů bezpečnostní techniky.
Vyhrazujeme si technické změny!
30
Page 31

44679-05-WAC 2647 10.03.2004 12:41 Uhr Seite 31
Záruka
Na námi prodaný přístroj poskytujeme záruku v trvání 24 měsíců od data prodeje (pokladní doklad).
Během záruční lhůty odstraníme bezplatně všechny vady přístroje nebo
příslušenství*), které vzniknou v důsledku vad materiálu nebo výrobních vad, a to
opravou nebo, podle našeho uvážení, formou výměny. Záruční plnění nemají za
následek ani prodloužení záruční doby ani tím nevzniká nárok na novou záruku!
Jako záruční doklad slouží doklad o koupi. Bez tohoto dokladu nelze uskutečnit
bezplatnou výměnu nebo bezplatnou opravu.
V případě uplatnění záruky předejte, prosím, základní přístroj v originálním obalu
spolu s pokladním dokladem Vašemu obchodníkovi.
*) Na díly příslušenství se vztahuje zákonná povinnost poskytování záruky
(6 měsíců) a jejich vady nezakládají nárok na bezplatnou výměnu kompletního
přístroje. V takovémto případě nezasílejte, resp. neobjednávejte celý přístroj, nýbrž
po dohovoru s naším zákaznickým servisem zašlete, resp. objednejte jen vadný díl
příslušenství! Škody na skleněných dílech zásadně podléhají povinnosti úhrady!
Jak na vady na spotřebním příslušenství, resp. dílech podléhajících rychlému
opotřebení (např. uhlíky motoru, hnětací háky, hnací řemeny, náhradní dálkové
ovládání, náhradní zubní kartáčky, pilové listy atd.), tak i na čištění, údržbu nebo
výměnu dílů podléhajících rychlému opotřebení se záruka nevztahuje a je proto
nutno je uhradit!
Záruka zaniká v případě, že dojde k zásahu neautorizovanou osobou.
Po uplynutí záruky
Po uplynutí záruční doby je možno za úplatu provést opravy v příslušném
odborném obchodě nebo opravně.
CZ
31
Page 32

44679-05-WAC 2647 10.03.2004 12:41 Uhr Seite 32
H
• A készülék használatba vétele előtt gondosan olvassa végig a használati
utasítást, és őrizze meg a garancialevéllel, a pénztári nyugtával és lehetőleg
a csomagolókartonnal, ill. az abban lévő bélésanyaggal együtt!
• Kizárólag személyi célra használja a készüléket, és csupán arra, amire való!
A készülék nem ipari jellegű használatra készült. Ne használja a szabadban
(hacsak nem a szabadban való, meghatározott korlátok közötti használatra
van szánva)! Ne tegye ki erős hőhatásnak, közvetlen napsugárzásnak és
nedvességnek (semmi esetre se mártsa folyadékba), és óvja az éles
szélektől! Ne használja a készüléket vizes kézzel! Ha a készülék vizes vagy
nedves lett, azonnal húzza ki a konnektorból! Ne nyúljon bele a vízbe!
• Kapcsolja ki a készüléket, és amikor nem használja, tartozékokat helyez rá,
tisztítja, vagy ha zavart észlel, mindig húzza ki a csatlakozó dugaszt a
konnektorból!
• Soha ne hagyja a készüléket felügyelet nélkül! Annak érdekében, hogy a
gyermekeket megvédje az elektromos készülékek okozta veszélyektől, soha
ne hagyja a kábeleket szabadon lógva, és olyan helyre tegye a készüléket,
ahol gyermekek nem férhetnek hozzá!
• Rendszeresen ellenőrizze, hogy nincs-e a készüléken vagy a kábelen
sérülés! Sérült készüléket soha ne helyezzen üzembe!
• A kockázatok elkerülése végett ne maga javítsa a készüléket, hanem
keressen fel egy erre kiképzett szakembert! Ha hibás a csatlakozó kábel,
csak a gyártótól, a vevőszolgálatunktól vagy hasonló képzettségű személytől
kérjen helyette azonos értékű másik kábelt!
• Csak eredeti tartozékokat használjon!
• Tartsa be az itt következő "Speciális biztonsági rendszabályokat" ...
Általános biztonsági rendszabályok
Speciális biztonsági intézkedések
• A sütőfelületek nagyon felforrósodnak. Csak a fogantyúkat fogja meg.
• A készüléket egy hőálló alapra állítsa.
A nagyfokú hőképződés miatt a készüléket nem szabad közvetlenül egy sze-
•
krény alá állítani. Gondoskodni kell a készülék körüli elegendő szabad helyről.
• A sütőfelületek kinyitásakor ügyeljen a kiáramló gőzre.
• A kenyér gyúlékony. A készüléket ezért soha nem szabad függönyök és más
éghető anyagok közelében vagy alatt használni!
A kezelő elemek bemutatása
1. Fedél
2. Ellenőrző lámpa
3. "Cool touch" (hőszigetelt) fogók
4. Reteszelő rendszer
32
Page 33

44679-05-WAC 2647 10.03.2004 12:41 Uhr Seite 33
A készülék üzembevétele
• LETAPADÁSMENTES BEVONAT
Az első használat előtt vékonyan zsírozza be a sütőfelületeket. Működtesse
kb. 10 percig a készüléket zárt sütőfelületekkel. (lásd: A készülék használata). Ezután törölje le azt egy nedves törlőkendővel.
• Az első melegszendvicseket/gofrikat ne fogyassza el!
A készülék használata
1. Dugja a csatlakozó dugót előírásszerűen szerelt, 230 V, 50 Hz-es földelt
konnektorba! A narancsszínű és a zöld ellenőrző lámpa kigyullad.
2. Fordítsa a termosztátot a kívánt fokozatra (felfűtés céljából általában a
6-osra)!
3. A felfűtési idő alatt tartsa csukva a sütőfelületeket! Amikor a zöld ellenőrző
lámpa kialszik, a készülék elérte a sütési hőmérsékletet.
4. Nyissa fel a fedelet, és tegye a tésztát a sütőfelület közepére! A tésztát kissé
szétterítheti, hogy egyenletes vastagságú gofrit kapjon.
5. Finoman csukja le a fedelet! Néhány másodperc elteltével a zöld ellenőrző
lámpa ismét kigyullad.
6. A szabályozóvel beállíthatja a kívánt sütési hőfokot. Ha túlságosan barnára
sülne az ostya, állítsa a szabályozót alacsonyabb hőfokra.
7. Amikor a zöld ellenőrző lámpa ismét kilaszik, a sütési folyamat befejeződött.
(Ez az idő az ostya vastagságától, ill. jellegétől függően különböző lehet.)
8. Nyissa fel a fedelet, és favillával vagy más hasonló eszközzel vegye ki a kész
gofrit! Ne használjon éles tárgyakat, hogy meg ne sérüljenek a sütőfelületek.
Tegye a kész gofrit tálra vagy tányérra, és hintse meg kevéske porcukorral!
9. Amikor éppen nem süt, tartsa a sütőfelületeket mindig zárva!
Piskótaostya-recept
5 tojássárgáját, 5 evőkanálnyi forró vizet, 10 dkg cukrot és 1 citrom lereszelt
héját verjük fel habosra, és kavarjuk bele egy 1/2 sütőpor és 15 dkg liszt keverékét. Verjünk fel kemény habbá 5 tojásfehérjét, és adjuk hozzá a tésztához.
További recepteket receptkönyvekben találhat, vagy használjon sütésre kész
keverékeket.
H
Ez a berendezés megfelel a CE-nek és lett gyártva a biztonság legmodernebb
írányelvei szerint.
Megjegyezzük az esetleges müszaki változásokat!
33
Page 34

44679-05-WAC 2647 10.03.2004 12:41 Uhr Seite 34
H
Az általunk forgalmazott készülékre a vétel időpontjától (pénztári nyugta)
számított 24 havi garanciát vállalunk.
A garanciális időn belül saját mérlegelésünk szerint javítással vagy cserével
díjtalanul megszüntetjük a készülék vagy a tartozék *) olyan hiányosságait, amelyek anyaghibára vagy gyártási hibára vezethetők vissza. A garanciális szolgáltatások sem a garanciális idő meghosszabbítását nem eredményezik, sem nem
alapoznak meg újabb garanciára való igényt!
A garancia igazolására a pénztári nyugta szolgál. E nélkül az igazolás nélkül sem
díjmentes csere, sem díjtalan javítás nem végezhető.
Garanciális esetben szíveskedjék az alapkészüléket eredeti csomagolásában a
pénztári nyugtával együtt átadni a kereskedőjének!
*) A tartozékok a jogszabályban előírt szavatossági kötelezettség (6 hónap)
hatálya alá tartoznak, és nem vezetnek az egész készülék díjtalan cseréjére.
Ilyen esetben ne a készüléket küldje be, ill. rendelje meg, hanem
vevőszolgálatunkkal egyeztetve csak a hibás tartozékot! Az üvegtörés okozta
hibák mindig térítéskötelesek!
Sem az elhasználódó tartozékokban, ill. kopó alkatrészekben (pl. szénkefe,
dagasztóhorog, hajtószíj, póttávvezérlő, pótfogkefe, fűrészlap stb.) bekövetkező
hibák, sem a tisztítás, karbantartás vagy a kopó alkatrészek cseréje nem esik a
garancia hatálya alá, következésképp térítésköteles.
Illetéktelen beavatkozás a garancia megszűnését eredményezi.
Garancia
A garanciális idő után
A garanciális idő eltelte után a megfelelő szakkereskedésben vagy javítószolgálatnál végeztethet térítésköteles javításokat.
34
Page 35

44679-05-WAC 2647 10.03.2004 12:41 Uhr Seite 35
Indicaflii generale de siguranflæ
• Înainte de punerea în funcfliune a acestui aparat citifli cu atenflie instrucfliunile de
utilizare øi pæstrafli inclusiv certificatul de garanflie, bonul de casæ øi dupæ posibilitæfli ambalajul.
• Folosifli acest aparat exclusiv în scop privat øi în cel pentru care a fost conce-
put. Acest aparat nu este conceput pentru utilizarea industrialæ. Nu-l folosifli în
exterior (doar dacæ este conceput pentru a fi folosit în exterior). Evitafli
expunerea aparatului la cælduræ, la influenfla directæ a razelor solare, umezealæ
(este interzisæ scufundarea acestuia în lichide) øi nu folosifli obiecte ascuflite în
timpul utilizærii. Evitafli folosirea aparatului cu mâinile ude. În cazul în care aparatul este umed sau ud, deconectafli imediat de la reflea. Nu bægafli mâna în
apæ.
• Oprifli aparatul øi deconectafli întotdeuna de la reflea (tragefli de øtecher øi nu de
cablu) atunci când nu folosifli aparatul, când montafli accesorii, în timpul curæflærii
sau în cazul unor defecfliuni de funcflionare.
• Nu læsafli aparatul niciciodatæ nesupravegheat. Pentru a proteja copiii faflæ de
pericolele aparatelor electrice, asigurafli-væ cæ aceøtia nu au acces la ele øi nu
læsafli cablurile sæ atârne.
• Verificafli regulat aparatul øi cablurile în vederea detectærii defecfliunilor. Nu
folosifli aparate defecte.
• Pentru repararea aparatului contactafli un specialist autorizat. Pentru înlocuirea
unuiui cablu defect de reflea contactafli, în vederea evitærii riscurilor, producætorul, serviciul nostru de clienfli sau o persoanæ calificatæ.
• Folosifli doar accesorii originale.
• Væ rugæm sæ citifli cu atenflie øi urmætoarele „Indicaflii speciale de siguranflæ…“
Indicaflii speciale de siguranflæ
• Suprafeflele pentru præjire se încælzesc foarte tare! Atingefli doar mânerele.
• Punefli aparatul pe o suprafaflæ rezistentæ la temperaturi înalte!
• Pentru a evita acumularea de cælduræ, nu punefli aparatul într-un raft. Asigurafli
un spafliu adecvat!
• Atenflie la aburi, când deschidefli suprafeflele pentru præjire.
• Pâinea poate lua foc. Nu punefli aparatul în apropierea perdelelor sau a altor
materiale inflamabile!
RO
Descrierea elementelor de deservire
1. Capac
2. Lampæ de control
3. Mâner „Cool Touch“ (termoizolat)
4. Sistem de blocare
35
Page 36

44679-05-WAC 2647 10.03.2004 12:41 Uhr Seite 36
RO
• STRATANTIADERENfiÆ
Înainte de 1. utilizare aplicafli pe suprafeflele de præjire un strat subflire de
ulei/græsime. Punefli aparatul în funcfliune pentru cca. 10 minute cu suprafeflele
de præjire închise (vezi utilizarea aparatului). Apoi øtergefli cu o cârpæ umedæ.
• Primele sandwich-uri/vafe nu sunt comestibile.
Punerea în funcfliune a aparatului
Utilizarea aparatului
1. Conectafli la o prizæ cu protecflie instalatæ regulamentar de 230 V, 50 Hz. Se
aprind lampa portocalie de control øi cea verde.
2. Reglafli termostatul la treapta doritæ (pentru încælzire de regulæ la treapta 6).
3. În timpul încælzirii flinefli suprafeflele de præjire închise. Dupæ stingerea læmpii
verzi de control s-a atins temperatura de præjire.
4. Decshidefli capacul, punefli aluatul în mijlocul suprafeflei de præjire. Pentru a
obfline vafe uniforme, putefli întinde aluatul.
5. Închidefli capacul. Lampa verde de control se va aprinde dupæ câteva secunde.
6. Cu ajutorul regulatorului putefli regla temperatura doritæ de præjire. În aczul în
care vafele devin prea colorate, reglafli la o treaptæ mai joasæ.
7. Dupæ stingerea læmpii verzi de control s-a terminat procesul de præjire (acesta
poate varia în funcflie de grosimea resp. compoziflia vafelor).
8. Deschidefli capacul øi îndepærtafli vafa cu ajutorul unei furculifle din lemn sau a
altui obiect asemænætor. Nu folosifli obiecte ascuflite sau tæioase, pentru a nu
deteriora suprafafla de præjire. Punefli vafele pe un platou øi presærafli zahær
pudræ.
9. Suprafeflele de præjire trebuie sæ stea închise în timpul pauzelor de lucru.
Refletæ pentru vafe din biscuifli
Se bat 5 gælbenuøuri, 5 linguri apæ caldæ, 100 g zahær øi 1 coajæ rasæ de læmâie
pânæ se obfline o spumæ øi apoi se amestecæ cu 1/2 linguriflæ praf de copt øi 150g
fæinæ. Se bat 5 albuøuri øi se amestecæ cu aluatul.
Alte reflete putefli gæsi în cærflile de bucate.
Aparatul acesta este corespunzætor cu directivele-CE respective
øi este fabricat dupæ indicafliile de siguranflæ cele mai noi!
Schimbæri technice sînt rezervate!
36
Page 37

44679-05-WAC 2647 10.03.2004 12:41 Uhr Seite 37
Garanflie
Acordæm pentru aparatul nostru o garanflie de 24 de luni începând cu data
achiziflionærii (bon de casæ).
Pe durata perioadei de garanflie remediem gratuit defecfliunile aparatului sau ale
accesoriilor*) rezultate ca urmare a unor defecfliuni din fabricaflie, reparând sau, în
funcflie de aprecierea noastræ, înlocuind aparatul. Reparafliile în garanflie nu duc la
prelungirea teremenului de garanflie øi nici la obflinerea unei noi garanflii!
Pentru a beneficia de garanflie, cumpærætorul este obligat sæ prezinte chitanfla/factura originalæ de cumpærare a aparatului. Færæ aceastæ dovadæ nu se poate efectua
înlocuirea sau reparaflia gratuitæ a aparatului.
Pentru a beneficia de reparaflii în garanflie, clientul se va adresa reprezentantului firmei predând aparatul în ambalajul sæu original împreunæ cu bonul de casæ.
*) Accesoriile se încadreazæ în obligafliile legale de garanflie (6 luni) øi nu implicæ
înlocuirea gratuitæ a aparatului. În acest caz nu trimitefli resp. comandafli aparatul,
ci dupæ o consultare în prealabil cu serviciului nostru cu clienflii, doar accesoriul
defect! Deteriorærile componentelor din sticlæ trebuie plætite!
Atât defectele de la accesoriile funcflionale resp. componetele care se uzeazæ (de
ex. paleta de fræmântat, curea de distribuflie, telecomandæ de rezervæ, periufle de
dinfli de rezervæ, pânza de fieræstræu) cât øi curæflarea, întreflinerea sau înlocuirea
componentelor care se uzeazæ, nu untræ sub incidenfla garanfliei øi de aceea trebuie
plætite!
Garanflia dispare în cazul intervenfliei stræine.
Post-garanflie
Dupæ scurgerea teremenului de garanflie reparafliile pot fi efectuate gratuit de cætre
service-ul autorizat.
RO
37
Page 38

44679-05-WAC 2647 10.03.2004 12:41 Uhr Seite 38
RUS
Общие указания по технике безопасности
• Перед началом эксплуатации прибора внимательно прочитайте
прилагаемую инструкцию по эксплуатации и сохраните ее в надежном
месте, вместе с гарантийным талоном, кассовым чеком и, по
возможности, картонной коробкой с упаковочным материалом.
• Пользуйтесь прибором только частным образом и по назначению.
Прибор не предназначен для коммерческого использования. Не
пользуйтесь прибором под открытым небом (исключая приборы,
эксплуатация которых под открытым небом допустима). Предохраняйте
прибор от жары, прямых солнечных лучей, влажности (ни в коем случае
не погружайте его в воду) и ударов об острые углы. Не прикасайтесь к
прибору влажными руками. Если прибор увлажнился или намок, тут же
выньте вилку из розетки. Не прикасайтесь к мокрым местам.
• После эксплуатации, монтаже принадлежностей, чистке или поломке
прибора всегда вынимайте вилку из розетки (тяните за вилку, а не за
кабель).
• Никогда не оставляйте прибор без присмотра. Для защиты детей от
поражений электротоком, следите за тем, чтобы кабель не висел где
попало и дети не имели доступа к прибору.
• Регулярно осматривайте прибор и кабель на предмет возможных
повреждений. Ни в коем случае не включайте прибор, имеющий
повреждения.
• Ни в коем случае не ремонтируйте прибор самостоятельно, а
обращайтесь в таком случае за помощью к специалисту, имеющему
соответствующий допуск. Из соображений безопасности, замена
сетевого шнура на равнозначный допускается только через заводизготовитель, нашу сервисную мастерскую или соответствующего
квалифицированного специалиста.
• Используйте только оригинальные запчасти.
• Пожалуйста, соблюдайте нижеследующие "Специальные указания по
технике безопасности ...".
Специальные требования безопасности
• Плита (полуформы) сильно нагревается. Прикасайтесь к прибору только
за ручки.
• Устанавливайте прибор на жароустойчивое основание/подставку.
• Для предотвращения тепловой пробки, не устанавливайте прибор
непосредственно под полками/шкафами. Обеспечьте достаточно
свободного места.
• При открывании полуформ остерегайтесь выступающего пара.
• Хлеб может гореть. Поэтому, запрещается ставить вафельницу вблизи
или под занавесями или другими легковоспламеняющимися предметами!
38
Page 39

44679-05-WAC 2647 10.03.2004 12:41 Uhr Seite 39
Изображение конрольных деталей
1. Крышка
2. Конрольная лампочка
3. "Cool Touch" (теплоизолированные) ручки
4. Запорный механизм
Подготовка прибора к работе
• НЕПОДГОРАЕМАЯ ПОВЕРХНОСТЬ
При первом пользовании смажьте поверхности полуформ жиром.
Включите прибор с закрытыми половинками прим. на 10 минут ("MAX")
(см. эксплуатация/порядок работы). В заключении протрите прибор
влажной тряпкой.
• Первый вафли в пищу не употреблять.
Порядок работы с вафельницей
1. Вставьте вилку в заземленную розетку с напряжением сети 230 В, 50 Гц,
установленную в соответствии с предписаниями. Загораются оранжевая
и зеленая конрольные лампочки.
2. Установите регулятор термостата на необходимую температуру (для
разогрева, как правило, в положение "6").
3. Во время разогрева держите полуформы вафельницы закрытыми. Когда
рабочая температура будет достигнута, зеленая контрольная лампочка
потухнет.
4. Откройте крышку и налейте тесто в середину полуформы. Для
выпечения вафель одинакового размера распределите тесто
равномерно по полуформе.
5. Плавно закройте крышку. Через несколько секунд опять загорится
зеленая контрольная лампочка.
6. При помощи регулятора отрегулируйте необходимую температуру
выпечки. Если вафли будут получаться темными, то переключите
регулятор на одно положение назад.
7. Как только зеленая контрольная лампочка потухнет, процес выпечки
закончен (может варьировать в зависимости от толщины и особенностей
теста).
8. Откройте крышку и выньте готовые вафли при помощи деревянной
вилки или т.п.. Не пользуйтесь острыми или режущими предметами, это
может повредить непригараемое покрытие полуформ. Переложьте
готовые вафли на поднос или блюдо и посыпьте их слегка сахарной
пудрой.
9. Полуформы вафельницы должны быть в перерывах закрыты.
RUS
39
Page 40

44679-05-WAC 2647 10.03.2004 12:41 Uhr Seite 40
RUS
Смешайте и взбейте до пены: 5 яичных желтков, 5 ст. ложек горячей воды,
100 г сахара и протёртую шкурку лимона, затем замесите тесто со 150 г
муки и 1/2 чайной ложки порошка для выпечки. Хорошо взбейте 5 яичных
белков и замесите их в тесто.
Другие рецепты Вы найдёте в рецептурных справочниках или применяйте
готовые смеси, предлагаемые торговлей.
Этот прибор соответствует директивам СЕ по искрозащите и технике
безопасности для низковольтных приборов; он сконструирован в
соответствии с новейшими предписаниями по технике безопасности.
Мы оставляем за собой право на технические изменения!
Рецепт бисквитных вафель
Гарантийное обязательство
На проданные нами изделия дается 24-х месячная гарантия, начиная с даты
покупки (кассовый чек).
Во время гарантии мы бесплатно устраняем все недостатки изделий и
принадлежностей к ним, возникшие по причине дефектных материалов или
по вине завода-изготовителя, путем ремонта или, на наше усмотрение,
путем замены изделия. Гарантийный ремонт не удлиняет срок гарантии и не
возобновляет ее!
Кассовый чек является гарантийным талоном. Без него невозможен
бесплатный ремонт или замена изделия.
В случае поломки изделия во время гарантийного срока, предъявите его
продавцу в оригинальной упаковке вместе с кассовым чеком.
*) На принадлежности дается только предписанный законом срок гарантии
(6 месяцев), их дефекты не являются причиной для бесплатной замены
всего изделия. В подобном случае отсылайте или заказывайте не все
изделие, а только, в согласовании с нашим персоналом, дефектную
принадлежность! Разбитые стеклянные изделия меняются, как правило,
только за оплату!
Дефекты изнашиваемых принадлежностей или трущихся деталей (например
контактные щетки моторов, смесительные крюки, приводные ремни,
запасные пульты управления, запасные зубные щетки, пильные полотна и
т.д.), а также чистка, техобслуживание или замена трущихся деталей не
попадают под гарантию, и поэтому проводятся за отдельную оплату!
Гарантия теряется при вскрытии изделия посторонними лицами.
После гарантии
После окончания срока гарантии, ремонт изделий производится за оплату,
соответствующими мастерскими или пунктами сервисного обслуживания.
40
Page 41

44679-05-WAC 2647 10.03.2004 12:41 Uhr Seite 41
Technische Daten
Modell: WAC 2647
Bemessungsspannung/-frequenz: 230 V, 50 Hz
Bemessungsaufnahme: 850 Watt
Schutzklasse:
Dieses Gerät entspricht den CE-Richtlinien.
Bitte führen Sie das ausgediente Gerät
einer umweltgerechten Entsorgung zu.
Ι
D-47906 Kempen/Germany · Industriering Ost 40
Internet: http://www.clatronic.de · email: info@clatronic.de
Stünings, Krefeld • 08/01
 Loading...