

Page 1
Bedienungsanleitung/Garantie
Gebruiksaanwijzing • Mode d’emploi
Instrucciones de servicio • Manual de instruções
Istruzioni per l’uso • Instruction Manual
Instrukcja obsługi/Gwarancja • Használati utasítás
Інструкція з експлуатації
Küchenmaschine
Keukenmachine • Robot de cuisine • Robot de cocina
Máquina de cozinha • Robot da cucina • Kitchen machine
Robot kuchenny • Konyhai robotgép • Кухонний комбайн
KM 3354
Page 2
DEUTSCH
Inhalt
Übersicht der Bedienelemente ....................................Seite 3
Bedienungsanleitung ....................................................Seite 4
Technische Daten .........................................................Seite 8
Garantiebedingungen ..................................................Seite 8
2
NEDERLANDS
Inhoud
Locatie van bedieningselementen .................................blz 3
Gebruiksaanwijzing ........................................................blz 10
Technische specicaties ................................................blz 14
FRANÇAIS
Table des matières
Situation des commandes ...........................................page 3
Manuel ..........................................................................page 15
Caractéristiques techniques.........................................page 19
ESPAÑOL
Contenidos
Ubicación de los controles .........................................página 3
Manual del usuario .....................................................página 20
Especicaciones técnicas ..........................................página 24
PORTUGUÊS
Índice
Localização dos controlos .......................................... página 3
Manual do utilizador ................................................... página 25
Especicações técnicas ............................................. página 29
ITALIANO
Contenuto
Posizione dei comandi ............................................... pagina 3
Manuale dell’utente .................................................... pagina 30
Speciche tecniche ....................................................pagina 34
ENGLISH
Contents
Location of Controls .....................................................page 3
User manual .................................................................page 35
Technical Specications ...............................................page 38
JĘZYK POLSKI
Spis treści
Lokalizacja kontrolek ...................................................strona 3
Instrukcja użytkowania ................................................strona 39
Techniczne specykacje .............................................strona 43
Warunki gwarancji .......................................................strona 43
MAGYARUL
Tartalom
A kezelőszervek elhelyezkedése .................................oldal 3
Használati útmutató......................................................oldal 44
Műszaki adatok.............................................................oldal 47
УКРАЇНСЬКА
Зміст
Розташування органів керування ............................. стор 3
Посібник користувача.................................................стор 49
Технічні характеристики ............................................стор 53
Page 3
3
Übersicht der Bedienelemente
Locatie van bedieningselementen • Situation des commandes
Ubicación de los controles • Localização dos controlos
Posizione dei comandi • Location of Controls • Lokalizacja kontrolek
A Kezelőszervek Elhelyezkedése • Розташування органів керування
Page 4
4
Allgemeine Sicherheitshinweise
Lesen Sie vor Inbetriebnahme dieses Gerätes die Bedienungsanleitung sehr sorgfältig durch und bewahren Sie diese inkl.
Garantieschein, Kassenbon und nach Möglichkeit den Karton
mit Innenverpackung gut auf. Falls Sie das Gerät an Dritte
weitergeben, geben Sie auch die Bedienungsanleitung mit.
• Benutzen Sie das Gerät ausschließlich für den privaten und
den dafür vorgesehenen Zweck. Dieses Gerät ist nicht für
den gewerblichen Gebrauch bestimmt.
Benutzen Sie das Gerät nicht im Freien. Halten Sie es vor
Hitze, direkter Sonneneinstrahlung, Feuchtigkeit (auf keinen
Fall in Flüssigkeiten tauchen) und scharfen Kanten fern.
Benutzen Sie das Gerät nicht mit feuchten Händen. Bei
feucht oder nass gewordenem Gerät sofort den Netzstecker ziehen.
• Schalten Sie das Gerät aus und ziehen Sie immer den
Stecker aus der Steckdose (ziehen Sie am Stecker, nicht
am Kabel), wenn Sie das Gerät nicht benutzen, Zubehörteile anbringen, zur Reinigung oder bei Störung.
• Betreiben Sie das Gerät nicht unbeaufsichtigt. Sollten Sie
den Raum verlassen, schalten Sie das Gerät immer aus.
Ziehen Sie den Stecker aus der Steckdose.
• Das Gerät und das Netzkabel müssen regelmäßig auf
Zeichen von Beschädigungen untersucht werden. Wird
eine Beschädigung festgestellt, darf das Gerät nicht mehr
benutzt werden.
• Reparieren Sie das Gerät nicht selbst, sondern suchen
Sie einen autorisierten Fachmann auf. Um Gefährdungen
zu vermeiden, ein defektes Netzkabel nur vom Hersteller,
unserem Kundendienst oder einer ähnlich qualizierten
Person durch ein gleichwertiges Kabel ersetzen lassen.
• Verwenden Sie nur Original-Zubehör.
• Beachten Sie die nachfolgenden „Speziellen Sicherheitshinweise“.
Kinder und gebrechliche Personen
• Zur Sicherheit Ihrer Kinder lassen Sie keine Verpackungsteile (Plastikbeutel, Karton, Styropor, etc.) erreichbar liegen.
Warnung!
Lassen Sie kleine Kinder nicht mit Folie spielen. Es
besteht Erstickungsgefahr!
• Dieses Gerät ist nicht dafür bestimmt, durch Personen (einschließlich Kinder) mit eingeschränkten physischen, sensorischen oder geistigen Fähigkeiten oder mangels Erfahrung
und/oder mangels Wissen benutzt zu werden, es sei denn,
sie werden durch eine für ihre Sicherheit zuständige Person
beaufsichtigt oder erhielten von ihr Anweisungen, wie das
Gerät zu benutzen ist.
• Kinder sollten beaufsichtigt werden, um sicherzustellen,
dass sie nicht mit dem Gerät spielen.
Symbole in dieser Bedienungsanleitung
Wichtige Hinweise für Ihre Sicherheit sind besonders gekennzeichnet. Beachten Sie diese Hinweise unbedingt, um Unfälle
und Schäden am Gerät zu vermeiden:
Warnung:
Warnt vor Gefahren für Ihre Gesundheit und zeigt mögliche
Verletzungsrisiken auf.
Achtung:
Weist auf mögliche Gefährdungen für das Gerät oder andere
Gegenstände hin.
Hinweis:
Hebt Tipps und Informationen für Sie hervor.
Spezielle Sicherheitshinweise für dieses Gerät
• Stellen Sie das Gerät auf eine glatte, ebene und standfeste
Arbeitsäche.
• Stecken Sie den Netzstecker des Geräts nicht in die
Steckdose, ohne alle notwendigen Zubehörteile installiert
zu haben.
• Berühren Sie keine sich bewegenden Teile des Gerätes
und warten Sie immer den Stillstand ab.
• Während des Betriebs dürfen niemals Gegenstände, wie
z.B. Löffel oder Teigschaber oder Ihre Hände, die rotierenden Schneebesen bzw. Knethaken berühren! Es besteht
Verletzungsgefahr!
• Vor dem Auswechseln der Zubehörteile muss das Gerät
ausgeschaltet und vom Netz getrennt werden!
• Verarbeiten Sie mit diesem Gerät nur Nahrungsmittel.
• Füllen Sie Zutaten nur bis zur MAX-Markierung in die
Rührschüssel.
• Betreiben Sie das Gerät nicht länger als 2 Minuten. Lassen
Sie es danach ca. 2 Minuten abkühlen, bevor Sie es erneut
verwenden.
• Tragen oder heben Sie das Gerät nicht während des
Betriebs, sondern schalten Sie es zuerst aus und ziehen
Sie danach den Netzstecker. Tragen Sie das Gerät immer
mit beiden Händen!
Mixer
• Schalten Sie das Gerät nur ein, wenn Sie die Karaffe mit
dem Deckel geschlossen haben.
• Entfernen Sie den Deckel nicht während des Betriebes!
Warnung:
► Greifen Sie niemals mit den Händen in das fertig montierte
Mixgerät!
► Handhaben Sie das Messer mit der nötigen Sorgfalt!
Insbesondere beim Herausnehmen des Messers aus
dem Mixgefäß, beim Entleeren des Mixgefäßes und beim
Reinigen besteht Verletzungsgefahr!
►
Schütten Sie keine Flüssigkeiten in die Karaffe, die heißer
als 60°C sind! Verbrennungsgefahr!
• Benutzen Sie den Mixer nicht ohne Mixgut!
• Nicht überfüllen! Überschreiten Sie nicht die auf dem
Mixgefäß angegebene Höchstmenge (1300 ml)!
Page 5
5
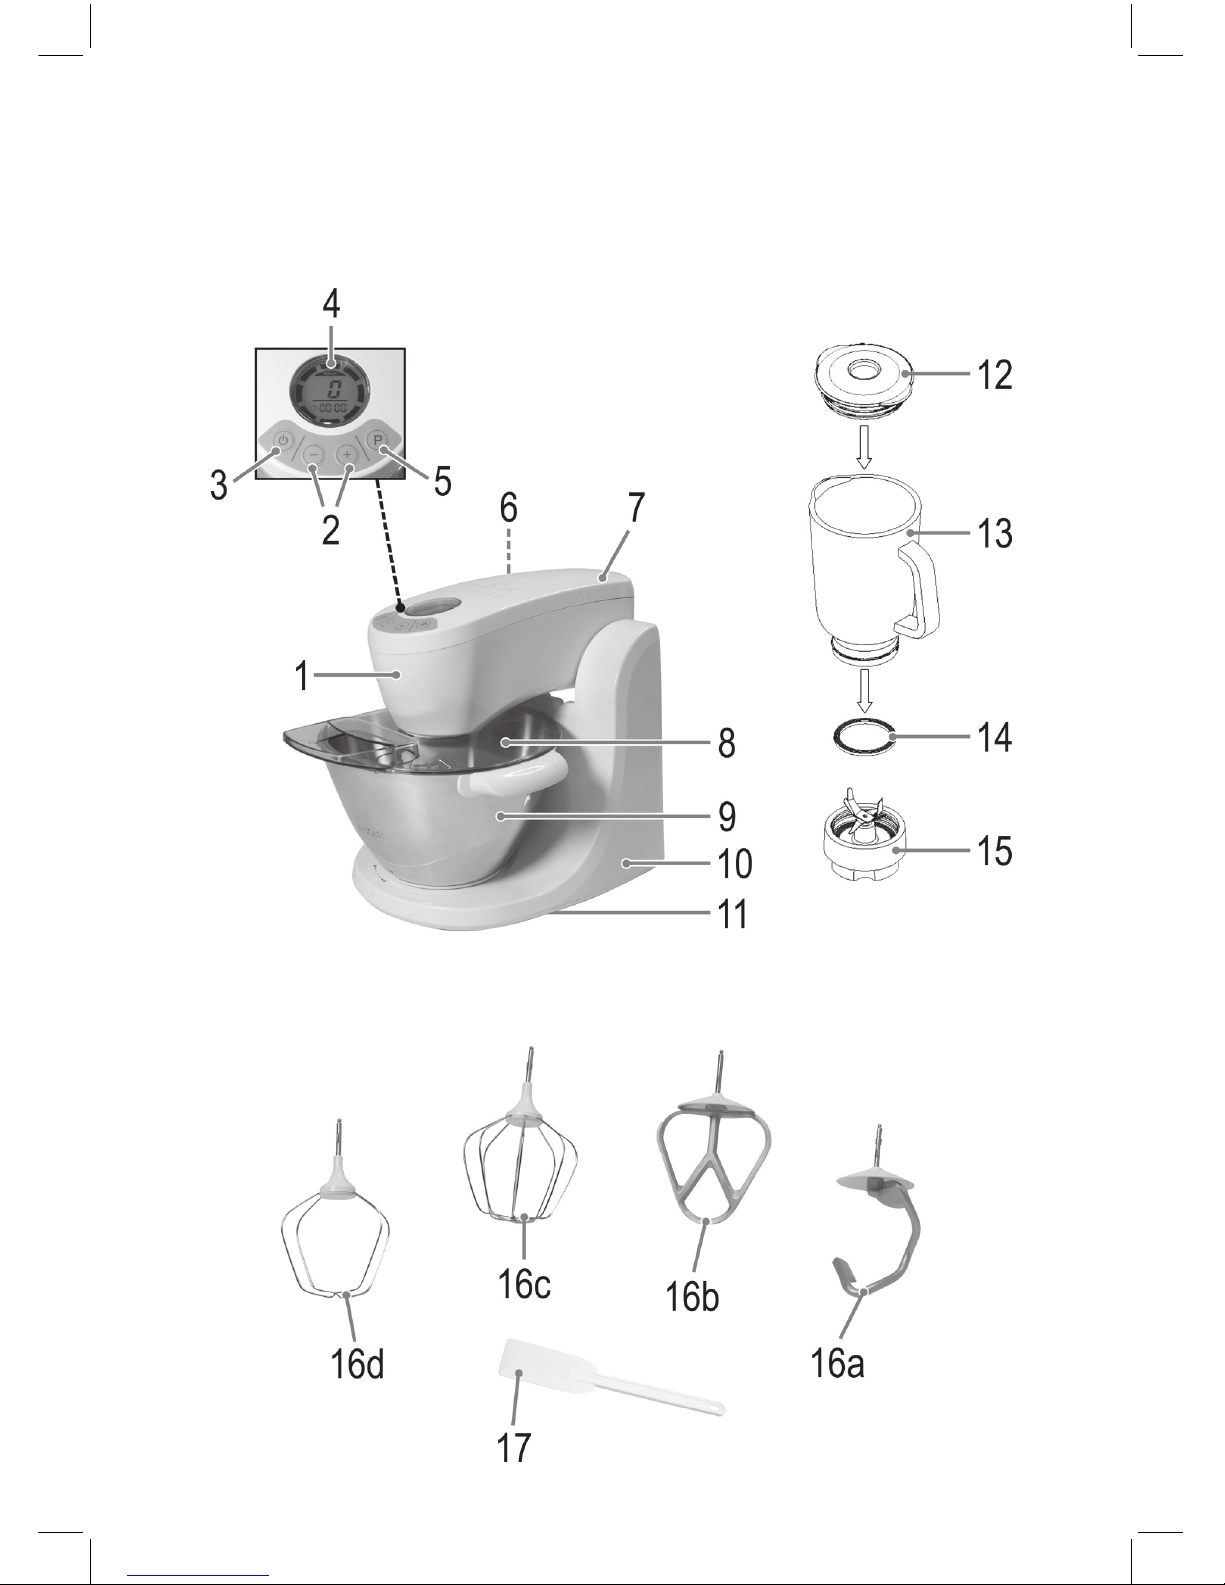
Übersicht der Bedienelemente
1 Schwenkbarer Arm
2 Tasten für Geschwindigkeitsstufen
3 Ein-/Aus-Taste
4 Betriebskontrollleuchte und Display
5 Pulsbetrieb-Taste
6 Schalter zum Heben/Senken des Arms
7 Sicherheitsdeckel für Antriebswelle
8 Spritzschutz auf Rührschüssel mit Einfüllöffnung
9 Rührschüssel
10 Gerätegehäuse
11 Geräteboden
12 Deckel für Mixgefäß
13 Mixgefäß (Karaffe)
14 Dichtungsring
15 Messerblock
16a Knethaken
16b Rührhaken
16c Rührbesen
16d Schneebesen
17 Teigschaber
Auspacken des Gerätes
• Entnehmen Sie dem Karton das Gerät und alle darin
enthaltenen Zubehörteile.
• Um eventuelle Verunreinigungen aus der Produktion zu
entfernen, reinigen Sie das Mixgefäß, die Arbeitsschüssel,
die verschiedenen Deckel und sonstigen Zubehörteile vor
der ersten Benutzung in einem einfachen Spülbad.
Warnung:
Die Messer am Messerblock sind scharf. Sie können sich
unter Umständen Verletzungen zufügen!
• Trocknen Sie nach dem Spülvorgang alle Teile gut ab.
Installation
• Achten Sie darauf, dass der Netzstecker des Gerätes während des Auswechselns der Zubehörteile nicht eingesteckt
ist. Erst jetzt dürfen Sie, wie nachfolgend beschrieben, die
Zubehörteile installieren und verwenden.
• Der Sicherheitsdeckel (7) muss auf der Antriebswelle des
Mixantriebes montiert sein, wenn Sie die Arbeitsschüssel
in Betrieb nehmen, um Verletzungen zu vermeiden. Ein
Betrieb ohne diesen Sicherheitsdeckel ist nicht möglich!
Warnung:
Auch wenn Sie nur den Mixer benutzen wollen, muss
die Arbeitsschüssel montiert sein. Das im Schwenkarm
eingesteckte Werkzeug dreht sich immer mit, auch wenn die
Arbeitsschüssel nicht montiert ist!
Elektrischer Anschluss
• Prüfen Sie, ob die Netzspannung, die Sie benutzen wollen,
mit der des Gerätes übereinstimmt. Die Angaben hierzu
nden Sie auf dem Typenschild der Basis.
Bedienung
Benutzung der Arbeitsschüssel und Werkzeuge
1. Verstellen Sie den Schwenkarm nur ohne aufgesetzte
Karaffe! Drücken Sie den Schalter (6) und heben Sie mit
der anderen Hand den Schwenkarm nach oben. Lassen
Sie den Schalter los, arretiert der Schwenkarm entweder in
halber Höhe oder in senkrechter Position.
2. Für den Einsatz des Schneebesens (16d) befestigen Sie
zuvor den Spritzschutz (8): Halten Sie den Spritzschutz mit
dem Kragen nach oben.
Hinweis:
An der Unterseite des Arms sehen Sie rechts und links
zwei Aussparungen.
Schieben Sie den Spritzschutz mit seinen Führungsnasen in diese Aussparungen und arretieren ihn durch eine
Drehung im Uhrzeigersinn.
Hinweis:
Durch die Einfüllöffnung können Sie während der Teigzubereitung Zutaten in die Schüssel hinzufügen.
3. An der Unterseite des Schwenkarms sehen Sie die Öffnung
für die Werkzeugaufnahme. Pressen Sie das Ende eines
Knet- / Rührhakens bzw. eines Schnee- / Rührbesens in die
Öffnung, bis dieses hörbar einrastet. Durch leichtes Drehen
beim Pressen wird das Einsetzen erleichtert.
4. Setzen Sie die Schüssel in ihre Halterung und drehen Sie
sie im Uhrzeigersinn bis zum Anschlag.
5. Füllen Sie nun Ihre Zutaten hinein.
Achtung:
Überfüllen Sie das Gerät nicht, die max. Zutatenmenge
ist 2 kg bzw. 1,3 Liter bei Flüssigkeiten.
6. Drücken Sie den Schalter (6) und führen Sie mit der anderen Hand den Schwenkarm langsam nach unten.
Achtung:
Lassen Sie den Schwenkarm nicht nach unten fallen!
7. Stecken Sie den Netzstecker in eine vorschriftsmäßig
installierte Schutzkontaktsteckdose 230 V / 50 Hz. Die Betriebsbereitschaft wird Ihnen durch die blaue Beleuchtung
des Displays angezeigt.
8. - Drücken Sie die Ein/Aus-Taste (3), um das Gerät einzu-
schalten.
- Durch ein- oder mehrmaliges Drücken der „+“-Taste
(2) wählen Sie die Geschwindigkeitsstufe. Sie wird im
Display angezeigt.
- Mit der „-“-Taste können Sie die Geschwindigkeitsstufe
wieder verringern.
- Für den Pulsbetrieb (Mixen in kurzen Intervallen)
drücken Sie die „P“-Taste (5). Halten Sie die Taste
entsprechend der gewünschten Intervalllänge fest.
Im Pulsbetrieb arbeitet das Gerät in der höchsten
Geschwindigkeitsstufe.
Page 6
6
Hinweis:
► Im Display wird Ihnen die Zeit des Mixvorgangs
angezeigt.
► Bei Nutzung der höchsten Geschwindigkeitsstufe kann
es zur leichten Geruchsbildung kommen. Dies ist kein
Mangel am Gerät.
Wählen Sie für die Anwendung ein Werkzeug und eine
Geschwindigkeit gemäß folgender Tabelle:
Produkt/
Zubereitungsart
Menge Werkzeug Stufe
Max.
Betriebszeit
Schwerer Teig (z. B.
Hefeteig, Mürbeteig)
Min. 0,5 kg
Knethaken
1 – 4 30 Sek.
Max. 2 kg 1 – 3 2 Min.
Leichter Teig
(z.B. Rührteig, Waffeloder Biskuitteig)
Min. 200 ml
Rührhaken
3 – 5 1 Min.
Max. 1,3 l 1 – 4 2 Min.
Leichte Flüssigkeiten
(z.B. Crêpes, Pudding)
Min. 200 ml
Schneebesen 1 – 7 30 Sek.
Max. 1,3 l
Sahne
Min. 200 ml
Schneebesen
4 – 12 90 Sek.
Max. 1,3 l 5 – 12 2 Min.
Eischnee
Min. 1 Eiweiß
Schneebesen 5 – 12 2 Min.
Max. 8 Eiweiß
Rührei
Min. 2 Eier
Rührbesen 1 – 4 1 Min.
Max. 1,3 l
Beachten Sie bei der Wahl der Geschwindigkeitsstufe auch die
Hinweise in Rezepten.
Hinweis:
► Kurzzeitbetrieb: Betreiben Sie das Gerät mit schweren
Teigen nicht länger als 2 Minuten und lassen das Gerät
dann 2 Minuten abkühlen.
► Verwenden Sie bei üssigen Teigen den Spritzschutz.
9. Um den Mixvorgang zu unterbrechen oder zu beenden,
drücken Sie die Ein-/Aus-Taste. Ziehen Sie den Netzste-
cker.
10. Drücken Sie den Schalter (6) und heben Sie mit der anderen Hand den Schwenkarm nach oben.
Hinweis:
Der Arm ist mit einem Sicherheitsschalter ausgestattet. Wird
der Arm während des Betriebs hochgeschwenkt, schaltet
der Motor sich aus. Nach Senken des Armes können Sie
das Gerät, wie unter Punkt 8 beschrieben, wieder in Betrieb
nehmen.
11. Die Rührschüssel lässt sich durch Drehen entgegen dem
Uhrzeigersinn entnehmen.
12. Den fertigen Teig können Sie mit Hilfe des Teigschabers
lösen und aus der Rührschüssel herausnehmen.
13. Um das Werkzeug von der Antriebswelle zu lösen, halten
Sie mit einer Hand den Schwenkarm fest. Mit der anderen
Hand ziehen Sie das Werkzeug ab.
14. Reinigen Sie die verwendeten Teile wie unter „Reinigung“
beschrieben.
Benutzung des Mixaufsatzes
Achtung:
► Benutzen Sie den Mixaufsatz und die Arbeitsschüssel
nicht gleichzeitig.
Warnung:
Das im Schwenkarm eingesteckte Werkzeug dreht sich
immer mit. Aus Sicherheitsgründen darf der Mixer nur in
Betrieb genommen werden, wenn die Arbeitsschüssel mit
Spritzschutz montiert ist.
1. Zerkleinern Sie vorab das Mixgut in kleinere Stücke.
2. Geben Sie die Mixzutaten in das Mixgefäß (max. 1,3l).
3. Drücken Sie den Deckel (12) fest auf die Karaffe.
Er muss das Mixgefäß dicht abschließen.
4. Entfernen Sie den Sicherheitsdeckel (7) vom Mixerantrieb:
Drücken und ziehen Sie gleichzeitig mit Daumen und Mittelnger einer Hand am hinteren Rand des Deckels.
Hinweis:
Sie nden am Rand des Deckels rechts und links
angeraute Stellen, um den Deckel besser fassen zu
können.
5. Setzen Sie das Mixgefäß so auf die Gerätebasis auf, dass
die Markierung ● am unteren Rand des Gefäßes auf den
Punkt ● der Gerätebasis zeigt. Die beiden Punkte müssen
genau nebeneinander stehen.
6. Gehen Sie weiter vor, wie unter „Benutzung der Arbeitsschüssel und Werkzeuge, Punkte 7-9“ beschrieben.
Hinweis: Eiswürfel zerkleinern
Die Klinge im Mixbehälter ist auch geeignet, um Eiswürfel zu
zerkleinern. Befüllen Sie bitte die Karaffe nur bis zu 1/3 mit
Eiswürfel. Benutzen Sie ausschließlich den Pulsbetrieb „P“
zum Zerkleinern.
Wählen Sie für die Anwendung eine Geschwindigkeit / Zeit
gemäß folgender Tabelle:
Produkt/
Zubereitungsart
Menge Werkzeug Stufe
Max.
Betriebszeit
Gemüse / Obst
zerkleinern
Min. 200 g
Mixaufsatz
Puls 30 Sek.
Max. 500 g 1 – 3 2 Min.
Gemüse / Obst
pürieren (Flüssigkeit
hinzugeben)
Max. 1,3 l Mixaufsatz
Puls 1 Min.
4 – 12 1 Min.
Eiswürfel Max. 400 ml Mixaufsatz Puls
Im 3-Sek.-Takt
30 Sek.
Rezeptvorschläge
Rührteig (Grundrezept) Stufe 1 - 4
Zutaten:
250g weiche Butter oder Margarine, 250g Zucker, 1 Pck.
Vanillezucker oder 1 Btl. Citro-Back, 1 Prise Salz, 4 Eier, 500g
Weizenmehl, 1 Pck. Backpulver, ca. 1/8 l Milch.
Page 7
7
Zubreitung:
Weizenmehl mit den restlichen Zutaten in die Rührschüssel
geben, mit dem Rührhaken 30 Sekunden Stufe 2, dann ca. 1,5
Minuten auf Stufe 4 rühren. Form fetten oder mit Backpapier
auslegen, Teig einfüllen und Backen. Bevor das Gebäck aus
dem Ofen genommen wird, eine Garprobe machen: Mit einem
spitzen Holzstäbchen in die Mitte des Gebäcks stechen. Wenn
kein Teig daran hängen bleibt, ist der Kuchen gar. Kuchen auf
einen Kuchenrost stürzen und auskühlen lassen.
Herkömmlicher Herd:
Einschubhöhe: 2
Beheizung: E-Herd Ober- und Unterhitze 175-200°,
G-Herd: Stufe 2-3
Backzeit: 50-60 Minuten
Dieses Rezept können Sie je nach Geschmack, z. B. mit 100g
Rosinen oder 100g Nüsse oder 100g geriebenen Schokolade
verändern. Weiterhin sind Ihrer Phantasie keine Grenzen
gesetzt.
Leinsamenbrötchen Stufe 1 - 3
Zutaten:
500-550g Weizenmehl, 50g Leinsamen, 3/8 l Wasser, 1 Würfel
Hefe (40g), 100g Magerquark, gut abgetropft, 1 TL Salz.
Zum Bestreichen: 2 EL Wasser
Zubereitung:
Leinsamen in 1/8 l lauwarmem Wasser einweichen. Das
restliche lauwarme Wasser (1/4 l) in die Rührschüssel geben,
Hefe hinein bröckeln, Quark zugeben und mit dem Knethaken
auf Stufe 1 gut verrühren. Die Hefe muss vollständig aufgelöst
sein. Mehl mit den eingeweichten Leinsamen und Salz in die
Rührschüssel geben. Auf Stufe 1 durchkneten, dann auf Stufe
2 schalten und 1-2 Minuten weiterkneten. Teig abdecken,
45-60 Minuten an einem warmen Ort gehen lassen. Noch
einmal durchkneten, aus der Schüssel nehmen und daraus 16
Brötchen formen. Backblech mit nassem Backpapier auslegen.
Brötchen darauf setzen, 15 Minuten gehen lassen, mit lauwarmem Wasser bestreichen und backen.
Herkömmlicher Herd:
Einschubhöhe: 2
Beheizung: E-Herd: Ober- und Unterhitze 200-220°
(5 Minuten vorheizen),
G-Herd Stufe 2-3
Backzeit: 30-40 Minuten
Reinigung
Vorreinigung
Füllen Sie das Mixgefäß zur Hälfte mit Wasser und benutzen
Sie für ca. 10 Sekunden den Pulsbetrieb. Schütten Sie die
Flüssigkeit anschließend aus.
Warnung:
► Ziehen Sie vor der Reinigung immer den Netzstecker.
► Das Gerät auf keinen Fall zum Reinigen in Wasser
tauchen. Es könnte zu einem elektrischen Schlag oder
Brand führen.
Achtung:
► Benutzen Sie keine Drahtbürste oder andere scheuernde
Gegenstände.
► Benutzen Sie keine scharfen oder scheuernden Reini-
gungsmittel.
• Zur gründlichen Reinigung nehmen Sie das Mixgefäß ab.
• Zerlegen Sie den Mixer nach jedem Gebrauch.
Warnung: Verletzungsgefahr!
Die Messer am Messerblock sind scharf. Gehen Sie
vorsichtig vor beim Auseinandernehmen, Reinigen und
Zusammensetzen der Einzelteile.
• Drehen Sie den Schraubverschluss im Uhrzeigersinn von
der Karaffe ab.
• Entnehmen Sie den Dichtungsring aus dem Schraubverschluss.
Karaffe (13) und Deckel (12)
• Die Karaffe und den Deckel können Sie in einem warmen
Spülbad reinigen.
Dichtungsring (14) und Messerblock (15)
• Diese Teile nur kurz mit heißem Wasser abspülen.
• Nach dem Reinigen und Trocknen aller Teile montieren Sie
Ihren Mixer in umgekehrter Reihenfolge wieder zusammen.
Arbeitsschüssel und Zubehör
• Nehmen Sie die Arbeitsschüssel ab, um Rückstände an der
Antriebswelle entfernen zu können.
• Abnehmbare Teile, die mit Teig in Berührung gekommen
sind, können Sie in einem Spülbad reinigen.
Achtung:
Die Bauteile sind nicht zur Reinigung in der Spülmaschine
geeignet. Unter Einwirkung von Hitze und scharfen Reinigern
könnten sie sich verziehen oder verfärben.
Gehäuse
• Zur äußeren Reinigung des Gerätes benutzen Sie nur ein
mäßig feuchtes Tuch.
Störungsbehebung
• Gerät ist ohne Funktion.
Abhilfe:
Überprüfen Sie den Netzanschluss.
Weitere mögliche Ursachen:
Ihr Gerät ist mit zwei Sicherheitsschaltern versehen.
Sie verhindern das unbeabsichtigte Anlaufen des Motors.
Page 8
8
Abhilfe:
Kontrollieren Sie den richtigen Sitz
des Schwenkarms (1) ○
des Mixgefäßes (13) oder ○
des Sicherheitsdeckels (7). ○
Überhitzungsschutz
• Das Gerät ist mit einem Überhitzungsschutz ausgestattet.
Sollte es einmal zu einer Überbelastung kommen, wird
dieser aktiv. Das Gerät ist dann nicht mehr funktionsbereit.
Ziehen Sie den Stecker aus der Steckdose.
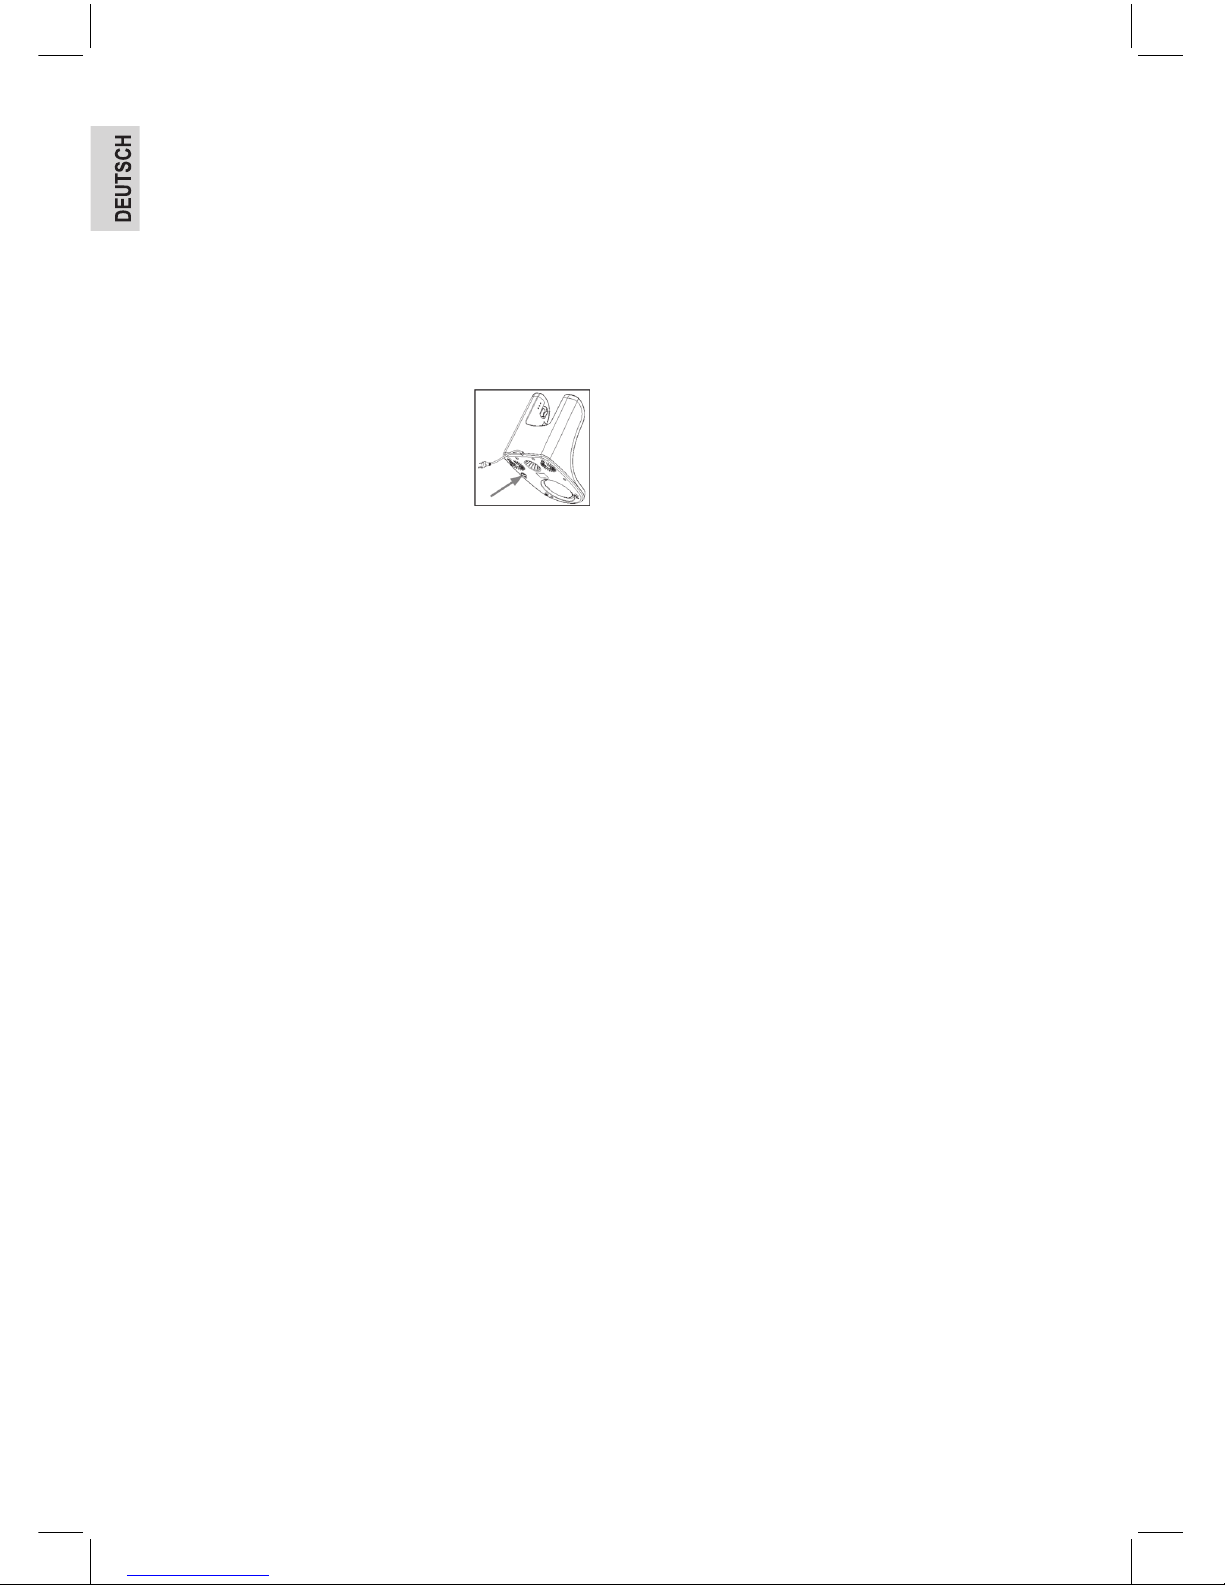
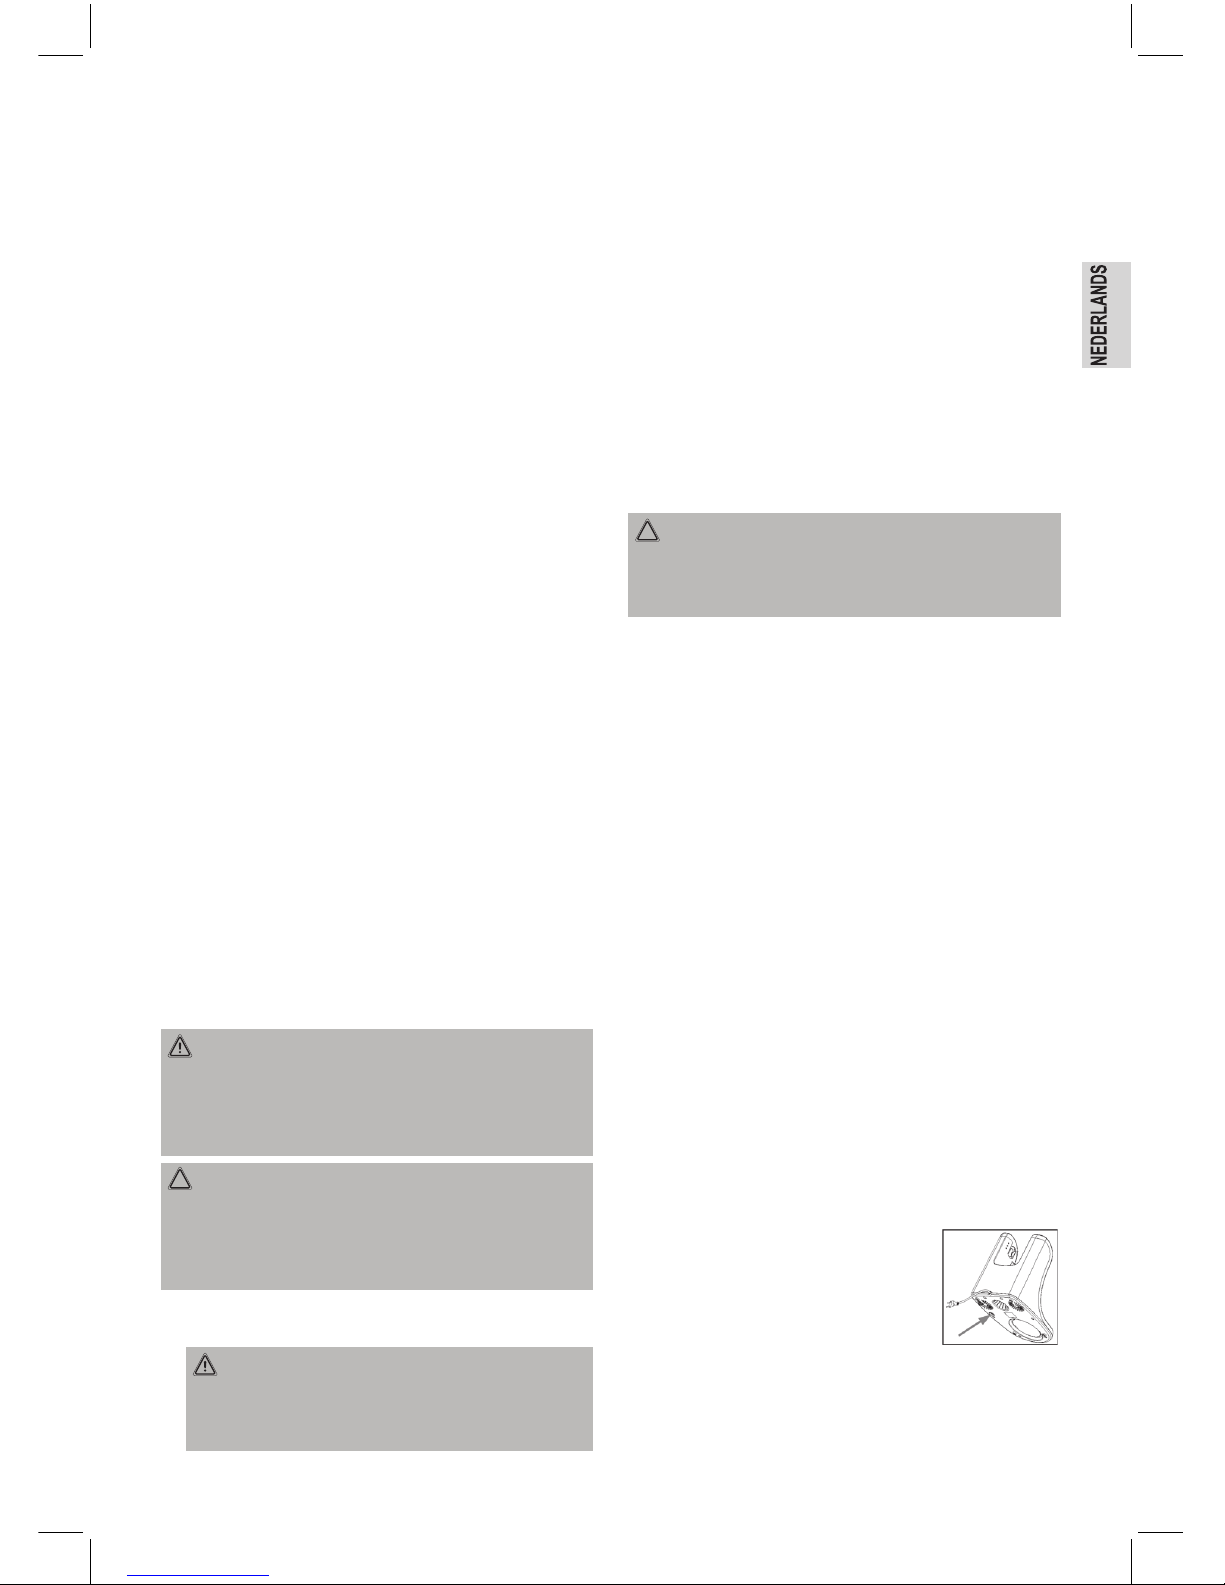
• Betätigen Sie erst nach vollständiger
Abkühlung des Gerätes am Geräteboden
die Rückstelltaste (s. Abb.), um die
Küchenmaschine erneut zu benutzen.
Geräuschentwicklung
Gemessen wurde der Schalldruckpegel am Ohr einer Bedienperson (LpA) in Übereinstimmung mit der DIN EN ISO 3744.
Ermittelter Schalldruckpegel: 85 dB(A) (kein Limit)
Technische Daten
Modell:.............................................................................KM 3354
Bemessungsspannung/-frequenz: .................220-240 V / 50 Hz
Leistungsaufnahme: ........................................................... 600 W
Schutzklasse: .............................................................................. II
Kurzbetriebszeit: ............................................................2 Minuten
Nettogewicht: .....................................................................4,35 kg
Technische Änderungen vorbehalten!
Konformitätserklärung
Hiermit erklärt die Firma Clatronic International GmbH,
dass sich das Gerät KM 3354 in Übereinstimmung mit den
grundlegenden Anforderungen, der europäischen Richtlinie
für elektromagnetische Verträglichkeit (2004/108/EG) und der
Niederspannungsrichtlinie (2006/95/EG) bendet.
Garantiebedingungen
1. Gegenüber Verbrauchern gewähren wir bei privater
Nutzung des Geräts eine Garantie von 24 Monaten ab
Kaufdatum.
Ist das Gerät zur gewerblichen Nutzung geeignet, gewähren wir beim Kauf durch Unternehmer für das Gerät eine
Garantie von 12 Monaten.
Die Garantiezeit für Verbraucher reduziert sich auf 12 Monate, sofern sie ein zur gewerblichen Nutzung geeignetes
Gerät – auch teilweise – gewerblich nutzen.
2. Voraussetzung für unsere Garantieleistungen sind der Kauf
des Geräts in Deutschland bei einem unserer Vertragshändler sowie die Übersendung einer Kopie des Kaufbelegs und dieses Garantiescheins an uns.
Bendet sich das Gerät zum Zeitpunkt des Garantiefalls im
Ausland, muss es auf Kosten des Käufers uns zur Erbringung der Garantieleistungen zur Verfügung gestellt werden.
3. Mängel müssen innerhalb von 14 Tagen nach Erkennbarkeit uns gegenüber schriftlich angezeigt werden. Besteht
der Garantieanspruch zu Recht, entscheiden wir, auf
welche Art der Schaden/Mangel behoben werden soll, ob
durch Reparatur oder durch Austausch eines gleichwertigen Geräts.
4. Garantieleistungen werden nicht für Mängel erbracht, die
auf der Nichtbeachtung der Gebrauchsanweisung, unsachgemäßer Behandlung oder normaler Abnutzung des Geräts
beruhen. Garantieansprüche sind ferner ausgeschlossen
für leicht zerbrechliche Teile, wie zum Beispiel Glas oder
Kunststoff. Schließlich sind Garantieansprüche ausgeschlossen, wenn nicht von uns autorisierte Stellen Arbeiten
an dem Gerät vornehmen.
5. Durch Garantieleistungen wird die Garantiezeit nicht verlängert. Es besteht auch kein Anspruch auf neue Garantieleistungen. Diese Garantieerklärung ist eine freiwillige Leistung
von uns als Hersteller des Geräts. Die gesetzlichen
Gewährleistungsrechte (Nacherfüllung, Rücktritt, Schadensersatz und Minderung) werden durch diese Garantie
nicht berührt.
Stand 03 2008
Garantieabwicklung
Sollte Ihr Gerät innerhalb der Garantiezeit einen Mangel aufweisen, bitten wir Sie, uns Ihren Garantieanspruch mitzuteilen.
Die schnellste und komfortabelste Möglichkeit ist die Anmeldung über unser SLI (Service Logistik International) InternetServiceportal.
www.sli24.de
Sie können sich dort direkt anmelden und erhalten alle Informationen zur weiteren Vorgehensweise Ihrer Reklamation.
Über einen persönlichen Zugangscode, der Ihnen direkt nach
Ihrer Anmeldung per E-Mail übermittelt wird, können Sie den
Bearbeitungsablauf Ihrer Reklamation auf unserem Serviceportal online verfolgen.
Alternativ können Sie uns den Servicefall per E-Mail
hotline@clatronic.de
oder per Fax
0 21 52 – 20 06 15 97
mitteilen.
Bitte teilen Sie uns Ihren Namen, Vornamen, Straße,
Hausnummer, PLZ und Wohnort, Telefon-Nummer, soweit
vorhanden, Fax-Nummer und E-Mail-Adresse mit. Im Weiteren benötigen wir die Typenbezeichnung des reklamierten
Gerätes, eine kurze Fehlerbeschreibung, das Kaufdatum
und den Händler, bei dem Sie das Neugerät erworben haben.
Page 9
9
Nach Prüfung Ihres Garantieanspruches erhalten Sie von
uns einen fertig ausgefüllten Versandaufkleber. Sie brauchen
diesen Aufkleber nur noch auf die Verpackung Ihres gut
verpackten Gerätes zu kleben und das Paket bei der nächsten
Annahmestelle der Deutschen Post / DHL abzugeben. Der
Versand erfolgt für Sie kostenlos an unser Servicecenter bzw.
Servicepartner.
Bitte fügen Sie dem Paket eine Kopie Ihres Kaufbeleges (Kassenbon, Rechnung, Lieferschein) sowie eine kurze Fehlerbeschreibung bei.
Ohne den Garantienachweis (Kaufbeleg) kann Ihre Reklamation nicht kostenfrei bearbeitet werden.
Bitte nehmen Sie in keinem Fall eine unfreie Einsendung Ihres
Gerätes vor. Bei unfreien Lieferungen entfällt Ihr Anspruch auf
Garantieleistungen.
Clatronic International GmbH
Industriering Ost 40
D-47906 Kempen
Bedeutung des Symbols „Mülltonne“
Schonen Sie unsere Umwelt, Elektrogeräte gehören nicht in
den Hausmüll.
Nutzen Sie die für die Entsorgung von Elektrogeräten vorgesehenen Sammelstellen und geben dort Ihre Elektrogeräte ab,
die Sie nicht mehr benutzen werden.
Sie helfen damit die potenziellen Auswirkungen, durch falsche
Entsorgung, auf die Umwelt und die menschliche Gesundheit
zu vermeiden.
Sie leisten damit Ihren Beitrag zur Wiederverwertung, zum
Recycling und zu anderen Formen der Verwertung von Elektround Elektronik-Altgeräten.
Informationen, wo die Geräte zu entsorgen sind, erhalten Sie
über Ihre Kommunen oder die Gemeindeverwaltungen.
Page 10
10
Algemene veiligheidsrichtlijnen
Lees deze gebruiksaanwijzing zorgvuldig door voordat u dit
apparaat in gebruik neemt, en bewaar hem samen met het
Garantiecerticaat, het aankoopbewijs en, indien mogelijk, de
originele verpakking inclusief het materiaal in de doos. Als u het
apparaat doorgeeft aan een derde persoon, geef de gebruiksaanwijzing dan ook door.
• Gebruik het apparaat alleen voor eigen gebruik en
waarvoor het bedoeld is. Dit apparaat is niet bestemd voor
commercieel gebruik.
Gebruik het apparaat niet buitenshuis. Bescherm het tegen
hitte, direct zonlicht, vocht (in geen geval onderdompelen
in water) en scherpe kanten. Gebruik het apparaat niet met
natte handen. Als het apparaat nat wordt, onmiddellijk de
stekker eruit trekken.
• Schakel het apparaat altijd uit en trek de stekker eruit (aan
de stekker trekken, niet aan het snoer) wanneer u het apparaat niet gebruikt, of wanneer u hulpstukken bevestigd,
tijdens het schoonmaken of een storing.
• Laat het apparaat niet onbeheerd achter tijdens gebruik.
Schakel het apparaat altijd uit bij het verlaten van de kamer.
Haal de stekker uit het stopcontact.
• Controleer het apparaat regelmatig op beschadigingen. Blijf
het apparaat niet gebruiken in het geval van beschadiging.
• Repareer het apparaat niet zelf. Neem contact op met
een bevoegde reparateur. Om gevaar te voorkomen dient
een beschadigd netsnoer vervangen te worden door een
gelijkwaardig snoer door de fabrikant, of klantenservice of
ieder ander bevoegd specialist.
• Gebruik alleen originele onderdelen.
• Graag het volgende in acht nemen “Speciale veiligheids-
aanwijzingen”.
Kinderen en gehandicapten
• Houd voor de veiligheid van uw kinderen het verpakkingsmateriaal (plastic zakken, karton, piepschuim enz.) buiten
hun bereik.
Waarschuwing!
Laat kleine kinderen niet met verpakkingsmateriaal
spelen i.v.m. verstikkingsgevaar!
• Dit apparaat is niet bedoeld voor gebruik door personen
(inclusief kinderen) met verminderde lichamelijke, zintuiglijke of mentale capaciteiten, of gebrek aan ervaring en/of
kennis tenzij zij onder toezicht staan of instructies hebben
gekregen betreffende het gebruik van het apparaat door
een persoon verantwoordelijk voor hun veiligheid.
• Houd kinderen onder toezicht om er voor te zorgen dat zij
niet met het apparaat gaan spelen.
Symbolen in deze gebruiksaanwijzing
Belangrijke opmerkingen voor uw veiligheid worden speciaal
aangeduid. Volg deze opmerkingen altijd op, om ongelukken
en schade aan het apparaat te voorkomen.
Waarschuwing:
Waarschuwt voor gezondheidsrisico’s en duidt op potentiaal
verwondingsgevaar.
Let op:
Duidt op potentiaal gevaar voor het apparaat of voor andere
voorwerpen.
Opmerking:
Duidt op tips en informatie voor u.
Speciale veiligheidsmaatregelen voor dit
apparaat
• Plaats het apparaat op een vlak, horizontaal en stevig oppervlak.
• Steek de stekker van het apparaat niet in het stopcontact
voordat alle benodigde accessoires zijn aangebracht.
• Raak geen bewegende delen aan en wacht totdat het apparaat volledig tot stilstand is gekomen.
• Steek als het apparaat in werking is geen keukengerei,
zoals lepels of spanen, in de mengkom en pak de gardes
of kneedhaken niet beet met uw handen! U loopt risico op
letsel!
• Schakel het apparaat uit en haal de stekker uit het stopcontact voordat u hulpstukken wisselt!
• Bewerk alleen levensmiddelen met dit apparaat.
• Vul de mengkom uitsluitend tot de MAX markering met
ingrediënten.
• Gebruik het apparaat niet langer dan 2 minuten aaneengesloten. Laat het ongeveer 2 minuten afkoelen voordat u het
weer gebruikt.
• Verplaats het apparaat niet wanneer het in bedrijf is. Schakel het altijd eerst uit en haal de stekker uit het stopcontact.
Draag het apparaat altijd met beide handen!
Mixer
• Schakel het apparaat alleen in wanneer de mengbeker is
afgesloten met het deksel.
• Verwijder het deksel niet wanneer het apparaat in werking is!
Waarschuwing:
► Steek nooit uw handen in de mixer, wanneer deze klaar is
voor gebruik!
► Wees voorzichtig met de snijbladen! Risico op letsel bij
het verwijderen van de snijbladen van de mengbeker, bij
het legen van de mengbeker of tijdens het reinigen!
► Giet geen vloeistoffen met een hogere temperatuur dan
60°C in de mengbeker. Risico op brandwonden!
• Gebruik de mixer niet zonder dat er zich ingrediënten in
bevinden!
• Doe de kom/beker niet te vol! Overschrijd de maximale
capaciteit (1300 ml) die is aangegeven op de mengkom
niet!
Page 11
11
Locatie van bedieningselementen
1 Draaibare arm
2 Snelheidstoetsen
3 Aan/Uitschakelaar
4 Aan/uitindicator en scherm
5 Pulsschakelaar
6 Knop voor ophalen/neerlaten van de arm
7 Veiligheidsafdekking voor aandrijfas
8 Spatdeksel met vultuit voor mengkom
9 Mengkom
10 Behuizing
11 Basis van het apparaat
12 Deksel voor mengbeker
13 Mengbeker (karaf)
14 Afdichtingsring
15 Snijbladsamenstel
16a Deeghaak
16b Roerhaak
16c Opklopper
16d Eiergarde
17 Deegspatel
Uitpakken van de machine
• Haal de machine en alle meegeleverde accessoires uit de
doos.
• Om enige verontreiniging die tijdens het productieproces
veroorzaakt kan zijn, te verwijderen, dienen de mengbeker,
mengkom, de verschillende deksels en andere accessoires
voor het eerste gebruik in sop afgewassen te worden.
Waarschuwing:
De snijbladen van het snijbladsamenstel zijn erg scherp.
Risico op letsel!
• Droog na het afwassen alle onderdelen grondig af.
Installatie
• Zorg ervoor dat de stekker niet in het stopcontact zit wanneer u accessoires wisselt. Alleen dan kunt u de accessoires plaatsen en gebruiken, zoals hieronder beschreven.
• Ter voorkoming van letsel dient de veiligheidsafdekking
(7) aangebracht te worden op de aandrijfas van de mixer
voordat de mengkom wordt gebruikt. Gebruik zonder deze
afdekking is niet mogelijk!
Waarschuwing:
Zelfs wanneer alleen de mixer wordt gebruikt dient de kom
geplaatst te worden. Het hulpstuk dat in de draaibare arm is
geplaatst, draait altijd, zelfs als de mengkom niet is geplaatst!
Elektrische aansluiting
• Zorg ervoor dat de netspanning overeenkomt met de spanning van de machine. Controleer het typeplaatje onderop
de machine voor gedetailleerde informatie.
Bediening
Gebruik van de mengkom en hulpstukken
1. Stel de draaibare arm alleen af zonder dat de mengbeker
wordt geplaatst! Druk de knop (6) en til met uw andere
hand de draaibare arm op. Wanneer de knop wordt losgelaten zal de draaibare arm of halverwege of volledig vertikaal
staan.
2. Plaats eerst het spatdeksel (8) voordat u de gardes (16d)
gebruikt: Houd het spatdeksel met de kraag naar boven.
Opmerking:
Onderaan de arm ziet u twee groeven, links en rechts.
Schuif het spatdeksel met zijn twee uitsteeksels in deze
groeven, en vergrendel het door het naar rechts te draaien.
Opmerking:
Bij het bereiden van deeg kunt u ingrediënten aan de kom
toevoegen door de vultuit.
3. De opening voor het bevestigen van de hulpstukken
bevindt zich aan de onderkant van de draaibare arm. Druk
het uiteinde van de deeg-/roerhaak of van de opklopper/
eiergarde in de opening totdat hij op zijn plaats klikt. Draai
de hulpstukken voorzichtig tijdens het indrukken, om ze
gemakkelijker te bevestigen.
4. Plaats de kom in de houder en draai hem volledig naar
rechts tot de blokkering.
5. Doe vervolgens de ingrediënten in de kom.
Let op:
Doe de kom niet te vol. De maximale hoeveelheid ingrediënten is 2 kg, of 1,3 liter voor vloeistoffen.
6. Druk de knop (6) en laat met uw andere hand de draaibare
arm langzaam neer.
Let op:
Laat de draaibare arm niet naar beneden vallen!
7. Steek de stekker in een juist geïnstalleerd stopcontact met
een spanning van 230 V / 50 Hz. De blauwe lamp in het
scherm geeft aan dat de machine gereed is voor gebruik.
8. - Druk de Aan-/Uitschakelaar (3) om de machine in te
schakelen.
- Druk verschillende keren de “+” toets (2) om een snel-
heidsinstelling te kiezen. De instellingen worden op het
scherm weergegeven.
- Druk de “-” toets om de snelheid te verminderen.
- Druk de “P” toets (5) voor pulserend mixen (mixen met
korte intervals). Druk de toets in en houd hem vast,
in overeenstemming met de gewenste lengte van het
interval. Tijdens de pulsstand werkt de machine op de
hoogste snelheidsinstelling.
Opmerking:
► Het scherm geeft de tijdsduur van het mengproces aan.
► Bij werken op de hoogste snelheid kan er een geur
waargenomen worden. Dit is geen storing van de
machine.
Page 12
12
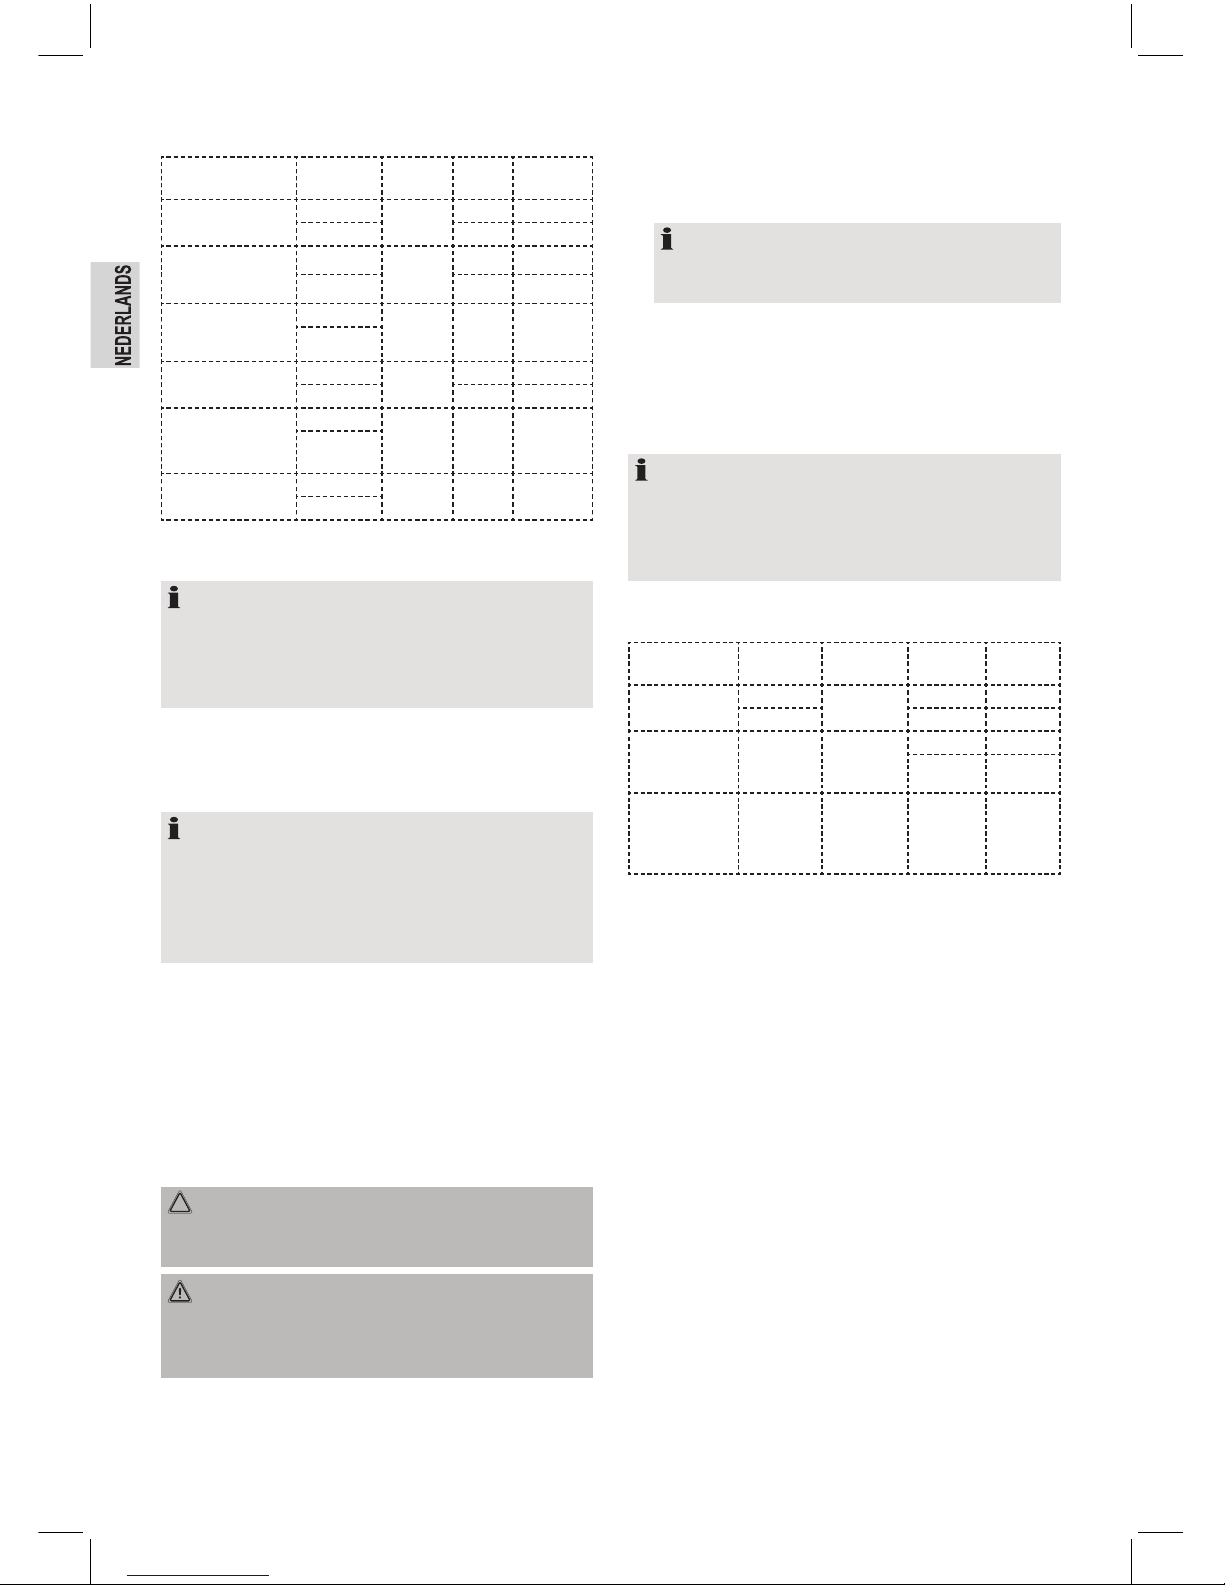
Kies hulpstukken en snelheid volgens onderstaande tabel:
Product/bereiding Hoeveelheid Hulpstuk
Snelheid
stand
Maximale
werktijd
Zwaar deeg (bijv.
kistdeeg, korstdeeg)
Min. 0,5 kg
Deeghaak
1 – 4 30 sec
Max. 2 kg 1 – 3 2 min
Licht deeg
(bijv. deeg voor wafels
of sponsmengsel)
Min. 200 ml
Roerhaak
3 – 5 1 min
Max. 1,3 l 1 – 4 2 min
Lichte vloeistoffen
(bijv. pannekoken,
pudding)
Min. 200 ml
Eiergarde 1 – 7 30 sec
Max. 1,3 l
Room
Min. 200 ml
Eiergarde
4 – 12 90 sec
Max. 1,3 l 5 – 12 2 min
Opgeklopte eiwitten
Min. 1 eiwit
Eiergarde 5 – 12 2 min
Max. 8
eiwitten
Roereieren
Min. 2 eieren
Opklopper 1 – 4 1 min
Max. 1,3 l
Let bij het kiezen van de snelheid ook op de aanwijzingen in de
recepten.
Opmerking:
► Korte werkingsduur: Gebruik het apparaat niet langer
dan 2 minuten voor zwaar deeg. Laat het daarna 2
minuten afkoelen.
► Gebruik het spatdeksel voor beslag.
9. Druk voor het pauzeren of het stoppen van het mixen de
Aan-/Uitschakelaar. Haal de stekker uit het stopcontact.
10. Druk de knop (6) in en til met uw andere hand de draaibare
arm op.
Opmerking:
De arm is voorzien van een veiligheidsschakelaar. De motor
wordt uitgeschakeld wanneer de arm wordt opgelicht wanneer de machine in bedrijf is. Nadat de arm is neergelaten, kunt
u de machine weer inschakelen, zoals beschreven onder
punt 8.
11. Verwijder de mengkom door hem naar links te draaien.
12. Maak het deeg los m.b.v. de spatel en neem het uit de kom.
13. Verwijder het hulpstuk van de aandrijfas, door de draaibare
arm met één hand vast te houden en met de andere hand
het hulpstuk eruit te trekken.
14. Reinig de gebruikte onderdelen zoals beschreven onder
“Reinigen”.
Gebruik van het menghulpstuk
Let op:
► Het menghulpstuk en de mengkom mogen niet gelijktijdig
gebruikt worden.
Waarschuwing:
Het in de draaibare arm aangebrachte hulpstuk draait altijd.
Om veiligheidsredenen mag de mixer uitsluitend worden gebruikt wanneer de mengkom is voorzien van het spatdeksel.
1. Snij de ingrediënten in kleine stukjes voor het mixen.
2. Doe de ingrediënten in de mengbeker (max. 1,3 l).
3. Druk het deksel (12) stevig op de mengbeker.
Het moet de mengbeker volledig afdichten.
4. Verwijder de veiligheidsafdekking (7) van de aandrijfas van
de mixer: Druk en trek gelijktijdig de achterste rand van de
afdekking met duim en middelvinger van één hand.
Opmerking:
Er zijn ruwe plekken links en rechts op de rand van de
afdekking om een betere grip te hebben.
5. Plaats de mengbeker op de basis, waarbij de ● markering
aan de onderkant van de kom wijst naar de ● markering
op de basis. De twee stippen dienen exact naast elkaar te
staan.
6. Vervolg zoals beschreven onder “Gebruik van de mengkom
en hulpstukken, punt 7-9”.
Opmerking: Malen van ijsblokjes
Het snijblad van de mengbeker is ook geschikt voor het
malen van ijsblokjes. Vul de mengbeker tot 1/3 met ijsblokjes.
Gebruik het apparaat uitsluitend in de pulsstand, d.m.v. de “P”
toets, voor het malen van ijsblokjes.
Zie de snelheids-/tijdinstellingen in onderstaande tabel:
Product/
bereiding
hoeveelheid Hulpstuk
Snelheids-
instelling
Max.
tijdsduur
Snijden groenten/
fruit
Min. 200 g
Menghulpstuk
Puls 30 sec
Max. 500 g 1 – 3 2 min
Pureren groenten
/ fruit (vloeistof
toevoegen)
Max. 1,3 l Menghulpstuk
Puls 1 min
4 – 12 1 min
IJsblokjes Max. 400 ml Menghulpstuk Puls
3 sec
pulseren
gedurende
30 sec
Aanbevolen recepten
Gerezen Deeg (Basisrecept) Snelheid stand 1 - 4
Ingrediënten:
250 gr zachte boter of margarine, 250 gr suiker, 1 zakje vanillesuiker of 1 zakje Citroenbakpoeder, 1 slufje zout, 4 eieren,
500 gr tarwebloem, 1 zakje bakpoeder, ongeveer 1/8 liter melk.
Bereiding:
Doe de tarwebloem met de andere ingrediënten in de mengkom. Meng met de menghaak gedurende 30 seconden op
stand 2, en vervolgens ongeveer 1,5 minuten op stand 4. Vet
een bakblik in of doe er bakpapier in. Doe het beslag in het
bakblik en bak het. Test de cake voordat u hem uit de oven
neemt door er in het midden een satéprikker in te steken. Als
het beslag niet meer aan de prikker plakt is de cake gaar. Kiep
de cake op een rooster en laat hem afkoelen.
Conventionele oven:
Sleuf: 2
Temperatuur: Elektrische oven: boven- en onderwarmte
175-200°, gasoven: stand 2-3
Baktijd: 50-60 minuten
Page 13
13
U kunt dit recept aanpassen aan uw smaak, bijv. door het
toevoegen van 100 gr. Rozijnen of 100 gr noten of 100 gr
chocoladehagelslag. Uw verbeelding kent geen grenzen.
Lijnzaadrolletjes Snelheid stand 1 - 3
Ingrediënten:
500-550 gr tarwebloem, 50 gr lijnzaad, 3/8-liter water, 1 blokje
gist (40 gr), 100 gr magere kwark, goed uitgelekt, 1 theelepel
zout.
Voor afstrijken: 2 eetlepels water
Bereiding:
Week het lijnzaad in 1/8-liter lauw water. Doe het resterende
lauwe water (1/4 liter) in de mengkom. Kruimel hier de gist
in, en voeg de kwark toe. Meng het goed met de kneedhaak
op stand 1. De gist dient volledig opgelost te zijn. Doe de
bloem met het geweekte lijnzaad en het zout in de mengkom.
Kneed op stand 1, en schakel daarna naar stand 2 en meng
gedurende 1-2 minuten. Dek het deeg af en laat het op een
warme plaats 45-60 minuten rijzen. Kneed opnieuw, neem de
mengkom uit en vorm 16 broodrolletjes van het deeg. Bedek
de bakplaat met nat bakpapier. Plaats hier de rolletjes op en
laat ze 15 minuten rijzen. Strijk ze af met lauw water en bak ze.
Conventionele oven:
Sleuf: 2
Temperatuur: Elektrische oven: boven- en onderwarmte
200-220°
(Verwarm 5 minuten voor),
Gasoven: stand 2-3
Baktijd: 30-40 minuten
Reinigen
Voorspoelen
Vul de mengbeker voor de helft met water en laat de machine
gedurende ongeveer 10 seconden werken in de pulsstand.
Gooi hierna het water weg.
Waarschuwing:
► Haal altijd de stekker uit het stopcontact voor het reinigen.
► Dompel de machine niet onder in water om hem
te reinigen. Dit kan elektrische schokken of brand
veroorzaken.
Let op:
► Gebruik geen staalborstels of andere schurende voorwer-
pen.
► Gebruik geen agressieve of schurende schoonmaak-
middelen.
• Verwijder d mengbeker voor grondiger reinigen.
• Haal de mixer na ieder gebruik uit elkaar.
Waarschuwing: Risico op letsel!
De snijbladen van het snijbladsamenstel zijn zeer scherp.
Wees voorzichtig met het uit elkaar halen, reinigen of
bevestigen van onderdelen.
• Draai de schroefdop van de mengbeker door hem naar
rechts te draaien.
• Verwijder de Afdichtingsring van de schroefdop.
Mengbeker (13) en deksel (12)
• Reinig de mengbeker en het deksel in warm sop.
Afdichtingsring (14) en snijbladsamenstel (15)
• Spoel deze alleen kort af met heet water.
• Zet na het reinigen en drogen de mixer weer in omgekeerde volgorde in elkaar.
Mengkom en accessoires
• Verwijder de mengkom om overblijfselen op de aandrijfas
te kunnen verwijderen.
• Reinig afneembare onderdelen met deegspetters met sop.
Let op:
De onderdelen zijn niet vaatwasserbestendig. De onderdelen
kunnen buigen of verkleuren onder invloed van hitte en
agressieve schoonmaakmiddelen.
Behuizing
• Gebruik een licht vochtige doek voor het reinigen van het
oppervlak van de machine.
Probleemoplossing
• De machine werkt niet.
Oplossing:
Controleer of de stekker in het stopcontact zit.
Andere mogelijke oorzaken:
De machine is voorzien van twee veiligheidsschakelaars.
Zij voorkomen het per ongeluk starten van de motor.
Oplossing:
Controleer de juiste stand van:
de beweegbare arm (1) ○
de mengbeker (13) of ○
de veiligheidsafdekking (7). ○
Oververhittingsbeveiliging
• De machine is voorzien van een systeem voor beveiliging
tegen oververhitting. Bij te zwaar gebruik treedt dit systeem
in werking. De machine kan niet gebruikt worden. Haal de
stekker uit het stopcontact.
• Laat de machine volledig afkoelen en
druk daarna de hersteltoets onderop de
machine (zie afb.), om de keukenmachine
weer te kunnen gebruiken.
Page 14

14
Geluidsniveau
Het geluidsniveau was gemeten aan het oor van een gebruiker
(LpA) in overeenstemming met DIN EN ISO 3744.
Vastgesteld geluidsniveau: 85 dB(A) (geen limiet)
Technische specicaties
Model: .............................................................................KM 3354
Opgegeven spanning /frequentie: ..................220-240 V / 50 Hz
Opgenomen vermogen: ..................................................... 600 W
Beveligingsklasse: ....................................................................... II
Korte werking: ................................................................2 minuten
Netto gewicht: ....................................................................4,35 kg
Onderhevig aan verandering zonder voorafgaande kennisgeving!
Dit apparaat voldoet aan alle huidige CE-richtlijnen, zoals de
richtlijn elektromagnetische compatibiliteit en de laagspanningsrichtlijn, en is gefabriceerd volgens de meest recente
veiligheidsvoorschriften.
Betekenis van het vuilnisbak-symbool
Houd rekening met het milieu, gooi elektrische apparaten niet
weg bij het huishoudafval.
Breng overbodige of defecte elektrische apparaten naar
gemeentelijke inzamelpunten.
Help potentiële milieu- en gezondheidsgevaren door onverantwoordelijk wegwerpen te voorkomen.
Draag bij aan hergebruik en ander opnieuw gebruik van oude
elektrische en elektronische apparaten.
Uw gemeente kan u informatie geven over inzamelingspunten.
Page 15
15
Indications générales de sécurité
Avant d’utiliser cet appareil, lire attentivement ce manuel et
le conserver avec le Certicat de Garantie, la facture et, si
possible, l’emballage d’origine, y compris l’emballage interne.
Si cet appareil est donné à une tierce personne, transmettre le
manuel avec.
• Cet appareil ne doit être utilisé que de façon privée et pour
l’usage auquel il a été destiné. Il n’est pas destiné à une
utilisation commerciale.
Ne l’utilisez pas en extérieurs. Gardez-le à l’abri de la
chaleur, des rayons directs du soleil, de l’humidité (ne
l’immergez en aucun cas dans des liquides) et des angles
des meubles. N’utilisez pas cet appareil avec des mains
mouillées. Si l’appareil est mouillé, débranchez-le immédiatement.
• Lorsque vous n’utilisez pas l’appareil, lorsque vous installez
des accessoires, lorsque vous le nettoyez ou en cas de
mauvais fonctionnement, éteignez l’appareil et débranchezle systématiquement (tirez sur la che et non sur le câble).
• Ne laissez pas l’appareil sans surveillance lorsqu’il est en
marche. Eteignez toujours l’appareil lorsque vous quittez la
pièce. Débranchez l’appareil.
• Vériez régulièrement l’état de l’appareil et du cordon.
Assurez-vous qu’ils ne soient pas endommagés et cessez
d’utiliser l’appareil si vous constatez des dommages.
• Ne réparez pas vous-même l’appareil. Veuillez prendre
contact avec du personnel qualié. An d’éviter les risques,
un cordon d’alimentation endommagé doit être remplacé
par un cordon équivalent par le constructeur, notre service
après-vente ou tout autre spécialiste qualié.
• N’utilisez que les composantes originales.
• Veuillez respecter les “Instructions spéciales de sécurité”
présentées ci-après.
Enfants et personnes invalides
• Pour la sécurité de vos enfants, garder hors de leur portée
tous les emballages (sachets en plastique, pièces de
cloisonnement, polystyrène etc.).
Avertissement!
Ne pas laisser de jeunes enfants jouer avec les emballages danger d’étouffement!
• Cet appareil n’est pas destiné à être utilisé par des personnes (y compris des enfants) aux capacités physiques,
sensorielles ou mentales réduites ou ne disposant pas de
l’expérience et/ou des connaissances nécessaires à moins
qu’elles ne soient supervisées ou reçoivent d’une personne
responsable de leur sécurité des instructions concernant
l’utilisation de l’appareil.
• Surveillez les enfants et assurez-vous qu’ils ne jouent pas
avec l’appareil.
Symboles utilisés dans ce manuel
Les notes importantes de sécurité sont marquées de façon distincte. Y faire attention an d’éviter les accidents et dommages
sur l’appareil.
Avertissement:
Avertit contre les dangers pour la santé et indique les risques
potentiels de blessure.
Attention:
Indique de potentiels dangers pour l’appareil ou d’autres
objets.
Note:
Souligne les conseils et informations donnés à l’utilisateur.
Précautions de sécurité spéciales pour cet
appareil
• Disposez l’appareil sur une surface plane, horizontale et
stable.
• Ne branchez pas l’appareil à l’alimentation sur secteur
avant d’y avoir xé tous les accessoires nécessaires.
• Ne touchez pas les éléments mobiles et attendez que
l’appareil soit à l’arrêt.
• N’insérez pas d’ustensiles comme des cuillers ou spatules
et ne tentez pas de saisir les fouets battants ou le crochet
à pétrir avec vos mains lorsque l’appareil est en marche!
Risque de blessure!
• Eteignez l’appareil et déconnectez-le de l’alimentation sur
secteur avant de changer les accessoires!
• N’utilisez cet appareil que pour traiter des aliments.
• Remplissez le bol à mélanger d’ingrédients uniquement
jusqu’à la marque MAX.
• Ne faites pas fonctionner l’appareil durant plus de 2 minutes. Laissez-le refroidir durant environ 2 minutes avant de
l’utiliser à nouveau.
• Ne déplacez pas l’appareil lorsqu’il fonctionne. Eteignezle systématiquement avant et débranchez-le de sa prise
d’alimentation. Transportez-le toujours en le tenant avec les
deux mains!
Batteur
• N’allumez l’appareil que lorsque la carafe est fermée.
• Ne retirez pas le couvercle pendant le fonctionnement!
Avertissement:
► Ne mettez pas les mains dans le batteur que vous pouvez
facilement installé!
► Manipulez les lames avec soin! Risque de blessures
lorsque vous retirez la lame du récipient à mélanger, videz
le récipient à mélanger ou pendant l’entretien!
► Ne versez pas de liquides d’une température supérieure à
60°C dans la carafe. Risque de brûlures!
• N’utilisez pas le batteur sans ingrédients à mélanger!
• Ne surchargez pas! Ne dépassez pas la capacité maximum
de (1300 ml) indiquée sur le récipient à mélanger!
Page 16
16
Situation des commandes
1 Bras pivotant
2 Boutons de vitesse
3 Interrupteur Marche/Arrêt
4 Témoin d’alimentation et afchage
5 Bouton-poussoir à impulsion
6 Interrupteur pour lever/baisser le bras
7 Couvercle de sécurité pour l’arbre de commande
8 Pare-éclaboussures sur le bol à mélanger avec orice de
remplissage
9 Bol à mélanger
10 Enceinte
11 Base de l’appareil
12 Couvercle du récipient à mélanger
13 Récipient à mélanger (carafe)
14 Joint d’étanchéité
15 Assemblage de lames
16a Crochet pétrisseur
16b Crochet mélangeur
16c Fouet
16d Fouet à oeufs
17 Spatule
Déballer l’appareil
• Retirez l’appareil et tous les accessoires compris de la boîte.
• Pour éliminer toute contamination survenue lors du procédé
de fabrication, nettoyez le récipient à mélanger, le bol à
mélanger, les divers couvercles et autres accessoires avec
de l’eau savonneuse avant la première utilisation.
Avertissement:
Les lames de l’assemblage de lames sont très affûtées.
Risque de blessures!
• Après le nettoyage, séchez parfaitement toutes les pièces.
Installation
• Assurez-vous que la prise n’est pas branchée lorsque vous
remplacez un accessoire. Vous pouvez ensuite installer les
accessoires comme décrit ci-dessous.
• Pour éviter tout risque de blessures, le couvercle de sécu-
rité (7) doit être monté sur l’arbre de commande du batteur
avant d’utiliser le bol à mélanger. Un fonctionnement sans
ces couvercles est impossible!
Avertissement:
Même si vous utilisez uniquement le batteur, vous devez
monter le bol. L’outil introduit dans le bras pivotant tournera
toujours, même si le bol à mélanger n’est pas installé!
Branchement électrique
• Assurez-vous que la tension d’alimentation correspond à la
tension de votre appareil. Vériez la plaque signalétique au
bas de l’appareil pour plus d’informations.
Fonctionnement
Utiliser le bol et les accessoires à mélanger
1. Réglez uniquement le bras pivotant sans la carafe installée!
Appuyez sur le bouton (6) et levez le bras pivotant de l’autre
main. Lorsque vous relâchez le bouton, le bras pivotant
sera soit à mi-hauteur soit vertical.
2. Pour utiliser le fouet (16d), attachez d’abord la protection
anti-éclaboussures (8): Maintenez la protection avec le
collier dirigé vers le haut.
Note:
Vous pouvez voir deux rainures au bas du bras, à gauche
et à droite.
Faites coulisser la protection anti-éclaboussures avec sa
languette dans ces rainures et verrouillez en faisant tourner
dans le sens des aiguilles d’une montre.
Note:
Lorsque vous préparez la pâte, ajoutez des ingrédients à
l’aide de l’orice de remplissage dans le bol.
3. L’ouverture pour introduire l’accessoire se situe au bas du
bras pivotant. Enfoncez l’extrémité du crochet pétrisseur/
mélangeur du fouet/fouet à œufs dans l’ouverture jusqu’au
déclic. Tournez soigneusement lorsque vous enfoncez pour
xer les pièces plus facilement.
4. Placez le bol sur son siège et faites-le tourner dans le sens
des aiguilles d’une montre jusqu’à ce qu’il s’arrête.
5. Versez maintenant vos ingrédients.
Attention:
Ne remplissez pas trop l’appareil, la quantité maximale
d’ingrédients est de 1,3 kg ou de 1,5 litre pour les liquides.
6. Appuyez sur le bouton (6) et baissez lentement le bras
pivotant de l’autre main.
Attention:
Ne laissez pas tomber le bras pivotant!
7. Branchez la prise électrique à une prise murale correctement installée 230V / 50Hz. La lumière bleue de l’écran
indique l’état de fonctionnement.
8. - Appuyez sur l’interrupteur Marche/Arrêt (3) pour allumer
l’appareil.
- Appuyez plusieurs fois sur le bouton “+” (2) pour sélec-
tionner une vitesse, qui sera indiquée à l’écran.
- Utilisez le bouton “-” pour réduire à nouveau la vitesse.
- Appuyez sur le bouton “P” (5) pour accéder au fonctionnement par impulsions (mélanger à intervalles courts).
Maintenez le bouton enfoncé selon la durée d’intervalle
souhaitée. Pendant le mode par impulsions, l’appareil
fonctionnera à sa vitesse la plus haute.
Note:
► L’écran indiquera la durée du processus de mélange.
► Pendant le fonctionnement à la vitesse la plus haute,
vous pouvez sentir une odeur. Cela n’est pas une erreur
de l’appareil.
Page 17
17
Choisissez l’ustensile et la vitesse en fonction des indications du tableau:
Produit /
préparation
quantité Ustensile
Position
vitesse
Temps de
fonctionnement
maximal
Pâte épaisse (ex.
pâte levée, pâte
sucrée)
Min. 0,5 kg
Crochet
pétrisseur
1 – 4 30 sec
Max. 2 kg 1 – 3 2 min
Pâte légère
(p. ex. une pâte
à gaufres ou une
pâte levain-levure)
Min. 200 ml
Crochet
mélangeur
3 – 5 1 min
Max. 1,3 l 1 – 4 2 min
Liquides légers
(p. ex. crêpes,
crème-dessert)
Min. 200 ml
Fouet à
oeufs
1 – 7 30 sec
Max. 1,3 l
Crème
Min. 200 ml
Fouet à
oeufs
4 – 12 90 sec
Max. 1,3 l 5 – 12 2 min
Blanc d’oeufs
battus
1 blanc
d’oeuf min.
Fouet à
oeufs
5 – 12 2 min
8 blancs
d’oeuf max.
Oeufs brouillés
2 oeufs min.
Fouet 1 – 4 1 min
1,3 l max.
Lorsque vous sélectionnez la vitesse, consultez également les
références présentes dans la recette.
Note:
► Fonctionnement court: Ne faites pas fonctionner
l’appareil avec une pâte épaisse durant plus de 2 minutes
et laissez-le refroidir durant 2 minutes après cela.
► Utilisez la protection anti-éclaboussure pour les pâtes
liquides.
9. Pour mettre en pause ou arrêter le mélange, appuyez sur
l’interrupteur Marche/Arrêt. Débranchez la prise électrique.
10. Appuyez sur l’interrupteur (6) et levez le bras pivotant de
l’autre main.
Note:
Le bras est équipé d’un interrupteur de sécurité. Le moteur
s’éteint si vous inclinez le bras pendant le fonctionnement.
Après avoir baissé le bras, vous pouvez redémarrer comme
décrit sous le point 8.
11. Retirez le bol de mixage en le faisant tourner dans le sens
inverse des aiguilles d’une montre.
12. Remuez la pâte à l’aide de la spatule et retirez-la du bol de
mixage.
13. Pour desserrer l’accessoire de l’arbre de commande, maintenez le bras pivotant d’une main et enfoncez l’accessoire
de l’autre.
14. Nettoyez les éléments dont vous vous êtes servi en procédant de la façon décrite dans “Nettoyage”.
Utiliser l’accessoire pour mélanger
Attention:
► N’utilisez pas l’accessoire pour mélanger et le bol à
mélanger en même temps.
Avertissement:
L’accessoire introduit dans le bras pivotant tournera toujours.
Pour des raisons de sécurité, le batteur fonctionnera uniquement lorsque le bol à mélanger sera monté avec le pareéclaboussures.
1. Coupez les ingrédients en petits morceaux avant de mélanger.
2. Mettez les ingrédients dans le récipient à mélanger (max.1,3 l).
3. Enfoncez fermement le couvercle (12) sur la carafe.
Il doit bien fermer le récipient à mélanger.
4. Retirez le couvercle de sécurité (7) du batteur: Utilisez le
pouce et le majeur d’une main pour simultanément enfoncer et pousser l’arrière du couvercle.
Note:
Le bord du couvercle, à droite et à gauche, présente une
rugosité pour avoir une meilleure prise.
5. Placez le récipient à mélanger sur la base de façon que le
symbole ● situé au bas du récipient indique le symbole ●
de la base. Les deux points doivent exactement se toucher.
6. Continuez comme il est décrit dans le paragraphe “Utiliser
le bol et les accessoires à mélanger, points 7-9”.
Note: Piler des glaçons
La lame du récipient à mélanger sert également à piler des
glaçons. Remplissez la carafe au 1/3 de glaçons. Activez
uniquement l’appareil en mode par impulsions en utilisant le
bouton “P” pour piler des glaçons.
Veuillez consulter les paramètres du temps et de la vitesse
dans le tableau ci-dessous:
Produit/
préparation
quantité Accessoire
Réglage de
la vitesse
Durée de
fonctionnement
max.
Fruits/Légumes
coupés
200 g min.
Accessoire à
mélanger
Impulsions 30 sec
500 g max. 1 – 3 2 min
Purée de
légumes/fruits
(avec liquide)
1,3 l max.
Accessoire à
mélanger
Impulsions 1 min
4 – 12 1 min
Glaçons
400 ml
max.
Accessoire à
mélanger
Impulsions
Impusions de
3 sec pour
30 sec
Recettes recommandées
Mixture Songe (Recette simple) Réglage de vitesse 1 - 4
Ingrédients:
250g de beurre doux ou de margarine, 250g de sucre, 1 sachet
de sucre vanille ou bien un sachet de Citro-back (poudre de
citron), 1 pincée de sel, 4 œufs, 500g de farine de froment, 1
sachet de levure chimique, environ 1/8 litre.
Préparation:
Placez la farine de froment avec les autres ingrédients dans le
bol de mixage et mixez à l’aide du crochet mélangeur pendant
30 secondes à la vitesse 2, puis durant environ 1,5 minutes à
la vitesse 4. Graissez le moule à gâteaux ou bien disposez du
Page 18

18
papier sulfurisé, versez la pâte et faites cuire. Goûtez avant
de sortir le plat du four: piquez au centre avec un ustensile en
bois. Si la pâte colle, le gâteau est prêt. Placez le gâteau sur la
grille de cuisson et laissez-le refroidir.
Four conventionnel:
Supports: 2
Chaleur: Four électrique: chaleur provenant
du haut et du bas 175-200°, Four à
gaz: réglage 2-3
Temps de cuisson: 50-60 minutes
Vous pouvez modier cette recette en fonction de vos goûts,
par exemple avec 100g de raisons ou 100g de noisettes ou
encore 100g de chocolat râpé. Rien ne limite votre créativité.
Rouleaux aux graines de lin Réglage de vitesse 1 - 3
Ingrédients:
500-550g de farine de froment, 50g de graines de lin, 3/8litre d’eau, 1 cube de levure (40g), 100g crème allégée, bien
drainée, 1 cuiller a café de sel.
Pour le levage: 2 cuiller à soupe d’eau
Préparation:
Faites tremper les graines de lin dans 1/8 de litre d’eau tiède.
Placez le reste de l’eau tiède (1/4 de litre) dans le bol mixeur,
répartissez la levure dedans, ajoutez la crème et mélangez
bien à l’aide du crochet à pétrir réglé sur la vitesse 1. La levure
doit être complètement dissoute dans l’eau. Disposez la farine
avec les graines de lin trempées ainsi que le sel dans le bol de
mixage. Pétrissez sur la vitesse 1, puis passez à la vitesse 2 et
continuez de pétrir durant encore 1-2 minutes. Couvrez la pâte
et laissez lever dans un endroit chaud durant 45 à 60 minutes.
Pétrissez à nouveau, sortez du bol de mixage et formez en
16 rouleaux de pains. Couvrez le plateau de cuisson avec du
papier sulfurisé. Placez dessus les rouleaux et faites monter
durant 15 minutes, ajoutez de l’eau tiède et faites cuire.
Four conventionnel:
Supports: 2
Chaleur: Four électrique: chaleur provenant
du haut et du bas 200-220°
(Préchauffer durant 5 minutes),
Four à gaz: réglage position 2-3
Temps de cuisson: 30-40 minutes
Nettoyage
Prénettoyage
Remplissez le récipient à mélanger à moitié d’eau et mettez en
mode par impulsions pendant 10 secondes environ. Puis, videz
le liquide.
Avertissement:
► Débranchez toujours la prise électrique avant d’effectuer
l’entretien.
► Ne plongez pas l’appareil dans de l’eau pour l’entretien.
Cela pourrait causer un choc électrique ou un incendie.
Attention:
► N’utilisez pas de brosses métalliques ou d’autres objets
abrasifs.
► N’utilisez pas de décapants abrasifs ou agressifs.
• Retirez le récipient à mélanger pour effectuer un entretien
plus approfondi.
• Démontez le batteur après chaque utilisation.
Avertissement: Risque de blessures!
Les lames de l’assemblage de lames sont très affûtées.
Soyez prudent à chaque démontage, entretien ou
montage de chaque pièce.
• Desserrez le bouchon à vis de la carafe dans le sens des
aiguilles d’une montre.
• Retirez le joint d’étanchéité du bouchon à vis.
Carafe (13) et couvercle (12)
• Nettoyez la carafe et le couvercle avec de l’eau chaude et
du savon.
Joint d’étanchéité (14) et assemblage de lames (15)
• Rincez brièvement uniquement sous l’eau chaude.
• Après le nettoyage et le séchage, montez votre batteur
dans l’ordre inverse.
Bol et accessoires à mélanger
• Retirez le bol à mélanger pour retirer tout résidu situé sur
l’arbre de commande.
• Nettoyez les pièces amovibles qui ont été tachées de pâte
dans un mélange d’eau et de savon.
Attention:
Les pièces ne sont pas conçues pour passer au lavevaisselle. Elles pourraient se déformer ou s’éclaircir sous
l’effet de la chaleur et de décapants agressifs.
Enceinte
• Utilisez un chiffon légèrement humide pour nettoyer la
surface de l’appareil.
Dépannage
• L’appareil ne fonctionne pas.
Solution:
Vériez les branchements électriques.
Autres origines possibles:
Votre appareil est équipé de deux interrupteurs de sécurité.
Ils empêchent tout départ imprévu du moteur.
Solution:
Vériez la bonne position du
bras pivotant (1) ○
récipient à mélanger (13) ou ○
du couvercle de sécurité (7). ○
Page 19

19
Protection thermique
• L’appareil dispose d’un système de protection thermique.
Une surcharge déclenche ce système. L’appareil ne sera
alors pas disposé à fonctionner. Débranchez la che du
réseau électrique.
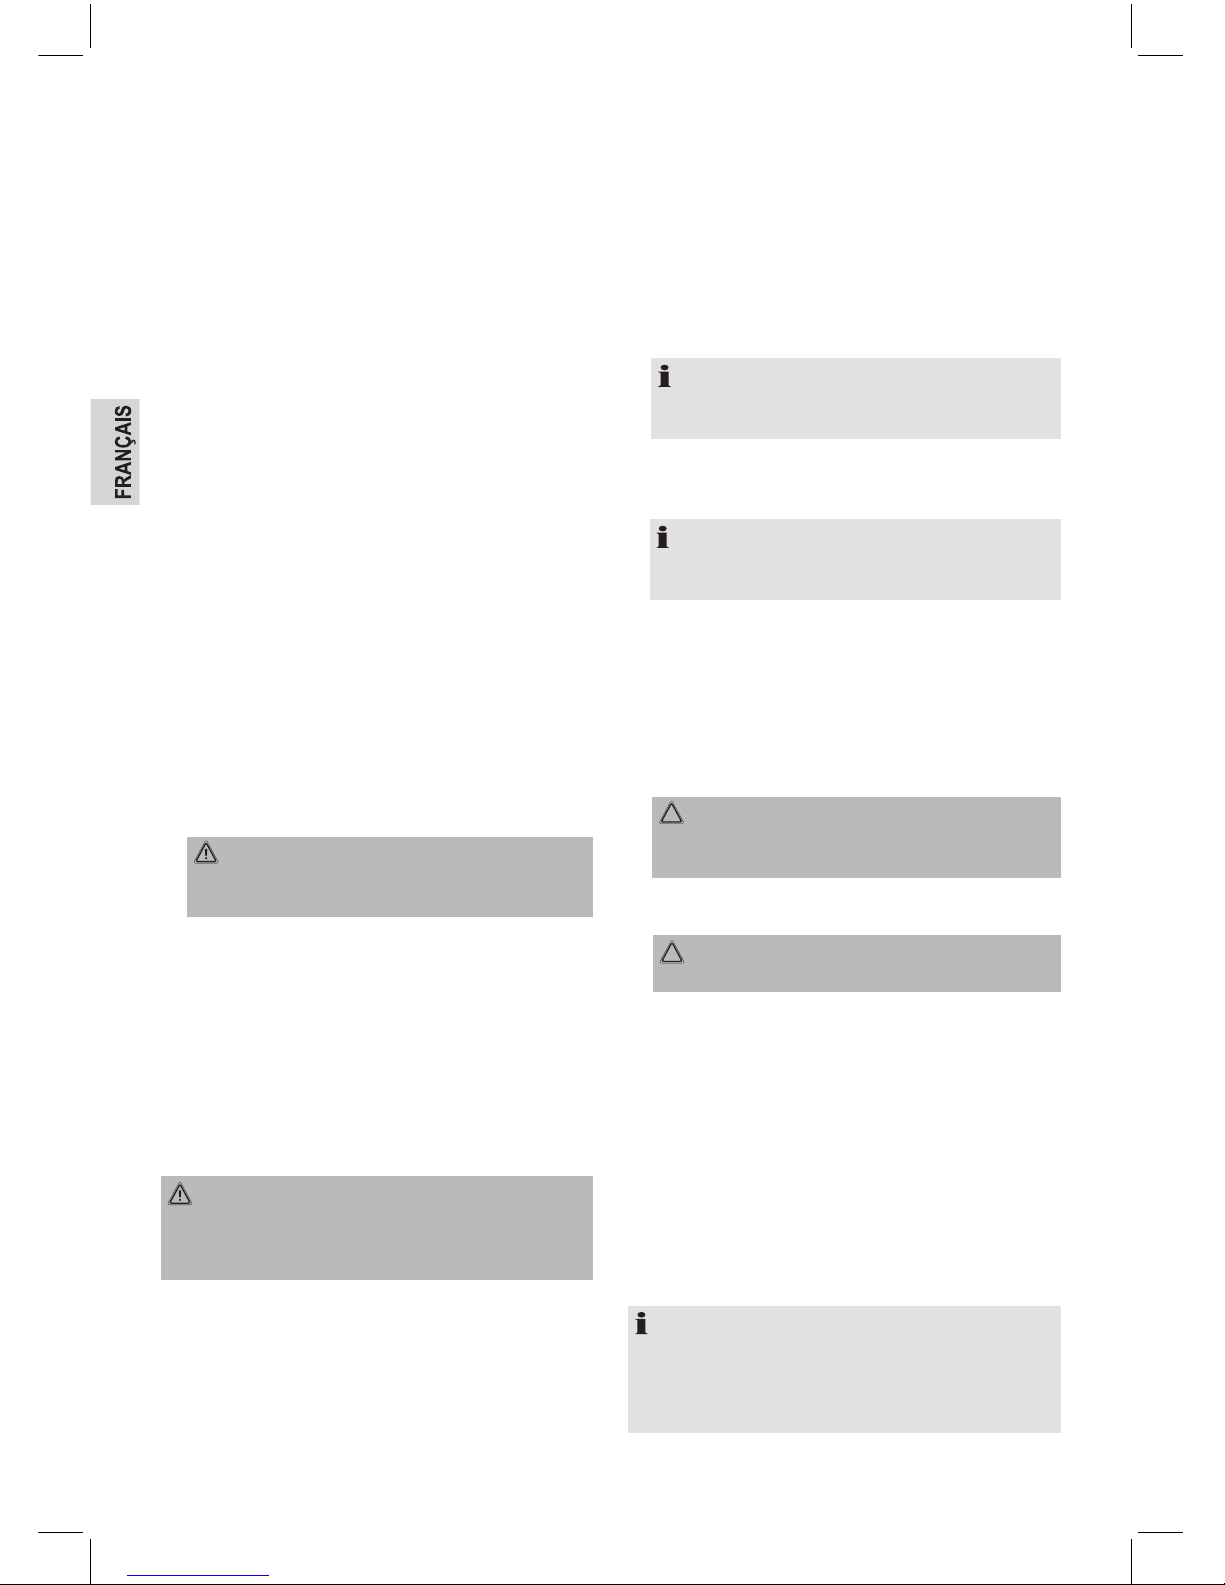
• Laissez l’appareil entièrement refroîdir, et
ensuite, seulement, appuyez sur le bouton de réinitialisation au bas de l’appareil
(voir g.) pour utiliser à nouveau
le robot de cuisine.
Emission de bruit
Le niveau de pression sonore a été mesure au niveau de l’oreille
d’un utilisateur (LpA) en conformité avec la norme DIN EN ISO
3744.
Niveau de pression sonore déterminé: 85 dB(A) (pas de limite)
Caractéristiques techniques
Modèle: ........................................................................... KM 3354
Tension/fréquence mesurées: .......................... 220-240V / 50Hz
Consommation électrique: .................................................. 600W
Classe de protection:................................................................... II
Fonctionnement court: ..................................................2 minutes
Poids net: ............................................................................4,35kg
Sujet à changement sans avertissement préalable!
Cet appareil est conforme à toutes les directives CE en vigueur,
telles que les directives sur la compatibilité électromagnétique
et les faibles tensions et a été fabriqué selon les derniers
règlements de sécurité.
Signication du symbole de “Poubelle à
roulettes”
Prendre soin de l’environnement, ne pas jeter des appareils
électriques avec les ordures ménagères.
Porter les appareils électriques obsolètes ou défectueux dans
les centres de récupération municipaux.
Aider à éviter les impacts potentiels sur l’environnement et la
santé en luttant contre les déchets sauvages.
Vous contribuerez ainsi au recyclage et autres formes de réutilisation des appareils électriques usagés.
Votre municipalité vous fournira les informations nécessaires
sur les centres de collecte.
Page 20

20
Normas generales de seguridad
Antes de usar este dispositivo, lea cuidadosamente este
manual del usuario y consérvelo junto con el certificado de
garantía, el recibo de compra y, si es posible, el embalaje original, incluyendo el embalaje interno. Si entrega el dispositivo a
terceros, incluya también el manual del usuario.
• Use el dispositivo exclusivamente para su n y de modo
particular. Este aparato no está diseñado para uso comercial.
No use el dispositivo en exteriores. Protéjalo del calor, la luz
del sol directa, la humedad (no lo sumerja en líquidos bajo
ningún concepto) y bordes alados. No use el dispositivo
con las manos mojadas. Si se moja el dispositivo, desenchúfelo de inmediato.
• Apague y desenchufe el dispositivo (tire del enchufe, no
del cable) cuando no lo use, o cuando conecte accesorios,
durante la limpieza o si se avería.
• No deje el dispositivo sin vigilar durante el funciona-
miento. Apague siempre el dispositivo cuando salga de la
habitación. Desenchufe el dispositivo.
• Compruebe regularmente si hay daños en el cable y el
dispositivo. Deje de usar el dispositivo si hay daños.
• No repare usted mismo el dispositivo. Contacte con personal autorizador. Para evitar riesgos, el fabricante, nuestro
servicio de atención al cliente u otro especialista cualicado
debe cambiar el cable de corriente dañado con un cable
equivalente.
• Use exclusivamente piezas originales.
• Tenga en cuenta las siguientes “Instrucciones especiales
de seguridad”.
Niños y personas discapacitadas
• Para la seguridad de sus hijos, mantenga las piezas de
embalaje (bolsas de plástico, cartones, porexpan, etc.)
fuera de su alcance.
Aviso!
No deje que los niños pequeños jueguen con los plásticos, debido al riesgo de asxia.
• Este dispositivo no está pensado para ser usado por
personas (incluyendo niños) con capacidades físicas, sensoriales o mentales reducidas, o con falta de experiencia y/
o conocimientos, a menos que tengan supervisión o sean
instruidas sobre el uso del dispositivo por una persona
responsable por su seguridad.
• Vigile a los niños para garantizar que no jueguen con el
dispositivo.
Símbolos en este manual del usuario
Las notas importantes para su seguridad se indicant claramente. Preste mucha atención a las mismas para evitar accidentes
y daños al dispositivo.
Aviso:
Advierte de riesgos para su salud, e indica riesgo potencial
de heridas.
Atención:
Indica peligros potenciales para el dispositivo u otros objetos.
Nota:
Indica recomendaciones e información para usted.
Precauciones especiales de seguridad para
este dispositivo
• Ponga el dispositivo sobre una supercie estable, plana y
resistente.
• No conecte el dispositivo a la alimentación antes de incor-
porar todos los accesorios necesarios.
• No toque las piezas móviles, y espere a que el aparato se
detenga.
• No introduzca utensilios como cucharas o espátulas ni
agarre con las manos el batidor giratorio ni el gancho de
amasado durante el uso. Riesgo de heridas.
• Apague el aparato y desconéctelo de la corriente antes de
cambiar accesorios.
• Procese exclusivamente alimentos con este dispositivo.
• Llene el recipiente de mezcla con ingredientes hasta la
marca MAX solamente.
• No use el aparato durante más de 2 minutos seguidos.
Déjelo enfriar durante aprox. 2 minutos antes de usarlo de
nuevo.
• No mueva el aparato durante el funcionamiento; apáguelo
siempre primero de la alimentación. Transporte siempre el
aparato con ambas manos.
Batidora
• Encienda el dispositivo exclusivamente cuando la jarra esté
cerrada con la tapa.
• No retire la tapa durante el uso.
Aviso:
► No ponga nunca las manos dentro de la batidora una vez
esté montada.
► Manipule con cuidado las hojas. Riesgo de heridas cuan-
do se retira la hoja del recipiente de mezcla, al vaciar el
recipiente o durante la limpieza.
► No vierta líquidos con una temperatura superior a 60ºC en
la jarra. Riesgo de quemaduras.
• No use la batidora sin ingredientes.
• No la sobrecargue. No exceda la capacidad máxima
(1300 ml) indicada en el recipiente de mezclas.
Ubicación de los controles
1 Brazo pivotante
2 Botones de velocidad
3 Interruptor de encendido/apagado
4 Indicador de encendido y pantalla
5 Interruptor de pulso
6 Interruptor para alzar/bajar el brazo
7 Tapa de seguridad para el eje motor
Page 21

21
8 Protección para salpicaduras del recipiente con caño
para servir
9 Recipiente de mezcla
10 Chasis
11 Base del dispositivo
12 Tapa del recipiente de mezcla
13 Recipiente de mezcla (jarra)
14 Anilla de sellado
15 Grupo de hojas
16a Gancho para amasado
16b Gancho para remover
16c Batidor
16d Batidor para huevos
17 Espátula para masa
Desembalado del dispositivo
• Saque el dispositivo y todos los accesorios incluidos de la caja.
• Para eliminar cualquier contaminación producida durante el
proceso de fabricación, limpie el recipiente de mezcla, las
tapas y otros accesorios en agua jabonosa caliente antes
del uso.
Aviso:
Las hojas del grupo de hojas están muy aladas. Riesgo
de heridas.
• Después de limpiar, seque por completo todas las piezas.
Instalación
• Asegúrese de que el enchufe no esté conectado cuando
cambie cualquier accesorio. Solamente ahora puede
instalar y usar accesorios como se describe a continuación.
• Para evitar heridas, la tapa de seguridad (7) debe montarse
sobre el eje motor de la batidora antes de usar el recipiente
de mezcla. El uso sin estas tapas resulta imposible.
Aviso:
Aunque solamente esté usando la batidora, el recipiente
debe estar montado. La herramienta introducida en el brazo
pivotante siempre girará, aunque el recipiente de mezcla no
esté instalado.
Conexión eléctrica
• Asegúrese de que la tensión de la alimentación que va a
conectar coincida con la tensión del dispositivo. Compruebe
la etiqueta identicadora de la parte inferior del dispositivo
para información detallada.
Uso
Uso del recipiente de mezcla y herramientas
1. Ajuste el brazo pivotante sin acoplar la jarra. Pulse el botón
(6) y use la otra mano para elevar el brazo pivotante. Cuando suelte el botón, el brazo pivotante reposará a media
altura o en posición vertical.
2. Para usar el batidor (16c) acople primero la protección
contra salpicaduras (8): Sujete la protección contra salpicaduras con el cuello hacia arriba.
Nota:
En la parte inferior del brazo puede ver dos muescas a
izquierda y derecha.
Deslice la protección contra salpicaduras con la pestaña en
estas muescas y encájela girándola hacia la derecha.
Nota:
Cuando prepare masa, añada ingredientes a través del
caño de alimentación al recipiente.
3. La apertura del accesorio de herramientas se encuentra
en el lado inferior del brazo pivotante. Empuje el extremo
del gancho de amasado/removido o del batidor/batidor de
huevos en la apertura hasta que encaje en su lugar. hágalo
girar cuidadosamente mientras empuja para jar con mayor
facilidad las piezas.
4. Ponga el recipiente en su lugar y gírelo hacia la derecha
hasta que se detenga.
5. Ponga ahora los ingredientes.
Atención:
No llene en exceso el aparato, la cantidad máxima de
ingredientes es de 2 kg, o 1,3 litros de líquidos.
6. Pulse el botón (6) y use la otra mano para bajar lentamente
el brazo pivotante.
Atención:
No deje que el brazo pivotante caiga hacia abajo.
7. Conecte el enchufe a una toma de corriente adecuadamente instalada de 230V / 50Hz. El testigo azul de la pantalla
indica la preparación para el uso.
8. - Pulse el interruptor de encendido/apagado (3) para
encender el dispositivo.
- Pulse el botón “+” (2) varias veces para seleccionar la
velocidad. Se mostrará en la pantalla.
- Use el botón “-” para reducir la velocidad.
- Pulse el botón “P” (5) para el funcionamiento en modo
pulso (mezcla en intervalos cortos). Presione y mantenga el botón según la duración deseada del intervalo.
Durante el modo pulso, el dispositivo funcionará a su
máxima velocidad.
Nota:
► La pantalla indicará el tiempo del proceso de mezclado.
► Durante el funcionamiento a máxima velocidad pueden
producirse olores, no se trata de una avería del
dispositivo.
Seleccione la herramienta y velocidad según la tabla
siguiente:
Producto/
preparación
amount Herramienta Velocidad
Tiempo
máximo de
funcionamiento
Masa pesada
(p.ej., masa
con levadura,
pastelería)
Mín. 0,5 kg
Gancho para
masa
1 – 4 30 s.
Máx. 2 kg 1 – 3 2 min.
Page 22

22
Producto/
preparación
amount Herramienta Velocidad
Tiempo
máximo de
funcionamiento
Masa ligera
(p. ej., masa
para gofres o
esponjosa)
Mín. 200 ml
Gancho para
remover
3 – 5 1 min.
Máx. 1,3 l. 1 – 4 2 min.
Líquidos ligeros
(p. ej. crepes,
púdin)
Mín. 200 ml
Batidor de
huevo
1 – 7 30 s.
Máx. 1,3 l.
Nata
Mín. 200 ml
Batidor de
huevo
4 – 12 90 s.
Máx. 1,3 l. 5 – 12 2 min.
Claras de
huevo batidas
Mín. 1 clara
de huevo
Batidor de
huevo
5 – 12 2 min.
Máx. 8
claras de
huevo
Huevos
revueltos
Mín.
2 huevos
Batidor 1 – 4 1 min.
Máx. 1,3 l.
Cuando elija la velocidad observe también las referencias de
las recetas.
Nota:
► Uso en periodos breves: No use el aparato para ama-
sar masas densas durante más de 2 minutos, y déjelo
enfriar durante 2 minutos a continuación.
► Use la protección contra salpicaduras para masas líquidas.
9. Para pausar o detener la mezcla, pulse el interruptor de
encendido/apagado. Desconecte el enchufe.
10. Pulse el botón (6) y use la otra mano para elevar el brazo
pivotante.
Nota:
El brazo está equipado con un interruptor de seguridad. El
motor se apaga si se inclina el brazo durante el funcionamiento. Tras bajar el brazo, puede iniciar de nuevo el funcionamiento como se describe en el punto 8.
11. Saque el recipiente de mezcla girándolo hacia la izquierda.
12. Suelte la masa con la espátula y sáquela del recipiente de
mezcla.
13. Para soltar la herramienta del eje motor, aguante el brazo
pivotante con una mano y tire de la herramienta con la otra.
14. Limpie las piezas usadas como se describe en “Limpieza”.
Uso del accesorio de mezcla
Atención:
► No use el accesorio de mezcla y el recipiente de mezcla
(bol) simultáneamente.
Aviso:
La herramienta introducida en el brazo pivotante girará
siempre. Por motivos de seguridad, la batidora sólo puede
usarse cuando el recipiente de mezcla está montado con la
protección contra salpicaduras.
1. Corte los ingredientes en trozos pequeños antes de batir.
2. Ponga los ingredientes en el recipiente de mezcla (máx. 1,3 l).
3. Presione la tapa (12) con rmeza sobre la jarra.
Debe cerrar rmemente el recipiente de mezcla.
4. Saque la tapa de seguridad (7) del motor de la batidora:
Use el pulgar y el dedo corazón de una mano para empujar
y tirar simultáneamente del borde posterior de la cubierta.
Nota:
Existen puntos rugosos a izquierda y derecha de los
bordes de la cubierta para obtener un mejor agarre.
5. Ponga el recipiente de mezcla sobre la base de forma que
la marca ● del lado inferior del recipiente coincida con la
marca ● de la base. Los dos puntos deben quedar perfectamente alineados.
6. Prosiga como se describe en “Uso del recipiente de mezcla
y herramientas, puntos 7-9”.
Nota: Triturar cubitos de hielo
La hoja del recipiente de mezcla también es adecuada para
triturar cubitos de hielo. Llene la jarra hasta 1/3 con cubitos
de hielo. Use el dispositivo en modo de pulso usando el
botón “P” para triturar cubitos de hielo.
Consulte la conguración de velocidad/tiempo en la tabla
siguiente:
Producto/
preparado
cantidad Herramienta
Posición de
velocidad
Tiempo máx. de
funcionamiento
Cortar
verdura/fruta
Mín. 200 g
Accesorio de
mezcla
Pulso 30 s.
Máx. 500 g. 1 – 3 2 min.
Puré de
verduras/fruta
(con líquido
añadido)
Máx. 1,3 l.
Accesorio de
mezcla
Pulso 1 min.
4 – 12 1 min.
Cubitos de
hielo
Máx. 400 ml.
Accesorio de
mezcla
Pulso
Pulsos de 3 s.
durante
30 s.
Recetas recomendadas
Mezcla esponjosa (receta básica) Velocidad 1 – 4
Ingredientes:
250g de mantequilla blanda o margarina, 250g de azúcar, 1 saquito de azúcar con vainilla o 1 saquito de citronade, 1 pizca de
sal, 4 huevos, 500g de harina de trigo, 1 saquito de levadura
pastelera, aprox. 1/8 de litro de leche.
Preparación:
Ponga la harina con el resto de ingredientes en el recipiente de
mezcla, mezcle con el gancho de mezcla durante 30 segundos
a velocidad 2, y luego aprox. 1,5 minutos a velocidad 4. Engrase el molde passtelero o cúbralo con papel para pastelería,
llénelo con la masa y cuézala. Pruébelo antes de sacarlo del
horno: pinche el pastel con un palillo de madera puntiagudo en
el centro. Si la masa no se pega el pastel ya está listo. Vuelque
el pastel sobre una rejilla para pan y déjelo enfriar.
Page 23

23
Horno convencional:
Bandeja: 2
Temperatura: Horno eléctrico: superior e inferior a
175-200º, horno de gas: Posición 2-3
Tiempo de cocción: 50-60 minutos
Puede modicar la receta según sus preferencias, por ejemplo
con 100g de pasas, 100g de frutos secos o 100g de chocolate
rallado. No hay límites a su imaginación.
Rollos de linaza Velocidad 1 – 3
Ingredientes:
500-550g de harina de trigo, 50g de linaza, 3/8 de
litro de agua, 1 cubo de levadura (40g), 100g de requesón bajo en grasas, bien seco, 1 cucharadita de sal.
Para la cobertura: 2 cucharadas de agua
Preparación:
Ponga en remojo la linaza en 1/8 de litro de agua tibia. Ponga
el resto de agua tibia (1/4 de litro) en el recipiente de mezcla,
triture la levadura dentro, añada el requesón y mézclelo bien
con el gancho de amasado en la velocidad 1. La levadura
debe disolverse por completo. Ponga la harina con la linaza
remojada y la sal en el recipiente de mezcla. Amase en la
velocidad 1, y cambie a velocidad 2 y amase durante otros 1-2
minutos. Cubra la masa y apártela en un lugar caliente durante
45-60 minutos. Amase de nuevo, saque la masa del recipiente
y forme 16 rollos con ella. Cubra la bandeja con papel para
pastelería húmedo. Ponga los rollos encima, apártelos durante
15 minutos, unte con agua tibia y cuézalos.
Horno convencional:
Bandeja: 2
Temperatura: Horno eléctrico: Superior e inferior a
200-220º
(Precalentar durante 5 minutos),
Horno de gas: Posición 2-3
Tiempo de cocción: 30-40 minutos
Limpieza
Antes de la limpieza
Llene el recipiente de mezcla hasta la mitad con agua y úselo en
modo pulso durante aprox. 10 segundos. Deseche el líquido.
Aviso:
► Desconecte siempre el enchufe antes de limpiar.
► No sumerja el dispositivo en agua para limpiarlo. Puede
provocar una electrocución o incendio.
Atención:
► No use cepillos metálicos ni otros objetos abrasivos.
► No use agentes limpiadores agresivos ni abrasivos.
• Saque el recipiente de mezcla para limpiarlo más a fondo.
• Desmonte la batidora tras cada uso.
Aviso: Riesgo de heridas.
Las hojas del grupo de hojas están muy afiladas. Tenga
cuidado al desmontar, limpiar o montar piezas individuales.
• Aoje la tapa de rosca hacia la derecha de la jarra.
• Saque la anilla de sellado de la tapa de rosca.
Jarra (13) y tapa (12)
• Limpie la jarra y la tapa en agua jabonosa caliente.
Anilla de sellado (14) y grupo de hojas (15)
• Enjuáguela brevemente con agua caliente.
• Tras limpiarla y secarla, monte la batidora en el orden
inverso.
Recipiente de mezcla y accesorios
• Saque el recipiente de mezcla para eliminar los residuos
del eje motor.
• Limpie las piezas desmontables que se hayan manchado
con masa en agua jabonosa.
Atención:
Las piezas no son adecuadas para el lavavajillas. Pueden
deformarse o perder color debido a la inuencia del calor y
los agentes limpiadores agresivos
Chasis
• Use un trapo levemente húmedo para limpiar la supercie
del dispositivo.
Solución de problemas
• El dispositivo no funciona.
Solución:
Compruebe la conexión de la corriente.
Otras posibles causas:
Su dispositivo está equipado con dos interruptores de
seguridad.
Evitan el arranque accidental del motor.
Solución:
Compruebe la correcta posición de
Brazo pivotante (1) ○
Recipiente de mezcla (13) o ○
Tapa de seguridad (7) ○
Protección contra sobrecalentamiento
• El dispositivo incluye un sistema de protección contra
sobrecalentamiento. En caso de sobrecarga se activará el
sistema. El dispositivo quedará inutilizable. Desconecte el
enchufe de la corriente.
Page 24

24
• Deje enfriar por completo el dispositivo, y
a continuación
pulse el botón de reinicio de la parte
inferior del dispositivo
(ver g.) para usar de nuevo el robot de
cocina.
Emisiones sonoras
El nivel de presión sonora se ha medido en oído del usuario
(LpA) en cumplimiento con DIN EN ISO 3744.
Presión sonora determinada: 85 dB(A) (sin límite)
Especicaciones técnicas
Modelo: ........................................................................... KM 3354
Tensión/frecuencia nominal: .............................220-240V / 50Hz
Consumo: ............................................................................600W
Clase de protección:.................................................................... II
Funcionamiento breve: .................................................2 minutos
Peso neto: ...........................................................................4,35kg
Sujeto a cambios sin previo aviso.
Este dispositivo cumple con todas las directrices CE actuales,
como la directriz de compatibilidad electromagnética y de bajo
voltaje, y está fabricada según las últimas normas de seguridad.
Signicado del símbolo “cubo de basura”
Cuide del medio ambiente, no deseche aparatos eléctricos con
los residuos domésticos.
Deseche los aparatos eléctricos obsoletos o defectuosos en
los puntos de recolección municipales.
Ayude a evitar potenciales impactos medioambientales y en la
salud por una eliminación de residuos inadecuada.
Contribuye al reciclaje y otros modos de uso de aparatos
eléctricos y
electrónicos viejos.
Su municipalidad le proporcionará información sobre los puntos
de recolección.
Page 25

25
Directrizes gerais de segurança
Antes de utilizar este aparelho, leia atentamente este manual
do utilizador e guarde-o juntamente com o Certicado de Garantia, o talão de compra e, tanto quanto possível, a embalagem original com os elementos interiores. Se puser o aparelho
à disposição de terceiros, entregue-lhes também o manual do
utilizador.
• Utilize o dispositivo para uso privado e apenas para os
ns a que se destina. O dispositivo não se destina a uso
comercial.
Não utilize o aparelho no exterior. Proteja-o do calor, da luz
solar directa, da humidade (nunca o mergulhe em líquidos)
e de extremidades aadas. Não utilize o aparelho com
as mãos molhadas. Se o aparelho se molhar, desligue-o
imediatamente da corrente.
• Desligue sempre o aparelho no interruptor e retire a cha
da corrente (puxe pela cha, não pelo cabo) quando não
o utilizar ou quando estiver a xar acessórios, durante a
limpeza ou em caso de avaria.
• Não deixe o dispositivo desacompanhado enquanto estiver em operação. Desligue sempre o dispositivo quando
sair do quarto. Desligue o dispositivo.
• Verique regularmente o dispositivo e o cabo em busca
de quaisquer sinais de dano. Não continue a operar o
dispositivo em caso de dano.
• Não realize reparações no dispositivo por si próprio. Por
favor, contacte o pessoal autorizado. A m de evitar riscos,
um cabo danicado deve ser substituído por um cabo
equivalente produzido pelo fabricante, o nosso serviço de
apoio a clientes ou qualquer outro especialista qualicado.
• Utilize apenas peças originais.
• Por favor observe o que se encontra determinado em
“Instruções especiais de segurança”.
Crianças e pessoas débeis
• Para a segurança dos seus lhos, não deixe partes da
embalagem (sacos plásticos, papelão, esferovite, etc.) ao
alcance dos mesmos.
Aviso!
Não deixe crianças pequenas brincarem com folhas de
plástico. Perigo de asxia!
• Este dispositivo não se destina a ser usado por pessoas
(incluindo crianças) com redução capacidades físicas,
sensoriais ou mentais ou com falta de experiência e / ou
conhecimentos a menos que tenham recebido supervisão
ou instruções respeitantes ao uso do dispositivo por uma
pessoa responsável pela sua segurança.
• Supervisione as crianças para assegurar que elas não
tocam o aparelho.
Símbolos neste manual do utilizador
Indicações importantes para a sua segurança estão marcadas
de forma especial. Preste incondicionalmente atenção a estas
indicações, para evitar acidentes e estragos no aparelho.
Aviso:
Chama a atenção para perigos existentes para a sua saúde
e para possíveis riscos de ferimento.
Atenção:
Chama a atenção para possíveis perigos existentes para o
aparelho ou para outros objectos.
Indicação:
Realça sugestões e informações para si.
Precauções de segurança especiais deste apa-
relho
• Coloque o aparelho sobre uma superfície estável, nivelada
e resistente.
• Não ligue o aparelho à rede eléctrica antes de montar
todos os acessórios necessários.
• Não toque nas peças rotativas e aguarde até que o aparelho pare.
• Não insira utensílios como colheres ou espátulas ou segure
mesmo com as mãos o gancho rotativo ou o gancho de
amassar durante o funcionamento! Perigo de ferimento!
• Desligue o aparelho e retire a cha da tomada eléctrica
antes de mudar os acessórios!
• Amasse só alimentos com este aparelho.
• Encha a taça de mistura com ingredientes apenas até à
marca de MAX.
• Não coloque o aparelho em funcionamento durante mais
de 2 minutos. Deixe-o arrefecer durante acerca de 2 minutos antes de o utilizar outra vez.
• Não movimente o aparelho durante o seu funcionamento;
desligue-o sempre em primeiro lugar e retire a cha da
tomada eléctrica. Transporte sempre o aparelho com as
duas mãos!
Misturadora
• Ligue o aparelho apenas quando o jarro tiver a tampa
fechada.
• Não retire a tampa durante o funcionamento!
Aviso:
► Nunca coloque as mãos na misturadora já instalada!
► Manuseie as lâminas com cuidado! Existe o risco de
ocorrerem ferimentos ao retirar a lâmina da misturadora,
ao esvaziar o recipiente da misturadora ou durante a
limpeza!
►
Não verta líquidos com mais de 60°C no jarro. Existe o risco
de ocorrerem queimaduras!
• Não utilize a misturadora sem ingredientes a misturar!
• Não sobrecarregue o aparelho! Não exceda a capacidade
máxima (1300 ml) indicada no recipiente da misturadora!
Page 26

26
Localização dos controlos
1 Braço oscilante
2 Botões de velocidade
3 Botão de Ligado/Desligado
4 Indicador de corrente e visor
5 Botão de impulse
6 Botão para levantar/baixar o braço
7 Cobertura de segurança para o eixo rotativo
8 Protecção de salpicos da taça da batedeira com abertura
para ingredientes
9 Taça da batedeira
10 Corpo
11 Base do aparelho
12 Tampa do recipiente da misturadora
13 Recipiente da misturadora (jarro)
14 Anilha vedante
15 Lâminas
16a Gancho de massa
16b Gancho de misturar
16c Batedor
16d Batedor de ovos
17 Espátula
Desembalar o aparelho
• Retire da caixa o aparelho e todos os acessórios incluídos.
• Para eliminar qualquer sujidade provocada pelo processo
de fabrico, limpe o recipiente da misturadora, a taça da
batedeira, as várias tampas e os outros acessórios em
água com sabão antes da primeira utilização.
Aviso:
As lâminas são muito aadas. Existe o risco de ocorrerem ferimentos!
• Após a limpeza, limpe cuidadosamente todas as peças.
Instalação
• Assegure-se que a cha não está ligada na tomada sempre
que substituir algum acessório. Só assim deverá instalar e
utilizar os acessórios, tal como descrito abaixo.
• Para evitar ferimentos, a tampa de segurança (7) deve ser
montada no eixo rotativo antes de utilizar a taça da batedeira.
Não é possível funcionar com o aparelho sem estas tampas!
Aviso:
Mesmo quando utilizar apenas a misturadora, a taça deve estar
montada. O utensílio inserido no braço oscilante irá sempre
rodar, mesmo se a taça da batedeira não estiver instalada!
Ligação Eléctrica
• Assegure-se que a voltagem da tomada corresponde à vol-
tagem do aparelho. Verique a placa por baixo do aparelho
para obter mais informações.
Funcionamento
Utilização da taça da batedeira e utensílios
1. Ajuste o braço oscilante apenas sem o jarro estar montado!
Prima o botão (6) e utilize a sua outra mão para levantar o
braço oscilante. Quando libertar o botão, o braço oscilante
permanecerá ou a meia altura ou em posição vertical.
2. Para utilizar o batedor (16d) em primeiro lugar monte o
resguardo de salpicos (8): segure o resguardo de salpicos
com o pescoço para cima.
Indicação:
No fundo do braço pode ver duas ranhuras: uma direita e
outra esquerda.
Deslize o resguardo de salpicos com a sua lingueta no
sentido destas ranhuras e xe-o rodando-o no sentido dos
ponteiros do relógio.
Indicação:
Quando preparar massa, acrescente ingredientes para a
taça através da abertura respectiva.
3. A abertura para os utensílios situa-se sob o braço oscilante.
Empurre a extremidade do gancho de massa / misturar ou
do batedor / batedor de ovos na abertura até encaixar. Rode
cuidadosamente ao empurrar para encaixar os utensílios mais
facilmente.
4. Coloque a taça na sua base e rode-a no sentido dos
ponteiros do relógio até car xada.
5. Agora coloque os ingredientes.
Atenção:
Não coloque demasiados ingredientes na taça misturadora; a quantidade máxima de ingredientes é de 2 kg ou de
1,3 litros respectivamente para líquidos.
6. Prima o botão (6) e utilize a sua outra mão para baixar
lentamente o braço oscilante.
Atenção:
Não permita que o braço oscilante caia!
7. Ligue a cha de alimentação a uma tomada de parede de 230 V
/ 50 Hz. A luz azul do visor indica prontidão para funcionar.
8. - Prima o botão Ligado/Desligado (3) para ligar o aparelho.
- Prima o botão “+” (2) várias vezes para seleccionar uma
velocidade. Será exibida no visor.
- Utilize o botão “-” para reduzir novamente a velocidade.
- Prima o botão “P” (5) para funcionar com o impulso
(mistura em intervalos curtos). Prima e não largue o
botão de acordo com o intervalo de tempo pretendido.
Durante o modo de impulso o aparelho funcionará à
sua velocidade mais elevada.
Indicação:
► O visor indicará o tempo do processo de mistura.
► Durante o funcionamento à velocidade mais elevada
poderão ocorrer odores. Isto não indica um mau
funcionamento do aparelho.
Page 27

27
Seleccionar o utensílio e a velocidade de acordo com a
tabela seguinte:
Produto/
preparação
Quantiadde Utensílio
Denição da
velocidade
Tempo de
funcionamento
máximo
Massa de pão
grossa (por ex.
massa de pão
com fermento,
massa folhada
na)
Mín. 0,5 kg
Gancho
de massa
1 – 4 30 seg
Mín. 2 kg 1 – 3 2 min
Massa leve
(ex. Massa
para wafers ou
pão-de-ló)
Mín. 200 ml
Gancho
de mistura
3 – 5 1 min
Mín. 1,3 l 1 – 4 2 min
Líquidos leves
(ex. Crepes,
pudim)
Mín. 200 ml
Batedor
de ovos
1 – 7 30 seg
Mín. 1,3 l
Claras
Mín. 200 ml
Batedor
de ovos
4 – 12 90 seg
Mín. 1,3 l 5 – 12 2 min
Claras em
castelo
Mín. 1 claras Batedor
de ovos
5 – 12 2 min
Mín. 8 claras
Ovos mexidos
Mín. 2 ovos
Batedor 1 – 4 1 min
Mín. 1,3 l
Quando seleccionar a velocidade observe também as referências das receitas.
Indicação:
► Funcionamento de curta duração: não coloque o
aparelho em funcionamento com massa de pão grossa
durante mais de 2 minutos e deixe-o arrefecer durante
2 minutos depois.
► Utilize o resguardo de salpicos para a massa líquida.
9. Para pausar ou parar de misturar, prima o botão Ligado/
Desligado. Desligue a cha da tomada.
10. Prima o botão (6) e utilize a sua outra mão para levantar o
braço oscilante.
Indicação:
O braço está equipado com um dispositivo de segurança.
O motor desliga-se se o braço for levantado durante o
funcionamento. Depois de baixar o braço, poderá retomar o
funcionamento, tal como descrito no ponto 8.
11. Retire a taça misturadora rodando-a no sentido contrário
ao dos ponteiros do relógio.
12. Solte a massa de pão com a espátula e retire-a da taça
misturadora.
13. Para libertar o utensílio do eixo rotativo, segure no braço
oscilante com uma mão e puxe o utensílio com a outra.
14. Limpe as peças utilizadas conforme descrito em “Limpeza”
Utilização da misturadora
Cuidado:
► Não utilize a misturadora e a taça da batedeira ao
mesmo tempo.
Aviso:
O utensílio inserido no braço oscilante irá sempre rodar.
Por motivos de segurança, a misturadora apenas poderá
funcionar quando a taça da batedeira estiver montada com a
protecção de salpicos.
1. Corte os ingredientes em pedaços pequenos antes de
misturar.
2. Coloque os ingredientes no recipiente da misturadora
(máx. 1,3 l).
3. Coloque a tampa (12) no jarro de forma segura.
Deverá vedar bem o recipiente da misturadora.
4. Retire a tampa de segurança (7) do eixo da misturadora:
utilize o polegar e o dedo médio para simultaneamente
puxar e empurrar a traseira da protecção.
Indicação:
Existem pontos rugosos de ambos os lados para que
tenha uma melhor aderência.
5. Coloque o recipiente da misturadora na base de forma a
que a marca ● por baixo do recipiente aponte para a marca
● da base. Os dois pontos deverão estar exactamente ao
lado um do outro.
6. Continue tal como descrito em “Utilização da taça da
batedeira e utensílios”, pontos 7-9.
Indicação: Esmagar cubos de gelo
A lâmina do recipiente da misturadora também é adequada
para esmagar cubos de gelo. Encha o jarro com cubos de
gelo até 1/3. Para esmagar cubos de gelo, ligue o aparelho
apenas no modo de impulso utilizando o botão “P”.
Por favor consulte as referências de velocidade / tempo na
tabela abaixo:
Produto/
preparação
Quantidade Utensílio
Denição da
velocidade
Tempo de
funcionamento
máximo
Cortar vegetais /
fruta
Mín. 200 g
Utensílio
de mistura
Impulso 30 seg
Máx. 500 g 1 – 3 2 min
Vegetais / fruta
(acrescentar
líquido)
Máx. 1,3 l
Utensílio
de mistura
Impulso 1 min
4 – 12 1 min
Cubos de gelo Máx. 400 ml
Utensílio
de mistura
Impulso
Impulso de 3 seg
para 30 seg
Receitas recomendadas
Bolo fofo (receita básica) Denição da velocidade 1 - 4
Ingredientes:
250g de manteiga ou margarina, 250g de açúcar, 1 saqueta de
açúcar de baunilha ou 1 saqueta de Citro-Back, 1 pitada de sal,
4 ovos, 500g de farinha, 1 saqueta de fermento e cerca de 1/8
litros de leite.
Preparação:
Coloque a farinha com os outros ingredientes na taça misturadora, misture com o gancho durante 30 segundos na velocidade 2, depois cerca de 1,5 minutos na velocidade 4. Unte uma
Page 28
28
forma com margarina ou coloque papel vegetal, deite aí a massa e leve a cozer. Depois de retirar o bolo do forno, conrme se
está pronto. Espete um palito no centro do bolo. Se a massa
não sair agarrada ao palito o bolo está pronto. Coloque o bolo
sobre uma grelha e deixe-o arrefecer.
Forno convencional:
Botão interruptor : 2
Aquecimento: Forno eléctrico: aquecimento partes
superior e inferior 175-200°, Forno a
gás: denição 2-3
Tempo de cozedura: 50 a 60 minutos
Pode modicar esta receita ao seu gosto, por ex. com 100g de
uvas passas ou 100g de nozes ou 100g de chocolate ralado.
A sua imaginação não tem limites.
Pão de sementes Denição da velocidade 1 - 3
Ingredientes:
500-550g de farinha, 50g de sementes, 3/8 litros de água e 1
cubo de fermento (40g), 100g de requeijão meio gordo, bem
escoado e 1 colher de chá de sal.
Para pincelar: 2 colheres de sopa de água.
Preparação:
Mergulhe as sementes em 1/8 litros de água morna. Coloque a
água morna restante (1/4 litros) na taça misturadora, desfaça o
fermento na mistura, adicione o requeijão e misture bem com o
gancho de amassar na denição da velocidade 1. O fermento
deve ser completamente dissolvido. Coloque a farinha com as
sementes humedecidas e o sal na taça misturadora. Amasse
na velocidade 1, depois mude para a velocidade 2 e amasse
durante mais 1 a 2 minutos. Cubra a massa de pão e deixe levedar num local morno durante 45 a 60 minutos. Amasse outra
vez, retire a taça misturadora e molde 16 pãezinhos a partir
da massa. Cubra a forma com papel vegetal humedecido.
Coloque os pãezinhos aí, deixe-os levedar durante 15 minutos,
pincele-os com água morna e leve-os a cozer.
Forno convencional:
Botão interruptor : 2
Aquecimento: Forno eléctrico: aquecimento partes
superior e inferior 200-220°
(Pré-aquecer durante 5 minutos),
Forno a gás: denição 2-3
Tempo de cozedura: 30 a 40 minutos
Limpeza
Pré-limpeza
Encha o recipiente da misturadora até metade com água e
ligue-o no modo de impulso durante cerca de 10 segundos.
Depois verta o líquido.
Aviso:
► Desligue sempre a cha da tomada antes de limpar.
► Não mergulhe o aparelho em água para o limpar. Isso
poderá provocar choque eléctrico ou incêndio.
Atenção:
► Não utilize escovas de arame nem outros objectos
abrasivos.
► Não utilize produtos de limpeza agressivos ou abrasivos.
• Remova o recipiente da misturadora para efectuar uma
limpeza mais profunda.
• Desmonte a misturadora depois de cada utilização.
Aviso: Risco de ferimentos!
As lâminas são muito aadas. Cuidado ao desmontar,
limpar ou montar as peças individuais.
• Desaperte a tampa roscada do jarro no sentido dos ponteiros do relógio.
• Retire a anilha vedante da tampa roscada.
Jarro (13) e tampa (12)
• Limpe o jarro e a tampa com água morna e sabão.
Anilha vedante (14) e lâminas (15)
• Passe apenas por água quente.
• Após limpar e secar, monte a misturadora pela ordem
inversa.
Taça da batedeira e acessórios
• Retire a taça da batedeira para remover resíduos no eixo
rotativo.
• Limpe as peças amovíveis que estejam sujas com massa
com água e sabão.
Atenção:
As peças não são adequadas para a máquina de lavar
louça. As peças poderão quebrar-se ou descolorar-se sob a
inuência de calor e produtos de limpeza agressivos.
Corpo
• Utilize um pano húmido para limpar a superfície do aparelho.
Resolução de Problemas
• O aparelho não funciona.
Solução:
Verique a ligação da cha na corrente.
Outras causas possíveis:
O aparelho está equipado com dois dispositivos de
segurança.
Estes evitam uma ligação acidental do motor.
Solução:
Verique a posição correcta de:
Braço oscilante (1) ○
recipiente da batedeira (13) ou ○
tampa de segurança (7). ○
Page 29

29
Protecção de sobreaquecimento
• O aparelho possui um sistema de protecção contra
sobreaquecimento. No caso de ocorrer uma sobrecarga,
este sistema será despoletado. O aparelho cará assim
impossibilitado de funcionar. Desligue a cha da tomada.
• Permita que o aparelho arrefeça
completamente e só então prima o botão
de reinício (ver imagem) para utilizar novamente o robô de cozinha.
Emissão de ruído
O nível de pressão do ruído foi medido através da audição
humana (LpA) de acordo com a norma DIN EN ISO 3744.
Nível de pressão do ruído determinado: 85 dB (A) (sem limite)
Especicações Técnicas
Modelo: ........................................................................... KM 3354
Tensão nominal/frequência: ............................ 220-240 V / 50 Hz
Consumo da alimentação: ................................................. 600 W
Classe de protecção: ..................................................................II
Funcionamento de curta duração: ................................2 minutos
Peso líquido: ......................................................................4,35 kg
Reserva-se o direito de alterações!
Este aparelho está em conformidade com todas as actuais
directivas da CEE, tais como inocuidade electromagnética e
directiva sobre baixa tensão, e fabricado de acordo com as
mais novas prescrições de segurança técnica.
Signicado do símbolo “contentor do lixo”
Poupe o nosso ambiente, não deite aparelhos eléctricos para o
lixo doméstico.
Elimine os aparelhos eléctricos usados ou avariados através
dos pontos de recolha municipais.
Ajude a evitar potenciais impactos no ambiente e na saúde
através da eliminação incorrecta de resíduos.
Desta forma, poderá contribuir para a reciclagem e outras
formas de utilização de aparelhos eléctricos e electrónicos
usados.
A sua autarquia oferece informações sobre os pontos de
recolha.
Page 30
30
Linee guida generali sulla sicurezza
Prima di usare questo dispositivo, leggere attentamente il
manuale dell’utente e conservarlo con il Certicato di Garanzia,
lo scontrino e, se possibile, la confezione originale. Se il dispositivo viene consegnato a terzi, consegnare anche il manuale
dell’utente.
• Utilizzare l’apparecchio soltanto per gli scopi previsti e per
uso privato. Questo apparecchio non deve esser utilizzato
per scopi commerciali.
Non utilizzare l’apparecchio in esterni. Proteggerlo da
calore, luce solare diretta, umidità (non immergerlo mai in
liquidi) e bordi aflati. Non toccare l’apparecchio con le mani
bagnate. Se l’apparecchio si bagna, slare immediatamente la spina dalla presa.
• Spegnere sempre l’apparecchio e slare la spina dalla
presa (tirandolo per la presa e non per il cavo) quando non
si utilizza l’apparecchio o quando si installano accessori su
di esso, nonché durante la pulizia e in caso di anomalie.
• Non lasciare l’apparecchio incustodito durante il funzionamento. Spegnere sempre l’apparecchio quando si esce
dalla stanza e slare la spina dalla presa.
• Controllare periodicamente che apparecchio e cavo non
siano danneggiati. Non utilizzare l’apparecchio in caso di
anomalie.
• Non tentare di riparare l’apparecchio da soli; contattare
invece il personale autorizzato. Per evitare pericoli, un cavo
di rete danneggiato deve essere sostituito con un cavo
dello stesso tipo dal produttore, la nostra assistenza clienti
oppure un altro specialista qualicato.
• Utilizzare soltanto parti originali.
• Attenersi alle istruzioni riportate di seguito “istruzioni speciali
di sicurezza”.
Bambini e persone disabili
• Per ragioni di sicurezza tenere qualsiasi parte dell’imballaggio (sacchetti di plastica, cartilagine, spugne ecc.) fuori dalla
portata dei bambini.
Avviso!
Non lasciare che i bambini giochino con le pellicole in
quanto c’è pericolo di soffocamento!
• L’apparecchio non deve essere utilizzato da individui
(compresi bambini) con ridotte abilità siche, sensoriali
oppure mentali o con esperienza/conoscenza insufciente dell’apparecchio, se non dietro supervisione oppure
istruzioni sull’uso dell’apparecchio da parte del personale
responsabile della loro sicurezza.
• Controllare che i bambini non giochino con l’apparecchio.
Simboli nel manuale dell’utente
Note importanti per la sicurezza sono segnate in modo chiaro.
Fare attenzione ad evitare incidenti o danneggiare il dispositivo:
Avviso:
Avvertimenti di pericoli alla salute e indica rischi potenziali di
lesioni.
Attenzione:
Indica pericoli potenziali per il dispositivo e altri oggetti.
Nota:
Sottolinea consigli e informazioni.
Precauzioni di sicurezza speciali per questo
apparecchio
• Collocare l’apparecchio su una supercie piana, non
inclinata e stabile.
• Non collegare l’apparecchio all’alimentazione prima di aver
inserito gli accessori.
• Non toccare le parti in movimento e attendere nché l’apparecchio non è completamente fermo.
• Non inserire utensili come cucchiai o spatole né tenere
ferme gli sbattitori rotanti o il gancio d’impasto quando
l’apparecchio è in funzione. Pericolo di lesioni!
• Spegnere l’apparecchio e scollegarlo dall’alimentazione
prima di sostituire gli accessori.
• L’apparecchio deve essere utilizzato esclusivamente per
alimenti.
• Riempire il contenitore di miscelazione con ingredienti
soltanto no al segno MAX.
• Non far funzionare l’apparecchio per più di 2 minuti consecutive. Lasciarlo raffreddare per circa 2 minuti prima di
rimetterlo in funzione.
• Non spostare l’apparecchio quando esso è in funzione;
spegnerlo e scollegarlo dall’alimentazione. Afferrare sempre
l’apparecchio con entrambe le mani!
Mixer
• Accendere l’apparecchio soltanto quando il contenitore è
chiuso con il coperchio.
• Non aprire il coperchio quando l’apparecchio è in funzione!
Avviso:
► Non inserire mai le mani all’interno dell’apparecchio quan-
do esso è in funzione.
► Montare le lame con cura. Pericolo di lesioni durante la
rimozione della lama dal contenitore di miscelazione, lo
svuotamento del contenitore di miscelazione e la pulizia.
►
Non versare liquidi a temperatura superiore a 60°C nel
contenitore. Pericolo di ustioni!
• Non azionare il mixer senza i relativi ingredienti!
• Non sovraccaricare! Non superare la portata max (1300 ml)
indicate sul contenitore di miscelazione!
Posizione dei comandi
1 Braccio pivottante
2 Tasti velocità
3 Interruttore ON/OFF
4 Indicatore alimentazione e display
5 Interruttore impulsi
6 Interruttore per sollevamento/discesa braccio
7 Coperchio di sicurezza albero di azionamento
Page 31

31
8 paraspruzzi sul contenitore di miscelazione con beccuc-
cio di riempimento
9 Contenitore di miscelazione
10 Gruppo
11 Base apparecchio
12 Coperchio contenitore di miscelazione
13 Contenitore di miscelazione (caraffa)
14 Anello di tenuta
15 Gruppo lame
16a Gancio per impastare
16b Gancio per mescolare
16c Sbattitore
16d Frusta
17 Raschiaimpasto
Disimballaggio dell’apparecchio
• Estrarre l’apparecchio e gli accessori allegati dall’imballaggio.
• Per eliminare le particelle contaminanti formatesi durante il
processo di produzione, lavare il contenitore di miscelazione, il gruppo di miscelazione, I vari coperchi e gli altri accessori in una soluzione di acqua saponata prima di utilizzare
l’apparecchio per la prima volta.
Avviso:
Le lame del gruppo lame sono molto afliate. Pericolo di
lesioni.
• Asciugare accuratamente tutte le parti dopo averle pulite.
Installazione
• Controllare che l’apparecchio non sia collegato all’alimen-
tazione in sede di sostituzione degli accessori. Soltanto in
questo caso è possibile installare e utilizzare gli accessori
come descritto di seguito.
• Per evitare lesioni, installare il coperchio di sicurezza (7)
sull’albero di azionamento dell’azionamento del mixer
prima di utilizzare il gruppo di miscelazione. Non è possibile
mettere in funzione l’apparecchio senza questi coperchi!
Avviso:
Il gruppo deve essere installato anche quando si utilizza
soltanto il mixer. L’attrezzo inserito nel braccio pivottante
ruota sempre, anche se il gruppo di miscelazione non è stato
installato.
Collegamento elettrico
• Controllare che la tensione domestica corrisponda a quella
dell’apparecchio. Controllare la targhetta nominale sulla
parte inferiore dell’apparecchio per informazioni dettagliate.
Funzionamento
Utilizzo del gruppo e degli attrezzi di miscelazione
1. Regolare il braccio pivottante senza il contenitore installato.
Premere il tasto (6) e sollevare il braccio pivottante con
l’altra mano. Quando si rilascia il tasto, il braccio pivottante
si ferma a metà altezza oppure in posizione verticale.
2. Per utilizzare lo sbattitore (16c): montare la protezione (8):
tenere la protezione con il bordo verso l’alto.
Nota:
Sul fondo del braccio è possibile vedere due alloggiamenti: destro e sinistro.
Sistemare le linguette della protezione negli alloggiamenti e
bloccarle agendo in senso orario.
Nota:
Quando si prepara l’impasto, aggiungere gli ingredienti dal
beccuccio di riempimentol.
3. L’apertura per l’attacco dell’attrezzo si trova sul lato inferiore
del braccio pivottante. Premere la parte terminale del
gancio per impastare/ mescolare o della frusta/dello sbattitore nell’apertura nché non scatta in posizione. Girare
delicatamente quando si preme l’accessorio per ssare le
parti più facilmente.
4. Collocare la ciotola nell’alloggiamento e girarla in senso
orario no al ne-corsa.
5. Riempire la ciotola con gli ingredienti.
Attenzione:
Non riempire eccessivamente il contenitore; il peso max
degli ingredienti è 2kg o 1,3 l se si tratta di liquidi.
6. Premere il tasto (6) e abbassare delicatamente con l’altra
man oil braccio pivottante.
Attenzione:
Non lasciare cadere il braccio pivottante!
7. Collegare la spina a una presa 230 V/5 0Hz correttamente
installata. La spia blu sul display indica che l’apparecchio
può essere messo in funzione.
8. - Premere l’interruttore ON/OFF (3) per accendere l’appa-
recchio.
- Premere il tasto “+” (2) varie volte per selezionare un’im-
postazione velocità, che verrà visualizzata sul display.
- Ridurre nuovamente la velocità con il tasto “-”.
- Premere il tasto “P” (5) per il funzionamento a impulsi
(mescolare per brevi intervalli). Tenere premuto il tasto
per il tempo corrispondente all’intervallo desiderato. Durante il funzionamento a impulsi l’apparecchio funziona
alla velocità max.
Nota:
► Il display indica il tempo del processo di miscelazione.
► Durante il funzionamento a velocità max, possono
sprigionarsi odori. Non si tratta di anomalia
dell’apparecchio.
Selezionare attrezzo e velocità secondo la seguente tabella:
Prodotto/
preparazione
quantità Attrezzo
Imp.
velocità
Tempo di es.
max
Impasto duro (come
impasto con lievito,
pasticceria piccola)
Min. 0,5 kg
Gancio per
impastare
1 – 4 30 sec
Max. 2 kg 1 – 3 2 min
Impasto morbido
(come per wafer o
dolci al cucchiaio)
Min. 200 ml
Gancio per
mescolare
3 – 5 1 min
Max. 1,3 l 1 – 4 2 min
Page 32

32
Prodotto/
preparazione
quantità Attrezzo
Imp.
velocità
Tempo di es.
max
Liquidi densi
(crêpes, budino)
Min. 200 ml
Frusta 1 – 7 30 sec
Max. 1,3 l
Panna
Min. 200 ml
Frusta
4 – 12 90 sec
Max. 1,3 l 5 – 12 2 min
Albumi montati a
neve
Min.
1 albume
Frusta 5 – 12 2 min
Max.
8 albumi
Uova sbattute
Min. 2 uova
Sbattitore 1 – 4 1 min
Max. 1,3 l
Quando si seleziona la velocità, controllare anche le istruzioni
riportate nelle ricette.
Nota:
► Funzionamento a breve termine: non far funzionare
l’apparecchio nel modo impasto duro per più di 2 minuti.
Lasciarlo raffreddare per 2 minuti dopo lo spegnimento.
► Utilizzare la protezione se si lavora con impasti liquidi.
9. Per mettere in pausa o interrompere la miscelazione,
premere il tasto ON/OFF. Scollegare l’alimentazione.
10. Premere il tasto (6) e sollevare il braccio pivottante con l’altra
mano.
Nota:
Il braccio è dotato di interruttore di sicurezza. Il motorino si
spegne se il braccio viene sollevato quando l’apparecchio è in
funzione. Dopo aver abbassato il braccio è possibile mettere
nuovamente in funzione l’apparecchio come indicato al punto 8.
11. Rimuovere la ciotola mixer girandola in senso anti-orario.
12. Staccare l’impasto con la spatola e rimuoverlo dalla ciotola
mixer.
13. Per staccare l’attrezzo dal braccio di azionamento, tenere il
braccio pivottante con una mano e tirare l’attrezzo con l’altra
mano.
14. Pulire le parti usate come descritto nella sezione “Pulizia”.
Utilizzo dell’attacco di miscelazione
Attenzione:
► Non utilizzare attacco di miscelazione e gruppo di misce-
lazione allo stesso tempo.
Avviso:
L’attrezzo inserito nel braccio pivottante ruota sempre. Per
motivi di sicurezza, il mixer può essere messo in funzione
soltanto quando il gruppo di miscelazione è montato con il
paraspruzzi.
1. Tagliare gli ingredienti in pezzi piccolo prima di effettuare la
miscelazione.
2. Inserire gli ingredienti nel contenitore di miscelazione
(max. 1,3 l).
3. FIssare fermamente il coperchio (12) sul contenitore.
Il contenitore di miscelazione deve risultare chiuso a tenuta.
4. Rimuovere il coperchio di sicurezza (7) dall’azionamento
del mixer. Utilizzare il pollice e il medio di una mano per
tirare e spingere contemporaneamente il bordo posteriore
del coperchio.
Nota:
Le scanalature sulle parti sinistra e destra dei bordi del
coperchio assicurano una presa migliore.
5. Collocare il contenitore di miscelazione sulla base in modo
che il segno ● sul lato inferiore del contenitore sia puntato
verso il segno ● sulla base. I due segni devono trovarsi uno
esattamente accanto all’altro.
6. Continuare come descritto nella sezione “Utilizzo del gruppo e degli attrezzi di miscelazione, punti 7-9”.
Nota: triturazione di cubetti di ghiaccio
La lama del contenitore di miscelazione può essere utilizzata
anche per triturare cubetti di ghiaccio. Riempire il contenitore
di cubetti di ghiaccio per 1/3. Far funzionare l’apparecchio nel
modo a impulsi con il tasto “P” per la triturazione di cubetti di
ghiaccio.
Fare riferimento a impostazioni di velocità/tempo nella
tabella sottostante:
Prodotto/
preparazione
quantità Attrezzo
Impostazione
velocità
Tempo es.
max
Verdure/frutta a
pezzi
Min. 200 g
Attacco di
miscelazione
Impulso 30 sec
Max. 500 g 1 – 3 2 min
Purea di verdure/
frutta (con
aggiunta di liquidi)
Max. 1,3 l
Attacco di
miscelazione
Impulso 1 min
4 – 12 1 min
Cubetti di
ghiaccio
Max. 400 ml
Attacco di
miscelazione
Impulso
3 sec impulsi
per 30 sec
Ricette consigliate
Impasto al cucchiaio (Ricetta base)
Impostazione velocità 1 - 4
Ingredienti:
250 g di burro morbido a margarina, 250 g di zucchero, 1 bustina
di zucchero vanigliato o 1 bustina di aroma di limone, 1 presa
di sale, 4 uova, 500 g di farina, 1 bustina di lievito, circa 1/8 l di
latte.
Preparazione:
Mettere la farina con gli altri ingredienti nella ciotola mixer,
mescolare con il gancio mixer per 30 secondi a velocità 2, quindi circa 1,5 minuti a velocità 4. Imburrare lo stampo o coprirne
la base con carta da forno, depositarvi l’impasto e infornarlo.
Prima di estrarre l’impasto dal forno, controllare se è pronto
inlando uno stuzzicadenti di legno al centro. Se l’impasto non
si attacca la torta è pronta. Girare l’impasto su una griglia e
lasciarlo raffreddare.
Forno convenzionale:
Velocità: 2
Calore: Forno elettrico: calore sopra e sotto 175-200°,
forno a gas: impostazione 2-3
Durata: 50-60 minuti
Page 33

33
È possibile modicare la ricotta a seconda del gusto, cioè con
100 g di uvetta o 100 g di noci o 100 g di cioccolata grattugiata.
Non ci sono limiti all’immaginazione.
Involtini ai semi di lino Impostazione velocità 1 - 3
Ingredienti:
500-550 g di farina, 50 g di semi di lino, 3/8 l d’acqua, 1 cubetto
di lievito (40 g), 100 g di cagliata magra ben spurgata, 1 cucchiaino da te di sale.
Per la rinitura: 2 cucchiai d’acqua.
Preparazione:
Ammollare i semi di lino in 1/8 l di acqua tiepida. Mettere la
rimanente acqua tiepida (1/4 di l) nella ciotola mixer, aggiungere il lievito, la cagliata e mescolare bene con il gancio impasto
con impostazione velocità 1. Il lievito deve sciogliersi completamente, Mettere la farina con i semi di lino ammollati e il sale
nella ciotola mixer. Impastare a velocità 1, quindi passare a
velocità 2 e impastare per altri 1-2 minuti. Coprire l’impasto e
lasciarlo riposare in un luogo caldo per 45-60 minuti. Impastare
nuovamente, estrarre dalla ciotola mixer e ritagliare 16 involtini
di pane. Coprire il vassoio con carta da dolci. Collocarvi sopra
gli involtini, lasciarli riposare per 15 minuti, pennellarli con
acqua tiepida e informare.
Forno convenzionale:
Velocità: 2
Calore: Forno elettrico: calore sopra e sotto 200-220°
(Preriscaldato per 5 minuti),
Forno a gas: impostazione 2-3
Durata: 30-40 minuti
Pulizia
Pre-pulizia
Riempire il contenitore di miscelazione per metà d’acqua e
applicare il modo a impulsi per circa 10 sec. Rimuovere quindi
il liquido.
Avviso:
► Scollegare sempre l’apparecchio dall’alimentazione prima
di effettuare la pulizia.
► Non immergere l’apparecchio in acqua per pulirlo.
Pericolo di scosse elettriche o incendi.
Attenzione:
► Non utilizzare spazzole metalliche o altri oggetti abrasivi.
► Non utilizzare agenti di pulizia abrasivi.
• Rimuovere il contenitore di miscelazione per una pulizia più
accurata.
• Smontare il mixer dopo l’uso.
Avviso: pericolo di lesioni
Le lame del gruppo lame sono molto afliate. Prestare
attenzione in sede di smontaggio, pulizia o montaggio
delle single parti.
• Svitare il cappuccino della vite dal contenitore agendo in
senso orario.
• Rimuovere l’anello di tenuta dal cappuccino della vite.
Contenitore (13) e coperchio (12)
• Lavare contenitore e coperchio in una soluzione d’acqua
saponata.
Anello di tenuta (14) e gruppo lame (15)
• Risciacquare brevemente in acqua calda.
• Dopo aver effettuato pulizia e asciugatura, rimontare il
mixer nell’ordine inverso.
Contenitore di miscelazione e accessori
• Rimuovere il contenitore di miscelazione per rimuovere I
residui dall’albero di azionamento.
• Pulire le parti amovibili sporche d’impasto in una soluzione
di acqua e sapone.
Attenzione:
Le parti non devono essere lavate in una lavastoviglie. Le
parti possono deformarsi o scolorarsi con l’azione di agenti
detergenti caldi e aggressive.
Gruppo
• Utilizzare un panno leggermente umido per pulire la supercie dell’apparecchio.
Ricerca dei guasti
• Apparecchio non funzionante.
Soluzione:
Controllare il collegamento all’alimentazione.
Altre possibili cause:
L’apparecchio è dotato di due interruttori di sicurezza.
Essi impediscono l’accensione accidentale del motorino.
Soluzione:
Controllare il corretto posizionamento di
braccio pivottante (1) ○
contenitore di miscelazione (13) o ○
coperchio di sicurezza (7). ○
Termica
• L’apparecchio dispone di una termica. In caso di sovraccarico, la termica scatta e l’apparecchio non può essere
azionato. Scollegare l’apparecchio dall’alimentazione.
Page 34

34
• Lasciar raffreddare completamente l’apparecchio e premere il tasto Reset sulla
parte inferiore dell’apparecchio (vedere
g.) per rimettere in funzione il robot da
cucina.
Emissioni acustiche
Il livello di pressione acustica è stato misurato all’orecchio di un
utente (LpA) secondo la norma DIN EN ISO 3744.
Livello di pressione acustica determinato: 85 dB(A) (senza
limiti)
Speciche tecniche
Modello: ..........................................................................KM 3354
Tensione/frequenza nominale: ........................ 220-240 V / 50 Hz
Consumo energetico: ......................................................... 600 W
Classe di protezione: .................................................................. II
Funzionamento breve: .....................................................2 minuti
Peso netto: .........................................................................4,35 kg
Soggetto a modiche senza preavviso!
Questo dispositivo risponde a tutte le direttive della CE, come
la direttiva sulla compatibilità elettromagnetica e quella sul
basso voltaggio ed è prodotto secondo le più recenti norme di
sicurezza.
Signicato del simbolo “Cassonetto con ruote”
Rispettare l’ambiente, non smaltire dispositivi elettrici nei riuti
domestici.
Lo smaltimento di dispositivi obsoleti o difettosi deve avvenire
tramite consegna presso punti di raccolta locali.
Aiutate ad evitare pericoli potenziali per l’ambiente e la nostra
salute tramite uno smaltimento non corretto.
Voi contribuite al riciclaggio e altro forme di utilizzo di dispositivi
elettrici e elettronici.
Il vostro comune è in grado di fornirvi informazioni sui punti di
raccolta.
Page 35

35
General Safety Guidelines
Before using this device, carefully read this user manual and
keep it together with the Warranty Certicate, cashier receipt
and if possible, the original package inclusive its interior packing. If you hand on the device to any third person, include the
user manual as well.
• Use the device for private and its intended purpose only.
The device is not intended for commercial use.
Do not use the device outdoors. Protect it from heat, direct
sunlight, humidity (do not immerse into liquids under any
circumstances) and sharp edges. Do not use the device
with wet hands. If the device gets wet, unplug it immediately.
• Always switch off and unplug the device (pull the plug, not
the cable) when you do not use the device, or when you
attach accessories, during cleaning or malfunctioning.
• Do not leave the device unattended during operation.
Always switch off the device when leaving the room. Unplug
the device.
• Regularly check the device and cable for signs of damage.
Do not continue to operate the device in case of damage.
• Do not repair the device by yourself. Please contact authorized personnel. In order to avoid hazards, a damaged
mains cable must be replaced with an equivalent cable by
the manufacturer, our customer service or any other qualied specialist.
• Do only use original parts.
• Please observe the following “Special safety instructions”.
Children and disabled persons
• For the safety of your children, keep any packing parts
(plastic bags, cartilage, Styrofoam etc.) out of their reach.
Warning!
Don’t let small children play with foils for danger of
suffocation!
• This device is not intended for use by persons (including
children) with reduced physical, sensory or mental capabilities, or lack of experience and/or knowledge unless they
have been given supervision or instructions concerning the
use of the device by a person responsible for their safety.
• Supervise children to ensure they do not play with the
device.
Symbols in this user manual
Important notes for your safety are marked distinctively. Pay
absolute attention to them to avoid accidents and damage to
the device:
Warning:
Warns of dangers for your health and indicates potential risks
of injury.
Caution:
Indicates potential dangers for the device or other objects.
Note:
Highlights tips and information for you.
Special Safety Precautions for this Device
• Place the device on a at, level and sturdy surface.
• Do not connect the device to mains power supply before
attaching all necessary accessories.
• Do not touch moving parts and wait until the appliances
come to a standstill.
• Do not insert utensils such as spoons or spatulas or even
take hold with your hands of the rotating whisk or kneading
hook during operation! Danger of injury!
• Turn the appliance off and disconnect from mains power
supply before changing accessories!
• Only process foodstuffs with this device.
• Fill mixing bowl with ingredients only till MAX marking.
• Do not operate the appliance for more than 2 minutes. Let it
cool down for approx. 2 minutes before using it again.
• Do not move the appliance during operation; always turn
it off rst and disconnect from mains power supply. Always
carry the appliance with both hands!
Mixer
• Only turn on the device when the carafe is closed with the lid.
• Do not remove the lid during operation!
Warning:
► Never reach with your hands into the readily installed
mixer!
► Handle the blades with care! Risk of injury when remo-
ving the blade from the mixing container, when emptying
the mixing container or during cleaning!
► Do not pour liquids hotter than 60°C into the carafe. Risk
of burns!
• Do not use the mixer without ingredients to be mixed!
• Do not overload! Do not exceed the maximum capacity
(1300 ml) indicated on the mixing container!
Location of Controls
1 Pivoting arm
2 Speed buttons
3 On/Off switch
4 Power indicator and display
5 Pulse switch
6 Switch for lifting/lowering the arm
7 Safety cover for drive shaft
8 Splash guard on mixing bowl with ller spout
9 Mixing bowl
10 Enclosure
11 Device base
12 Lid for mixing container
13 Mixing container (carafe)
14 Sealing ring
15 Blade assembly
16a Dough hook
16b Stirring hook
16c Beater
16d Egg whisk
17 Dough scraper
Page 36

36
Unpacking the device
• Remove the device and all included accessories from the box.
• In order to remove any contamination caused during the
manufacturing process, clean the mixing container, mixing
bowl, the various lids and other accessories in soapy water
before rst time use.
Warning:
The blades of the blade assembly are very sharp. There
is a risk of injury!
• After cleaning, thoroughly dry all parts.
Installation
• Make sure the mains plug is not connected when replacing any accessory. Only then you may install and use the
accessories as described below.
• In order to avoid injuries, the safety lid (7) must be mounted
onto the drive shaft of the mixer drive before using the mixing bowl. Operation without these lids is not possible!
Warning:
Even when only using the mixer, the bowl must be mounted.
The tool inserted in the pivoting arm will always rotate, even if
the mixing bowl is not installed!
Electric Connection
• Make sure the mains voltage to be connected to matches
the voltage of the device. Check the rating plate on the
bottom of the device for detailed information.
Operation
Using the mixing bowl and tools
1. Only adjust the pivoting arm without the carafe being attached! Press the button (6) and use your other hand to lift
up the pivoting arm. When releasing the button, the pivoting
arm will either rest at half height or in vertical position.
2. For using the whisk (16d) rst attach splashguard (8):
Hold splashguard with collar upward.
Note:
At the bottom of the arm you can see two grooves left and
right.
Slide splashguard with its tab into these grooves and lock
by turning clockwise.
Note:
When preparing dough, add ingredients through the ller
spout to the bowl.
3. The opening for the tool attachment is located on the bottom side of the pivoting arm. Push the end of the dough/
stirring hook or of the beater/egg whisk into the opening
until it clicks into place. Carefully twist when pushing in
order to attach the parts more easily.
4. Place the bowl in its seat and turn clockwise all the way to
the stop.
5. Now ll in your ingredients.
Caution:
Do not overll the appliance, the max. amount of ingredients is 2kg or 1.3 litres respectively for liquids.
6. Press the button (6) and use your other hand to slowly
lower the pivoting arm.
Caution:
Do not let the pivoting arm fall downwards!
7. Connect the mains plug to a properly installed 230V / 50Hz
wall outlet.The blue lamp in the display indicates the readiness for operation.
8. - Press the On/Off switch (3) to turn on the device.
- Press the “+” button (2) several times to select a speed
setting. It will be shown on the display.
- Use the “-” button to reduce the speed again.
- Press the “P” button (5) for pulse operation (mixing in
short intervals). Press and hold the button according
to the desired interval length. During pulse mode the
device will operate at its highest speed setting.
Note:
► The display will indicate the time of the mixing process.
► During operation at highest speed odor might occur. This
is no malfunction of the device.
Select tool and speed according to the following table:
Product/ preparation amount Tool
Speed
setting
Max. operating
time
Heavy dough (e.g.
yeast dough, short
pastry)
Min. 0.5 kg
Dough
hook
1 – 4 30 sec
Max. 2 kg 1 – 3 2 min
Light dough
(e.g. dough for wafers
or sponge mixture)
Min. 200 ml
Stirring
hook
3 – 5 1 min
Max. 1.3 l 1 – 4 2 min
Light liquids
(e.g. Crêpes, pudding)
Min. 200 ml
Egg whisk 1 – 7 30 sec
Max. 1.3 l
Cream
Min. 200 ml
Egg whisk
4 – 12 90 sec
Max. 1.3 l 5 – 12 2 min
Beaten egg whites
Min. 1 egg
white
Egg whisk 5 – 12 2 min
Max. 8 egg
whites
Scrambled eggs
Min. 2 eggs
Beater 1 – 4 1 min
Max. 1.3 l
When selecting the speed also observe the references in the
recipes.
Note:
► Short-term operation: Do not operate the appliance to
operate with heavy dough for more than 2 minutes and
allow it to cool down for 2 minutes afterwards.
► Use the splashguard for liquid dough.
9. In order to pause or stop mixing, press the On/Off switch.
Disconnect the mains plug.
10. Press the switch (6) and use the other hand to lift the pivoting arm.
Page 37

37
Note:
The arm is equipped with a safety switch. The motor turns off
if the arm is tilted up during operation. After lowering the arm,
you may start operation again as described under point 8.
11. Remove the mixing bowl by turning it anti-clockwise.
12. Loosen the dough with the spatula and remove from mixing
bowl.
13. In order to loosen the tool from the drive shaft, hold the
pivoting arm with one hand and pull the tool with the other
hand.
14. Clean the used parts as described under “Cleaning”.
Using the mixing attachment
Caution:
► Do not use mixing attachment and mixing bowl at the
same time.
Warning:
The tool inserted in the pivoting arm will always rotate. For
safety reasons, the mixer may only be operated when the
mixing bowl is mounted with the splashing guard.
1. Cut the ingredients into smaller pieces before mixing.
2. Put the ingredients into the mixing container (max. 1.3 l).
3. Push the lid (12) securely onto the carafe. It must close the
mixing container tightly.
4. Remove the safety lid (7) from the mixer drive: Use the
thumb and middle nger of one hand to simultaneously
push and pull the rear edge of the cover.
Note:
There are roughened spots left and right on the cover
edges for you to have a better grip.
5. Place the mixing container onto the base in such a way that
the ● marking on the bottom side of the container points to
● marking on the base. The two dots must be exactly next
to each other.
6. Continue as described under “Using the mixing bowl and
tools, points 7-9”.
Note: Crushing ice cubes
The blade of the mixing container is also suitable for crushing
ice cubes. Fill the carafe to 1/3 with ice cubes. Only operate
the device in pulse mode using the “P” button for crushing ice
cubes.
Please refer to the speed / time settings in the table below:
Product/
preparation
amount Tool
Speed
setting
Max.
operating time
Chopping vegetables
/ fruits
Min. 200 g
Mixing
attachment
Pulse 30 sec
Max. 500 g 1 – 3 2 min
Pureeing vegetables /
fruits (adding liquids)
Max. 1.3 l
Mixing
attachment
Pulse 1 min
4 – 12 1 min
Ice cubes Max. 400 ml
Mixing
attachment
Pulse
3 sec pulse for
30 sec
Recommended Recipes
Sponge Mixture (Basic Recipe) Speed setting 1 - 4
Ingredients:
250g soft butter or margarine, 250g sugar, 1 sachet vanilla
sugar or 1 sachet Citro-Back, 1 pinch of salt, 4 eggs, 500g
wheat our, 1 sachet baking powder, approx. 1/8-litre milk.
Preparation:
Place wheat our with the other ingredients in mixing bowl, mix
with mixing hook for 30 seconds at speed 2, then approx. 1.5
minutes at speed 4. Grease baking tin or lay out with baking
paper, ll in dough and bake. Before the cake is removed from
the oven, test to see if it is done. With a sharp wooden stick
pierce the centre of the cake. If no mixture sticks to it, the cake
is cooked. Turn the cake on to a cake grid and allow to cool.
Conventional Oven:
Slide: 2
Heat: Electric oven: top and bottom heat 175-200°,
gas oven: setting 2-3
Baking time: 50-60 minutes
You can modify this recipe according to your taste, e.g. with
100g raisins or 100g nuts or 100g grated chocolate. Nothing
limits your imagination.
Linseed Rolls Speed setting 1 - 3
Ingredients:
500-550g wheat our, 50g linseed, 3/8-litre water, 1 cube yeast
(40g), 100g low-fat curd, well drained, 1 teaspoon salt.
For brushing: 2 tablespoons water
Preparation:
Soak linseed in 1/8-litre lukewarm water. Place the remaining
lukewarm water (1/4-litre) in mixing bowl, crumble the yeast into
it, add curd and mix well with kneading hook on speed setting
1. The yeast must be completely dissolved. Place our with
the soaked linseed and salt in mixing bowl. Knead on speed 1,
then change to speed 2 and knead another 1-2 minutes. Cover
dough and prove in a warm place for 45-60 minutes. Knead
again, take out of mixing bowl and shape 16 bread rolls from it.
Cover baking tray with wet baking paper. Place rolls on it, prove
for 15 minutes, brush with lukewarm water and bake.
Conventional Oven:
Slide: 2
Heat: Electric oven: top and bottom heat 200-220°
(preheat for 5 minutes),
Gas oven: setting 2-3
Baking time: 30-40 minutes
Cleaning
Pre-cleaning
Fill the mixing container half with water and operate in pulse
mode for approx. 10 seconds. Pour the liquid away afterwards.
Page 38

38
Warning:
► Always disconnect the mains plug before cleaning.
► Do not immerse the device into water for cleaning. This
could cause electric shock or re.
Caution:
► Do not use wire brushes or other abrasive objects.
► Do not use aggressive or abrasive cleaning agents.
• Remove the mixing container for a more thorough cleaning.
• Disassemble the mixer after each use.
Warning: Risk of injury!
The blades of the blade assembly are very sharp. Be careful
when disassembling, cleaning or mounting single parts.
• Unfasten the screw cap clockwise from the carafe.
• Remove the sealing ring from the screw cap.
Carafe (13) and lid (12)
• Clean the carafe and lid in warm soapy water.
Sealing ring (14) and blade assembly (15)
• Only rinse shortly under hot water.
• After cleaning and drying, assemble your mixer in reverse
order.
Mixing bowl and accessories
• Remove the mixing bowl for you to remove residue on the
drive shaft.
• Clean detachable parts that have been stained by dough in
soapy water.
Caution:
The parts are not suitable for dishwasher cleaning. The parts
could warp or discolor under inuence of heat and aggressive
cleaning agents.
Enclosure
• Use a slightly damp cloth for cleaning the surface of the
device.
Troubleshooting
• Device not functioning.
Solution:
Check the mains connection.
Other possible causes:
Your device is equipped with two safety switches.
They prevent the accidental start of the motor.
Solution:
Check for correct position of the
pivoting arm (1) ○
mixing container (13) or ○
safety lid (7). ○
Overheat protection
• The device features an overheat protection system. In case
of overcharge, this system will be triggered. The device will
then not be ready for operation. Disconnect the plug from
the mains.
• Let the device cool down completely, and
only then press the reset button on the
bottom of the device (see g.) in order to
use the kitchen machine again.
Noise Emission
The sound pressure level was measured at the ear of a user
(LpA) in compliance with DIN EN ISO 3744.
Determined sound pressure level: 85 dB(A) (no limit)
Technical Specications
Model: .............................................................................KM 3354
Rated voltage/frequency: ................................. 220-240V / 50Hz
Power consumption: ............................................................ 600W
Protection class: ..........................................................................II
Short operation: ............................................................. 2 minutes
Net weight: ..........................................................................4.35kg
Subject to change without prior notice!
This device complies with all current CE directives, such as
electromagnetic compatibility and low voltage directive and is
manufactured according to the latest safety regulations.
Meaning of the “Wheelie Bin” Symbol
Take care of our environment, do not dispose of electrical applicances via the household waste.
Dispose of obsolete or defective electrical appliances via
municipal collection points.
Please help to avoid potential environmental and health
impacts through improper waste disposal.
You contribute to recycling and other forms of utilization of old
electric and electronic appliances.
Your municipality provides you with information about collecting
points.
Page 39

39
Generalne wskazówki dotyczące bezpieczeństwa
Przed użyciem urządzenia, należy dokładnie przeczytać
podręcznik użytkowania i zachować go wraz z gwarancją,
paragonem oraz w razie możliwości wraz z oryginalnym
opakowaniem zawierającym wewnętrzne elementy. W razie
przekazania urządzenia osobom trzecim, należy dołączyć
podręcznik użytkowania.
• Stosować urządzenie wyłącznie do celów prywatnych
i zgodnie z jego przeznaczeniem. Urządzenie nie jest
przeznaczone do celów handlowych.
Nie należy używać go na świeżym powietrzu. Należy chronić je przed wysoką temperaturą, bezpośrednim promieniowaniem słonecznym, wilgocią (nie zanurzać pod żadnym
pozorem w płynach) i ostrymi krawędziami. Nie obsługiwać
urządzenia z mokrymi dłońmi. Jeśli urządzenie ulegnie
zamoczeniu, należy natychmiast odłączyć je od zasilania.
• Zawsze, gdy: urządzenie nie jest używane, montowane są
akcesoria, urządzenie jest czyszczone lub jego działanie
jest wadliwe, należy je wyłączyć oraz odłączyć od sieci
(ciągnąc za wtyczkę, a nie sznur zasilający).
• Nie należy zostawiać włączonego urządzenia bez nadzoru.
Wychodząc z pomieszczenia, należy wyłączyć urządzenie.
Odłączyć przewód zasilania.
• Regularnie sprawdzać czy urządzenie i przewód zasilania
nie posiadają oznak uszkodzenia. W przypadku stwierdzenia uszkodzenia, urządzenia nie należy używać.
• Nie naprawiać urządzenia samodzielnie. Należy skontaktować się z upoważnionym pracownikiem. Aby uniknąć
zagrożenia, uszkodzony kabel zasilania powinien wymienić
producent, pracownik naszego punktu obsługi klienta lub
inny wykwalikowany specjalista.
• Stosować wyłącznie części oryginalne.
• Należy przestrzegać poniższych „Specjalnych instrukcji
dotyczących bezpieczeństwa“.
Dzieci i osoby niepełnosprawne
• Ze względu na bezpieczeństwo dzieci, trzymać części
opakowania (torby plastikowe, kartony, styropian, itp.) poza
ich zasięgiem.
Ostrzeżenie!
Małe dzieci nie mogą bawić się folią ze względu na
niebezpieczeństwo uduszenia!
• Urządzenia nie powinny używać osoby (także dzieci), które
mają ograniczone możliwości zyczne, sensoryczne lub
umysłowe, którym brakuje doświadczenia i/lub wiedzy,
chyba, że znajdują się pod nadzorem osoby odpowiedzialnej za ich bezpieczeństwo albo osoba ta przedstawiła im
instrukcje dotyczące używania urządzenia.
• Należy dopilnować, aby dzieci nie bawiły się urządzeniem.
Symbole użyte w instrukcji użytkowania
Ważne wskazówki dotyczące bezpieczeństwa są wyraźne
zaznaczone. Należy wziąć je pod szczególną uwagę, aby
uniknąć wypadków i uszkodzeń urządzenia.
Ostrzeżenie:
Niebezpieczeństwo dla zdrowia oraz potencjalne ryzyko
obrażeń ciała.
Uwaga:
Oznacza potencjalne zagrożenie urządzenia lub innych
obiektów.
Wskazówka:
Podświetlone wskazówki oraz informacje.
Specjalne Środki Ostrożności związane z Urzą-
dzeniem
• Urządzenie umieścić na płaskiej, równej i stabilnej powierzchni.
• Nie podłączać urządzenia do zasilania przed zamocowaniem wszystkich potrzebnych akcesoriów.
• Nie dotykać części będących w ruchu; zaczekać, aż
wszystkie elementy przestaną się poruszać.
• Nie wkładać przyborów takich, jak łyżki czy łopatki do
trzepaczki lub końcówki ugniatającej, gdy są w ruchu, a
także nie przytrzymywać ich ręką! Niebezpieczeństwo
zranienia!
• Przed zmianą końcówek należy wyłączyć urządzenie i
odłączyć je od zasilania!
• Urządzenie służy wyłącznie do obróbki produktów spożywczych.
• Napełnić miskę do mieszania składnikami, lecz tylko do
znacznika MAX.
• Urządzenie nie powinno pracować bez przerwy przez okres
dłuższy niż 2 minut. Przed ponownym uruchomieniem należy pozostawić je do ostygnięcia na ok. 2 minut.
• Nie przenosić urządzenia podczas pracy; najpierw należy je
wyłączyć i odłączyć zasilanie. Urządzenie należy przenosić
trzymając oburącz!
Mikser
• Urządzenie włączać tylko wtedy, gdy pojemnik do miksowania (naczynie) jest przykryty wiekiem.
• Nie zdejmować wieka w trakcie pracy urządzenia!
Ostrzeżenie:
► Nigdy nie wkładać rąk do gotowego do pracy miksera!
► Ostrożnie obchodzić się z nożami! Ryzyko skaleczenia
występuje przy wyjmowaniu zespołu noży z pojemnika do
miksowania, przy wypróżnianiu pojemnika do miksowania
czy w trakcie jego mycia!
►
Do naczynia (pojemnika do miksowania) nie wlewać cieczy
gorętszych niż 60°C. Występuje ryzyko poparzenia!
• Nie włączać miksera, gdy nie jest on wypełniony składnikami do zmiksowania!
• Nie przeciążać miksera! Nie przekraczać wskazanej na
mikserze maksymalnej objętości (1300 ml)!
Page 40

40
Lokalizacja Kontrolek
1 Ramię uchylne
2 Przyciski prędkości
3 Wyłącznik On/Off
4 Kontrolka zasilania wraz z wyświetlaczem
5 Przełącznik impulsowy
6 Przełącznik do podnoszenia/opuszczania ramienia
7 Osłona wałka napędowego
8 Osłona przeciwbryzgowa na misce do mieszania, wraz z
otworem wylewu
9 Miska do mieszania
10 Obudowa
11 Podstawa urządzenia
12 Wieko pojemnika do miksowania
13 Pojemnik do miksowania (naczynie)
14 O-ring
15 Zespół noży
16a Końcówka do mieszania ciasta
16b Mieszadło
16c Ubijaczka
16d Trzepaczka do jajek
17 Łopatka do wybierania do ciasta
Odpakowanie urządzenia
• Wyjąć z pudełka urządzenie wraz z jego akcesoriami.
• W celu usunięcia wszelkich zanieczyszczeń powstałych
w procesie produkcji urządzenia, przed jego pierwszym
użyciem umyć pojemnik do miksowania, miskę do mieszania, poszczególne pokrywy i inne akcesoria w wodzie z
dodatkiem płynu do mycia naczyń.
Ostrzeżenie:
Noże w zespole noży są bardzo ostre. Stąd istnieje
ryzyko skaleczenia!
• Po umyciu należy starannie osuszyć wszystkie części.
Instalacja
• Wymieniając jakikolwiek element wyposażenia, sprawdzić,
czy czasem wtyczka zasilania nie jest podłączona do
sieci. Tylko wtedy można montować i użytkować akcesoria
zgodnie z poniższym opisem.
• Aby uniknąć uszkodzeń ciała, przed przystąpieniem do
użytkowania miski do mieszania na wale napędowym musi
być zamontowana pokrywa ochronna (7). Praca bez tych
pokrywek nie jest możliwa!
Ostrzeżenie:
Nawet jeśli użytkujemy tylko mikser, musimy pamiętać, że
miska do mieszania musi być zamontowana. Narzędzie
włożone w ramię uchylne zawsze będzie się obracało, nawet
przy nie zamontowanej misce do mieszania!
Podłączenie do sieci zasilania elektrycznego
• Sprawdzić, czy napięcie zasilania w sieci jest takie samo
jak napięcie znamionowe urządzenia. Szczegółowe infor-
macje na ten temat podane są na tabliczce znamionowej
urządzenia umiejscowionej u spodu jego podstawy.
Użytkowanie
Użytkowanie miski do mieszania i narzędzi
1. Ustaw tylko ramię uchylne bez zamocowanego pojemnika
do miksowania! Naciśnij przycisk (6) i drugą ręką unieś
ramię uchylne. Zwalniając przycisk spowodujesz, że ramię
uchylne spocznie albo w połowie wysokości albo w położeniu pionowym.
2. Aby użyć trzepaczki (16d), należy najpierw zamontować
pokrywę miski (8): Trzymać pokrywę kołnierzem w górę.
Wskazówka:
W dolnej części ramienia widoczne są dwa rowki – lewy i
prawy.
Wsunąć pokrywę miski w rowki i zablokować, przekręcając
w kierunku zgodnym z ruchem wskazówek zegara.
Wskazówka:
Przygotowując ciasto, jego składniki dodawaj do misy
przez otwór wylewu.
3. Otwór do zamocowania narzędzi znajduje się po spodniej
stronie uchylnego ramienia. Końcówkę haczyka do mieszania
ciasta / mieszadła czy ubijaczki/trzepaczki do jajek wsuń w
otwór, aż zaskoczy nieruchomo. Ostrożnie obracać częściami
podczas wsuwania, co uczyni tę czynność łatwiejszą.
4. Umieścić miskę na miejscu i przekręcić w kierunku zgodnym z ruchem wskazówek zegara, do momentu zablokowania.
5. Włożyć do niej składniki.
Uwaga:
Nie należy przepełniać miski. Maksymalna ilość składników
to 2 kg lub 1,3 litra w przypadku płynów
6. Naciśnij przycisk (6)i drugą ręką powoli obniż ramię uchylne.
Uwaga:
Nie pozwalaj ramieniu uchylnemu swobodnie opadać!
7. Wtyczkę kabla zasilania wsuń do prawidłowo zamontowanego gniazdka ściennego 230V / 50Hz. Niebieska kontrolka
wyświetlacza wskaże gotowość urządzenia do pracy.
8. - Aby włączyć urządzenie, naciśnij wyłącznik On/Off (3).
- Aby wybrać ustawienie prędkości, kilkakrotnie naci-
śnij przycisk „+“ (2). Prędkość zostanie pokazana na
wyświetlaczu.
- Do zmniejszenia prędkości, naciśnij przycisk „-“.
- Do pracy impulsowej używaj przycisku „P“ (5) (mieszanie
w krótkich odstępach). Naciśnij i przytrzymaj przycisk
tak długo, jak jest to potrzebne. W trybie impulsowym
urządzenie będzie pracowało w ustawieniu maksymalnej prędkości.
Wskazówka:
► Wyświetlacz wskaże czas procesu mieszania.
► Podczas pracy urządzenia przy największej prędkości
może być wyczuwalny zapach. Nie jest to objaw usterki
urządzenia..
Page 41
41
Wybór końcówki i prędkości ułatwi poniższa tabela:
Produkt / sposób
przygotowania
Ilość Końcówka
Poziom
prędkośc
Maks. czas
pracy
Ciasto twarde (np.
ciasto drożdżowe,
ciasto kruche)
Min. 0,5 kg
Końcówka do
ciasta
1 – 4 30 s.
Maks. 2 kg 1 – 3 2 min.
Ciasto lekkie (np.
ciasto do wai lub
biszkoptowe)
Min. 200 ml
Mieszadło
3 – 5 1 min.
Maks. 1,3 l 1 – 4 2 min
Lekkie płyny (np. c.
naleśn., budyń)
Min. 200 ml
Trzepaczka do
białek
1 – 7 30 s
Maks. 1,3 l
Krem
Min. 200 ml
Trzepaczka
do białek
Schneebesen
4 – 12 90 s
Maks. 1,3 l 5 – 12 2 min
Ubite białko
Min. 1 białko
kurz.
Trzepaczka
do białek
Schneebesen
5 – 12 2 min
Maks. 8 białek
kurzych
Jajecznica
Min. 2 Jaja
Ubijaczka 1 – 4 1 min
Maks. 1,3 l
Wybierając prędkość, należy również brać pod uwagę wskazówki podane w przepisie.
Wskazówka:
► Czas eksploatacji: Przygotowując ciasto twarde, nie
uruchamiać urządzenia na dłużej niż 2 minut. Następnie
pozostawić je na 2 minut do ostygnięcia.
► Przygotowując ciasto płynne, używać pokrywy miski.
9. Aby zatrzymać lub zakończyć mieszanie, naciśnij wyłącznik On/Off. Odłącz wtyczkę kabla zasilania od gniazdka
sieciowego.
10. Naciśnij przełącznik (6) i drugą ręką unieś uchylne ramię.
Wskazówka:
Ramię to jest wyposażone w wyłącznik bezpieczeństwa.
W momencie przechylania się ramienia w trakcie pracy natychmiast wyłącza się silnik. Po opuszczeniu ramienia można
ponownie zacząć pracę, jak opisano to w punkcie 8.
11. Wyjąć miskę obracając ją w kierunku przeciwnym do ruchu
wskazówek zegara.
12. Za pomocą łopatki wyjąć ciasto z miski.
13. Aby wyjąć końcówkę narzędzia z wału napędowego,
przytrzymaj jedną ręką ramię uchylne, a drugą wyciągnij
narzędzie.
14. Wyczyścić używane części zgodnie ze wskazówkami
zawartymi w części „Czyszczenie”.
Użytkowanie gniazda do miksowania
Uwaga:
► Nie używać gniazdka do miksowania jednocześnie z
miską do mieszania.
Ostrzeżenie:
Narzędzie wsunięte w ramię uchylne zawsze będzie się
obracało. Dla bezpieczeństwa mikser może się jedynie
obracać przy zamontowanej misce do mieszania wraz z jej
osłoną przeciwbryzgową.
1. Przed przystąpieniem do miksowania należy pociąć składniki na mniejsze kawałki.
2. Składniki umieścić wewnątrz pojemnika do miksowania
(maks. 1,3 l).
3. Wiekiem (12) solidnie zamknąć pojemnik poprzez jego
wciśnięcie.
4. Wieko zabezpieczające (7) zdjąć z gniazda napędu miksera: w tym celu użyj kciuka i środkowego palca jednej ręki,
by jednocześnie wciskać i ciągnąć tylną krawędź pokrywy.
Wskazówka:
Z lewej i z prawej strony krawędzi pokrywy znajdują się
szorstkie miejsca celem lepszego uchwytu.
5. Pojemnik do miksowania umieścić na podstawie w taki
sposób, aby znacznik ● u spodu pojemnika wskazywał
znacznik ● na podstawie. Te dwie kropki muszą być
dokładnie obok siebie.
6. Kontynuować według opisu zawartego w „Użytkowaniu
miski do mieszania i narzędzi/akcesoriów, punkty 7-9“.
Wskazówka: Kruszenie kawałków lodu
Ostrza pojemnika miksera nadają się także do kruszenia
kawałków lodu. Napełnij pojemnik do miksowania w 1/3
kawałkami lodu. Do kruszenia lodu używaj jedynie trybu
impulsowego pracy urządzenia, naciskając przycisk „P“.
W celu ustawienia prędkości / czasu odwołuj się do tabeli
poniżej:
Produkt/
przygotowanie
Ilość Narzędzie
Ustawienie
prędkości
Maks. czas
pracy
Szatkowanie
warzyw / owoców
Min. 200 g
Mikser
Impuls 30 s
Maks. 500 g 1 – 3 2 min
Przecieranie
warzyw / owoców
(dodaw. płynów)
Maks. 1,3 l Mikser
Impuls 1 min
4 – 12 1 min
Kawałki lodu Maks. 400 ml Mikser Impils
3-sekundowy
impuls na 30 s
Proponowane Przepisy
Ciasto biszkoptowe (przepis podstawowy)
Poziom prędkości 1 - 4
Składniki:
250g masła lub margaryny, 250g cukru, 1 opakowanie cukru
wanilinowego lub 1 opakowanie mieszanki „Citro-Back”,
szczypta soli, 4 jaja, 500g mąki pszennej, 1 opakowanie proszku do pieczenia, ok. 1/8 litra mleka.
Przygotowanie:
Wsypać mąkę i pozostałe składniki do miski, uruchomić robot z
końcówką do mieszania na 30 sekund z prędkością 2, a potem
na ok. 1,5 minuty z prędkością 4. Natłuścić formę do pieczenia
lub wyłożyć ją papierem do pieczenia, wlać ciasto i piec. Przed
wyjęciem ciasta z piekarnika należy sprawdzić, czy jest gotowe.
Nakłuć ciasto ostrym drewnianym patyczkiem na środku formy.
Jeśli ciasto nie przykleja się do patyczka – jest gotowe. Wyjąć
ciasto na kratę piekarską i pozostawić do ostygnięcia.
Page 42
42
Piekarnik tradycyjny:
Poziom: 2
Temperatura: Piekarnik elektryczny: grzałka dolna i górna
175-200°, piekarnik gazowy: tryb 2-3
Czas pieczenia: 50-60 minut
Przepis można zmieniać według własnych upodobań, np. dodać 100g rodzynek, 100g orzechów lub 100g startej czekolady.
Ograniczeniem jest wyłącznie wyobraźnia.
Bułeczki z siemieniem lnianym Poziom prędkości 1 - 3
Składniki:
500-550g mąki pszennej, 50g siemienia lnianego, 3/8 litra
wody, 1 kostka drożdży (40g), 100g chudego odsączonego
twarogu, 1 łyżeczka soli.
Do posmarowania: 2 łyżki wody
Przygotowanie:
Siemię lniane namoczyć w 1/8 litra letniej wody. Pozostałą
letnią wodę (1/4 litra) wlać do miski robota, wkruszyć do niej
drożdże, dodać twaróg i dokładnie wymieszać końcówką do
ugniatania z prędkością 1. Drożdże muszą całkowicie się
rozpuścić. Mąkę, namoczone siemię lniane i sól, wsypać do
miski. Ugniatać z prędkością 1, następnie zmienić prędkość na
2 i ugniatać jeszcze przez 1-2 minut. Przykryć ciasto i odstawić
w ciepłe miejsce na 45-60 minut. Ponownie zagnieść, wyjąć z
miski i uformować 16 bułeczek. Blachę do pieczenia wyłożyć
zmoczonym papierem do pieczenia. Ułożyć bułeczki na blasze,
odstawić na 15 minut, posmarować letnią wodą i piec.
Piekarnik tradycyjny:
Poziom: 2
Temperatura: Piekarnik elektryczny: grzałka górna i dolna
200-220°
(Rozgrzewać przez 5 minut),
Piekarnik gazowy: tryb 2-3
Czas pieczenia: 30-40 minut
Czyszczenie
Mycie wstępne
Napełnij pojemnik do miksowania w połowie wodą i uruchom
narzędzie w trybie impulsowym na ok. 10 sekund. Następnie
wylej ciecz z naczynia.
Ostrzeżenie:
► Zawsze przed myciem wyciągnij wtyczkę kabla zasilania
z gniazdka sieciowego.
► Nigdy nie zanurzaj urządzenia w wodzie celem jego umycia.
To mogłoby spowodować porażenie elektryczne lub pożar.
Uwaga:
► Nie używaj szczotek drucianych czy innych szorstkich
materiałów.
► Nie stosuj żadnych agresywnych czy ścierających
środków czyszczących.
• W celu bardziej dokładnego umycia zdejmij pojemnik do
miksowania.
• Po każdym użyciu rozmontuj mikser.
Ostrzeżenie: Ryzyko skaleczenia!
Ostrza zespołu noży są bardzo ostre. Uważaj przy
demontażu, myciu czy montowaniu pojedynczych części.
• Odkręć złącze gwintowane pojemnika do miksowania w kierunku
zgodnym z kierunkiem ruchu wskazówek zegara (w prawo).
• Zdejmij o-ring ze złącza gwintowanego.
Pojemnik do miksowania (13) wraz z wiekiem/pokrywą (12)
• Umyj pojemnik wraz z wiekiem w ciepłej wodzie ze środkiem do mycia naczyń.
O-ring (14) oraz zespół noży (15)
• Jedynie przepłucz krótko w strumieniu gorącej wody.
• Po umyciu i osuszeniu złóż na powrót naczynie miksera w
odwrotnej kolejności.
Miska do mieszania wraz z akcesoriami
• Wyjmij miskę do mieszania w celu usunięcia pozostałości
na wale napędowym.
• Umyj części odłączalne zaklejone ciastem w ciepłej wodzie
ze środkiem myjącym.
Uwaga:
Części urządzenia nie są przystosowane do mycia w
zmywarce do naczyń. Części te mogłyby się wypaczyć
lub utracić swój kolor pod wpływem ciepła i agresywnych
środków myjących.
Obudowa
• Do umycia i czyszczenia powierzchni urządzenia używaj
lekko zwilżonej szmatki.
Wykrywanie i usuwanie usterek
• Urządzenie nie funkcjonuje.
Rozwiązanie:
Sprawdź podłączenie do źródła zasilania.
Inne możliwe przyczyny:
Twoje urządzenie jest wyposażone w dwa wyłączniki
bezpieczeństwa.
Chronią one przed przypadkowym uruchomieniem silnika.
Rozwiązanie:
Sprawdź prawidłowe ustawienie
ramienia uchylnego (1) ○
pojemnika do miksowania (13) lub ○
pokrywy/wieka ochronnego (7). ○
Zabezpieczenie przed przegrzaniem
• Urządzenie jest wyposażone w układ zabezpieczający
przed przegrzewaniem. W przypadku przeciążenia układ
ten spowoduje wyłączenie urządzenia. Nie będzie można
wtedy jego ponownie uruchomić. Należy w takim wypadku
odłączyć wtyczkę z gniazdka zasilania.
Page 43

43
• Pozostaw urządzenie do całkwitego
ostygnięcia, a następnie tylko wtedy
naciśnij przycisk resetowania znajdujący
się u spodu urządzenia(patrz rys.), aby
móc ponownie użytkować tę maszynę.
Poziom Hałasu
Poziom ciśnienia akustycznego mierzony przy uchu użytkownika (LpA) jest zgodny z normą DIN EN ISO 3744.
Określony poziom ciśnienia akustycznego: 85 dB(A) (bez
ograniczeń)
Techniczne specykacje
Model: .............................................................................KM 3354
Napięcie znamionowe/częstotliwość: ............. 220-240 V / 50 Hz
Pobór mocy: ....................................................................... 600 W
Klasa ochrony: ............................................................................. II
Działanie krótkookresowe: .............................................. 2 minuty
Waga netto:........................................................................4,35 kg
Możliwość dokonywania zmian bez powiadomienia!
Urządzenie jest zgodne z aktualnymi dyrektywami CE,
dotyczącymi zgodności elektromagnetycznej czy niskiego
napięcia i produkowane jest zgodnie z najnowszymi przepisami
bezpieczeństwa.
WARUNKI GWARANCJI
Przyznajemy 24 miesiące gwarancji na produkt licząc od daty
zakupu.
W tym okresie będziemy bezpłatnie usuwać w terminie 14 dni
od daty dostarczenia wadli-wego sprzętu z kartą gwarancyjną
do miejsca zakupu wszystkie uszkodzenia powstałe w tym
urządzeniu na skutek wady materiałów lub wadli-wego wykonania, naprawiając oraz wymieniając wadliwe części lub (jeśli uznamy
za stosowne) wymieniając całe urządzenie na nowe.
Sprzęt do naprawy powinien być dostarczony w komplecie
wraz z dowodem zakupu oraz z ważną kartą gwarancyjną do
sprzedawcy w miarę możliwości w oryginalnym opakowaniu lub
innym odpowiednim dla zabezpieczenia przed usz-kodzeniem.
W razie braku kompletnego opak-owania fabrycznego, ryzyko
uszkodzenia sprzętu podczas transportu do i z miejsca zakupu
ponosi reklamujący.
Naprawa gwarancyjna nie dotyczy czynności przewidzianych
w instrukcji obsługi, do wykonania których zobowiązany jest
użytkownik we własnym zakresie i na własny koszt.
Gwarancja nie obejmuje:
• mechanicznych, termicznych, chemicznych uszkodzeń
sprzętu i wywołanych nimi wad,
• uszkodzeń powstałych w wyniku działania sił zewnętrznych
takich jak wyładowania atmos-feryczne, zmiana napięcia
zasilania i innych zdarzeń losowych,
• nieprawidłowego ustawienia wartości napięcia elektrycznego, zasilanie z nieodpowiedniego gniazda zasilania,
• sznurów połączeniowych, sieciowych, żarówek, baterii,
akumulatorów,
• uszkodzeń wyrobu powstałych w wyniku niewłaściwego
lub niezgodnego z instrukcją jego użytkowania, przechowywania, konser-wacji, samowolnego zrywania plomb oraz
wszelkich przeróbek i zmian konstrukcyjnych dokonanych
przez użytkownika lub osoby niepowołane,
• roszczeń z tytułu parametrów technicznych wyrobu, o ile są
one zgodne z podanymi przez producenta,
• prawidłowego zużycia i uszkodzeń, które mają nieistotny
wpływ na wartość lub działanie tego urządzenia.
Karta gwarancyjna bez pieczątki sklepu, daty sprzedaży, nie
wypełniona, źle wypełniona, ze śladami poprawek, nieczytelna
wskutek zniszcze-nia, bez możliwości ustalenia miejsca sprzedaży oraz dołączonego dowodu zakupu jest nieważna.
Korzystanie z usług gwarancyjnych nie jest możliwe po upływie
daty ważności gwarancji. Gwarancja na części lub całe
urządzenie, które są wymieniane kończy się, wraz z końcem
gwarancji na to urządzenie.
Wszystkie inne roszczenia, wliczając w to odsz-kodowania są
wykluczone chyba, że prawo prze-widuje inaczej. Roszczenia
wykraczające poza tą umowę nie są uwzględniane przez tą
gwarancję.
Gwarancja na sprzedany towar konsump-cyjny nie wyłącza, nie
ogranicza ani nie zawi-esza uprawnień kupującego wynikających z niezgodności towaru z umową.
Gwarancja oraz zawarte w niej warunki obowiązują na terenie
Rzeczpospolitej Polskiej.
Znaczenie symbolu „kubła na kółkach“
Należy zadbać o środowisko i nie wyrzucać urządzeń elektrycznych razem z odpadami gospodarstwa domowego.
Stare lub uszkodzone urządzenia elektryczne należy odstawić
do miejskich punktów zbiórki.
Prosimy unikać potencjalnych zagrożeń dla zdrowia i środowiska poprzez nieprawidłowe metody utylizacji odpadów.
Przyczyniasz się do recyklingu i innych form utylizacji zużytych
urządzeń elektrycznych i elektronicznych.
Informacje na temat punktów zbiórki znajdują się na terenie
danego miasta.
Page 44
44
Általános Biztonsági Rendszabályok
A készülék használata előtt gyelmesen olvassa el a használati
útmutatót és őrizze meg a garancialevéllel, a számlával és –
amennyiben lehetséges – az eredeti csomagolással, valamint
a belső csomagolóanyaggal együtt. Amennyiben a készüléket
harmadik személynek adja tovább, akkor a használati útmutatót is mellékelje.
• A készüléket csak személyes célra és rendeltetésének
megfelelően használja. A készülék nem kereskedelmi
használatra készült.
Ne használja a készüléket a szabadban. Védje a hőtől,
közvetlen napfénytől, nedvességtől (semmilyen körülmények között ne merítse folyadékba) és az éles szélektől.
Ne használja a készüléket nedves kézzel. Ha a készülékre
nedvesség került, azonnal áramtalanítsa azt.
• Mindig kapcsolja ki és áramtalanítsa a készüléket (a
dugaszt húzza ki, ne a kábelt) amikor nem használja a
készüléket, vagy amikor tartozékot szerel fel, illetve tisztítás
vagy meghibásodás esetén is.
• Használat közben ne hagyja felügyelet nélkül a készüléket. A szoba elhagyásakor mindig kapcsolja ki a készüléket.
Húzza ki a készüléket.
• Sérülések tekintetében rendszeresen ellenőrizze a készüléket
és a kábelt. Ne használja a készüléket, ha sérülést észlel.
• Ne javítsa saját kezűleg a készüléket. Lépjen kapcsolatba
a hivatalos szervizzel. A veszélyek elkerülése érdekében a
sérült hálózati kábelt a gyártónak, a szerviznek vagy más
szakképzett szakembernek egy azzal egyenértékűre kell
kicserélni.
• Csak eredeti cserealkatrészeket használjon.
• Tartsa be a következő “Speciális biztonsági óvintézkedések” részben leírtakat.
Gyermekek És Fogyatékkal Élő Személyek
• A gyermekek biztonsága érdekében a csomagolóanyagokat (műanyag zacskó, karton, styrofoam stb.) ne hagyja
általuk elérhető helyen.
Figyelmeztetés!
Vigyázzon, hogy a kisgyermekek ne játsszanak a fóliával,
mert ez fulladásveszélyt jelenthet!
• A készüléket nem használhatják csökkent zikai, érzékszervi vagy értelmi képességű személyek (a gyerekeket is
beleértve), vagy akiknek nincs meg a tapasztalatuk és tudásuk
ehhez; kivéve, ha a biztonságukért felelős személy a használatra megtanítja, vagy a használat közben felügyeli őket.
• Figyeljen a gyerekekre, hogy ne játsszanak a készülékkel.
A Használati Útmutatóban Található Jelzések
Az Ön biztonságára vonatkozó fontos tudnivalókat külön
kiemeltük. Kérjük, mindenképpen ügyeljen ezekre annak érdekében, hogy elkerülje a baleseteket és a készülék károsodását.
Figyelmeztetés:
Egészségét károsító veszélyforrásokra gyelmeztet, és jelzi
a lehetséges sérülésveszélyeket.
Vigyázat:
A készülékre vagy más tárgyakra veszélyt jelentő dolgokat jelez.
Megjegyzés:
Javaslatokat, információt közöl.
Speciális biztonsági előírások a készülékre
vonatkozóan
• A készüléket lapos, vízszintes és csúszásmentes felületen
helyezze el.
• Ne csatlakoztassa a készüléket az áramforráshoz, amíg fel
nem helyezte az összes szükséges tartozékot.
• Ne érjen a mozgó alkatrészekhez, és várja meg, amíg a
készülék teljesen meg nem áll.
• Ne helyezzen bele konyhai eszközöket, úgymint kanalakat
vagy spatulákat, és a kezével se próbálja megfogni a forgó
habverőt vagy keverőlapátot! Sérülésveszély!
• Kapcsolja ki a készüléket és húzza ki az elektromos hálózatból a tartozékok cseréje előtt.
• Csak élelmiszereket dolgozzon fel a készülékkel.
• Csak a MAX jelzésig töltse fel a keverőtálat az összetevőkkel.
• Ne működtesse a készüléket 2 percnél hosszabb ideig.
Újbóli használat előtt kb. 2 percig hagyja lehűlni.
• Ne mozgassa a készüléket használat közben; először
mindig kapcsolja ki, és húzza ki az elektromos hálózatból.
Mindig két kézzel fogva szállítsa a készüléket.
Turmix
• Csak akkor kapcsolja be a készüléket, ha a pohár le van
takarva a fedéllel.
• Működés közben ne vegye le a fedelet!
Figyelmeztetés:
► Soha ne nyúljon bele a használatra előkészített turmixp-
ohárba!
► Óvatosan kezelje a késeket! Sérülés veszélye áll fenn,
amikor eltávolítja a kést a turmixpohárból, kiüríti a turmixpoharat vagy tisztítja a készüléket!
►
Ne öntsön 60 °C-nál melegebb folyadékot a pohárba.
Égésveszély
• Ne használja a turmixot üresen, a keverni kívánt összetevők nélkül!
• Ne terhelje túl! Ne lépje túl a turmixpoháron jelzett maximális kapacitást (1300 ml)!
A kezelőszervek elhelyezkedése
1 Dönthető kar
2 Sebességfokozat gombok
3 Be/ki kapcsoló
4 Bekapcsolásjelző és kijelző
5 Impulzus mód kapcsoló
6 Kar leengedése/felhajtása kapcsoló
7 Hajtótengely biztonsági fedele
8 Keverőtál fröccsenésvédője beöntőnyílással
Page 45

45
9 Keverőtál
10 Burkolat
11 A készülék alapzata
12 Turmixpohár fedele
13 Turmixpohár (pohár)
14 Tömítőgyűrű
15 Kés szerelvény
16a Tésztagyúró horog
16b Keverőhorog
16c Habverő
16d Tojásverő
17 Tésztakaparó
A készülék kicsomagolása
• Vegye ki a készüléket és az összes tartozékát a dobozból.
• A gyártási folyamat során lerakódott szennyeződések
eltávolításához első használat előtt szappanos vízben
mossa meg a turmixpoharat, a keverőtálat, a fedeleket és
más tartozékokat.
Figyelmeztetés:
A kés szerelvény kései nagyon élesek. Sérülésveszély!
• Tisztítás után alaposan szárítsa meg az összes alkatrészt.
Összeállítás
• Ügyeljen arra, hogy a tartozékok cseréje előtt mindig
kihúzza a tápkábelt. Csak ezt követően szerelheti fel és
használhatja a tartozékokat az alábbi módon.
• A sérülések elkerülése érdekében a biztonsági fedelet (7) a
keverőtál használata előtt fel kell helyeznie a gép hajtótengelyére.
A készülék használat a fedél nélkül nem lehetséges!
Figyelmeztetés:
A tálat akkor is fel kell helyezni, ha csak a turmixot használja.
A dönthető karba helyezett feltét mindig forog, még akkor is,
ha nem helyezte fel a keverőtálat!
Elektromos csatlakozás
• Ellenőrizze, hogy a hálózati feszültség egyezik a készüléken megadott hálózati feszültséggel. Részletes információért lásd a készülék alján található adattáblát.
Használat
A keverőtál és a feltétek használata
1. A dönthető kart állítását csak a pohár felhelyezése nélkül
végezze! Nyomja meg a gombot (6), és a másik kezével
emelje fel a dönthető kart. A gomb elengedésével a dönthető kar félmagasságba vagy függőleges állásba állítható.
2. A habverő (16d) használatához először illessze fel a fedelet (8): A fedelet peremmel felfelé tartsa.
Megjegyzés:
A kar alsó részén két rovátkát láthat balra és jobbra.
Csúsztassa a fedél füleit a rovátkákhoz, és rögzítse az
óramutató járásának irányba elforgatva.
Megjegyzés:
Tészta készítésekor az összetevőket a keverőtál
beöntőnyílásán át adagolja.
3. A feltétek csatlakoztatási nyílása a dönthető kar alsó részén
található. A tésztagyúró/keverőhorog vagy a habverő/tojásverő végét illessze be a nyílásba, majd tolja be addig, amíg be
nem kattan a helyére. Benyomáskor a könnyebb behelyezés
érdekében óvatosan forgassa ide-oda a feltéteket.
4. Tegye a helyére a tálat, és ütközésig fordítsa el az óramutató járásának irányába.
5. Most helyezze be az összetevőket.
Vigyázat:
Ne töltse túl a készüléket. Az összetevők max. mennyisége 2 kg vagy 1,3 liter, ha folyadékot tölt bele.
6. Nyomja meg a gombot (6), és a másik kezével lassan
engedje le a dönthető kart.
Vigyázat:
Ne hagyja, hogy a dönthető kar leessen!
7. Csatlakoztassa a tápkábelt egy megfelelően felszerelt
230 V / 50 Hz-es fali aljzatba. A kijelzőn megjelenő kék
lámpa jelzi, hogy a készülék készen áll a használatra.
8. - Nyomja meg a be/ki kapcsolót (3) a készülék bekapcso-
lásához.
- Nyomja meg néhányszor a “+” gombot (2) a sebesség-
fokozat kiválasztásához. A fokozat a kijelzőn látható.
- A “-” gomb használatával csökkentheti a sebességet.
- Nyomja meg a “P” gombot (5) a készülék működtetéséhez impulzus módban (rövid ideig tartó keverés).
Nyomja meg és tartsa lenyomva a gombot a kívánt
időtartam beállításához. Impulzus módban a készülék a
legmagasabb sebességfokozaton működik.
Megjegyzés:
► A kijelzőn látható a keverés időtartama.
► A legmagasabb sebességfokozaton való működtetés
esetén szag keletkezhet. Ez nem jelenti a készülék
meghibásodását.
Válassza ki az eszközt és a sebességet a következő táblázatnak megfelelően:
Termék/elkészítés Mennyiség Eszköz
Sebesség-
beállítás
Max.
működési
idő
Sűrű tészta (pl.
élesztős tészta, édes
tészta)
Min 0,5 kg
Tésztagyúró
horog
1 – 4
30
másodperc
Max. 2 kg 1 – 3 2 perc
Könnyű tészta(pl.
ostyatészta vagy
kovász)
Min 200 ml
Keverőhorog
3 – 5 1 perc
Max. 1,3 l 1 – 4 2 perc
Könnyű
folyadékok(pl.
palacsinta, puding)
Min 200 ml
Tojásverő 1 – 7
30
másodperc
Max. 1,3 l
Krém
Min 200 ml
Tojásverő
4 – 12
90
másodperc
Max. 1,3 l 5 – 12 2 perc
Page 46

46
Termék/elkészítés Mennyiség Eszköz
Sebesség-
beállítás
Max.
működési
idő
Felvert tojásfehérje
Min. 1
tojásfehérje
Tojásverő 5 – 12 2 perc
Max. 8
tojásfehérje
Tojásrántotta
Min. 2 tojás
Habverő 1 – 4 1 perc
Max. 1,3 l
A sebességfokozat kiválasztásakor vegye gyelembe a recept
előírásait is.
Megjegyzés:
► Rövid idejű használat: Ne működtesse a készüléket
sűrű tészta keverésekor 2 percnél tovább. Ezután hagyja
lehűlni a készüléket 2 percig.
► Folyékony massza keverésekor használja a fedelet.
9. A keverés szüneteltetéséhez vagy leállításához nyomja
meg a be/ki kapcsolót. Húzza ki a tápkábelt.
10. Nyomja meg a kapcsolót (6), és a másik kezével emelje fel
a dönthető kart.
Megjegyzés:
A kar biztonsági kapcsolóval van felszerelve. A motor kikapcsol, ha a kart működés közben felemelik. A kar leengedése
után a 8. pontban leírtak szerint kezdheti újra a használatot.
11. Az óramutató járásával ellentétes irányába forgatva távolítsa el a keverőtálat.
12. Lazítsa fel a tésztát egy spatulával, és vegye ki a keverőtálból.
13. A feltét eltávolításához a hajtótengelyből, egyik kezével tartsa
meg a dönthető kart, a másikkal pedig húzza ki a feltétet.
14. Tisztítsa meg a készülék részeit a “Tisztítás” részben leírtak
szerint.
A turmix feltét használata
Vigyázat:
► Ne használja egyszerre a turmixot és a keverőtálat.
Figyelmeztetés:
A dönthető karba helyezett feltét mindig forog. Biztonsági
okokból a turmix csak akkor működtethető, ha a keverőtálra
fel van helyezve fröccsenésvédő.
1. Turmixolás előtt vágja kisebb darabokra az összetevőket.
2. Helyezze az összetevőket a turmixpohárba (max. 1,3 l).
3. Nyomja rá erősen a fedelet (12) a pohárra.
Ennek szorosan kell zárnia a turmixpoharat.
4. Távolítsa el a biztonsági fedelet (7) a turmix meghajtójáról:
A hüvelykujjával és a középső ujjával nyomja be és húzza
felfelé a fedél hátsó szélét.
Megjegyzés:
A fedél jobb és bal széle érdesítve van a jobb fogás
érdekében.
5. Helyezze a turmixpoharat az alapzatra úgy, hogy a turmixpohár alsó részén lévő ● jelzés és az alapzat ● jelzése
egymáshoz kerüljön. A két pontnak pontosan egymás
mellett kell lennie.
6. Folytassa a keverőtál és a feltétek használata rész 7-9.
pontjában leírtak szerint.
Megjegyzés: Jégkocka aprítása
A turmixpohár kése alkalmas jégkocka aprítására is. Töltse
fel a poharat 1/3 részig jégkockával. A készüléket jégkocka
aprítására csak impulzus módban használja, a “P” gomb
segítségével.
A sebességfokozat/idő beállításaival kapcsolatban tájékozódjon az alábbi táblázatból:
Termék/elkészítés: Mennyiség Feltét
Sebesség-
fokozat
Max.
működési idő
Zöldségek/
gyümölcsök aprítása
Min 200 g
Turmix
feltét
Impulzus 30 másodperc
Max. 500 g 1 – 3 2 perc.
Zöldségek/
gyümölcsök
pürésítése (folyadék
hozzáadásával)
Max. 1,3 l
Turmix
feltét
Impulzus 1 perc
4 – 12 1 perc
Jégkockák Max. 400 ml
Turmix
feltét
Impulzus
I3 mp impulzus
mód 30
másodpercig
Ajánlott receptek
Kovász (alaprecept) Sebesség-beállítás: 1 - 4
Összetevők:
250 g lágy vaj vagy margarin, 250 g cukor, 1 csomag vaníliás
cukor vagy 1 csomag Citro-Back, 1 csipet só, 4 tojás, 500 g
búzaliszt, 1 csomag sütőpor, kb. 1/8 liter tej.
Elkészítés:
A búzalisztet a többi összetevővel helyezze a keverőtálba, a
keverőlapáttal 30 másodpercig keverje össze 2. sebességfokozaton, majd kb. 1,5 percig 4. sebességfokozaton. Kenje ki
a tepsit vagy terítsen bele sütőpapírt, öntse bele a tésztát és
süsse ki. Ellenőrizze, mielőtt kivenné a tepsit a sütőből: egy
fatűvel szúrjon bele a közepébe. Ha a tészta nem tapad hozzá
a tűhöz, a sütemény kész. Helyezze a süteményt egy sütőrácsra és hagyja kihűlni.
Hagyományos sütő
Tálca: 2
Hőmérséklet: Elektromos sütő: felső és alsó hőmérséklet
175-200°, gázsütő: 2-3 fokozat.
Sütési idő: 50-60 perc
Módosíthatja a receptet a saját ízlésének megfelelően, pl.
100 g mazsolával vagy 100 g mogyoróval vagy 100 g reszelt
csokoládéval. Semmi sem szab határt a képzeletének.
Lenmagos tekercs Sebesség-beállítás: 1 - 3
Összetevők:
500-550 g búzaliszt, 50 g lenmag, 3/8 liter víz, 1 élesztőkocka
(40 g),100 g alacsony zsírtartalmú aludttej, jól lecsepegtetve,
1 teáskanál só.
A kenéshez: 2 evőkanál víz
Page 47

47
Elkészítés:
A lenmagot áztassa be 1/8 liter langyos vízbe. A maradék
langyos vizet (1/4 liter) öntse a keverőtálba, morzsolja bele az
élesztőt, adja hozzá az aludttejet, és jól keverje el a dagasztólapáttal 1. sebességfokozaton. Az élesztőt teljesen fel kell
oldani. Tegye a keverőtálba a lisztet, a beáztatott lenmagot és
a sót. Keverje 1. sebességfokozaton, majd váltson 2. sebességfokozatra és keverje újabb 1-2 percig. Fedje le a tésztát és
45-60 percig pihentesse meleg helyen. Dagassza újra, vegye
ki a keverőtálból és formáljon belőle 16 tekercset. A tepsit fedje
le nedves sütőpapírral. Helyezze rá a tekercseket, pihentesse
15 percig, kenje meg langyos vízzel és süsse ki.
Hagyományos sütő:
Tálca: 2
Hőmérséklet: Elektromos sütő: alsó és felső hőmérséklet:
200 – 220 °C
(5 perces előmelegítés),
Gázsütő: 2-3. fokozat.
Sütési idő: 30-40 perc
Tisztítás
Előtisztítás
Félig töltse fel a turmixpoharat vízzel, és működtesse impulzus
módban kb. 10 másodpercig. Ezután öntse ki a folyadékot.
Figyelmeztetés:
► Tisztítás előtt mindig húzza ki a készüléket az elektromos
hálózatból.
► Tisztításkor ne merítse vízbe a készüléket. Ez áramütést
vagy tüzet okozhat.
Vigyázat:
► Ne használjon drótkefét vagy más karcoló eszközöket.
► Ne használjon agresszív vagy karcoló tisztítószereket.
• Az alaposabb tisztításhoz vegye le a turmixpoharat.
• Szerelje szét a turmixot minden használat után.
Figyelmeztetés: Sérülésveszély!
A kés szerelvény kései nagyon élesek. Szétszereléskor,
tisztításkor és az alkatrészek felszerelésekor legyen
nagyon óvatos.
• Az óramutató járásának irányába forgatva csavarja ki a
menetes fedelet a pohárból.
• Távolítsa el a tömítőgyűrűt a menetes kupakból.
Pohár (13) és fedél (12)
• Meleg szappanos vízben tisztítsa meg a poharat és a fedelet.
Tömítőgyűrű (14) és kés szerelvény (15)
• Csak öblítse át rövid ideig forró víz alatt.
• Tisztítás és szárítás után a fordított sorrendben szerelje
össze a turmixot.
Keverőtál és feltétek
• A hajtótengely lerakódásainak eltávolításához távolítsa el a
keverőtálat.
• A tésztától koszos levehető részeket szappanos vízzel
tisztítsa meg.
Vigyázat:
A készülék részei mosogatógépben nem tisztíthatók. Hő és
az agresszív tisztítószerek hatására megvetemedhetnek
vagy elszíneződhetnek.
Burkolat
• A készülék felületének tisztításához enyhén nedves törlőruhát használjon.
Hibaelhárítás
• A készülék nem működik.
Megoldás:
Ellenőrizze a tápkábel csatlakozását.
Más lehetséges okok:
A készülék két biztonsági kapcsolóval van ellátva.
Ezek megakadályozzák a motor véletlen elindulását.
Megoldás:
Ellenőrizze a következők megfelelő pozícióját:
dönthető kar (1) ○
turmixpohár (13) és ○
biztonsági fedél (7). ○
Túlhevülés elleni védelem
• A készülékbe túlhevülés elleni rendszer van beépítve. Túlhajtás esetén a rendszer aktiválódik. Ekkor a készülék nem
lesz használatra kész. Húzza ki a tápkábelt a csatlakozó
aljzatból.
• Hagyja teljesen lehűlni a készüléket és
csak ezután nyomja meg a visszaállítás
gombot a készülék alján.(lásd az ábán) a
konyhai robotgép újbóli használatához.
Zajkibocsátás
A felhasználó fülénél mért hangnyomásszint (LpA) a DIN EN
ISO 3744 szabványnak megfelelően lett meghatározva.
Mért hangnyomásszint: 85 dB(A) (nincs korlátozva)
Műszaki adatok
Típus: .............................................................................. KM 3354
Névleges feszültség/frekvencia: ..................... 220-240 V / 50 Hz
Energiafogyasztás: ............................................................. 600 W
Védelmi osztály: .........................................................................II
Roved működtetés: .............................................................2 perc
Nettó tömeg: ...................................................................... 4,35 kg
Előzetes értesítés nélkül módosulhat.
A készülék megfelel minden érvényes CE irányelvnek, beleértve az elektromágneses megfelelőségről, és a kisfeszültségű
berendezésekről szóló irányelveket, és a legújabb biztonsági
szabályozások gyelembe vételével készült.
Page 48

48
A “Kerekes Szeméttároló” Szimbólum Jelentése
Óvja a környezetet, ne a háztartási hulladékkal semmisítse
meg az elektromos készülékeket.
A fölösleges vagy hibás elektromos készülékeket a helyi gyűjtőpontokban adja le.
Segítsen elkerülni a helytelen hulladékkezelésből eredő
környezeti és egészségügyi hatásokat.
Hozzájárulhat a régi elektromos és elektronikus készülékek
újrahasznosításához vagy más módon való hasznosításához.
A gyűjtőpontokról a helyi hatóságok adhatnak felvilágosítást.
Page 49

49
Загальні вказівки щодо техніки безпеки
Перш ніж використовувати пристрій, уважно прочитайте
цей посібник користувача і зберігайте його, а також гарантію, чек і, якщо можливо, оригінальну упаковку разом із
внутрішнім пакуванням. Якщо ви передасте пристрій третій
особі, додайте також цей посібник користувача.
• Використовуйте цей пристрій для приватних цілей і за
призначенням. Пристрій не призначений для комерційного використання.
Не використовуйте цей пристрій на вулиці. Захищайте
пристрій від тепла, прямих сонячних променів, вологи
(за жодних обставин не занурюйте пристрій у рідини) і
гострих країв. Не користуйтеся пристроєм, якщо у вас
вологі руки. Якщо пристрій намокне, негайно від’єднайте
його від мережі.
• Завжди вимикайте пристрій і від’єднуйте від мережі
(тягніть за штекер, а не за кабель), якщо пристрій не
використовується або коли під’єднуєте приладдя, під
час чищення чи у разі неналежної роботи пристрою.
• Не залишайте пристрій без нагляду під час роботи.
Залишаючи кімнату, завжди вимикайте пристрій.
Від’єднуйте пристрій від мережі.
• Регулярно перевіряйте пристрій і кабель на наявність
пошкоджень. Не вмикайте пристрій, якщо виявлено
пошкодження.
• Не ремонтуйте пристрій самотужки. Зверніться до
уповноважених спеціалістів. Щоб уникнути небезпеки,
слід замінити пошкоджений кабель живлення на такий
самий кабель; заміну має виконувати виробник, служба
підтримки споживачів чи інший кваліфікований спеціаліст.
• Використовуйте лише оригінальні деталі.
• Дотримуйтесь поданих далі у розділі про спеціальні
вказівки з техніки безпеки.
Діти і особи з особливим потребами
• Задля безпеки ваших дітей зберігайте пакувальний
матеріал (пластикові пакети, скоби, пінопласт тощо) у
місцях, недоступних для дітей.
Попередження!
Не дозволяйте малим дітям бавитися фольгою, існує
небезпека задушення!
• Цей пристрій не призначений для використання особами (включаючи дітей) з обмеженими фізичними чи розумовими здібностями, або з браком досвіду та/або знань,
якщо за ними не ведеться нагляд чи їм не були надані
відповідні вказівки стосовно використання пристрою
особою, яка несе відповідальність за їхню безпеку.
• Стежте, щоб діти не бавились пристроєм.
Символи у цьому посібнику
Задля вашої безпеки подано чіткі застереження. Радимо
звернути на них увагу, щоб уникнути нещасних випадків і
пошкодження пристрою.
Попередження.
Попереджає про небезпеку здоров’ю і вказує на можливий
ризик травмування.
Увага.
Вказує на можливу небезпеку для пристрою чи інших
предметів.
Примітка.
Вказує на підказку чи інформацію для користувача.
Спеціальні заходи безпеки для цього при-
строю
• Встановлюйте пристрій на пласку рівну і стійку поверхню.
• Не під’єднуйте пристрій до джерела живлення, допоки
не прикріпите все необхідне приладдя.
• Не торкайтесь частин, що рухаються, і зачекайте, допоки пристрій не зупиниться.
• Не вставляйте посуд, наприклад ложки чи лопатки, та
не утримуйте руками віничок, який обертається, або гачок для замішування під час їх роботи! Існує небезпека
травмування!
• Вимкніть пристрій і від’єднайте його від мережі живлення, перед тим як змінити приладдя!
• Цей пристрій призначений тільки для приготування
харчових продуктів.
• Наповнюйте ємність для змішування лише до позначки
“МАX”.
• Не слід залишати пристрій працювати безперервно
більше 2 хвилин. Дайте йому охолонути приблизно
впродовж 2 хвилин, перед тим як використовувати його
знову.
• Не переміщуйте пристрій під час його роботи; завжди
спочатку вимикайте його і від’єднуйте від мережі
живлення. Завжди переносьте пристрій, тримаючи його
двома руками!
Міксер
• Вмикайте пристрій лише коли чаша закрита кришкою.
• Не відкривайте кришку під час роботи пристрою!
Попередження.
► Ніколи не засовуйте руки в увімкнений міксер!
► Будьте обережні, користуючись лезами! Існує
небезпека травмування під час виймання лез із чаші
для змішування, а також під час спорожнення або
чищення чаші!
►
Не лийте в чашу рідину, температура якої вища за 60°C.
Існує небезпека отримання опіків!
• Не використовуйте міксер без інгредієнтів!
• Не перевантажуйте пристрій! Не перевищуйте максимальний рівень ємності (1300 мл), зазначений на чаші
для змішування!
Page 50

50
Розташування органів керування
1 Ручка з віссю обертання
2 Кнопки регулювання швидкості
3 Вмикач/вимикач живлення
4 Індикатор живлення і дисплей
5 Кнопка вибору пульсуючого режиму
6 Перемикач для піднімання/опускання ручки
7 Захисна кришка приводу
8 Захист від бризок на ємності для змішування з
отвором для наповнення
9 Ємність для змішування
10 Корпус
11 Основа пристрою
12 Кришка ємності для змішування
13 Чаша для змішування
14 Кільце ущільнення
15 Леза
16a Гачок для тіста
16b Гачок для змішування
16c Засіб збивання
16d Віничок для збивання яєць
17 Лопатка для тіста
Розпаковування виробу
• Вийміть пристрій і все приладдя, що до нього додається, з коробки.
• Перш ніж використовувати пристрій, почистьте чашу
для змішування, ємність для змішування, всі кришки та
інше приладдя у воді з милом, щоб усунути можливе
забруднення під час виробництва.
Попередження.
Леза дуже гострі. Існує ризик травмування!
• Після чищення добре висушіть всі частини.
Встановлення
• У разі заміни будь-якого приладдя перевірте, чи пристрій не під’єднано до мережі. Лише за такої умови
можна встановити та використовувати приладдя, як
описано нижче.
• Щоб уникнути травм, перш ніж використовувати ємність
для змішування, на привід міксера слід встановити захисну кришку (7). Не вмикайте пристрій без цієї кришки!
Попередження.
Навіть якщо використовується лише міксер, слід
встановлювати ємність. Оскільки засіб, встановлений у
ручку з віссю обертання, буде постійно обертатись, навіть
якщо ємність для змішування не встановлена!
Під’єднання до електромережі
• Перевірте, чи напруга в мережі, до якої слід під’єднати
пристрій, відповідає напрузі, зазначеній на пристрої. Для
отримання більш детальної інформації перевірте табличку
з паспортними даними в нижній частині пристрою.
Експлуатація
Використання ємності для змішування і приладдя
1. Регулюйте ручку з віссю обертання до того, як буде
прикріплено чашу! Натисніть кнопку (6); іншою рукою
підніміть ручку з віссю обертання. Коли ви відпустите
кнопку, ручку з віссю обертання буде встановлено на
піввисоті або у вертикальному положенні.
2. Щоб використовувати віничок (16d) спочатку прикріпіть захист від бризок (8):Тримайте захист від бризок
муфтою догори.
Примітка.
У нижній частині ручки є два пази зліва та справа.
Встановіть захист від бризок так, щоб виступи потрапили в ці пази, і заблокуйте його, повернувши за годинниковою стрілкою.
Примітка.
Під час приготування тіста додавайте інгредієнти в
ємність через отвір для наповнення.
3. Отвір для прикріплення приладдя розташовано в нижній
частині ручки з віссю обертання. Потисніть кінець гачка
для тіста / змішування або засобу збивання / віничка
для збивання яєць в отвір, допоки вони не клацнуть на
місці. Щоб було легше прикріпити частини, обережно
повертайте їх.
4. Встановіть ємність на місце і поверніть за годинниковою
стрілкою до кінця.
5. Тепер можна заповнювати ємність інгредієнтами.
Увага.
Не переповнюйте пристрій, максимальна кількість
інгредієнтів – 2 кг або 1,3 літра рідини.
6. Натисніть кнопку (6); іншою рукою повільно опустіть
ручку з віссю обертання.
Увага.
Стежте, щоб ручка з віссю обертання не впала донизу!
7. Під’єднайте штекер живлення до належно встановленої
настінної розетки 230 В / 50 Гц. Синій індикатор на дисплеї позначатиме готовність до роботи.
8. - Щоб увімкнути пристрій, натисніть вмикач/вимикач
живлення (3).
- Натискайте кнопку “+” (2) кілька разів поспіль, щоб
вибрати налаштування швидкості. Воно відобразиться на дисплеї.
- Знову зменшити швидкість можна за допомогою
кнопки “-”.
- Щоб увімкнути пульсуючий режим (змішування з
короткими інтервалами), натисніть кнопку “P” (5).
Натисніть і утримуйте кнопку відповідно до потрібної
тривалості інтервалу. У пульсуючому режимі пристрій працюватиме з найвищою швидкістю.
Page 51

51
Примітка.
► На дисплеї буде відображатись час процесу
змішування.
► Під час роботи з найвищою швидкістю може чутися
певний запах. Це не є несправністю пристрою.
Виберіть приладдя і швидкість відповідно до даних у
поданій далі таблиці.
Продукт/
приготування
Кількість Приладдя
Налаштування
швидкості
Макс.
час
роботи
Густе тісто
(наприклад,
дріжджове тісто,
листкове тісто)
Мін. 0,5 кг
Гачок для
тіста
1 – 4 30 c
Макс. 2 кг 1 – 3 2 хв.
Негусте
тісто(наприклад,
тісто для вафель
чи пориста суміш)
Мін. 200 мл
Гачок для
змішування
3 – 5 1 хв.
Макс. 1,3 л 1 – 4 2 хв.
Легкі рідини
(наприклад, тісто
для млинців,
пудинг)
Мін. 200 мл
Віничок для
збивання
яєць
1 – 7 30 с
Макс. 1,3 л
Вершки
Мін. 200 мл Віничок для
збивання
яєць
4 – 12 90 с
Макс. 1,3 л 5 – 12 2 хв.
Збиті білки
Мін. 1 білок Віничок для
збивання
яєць
5 – 12 2 хв.
Макс. 8
білків
Омлет
Мін. 2 яйця
Засіб
збивання
1 – 4 1 хв.
Макс. 1,3 л
Під час вибору швидкості також враховуйте рецепт.
Примітка.
► Короткотермінова робота. Не залишайте пристрій
працювати з густим тістом більше 2 хвилин. Після роботи дайте пристрою охолонути впродовж 2 хвилин.
► Для рідкого тіста використовуйте захист від бризок.
9. Щоб призупинити або зупинити змішування, натисніть
вмикач/вимикач живлення. Від’єднайте штекер живлення.
10. Натисніть перемикач (6); іншою рукою підніміть ручку з
віссю обертання.
Примітка.
Ручку обладнано запобіжним вимикачем. Двигун
вимкнеться, якщо під час роботи ручку підняти. Якщо
ручку опустити, роботу пристрою можна продовжити
відповідно до описаного в пункті 8.
11. Вийміть ємність для змішування, повернувши її проти
годинникової стрілки.
12. Розрухайте тісто за допомогою лопатки і вийміть його з
ємності для змішування.
13. Щоб зняти приладдя з приводу, тримаючи ручку з віссю
обертання однією рукою, іншою рукою потягніть приладя.
14. Почистіть частини, що використовувались, як описано в
розділі “Чищення”.
Використання приладдя для змішування
Увага.
► Не використовуйте одночасно приладдя для
змішування і ємність для змішування.
Попередження.
Приладдя, що встановлено в ручку з віссю обертання,
буде постійно обертатися. Задля безпеки міксер
може працювати лише коли встановлена ємність для
змішування із захистом від бризок.
1. Перш ніж змішувати, поріжте інгредієнти на маленькі
шматки.
2. Покладіть інгредієнти в чашу для змішування (макс. 1,3 л).
3. Закрийте кришку (12) чаші.
Вона повинна надійно закривати чашу для змішування.
4. Зніміть захисну кришку (7) з приводу міксера: використовуйте великий і середній пальці однієї руки, щоб
одночасно натиснути і вийняти задній край кришки.
Примітка.
Для кращого захоплення справа та зліва з країв
кришки є виступи.
5. Встановіть чашу для змішування на корпус так, щоб позначка ● в нижній частині чаші співпадала з позначкою
● на корпусі. Дві точки повинні бути розташовані одна
навпроти одної.
6. Продовжуйте відповідно до описаного в розділі “Використання ємності для змішування та приладдя, пункти 7-9”.
Примітка. Подрібнення кубиків льоду
Леза в чаші для змішування можна також
використовувати для подрібнення кубиків льоду.
Заповніть чашу на 1/3 куб-иками льоду. Щоб подрібнити
кубики льоду, використовуйте тільки пульсуючий режим,
натиснувши кнопку “P”.
Дивіться таблицю налаштувань швидкості / часу нижче.
Продукт/
приготування
Кількість Приладдя
Налаштування
швидкості
Макс. час
роботи
Нарізання
овочів/фруктів
Мін. 200 г
Приладдя
для
змішування
Пульсуючий
режим
30 с
Макс. 500 г 1 – 3 2 хв.
Пюре з овочів/
фруктів (з додаванням рідин)
Макс. 1,3 л
Приладдя
для
змішування
Пульсуючий
режим
1 хв.
4 – 12 1 хв.
Кубики льоду
Макс.
400 мл
Приладдя
для
змішування
Пульсуючий
режим
3 секундне
пульсування
протягом
30 секунд
Page 52

52
Рекомендовані рецепти
Пориста суміш (базовий рецепт)
Налаштування швидкості 1 - 4
Інгредієнти
250 г м’якого масла або маргарину, 250 г цукру, 1 пакет
ванільного цукру або 1 пакет лимонного порошку, 1 пучка
солі, 4 яйця, 500 г пшеничної муки, 1 пакет соди для випічки, приблизно 1/8 літра молока.
Приготування.
Всипте пшеничну муку разом з іншими інгредієнтами в ємність для змішування, розмішуйте за допомогою гачка для
змішування приблизно 30 секунд на швидкості 2, тоді на
швидкості 4 приблизно 1,5 хвилини. Змажте посудину для
випічки або розкладіть папір для випікання, викладіть тісто
і випечіть. Спробуйте пиріг, перед тим як вийняти страву
з духовки. Проколіть пиріг по центру кінцем дерев’яної
палички. Якщо тісто не пристає до палички, пиріг готовий.
Переверніть пиріг на сітку для випікання і дайте йому
охолонути.
Вимоги до духовки.
Рівень: 2
Нагрівання: електродуховка: температура зверху і зни-
зу 175-200°, газова духовка: налаштування
2-3
Час випікання: 50-60 хвилин
Цей рецепт можна змінити, виходячи з власного досвіду,
наприклад додати 100 г родзинок або 100 г горіхів чи 100 г
тертого шоколаду. Немає обмежень для вашої фантазії.
Булочки з зернами льону
Налаштування швидкості 1 - 3
Інгредієнти.
500-550 г пшеничної муки, 50 г зерен льону, 3/8 літра води,
1 кубик дріжджів (40 г), 100 г нежирного сухого сиру, 1
чайна ложка солі.
Для змочування: 2 столові ложки води
Приготування.
Замочіть зерна льону в 1/8 літра теплої води. Залийте
решту теплої води (1/4 літра) в ємність для змішування,
висипте в неї дріжджі, додайте сир і добре вимішайте за
допомогою гачка для замішування на швидкості 1. Дріжджі
мають повністю розчинитися. Висипте муку із вимоченими
зернами льону і сіллю в ємність для змішування. Замішайте тісто на швидкості 1, тоді змініть швидкість на швидкість
2 і замішуйте тісто ще 1-2 хвилин. Накрийте тісто і залиште
в теплому місці на 45-60 хвилин. Замішайте тісто знову,
вийміть його з ємності для змішування і зробіть 16 булочок.
Накрийте лоток для випікання вологим папером для випікання. Покладіть на нього булочки, залиште на 15 хвилин,
змочіть теплою водою і випікайте.
Вимоги до духовки.
Рівень: 2
Нагрівання: електродуховка: температура зверху і
знизу 200-220° (попередньо розігрівати
протягом 5 хвилин), газова духовка: налаштування 2-3
Час випікання: 30-40 хвилин
Чищення
Попереднє чищення
Наповніть чашу для змішування наполовину водою і увімкніть пульсуючий режим приблизно на 10 секунд. Після
цього злийте рідину.
Попередження.
► Перед тим як чистити пристрій, завжди від’єднуйте
штекер кабелю живлення від мережі.
► Не занурюйте пристрій у воду, щоб почистити його.
Існує небезпека ураження електричним струмом або
пожежі.
Увага.
► Не використовуйте дротяну щітку або інші предмети,
що можуть подряпати пристрій.
► Не використовуйте агресивні або абразивні засоби
для чищення.
• Для ретельного чищення зніміть чашу для змішування.
• Розбирайте міксер після кожного використання.
Попередження. Існує небезпека травмування!
Леза дуже гострі. Будьте обережні під час розбирання,
чищення або встановлення окремих частин.
• Викрутіть гвинт чаші за годинниковою стрілкою.
• Зніміть кільце ущільнення з гвинта.
Чаша (13) і кришка (12)
• Чистьте чашу і кришку теплою водою з милом.
Кільце ущільнення (14) і леза (15)
• Промийте в теплій воді.
• Почистивши і висушивши, зберіть міксер, виконавши дії
у зворотному порядку.
Ємність для змішування і приладдя
• Вийміть ємність для змішування, щоб видалити залишки з приводу.
• Чистьте всі забруднені тістом знімні частини водою з
милом.
Увага.
Ці частини не можна мити в посудомийній машині.
Під дією гарячих або агресивних засобів для чищення
частини можуть деформуватись або втратити колір.
Page 53

53
Корпус
• Для чищення поверхні пристрою використовуйте злегка
вологу ганчірку.
Усунення несправностей
• Пристрій не працює.
Вирішення.
Перевірте під’єднання до мережі живлення.
Інші можливі несправності.
Пристрій обладнано двома перемикачами захисту.
Вони запобігають випадковому увімкненню мотора.
Вирішення.
Перевірте правильність встановлення
ручки з віссю обертання (1) ○
чаші для змішування (13) або ○
захисної кришки (7). ○
Захист від перегрівання
• Пристрій обладнано системою захисту від перегрівання.
У випадку перевантаження, спрацює ця система. Тоді
пристрій не буде готовий до роботи. Від’єднайте штекер
кабелю живлення від розетки.
• Дайте пристрою повністю охолонути і
тільки тоді натисніть кнопку скидання
налаштувань внизу пристрою (див.
мал.), щоб знову використовувати
кухонний комбайн.
Створення шуму
Рівень дії шуму на слух користувача (LpA) відповідає
нормам DIN EN ISO 3744.
Встановлений рівень шумів: 85 дБ(A) (без обмежень)
Технічні характеристики
Модель: .......................................................................... KM 3354
Номінальна напруга/частота: ........................220-240 В / 50 Гц
Споживання живлення: ....................................................600 Вт
Клас захисту: .............................................................................. II
Короткотерміновий цикл роботи: ....................................... 2 хв.
Вага нетто: ......................................................................... 4,35 кг
Технічні характеристики можуть бути змінені!
Цей пристрій сертифіковано відповідно до діючих норм
РЄ, наприклад норм електромагнітної сумісності і низької
напруги, і сконструйовано відповідно до останніх характеристик із техніки безпеки.
Page 54

Stand 01/10
 Loading...