

Page 1
R
5....-05-DR 564 CD 09.05.2003 11:47 Uhr Seite 1
Bedienungsanleitung/Garantie
Gebruiksaanwijzing/Garantie • Mode d’emploi/Garantie
Instrucciones de servicio/Garantía • Istruzioni per l’uso/Garanzia
Instruction Manual/Guarantee • Instrukcja obsługi/Gwarancja
A használati utasítás/garancia
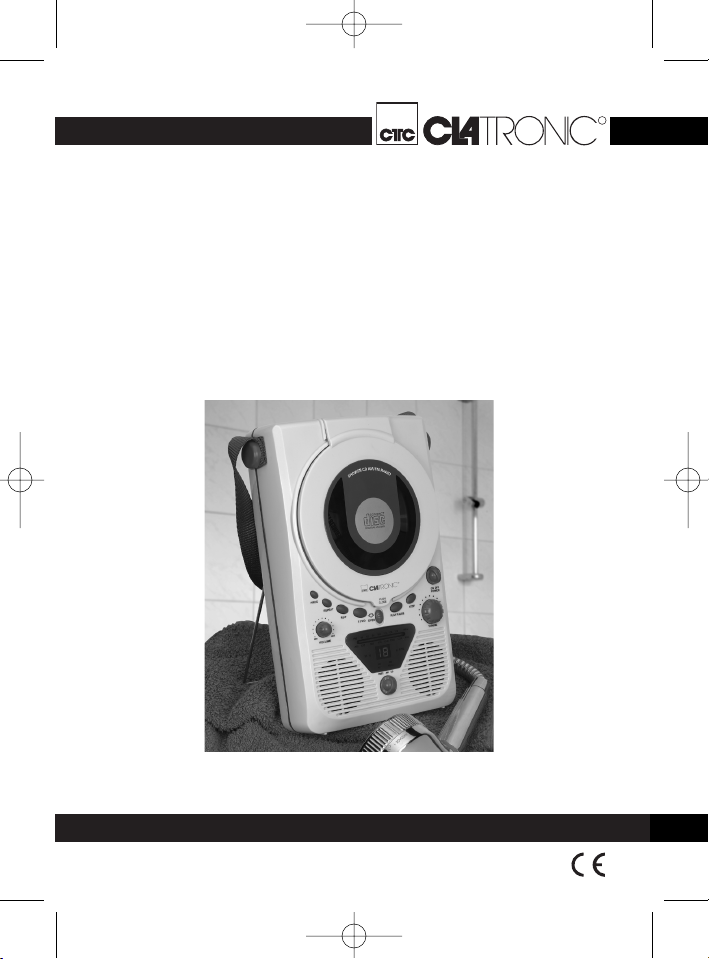
Duschradio mit CD-Player
Doucheradio met CD-speler • Radio de douche avec lecteur de CD
Radio para la ducha con CD-Player • Doccia per radio con lettore CD
Shower Radio with CD Player •
Radio pod prysznic z odtwarzaczem CD
Zuhanyrádió CD-lejátszóval
DR 564 CD
Page 2
5....-05-DR 564 CD 09.05.2003 11:47 Uhr Seite 2
Inhalt
Inhoud • Sommaire • Indice • Indice • Contents • Spis treści • Tartalom
Übersicht Bedienelemente . . . . . . . . . . . . . . . . . . . . . . . . . .Seite 3
D
Bedienungsanleitung . . . . . . . . . . . . . . . . . . . . . . . . . . . . . . .Seite 4
Garantie . . . . . . . . . . . . . . . . . . . . . . . . . . . . . . . . . . . . . . . .Seite 8
Overzicht bedieningselementen . . . . . . . . . . . . . . . . . . . . . .Pagina 3
NL
Gebruiksaanwijzing . . . . . . . . . . . . . . . . . . . . . . . . . . . . . . . .Pagina 10
Garantie . . . . . . . . . . . . . . . . . . . . . . . . . . . . . . . . . . . . . . . .Pagina 14
Aperçu des éléments de commande . . . . . . . . . . . . . . . . . . .Page 3
F
Mode d’emploi . . . . . . . . . . . . . . . . . . . . . . . . . . . . . . . . . . .Page 16
Garantie . . . . . . . . . . . . . . . . . . . . . . . . . . . . . . . . . . . . . . . .Page 21
Vista de conjunto Elementos de mando . . . . . . . . . . . . . . . .Página 3
E
Instrucciones de servicio . . . . . . . . . . . . . . . . . . . . . . . . . . . .Página 22
Garantia . . . . . . . . . . . . . . . . . . . . . . . . . . . . . . . . . . . . . . . .Página 27
I Descrizione dei singoli pezzi . . . . . . . . . . . . . . . . . . . . . . . .Pagina 3
Istruzioni per l’uso . . . . . . . . . . . . . . . . . . . . . . . . . . . . . . . . .
Garanzia . . . . . . . . . . . . . . . . . . . . . . . . . . . . . . . . . . . .Pagina 33
Control element overview . . . . . . . . . . . . . . . . . . . . . . . . . . .Page 3
GB
Instruction Manual . . . . . . . . . . . . . . . . . . . . . . . . . . . . . . . . .Page 34
Guarantee . . . . . . . . . . . . . . . . . . . . . . . . . . . . . . . . . . . . . .Page 39
Przegląd elemetów obsługi . . . . . . . . . . . . . . . . . . . . . . . . .Strona 3
PL
Instrukcja obsługi . . . . . . . . . . . . . . . . . . . . . . . . . . . . . . . .Strona 40
Gwarancja . . . . . . . . . . . . . . . . . . . . . . . . . . . . . . . . . . .Strona 45
A hasznalt elemek megtekintése . . . . . . . . . . . . . . . . . . . . .Oldal 3
H
A hasznalati utasítás . . . . . . . . . . . . . . . . . . . . . . . . . . . . . .Oldal 47
Garancia . . . . . . . . . . . . . . . . . . . . . . . . . . . . . . . . . . . . . . . . Oldal 52
Pagina 28
Page 3
5....-05-DR 564 CD 09.05.2003 11:47 Uhr Seite 3
D
3
Page 4
5....-05-DR 564 CD 09.05.2003 11:47 Uhr Seite 4
D
Verwenden Sie das Gerät nur für den vorgesehenen Zweck.
Das Gerät ausschließlich an eine vorschriftsmäßig installierte Steckdose
anschließen. Achten Sie darauf, dass die angegebene Spannung mit der Spannung
der Steckdose übereinstimmt.
Bei Verwendung von externen Netzteilen auf die richtige Polarität und Spannung
achten, Batterien stets richtigherum einlegen.
Das Gerät so aufstellen, dass vorhandene Lüftungsöffnungen nicht verdeckt werden.
Niemals das Gehäuse des Gerätes öffnen. Durch unsachgemäße Reparaturen
können erhebliche Gefahren für den Benutzer entstehen. Bei Beschädigung des
Gerätes, insbesondere des Netzkabels, das Gerät nicht mehr in Betrieb nehmen,
sondern von einem Fachmann reparieren lassen. Netzkabel regelmäßig auf
Beschädigungen prüfen.
Ein defektes Netzkabel darf nur vom Hersteller, unserem Kundendienst oder einer
ähnlich qualifizierten Person durch ein gleichwertiges Kabel ersetzt werden, um
Gefährdungen zu vermeiden.
Benutzen Sie das Gerät längere Zeit nicht, ziehen Sie den Netzstecker aus der
Steckdose, bzw. entnehmen Sie die Batterien.
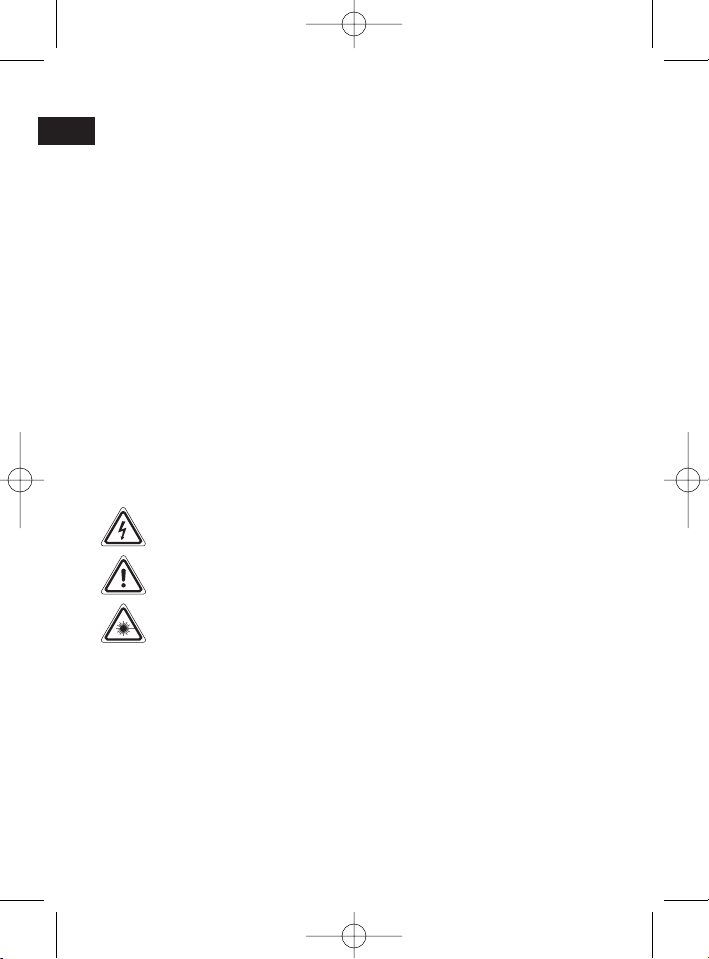
Diese Symbole können sich ggfs. auf dem Gerät befinden und sollen Sie auf folgendes hinweisen:
Diese Sicherheitsschalter sollten auf keinen Fall überbrückt oder manipuliert werden, sonst besteht die Gefahr, dass Sie sich dem Laser-Licht aussetzen.
Allgemeine Sicherheitshinweise
Das Blitz-Symbol soll den Benutzer auf Teile im Inneren des Gerätes hinweisen, die gefährlich hohe Spannungen führen.
Das Symbol mit Ausrufezeichen soll den Benutzer auf wichtige
Bedienungs- oder Wartungs-Hinweise in den Begleitpapieren hinweisen.
Geräte mit diesem Symbol arbeiten mit einem „Klasse 1-Laser“ zur
Abtastung der CD. Die eingebauten Sicherheitsschalter sollen verhindern,
dass der Benutzer gefährlichem, für das menschliche Auge nicht sichtbarem Laserlicht ausgesetzt wird, wenn das CD-Fach geöffnet ist.
Wandmontage
• Das Gerät lässt sich auch an die Wand montieren. Messen Sie für die
Anbringung die Distanz zwischen den beiden Einschnitten aus und bohren Sie
im waagerechten Abstand zwei Löcher.
• Vergewissern Sie sich vorher, dass Sie nicht Leitungen beschädigen die sich in
der Wand verbergen! Versehen Sie die Bohrlöcher mit Schrauben und Dübeln.
• Hängen Sie das Gerät ein und kontrollieren Sie den festen Sitz.
4
Page 5

5....-05-DR 564 CD 09.05.2003 11:47 Uhr Seite 5
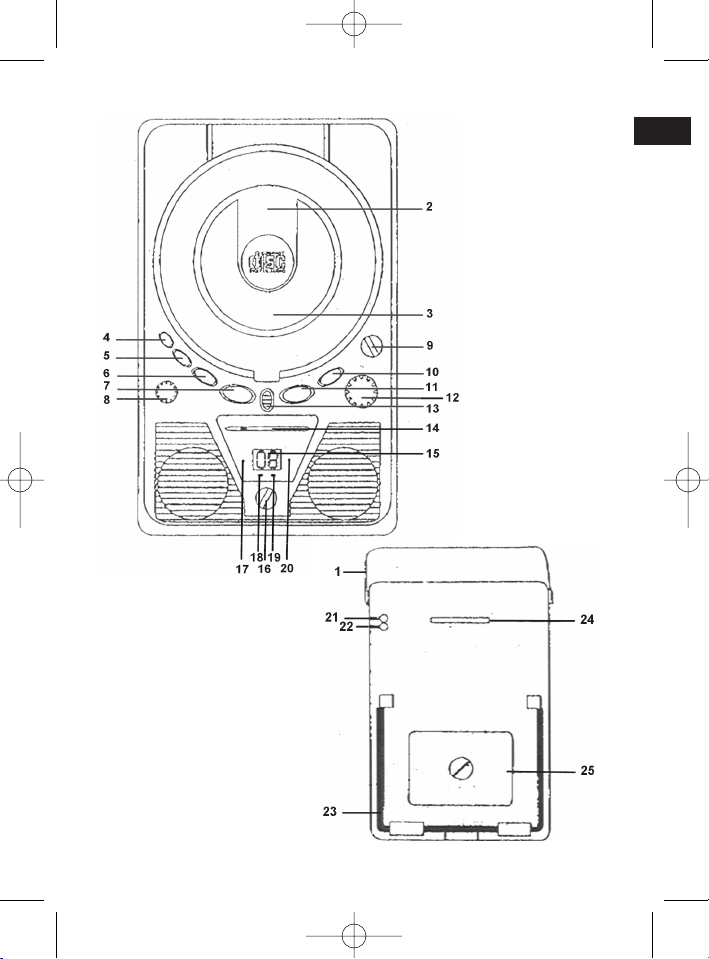
1 Tragegurt
2 CD-Fach
3 CD-Fachklappe
4 PROG Taste
5 REPEAT Taste
6 REW Taste (Rückwärts spulen)
7 F.FWD Taste (Vorwärts spulen)
8 VOLUME / Lautstärkeregler
9 Funktionswahlschalter
ON/OFF POWER
10 STOP Taste
11 PLAY/PAUSE Taste
12 TUNING Regler
13 OPEN / Taste zum Öffnen des
CD-Fach
14 Frequenzskala
15 LED-Display
16 Funktionswahlschalter
(FM ST./AM/CD)
17 Kontrollleuchte ST.
18 Kontrollleuchte REP
19 Kontrollleuchte PROG
20 Kontrollleuchte POW.
Rückseite
21 PHONES (Kopfhöreranschluss)
22 DC 9 V Buchse
23 Standfuß
24 Aufhängevorrichtung
25 Batteriefach
Inbetriebnahme des Gerätes
Batterien einlegen (Batterien nicht im Lieferumfang enthalten)
•Öffnen Sie das Batteriefach (25) auf der Rückseite des Gerätes, indem Sie die
Schraube in Richtung OPEN drehen.
• Legen Sie 8 Batterien 1,5 V, Type AA ein. Achten Sie auf richtige Polarität
(Siehe Batteriefachboden).
• Schließen Sie das Batteriefach (LOCK).
• Wird das Gerät längere Zeit nicht benutzt, nehmen Sie bitte die Batterien aus
dem Gerät, um ein „Auslaufen“ von Batteriesäure zu vermeiden.
• Wechseln Sie immer den kompletten Batteriesatz aus, erneuern Sie nicht nur
eine Batterie.
Achtung: Batterien gehören nicht in den Hausmüll. Bitte geben Sie verbrauchte
Batterien bei zuständigen Sammelstellen oder beim Händler ab.
Werfen Sie Batterien niemals ins Feuer.
Netzteilbetrieb (nicht im Lieferumfang enthalten)
Sie haben die Möglichkeit das Gerät auch über ein Steckernetzteil zu betreiben.
1. Stecken Sie das Steckernetzteil in eine vorschriftsmäßig installierte
Schutzkontakt Steckdose 230V, 50 Hz.
2. Verbinden Sie das Gerät mit dem Steckernetzteil, indem Sie den Stecker des
Netzteiles in die DC 9 V Buchse (22) einstecken.
3. Bei der Verwendung eines Netzteils achten Sie bitte auf die richtige Polung
gemäß der Aufschriften am Gerät.
4. Haben Sie ein Netzteil angeschlossen, werden die Batterien automatisch abgeschaltet.
Übersicht der Bedienelemente
D
5
Page 6

5....-05-DR 564 CD 09.05.2003 11:47 Uhr Seite 6
D
Das Gerät ist Spritzwasser geschützt. Es kann somit auch innerhalb der
Duschkabine verwendet werden. Aufgrund des spritzwassergeschützten Gehäuses
sind die Tasten, der VOLUME- und der TUNNING Regler etwas schwergängig.
Achtung: Bitte beachten Sie, dass das Gerät in der Duschkabine, Badewanne nur
im Batteriebetrieb verwendet werden darf.
Hinweis: Das Wechseln der CD und der Batterien sollten grundsätzlich im trockenen Zustand des Gerätes erfolgen.
Spritzwasserschutz
Allgemeine Bedienung
Aufhänger / Standfuß (24/23): Hängen Sie das Gerät ggf. auf oder stellen
ON OFF POWER (9): Schaltet das Gerät betriebsbereit bzw. aus.
VOLUME (8): Dient der Abstimmung der Lautstärke.
9 V Buchse (22): Zum Anschluss eines Netzadapters.
PHONES (21): Zum Anschluss eines Kopf- oder Ohrhörers.
Ausschalten
Sie schalten das Gerät aus, indem Sie den Funktionswahlschalter (9) auf OFF stellen.
Sie es auf seinen Standfuß.
Die Kontrollleuchte POW (20) zeigt die
Funktion an.
CDs abspielen
1. Schieben Sie die OPEN Taste (13) nach unten, öffnet sich das CD-Fach.
2. Eine CD mit dem Etikett nach oben so auf den „Puck“ über die Kugeln hinweg
aufdrücken, dass diese einrastet. Die CD-Fachklappe (3) bitte schließen.
3. Drehen Sie den Funktionswahlschalter (16) auf Position CD.
4. Drücken Sie die PLAY/PAUSE Taste (11), um die CD wiederzugeben. Auf dem
Display erscheint „- -„ und dann die Anzahl der Titel. Die CD wird vom ersten
Titel an abgespielt. Das aktuelle Lied wird im Display angezeigt.
5. Um eine CD zu entnehmen, drücken Sie die STOP Taste (10), öffnen das CDFach mit der OPEN Taste und heben die CD vorsichtig ab.
Halten Sie den CD-Deckel bitte stets geschlossen.
Beschreibung der CD-Tasten
PLAY/PAUSE (11):
Sie können die Wiedergabe kurz unterbrechen.
Nochmaliges Drücken der Taste setzt die Wiedergabe
an derselben Stelle fort.
6
Page 7

5....-05-DR 564 CD 09.05.2003 11:47 Uhr Seite 7
REW (6): 1 x drücken = Beginnt das aktuelle Lied wieder von
F.FWD (7): Mit dieser Taste können Sie zum nächsten bzw.
STOP (10): Die CD wird angehalten.
REPEAT (5): Folgende Funktionen können Sie mit der REPEAT
Programmierte Wiedergabe
1. Drücken Sie die STOP Taste.
2. Drücken Sie die PROG (4) Taste.
3. Im Display blinkt die Kontrollleuchte PROG (19) und „01“ (Titelnummer).
4. Wählen Sie mit den REW/F.FWD Tasten den gewünschten Titel aus und
drücken Sie erneut die PROG Taste.
5. Die Anzeige im Display wechselt auf Speicherplatz 02.
6. Wählen Sie mit den REW/F.FWD Tasten den nächsten Titel aus und drücken
Sie erneut die PROG. Taste. Wiederholen Sie den Vorgang, bis Sie alle Titel
ausgewählt haben.
7. Drücken Sie die PLAY/PAUSE Taste. Im Display leuchtet die Kontrollleuchte
PROG. Die Wiedergabe wird gestartet. Mit dieser Taste können Sie das
Programm ebenso kurz unterbrechen.
8. Drücken Sie einmal die STOP Taste, wird die Wiedergabe gestoppt, das
Programm bleibt jedoch erhalten.
9. Zur erneuten Wiedergabe des Programms, drücken Sie bitte zuerst 1x die
PROG Taste und danach die PLAY/PAUSE Taste.
10. Zum Löschen des Programms drücken Sie bitte 2x die STOP Taste.
Das Gerät stoppt automatisch, nachdem alle programmierten Titel wiedergegeben
wurden. Die programmierte Reihenfolge bleibt im Speicher enthalten bis Sie die
Programmierung löschen oder die CD aus dem CD Fach entnehmen, bzw. das
Gerät ausschalten. Um die programmierte Reihenfolge erneut wiederzugeben,
drücken Sie zuerst die PROG- und dann die PLAY/PAUSE Taste.
Sie haben die Möglichkeit die programmierten Titel mit der REPEAT-Funktion zu
kombinieren. Nachdem Sie programmiert und das Gerät gestartet haben, drücken
vorne.
2 x drücken = Springt zum vorherigen Titel.
3 x drücken = Spielt ein Lied davor usw. Halten Sie die
Taste gedrückt, setzt ein Musiklauf ein.
übernächsten Titel springen usw. Halten Sie die Taste
gedrückt, setzt ein Musiksuchlauf ein.
Taste auswählen:
1 x drücken = Im Display blinkt die Kontrollleuchte REP
(18). Der aktuelle Titel wird ständig wiederholt.
2 x drücken = Im Display leuchtet die Kontrollleuchte
REP. Die aktuelle CD wird ständig wiederholt.
3 x drücken = Alle Funktionen sind aufgehoben. Der
normale Abspielbetrieb wird fortgesetzt.
D
7
Page 8
5....-05-DR 564 CD 09.05.2003 11:47 Uhr Seite 8
Sie bitte die REPEAT Taste bis zu 3 x. Die Funktionen können Sie, wie bereits in
D
Abschnitt „REPEAT“ beschrieben, anwenden.
Radio hören
1. Drehen Sie den Funktionswahlschalter (16) auf Position FM ST oder AM.
2. Mit diesem Schalter können Sie das gewünschte Frequenzband auswählen.
3. UKW = FM ST., Mittelwelle = AM (Mono).
4. Stimmen Sie mit dem TUNING Regler (12) den gewünschten Sender ab.
5. Die Stereo-Kontrollleuchte (17) leuchtet nur, wenn Sie UKW Stereo ausgewählt
haben und den Sender in Stereo Qualität empfangen. Ist der Empfang zu
schwach und rauscht der empfangene Sender, ist es möglich, dass diese nicht
leuchtet. Ist keine Verbesserung zu erreichen, empfiehlt es sich, den Standort
zu wechseln.
6. Zum Empfang von MW/AM Sendern verfahren Sie auf entsprechende Weise. In
diesem Frequenzband werden Sendungen nur in „Mono“ ausgestrahlt.
Anmerkung: Zum Empfang von FM ST/AM Sendern ist eine Antenne im Gerät integriert. Das Gerät kann durch Verdrehen und Änderung der Position auf den Sender
ausgerichtet werden.
Reinigung und Aufbewahrung
• Reinigen Sie das Gerät mit einem feuchten Tuch und trocknen Sie es danach
gut ab.
• Benutzen Sie bitte keine scharfen Reinigungsmittel.
• Wird das Gerät über einen längeren Zeitraum (einige Monate) nicht benutzt,
sollten Sie die Batterien aus dem Batteriefach entnehmen, um ein „Auslaufen“
von Batteriesäure zu verhindern.
Garantie
Wir übernehmen für das von uns vertriebene Gerät eine Garantie von 24 Monaten
ab Kaufdatum (Kassenbon).
Innerhalb der Garantiezeit beseitigen wir unentgeltlich die Mängel des Gerätes oder
des Zubehörs*), die auf Material- oder Herstellungsfehler beruhen, durch Reparatur
oder, nach unserem Ermessen, durch Umtausch. Garantieleistungen bewirken
weder eine Verlängerung der Garantiefrist, noch beginnt dadurch ein Anspruch auf
eine neue Garantie!
Als Garantienachweis gilt der Kaufbeleg. Ohne diesen Nachweis kann ein kostenloser Austausch oder eine kostenlose Reparatur nicht erfolgen.
Im Garantiefall geben Sie bitte das Grundgerät in der Originalverpackung zusammen
mit dem Kassenbon an Ihren Händler.
8
Page 9

5....-05-DR 564 CD 09.05.2003 11:47 Uhr Seite 9
*) Schäden an Zubehörteilen führen nicht automatisch zum kostenlosen Umtausch
des kompletten Gerätes. Wenden Sie sich in desem Fall bitte an unsere Hotline!
Glasbruchschäden bzw. Brüche von Kunststoffteilen sind grundsätzlich kostenpflichtig!
Sowohl Defekte an Verbrauchszubehör bzw.Verschleißteilen (z.B. Motorkohlen,
Knethaken, Antriebsriemen, Ersatzfernbedienung, Ersatzzahnbürsten, Sägeblättern
usw.), als auch Reinigung, Wartung oder der Austausch von Verschleißteilen, fallen
nicht unter die Garantie und sind deshalb kostenpflichtig!
Die Garantie erlischt bei Fremdeingriff.
Nach der Garantie
Nach Ablauf der Garantiezeit können Reparaturen kostenpflichtig vom entsprechenden Fachhandel oder Reparaturservice ausgeführt werden.
Service für unsere
Haushaltsartikel
Verschleißteile für Haushaltsartikel
(soweit diese nicht vom Fachmann
ausgewechselt werden müssen),
Ersatzkannen, Staubsaugerfilterbeutel
usw.können Sie mit Angabe des
Gerätetyps unter folgender TelefonHotline bestellen:
0 21 52 / 2006 –888
Für technische Fragen haben wir für Sie folgende e-mail-Adresse eingerichtet:
hotline@clatronic.de
Interessieren Sie sich für weitere Clatronic-Produkte?
Besuchen Sie doch einmal unsere Homepage unter
www.clatronic.de oder www.clatronic.com
Auch Ihre Bestellungen nehmen wir gerne unter o. g. Homepage-Adresse entgegen.
Service für unsere
Unterhaltungselektronik
Verschleißteile und Ersatzteile für
unsere Unterhaltungselektronik (soweit
diese nicht vom Fachmann ausgewechselt werden müssen) wie z. B.
Fernbedienungen, Bedienteilklappen,
Lautsprecherblenden usw. können Sie
mit Angabe des Gerätetyps unter folgender Telefon-Hotline bestellen:
0 21 52 / 2006 – 666
D
9
Page 10
5....-05-DR 564 CD 09.05.2003 11:47 Uhr Seite 10
NL
Gebruik het apparaat uitsluitend voor het daarvoor bestemde doel.
Sluit het apparaat uitsluitend aan op een correct geïnstalleerde contactdoos. Let op
dat de aangegeven spanning overeenstemt met de spanning van de contactdoos.
Let bij het gebruik van externe adapters op de juiste polariteit en spanning en
plaats batterijen altijd in de juiste richting.
Plaats het apparaat zodanig dat de aangebrachte luchtopeningen niet worden afgedekt.
Open nooit de behuizing van het apparaat. Door ondeskundige reparaties kunnen
aanzienlijke gevaren voor de gebruiker ontstaan. Neem het apparaat niet meer in
gebruik wanneer het apparaat - en in het bijzonder de kabel - beschadigingen vertoont, maar laat het eerst door een vakman repareren. Controleer de kabel regelmatig op beschadigingen.
Een defecte kabel mag alleen door de fabrikant, onze technische dienst of een
soortgelijk gekwalificeerd persoon worden vervangen. Alleen zo kunnen gevaren
vermeden worden.
Onderbreek de stroomtoevoer of verwijder de batterijen wanneer u denkt, het apparaat langere tijd niet te gebruiken.
Volgende symbolen kunnen op uw apparaat zijn aangebracht. Zij hebben de volgende betekenis:
Deze veiligheidsschakelaars mogen in geen geval overbrugd of gemanipuleerd
worden omdat u anders gevaar loopt, aan het laserlicht te worden blootgesteld.
Algemene veiligheidsinstructies
Het bliksemsymbool wijst de gebruiker op onderdelen in het inwendige
van het apparaat die gevaarlijk hoge spanning voeren.
Het symbool met het uitroepteken verwijst naar belangrijke
bedienings- en onderhoudsinstructies in de begeleidende documentatie.
Apparaten met dit symbool werken met een „klasse 1-laser„ voor de aftasting van de CD. De ingebouwde veiligheidsschakelaars moeten voorkomen dat de gebruiker wordt blootgesteld aan gevaarlijke, voor het menselijk oog onzichtbaar laserlicht wanneer het CD-vak geopend is.
Wandmontage
• U kunt het apparaat ook aan de wand monteren. Meet voor de montage de
afstand tussen de beide uitsparingen en boor in deze afstand horizontaal twee
gaten in de muur.
• Waarborg eerst dat u geen leidingen in de muur beschadigt! Voorzie de boorgaten van pluggen en schroeven.
• Hang het apparaat op en controleer het op correcte montage.
10
Page 11
5....-05-DR 564 CD 09.05.2003 11:47 Uhr Seite 11
Overzicht van de bedieningselementen
1 Draagriem
2 CD-lade
3 Klep CD-lade
4 PROG-toets
5 REPEAT-toets
6 REW-toets (terugspoelen)
7 F.FWD-toets (vooruitspoelen)
8 VOLUME / volumeregelaar
9 Functiekeuzeschakelaar
ON/OFF POWER
10 STOP-toets
11 PLAY/PAUSE-toets
12 TUNING-regelaar
13 OPEN / toets voor het openen van
de CD-lade
14 Frequentieschaal
15 LED-display
16 Functiekeuzeschakelaar
(FM ST./AM/CD)
17 Controlelamp ST.
18 Controlelamp REP
19 Controlelamp PROG
20 Controlelamp POW.
Achterzijde
21 PHONES (Koptelefoonaansluiting)
22 DC 9 V bus
23 Standvoet
24 Ophanginrichting
25 Batterijenvakje
Ingebruikname van het apparaat
Batterijen plaatsen (niet bij de levering inbegrepen)
• Open het batterijvakje (25) aan de achterzijde van het apparaat door de schroef
in de richting OPEN te draaien.
• Plaats 8 1,5 V-batterijen type AA. Let op de juiste polariteit (zie bodem van het
batterijenvakje).
• Sluit het batterijvak weer (LOCK).
• Verwijder de batterijen wanneer u denkt, het apparaat langere tijd niet te gebrui-
ken. Zo voorkomt u dat batterijzuur uit de batterijen kan lekken.
• Vervang alleen een complete set batterijen en nooit één batterij.
Belangrijk: batterijen horen niet thuis in het huisafval. Geef verbruikte batterijen
altijd af in het gemeentelijke milieupark of bij de handelaar.
Gooi batterijen nooit in het vuur.
Netvoeding via adapter (niet bij levering inbegrepen)
U kunt het apparaat ook via het stroomnet voeden.
1. Sluit de adapter aan op een correct geïnstalleerde contactdoos 230 V, 50 Hz.
2. Verbind het apparaat met de stroomkabel door de steker van het voedingsapparaat in de DC 9 V-bus (22) te steken.
3. Wanneer u een voedingsapparaat gebruikt, dient u op de juiste polariteit volgens de kenmerking op het apparaat te letten.
4. De batterij wordt automatisch uitgeschakeld wanneer een voedingsapparaat is
aangesloten.
NL
11
Page 12

5....-05-DR 564 CD 09.05.2003 11:47 Uhr Seite 12
NL
Het apparaat is beveiligd tegen spatwater. Het kan dus ook in de douchecabine
worden gebruikt. Vanwege de tegen spatwater beveiligde behuizing zijn de toetsen
van de VOLUME- en de TUNING-regelaar iets stroef te bedienen.
Let op: denk eraan dat het apparaat alléén in batterijmodus in de douchecabine of
de badkuip mag worden gebruikt.
Opmerking: Vervang de CD en de batterijen alléén wanneer het apparaat droog is.
Beveiligd tegen spatwater
Bediening algemeen
Haakje / standvoet (24/23): U kunt het apparaat eventueel ophangen of
ON OFF POWER (9): Schakelt de installatie in of uit. Het controle-
VOLUME (8): Hiermee regelt u de geluidssterkte.
9 V bus (22): Aansluiting voor de netadapter.
PHONES (21): Aansluiting voor een kop- of oortelefoon.
Uitschakelen
Schakel het apparaat uit door de functiekeuzeschakelaar (9) naar de stand OFF te
schuiven.
op de standvoet zetten.
lampje POW (20) geeft de functie weer.
CD’s afspelen
1. Schuif de OPEN-toets (13) naar beneden om de CD-lade te openen.
2. Druk een CD met het etiket naar boven zodanig op de “puck” over de kogel
heen dat de CD inklikt. Sluit de CD-lade (3) weer.
3. Draai de functiekeuzeschakelaar (16) naar de stand CD.
4. Druk de PLAY/PAUSE-toets (11) in om de CD af te spelen. Op het display verschijnt “- -“ en daarna het aantal titels. De CD wordt nu afgespeeld vanaf de
eerste titel. Op het display wordt de huidige titel en de verstreken speelduur
weergegeven.
5. Om een CD te verwijderen drukt u op de STOP-toets (10), opent de CD-lade
met de OPEN-toets en neemt de CD voorzichtig uit het apparaat.
Houd de CD-lade verder steeds gesloten.
Beschrijving van de CD-toetsen
PLAY/PAUSE (11):
U kunt de weergave kort onderbreken.
Door het nogmaals indrukken van de toets wordt de
weergave vanaf hetzelfde punt voortgezet.
12
Page 13

5....-05-DR 564 CD 09.05.2003 11:47 Uhr Seite 13
REW (6): 1 x indrukken = De huidige titel begint opnieuw.
F.FWD (7): Met deze toets kunt u naar de volgende of de daarop-
STOP (10): De CD wordt stilgezet.
REPEAT (5): U kunt de volgende functies met de REPEAT-toets uit-
Geprogrammeerde weergave
1. Druk op de STOP-toets.
2. Druk op de PROG-toets (4).
3. Op het display knippert het controlelampje PROG (19) en “01” (titelnummer).
4. Selecteer de gewenste titel met de toetsen REW/F.FWD en druk opnieuw op de
PROG-toets.
5. Het display schakelt naar geheugenplaats 02.
6. Selecteer de gewenste titel met de toetsen REW/F.FWD en druk opnieuw op de
PROG-toets. Herhaal deze stappen totdat u alle gewenste titels hebt uitgekozen.
7. Druk op de toets PLAY/PAUSE. Het controlelampje PROG knippert op het display. De titels worden afgespeeld. Met deze toets kunt u het programma
eveneens kortstondig onderbreken.
8. Wanneer u één keer op de STOP-toets drukt, wordt de weergave onderbroken,
maar blijft het programma behouden.
9. Druk 1x op de PROG-toets en daarna op de PLAY/PAUSE-toets om het programma opnieuw weer te geven.
10. Druk 2x op de STOP-toets om het programma te wissen.
Het apparaat stopt automatisch nadat alle geprogrammeerde titels zijn afgespeeld.
De geprogrammeerde volgorde wordt in het geheugen opgeslagen totdat u de programmering wist, de CD uit de CD-lade verwijdert of het apparaat uitschakelt. Om
de geprogrammeerde volgorde opnieuw weer te geven, drukt u op de PROG-toets
en daarna op de PLAY/PAUSE-toets.
2 x indrukken = Springt naar de volgende titel.
3 x indrukken = Speelt een eerdere titel enz. Wanneer
u de toets ingedrukt houdt, kunt u snel
naar titels zoeken.
volgende titel springen enz. Wanneer u de toets ingedrukt houdt, kunt u snel naar titels zoeken.
kiezen:
1 x indrukken = Het controlelampje REP (18) knippert
op het display. De huidige titel wordt
voortdurend herhaald.
2 x indrukken = Het controlelampje REP knippert op
het display. De huidige CD wordt
voortdurend herhaald.
3 x indrukken = Alle functies zijn opgeheven. De nor-
male afspeelmodus wordt voortgezet.
NL
13
Page 14

5....-05-DR 564 CD 09.05.2003 11:47 Uhr Seite 14
U hebt de mogelijkheid, de geprogrammeerde titels met de REPEAT-functie te com-
NL
bineren. Nadat u de programmering hebt afgesloten en het apparaat gestart hebt,
drukt u de REPEAT-toets tot 3 x in. U kunt de functies gebruiken zoals in het hoofdstuk “REPEAT” beschreven.
De radio beluisteren
1. Draai de functiekeuzeschakelaar (16) naar de stand FM ST of AM.
2. Met deze schakelaar kunt u de gewenste frequentieband selecteren.
3. UKW = FM ST., middengolf = AM (mono).
4. U stemt de gewenste zender af met de knop TUNING (12).
5. Het stereocontrolelampje (17) brandt alleen wanneer u UKW-stereo hebt gekozen en de zender in stereokwaliteit wordt ontvangen.Wanneer de ontvangst te
zwak is en de zender ruist, kan het zijn dat het lampje niet brandt. Wanneer
geen verbetering te bereiken is, is het zinvol om een andere plaats te kiezen.
6. Ga voor de ontvangst van MW/AM-zenders op overeenkomstige wijze te werk.
In dit frequentiebereik worden programma’s alleen in mono ontvangen.
Opmerking: voor de ontvangst van FM ST/AM-zenders is een antenne in het
apparaat geïntegreerd. Het apparaat kan door draaien en veranderen van de positie worden ingesteld op de zender.
Reiniging en bewaring
• Reinig het apparaat met een vochtige doek en droog het daarna goed af.
• Gebruik géén agressieve reinigingsmiddelen.
• Wanneer het apparaat gedurende een langere periode (enkele maanden) niet
wordt gebruikt, dient u de batterijen uit het batterijvakje te verwijderen om lekkage van batterijzuur te voorkomen.
Dit apparaat is gekeurd conform de op dit moment van toepassing zijnde CErichtlijnen zoals bijvoorbeeld elektromagnetische compatibiliteit en laagspanningsvoorschriften en is geconstrueerd volgens de nieuwste veiligheidstechnische voorschriften.
Technische wijzigingen voorbehouden!
Garantie
Voor het door ons geleverde apparaat verlenen wij een garantie van 24 maanden
vanaf koopdatum (kassabon).
Eventuele gebreken aan het apparaat of aan het toebehoren*) die zijn ontstaan
door productie- of materiaalfouten verhelpen wij binnen deze periode kosteloos
door middel van reparatie of, naar ons oordeel, door vervanging. Eventuele garan-
14
Page 15

5....-05-DR 564 CD 09.05.2003 11:47 Uhr Seite 15
tiegevallen verlengen noch de geldigheidsduur van de garantie, noch begint daardoor een nieuwe garantieperiode!
Het koopbewijs geldt als garantiebewijs. Zonder dit bewijs kan geen kosteloze
reparatie of vervanging plaatsvinden.
Geef in geval van garantie het apparaat met de kassabon en in de originele verpakking af bij uw handelaar.
*) Schade aan onderdelen leidt niet automatisch tot kosteloze vervanging van het
complete apparaat. Neem in dit geval contact op met onze hotline! De reparatie van
glasbreuk of breuk van kunststofonderdelen wordt altijd berekend!
Niet defecten aan de hulpstukken of aan de slijtende onderdelen (bijv. koolborstels,
deeghaken, drijfriemen, reserveafstandsbediening, reservetandenborstels, zaagbladen enz.), maar ook reiniging, onderhoud of de vervanging van slijtende delen
vallen niet onder de garantie en geschieden altijd tegen berekening!
Bij ingrepen door derden komt de garantieverlening te vervallen.
Na de garantieperiode
Na afloop van de garantieperiode kunnen reparaties tegen berekening worden uitgevoerd door de betreffende vakhandelaar of de technische dienst.
NL
15
Page 16
5....-05-DR 564 CD 09.05.2003 11:47 Uhr Seite 16
F
N’utilisez l’appareil qu’aux fins auxquelles il est destiné.
Ne branchez l’appareil que dans une prise de courant en bon état de fonctionne-
ment. Veillez à ce que la tension électrique de l’appareil corresponde à celle indiquée sur la prise de courant.
Si vous utilisez une alimentation électrique externe, vérifiez la polarité et la tension
électrique. Placez toujours correctement les piles.
Installez toujours l’appareil de façon à ce que les ouvertures de ventilation ne
soient pas obstruées.
N’ouvrez jamais le bloc moteur de l’appareil. Des réparations mal appropriées peuvent entraîner des risques importants pour l’utilisateur. En cas d’endommagement
de l’appareil, en particulier du câble d’alimentation, ne mettez plus l’appareil en
marche et laissez un spécialiste se charger de la réparation. Contrôlez régulièrement le bon état du câble d’alimentation.
Pour éviter tout risque, seul le fabricant, son service après-vente ou un spécialiste
à qualification similaire sont aptes à remplacer un câble défectueux par un câble
équivalent.
Si l’appareil n’est pas utiliser pendant assez longtemps, débranchez le câble d’ali-
mentation ou retirez les piles.
Vous pouvez éventuellement trouver ces symboles sur l’appareil, qui ont la signification suivante:
L’éclair indique à l’utilisateur les pièces dangereuses, situées à l’intérieur
de l’appareil, qui conduisent de hautes tensions.
Le point d’exclamation attire l’attention de l’utilisateur sur les remarques
importantes d’utilisation et d’entretien données dans les documents de
l’appareil.
Les appareils dotés de ce symbole fonctionnent avec un „laser de la classe 1“ pour la lecture des disques CD. Les boutons de sécurité intégrés
sont chargés d’éviter qu’à l’ouverture du compartiment à CD l’utilisateur
entre en contact avec la lumière laser qui est dangereuse et invisible à
l’oeil humain.
Il est absolument interdit de court-circuiter ou manipuler ces boutons de sécurité,
ce qui risquerait sinon de mettre l’utilisateur en contact avec la lumière laser.
Conseils de sécurité
16
Page 17

5....-05-DR 564 CD 09.05.2003 11:47 Uhr Seite 17
Description des éléments de commande
1 Bandoulière
2 Compartiment à CD
3 Couvercle du compartiment à CD
4 Touche PROG
5 Touche REPEAT
6 Touche REW (marche arrière)
7 Touche F.FWD (marche avant)
8 VOLUME / réglage du son
9Sélecteur de fonctions
ON/OFF POWER
10 Touche STOP
11 Touche PLAY/PAUSE
12 Régulateur TUNING
13 Touche OPEN pour ouvrir le com-
partiment à CD
14 Bandes de fréquences
15 Affichage lumineux
16 Sélecteur de fonctions
(FM ST./AM/CD)
17 Lampe témoin ST.
18 Lampe témoin REP
19 Lampe témoin PROG
20 Lampe témoin POW.
Dos de l’appareil
21 PHONES (Prise casque)
22 DC fiche 9 V
23 Pied support
24 Système de fixation
25 Compartiment à piles
Fixation murale
• Il est possible de fixer l’appareil au mur. Mesurez pour cela l’écartement entre
les deux orifices prévus à cet effet de l’appareil puis percez 2 trous à l’horizontale dans le mur.
• Assurez-vous au préalable de ne pas endommager de canalisations se trouvant
dans le mur! Fixez l’appareil à l’aide de vis équipées de chevilles.
• Suspendez l’appareil au mur et assurez-vous qu’il est fermement accroché
Avant la première utilisation
Installation des piles (non comprises à la livraison)
• Pour ouvrir le compartiment à piles (25) situé au dos de l’appareil dévissez la
vis dans le sens OPEN.
• Installez 8 piles de 1,5 V de type AA. Veillez à respecter la polarité (voir fond du
compartiment).
• Fermez le compartiment à piles (LOCK).
• Si l’appareil ne doit pas être utilisé pendant une période prolongée, retirez les
piles pour éviter que l’acide des piles ne “coulent”.
• Remplacez toujours toutes les piles à la fois et pas seulement une seule.
Attention: ne jetez en aucun cas vos piles avec les ordures ménagères.Vous êtes
priés de rapporter vos piles à une borne de recyclage ou à votre revendeur.
Ne jetez jamais les piles dans le feu.
F
17
Page 18

5....-05-DR 564 CD 09.05.2003 11:47 Uhr Seite 18
Fonctionnement avec câble d’alimentation (non compris à la livraison)
F
Vous avez la possibilité d’utiliser cet appareil au moyen d’une unité d’alimentation
électrique.
1. Branchez le câble d’alimentation dans une prise de courant de 230V, 50 Hz en
bon état de fonctionnement.
2. Pour raccorder l’appareil avec le câble d’alimentation, introduisez la fiche du
câble d’alimentation dans la prise DC 9 V (22).
3. Si vous utilisez le câble d’alimentation, veillez à respecter la polarité selon les
inscriptions sur l’appareil.
4. Si vous avez branché le câble d’alimentation, les piles seront automatiquement
arrêtées.
Protection contre les éclaboussures
Cet appareil est équipé d’une protection contre les éclaboussures. Il peut ainsi être
utilisé dans une cabine de douche. Les parois de l’appareil étant spécialement
protégées contre les éclaboussures, les touches de réglage du VOLUME et du
TUNNING ne sont pas aisées d’accès.
Attention: n’oubliez en aucun cas que cet appareil ne peut être utilisé qu’avec des
piles dans une cabine de douche ou une baignoire.
Remarque: Ne changez de disque ou de pile que lorsque l’appareil est sec.
Conseils généraux d’utilisation
Bandoulière / pied support (24/23): suspendez l’appareil ou posez-le sur son pied
ON OFF POWER (9): pour mettre l’appareil en marche ou l’arrêter.
VOLUME (8): sert à régler le son.
Fiche 9 V (22): pour le raccordement de l’unité d’alimentation
PHONES (21): pour le raccordement d’un casque ou d’oreil-
Arrêt
Pour arrêter l’appareil, positionnez le sélecteur de fonctions (9) sur OFF.
support.
La lampe témoin POW (20) indique la fonction choisie
lettes.
Lecture de CD
1. Faites coulisser la touche OPEN (13) vers le bas, ouvrez le compartiment à CD
2. Placez un disque sur le cône central du compartiment, en orientant la face illustrée vers le haut et en veillant à ce qu’il soit fermement installé. Fermez le couvercle du compartiment à CD (3).
3. Positionnez le sélecteur de fonctions (16) sur la position CD.
18
Page 19

5....-05-DR 564 CD 09.05.2003 11:47 Uhr Seite 19
4. Enfoncez la touche PLAY/PAUSE (11) pour lire le disque. Sur l’écran apparaît
“- -“ puis le nombre de titres. Le disque est lu à partir du premier titre. La chan-
son en cours et le temps de lecture écoulé sont indiqués sur l’écran.
5. Pour sortir le disque, enfoncez la touche STOP (10), ouvrez le couvercle du
compartiment à l’aide de la touche OPEN et retirez le disque délicatement.
Maintenez le couvercle de l’appareil toujours fermé.
Description des touches à CD
PLAY/PAUSE (11):
REW (6): 1 pulsion = la chanson en cours recommence depuis
F.FWD (7): Vous pouvez grâce à cette touche passer au titre sui-
STOP (10): le disque est arrêté.
REPEAT (5): A l’aide de la touche REPEAT vous pouvez choisir les
Programmation de la lecture
1. Enfoncez la touche STOP.
2. Enfoncez la touche PROG (4).
3. Sur l’écran clignote la lampe témoin PROG (19) et “01” (numéro du titre).
4. Sélectionnez, à l’aide des touches REW/F.FWD le titre désiré puis enfoncez à
nouveau la touche PROG.
5. L’information sur l’écran passe alors à la plage de mémoire 02.
vous pouvez interrompre la lecture pour un court
instant. Si vous enfoncez à nouveau cette touche, la
lecture recommence automatiquement.
le début.
2 pulsions = pour passer au titre précédent.
3 pulsions = pour lire la chanson précédente, etc. Si
vous maintenez la touche enfoncée, la
recherche automatique est activée.
vant ou celui d’après, etc. Si vous maintenez la touche
enfoncée, la recherche automatique est activée.
fonctions suivantes
1 pulsion = La lampe témoin REP (18) clignote
sur l’écran. Le titre en cours sera sans
cesse répété.
2 pulsions = La lampe témoin REP (18) est
éclairée sur l’écran. Le disque en
cours sera sans
cesse répété.
3 pulsions = Toutes les fonctions sont désactivées.
Le fonctionnement normal est à nouveau activé.
F
19
Page 20

5....-05-DR 564 CD 09.05.2003 11:47 Uhr Seite 20
6. Sélectionnez, à l’aide des touches REW/F.FWD le titre suivant puis enfoncez à
F
nouveau la touche PROG. Procédez de la façon suivante jusqu’à ce que vous
ayez sélectionné tous les titres désirés.
7. Enfoncez la touche PLAY/PAUSE. Sur l’écran la lampe témoin PROG est
allumée.. La lecture commence.Grâce à cette touche, vous pouvez également
interrompre le programme pour un court instant.
8. Enfoncez une fois la touche STOP pour arrêter la lecture sans toutefois effacer
le programme.
9. Pour relancer le programme, enfoncez d’abord 1x la touche PROG puis la touche PLAY/PAUSE.
10. Pour effacer le programme, enfoncez 2x la touche STOP.
L’appareil s’arrête automatiquement après la lecture du dernier titre. L’ordre pro-
grammé reste sauvegardé en mémoire jusqu’à ce que vous effaciez la programmation ou sortiez le disque de l’appareil ou éteigniez l’appareil. Pour relancer la lecture
dans l’ordre programmé, enfoncez d’abord la touche PROG- puis la touche
PLAY/PAUSE.
Vous pouvez combiner les titres programmés avec la fonction REPEAT.
Programmez d’abord l’appareil, mettez-le en marche puis enfoncez la touche
REPEAT au maximum 3 x. Vous pouvez utiliser les fonctions comme déjà indiqué
dans la section “REPEAT”.
Pour écouter la radio
1. Positionnez le sélecteur de fonctions (16) sur la position FM ST ou AM.
2. Vous pouvez grâce à cette touche choisir la bande de fréquence souhaitée.
3. UKW = FM ST., moyennes ondes = AM (Mono).
4. Réglez le captage de l’émetteur désirée grâce au bouton d’accord TUNING
(12).
5. La lampe témoin stéréo (17) ne s’allume que si vous avez sélectionné UKW
stéréo et recevez la station en qualité stéréo. Si la réception est trop faible et
l’appareil grésille, il est possible que le témoin ne s’allume pas.Si la qualité ne
s’améliore pas, il est conseillé de changer d’emplacement.
6. Pour la réception de stations en MW/AM. procédez de la même façon. Pour
cette bande de fréquences, les stations ne sont émises qu’en mono.
Attention: une antenne est intégrée à l’appareil pour une réception FM ST/AM.
L’appareil peut être dirigé vers l’émetteur en modifiant son orientation ou son
emplacement.
Nettoyage et rangement
• Nettoyez l’appareil avec un torchon humide puis essuyez-le consciencieusement.
• N’utilisez jamais de détergent.
20
Page 21

5....-05-DR 564 CD 09.05.2003 11:47 Uhr Seite 21
• Si vous n’utilisez pas l’appareil pendant un laps de temps prolongé (plusieurs
mois), il est conseillé de retirer les piles afin d‘éviter que l’acide des piles ne
coule.
Cet appareil a été contrôlé d’après toutes les directives européennes actuelles
applicables, comme par exemple concernant la compatibilité électromagnétique et
la basse tension. Cet appareil a été fabriqué en respect des réglementations techniques de sécurité les plus récentes.
Sous réserve de modifications techniques.
Garantie
Nous accordons une garantie de 24 mois à dater de la date d’achat (ticket de
caisse) pour l’appareil que nous vendons.
Pendant la durée de la garantie, nous éliminons gratuitement les défauts de l’appareil ou des accessoires *) découlant d’un vice de matériau ou de fabrication au
moyen d’une réparation ou, selon notre estimation, au moyen d’un remplacement.
Les prestations dans le cadre de la garantie n’entraînent aucune prorogation de la
durée de garantie et ne donnent pas droit à une nouvelle garantie !
Le justificatif de garantie est le reçu. Sans ce justificatif, aucun remplacement
gratuit ni aucune réparation gratuite ne peuvent être effectués.
En cas de recours à la garantie, rapportez l’appareil dans son emballage d’origine
accompagné du ticket de caisse à votre revendeur.
*) Les endommagements de pièces d’accessoires ne justifient pas automatiquement l’échange gratuit de l’appareil complet. Contactez alors notre centrale télépho-
nique! La casse de pièces en verre ou en plastique est dans tous les cas à votre
charge!
Les défauts sur les accessoires ou les pièces d’usure (p.ex. les charbons de
moteurs, crochets, courroies d’entraînement, télécommande de rechange, brosses
à dents de rechange, lames de scies etc.) ainsi que le nettoyage, l’entretien ou le
remplacement de pièces d’usure ne sont pas garantis et sont donc payants !
En cas d’intervention étrangère, la garantie devient caduque.
F
Après la garantie
Après écoulement de la durée de garantie, les réparations peuvent être effectuées,
contre paiement, par le commerce spécialisé ou le service de réparation.
21
Page 22

5....-05-DR 564 CD 09.05.2003 11:47 Uhr Seite 22
E
Indicaciones generales para su seguridad
Utilice el aparato únicamente para la finalidad para la que ha sido construido.
El aparato se ha de conectar únicamente a una caja de toma de corriente instalada
reglamentariamente. Cerciórese de que la tensión indicada concuerda con la tensión de la caja de enchufe.
Preste atención a que sea correcta la polaridad cuando se empleen fuentes de alimentación externas. Las pilas se han de introducir siempre correctamente.
El aparato se ha de dejar puesto de modo que no se tapen los orificios de aireación existentes.
Jamás se abrirá la carcasa del cuerpo del aparato. Las reparaciones mal hechas
pueden generar considerables peligros para el usuario.
En caso de estar deteriorado el aparato, en especial el cable de conectar a red, ya
no se ha de poner más en servicio el aparato, sino que se hará que lo repare un
especialista. Controle periódicamente el cable de conexión a red para ver si se ha
deteriorado.
Sólo el fabricante, nuestro servicio posventa o un técnico con una cualificación
similar pueden cambiar un cable defectuoso por otro similar, para evitar todo tipo
de riesgo.
Saque de la toma de corriente la clavija de conectar a la red o bien quite las pilas
cuando no se vaya a usar el aparato durante largo tiempo.
Estos símbolos pueden encontrarse en caso dado en el aparato, y son para indicar
lo siguiente:
El símbolo del rayo advierte al usuario que hay componentes internos del
aparato que pueden tener tensiones peligrosamente altas.
El símbolo con el signo de exclamación advierte al usuario que hay
instrucciones de manejo y de mantenimiento importantes en la documentación que va adjunta.
Aparatos que llevan puesto este símbolo operan con un ”Lector Clase 1”
para explorar el CD. Los interruptores de seguridad incorporados sirven
para impedir que el usuario esté expuesto a luz láser invisible peligrosa
para la vista del usuario cuando está abierto el compartimiento del CD.
Bajo ningún concepto se ha de hacer un puenteado sobre estos interruptores de
seguridad ni deben ser manipulados. De hacerlo, existe el peligro de que Vd. esté
expuesto a la luz láser.
22
Page 23

5....-05-DR 564 CD 09.05.2003 11:47 Uhr Seite 23
Descripción de los elementos de manejo
1 Cinta portadora
2 Compartimento de CD
3 Tapa del portadisco
4 Tecla PROG
5 Tecla REPEAT
6 Tecla REW (bobinado hacia atrás)
7 Tecla F.FWD (bobinado hacia
delante)
8 VOLUME / regulador de volumen
9 Interruptor selector de funciones
ON/OFF POWER
10 Tecla STOP
11 Tecla PLAY/PAUSE
12 Regulador-TUNING
13 Tecla OPEN para abrir el portadisco
14 Escala de frecuencias
15 Visualizador-LED
16 Interruptor selector de funciones
(FM ST./AM/CD)
17 Lámpara de control ST.
18 Lámpara de control REP
19 Lámpara de control PROG
20 Lámpara de control POW.
Parte trasera
21 PHONES (Toma para auriculares)
22 DC 9 V-conector
23 Pie
24 Dispositivo fijador
25 Compartimiento de baterías
Montaje en la pared
• El aparato se puede montar en la pared. Para el montaje mida la distancia
entre las dos ranuras y taladre en una distancia horizontal dos agujeros.
•¡Anteriormente se tiene que asegurar que no dañe conductos que se encuen-
tren ocultados en la pared! Introduzca en las perforaciones tornillos y espigas.
• Cuelgue el aparato y controle el ajuste seguro.
Puesta en funcionamiento del aparato
Funcionamiento de batería (no está incluido en el suministro)
• Abra el compartimiento de baterías (25) en la parte trasera del aparato, girando
el tornillo en dirección OPEN.
• Introduzca 8 baterías de 1,5V, tipo AA. Tenga atención con la polaridad correcta
(vea la indicación en el suelo del compartimento de baterías).
• Cierre el compartimiento de baterías (LOCK).
• Si el aparato no se utiliza durante largo tiempo, saque las pilas para evitar todo
„derrame" del ácido de pilas.
• Siempre cambie todas las baterías de una vez, no cambie solamente una
batería.
Atención: Las baterías no se deben tirar a la basura doméstica. Por favor lleve las
baterías usadas a sitios especiales de recogida o a su concesionario.
Nunca tire las baterías al fuego.
E
23
Page 24

5....-05-DR 564 CD 09.05.2003 11:47 Uhr Seite 24
Funcionamiento del aparato de alimentación
E
(no está incluido en el suministro)
También tiene la posibilidad de utilizar el aparato a través de un convertidor de clavija.
1. Introduzca el aparato de alimentación en una caja de enchufe de contacto de
protección 230 V, 50 Hz e instalada por la norma.
2. Conecte el aparato con la clavija de la fuente de alimentación, introduciendo la
clavija de la fuente de alimentación en la hembrilla DC 9 V (22).
3. Al utilizar una fuente de alimentación tenga atención con la polaridad correcta
según las indicaciones en el aparato.
4. Si ha conectado una fuente de alimentación, se desconectarán las baterías de
forma automática.
Protección contra los chorros de agua
El aparato está protegido contra los chorros de agua. Por ello también se puede
poner en marcha en la ducha. A causa de la carcasa que está protegida contra los
chorros de agua, el regulador de VOLUME y de TUNNING no se deja girar tan
fácil.
Atención: Tenga atención que dentro de la cabina para ducharse o en la bañera,
el aparato solamente se podrá utilizar con las baterías.
Nota: El recambio de baterías o de un CD en principio se debería realizar al estar
el aparato en un estado seco.
Manejo general
Gancho / pie (24/23): En caso de que sea necesario puede colgar
ON OFF POWER (9): Aquí se conmuta el aparato entre conectado
VOLUME (8): Sirve para ajustar el volumen.
9 V-conector (22): Para la conexión de un adaptador de red.
PHONES (21): Para la conexión de auriculares en casco o
¿Cómo parar el aparato?
Puede desconectar el aparato, poniendo el interruptor selector de funciones (9) a la
posición OFF.
el aparato o colocarlo sobre el pie.
y desconectado. La lámpara de control POW
(20) indica la función.
de un auricular en el pabellón de la oreja.
Tocar Compact Disks
1. Si empuja la tecla OPEN (13) hacia abajo, se abrirá el portadisco.
2. Introduzca un disco con la etiqueta hacia arriba y presione el disco encima del
“Puck” hasta que encaje. Se ruega cerrar la tapa del portadisco (3).
24
Page 25

5....-05-DR 564 CD 09.05.2003 11:47 Uhr Seite 25
3. Gire el interruptor selector de funciones (16) a la posición CD.
4. Pulse la tecla PLAY/PAUSE (11) para la lectura del disco compacto. En el
visualizador aparecerá „- - „ y después el número de títulos.. Éste será
reproducido a partir del primer título. La canción actual y el tiempo de reproducción transcurrido se indicarán en el visualizador.
5. Para sacar un disco compacto, apriete la tecla STOP (10), abra la tapa con la
tecla OPEN y extraiga cuidadosamente el disco compacto.
Mantenga siempre cerrada la tapa de la cámara para discos compactos.
Descripción de las teclas CD
PLAY/PAUSE (11):
REW (6): 1 x presionar = La canción actual empieza de nuevo.
F.FWD (7): Con esta tecla puede saltar al título siguiente o al sub-
STOP (10): Se para el CD.
REPEAT (5): Siguientes funciones puede elegir con la tecla
Reproducción programada
1. Presione la tecla STOP.
2. Presione la tecla PROG (4).
3. En el visualizador parpadea la lámpara de control PROG (19) y “01” (número
del título).
4. Elija con las teclas REW / F.FWD el título deseado y presione de nuevo la tecla
PROG.
5. La indicación en el visualizador cambia al puesto de memoria 02.
6. Elija con las teclas REW / F.FWD el próximo título y presione de nuevo la tecla
PROG. Repita el procedimiento hasta que haya elegido todos los títulos.
Permite la interrupción breve de la reproducción.
Pulsando esta tecla de nuevo, la reproducción conti-
nuará a partir de este mismo punto.
2 x presionar = Salta al título anterior
3 x presionar = Reproduce una canción previa etc.
Al mantener la tecla apretada, empieza
la busca de una canción.
siguiente etc. Al mantener la tecla apretada, empieza
la busca de una canción.
REPEAT:
1 x presionar = En el visualizador parpadea la lámpara
de control REP (18). El título actual se
repite continuamente.
2 x presionar = En el visualizador se ilumina la lámpara
de control REP.. El disco actual se repite continuamente.
3 x presionar = Todas las funciones se han anulado.
El funcionamiento normal de reproducción continuará.
E
25
Page 26

5....-05-DR 564 CD 09.05.2003 11:47 Uhr Seite 26
7. Presione la tecla PLAY/PAUSE. En el visualizador se iluminará la lámpara de
E
control PROG. Se inicia la reproducción. Con esta tecla puede también interrumpir brevemente el programa.
8. Si presiona una vez la tecla STOP, se para la reproducción, pero el programa
se sigue manteniendo.
9. Para reproducir de nuevo el programa, presione primero 1 x la tecla PROG y
después la tecla PLAY/PAUSE.
10. Para eliminar el programa, presione por favor dos veces la tecla STOP.
El aparato para automáticamente después de la reproducción de todos los títulos
programados. El orden programado se mantendrá en la memoria hasta que borra
la programación o hasta que aparta el CD del portadisco, es decir desconecte el
aparato. Para reproducir de nuevo el orden programado, presione primero la tecla
PROG- y después la tecla PLAY / PAUSE.
Tiene la posibilidad de combinar los títulos programados con la función REPEAT.
Después de haber programado y conectado el aparato, presione por favor la tecla
REPEAT hasta 3x. Las funciones se podrán utilizar como ya indicado en el apartado “REPEAT”.
Escuchar la radio
1. Gire el interruptor selector de funciones (16) a la posición FM ST o AM.
2. Con este interruptor puede elegir la banda de frecuencias deseada.
3. Ondas ultracortas= FM ST., Onda media = AM (MONO).
4. Utilizar el control de sintonización de emisoras TUNING (12) para sintonizar la
emisora deseada.
5. La lámpara de control estereo (17) solamente se iluminará si ha elegido FM ST.
estereo y si es capaz de recibir el emisor en calidad de estereo. Si la recepción
es demasiada débil o si en el emisor hay interferencias, posiblemente ésta no
se iluminará. Si no consigue una mejora, se recomienda cambiar la ubicación
del aparato.
6. Para la recepción de la emisoras de AM (onda media), procédase de manera
similar. Dentro de esta banda de frecuencias, los programas transmitidos son
solamente monofónicos.
Nota: Para la recepción de emisores FM ST/AM hay una antena integrada en el
aparato. Girando o cambiando la posición del aparato se podrá conseguir el ajuste
al emisor.
Limpieza y almacenamiento
• Limpie el aparato con un paño húmedo y después sequelo bien.
• No utilice detergentes agresivos.
• En caso de que no utilice el aparato durante un largo periodo de tiempo (unos
meses), debería retirar las baterías de la cámara para baterías para evitar un
derrame del ácido para acumuladores.
26
Page 27

5....-05-DR 564 CD 09.05.2003 11:47 Uhr Seite 27
Este aparato se ha examinado según las normativas actuales y vigentes de la
Comunidad Europea, como p.ej. compatibilidad electromagnética y directiva de
baja tensión y se ha construido según las más nuevas especificaciones en razón
de la seguridad.
No reservamos el derecho de efectuar modificaciones técnicas.
Garantía
Para el aparato comercializado por nosotros nos responsabilizamos con una
garantía de 24 meses a partir de la fecha de compra (factura de compra).
Durante el período de garantía nos encargamos gratuítamente de los defectos del
aparato y de los accesorios*), que se hayan originado por defectos del material o
de la fabricación. Dependiendo de nuestra estimación se realizará una reparación
o un cambio. ¡Los servicios de garantía no prolangan la garantía, ni se incia por
ello un período nuevo de garantía!
Como comprobante para la garantía es válido la factura de compra. Sin este comprobante no se podrá realizar un cambio o una reparación gratuíta.
En el caso de garantía lleve el aparato base en el embalaje original y la factura de
compra a su concesionario.
*) Defectos en los accesorios de uso o en las piezas de desgaste (p.ej. escobillas
de carbón del motor, varillas amasadoras, correas de transmisión, mando a
distancia de repuesto, cepillos de dientes de repuesto, hojas de sierra etc.), como
también la limpieza, mantenimiento o el recambio de piezas de desgaste no recaen en la garantía e irán al cargo del cliente!
En caso de intervención ajena se expira la garantía.
Después de la garantía
Después de haber expirado la garantía se pueden realizar las reparaciones por el
concesionario o por el servicio de reparaciones. Los gastos irán al cargo del cliente.
E
27
Page 28

5....-05-DR 564 CD 09.05.2003 11:47 Uhr Seite 28
I
Utilizzare l’apparecchio solo per l’uso previsto.
Collegare l’apparecchio esclusivamente ad una presa installata a norma. Fare
attenzione a che la tensione indicata corrisponda alla tensione della presa. Se si
impiegano alimentatori esterni, fare attenzione all’esattezza di polarità e di tensione, inserire le batterie sempre correttamente.
Collocare l’apparecchio in modo che le aperture per l’aerazione esistenti non vengano coperte.
Non togliere mai la protezione dell’apparecchio. Riparazioni non a regola d’arte
possono causare notevoli pericoli per l’utente. Se l’apparecchio presenta danni,
soprattutto nella zona del cavo di collegamento, non metterlo più in funzione, ma
farlo riparare prima da un esperto. Esaminare regolarmente il cavo di collegamento
alla rete per verificare che non ci siano danni.
Un cavo di collegamento difettoso può essere sostituito con un cavo equivalente
solo dal produttore, dal nostro servizio assistenza o da persone similmente qualificate, al fine di evitare pericoli.
Se l’apparecchio non viene usato per un periodo di tempo prolungato, togliere il
blocchetto alimentatore dalla presa ovvero estrarre le batterie.
Questi simboli possono trovarsi eventualmente sull’apparecchio e rimandano ai
seguenti elementi:
Questi interruttori di sicurezza non devono mai essere cavallottati né manipolati
perché altrimenti sussiste il rischio di esposizione alla luce del laser.
Avvertenze generali per la sicurezza
Il simbolo del lampo fa presente all’utente la presenza di pezzi all’interno
dell’apparecchio che possono produrre alte tensioni pericolose.
Il simbolo con il punto esclamativo fa presente all’utente la presenza di
importanti avvertenze per l’uso e la manutenzione nei fogli di accompagnamento dell’apparecchio.
Gli apparecchi dotati di questo simbolo lavorano con un „Laser classe 1“
per riprodurre i CD. Gli interruttori di sicurezza integrati hanno lo scopo di
impedire che l’utente venga esposto alla luce non visibile del laser, pericolosa per l’occhio umano, aprendo lo scomparto per i CD.
Montaggio su parete
• L' apparecchio si lascia anche montare alla parete. Per appendere, misurare la
distanza tra le due fessure e trapanare i due buchi che si trovano ad una distanza orizzontale l' uno dall' altro.
• Accertarsi prima di non danneggiare linee elettriche o tubature che si celano
nella parete! Dotare i fori di viti e tasselli.
• Appendere l' apparecchio e controllare la posizione stabile.
28
Page 29

5....-05-DR 564 CD 09.05.2003 11:47 Uhr Seite 29
1 Cinghia
2 Vano CD
3 Coperchio vano CD
4 Tasto PROG
5 Tasto REPEAT
6 Tasto REW (salta e ricerca i brani in
avanti
7 Tasto F.FWD (salta e ricerca i brani
all' indietro)
8 VOLUME / Regolatore del volume
9 Selezionatore
ON/OFF POWER
10 Tasto STOP
11 Tasto PLAY/PAUSE
12 Manopola di regolazione TUNING
13 OPEN / Tasto per aprire il vano CD
14 Scala frequenza
15 Display LED
16 Selezionatore
(FM ST./AM/CD)
17 Indicatore luminoso ST.
18 Indicatore luminoso REP
19 Indicatore luminoso PROG
20 Indicatore luminoso POW.
Retro
21 PHONES (Collegamento cuffie)
22 Presa DC 9 V
23 Piede
24 Dispositivo di aggancio
25 Vano cassette
Messa in funzione dell' unità
Funzionamento a batterie (non incluso nella fornitura)
• Aprire il vano cassette (25) sulla parte posteriore dell' apparecchio girando la
vite in direzione OPEN.
• Inserire 8 batterie da 1,5 V, tipo AA. Fare attenzione alla polarità corretta (v.
fondo vano batterie).
• Chiudere il vano cassette (LOCK).
• Si el aparato no se utiliza durante largo tiempo, saque las pilas para evitar todo
„derrame" del ácido de pilas.
• Sostituire sempre il set completo, non sostituire mai un’unica batteria.
Attenzione: non gettare le batterie nei rifiuti domestici. Buttare le batterie usate
negli appositi contenitori o restituirle al negoziante.
Non buttare mai le batterie nel fuoco.
Funzionamento alimentatore (non incluso nella fornitura)
È possibile usare l’apparecchio anche senza alimentatore.
1. Inserire la spina dell'alimentatore in una presa con contatto di terra regolarmente installata da 230 V, 50 Hz.
2. Collegare l' apparecchio con la rete, introducendo la presa della rete in una
bussola DC 9 V (22).
3. Per usare la rete, fare attenzione di avere la giusta polarità a seconda delle
regole indicate per l' apparecchio.
4. Se si usa una presa, le batterie si spengono automaticamente.
Elementi di comando
I
29
Page 30

5....-05-DR 564 CD 09.05.2003 11:47 Uhr Seite 30
I
L’apparecchio è protetto contro gli spruzzi dell’acqua. In questo modo è possibile
utilizzarlo anche all’interno della cabina della doccia. Dovuto alla scatola con protezione antispruzzo, i tasti del regolatore VOLUME e TUNING sono difficili da maneggiare.
Attenzione: Fare attenzione che l' apparecchio venga usato nella doccia unicamente con le batterie.
Attenzione: Cambiare i CD e le batterie unicamente quando l' apparecchio è completamente secco.
Protezione antispruzzo
Uso generico
Dispositivo di aggancio /
Piede (24/23):
ON OFF POWER (9): Mette in funzione l' apparecchio oppure lo
VOLUME (8): Per la regolazione del volume.
Presa 9 V (22): Per il collegamento di un adattatore di rete.
PHONES (21): Per il collegamento di cuffie o auricolari.
Spegnere
L' apparecchio si spegne ponendo l' interruttore per la selezione (9) sulla posizione
OFF.
Se necessario appendere l'apparecchio oppure appoggiarlosul piede.
spegne. La spia di controllo POW (20) indica
la funzione
Lettura CD
1. Se si sposta il tasto OPEN (13) all' ingiù, il vano CD si apre.
2. Premere un CD con l' etichetta rivolta verso l' alto sul "rullino",facendola scorrere sulle sfere in modo che incastri. Chiudere lo sportello (3) del vano CD.
3. Girare l' interruttore per la selezione (16) sulla posizione CD
4. Per ripetere un CD, premere il tasto PLAY/PAUSE (11). Sul display appare “- -“
e poi il numero dei brani. Il CD comincerà a leggere dal primo brano. Il brano
attualmente in riproduzione e la durata d’ascolto trascorsa vengono segnalati
nel display.
5. Per togliere un CD, premere il tasto STOP (10), aprire il coperchio del vano con
il tasto OPEN e togliere delicatamente il CD.
Tenere sempre chiuso il coperchio.
30
Page 31

5....-05-DR 564 CD 09.05.2003 11:47 Uhr Seite 31
Descrizione dei tasti CD
PLAY/PAUSE (11):
REW (6): Premere 1 volta = Dà avvio al brano attuale dall’inizio.
F.FWD (7): Con questo tasto si può passare al prossimo brano o
STOP (10): Il CD si ferma.
REPEAT (5): Le seguenti funzioni possono essere scelte unicamente
Ripetizione programmata
1. Premere il tasto STOP.
2. Premere il tasto PROG (4).
3. Nel display si illumina la spia di controllo PROG (19) e "01" (numero del brano).
4. Scegliere con il tasto REW/F.FWD il brano desiderato e premere nuovamente il
tasto PROG.
5. Il display segnala la posizione di memoria 02.
6. Scegliere con il tasto REW/F.FWD il prossimo titolo e premere nuovamente il
tasto PROG. Ripetere la procedura finché avete selezionato tutti i brani.
7. Premere il tasto PLAY/PAUSE. Nel display si accende la spia di controllo
PROG. La riproduzione ha inizio.Con questo tasto si può anche sospendere
per un attimo il programma.
8. Premendo di nuovo il tasto STOP, si ferma la riproduzione, tuttavia il programma rimane.
9. Per riprodurre di nuovo il programma, premere prima 1x il tasto PROG e poi il
tasto PLAY/PAUSE.
10. Per cancellare il programma premere 2x il tasto STOP.
Quando tutti i brani programmati sono stati riprodotti l’apparecchio si blocca automaticamente. La sequenza programmata è così memorizzata fino ad essere can-
cellata o i CD vengono prelevati dal vano CD, cioè fino a quando si spegne l' appa-
La ripetizione può essere interrotta. Premendo nuovamente il tasto, si rimette in funzione la ripetizione allo
stesso punto di prima.
Premere 2 volte = Passa al brano successivo.
Premere 3 volte = Riproduce un brano precedente ecc.
Tenendo premuto il tasto, si mette in
funzione una ricerca dei brani.
successivi. Tenendo premuto il tasto, si mette in funzione una ricerca dei brani.
con il tasto REPEAT
Premere 1 volta = Nel display si illumina la spia di
controllo REP (18). Il brano attuale
si ripete continuamente
Premere 2 volte = Nel display lampeggia la spia di
controllo REP. Il CD attuale si ripete
continuamente
Premere 3 volte = Tutte le funzioni sono annullate.
La riproduzione normale continua.
31
I
Page 32

5....-05-DR 564 CD 09.05.2003 11:47 Uhr Seite 32
recchio. Per avere nuovamente la sequenza desiderata, premere dapprima il tasto
I
PROG e poi quello PLAY/PAUSE.
Si ha la possibilità di combinare i titoli programmati con la funzione REPEAT. Dopo
aver programmato ed avviato l' apparecchio, premere fino a 3 volte il tasto
REPEAT. Usare le funzioni come descritto nel paragrafo "REPEAT".
Ascoltare la radio
1. Girare la manopola (16) sulla posizione FM o AM.
2. Con questo regolatore si può scegliere la frequenza di banda desiderata.
3. UKW = FM ST, onda media = AM (Mono).
4. Sintonizzare il canale desiderato con il tasto TUNING (12).
5. La spia di controllo stereo (17) si illumina solo se si ha scelto UKW (FM) stereo
o si riceve in qualità stereo. Se la ricezione è debole e fruscia l' apparecchio
radiotrasmittente, è possibile che non si illumini. Se non si raggiunge un miglioramento,cambiare la posizione.
6. Per la ricezione di canali AM procedere in ugual modo. In questa frequenza
vengono trasmesse solo trasmissioni in “mono”.
Attenzione: Per ricevere i trasmittenti FM ST / AM è necessario integrare un'
antenna. L' apparecchio può essere adattato al trasmittente girando e cambiando la
posizione.
Pulizia e conservazione
• Ai fini della pulizia dell’apparecchio, utilizzare un panno umido e asciugarlo successivamente sempre con cura.
• Non utilizzare detergenti aggressivi.
• Nel caso in cui l’apparecchio non venga utilizzato per periodi di tempo prolun-
gati (alcuni mesi), si consiglia di estrarre le batterie dallo scomparto portabatterie allo scopo di evitare che si verifichino fuoriuscite dell’acido delle batterie
stesse.
Questo apparecchio è stato controllato sulla base di tutte le direttive CE attuali in
vigore in questo settore, quali per esempio la normativa in materia di compatibilità
elettromagnetica e la direttiva in materia di bassa tensione, ed è stato costruito
conformemente alle norme di sicurezza più moderne.
Con riserva di apportare modifiche tecniche.
32
Page 33

5....-05-DR 564 CD 09.05.2003 11:47 Uhr Seite 33
Garanzia
Per l’apparecchio da noi messo in commercio ci assumiamo una garanzia di
24 mesi dalla data di acquisto (scontrino).
Durante la garanzia noi ci impegniamo ad eliminare gratuitamente i guasti dell’apparecchio o degli accessori*), dovuti a difetti di materiale o di fabbricazione, riparandoli o, a nostra discrezione, sostituendoli. Le prestazioni in garanzia danno luogo a
una proroga della garanzia né danno diritto ad una nuova garanzia!
Per la garanzia è sufficiente lo scontrino di acquisto. Senza questo scontrino non
sussiste il diritto né ad una sostituzione né ad una riparazione gratuita.
In caso di garanzia consegnare al vostro rivenditore l’apparecchio base nell’imballaggio originale unitamente allo scontrino.
*) Danni agli accessori non giustificano automaticamente lo scambio gratuito dell’-
apparecchio completo. Si prega di mettersi in contatto con la nostra centrale telefonica. Danni alle parti di vetro oppure fratture ai pezzi di materia plastica sono obbligatoriamente a spese del cliente.
La riparazione di pezzi d’uso ovvero soggetti a logoramento (cursori, ganci impastatori, cinghie di trasmissione, telecomandi di ricambio, spazzolini di ricambio,
lame di seghe ecc.) come anche operazioni di pulizia e manutenzione o la sostituzione di pezzi soggetti a logoramento non rientrano nella garanzia e quindi sono a
pagamento!
La garanzia si annulla nel caso di intervento da parte di terzi.
Dopo la garanzia
Al termine della garanzia le riparazioni possono essere eseguite dietro pagamento
dal corrispettivo negozio specializzato o servizio riparazioni.
I
33
Page 34

5....-05-DR 564 CD 09.05.2003 11:47 Uhr Seite 34
GB
Use the device only for the intended purpose.
Only connect the device at a properly installed plug socket. Pay attention that the
specified voltage corresponds to the voltage of the plug socket.
When using external mains supply, pay attention to the correct polarity and voltage.
Always place the batteries in the correct direction.
Assemble the device in such a way that the available ventilation openings are not
covered.
Never open the housing of the device. Incorrect repairs can constitute a considerable risk for the user. Should the device become damaged, in particular the mains
supply cable, do not operate the device any longer, but rather have it repaired by an
expert. Check the mains supply cable regularly for damage.
For safety reasons a broken or damaged mains lead may only be replaced by an
equivalent lead from the manufacturer, our customer service department or a
similary qualified person.
If the device is not used for a longer period, remove the plug connector from the
plug socket or take out the batteries.
These symbols may be found on the machine and are intended to indicate the
following:
The lightning symbol should advise the user of parts in the inside of the
device which carry dangerously high voltage levels.
The symbol with an exclamation mark should advise the user of important
operation or maintenance instructions in the accompanying documentation.
Devices bearing this symbol work with a „class 1 laser“ for tracing the CD.
The built-in safety switches should prevent the user being exposed to dangerous laser light, which is invisible to the human eye, when the CD compartment is opened.
Under no circumstances should these safety switches be bypassed or manipulated,
as this could result in a danger of exposure to the laser light.
General safety instructions
Wall Installation
• The device can also be mounted on the wall. To do so, measure the distance
between the two indentations and drill two holes at the same horizontal
distance from one another.
• Please ensure beforehand that you will not damage any electric cables that are
hidden in the wall! Then insert rawlplugs and screws into the drilled holes.
• Hang up the device and check that it is securely in place.
34
Page 35

5....-05-DR 564 CD 09.05.2003 11:47 Uhr Seite 35
1 Carrying belt
2 CD compartment
3 CD compartment flap
4 PROG button
5 REPEAT button
6 REW button (fast rewind)
7 F.FWD button (fast forward)
8 VOLUME / volume regulator
9 Function selector switch
ON/OFF POWER
10 STOP button
11 PLAY/PAUSE button
12 Regulator TUNING
13 OPEN / button for opening the CD
compartment
14 Frequency scale
15 LED display
16 Function selector switch
(FM ST./AM/CD)
17 ST. control lamp
18 REP control lamp
19 PROG control lamp
20 POW. control lamp
Reverse side
21 PHONES (Headphone connection)
22 DC 9 V socket
23 Foot
24 Suspension device
25 Battery compartment
Commissioning the device
Battery Mode (not supplied)
• Open the battery compartment (25) on the back of the machine by turning the
screw in the direction of OPEN.
• Insert 8 1.5V AA type batteries. Match the polarities correctly (see the inside of
the battery compartment).
• Close the battery compartment (LOCK).
• If the device is not used for a long period of time, remove the batteries to avoid
the „spilling“ of battery acid.
• Always change the battery set completely, do not change just one battery.
Warning: batteries are not to be disposed of together with domestic wastes.
Dispose of the used batteries at the relevant collection bin or at your dealer’s.
Never throw batteries into the fire.
AC Adapter Mode (not supplied)
You can also use the device with an adapter.
1. Insert the AC adapter into a duly installed 230V/50Hz protective contact outlet.
2. Connect the device to the power supply unit by inserting the plug of the supply
unit into the 9 V DC socket (22).
3. If a power supply unit is used, please ensure correct polarity as shown by the
inscription on the device.
4. If you have connected a power supply unit, the batteries are automatically switched off.
Overview of the components
GB
35
Page 36

5....-05-DR 564 CD 09.05.2003 11:47 Uhr Seite 36
GB
The device is spray water proof.It can hence be used also in the shower. Owing to
the fact that the housing is protected against water spray, the VOLUME and
TUNING regulators are somewhat stiff.
Caution: Please note that in the shower or bath the device may only be used on
battery power.
Note: Always make sure that the device is dry when changing a CD or the batteries
Spray water proof
General Operating
Suspension device / foot (24/23): Hang up the device or place it on its foot.
ON OFF POWER (9): Switches the unit to "ready for operation" or to
VOLUME (8): Is used to set the volume of the music.
9 V socket (22): For connecting a mains adapter.
PHONES (21): For connecting head- or earphones.
Switching off
The device is switched off by turning the function selector switch (9) to OFF.
"off". The POW control lamp (20) shows the
function.
Playing CDs
1. If the OPEN button (13) is pushed down the CD compartment opens.
2. Insert a CD with the label facing upwards and press carefully over the button
until it snaps into place. Please close the CD compartment flap (3).
3. Turn the function selector switch (16) to the CD position
4. Press the PLAY/PAUSE button (11) to start the playback. "- -" appears in the
display followed by the number of tracks.. The CD starts from the first track. The
track currently being played and the time that has elapsed are shown in the display.
5. To remove a CD, press the STOP key (10), open the CD deck with the OPEN
key and take out the CD carefully.
Always keep the CD deck cover closed.
Description of the CD buttons
PLAY/PAUSE (11):
You can briefly interrupt the playing. Renewed pressing
of the button will re-start the playing from the same
place.
36
Page 37

5....-05-DR 564 CD 09.05.2003 11:47 Uhr Seite 37
REW (6): Press once = This starts the current track
Press a second time = This jumps back to the previous
Press a third time = This plays the song before etc.
F.FWD (7): With this button you can jump to the following track or
STOP (10): The CD is stopped.
REPEAT (5): The following functions can be selected with the
Programmed Play
1. Press the STOP key.
2. Press the PROG key (4).
3. The PROG (19) control lamp flashes in the display together with "01" (track
number).
4. Use the REW/F.FWD buttons to select the desired track and then press the
PROG button again.
5. The display changes to memory slot 02.
6. Use the REW/F.FWD buttons to select the next track and press the PROG button again. Repeat the procedure until all the desired tracks are selected.
7. Press the PLAY/PAUSE key. The PROG control lamp lights up in the display.
The playback starts. Press this button to pause briefly the playback.
8. Press once the STOP key to stop the playback while retaining the program.
9. To resume the playback of the program press first the PROG key once and then
the PLAY/PAUSE key.
10. To delete the program, press the STOP key twice.
The device stops automatically once the entire sequence of programmed tracks is
completed. The programmed order of tracks remains in the memory until you delete
the programme, remove the CD from the CD compartment or switch off the machine. In order to play the programmed order of tracks again, first press the PROG
and then that PLAY/PAUSE button.
the next track but one etc. If the button is kept pressed
down, the machine starts to search through the tracks.
REPEAT button
Press once = The REP control lamp (18) flas-
Press a second time = The REP control lamp lights up
Press a third time = All the functions are reset.The
again from the beginning.
track.
If the button is kept pressed
down, the machine starts to
search through the tracks.
hes in the display. The current
track is repeated continuously.
in the display. The whole CD is
played continuously.
normal play mode is resumed.
GB
37
Page 38

5....-05-DR 564 CD 09.05.2003 11:47 Uhr Seite 38
It is possible to combine the programmed tracks with the REPEAT function. After
GB
you have programmed and started the device, please press the REPEAT button up
to three times.You can now use the functions described in the "REPEAT" section.
Listening to the Radio
1. Turn the function selector switch (16) to the FM ST or AM position.
2. With this switch you can select the desired frequency band.
3. UKW = FM ST., medium wave = AM (mono).
4. Tune in the desired station with the station adjustment knob TUNING (12).
5. The stereo control lamp (17) only lights up if you have selected FM stereo and
the station is being received in stereo quality. If reception is too weak and the
station being received is subject to interference, it is possible that this lamp will
not light up. If it is not possible to improve reception it is advisable to try a change of location.
6. To receive MW/AM stations proceed in the same manner. In this frequency
band programs are transmitted in "mono" only.
Note: An aerial is integrated in the device for the reception of FM ST/AM stations.
The device can be aligned to the transmitter by turning and changing its position.
Cleaning and storage
• Clean the device with a moist cloth and dry it well.
• Do not use abrasive detergents!
• If the device is not used for a long period of time (a few months), the battery is
to be removed from the battery compartment to avoid the „spillage“ of the battery acid.
This device has been tested according to all relevant current CE guidelines,
such as electromagnetic compatibility and low voltage directives, and has been
constructed in accordance with the latest safety regulations.
Subject to technical changes without prior notice!
38
Page 39

5....-05-DR 564 CD 09.05.2003 11:47 Uhr Seite 39
Guarantee
The device supplied by our Company is covered by a 24 month guarantee starting
on the date of purchase (receipt).
During the life of the guarantee any fault of the device or its accessories *) ascribable to material or manufacturing defects will be eliminated free of charge by repairing or, at our discretion, by replacing it. The guarantee services do not entail an
extension of the life of the guarantee nor do they give rise to any right to a new
guarantee!
Proof of the guarantee is provided by the proof of purchase. Without proof of
purchase no free replacement or repair will be carried out.
For repairs or replacement during the life of the guarantee return the device in its
original packing together with the proof of purchase to your dealer.
*) Damage to accessories does not mean automatic free replacement of the whole
machine. In such cases please contact our hotline. Broken glass or breakage of
plastic parts are always subject to a charge.
Defects to consumables or parts subject to wearing (e.g. motor pistons, kneading
blades, drive shafts, spare remote control, spare toothbrushes, saw blades, etc.) as
well as cleaning, maintenance or the replacement of said parts are not covered by
the guarantee and hence are to be paid!
The guarantee lapses in case of unauthorized tampering.
After the expiry of the guarantee
After the expiry of the guarantee repairs can be carried by the competent dealer or
repair service against the payment of the ensuing costs.
GB
39
Page 40

5....-05-DR 564 CD 09.05.2003 11:47 Uhr Seite 40
Ogólne wskazówki związane z bezpieczną obsługą
PL
Urządzenie należy używać tylko zgodnie z jego przeznaczeniem.
Urządzenie należy podłączyć tylko i wyłącznie do przepisowo zamontowanego
gniazdka.
Proszę zwrócić uwagę na to, żeby podane napięcie zgadzało się z napięciem w
gniazdku.
W przypadku używania oddzielnych zasilaczy należy zwrócić uwagę na biegunowość i napięcie, baterie muszą zostać włożone do urządzenia zgodnie z oznaczoną biegunowością.
Urządzenie należy w taki sposób ustawić, żeby istniejące otwory wentylacyjne
nie zostały przykryte.
Nigdy nie wolno otwierać obudowy urządzenia. Niefachowo przeprowadzone
naprawy mogą być groźne w skutkach dla użytkownika. Przy uszkodzeniu
urządzenia, w szczególności kabla sieciowego, urządzenie nie może być
używane dopóki nie zostanie naprawione przez osobę z wymaganymi uprawnieniami. Przewód zasilający należy regularnie sprawdzać, czy nie jest uszkodzony.
W razie awarii proszę nie naprawiać urządzenia samemu lecz skorzystać z
pomocy autoryzowanego specjalisty.Jeżeli przewód zasilający nieodłączalny
ulegnie uszkodzeniu, to powinien on być wymieniony u wytwórcy lub w specjalnym zakładzie naprawczym albo przez wykwalifikowaną osobę w celu uniknięcia zagrożenia.
Jeżeli urządzenie nie będzie przez dłuższy czas używane, należy wyciągnąć
wtyczkę z gniazdka lub wyjąć baterie.
Poniższe symbole mogą znajdować się na urządzeniu i mają zwracać Państwa
uwagę na:
Symbol błyskawicy ma zwrócić uwagę użytkownika na znajdujące się
we wnętrzu urządzenia części, które są pod niebezpiecznie wysokim
napięciem.
Symbol z wykrzyknikiem ma zwrócić uwagę użytkownika na znajdujące
się w załączonych dokumentach ważne wskazówki związane z
obsługą i konserwacją urządzenia.
Urządzenia z tym symbolem używają do odczytywania dźwięku z płyty
kompaktowej „Lasera klasy A“. Wbudowany wyłącznik bezpieczeństwa
ma zapobiec temu, żeby użytkownik w czasie otwierania kieszeni odtwarzacza płyt kompaktowych został poddany niebezpiecznemu dla
ludzkich oczu oddziaływaniu niewidocznego światła lasera.
Wyłącznika tego nie należy w żadnym wypadku zmostkować lub też przy nim
manipulować, ponieważ grozi to niebezpieczeństwem, że użytkownik poddany
zostanie oddziaływaniu niebezpiecznego dla ludzkich oczu niewidocznego
światła lasera.
40
Page 41

5....-05-DR 564 CD 09.05.2003 11:47 Uhr Seite 41
Zestawienie elementów obsługi
1 Pasek nośny
2 Kieszeń dla CD
3 Klapa kieszeni CD
4 Przycisk PROG
5 Przycisk REPEAT
6 Przycisk REW (przewijanie do tyłu
7 Przycisk F.FWD (przewijanie do
przodu)
8 VOLUME/ regulator siły głosu
9 Przełącznik wyboru funkcji
ON/OFF POWER
10 Przycisk STOP
11 Przycisk PLAY/PAUSE
12 Regulator TUNING
13 OPEN/ przycisk otwierania kiesze-
ni CD
14 Zakres częstotliwości
15 Wyświetlacz z diodami elektro
luminescencyjnymi
16 Przełącznik wyboru funkcji
(FM ST./AM/CD)
17 Lampka kontrolna ST.
18 Lampka kontrolna REP
19 Lampka kontrolna PROG
20 Lampka kontrolna POW.
Tylna strona
21 PHONES (Podłączenie dla słuch-
awek)
22 Gniazdko DC 9 V
23 Podstawa
24 Zawieszenie
25 Kieszeń na baterie
Montaż na ścianie
• Urządzenie można również zamontować na ścianie. W celu zamocowania
urządzenia proszę zmierzyć odległość między dwoma nacięciami i wywiercić w poziomie dwa otwory.
• Uprzednio należy się upewnić, że nie zostaną uszkodzone przewody znajdujące się w ścianie! W wywiercone otwory należy włożyć kołki rozporowe ze
śrubami
• Proszę zawiesić urządzenie i sprawdzić stabilność mocowania.
Użytkowanie urządzenia
Zasilanie z Baterii (nie objęte dostawą)
• Przekręcając śrubę w kierunku OPEN proszę otworzyć kieszeń na baterie
(25) znajdującą się z tyłu urządzenia.
• Proszę umieścić w środku 8 baterii1,5 V, typ AA. Proszę pamiętać o prawidłowej polarności (patrz spód kieszeni na baterie).
• Proszę zamknąć kieszeń na baterie (LOCK).
• Jeżeli nie będą Państwo przez dłuższy czas korzystać z urządzenia proszę
wyjąć z niego baterie, aby zapobiec „wyciekowi” kwasu akumulatorowego.
• Proszę zawsze wymieniać cały komplet, a nie tylko jedną baterię.
Uwaga: Baterii nie należy wrzucać do zwykłych domowych śmieci. Zużyte
baterie proszę oddać do punktu zbiórki odpadów specjalnych lub do punktu
sprzedaży.
Nigdy nie wrzucaj baterii do ognia.
PL
41
Page 42

5....-05-DR 564 CD 09.05.2003 12:14 Uhr Seite 42
Zasilanie z sieci (nie objęte dostawą)
PL
Istnieje możliwość zasilania urządzenia poprzez zasilacz z wtyczką.
1. Proszę połączyć element z wtyczką podłączenia do przepisowo zainstalowanego sprawnego, gniazda wtyczkowego (230V, 50 Hz).
2. Proszę połączyć urządzenie z zasilaczem wtyczkowym podłączając wtyczkę
zasilacza do gniazdka DC 9 V (22).
3. Przy stosowaniu zasilacza proszę zwracać uwagę na prawidłową polarność,
zgodnie z opisem na urządzeniu.
4. Jeżeli podłączyli Państwo zasilacz baterie automatycznie się odłączą.
Zabezpieczenie przed pryskającą wodą
Urządzenie zabezpieczone jest przed pryskającą wodą, dlatego można z niego
korzystać również w kabinie prysznicowej. Ze względu na zabezpieczenie obudowy przed wodą rozpryskową przyciski regulatora VOLUME oraz TUNNING
trzeba wciskać z nieco większą siłą.
UWAGA: proszę pamiętać, że urządzenie w kabinie prysznicowej, wannie może
być użytkowane wyłącznie w trybie pracy na baterie.
Wskazówka: Przy wymianie płyty kompaktowej i baterii urządzenie zasadniczo
powinno być suche.
Ogólne informacje dotyczące obsługi
Zawieszenie/
podstawa (24/ 23):
ON OFF POWER (9): przełącza urządzenie z „gotowe do urucho-
VOLUME (8): służy do regulowania głośności.
Gniazdko 9 V (22): przeznaczone jest do podłączenia przysta-
PHONES (21): służy do podłączenia słuchawek lub
Wyłączenie
Urządzenie wyłączą Państwo ustawiając przełącznik wyboru funkcji (9) na OFF.
proszę zawiesić ewent. ustawić urządzenie
na podstawie
mienia” na „wyłączone”. Lampka kontrolna
POW (20) wskazuje odpowiednią funkcję.
wki sieciowej.
słuchawek miniaturowych
Odtwarzanie CD
1. Jeżeli przesuną Państwo przycisk OPEN (13) w dół, kieszeń CD otworzy się.
2. Umieścić CD w kieszeni wkładając etykietką do góry i otworem na „uwypuklenie”, aż zostanie odpowiednio osadzone. Proszę zamknąć klapę kieszeni
CD (3).
42
Page 43

5....-05-DR 564 CD 09.05.2003 11:47 Uhr Seite 43
3. Proszę przekręcić przełącznik wyboru funkcji (16) na pozycję CD
4. Proszę nacisnąć przycisk PLAY/PAUSE (11), a rozpocznie się odtwarzanie
CD. Na wyświetlaczu pojawi się „- -„ a następnie liczba tytułów.
Odtwarzanie CD rozpocznie się od pierwszego utworu. Na wyświetlaczu
pojawi się aktualny utwór oraz miniony czas odtwarzania.
5. Aby wyjąć CD należy nacisnąć przycisk STOP (10), otworzyć przy pomocy
przycisku OPEN pokrywę CD i unieść ostrożnie CD.
Proszę zawsze zamykać pokrywę.
Opis przycisków odtwarzacza do płyt kompaktowych
PLAY/PAUSE (11): odtwarzanie może zostać na krótko przerwane.
REW (6): Naciśnięcie 1x = Aktualny utwór odtwarzany jest od
F.FWD (7): Przy pomocy tego przycisku mogą Państwo przejść
STOP (10): CD zostaje zatrzymane.
REPEAT (5): Przy pomocy przycisku REPEAT mogą Państwo
Odtwarzanie zaprogramowane
1. Proszę nacisnąć przycisk STOP.
2. Proszę nacisnąć przycisk PROG (4).
3. Na wyświetlaczu miga lampka kontrolna PROG (19) i „01” (numer utworu).
Ponowne naciśnięcie klawisza rozpocznie odtwarzanie płyty w tym samym miejscu.
początku.
Naciśnięcie 2x
Naciśnięcie 3x
do następnego lub jeszcze wcześniejszego tytułu.
Po wciśnięciu przycisku rozpoczyna się proces
przeszukiwania skali odbiornika.
wybierać następujące funkcje
Naciśnięcie 1x = Na wyświetlaczu miga lampka kon-
Naciśnięcie 2x = Na wyświetlaczu świeci się lampka
Naciśnięcie 3x = Dezaktywacja wszystkich funkcji.
= Przeskakuje do poprzedniego
tytułu
= Odtwarza utwór poprzedzający itd.
Po wciśnięciu przycisku rozpoczyna się proces przeszukiwania skali
odbiornika.
trolna REP (18). Aktualnie odtwarzane nagranie będzie stale powtarzane.
kontrolna REP.
ne CD będzie stale powtarzane
Kontynuacja zwykłego trybu odtwarzania.
Aktualnie odtwarza-
PL
43
Page 44

5....-05-DR 564 CD 09.05.2003 11:47 Uhr Seite 44
4. Przy pomocy przycisków REW/F.FWD prosz´ wybraç nast´pny utwór i nacisnàç
PL
ponownie przycisk PROG.
5. Wskaźnik na wyświetlaczu pokaże numer zapisu w pamięci 02.
6. Przy pomocy przycisków REW/F.FWD proszę wybrać następny utwór i
nacisnąć ponownie przycisk PROG. Proszę powtarzać tę czynność do
momentu wybrania wszystkich utworów.
7. Proszę nacisnąć przycisk PLAY/PAUSE. Na wyświetlaczu świeci się lampka
kontrolna PROG. Uruchomione zostaje odtwarzanie. Przy pomocy tego przycisku mogą Państwo również na krótko przerwać odtwarzanie programu.
8. Jeżeli nacisną Państwo jeden raz przycisk STOP, odtwarzanie zostaje zatrzymane, program zostanie jednak zachowany.
9. W celu ponownego odtworzenia programu proszę nacisnąć najpierw jeden
raz przycisk PROG a następnie przycisk PLAY/PAUSE.
10. Aby wykasować program proszę 2-krotnie nacisnąć przycisk STOP.
Po odtworzeniu wszystkich zaprogramowanych utworów urządzenie samoczynnie się zatrzyma. Zaprogramowana kolejność utworów zostaje zachowana w
pamięci aż do wykasowania ustawienia programowego lub wyjęcia CD z kieszeni CD, ewent. wyłączenia urządzenia. Aby odtwarzanie odbywało się ponownie
w zaprogramowanej kolejności proszę nacisnąć najpierw przycisk PROG a
następnie PLAY/ PAUSE.
Dzięki funkcji REPEAT mają Państwo możliwość ustawienia różnych kombinacji
zaprogramowanych utworów. Po zaprogramowaniu i włączeniu urządzenia
proszę do 3 x wcisnąć przycisk REPEAT. Z funkcji tej mogą Państwo korzystać
jak opisano w rozdziale „REPEAT”.
Odbiór radiowy
1. Proszę przekręcić przełącznik wyboru funkcji (16) na pozycję FM ST lub
AM.
2. Przy pomocy tego przełącznika mogą Państwo wybrać żądane pasmo
częstotliwości.
3. UKW = FM ST., fale średnie = AM (mono).
4. Proszę wystroić żądaną stację przy pomocy gałkido wystrajania stacji
TUNING (12).
5. Lampka kontrolna stereo (17) świeci się jedynie wówczas, gdy wybrali
Państwo UKW stereo i odbiór odbywa się w jakości stereo. Jeżeli odbiór jest
zbyt słaby i słychać zakłócenia możliwe, że lampka się nie świeci. Jeżeli nie
można uzyskać poprawy jakości odbioru zaleca się zmianę miejsce ustawienia odbiornika.
6. Ýeby odbierać stacje pasma MF/AM należy postępować w podobny sposób.
W tym paśmie częstotliwości programy nadawane są tylko monofonicznie.
Uwaga: aby umożliwić odbiór FM ST/ AM w urządzeniu zintegrowano antenę.
Urządzenie można skierować na nadajnik przekręcając je i zmieniając jego
pozycję.
44
Page 45

5....-05-DR 564 CD 09.05.2003 11:47 Uhr Seite 45
Czyszczenie i przechowywanie
• Urządzenie należy czyścić wilgotną szmatką, a następnie dokładnie je wytrzeć.
• Proszę nie używać ostrych środków czyszczących.
• Gdy urządzenie nie jest używane przez dłuższy czas (kilka miesięcy) proszę
wyjąć baterie z kasetki, aby zapobiec „wyciekaniu” zawartego w nich kwasu.
Niniejsze urządzenie odpowiada wymaganiom normy bezpieczeństwa użytkowania oraz spełnia wymagania dyrektywy niskonapięciowej i kompatybilności elektromagnetycznej.
Zastrzega się prawo do zmian technicznych!
WARUNKI GWARANCJI
Przyznajemy 24 miesięcy gwarancji na produkt licząc od daty zakupu.
W tym okresie będziemy bezpłatnie usuwać w terminie 14 dni od daty dostarczenia wadliwego sprzętu z kartą gwarancyjną do miejsca zakupu wszystkie uszkodzenia powstałe w tym urządzeniu na skutek wady materiałów lub wadliwego
wykonania, naprawiając oraz wymieniając wadliwe części lub (jeśli uznamy za stosowne) wymieniając całe urządzenie na nowe.
Sprzęt do naprawy powinien być dostarczony w komplecie wraz z dowodem
zakupu oraz z ważną kartą gwarancyjną do sprzedawcy
oryginalnym opakowaniu lub innym odpowiednim dla zabezpieczenia przed uszkodzeniem. W razie braku kompletnego opakowania fabrycznego, ryzyko uszkodzenia sprzętu podczas transportu do i z miejsca zakupu ponosi reklamujący.
Naprawa gwarancyjna nie dotyczy czynności przewidzianych w instrukcji obsługi,
do wykonania których zobowiązany jest użytkownik we własnym zakresie i na
własny koszt.
Gwarancja nie obejmuje:
• mechanicznych, termicznych, chemicznych uszkodzeń sprzętu i wywołanych
nimi wad,
• uszkodzeń powstałych w wyniku działania sił zewnętrznych takich jak wyładowania atmosferyczne, zmiana napięcia zasilania i innych zdarzeń losowych,
• nieprawidłowego ustawienia wartości napięcia elektrycznego, zasilanie z nieodpowiedniego gniazda zasilania,
• sznurów połączeniowych, sieciowych, żarówek, baterii, akumulatorów,
• uszkodzeń wyrobu powstałych w wyniku niewłaściwego lub niezgodnego z
instrukcją jego użytkowania, przechowywania, konserwacji, samowolnego
zrywania plomb oraz wszelkich przeróbek i zmian konstrukcyjnych dokonanych
przez użytkownika lub osoby niepowołane,
• roszczeń z tytułu parametrów technicznych wyrobu, o ile są one zgodne z
podanymi przez producenta,
w miarę możliwości w
PL
45
Page 46

5....-05-DR 564 CD 09.05.2003 11:47 Uhr Seite 46
• prawidłowego zużycia i uszkodzeń, które mają nieistotny wpływ na wartość
PL
lub działanie tego urządzenia.
Karta gwarancyjna bez pieczątki sklepu, daty sprzedaży, nie wypełniona, źle
wypełniona, ze śladami poprawek, nieczytelna wskutek zniszczenia, bez
możliwości ustalenia miejsca sprzedaży oraz dołączonego dowodu zakupu jest
nieważna.
Korzystanie z usług gwarancyjnych nie jest możliwe po upływie daty ważności
gwarancji. Gwarancja na części lub całe urządzenie, które są wymieniane kończy
się, wraz z końcem gwarancji na to urządzenie.
Wszystkie inne roszczenia, wliczając w to odszkodowania są wykluczone chyba, że
prawo przewiduje inaczej. Roszczenia wykraczające poza tą umowę nie są
uwzględniane przez tą gwarancję.
Gwarancja oraz zawarte w niej warunki obowiązują na terenie Rzeczpospolitej
Polskiej.
46
Page 47

5....-05-DR 564 CD 09.05.2003 11:47 Uhr Seite 47
Általános biztonsági rendszabályok
Csak arra a célra használja a készüléket, mire készült!
Mindig csak előírásszerűen szerelt konnektorba csatlakoztassa a készüléket!
Ügyeljen rá, hogy a megadott feszültség egyezzen a hálózati feszültséggel!
Külső áramforrás használata esetén ügyeljen a megfelelő polaritásra és fes-
zültségre, az elemeket mindig jó irányban helyezze be!
Úgy állítsa fel a készüléket, hogy ne záródjanak el a meglévő szellőzőnyílások!
Soha ne nyissa ki a készülék burkolatát! A szakszerűtlen javítások jelentős ves-
zély forrásai lehetnek a használók számára. Ha a készülék, különösen a hálózati
csatlakozó kábel megsérült, a készüléket nem szabad üzembe helyezni, hanem
előbb szakemberrel meg kell javíttatni. Rendszeresen ellenőrizendő, hogy a
hálózati csatlakozó kábelen nincs-e sérülés.
Veszélyhelyzetek elkerülése végett a hibás csatlakozó kábelt csak a gyártóval, a
mi vevőszolgálatunkkal vagy hasonló szakképzettségű más személlyel szabad
pótoltatni azonos értékű kábellel.
Ha hosszabb időn át nem használja a készüléket, húzza ki a csatlakozó dugaszt
a konnektorból, ill. vegye ki belőle az elemeket!
Adott esetben a készüléken az alábbi szimbólumokat láthatja, amelyek a
következőkre hívják fel az Ön figyelmét:
A villám-szimbólum olyan alkatrészekre figyelmeztet a készülék belsejében, amelyek veszélyesen nagy feszültséget vezetnek.
A felkiáltójellel ellátott szimbólum a kísérőpapírokban található fontos
kezelési vagy karbantartási útmutatásokra hívja fel a használó figyelmét.
Az ezzel a szimbólummal jelzett készülékek „1. osztályú lézerrel“
működve tapogatják le a CD-t. A beépített biztonsági kapcsolók megakadályozzák, hogy a használó emberi szemmel nem látható, veszélyes
lézersugárzás hatásának legyen kitéve, amikor a CD-rekesz fel van
nyitva.
Ezeket a biztonsági kapcsolókat semmi esetre sem szabad „megpatkolni“ vagy
más módon manipulálni, különben Ön lézersugárhatás veszélyének teheti ki
magát.
H
47
Page 48

5....-05-DR 564 CD 09.05.2003 11:47 Uhr Seite 48
H
1 Tartószíj
2 CD-rekesz
3 CD-fiók ajtaja
4 PROG gomb
5 REPEAT gomb
6 REW gomb (visszafelé futtat)
7 F.FWD gomb (előre futtat)
8 VOLUME / hangerő-szabályozó
9 Funkcióválasztó kapcsoló
ON/OFF POWER
10 STOP gomb
11 PLAY/PAUSE gomb
12 TUNING szabályozó
13 OPEN / CD-rekesz nyitógombja
14 Frekvenciaskála
A kezelőelemek leírása
15 LED-display
16 Funkcióválasztó kapcsoló
(FM ST./AM/CD)
17 ST. ellenőrzőlámpa
18 REP ellenőrzőlámpa
19 PROG ellenőrzőlámpa
20 POW. ellenőrzőlámpa
Hátfal
21 PHONES (Fejhallgató-csatlakozás)
22 DC 9 V hüvely
23 Láb
24 Felfüggesztő szerkezet
25 Elemtartó rekesz
Falra szerelés
• A készülék falra is szerelhető. A felhelyezéshez vízszintes vonalban mérje ki
a két bevágás közötti távolságot, és ilyen távolságban fúrjon két lyukat a
falba!
• Előtte bizonyosodjék meg róla, hogy nem sért-e meg a fúrással a falban
rejlő vezetékeket! Helyezzen a fúrt lyukakba tiplit és csavart!.
• Akassza be a készüléket, és ellenőrizze, hogy stabilan áll-e!
A készülék használatba vétele
Tegye bele az elemeket (nem hozzá járó tartozék)!
• A csavart OPEN irányba forgatva, nyissa ki a készülék hátlapján az elemtartó
rekeszt (25)!
• Helyezzen be 8 db 1,5 V-os, AA típusú elemet! Ügyeljen a helyes polaritásra!
(lásd az elemtartó rekesz fenekét, ill. a külső falon lévő domborított jelzést)
• Zárja le az elemtartó rekeszt (LOCK)!
• Ha hosszabb ideig nem használja a készüléket, vegye ki belőle az elemeket,
hogy elkerülje az akkumulátorsav esetleges „kifutását“.
• Mindig a teljes elemkészletet cserélje, ne csak egy-egy elem helyett tegyen
be újat!
Figyelem: Az elemek nem a háztartási szemétbe valók! Az elhasznált elemeket
vagy a megfelelő gyűjtőhelyen, vagy a kereskedőnél adja le!
Soha ne dobjon elemeket a tűzbe!
48
Page 49

5....-05-DR 564 CD 09.05.2003 11:47 Uhr Seite 49
Hálózati adapteres működtetés (nem hozzá járó tartozék)
Arra is lehetősége van, hogy konnektorba dugható hálózati adapterről használja
a készüléket.
1. Dugja az adaptert előírásszerűen szerelt, 230V, 50 Hz-es földelt konnektorba!
2. A hálózati adapter dugaszát a DC 9 V hüvelybe (22) dugva, kösse össze a
készüléket a hálózati adapterrel!
3. Ha hálózati adaptert használ, ügyeljen a készüléken lévő feliratoknak
megfelelő helyes polaritásra!
4. Ha a hálózati adapterrel használja a készüléket, az elemek automatikusan
kikapcsolódnak.
Cseppvédelem
A készülék cseppvédett, tehát a zuhanyfülkén belül is használható. A cseppvédett burkolat miatt a gombok, a VOLUME- és a TUNING-szabályozó kissé nehezebben mozog.
Figyelem: Ügyeljen rá, hogy a készüléket a zuhanyfülkében, fürdőkádban csak
elemes üzemmódban szabad használni.
Figyelmeztetés: A CD-t és az elemeket mindig olyankor célszerı cserélni, amikor a
készülék száraz állapotban van.
Általános kezelés
Felfüggesztő / láb (24/23): Szükség szerint akassza fel a készüléket,
ON OFF POWER (9): Üzemkész állapotba kapcsolja, ill. kikapcsol-
VOLUME (8): A hangerő beállítására szolgál.
9 V hüvely (22): Hálózati adapter csatlakoztatására.
PHONES (21): Fej- vagy fülhallgató csatlakoztatására.
Kikapcsolás
Ha a funkcióválasztó kapcsolót (9) OFF-ra állítja, azzal kikapcsolja a készüléket.
vagy állítsa a lábára!
ja a készüléket. A POW (20) ellenőrző
lámpa kijelzi a funkciót.
H
CD-k lejátszása
1. Ha az OPEN gombot (13) lefelé tolja, kinyílik a CD-fiók.
2. Nyomjon a tüskére címkéjével felfelé egy CD-t úgy, hogy bekattanjon!
Csukja vissza a CD-fiókot (3)!
3. Fordítsa a funkcióválasztó kapcsolót (16) CD állásba.
4. A CD lejátszásához nyomja meg a PLAY/PAUSE gombot (11)! A display-n
„- -„ jelenik meg, majd a korongon lévő címek száma. A CD az első számtól
49
Page 50

5....-05-DR 564 CD 09.05.2003 11:54 Uhr Seite 50
kezdve végigfut. A display kijelzi az éppen játszott számot és az eltelt lejáts-
H
zási időt.
5. A CD kivételéhez nyomja meg a STOP- gombot (10), az OPEN gombbal
nyissa fel a CD-fedelet, és óvatosan emelje le a korongot!
Egyébként tartsa a CD-fedelet mindig lecsukva!
A CD-gombok leírása
PLAY/PAUSE (11): Rövid időre megszakíthatja vele a lejátszást. A gomb
REW (6): 1 x megnyomva = Újra elölről kezdi az éppen játszott
F.FWD (7): Ezzel a gombbal ugorhat a következő, ill. a
STOP (10): Leállítja a CD-t.
REPEAT (5): A REPEAT gombbal a következő funkciókat lehet
Programozott lejátszás
1. Nyomja meg a STOP gombot.
Nyomja meg a PROG gombot (4)!
2.
3. A display-n a PROG ellenőrző lámpa (19) és „01“ (a cím sorszáma) villog.
4. A REW/F.FWD gombokkal válassza ki a kívánt sorszámú címet, és nyomja
meg ismét a PROG gombot!
5. A display-n a kijelzés a 02 memóriahelyre vált.
6. A REW/F.FWD gombokkal válassza ki a következő címet, és nyomja meg
ismét a PROG gombot! Ismételje ezt a folyamatot mindaddig, míg az összes
kívánt számot ki nem választotta
ismételt megnyomása után a lejátszás ugyanazon a
helyen folytatódik.
számot.
2 x megnyomva = Az előző számra ugrik.
3 x megnyomva = Az egyik előtte lévő számot játssza
stb. Ha lenyomva tartja, folyama-
tos zenekeresés indul el.
következő utáni számra stb. Ha lenyomva tartja,
folyamatos zenekeresés indul el.
választani
1 x megnyomva = A display-n villog a REP ellenőrző
lámpa (18). Állandóan ismétli az
éppen futó számot.
2 x megnyomva = A display-n folyamatosan ég a
REP ellenőrző lámpa. Állandóan
ismétli az éppen feltett CD-t.
3 x megnyomva = Minden funkciót megszüntet.
Folytatódik a rendes lejátszó
működés.
50
Page 51

5....-05-DR 564 CD 09.05.2003 11:47 Uhr Seite 51
7. Nyomja meg a PLAY/PAUSE gombot! A display-n folyamatosan ég a PROG
ellenőrző lámpa.. Megindul a lejátszás. Ugyanezzel a gombbal rövid időre
félbe is szakíthatja a programot.
8. Ha egyszer megnyomja a STOP gombot, megszakad a lejátszás, de a program megmarad.
9. A program ismételt lejátszásához nyomja meg először 1-szer a PROG gombot, utána pedig 2-szer a STOP gombot!
10. Ha törölni kívánja a programot, nyomja meg 2-szer a STOP gombot!
Miután a készülék az összes beprogramozott számot lejátszotta, magától leáll. A
beprogramozott sorrend mindaddig megmarad a memóriában, amíg nem törli a
programozást, vagy ki nem veszi a CD-t a fiókból, ill. ki nem kapcsolja a készüléket. Ha a programozott sorrendet újra le akarja játszani, nyomja meg
először a PROG, utána pedig a PLAY/PAUSE gombot!
Lehetősége van arra is, hogy a programozott címeket a REPEAT funkcióval
kombinálja. Miután elvégezte a programozást, és elindította a készüléket, nyomja meg a REPEAT gombot legfeljebb 3-szor. A funkciókat ugyanúgy lehet használni, ahogy a „REPEAT“ című fejezetben olvasható.
Rádióhallgatás
1. Fordítsa a funkcióválasztó gombot (16) FM ST vagy AM állásba!
2. Ezzel a kapcsolóval választható meg a kívánt frekvenciatartomány (hullámhossz).
3. URH = FM ST., középhullám = AM (mono).
4. Állítsa be a TUNING állomáskereső gombbal (12) a kívánt adót!
5. A sztereó ellenőrző lámpa (17) csak akkor ég, ha URH sztereót választott,
és sztereó minőségben veszi az adást. Ha túl gyenge a vétel, és a választott
adó zúg, előfordulhat, hogy a lámpa nem ég. Ha a vétel nem javítható, ajánlatos megváltoztatni a készülék elhelyezését.
6. Középhullámú, AM-adók vételekor ennek megfelelően járjon el! Ebben a
frekvenciatartományban csak mono adásokat sugároznak.
Megjegyzés: Az FM ST/AM adók vételére a készülékben beépített antenna
van. A készülék elfordítással vagy helyzetének megváltoztatásával tájolható az
adóra.
H
Tisztítás és tárolás
• Nedves ruhával tisztítsa meg a készüléket, utána pedig törölje gondosan
szárazra!
• Ne használjon semmilyen erős tisztítószert!
• Ha hosszabb időn át (néhány hónapig) nem használja a készüléket, célszerű
kivenni az elemeket az elemtartóból, hogy megakadályozza az akkumulátorsav „kifutását”.
51
Page 52

5....-05-DR 564 CD 09.05.2003 11:47 Uhr Seite 52
Ezt a készüléket az Európa Tanács minden vonatkozó aktuális irányelve szerint
H
(pl. elektromágnesesség-elviselő képesség vagy kisfeszültség-elviselő képesség) ellenőriztük, és a legújabb biztonságtechnikai előírások szerint készült.
Megjegyezzük az esetleges müszaki változásokat!
Garancia
Garanciális igényeivel forduljon, kérem, a szerződéses kereskedőjéhez!
A garancia igazolására a pénztári nyugta szolgál. E nélkül az igazolás nélkül sem
díjmentes csere, sem díjtalan javítás nem végezhető.
Garanciális esetben eredeti csomagolásában adja át az alapkészüléket a pénz-
tári bizonylattal együtt annak a kereskedőnek, akitől a készüléket vásárolta!
*) A tartozékok hibái nem eredményezik automatikusan az egész készülék
díjtalan cseréjét. Ilyen esetekben forduljon „forró vonalunkhoz”! Az üvegtörésből,
ill. a műanyag alkatrészek töréséből eredő hibák megszüntetése mindenkor
térítésköteles.
Sem az elhasználódó tartozékokban, ill. kopó alkatrészekben (pl. szénkefe,
dagasztóhorog, hajtószíj, póttávvezérlő, pótfogkefe, fűrészlap stb.) bekövetkező
hibák, sem a tisztítás, karbantartás vagy a kopó alkatrészek cseréje nem esik a
garancia hatálya alá, következésképp térítésköteles.
Illetéktelen beavatkozás a garancia megszűnését eredményezi.
A garanciális idő után
A garanciális idő eltelte után a megfelelő szakkereskedésben vagy javítószolgálatnál végeztethet térítésköteles javításokat.
52
Page 53

5....-05-DR 564 CD 09.05.2003 11:47 Uhr Seite 53
Technische Daten
Modell: DR 564 CD
Kopfhörerbuchse: 3,5 mm Klinkenstecker Stereo
Spannungsversorgung: 8 x 1,5 V Batterien,Typ AA
Netzadapter-Buchse: 9 V DC,
Polarität – +
Frequenzbereiche: FM 88–108 MHz
AM 530–1700 KHz
Dieses Gerät wurde nach allen zutreffenden,
aktuellen CE-Richtlinien geprüft, wie z.B.
elektromagnetische Verträglichkeit und
Niederspannungsdirektive und wurde nach den
neuesten sicherheitstechnischen Vorschriften
gebaut.
Technische Änderungen vorbehalten!
Bitte führen Sie das ausgediente Gerät
einer umweltgerechten Entsorgung zu.
D-47906 Kempen/Germany · Industriering Ost 40
Internet: http://www.clatronic.de · email: info@clatronic.de
Stünings, Krefeld • 05/03
 Loading...