

Page 1

Key - Remote control
Complete locking of the vehicle.
Unlocking of the load space only.
First press: unlocking of the cab,
second press: unlocking of the rear
doors.
2a
17
Exterior
8
2a
2b
Door open warning light
If this comes on, a door is not closed correctly.
Sliding side door
Pull the handle towards you then
towards the rear and open the door
guiding the rearward sliding until the
point of resistance has been passed.
If fitted on your vehicle, do not open the
left-hand side door while filling with fuel
as this may damage the fuel filler flap.
2b
22
Usable dimensions
Key
: chapter identification
: page identification
126
8
Page 2

3b
3a
2
Exterior
Hinged rear doors
This control permits opening to
approximately 180°.
2
Rear suspension
Two functions:
- Automatic correction.
- Manual correction.
23
70
3b
7
Parking assistance
In bad weather or in winter, check
that the sensors are not covered with
mud, ice or snow.
77
3a
Repairing a wheel
Changing a wheel
106
7
108
7
Page 3

6
7
6
6
Exterior
Opening the bonnet
Lift the cover located at the foot of the lefthand seat and pull the control upwards.
Towing eye
At the front, unclip the cover by pressing it
at the bottom.
At the rear, unclip the cover using a coin or
the flat part of the towing eye.
124
Partially open the bonnet, lift the control and
raise the bonnet.
Diesel engines Petrol engine
Take care when carrying out work under the bonnet.
Refer to the "Levels" section of chapter 6 for instructions for use of the fluids.
96
Secure the strut in one of the two notches,
according to the height required, to hold the
bonnet open.
95
97
Page 4

Interior
INSTRUMENTS AND CONTROLS
1. Lights and direction indicators stalk.
2. Instrument panel with display.
3. Wipers, wash-wipe, trip computer
controls.
4. Gear lever.
5. Ignition.
6. Audio equipment controls.
7. Driver's airbag, horn.
8. Steering wheel height and depth
adjustment.
9. Headlamp beam adjustment.
10. Cruise control, speed limiter switch.
11. 12 volt accessories socket
(120 W max) of the lighter type.
12. Ashtray.
13. Glove box, auxiliary socket,
passenger airbag disarming switch.
Page 5

Interior
ADJUSTING THE TIME
Depending on the configuration of your
vehicle, you have either:
- a centre console with display: refer
to the "Adjusting the date and time"
section of chapter 9,
- a centre console without display:
refer to the "Instruments and controls"
section of chapter 2.
CENTRE CONSOLE AND OVERHEAD STORAGE UNIT
1. Location of the controls:
- central locking/unlocking,
- locking/unlocking of the load
space.
2. Heating and/or air conditioning
controls.
3. Location of the ticket/card storage or
controls:
- deactivation of the ESP,
- disarming of the interior protection
alarm, alarm diode,
- deactivation of the parking
assistance.
4. CD changer or storage compartment.
5. Audio equipment or storage
compartment.
6. Central adjustable vents.
7. Hazard warning lights button.
8. Display or storage compartment.
9. Courtesy light.
10. Passenger airbag disarmed warning
light.
11. Location of the ticket/card storage,
heated seat controls.
Page 6
Interior
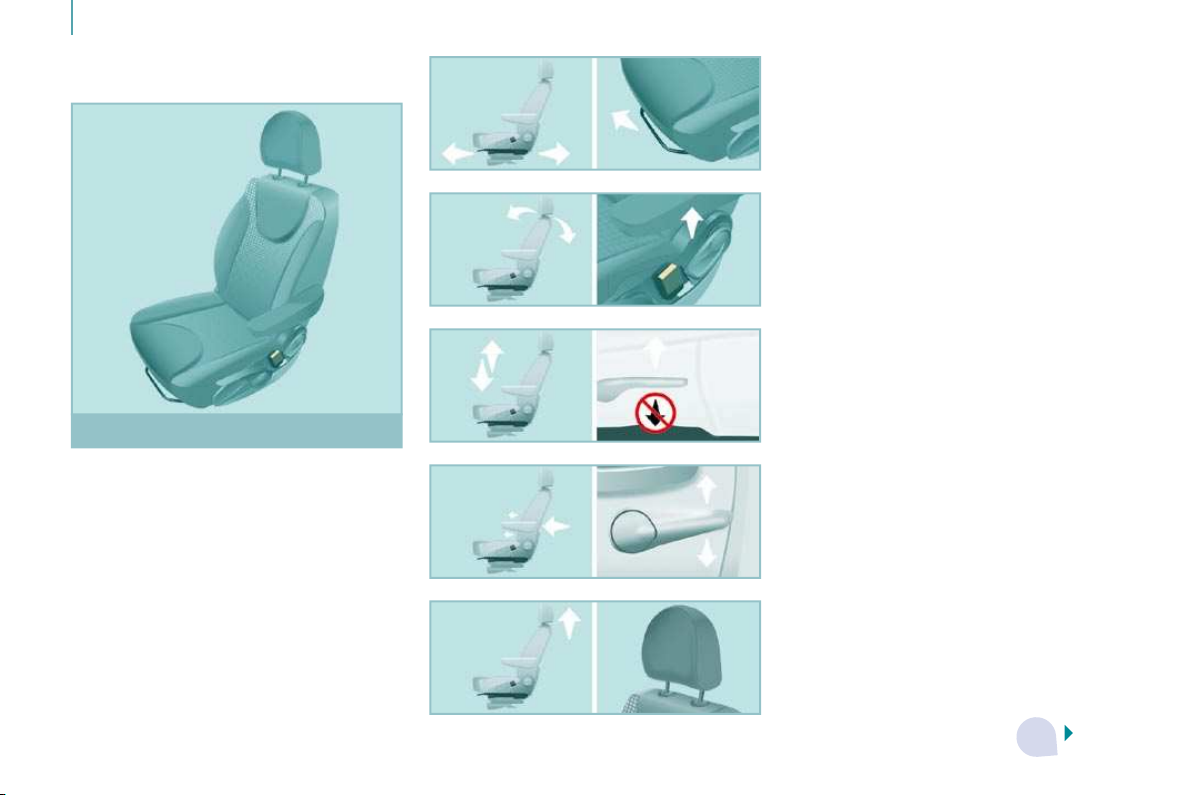
SIT COMFORTABLY
1. Forwards-backwards adjustment.
2. Angle.
Driver's seat
3. Height.
4. Lumbar.
5. Head restraint height.
59
3
Page 7

2
4
Interior
Steering wheel Electric windows Mirrors
Adjust the height and depth of the steering
wheel.
36
Manual adjustments.
3
75
Seat belts
Height adjustment.
Fastening.
Electric adjustments, electric folding/
unfolding.
80
73
3
Page 8

3
Interior
SEE CLEARLY
Lights stalk
Lights off.
Side lights.
Main beam headlamps (blue).
Dipped headlamps (green).
AUTO, automatic switching
on of the lights.
37
Wipers stalk
2 fast.
1 normal.
I intermittent.
0 off.
single wipe.
AUTO , press the stalk down.
Changing bulbs
In bad weather or in winter, check that the
lights are not covered with mud or snow.
113
7
40
3
Page 9

Interior
DRIVE SAFELY
NaviDrive
This audio equipment incorporates a hard
disc with a capacity of 10 Gb, reserved for
your music.
The Jukebox function permits the selective
playing of up to 10 hours of music. The
detailed map of Europe is stored on this
hard disc, without the addition of a CD. It is
displayed on the 16/9ths 7" colour display
and offers a 3D view.
Via your SIM card, the GSM hands-free
telephone also provides access to the
CITROËN emergency team (subject to
conditions).
9
USB Player
CITROËN recommends the use of a
connection lead to connect your portable
player to the USB.
In the right-hand drive configuration, the
lead is essential.
9
Audio system
MyWay
This ergonomic audio equipment offers a
map of Europe on SD Card, a Bluetooth
telephone connection and the playing of
MP3/WMA files.
9
Cruise control
The vehicle speed must be higher than
25 mph (40 km/h) with at least 4th gear
engaged.
9
Speed limiter
The lowest speed which can be
programmed is 20 mph (30 km/h).
42
3
45
3
Page 10

3
3
Interior
CAB LAYOUT
Overhead storage unit
65
Glove box
Storage compartment
63 63
3
Page 11

3
3 3
Interior
LOAD SPACE
Tunnel and interior rack
Vertical partition
69
Location for stowing rail
Stowing rings
You are advised to immobilise the load by
securing it firmly using the stowing rings on
the floor.
68 67 67
3
Page 12

3
Interior
VENTILATION
Manual
3
Automatic, with separate driver and
passenger settings
48
50
Recommended settings
For optimum use of the system, we recommend:
If I require...
Heating -
Cooling
De-icing
Demisting
Air
distribution
Temperature Air flow
Air
recirculation
AC
Page 13

this selectivity of opening between the cab
REMOTE CONTROL
ACCESS
and the load space, contact a CITROËN
dealer.
Access
This is confirmed by fixed lighting of the
direction indicators for approximately
two seconds.
Unlocking the cab
Press this button once to unlock
your vehicle's cab.
The direction indicators flash
twice.
Press this button a second time to unlock
the side door(s) and the rear doors.
This selective function of the accesses is
active when the vehicle is delivered. At
your request, the network can deactivate
Unlocking the load space
Press this button to unlock all of
the rear doors.
This separation of the locking
of the cab and load space is an
operating security feature. It enables you
to prevent access to the part of the vehicle
from which you are absent.
Central locking
Press this button to lock your
vehicle, cab and rear doors.
The direction indicators flash
once.
If one of the front doors is open or is not
closed correctly, the central locking will not
work.
Deadlocking
If your vehicle is fitted with deadlocking,
a second press on the closed padlock on
the remote control within five seconds after
locking changes the locking to deadlocking.
Deadlocking renders the exterior and interior
door opening handles inoperative: do not
leave anyone inside the vehicle when it is
deadlocked.
If deadlocking is activated from inside the
vehicle, it will change to normal locking
when the vehicle is started.
Folding/unfolding the key
Press this button to release the
key from its housing.
To fold the key, press the
chromed button then fold the key
into the housing. If you do not press the
button, the mechanism may be damaged.
Good practice
Take care not to allow the remote control to
come into contact with grease, dust, rain or
a damp environment.
A heavy object attached to the key
(keyring, ...) weighing on the shaft of the key
in the switch, may cause a malfunction.
Page 14

Access
KEY
REMOTE CONTROL
ELECTRONIC IMMOBILISER
This locks and unlocks the locks on the
vehicle and starts the engine.
Changing the battery
Battery ref.: CR1620/3 volts.
The information "battery flat" is given by an
audible signal, accompanied by a message
on the display.
To replace the battery, unclip the casing
using a coin at the ring.
If the remote control does not work after the
battery has been changed, re-programme
the remote control.
There is a risk of damage if the replacement
battery does not conform.
Use only identical batteries or batteries of an
equivalent type to those recommended by
CITROËN dealers.
Do not discard the remote control batteries,
they contain metals which are harmful to the
environment.
Deposit them at a CITROËN dealership, or
at any other approved collection point.
Programming the remote control
Following changing of the remote control battery
or disconnection of the vehicle battery, the
remote control may have to be reprogrammed.
Wait at least one minute before using the
remote control.
Insert the key in the ignition switch with the
buttons (padlocks) of the remote control
facing you.
Switch on the ignition.
Press the locking padlock for at least
five seconds within the next ten seconds.
Switch off the ignition.
Wait at least one minute before using the
remote control.
The remote control is now working again.
All of the keys contain an electronic
immobiliser device.
This device locks the engine supply system.
It is activated automatically when the key is
removed from the ignition.
After the ignition is switched on, a dialogue
is established between the key and the
electronic immobiliser system.
The metal part of the key must be unfolded
correctly for correct dialogue to take place.
If you lose your keys
Visit a CITROËN dealer with the
vehicle's V5 registration document and your
identification document.
A CITROËN dealer will be able to retrieve
the key code and the transponder code so
that a replacement key can be ordered.
Page 15

Access
ALARM
Good practice
Do not make any modifications to the
electronic immobiliser system.
Operating the remote control, even when it
is in your pocket, may result in involuntary
unlocking of the doors.
The simultaneous use of other high
frequency equipment (mobile telephones,
domestic alarms…), may interfere with the
operation of the remote control temporarily.
The remote control does not operate while
the key is in the ignition, even if the ignition
is off.
As a safety precaution (with children on
board), remove the key from the ignition
when leaving the vehicle, even for a short
time.
When purchasing a second-hand vehicle:
- have the keys memorised by a
CITROËN dealer to ensure that the keys
in your possession are the only ones
which can start the vehicle.
If fitted on your vehicle, this provides
two types of protection:
- exterior protection: it sounds if a front/
rear door or the bonnet is opened.
- interior protection: it sounds if
the volume inside the passenger
compartment changes (breaking of
a window or a movement inside the
vehicle).
If your vehicle is fitted with a separation
partition, the interior protection is not active
in the load space.
Locking the vehicle with complete
alarm
Setting the alarm
- Switch off the ignition and get out of
the vehicle.
- Set the alarm within five minutes of
getting out of the vehicle, by locking or
deadlocking using the remote control.
The red diode, located on the centre
console, flashes once per second.
Disarming
- Unlock the vehicle with the remote
control or switch on the ignition, the red
diode goes out.
Locking the vehicle with exterior
protection only
If, while you are away from the vehicle, you
wish to leave a window partially open or a
pet inside the vehicle, you should choose
exterior protection only.
- Switch off the ignition.
- In the next ten seconds, press
this button, located on the
centre console, until the red
diode is on continuously.
- Get out of the vehicle.
- Within the next five minutes, set the
alarm by locking or deadlocking using
the remote control (the red diode flashes
once a second).
Page 16

Access
KEY
REMOTE CONTROL
ELECTRONIC IMMOBILISER
This locks and unlocks the locks on the
vehicle and starts the engine.
Changing the battery
Battery ref.: CR1620/3 volts.
The information "battery flat" is given by an
audible signal, accompanied by a message
on the display.
To replace the battery, unclip the casing
using a coin at the ring.
If the remote control does not work after the
battery has been changed, re-programme
the remote control.
There is a risk of damage if the replacement
battery does not conform.
Use only identical batteries or batteries of an
equivalent type to those recommended by
CITROËN dealers.
Do not discard the remote control batteries,
they contain metals which are harmful to the
environment.
Deposit them at a CITROËN dealership, or
at any other approved collection point.
Programming the remote control
Following changing of the remote control battery
or disconnection of the vehicle battery, the
remote control may have to be reprogrammed.
Wait at least one minute before using the
remote control.
Insert the key in the ignition switch with the
buttons (padlocks) of the remote control
facing you.
Switch on the ignition.
Press the locking padlock for at least
five seconds within the next ten seconds.
Switch off the ignition.
Wait at least one minute before using the
remote control.
The remote control is now working again.
All of the keys contain an electronic
immobiliser device.
This device locks the engine supply system.
It is activated automatically when the key is
removed from the ignition.
After the ignition is switched on, a dialogue
is established between the key and the
electronic immobiliser system.
The metal part of the key must be unfolded
correctly for correct dialogue to take place.
If you lose your keys
Visit a CITROËN dealer with the
vehicle's V5 registration document and your
identification document.
A CITROËN dealer will be able to retrieve
the key code and the transponder code so
that a replacement key can be ordered.
Page 17

Access
ALARM
Good practice
Do not make any modifications to the
electronic immobiliser system.
Operating the remote control, even when it
is in your pocket, may result in involuntary
unlocking of the doors.
The simultaneous use of other high
frequency equipment (mobile telephones,
domestic alarms…), may interfere with the
operation of the remote control temporarily.
The remote control does not operate while
the key is in the ignition, even if the ignition
is off.
As a safety precaution (with children on
board), remove the key from the ignition
when leaving the vehicle, even for a short
time.
When purchasing a second-hand vehicle:
- have the keys memorised by a
CITROËN dealer to ensure that the keys
in your possession are the only ones
which can start the vehicle.
If fitted on your vehicle, this provides
two types of protection:
- exterior protection: it sounds if a front/
rear door or the bonnet is opened.
- interior protection: it sounds if
the volume inside the passenger
compartment changes (breaking of
a window or a movement inside the
vehicle).
If your vehicle is fitted with a separation
partition, the interior protection is not active
in the load space.
Locking the vehicle with complete
alarm
Setting the alarm
- Switch off the ignition and get out of
the vehicle.
- Set the alarm within five minutes of
getting out of the vehicle, by locking or
deadlocking using the remote control.
The red diode, located on the centre
console, flashes once per second.
Disarming
- Unlock the vehicle with the remote
control or switch on the ignition, the red
diode goes out.
Locking the vehicle with exterior
protection only
If, while you are away from the vehicle, you
wish to leave a window partially open or a
pet inside the vehicle, you should choose
exterior protection only.
- Switch off the ignition.
- In the next ten seconds, press
this button, located on the
centre console, until the red
diode is on continuously.
- Get out of the vehicle.
- Within the next five minutes, set the
alarm by locking or deadlocking using
the remote control (the red diode flashes
once a second).
Page 18

Access
ALARM
Good practice
Do not make any modifications to the
electronic immobiliser system.
Operating the remote control, even when it
is in your pocket, may result in involuntary
unlocking of the doors.
The simultaneous use of other high
frequency equipment (mobile telephones,
domestic alarms…), may interfere with the
operation of the remote control temporarily.
The remote control does not operate while
the key is in the ignition, even if the ignition
is off.
As a safety precaution (with children on
board), remove the key from the ignition
when leaving the vehicle, even for a short
time.
When purchasing a second-hand vehicle:
- have the keys memorised by a
CITROËN dealer to ensure that the keys
in your possession are the only ones
which can start the vehicle.
If fitted on your vehicle, this provides
two types of protection:
- exterior protection: it sounds if a front/
rear door or the bonnet is opened.
- interior protection: it sounds if
the volume inside the passenger
compartment changes (breaking of
a window or a movement inside the
vehicle).
If your vehicle is fitted with a separation
partition, the interior protection is not active
in the load space.
Locking the vehicle with complete
alarm
Setting the alarm
- Switch off the ignition and get out of
the vehicle.
- Set the alarm within five minutes of
getting out of the vehicle, by locking or
deadlocking using the remote control.
The red diode, located on the centre
console, flashes once per second.
Disarming
- Unlock the vehicle with the remote
control or switch on the ignition, the red
diode goes out.
Locking the vehicle with exterior
protection only
If, while you are away from the vehicle, you
wish to leave a window partially open or a
pet inside the vehicle, you should choose
exterior protection only.
- Switch off the ignition.
- In the next ten seconds, press
this button, located on the
centre console, until the red
diode is on continuously.
- Get out of the vehicle.
- Within the next five minutes, set the
alarm by locking or deadlocking using
the remote control (the red diode flashes
once a second).
Page 19

Access
Triggering
The siren sounds, the direction indicators
flash for approximately 30 seconds and the
red diode flashes rapidly.
- To switch it off, insert the key and switch
on the ignition.
When the alarm has been triggered ten
times in succession (when triggered for the
eleventh time) it is deactivated. Repeat the
rules for setting the alarm.
Incorrect operation
When the ignition is switched on, if the red
diode remains on for ten seconds, there is a
fault in the siren connection.
Contact a CITROËN dealer to have the
system checked.
Locking the vehicle without alarm
- Insert the key in the lock on the driver's
door and lock it.
Do not set the alarm when washing your
vehicle.
Failure of the remote control
When the alarm is set but the remote control
does not operate:
- Unlock the doors with the key and open
the door. The alarm is triggered.
- Switch on the ignition in the next
ten seconds. The alarm is disarmed.
Automatic setting of the alarm
Depending on the country in which the
vehicle is sold, the alarm is set automatically
approximately 2 minutes after the last door
is closed.
To prevent triggering of the alarm when a
door is opened, it is imperative to press the
remote control unlocking button again.
Do not make any modifications to
the alarm system as this could cause
faults.
Page 20

Access
DOORS
From the outside
Use the remote control to lock/unlock the
vehicle.
Insert the metal part of the key in the lock on
the driver's side if the remote control does
not work.
From the inside
Cab and load space
The first press permits central
locking of the front and rear
doors, if they are closed.
A second press permits central unlocking of
the vehicle.
The control does not work if the vehicle has
been locked using the remote control or the
key from the outside.
Load space - comes on if the accesses are
Pressing permits locking/
unlocking of the rear doors from
the cab.
This selective accesses function
is activated on delivery. At your request,
the network can deactivate this opening
selectivity between the cab and load space,
contact a CITROËN dealer.
The doors can still be opened from
the inside.
The indicator light on the controls:
- flashes if the accesses are
locked when stationary with
the engine off,
Protection against attack
When the vehicle is started, the system
automatically locks the front doors. When
you reach approximately 6 mph (10 km/h),
the system locks the rear doors.
Activation/deactivation of the function
Opening warning light
locked and from the time the
ignition is switched on.
With the ignition on, a long
press on this button activates or
deactivates the function.
If this warning light comes on,
check that the cab doors and
the rear or side doors are closed
correctly.
Page 21

Access
SLIDING SIDE DOOR
If fitted on your vehicle, do not open the lefthand side door while filling with fuel as you
risk damaging the fuel filler flap.
From the outside
Pull the handle towards you then towards
the rear.
Good practice
Take care not to block the guide space on
the floor to allow the door to slide correctly.
For safety and operation reasons, do not
drive with the sliding side door open.
From the inside
To unlock and open, push the handle
towards the rear. Ensure that the door opens
fully to lock the device at the base of the
door.
Operation in the event of a battery
failure
Front and side passenger doors
In the event of a malfunction of the battery
or of the central locking, use the lock to lock
the doors mechanically.
- To open the door and get out of the
vehicle, pull the interior control.
- To lock the door, insert the key in the
lock, located on the edge of the door,
then turn it one eighth of a turn .
Driver's door
- Insert the key in the lock, then turn it to
the right to lock or to the left to unlock.
Page 22

Access
HINGED REAR DOORS
TAILGATE
From the outside
The two hinged doors open to 90°.
To open, pull the handle towards you then
pull the lever to open the left-hand door.
To close, start with the left-hand door then
close the right-hand door.
Opening to 180°
A retractable check strap system permits
extension of the opening from 90° to 180°.
Disengage the check strap towards you
when the door is partially open.
The check strap will re-attach automatically
on closing.
When parked with the rear
doors open to 90°, the doors
mask the rear lights.
To signal your position to
road users travelling in the
same direction who may
not have noticed that you
have stopped, use a warning
triangle or any other device
stipulated by the legislation
and regulations of your
country.
From the outside
If fitted on your vehicle, locking/unlocking is
via the remote control.
To open, press the control then raise the
tailgate.
A strap is provided to secure the tailgate in
the upper position.
From inside
Emergency control
In the event of a central unlocking operating
fault, this permits unlocking of the tailgate
from the inside.
Fold the rear seats to gain access to the lock.
Insert a small screwdriver in this opening to
unlock the tailgate.
Page 23

Instruments and controls
INSTRUMENT PANEL
INSTRUMENTS AND CONTROLS
1. Distance recorder in kilometres/miles.
2. Display.
3. Fuel level, coolant temperature.
4. Rev counter.
5. Instrument panel lighting rheostat.
6. Trip distance recorder/service indicator
zero reset.
Warning light and controls on the
overhead storage unit
- Passenger airbag disarmed warning
light.
- Driver/passenger heated seat controls
(version with 2 front seats).
Instrument panel display
- Speed limiter/cruise control.
- Kilometres/Miles travelled.
- Service indicator, engine oil level
indicator, total kilometres/miles.
- Presence of water in the diesel filter.
- Diesel pre-heating.
Page 24

Instruments and controls
ADJUSTING THE TIME
Instrument panel without display
Centre console without display
To adjust the time of the clock
on the instrument panel, use the
left-hand button on the instrument
panel then carry out the
operations in the following order:
- turn to the left: the minutes flash,
- turn to the right to increase the minutes
(hold the button to the right for rapid
scrolling),
- turn to the left: the hours flash,
- turn to the right to increase the hours
(hold the button to the right for rapid
scrolling),
- turn to the left: 24 H or 12 H is
displayed,
- turn to the right to select 24 H or 12 H,
- turn to the left to complete the time
adjustment.
After approximately 30 seconds without any
action, the display returns to the normal
display.
Centre console with display
The display - time sequence
is linked according to model
(version). The access to the Date
is only active when the model
version offers a date in words.
To adjust the time indicated on the
display, refer to the "Adjusting the date
and time" section of chapter 9.
Page 25

Instruments and controls
ADJUSTING THE TIME
Instrument panel without display
Centre console without display
To adjust the time of the clock
on the instrument panel, use the
left-hand button on the instrument
panel then carry out the
operations in the following order:
- turn to the left: the minutes flash,
- turn to the right to increase the minutes
(hold the button to the right for rapid
scrolling),
- turn to the left: the hours flash,
- turn to the right to increase the hours
(hold the button to the right for rapid
scrolling),
- turn to the left: 24 H or 12 H is
displayed,
- turn to the right to select 24 H or 12 H,
- turn to the left to complete the time
adjustment.
After approximately 30 seconds without any
action, the display returns to the normal
display.
Centre console with display
The display - time sequence
is linked according to model
(version). The access to the Date
is only active when the model
version offers a date in words.
To adjust the time indicated on the
display, refer to the "Adjusting the date
and time" section of chapter 9.
Page 26

Instruments and controls
WARNING LIGHTS
Each time the engine is started: a series of warning lights comes on applying a check auto-test. They are switched off almost immediately.
When the engine is running: the warning light becomes a warning if it remains on continuously or flashes. This initial warning may be
accompanied by an audible signal and a message on the display.
Do not ignore these warnings
Warning light is indicates Solution - action
STOP
lit, associated
with another
warning
light and
accompanied by
a message on
the display.
major faults linked with the
"Brake fluid level", "Engine oil
pressure and temperature",
"Coolant temperature",
"Electronic brake force
distribution" and "Power
steering" warning lights.
You must stop, park, switch off the ignition and call
a CITROËN dealer.
Handbrake/
Brake fluid
level/EBFD
lit.
handbrake applied or not
released correctly.
Releasing the handbrake switches off the warning light.
lit. low brake fluid level. Top up using a fluid recommended by CITROËN.
remaining on,
even though the
level is correct
and associated
with the ABS
warning light.
failure of the electronic brake
force distribution.
You must stop, park, switch off the ignition and call
a CITROËN dealer.
Engine oil
pressure and
temperature
lit while driving.
insufficient pressure or
temperature too high.
Park, switch off the ignition and allow to cool. Visually
check the level. Chapter 6, "Levels" section.
remaining on,
even though the
level is correct.
major fault. Call a CITROËN dealer.
Page 27

Instruments and controls
Warning light is indicates Solution - action
Coolant
temperature
and level
lit with needle in
the red zone.
abnormal increase in
temperature.
Park and switch off the ignition then allow to cool.
Visually check the level.
flashing. drop in coolant level. Chapter 6, "Levels" section. Contact a CITROËN dealer.
Service
lit temporarily. minor faults or warnings.
Consult the warnings log on the display or on the
screen.
See chapter 9, "Trip computer" section then "Warnings
log".
Depending on the seriousness of the fault, contact a
CITROËN dealer.
remaining on. major faults.
Row 1 seat belt
not fastened
lit then flashing.
the driver or a front passenger
has not fastened his seat belt.
Pull the strap then insert the tongue in the buckle.
accompanied
by an audible
signal then
remains on.
the vehicle is moving with the
driver or front passenger seat
belt not fastened.
Check that the seat belt is fastened by pulling the strap.
Chapter 4, "Seat belts" section.
The driver must ensure that all passengers have
fastened their seat belt and use it correctly.
Page 28

Instruments and controls
Warning light is indicates Solution - action
Front/side/
curtain airbag
flashing or
remaining on.
failure of an airbag.
Have the system checked by a CITROËN dealer without
delay. Chapter 4, "Airbags" section.
Front
passenger
airbag
disarmed
lit.
intentional disarming of this
airbag in the presence of a rear
facing child seat.
Chapter 4, "Airbags-children on board" section.
Low fuel level
lit with gauge
needle in the red
zone.
that when it first comes on
approximately 8 litres of fuel
remain.
It is essential to fill the tank to avoid running out of fuel.
Never continue to drive until you run out of fuel, this
could damage the emission control and injection
systems.
Tank capacity: approximately 80 litres
remaining on each
time the ignition is
switched on.
an insufficient top-up of the
fuel.
flashing.
cutting off of the supply
following a serious impact.
Restore the supply. Chapter 6, "Fuel" section.
EOBD emission
control system
flashing or
remaining on.
failure of the system.
Have the system checked by a CITROËN dealer as
soon as possible.
Battery charge
lit. fault in the charging circuit.
Check the battery terminals, … Chapter 7, "Battery"
section.
flashing.
placing of the active functions
on standby (economy mode).
Chapter 7, "Battery" section.
remaining on,
in spite of the
checks.
faulty circuit, injection or
ignition malfunction.
Call a CITROËN dealer.
Page 29

ABS
ESP
Instruments and controls
Warning light is indicates Solution - action
Power steering lit. system malfunction.
The vehicle retains conventional steering without assistance.
Have the system checked by a CITROËN dealer.
Opening
detection
lit and
accompanied by
a message on
the display.
access not closed correctly.
Check that the cab doors, the rear and side doors and
the bonnet are closed (if your vehicle is fitted with an
alarm).
Rear
suspension
with pneumatic
compensation
flashing.
abnormal difference between
the detected sill height and the
optimum sill height.
In automatic correction mode: drive slowly (approximately
6 mph (10 km/h)) until the warning light is switched off.
In manual correction mode: return the sill which is still at
the upper or lower limit to an optimum height. Chapter 3,
"Rear suspension" section.
lit on starting or
while driving.
failure of the pneumatic
compensation.
You must stop. Call a CITROËN dealer.
ABS remaining on.
failure of the anti-lock braking
system.
The vehicle retains conventional braking without
assistance but you are advised to stop. Call a
CITROËN dealer.
ESP
flashing.
triggering of regulation by
the ESP.
The system optimises drive and permits improvement
of the directional stability of the vehicle. Chapter 4,
"Driving safety" section.
remaining on.
system malfunction. E.g.:
under-inflation of the tyres.
E.g. Check the pressure of the tyres. Have them
checked by a CITROËN dealer.
remaining on with
the diode on the
button (on the
fascia) lit.
deactivation of the system at
the request of the driver.
Operation of the system is deactivated.
Reactivation is automatic above 30 mph (50 km/h) or
after pressing the button (on the fascia).
Page 30

Instruments and controls
Warning light is indicates Solution - action
Brake pads lit. brake pad wear. Have the pads replaced by a CITROËN dealer.
Dipped
headlamps/
Daytime lights
lit.
manual selection or automatic
lighting.
Rotate the ring on the lights stalk to the second position.
lighting of the dipped headlamps
from the time the ignition is
switched on - daytime lights.
Depending on the country in which the vehicle is sold.
Chapter 3, "Steering wheel controls" section.
Main beam
headlamps
pulling of the stalk towards you. Pull the stalk to return to dipped headlamps.
Direction
indicators
flashing with
buzzer.
change of direction via the
lights stalk, to the left of the
steering wheel.
To the Right: control to be pushed upwards.
To the Left: control to be pushed downwards.
Front fog
lamps
lit. manual selection.
The fog lamps only operate if the side lights or dipped
headlamps are on.
Rear fog lamps lit. manual selection.
The fog lamps only operate if the side lights or dipped
headlamps are on. In conditions of normal visibility,
take care to switch them off on penalty of being booked.
"This light is a dazzling red."
Particle
emission filter
lit.
a malfunction of the particle
emission filter (diesel additive
level, risk of clogging, ...).
Have the filter checked by a CITROËN dealer.
Chapter 6, "Checks" section.
Page 31

Instruments and controls
Display is indicates Solution - action
Cruise control lit. cruise control selected.
Speed limiter lit. speed limiter selected.
Diesel
pre-heating
Particle
emission filter
Presence of
water in the
diesel filter
Service
spanner
Time displayed. adjustment of the time.
lit.
lit
lit and
accompanied by
a message on
the display.
lit. service due shortly.
climatic conditions requiring
pre-heating.
a malfunction of the particle
emission filter (diesel additive
level, risk of clogging, ...).
water in the diesel filter.
Manual selection. Chapter 3, "Steering wheel controls"
section.
Manual selection. Chapter 3, "Steering wheel controls"
section.
Wait until the warning light is switched off before
operating the starter.
Have the filter checked by a CITROËN dealer.
Chapter 6, "Checks" section.
Have the filter bled by a CITROËN dealer without delay.
Chapter 6, "Checks" section.
Refer to the list of checks in the servicing booklet. Have
the service carried out by a CITROËN dealer.
Use the left-hand button on the instrument panel.
Chapter 2, at the beginning of the "Instruments and
controls" section.
Page 32
Instruments and controls
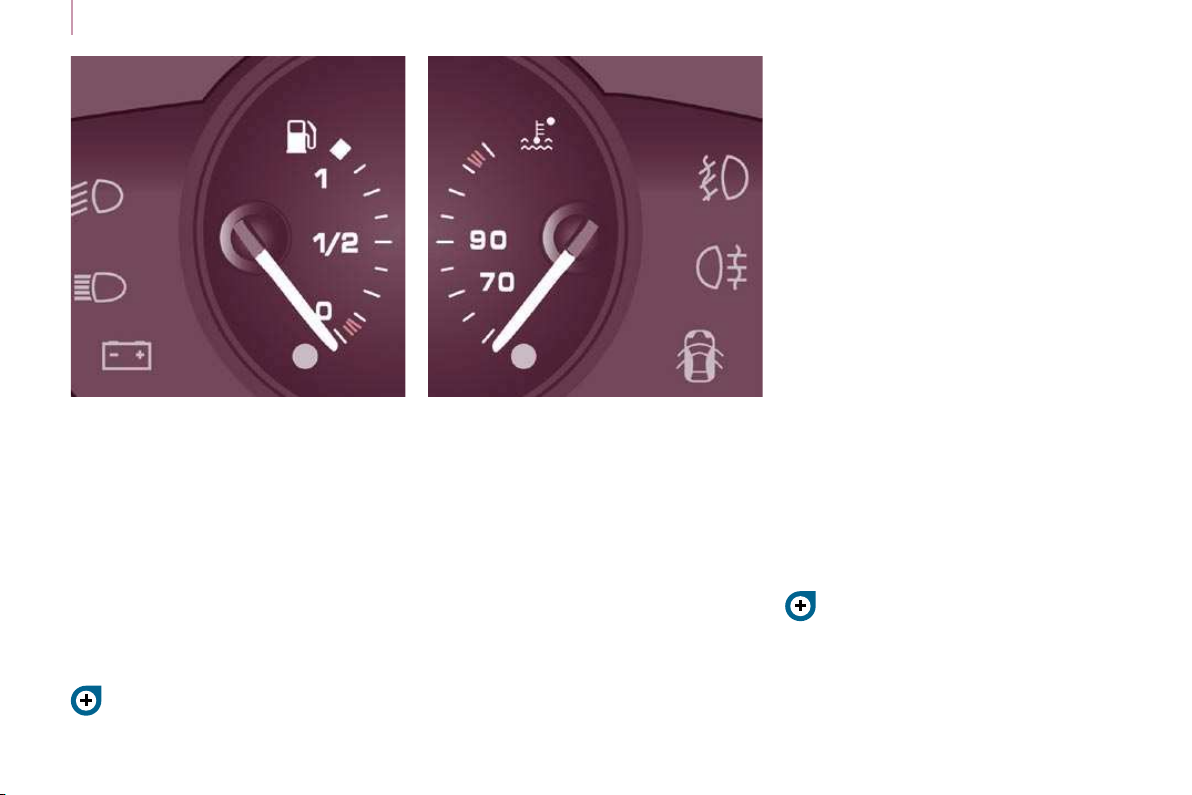
FUEL GAUGE
COOLANT TEMPERATURE
The fuel level is tested each time the key is
turned to the "running" position.
The gauge is positioned on:
- 1: the fuel tank is full, approximately
80 litres.
- 0: the reserve is now being used, the
warning light comes on continuously.
The needle is positioned before the red
zone: normal operation.
In arduous conditions of use or hot climatic
conditions, the needle may move close to
the red graduations.
What you should do if the warning light
comes on:
- stop immediately, switch off the ignition.
The fan may continue to operate for
a certain time up to approximately
10 minutes,
- wait for the engine to cool down in order
to check the coolant level and top it up if
necessary.
As the cooling system is pressurised, follow
this advice in order to avoid any risk of
scalding:
- wait at least one hour after switching off
the engine before carrying out any work,
- unscrew the cap by 1/4 turn to allow the
pressure to drop,
- when the pressure has dropped, check
the level on the expansion bottle,
- if necessary, remove the cap to top up.
If the needle remains in the red zone, have
the system checked by a CITROËN dealer.
Refer to the "Levels" section of chapter 6.
The reserve when the warning first comes
on is approximately 8 litres.
Refer to the "Fuel" section of chapter 6.
What you should do if the needle enters
the red zone:
Reduce your speed or let the engine run at
idle.
Page 33
Instruments and controls
SERVICE INDICATOR
EMISSION CONTROL
EOBD (European On Board
Diagnosis) is a diagnostics system
which complies with, among
others, the standards concerning
authorised emissions of:
- CO (carbon monoxide),
- HC (unburnt hydrocarbons),
- NOx (nitrogen oxides) or particles,
detected by oxygen sensors placed
upstream and downstream of the
catalytic converters.
Therefore, the driver is warned of any
malfunction of this emission control system
by the lighting of this specific warning lamp
on the instrument panel.
There is a risk of damage to the
catalytic converter. Have it checked by a
CITROËN dealer.
This programmes service intervals according
to the use of the vehicle.
Operation
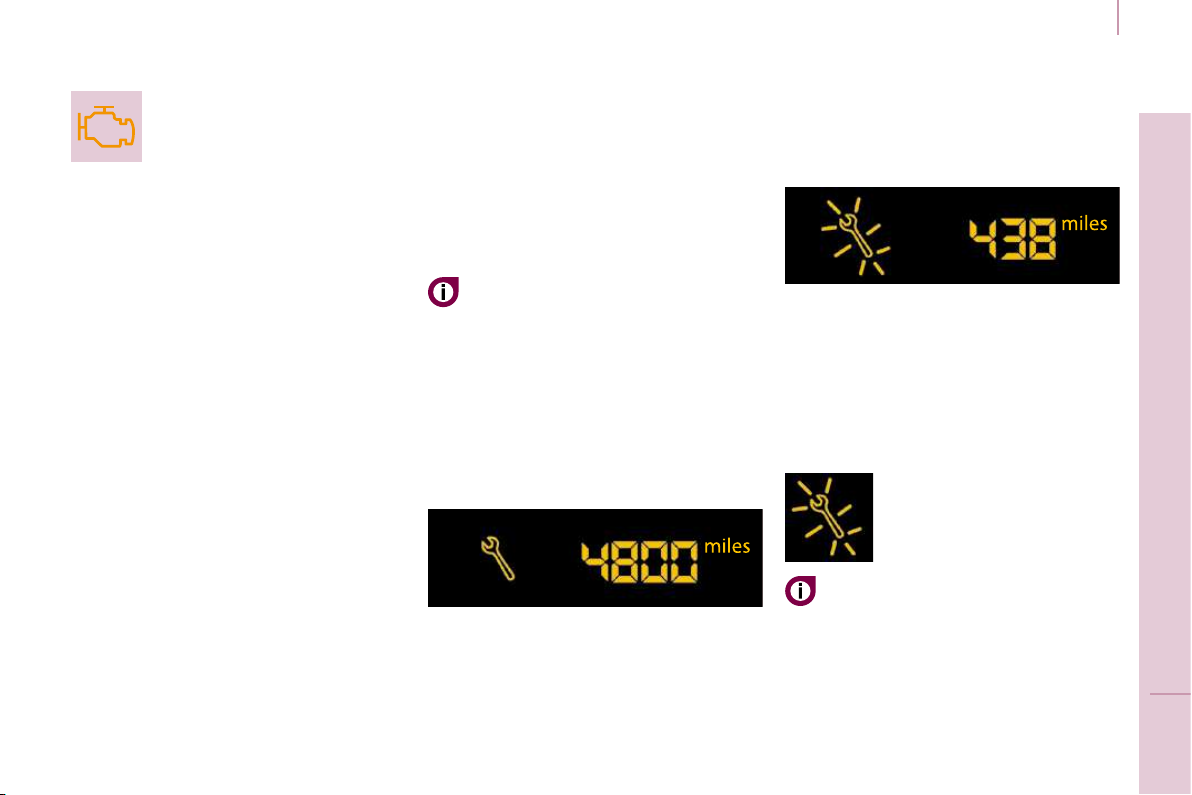
A few moments after the ignition has been
switched on, the spanner indicating a
service operation lights up; the display for
the total distance recorder tells you (in round
figures) the distance remaining before the
next service.
The points at which a service is due are
calculated from the last indicator zero reset.
The point at which a service is due is
determined by two parameters:
- the distance travelled,
- the time which has elapsed since the
last service.
The distance remaining before the next
service may be weighted by the time
factor, depending on the driver's driving
habits.
More than 1 000 miles/km before the next
service is due
Example: 4 800 miles/km remain before
the next service is due. When the ignition
is switched on and for a few seconds, the
display shows:
A few seconds after the ignition is switched
on, the oil level is displayed, then the total
distance recorder resumes normal operation
showing the total and trip distances.
Less than 1 000 miles/km before the next
service is due
Each time the ignition is switched on and for a few
seconds, the spanner fl ashes and the number of
miles/kilometres remaining is displayed:
A few seconds after the ignition is switched
on, the oil level is displayed, then the total
distance recorder resumes normal operation
and the spanner remains lit. This indicates
that a service should be carried out shortly.
Service overdue
Each time the ignition is
switched on and for a few
seconds, the spanner flashes
and the excess distance is
displayed.
With the engine running the spanner
remains lit until the service has been
carried out.
First of the two terms reached: the spanner
also lights up if the two-year interval has
elapsed.
Page 34
Instruments and controls
SERVICE INDICATOR
EMISSION CONTROL
EOBD (European On Board
Diagnosis) is a diagnostics system
which complies with, among
others, the standards concerning
authorised emissions of:
- CO (carbon monoxide),
- HC (unburnt hydrocarbons),
- NOx (nitrogen oxides) or particles,
detected by oxygen sensors placed
upstream and downstream of the
catalytic converters.
Therefore, the driver is warned of any
malfunction of this emission control system
by the lighting of this specific warning lamp
on the instrument panel.
There is a risk of damage to the
catalytic converter. Have it checked by a
CITROËN dealer.
This programmes service intervals according
to the use of the vehicle.
Operation
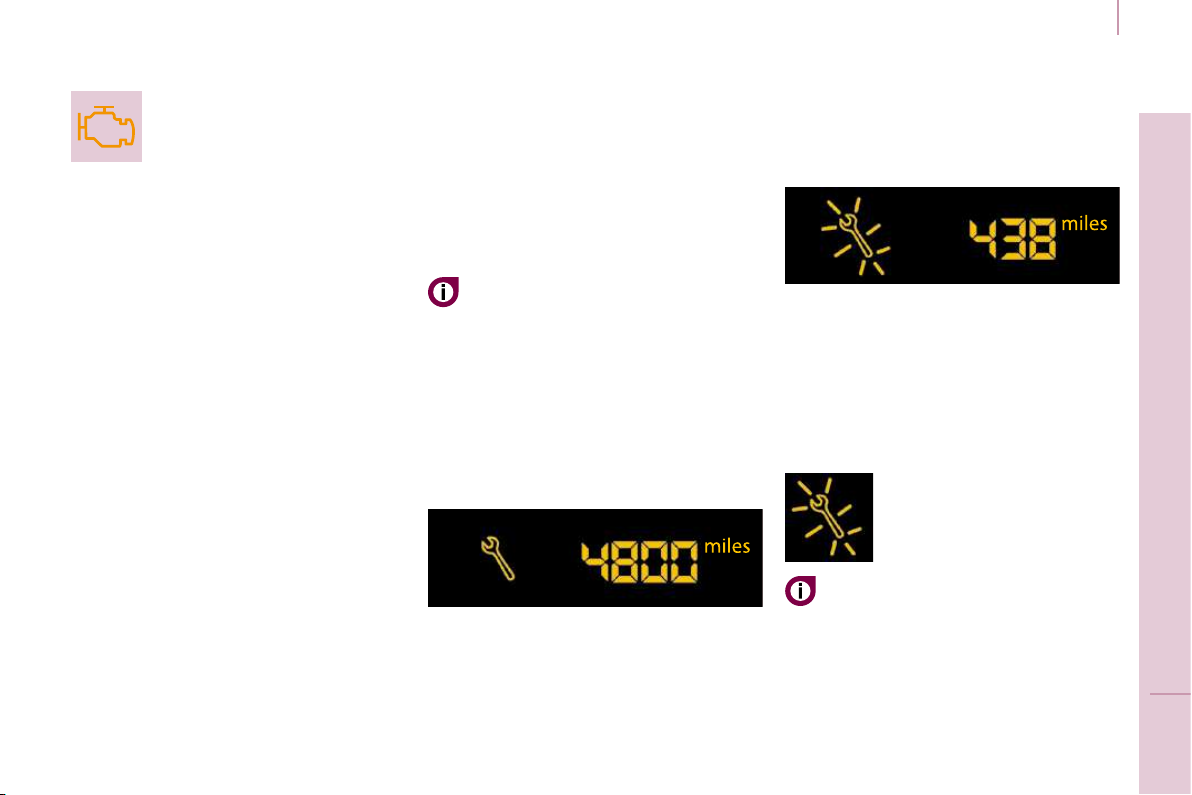
A few moments after the ignition has been
switched on, the spanner indicating a
service operation lights up; the display for
the total distance recorder tells you (in round
figures) the distance remaining before the
next service.
The points at which a service is due are
calculated from the last indicator zero reset.
The point at which a service is due is
determined by two parameters:
- the distance travelled,
- the time which has elapsed since the
last service.
The distance remaining before the next
service may be weighted by the time
factor, depending on the driver's driving
habits.
More than 1 000 miles/km before the next
service is due
Example: 4 800 miles/km remain before
the next service is due. When the ignition
is switched on and for a few seconds, the
display shows:
A few seconds after the ignition is switched
on, the oil level is displayed, then the total
distance recorder resumes normal operation
showing the total and trip distances.
Less than 1 000 miles/km before the next
service is due
Each time the ignition is switched on and for a few
seconds, the spanner fl ashes and the number of
miles/kilometres remaining is displayed:
A few seconds after the ignition is switched
on, the oil level is displayed, then the total
distance recorder resumes normal operation
and the spanner remains lit. This indicates
that a service should be carried out shortly.
Service overdue
Each time the ignition is
switched on and for a few
seconds, the spanner flashes
and the excess distance is
displayed.
With the engine running the spanner
remains lit until the service has been
carried out.
First of the two terms reached: the spanner
also lights up if the two-year interval has
elapsed.
Page 35
Instruments and controls
Zero re-set
Your CITROËN dealer carries out this
operation after each service.
However, if you carry out the service
yourself, the re-set procedure is as follows:
- switch off the ignition,
- press and hold the trip recorder reset
button,
- switch on the ignition.
The display begins a countdown.
When the display shows "=0" , release the
button; the spanner disappears.
After this operation, if you wish to
disconnect the battery, lock the vehicle
and wait for at least five minutes, otherwise
the zero re-set will not be registered.
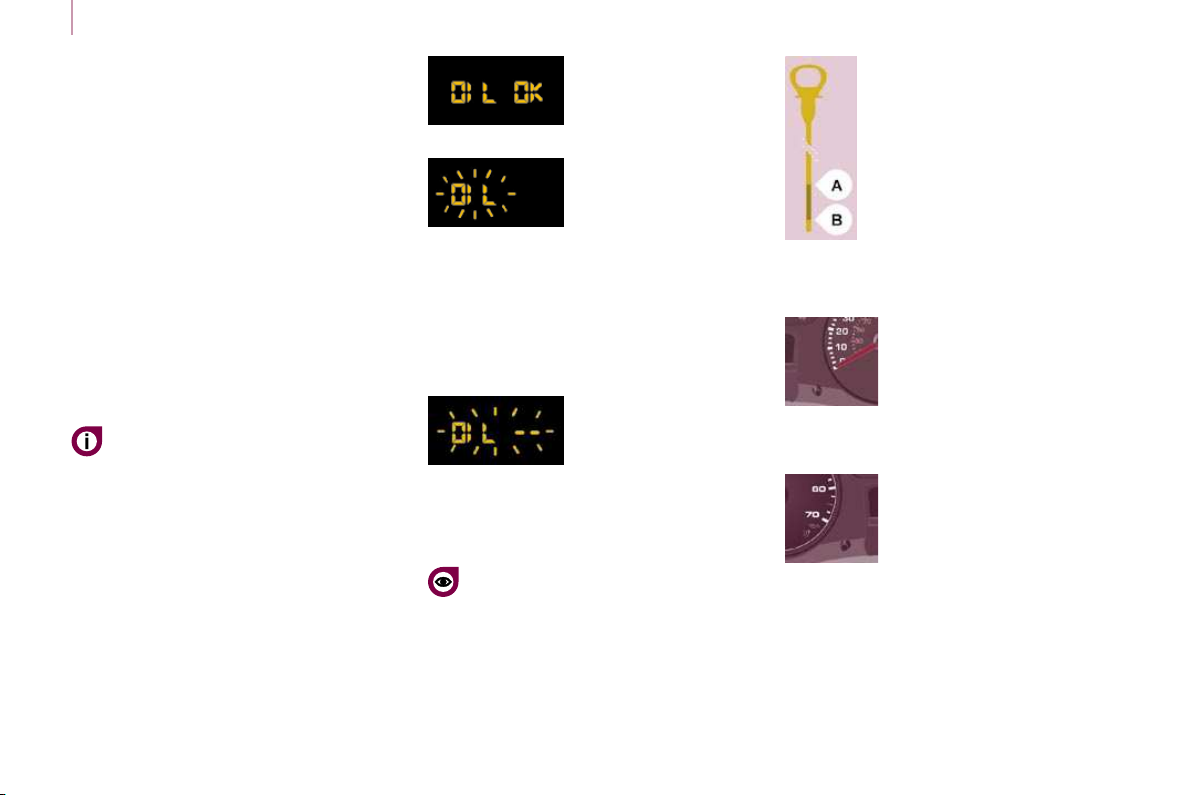
Engine oil level indicator
When the ignition is switched on, the engine
oil level is indicated for a few seconds, after
the service information.
Oil level correct
Lack of oil
Flashing of "OIL" , linked
with the service warning
light, accompanied by
an audible signal and a
message on the display, indicates a lack of
oil which could damage the engine.
If the lack of oil is confirmed by a check
using the dipstick, it is essential that the
level is topped up.
Oil level gauge fault
Flashing of "OIL --"
indicates a malfunction
of the engine oil level
gauge. Consult a
CITROËN dealer.
The level read will only be correct
if the vehicle is on level ground and
the engine has been off for more than
15 minutes.
Dipstick
A = maximum, never exceed
this level as a surplus of oil may
damage the engine.
Contact a CITROËN dealer
without delay.
B = minimum, top up the level via
the oil filler cap, using the type of
oil suited to your engine.
Trip recorder zero reset
button
With the ignition on, press the
button until the zeros appear.
Lighting rheostat
With the lights on, press the
button to vary the intensity of
the lighting of the instruments
and controls. When the
lighting reaches the minimum (or maximum)
setting, release the button then press it
again to increase (or reduce) the brightness.
As soon as the lighting is of the required
brightness, release the button.
Page 36
Instruments and controls
Zero re-set
Your CITROËN dealer carries out this
operation after each service.
However, if you carry out the service
yourself, the re-set procedure is as follows:
- switch off the ignition,
- press and hold the trip recorder reset
button,
- switch on the ignition.
The display begins a countdown.
When the display shows "=0" , release the
button; the spanner disappears.
After this operation, if you wish to
disconnect the battery, lock the vehicle
and wait for at least five minutes, otherwise
the zero re-set will not be registered.
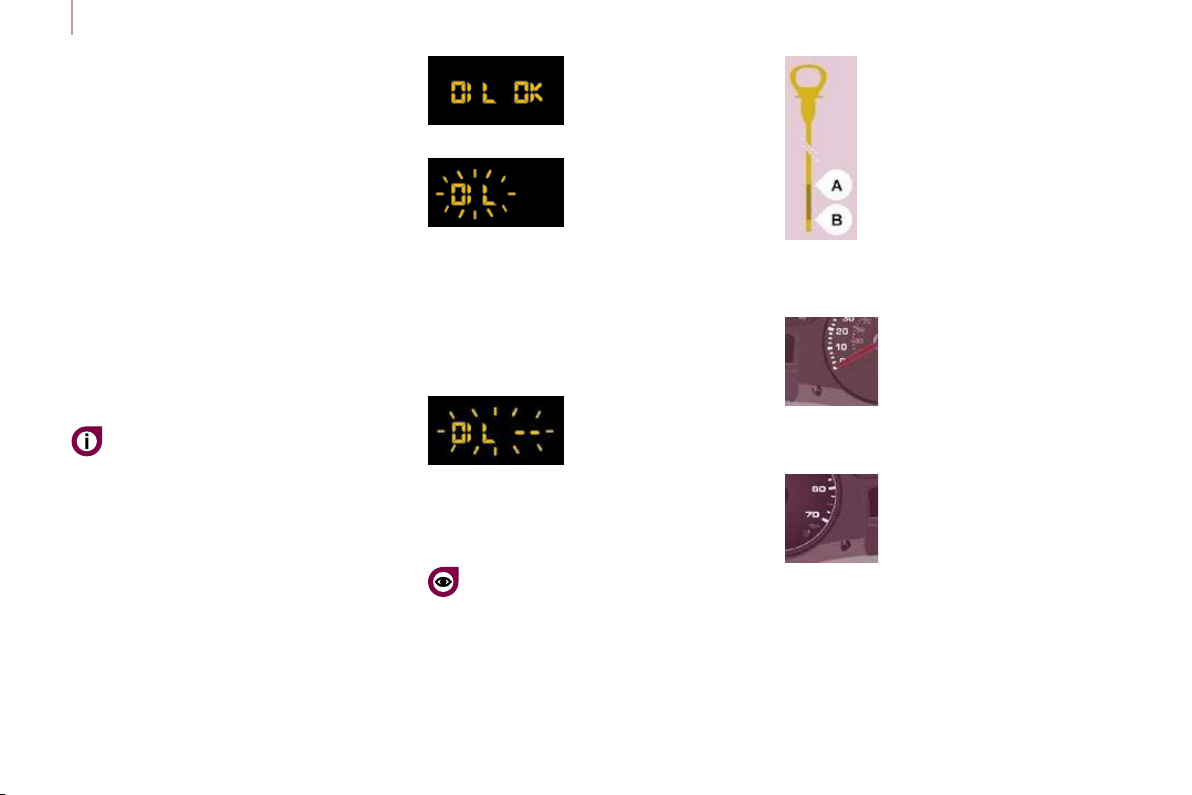
Engine oil level indicator
When the ignition is switched on, the engine
oil level is indicated for a few seconds, after
the service information.
Oil level correct
Lack of oil
Flashing of "OIL" , linked
with the service warning
light, accompanied by
an audible signal and a
message on the display, indicates a lack of
oil which could damage the engine.
If the lack of oil is confirmed by a check
using the dipstick, it is essential that the
level is topped up.
Oil level gauge fault
Flashing of "OIL --"
indicates a malfunction
of the engine oil level
gauge. Consult a
CITROËN dealer.
The level read will only be correct
if the vehicle is on level ground and
the engine has been off for more than
15 minutes.
Dipstick
A = maximum, never exceed
this level as a surplus of oil may
damage the engine.
Contact a CITROËN dealer
without delay.
B = minimum, top up the level via
the oil filler cap, using the type of
oil suited to your engine.
Trip recorder zero reset
button
With the ignition on, press the
button until the zeros appear.
Lighting rheostat
With the lights on, press the
button to vary the intensity of
the lighting of the instruments
and controls. When the
lighting reaches the minimum (or maximum)
setting, release the button then press it
again to increase (or reduce) the brightness.
As soon as the lighting is of the required
brightness, release the button.
Page 37
Gearboxes and steering wheel
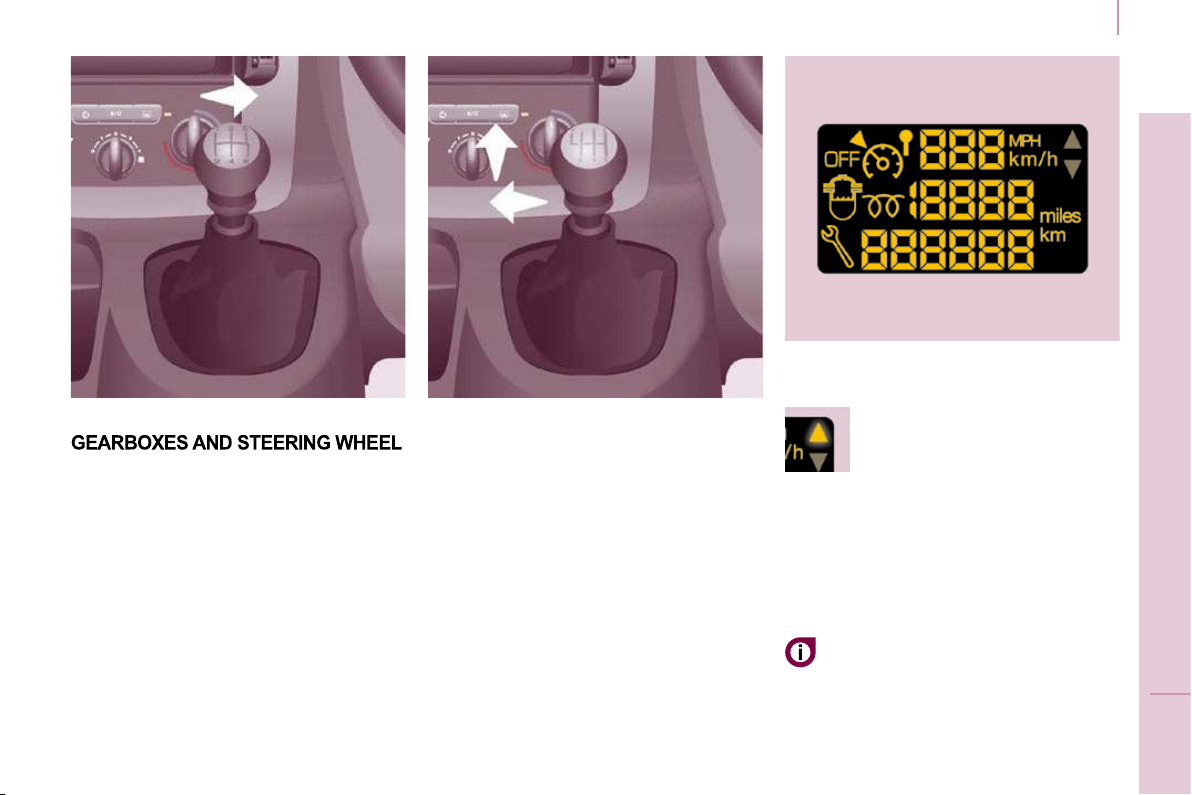
Gear shift indicator
5-speed gearbox 6-speed gearbox
To change gear easily, always press the
clutch pedal fully.
To prevent the mat from becoming caught
under the pedal:
- ensure that the mat is positioned
correctly,
- never fit one mat on top of another.
When driving, avoid leaving your hand on
the gear knob as the force exerted, even if
slight, may wear the internal components of
the gearbox over time.
Reverse gear
In the 6-speed configuration, raise the collar
under the gear knob to engage reverse gear.
Never engage reverse gear before the
vehicle is completely stationary.
The lever should be moved slowly to reduce
the noise on engaging reverse gear.
In order to drive as fuel effi ciently as
possible with a manual gearbox, this
indicator lamp indicates to the driver
to change up.
The driver remains responsible for deciding
whether or not to follow this indication, since
the indicator lamp comes on without taking
into account the configuration of the road,
the amount of traffic and safety factors.
The lighting of this indicator lamp cannot be
deactivated.
When reverse gear is engaged
and when changing down whilst
decelerating, the function is disabled.
This equipment will become available during
the year.
Page 38
Gearboxes and steering wheel
STARTING AND STOPPING
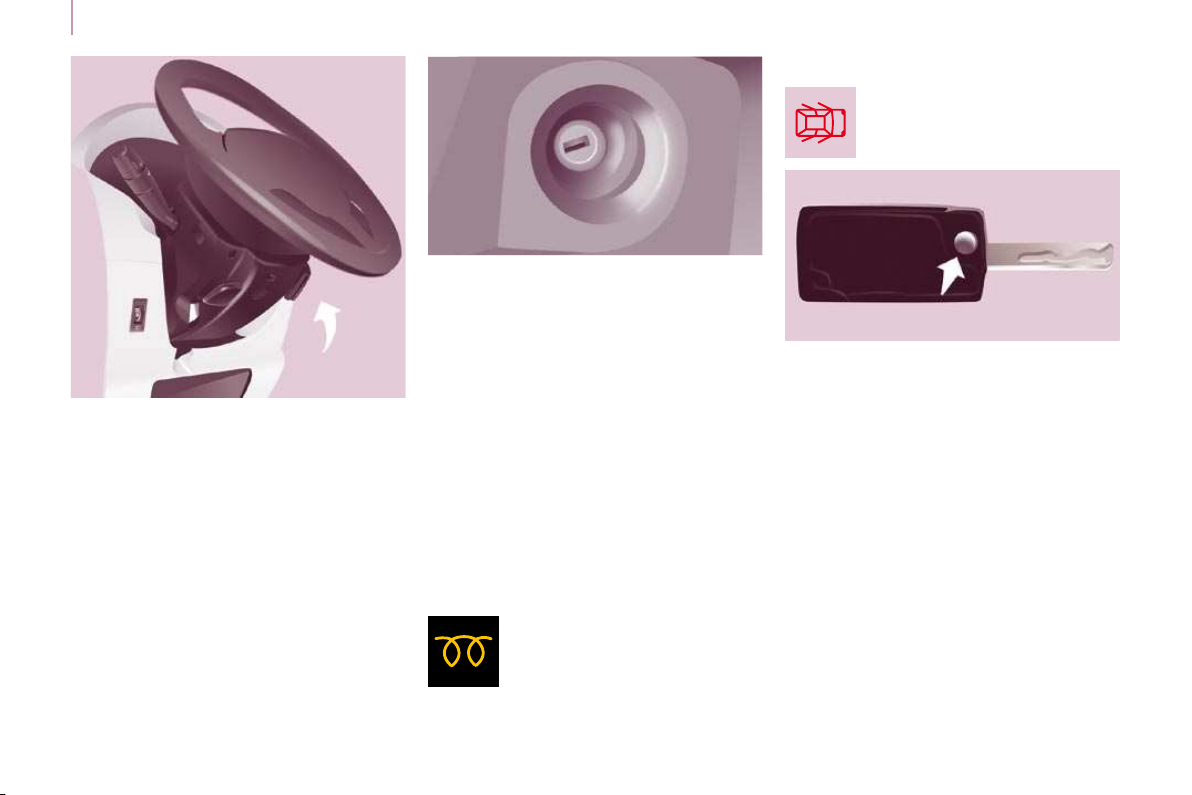
STEERING WHEEL HEIGHT AND
When the vehicle is stationary, unlock the
steering wheel by lowering the lever.
Adjust the height and depth of the steering
wheel, then lock by pushing the lever fully
upwards.
Starting and stopping
Running and accessories position.
To unlock the steering, turn the steering
wheel gently while turning the key, without
forcing. In this position, certain accessories
can be used.
Starting position.
The starter is operated, the engine turns
over, release the key.
STOP position: steering lock.
The ignition is off. Turn the steering wheel
until the steering locks. Remove the key.
Diesel pre-heating warning light
If the temperature is high
enough, the warning light comes
on for less than one second, you
can start without waiting.
In cold weather, wait for this warning light to
switch off then operate the starter (Starting
position) until the engine starts.
Good practice when starting
Door or bonnet open warning light
If this comes on, a door or the
bonnet is not closed correctly, check!
Key
Take care to prevent the key from coming
into contact with grease, dust, rain or a
damp environment.
A heavy object attached to the key (key
ring, ...) weighing the key down in the
ignition switch may cause a malfunction.
Good practice when stopping
Minimise engine and gearbox wear
When switching off the ignition, let the
engine run for a few seconds to allow the
turbocharger (Diesel engine) to return to idle.
Do not press the accelerator when switching
off the ignition.
There is no need to engage a gear after
parking the vehicle.
Page 39
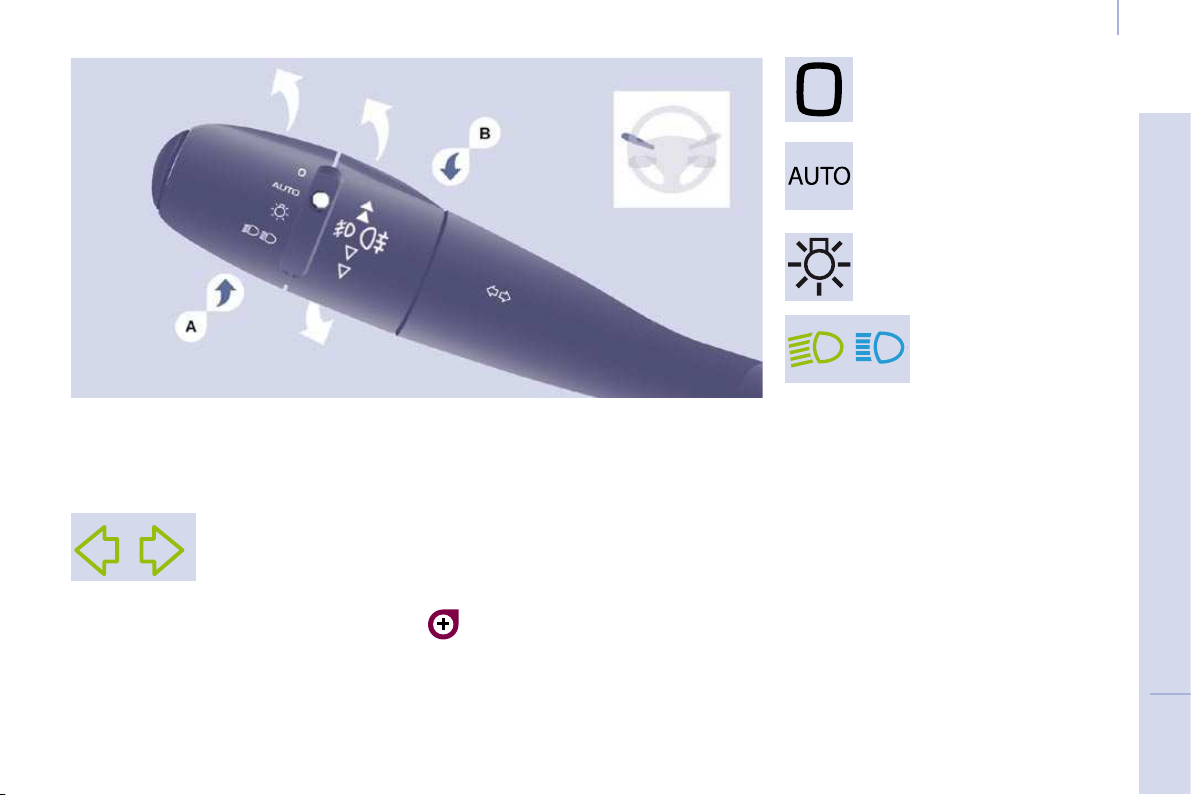
DIRECTION INDICATORS
STEERING MOUNTED CONTROLS
LIGHTING CONTROL
(flashing)
Left : downwards passing
the point of resistance.
Right : upwards passing
the point of resistance.
Front and rear lights
Selection is by turning ring A .
Checking by means of the indicator
lights on the instrument panel is
described in the "Instruments and
controls" section of chapter 2.
Steering mounted controls
Lights off
Automatic lights
if your vehicle is fitted with a
brightness sensor.
Side lights
Dipped beam (green)
Main beam (blue)
Dipped beam/main beam change
Pull the stalk fully towards you.
Lights-on buzzer
When the ignition is switched off, when the
driver's door is opened, a buzzer sounds if
you have left your lights on.
Page 40
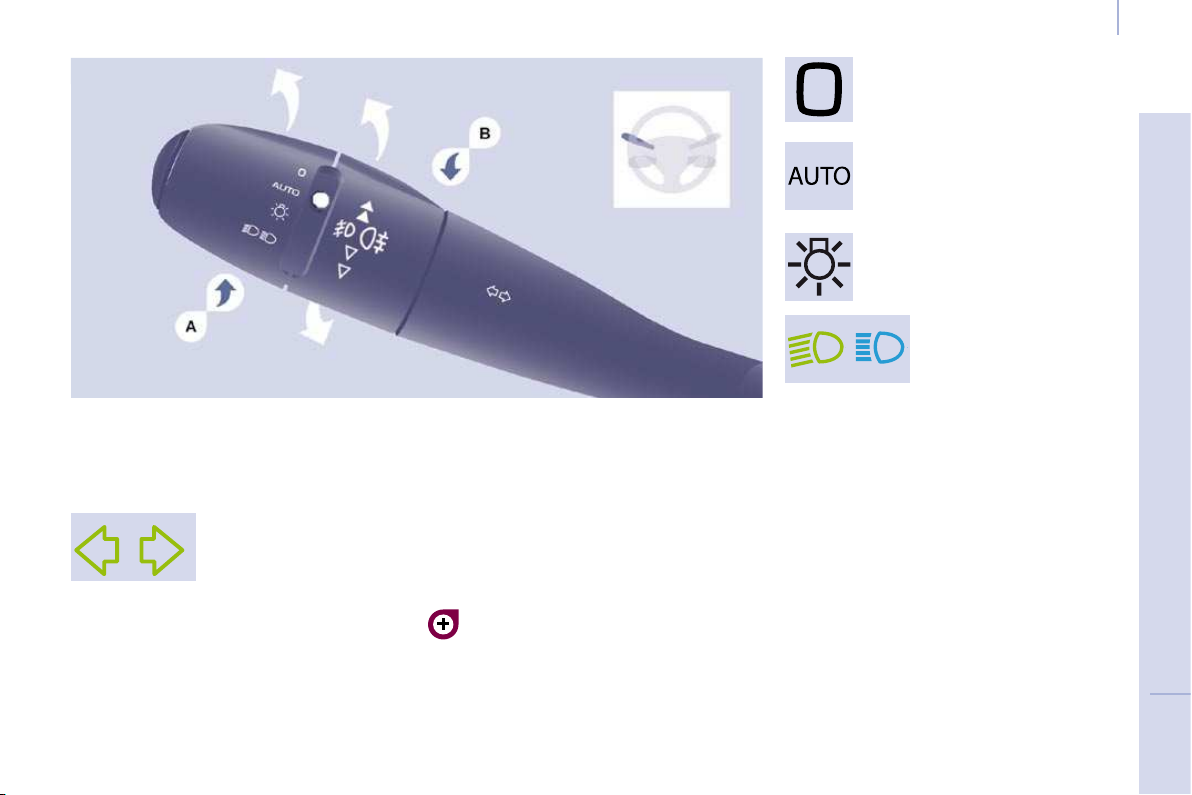
DIRECTION INDICATORS
STEERING MOUNTED CONTROLS
LIGHTING CONTROL
(flashing)
Left : downwards passing
the point of resistance.
Right : upwards passing
the point of resistance.
Front and rear lights
Selection is by turning ring A .
Checking by means of the indicator
lights on the instrument panel is
described in the "Instruments and
controls" section of chapter 2.
Steering mounted controls
Lights off
Automatic lights
if your vehicle is fitted with a
brightness sensor.
Side lights
Dipped beam (green)
Main beam (blue)
Dipped beam/main beam change
Pull the stalk fully towards you.
Lights-on buzzer
When the ignition is switched off, when the
driver's door is opened, a buzzer sounds if
you have left your lights on.
Page 41
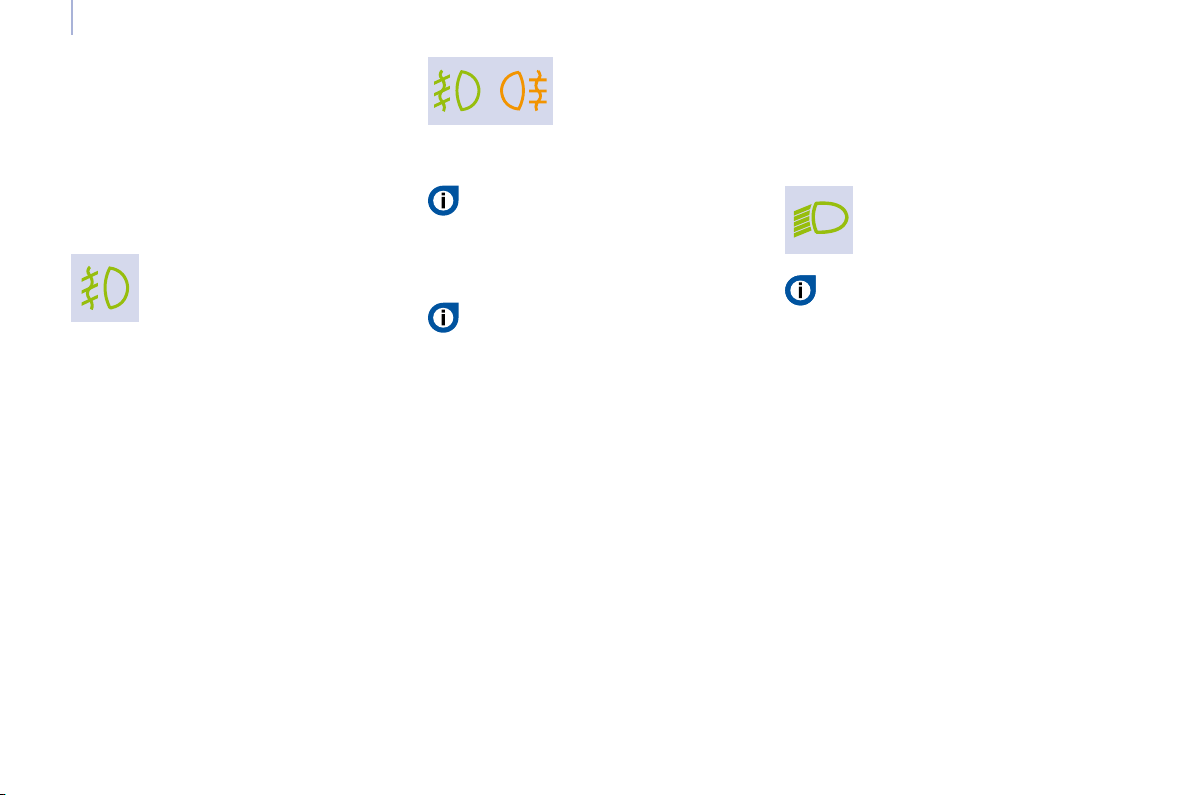
Steering mounted controls
Front and rear fog lights
Rotate ring B forwards to switch on and
rearwards to switch off. The status is
confirmed by the light on the instrument
panel.
These operate with the side lights and the
dipped beam headlamps.
Front fog lights (green,
1st rotation of the ring forwards).
Front fog lights (green)
and rear fog lights (amber,
2nd rotation of the ring
forwards).
To switch off the front and rear fog
lights, turn the ring rearwards twice in
succession.
In clear weather or in rain, both day
and night, rear fog lights dazzle and
are prohibited.
Do not forget to switch them off when they
are no longer needed.
Automatic switching on of the lights switches
off the rear fog lamps, but the front fog
lamps remain on.
Daytime lights
Depending on the country in which the
vehicle is sold, the vehicle may be equipped
with daytime lights. The dipped headlamps
come on when the vehicle is started.
This warning light comes on on
the instrument panel.
The instruments and controls
(instrument panel, display, air
conditioning control panel, ...) are only lit
on switching to the automatic switching on
of the lights mode or when the lights are
switched on manually.
Page 42
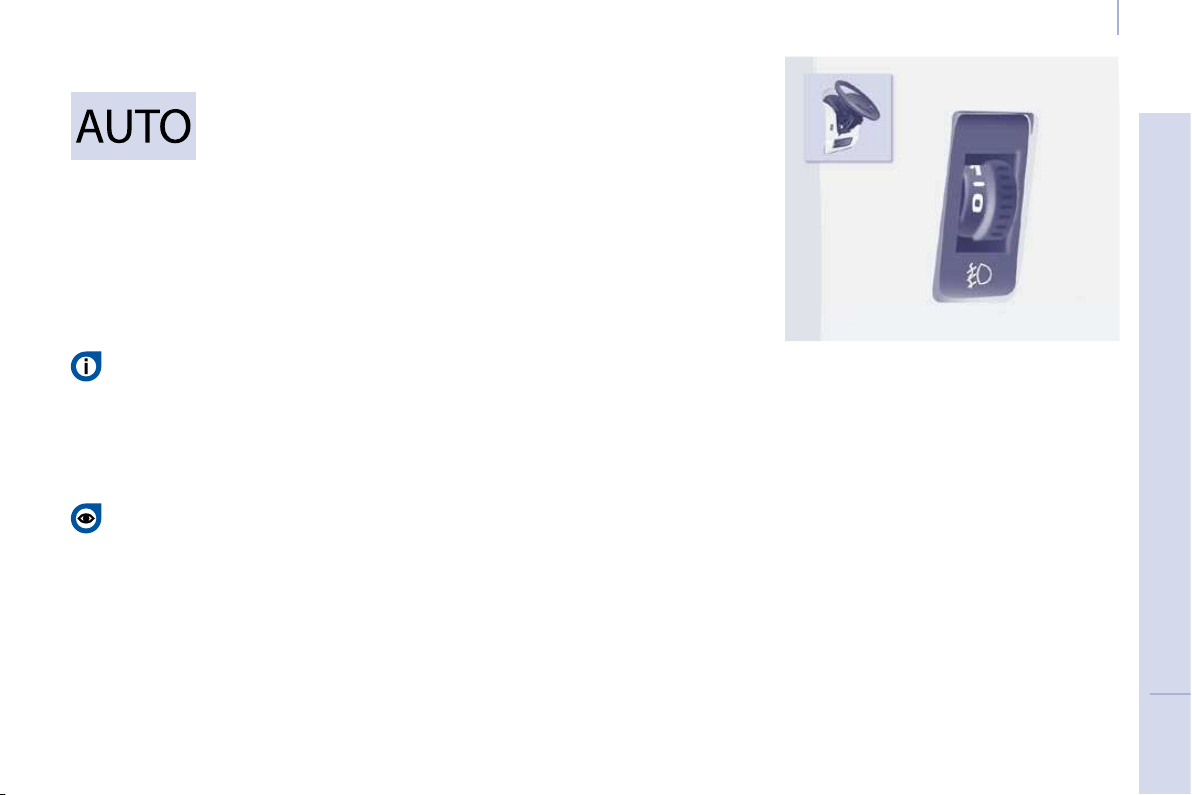
Steering mounted controls
Automatic switching on of the lights
The side lights and dipped
beam headlamps switch
on automatically if the light
is poor, or during operation
of the windscreen wipers. They switch off as
soon as the light becomes bright enough or
the windscreen wipers stop.
This function is not compatible with the
daytime lights.
Activation
Turn the ring to the AUTO position. The
activation of this function is accompanied by
a message on the display.
Deactivation
Turn the ring forwards or rearwards. The
deactivation of this function is accompanied
by a message on the display.
The function is deactivated temporarily when
you use the manual lights stalk.
In foggy weather or in snow, the
brightness sensor can detect sufficient
light. As a consequence, the lights will
not come on automatically. If necessary,
you must switch on the dipped headlamps
manually.
Do not cover the brightness sensor
located on the windscreen, behind the
mirror. It is used for the automatic switching
on of the lights and for the automatic wipers.
If the brightness sensor does not
function correctly , the lights come on
accompanied by the service warning light,
an audible signal and a message on the
display.
Consult a CITROËN dealer.
Depending on the load in your vehicle, the
beam setting must be adjusted.
0 - No load.
1 - Partial load.
2 - Average load.
3 - Maximum authorised load.
Initial setting is position 0.
Page 43
Steering mounted controls
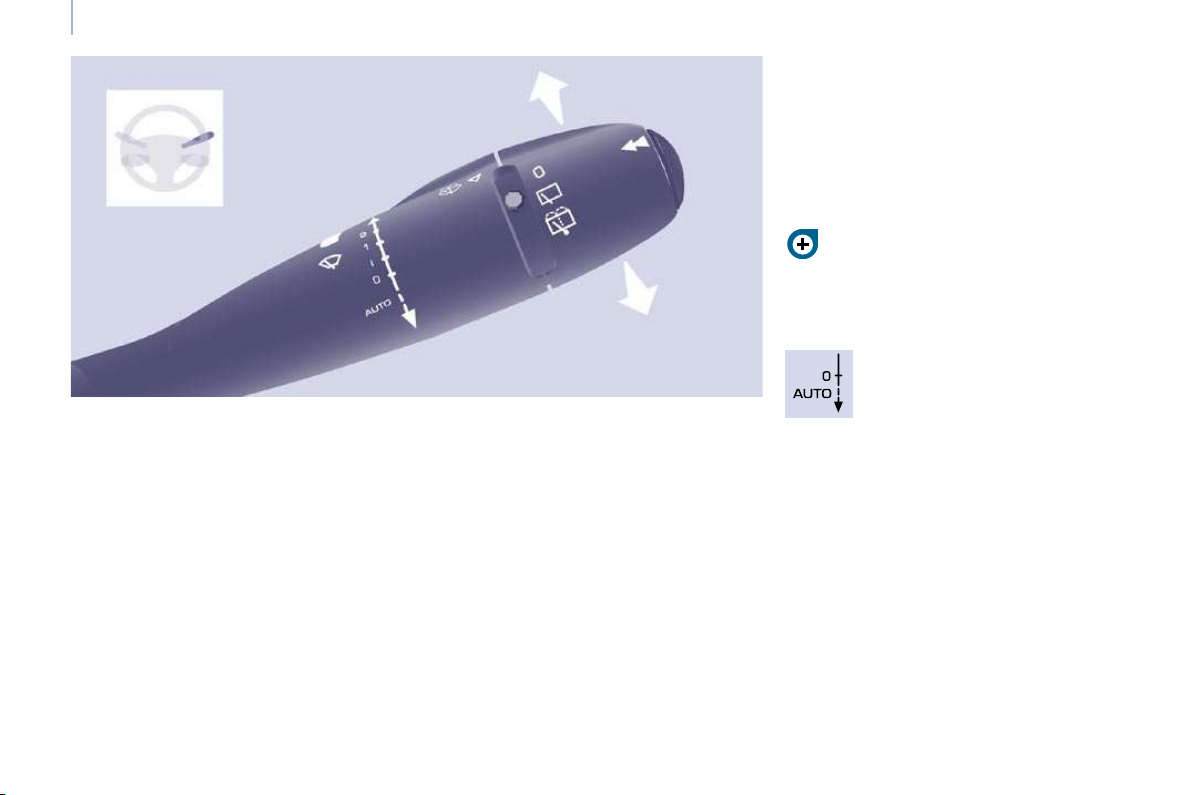
WINDSCREEN WIPER STALK
Wash-wipe and headlamp wash
Pull the stalk towards you, the wash-wipe
is accompanied by a timed sweep of the
wipers.
The headlamp wash is linked with the washwipe, it is triggered if the dipped headlamps
are on.
To top up the levels, refer to the
"Levels" section of chapter 6.
Automatic windscreen wipers
Do not cover the rain sensor,
located in the centre of the
windscreen, behind the mirror.
Manual windscreen wipers
2 Fast wipe (heavy rain).
1 Normal wipe (moderate rain).
l Intermittent wipe.
0 Off.
Single wipe
(press downwards).
In the I ntermittent position, the wiping speed
is in proportion to the vehicle speed.
Whenever the ignition has been switched
off for more than one minute, with the
windscreen wiper stalk in position 2, 1 or I,
the stalk must be reactivated:
- move the stalk to any position,
- then move it back to the required
position.
In the AUTO position, the windscreen wipers
operate automatically and adapt their speed
to the intensity of the rainfall.
When not in AUTO mode, for the other
positions, refer to the manual windscreen
wipers section.
Page 44
Steering mounted controls
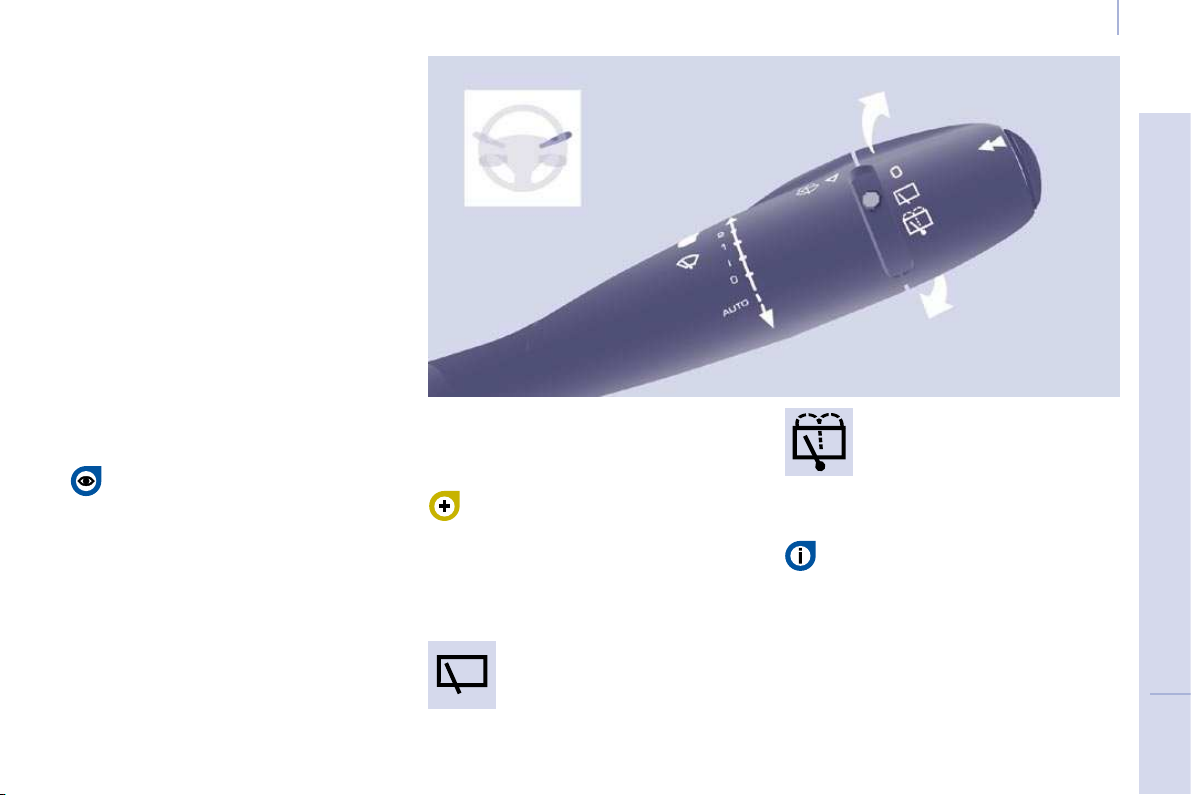
Activation
Press the control downwards. Activation of
the function is accompanied by a message
on the display.
The automatic windscreen wipers function
must be reactivated if the ignition has been
switched off for more than one minute, by
pressing the stalk downwards.
Deactivation/Switching off
Place the windscreen wipers stalk in
position I , 1 or 2 . Deactivation of the function
is accompanied by a message on the
display.
In the event of malfunction of the automatic
windscreen wipers, the windscreen wipers
will operate in intermittent mode.
Contact a CITROËN dealer to have the
system checked.
When using an automatic car wash,
switch off the ignition to avoid
triggering of the automatic wiping.
In winter, it is advisable to wait for the
windscreen to completely clear of ice before
operating the automatic wipe.
Special position of the windscreen
wipers
In the minute following switching off of the
ignition, any action on the stalk positions the
wipers against the windscreen uprights.
This action enables you to position the
wiper blades for winter parking, cleaning or
replacement.
Refer to the "Changing a windscreen
wiper blade" section of chapter 7.
To park the wipers in their normal position
after this has been done, switch on the
ignition and move the stalk.
Rear windscreen wiper
Turn the ring to the first notch.
Rear windscreen wash
Turn the ring past the first notch:
the windscreen wash then the
windscreen wiper operate for a
fixed time.
In winter, in the event of a considerable
amount of snow or ice, switch on the
rear screen demister. Once de-icing is
complete, remove the snow or ice which has
accumulated on the rear wiper blade. You
can then operate the rear windscreen wiper.
Page 45
Steering mounted controls
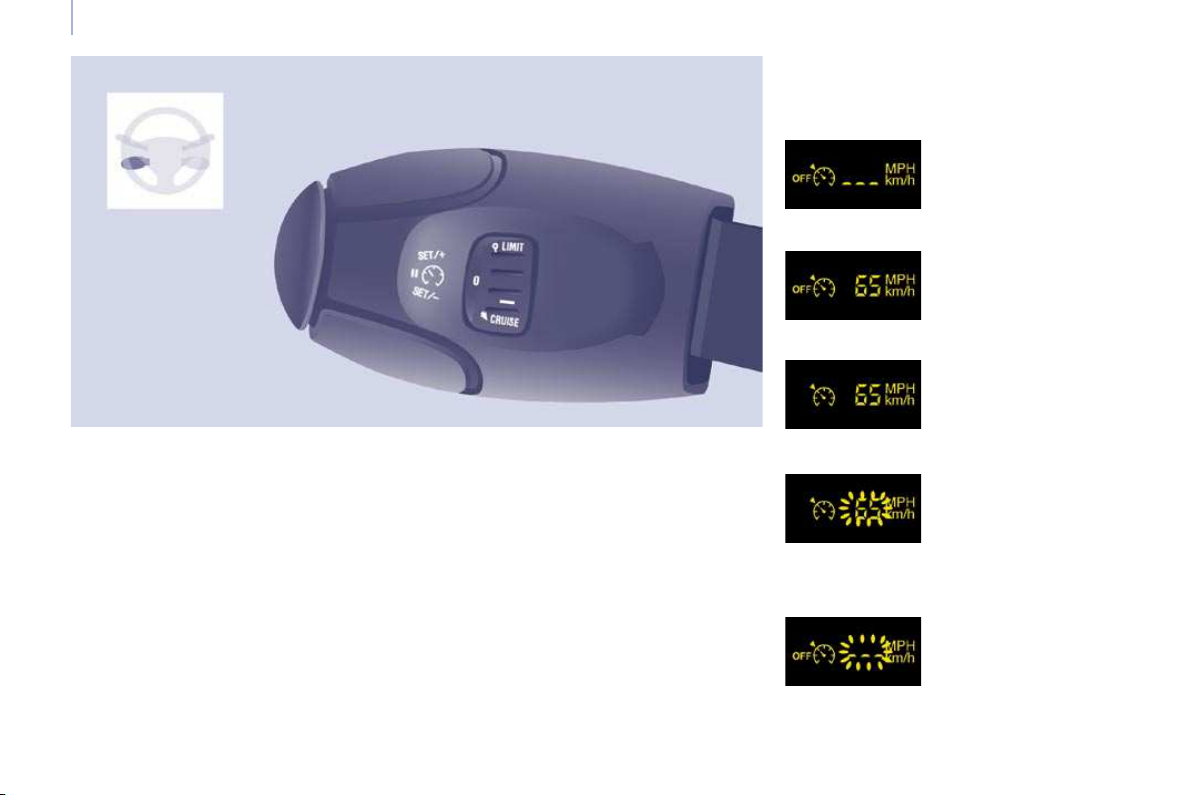
CRUISE CONTROL "CRUISE"
In order for it to be programmed or
activated, the vehicle speed must be greater
than 25 mph (40 km/h) with at least 4th gear
engaged.
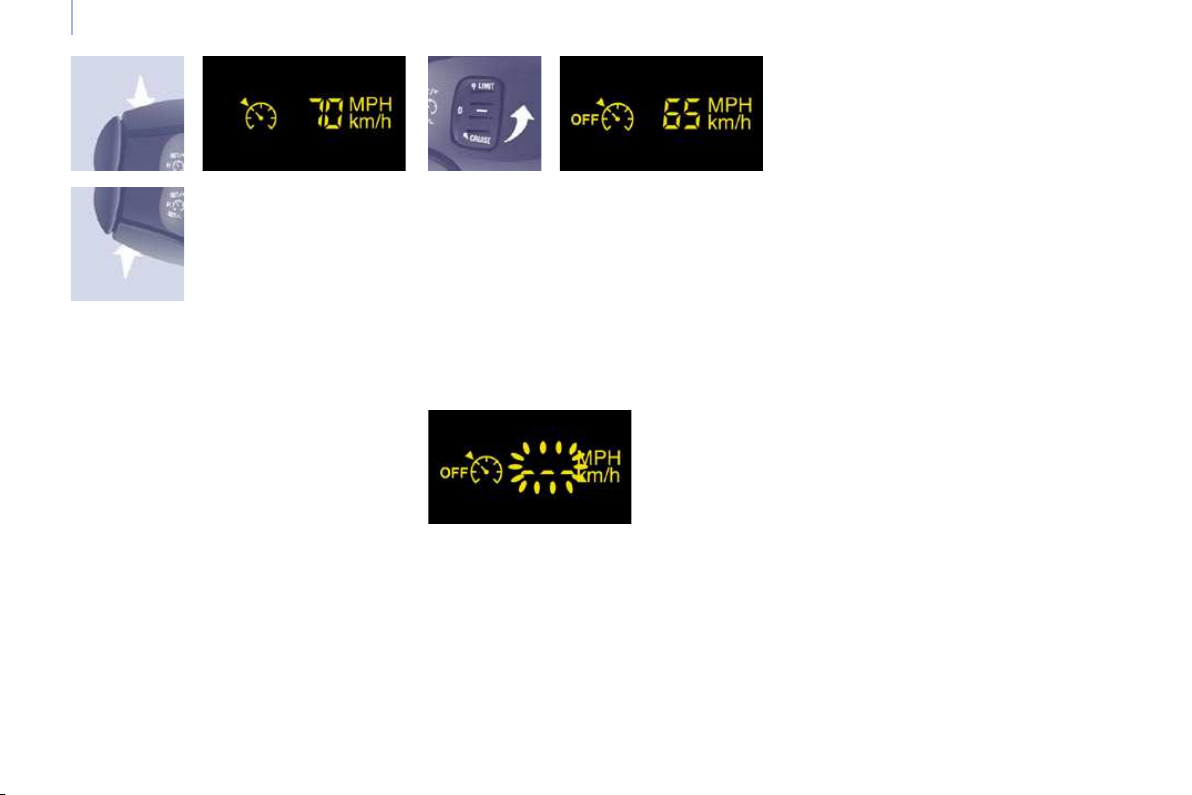
Function selected,
displaying of the "Cruise
Control" symbol.
Function deactivated,
OFF (example at
107 km/h).
Function activated
(example at 107 km/h).
Vehicle speed above
(e.g. 118 km/h),
the programmed speed
is displayed flashing.
Operating fault detected,
OFF - the dashes flash.
This cruise control shows the function
selection status on the instrument panel and
displays the programmed speed:
"This is the speed at which the driver wishes
to drive".
This aid to driving in free-flowing traffic
enables the vehicle to maintain the speed
programmed by the driver, unless a steep
gradient makes this impossible.
Page 46
Steering mounted controls
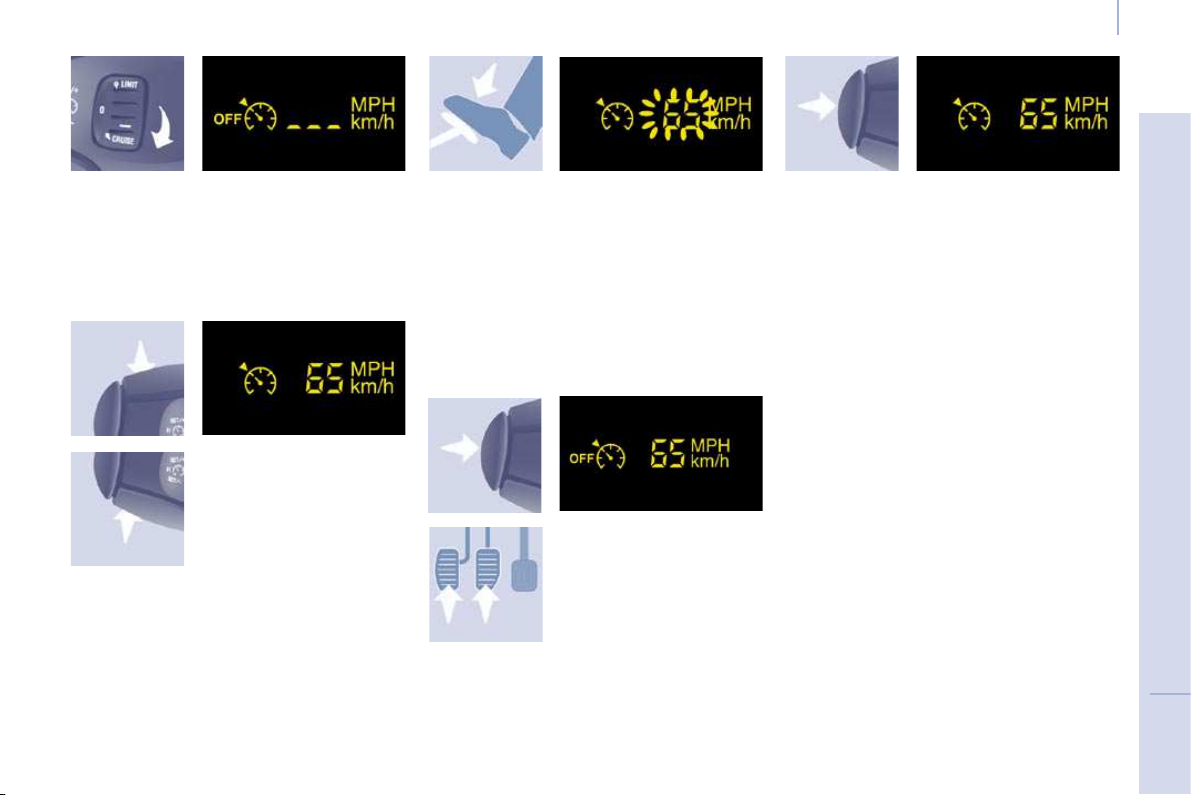
Selecting the function
- Place the switch in the CRUISE position.
The cruise control is selected but is
not yet active and no speed has been
programmed.
First activation/
programming a speed
- Reach the chosen
speed by pressing the
accelerator.
- Press the SET - or SET +
button.
This programmes/activates the reference
speed and the vehicle will maintain this
speed.
Temporary exceeding of the speed
It is possible to accelerate and drive
momentarily at a speed greater than the
programmed speed. The value programmed
flashes.
When the accelerator pedal is released, the
vehicle will return to the programmed speed.
Reactivation
- Following deactivation of the cruise
control, press this button.
Your vehicle will return to the last
programmed speed.
Alternatively, you can repeat the "first
activation" procedure.
Deactivation (off)
- Press this button or the
brake or clutch pedal.
Page 47
Steering mounted controls
Switching the function off
- Place the dial in position 0 or switch off
the ignition to switch everything off.
Good practice
When changing the programmed reference
speed by means of a maintained press,
pay attention as the speed can increase or
decrease rapidly.
Do not use the cruise control on slippery
roads or in heavy traffic.
In the event of a steep slope, the cruise
control cannot prevent the vehicle from
exceeding the programmed speed.
In any event, the cruise control cannot
replace the need to observe the speed
limits, nor can it replace the need for
vigilance and responsibility on the part of
the driver.
It is advisable to leave your feet near the
pedals.
To avoid any jamming under the pedals:
- ensure that the mat and its fixings on the
floor are positioned correctly,
- never place one mat on top of another.
Changing the
programmed speed
There are two methods of
memorising a speed higher
than the previous one:
Without using the
accelerator:
- press the Set + button.
A brief press increases the speed by 1 mph (km/h).
A maintained press increases the speed in
steps of 5 mph (km/h).
Cancelling the programmed
reference speed
When the vehicle becomes stationary, after
switching off the ignition, the system no
longer memorises a speed.
Using the accelerator:
- exceed the memorised speed until the
speed required is reached,
- press the Set + or Set - button.
To memorise a speed lower than the
previous one:
- press the Set - button.
A brief press decreases the speed by
1 mph (km/h).
A maintained press decreases the speed in
steps of 5 mph (km/h).
Operating fault
The programmed speed is cleared then
replaced by three dashes. Contact a
CITROËN dealer to have the system
checked.
Page 48
Steering mounted controls
SPEED LIMITER "LIMIT"
However, pressing the pedal beyond this
point of resistance to the floor permits
exceeding of the programmed speed. To
resume use of the limiter, simply reduce
the pressure on the accelerator pedal
gradually and return to a speed below that
programmed.
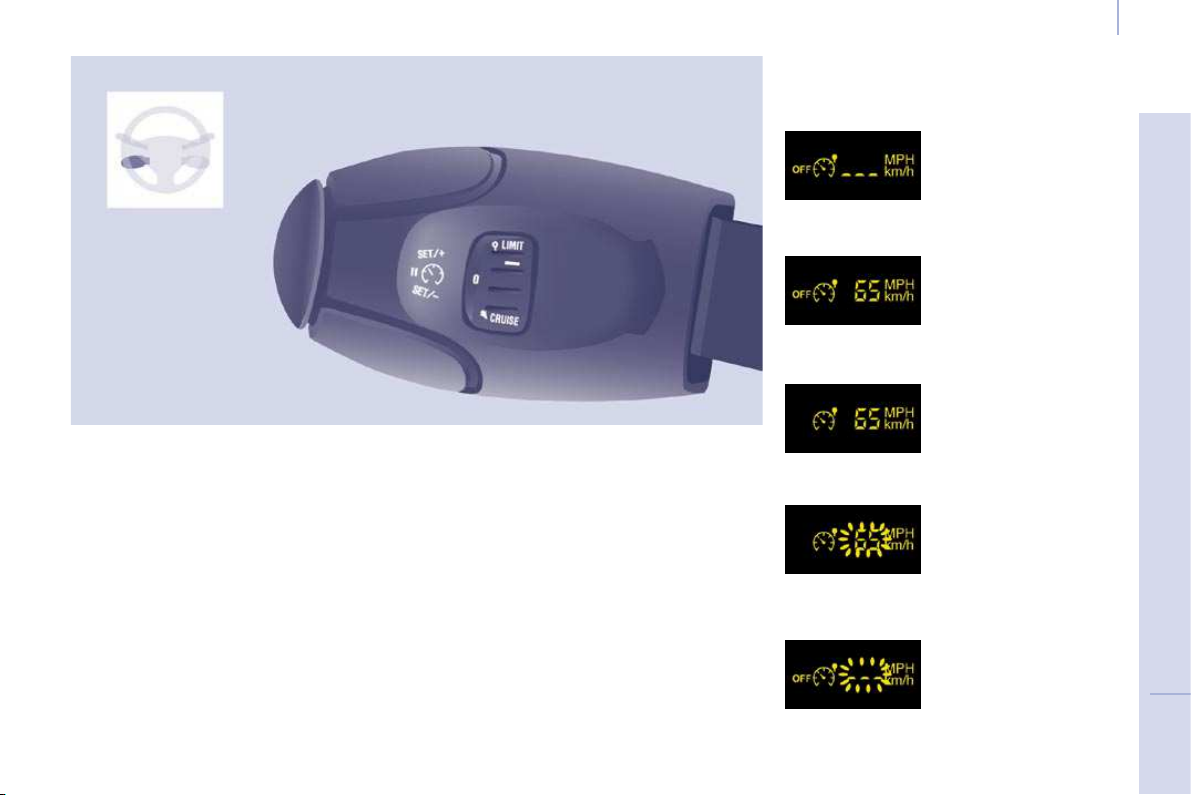
Function selected,
displaying of the "Speed
Limiter" symbol.
Function deactivated,
last programmed speed - OFF
(example at 65 mph
(107 km/h)).
Function activated
(example at 65 mph
(107 km/h)).
Vehicle speed above
(example 70 mph
(118 km/h)),
the programmed speed
is displayed flashing.
Operating fault detected,
OFF - the dashes flash.
This speed limiter shows the function
selection status on the instrument panel and
displays the programmed speed:
The operating actions may be carried out
when stationary, with the engine running,
or with the vehicle moving.
"This is the selected speed which the driver
does not wish to exceed".
This selection is made with the engine
running while stationary or with the vehicle
moving. The minimum speed which can be
programmed is 20 mph (30 km/h).
The speed of the vehicle responds to the
pressure of the driver's foot as far as the
accelerator pedal point of resistance which
indicates that the programmed speed has
been reached.
Page 49
Steering mounted controls
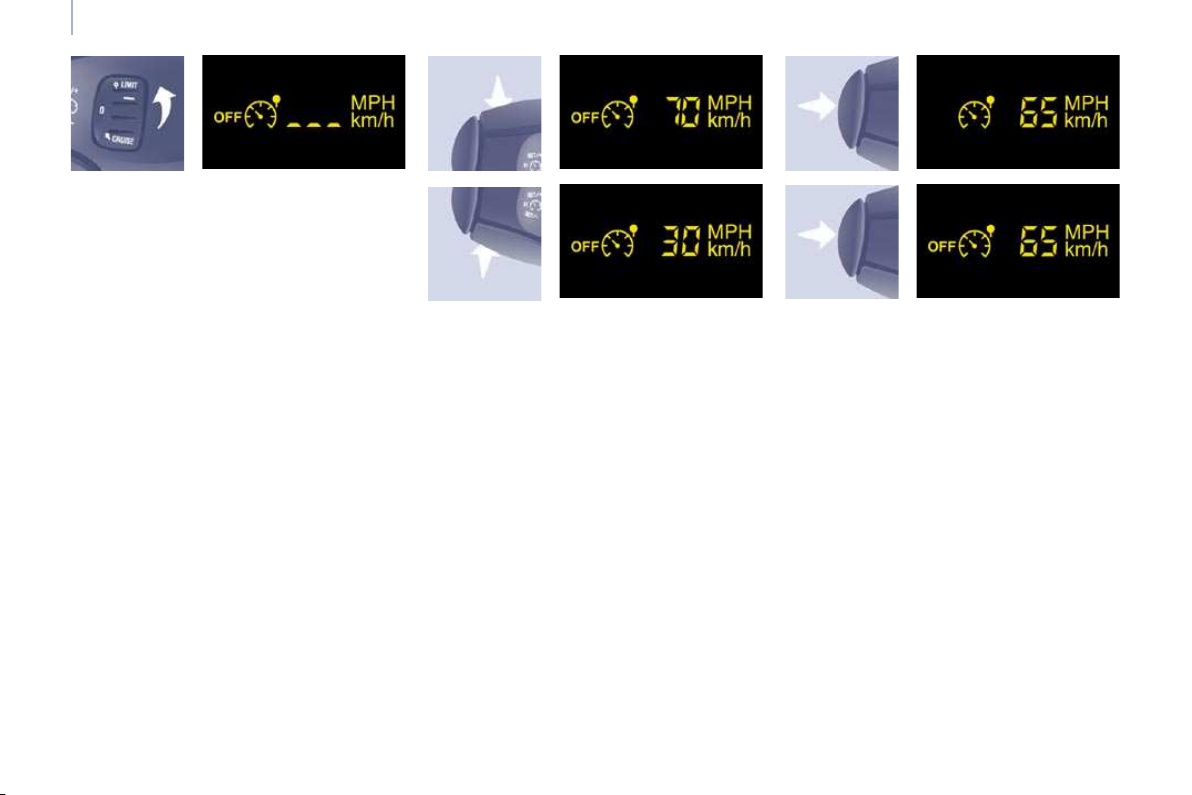
Selecting the function
- Place the dial in the LIMIT position.
The limiter is selected but is not yet
active. The display indicates the last
programmed speed.
Programming a speed
A speed can be programmed without
activating the limiter but with the engine
running.
To memorise a speed higher than the
previous one:
- press the Set + button.
A brief press increases the speed by
1 mph (km/h).
A maintained press increases the speed in
steps of 5 mph (km/h).
To memorise a speed lower than the
previous one:
- press the Set - button.
A brief press decreases the speed by
1 mph (km/h).
A maintained press decreases the speed in
steps of 5 mph (km/h).
Activation/Deactivation (off)
Pressing this button once activates the
limiter, pressing the button again deactivates
it (OFF).
Page 50
Steering mounted controls
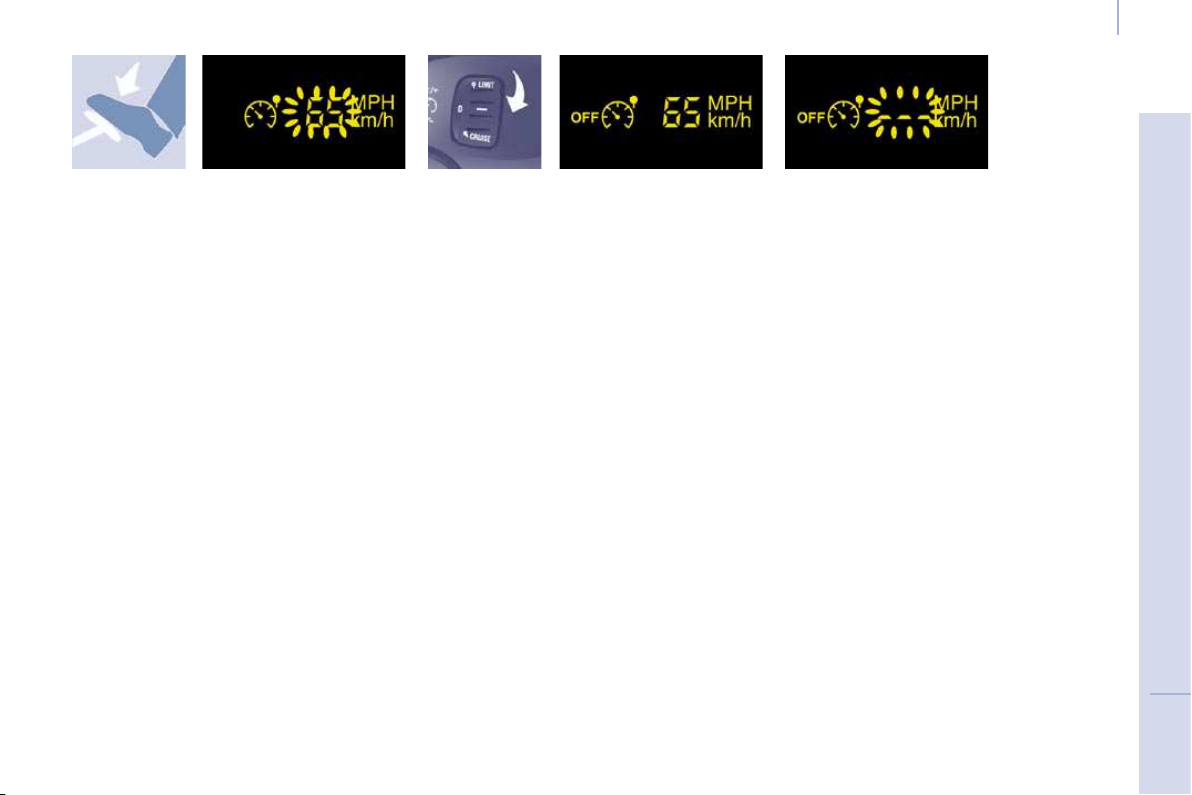
Flashing of the speed
The speed flashes:
- following forcing of the accelerator point
of resistance,
- when the limiter cannot prevent an
increase in the vehicle speed due to the
profile of the road or on a steep descent,
- in the event of sharp acceleration.
Exceeding the programmed speed
Pressing the accelerator pedal in order to
exceed the programmed speed will have
no effect unless you press the pedal firmly
beyond the point of resistance .
Good practice
Operating fault
The programmed speed is cleared then
replaced by three dashes.
Contact a CITROËN dealer to have the
system checked.
The limiter is deactivated temporarily and
the programmed speed flashes.
To return to the limiter function, reduce your
speed to below the programmed speed.
Switching the function off
- Place the dial in position 0 or switch off
the ignition to switch the system off.
The last programmed speed remains in the
memory.
In any event, the speed limiter cannot
replace the need to observe speed limits,
nor can it replace the need for vigilance and
responsibility on the part of the driver.
Always pay attention to the profile of the
road and sharp acceleration and stay in
complete control of your vehicle.
To avoid any jamming under the pedals:
- ensure that the mat and its fixings on the
floor are positioned correctly,
- never place one mat on top of another.
Page 51
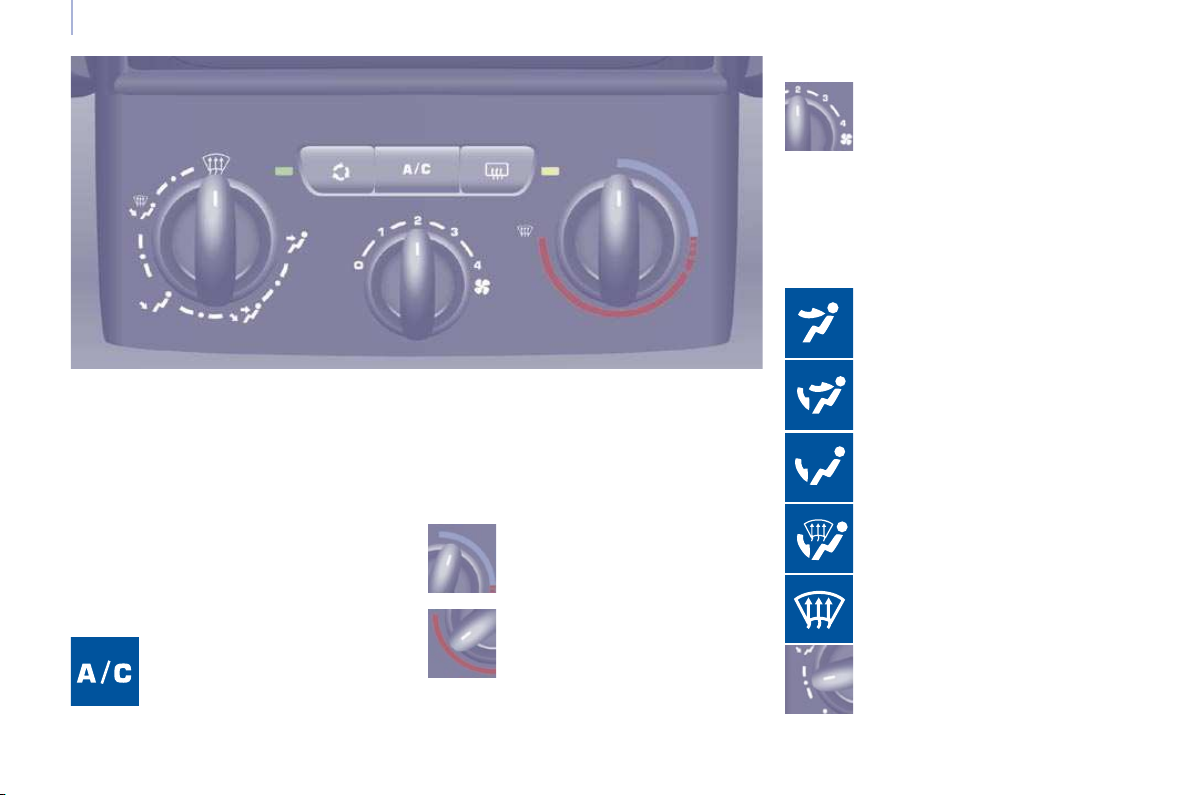
Ventilation
WITH MANUAL ADJUSTMENT
If your vehicle is fitted with these controls,
they are located on the control panel of the
fascia centre console.
Air distribution
The air supply distribution is directed by the
control turned towards:
the side vents and the central
vents,
the side vents, the central vents
and the footwells,
the footwells,
the windscreen and the footwells,
Air flow
The air conditioning does not operate if the
air flow is set to 0.
the windscreen.
Air conditioning A/C
If fitted on your vehicle, the air conditioning
can only operate with the engine running.
Pressing the button triggers the
operation of the air conditioning,
the diode is lit. Pressing the
button again switches the function
off and the diode is switched off.
Temperature adjustment
Control positioned:
- in the red zone, triggers
heating of the interior
ambient air.
- in the blue zone, triggers
cool air,
The air distribution can be
modulated by placing the control
in the intermediate positions,
marked "".
The force of the blown air, from
the vents, varies from 1 to the
strongest 4. Position 0 switches it off.
Remember to adjust this control
in order to reach the ambient air
comfort level.
VENTILATION
Page 52
Ventilation
Intake of exterior air
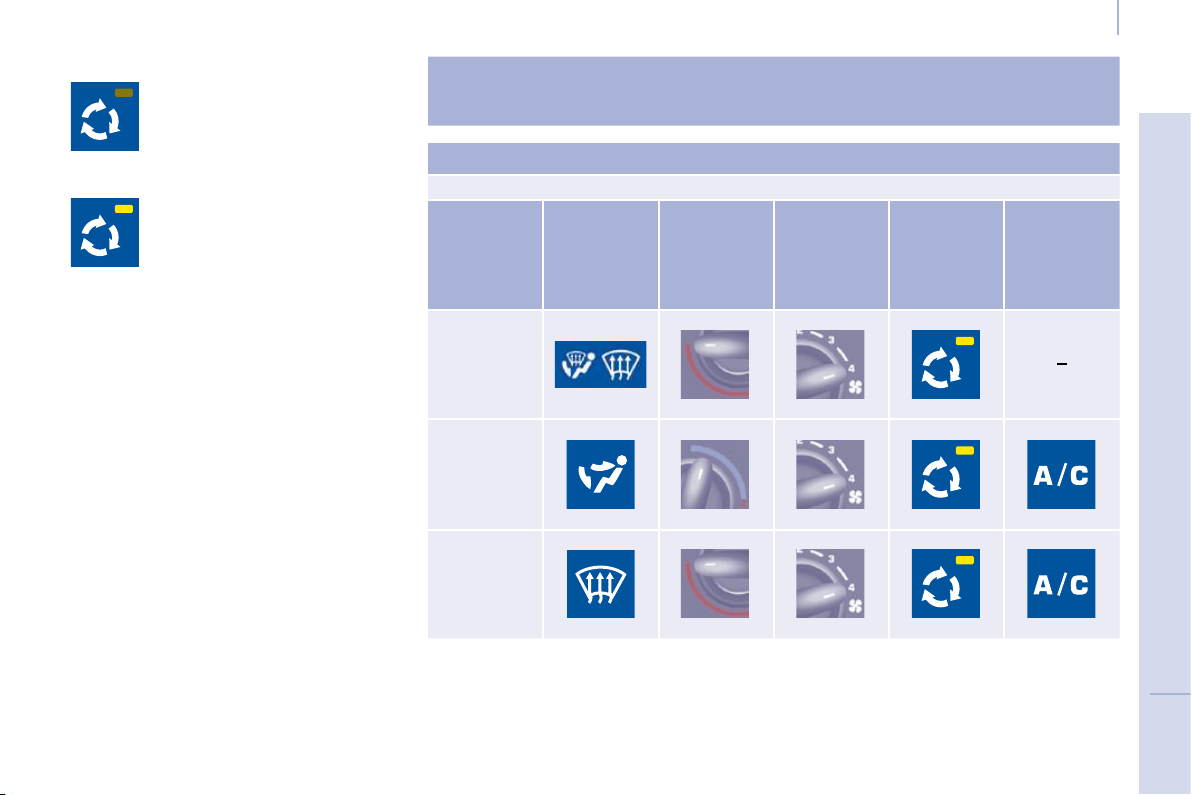
Recommended settings
For optimum operation of the manual system, the settings below are recommended:
The diode on the button is off.
This is the preferred operating
position.
Recirculation of interior air
The diode on the button is lit.
Recirculation temporarily prevents
exterior odours and smoke
from entering the passenger
compartment.
Used with the air conditioning switched on
and setting of the force of blown air (from
1 to 4), recirculation enables you to obtain
the required ambient air comfort level more
quickly with both hot or cold settings.
This position should only be temporary.
When your ambient air comfort level has
been reached, return to the intake of exterior
air position to permit renewal of the air in the
passenger compartment and avoid misting.
This operating mode is preferable.
If I require...
Air
distribution
Temperature Air flow
Air
recirculation
Air
conditioning
A/C
Heating
Cooling
Deicing
Demisting
Page 53
Ventilation
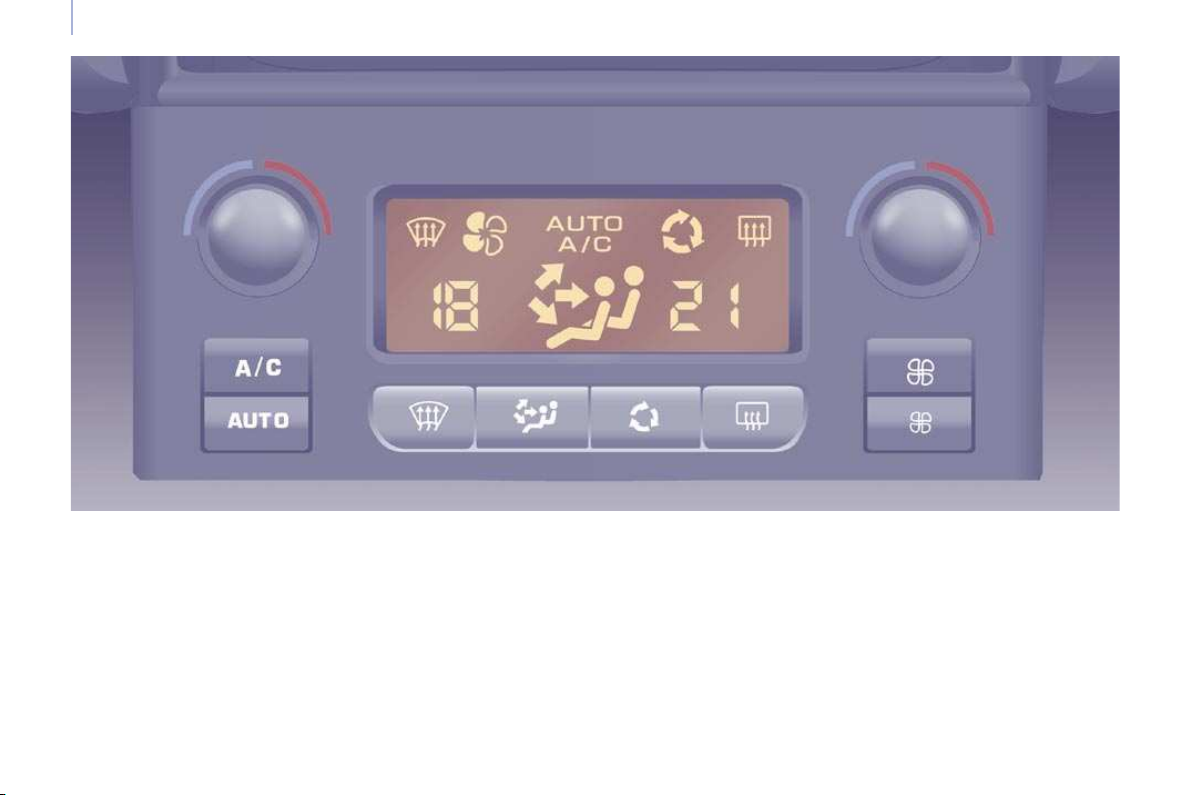
AUTOMATIC AIR CONDITIONING WITH SEPARATE ADJUSTMENTS
Good practice
For maximum cooling or heating of the
passenger compartment, it is possible to exceed
the value 15 by turning until LO is displayed or
the value 27 by turning until HI is displayed.
For optimum comfort, the difference between
the value displayed for the driver and for the
passenger should not be greater than 3.
If your vehicle is fitted with this control
panel, it is located on the centre console.
On entering the vehicle, the inside
temperature may be much colder (or
warmer) than is comfortable. There is no
advantage in changing the value displayed
in order to quickly reach the level of comfort
required. The system will use its maximum
performance to reach the comfort value set.
Page 54
Ventilation
Driver or passenger side comfort value
The value indicated on the display
corresponds to a level of comfort and
not a temperature in degrees Celsius or
Fahrenheit.
Automatic operation
Do not cover the sunshine sensor,
located on the windscreen behind the
mirror, it is used for regulation of the air
conditioning.
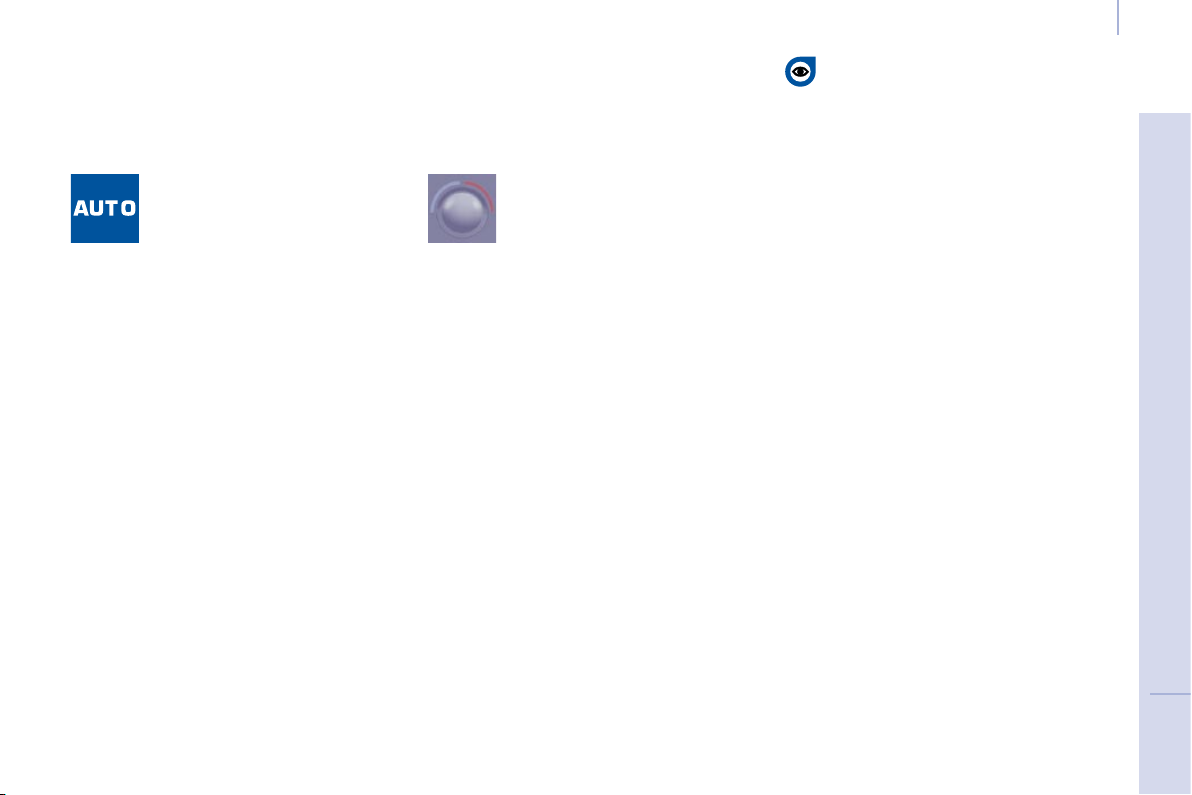
AUTO comfort programme
This is the normal air conditioning system
operating mode.
Press this button, the AUTO symbol
is displayed.
In accordance with the comfort
value selected, the system controls
the distribution, the fl ow and the intake of air to
guarantee comfort and a suffi cient circulation
of air in the passenger compartment. No
further action on your part is required.
When the engine is cold, to prevent an
excessive diffusion of cold air, the ventilation
will reach its optimum level gradually.
For your comfort, the settings are stored
when the ignition is switched off and are
reinstated the next time the vehicle is
started, if the temperature in the passenger
compartment has not changed significantly;
otherwise, operation resumes in automatic
mode.
Turn this control to the left or to
the right to decrease or increase
the value. A setting around the
value 21 provides optimum
comfort. However, depending on your
requirements, a setting between 18 and
24 is usual.
Page 55

Ventilation
Air flow
Press the small fan button to
reduce the flow or the large fan
button to increase the flow.
On the display, the blades of the fan darken
when the flow is increased.
Manual operation
You can, according to your requirements,
make a different selection from that offered
by the system by changing a setting.
The other functions will still be controlled
automatically. Pressing the AUTO button
restores fully automatic operation.
Intake of exterior air/
Recirculation of interior air
Press this button to recirculate
the interior air. The recirculation
symbol is displayed.
Recirculation prevents exterior odours
and smoke from entering the passenger
compartment. Avoid prolonged operation
in interior air recirculation mode (risk of
condensation, odour and humidity).
Pressing this button again activates the
intake of exterior air.
Air distribution
Pressing this button several times
in succession directs the air flow
towards:
- the windscreen,
- the windscreen and footwells,
- the footwells,
- the side vents, central vents and
footwells,
- the side vents and central vents.
Deactivating the system
Press the air flow small fan
button until the fan symbol
disappears.
This action deactivates all of the system's
functions, with the exception of the air
recirculation and rear screen demisting (if
fitted on your vehicle). Your comfort setting
is no longer maintained and is switched off.
For your comfort, do not deactivate the
system for long periods.
Pressing the large fan button or
the AUTO button reactivates the
system with the values set before
it was deactivated.
Switching the air conditioning
On/Off
Press this button, the A/C
symbol is displayed and the air
conditioning is activated.
Pressing this button again switches off the
air cooling.
Page 56
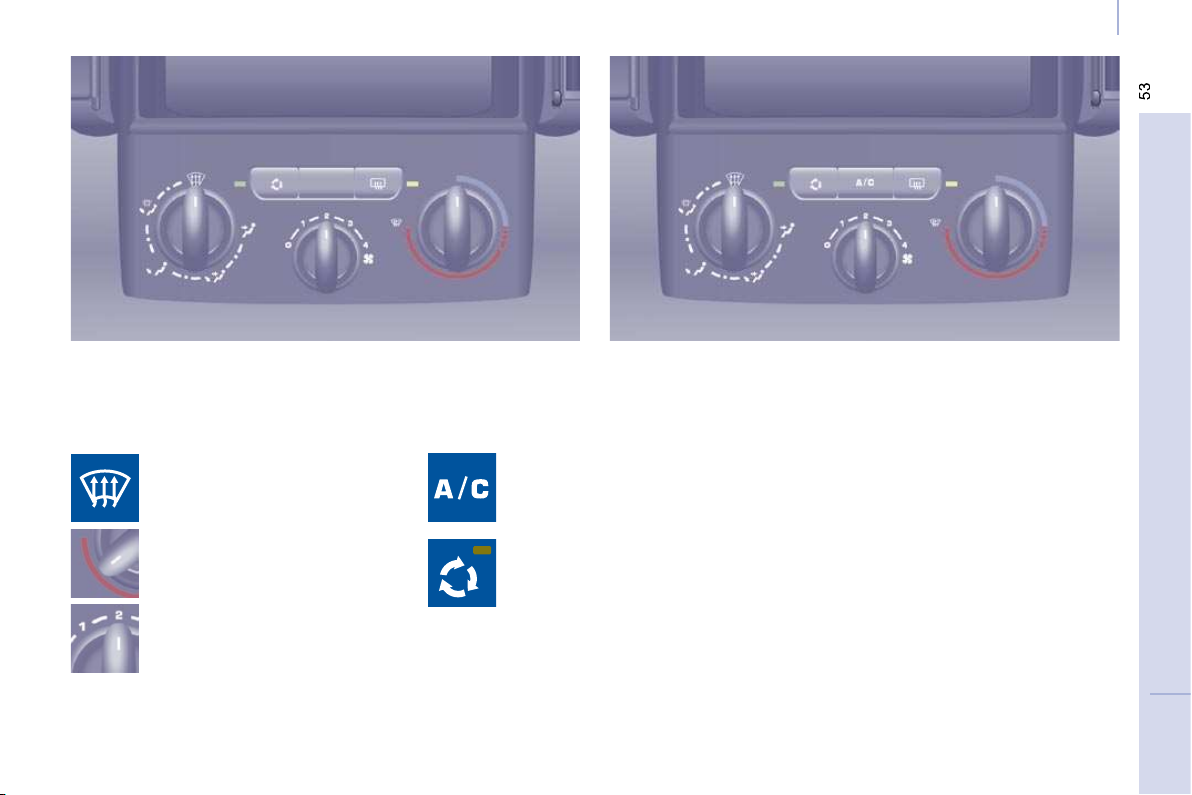
Ventilation
Press the air conditioning. Direct the control to this air
distribution setting.
Direct the control to this
temperature setting.
Increase the air flow setting.
DE-ICING AND DEMISTING
Manual mode
Returning to exterior air intake
open permits renewal of the air
in the passenger compartment
(diode off).
Page 57
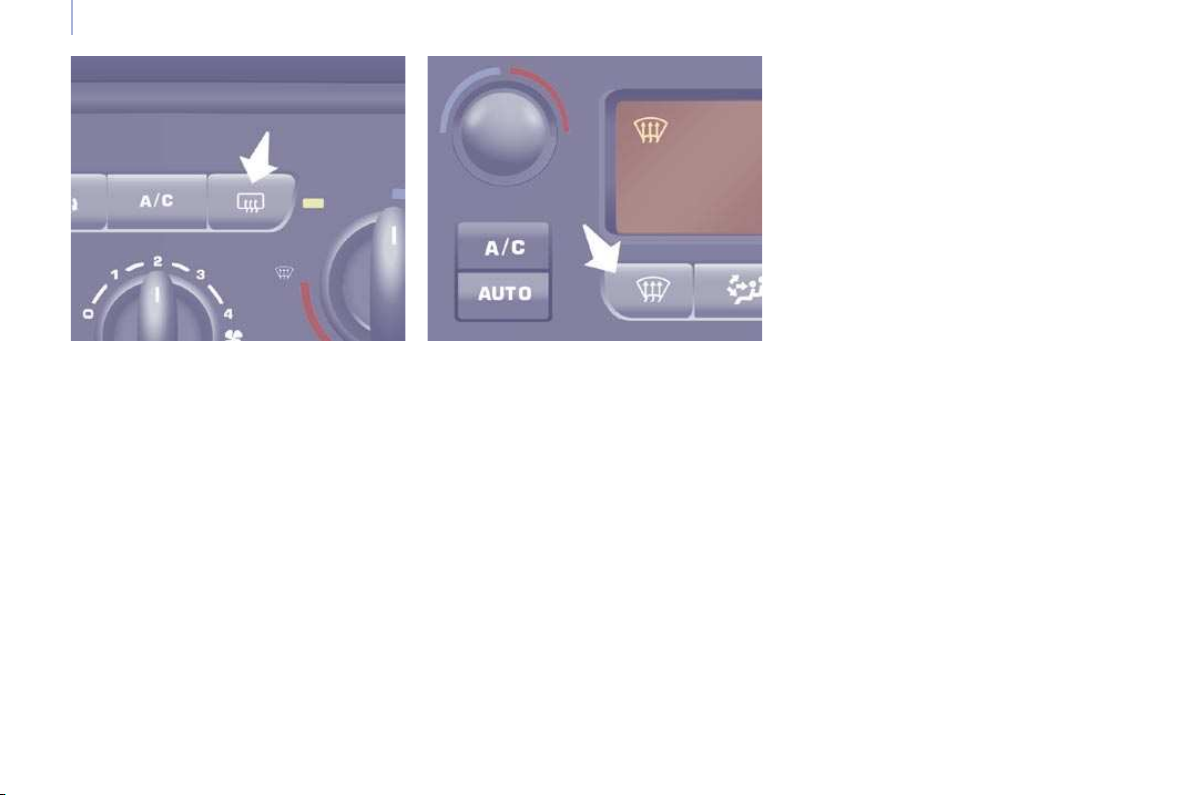
Ventilation
De-icing the rear screen and/or
mirrors
Pressing this button, with the engine
running, activates the rapid demisting de-icing of the rear screen and/or electric
mirrors.
This function switches off:
- when the button is pressed,
- when the engine is switched off,
- automatically to prevent excessive
energy consumption.
Automatic air conditioning: visibility
programme
The comfort programme (AUTO) may not
be sufficient to quickly demist or de-ice the
windows (humidity, several passengers, ice).
In this case, select the visibility programme.
The visibility programme indicator light
comes on.
It activates the air conditioning, the air flow,
the de-icing of the rear screen and provides
optimum distribution of the ventilation to the
windscreen and side windows.
It deactivates the air recirculation.
Page 58

Ventilation
CORRECT USE OF THE
VENTILATION AND AIR
Vents
"Leave them open"
For optimum distribution and diffusion of hot
or cool air in the passenger compartment,
there are adjustable central and side vents
which can be directed sideways (right or
left) towards the top of the body. For your
comfort while driving, do not close them,
direct the flow of air towards the windows
instead.
The air vents directed towards the floor of
the vehicle complete the equipment.
Passenger compartment filter,
carbon filter
Ensure that this fi lter is in good condition and
have all of the fi lter elements replaced regularly.
Refer to the "Checks" section of
chapter 6.
Air conditioning
In all seasons, the air conditioning should
only be used with the windows closed.
However, if the interior temperature remains
high after a prolonged period parked in
the sun, do not hesitate to ventilate the
passenger compartment for a few minutes.
Use the AUTO mode as much as
possible as it permits optimised control
of all of the functions: air flow, passenger
compartment comfort temperature,
air distribution, air intake mode or air
recirculation in the passenger compartment.
Operate the air conditioning system for 5 to
10 minutes, once or twice a month, to keep
it in perfect working order.
It is normal that the condensation created by
the air conditioning system results in a flow
of water which may form a puddle under the
vehicle when parked.
If the system does not produce cold air, do
not use it and consult a CITROËN dealer.
Page 59
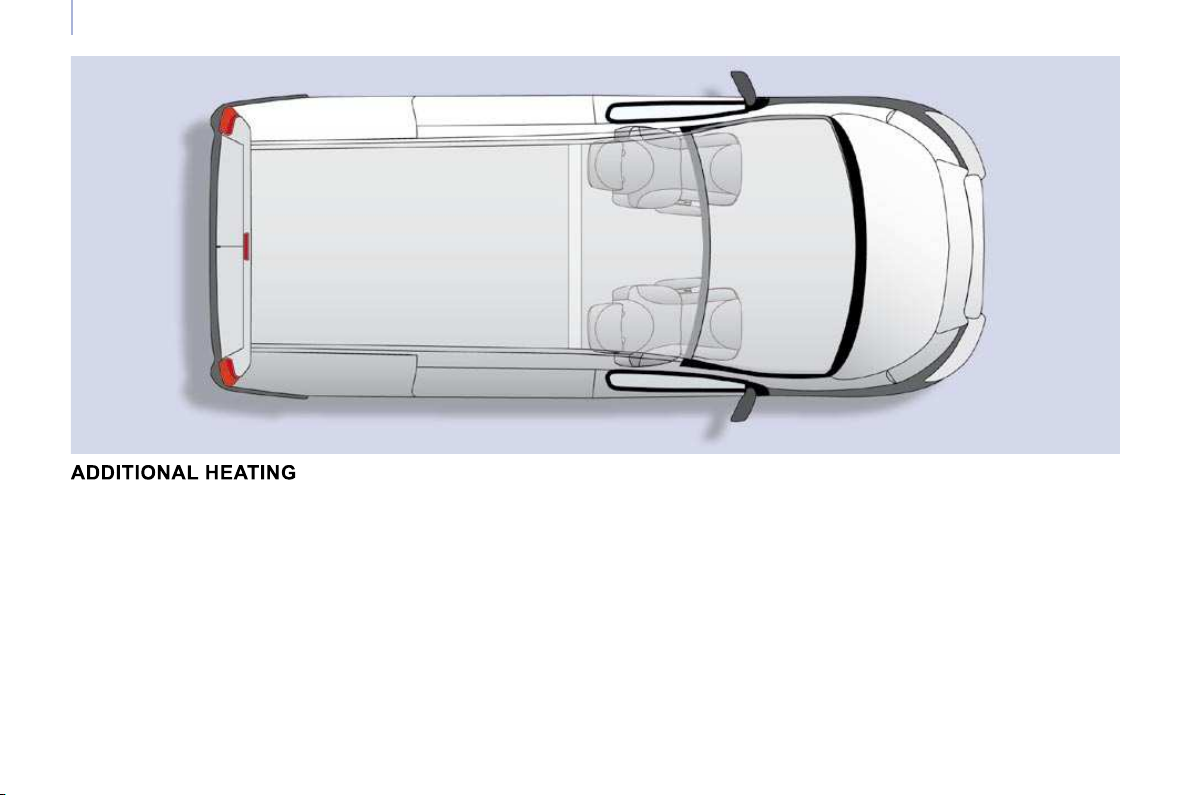
Ventilation
Good practice
To avoid any risk of poisoning or
asphyxiation, the heater must not be used,
even for short periods, in an enclosed space
such as a garage or workshop which is not
fitted with an exhaust gas extraction system.
Do not park the vehicle on an inflammable
surface (dry grass, dead leaves, paper…),
there is a risk of fire.
The temperature near the heater must not
exceed 120 °C. A temperature higher than
this (for example in the case of painting in
an oven) could damage the components of
the electronic circuits.
The heater is supplied by the vehicle's fuel
tank. Ensure that the fuel gauge indicator
light is not at reserve.
Coolant circuit heater
This is an additional and autonomous
system which heats the diesel engine hot
coolant loop to make starting easier.
It improves the de-icing and demisting
performance.
Vehicles fitted with an HDi engine may be
fitted with a heater. When the engine is at
idle or the vehicle is stationary, it is normal
to notice a high-pitched whistling noise and
a slight emission of smoke and odour.
Page 60

Ventilation
Have the heater checked at least
once a year at the beginning of winter.
Maintenance and repairs should only be
carried out by a CITROËN dealer. Use
recommended replacement parts only.
Page 61
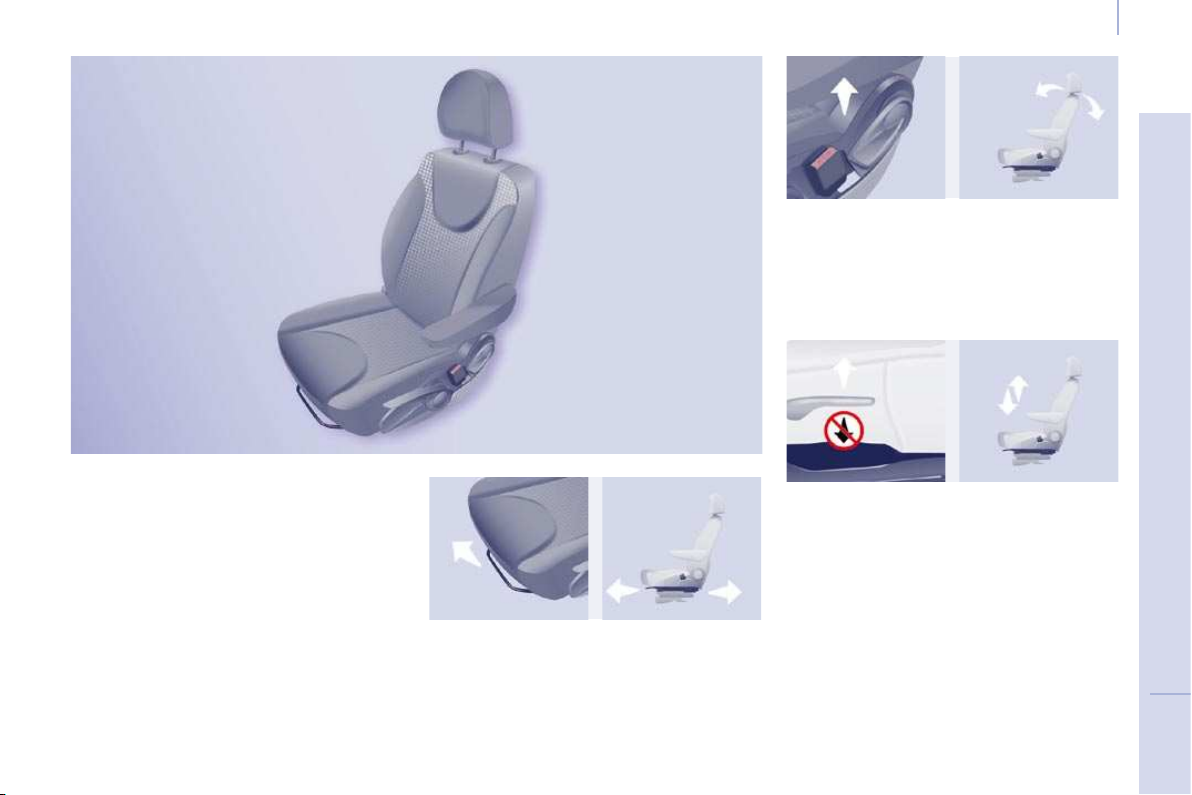
Seats
FRONT SEATS
2 - Seat back angle adjustment
Pull the lever upwards and set the required
angle.
Depending on the version and configuration
of your vehicle, different front seats are
fitted, either:
- a driver's seat and a passenger seat,
- an individual driver's seat and a two-
seat passenger bench.
Depending on the models, the following
adjustments are available:
1 - Forwards/backwards adjustment
Lift the bar and slide the seat forwards or
backwards.
3 - Driver's seat height adjustment
Depending on the version and configuration
of your vehicle, you have either:
- a passive adjustment: pull the handle
upwards then take your weight off the
seat to raise, or push on the seat to
lower,
Page 62
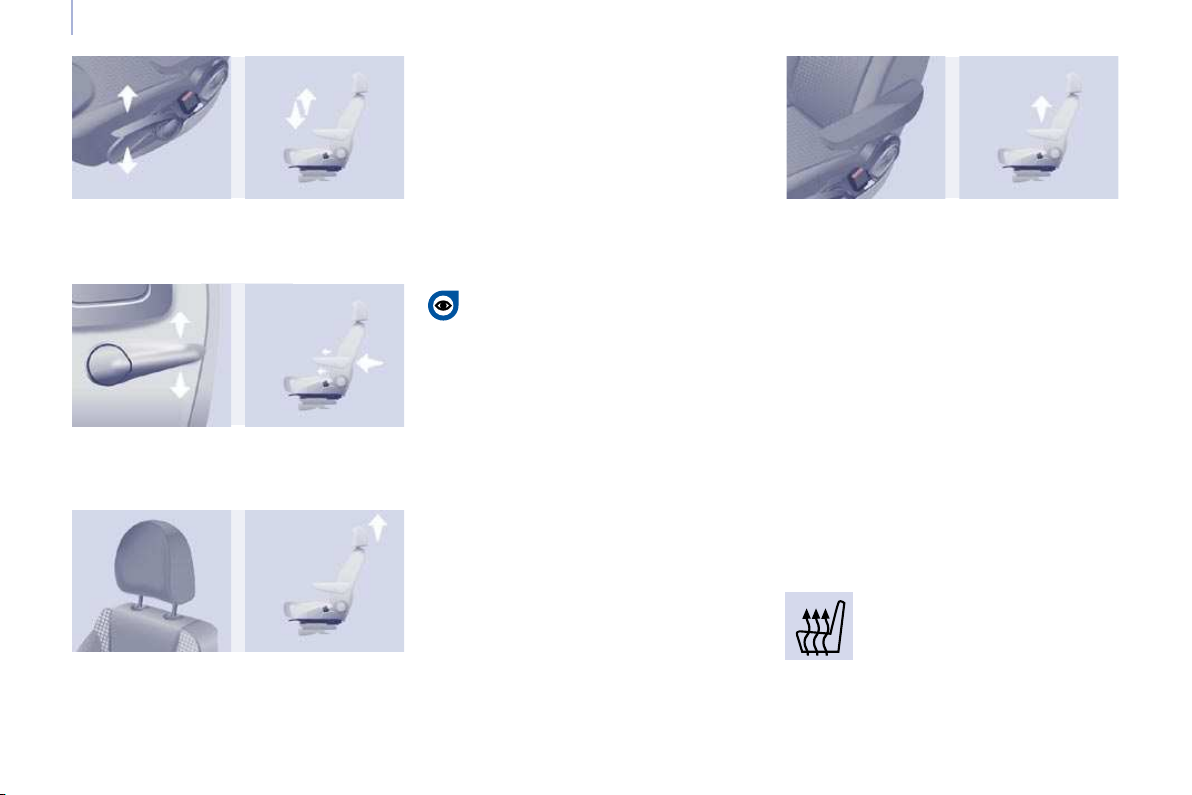
Seats
- an active adjustment: manoeuvre the
handle upwards or downwards until the
desired position is reached.
4 - Driver's seat lumbar adjustment
Move the lever up or down to obtain the
required position.
Head restraint height adjustment
To raise or lower the restraint, pull it
forwards, then slide it.
The adjustment is correct when the upper
edge of the head restraint is level with the
top of the head.
To remove it, set it in the high position, press
the tabs and pull upwards and forwards at
the same time.
To re-install, engage the head restraint rods
in the holes, making sure they are aligned
with the seat back.
Never drive with the head restraints
removed; they must be in place and
correctly adjusted.
Adjustable armrest
To place the armrest in its rest position:
- raise it until it is in the centreline of the
seat back.
To place the armrest in a position for use:
- fold it down fully,
- raise it slowly to the required position,
- if you pass the required position, raise it
fully then repeat the operations above.
Front heated seat controls
Press the corresponding control,
located on the overhead storage
unit.
The temperature is controlled
automatically.
Pressing a second time stops operation.
Page 63
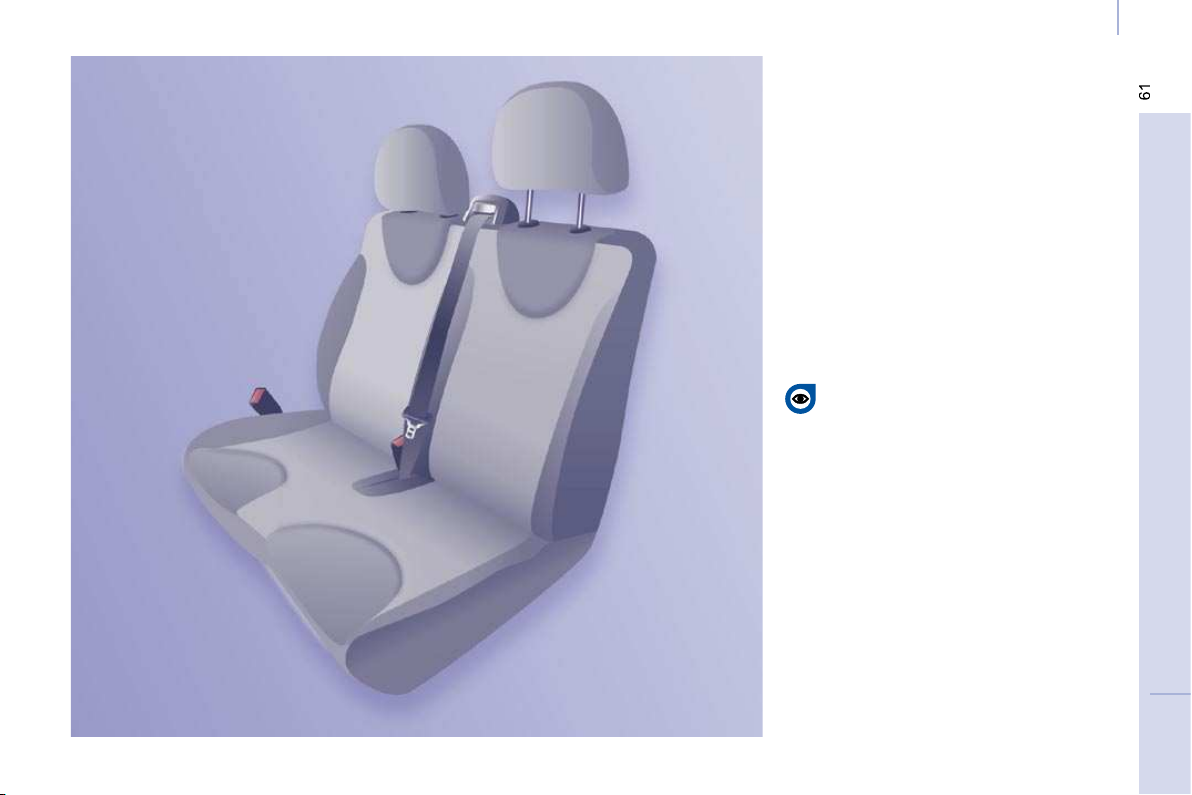
Seats
2-SEAT FRONT BENCH
If your vehicle is fitted with this bench seat,
it is fixed and has a 3rd seat belt.
Head restraint
Press the tab to adjust the height of the
head restraint.
To remove the head restraint, press the tabs
and raise the head restraint.
The adjustment is correct when the upper
edge of the head restraint is level with the
top of the head.
Never drive with the head restraints
removed; they must be in place and
adjusted correctly.
Page 64
Page 65
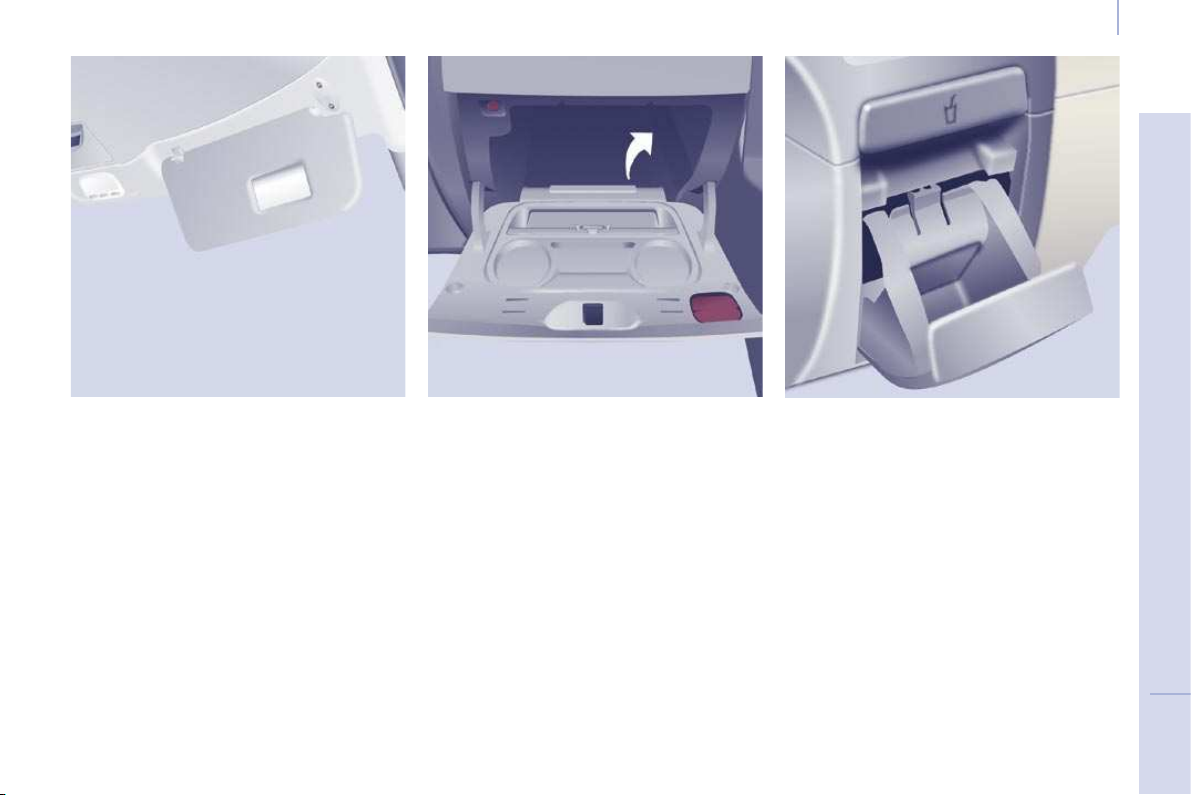
Practical information
CAB LAYOUT
PRACTICAL INFORMATION
Depending on the vehicle's equipment, the
various fittings below enhance your cab.
Sun visor
To prevent dazzle from ahead, fold the sun
visor down.
A pocket is provided in the driver's sun visor
for storing toll cards, tickets, ...
Glove box
This is fitted with a lock, you can lock it
using the key.
It contains three sockets for the connection
of portable electronic equipment (video
equipment, ...) if the vehicle is fitted with a
colour screen.
It also contains can holders and
compartments for storing maps, a packet of
cigarettes, an A4 format document, a pen,
etc.
Storage compartment
Page 66
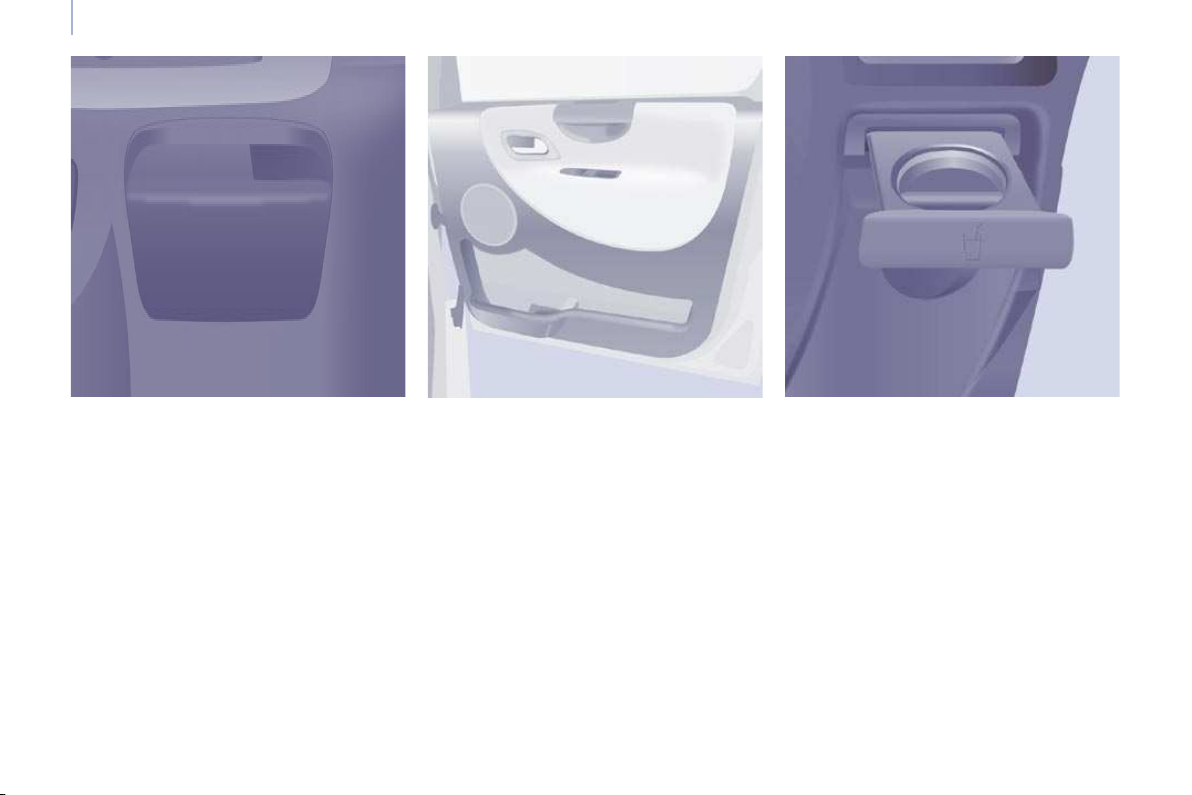
Practical information
Ashtray Storage tray and bottle holder (1.5 L) Cup holder
Any liquid transported in the vehicle in
a cup (mug or similar), which may spill,
presents a risk of damage on contact with
the instrument panel and centre console
controls. "Take care".
12 volt socket
The maximum power of the socket, which is
of the lighter type, is 120 W.
Page 67
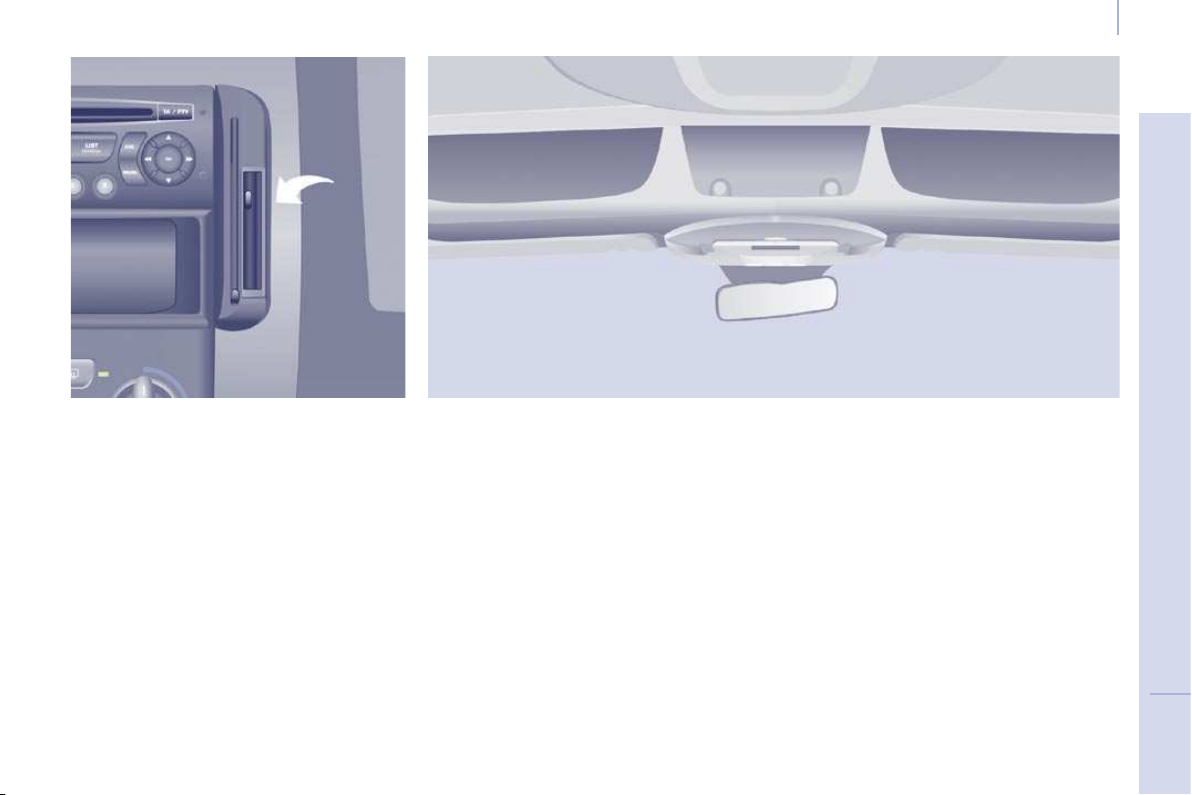
Practical information
Ticket storage
According to the configuration of the vehicle.
Overhead storage unit
This is located above the sun visors and has
two compartments for storing a jumper,
a file, ...
Be aware that storing a hard object in direct
contact with the compartment may result in
noise.
Tip: the central cavity of the overhead
storage unit, located in the extension of the
vehicle's roof between the rear space and
the cab, permits the transportation of long
objects. Take care to support and wedge
them securely.
The tunnel may be added to by an internal
rack, offered as an accessory.
For raised vehicles, a shelf located above
the overhead storage unit permits the
storing of small objects and materials
(straps, cloths, gloves, helmets, etc...).
Page 68
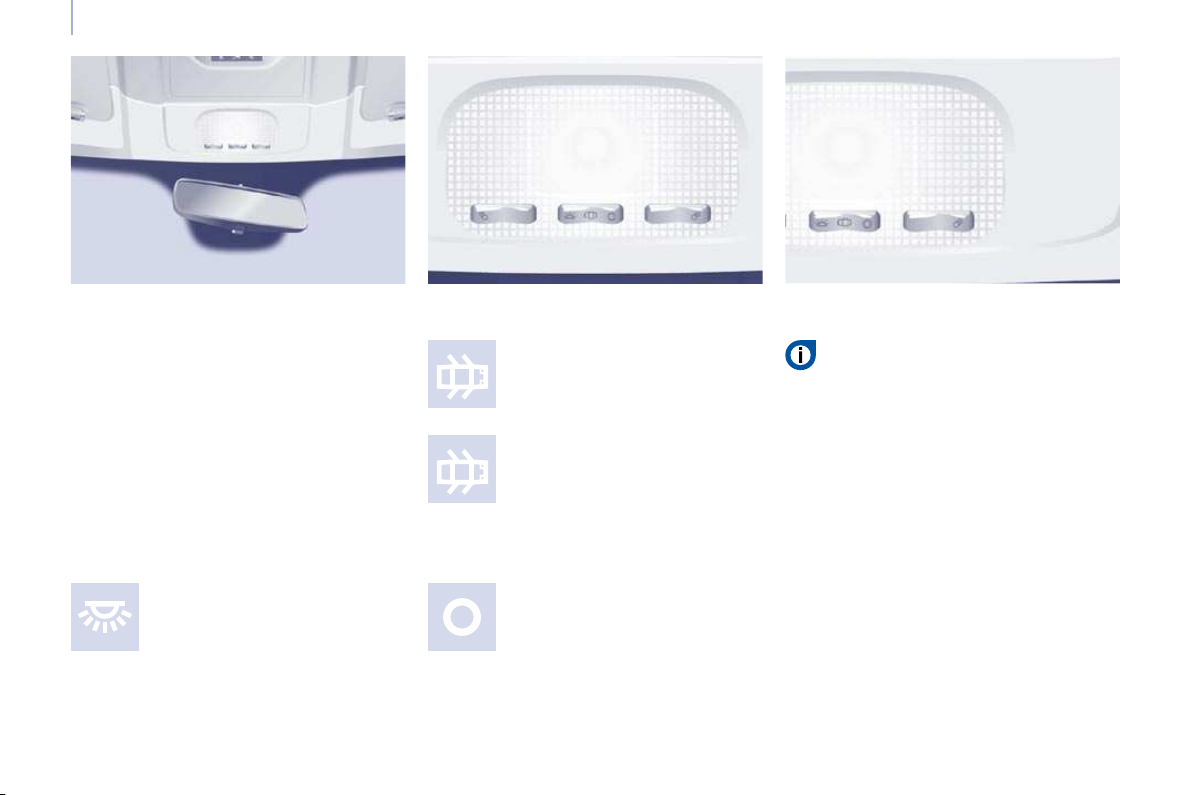
Practical information
COURTESY LIGHTS
Front courtesy light
Automatic switching on/off
The front courtesy light comes on when
the key is removed from the ignition, when
the vehicle is unlocked, when one of the
front doors is opened and for location of the
vehicle using the remote control.
It switches off gradually after the ignition is
switched on and when the vehicle is locked.
Permanently on, ignition on.
Cab: comes on when one of the
front doors is opened.
Load space: comes on
when one of the rear doors is
opened.
If the doors remain open for
a few minutes, the courtesy lights are
switched off.
Permanently off.
Front individual reading lights Rear courtesy light
These are switched on and off by
means of a manual switch, with the
ignition on.
Areas for toll cards/car park tickets
The athermic windscreen has two nonreflective zones located either side of the
base of the interior mirror.
They are intended for affixing toll cards
and/or car park tickets.
Page 69
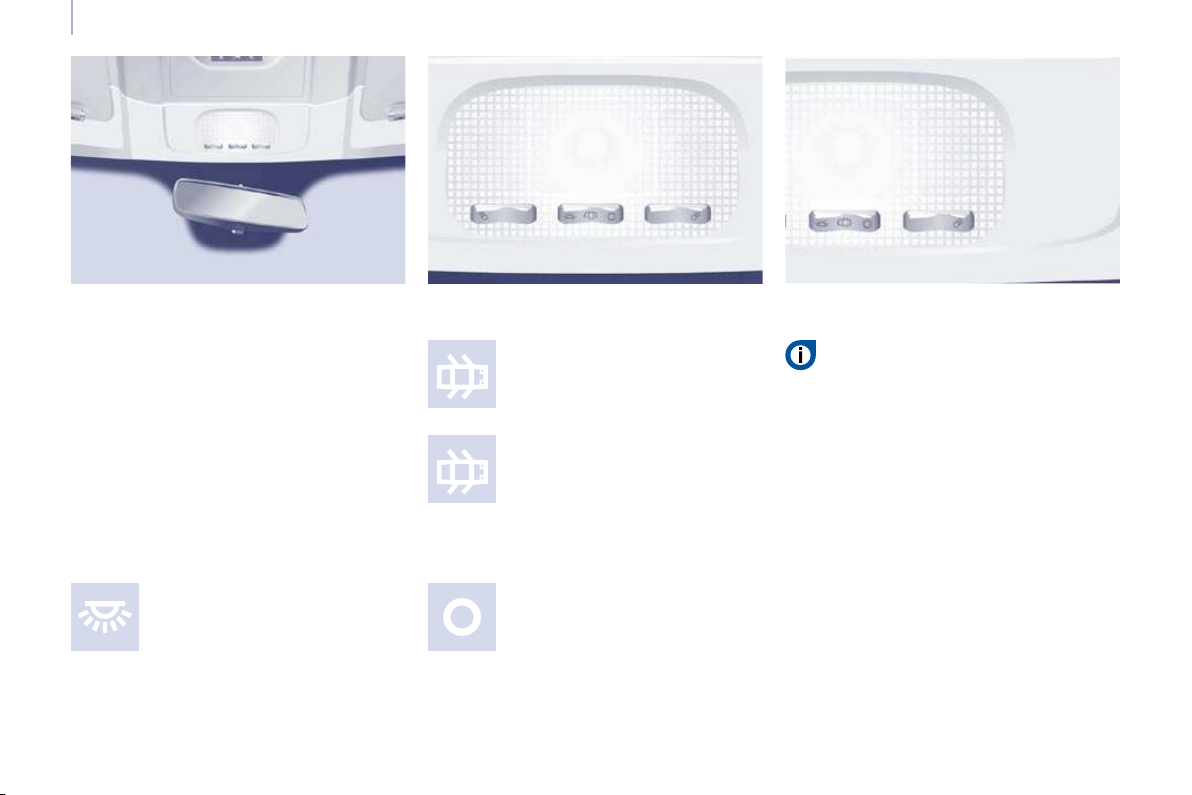
Practical information
COURTESY LIGHTS
Front courtesy light
Automatic switching on/off
The front courtesy light comes on when
the key is removed from the ignition, when
the vehicle is unlocked, when one of the
front doors is opened and for location of the
vehicle using the remote control.
It switches off gradually after the ignition is
switched on and when the vehicle is locked.
Permanently on, ignition on.
Cab: comes on when one of the
front doors is opened.
Load space: comes on
when one of the rear doors is
opened.
If the doors remain open for
a few minutes, the courtesy lights are
switched off.
Permanently off.
Front individual reading lights Rear courtesy light
These are switched on and off by
means of a manual switch, with the
ignition on.
Areas for toll cards/car park tickets
The athermic windscreen has two nonreflective zones located either side of the
base of the interior mirror.
They are intended for affixing toll cards
and/or car park tickets.
Page 70
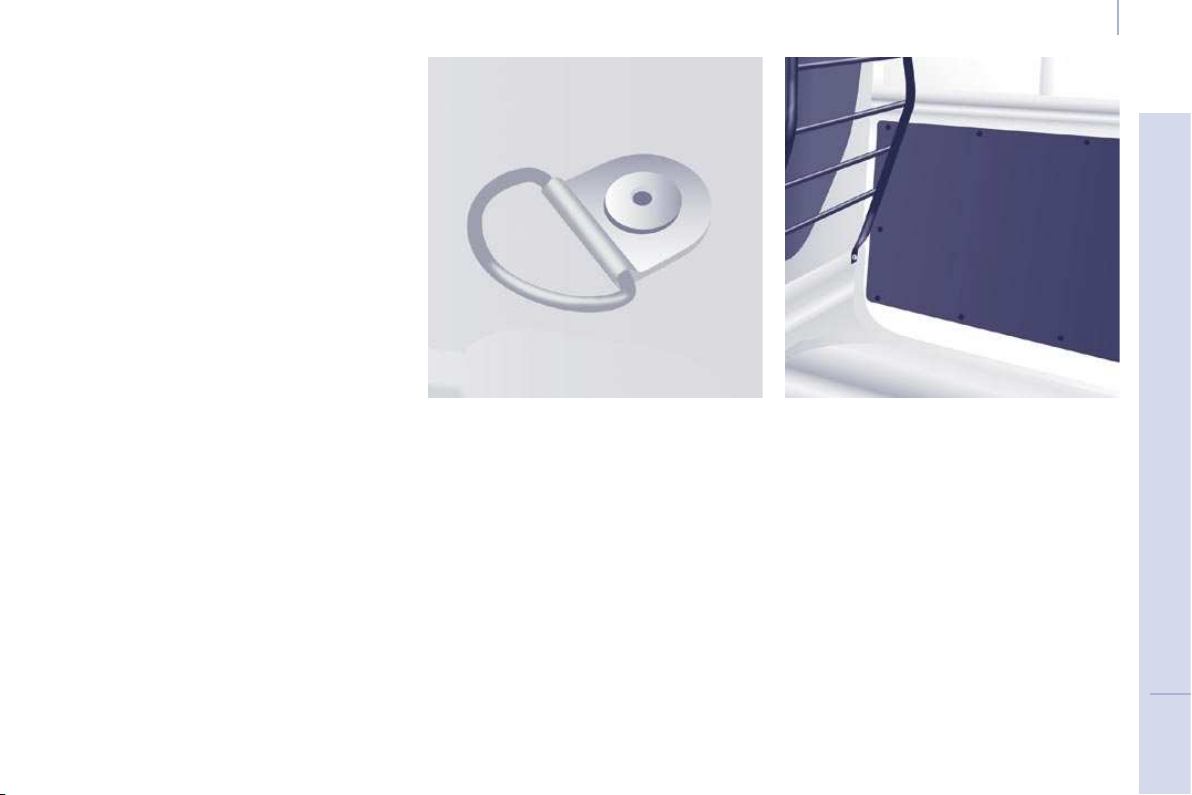
Practical information
LOAD SPACE LAYOUT
Depending on the vehicle's equipment, the
various fittings below enhance your load
space.
Locations for stowing rail
Locations for securing a stowing rail are
available on each side of the vehicle.
Stowing rings
Use the stowing rings on the rear floor to
secure your loads.
As a safety precaution in case of sharp
braking, you are advised to place heavy
objects as far forwards towards the cab as
possible.
You are advised to immobilise the load by
securing it firmly using the stowing rings on
the floor.
Trims
The lower parts of the sides are fitted with
load protection trims.
Roof box on raised version
This is a storage compartment located in the
load space, above the cab roof.
Page 71
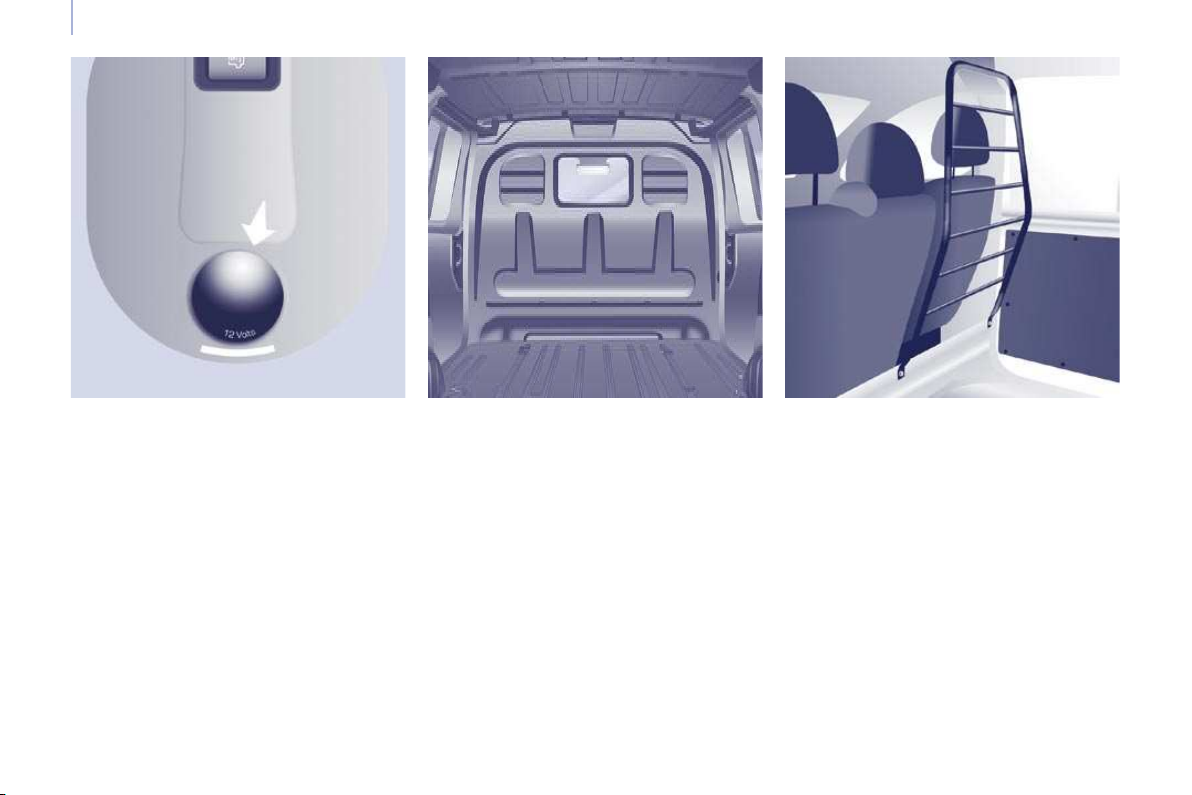
Practical information
12 volt socket
This operates with the ignition off, therefore
limit its use to avoid discharging the battery.
Maximum power: 120 W.
Ladder type vertical separation or
partition
Behind the driver's seat, a ladder type
vertical separation or partition protects the
driver against the risk of load movement.
Load retainer
On the floor, behind the front seats, a
horizontal partition protects the driver and
front passengers against the risk of load
movement.
Panel or glazed separation partitions permit
separation of the load space from the cab.
Page 72
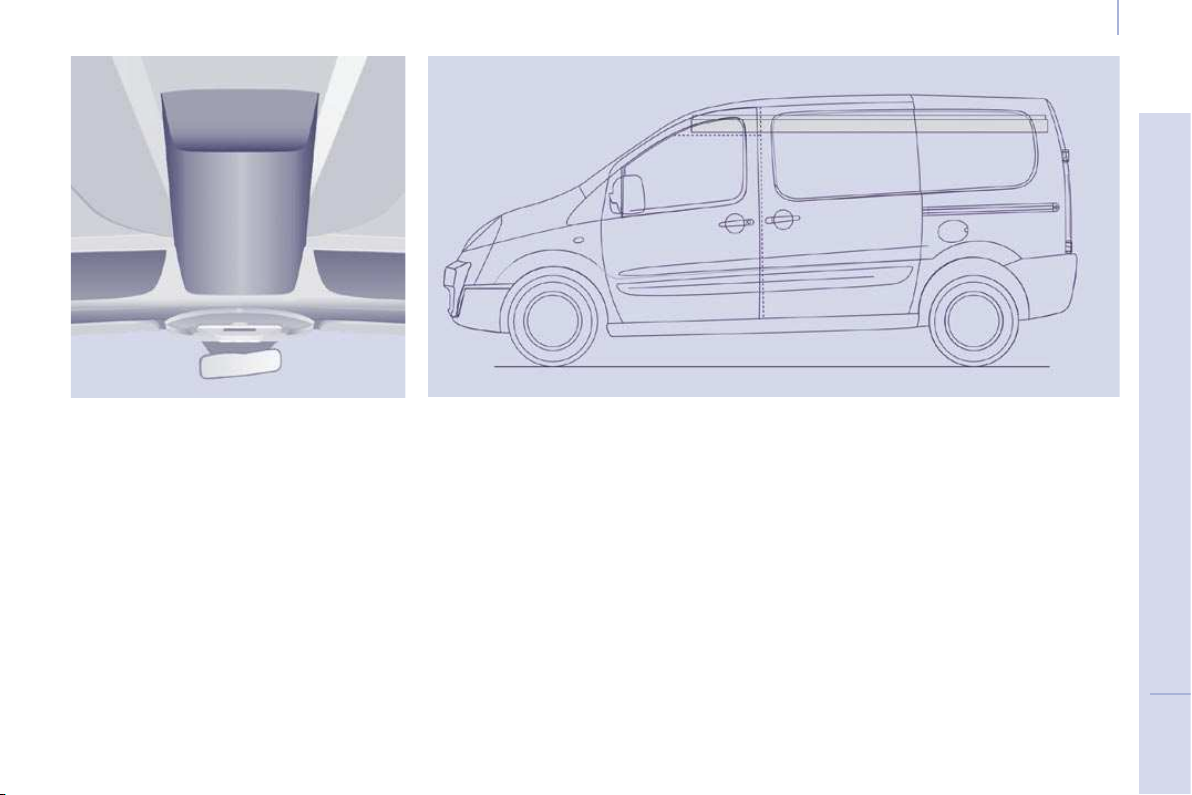
Practical information
Tunnel and internal rack
Located above the cab, access to the tunnel
is via the load space.
The tunnel can be added to by an internal rack which will enable you to transport long, light
items (electrical rods, pipes, etc...).
Page 73
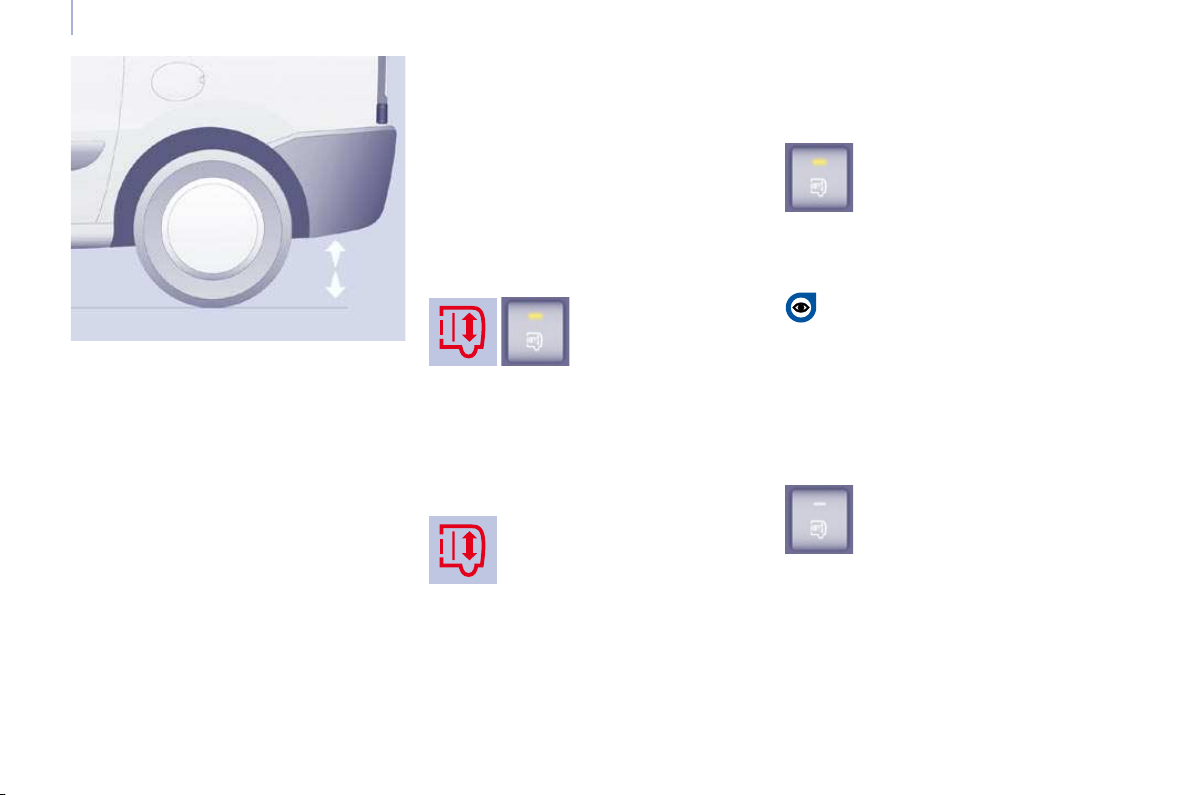
Rear suspension
REAR SUSPENSION
Two types of suspension are offered.
Metal suspension
This equipment adopts long movement
limiters which make it possible to guarantee
stable behaviour both when loaded and
when empty. No action on your part is
required except to ensure that maintenance
is carried out and that the authorised loads
are complied with.
Rear suspension with pneumatic
compensation
If fi tted on your vehicle, this type of
suspension regulates the variations in the
height of the rear platform of your vehicle
irrespective of the weight of the load, within
the limit of the authorised values. On board,
the increasing or lightening of the load on the
vehicle's platform is detected by two height
sensors. When all of the doors are closed, the
sensors trigger the automatic compensation
and determine the optimum height of the sill
for the vehicle's driving conditions.
Two functions
1. Automatic correction
2. Manual correction
1 - Automatic correction of the
height of the rear sill
The pneumatic suspension automatically
regulates the variations in the height of the
rear platform of your vehicle.
A red warning light on your
instrument panel fl ashes if the
height is not at its optimum level and
requires correction, drive slowly until
this warning light is switched off.
The automatic compensation is temporarily
inactive:
- if a door/the tailgate is open,
- when braking or when stopped at a red
light (brake pedal pressed).
Deactivation of the automatic correction
The control which permits deactivation of the
automatic control is located on the righthand side, at the rear of the vehicle.
With the vehicle stationary:
- press and hold,
- release the control.
Deactivation is confirmed by the diode
which is lit. It remains lit for approximately
30 seconds.
You must deactivate the automatic
correction manually in the following
situations:
- when working underneath the vehicle,
- when changing a wheel,
- when the vehicle is being transported by
lorry, train, ferry, boat, ...
Return to automatic correction
With the vehicle stationary:
- press and hold,
- release the control.
Return to automatic correction is confirmed
by the diode which is switched off.
According to the configurations, a bleep may
be heard during these operations.
Page 74
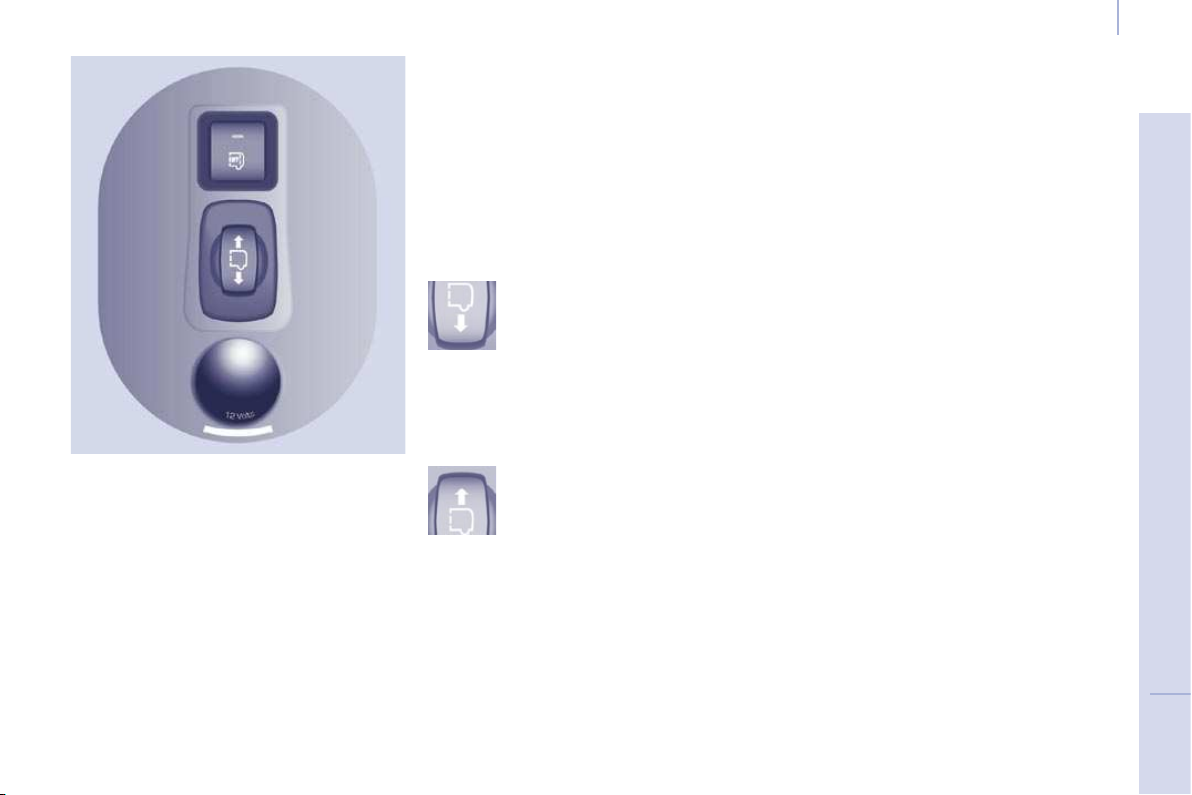
Rear suspension
2 - Manual correction of the height
of the rear sill
If your vehicle is fitted with this adjustment,
the control is located on the right-hand side
at the rear of the vehicle.
This manual adjustment permits "lowering"
or "raising" of the height of the sill of the rear
platform to facilitate operations in a parking
area.
This adjustment of the height of the sill is
restricted by a lower limit and an upper limit.
Carry out these operations with the vehicle
still stationary and:
- with the front and side doors closed,
- with the handbrake applied,
- do not leave your foot on the brake
pedal.
First use
To initialise the function, press the control
for approximately 2 seconds.
Lower: downwards adjustment
of the platform sill
Press the control downwards
continuously.
Release the button to stop the movement,
"3 bleeps" indicate that you have reached
the maximum limit, the movement stops
automatically.
Raise: upwards adjustment of
the platform sill
Press the control upwards
continuously.
Release the button to stop the movement,
"3 bleeps" indicate that you have reached
the maximum limit, the movement stops
automatically.
Return to the optimum sill height
Press the control up or down twice in
succession, the opposite of the position of
the load sill.
Operating faults
If the load sill is not adjusted when the
control is pressed, "3 bleeps" indicate a
malfunction for the following reasons:
- foot on the brake pedal with the key in
the ignition,
- excessive use of the manual correction,
- low battery charge,
- failure of the system.
If the audible signal persists, contact a
CITROËN dealer.
Page 75

Rear suspension
Deactivation of the manual correction
With the vehicle stationary:
- press and hold,
- release the control.
Deactivation is confirmed by the diode
which is lit. It remains lit for approximately
30 seconds.
Return to manual correction
With the vehicle stationary:
- press and hold,
- release the control.
Return to manual correction is confirmed by
the diode which is switched off.
According to the configurations, a bleep may
be heard during these operations.
You must deactivate the manual
correction in the following situations:
- when working underneath the vehicle,
- when changing a wheel,
- when the vehicle is being transported by
lorry, train, ferry, boat, ...
Good practice
When stationary and with the ignition key
removed, excessive use of the system
consumes battery charge.
Driving with the height of the rear platform:
- too low, risks damaging the technical
components underneath the vehicle,
- too high, risks unstable driving.
If you start and the warning light flashes, to
switch it off:
- correct the position of the manual
control which is still at the lower or
upper limit,
- or drive slowly at above 6 mph
(10 km/h), until the compensation
returns to automatic mode.
Parking for a long duration
Avoid parking for a long duration on ground
which could present a potential obstacle as
your vehicle could lower.
Following a long period out of use, the
height of the platform may change due to the
automatic compensation on unlocking or on
opening one of your vehicle's doors.
Warning light
Refer to the "Instruments and controls"
section of chapter 2.
Page 76
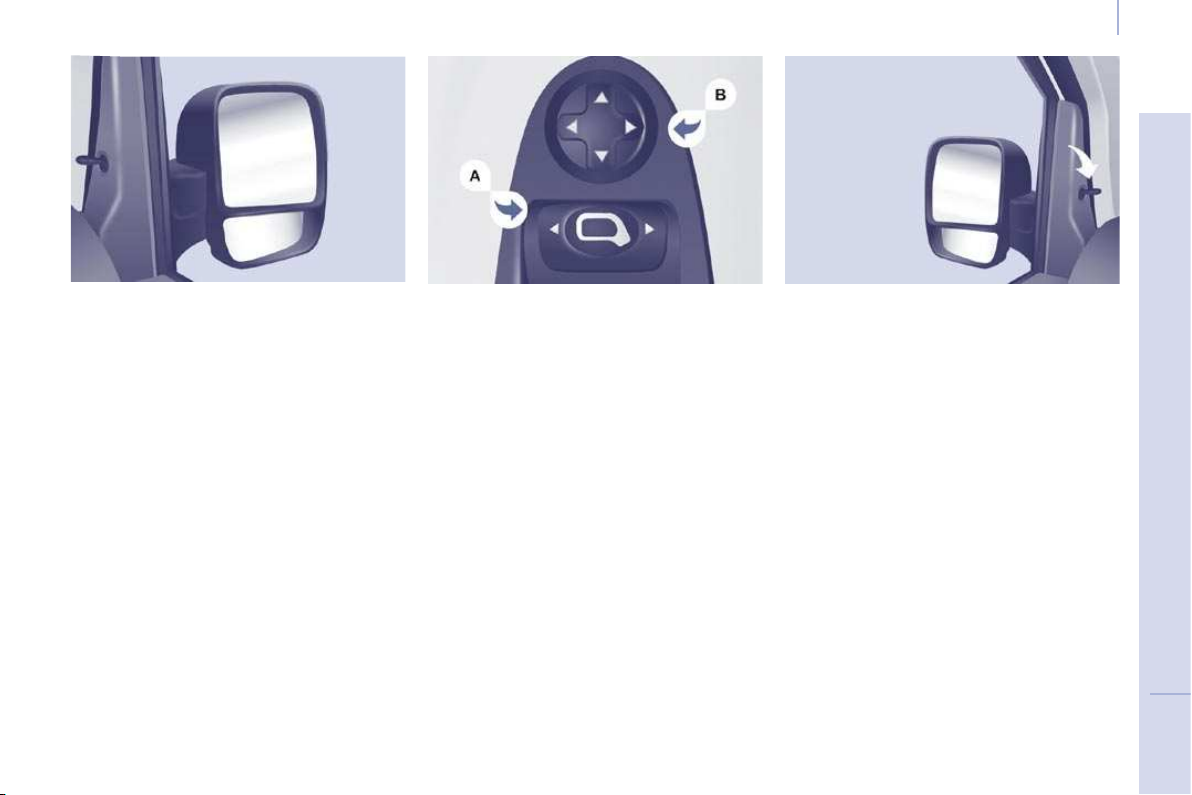
Mirrors and windows
MIRRORS
MIRRORS AND WINDOWS
The mirror is spherical to broaden the field
of side vision. Objects observed are, in
reality, closer than they appear. Therefore,
take this into account in order to judge the
distance correctly.
Electric exterior mirrors
- Move switch A to the right or to the left
to select the corresponding mirror.
- Move knob B in all four directions to
adjust.
- Return switch A to the centre position.
Electric folding/unfolding
If your vehicle is fitted with this function, the
mirrors can be folded or unfolded electrically
from the inside, with the vehicle parked and
the ignition on:
- Place switch A in the centre position.
- Pull switch A rearwards.
Heated mirrors
If your vehicle is fitted with this function,
press the rear screen demisting button.
Manual exterior mirrors
Move the lever in all four directions to
adjust.
When the vehicle is parked, the exterior
mirrors can be folded back manually.
If the mirror casing has come out of its
initial location, with the vehicle stationary,
reposition the mirror casing manually or use
the electric folding switch.
There is no risk of breakage even in the
presence of ice.
Page 77
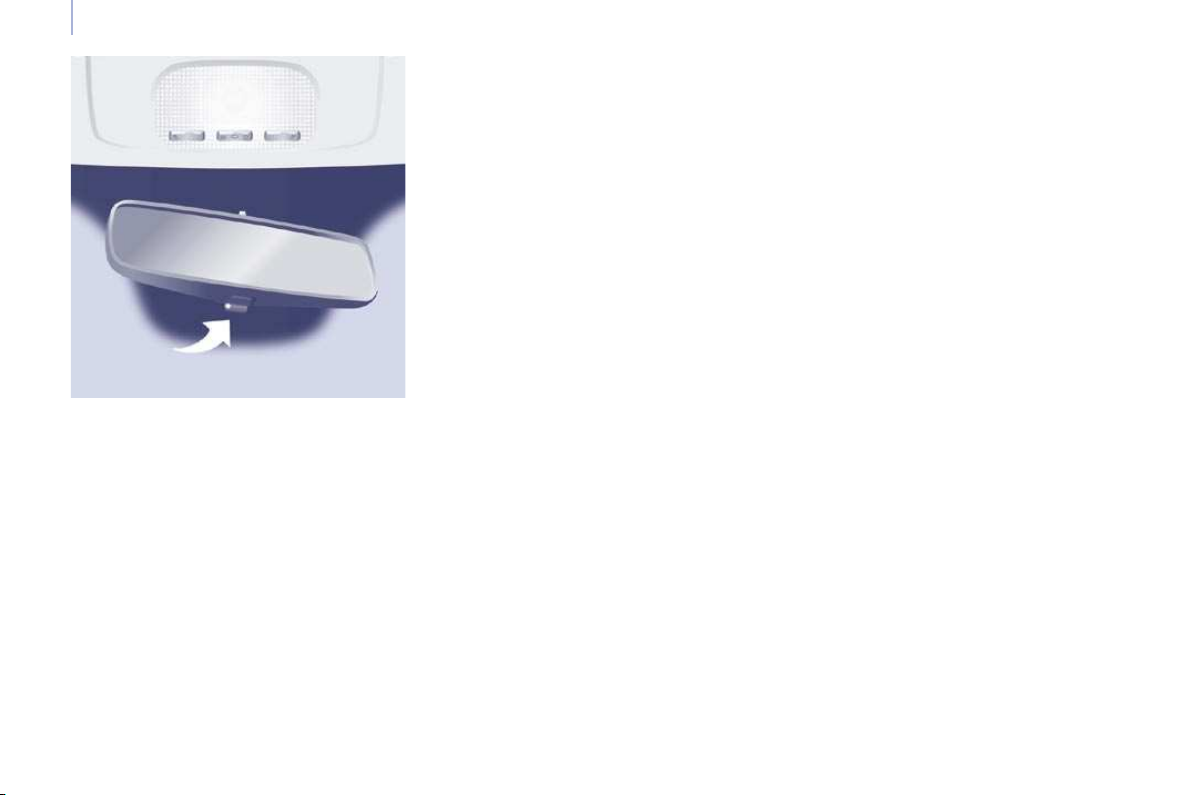
Mirrors and windows
Manual interior mirror
The interior mirror has two positions:
- day (normal),
- night (anti-dazzle).
To change from one to the other, push or
pull the lever on the lower edge of the mirror.
Page 78
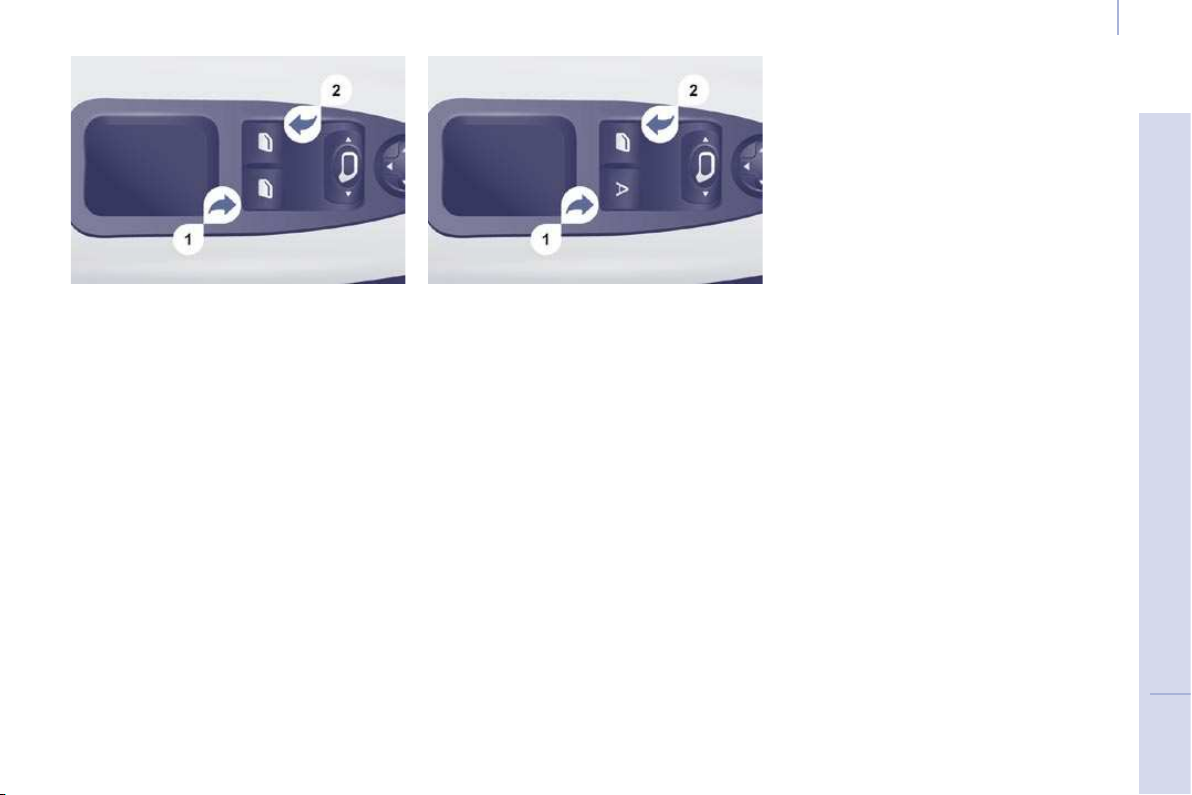
Mirrors and windows
ELECTRIC WINDOWS
1. Driver's electric window control
2. Passenger electric window control
The electrical functions of the electric
windows are deactivated:
- approximately 45 seconds after the
ignition is switched off,
- after one of the front doors is opened,
if the ignition is off.
Reinitialisation
Following reconnection of the battery,
the safety auto-reverse function must be
reinitialised.
Lower the window fully, then raise it, it will
rise in steps of a few centimetres each time
the control is pressed. Repeat the operation
until the window is fully closed.
Continue to press the control for at least one
second after the window closed position has
been reached.
The safety auto-reverse does not operate
during these operations.
Manual mode
Press or pull the control, without passing the
point of resistance. The window stops when
you release the control.
Automatic mode
Press or pull the control, beyond the point
of resistance. The window opens or closes
fully when the control is released. Pressing
the control again stops the movement of
the window.
Safety auto-reverse
If your vehicle is fitted with the safety autoreverse function, when the window rises
and meets an obstacle, it stops and partially
lowers.
In the event of unwanted opening of the
window on closing, press the control until
the window is fully open. Within the next
4 seconds, pull the control until the window
is fully closed.
The safety auto-reverse does not operate
during these operations.
Good practice
If the electric windows meet an obstacle
during operation, you must reverse the
movement of the window. To do this, press
the control concerned.
When the driver operates the passenger
electric window controls, he must ensure
that no one is preventing correct closing of
the windows.
The driver must ensure that the passengers
use the electric windows correctly.
Be aware of children when operating
the windows.
There are two operating modes:
Page 79
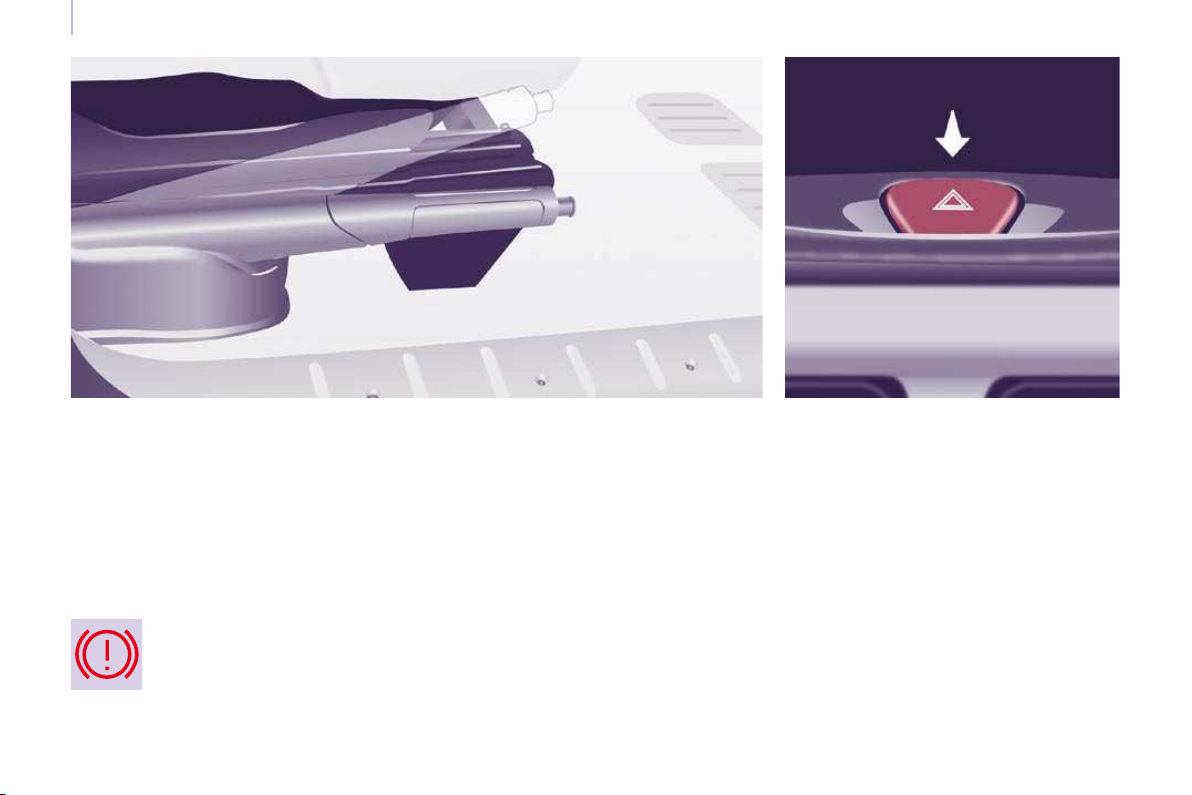
Driving safely
PARKING BRAKE
HAZARD WARNING LAMPS
DRIVING SAFELY
Applying
Pull the parking brake to immobilise your
vehicle.
Check that the parking brake is applied
firmly before leaving the vehicle.
If the parking brake is still on or
has not been released properly,
this is indicated by this warning
lamp which comes on on the
instrument panel.
When parking on a slope, direct your wheels
towards the pavement and pull the parking
brake lever up.
There is no advantage in engaging a gear
after parking the vehicle, particularly if the
vehicle is loaded.
Releasing
Pull the lever and press the button to lower
the parking brake lever.
Press this button, the direction indicators
flash.
They can operate with the ignition off.
The hazard warning lamps should only be
used in dangerous situations, when stopping
in an emergency or when driving in unusual
conditions.
Page 80
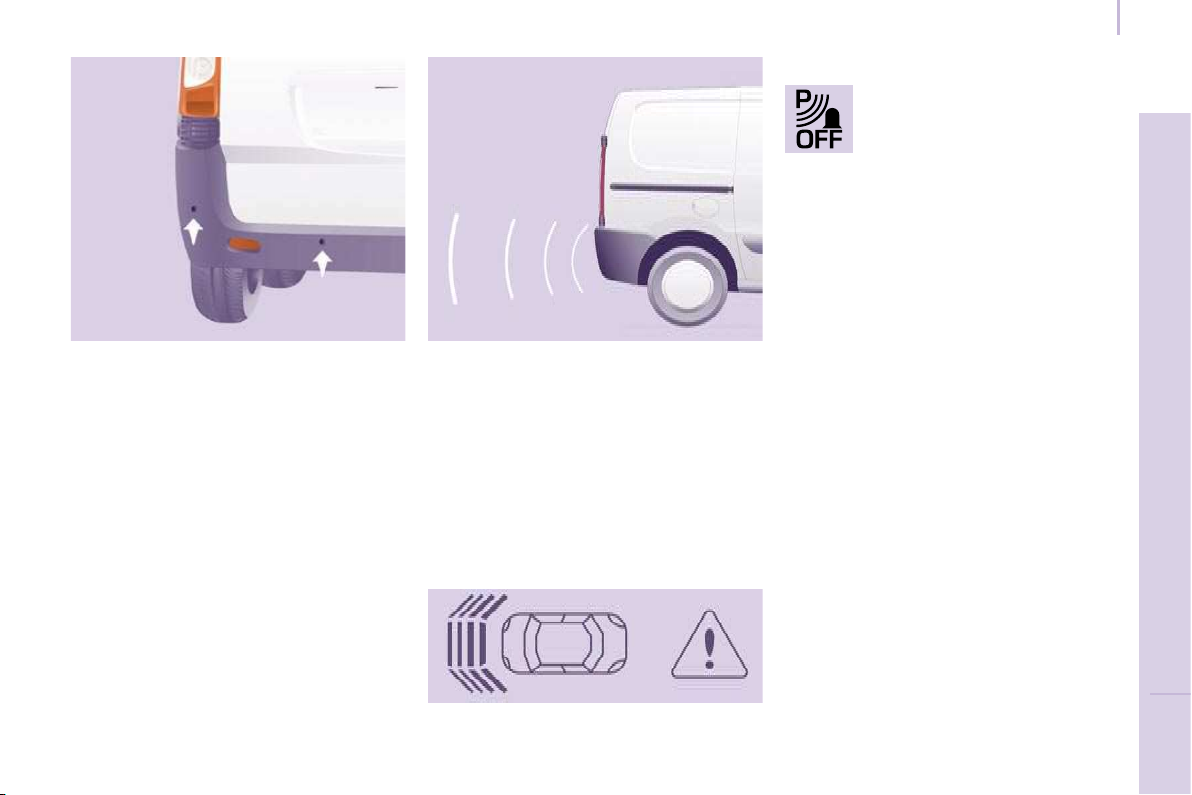
The audible and/or visual rear parking
REAR PARKING ASSISTANCE
assistance consists of four proximity
sensors, installed in the rear bumper. The
sensors detect any obstacle which enters
the field: person, vehicle, tree, fence, behind
the vehicle during the manoeuvre.
Certain objects detected at the beginning of
the manoeuvre will no longer be detected
at the end of the manoeuvre due to the
blind spots between and below the sensors.
Examples: stake, roadworks cone or
pavement post.
Engage reverse gear
An audible signal confi rms the activation of the
system by engaging reverse gear.
The proximity information is indicated by an audible
signal which becomes more rapid as the vehicle
approaches the obstacle. When the distance
between the rear of the vehicle and the obstacle
is less than approximately thirty centimetres, the
audible signal becomes continuous.
Display on the screen
Parking assistance
Activation/Deactivation
You can activate or deactivate the
system by pressing this button.
The activation or deactivation of
the system is stored when the
vehicle stops.
Operating fault
In the event of an operating fault, when
reverse gear is engaged the diode on
the button comes on, accompanied by
an audible signal and a message on the
display. Consult a CITROËN dealer.
Good practice
In bad weather or in winter, ensure that the
sensors are not covered with mud, ice or
snow.
The system will be deactivated automatically
if a trailer is being towed or if a bicycle
carrier is fitted (vehicle fitted with a
towbar or bicycle carrier recommended by
CITROËN).
The parking assistance cannot, in any
circumstances, take the place of the
vigilance and responsibility of the driver.
Stop the assistance
Change to neutral.
You are advised to deactivate the system if
your vehicle is fitted with a rear ladder or if
you are transporting a load which exceeds
the length of the vehicle.
Page 81
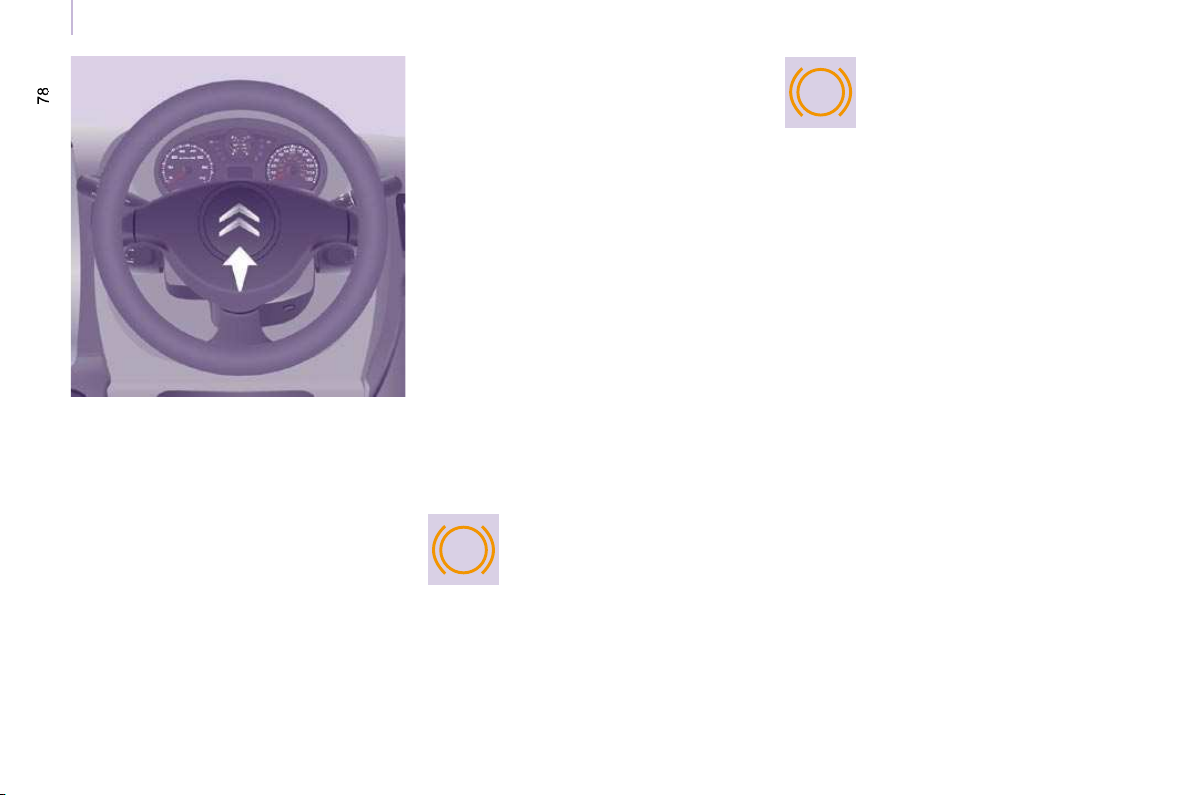
ABS
ABS
Driving safely
HORN
ANTI-LOCK BRAKING SYSTEM
EMERGENCY BRAKING
ASSISTANCE SYSTEM (EBA)
Press the centre of the steering wheel.
The ABS and EBFD (electronic brake force
distribution) systems improve the stability
and manoeuvrability of your vehicle on
braking, in particular on poor or slippery
surfaces.
The ABS prevents locking of the wheels,
the EBFD provides control of the braking
pressure wheel by wheel.
Good practice
The anti-lock braking system comes into
operation automatically when there is a risk
of wheel lock. It does not reduce the braking
distance.
On very slippery surfaces (ice, oil, etc...)
the ABS may increase the braking distance.
When braking in an emergency, do not
hesitate to press the brake pedal firmly,
without releasing the pressure, even on a
slippery surface, you will then be able to
continue to manoeuvre the vehicle to avoid
an obstacle.
Normal operation of the ABS may be felt by
slight vibration of the brake pedal.
When changing wheels (tyres and rims),
ensure that these are recommended by
CITROËN.
If this warning light comes on,
accompanied by an audible signal
and a message on the display,
it indicates a malfunction of the
ABS which could result in a loss of control of
the vehicle on braking.
If this warning light comes on,
together with the brake and STOP
warning lights, accompanied by
an audible signal and a message
on the display, it indicates a malfunction of
the electronic brake force distribution which
could result in a loss of control of the vehicle
on braking.
Stop immediately.
In both cases, contact a CITROËN dealer.
In an emergency, this system enables the
optimum braking pressure to be reached
more quickly, press the pedal firmly without
releasing it.
It is triggered by the speed at which the
brake pedal is activated.
This alters the resistance of the brake pedal
under your foot.
To prolong the operation of the emergency
braking assistance system: keep your foot
on the brake pedal.
Page 82
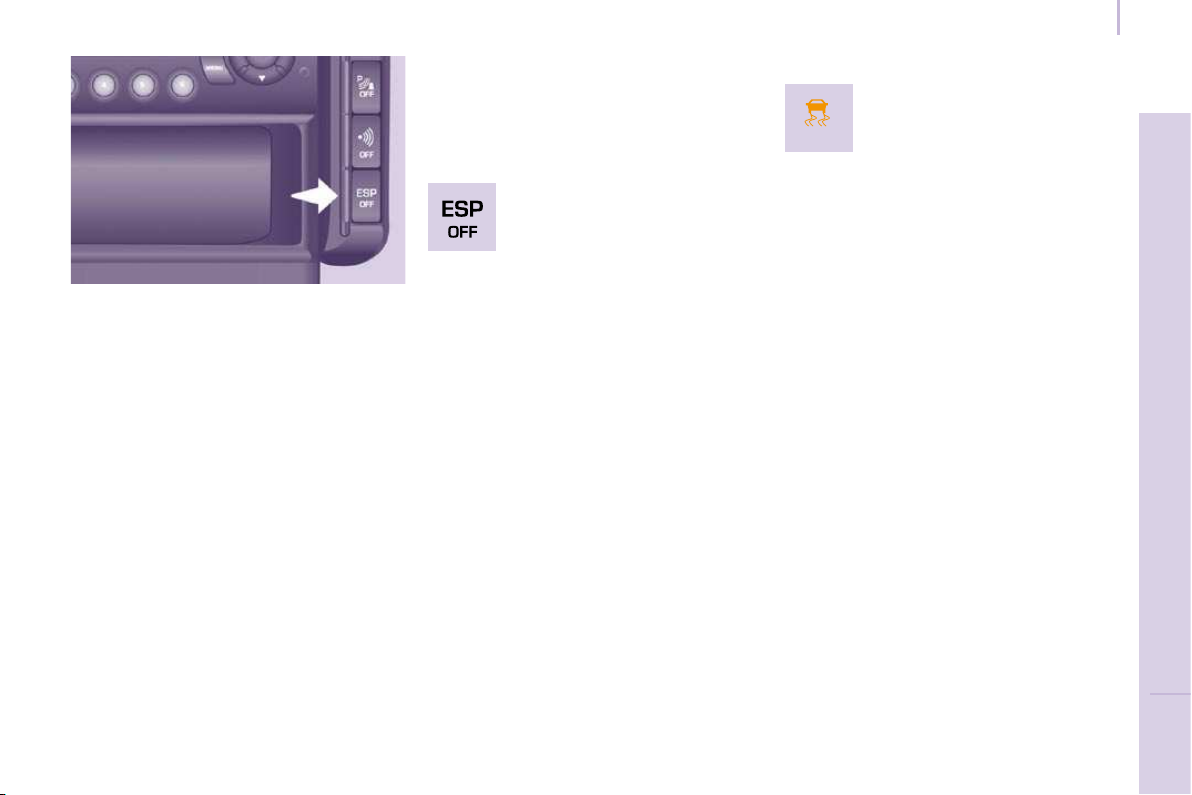
ESP
Driving safely
TRACTION CONTROL (ASR) AND
These systems are linked and complement
the ABS.
The ASR system is very useful for
maintaining optimum drive and avoiding
losses of control of the vehicle on
acceleration.
The system optimises drive to prevent the
wheels skidding, by acting on the brakes of
the drive wheels and on the engine. It also
allows the directional stability of the vehicle
to be improved on acceleration.
Use the ESP to hold your course without
attempting to countersteer.
If there is a variation between the trajectory
followed by the vehicle and that required
by the driver, the ESP system automatically
acts on the engine and the brake of one
or more wheels, in order to put the vehicle
back on course.
Operation of the ASR and ESP
systems
The LED flashes when the ASR or
ESP is triggered.
Disarming the ASR/ESP systems
In certain exceptional conditions (starting
the vehicle when stuck in mud or snow, or
on loose ground...), it could prove useful to
disarm the ASR and ESP systems to make
the wheels spin and regain grip.
- Press the button, located on the centre
console.
- The indicator light comes on: the ASR
and ESP systems no longer act.
They engage again:
- automatically above 30 mph (50 km/h),
- manually by pressing the button again.
Operating check
When a malfunction of the
systems occurs, the indicator light
comes on, accompanied by an
audible signal and a message on
the display.
Contact a CITROËN dealer to have the
system checked.
The warning light may also come on if the
tyres are under-inflated. Check the pressure
of each tyre.
Good practice
The ASR/ESP systems offer increased
safety during normal driving, but should not
incite the driver to take risks or to drive at
high speed.
The operation of these systems is ensured
if the recommendations of the manufacturer
regarding the wheels (tyres and rims),
the braking components, the electronic
components and the fitting and repair
procedures within the CITROËN network are
observed.
After an impact, have these systems
checked by a CITROËN dealer.
Page 83
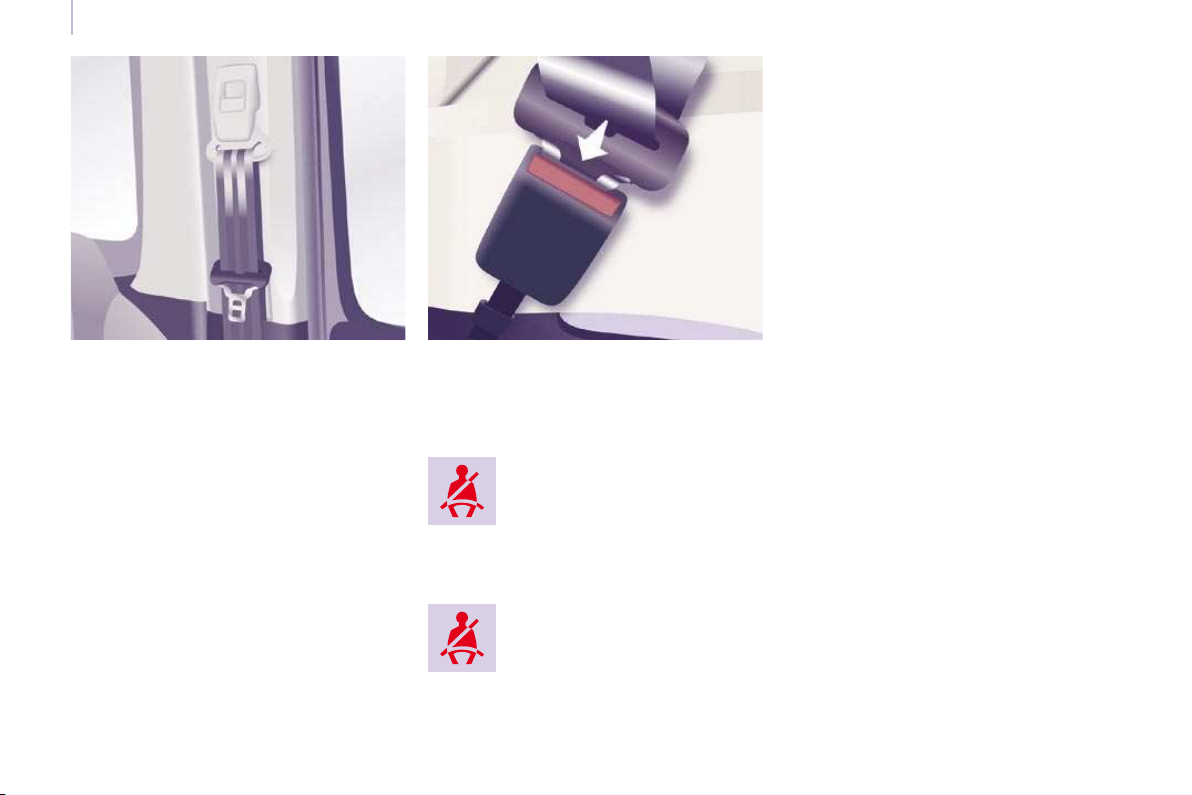
Seat belts
SEAT BELTS
Height adjustment
Squeeze the control with the return and slide
the assembly on the driver's seat side and
on the individual passenger seat side.
If your vehicle is fitted with a front bench,
the height of the seat belt associated with
the centre seat cannot be adjusted.
Fastening
Pull the strap, then insert the tongue into the
buckle.
Check that the seat belt is fastened correctly
by pulling the strap.
Unfastening
Press the red button.
Driver's seat belt not fastened warning
light
When the vehicle is started, this
warning light comes on if the
driver has not fastened his seat
belt.
Passenger seat belt not fastened warning
light
If your vehicle is fitted with a front
passenger seat, when the vehicle
is started, this warning light
comes on if the passenger has not
fastened his seat belt.
Good practice
The driver must ensure that passengers
use the seat belts correctly and that
they are all strapped in securely before
moving off.
Wherever you are seated in the vehicle,
always fasten your seat belt, even for short
journeys.
The seat belts are fitted with an inertia reel
which automatically adjusts the length of the
strap to your size.
Do not use accessories (clothes pegs, clips,
safety pins, etc.) which permit a clearance
with the seat belt straps.
Ensure that the seat belt is rolled up
correctly after use.
After folding or moving a seat or a rear
bench seat, ensure that the seat belt is
rolled up correctly and that the buckle is
ready to accommodate the tongue.
Depending on the nature and seriousness
of any impact, the pretensioning device may
be triggered before and independently of
inflation of the airbags. It instantly tightens
the seat belts against the body of the
occupants.
Triggering of the pretensioners is
accompanied by a slight discharge
of harmless smoke and a noise,
Page 84
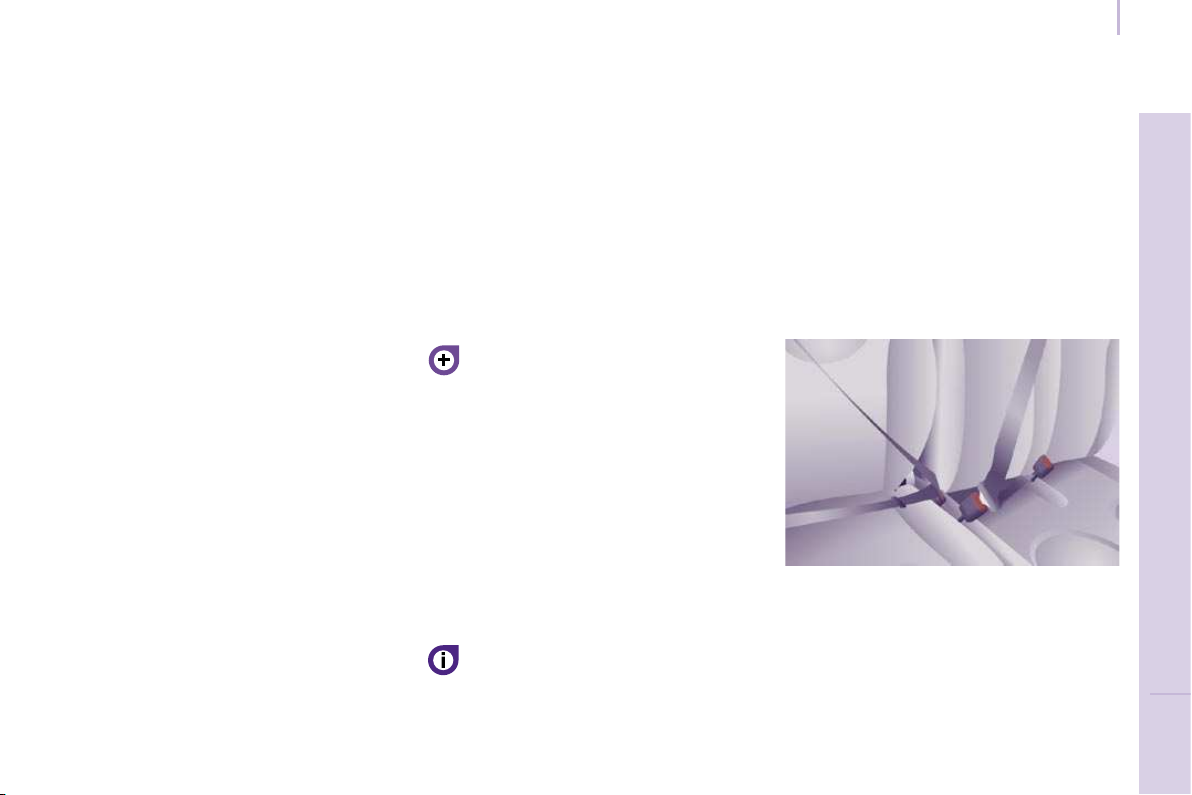
Seat belts
due to the activation of the pyrotechnic
FRONT SEAT BELTS
cartridge incorporated in the system.
The force limiter reduces the pressure of the
seat belt against the body of the occupants.
The pretensioning seat belts are active when
the ignition is switched on.
The inertia reels are fitted with a device
which automatically locks the strap in the
event of a collision or emergency braking or
if the vehicle rolls over.
You can unfasten the seat belt by pressing
the red button on the buckle. Guide the seat
belt after unfastening.
The airbag warning light comes on if the
pretensioners are triggered. Consult a
CITROËN dealer.
In order to be effective, a seat belt must:
- restrain one person only,
- must not be twisted, check by pulling in
front of you with an even movement,
- be tightened as close to the body as
possible.
The upper part of the seat belt should be
positioned in the hollow of the shoulder.
The lap part should be placed as low as
possible on the pelvis.
Do not invert the seat belt buckles as they
will not fulfil their role completely. If the
seats are fitted with armrests,
the lap part of the seat belt should always
pass under the armrest.
Check that the seat belt is fastened correctly
by pulling the strap firmly.
Recommendations for children:
- use a suitable child seat if the
passenger is less than 12 years old or
shorter than one metre fifty,
- never allow a child to travel on your lap,
even with the seat belt fastened.
For further information regarding child
seats, refer to the "Children on board"
section of chapter 4.
In accordance with current safety
regulations, your CITROËN dealer
guarantees all work or any checks, from
testing to maintenance, on your seat belt
equipment.
Have the seat belts checked regularly
(even after a minor impact) by a CITROËN
dealer: they must not show any signs of
wear, cutting or fraying and they must not be
transformed or modified.
Clean the seat belt straps with soapy
water or a textile cleaning product, sold
by CITROËN dealers.
With front airbags
The front seats are fitted with pretensioners
and force limiters.
Without front airbag
If your vehicle is fitted with a front bench
without front airbag, the centre passenger's
seat belt does not have a pretensioner.
With bench seat
If your vehicle is fitted with a front bench
seat, take care to fasten the correct seat belt
using the correct buckle. Do not invert the
driver's seat belt or buckle with the buckle or
seat belt of the centre seat.
Page 85
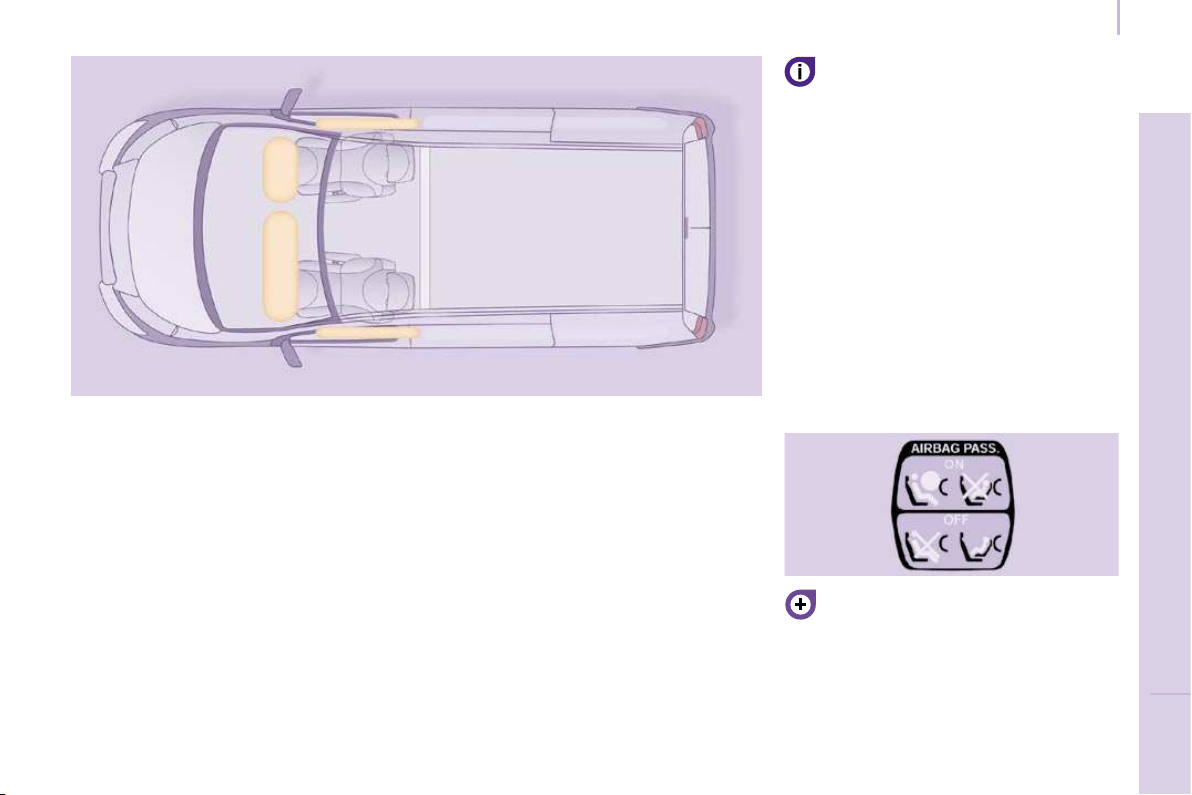
Airbags
AIRBAGS
Airbags only operate when the
ignition is switched on.
This equipment only operates once. If
a second impact occurs (during the same or
a subsequent accident), the airbag will not
operate.
The triggering of an airbag or airbags
is accompanied by a slight discharge of
harmless smoke and a noise, due to the
activation of the pyrotechnic cartridge
incorporated in the system.
This smoke is not harmful, but sensitive
individuals may experience some irritation.
The noise of the detonation may result in a
slight loss of hearing for a short time.
The airbags have been designed to
maximise the safety of the occupants in the
event of a serious collision; they work in
conjunction with the force limiting seat belts.
In the event of a serious collision, the
electronic detectors record and analyse the
front and side impacts suffered in the impact
detection zones:
- in the event of a serious impact, the
airbags inflate instantly and protect the
occupants of the vehicle. Immediately
after the impact, the airbags deflate
rapidly, so that they do not hinder the
visibility of the occupants nor their
possible exit from the vehicle.
- in the event of a minor or rear impact
and in certain roll-over conditions,
the airbags will not be deployed; the
seat belt alone is sufficient to provide
maximum protection in these situations.
The seriousness of the collision depends on
the nature of the obstacle and the speed of
the vehicle at the moment of impact.
It is imperative that the passenger
airbag is disarmed if a child seat is
installed facing rearwards. Refer to the
"Children on board" section of chapter 4.
Page 86

Airbags
Good practice
Sit in a normal upright position.
Wear a correctly adjusted seat belt.
Do not leave anything between the
occupants and the airbags (a child, pet,
object...). This could hamper the operation
of the airbags or injure the occupants.
After an accident or if the vehicle has been
stolen or broken into, have the airbag
systems checked.
All work on the airbag system is strictly
forbidden unless it is carried out by qualified
personnel of the CITROËN network.
Even if all of the precautions mentioned
are observed, a risk of injury or of minor
burns to the head, chest or arms when an
airbag is triggered cannot be ruled out. In
fact, the bag inflates almost instantly (within
a few milliseconds) then deflates within
the same time discharging the hot gas via
openings provided for this purpose.
Side airbags
Only put recommended covers on the seats.
These will not hinder inflation of the side
airbags. Consult a CITROËN dealer.
Do not fix or glue anything to the seat backs.
This could cause injury to the chest or arms
when the side airbag inflates.
Do not sit with the upper part of the body
any nearer to the door than necessary.
Front airbags
Do not drive holding the steering wheel
by its spokes or resting your hands on the
centre part of the wheel.
Do not allow passengers to place their feet
on the fascia, they risk serious injury if the
airbag is triggered.
Smoke as little as possible as deployment
of the airbags can cause burns or the risk of
injury from a cigarette or pipe.
Never remove or pierce the steering wheel
or hit it violently.
Page 87
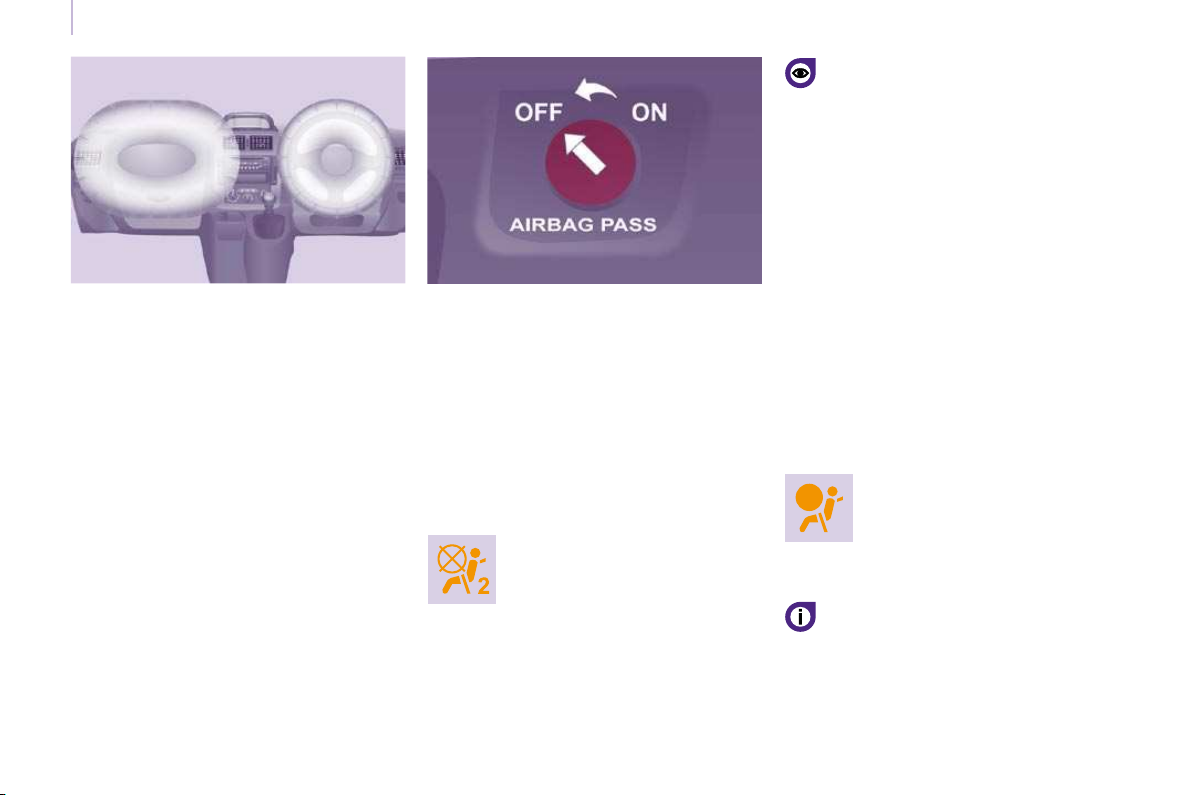
Airbags
Front airbags
The front airbags are incorporated in the
centre of the steering wheel for the driver
and in the fascia for the front passenger.
Activation
They are deployed simultaneously, unless
the passenger's front airbag has been
disarmed, in the event of a serious front
impact applied to all or part of the front
impact zone A in the longitudinal centreline
of the vehicle on a horizontal plane directed
from the front towards the rear of the
vehicle.
The front airbag inflates between the front
occupant of the vehicle and the fascia to
cushion his forward movement.
Disarming
The passenger's front airbag alone can be
disarmed:
- With the ignition switched off , insert
the key into the passenger airbag
disarming switch,
- turn it to the "OFF" position,
- then remove the key keeping the slot in
this position.
The airbag warning light on the
instrument panel is lit throughout
the period of disarming.
To ensure the safety of your child, it
is essential to disarm the passenger
airbag when you install a rear-facing child
seat on the front passenger seat. Otherwise,
the child would risk being killed or seriously
injured if the airbag were to inflate.
Reactivation
In the "OFF" position, the passenger airbag
will not be triggered in the event of an
impact.
As soon as the child seat is removed, turn
the airbag slot to the "ON" position to
re-activate the airbag and thus ensure the
safety of your passenger in the event of an
impact.
Front airbag fault
If this warning light comes on,
accompanied by an audible signal
and a message on the display,
contact a CITROËN dealer to
have the system checked.
If the two airbag warning lights are lit
continuously, do not install a rear-facing
child seat. Consult a CITROËN dealer.
Page 88
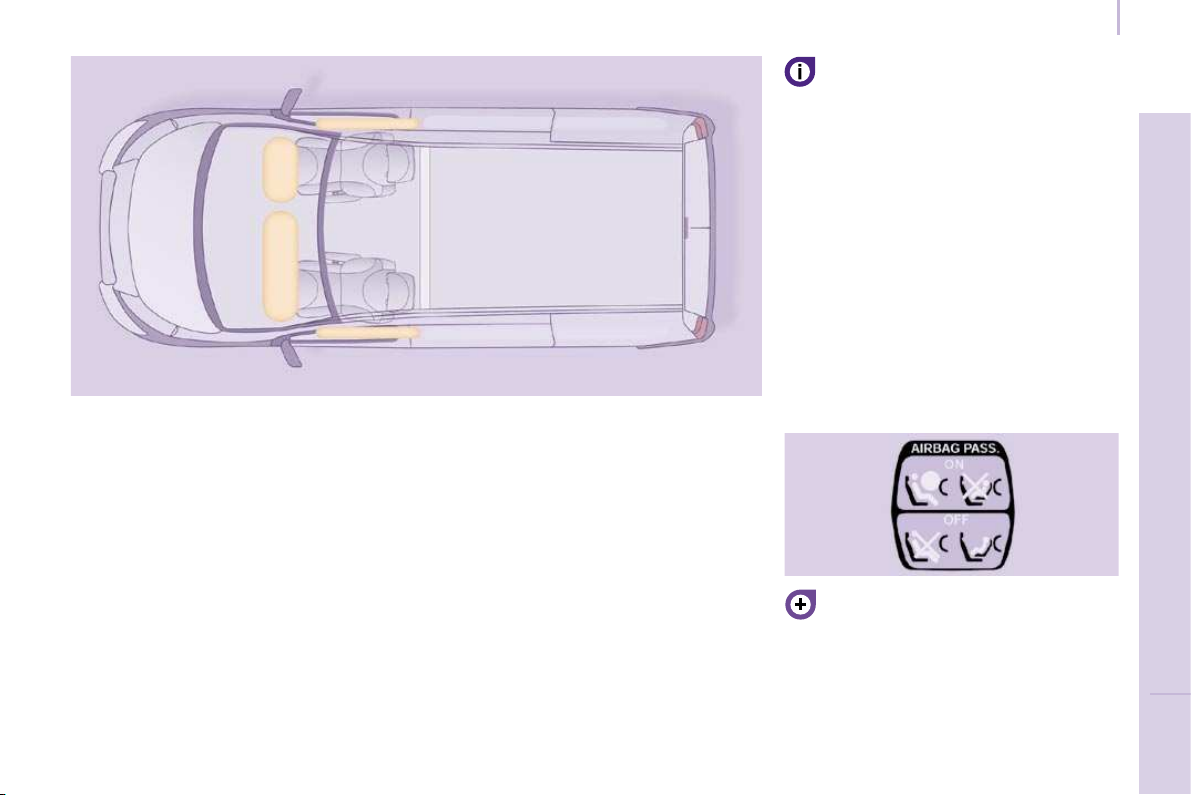
Airbags
AIRBAGS
Airbags only operate when the
ignition is switched on.
This equipment only operates once. If
a second impact occurs (during the same or
a subsequent accident), the airbag will not
operate.
The triggering of an airbag or airbags
is accompanied by a slight discharge of
harmless smoke and a noise, due to the
activation of the pyrotechnic cartridge
incorporated in the system.
This smoke is not harmful, but sensitive
individuals may experience some irritation.
The noise of the detonation may result in a
slight loss of hearing for a short time.
The airbags have been designed to
maximise the safety of the occupants in the
event of a serious collision; they work in
conjunction with the force limiting seat belts.
In the event of a serious collision, the
electronic detectors record and analyse the
front and side impacts suffered in the impact
detection zones:
- in the event of a serious impact, the
airbags inflate instantly and protect the
occupants of the vehicle. Immediately
after the impact, the airbags deflate
rapidly, so that they do not hinder the
visibility of the occupants nor their
possible exit from the vehicle.
- in the event of a minor or rear impact
and in certain roll-over conditions,
the airbags will not be deployed; the
seat belt alone is sufficient to provide
maximum protection in these situations.
The seriousness of the collision depends on
the nature of the obstacle and the speed of
the vehicle at the moment of impact.
It is imperative that the passenger
airbag is disarmed if a child seat is
installed facing rearwards. Refer to the
"Children on board" section of chapter 4.
Page 89

Airbags
Good practice
Sit in a normal upright position.
Wear a correctly adjusted seat belt.
Do not leave anything between the
occupants and the airbags (a child, pet,
object...). This could hamper the operation
of the airbags or injure the occupants.
After an accident or if the vehicle has been
stolen or broken into, have the airbag
systems checked.
All work on the airbag system is strictly
forbidden unless it is carried out by qualified
personnel of the CITROËN network.
Even if all of the precautions mentioned
are observed, a risk of injury or of minor
burns to the head, chest or arms when an
airbag is triggered cannot be ruled out. In
fact, the bag inflates almost instantly (within
a few milliseconds) then deflates within
the same time discharging the hot gas via
openings provided for this purpose.
Side airbags
Only put recommended covers on the seats.
These will not hinder inflation of the side
airbags. Consult a CITROËN dealer.
Do not fix or glue anything to the seat backs.
This could cause injury to the chest or arms
when the side airbag inflates.
Do not sit with the upper part of the body
any nearer to the door than necessary.
Front airbags
Do not drive holding the steering wheel
by its spokes or resting your hands on the
centre part of the wheel.
Do not allow passengers to place their feet
on the fascia, they risk serious injury if the
airbag is triggered.
Smoke as little as possible as deployment
of the airbags can cause burns or the risk of
injury from a cigarette or pipe.
Never remove or pierce the steering wheel
or hit it violently.
Page 90
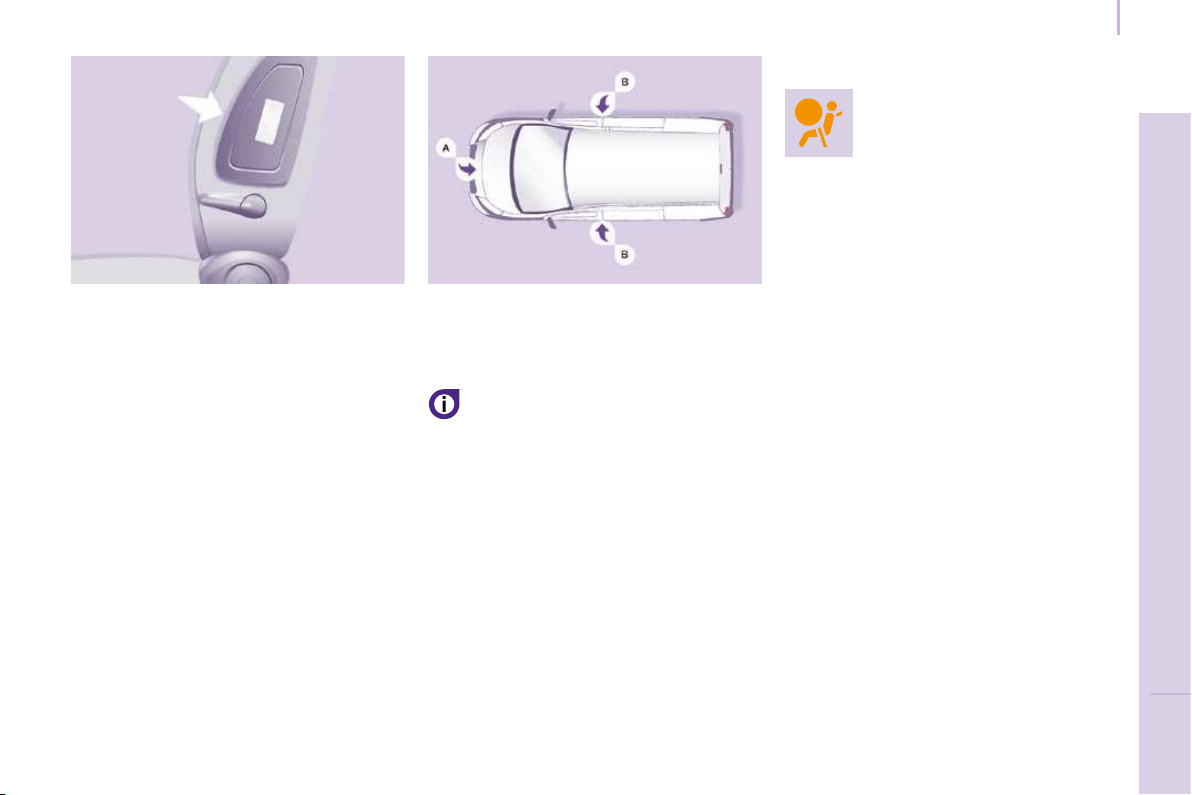
Airbags
Operating fault
If this warning light comes
on on the instrument panel,
accompanied by an audible signal
and a message on the display,
contact a CITROËN dealer to
have the system checked. The airbags may
no longer be triggered in the event of a
serious impact.
Side airbags
If fitted on your vehicle, this is a system
which protects the driver and front
passenger in the event of a serious side
impact in order to limit the risk of injury to
the chest.
Each side airbag is incorporated in the front
seat back frame, on the door side.
Activation
It is triggered unilaterally in the event of a
serious side impact applied to all or part
of the side impact zone B , perpendicular
to the longitudinal centreline of the vehicle
on a horizontal plane and directed from the
outside towards the inside of the vehicle.
The side airbag inflates between the
front occupant of the vehicle and the
corresponding door trim pad.
Impact detection zones
A. Front impact zone.
B. Side impact zone.
In the event of a minor impact or bump
on the side of the vehicle or if the
vehicle rolls over, the airbag may not be
triggered.
The airbag is not triggered in the event of a
rear or front collision.
Page 91
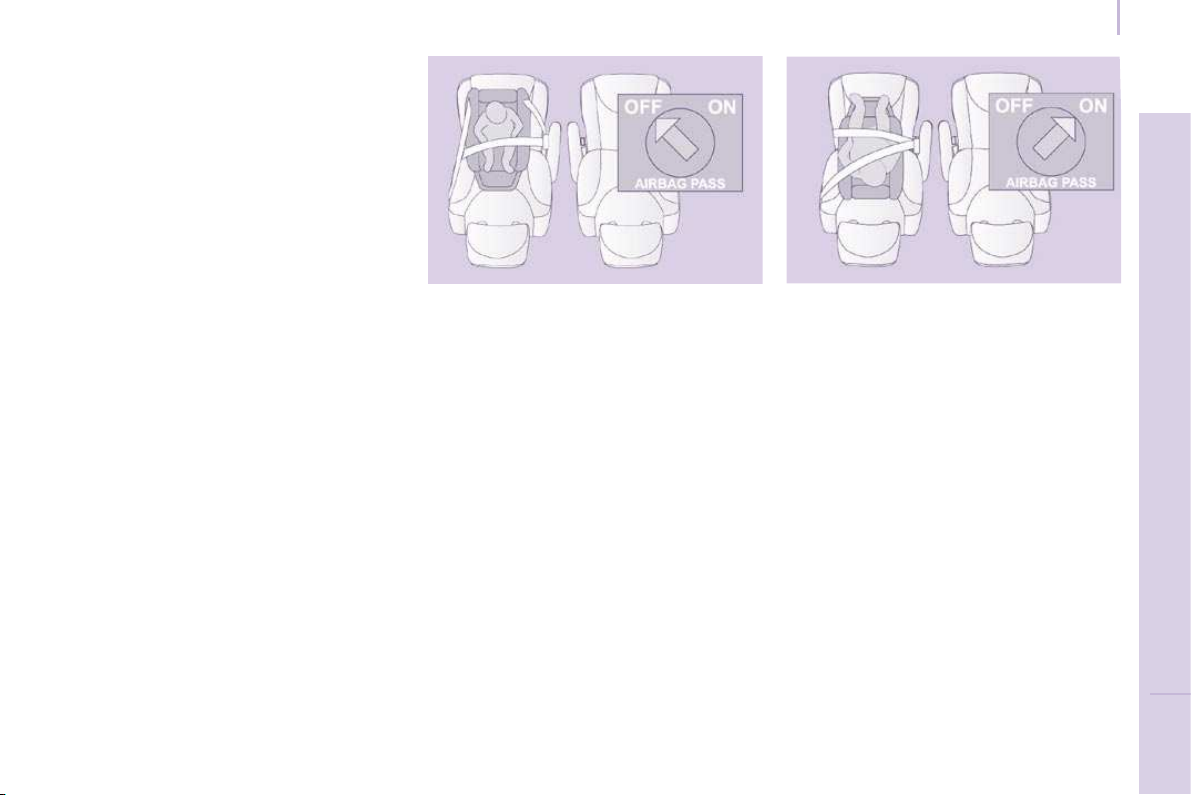
GENERAL POINTS RELATING TO
Although one of CITROËN's main criteria
when designing your vehicle, the safety of
your children also depends on you.
For maximum safety, please follow these
precautions:
- all children under the age of 12 or less
than one metre fifty tall must travel in
approved child seats suited to their
weight, on seats fitted with a seat belt or
ISOFIX mountings.
- statistically, the safest seats in your
vehicle for the transportation of children
are the rear seats,
- a child weighing less than 9 kg must
travel in the "rearwards-facing" position
both in the front and in the rear,
- the passenger must not travel with a
child on his lap.
CHILD SEAT IN THE FRONT
"Rearwards-facing"
Recommended on the rear seats up to the
age of 2.
When a "rearwards-facing" child seat is
installed on the front passenger seat, it
is essential that the passenger airbag is
disarmed. Otherwise, the child would risk
being seriously injured or killed if the airbag
were to inflate.
Child safety
"Forwards-facing"
Recommended on the rear seats over the
age of 2.
When a "forwards-facing" child seat is
installed on the front passenger seat, leave
the passenger airbag armed.
The rules for carrying children are specific to
each country. Consult the current legislation
in your country.
Please consult the list of seats approved
in your country. The Isofix mountings, the
rear seats, the passenger airbag and the
deactivation of this airbag depend on the
version sold.
Page 92
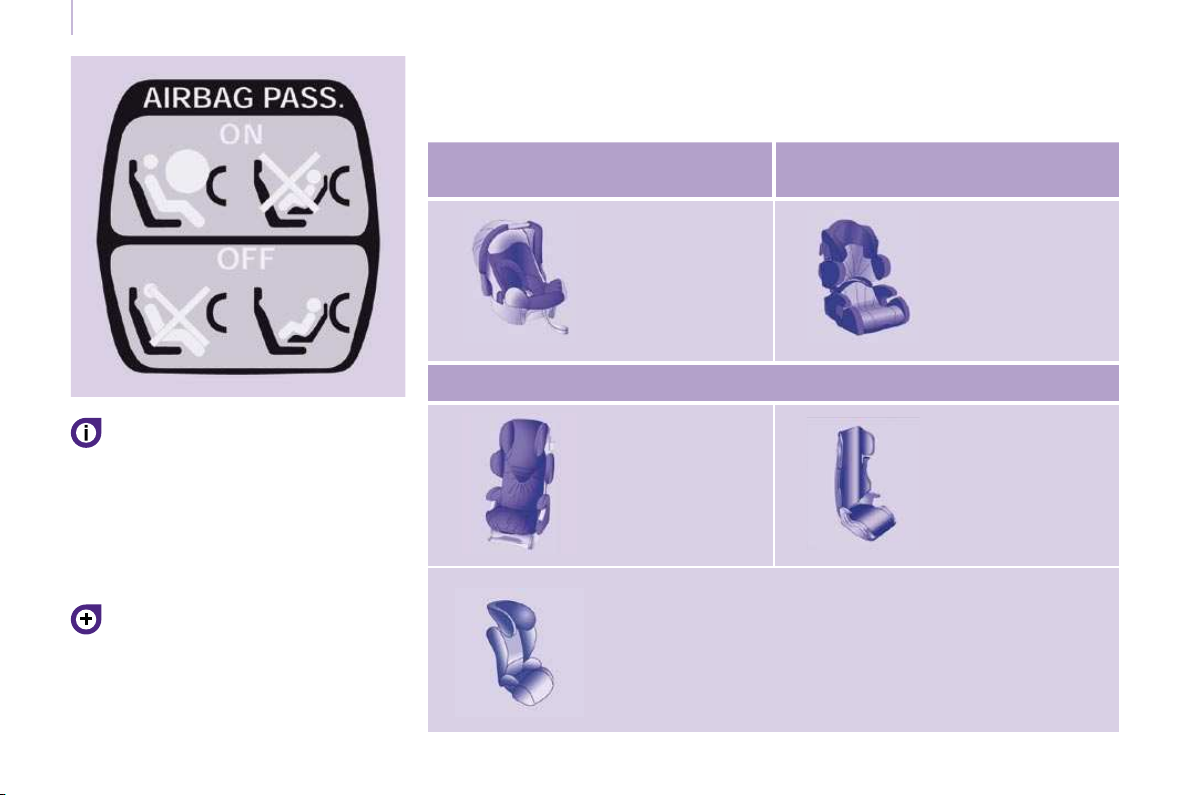
Child safety
CHILD SEATS RECOMMENDED BY CITROËN
CITROËN offers a complete range of recommended child seats which are secured using
a three point seat belt :
The child seats function and the
passenger airbag disarming function are
common to the entire CITROËN range.
If the passenger airbag is not disarmed, the
installation of a "rearwards-facing" child seat
in the front is strictly prohibited.
Refer to chapter 4, "Airbags" section.
Group 0: from birth to 10 kg
Group 0+: from birth to 13 kg
L1
"ROMER Baby-Safe
Plus"
Installed in the
rear-facing position
Groups 2 and 3: from 15 to 36 kg
L3
"RECARO Start''.
Can be fixed on the vehicle's ISOFIX mountings.
Groups 1, 2 and 3: from 9 to 36 kg
"KIDDY Life"
Use of the restraining
cushion is compulsory
for the transportation
of young children
(from 9 to 18 kg).
"KLIPPAN Optima"
From the age
(approximately
22 kg), the booster
is used on its own.
L5
"RÖMER KIDFIX"
The child is restrained by the seat belt.
L2
L4
of 6 years
Page 93
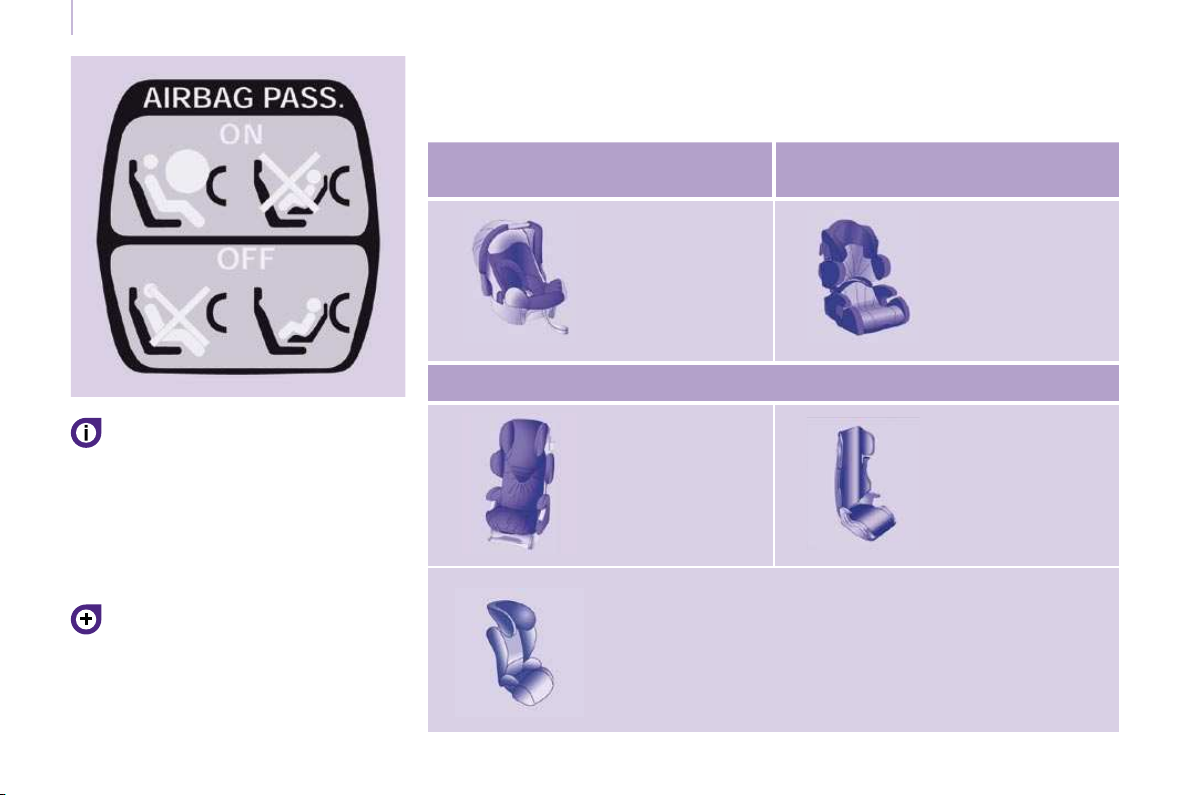
Child safety
CHILD SEATS RECOMMENDED BY CITROËN
CITROËN offers a complete range of recommended child seats which are secured using
a three point seat belt :
The child seats function and the
passenger airbag disarming function are
common to the entire CITROËN range.
If the passenger airbag is not disarmed, the
installation of a "rearwards-facing" child seat
in the front is strictly prohibited.
Refer to chapter 4, "Airbags" section.
Group 0: from birth to 10 kg
Group 0+: from birth to 13 kg
L1
"ROMER Baby-Safe
Plus"
Installed in the
rear-facing position
Groups 2 and 3: from 15 to 36 kg
L3
"RECARO Start''.
Can be fixed on the vehicle's ISOFIX mountings.
Groups 1, 2 and 3: from 9 to 36 kg
"KIDDY Life"
Use of the restraining
cushion is compulsory
for the transportation
of young children
(from 9 to 18 kg).
"KLIPPAN Optima"
From the age
(approximately
22 kg), the booster
is used on its own.
L5
"RÖMER KIDFIX"
The child is restrained by the seat belt.
L2
L4
of 6 years
Page 94
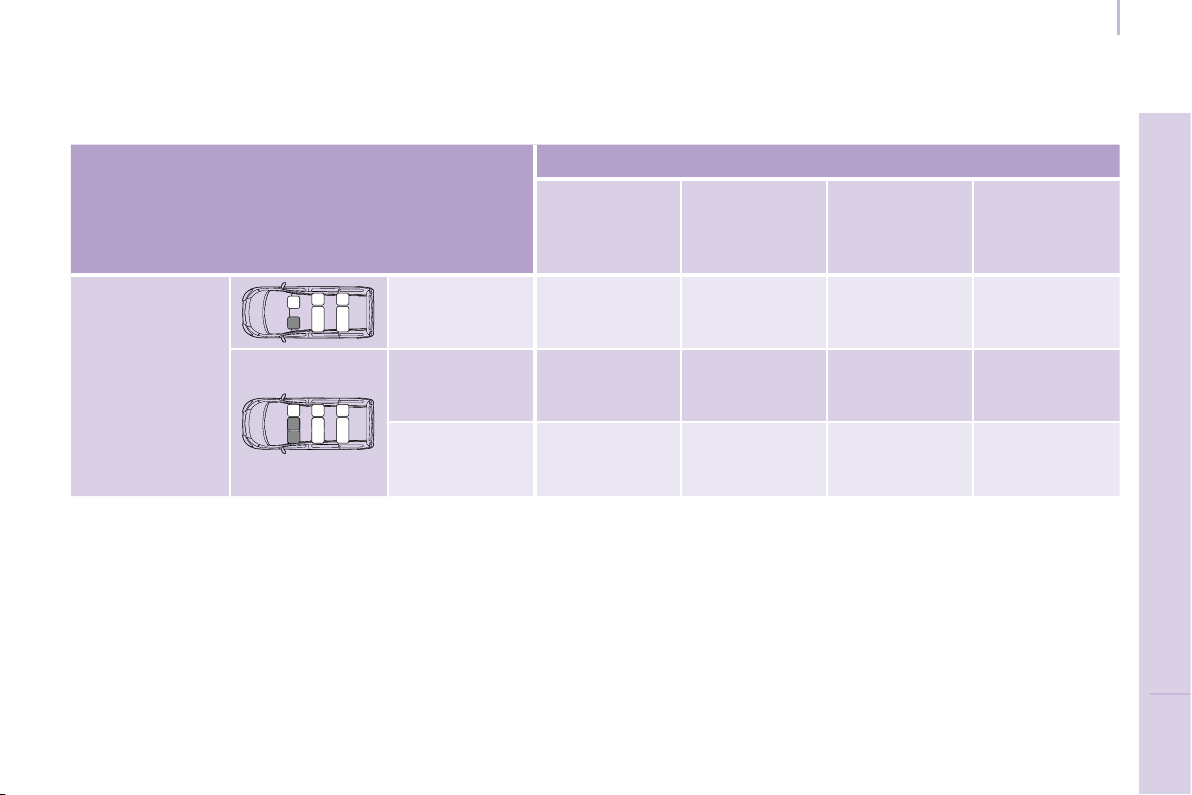
Child safety
a: Group 0: from birth to 10 kg. Infant car seats and "car cots" cannot be installed on the front passenger seat.
b: consult the legislation in force in your country before installing your child on this seat.
U: seat suitable for the installation of a child seat secured using a seat belt and universally approved, "rear facing" and/or "forward facing".
INSTALLING CHILD SEATS ATTACHED USING THE SEAT BELT
This table indicates the options for installing child seats secured using a seat belt and universally approved in accordance with the weight of
the child and the seat in the vehicle.
Weight of the child and indicative age
Seat
Under 13 kg
(groups 0 (a)
and 0+)
Up to approx 1
Individual seat U U U U
From 9 to 18 kg
year
(group 1)
1 to 3 years
approx
From 15 to 25 kg
(group 2)
3 to 6 years
approx
From 22 to 36 kg
(group 3)
6 to 10 years
approx
Row 1 (b)
Bench, side seat U U U U
Bench, centre
seat
L1 L2 L2, L3, L4 L2, L3, L4
Page 95

Child safety
ADVICE ON CHILD SEATS
The incorrect installation of a child seat in a
vehicle compromises the child's protection in
the event of an accident.
Remember to fasten the seat belts or the
child seat harnesses keeping the slack in
relation to the child's body to a minimum ,
even for short journeys.
For optimum installation of the "forward
facing" child seat, ensure that the back of
the child seat is in contact with the back of
the vehicle's seat and that the head restraint
does not cause any discomfort.
If the head restraint has to be removed,
ensure that it is stored or attached securely
to prevent it from being thrown around the
vehicle in the event of sharp braking.
Children under the age of 10 must not travel
in the "forward facing" position on the front
passenger seat, unless the rear seats are
already occupied by other children, cannot
be used or are absent.
Deactivate the passenger airbag when a
"rear facing" child seat is installed on the
front seat.
Otherwise, the child would risk being
seriously injured or killed if the airbag were
to inflate.
As a safety precaution, do not leave:
- one or more children alone and
unsupervised in a vehicle,
- a child or an animal in a vehicle which
is exposed to the sun, with the windows
closed,
- the keys within reach of children inside
the vehicle.
To prevent accidental opening of the doors,
use the "Child Lock".
Take care not to open the rear windows by
more than one third.
To protect young children from the rays of
the sun, fit side blinds to the rear windows.
Installing a booster seat
The chest part of the seat belt must be
positioned on the child's shoulder without
touching the neck.
Ensure that the lap part of the seat belt
passes correctly over the child's thighs.
CITROËN recommends the use of a booster
seat which has a back, fitted with a seat belt
guide at shoulder level.
Page 96
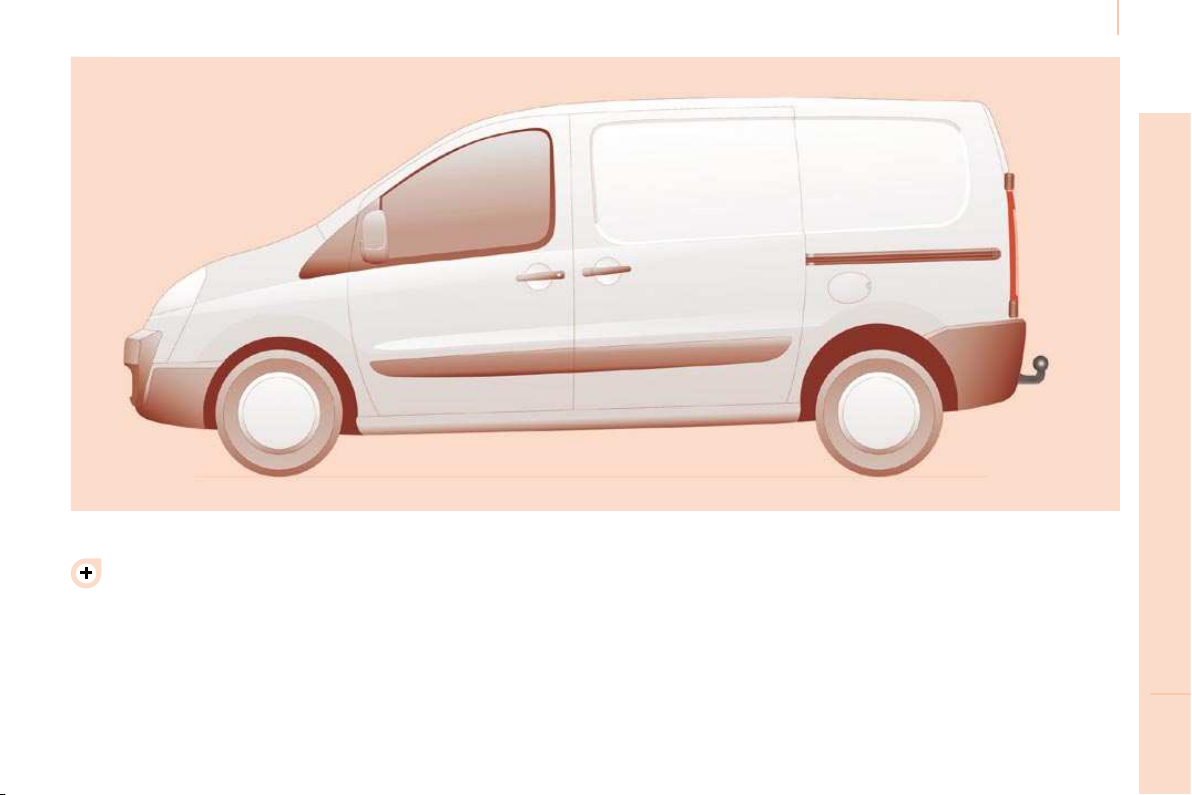
Towing a trailer
ACCESSORIES
TOWING A TRAILER, CARAVAN, BOAT, ETC...
For more information about weights,
refer to the administrative documents
(V5 registration document, ...) or to the
"Weights" section of chapter 8.
Driving advice
A towed vehicle must free wheel: gearbox in
neutral.
Distribution of loads
Distribute the load in the trailer so that the
heaviest objects are as close as possible
to the axle and the nose weight is close to
the maximum authorised without, however,
exceeding it.
Cooling
Towing a trailer on a slope increases the
coolant temperature.
As the fan is electrically controlled, its
cooling capacity is not dependent on the
engine speed.
Page 97

Towing a trailer
On the contrary, use a high gear to lower the
engine speed and reduce your speed.
In all cases, pay attention to the coolant
temperature.
Good Practice
In certain cases of particularly arduous
use (towing the maximum load up a steep
slope in high temperatures), the engine
automatically limits its power. In this
case, the automatic cutting off of the air
conditioning allows the engine power to be
recovered.
If the coolant temperature warning
light comes on, stop the vehicle
and switch off the engine as soon
as possible.
See the "Levels" section of chapter 6.
Tyres
Check the tyre pressures of the towing
vehicle (see the "Identification features"
section of chapter 8) and of the trailer,
observing the recommended pressure.
Brakes
Towing increases the braking distance. Drive
at a moderate speed, change down early
and brake gradually.
Side wind
Sensitivity to side wind is increased. Drive
smoothly and at a moderate speed.
ABS/ESP
The ABS or ESP systems only control the
vehicle, not the trailer or caravan.
Rear parking assistance
The assistance does not function while the
vehicle is towing.
Towbar
We recommend the use of original
CITROËN towbars and their harnesses,
which have been tested and approved from
the design stage of your vehicle, and that
you entrust the fitting of this equipment to a
CITROËN dealer.
If this equipment is not fitted by a CITROËN
dealer, it is imperative that it is fitted using
the electrical pre-equipment installed at the
rear of the vehicle and in accordance with
the manufacturer's instructions.
In accordance with the general instructions
a reminder of which has been given above,
we draw your attention to the risk linked with
fitting a towbar or electrical accessory not
recommended by CITROËN. Fitting such
equipment could result in the failure of your
vehicle's electronic system. Please contact
a CITROËN dealer for information before
fitting this type of equipment.
Page 98
ACCESSORIES
OTHER ACCESSORIES
These accessories and parts, having been
tested and approved for reliability and
safety, are all adapted to your vehicle. A
wide range of recommended products and
original parts is offered.
Roof bars for the various heights, roof bars,
ladder.
Separation partitions and grilles, smooth,
non-slip wooden protective floor.
Protective grilles, multimedia.
Equipment
Audio equipment, hands-free kit, speakers,
CD changer, navigation, ...
Regardless of the audio and telematic
equipment offered on the market, the
technical constraints linked with the fitting
of equipment of these families of products
mean that the special features of the
equipment and its compatibility with the
capacities of the your vehicle's standard
equipment must be taken into account.
Please contact a CITROËN dealer for
information before fitting such equipment.
Range of professional equipment
Parts and Service technical information
publishes an accessories catalogue offering
various equipment and fittings, such as:
Roof bars for short, medium and long
wheelbase (load retainers for all models).
Sill plate, loading roller, sill. Sill plate,
loading roller, sill.
Towbar, towbar harness: trailer towbar which
must be fitted by the CITROËN network.
Another range is also available, structured
around comfort, leisure and maintenance:
Anti-theft alarm, window engraving, first aid
kit, high visibility safety jacket, rear parking
assistance, warning triangle,
Front seat covers compatible with airbags,
bench, rubber mats, carpet mats, snow
chains.
To prevent the mat from becoming caught
under the pedals:
- ensure that the mat and its fixings are
positioned correctly,
- never fit one mat on top of another.
Page 99

Equipment
ROOF BARS
Installation of radiocommunication
transmitters
Before installing accessory
radiocommunication transmitters with an
external aerial on your vehicle, you are
advised to contact a representative of the
CITROËN marque.
The CITROËN Network will inform you of the
specifications (frequency band, maximum
output power, aerial position, specific
installation conditions) of the transmitters
which can be fitted, in accordance with the
Motor Vehicle Electromagnetic Compatibility
Directive (2004/104/CE).
Front mud flaps, rear mud flaps, ....
Screenwash, interior and exterior cleaning
and maintenance products, replacement
bulbs, ...
The fitting of electrical equipment
or accessories which are not
recommended by CITROËN may result
in the failure of your vehicle's electronic
system. Please note this specific warning.
You are advised to contact a representative
of the Marque to be shown the range of
recommended equipment and accessories.
Depending on the country in which the
vehicle is sold or operated, it is compulsory
to have a high visibility safety jacket,
warning triangle and replacement bulbs
available in the vehicle.
To install the transverse roof bars, use the
fixings provided for this purpose.
Maximum load: 170 kilogrammes.
Page 100

Equipment
ROOF BARS
Installation of radiocommunication
transmitters
Before installing accessory
radiocommunication transmitters with an
external aerial on your vehicle, you are
advised to contact a representative of the
CITROËN marque.
The CITROËN Network will inform you of the
specifications (frequency band, maximum
output power, aerial position, specific
installation conditions) of the transmitters
which can be fitted, in accordance with the
Motor Vehicle Electromagnetic Compatibility
Directive (2004/104/CE).
Front mud flaps, rear mud flaps, ....
Screenwash, interior and exterior cleaning
and maintenance products, replacement
bulbs, ...
The fitting of electrical equipment
or accessories which are not
recommended by CITROËN may result
in the failure of your vehicle's electronic
system. Please note this specific warning.
You are advised to contact a representative
of the Marque to be shown the range of
recommended equipment and accessories.
Depending on the country in which the
vehicle is sold or operated, it is compulsory
to have a high visibility safety jacket,
warning triangle and replacement bulbs
available in the vehicle.
To install the transverse roof bars, use the
fixings provided for this purpose.
Maximum load: 170 kilogrammes.
 Loading...