

Citizen JDVD3836 Instruction Manual

CITIZEN
JDVD3836
INSTRUCTION MANUAL
PLEASE READ THESE INSTRUCTIONS CAREFULLY
BEFORE OPERATING YOUR NEW PRODUCT
CALL OUR TOLL FREE HELP LINE AT 1-800-663-5954,
FROM 9AM TO 5 PM (ET) MONDAY TO FRIDAY
IF YOU HAVE ANY QUESTIONS OR PROBLEMS WITH YOUR NEW PRODUCT
CITIZEN ELECTRONICS
TORONTO, CANADA
The lightning flash with arrowhead symbol
within an equilateral triangle, is intended to
alert the user to the presence of uninsulated
dangerous voltage within the product s
enclosure that may be of sufficient magnitude
to constitute a risk of electric shock to persons.
WARNING
RISK OF ELECTRIC SHOCK
DO NOT OPEN
WARNING: TO REDUCE THE RISK OF
ELECTRIC SHOCK, DO NOT REMOVE COVER
(OR BACK) NO USERSERVICEABLE PARTS
INSIDE, REFER SERVICING TO QUALIFIED
SERVICE PERSONNEL
The exclamation point within an equilateral
triangle is intended to alert the user to the
presence of important operating and
maintenance (servicing) instructions in the
literature accompanying the appliance.
* Warning
To prevent fire or shock hazard. Do not use this plug with an extension cord. Receptacle or other
outlet unless the blades can be fully inserted to prevent blade exposure to prevent fire or shock
hazard. Do not expose this appliance to rain or moisture.
* Important Safety Precautions
Read these instructions.
Keep these instructions.
Heed all warnings.
Follow all instructions.
Do not use this apparatus near water.
Clean only with dry cloth.
Do not block any ventilation openings. Install in accordance with the manufacturer's instructions.
Do not install near any heat sources such as radiators, heat registers, stoves or other apparatus
(including amplifiers) that produce heat.
Do not defeat the safety purpose of the polarized or grounding-type plug. A polarized plug has
two blades with one wider than the other. A grounding type plug has two blades and a third
grounding prong. The wide blade or the third prong is provided for your safety. If the provided
plug does not fit into your outlet, consult an electrician for replacement of the obsolete outlet.
Protect the power cord from being walked on or pinch particularly at plugs, convenience
receptacles, and the point where they exit from the apparatus.
Only use attachments/accessories specified by the manufacturer.
Unplug this apparatus during lightening storms or when unused for long periods of time.
Refer all servicing to qualified service personnel. Servicing is required when the apparatus has
been damaged in any way, such as power supply cord or plug is damaged. Liquid has been
exposed to rain or moisture, does not operate normally or has been dropped.
This appliance shall not be exposed to dripping or splashing water and that no object filled with
liquid such as vases shall be placed on the apparatus.
E
N
G
L
I
S
H

Table of Discs Your DVD player Will play
Supporting function of disc
Chapter 1 Basic Operation
1. Turn On the TV and your DVD player
2. Place a disc
.
5. Freeze Frame and Frame Advance (compatible with DVD, CD, CD+G,
DTS-CD, HD-CD, WMA, MP3/JPEG discs)
6. Using the Repeat Feature (compatible with DVD, CD, CD+G, DTS-CD,
HD-CD, WMA, MP3/JPEG discs)
7. Using the Display Feature (compatible with DVD, CD, CD+G,
DTS-CD, WMA, MP3/JPEG discs)
8.Using the Search Feature (compatible with DVD, CD, DTS-CD, HD-CD
discs)
9.Using the Browse / Scan / Index feature (compatible with discs; the scan
feature is also compatible with CD, CD+G, DTS-CD, HD-CD discs)
10. Changing the Soundtrack (compatible with CD, CD+G, HD-CD, WMA,
MP3/JPEG discs)
11. Changing the Audio Language (compatible with DVD discs)
12. Subtitles (compatible with DVD discs)
13. Changing the Camera Angle (compatible with DVD discs)
14. Mute the Audio Output (compatible with DVD, CD, CD+G,
DTS-CD, HD-CD, WMA, MP3/JPEG discs)
15. Zoom In the Video Image (compatible with DVD, JPEG discs)
16. Repeat a Specific Segment on the Disc that You Define (compatible with
DVD, CD, CD+G, DTS-CD, HD-CD, WMA, MP3 discs)
17. Volume control (compatible with DVD, CD, CD+G, DTS-CD, HD-CD,
WMA, MP3/JPEG discs)
Chapter 3 Playing WMA, MP3 and JPEG discs
5
5
9
14
21
2
2
5
7
8
8
10
3
7
8
9
10
11
10
10
9
8
7
7
7
5
3. Play
Chapter 2 Additional Operation
1. Selecting Tracks (compatible with DVD, CD, CD+G, DTS-CD, HD-CD,
WMA, MP3/JPEG discs)
2. Skipping Tracks (compatible with DVD, CD, CD+G, DTS-CD, HD-CD,
WMA, MP3/JPEG discs)
3. Multispeed Fast Motion Playback (compatible with DVD, CD, DTS-CD,
WMA, Mp3)
Chapter 4 The Setup Menu System
11
12
Table of Contents
1
Remote Controller
4. Multispeed Slow motion playback (compatible with DVD, CD, CD+G,
DTS-CD, HD-CD, WMA, Mp3)
Disc maintenance
Specifications
21
6
Program Menu
E
N
G
L
I
S
H
Systems Connection
4
2
Types of Discs Your DVD Player Will Play
Types of
Discs
Diameter
Playback Time
Data Format Remark
DVD
12cm
8cm
1 layer: 120min
2 layers: 240min
1 layer: 80min
2 layers: 180min
DVD Format Disc:
Compressed Digital
Audio Compressed Digital
Video Moving picture
CD
12cm
74min
8cm
20min
CD-DA:
Digital Audio
HD-CD
12cm
74min
HD-CD:
Digital Audio
DTS-CD
12cm
74min
DTS-CD:
Digital Audio
MP3/JPEG
12cm
600min
Compressed Digital Video
Compressed Digital Audio
12cm
WMA
Note: DVD-R, CD+R, CD-RW discs can be played in this DVD player.
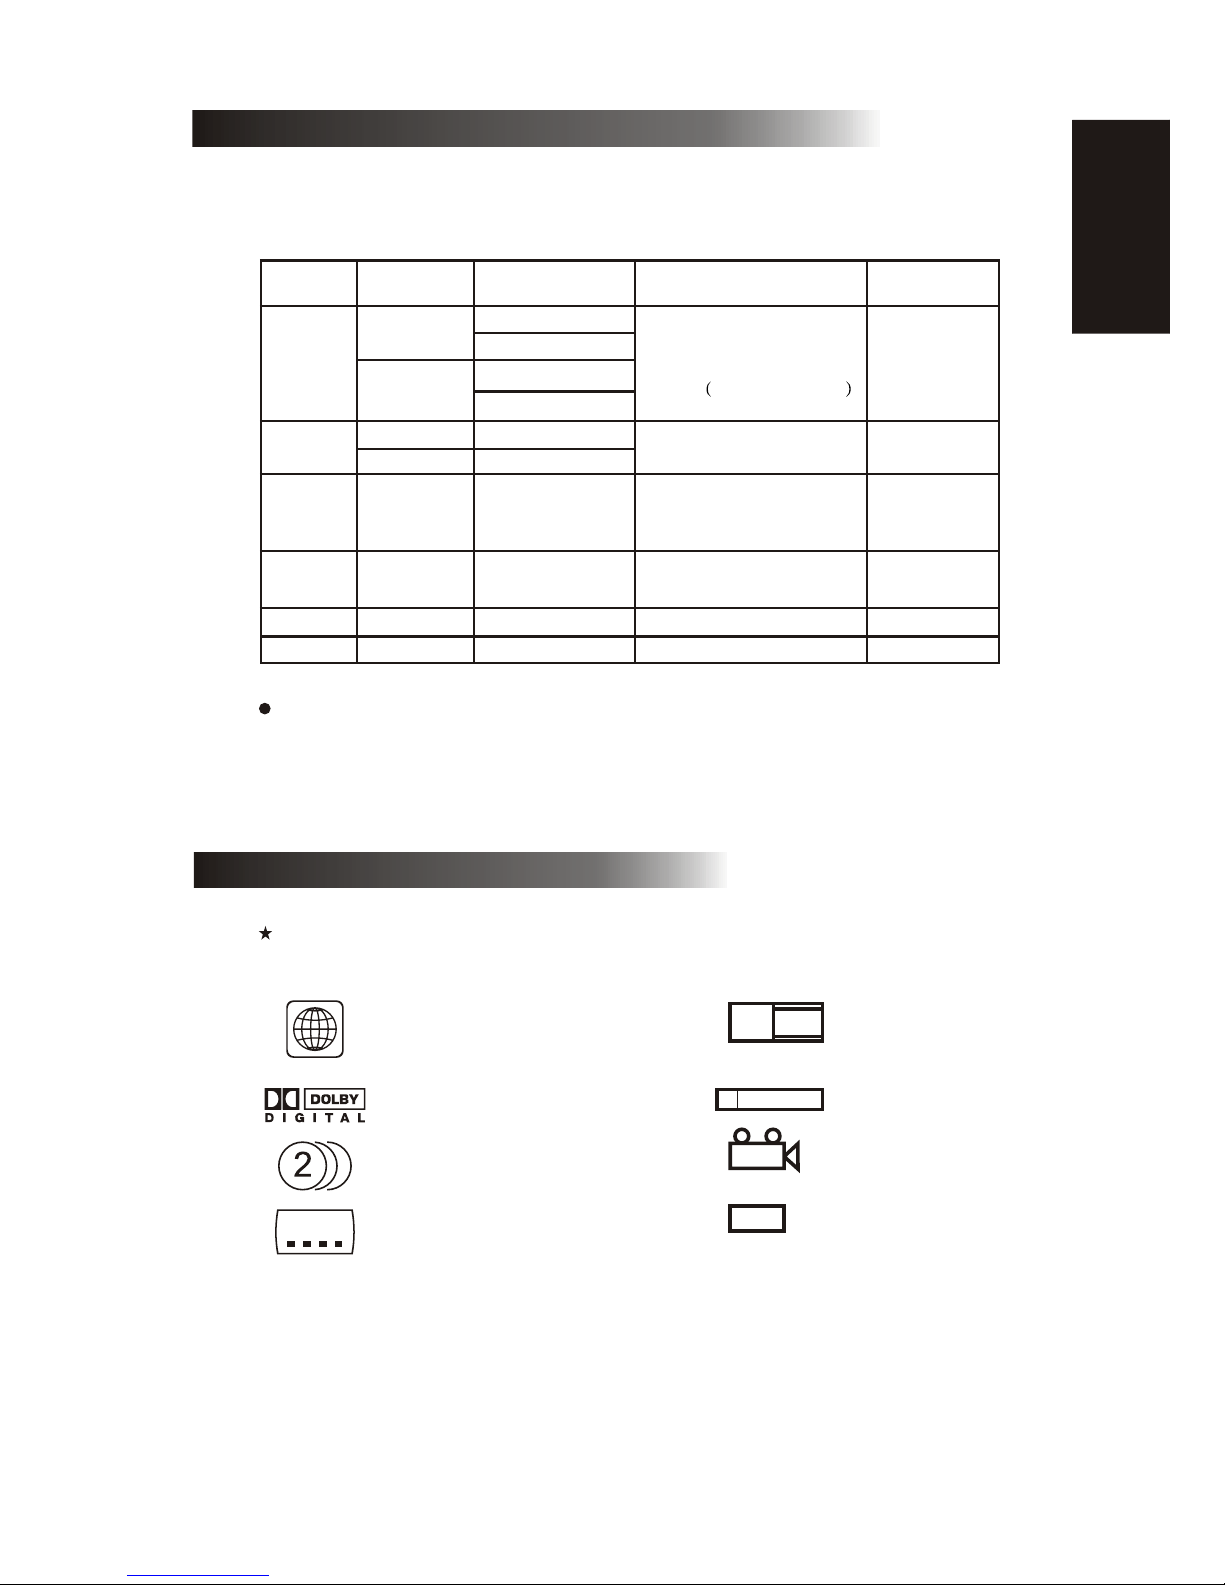
Supporting function of disc
DVD disc can support many functions, different makers, and different function support.
Prevalent marks of a few functions as follows:
NTSC zone code & TV system
DOLBY digital surround sound
Numbers of sound language
Numbers of subtitle language
Picture scale mode
Parental lock
View angle
Close caption
(Only NTSC)
2
16:9
LB
R RESTRICTED
4
CC
NTSC
1
E
N
G
L
I
S
H

Remote Controller:
1. SUBTITLE
2. OPEN/CLOSE
3.
4. PBC
5.STEP
6.
7.
8. SETUP
9.
10.TITLE
11. PAUSE
12.MUTE
13.
14.
15. STOP
16.PLAY
17. MENU
18. ZOOM
19. A-B
20.
21.
22. OSD
23. GOTO
24. L/R
25. RETURN
26. S-VIDEO /
INTERLACE-Y U V/
P-SCAN Y Pb Pr
27.
28.
29. STAND-BY
NUMERIC KEYS
PROGRAM
SLOW
CURSOR CONTROL
/ENTER
FR, FF
PREV, NEXT
VOL+,VOLREPEAT
LANGUAGE
ANGLE
3
E
N
G
L
I
S
H
4
7
12
13
3
8
14
15
16
27
20
17
20
18
20
20
20
21
20
26
20
22
20
23
20
24
5
20
25
20
19
9
10
2
6
1
28
29
11
CITIZEN
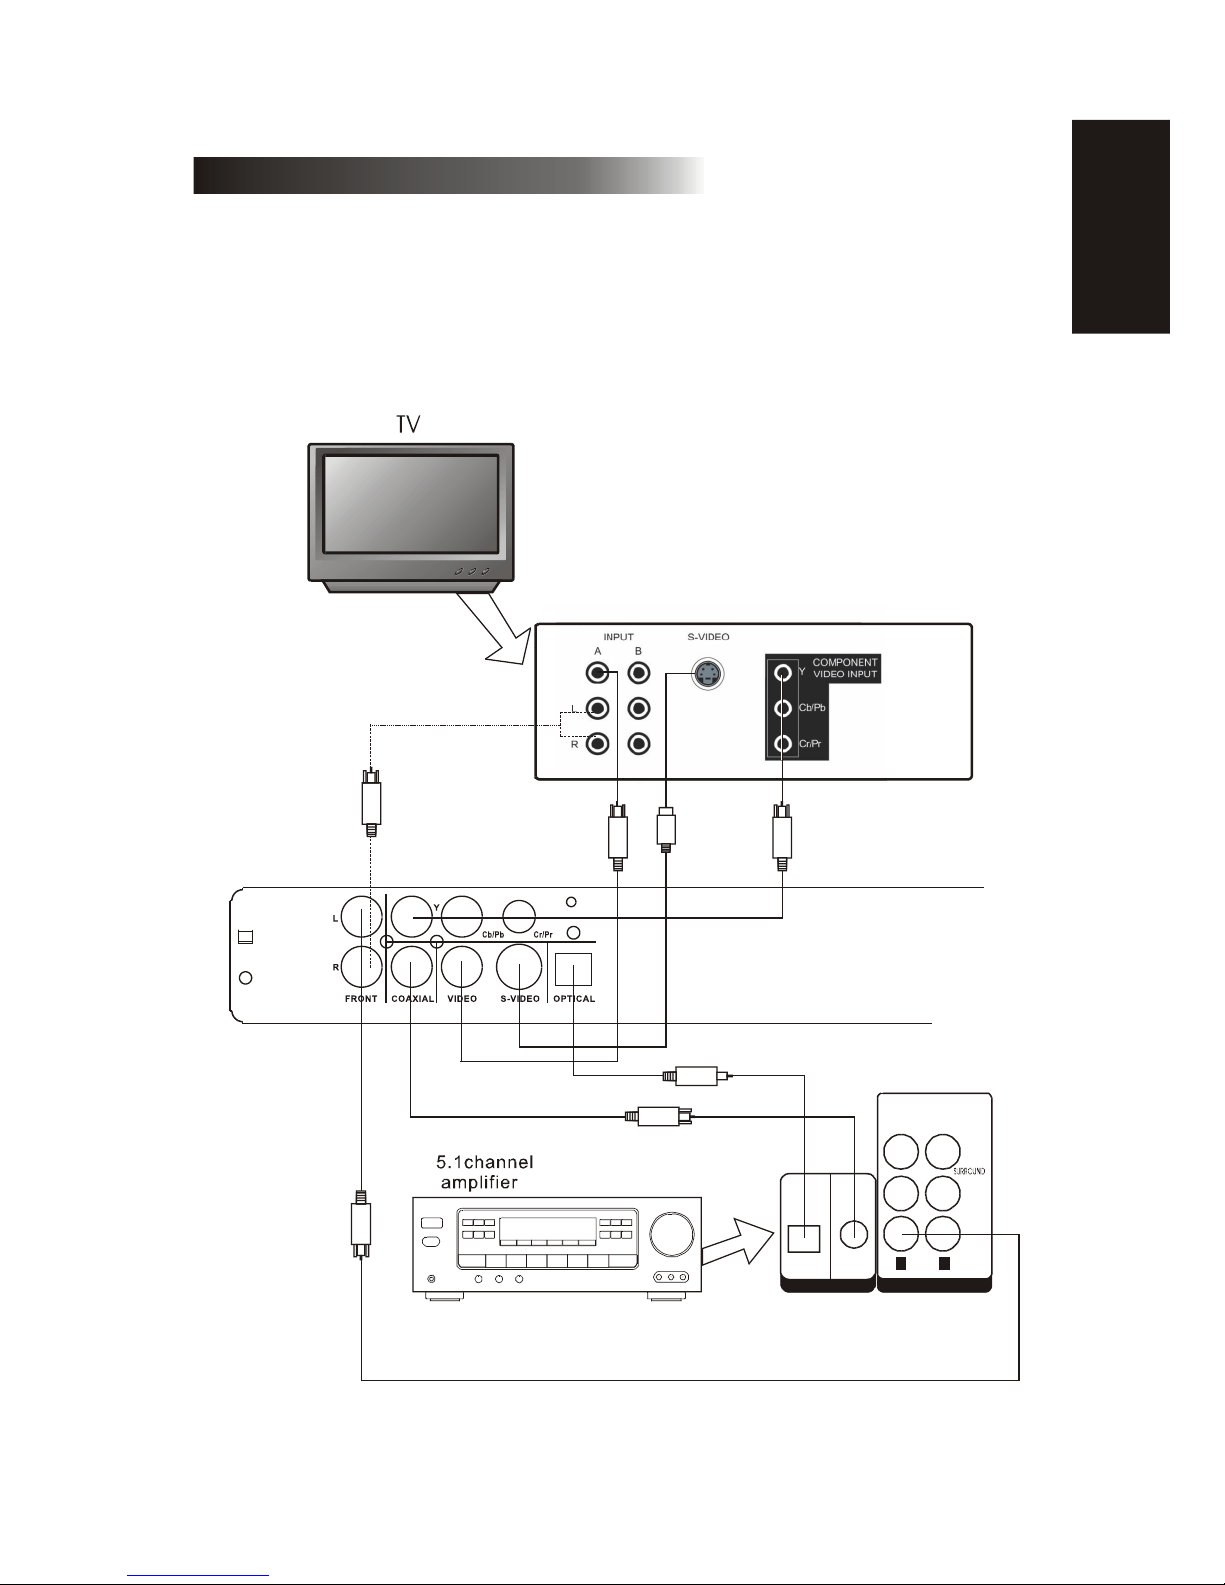
systems connection
1) Before connecting, make sure to turn off power of all apparatus.
2) After finishing connection, turn on the power again.
AV cable (accessory) should be connected by color .
Yellow plug-------- video terminal (yellow)
White plug--------- left audio terminal (white)
Red plug----------- right audio terminal (red)
Must connect properly, especially the plug should be inserted to the bottom.
4
DIGITAL AUDIO INPUT
OPTICAL
COAXIAL
SUB
WOOFER
CENTER
FRONT
R L
5.1 CHANNEL INPUT
E
N
G
L
I
S
H

5
Chapter 1 Basic Operation
1.Turn On the TV and Your DVD Player
Press the STANDBY button on the player or the remote controller, and Read appears
on the TV screen. If there hasn't a disc in the DVD player, No disc will be displayed on
both the screen.
2.Place A Disc
Press the Open / Close button on the remote controller or the front of the DVD player, and
Open appears on the screen. Then Place a disc gently into the tray with the disc's label
facing up (double-sided discs have content on both sides, so you can place either side up),
and press the Open / Close button again to close the disc tray, Close appears and the player
starts to read. Then the disc starts playing automatically. (Note: Of some certain type discs,
after reading out the type, the Play or Enter button should be pressed to start playing.)
3. Play
The contents of each disc menu vary according to how the disc was authored and what
features are included. The disc menu will be turned on for you to select, when Menu button
pressed. Also play and pause can be switched with the Pause button on the remote. Moreover,
such as menu play, title play, sequence play etc., These different play modes are offered.
a) Menu Play (compatible with DVD discs)
I. Press Menu Button
TV screen displays the DVD Root Menu when a DVD disc is loaded.
II. When a DVD disc is loaded, you can press Arrow buttons to highlight the menu item you
want to choose.
III. Press Enter or Play button, you can begin play with the highlighted.
IV. Return when playing: When a DVD disc is playing, press Menu button, and you
can return to Root Menu.
V. Stop
1) When you press Stop button for the first time, the player turns into quasi stop state. At
the same time the OSD appears Quasi Stop . To begin the title over, press Stop twice.
2) In quasi stop state, the player remembers where you stopped, when you start playing the
disc again, the DVD player picked up where you left off.
3) In stop state, when you press Play, the player enters sequence playback mode.
For the disc protection, before you press Open / Close button to eject the disc tray when
playing, please press Stop button at first. After taking out the disc, press Open / Close
again to close the tray.
If you're not going to use the DVD player for a long time, be sure to remove the electr onic plug.
b) Title Play (compatible with DVD discs only)
I. During DVD playback, press Title button to display the DVD title content.
II. Press the Arrow buttons to highlight the title you want to choose, and press Enter; Also
you can press numeric buttons to choose.
III. The DVD player begins with the chapter 1 of the chosen title.
E
N
G
L
I
S
H
 Loading...