

Page 1

Cisco Security Device Manager (SDM) Quick
Start Guide
This document accompanies the Quick Start Guide for your Cisco router. It describes Security Device
Manager (SDM) and shows you how to use it to configure your Cisco IOS.
Cisco Security Device Manager (SDM) is an easy-to-use device management tool that allows you to
configure Cisco IOS security features through an intuitive web-based graphical user interface.
Note This document contains the latest information on how to use SDM to give your router an initial
configuration.If the Quick Start Guide that came with your router contains SDM startup instructions, do
not use those instructions. Use this document instead.
If you don’t want to use SDM to configure the router, see I Want to Use the Cisco IOS Startup Sequence.
Translated Versions of this Document
Translated versions of this document are available in the following languages: German, Dutch, French,
Spanish, Italian.
• Die Deutsche Version dieses Dokuments finden Sie unter http://www.cisco.com/go/sdm.
• Voor de Nederlandse versie van dit document ga naar de volgende website:
http://www.cisco.com/go/sdm.
• Une version Francaise de ce document est disponible a partir du lien suivant:
http://www.cisco.com/go/sdm
• Este documento está disponible en español a través de http://www.cisco.com/go/sdm
• Una versione italiana di questo documento è disponibile a http://www.cisco.com/go/sdm
Corporate Headquarters:
Cisco Systems, Inc., 170 West Tasman Drive, San Jose, CA 95134-1706 USA
Copyright © 2003 Cisco Systems, Inc. All rights reserved.
Page 2
Use SDM to Configure the Router
Use SDM to Configure the Router
This section explains how touse theSDM Startupwizard todeploy your router with a working LAN and
WAN configuration. Once the router is deployed you can use SDM to further configure LAN and WAN
interfaces, dynamic routing, Network Address Translation (NAT), firewalls, Virtual Private Networks
(VPNs), and other features on your router. SDM runs under Internet Explorer version 5.5 or later, on a
PC that is running Microsoft Windows XP, Windows 2000, Windows ME, Windows NT 4.0 (with
Service Pack 4), or Windows 98. SDM runs under Netscape 4.79 on a PC that is running Microsoft
Windows XP, Windows 2000, Windows ME, or Windows NT 4.0 (with Service Pack 4).
Task 1: Install Interface Cards, and Cable the Router
Before SDM can be used to configure the router, you must install all the necessary hardware accessories
that are applicable to your router, such as WAN interface cards (WICs), Network Modules (NMs), or
AIM cards that you will use to connect to the network. Refer to the Quick Start Guide for your router
for instructions on installing these interface cards, cabling the router, and verifying that all the
connections are working properly.
Task 2: Set Up the PC
You have to set up the PC to communicate with SDM. SDM is shipped with a default configuration file
that assigns an IP address to a LAN interface on the router, and you must configure the PC to be on the
same subnet as the router’s LAN interface.
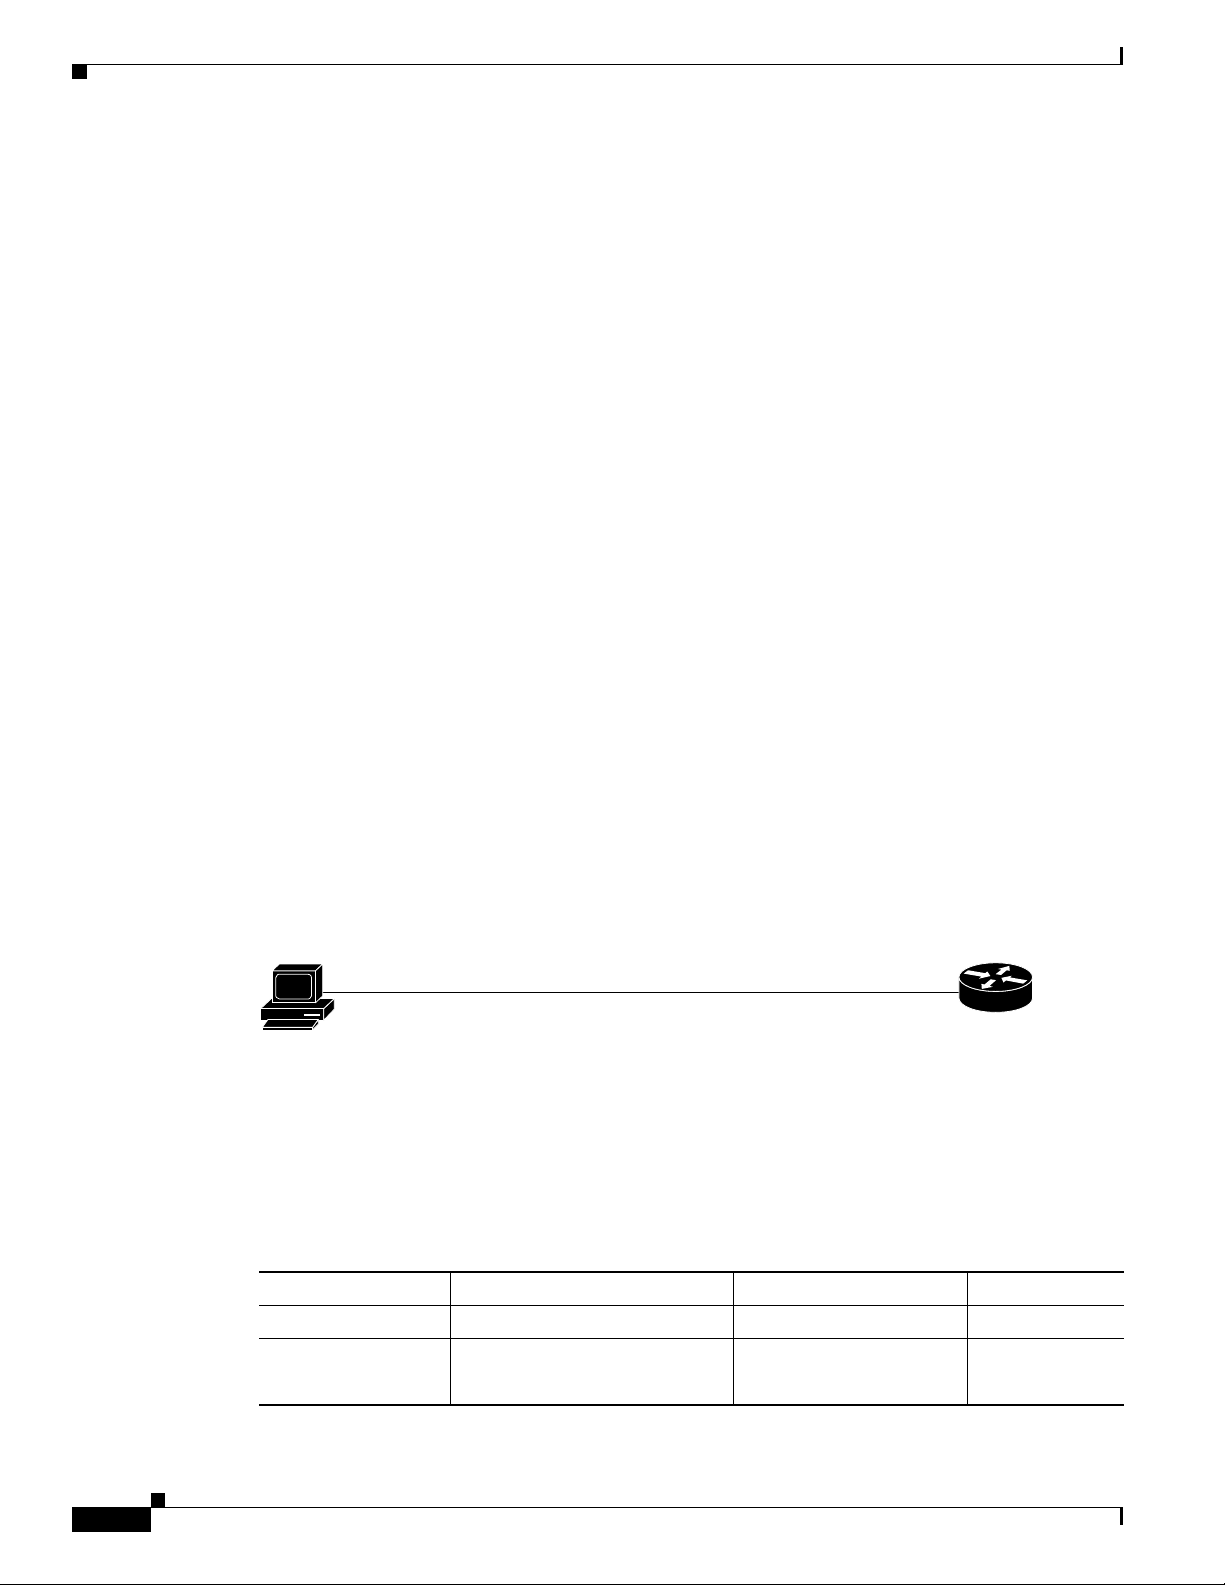
Because the router is not preconfigured as a DHCP server, you must assign a static IP address to the PC.
Assign an IP address in the range of 10.10.10.2 to 10.10.10. 6 to the Ethernet port of the PC, as shown
in Figure 1. Use the subnetmask 255.255.255.248. The lowest numberedEthernet interface of the router
is preconfigured with the IP address 10.10.10.1.
Figure 1 Configure the PC with a Static IP Address in the 10.10.10.0 Subnet
10.10.10.2/255.255.255.248
Use an Ethernet cable to connect the PC’sEthernet adapter to the lowest-numbered Ethernet port on the
router. See Table 1 to determine which port to connect the PC to, and what type of cable to use. The
Ethernet LED for your router listed in Table 1 turns on when the connection is made. Although Figure 1
does not show an Ethernet switch between the PC and the router, an Ethernet switch can be used with
straight through cables.
Table 1 Router Port Numbers
Configure
static IP address
10.10.10.0 subnet
Factory configuration
10.10.10.1/255.255.255.248
111011
Cisco Router Model Cable Type Port Number LED
831, 836, and 837 Straight through (standard) Ethernet ports 1, 2, 3, or 4 E1, E2, E3,or E4
1701 Crossover, or straight through
with Ethernet switch
Cisco Security Device Manager (SDM) Quick Start Guide
2
Ethernet 10/100
(Yellow port on router)
ETH ACT
78-16254-01
Page 3

Table 1 Router Port Numbers
Cisco Router Model Cable Type Port Number LED
1711, 1712 Crossover, or straight through
WIC 4ESW port 1x Port 1X
with Ethernet switch
1710, 1721, 1751,
1760
2600 Crossover, orstraight through
3600 Crossover, or straight through
3700 Crossover, or straight through
Crossover, or straight through
with Ethernet switch
with Ethernet switch
with Ethernet switch
with Ethernet switch
Ethernet 10/100
(Yellow port on router)
Ethernet 0/0 or
FastEthernet 0/0
FastEthernet 0/0 or
FastEthernet 0
FastEthernet 0/0 or
FastEthernet 0
Task 3: Start SDM, and Complete the Startup Wizard
To start SDM and begin the router configuration, follow these steps:
Use SDM to Configure the Router
ETH ACT or
10/100 ACT
View LED at
port.
View LED at
port.
View LED at
port.
Step 1 Open a web browser on the PC, and enter the following URL:
https://10.10.10.1
Note The https://... specifies that the Secure Socket Layer (SSL) protocol be used for a secure connection.
You can use http://... if SSL is not available.
Step 2 Enter the username cisco, and password cisco in the login window. If other login windows appear during
the startup process, enter the same credentials (cisco/cisco).
Step 3 The router’s home page appears (Figure 2). Click Security Device Manager in the left frame.
78-16254-01
Cisco Security Device Manager (SDM) Quick Start Guide
3
Page 4

Use SDM to Configure the Router
Figure 2 Router Home Page
If the router home page does not appear when you enter the URL https://10.10.10.1
(or http://10.10.10.1), test the connection between the PC and the router by doing the following:
• Check that the PowerLED on the router is on, and that the LED for the port towhich you connected
the PCis on, indicating an active Ethernet connection between the router andthe PC. See Table 1 to
determine which LED this is. If this LED is not lit, verify that you are using a crossover cable to
connect the PC to the router, or that you are using a straight-through cable between the router and
the switch.
• If the Launch page still does not appear, verify that the web browser’s “work offline” option is
disabled. In Internet Explorer, click the File menu, and verify that the “work offline” option is
unchecked. In Netscape, the default selection in the File menu is set to “work online.”
• If the Launch page still does not appear, verify that the file sdm.tar is loaded into Flash memory.
Open a Telnet session to 10.10.10.1, entering the username cisco and the password cisco. Enter the
show flash command to verify that sdm.tar is loaded in Flash memory.
• If the web page still does not appear, verify that the PC is configured with a static IP address.
Step 4 A window appears that informs you that Verisign certifies that this is a Cisco application. Click Yes,or
click Grant to accept the certificate and proceed. If additional certificate windowsappear , click Grant
to accept the certificates.
Step 5 The SDM Launch page appears after a short time (Figure 3). Leave this window open and wait for the
next window.
Cisco Security Device Manager (SDM) Quick Start Guide
4
78-16254-01
Page 5

Figure 3 SDM Launch Page
Use SDM to Configure the Router
Step 6 A window appears that provides information about the browser and its settings. That window also
informs you that SDM will open in another window. You can close this window and wait for the SDM
Startup Wizard page to appear.
Step 7 When the SDM Startup wizard appears, click Next to begin configuring the router. Use the wizard to
give the router a name, and to configure a LAN interface, a WAN interface, and secure the router. You
configurethe LAN IP address, and you can create a DHCP server to provide IP addresses to the hosts on
the private (inside) network. To configure the WAN, you need to enter the IP address and other
parameters provided by your Internet service provider (ISP).
Tip The Startup wizard will ask you to enter an enable secret password to control access to the Cisco IOS.
Be sure to write down or remember the enable secret password that you enter. It is not shown in the
enable password field or in the summary window, and it cannot be reset without erasing the router
configuration.
Step 8 When the Summary window appears, write down the LAN IP address, the username and the user
password that you entered, and click Finish. You will need this information to reconnect to the router
and use SDM to perform additional configuration.
Step 9 Exit SDM and complete Task 4 to reconfigure the PC and toreconnect to SDM, using thenew IP address
you gave to the LAN interface.
Task 4: Assign a New IP Address to the PC, and Restart SDM
Follow these steps to assign a new IP address to the PC and to continue using SDM:
Cisco Security Device Manager (SDM) Quick Start Guide
78-16254-01
5
Page 6

Use SDM to Configure the Router
Step 1 Assign a new IP address to the PC’s Ethernet interface; place it on the same subnet as the router’s
Ethernet port, which you assigned in Step 7 of Task 3. See Figure 4 for an example configuration. If you
configured a DHCP server on the router, configure the PC to obtain an IP address automatically.
Figure 4 Configure the PC with an IP Address on the New Subnet
Crossover cable
Example static
or dynamic IP address:
172.16.30.2/255.255.255.248
172.16.30.0 subnet
Example configured IP address:
172.16.30.1/255.255.255.248
Or
Straight through cables
111012
Figure 4 shows that you can connect the PC directly to the router using a crossover cable, or connect it
to a switch using a straight through cable.
Step 2 Open a web browser on the PC, and enter the SDM URL, using the new IP address that you gave the
LAN interface (https://new-IP-address). In the example shown in Figure 4, you would enter the
following:
https://172.16.30.1
The https://... specifies that the Secure Socket Layer (SSL) protocol be used for a secure connection.
You can use http://... if SSL is not available.
Step 3 Enter the username and password that you specified in Step 7 in the “Task 3: Start SDM, and Complete
the Startup Wizard” section on page 3.
The SDM Overview window appears, as shown in Figure 5.
To continue configuring your router, see the “Using SDM” section on page 7.
Cisco Security Device Manager (SDM) Quick Start Guide
6
78-16254-01
Page 7

Figure 5 SDM Overview Window
Using SDM
Using SDM
Cisco SDM provides a series of easy-to-use wizards that quickly take you step-by-step through
configuringyour router,without requiring knowledge of the Cisco IOS software CLI. You can use SDM
wizards to:
• Configure WAN connections
• Create firewalls
• Configure VPN connections
• Perform Security Audits
To start a wizard, simply click the appropriate button in the left frame of the Overview window, shown
in Figure 5.
SDM also provides the Advanced Mode, through which you can configure advanced features, such as
Firewall Policy, NAT, VPNs, routing protocols, and other options. To use Advanced Mode, click the
Advanced Mode button on the SDM toolbar, and then click the button on the left side of the screen for
the feature you want to configure.
• To configure NAT, click NAT on the left side of the screen while in Advanced Mode. From there
you can
–
Click Designate Interfaces to designate inside and outside interfaces.
78-16254-01
Cisco Security Device Manager (SDM) Quick Start Guide
7
Page 8

You’re Done! Where to Go from Here
–
Click Address Pool to define a pool of dynamic NAT IP addresses.
–
Click Add... to create NAT rules.
• To customize the router’s firewall policy or create an ACL, click Firewall Policy.
• To allow the router to be securely managed, click Management Access in the System tree.
SDM automatically saves changes to the router’s running configuration,and you can direct it to save the
running configuration to the startup configuration.
You’re Done! Where to Go from Here
Now that you have used SDM to give your router an initial configuration, you can continue to use SDM
to configure additional features or modify existing feature configurations.You can use the SDM URL to
start SDM and then add to, or modify, your router’s configuration at any time.
For More Information About SDM and About Your Router
For additional information about SDM features, refer to the SDM online help. Additional information
about SDM is also available on the SDM website at http://www.cisco.com/go/sdm. This website
provides access to detailed information about SDM, including an SDM FAQ, data sheet, customer
presentation, Flash demo, and links to technical documentation and product updates.
Refer to the Quick StartGuide for your router for other procedures,such as connecting a PCto the router
console port so that you can use the CLI when you need to, and using the router LEDs to verify
installation. The Quick Start Guide may also contain important warranty information.
I Want to Use the Cisco IOS Startup Sequence
If you have already configured the router using SDM, you don’t need to read this section.
Because SDM uses a default configuration file, your router will not execute the standard Cisco IOS
startup sequence. You can use this section to run Cisco IOS setup utility and take advantage of a TFTP
or BOOTP configuration download, or use other features available through the standard Cisco IOS
startup sequence. It also tells you what to do if you want to use SDM in the future.
SDM has created a default configuration for your router. The configuration does the following:
• Provides an IP address for your Fast Ethernet interface, enabling an interface to your LAN
• Enables your router’s HTTP/HTTPS server, allowing HTTP access from your LAN
• Creates a default username (cisco) and password (cisco) with privilege level 15
• Enables Telnet/SSM access to the router from your LAN
If you want to erase the existing configuration and take advantage of the Cisco IOS startup sequence,
perform the following steps. SDM will remain on the router.
Step 1 Connect the lightblue console cable, includedwith your router, from theblue console porton your router
to a serial port on your PC. Refer to your router’s Hardware Installation Guide for instructions.
Step 2 Connect the power supply to your router, plug the power supply into a power outlet, and turn on your
router. Refer to your router’s Quick Start Guide for instructions.
Cisco Security Device Manager (SDM) Quick Start Guide
8
78-16254-01
Page 9

I Want to Use the Cisco IOS Startup Sequence
Step 3 Use a terminal emulation program on your PC,with theterminal emulation settings of 9600 baud, 8 data
bits, no parity, 1 stop bit, and no flow control, to connect to your router.
Step 4 At the prompt, enter the enable command. The default configuration file does not configure an enable
password.
yourname> enable
yourname#
Step 5 Enter the erase startup-config command.
yourname# erase startup-config
Step 6 Confirm the command by pressing Enter.
Step 7 Enter the reload command.
yourname# reload
Step 8 Confirm the command by pressing Enter.
After you press enter, the router will begin executing the standard startup sequence. If you want to be
able to use SDM to perform subsequent configurations for the router, you must use the CLI to add
statements to the configurationfile. See the “I Want to Install or Enable SDM on the Router” section for
this information.
I Want to Install or Enable SDM on the Router
In order to use SDM in the future, you must configure the router to support web-based applications,
configureit with a user account definedwith privilege level 15, and configure it to support the Telnetand
SSH protocols.
• The router’s HTTP/HTTPS server must be enabled, using the following Cisco IOS commands:
ip http server
ip http secure-server
ip http authentication local
If the router uses an IPSec IOS image, the HTTPS server is enabled. Otherwise only the HTTP
server is enabled.
• SDM requires a user account that is defined with privilege level 15 (enable privileges):
username <
Note For security purposes, the user account that you define should be different from the default
• SSH/Telnet must be configured for local login and privilege level 15:
line vty 0 4
privilege level 15
login local
transport input telnet
transport input telnet ssh
username
> privilege 15 password 0 <
one used in the example above.
password
>
78-16254-01
• Local logging should (optionally) be enabled to support the log monitoring function:
Cisco Security Device Manager (SDM) Quick Start Guide
9
Page 10

Cisco.com
Cisco.com
logging buffered 51200 warning
Go to http://www.cisco.com/go/sdm to obtain SDM documents such as release notes and installation
instructions that can be used to obtain the latest version of SDM. If you are configuring a Cisco 830
router, you should obtain the following document:
• Switching Between Cisco Security Device Manager (SDM) and Cisco Router Web Setup Tool
(CRWS) on Cisco 83x Series Routers
If you accidentally delete SDM files on the router, or the router was shipped without SDM, you can
download SDM free of charge from http://www.cisco.com/go/sdm under Software Center. Be sure to
download the SDM installation instructions from the Software Center too.
You can access the most current Cisco documentation on the World Wide Web at this URL:
http://www.cisco.com/univercd/home/home.htm
You can access the Cisco website at this URL:
http://www.cisco.com
CCIP, CCSP, the Cisco Arrow logo, the Cisco Powered Network mark, Cisco Unity, Follow Me Browsing, FormShare, and StackWise are trademarks of
Cisco Systems, Inc.; Changing the Way We Work, Live, Play, and Learn, and iQuick Study are service marks of Cisco Systems, Inc.; and Aironet, ASIST,
BPX, Catalyst, CCDA, CCDP, CCIE, CCNA, CCNP, Cisco, the Cisco Certified Internetwork Expert logo, Cisco IOS, the Cisco IOS logo, Cisco Press,
Cisco Systems, Cisco Systems Capital, the Cisco Systems logo, Empowering the Internet Generation, Enterprise/Solver, EtherChannel, EtherSwitch,
Fast Step, GigaStack, Internet Quotient, IOS, IP/TV, iQ Expertise, the iQ logo, iQ Net Readiness Scorecard, LightStream, MGX, MICA, the Networkers
logo, Networking Academy, Network Registrar, Packet, PIX, Post-Routing, Pre-Routing, RateMUX, Registrar, ScriptShare, SlideCast, SMARTnet,
StrataView Plus, Stratm, SwitchProbe, TeleRouter, The Fastest Way to Increase Your Internet Quotient, TransPath, and VCO are registered trademarks of
Cisco Systems, Inc. and/or its affiliates in the United States and certain other countries.
All other trademarks mentioned in this document or Website are the property of their respective owners. The use of the word partner does not imply a
partnership relationship between Cisco and any other company. (0401R)
Copyright © 2003 Cisco Systems, Inc. All rights reserved.
10
Cisco Security Device Manager (SDM) Quick Start Guide
78-16254-01
 Loading...