

C
ISCO
A
IRONET
Quic k Start Guide
350 S
ERIES
PC C
ARD
LIENT
C
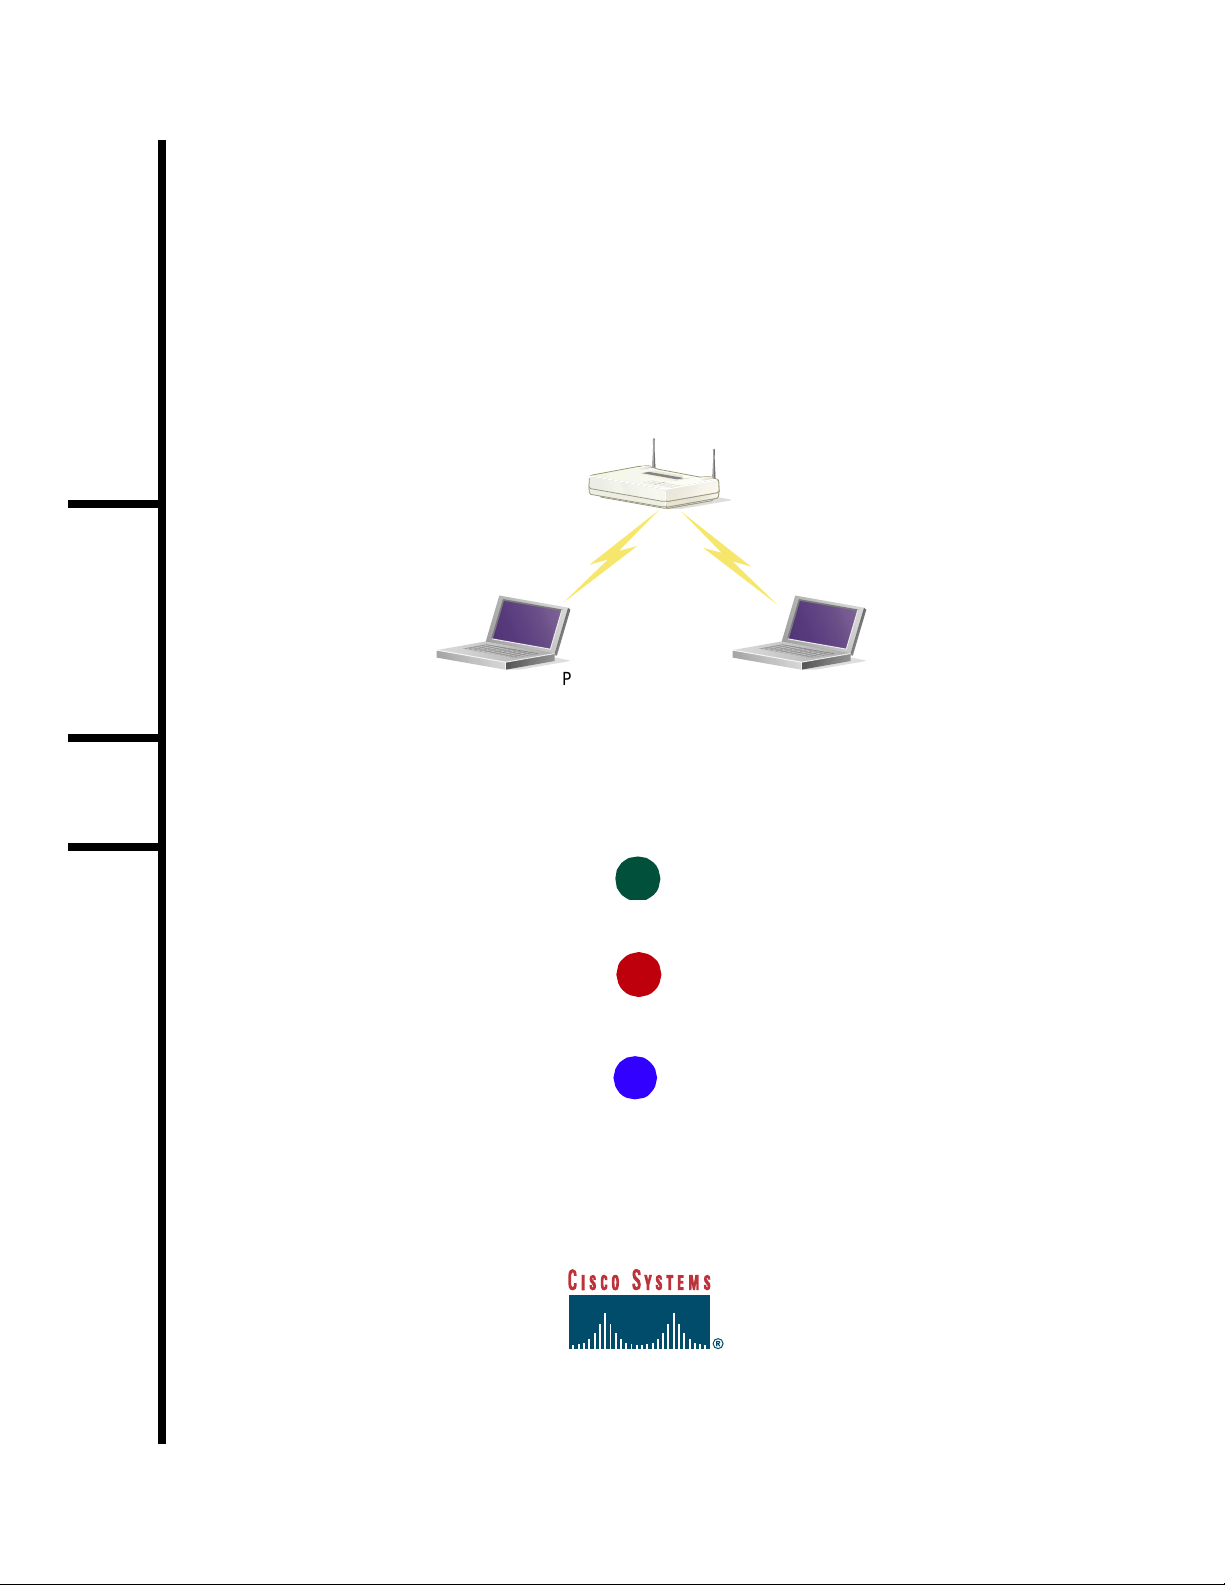
Access Point
A
DAPTERS
Laptops with
PC card client adapters
1
TAKE OUT WHAT YOU NEED
2
INSTALL THE PC CARD CLIENT ADAPTER
3
INSTALL THE APPROPRIATE DRIVER AND UTILITIES

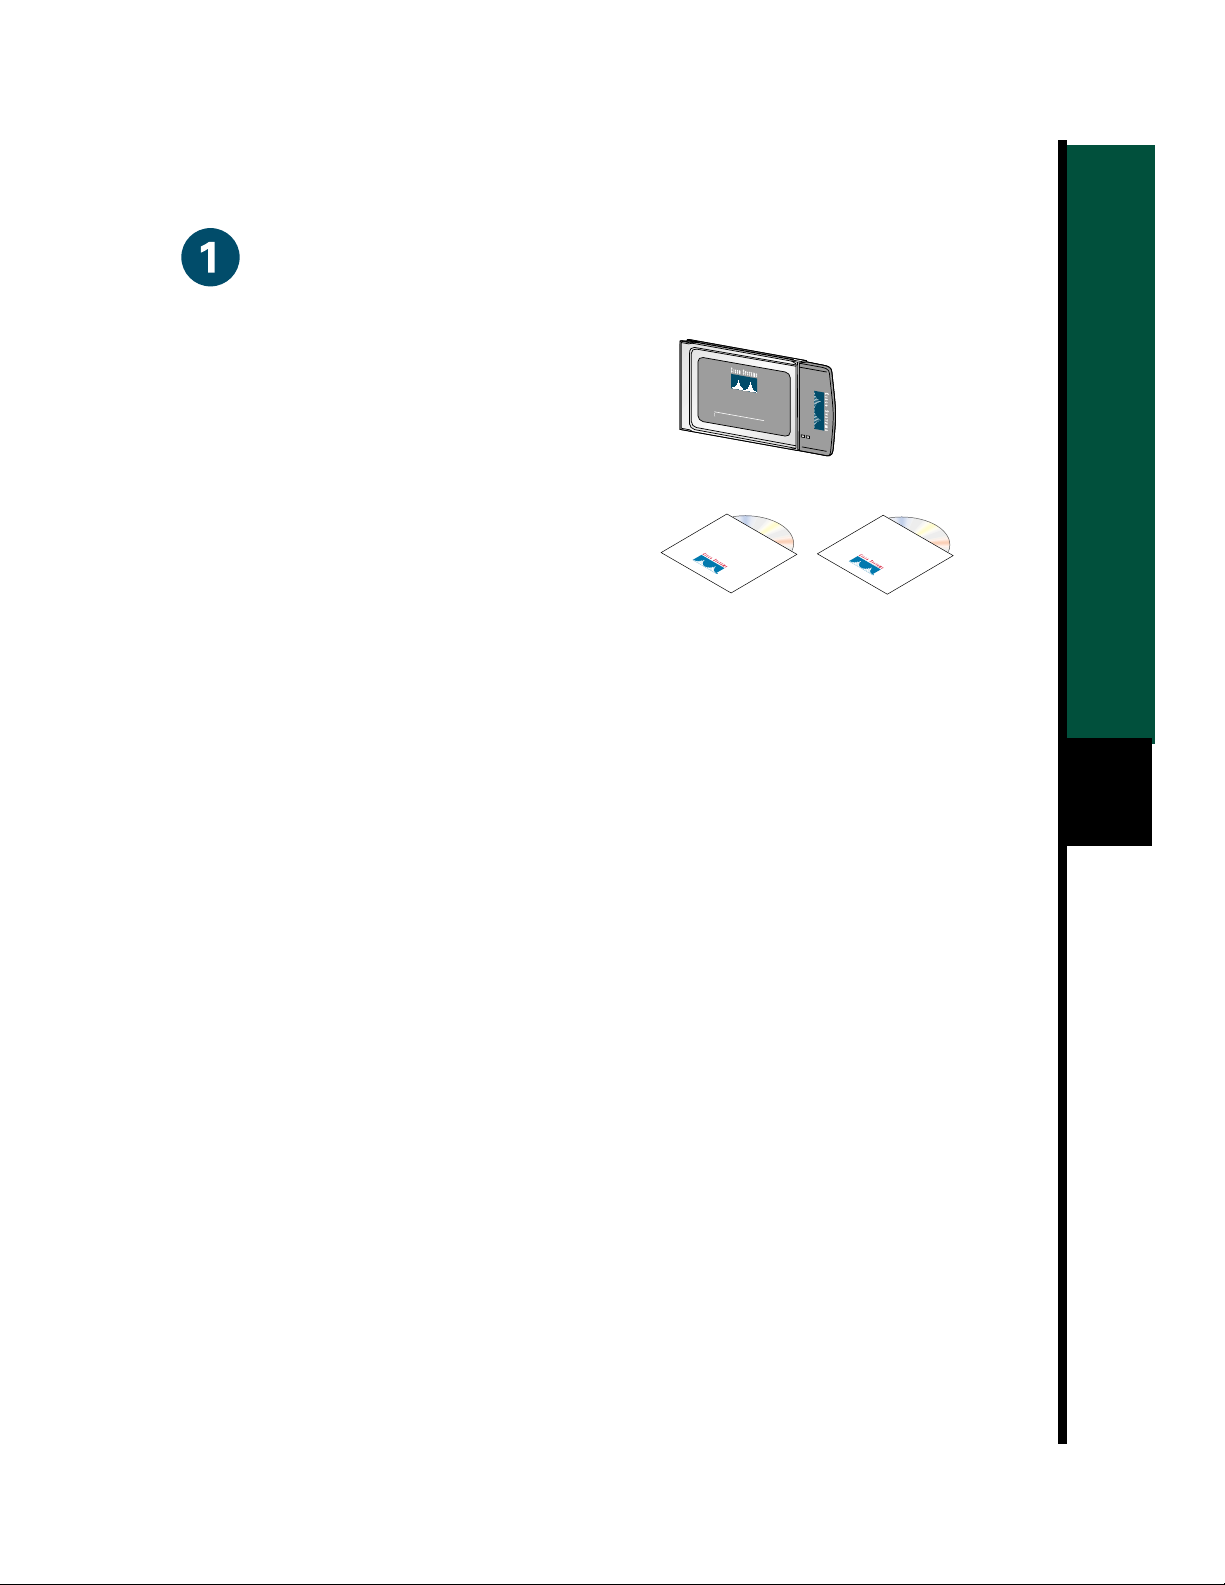
Take Out What You Need
Cisco Aironet 350 Series PC Card Client Adapter
CISCO AIRONET 340
11 Mbps WIRELESS LAN ADAPTER
(labeled Wireless LAN Adapter)
Cisco Aironet 350 Series PC Card Client Adapter CDs
for Windows 95 and Windows NT
or Windows 98 and Windows 2000
with software and product documentation
If any item is missing or damaged, contact your Cisco representative or reseller for support.
Note: The integrated antenna on PC models of the Aironet PC Client Card Adapter is
permanently attached; LM models are shipped with no antenna.
Additional Requirements
• A computing device (desktop personal computer, notebook, laptop computer, portable or
hand-held device) equipped with an internal or exte rnal PC Card Typ e II or Type III slot.
All drivers and supporting software (card and socket services) for the PC card slot must be
loaded and configured.
SERIES
1
• The following information from your system administrator:
— your wireless client name
— the (case-sensitive) wireless service set identification (SSID) for your radio network
— for Microsoft Windows networking, your computer name and workgroup name
— the username and password for your network account
— if you are not connected to a DHCP server, the IP address, default gateway address,
and subnet mask of your computer
— for Windows NT systems, an available IRQ number (interrupt address) in your system
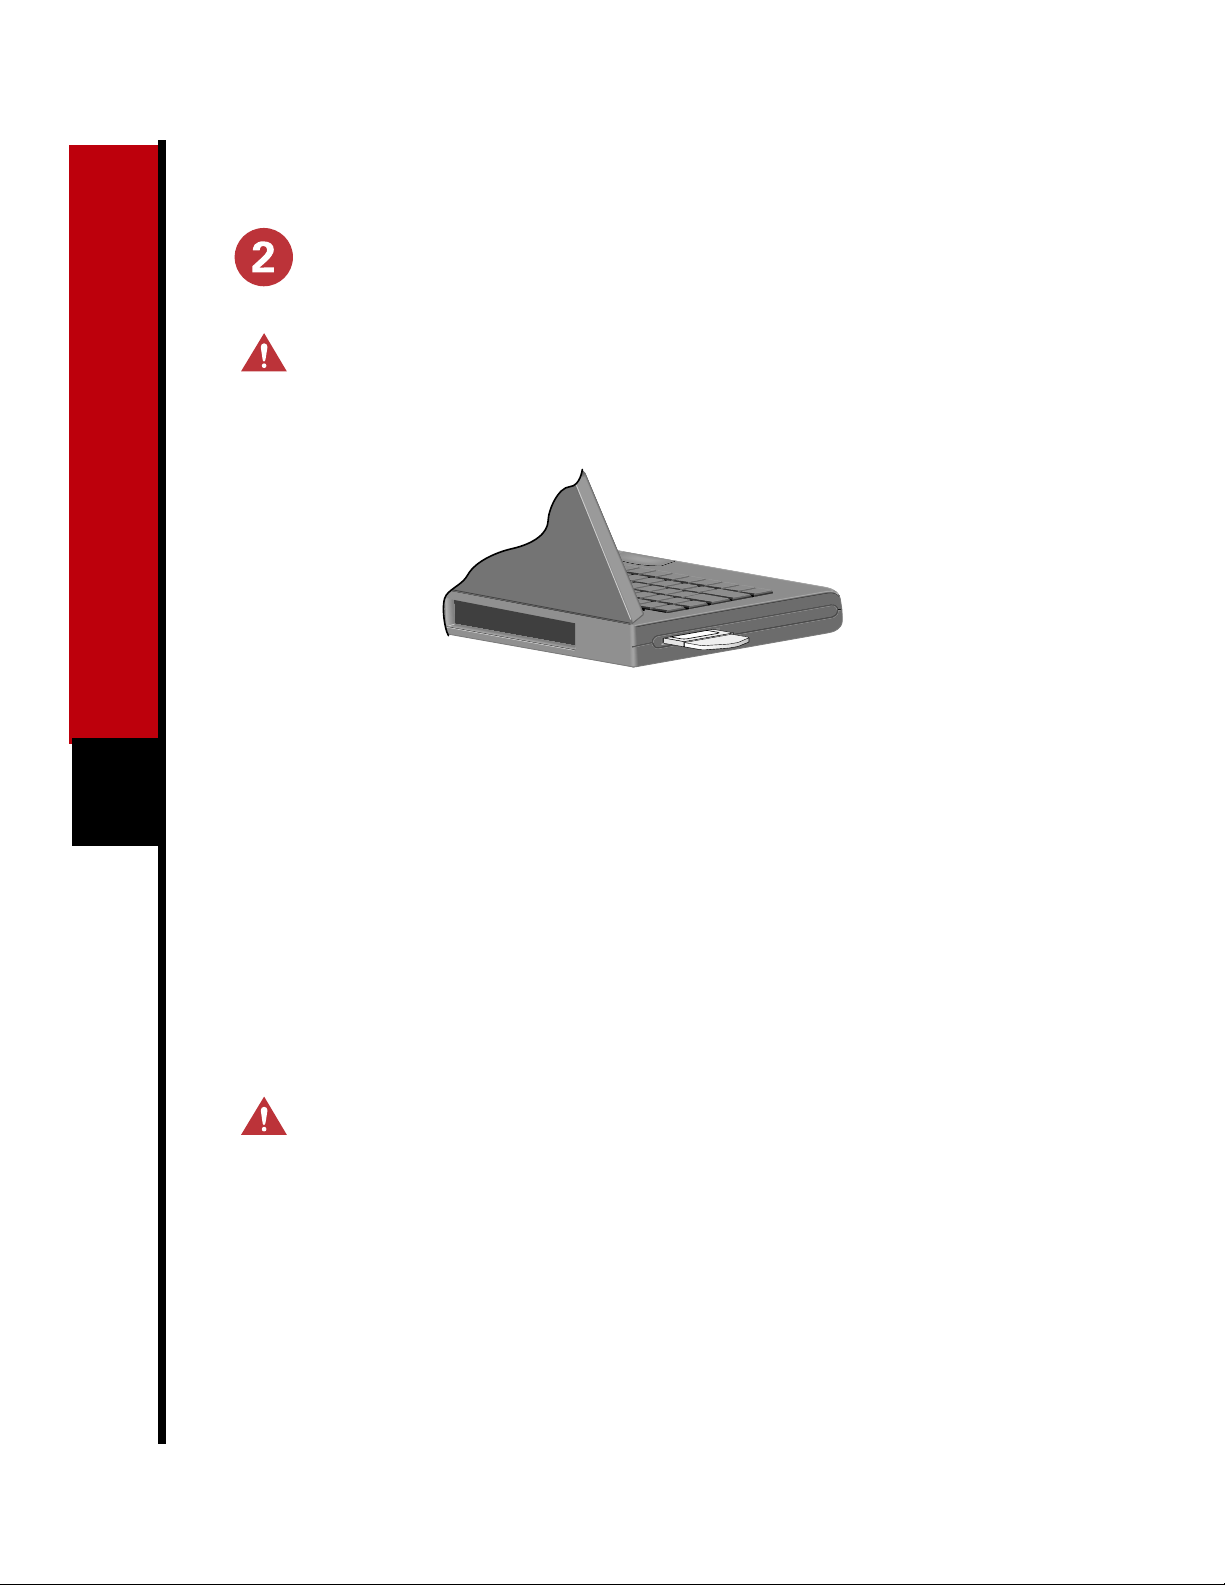
Install the PC Card Client Adapter
Caution The following procedures and physical connections apply generally to
normal and conventional PC card slots. In cases of custom or non-conventional
equipment, be alert to possible differences in PC card slot configurations.
Before you begin, examine the PC card client adapter. One end is a dual-row, 68-pin PC
1
card connector. The card is keyed so that it can be inserted only one way into the PC card
2
slot. The slot in your computing device must be a PC card Type II slot (this includes slots
that support both the Type II and Type III cards).
Note: The PC card slot will be on the left or right side of the computer, depending on the
model.
For Windows 95 and Windows 98 systems, remove any other PC card from the card slot.
2
For Windows 95 or Windows 98 systems, turn the computer on before inserting the PC card
3
client adapter.
For Windows NT systems, turn the computer off before inserting the client adapter.
Caution Never f o r ce the PC card cli en t ad ap t er in t o th e PC card slot. Forcing it will
damage both the PC card and the slot. If the PC card does not easily insert, remove the
card and re-insert it.
Hold the PC card client adapter with the logo facing up and insert the card into the slot,
4
applying just enough pressure to make sure it is fully seated.
Proceed to the appropriate driver installation for your operating system.

Install the Appropriate Driver and Utilities
Note: The following procedures assume you are installing the driver from the CD provided. If
your PC does not have a CD-ROM drive, download the driver from Cisco’s web site.
Windows 98 Systems
Note: The Windows 98 driver also works
with the Windows 2000 operating system.
In Windows 98 systems, after you have
installed the PC card client adapter, the
system automatically detects it, opens a New
Hardware Found window, and starts
collecting information for a driver database.
When the A d d New Hardwa r e Wiza rd
1
dialog box opens, it is searching for new
drivers. Click Next.
From the next dialog box, select Search
2
for the best driver for your device
(Recommended) and click Next.
Select CD-ROM drive, deselect all othe r
3
options, insert the Cisco Aironet 350
Series Client Adapter CD for Windo ws
98, and click Next.
(a) Windows 98 files installed on your
PC are usually located in the folder
C:\Windows\Options\Cabs. Click
OK to in stall.
(b) If the syste m prompts y ou for the
Windows CD and the CD-ROM
drive on your PC is drive D, the
path should be D:\WIN98. Click
OK to copy the required files.
The Add New Hardwa re Wizard
6
window again opens indicating that the
installatio n is complet e. Click Finish.
Remove the CD and restart your laptop.
7
When the co mputer rest a r t s,
8
double-click My Computer, Control
Panel, and Network.
Select the PCMCIA adapter and click
9
Properties.
3
The hardware wizard will find the
4
installation files on the CD and display
the search results. When the PCMCIA
adapter drive r is displaye d, click Next to
copy the required files.
During driver installation, you may be
5
prompted to enter a path to the required
client adapter or Windows 98 files:
In the Properties window, click
10
Advanced.
In the Advanced window , select Client
11
Name and enter your computer’s unique
name in the Value dialog box.
Select SSID. Enter your Access Point’s
12
(case-sensitive) SSID in the Value dialog
box. Click OK.

If you are not connected to a DHCP
13
server, double-click My Computer,
Control Panel, and Network. Click the
Protocols tab and select TCP/IP and
Properties. Sel e ct Specify an IP address
and enter the IP Address, Subnet Mask,
and Default Gateway address of your
computer. Click OK.
In the Network window, click OK.
14
When prompted, click Yes to reboot the
15
laptop.
Windows 9 5 Systems
In Windows 95 systems, after you have
instal led t he PC card client adapter, the
system automatically detects it, opens a New
Hardware Found window, and starts
4
collecting information for a driver database.
The Update Device Driver Wizard
1
dialog box opens and indicates that
Windows will complete the installation
of the PCMCIA adapter.
Insert the Clien t Ada pter CD for
2
Windows 95 and NT, and click Next.
When the Up dat e De vic e Driv er W i zard
3
indicates that it is unable to locate a
driver, click Other Locations.
When t he Up dat e Devi ce Dri ver W iza rd
7
indicates that it has found the driver,
click Finish.
When prompted to insert the Windows
8
CD-ROM, click OK:
(a) If Windows 95 prompts for files
installed on your PC (located at
C:\Windows\Options\Cabs), type
this path in the Copy files from
dialog box and Click OK to copy .
(b) If Windows 95 prompts for the
Windows CD and the CD-ROM
drive on your PC is drive D, the path
in the dialog box should be
D:\WIN95. Click OK to copy the
required files.
In the Systems Settings Change window ,
9
you are prompted to restart the
computer . Remove the CD and click Yes.
When the computer ha s restart e d,
10
double-click My Comput er, Control
Panel, and Network.
Select the PCMCIA adapter and click
11
Properties.
In the Properties window, click
12
Advanced.
In the Select other Location window,
4
click Browse.
Select t he CD -ROM driv e and cl ick OK.
5
In the Select other Location window,
6
click OK.
In the Adva nc ed window , se lect Client
13
Name and enter your computer’s unique
name in the Value dialog box.
Select SSID. Enter your Access Point’s
14
(case-sensitive) SSID in the Val ue d ialog
box. Click OK.

In the Network window, click OK.
15
If you are not connected to a DHCP
16
server, double-click My Computer,
Con trol Panel, and Network. Click the
Protocols tab and select TCP/IP and
Properties. Select Specify an IP address
and enter the IP Address, Subnet Mask,
and Default Gateway address of your
computer. Click OK.
When prompted, click Yes to reboot the
17
computer.
Windows NT Systems
Note: With Windows NT, install the PC
card client adapter with the c ompute r off.
After installing the PC card client
1
adapter, turn the computer on and wait
for Windows NT to fully start.
On your computer desktop,
2
double-click My Computer, Control
Panel, and Devices. Scroll down and
select Pcmcia. Click Startup, select
Automatic, and click OK.
Note: Also ensure that the Cardbus
protocol for PC cards is deselected.
Insert the Client Adapter CD for
3
Windows 95 and Windows NT into
your CD-ROM drive.
Double-click My Computer, Control
4
Panel, and Network.
Click the Adapter tab and select Add.
5
In the Select Network Adapter window,
6
click Have Disk.
In the Copy files from box, enter the
7
letter of your CD-ROM drive (for
example: D:\) and click OK.
In the Select OEM option box, select the
8
PCMCIA option and click OK.
From the Adapter Setup window, select
9
Client Na me and enter your computer’s
unique name in the V al ue dialog box.
Select SSID. Enter your Access Point’s
10
(case-sensitive) SSID in the Value dialog
box.
Select the IRQ number obtained from
11
your system admi nist ra tor.
Click OK and then Close.
12
The TCP/IP Properties windows should
13
open. If not, double-click My Computer ,
Control Panel, and Network. Select
Protocols > TCP/IP > Properties.
(a) If you are connected to a DHCP
server, se lect Obtain an IP address
from a DHCP server.
(b) If y ou are not connected to a DHCP
server, se lect Specify an IP address
and enter the IP Address, Subnet
Mask and Default Gateway address
of your computer. Click OK.
When prompted to shutdown and
14
restart your computer, remove the
CD-ROM disk and click Yes.
5

Installing Utilities
After you have installed the appropriate driver for your system, you can install the Aironet
Client Utilities (ACU), Link Status Meter (LSM), and Client Encryption Manager (CEM)
utilities. Installing utilities is optional unless using Wired Equivalent Privacy (WEP) in your
network. If WEP is enabled, all devices in the network must have the same WEP code, which
you set using the CEM utility. The ACU and LSM utilities provide troubleshootin g and status
information, but are not required.
Refer to Using the Cisco Aironet 350 Series PC Card Client Adapters on the on the Client
Adapter CD for instru ctio ns on ho w to use eac h utility.
Insert the CD-ROM for your operating system into your compute r CD-ROM dri ve.
1
Select Start > Run and enter the following path (where D is the letter for your CD-ROM
2
drive): D:\utils\setup.exe
Follow the setup instru ctions on th e screen to compl ete the instal latio n.
3
Note: After you have installed the appropriate driver and utilities, contact your IS department
if you have a problem connecting to the network.
6

Safety Information for the Cisco Aironet 350 Series PC Card Client
Adapter
The FCC with its action in ET Docket 96-8 has adopted a safety standard for human exposure
to radio frequency (RF) electromagnetic energy emitted by FCC certified equipment. Cisco
Aironet 350 Series products meet the uncontrolled environmental limits found in OET-65 and
ANSI C95.1, 1991. Proper operation of this radio according to the instructions found in this
manual and the user guide on the Cisco Aironet 350 Series PC Card Client Adapter product CD
will result in user exposure that is substantially below the FCC recommended limits.
• Do not touch or move antenna(s) while the unit is transmitting or receiving.
• Do not hold any component containing the radio such that the antenna is very close or
touching any exposed parts of the body, especially the face or eyes, while transmitting.
• Do not operate a portable transmitter near unshielded blasting caps or in an explosive
environment unless it is a type especially qualified for such use.
• Do not operate the radio or attempt to transmit date unless the antenna is connected; if not,
the radio may be damaged.
• Antenna use:
— Always orient a dipole antenna such that it is at least 6 inches (15 cm) away from your
body.
— High-gain, wall-mount or mast-mount antennas are designed to be professionally
installed and should be located at a minimum distance of 12 inches (30 cm) or more
from your body. Please contact your professional installer, VAR, or antenna
manufacturer for proper installation requir ements .
— Warning for laptop users: In order to comply with the FCC RF exposure limits, it is
recommended when using a laptop with a PC client adapter, that the adapter’s
integrated antenna should not be positioned closer than 2 inches (5 cm) from your
body or nearby persons for extended periods of time while it is transmitting (or
operating). If the antenna is positioned less than 2 inches (5 cm) from the user , it is
recommended that the user limit exposure time.
7

Compliance Information for the Cisco Aironet 350 Series PC Card Client
Adapter
Federal Communication Commi ssion De cla ration of Conformi ty Statement
This device complies with Part 15 rules. Operation is subject to the following two conditions:
This device may not cau se harmfu l in t er ference, and
1
This d evice must accept any interference re ceived, includin g interfe ren ce that m a y cause
2
undesired operation.
This equipment has been tested and found to comply with the limits of a Class B digital device,
pursuant to Part 15 of the FCC Rules. These limits are designed to provide reasonable
prot ec ti o n a g ainst har m ful interf erence wh en the equ ip ment is o per a t ed in a residentia l
environment. This equipment generates, uses, and radiates radio frequency energy, and if not
installed and used in accordance with the instructions, may cause harm ful interferenc e.
How ev er, there is no gu a r a n t ee that in te r f erence wi ll n o t oc cur. If this equipment does caus e
interference to radio or television reception, which can be determined by turning the equipment
on and off, the user is encouraged to correct the interference by one of the following measures:
8
• Reorient or relocate the receiving antenna.
• Increase separation between the equipment an d receiver.
• Connect the equipment into an outlet on a circuit different from which the receiver is
connected.
• Consult the dealer or an experienced radio/TV technician.
Department of Communications—Cana da
Canadian Compliance Statement
This class B Digital apparatus meets all the requirements of the Canadian Interference-Causing
Equipment Regulations.
Cet appareil numerique de la classe B respecte les exigences du Reglement sur le material
broilleur du Canada.
This device complies with RSS-210 of Industry Canada. Operation is subject to the following
two conditions: 1) this device may not cause harmful interference, and 2) this device must
accept any interference received, including interference that may cause undesired operation.

The device is certified to the requirements of RSS-139-1 for 2.4 GHz spread spectrum devices.
The use of this device in a system operating either partially or completely outdoors may require
the user to obtain a license for the system according to the Canadian regulations. For further
information, contact your local Industry Canada office.
European Telecommunications Standards Institute
Statement of Compliance
Information to User
This equipment has been tested and found to comply with the European Telecomm unication s
Standard ETS 300.328. This standard covers Wideband Data Transmission Systems referred to
in CEPT recommendation T/R 10.01.
This type accepted equipment is designed to provide reasonable protection against harmful
interf erence whe n the equipm ent is opera t ed in a commercial env i ro n ment. Thi s eq uipmen t
generates, uses, and can radiate radio frequency energy, and if not installed and used in
accord ance with the instru ct ion manual, may caus e h a r mf u l interference to rad i o
communications.
9

Corporate Headquarters
Cisco System s, Inc.
170 West Tasman Drive
San Jose, CA 95134-1706
USA
http://www.cisco.com
Tel: 408 526-4000
800 553-NETS (6387)
Fax: 408 526-4100
European Headquarters
Cisco Systems Europe s.a.r.l.
Parc Evolic, Batiment L1/L2
16 Avenue du Quebec
Villebon, BP 706
91961 Courtaboeuf Cedex
France
http://www-europe.cisco.com
Tel: 33 1 69 18 61 00
Fax: 33 1 69 28 83 26
Americas
Headquarters
Cisco Systems, Inc.
170 West Tasman Drive
San Jose, CA 95134-1706
USA
http://www.cisco.com
Tel: 408 526-7660
Fax: 408 527-0883
Asia Headquarters
Nihon Cisco Systems K.K.
Fuji Building, 9th Floor
3-2-3 Marunouchi
Chiyoda-ku, Tokyo 100
Japan
http://www.cisco.com
Tel: 81 3 5219 6250
Fax: 81 3 5219 6001
Cisco Systems has more than 200 offices in the following countries. Addresses, phone numbers, and fax numbers are listed on the
Cisco Connection Online Web site at http://www.cisco.com/offices.
Argentina • Australia • Austria • Belgium • Brazil • Canada • Chile • China • Colombia • Costa Rica • Croatia • Czech Republic • Denmark • Dubai, UAE
Finland • France • Germany • Greece • Hong Kong • Hungary • India • Indonesia • Ireland • Israel • Italy • Japan • Korea • Luxembourg • Malaysia
Mexico • The Netherlands • New Zealand • Norway • Peru • Philippines • Poland • Portugal • Pu erto Rico • Romania • Russia • Saudi Arabia • Singapore
Slovakia • Slovenia • South Africa • Spain • Sweden • Switzerland • Tai wan • Thailand • Tu rk ey • Ukr aine • United Kingdom • United States • Venezuela
Copyright © 2000, Cisco Sy stems, Inc. All rights reserved. Access Registrar, AccessPath, Any to Any, AtmDirector, Browse with Me, CCDA, CCDE, CCDP, CCIE, CCNA, CCNP,
CCSI, CD-PAC, the Cisco logo, Cisco Certified Internetwork Expert logo, CiscoLink, the Cisco Management Connection logo, the Cisco NetWorks logo, the Cisco Powered Network
logo, Cisco Systems Capital, the Cisco Systems Capital logo, Cisco Systems Networking Academy, the C isco Systems Networking Academy logo, the Cisco Technologies logo,
ConnectWay, Fast Step, FireRunner, Follow Me Br owsing, Fo rmShare, G igaStack, IGX, Inte lligence in the O ptical C ore, Internet Quot ient , IP/V C, K ern el P rox y, MGX, M ult iPat h
Data, MultiPath Voic e, Natural Network Viewer, NetSonar, Network Registrar, the Networkers logo, Packet, PIX, Point and Click Internetw orking, Policy Builder, Precept,
ScriptSha re, Se cu re Scrip t, Se rviceWay, Shop wi th M e, Sli deCas t, SM ARTn et, S VX, The C ell, TrafficDirector, TransPath, ViewRunner, Virtual Loop Carrier System, Virtual Service
Node, Virtual Voice Line, VisionWay, VlanDirector, Voice LAN, WaRP, Wavelength Router, Wavelength Router Protocol, WebViewer, Workgroup Director, and Workgroup Stack are
trademarks; Changing the Way We Work, Live, Play, and Lea rn, Empowering the Internet Generation, The Internet Economy, and The New Internet Economy are service marks; and
Aironet, ASIST, BPX, Catalyst, Cisco, Cisco IOS, the Cisco IOS logo, Cisco Systems, the Cisco S ystems logo, the Cisco Systems Cisco Press logo, Enterprise/Solver, Et herChannel,
EtherSwitch, FastHub, FastLink, FastPAD, FastSwitch, GeoTel, IOS, IP/TV, IPX, LightStream, LightSwitch, MICA, NetRanger, Post-Routing, Pre-Routing, R egistrar, StrataView Plus,
Stratm, TeleRouter, and VCO are registered trademarks of Cisco Systems, Inc. or its affiliates in the U.S. and certain other countries. All other tr ademarks mentioned in this document
are the property of their respect ive owners. The use of the word partner does not imply a partnership relationship between Cisco and any of its resellers. (9912R)
Printed in the USA on recycled paper containing 10% postconsumer waste.
78-10624-01
 Loading...