

Page 1
Getting Started
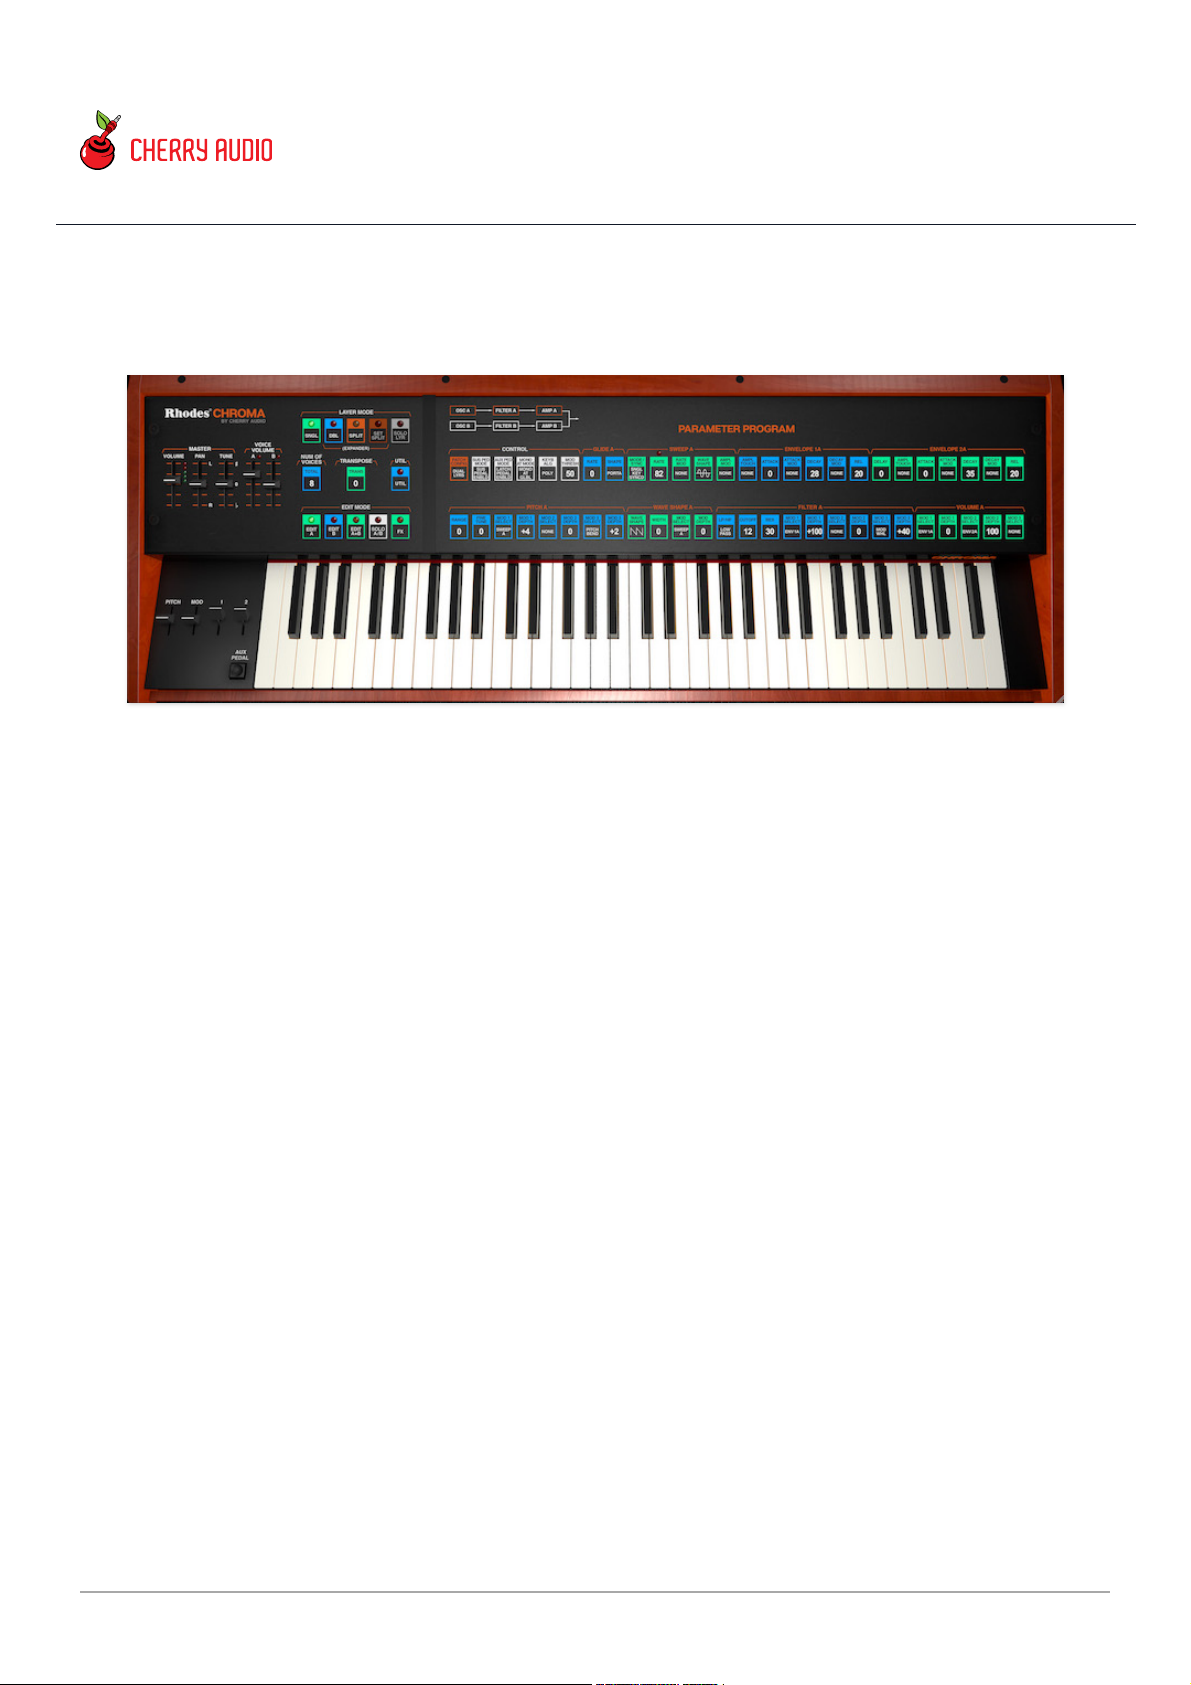
The Rhodes Chroma by Cherry Audio is an incredible replication of one of the
most advanced analog poly synthesizers ever conceived. Conceptually, its
intention was to combine the massive flexibility of a patch-cable analog
modular synthesizer with full digital control and memory, as well as up to 16voice polyphony. If this wasn't enough, a rare keyboardless Expander module
was produced in small numbers that doubled the Chroma's capabilities.
The conception, creation, and demise of the original Chroma is a famous
story in the annals of synthesizer history. Though released and branded as a
Rhodes instrument (makers of the world's most popular electric piano), in
actuality, the Chroma was developed by ARP Instruments. Sadly, its
development was completed in 1981 just as ARP was going into receivership;
fortunately, the Rhodes company wisely acquired productions rights (as well
as key members of the development team), otherwise the Chroma might
never have seen the light of day.
So what makes the Chroma so special? At a glance, it appears to be a typical
80s-era, single-slider-controlling-many-parameters, analog polysynth.
Furthermore, its sound generation utilizes then
de rigeur
Curtis filter, VCA,
and envelope chips. The answer lies in its advanced signal routing,
modulation, and layering capabilities, which were far ahead of almost any
Chroma User Guide
Last updated 2025.03.12
Cherry Audio Chroma User Guide - 1
Page 2

other analog polysynth (to be fair, Oberheim's Xpander and Matrix-12
featured some pretty awesome mod capabilities, but the the Xpander wasn't
released for another three years in 1984).
The Chroma's primary innovation was its ability to reconfigure filter and VCA
signal paths, enabling numerous series and parallel filter routings and audiorate filter and amplitude modulation, as well as multiple oscillator sync and
ring modulation options. This enabled an incredibly wide sonic palette. The
Chroma also featured an advanced keyboard action with genuine wooden
keys and precise weighting for highly expressive velocity and aftertouch
control. And though it's easy to overlook these days, the Chroma was also an
innovator in the pre-MIDI realm of connectivity and computer control - it
included a 25-pin D-sub connector that allowed interfacing with either
another Chroma, the aforementioned Chroma Expander, or it could be
connected directly to an Apple II computer for sound programming via
proprietary software.
Unfortunately, the Chroma had a number of factors going against it. Most
significantly, given the hardware limitations of the time, its user interface
didn't adequately support the vast quantity of menus and parameters,
making sound programming a frustrating slog entailing constantly reference
to a printed chart of parameter information and signal routing diagrams. Not
long after its release, the Chroma was in the unenviable position of being a
large, heavy, and expensive instrument when Yamaha released its worldbeating and affordable DX-series FM synthesizers. Rhodes did release one
more polyphonic synthesizer, the Chroma Polaris, but this was a far more
conventional (and more affordable) six-voice polysynth, designed to compete
in the mid-level market segment occupied by instruments such as the Roland
Juno series, Korg Poly-61, Kawai SX-210, and others.
Due to its relative rarity and expense, the Chroma became what we refer to
as a "unicorn" instrument - a seldom-seen-in-the-flesh powerhouse that few
musicians get to experience. Cherry Audio's Rhodes Chroma resurrects the
spirit and sounds of this incredible instrument with a mind-blowing accurate
replication. Due to its highly complex and quirky nature (and sheer amount
of parameters), this has been one of the most challenging instruments we've
created thus far, and we couldn't be more proud of the results. From a
synthesis perspective, every single aspect has been recreated with exacting
precision - in fact, sysex patch data from the original instrument can be
loaded directly into Rhodes Chroma. At the same time, we've radically
altered the user interface, hugely improving the sound programming
experience, with super easy-to-use multiple button menus and dozens of
Cherry Audio Chroma User Guide - 2
Page 3

informative real-time displays built right into the parameter buttons - no
more laminated cheat sheet! Finally, in addition to the standard single
instrument mode, Rhodes Chroma includes an "Expander" mode, effectively
adding an entire second Chroma Expander synthesizer to the mix with full
onscreen controls that can run in layer or split modes.
We hope you'll enjoy this amazing beast of a synth as much as we have, and
as always, we humbly thank all of our customers for the unwavering support
you've shown!
Technical Assistance
Cherry Audio's unique online store and automatic updating should make
operation a smooth experience, but if you run into any issues or have
questions, you can discuss issues online at the Cherry Audio forums at:
https://forums.cherryaudio.com/viewforum.php?f=53
... or you can communicate directly with one of our swell tech support staff
at:
https://cherryaudio.kayako.com/
Cherry Audio Chroma User Guide - 3
Page 4
Top Toolbar, Sound Presets, and
Focus Control
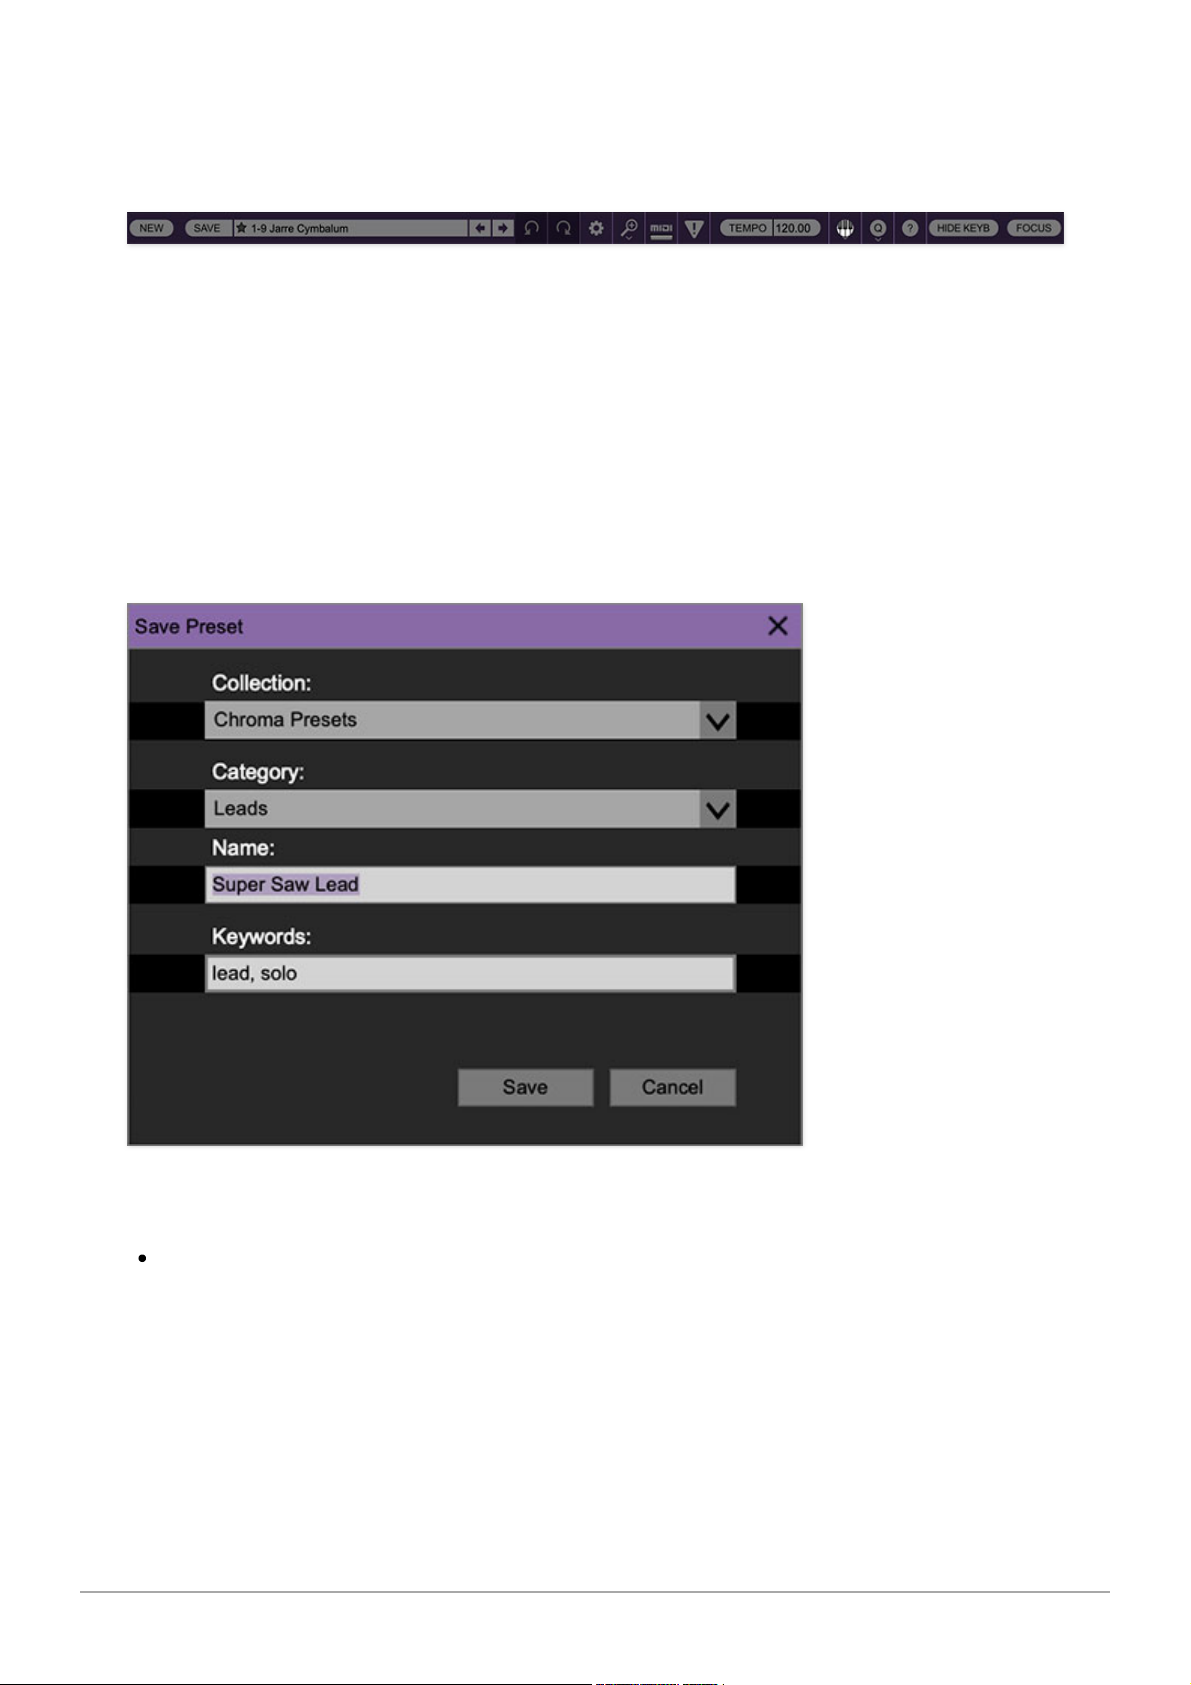
The purple strip at the top of Chroma contains all of the preset loading and
saving navigation, "under-the-hood" settings, zoom and focus control, and
more.
New- Opens a new blank patch preset. If an unsaved patch is currently open
or you’ve modified an existing saved patch, a dialog asks if you’d like to save
the patch in its current state. This greatly reduces the possibility of losing an
edited unsaved patch.
Save- Use this to save patches. There are a couple of levels of hierarchy:
Collection- This is the top level of organization, and contains entire
“sets” of presets. The
Chroma Presets
are the main included collection.
We also include a
User Presets Collection
for storing user presets, but
you’re free to create your own collections. To create a new collection, click
in the
Collection
text field (where it says
User Presets
above) and type a
name. User-created sounds can be freely saved to any collection.
Cherry Audio Chroma User Guide - 4
Page 5
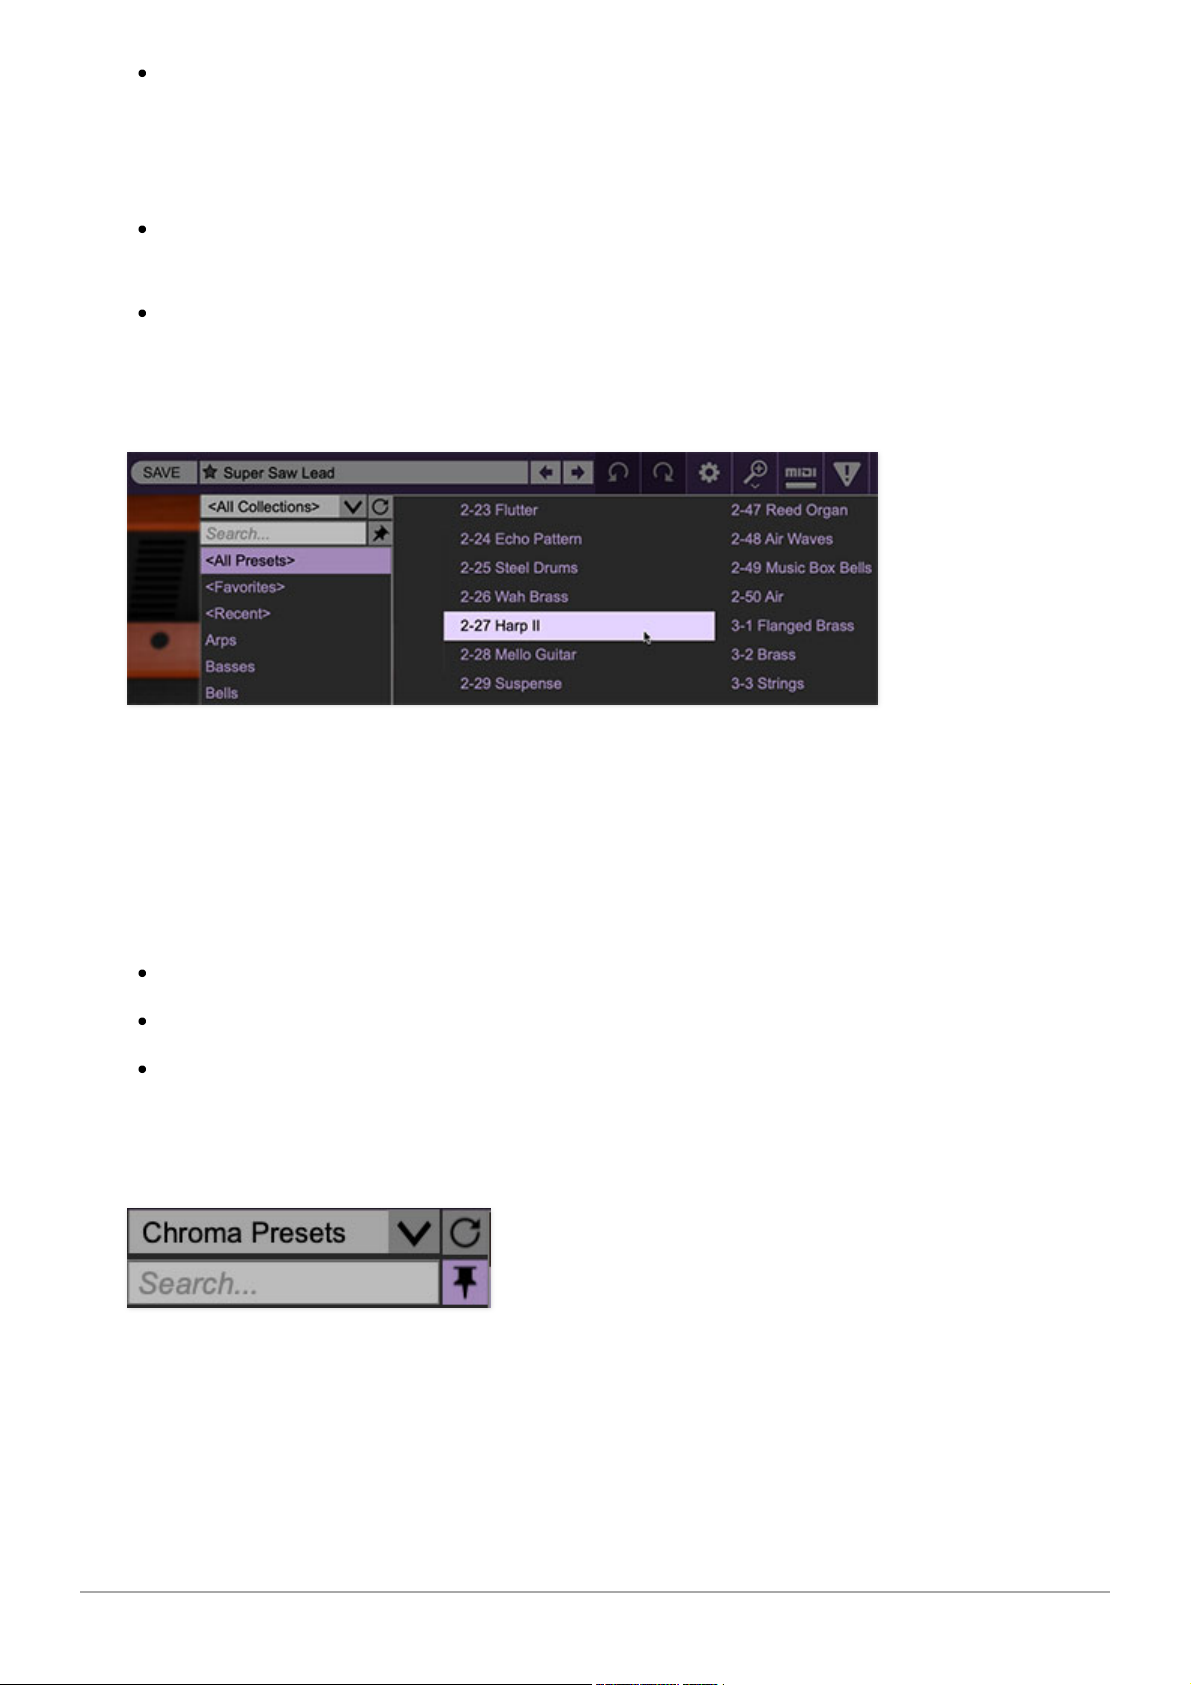
Categories- Within each
Collection
are a number of sound categories. As
with collections, you’re free to create as many categories as you like. To
create a category, click in the
Category
text field of the
Save
dialog
window and type a new category name.
Patch- A patch is an individual sound. To save a patch, simply type the
name in the
Name
field and click
Save
.
Keywords- You can add descriptive words such as "huge," "clavinet,"
"noisy," etc., to patches to make them appear when terms are typed in
the
Search
field. Use commas to separate multiple keywords entries.
Browsing Patches- Patches can be browsed by clicking the <
Select Preset
>
field. To select a preset collection, click in the area that says <
All
Collections
> or on the downward-facing arrow next to it.
Clicking on the left-side categories narrows down which patches are
displayed.
<All Presets> will show presets from all collections and categories.
<Recent> displays recently used presets.
Refresh- This is the circular arrow button to the right of the downward
arrow; clicking this checks the Cherry Audio server for new or updated
presets.
Pin- Clicking the pushpin icon locks the patch selection list open, allowing
fast and easy browsing and auditioning of patches. Click the icon again to
disable pin mode. When in pin mode, the up and down arrow keys can be
used to select patches.
Cherry Audio Chroma User Guide - 5
Page 6

Preset
- Step Back/Forward Arrows
- These step to the previous or next
preset. macOS [⌘+left/right arrow key] or Windows [CTRL+left/right arrow
key] will navigate through presets back and forth in the currently selected
collection/category.
Undo/Redo- These circular arrows will undo or redo the last action. It
remembers many steps, so if you really loused something up, keep on
(un)clickin'...
Settings- This is where user preferences for user interface, audio interfaces,
user account, and more are configured. See the Settings section for full
information.
Importing Presets with drag-and-drop
Presets can be imported singly or en masse (as a single compressed ZIP file)
simply by dragging and dropping from the desktop anywhere on the user
interface.
If a single .*preset file is dragged and dropped, the sound is immediately
loaded and the standard Save Preset dialog appears; this lets you save the
sound to the instrument's preset browser. Note that you don't have to save
the sound to preset browser; if you just want to hear and play the sound,
click the Cancel button in the Save Preset dialog - the sound will still be
loaded.
Compressed zip files containing multiple sounds can also be drag and
dropped onto the UI. This works the same as with single sounds, but instead
of the Save Preset dialog, you'll see the Import Preset Collection dialog. The
presets will be added as a new collection and available in the categories for
which they were tagged.
Cherry Audio Chroma User Guide - 6
Page 7
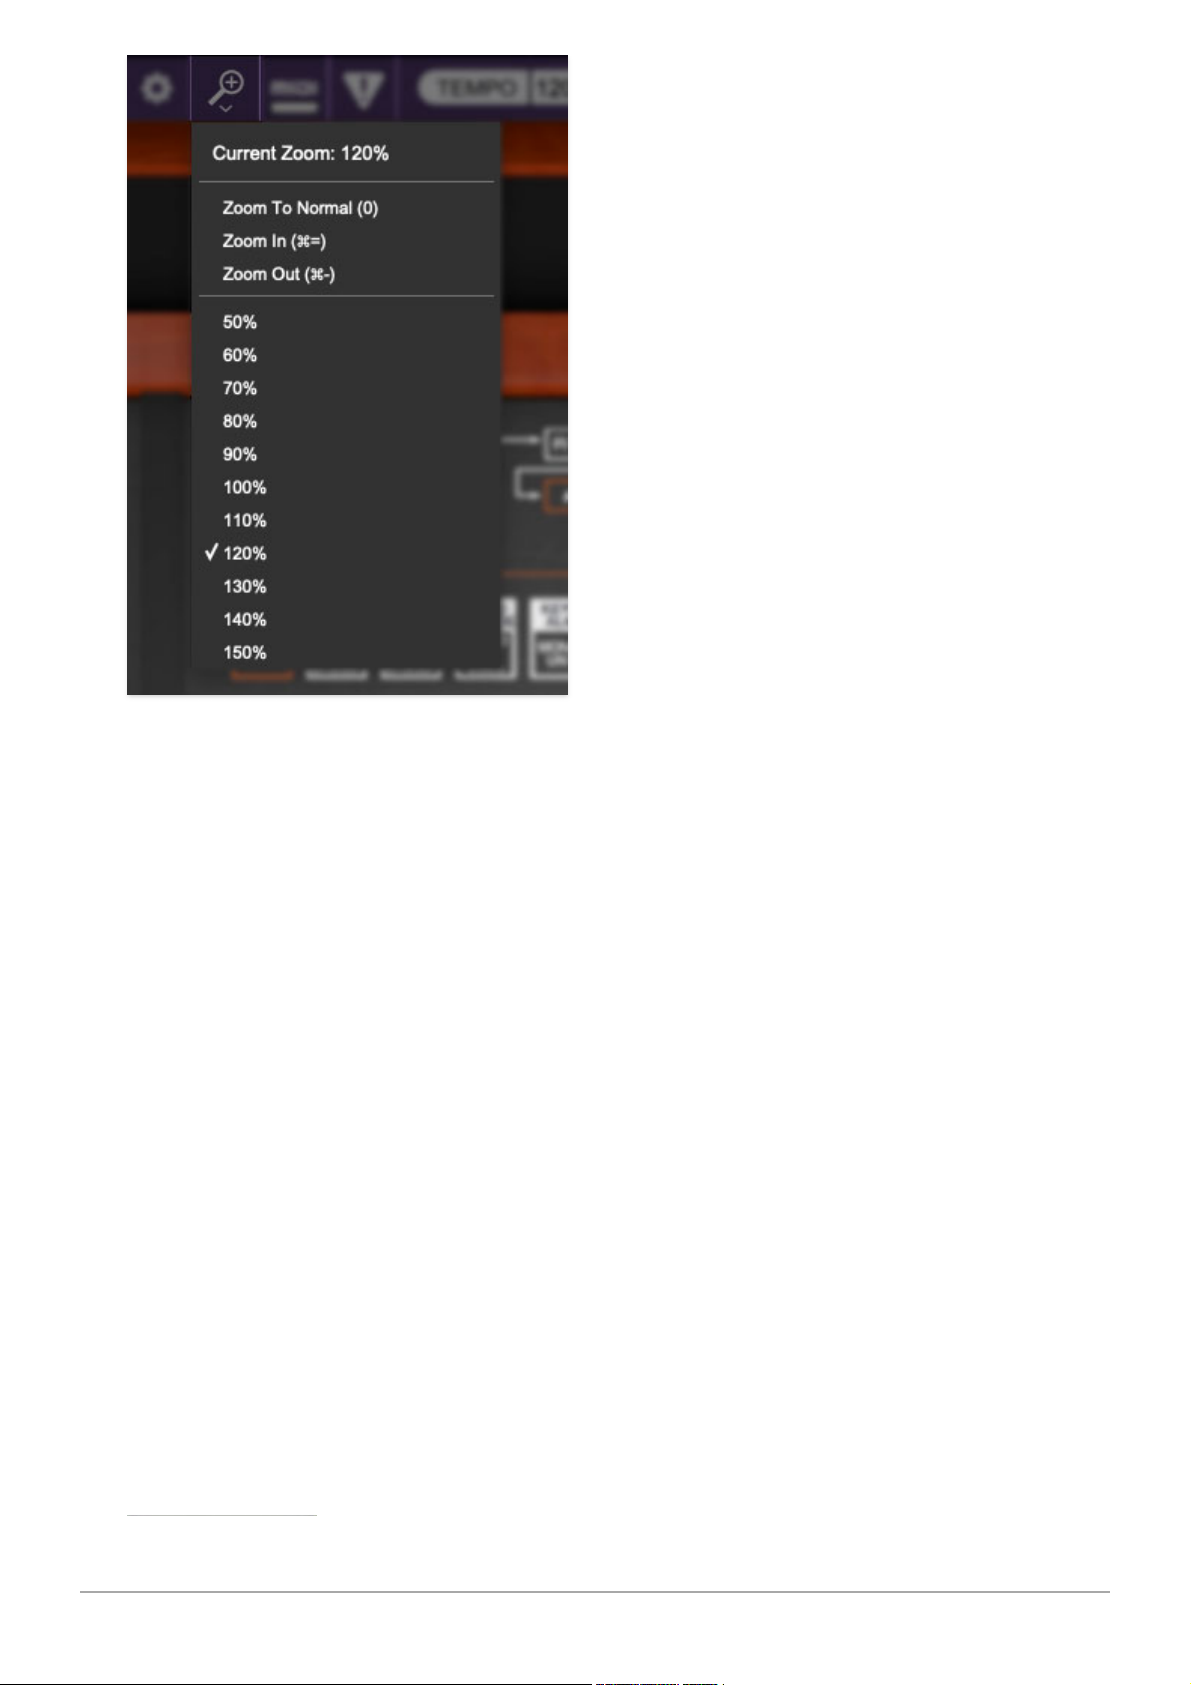
Zoom Magnifying Glass- Click to resize the Chroma interface window.
Selecting
100%
returns the user interface to native size.
MIDI tab- Opens the MIDI controllers tab for configuring internal and
hardware MIDI controls. See the MIDI Controllers Setup and MIDI Tab
section for full information.
! (MIDI Panic)- Click to send an all-notes-off message in case of rare, "make
this #$!%ing thing shut up?!?" stuck-note incidents.
Tempo (Standalone Version Only)- Displays Chroma's current internal
tempo setting. Chroma's internal tempo affects the SWEEP section
Rate
control, the sequencer, and in the FX section, PHASER Rate,
FLANGE/CHORUS Rate, and DELAY Time when
Sync To Host Tempo
is enabled
in their respective control PARAMETER PROGRAM menus. The tempo setting
can be changed by moving the mouse up and down anywhere in the tempo
section, or by double-clicking the number and entering the desired BPM
value.
The tempo display only appears in the standalone version of
Chroma. VST, AU, and AAX plug-in versions receive tempo data from
their host DAW app.
Cherry Audio Chroma User Guide - 7
Page 8
QWERTY Musical Typing Keyboard- Opens an onscreen keyboard allowing
a standard QWERTY computer keyboard to be used for playing music notes.
For more information, see the QWERTY Musical Typing Keyboard (MTK)
section.
? (Help)- Clicking this launches your web browser and opens the help
document you’re already reading. Confusing circular logic at its finest.
Cherry Audio Chroma and Expander logos- These aren't exactly in the
purple menu strip, but clicking them displays “about” information, and shows
the version number and current registered user ID.
Hide/Show Keyboard- This allows the lovingly 3D-modeled keyboard to be
hidden or from view (sorry Mal) in order to conserve display space. To bring it
back, simply click the button again. The
Pitch, Mod
, and
Control 1
and
2
paddles sliders will also be hidden, but their operation will not be affected.
Focus Button
Cherry Audio Chroma User Guide - 8
Page 9
The original Chroma is pretty large; obviously we had to scale it down to fit
on a computer screen. If you're using a tiny laptop, this could make things
hard to see. With this in mind, the
Focus
button conveniently blows up
Chroma's user interface to roughly twice its normal size within the current
window size. Unlike the
Zoom
"magnifying glass" function,
Focus
doesn't
affect the current window size. By default, the patch panel section fills the
current window, but the view can be scrolled vertically and horizontally with
a mouse wheel, track pad, or Apple Mighty Mouse finger-scrolling. Or if you're
the last person on earth still using a single-button mouse, scroll bars will
appear at the window edges when in
Focus
mode. (Drop us a line from your
Hotmail account, umkay?)
Preset List Right-Click Functions
Show File- This displays the selected preset in the Mac or Windows folder
containing it. This is useful for backing up or sending a preset file to another
user.
Show In Original Category- Selects the preset within its category, i.e. the
category will highlight in the left preset menu. The
Show In Original Category
command only displays if the preset was selected within the <
All Presets
>,
<
Favorites
>, or <
Recent
> categories.
Cherry Audio Chroma User Guide - 9
Page 10

Favorites- Favorited presets will show in when the
<Favorites>
category is
selected. A star will display next to the preset name. Right-click on the preset
and reselect
Favorite
to un-favorite it.
Delete- Deletes the selected preset.
Restore Factory Preset- If one of the factory (i.e. not user) patches is
edited and saved, selecting this command restores the patch to its unaltered
"factory" setting. This menu will be grayed-out for user bank patches.
Restore All Factory Presets From 'Chroma Presets'- If any patches from
the "factory" Chroma bank are edited and saved, selecting this command
restores
all
of them to their unaltered factory setting.
Restore All From Factory- If any patches from the factory banks are edited
and saved, selecting this command restores
all
of them to their unaltered
factory setting. At the time of writing, the Chroma bank mentioned above is
the only factory bank, so this function and the
Restore All Factory Presets
From 'Chroma Presets'
above have the same effect.
Show File- This displays the selected preset in the Mac or Windows folder
containing it. This is useful for backing up or sending a preset file to another
user.
Cherry Audio Chroma User Guide - 10
Page 11
Following is an overview explaining Chroma's synthesis structure. We'll delve
further into the operation of individual parameter controls in the following
chapters.
It's important to understand that from a synthesis perspective, Cherry
Chroma
exactly
reproduces all of the original instrument's parameters and
sound programming functionality - so much so that original Rhodes Chroma
patch sysex data can be directly loaded with no conversion or parameter
changes whatsoever. However, when it comes to various layering and
combining of patches, the original was limited and frankly, pretty darn
confusing. Modern computer horsepower and graphic UI's allowed us to
greatly
streamline and simplify this aspect of operation.
PATCH CONFIGURATION
Unlike most hardwired synths, Chroma's synthesis "building blocks" can be
configured in a number of ways, ranging from standard oscillator>filter>VCA
to more esoteric arrangements including ring mod, oscillator cross
modulation, filter FM, and more. This is referred to as
Patch Configuration
. If
you're at all familiar with patch-cord based modular synthesizers, patch
configuration represents how the various synthesis modules are patched
together - this is the "root level" Chroma patch hierarchy. These are selected
either by clicking on the
Patch Config
button in the CONTROL section, or
directly on the patch configuration block diagram above the buttons. The
block diagram at the top of the panel displays which of the 16 Patch
Configurations is currently selected.
We'll explore patch configurations further in the Control section.
LAYER MODES
Chroma's LAYER MODE buttons allow it to operate either as a single synth
(
SINGLE
mode) or as two entire independent instruments (
DOUBLE
mode, i.e.
Chroma+Expander).
SINGLE MODE
Cherry Audio Chroma User Guide - 11
Page 12
When running in
SINGLE
Layer Mode, a Chroma voice generally consists of
two oscillators, two 12 dB/oct filters, two VCA's, two envelope generators and
a ring modulator - effectively two separate oscillator>filter>amp voice paths.
These voice paths are referred to as A and B. The 50 Parameter Program
buttons display parameters for a single voice path at any given time, as
selected with the EDIT MODE buttons at left. In addition to the illuminated
EDIT MODE buttons, the orange parameter text above the buttons changes
letters to show the currently edited voice path (e.g.,
GLIDE A, SWEEP A
,
ENVELOPE 1A
, etc.,
or GLIDE B, SWEEP B, ENVELOPE 1B
, etc.) The exception
are the six CONTROL section buttons - these globally affect both A and B
voice paths.
DOUBLE MODE
Cherry Audio Chroma User Guide - 12
Page 13
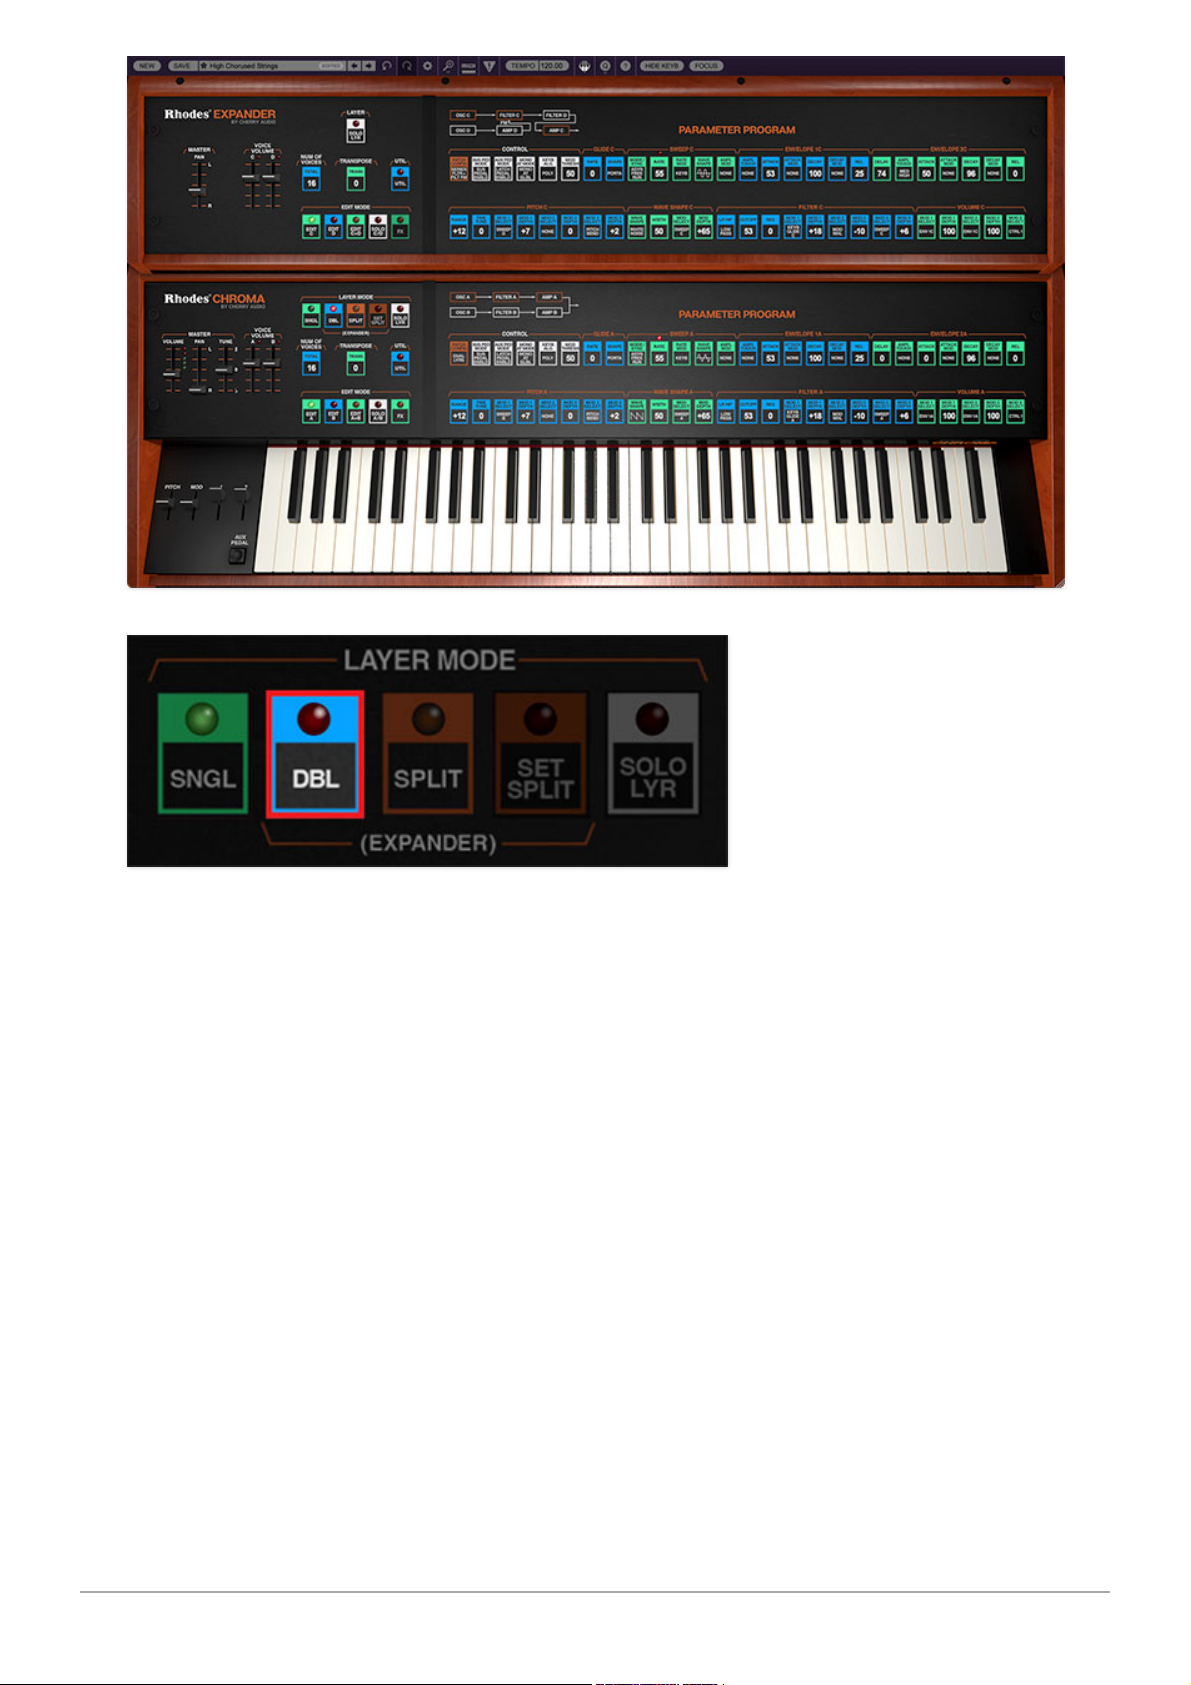
Setting LAYER MODE to
Double
effectively enables two separate Chroma
instruments - the bottom "normal" Chroma, and an Expander at the top. The
Expander can operate either in layered mode or the keyboard can be split
with the bottom Chroma on the bottom half of the split, and the Expander on
the top half. Expander functionality is identical to the main Chroma. The only
difference is that voice paths are referred to as C and D - this was done for
clarity (as opposed to having two sets of A and B voice paths).
When using FX in
Double
mode, the FX section may be either global for the
entire instrument (i.e., one single set of effects applied to Chroma
and
Expander) or an independent set of effects for Chroma and the Expander.
This is set with the FX MODE button on the Chroma FX page.
In this manual, we'll refer to the "main" Chroma section simply as
"Chroma," and the top Expander section simply as "Expander." Any
time the we reference the main Chroma's voice path A or B, the
same will apply to Expander's identical C and D voice paths.
Cherry Audio Chroma User Guide - 13
Page 14

SUMMARY
Depending on the Patch Configuration and LAYER MODE settings, Chroma
can have from 1-4 independent voice paths at any time. And depending on
patch configuration settings, these paths can either function simply and
independently, or they can interact in pairs (Chroma A/B paths and Expander
C/D paths) for more elaborate synthesis setups.
Cherry Audio Chroma User Guide - 14
Page 15
Unlike "control-per-function" synthesizers of the 70s that utilized a separate
knob, slider, or button for each parameter, the original Chroma made use of
a single data slider along with a multitude of membrane buttons and LEDs
for parameter adjustment. This type of UI was very popular in the 80s, for a
couple of reasons:
1) It drastically reduced the number of necessary physical knobs, sliders, or
switch controls , which greatly reduced production costs.
2) As the complexity of instrument architecture ballooned, so did the number
of necessary controls. This made it almost impossible for manufacturers to
continue producing "control-per-function" user interfaces, as it would've
necessitated an overwhelming number of physical controls, as well as
making instruments prohibitively expensive.
Specifically, the way the 80s-era single data-slider/many buttons instruments
worked was that the parameter to be adjusted would be selected using a
dedicated button (or worse, by selecting a "parameter number" with an LED
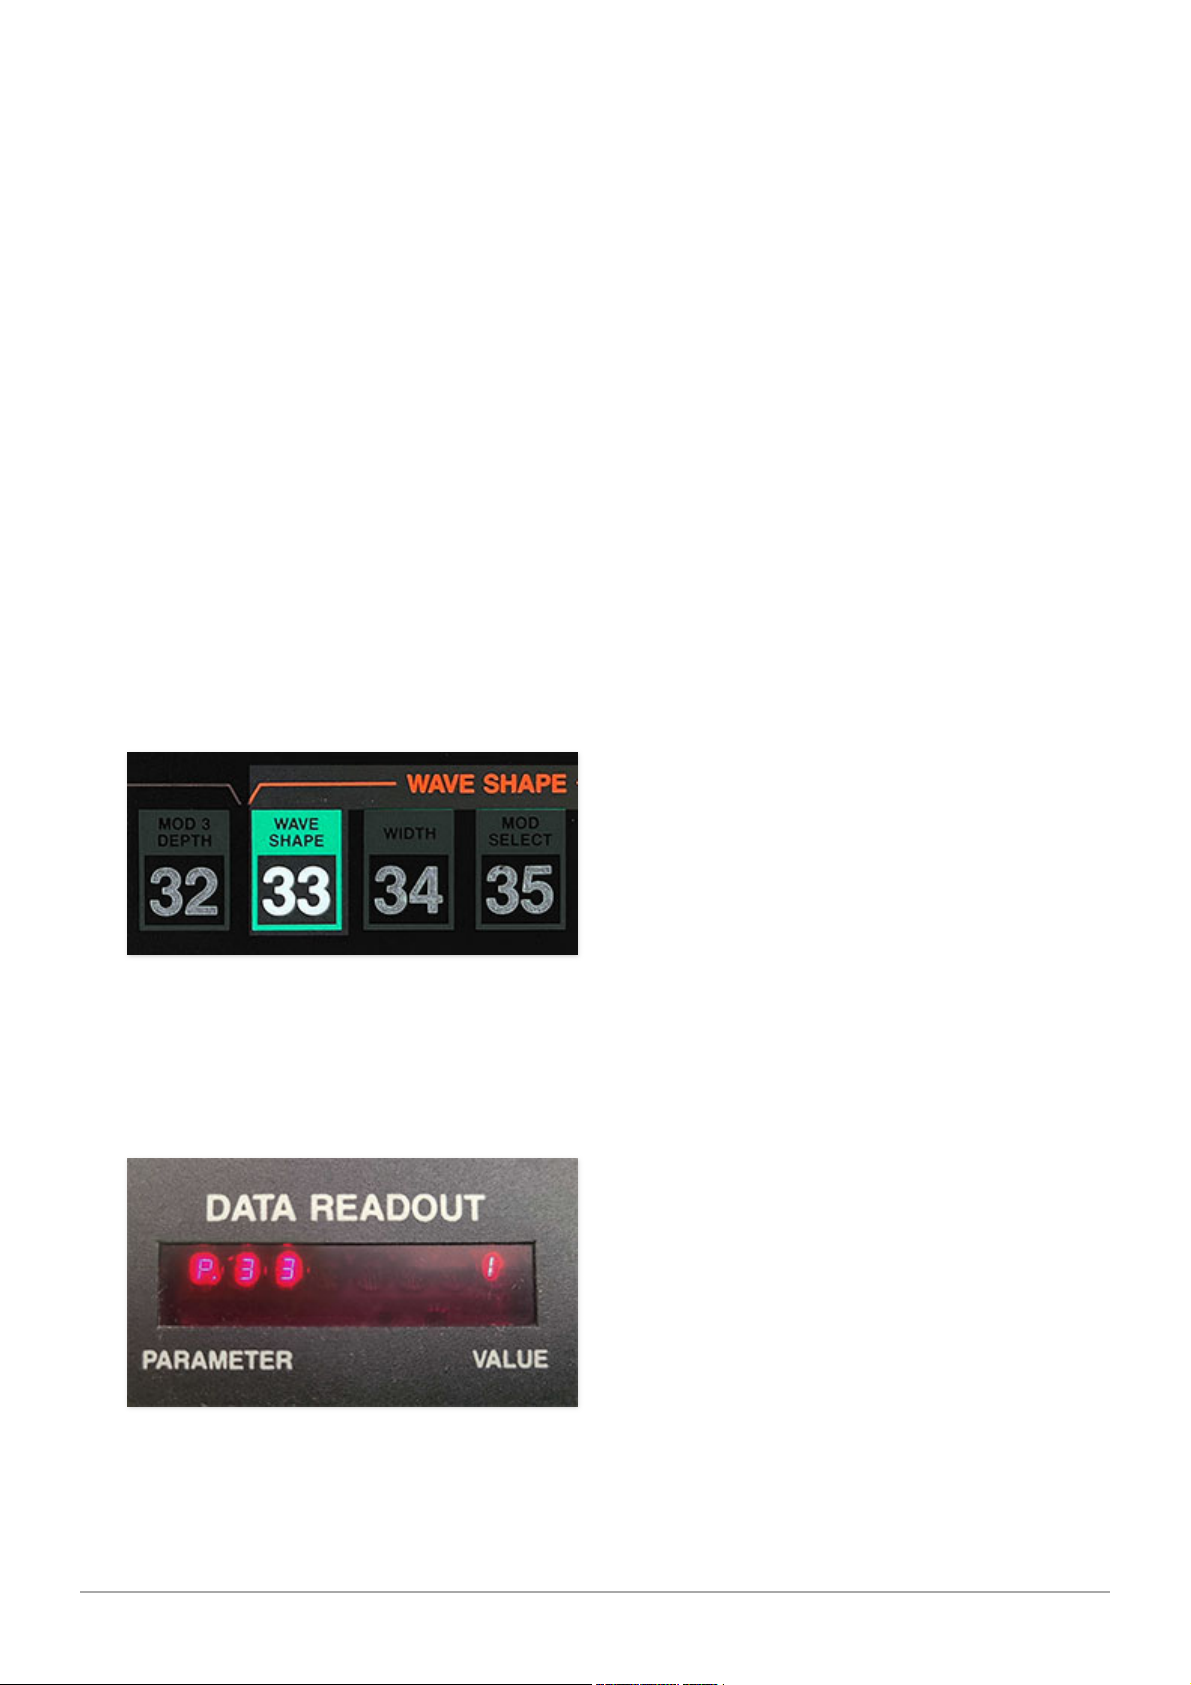
display). For example, if you wanted to change the oscillator wave shape in
the original Chroma, you'd press the #33 membrane button:
The teeny LED number display would show the current parameter number
being adjusted and its value. In this case you'd choose value of 0, 1, 2, or 3
using the single
PARAMETER CONTROL
slider:
Cherry Audio Chroma User Guide - 15
Page 16
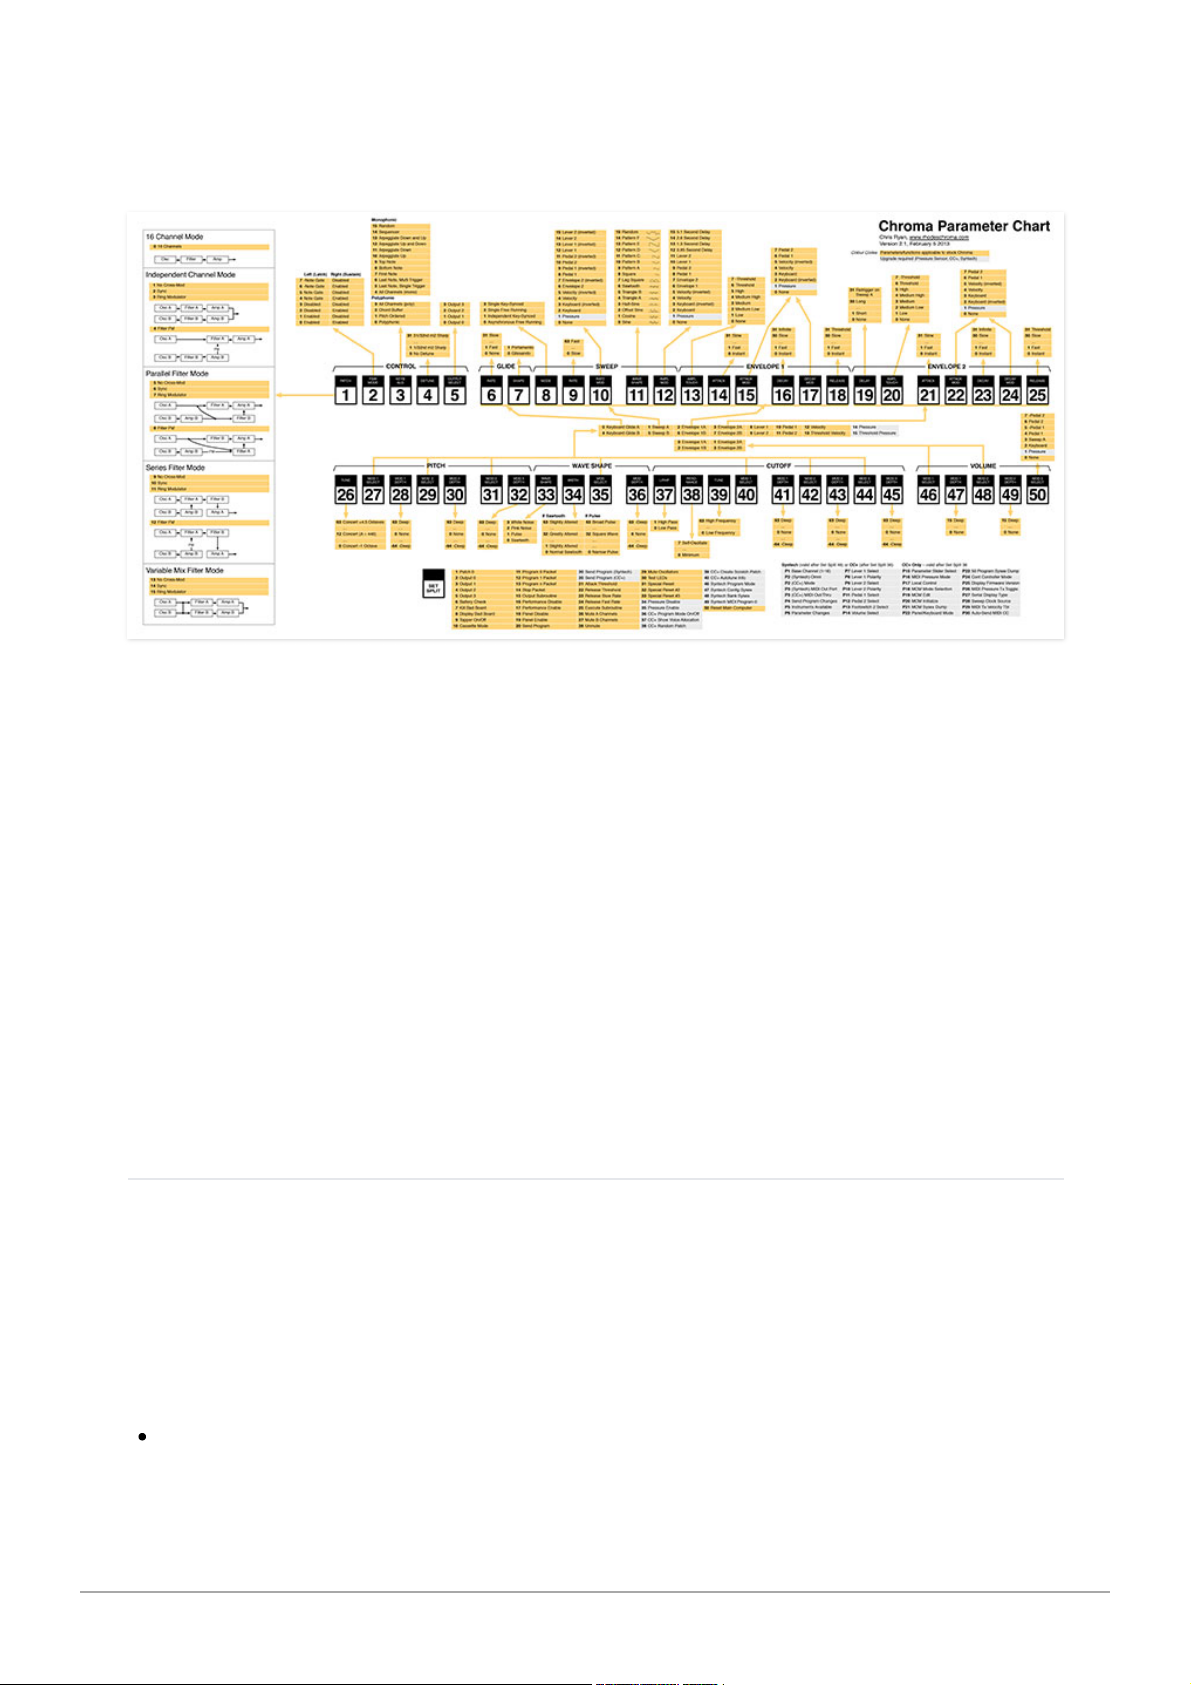
Obviously, the user would have no way of knowing which oscillator wave the
value number selection corresponded to, so they would simply refer to this
handy-dandy chart (!):
Stay with us here... now imagine having these kinds of arbitrary numbers for
dozens
of parameters, many consisting of menus with up to 16 choices. Most
Chroma users had this chart printed out in a large format and laminated (and
on the trip back from Kinko's, they probably made a second stop at Costco to
pick up a 65-gallon drum of Excedrin).
To be fair, the Chroma certainly wasn't the only offender at the time -
everyone
jumped on the the single-data-slider bandwagon, including
Yamaha, Korg, Roland, and Ensoniq. It's no accident that the control-perfunction synths immediately preceding the single-data-slider era are
generally considered far more desirable these days,
CHERRY AUDIO, MAKING A BRIGHTER
TOMORROW
There was no way we were going to subject users to this kind of
madness, so we put our heads together and created a much easierto-navigate user experience while retaining all of the Chroma's
awesome synthesis power. Obviously, having a large bank of
microscopically changeable light (aka, your computer's display) made a
friendly UI far more feasible. This was accomplished in a few basic ways:
Roughly half of the buttons are used to choose a selection from a menu
list. Instead of users selecting an arbitrary number, Cherry Chroma opens
Cherry Audio Chroma User Guide - 16
Page 17
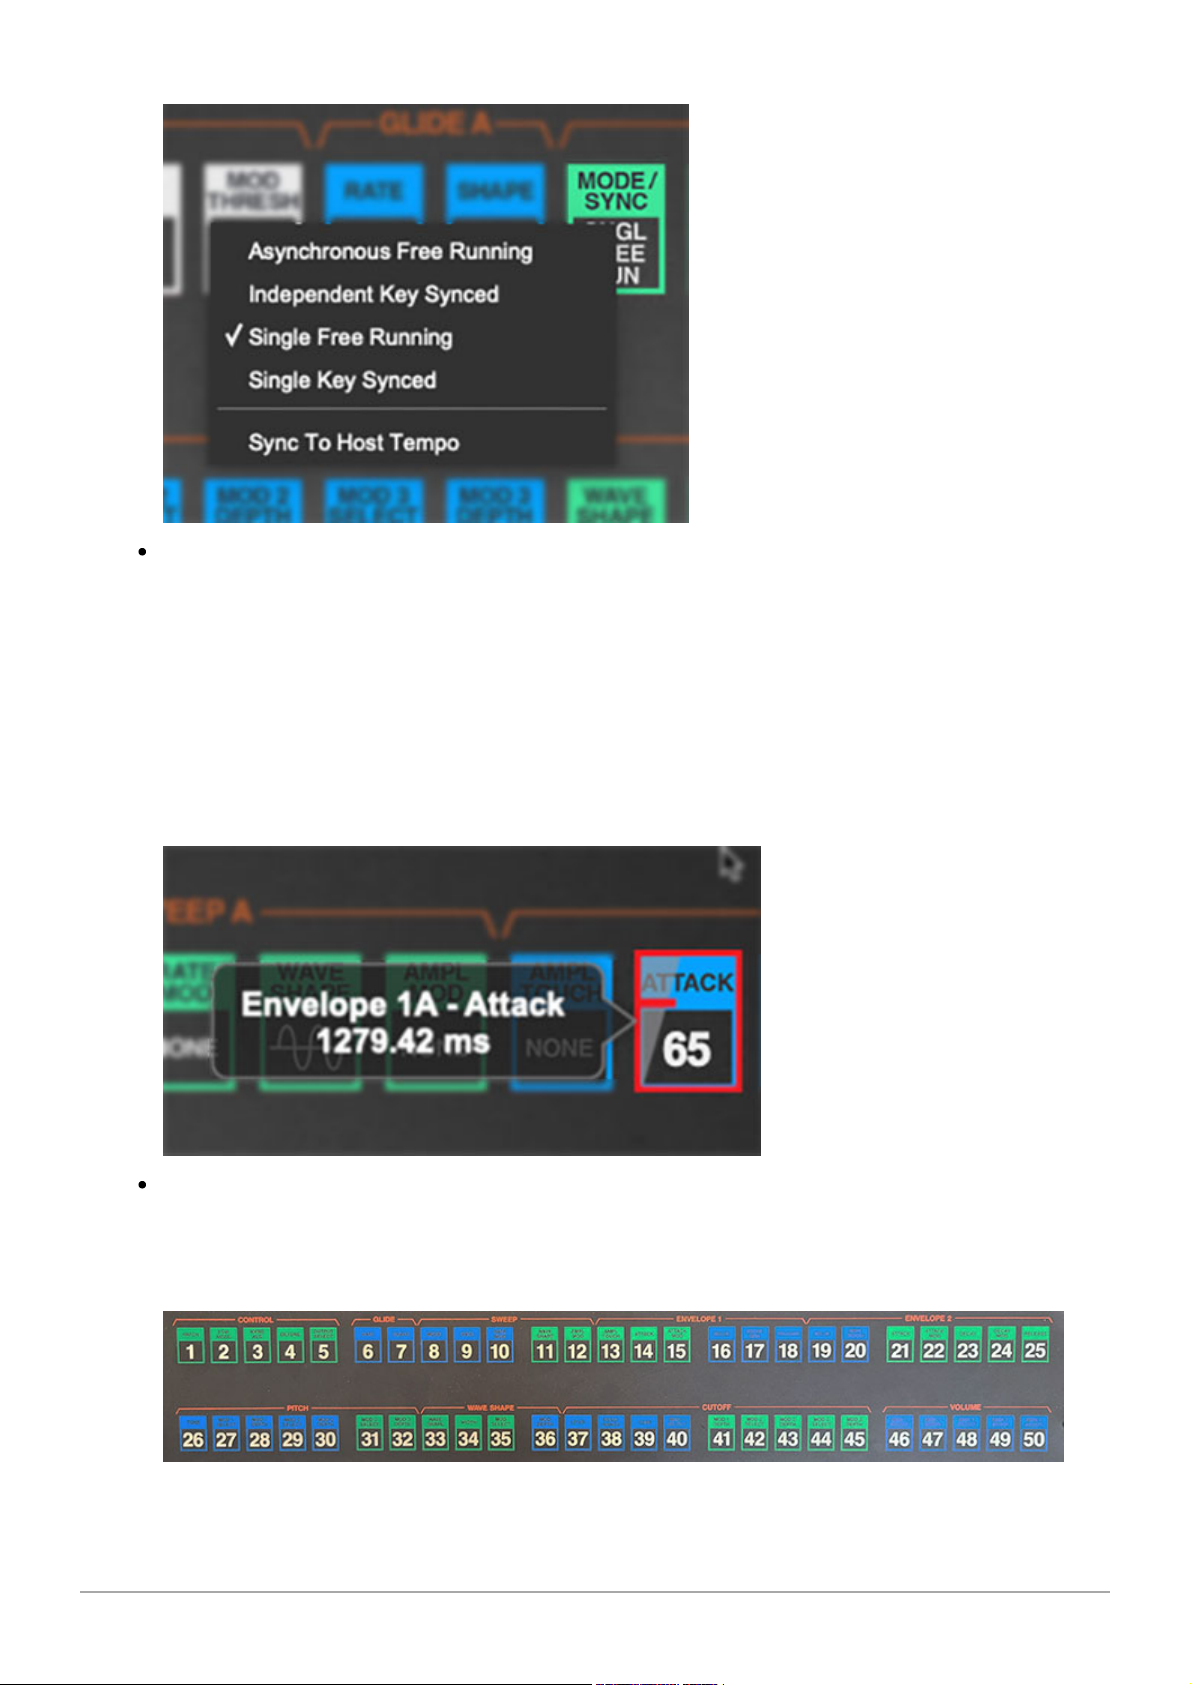
popup windows with text lists of clickable selections:
The remaining buttons are used to specify a value setting just like a
regular knob or slider. On the original, you'd click the button, then move
the single data slider to the desired setting.
In Cherry Chroma, the button itself is the "slider" control. The current
value is displayed in bold text, and the setting is varied by simply clicking
and dragging directly on the control. When the mouse is positioned over
the control, a more accurate numeric display will show in the popup
tooltip and a red line and scale appear for additional visual feedback.
In the original instrument, the Parameter Program buttons did doubleduty: not only did they specify the current sound edit parameter, they also
were used to select the current patch preset, hence the 1-50 numbers
printed on them (original instrument panel shown below):
Cherry Audio Chroma User Guide - 17
Page 18
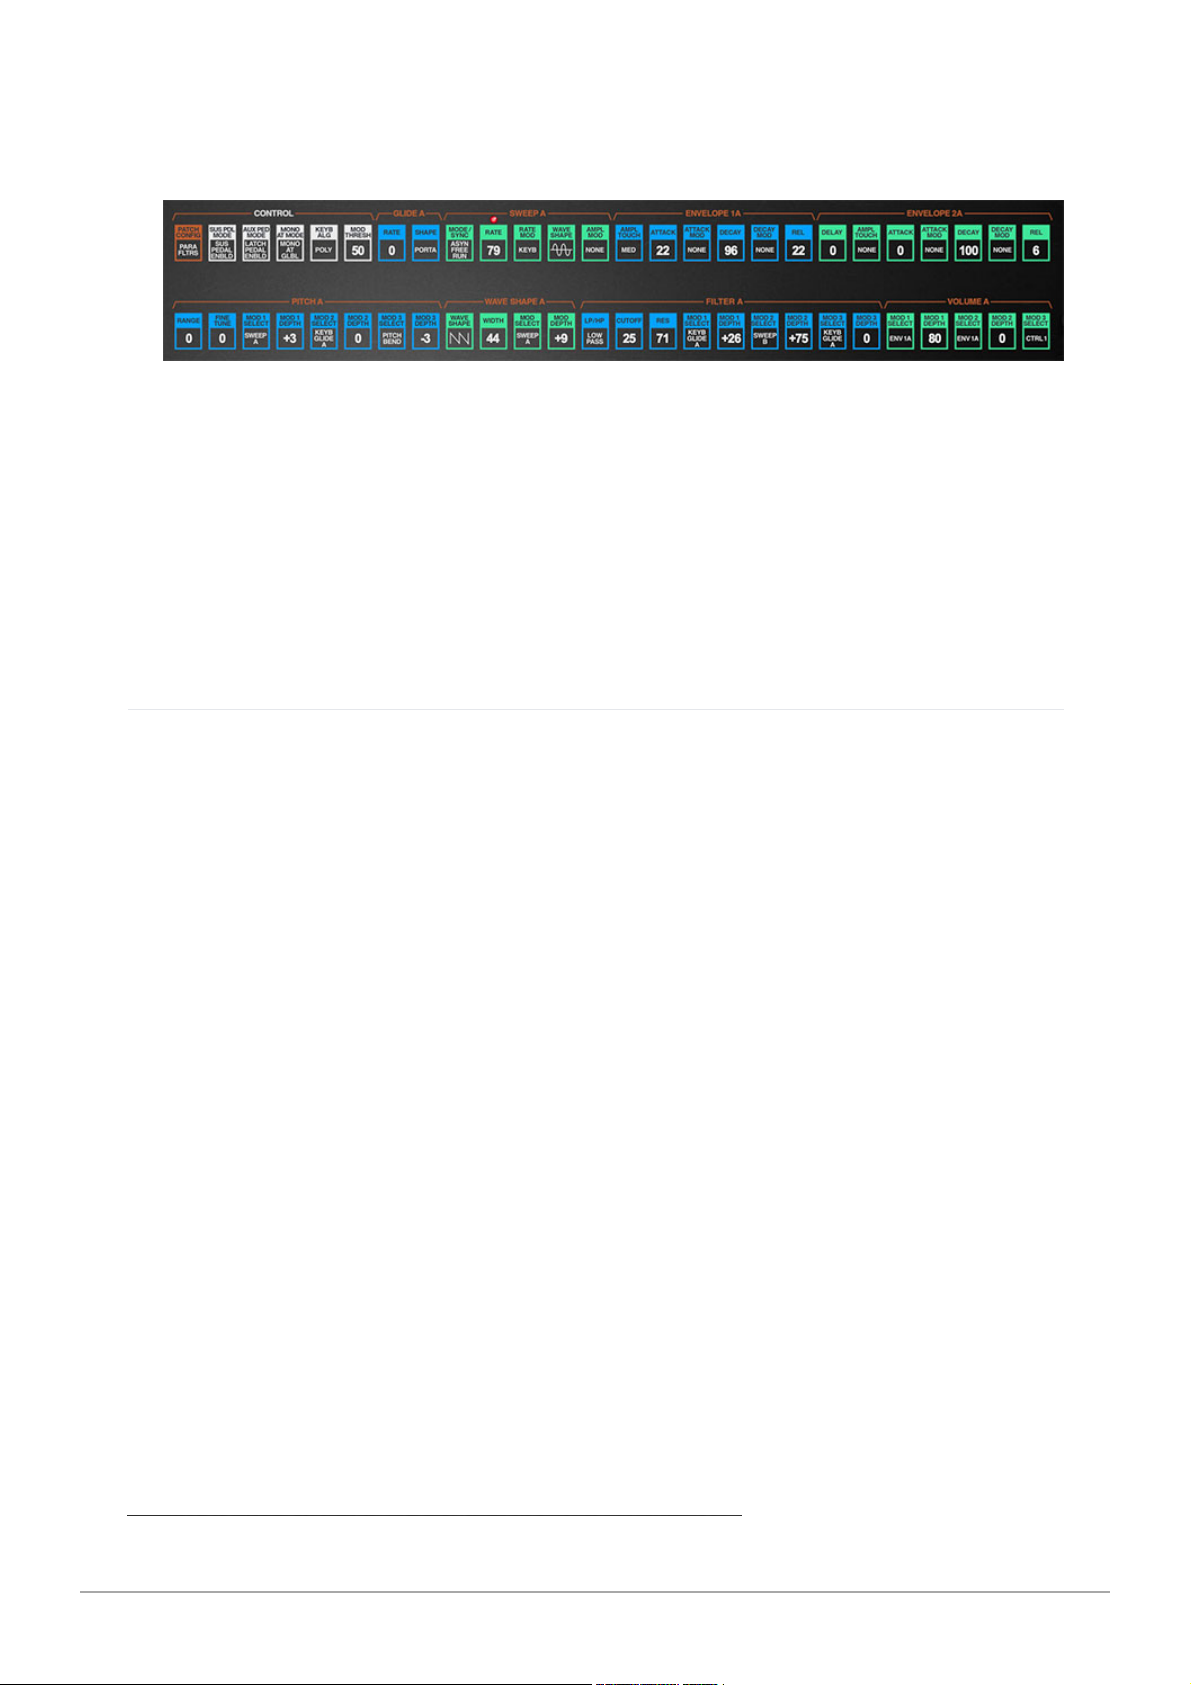
Since Cherry Chroma's preset browser operates independently of the
parameter buttons, we were able to use the space on the buttons where
the big numbers used to be to display either the current menu selection
or numeric parameter values:
This makes it MUCH easier to know what's going on with patches at a
glance. On the original instrument, if you wanted to know what the
current filter resonance setting was, for example, you'd have to make sure
you were in sound edit mode, then hit button 38, then check the value in
the teeny LED numeric display (and if you didn't have the values
memorized, refer to your value chart). Yuck.
PATCH CONFIGURATION MENU AND BLOCK
DIAGRAM
PATCH CONFIGURATION
in the CONTROL section specifies the basic setup of
Chroma's synthesis components. Its modular-like ability to rearrange the
voice path is possibly the most significant aspect of what makes the Chroma
special. (more about this in the Voice Architecture section, and specifics of
each configuration in Appendix: Patch Configurations)
If you've been reading up to this point, it should come as no surprise that the
original Chroma's 16 patch configurations were selected by clicking the
PATCH CONFIG
membrane button, then selecting a number from 0-15... and
referring to the aforementioned chart to see what you were getting. More
yuck.
Cherry Audio Chroma User Guide - 18
Page 19
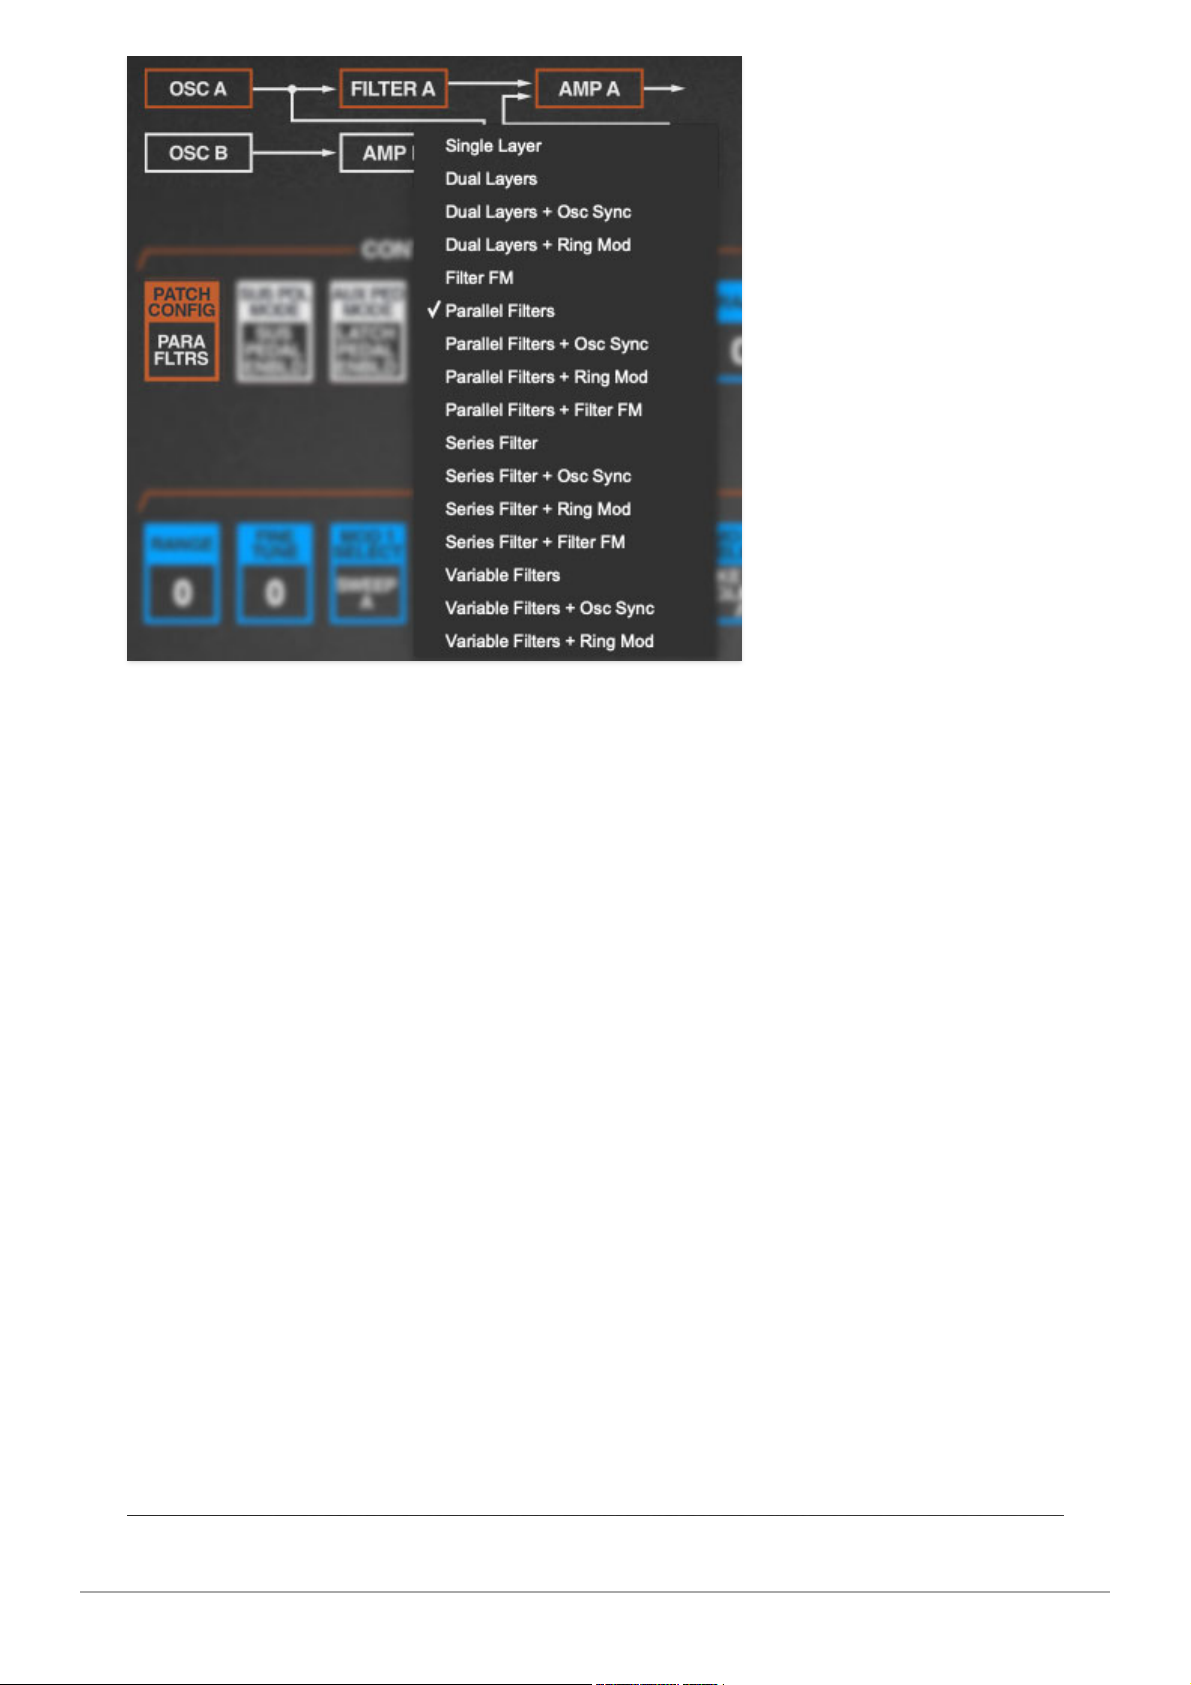
Cherry Audio's Chroma adds block diagram images right above the
PATCH
CONFIG
button that change to reflect the current voicing configuration. Its
boxes also turn orange to indicate which voice path is currently being edited:
A, B, or both A and B (or C, D, or both C and D for the Expander).
Additionally, the patch configuration selection menu can be opened either by
clicking the
PATCH CONFIG
button or by clicking anywhere on the patch
configuration block diagram. See how we thought of everything?
Cherry Audio Chroma User Guide - 19
Page 20
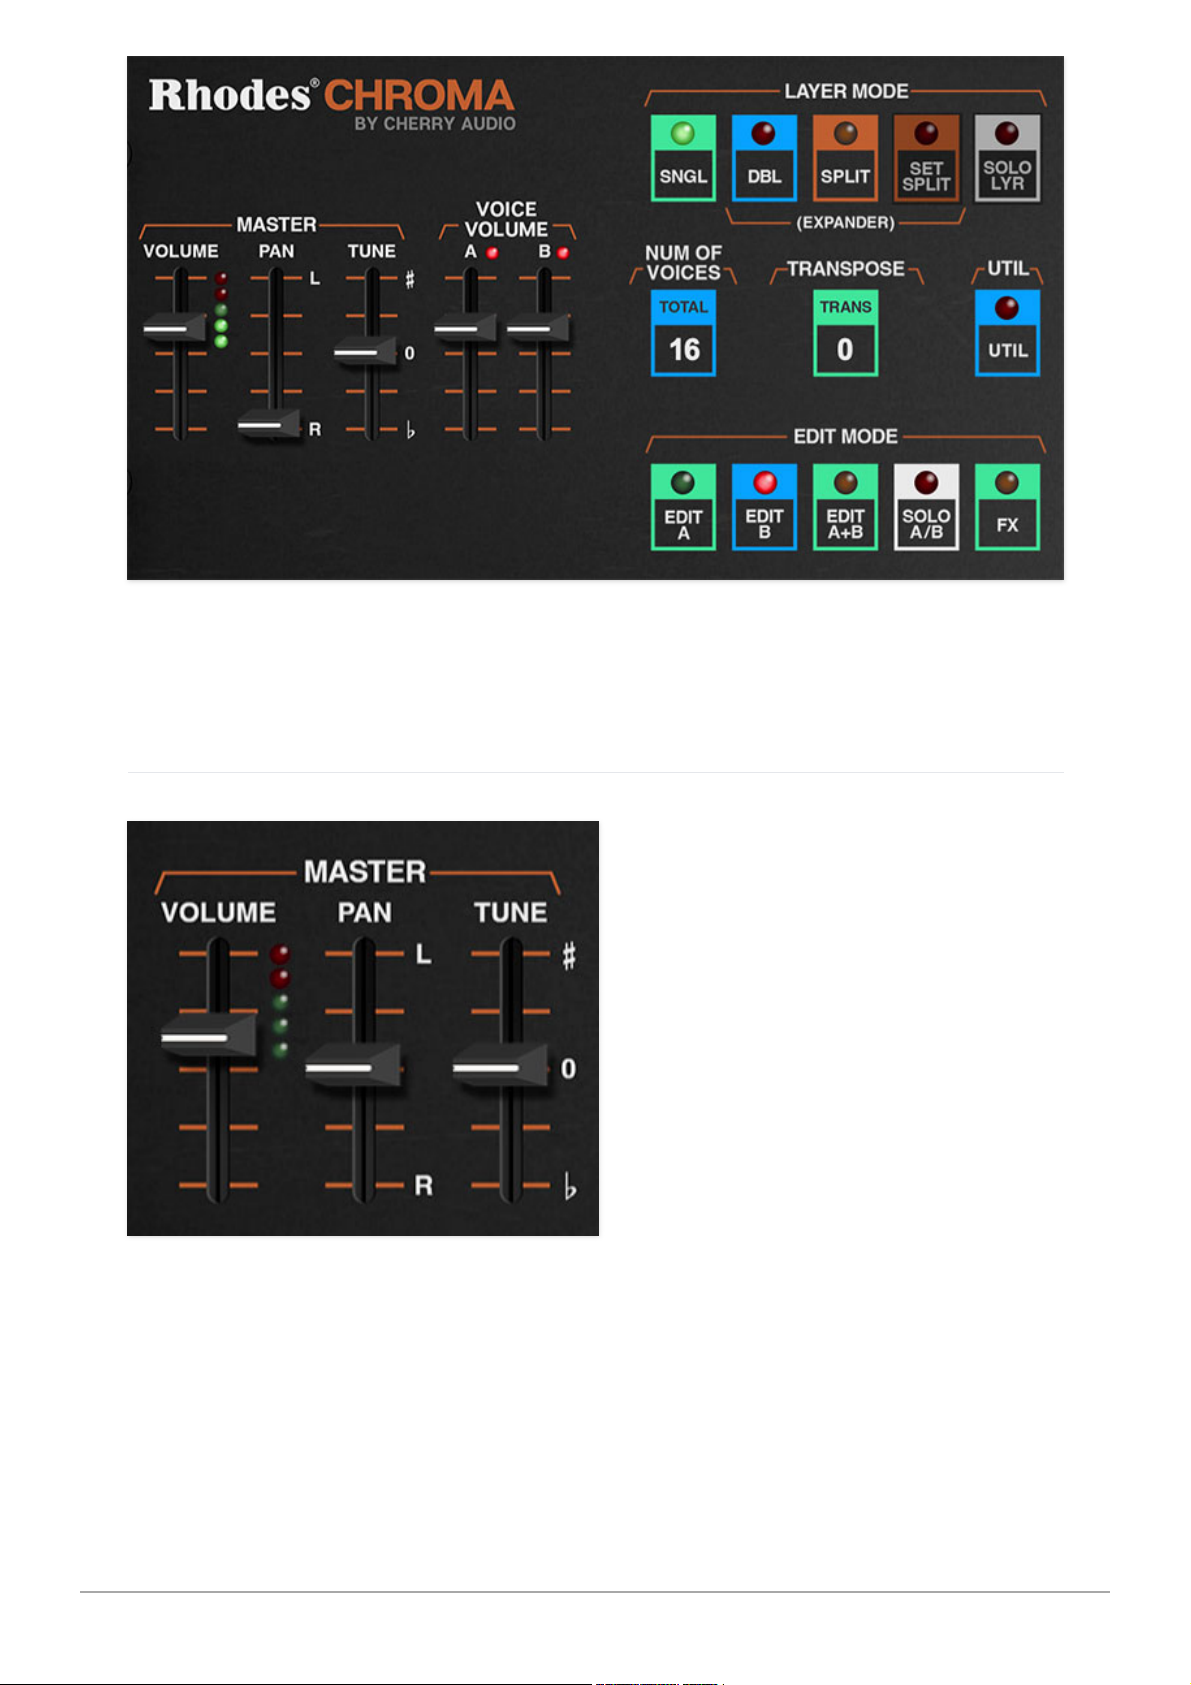
Most of these controls affect the Chroma or Expander sections; some affect
the entire instrument. We'll explain how they apply to as we go.
MASTER
VOLUME- Sets the master volume for the entire instrument. The LED meter
indicates output level; keep it in the high greens/low red to avoid undesirable
digital clipping.
PAN- Sets the positions of the instrument in the stereo field; up for left
channel, down for right channel. The Chroma and the Expander each have
their own independent pan controls.
Cherry Audio Chroma User Guide - 20
Page 21
TUNE- Sets the overall tuning for the entire instrument up or down by one
semitone.
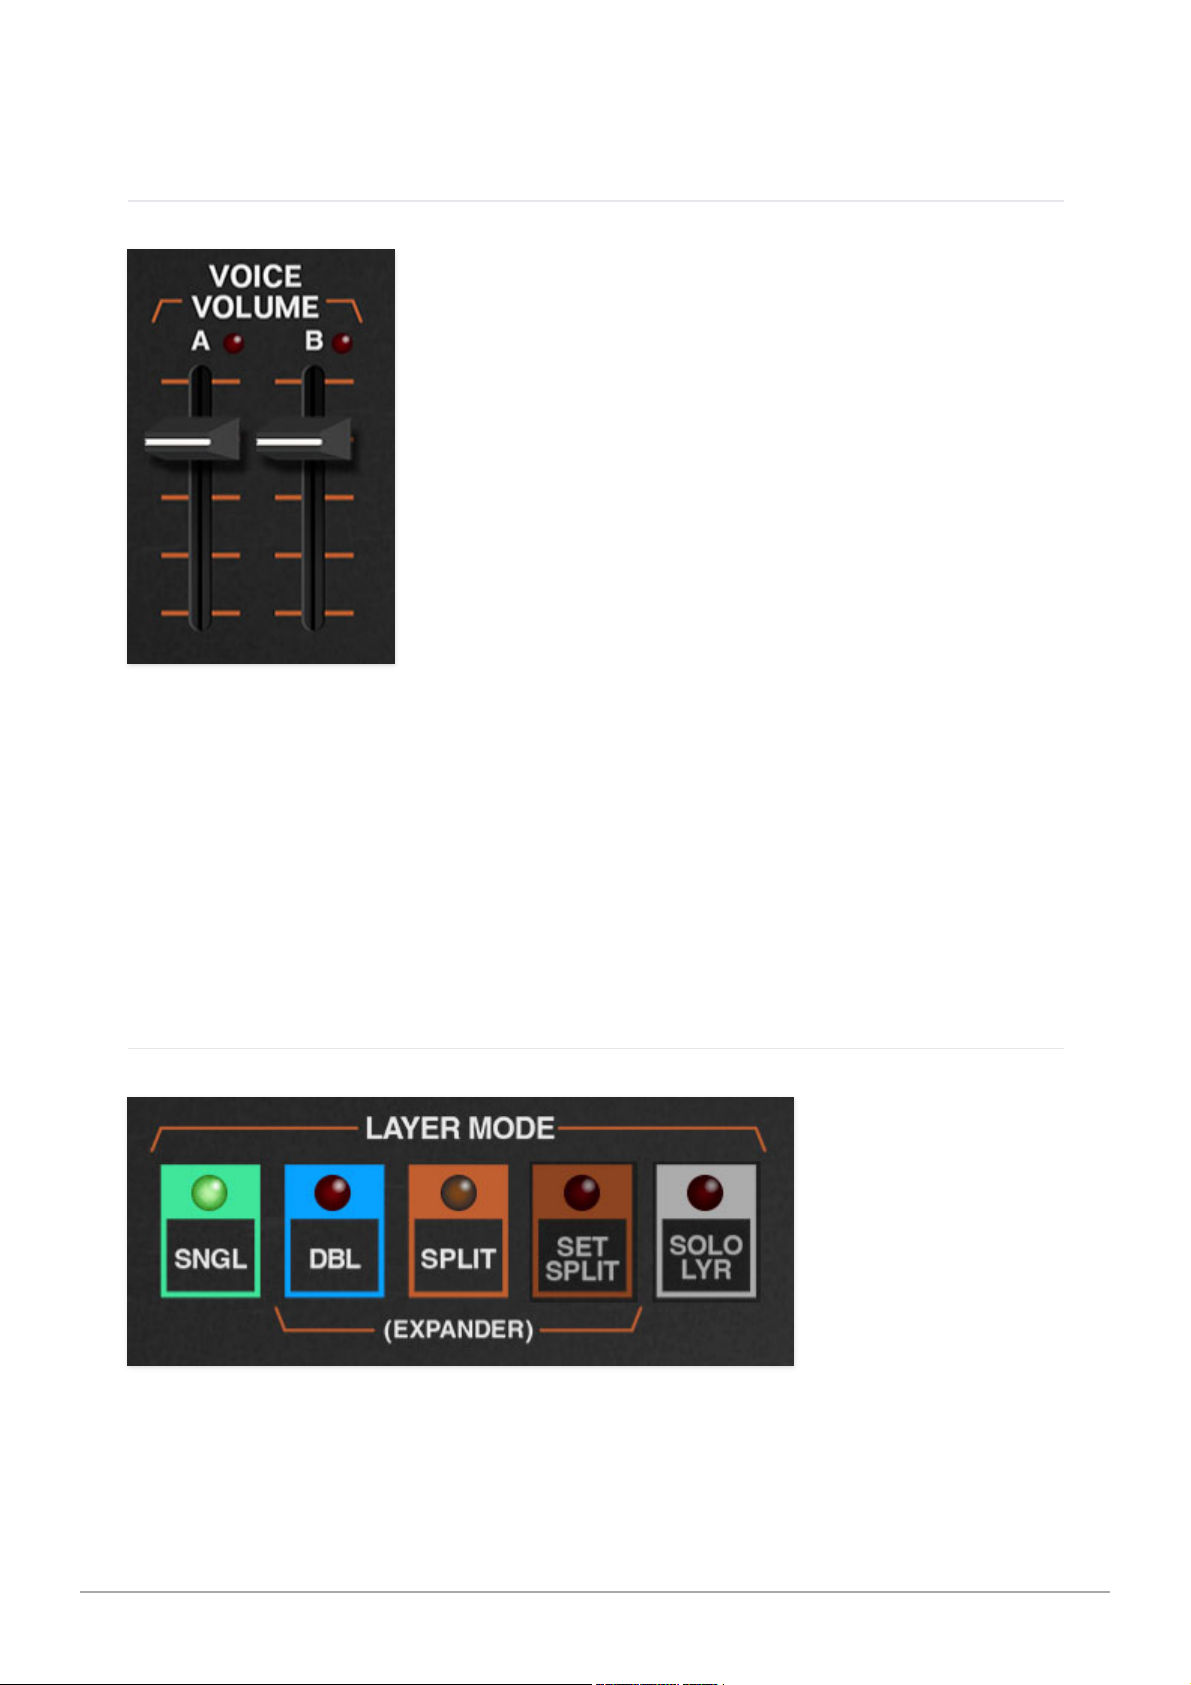
VOICE VOLUME
VOICE VOLUME- These sliders independently set the volume of each voice
path. If the Single Layer Patch Config is currently selected, the B or D slider
will be disabled and dimmed. Each of these has a red signal-present LED at
the top; these very useful for determining which voice path(s) is currently
making sound.
Note that depending on the current Patch Config setting, in some
cases the B and D sliders won't have much (or any) effect.
LAYER MODE
The LAYER MODE section defines overall "single" or "double" behavior as well
as configuring splits in DOUBLE mode.
Cherry Audio Chroma User Guide - 21
Page 22
SINGLE- Sets Chroma to play as a single 16-voice instrument, with two
voice paths (A and B).
DOUBLE- Sets Chroma to play as two independent 16-voice instruments,
with four voice paths - A and B on the bottom Chroma, and C and D on the
top Expander.
SPLIT/SET SPLIT- When
SPLIT
mode is enabled, the keyboard is split into
two zones. The bottom half of the split plays the bottom Chroma, and the
top half of the split plays the Expander.
To set up a split, click the
SPLIT
button, then click
SET SPLIT
. The
SET
SPLIT
button will flash. Simply strike the keyboard key where you'd like
the keyboard split to be; the
SET SPLIT
button stops flashing the split is
set.
SOLO LAYER- Toggle the
SOLO LAYER
buttons to solo either the Chroma
or Expander sections when in DOUBLE or SPLIT modes. When LAYER
MODE is set to
SINGLE
, the
SOLO LAYER
button is dimmed and disabled.
SOLO LAYER should not be confused with Slayer solo, which is when Kerry
King plays fast, sloppy, and evil.
NUMBER OF VOICES
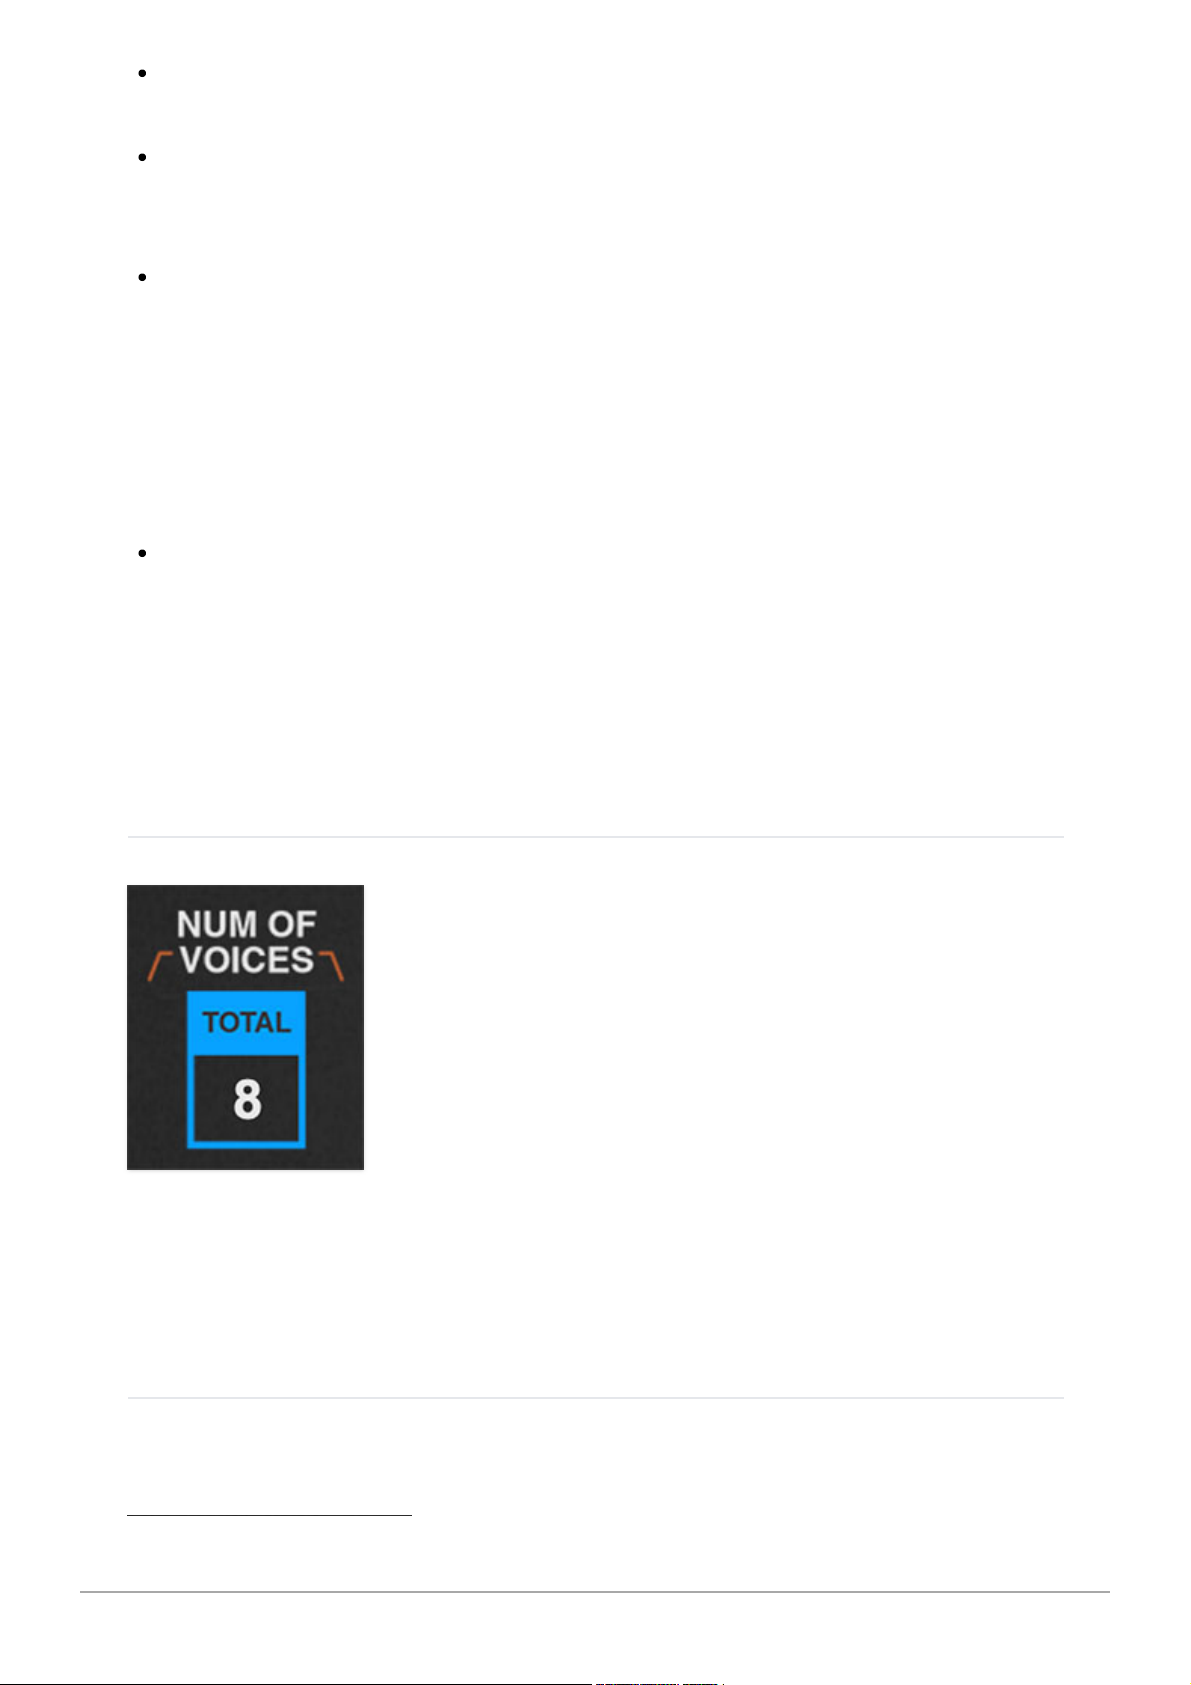
NUMBER OF VOICES- Sets the maximum number of voices for the layer,
whether set to a poly or mono unison mode. (Set this with the CONTROL
KEYBOARD ALGORITHM
menu.)
TRANSPOSE
Cherry Audio Chroma User Guide - 22
Page 23
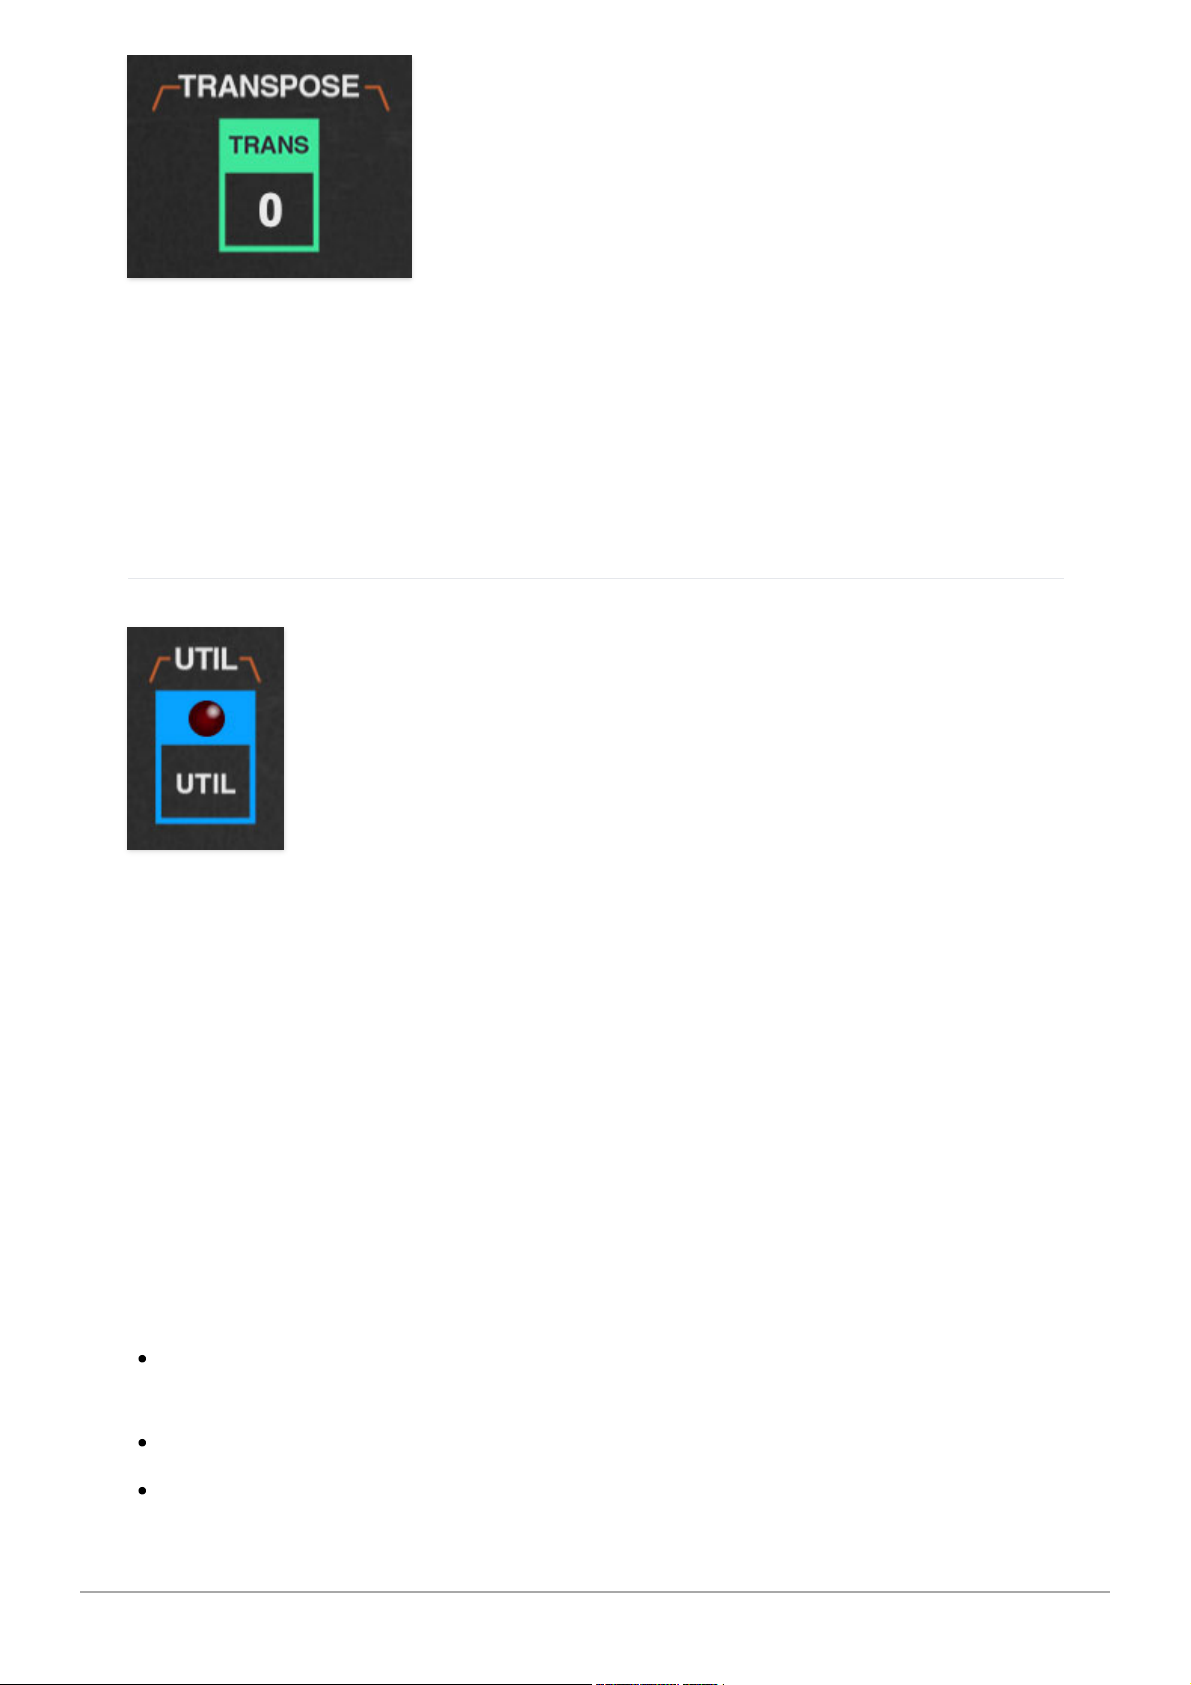
TRANSPOSE- The
TRANSPOSE
menu buttons transpose the range of Chroma
or Expander up to two octaves up or down. Unlike the PITCH A/B/C/D
RANGE
controls, which only affect one layer at a time, the TRANSPOSE section
buttons affect the entire Chroma (A/B) or Expander (C/D) for quick octave
changes.
UTILITY
The UTILITY popup menus allow Chroma and Expander layers to be moved
back and forth, independently initialized, and more. They also let you import
layers from other Chroma patches.
Note that a number of utility menu options only apply in
DOUBLE
or
SPLIT
LAYER MODE. If
SINGLE
mode is selected, inactive menus will be disabled.
If you accidentally mess anything up with the utility commands, you can
always undo with [ALT-Z] (Windows) or [⌘Z] (Mac), or by clicking the
counterclockwise undo arrow in the top menu strip.
Unlikes other controls, the Chroma and Expander
UTILITY
buttons are
identical, we just put copies in both places (because it looked nicer that
way).
Swap Chroma and Expander Parameters- Reverses the locations of
the Chroma and Expander layers.
Copy Parameters- Duplicates one layer to the other.
Voice Parameters-
Cherry Audio Chroma User Guide - 23
Page 24
Swap A and B- Reverses the voice path parameters
Copy A to B- Duplicates voice path A's parameters to voice path B.
Existing voice path B parameters are overwritten.
Copy B to A- Duplicates voice path B's parameters to voice path A.
Existing voice path A parameters are overwritten.
Reset Parameters- Initializes all settings of the selected layer only.
Copy Effects- Duplicates the settings of all effects from one layer to the
other; this is only relevant if FX Mode is set to
Dual Layer Effects
on the
Chroma EDIT MODE FX page. If FX Mode is currently set to
Global Effects
,
the
Copy Effects
menu options will be grayed out.
Import/Export- The Import/Export command allows layers to be moved
between sound presets. Data from the source preset isn't affected.
The process is simple:
Select the source patch in the patch browser in the top purple menu
strip.
Click the
UTILITY
button and select the appropriate
Copy <Chroma or
Expander> Parameters to Memory
submenu to copy the layer
parameters into the memory buffer.
Select the destination patch in the patch browser in the top purple
menu strip.
Click the
UTILITY
button and select the appropriate
Paste to <Chroma
or Expander> sub
menu to load the parameters into the desired layer.
The source patch will not be affected.
EDIT MODE
These buttons determine which voice path (or FX section) is currently being
edited with the 50
PARAMETER PROGRAM
controls.
Cherry Audio Chroma User Guide - 24
Page 25

EDIT A, EDIT B (Chroma), EDIT C, EDIT D (Expander)- These set the
voice path that is currently being edited. The orange bracket text above the
buttons also changes to indicate the currently edited voice path (e.g.,
GLIDE
A, SWEEP A
, etc. changes to
GLIDE B, SWEEP B
, etc.). Additionally, the color
of the boxes in the Patch Configuration diagram changes to orange for the
current A/B or C/D components, or to orange for both when
EDIT A+B
or
EDIT
C+D
is selected.
A+B (Chroma), EDIT C+D (Expander)- We'll explain this one as it applies
to the bottom Chroma A and B voice paths, but it works exactly the same for
the Expander C and D voice paths:
The
EDIT A+B
button is used to edit both voice paths simultaneously. When
EDIT A+B
is clicked, the most recently selected parameters (A or B) remain
displayed. Sound parameters are unaffected, that is, parameters retain their
individual settings for each voice path.
When a parameter is edited, the value will snap to the same setting
for both voice paths, but only for the parameter that's been edited.
In this way, you won't lose all the parameters settings for the "other" voice
path when
EDIT A+B
is selected, and you can freely move back and forth
between the
EDIT A
and
EDIT B
modes for parameters you'd like to retain
individual control of vs.
EDIT A+B
(for parameters you'd like both voice paths
to share).
SOLO A/B (Chroma), SOLO C/D (Expander)- These toggle soloing a
particular voice path. This lets you isolate the voice path for easier editing.
Note that the CONTROL section parameters are global for voice paths A/B
and C/D, so they don't change when EDIT A or EDIT B (or EDIT C or EDIT D) is
selected.
Also, some patch configurations only use one of the voice paths for audio
(
Filter FM, Parallel Filters
, etc.), so soloing may result in silence (everybody
sing along, "Soloing... results... in silence..."). The easiest way to determine if
this is happening is to look at the Patch Configuration block diagram at the
top; if there's only a single arrow at the right, the Patch Configuration isn't
using the B or D voice path.
FX- Allows editing of Chroma's effects section parameters. The EQ and
Limiter effects are always global for the entire plug-in (Chroma+Expander) that's why you'll only see controls for these on the Chroma FX page.
The Distortion, Phaser, Flange/Chorus, Delay, and Reverb effects can be
independent for Chroma and Expander or can function as a single set of
Cherry Audio Chroma User Guide - 25
Page 26

effects applied globally to both layers. This is set with the
FX MODE
button
on the Chroma FX edit page.
For more information, please see the FX section.
Cherry Audio Chroma User Guide - 26
Page 27
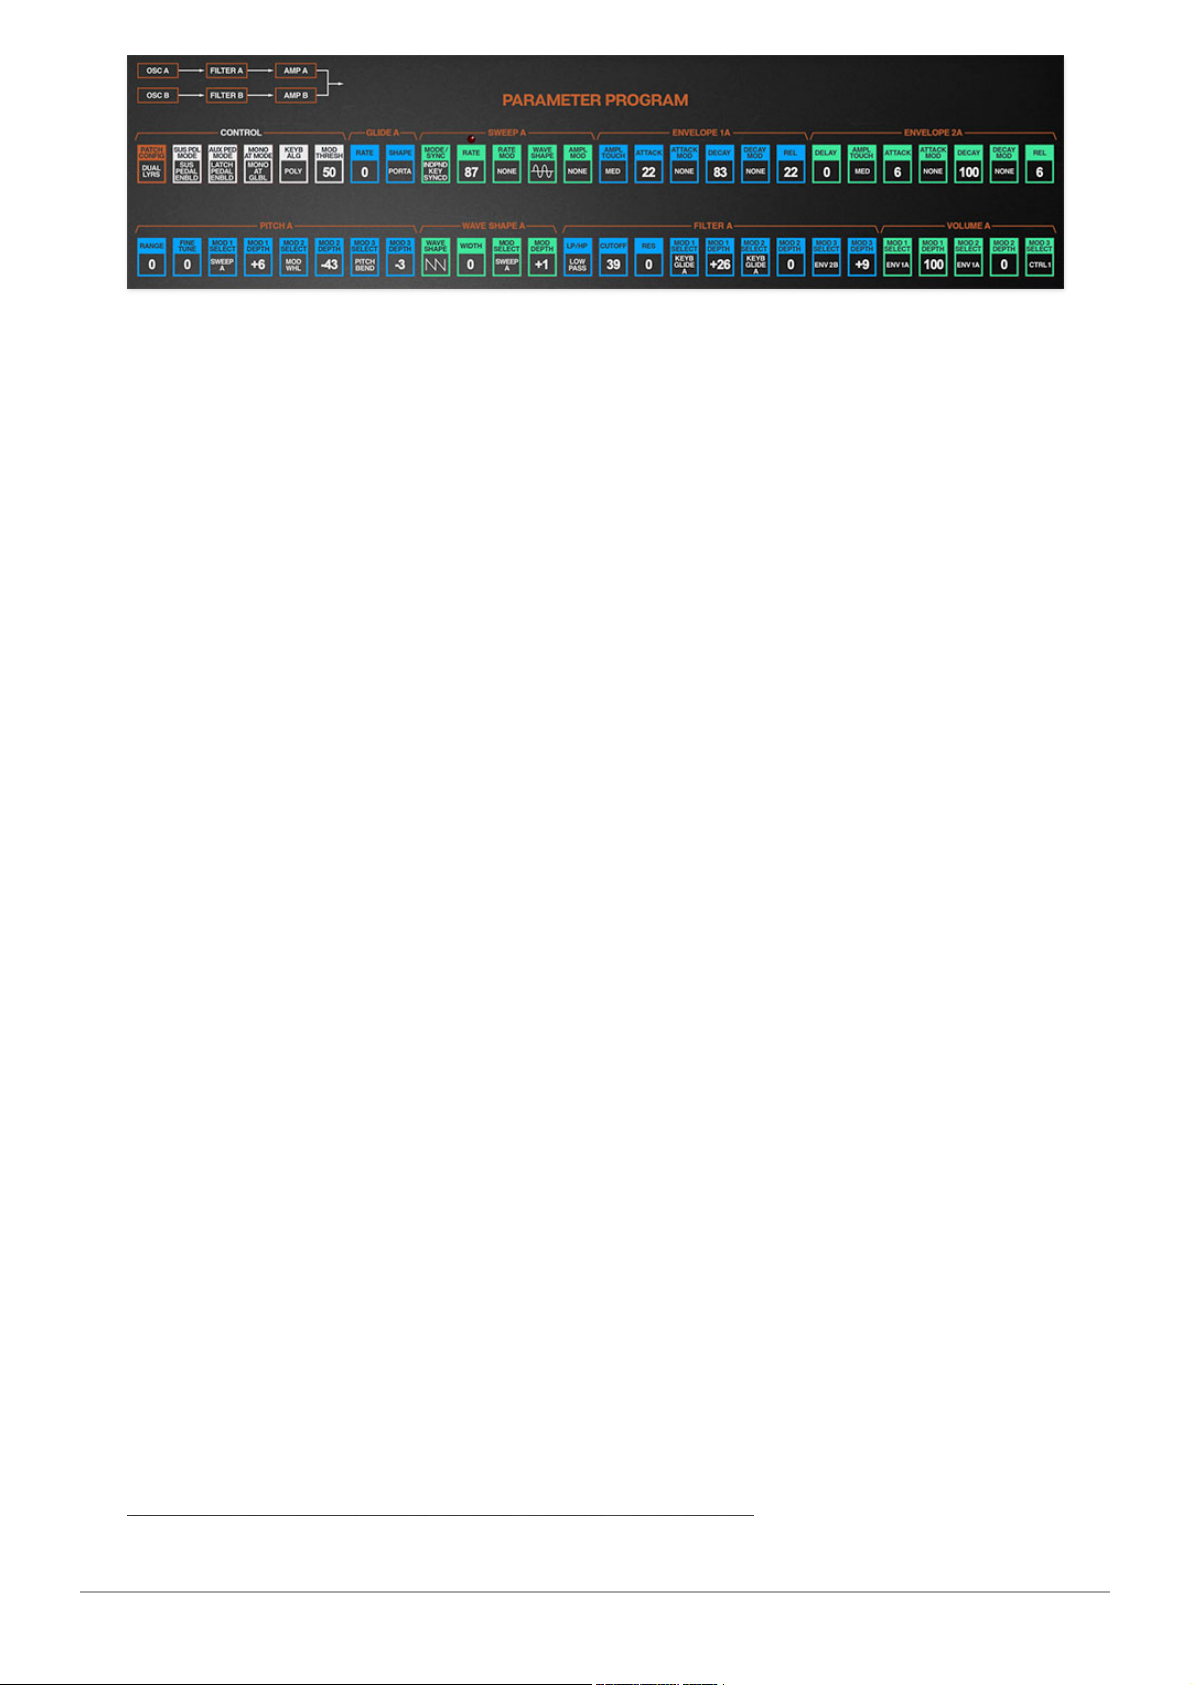
The PARAMETER PROGRAM section contains all of Chroma's sound
programming menus and variable controls. In case we hadn't previously
mentioned it, the Chroma is REALLY DEEP - kind of like a poly modular synth,
meets an Oberheim Expander, combined with a Kurzweil K2000.
In following chapters, we'll go through each PARAMETER PROGRAM section in
detail.
Cherry Audio Chroma User Guide - 27
Page 28
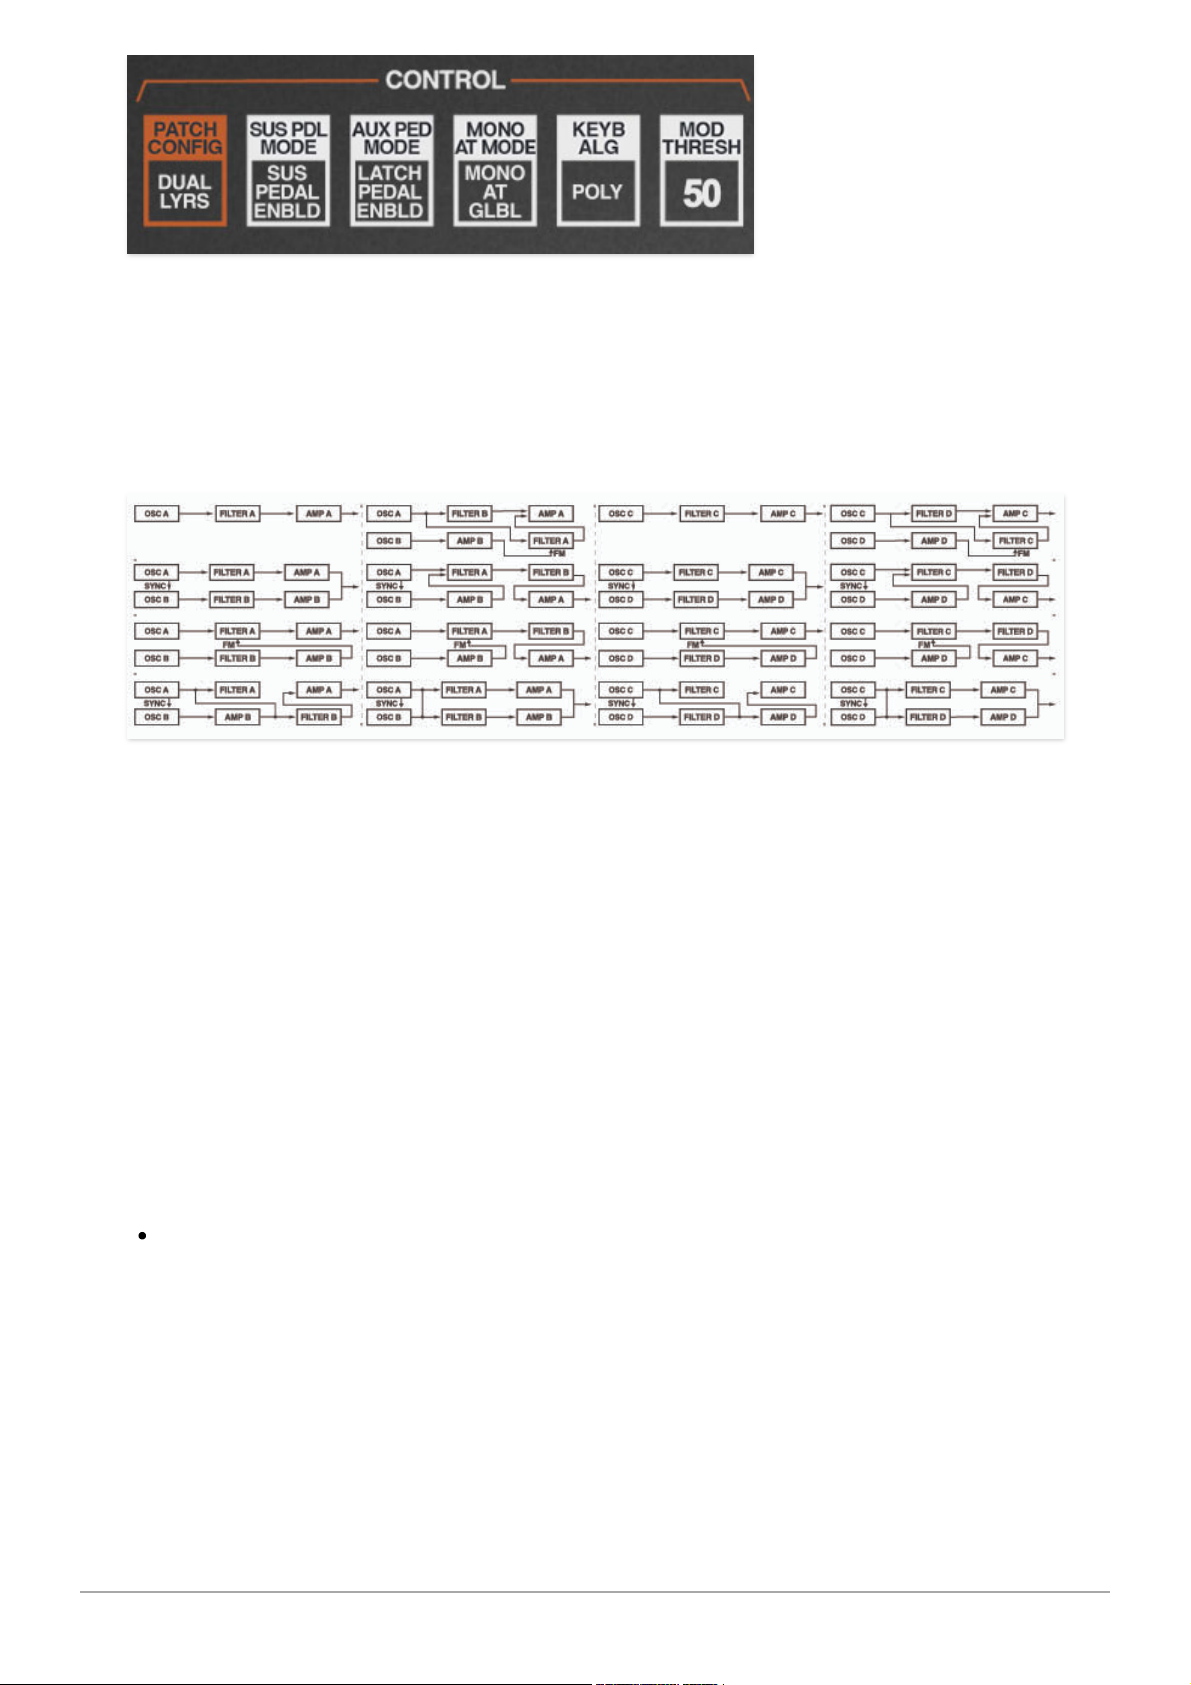
The CONTROL section contains what's often referred to as "global"
parameters. Unlike all other PARAMETER PROGRAM controls, these apply to
both
voice paths - A/B for the Chroma or C/D for the Expander. This is why
the word CONTROL (and most of the buttons) is white.
PATCH CONFIGURATION- This selects how the Chroma's various synthesis
"building blocks" are set up - if you're familiar with modular synthesizers,
think of PATCH CONFIGURATION as the way the modules are patched
together. Generally speaking, PATCH CONFIGURATION is the very first thing
you'll want to set when creating a patch.
There are sixteen choices in five categories, ranging from a simple single
oscillator>filter>amp setup to elaborate series or parallel dual-filter setups
with ring modulation, filter FM and more. For detailed information on each
PATCH CONFIGURATION choice, please see Appendix 1: Patch
Configurations.
SUSTAIN PEDAL MODE- Sets the behavior of a standard sustain pedal:
Sustain Pedal Enabled- Chroma responds to sustain pedal control.
When the sustain pedal isn't down, and keys are released, the envelope
generator instantly jumps to the release phase. When the sustain pedal is
down and keys are released, notes will complete the entire duration of the
envelope decay phase. With this in mind, set DECAY to high setting, and
RELEASE to a low setting if you'd like a sound's sustain characteristics to
behave in a familiar piano fashion.
Cherry Audio Chroma User Guide - 28
Page 29

Sustain Pedal Disabled- Chroma ignores sustain pedal control.
AUX PEDAL MODE- The original Chroma had inputs for two pedal
controllers. In fact, it actually included a fancy dual pedal... in the included
flight case... hooray for insanely pricey synths! (fun fact: in 1982 the Rhodes
Chroma retailed for $5295. At the time, that kinda dough would buy a brandnew Chevy Chevette!)
Since some modern MIDI/USB controllers include additional aux pedal inputs
(such as the higher-end Arturia and Native Instruments controllers), we
retained this feature. Keep in mind that the
AUX PEDAL
control doesn't
have
to be a pedal either - any switched MIDI controller can be assigned by simply
right-clicking on the
AUX PEDAL
button in the left-hand controllers section.
(For more information on the
AUX PEDAL
button see the Left-Hand
Controls section. More info on assigning hardware controllers can be found
in the MIDI Controllers Setup and The MIDI Tab section. So much hot-
linkering!)
Latch Pedal Enabled- This allows the secondary pedal to hold notes with
"no-hands" - it's useful for soloing over a bass note(s) or chords. Here's an
example of how to use it:
Play and hold a low octave, and press and hold the aux pedal
Release the held notes. The notes will continue to sound until the pedal
is released, or the envelope decay stage has ended. (it works best
when envelope
DECAY
is set to maximum, allowing constant sustain).
When notes are held with the sustain pedal, additionally played notes
will decay and release normally; that is, only the notes held by the aux
pedal will sustain indefinitely.
Latch Pedal Disabled- Disables the latch function.
Note Gate- Notes sound only when pedal is down. This makes the aux
pedal behave like a big mute button. It's useful for Double mode patches
when you'd like to "bring in" (or exclude) the Chroma or Expander layers.
Note Gate Inverted- The same as Note Gate, but in reverse - notes are
silenced when the pedal is down.
AUX PEDAL MODE AND PEDAL POLARITY
When using an aux pedal, more than likely, you'll be using a standard sustain
pedal. The polarity of sustain pedals isn't standardized - if you've ever had
notes sustain on a synth when the pedal was up, and play normally when the
pedal is down, you know what we're talking about.
Cherry Audio Chroma User Guide - 29
Page 30

If the
AUX PEDAL
button to the left of the keyboard nominally appears
down
and goes up when you press the aux pedal, your pedal is the wrong polarity.
Fortunately, there are three solutions, two of which are super easy:
Many sustain pedals include a polarity switch. If yours does, flip it the
other way, and Bob's your uncle.
If the pedal doesn't have a polarity switch, the polarity can effectively be
reversed in Chroma's MIDI controller assignment tab. We're going to
assume you've already assigned the pedal to the
AUX PEDAL
button to
the left of the keyboard (if not, right-click the
AUX PEDAL
button, choose
MIDI Learn
, press down the aux pedal, done!).
Click the
MIDI
icon button in the top purple menu strip. Now locate
Aux
Pedal
in the
Name
row of the MIDI tab. Turn its little
Min
knob all the way
up, and its
Max
knob all the way down. Click the
MIDI
icon button again to
close the MIDI controllers tab.
If for some reason you're not into the preceding options, most USB/MIDI
controllers allow pedal polarities to be reversed using their usuallynightmarish onboard menus (or some kind of computer control app you
didn't know you had, that will surely need to update itself 17 times,
require a login ID and password you don't remember, etc. etc.). So uh...
we recommend reversing polarity using one of the other methods.
AFTERTOUCH (AT) MODE- Determines how Chroma responds to mono
aftertouch controller data.
Mono Aftertouch Global- Incoming keyboard aftertouch control is
summed to one overall control stream.
Mono Aftertouch Last Note- Chroma responds to aftertouch data from
only the most recently played note. This rather nifty feature gets very
close to imitating true polyphonic aftertouch.
Note that Chroma always responds to poly aftertouch, so
AFTERTOUCH (AT) MODE has no effect on incoming poly
aftertouch control data.
KEYBOARD ALGORITHM- Determines how Chroma assigns notes to synth
voices.
Polyphonic- Multiple notes can sound simultaneously, up to a maximum
of 16 simultaneous voices. If max polyphony is exceeded, the oldest voice
Cherry Audio Chroma User Guide - 30
Page 31

will be "stolen."
Poly Pitch Ordered- Chords are assigned from top note down to the
most recently released voices. This works well when glide is enabled.
Poly Chord Buffer- Playing a chord will enter it into memory, but it will
not be heard. When the Aux Pedal is pressed, the chord will sound and
notes can be played on top (with both hands, hooray). The chord remains
in the buffer until all notes are released and the process can be repeated
with a new chord whereupon you can continue to bore the audience
joyously solo over a different chord.
Poly Unison- This unison mode stacks and divides Chroma's 16 voices
dependent upon the number of notes currently played. For example, if
one note is played, all 16 unison voices sound. If two notes are played,
each 8 voices sound for each note, continuing to divide to by even
numbers up to the total 16 voices, which would sound one voice per note
(in case you have an excess of fingers, or you're playing the world's most
badass version of "Heart and Soul" with a very understanding partner).
If you're using an older computer, be aware that
Poly Unison
can be CPU
intensive.
Mono, Last Note, Single Trigger- One note sounds at a time, with
priority given to the most recently played note. Single trigger means that
the envelope generators will only retrigger if all currently held notes are
released. This is useful for legato playing - a good analogy would be
sliding your finger up and down a guitar string after plucking a note.
Mono, Last Note, Multi Trigger- One note sounds at a time, with
priority given to the most recently played note. Multi trigger means that
the envelope generators retrigger every time a new note is played. This is
a has more aggressive sound, and is usually good for bass parts. A good
analogy here would be uh... Johnny Ramone insistently downstroking
every single chord played, then stealing Joey's girlfriend, and them never
speaking again, yet remaining in the band together for decades, and uh...
maybe we're not that good with analogies?
Mono, First Note- Only the first note is heard when a group of notes is
played. This can be useful in DOUBLE where one layer plays full chords,
and one emphasizes an "inner" chord note.
Mono, Bottom Note- Only the lowest note is heard when a group of
notes is played. Useful in DOUBLE mode if you're playing a chord and
you'd like one of the layers to play chords and the other to play bass.
Cherry Audio Chroma User Guide - 31
Page 32

Mono, Top Note- Only the highest note is heard when a group of notes is
played. Useful in DOUBLE mode when playing a chord and you'd like only
the top (lead) note only to sound on one of the layers.
The Chroma Arpeggiator
Before we delve into the specific arpeggio modes, we'd like to point out some
specifics of the Chroma arpeggiator, which is unique in a number of ways:
Typically, an arpeggiator has a range control that sets the upper and lower
note-range boundaries. The Chroma arpeggiator does not - the range is set
according to notes played. For example, if a simple triad is played, the range
would be a fifth: the distance between the bottom and top note of the triad.
However, the Chroma arpeggiator "remembers" notes as they're played; in
other words, notes don't have to be held to continue sounding in the
arpeggio. In this way, if you wanted to play a triad over a two-octave range,
you could play the initial three-note chord, release the notes, then play the
same triad an octave higher, and all two octaves of notes would continue to
play. The only caveat is that at least
one
note must be continuously held, or
the arpeggio sequence is reset. Unlike most arpeggiators, newly added notes
do not repeat in octaves - only specifically played note are added to the
arpeggio sequence. The arpeggiator "resets" and clears all notes when all
notes are released.
The other unique thing about the Chroma arpeggiator is that individual notes
respond to and retain velocity data. For example, if three notes of a chord
are played in succession with the first two struck very lightly, and the last
note stuck hard, the arpeggiator remembers each note's velocity and plays it
back with the velocity it was initially struck with. This results in musically
interesting, dynamic arpeggio sequences.
Finally, as the arpeggiator options are contained within the KEYBOARD
ALGORITHM menu, there is no rate control. Arpeggiator rate is determined by
the SWEEP A
RATE
control (or SWEEP C
RATE
on the Expander).
Arpeggiator Up- All entered notes play in ascending order.
Arpeggiator Down- All entered notes play in descending order.
Arpeggiator Up/Down- All entered notes ascend then descend.
Arpeggiator Down/Up- All entered notes descend then descend.
Arpeggiator Sequencer- Notes play back in the order they are entered
in and loop. The length of the arpeggio is the total number of notes
entered. Like the other arpeggio modes, once a note is played, it can be
Cherry Audio Chroma User Guide - 32
Page 33

released and will continue to play as part of the sequence as long as at
least one note is held. When all notes are released, the arpeggio pattern
stops and the sequence is "reset."
Arpeggiator Random- All entered notes play back in a random pattern.
MOD THRESHOLD- This is one of Chroma's more unusual features; it works
in conjunction with mod sources as a preset comparator. In other words, "if
control signal is above a certain level, then do <thing here>." Following is a
list of mod sources that mod threshold works with... we even made a fancy
table:
PARAMETER
PROG
SECTION
PARAMETER MOD THRESHOLD FUNCTION
ENVELOPE
1/2
AMPLITUDE
TOUCH/Threshold
notes audible when played with
velocity greater than THRESHOLD
setting
ENVELOPE
1/2
AMPLITUDE
TOUCH/Threshold
Inverted
notes silenced when played with
velocity greater than THRESHOLD
setting
PITCH
MOD <1,2,3>
SELECT/Threshold
Velocity
MOD <1,2,3> DEPTH CV summed with
pitch when notes played with velocity
greater than THRESHOLD setting
WAVE
SHAPE
MOD
SELECT/Threshold
Velocity
MOD <1,2,3> DEPTH CV summed with
WIDTH setting when notes played with
velocity greater than THRESHOLD
setting
FILTER
MOD <1,2,3>
SELECT/Threshold
Velocity
MOD <1,2,3> DEPTH CV summed with
CUTOFF setting when notes played
with velocity greater than THRESHOLD
setting
Cherry Audio Chroma User Guide - 33
Page 34
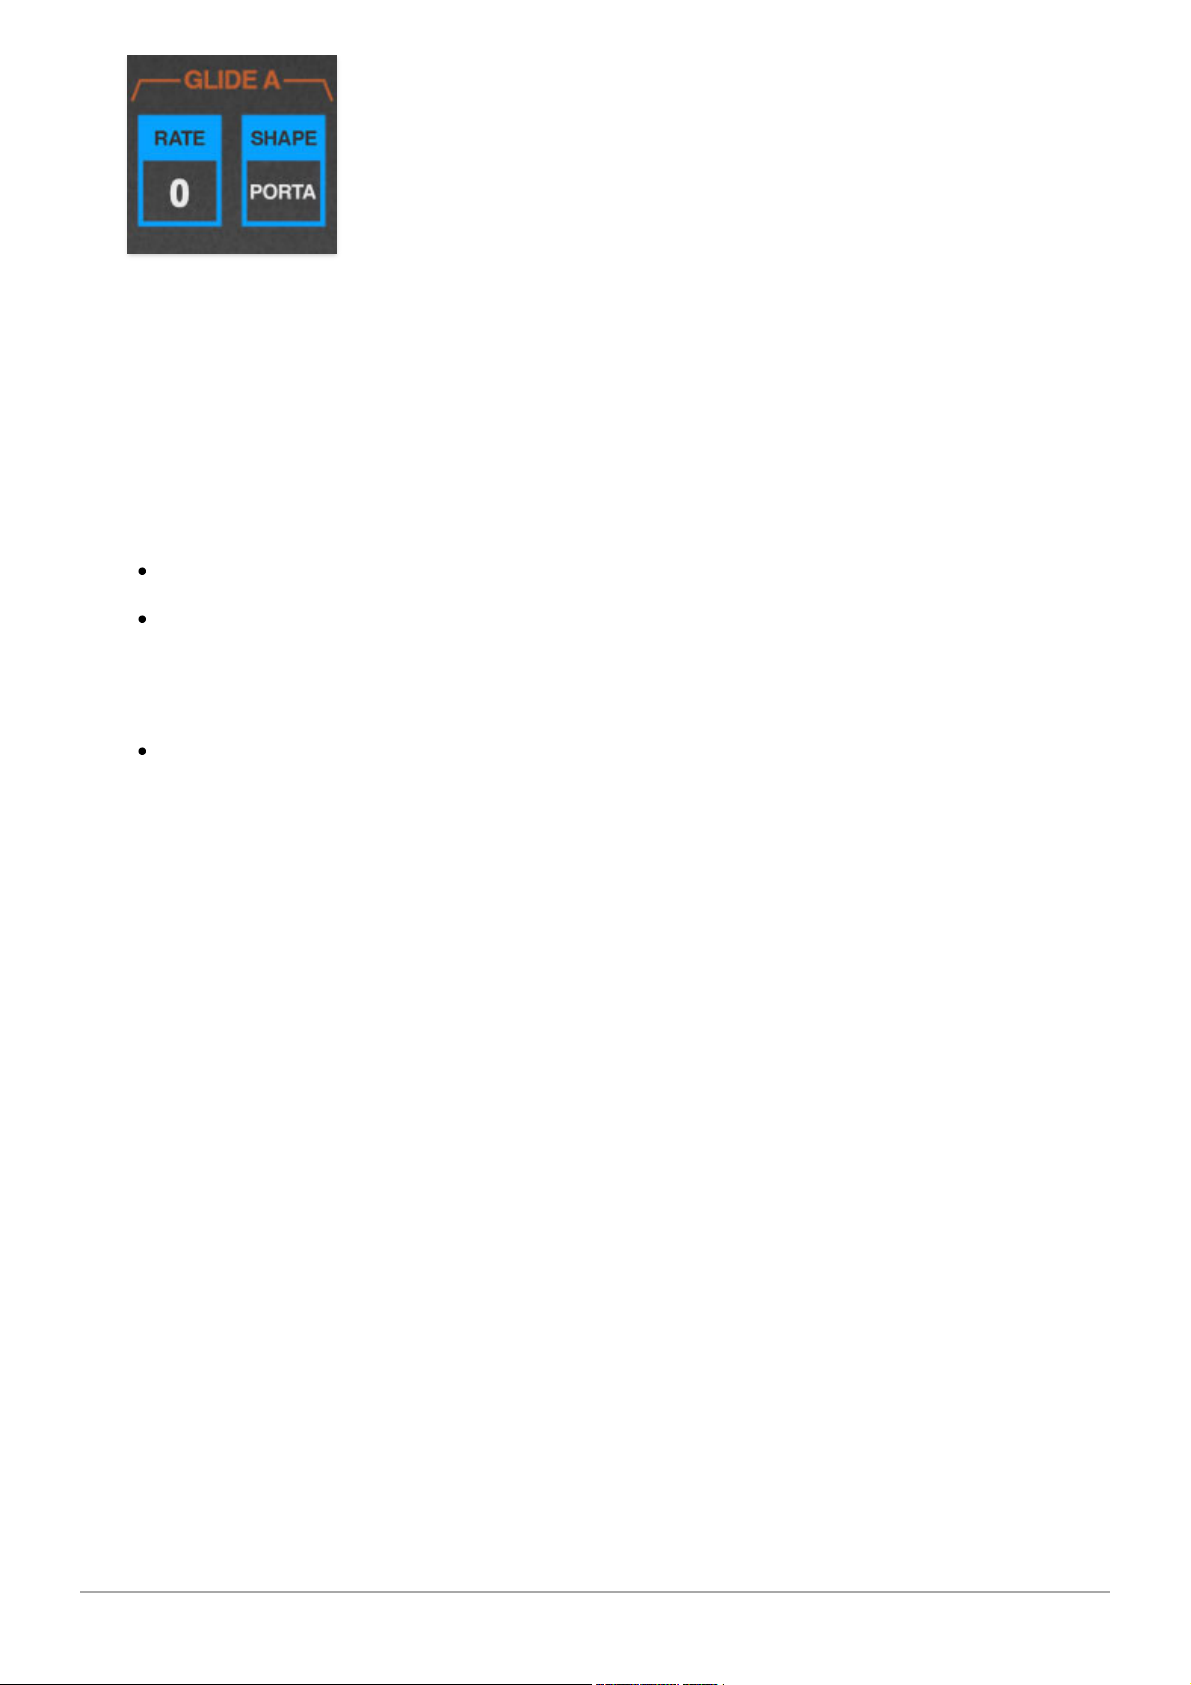
Glide slows down the transition of note pitches - think of the sliding pitches
of a violin or a trombone (on second thought, no one should think of a
trombone).
RATE- Sets the overall glide or portamento speed. with higher settings
corresponding to longer times.
SHAPE- Defines glide behavior as follows:
Portamento- Pitch changes smoothly between notes.
Glissando- Pitch changes in 1/2 step increments, as if playing
chromatically up or down the keyboard.
––––
Aux Pedal Enables Glide- When toggled, glide will only be on when the
Aux Pedal is pressed. For more info on setting up the AUX PEDAL button
and/or pedal, please see the Left-Hand Controls/Aux Pedal Button
section.
GLIDE RATE
must be set to a non-zero level.
Cherry Audio Chroma User Guide - 34
Page 35
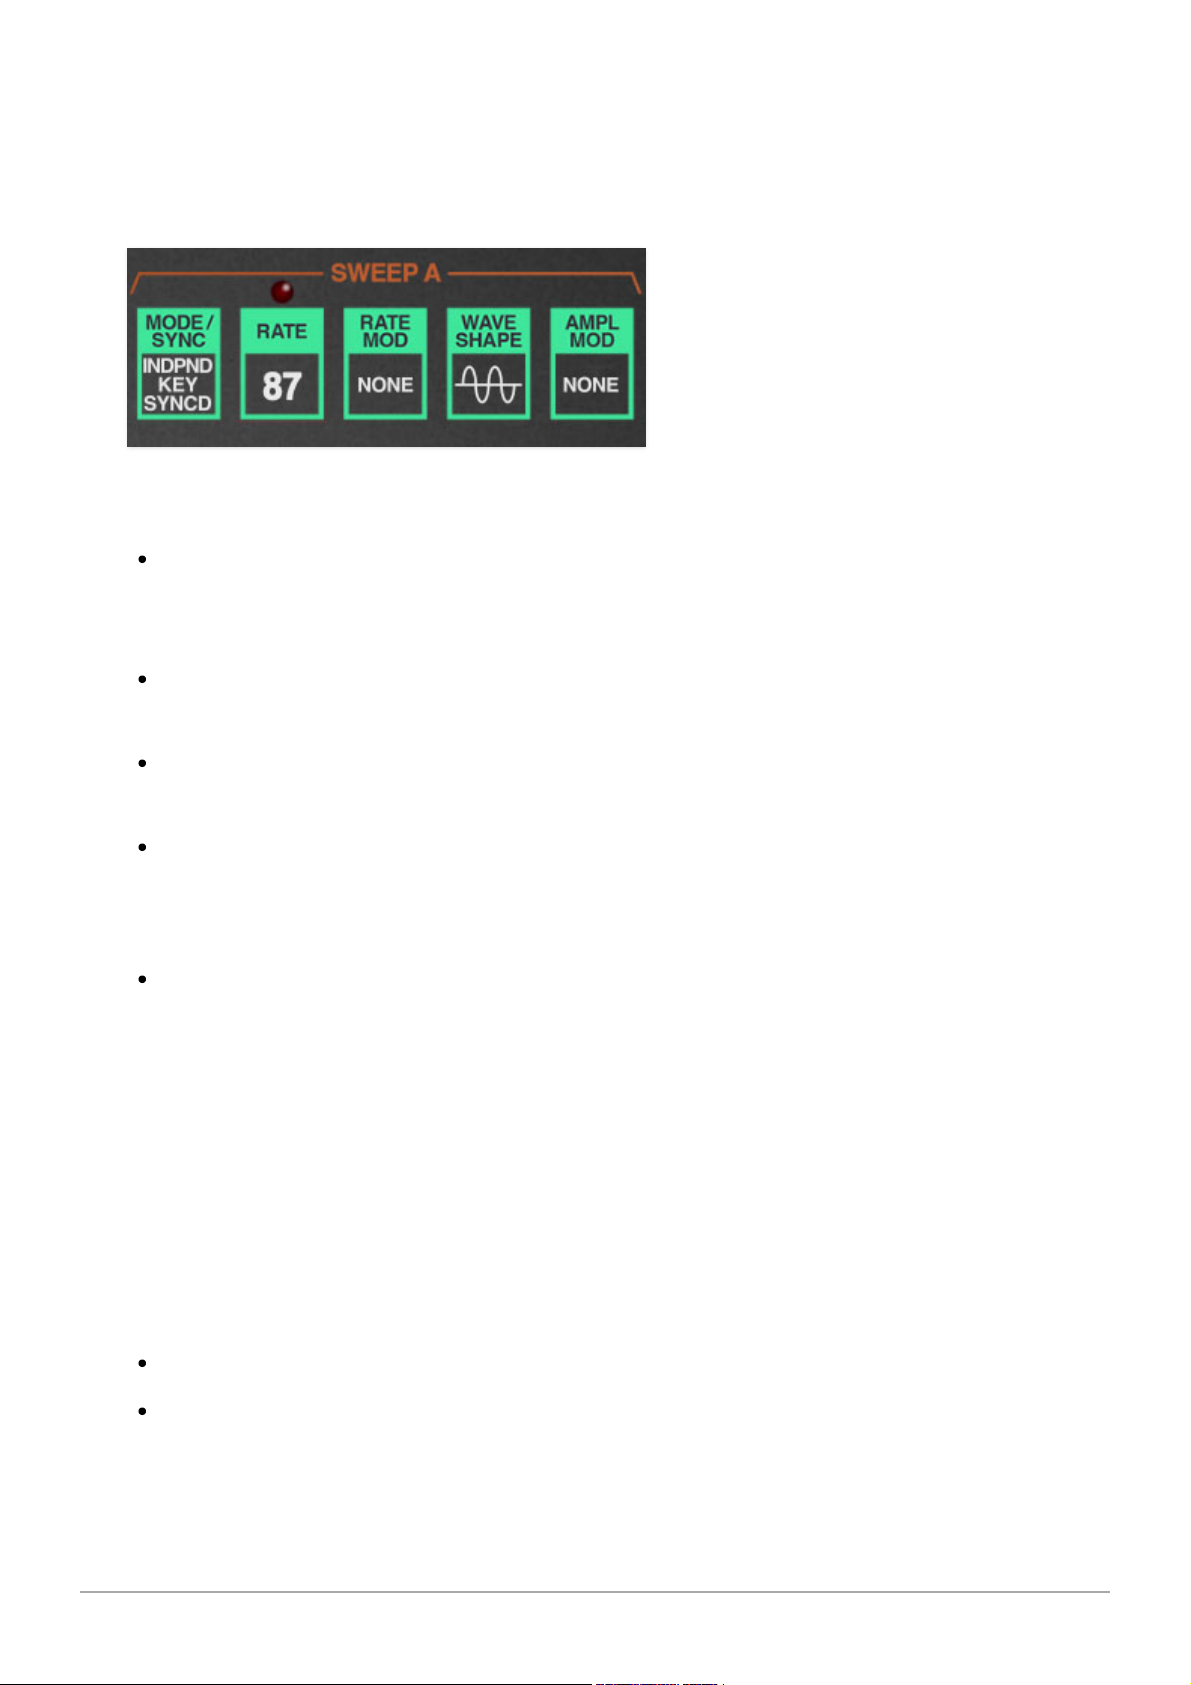
SWEEP is Chroma terminology for a low-frequency oscillator, which is a subaudio range modulation source commonly used for pitch modulation (i.e.
vibrato or trills), timbral mod (pulse-width mod), filter cutoff mod (for wahwah effects), or amp modulation (tremolo).
MODE/SYNC- Configures LFO reset and sync behavior.
Asynchronous Free Running- Each key played has its own free-running
LFO and does not reset. The mod rate for each key varies slightly for more
natural sounding mod cycles (hence the "asynchronous" terminology).
Independent Key Synced- Each key played has its own LFO that resets
with each keystroke.
Single Free Running- A single LFO is shared for all notes and does not
reset.
Single Key Synced- A single LFO is shared for all notes and resets any
time a new note is played.
––––
Sync To Host Tempo- This syncs the LFO to host tempo when using
Chroma within DAW software, or to the current tempo in the top menu bar
when using the standalone version. The RATE control will snap from 8
beats up to 1/64th note triplets.
RATE- Sets sweep speed , from 0.12 to 11.91 Hz (with MODE/SYNC
Sync To
Host Tempo
disabled). The LED above the RATE control flashes at the current
modulation rate.
RATE MOD- Allows the sweep rate to be modulated by the following mod
sources:
None- No rate modulation applied.
Aftertouch (Mono+Poly)- Sweep rate accelerates when keys are
pressed harder with aftertouch.
Cherry Audio Chroma User Guide - 35
Page 36
Keyboard- Sweep rate increases as higher notes are played on the
keyboard.
Keyboard Inverted- Sweep rate decreases as higher notes are played on
the keyboard.
Velocity- Playing harder increases the sweep rate.
Velocity Inverted- Playing harder decreases the sweep rate.
Envelope 2- Sweep rate increases as ENVELOPE 2 voltage increases.
Envelope 2 Inverted- Sweep rate decreases as ENVELOPE 2 voltage
increases.
Controller 1- Sweep rate increases as CONTROLLER 1 left-hand control is
increased (pushed up).
Controller 1 Inverted- Sweep rate decreases as CONTROLLER 1 lefthand control is increased (pushed up).
Controller 2- Sweep rate increases as CONTROLLER 2 left-hand control is
increased (pushed up).
Controller 2 Inverted- Sweep rate decreases as CONTROLLER 2 lefthand control is increased (pushed up).
Mod Wheel- Sweep rate increases as the mod wheel left-hand control is
increased (pushed up).
Mod Wheel Inverted- Sweep rate decreases as the mod wheel left-hand
control is increased.
Pitch Bend- Sweep rate increases as the pitch bend wheel left-hand
control is increased.
Pitch Bend Inverted- Sweep rate decreases as the pitch bend wheel
left-hand control is increased.
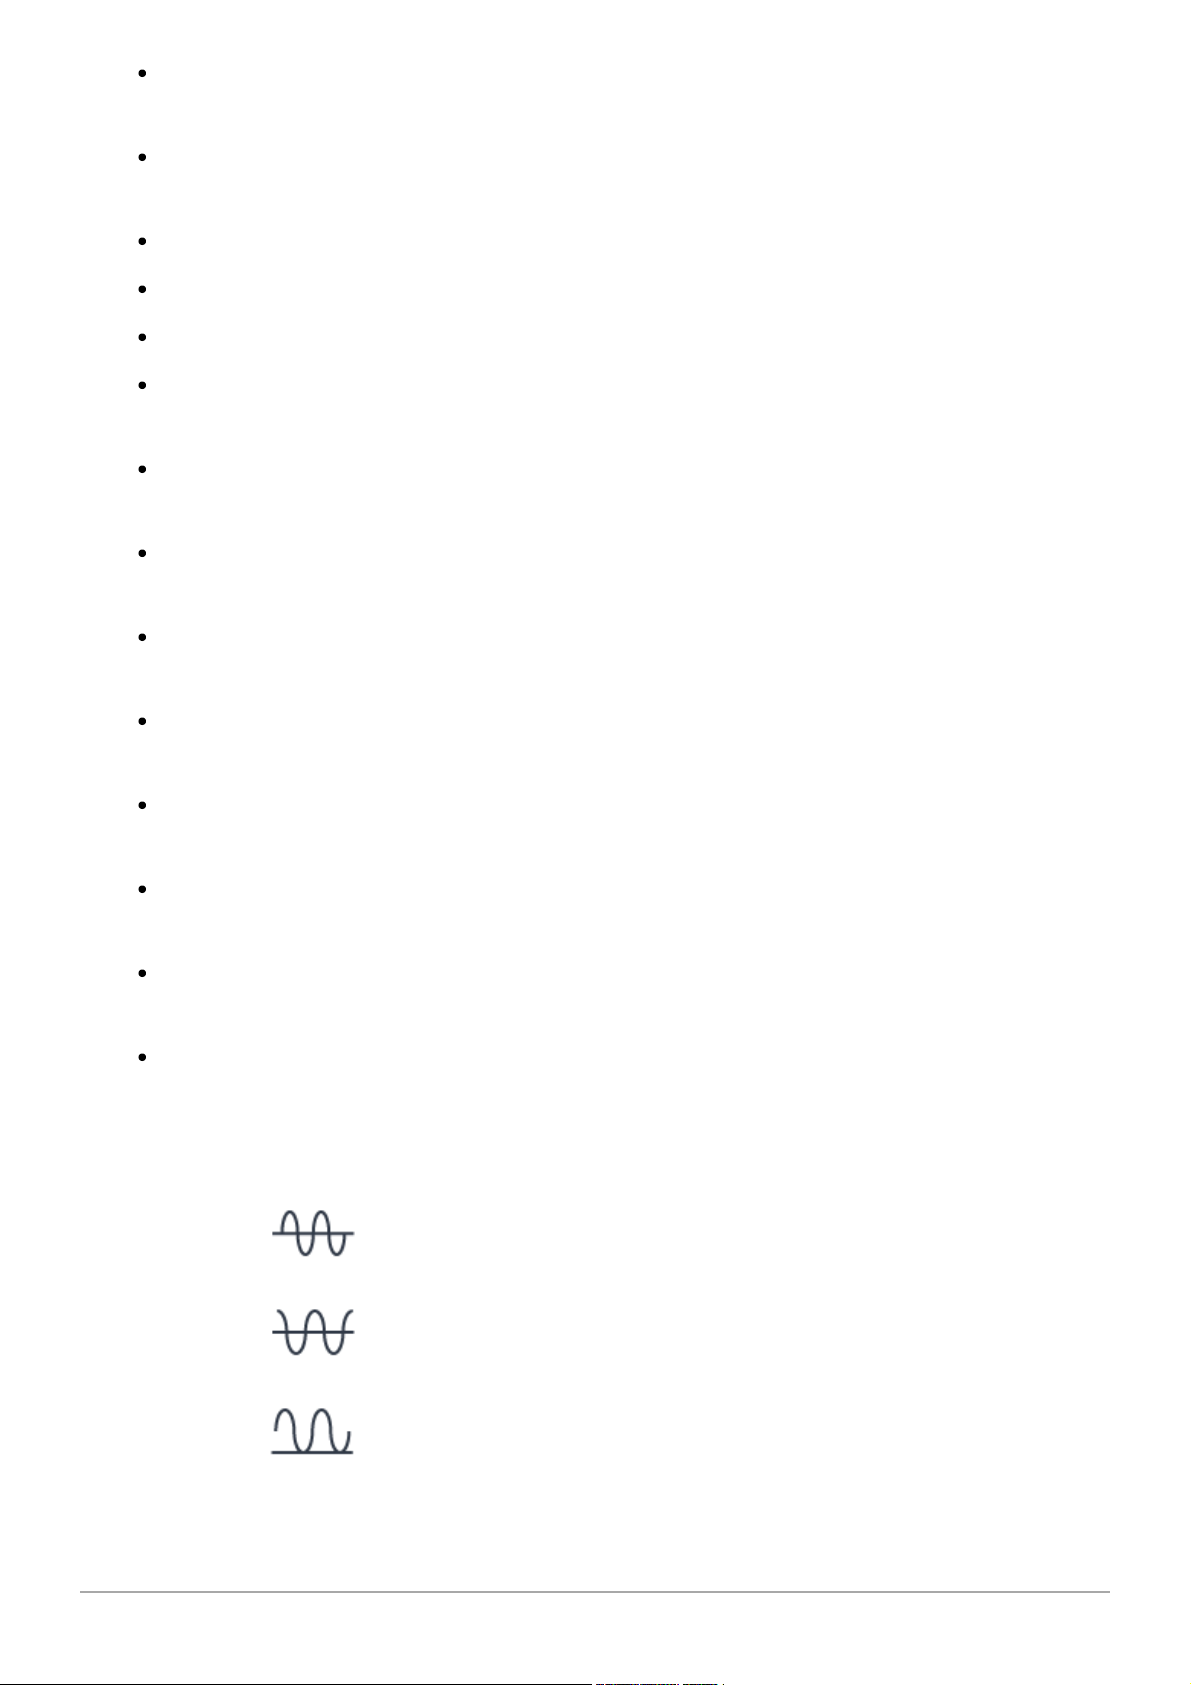
WAVE SHAPE- Selects from the following wave shapes:
Sine
Cosine
Offset Sine
Cherry Audio Chroma User Guide - 36
Page 37
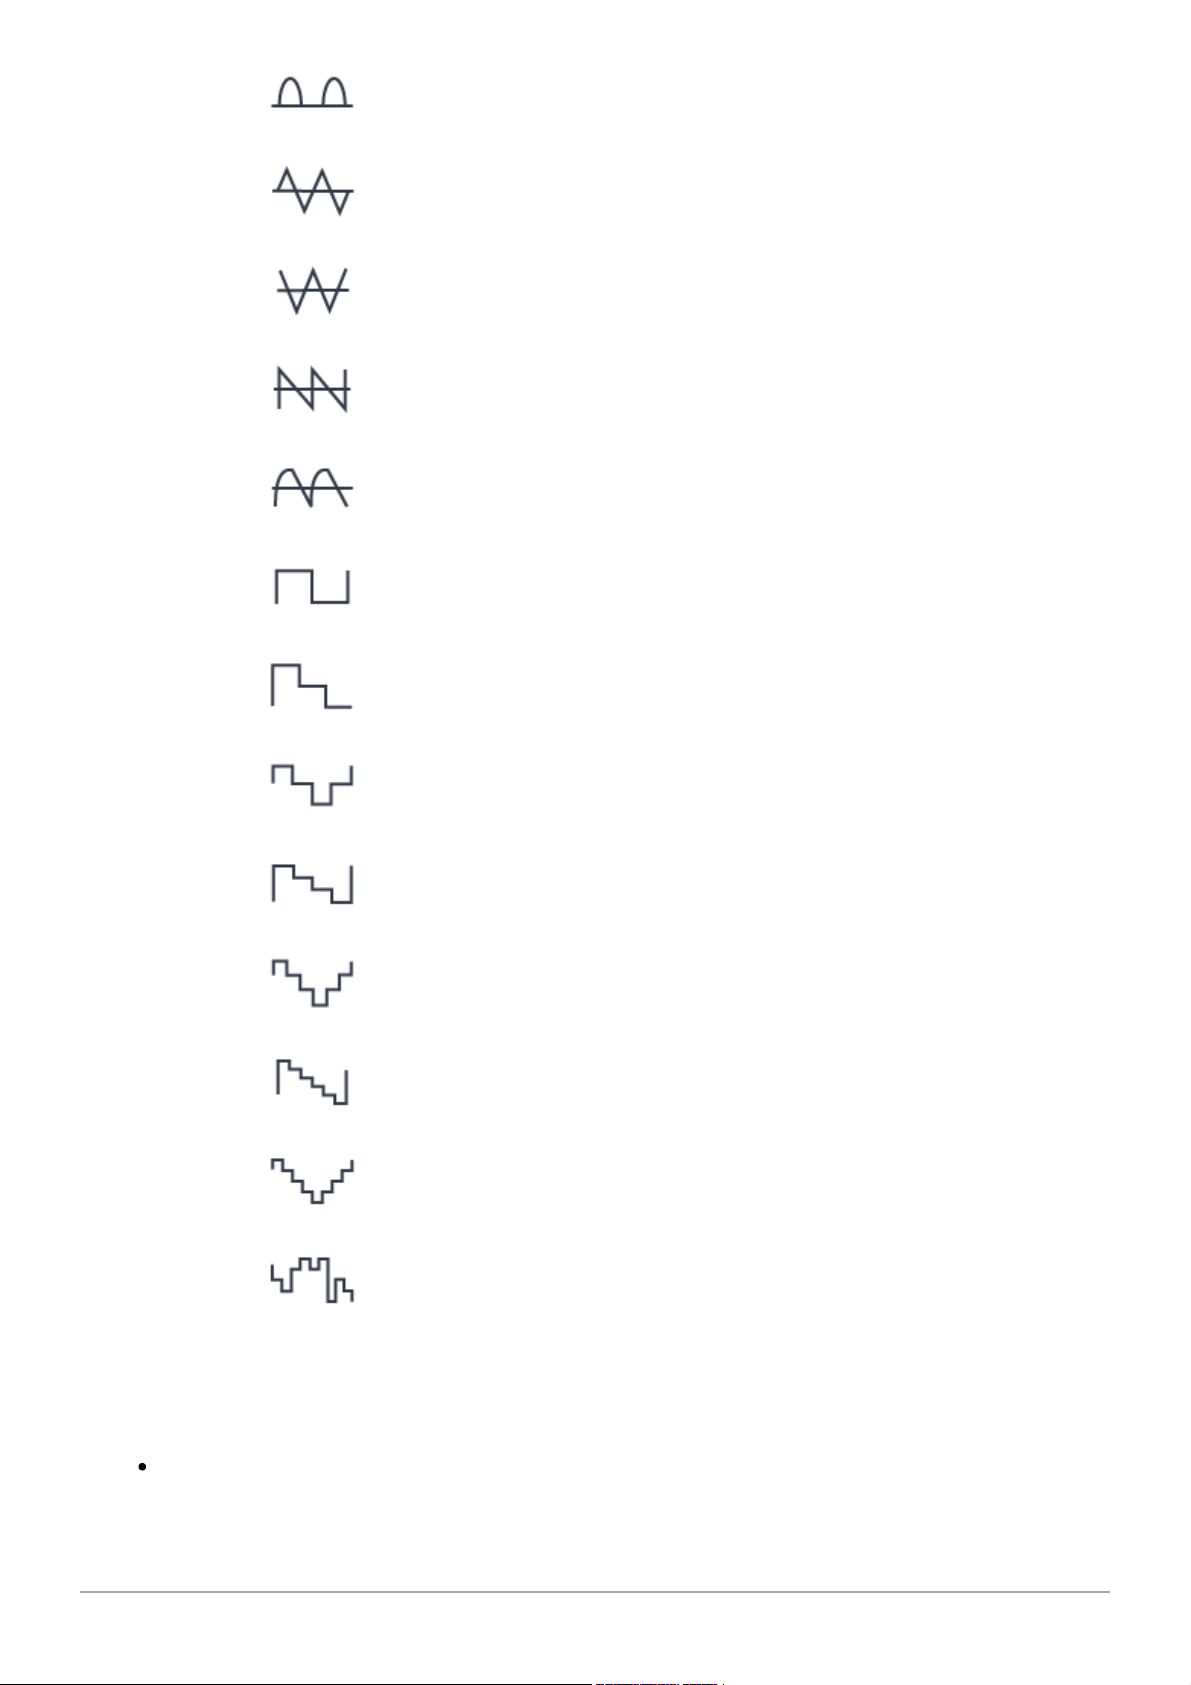
Half Sine
Triangle A
Triangle B
Sawtooth
Lag Square
Square
Pattern A
Pattern B
Pattern C
Pattern D
Pattern E
Pattern F
Random
AMPLITUDE MOD- This mod destination determines the amount or level of
SWEEP mod. Think of this as a "pre" modulation control, that is, controlling
the mod level
before
mod destinations.
None- No rate modulation applied.
Cherry Audio Chroma User Guide - 37
Page 38

Aftertouch (Mono+Poly)- Sweep amount increases when keys are
pressed harder with aftertouch.
Keyboard- Sweep amount increases as higher notes are played on the
keyboard.
Keyboard Inverted- Sweep amount decreases as higher notes are
played on the keyboard.
Velocity- Playing harder increases the sweep amount.
Velocity Inverted- Playing harder decreases the sweep amount.
Envelope 1- Sweep amount increases as ENVELOPE 1 voltage increases.
Envelope 2- Sweep amount increases as ENVELOPE 2 voltage increases.
Controller 1- Sweep amount increases as CONTROLLER 1 left-hand
control is increased (pushed up).
Controller 2- Sweep amount increases as CONTROLLER 2 left-hand
control is increased (pushed up).
Mod Wheel- Sweep amount increases as the mod wheel left-hand control
is increased.
Pitch Bend- Sweep amount increases as the pitch bend wheel left-hand
control is increased.
0.85, 1.3, 2.6, 5.1 Second Delay- Sweep amount increases gradually
and stays at maximum according to the time selected. Just the thing for
playing "
True
" by Spandau Ballet - originally recorded with a Chroma... we
know this much is... TRUE!
USING AMPLITUDE MOD TO SET UP MOD WHEEL-CONTROLLED
VIBRATO, TREMOLO, ETC.
In this example, we'll configure Chroma for vibrato (i.e. pitch mod) controlled
via the mod wheel, but any other continuous hardware controller can be
used.
If you were to simply set the PITCH section's MOD SELECT to SWEEP A, and
raise its companion MOD DEPTH setting above 0, you'd hear constant pitch
modulation. In other words, you'd have no way to control the mod amount in
real time.
Setting the SWEEP section AMPLITUDE MOD to MOD WHEEL allows the mod
wheel to control modulation depth. If the mod wheel is zeroed, then no
modulation occurs; as the mod wheel is raised, more modulation occurs. The
Cherry Audio Chroma User Guide - 38
Page 39

MOD DEPTH control in the target section can be used to limit the amount of
mod depth.
Cherry Audio Chroma User Guide - 39
Page 40
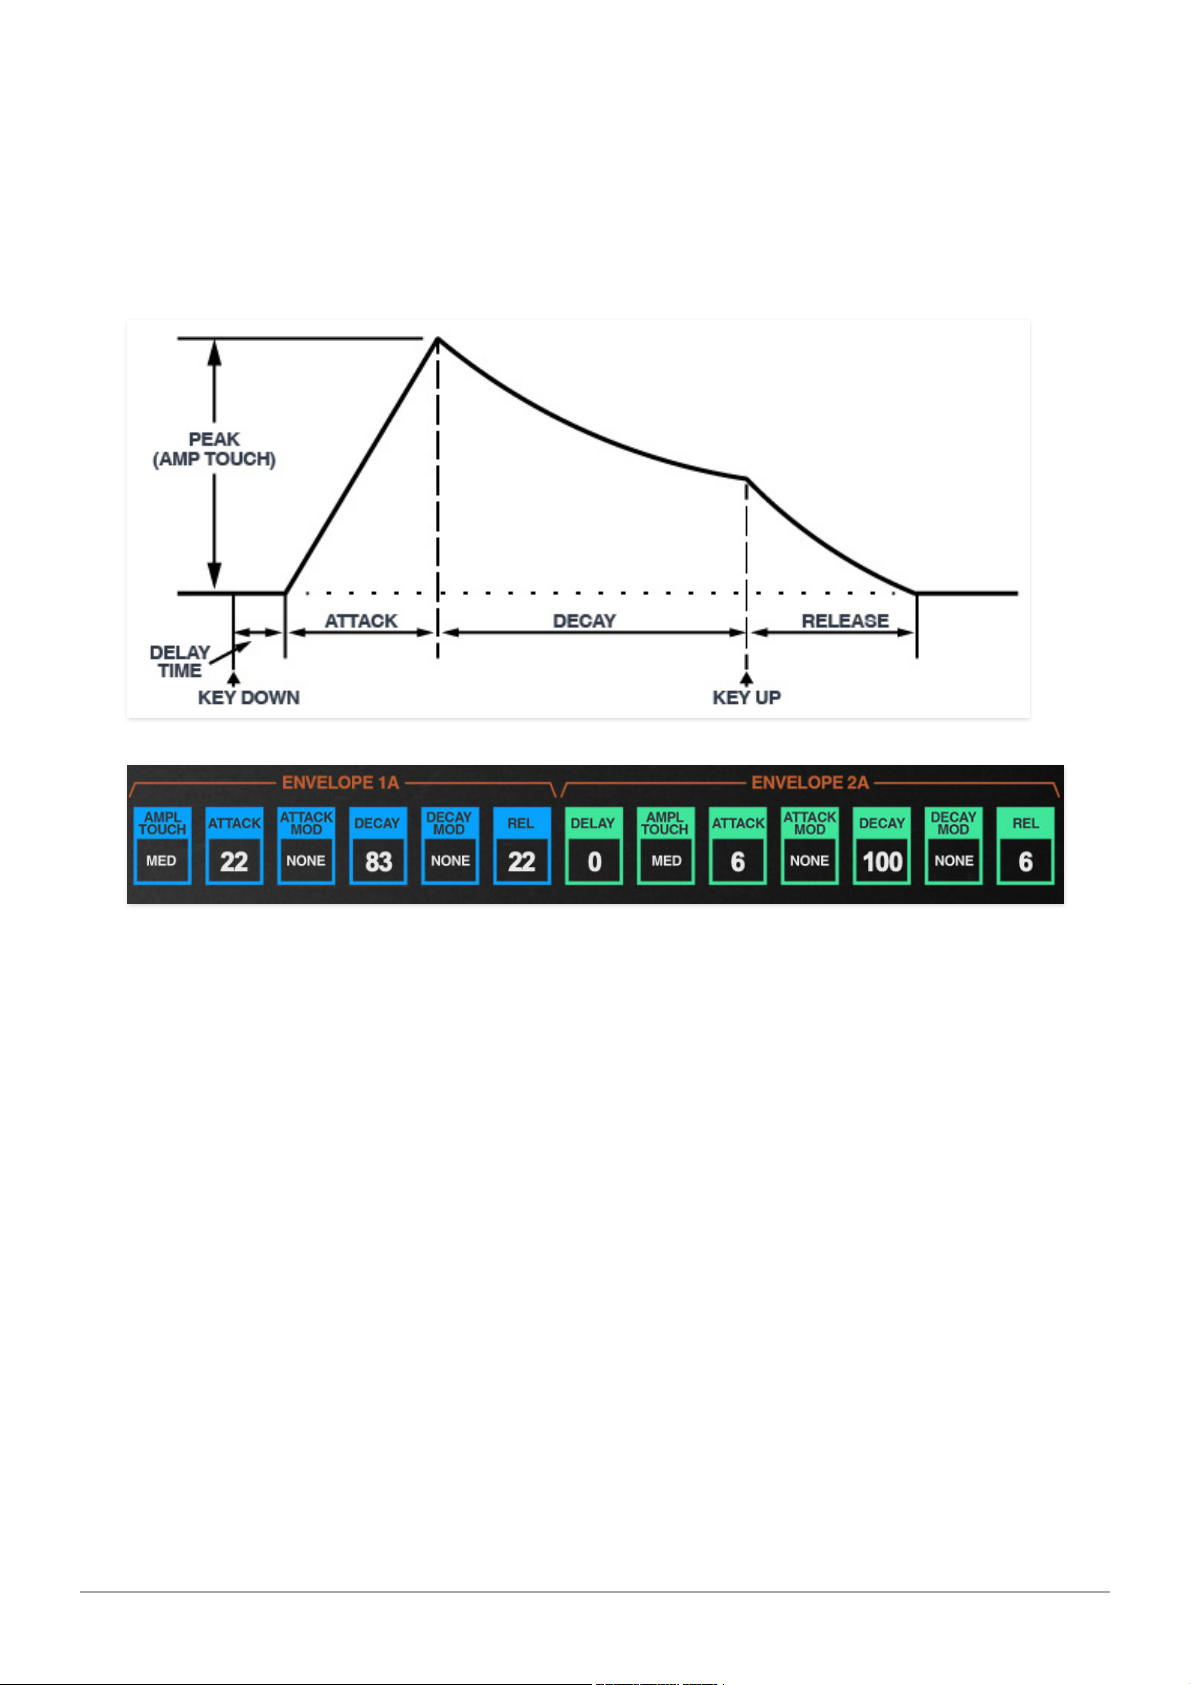
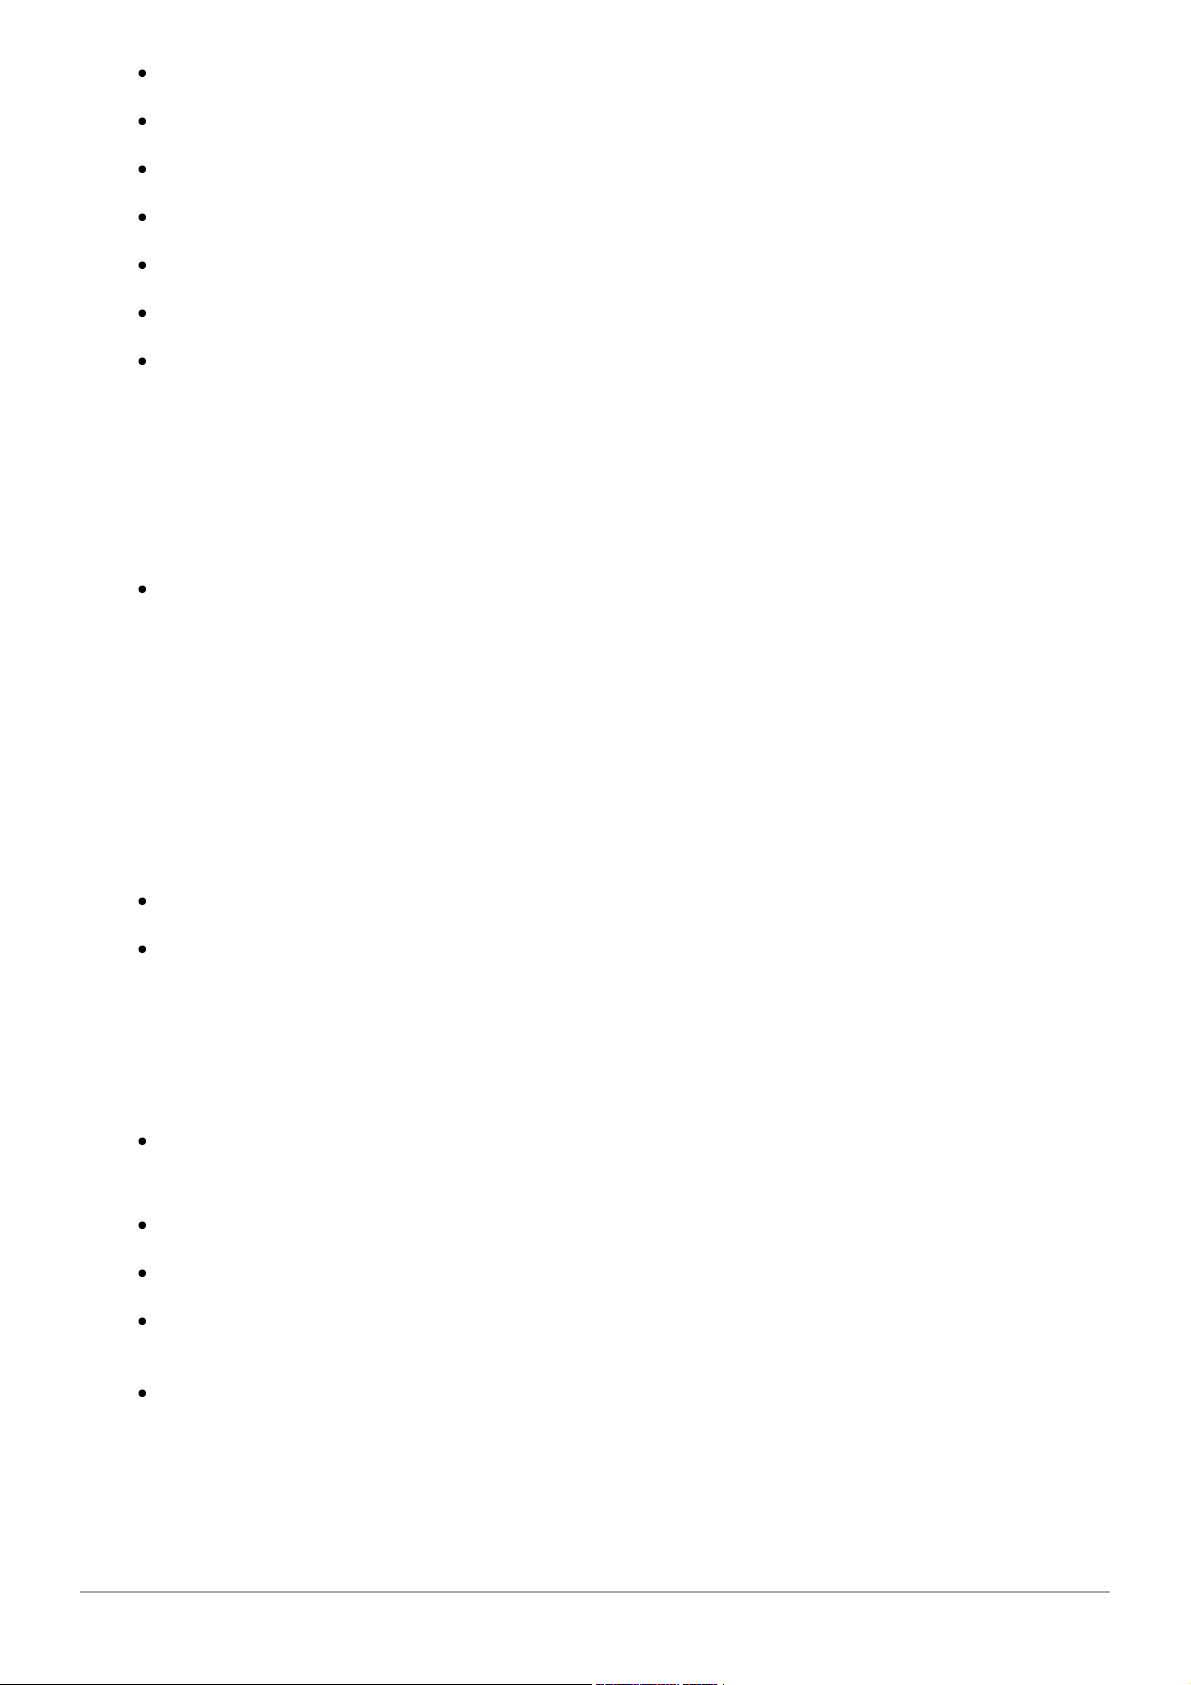
A voice path includes two independent envelope generators. These are
similar to a conventional attack/decay/sustain/release (ADSR) envelope
generator, but they don't have a dedicated sustain phase. However
increasing the
DECAY
setting to 100% sets the sustain level to max, resulting
in an ASR envelope. The diagram below illustrates Chroma envelope
functionality:
Chroma's envelope generators are identical with the exception that
ENVELOPE 2 adds a delay stage.
DELAY (Envelope 2 only)- Delays the onset of the attack stage by up to
1265 ms.
Setting
DELAY
to maximum setting puts envelope 2 in
Retrigger on Sweep A
mode; this triggers envelope 2 every time the sweep resets. This setting
works best when the keyboard is set to one of the mono modes (in the
CONTROL
KEYBOARD ALGORITHM
menu), otherwise things can get messy,
because there are 16 individual LFOs triggering voices at once.
AMPLITUDE TOUCH- Defines how much the envelope affects note
amplitude via keyboard velocity. You can think of the settings in a sort of
backwards way - the higher the setting, the quieter sounds will be when
playing really lightly, and the harder you'll need to play for sounds to be
loud.
Cherry Audio Chroma User Guide - 40
Page 41
None- Keyboard velocity has no effect on envelope.
Low- Low sensitivity.
Medium Low- Medium-low sensitivity.
Medium- Medium sensitivity.
Medium High- Medium-high sensitivity.
High- High sensitivity.
Threshold- Threshold allows notes to be heard at full velocity when
velocity exceeds the a certain setting; below the threshold, no sound will
be heard. The threshold level is set using the
MOD THRESHOLD
control in
the CONTROL section. Threshold is useful in double mode pages where
you'd like to add a layer by playing harder (or vice-versa using the
Threshold Inverted
setting below).
Threshold Inverted- As the name implies, this is the inverse of the
preceding
Threshold
setting. Notes are heard only when played with a
velocity less than the CONTROL section
MOD THRESHOLD
setting.
ATTACK- Defines the length of time for amplitude to rise from zero to full
scale when a key is played, ranging from 0 to 10,000 ms.
ATTACK MOD- Allows attack time to be modulated via the sources below.
Positive modulation decreases the attack time.
None- No attack modulation applied.
Aftertouch (Mono+Poly)- Attack time decreases when aftertouch is
applied. This is kind of a weird one, because attack is generally associated
with the instant a key is played, and aftertouch can only occur after a note
is played. The result is that notes with slow attack times can be "sped" up
and brought up to max volume more quickly using aftertouch. Try it!
Keyboard Inverted- Attack decreases as higher notes are played on the
keyboard.
Keyboard- Attack increases as higher notes are played on the keyboard.
Velocity- Playing harder decreases the attack time.
Velocity Inverted- Playing harder increases the attack time.
Controller 1- Attack time decreases as CONTROLLER 1 left-hand control
is increased (pushed up).
Cherry Audio Chroma User Guide - 41
Page 42
Controller 2- Attack time decreases as CONTROLLER 2 left-hand control
is increased (pushed up).
DECAY- Defines the length of time for amplitude to fall from the attack stage
peak to zero if a key is held. If the key is released before the decay phase is
over, it will jump to the release phase upon key release. Decay time range is
from 0-35,000 ms. At max setting, notes will stay at full amplitude as long as
a note is held, essentially converting the envelope generator to an ASR
(attack/sustain/release) envelope. The popup tooltip displays
Sustain 100%
to reflect this.
DECAY MOD- Allows decay time to be modulated via the sources below.
Positive modulation increases the decay time.
None- No decay modulation applied.
Aftertouch (Mono+Poly)- Decay time increases when aftertouch is
applied.
Keyboard- Decay time increases as higher notes are played on the
keyboard.
Keyboard Inverted- Decay time decreases as higher notes are played
on the keyboard.
Velocity- Playing harder increases the decay time.
Velocity Inverted- Playing harder decreases the decay time.
Controller 1- Decay time increases as CONTROLLER 1 left-hand control is
increased (pushed up).
Controller 2- Decay time increases as CONTROLLER 2 left-hand control is
increased (pushed up).
RELEASE- Defines the length of time for amplitude to fall to zero once a key
is released. Times range from 0-35,000 ms.
Cherry Audio Chroma User Guide - 42
Page 43
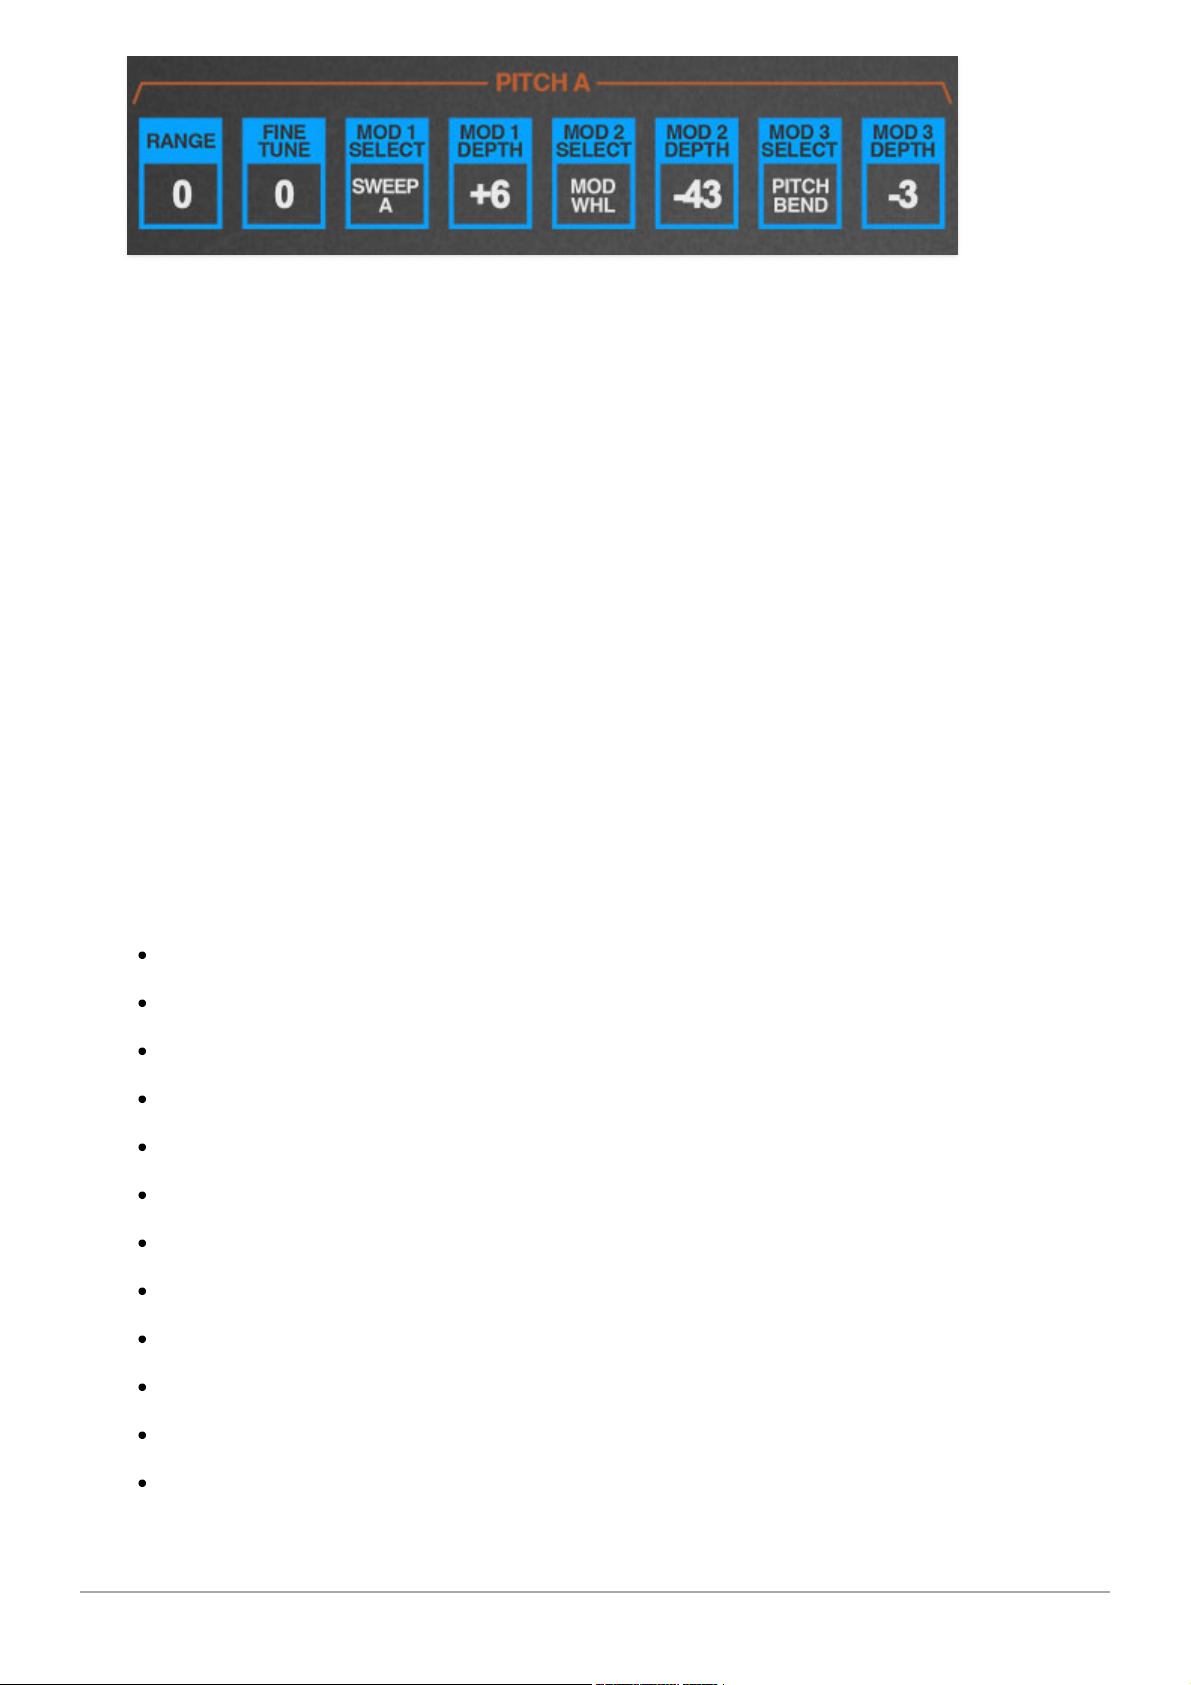
Each voice path includes a single oscillator; initial tuning and modulation are
set in the PITCH section.
RANGE- Sets the coarse pitch range for each oscillator in semitone intervals
from -12 to +51. We didn't make up these somewhat odd settings; they're
straight from the original instrument. We suspect the far-greater upper range
was implemented to best take advantage of Chroma's ring modulation and
oscillator sync capabilities.
FINE TUNE- Sets the fine tuning up or down one semitone in cents. This
useful for detuning when stacking oscillators.
MOD 1/2/3 SELECT- These configure pitch frequency modulation. Most of
these are self-explanatory, so we've included notes only where necessary.
Note that none of these mod sources have "inverted" options, because their
associated mod depth controls are bipolar - for inverted modulation, simply
set the appropriate DEPTH control to a negative value.
Keyboard Glide A- Slewed keyboard CV is used as a mod source (GLIDE
RATE
control must be set to a non-zero level).
Sweep A
Envelope 1A
Envelope 2A
Keyboard Glide B
Sweep B
Envelope 1B
Envelope 2B
Mod Wheel
Pitch Bend
Controller 1
Controller 2
Velocity
Cherry Audio Chroma User Guide - 43
Page 44

Threshold Velocity- Switches between two discrete pitch mod amounts
according to velocity. The velocity threshold is set using
MOD THRESH
in
the CONTROL section.
Keyboard- Sweep rate increases as higher notes are played on the
keyboard.
Keyboard Inverted- Sweep rate decreases as higher notes are played on
the keyboard.
Velocity- Playing harder increases the sweep rate.
Velocity Inverted- Playing harder decreases the sweep rate.
Aftertouch (Mono+Poly)
Threshold Aftertouch- Switches between two discrete pitch mod
amounts according to aftertouch. The aftertouch threshold is set using
MOD THRESH
in the CONTROL section.
MOD 1/2/3 DEPTH- Sets the amount of mod from the same-numbered mod
source.
Note that
MOD 3 DEPTH
's range differs from the others - instead of ranging
from -100 to +100%, it ranges from -64 to +64 in half-step increments. This
was done to simplify setting bend depth when assigning the pitch bend
wheel. (Unlike most synths, the Chroma doesn't have a "hard-wired" mod bus
for pitch bend.)
IMPORTANT NOTE ABOUT PITCH MOD - YOU REALLY SHOULD READ
THIS
Now that we have your attention... we wanted to be sure users were aware
of another of Chroma's unusual quirks. Each of the three PITCH section mod
buses has a different mod range and max setting as follows:
MOD 1- major 3rd
MOD 2- octave+major 3rd
MOD 3- five octaves+major 3rd
The idea behind is was that the three mod buses would be used for different
applications, depending upon the range needs. For example, MOD 1 could be
used for subtle vibrato via the sweep section, where only a very limited
amount of pitch deviation was necessary. MOD 2 might be used for siren
effects, and MOD 3 could be used with the sync or ring mod patch
configuration settings, when very wide pitch changes are desired.
Cherry Audio Chroma User Guide - 44
Page 45

Cherry Audio Chroma User Guide - 45
Page 46
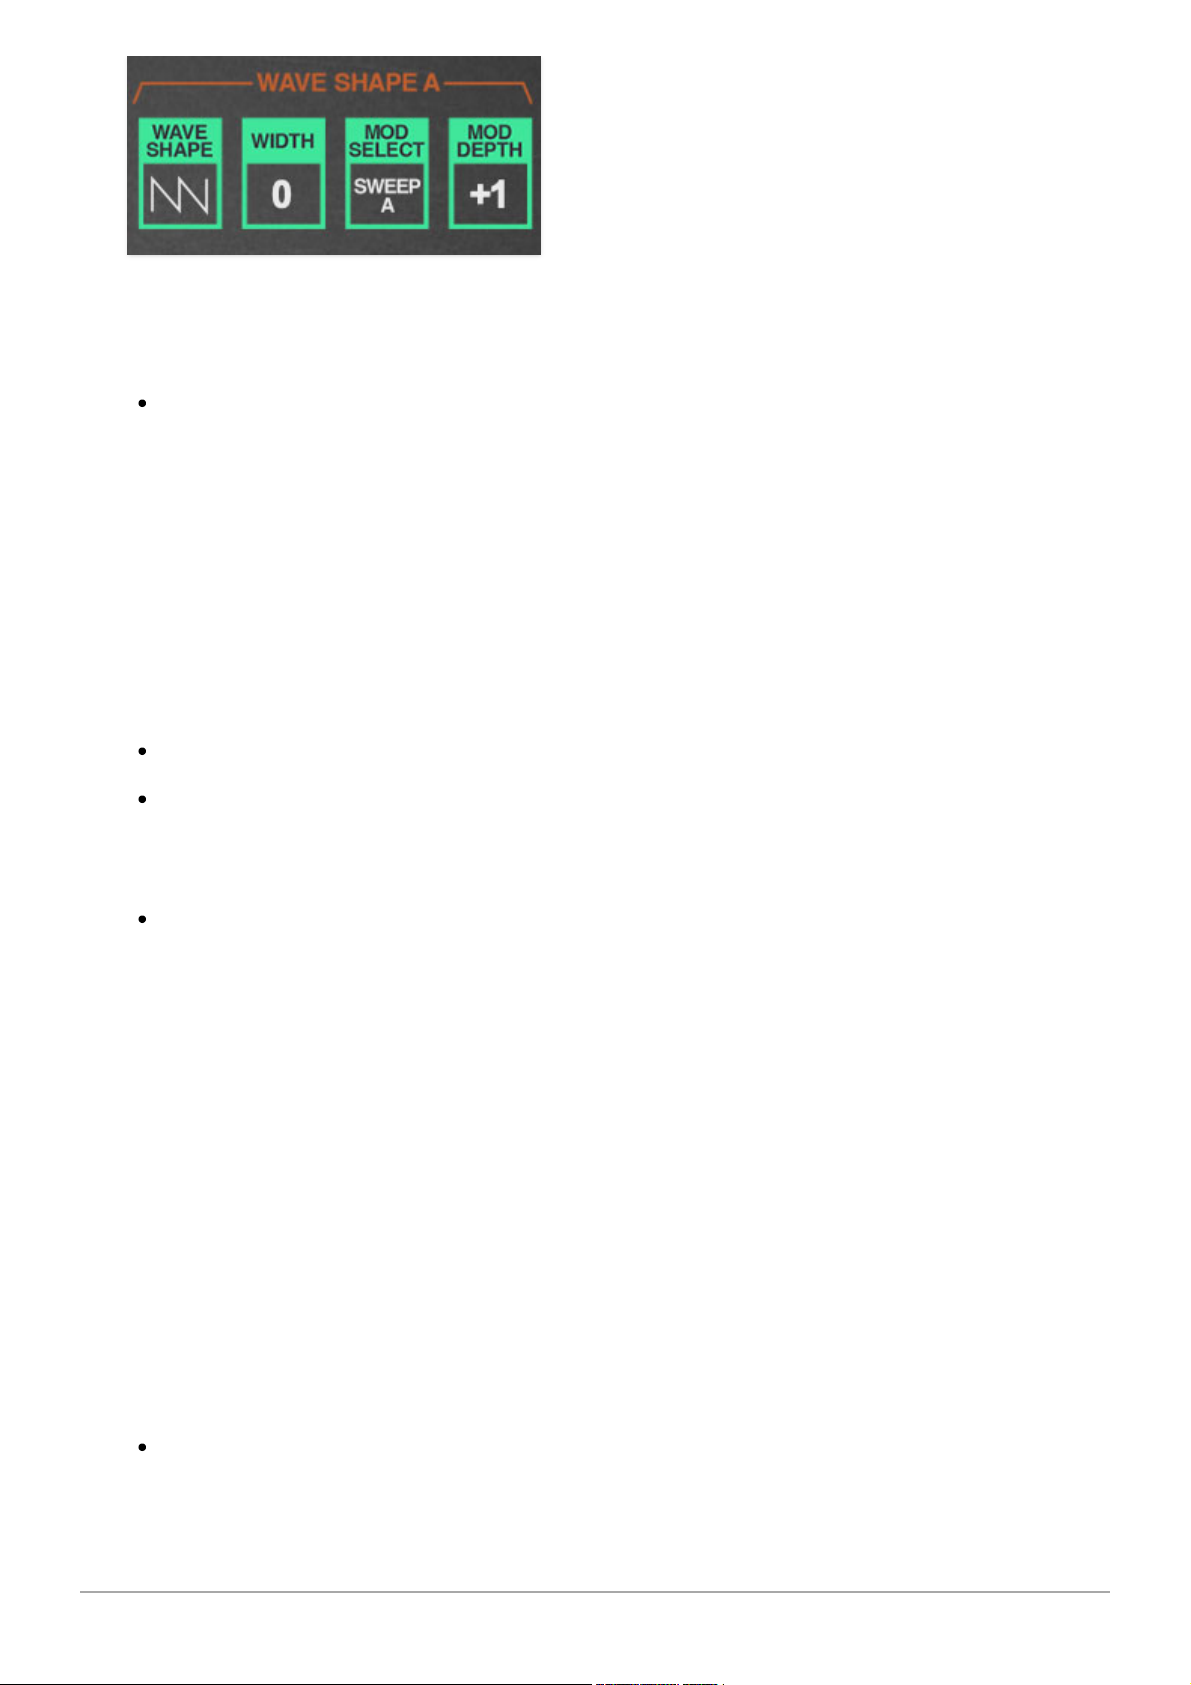
WAVE SHAPE- Selects the oscillator waveform. Each oscillator includes
triangle, sawtooth, square, variable pulse.
Sawteeth- That's not a typo - the "sawteeth" wave is a combined
sawtooth and pulse wave, with timbre adjusted by the adjacent WIDTH
control. Set WIDTH to 0 for a standard sawtooth wave. As the WIDTH
control is moved, additional harmonics are audible and appear as
additional "teeth" when viewed on an oscilloscope. A width setting of 50%
results in a "doubled" sawtooth wave; that is, a standard sawtooth
sounding one octave higher.
The width control can be modulated just as you would when applying
pulse-width modulation to a square wave for dynamic timbral movement.
Pulse- Adjustable-width pulse wave.
Pink Noise- A random signal in which each octave across the frequency
spectrum is represented equally. Pink noise sounds a littler duller and
bassier than white noise.
White Noise- A random signal in which all frequencies across the
frequency spectrum are represented equally.
WIDTH- When WAVE SHAPE is set to
Sawteeth
, this sets the width or "dutycycle" of the pulse wave that's combined with saw (explained in the
preceding
Sawteeth
section); when WAVE SHAPE is set to
Pulse
, sets the
width of the pulse wave. Set
WIDTH
to 50% for a perfect square wave. At
extreme width settings, no sound will be heard; this is a useful sound
programming trick for turning sound on or off using modulation sources.
MOD SELECT- These configure wave form width modulation. Most of these
are self-explanatory, so we've included notes only where necessary. Note
that none of these mod sources have "inverted" options, because their
associated mod depth controls are bipolar - for inverted modulation, simply
set the appropriate
DEPTH
control to a negative value.
Keyboard Glide A- Slewed keyboard CV is used as a mod source (GLIDE
RATE
control must be set to a non-zero level).
Cherry Audio Chroma User Guide - 46
Page 47
Sweep A
Envelope 1A
Envelope 2A
Keyboard Glide B
Sweep B
Envelope 1B
Envelope 2B
Mod Wheel
Pitch Bend
Controller 1
Controller 2
Velocity
Threshold Velocity- Switches between two discrete wave width amounts
according to velocity. The velocity threshold is set using
MOD THRESH
in
the CONTROL section.
Keyboard- Width amount increases as higher notes are played on the
keyboard.
Keyboard Inverted- Width amount decreases as higher notes are played
on the keyboard.
Velocity- Playing harder increases width amount.
Velocity Inverted- Playing harder decreases width amount.
Aftertouch (Mono+Poly)- Width amount increases with aftertouch
pressure.
Threshold Aftertouch- Switches between two discrete wave width
amounts according to aftertouch. The aftertouch threshold is set using
MOD THRESH
in the CONTROL section.
MOD DEPTH- Sets the amount of width modulation from the current source
selected with MOD SELECT.
Cherry Audio Chroma User Guide - 47
Page 48
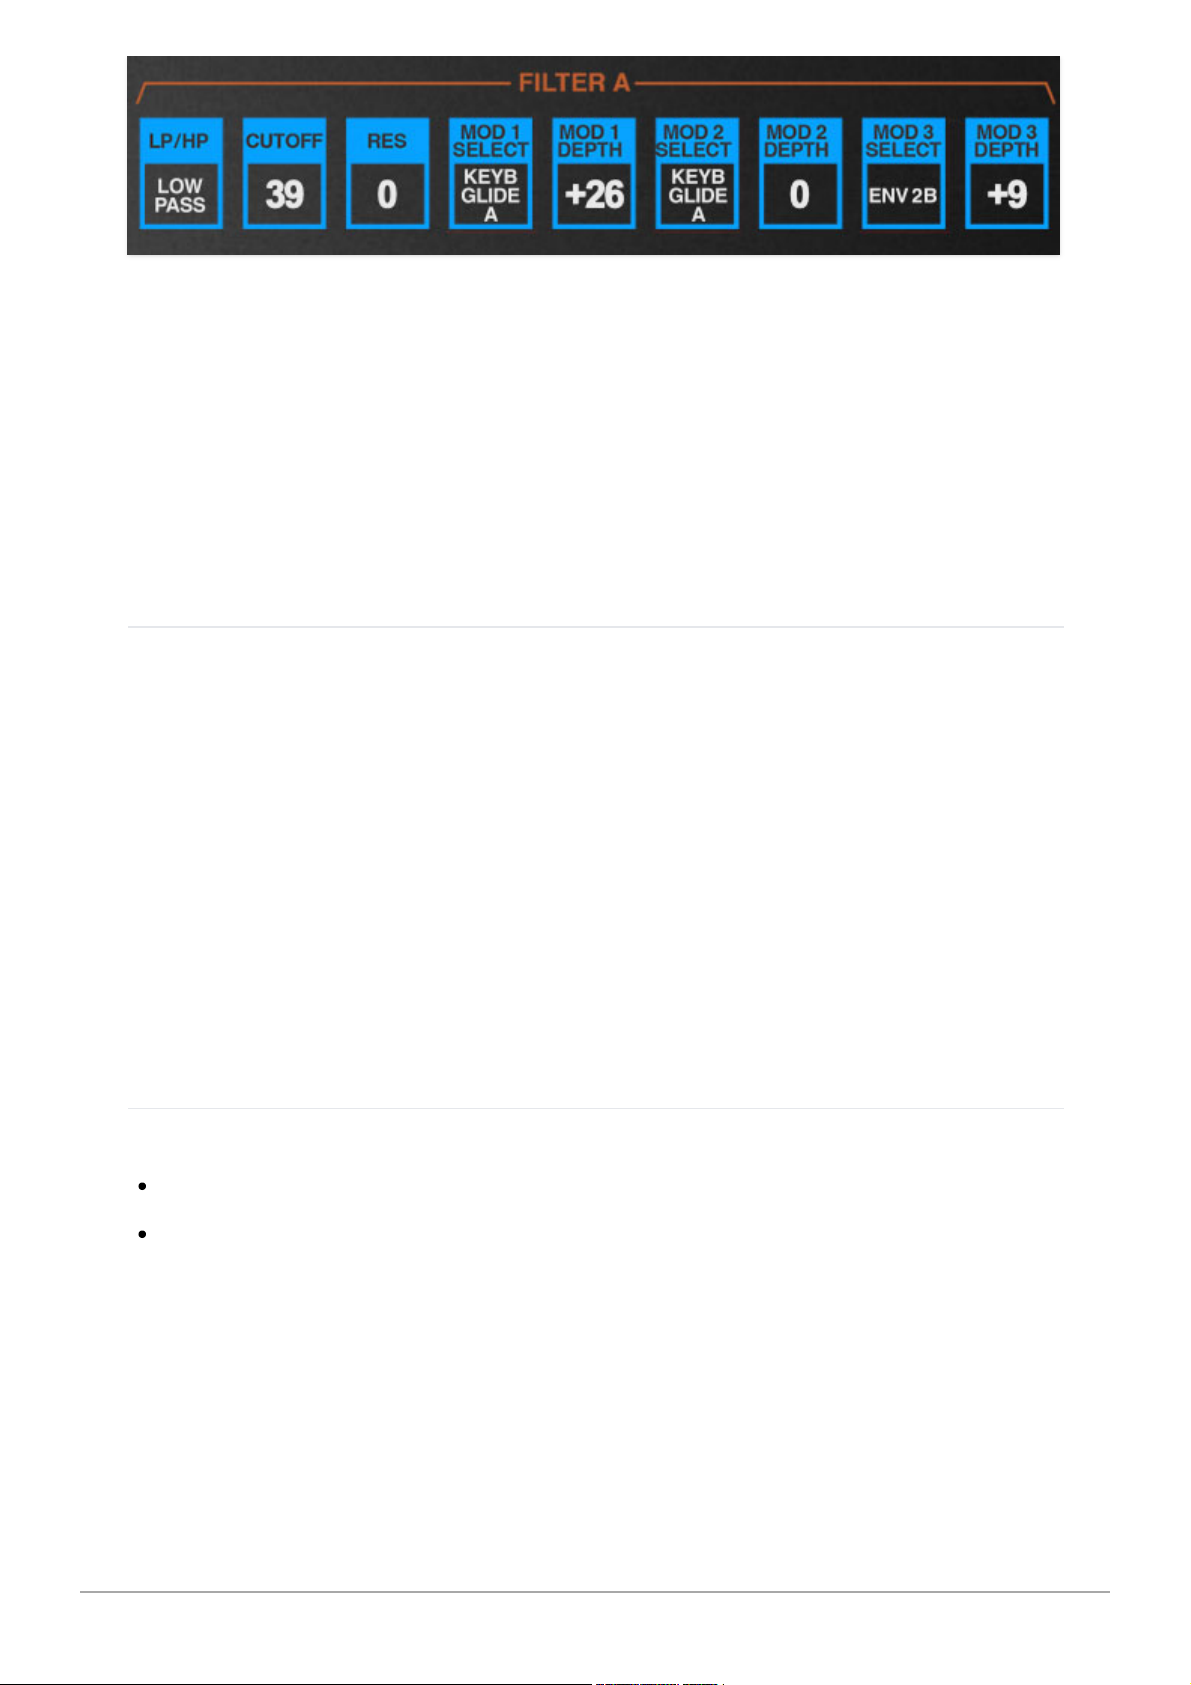
The original Chroma filter made use of CEM3350 chips, which were dual 12
dB/octave state-variable filters ("state-variable" meaning they could be
configured as a lowpass filter, a highpass filter, or Maine or Delaware). One
"block" in a Chroma voice path equates to a single 12 dB/octave filter which
can be set to lowpass or highpass mode. These can be combined to create
bandpass or notch filters, or a steeper 24/dB octave slope using Chroma's
flexible Patch Configurations.
About Filter Types
• A lowpass filter allows frequencies
below
the cutoff frequency setting to
pass through, but blocks frequencies
above
the cutoff frequency.
• A highpass filter is the opposite of lowpass mode: high-frequency content
remains, but low frequencies are removed as the cutoff frequency increases.
• Bandpass filters combine bothlowpass and highpass modes, leaving sound
only "in the middle" with amplitude falling off symmetrically on either side of
the cutoff frequency.
• A variable-speed pool filter is the thing that some scumbag stole from
outside my house in Las Vegas, and this is a not-uncommon example of why I
moved very far away from Vegas.
Controls
LP/HP-
Lowpass- Sets the filter to lowpass mode.
Highpass- Sets the filter highpass mode.
CUTOFF- Sets the frequency where frequency attenuation begins, i.e. which
frequencies are allowed to pass, dependent on the current
LP/HP
setting.
RESONANCE- Resonance emphasizes sound energy at and around the
current cutoff frequency by adding feedback from the filter's output back to
its input. At lower settings, this can be used to create mild resonances such
Cherry Audio Chroma User Guide - 48
Page 49
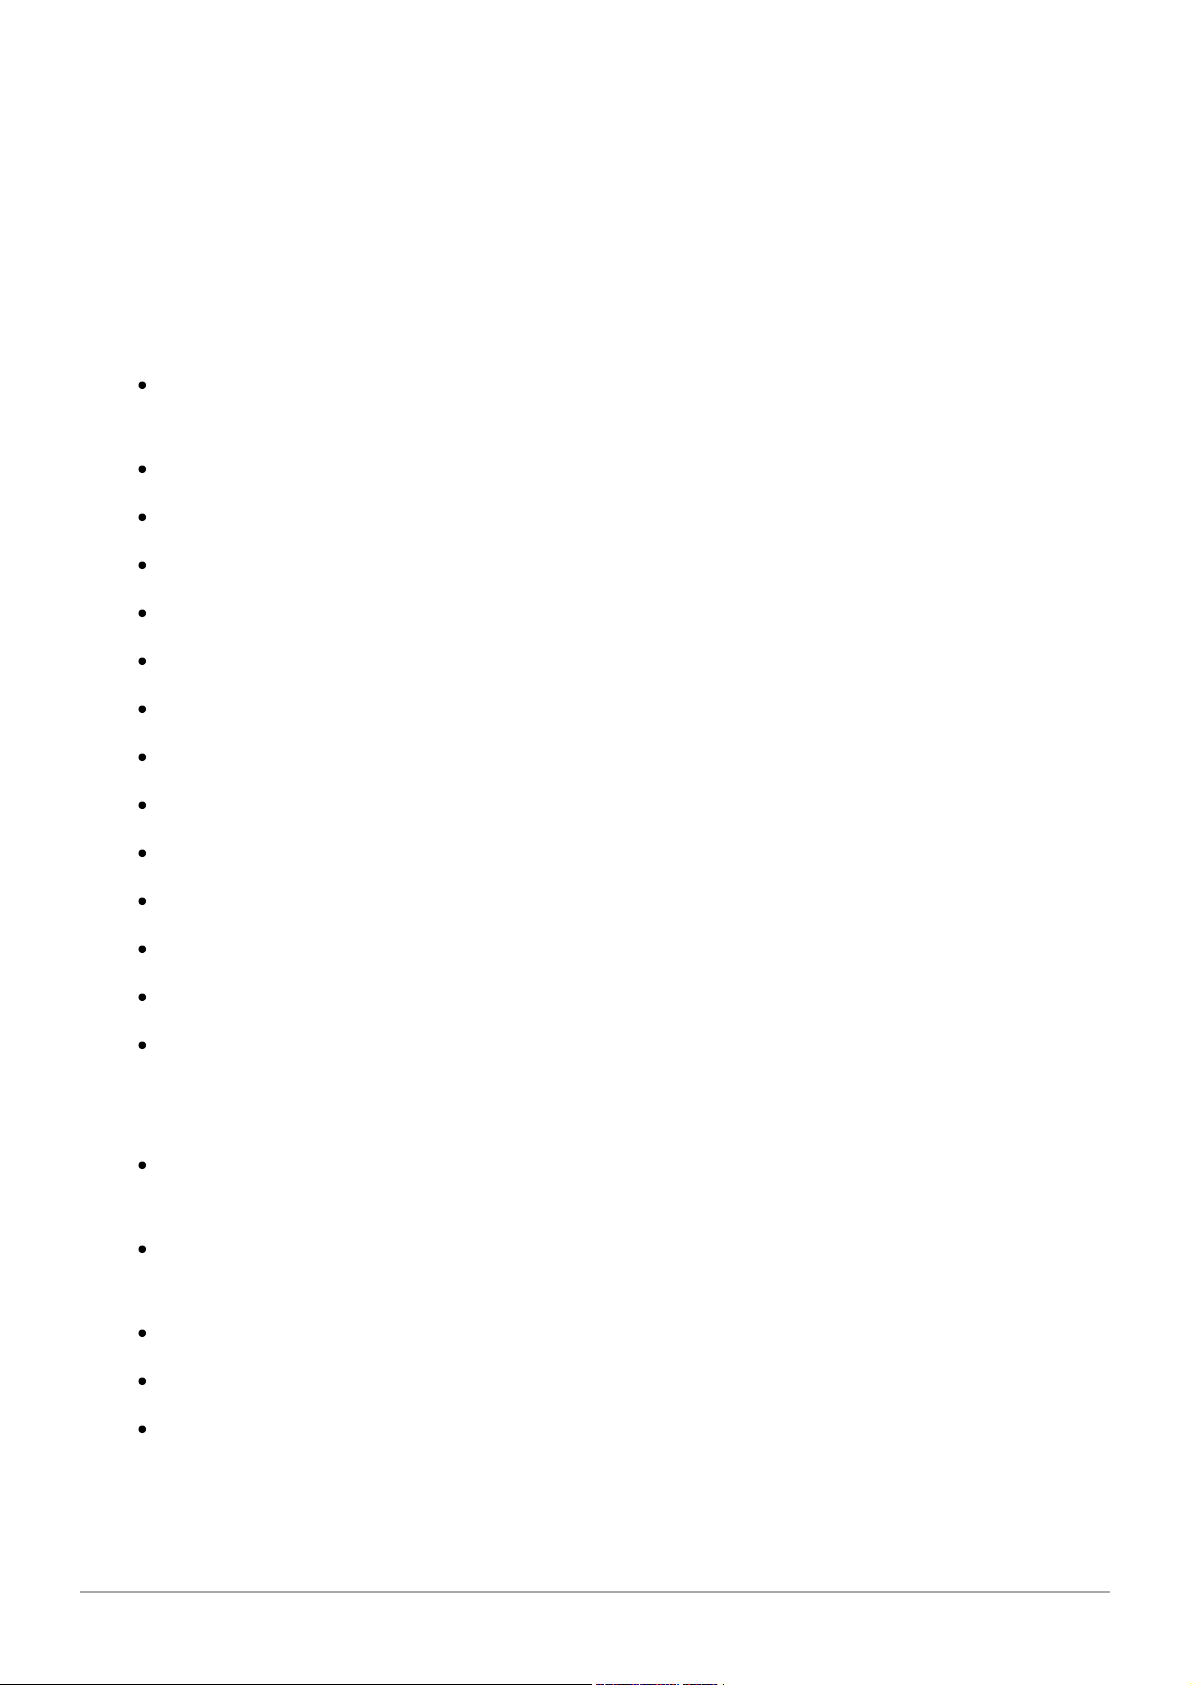
as those heard in acoustic instruments. At extreme settings, it can be used
as a sine wave generator, but be careful as high resonance settings can
result in loud, screamy, dog-spooking (and speaker blowing) occurrences.
MOD 1/2/3 SELECT- These configure filter cutoff frequency modulation.
Most of these are self-explanatory, so we've included notes only where
necessary. Note that none of these mod sources have "inverted" options,
because their associated mod depth controls are bipolar - for inverted
modulation, simply set the appropriate DEPTH control to a negative value.
Keyboard Glide A- Slewed keyboard CV is used as a mod source (GLIDE
RATE
control must be set to a non-zero level).
Sweep A
Envelope 1A
Envelope 2A
Keyboard Glide B
Sweep B
Envelope 1B
Envelope 2B
Mod Wheel
Pitch Bend
Controller 1
Controller 2
Velocity
Threshold Velocity- Switches between two discrete mod amounts
according to velocity. The velocity threshold is set using
MOD THRESH
in
the CONTROL section.
Keyboard- Sweep rate increases as higher notes are played on the
keyboard.
Keyboard Inverted- Sweep rate decreases as higher notes are played on
the keyboard.
Velocity- Playing harder increases the sweep rate.
Velocity Inverted- Playing harder decreases the sweep rate.
Aftertouch (Mono+Poly)
Cherry Audio Chroma User Guide - 49
Page 50
Threshold Aftertouch- Switches between two discrete mod amounts
according to aftertouch. The aftertouch threshold is set using
MOD
THRESH
in the CONTROL section.
MOD 1/2/3 DEPTH- Sets the amount of mod from the same-numbered mod
source.
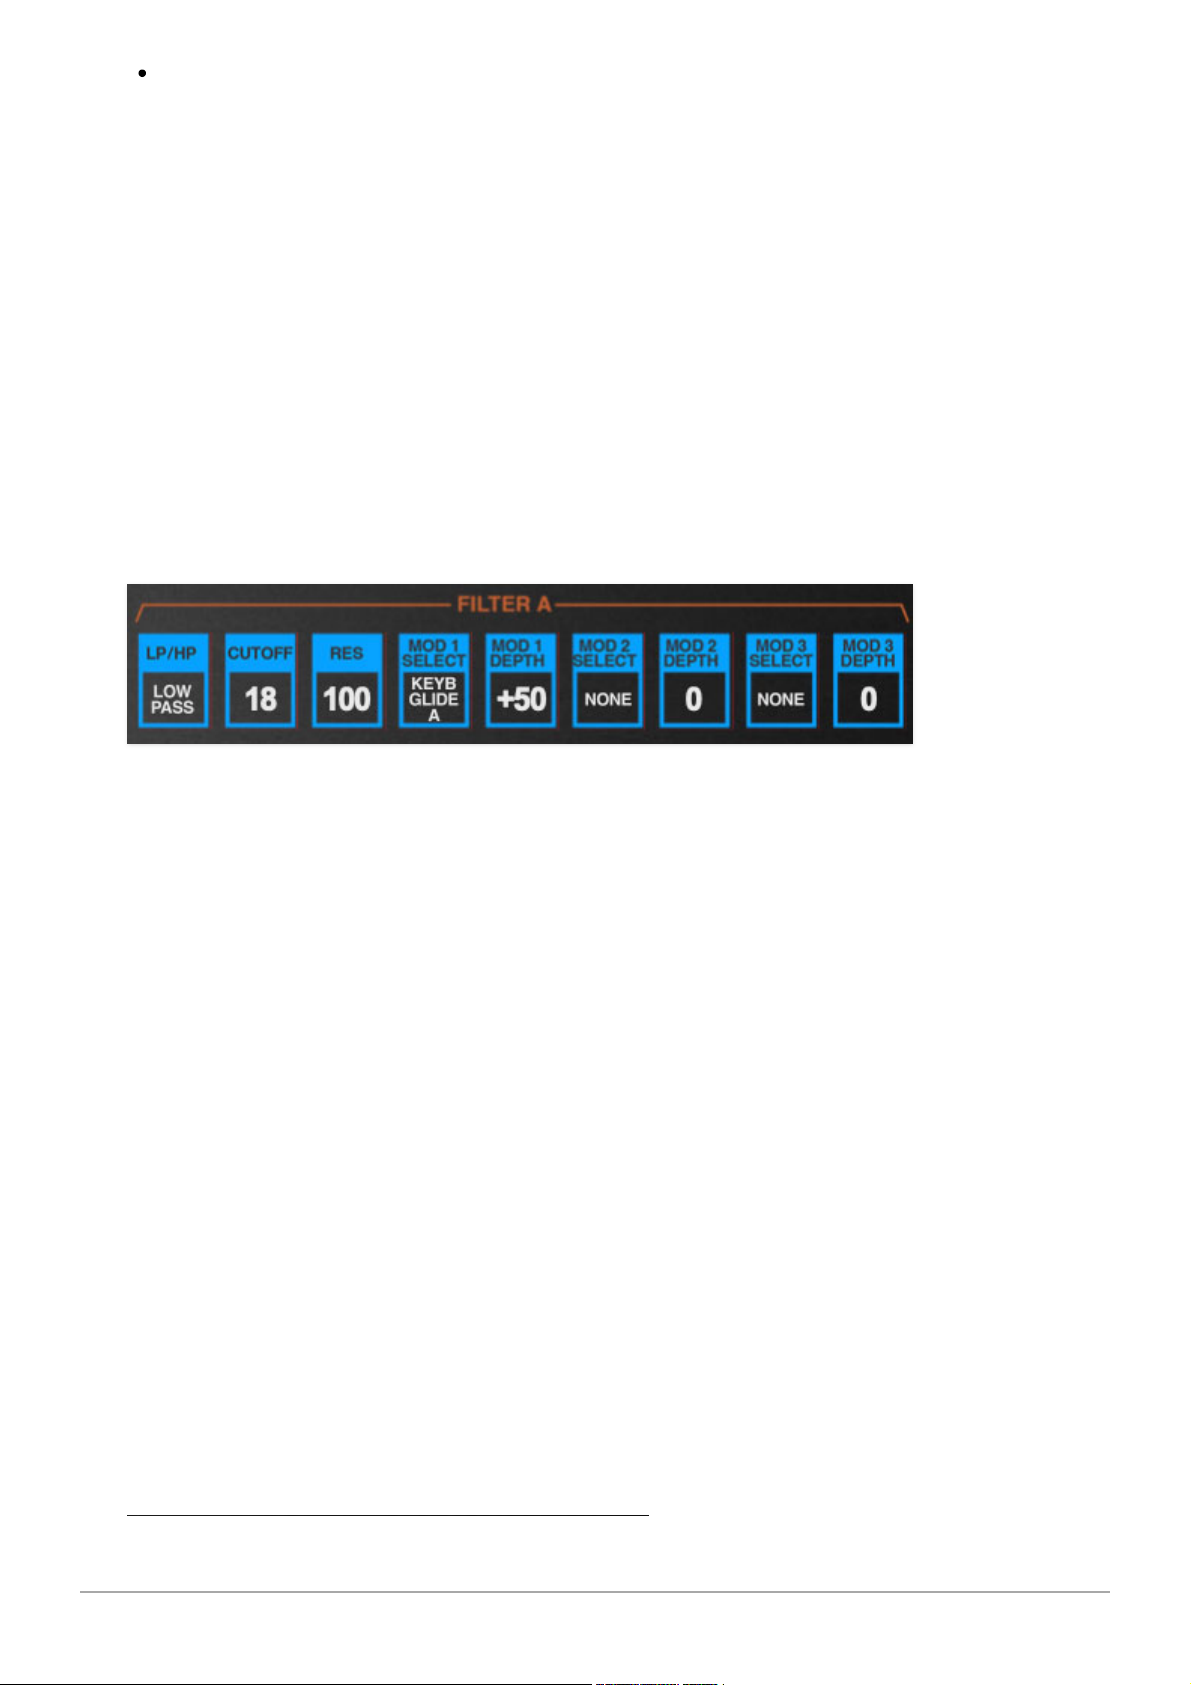
HOW TO APPLY KEYBOARD TRACKING TO FILTER CUTOFF FREQUENCY
Most analog synths include a keyboard tracking control (or fixed amount
switches). Since the frequency of note pitches obviously rise or fall
depending on the pitches of notes played, the idea is that the filter cutoff
frequency follows or "tracks" the pitches of notes played so that the relative
brightness (or dullness) of notes remains relatively constant across the range
of the keyboard.
Looking at Chroma's filter controls, you'll see there is no tracking control, but
there actually is way to create filter tracking, it's just not super obvious (kind
of a repeating theme with the Chroma!). Setting a mod source to
Keyboard
Glide
applies the keyboard CV to the filter cutoff frequency. It's a little
confusing, because the GLIDE section
GLIDE RATE
control can be set to zero
and filter cutoff frequency mod still works properly.
Setting
MOD DEPTH
to 50 results in almost-perfect 1/2 step tracking. This
lets you use the filter as a sine wave oscillator when
RESONANCE
is at high
settings (careful with volume, this can get potentially get squealy-screechy).
Cherry Audio Chroma User Guide - 50
Page 51
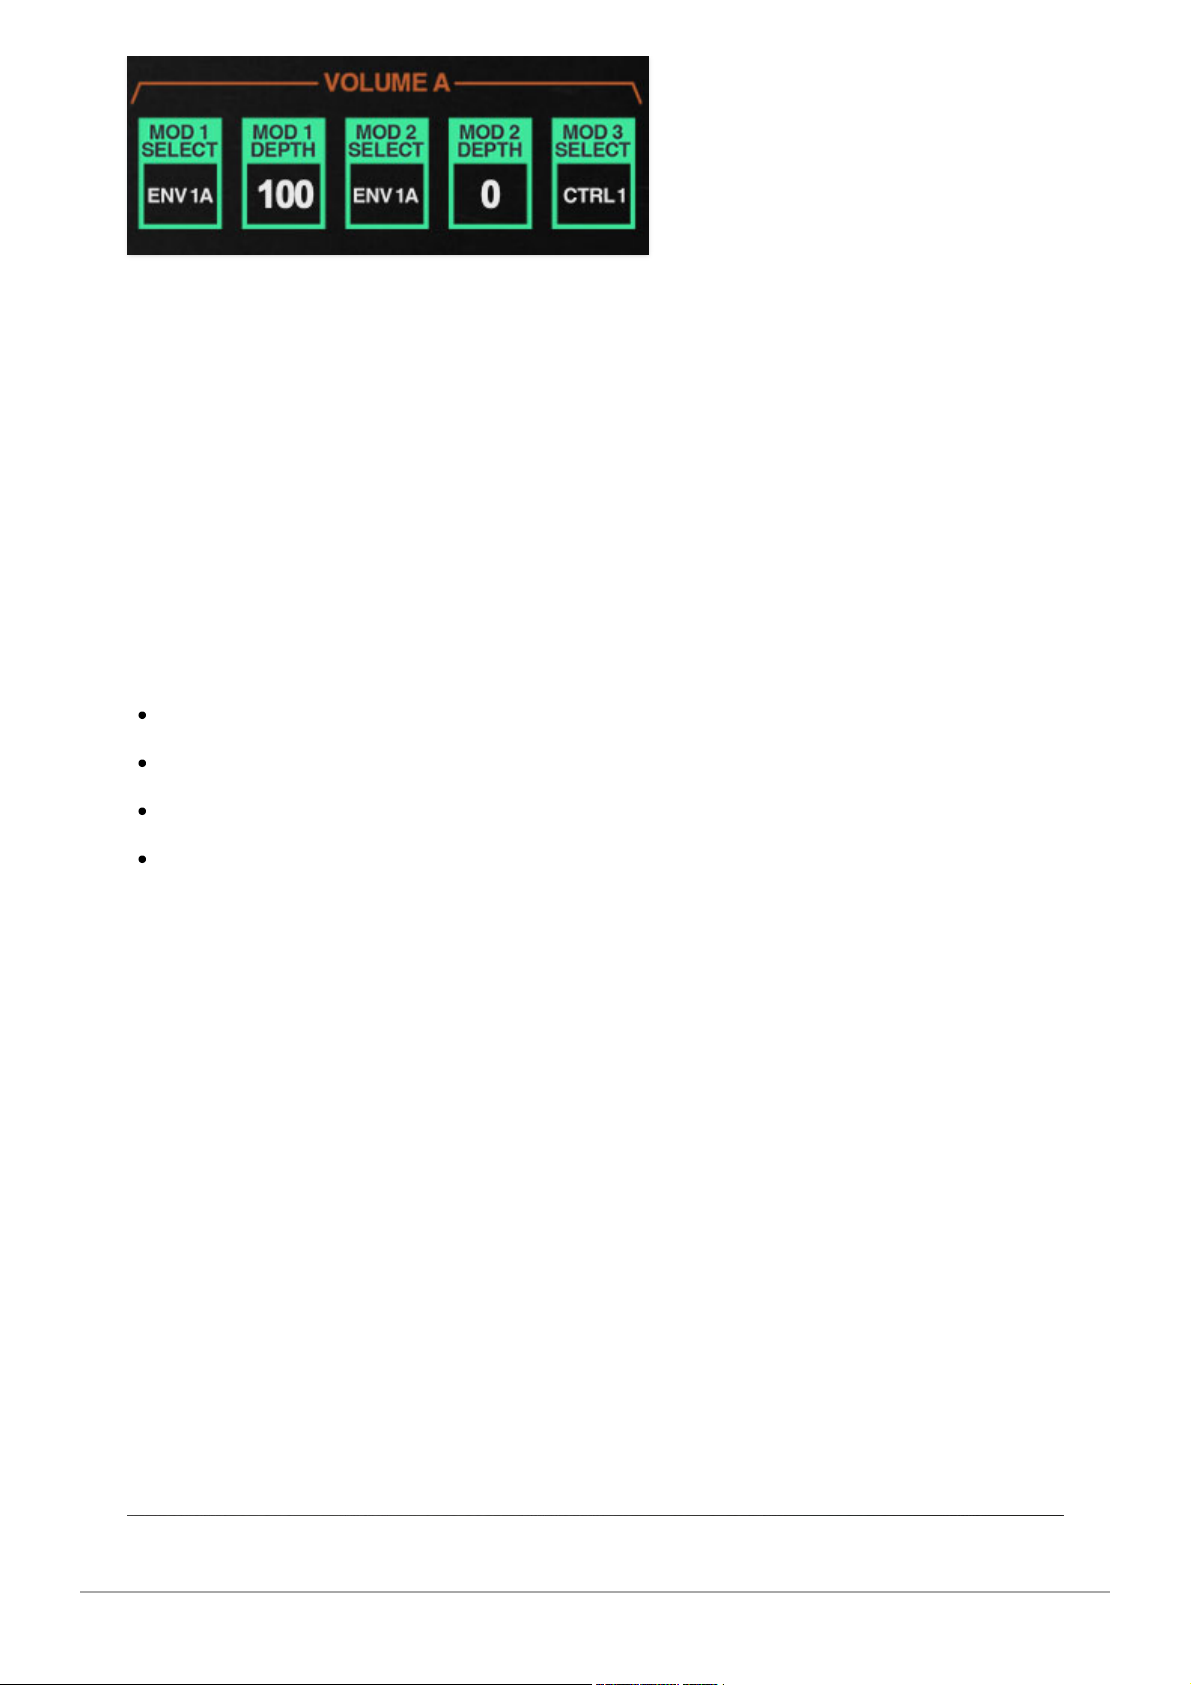
The VOLUME section defines how envelopes generators and other level
modulation is applied to shape the amplitude of sounds using a voltagecontrolled amplifier (VCA). If you're not familiar with them, think of a VCA as
a simple volume knob that gets automatically turned using control voltages.
This section includes three mod select/depth pairs; these are configured a
little differently than the previously discussed PITCH, WAVE SHAPE, and
FILTER mod sections:
MOD 1/2 SELECT- These allow envelope generators to be assigned to the
VOLUME section VCA. These are used to shape the amplitude curve of notes
when keys are played.
Envelope 1A
Envelope 2A
Envelope 1B
Envelope 2B
MOD 1/2 DEPTH- Sets the amount amplitude modulation from the current
envelope generator chosen with MOD SELECT. For most sounds using a single
envelope generator, you'll want to set the mod depth to 100.
MOD 3 SELECT- The MOD 3 bus is intended for applying amplitude-related
effects or additional control, such as tremolo, or volume control via
aftertouch. It doesn't have a depth control - it's always at 100%.
CONTROLLING NOTE VOLUME WITH VELOCITY
You may have noticed that the VOLUME modulation source lists does not
include velocity. Huh? That's because velocity amount is set using the
AMPLITUDE TOUCH parameters ini the ENVELOPE sections - this sets the
amount of keyboard velocity
before
envelope control signals reach the
VOLUME (VCA) section.
Cherry Audio Chroma User Guide - 51
Page 52
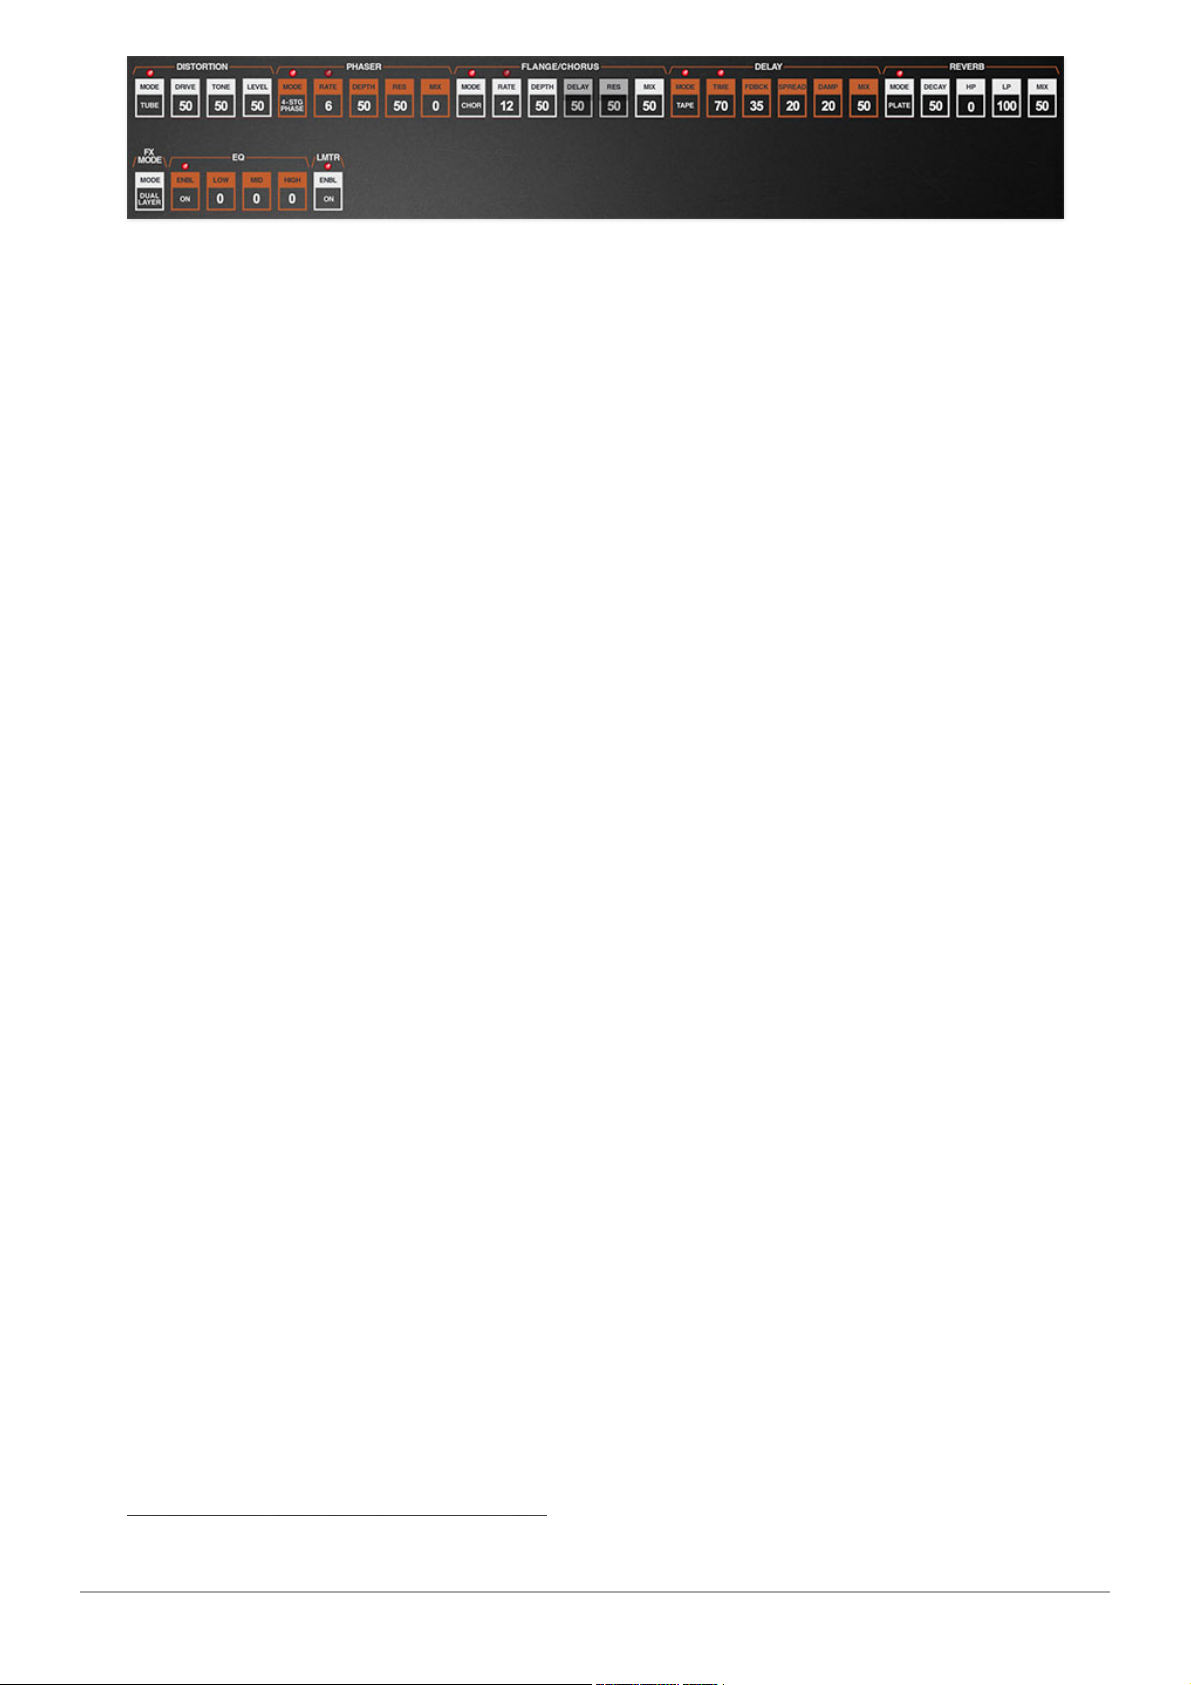
Chroma includes seven studio-quality onboard effects (we're not sure
who's
studio, but take our word, it's a nice one). The Distortion, Phaser,
Flange/Chorus, Delay, and Reverb effects can be independent for Chroma
and Expander or can function as a single set of effects applied globally to
both layers. The EQ and Limiter effects are always global for the entire
instrument.
EDITING FX
The FX section has its own dedicated PARAMETER PROGRAM page. To display
the FX page, click the orange FX button in the EDIT MODE section on the left.
In the following sub-sections, we'll go over each individual effect.
Cherry Audio Chroma User Guide - 52
Page 53
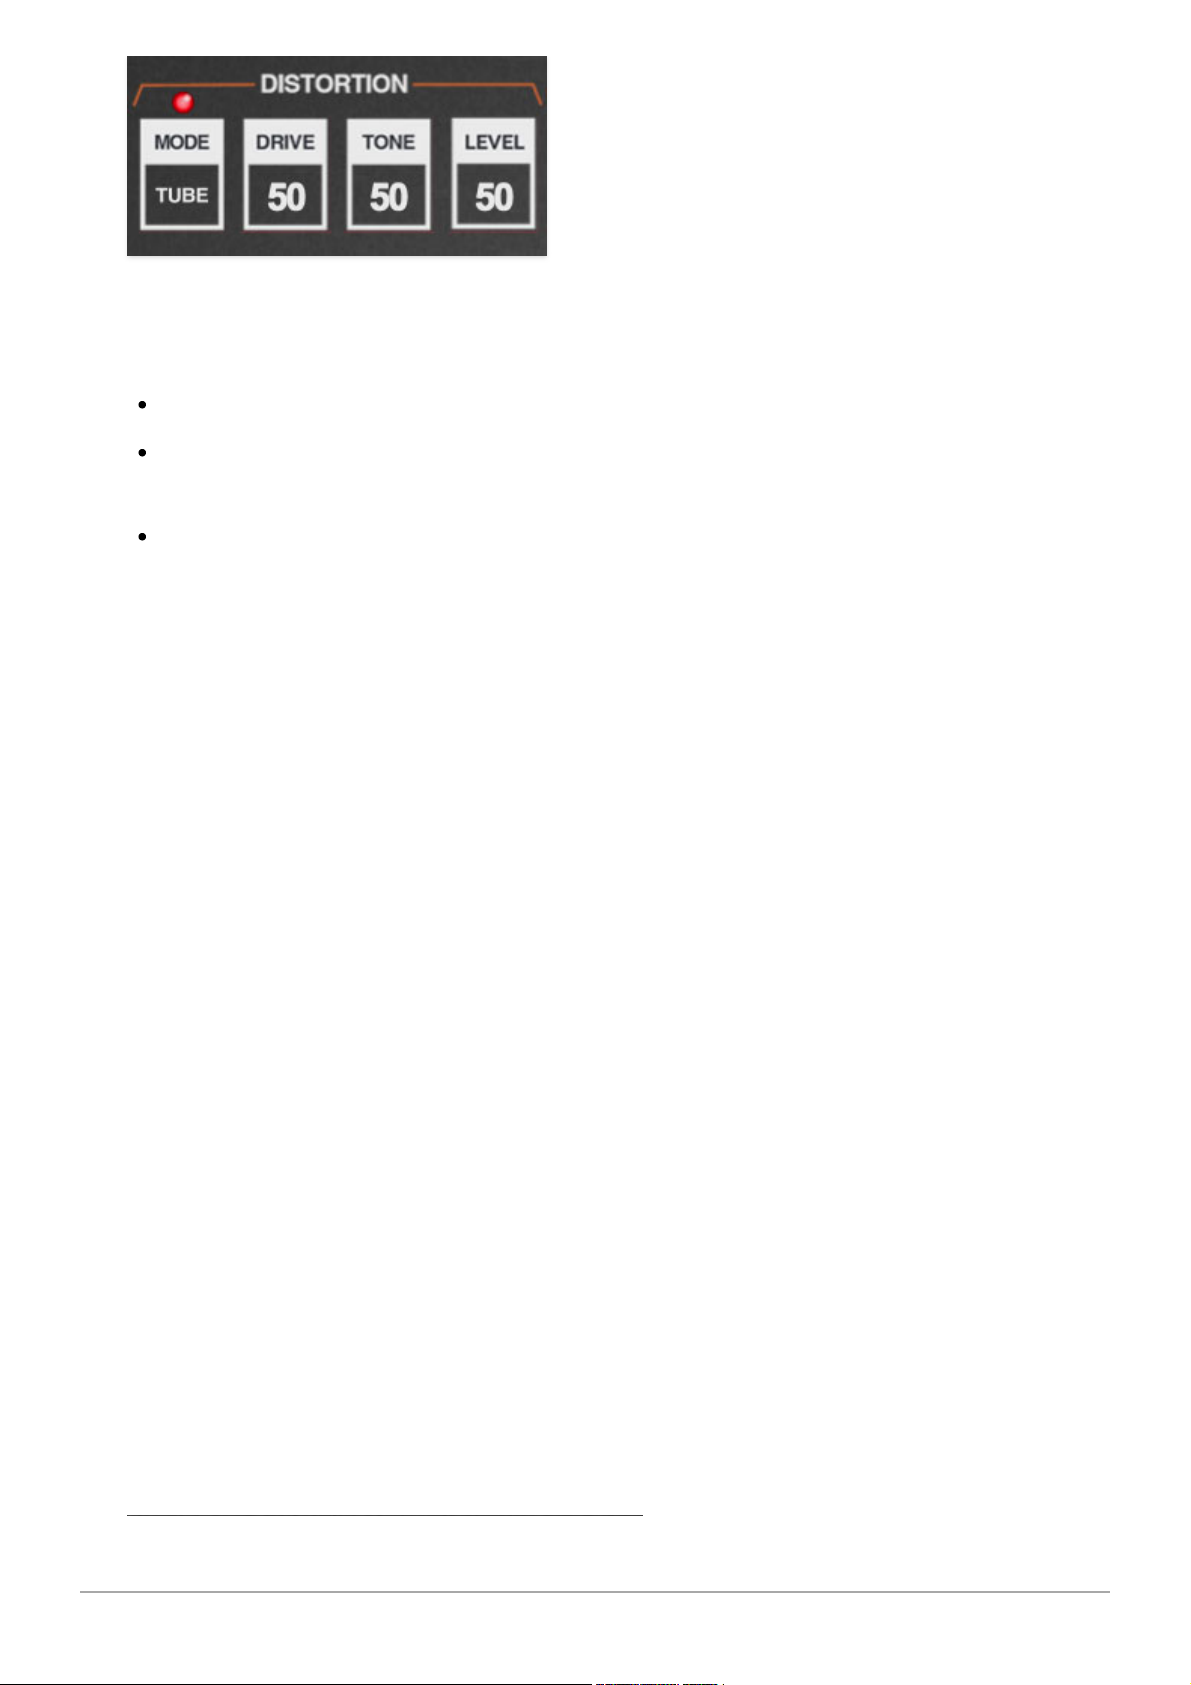
MODE- Turns distortion on and off and sets the type. The LED above the
MODE button illuminates when distortion is enabled.
Off- Distort effect is disabled.
Tube- Relatively mellow distortion mode. Use it to add just little bit of
vintage hair to sounds.
Fuzz- Aggressive and raunchy vintage fuzz tone.
DRIVE- Overall amount of distortion.
TONE- Sets the brightness of tone.
LEVEL- Sets overall volume; this doesn't affect the amount of distortion.
Increasing drive will cause an overall volume increase,
Level
can used to
balance levels.
Cherry Audio Chroma User Guide - 53
Page 54
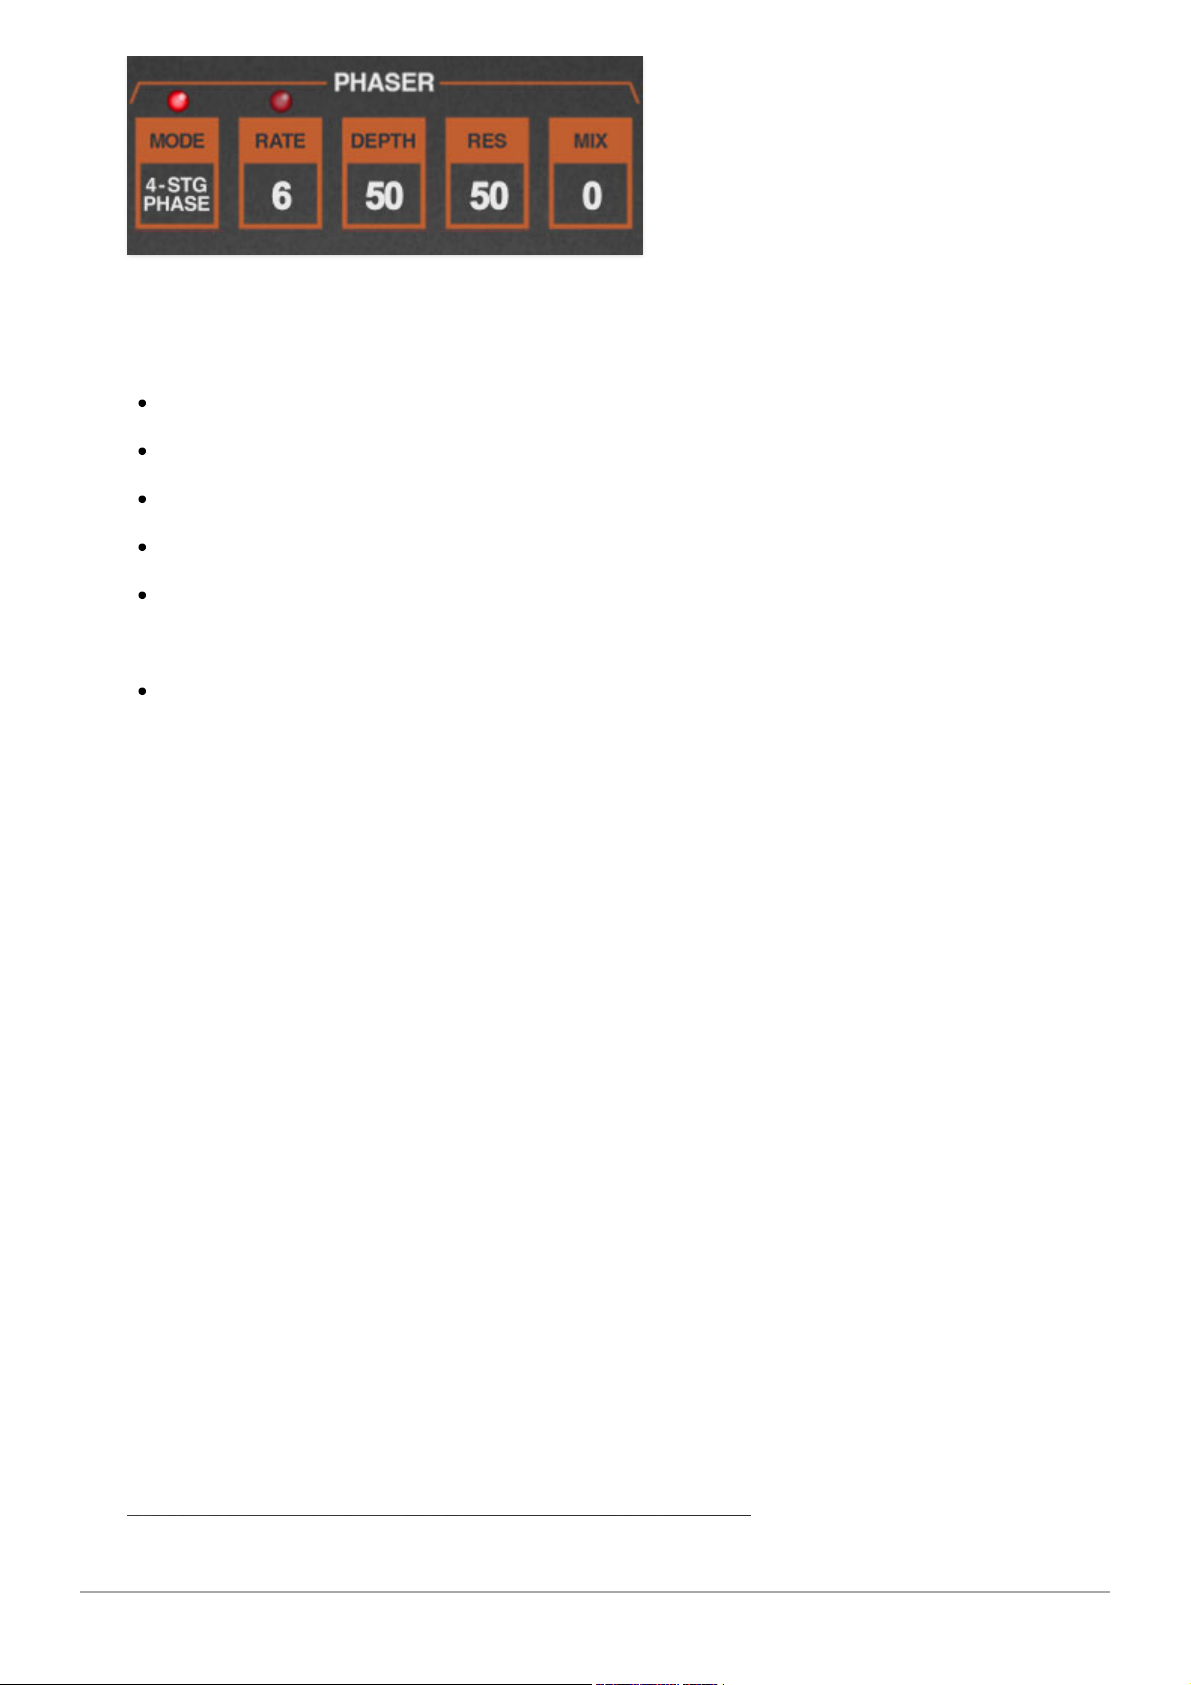
MODE- Turns the phaser on and off and sets the phasing type and sync. The
LED above the MODE button illuminates when the phaser is enabled.
Off- Phaser effect is disabled.
2-Stage Phaser- Two stages of of allpass filters.
4-Stage Phaser- Four stages of of allpass filters.
6-Stage Phaser- Six stages of of allpass filters.
8-Stage Phaser- Eight stages of of allpass filters.
––––
Sync To Host Tempo- Enabling this syncs the phaser's mod rate to host
tempo when using Chroma within DAW software, or to the current tempo
in the top menu bar when using the standalone version. The RATE control
will snap from 8 beats up to 1/64th note triplets.
RATE- Sets the phaser's internal LFO speed from 0.01 to 8 Hz. The LED
above flashes to indicate the current mod rate.
DEPTH- Sets the depth of phaser sweep.
RESONANCE- Increasing the amount of
Res
intensifies the phasing effect.
This is sometimes referred to as "feedback" in other phaser units.
MIX- Not usually seen in phaser units, the
Mix
control allows the overall
phase intensity to be dialed back when desired. For standard "phasers on
stun!" behavior, leave
Mix
at 100.
Cherry Audio Chroma User Guide - 54
Page 55
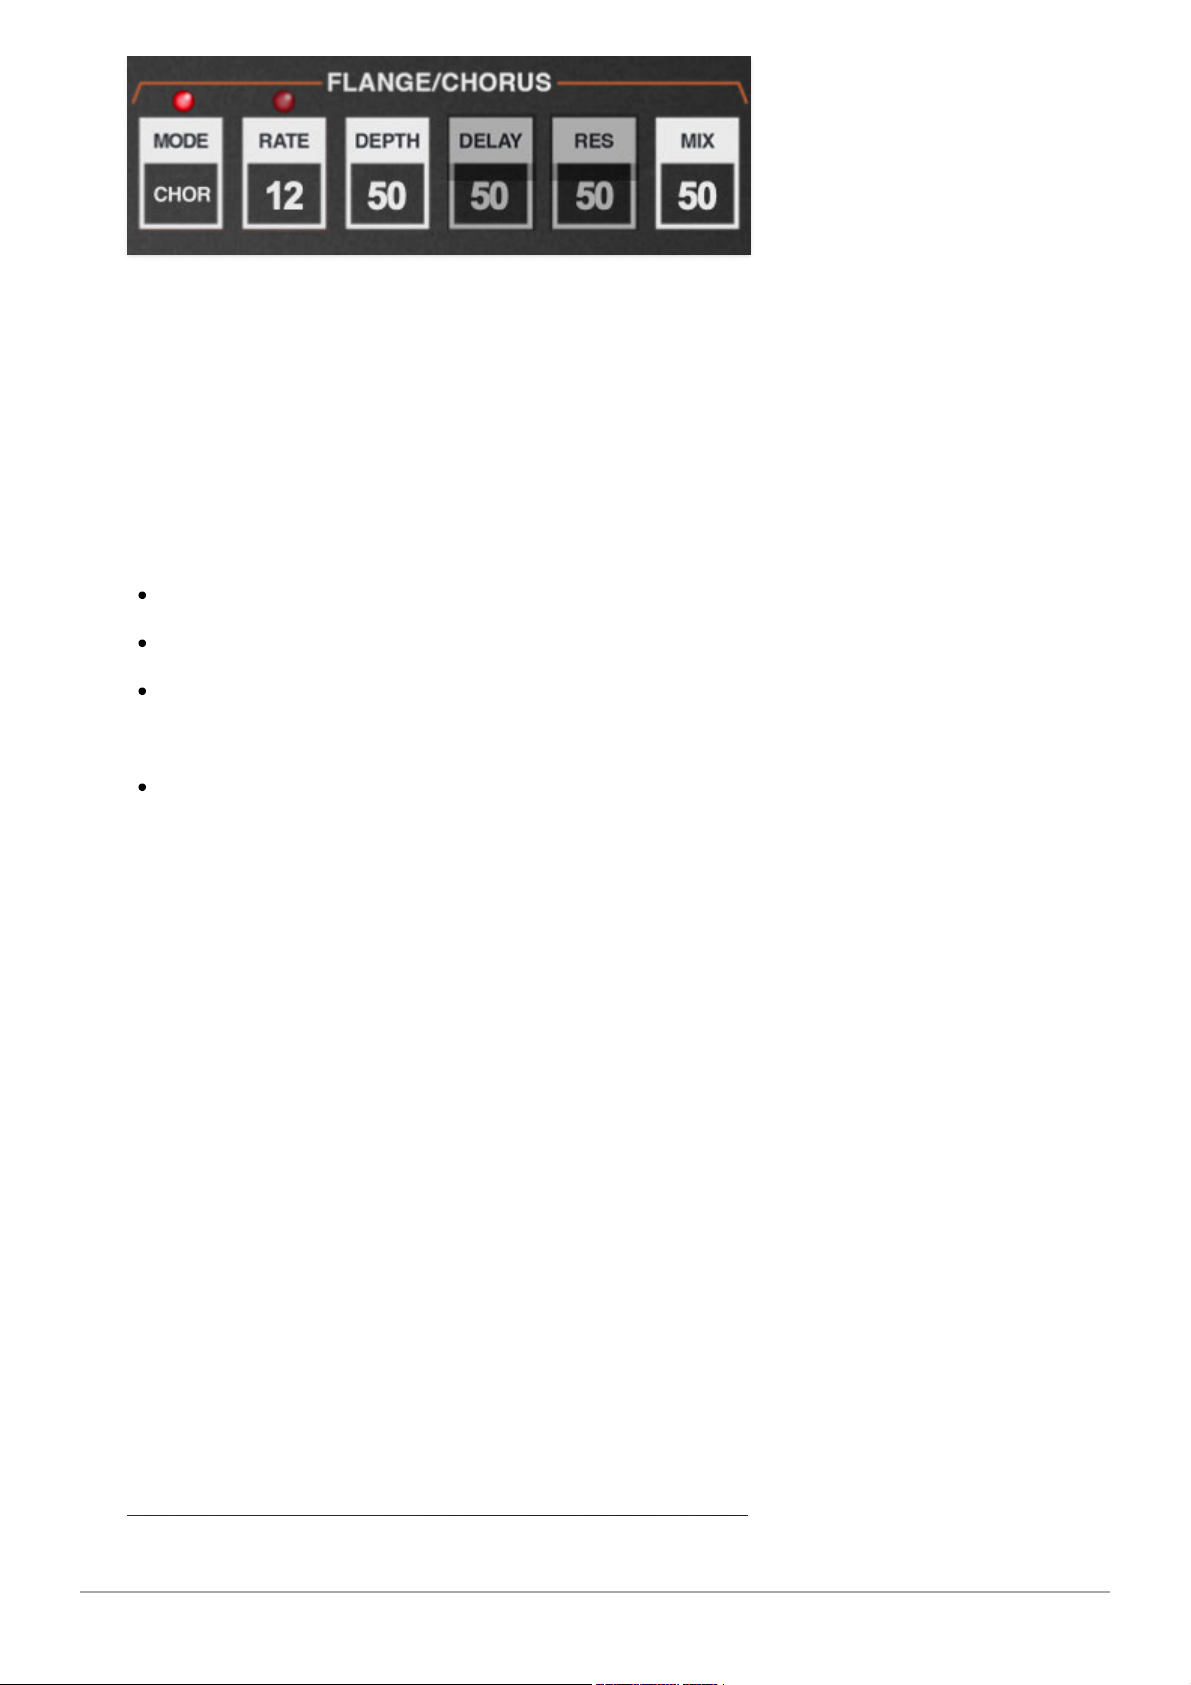
A thick and warm flange/chorus effect. Flanging and Chorus are closely
related - the general difference being that flangers use a shorter time range
and some amount of feedback (this intensifies the "jet-flyby" whoosh),
whereas choruses utilize a slightly longer delay time, and no feedback.
MODE- Turns the flange/chorus on and off and sets the effect type and sync.
The LED above the MODE button illuminates when the flange/chorus is
enabled.
Off- Flange/chorus effect is disabled.
Flange- Enables flange mode.
Chorus- Enables chorus mode.
––––
Sync To Host Tempo- Enabling this syncs the flange/chorus mod rate to
host tempo when using Chroma within DAW software, or to the current
tempo in the top menu bar when using the standalone version. The RATE
control will snap from 8 beats up to 1/64th note triplets.
RATE- Sets the flange/chorus internal LFO speed from 0.01 to 8 Hz. The LED
above flashes to indicate the current mod rate.
DEPTH- Sets the depth of flange or chorus sweep.
DELAY- Sets the amount of delay time when in flange mode, from 1-13ms.
This is disabled in chorus mode.
RESONANCE- Increasing the amount of
Res
intensifies the effect when in
flange mode. This is also disabled in chorus mode.
MIX- The
Mix
control allows the overall effect intensity to be dialed back
when desired. For standard flange/chorus effect behavior, leave
Mix
at 100.
Cherry Audio Chroma User Guide - 55
Page 56
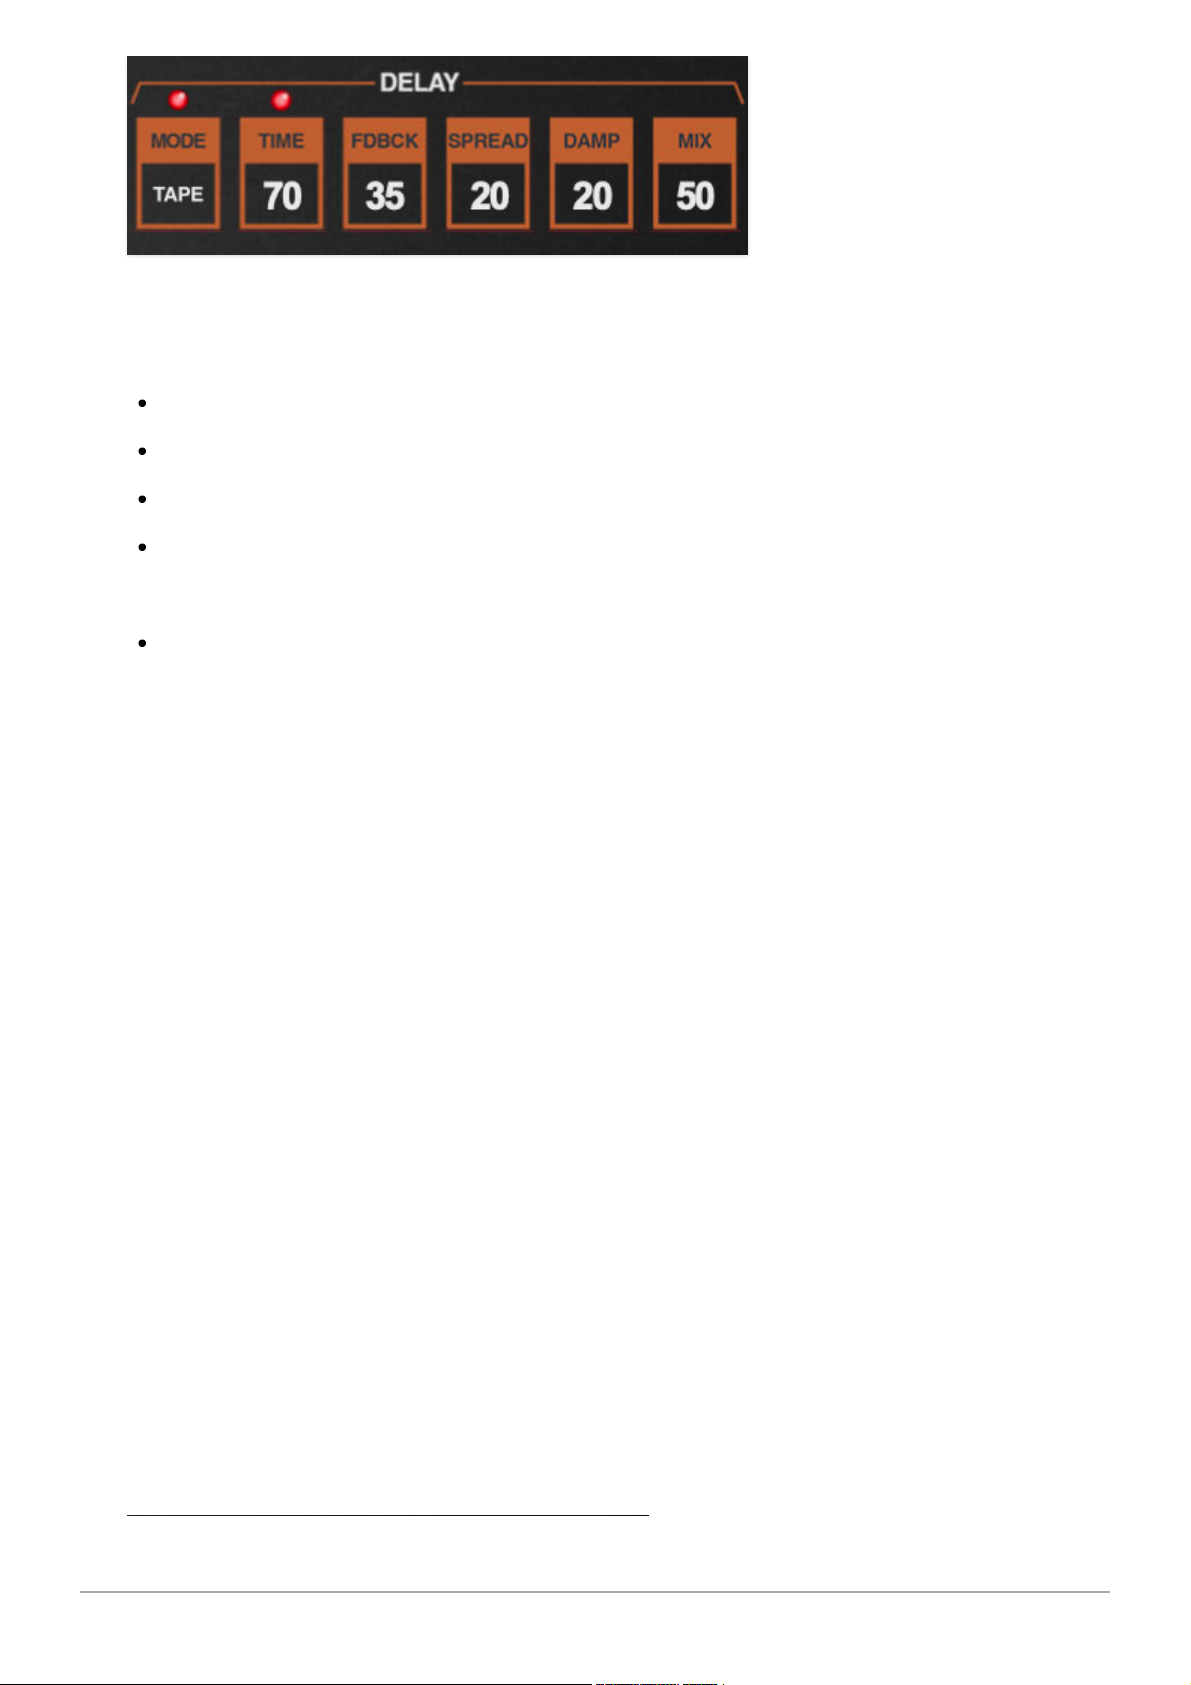
MODE- Turns the delay effect on and off and sets the type and sync. The LED
above the MODE button illuminates when the delay is enabled.
Off- Disables delay effect.
Digital- A pristine sounding digital delay.
Tape- Reproduces the effect of a vintage "space echo" tape delay.
Ping Pong- Echoes alternate between audio channels.
––––
Sync To Host Tempo- Enabling this syncs the delay time to host tempo
when using Chroma within DAW software, or to the current tempo in the
top menu bar when using the standalone version. The RATE control will
snap from 8 beats up to 1/64th note triplets.
TIME- Sets delay time, from 1 to 2000 ms. If the
Sync
button is enabled,
time settings snap to synchronized note values.
FEEDBACK- Routes the output to the input for additional repeats. Be careful
at high settings as this can result in runaway feedback madness.
SPREAD- Alters the left and right channel delay times creating a stereoizing
effect. Greater amounts of spread increase the delay time differential and
thus the stereo separation.
DAMP- Attenuates high-frequencies as the knob amount is increased. Not
only does this create more natural sounding decays, it also reduces the
"stacking" effect that occurs with high feedback levels.
MIX- Sets the ratio of clean to effected sound.
Cherry Audio Chroma User Guide - 56
Page 57
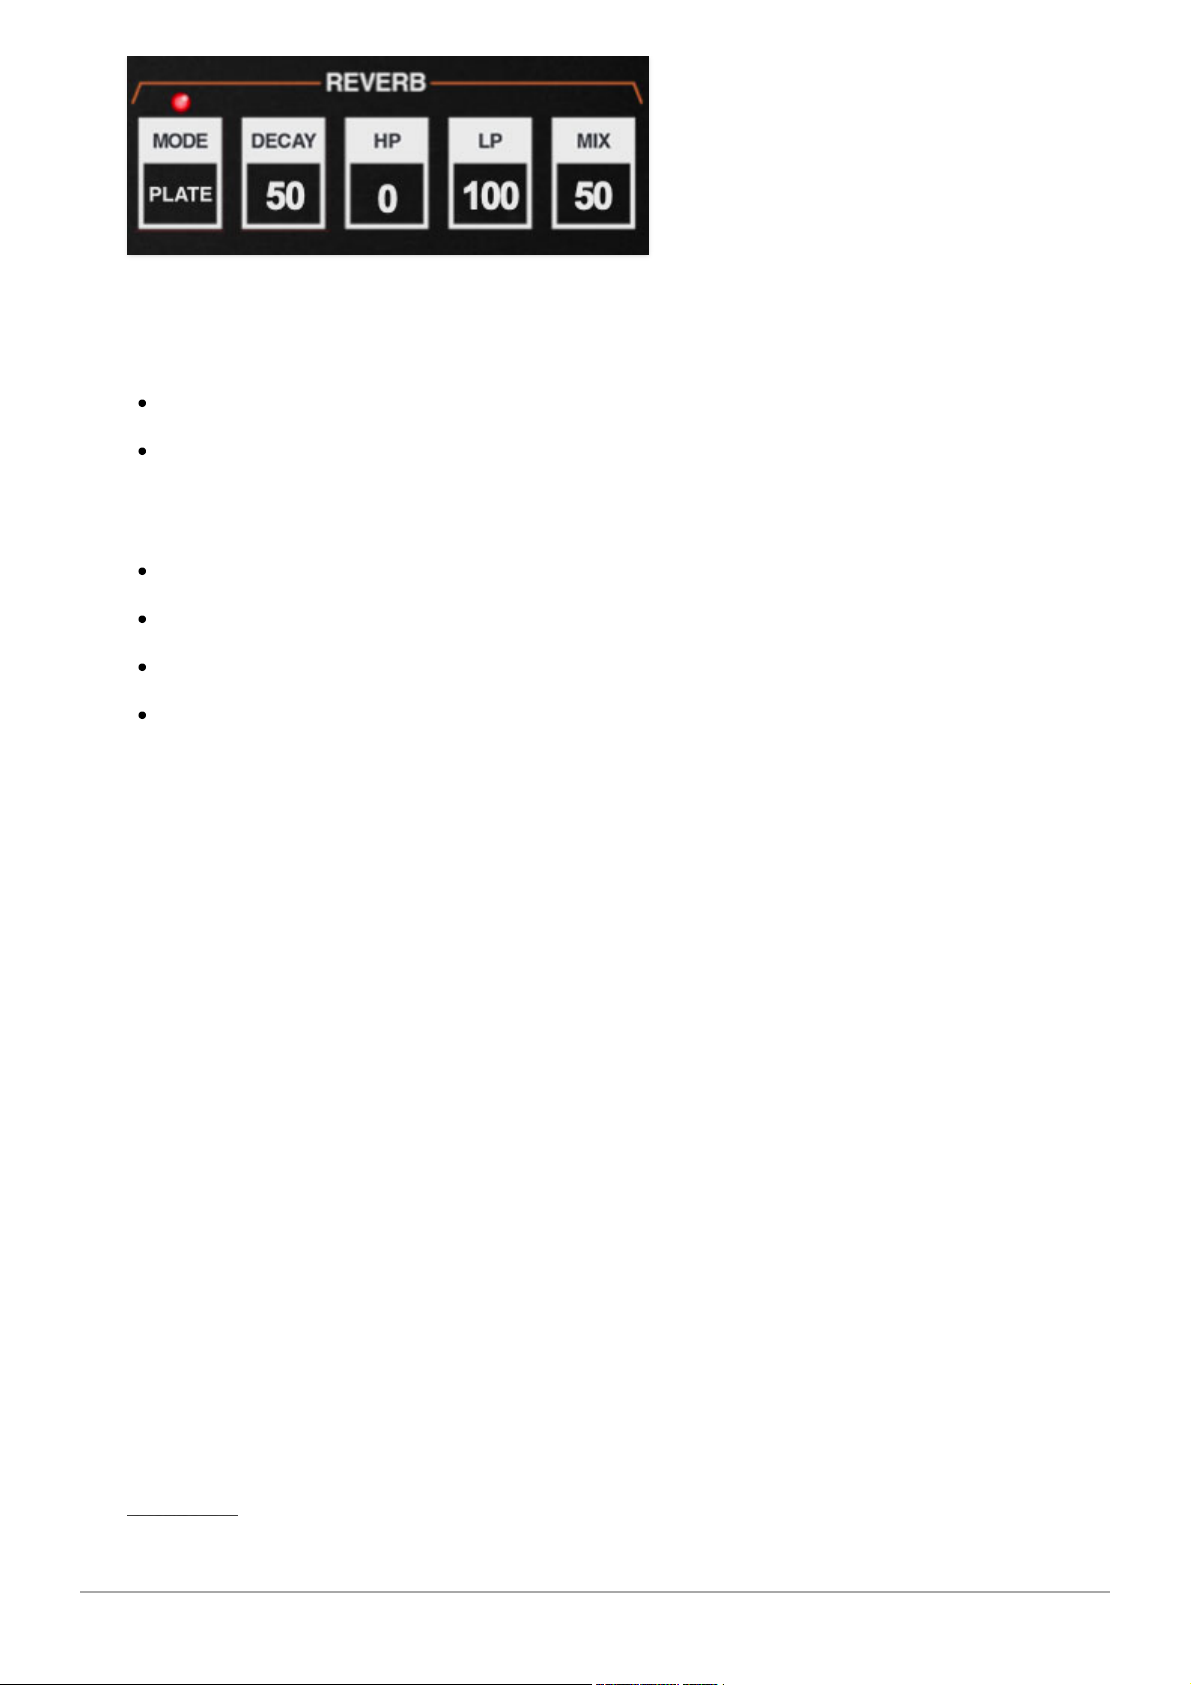
MODE- Turns the reverb effect on and off and sets the type. The LED above
the MODE button illuminates when reverb is enabled.
Off- Disables reverb effect.
Spring- Recreates mechanical spring-reverb effect often seen (and
kicked) in vintage guitar amps. We don't recommend kicking your
computer.
Plate- A medium-to-large studio plate-style algorithm.
Room- Recreates a vintage algorithmic-style medium room verb.
Hall- A large, hall-style reverb.
Galactic- Cherry Audio's exclusive, giant, spacey reverb. Guaranteed to
make anything sound cool!™.
DECAY- Sets the length of reverb release time/size of room.
HP- A highpass filter affecting wet reverb signal only. Low frequencies are
increasingly attenuated as the setting is increased.
LP- A lowpass filter affecting wet reverb signal only. High frequencies are
increasingly attenuated as the setting is decreased.
MIX- Sets the ratio of clean to effected sound.
Cherry Audio Chroma User Guide - 57
Page 58
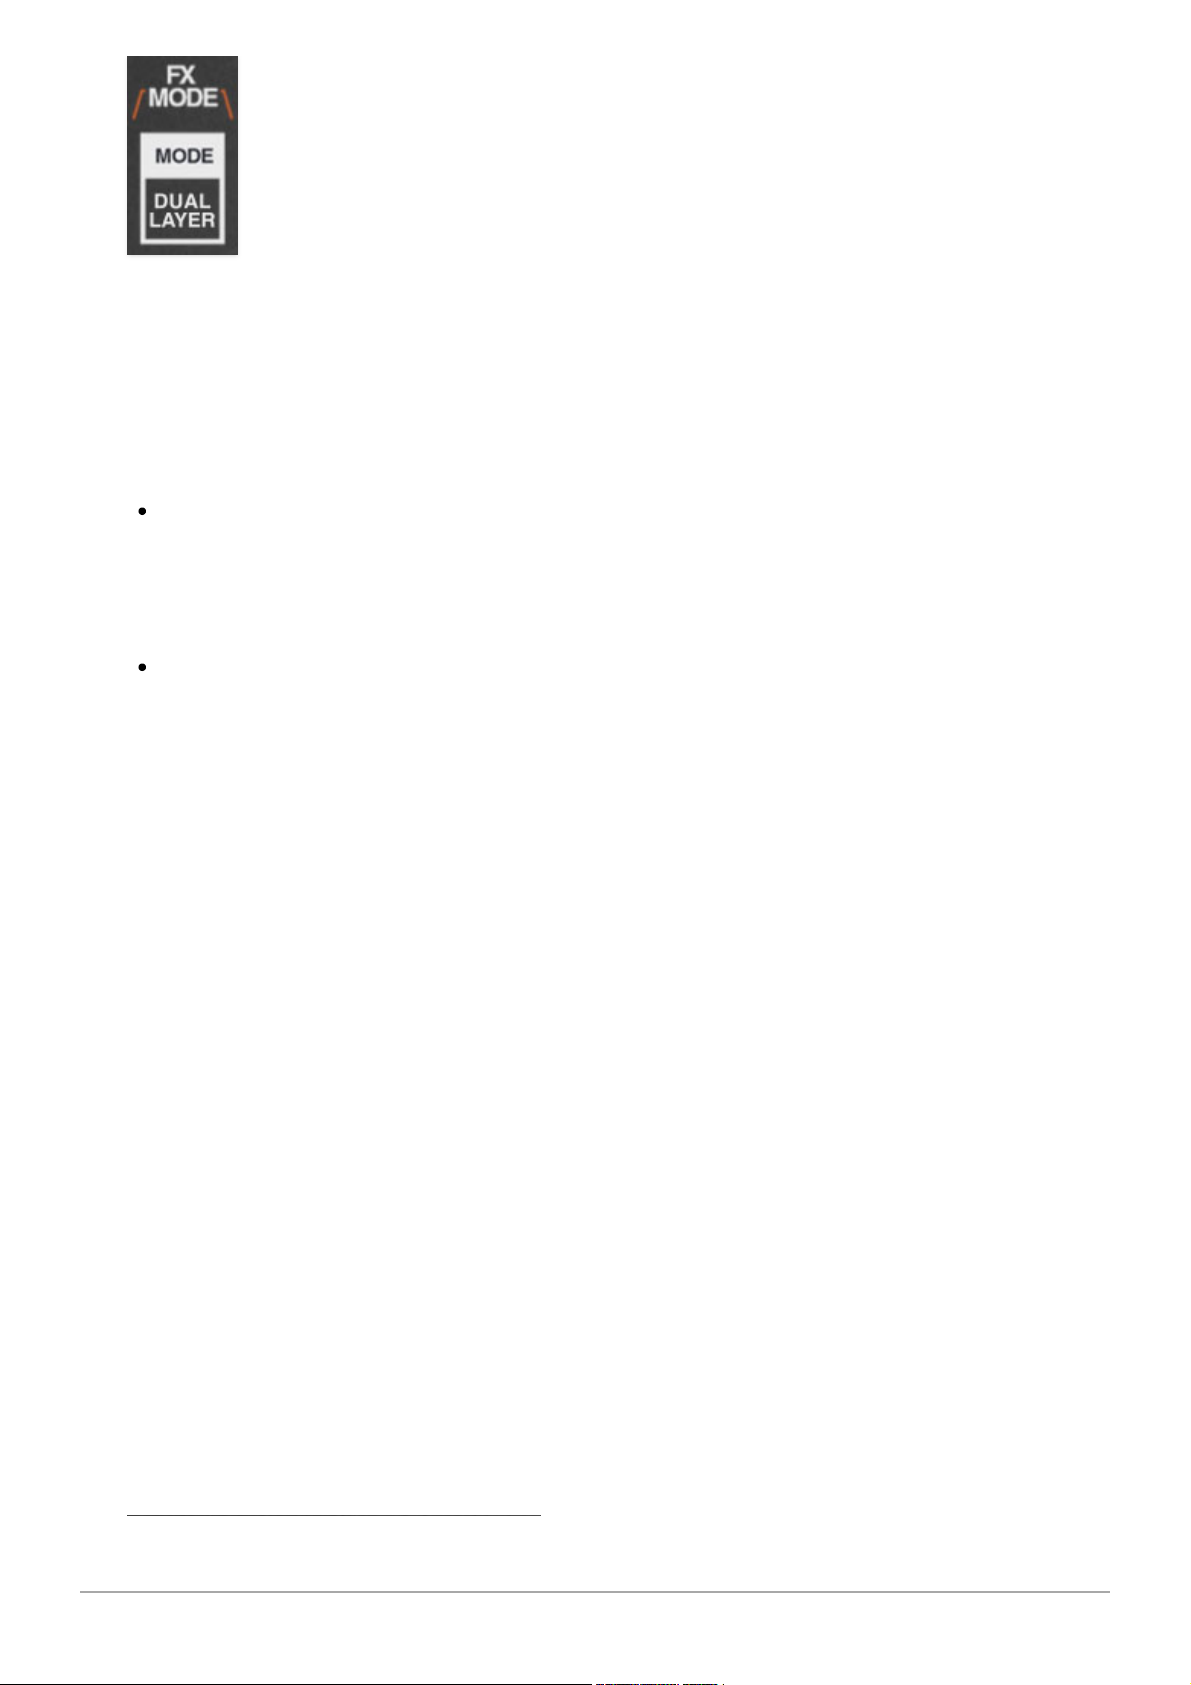
MODE- This allows selection of either a common or individual set of
distortion, phaser, flange/chorus, delay, and reverb effects for Chroma (A/B
layers) and Expander (C/D layers). The EQ and limiter effects are always
global for the both Chroma and Expander layers. This is why the EQ
and limiter are only visible on the Chroma FX page.
Global Effects- Both Chroma (A/B layers) and Expander (C/D layers) run
through a single set of effects. This is useful when you'd like the same
effects settings for both layers when creating stacked (DOUBLE MODE) or
split patches.
Dual Layer Effects- Chroma (A/B layers) and Expander (C/D layers) each
run through independent effects sections. If you're using an older
computer, be aware that
DUAL LAYER EFFECTS
is more CPU intensive.
Cherry Audio Chroma User Guide - 58
Page 59
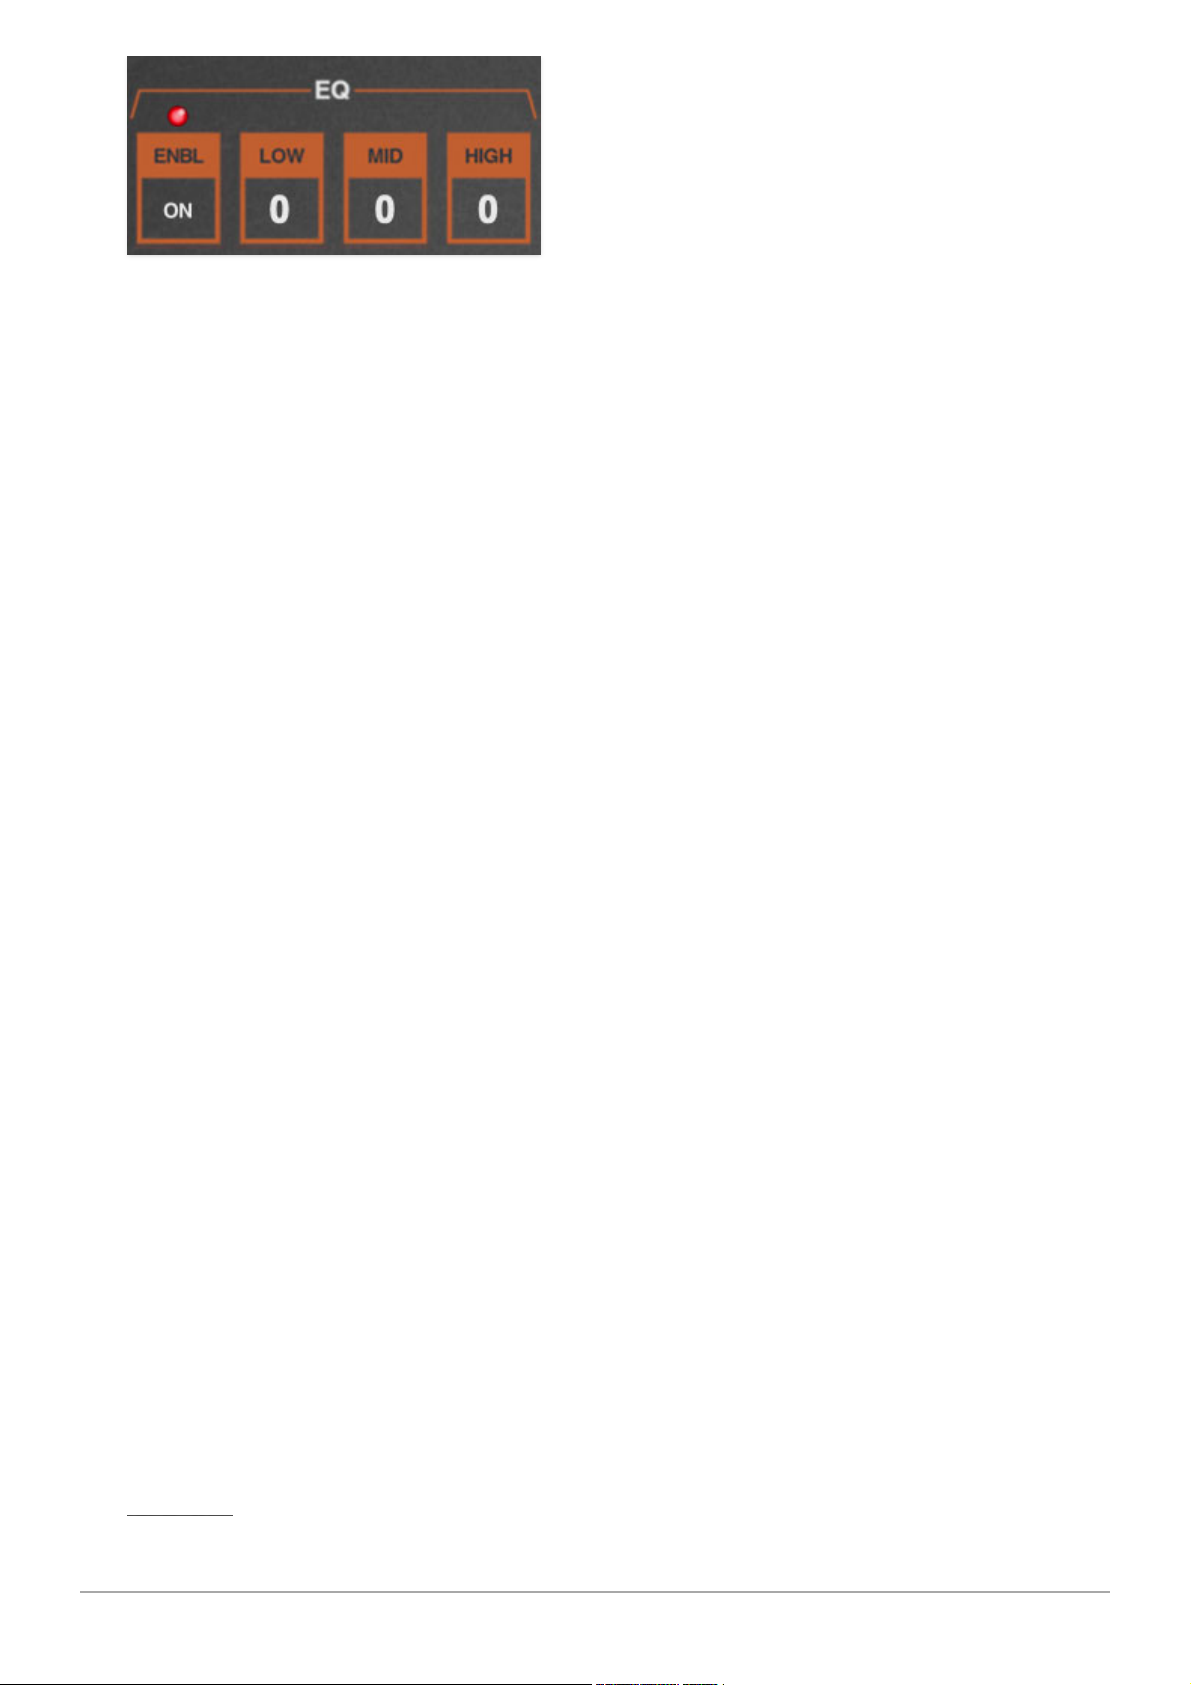
The EQ section precisely replicates the frequency and boost and cut
characteristics of the original Chroma's three-band EQ - this is why some of
the specs may look a little odd compared to more modern general-purpose
EQ sections.
ENABLE- Turns the EQ section on and off. The LED above the button
illuminates when the limiter is enabled.
LOW- Low-shelf filter with a corner frequency of 200 Hz, and up to 12 dB of
boost or cut.
MID- Peaking EQ with a center frequency of 3000 Hz, bandwidth of four
octaves, and up to 10 dB of boost or cut.
HIGH- High-shelf filter with a corner frequency of 3000 Hz, and up to 7.5 dB
of boost or cut.
Cherry Audio Chroma User Guide - 59
Page 60

The limiter globally applies a transparent limiting effect to help prevent ugly
digital overloading and clipping. The LED above the button illuminates when
the limiter is enabled.
Enable- Turns the limiter on and off.
Cherry Audio Chroma User Guide - 60
Page 61
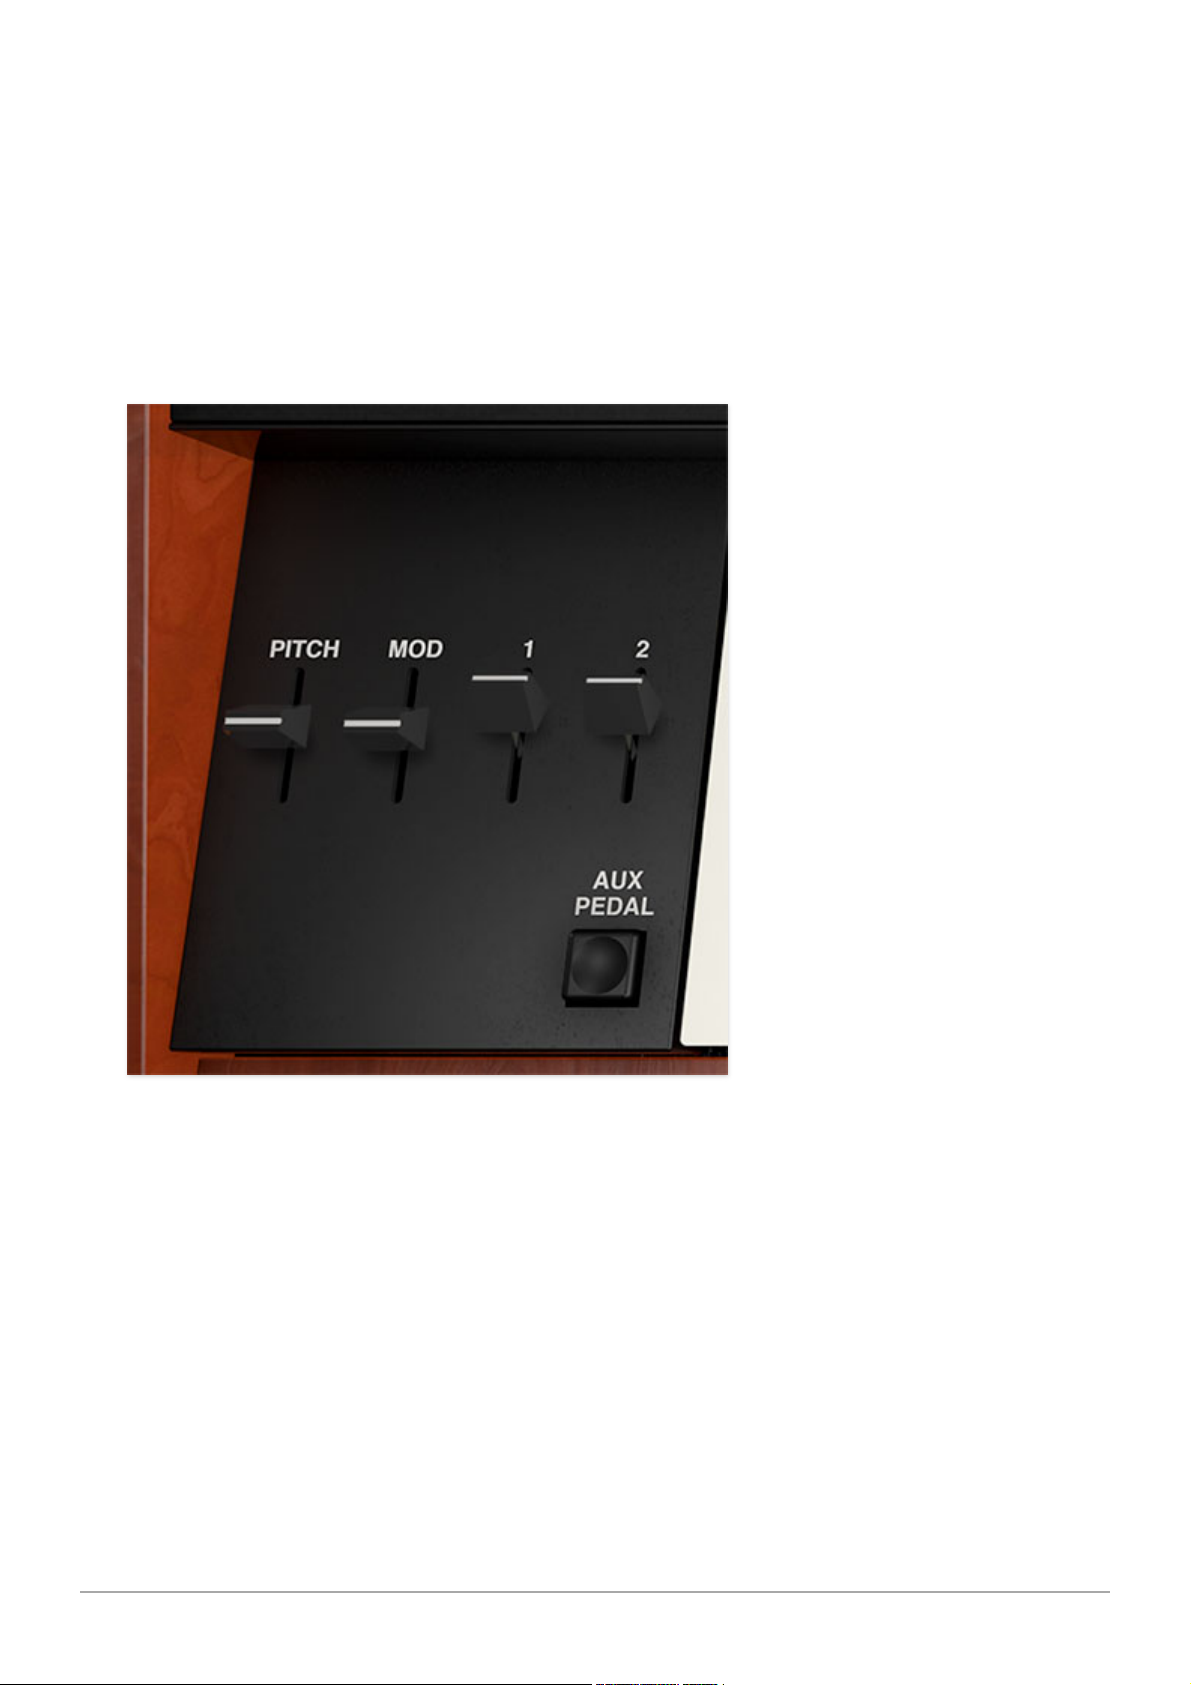
The left-hand control section of the original Chroma was is a little different
than the standard pitch and mod wheel setup. Its left-hand controls consisted
of simply of two spring-loaded, self-centering arced "paddle" controls,
colorfully named "1" and "2." These were included as sources in most of
Chroma's mod source menus, allowing them to be configured as standard
pitch and mod controls, or much more.
In Cherry Audio's Chroma, we made some changes and added a few controls
to better accommodate modern MIDI/USB controllers.
PITCH- The PITCH paddle operates like most pitch wheels you've
encountered, but with one difference. Unlike most synths, its control signals
are
not
hard-wired to the oscillators; it needs to be set up in a mod bus to
function. The good news is that it's already set up in the vast majority of
Chroma's presets (including the default patch that loads when the NEW
button at top left.) The other good news is that the pitch paddle controller
signals can be multiplexed to numerous simultaneous destinations.
One more quirk we should mention - the Chroma pitch wheels operated
backwards from most, that is, pushing up lowered pitch, and pulling it back
Cherry Audio Chroma User Guide - 61
Page 62
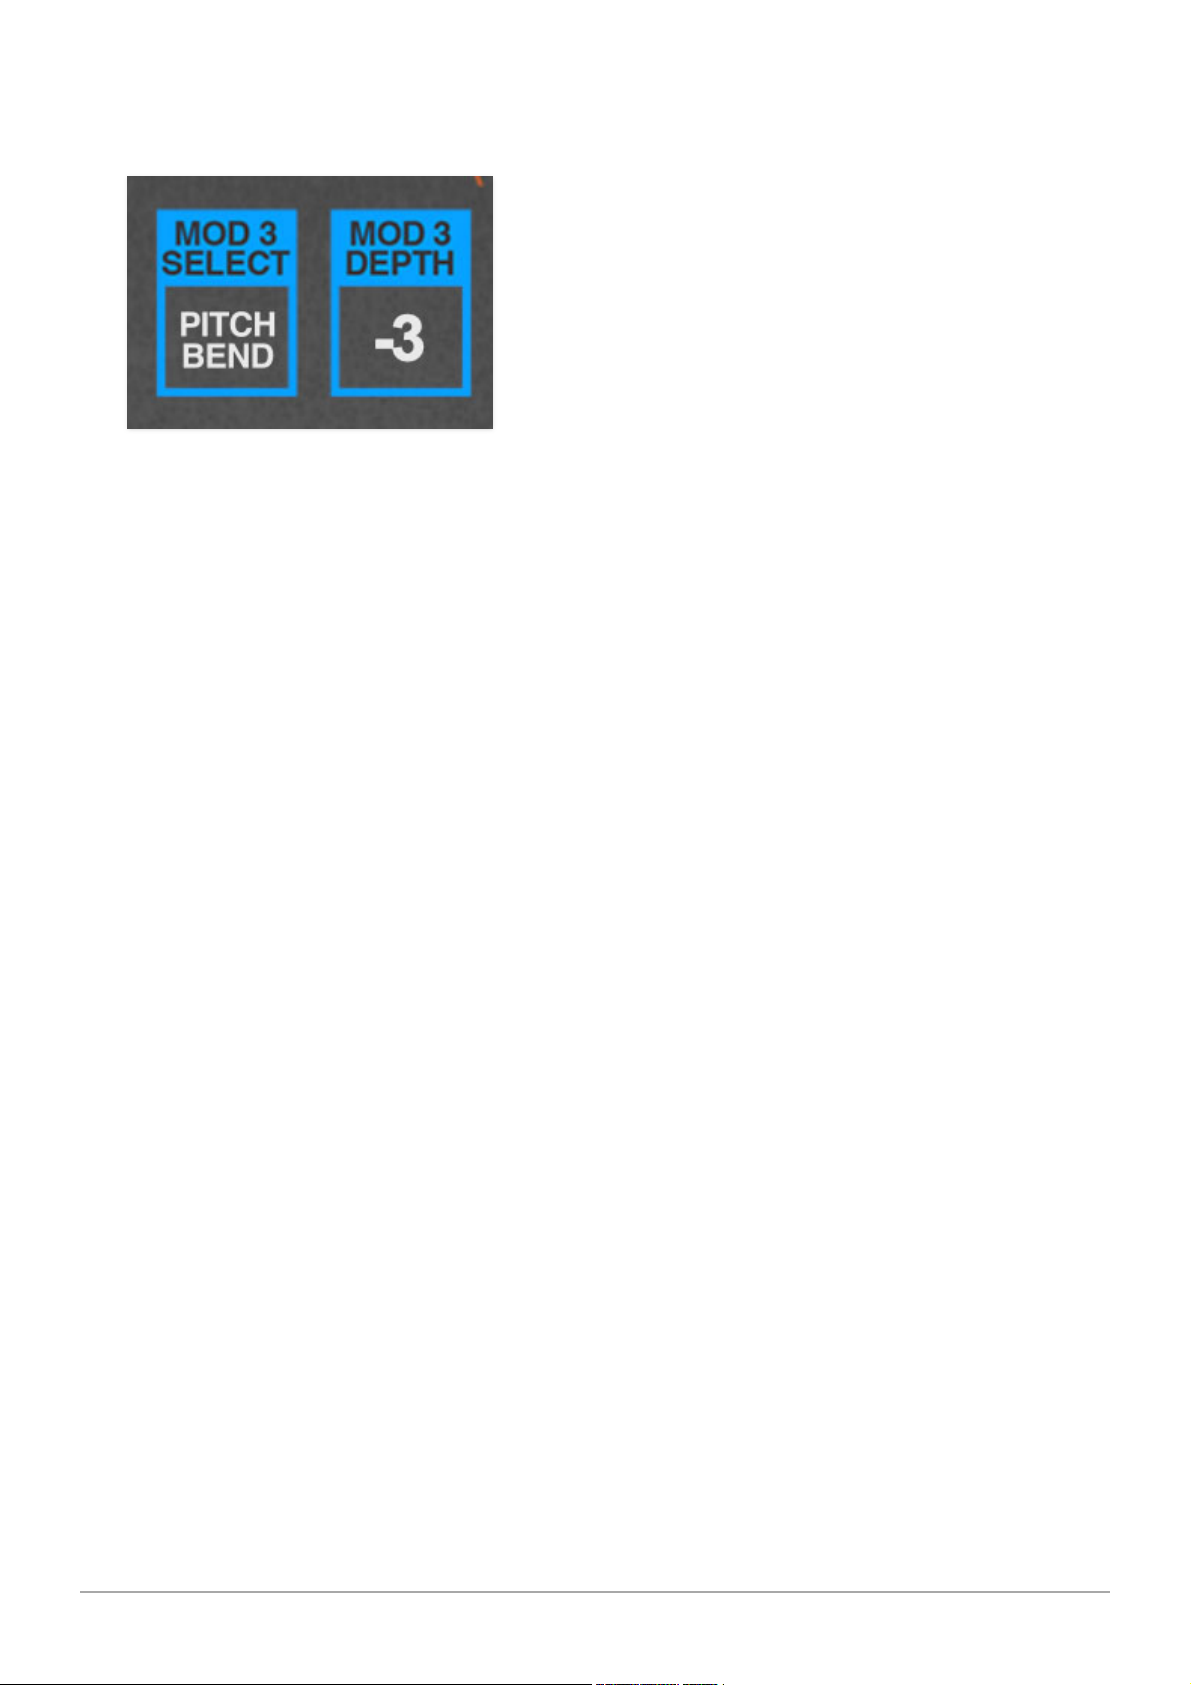
raised pitch, so any of the original patches will work this way. If you'd like to
modify a patch to be standard "wheel-forward-moves-pitch-up," here's how:
In the PITCH section, locate the mod bus that pitch bend is currently assigned
to and invert the
MOD DEPTH
setting. In the example above, you'd set
MOD
DEPTH
to +3 instead of -3.
Keep in mind you'll most likely need to do this for all layers - A and B if you're
just using Chroma, or A, B, C, and D if you're using a double
Chroma+Expander patch. (You can streamline the process a bit by clicking
the
EDIT A+B
or
EDIT C+D
in the EDIT MODE section.)
MOD- Like the PITCH paddle, the MOD paddle is a mod source in most of
Chroma's mod source menus. Unlike most mod wheels though, it's a springloaded and self-centering like the pitch wheel. When used with a hardware
MIDI/USB controller with a standard bottom-to-top (i.e. not centered) mod
wheel control, it moves onscreen from middle-to-top position. This results in
positive-only mod values, just like a standard mod wheel. That said, it can
output negative values either by moving the control with onscreen with the
mouse/trackpad, or by assigning a different hardware MIDI controller (by
right-clicking, selecting
MIDI Learn
, and moving the desired controller).
To configure mod wheel-controlled vibrato or tremolo, check out
Using
Amplitude Mod to Set Up Mod-Wheel Controlled Vibrato, Tremolo, etc.
toward
the bottom of the page in the Sweep section.
1/2- Unlike the pitch and mod sliders, these are not "spring loaded" and will
remain at whatever position they're set to. 1 and 2 paddle positions are
stored with saved patches.
Aux Pedal button- The original Chroma included a fanciful piano-style dualpedal foot controller (they're probably $27,000 on Reverb these days). The
right-side pedal was a standard sustain pedal; the left-side pedal was
referred to as the
Auxiliary Pedal
, and it has its own dedicated mode button
in the CONTROL section. It's an on/off pedal that performs a couple of nifty
Cherry Audio Chroma User Guide - 62
Page 63
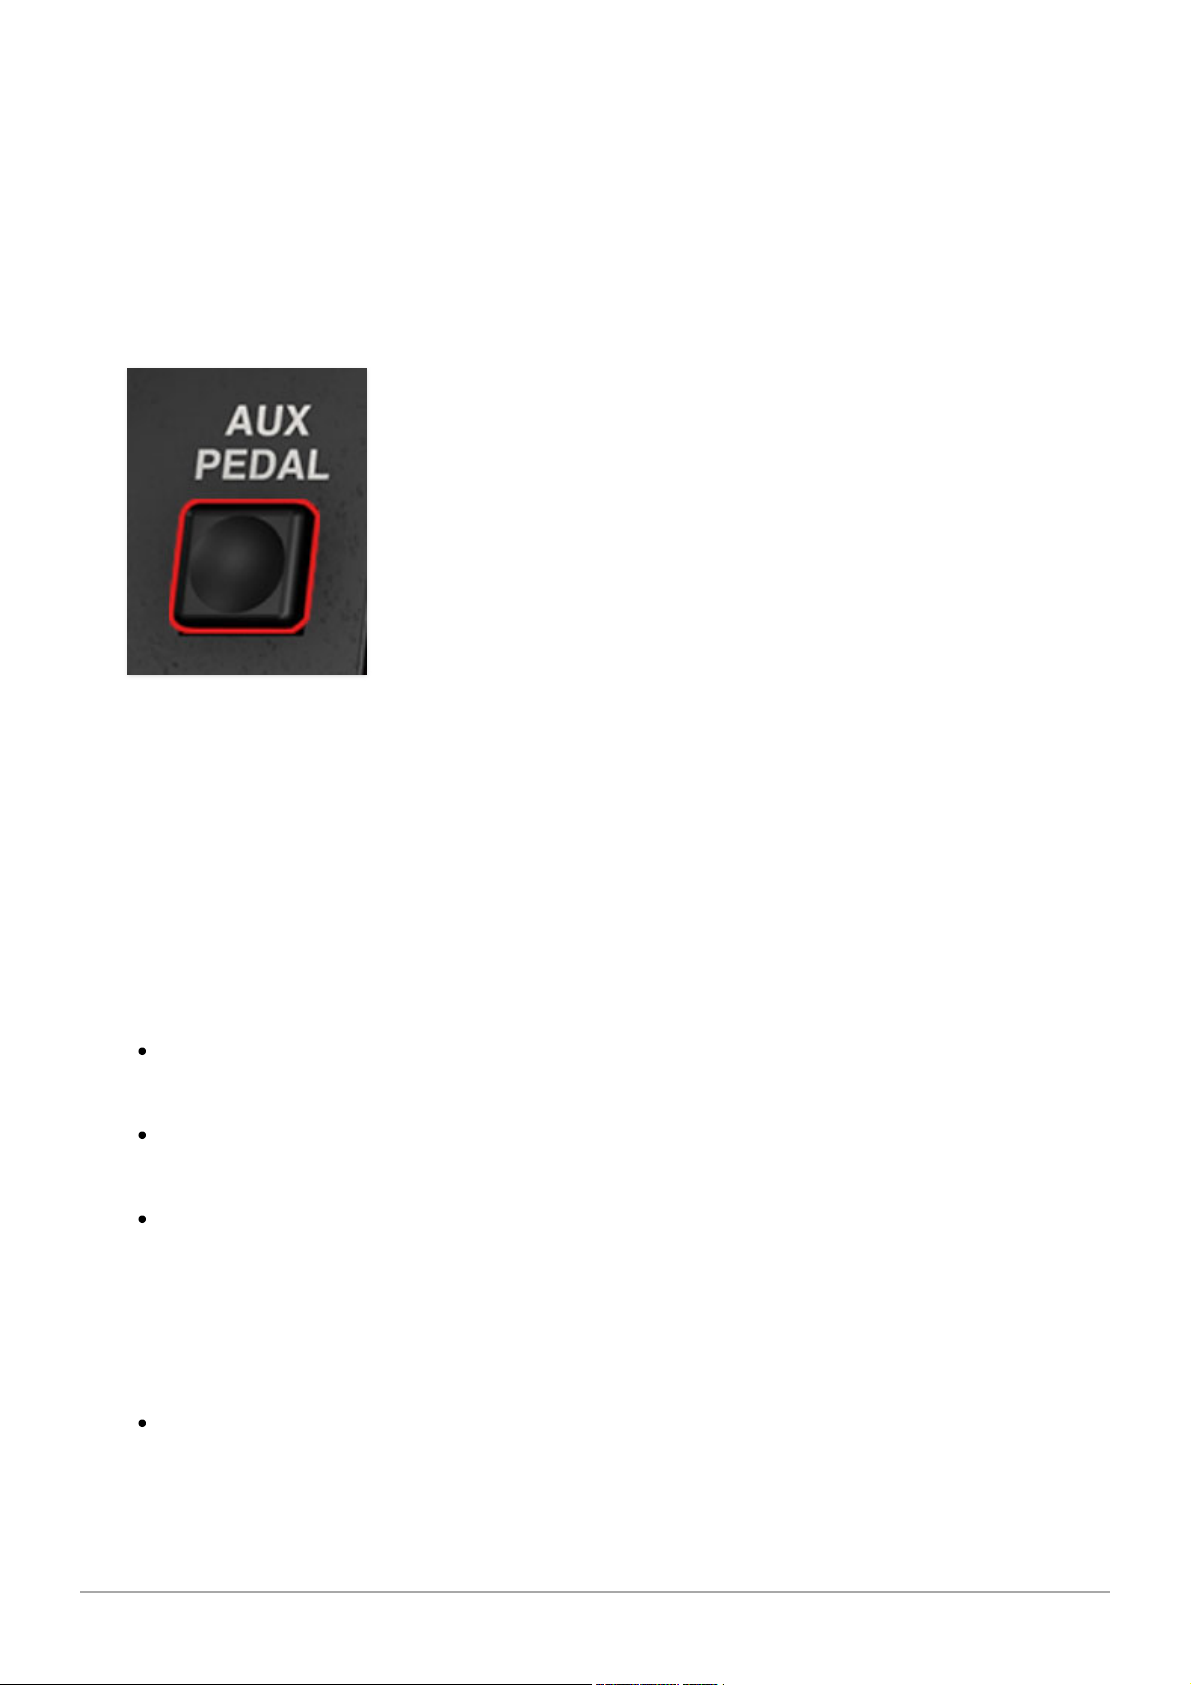
real-time functions. In the name of staying true to the original Chroma's
functionality, we wanted to retain it .
The problem we ran into is that many MIDI/USB controllers don't have
additional pedal input jacks (the fancier Arturia and Native Instruments
controllers do). The other problem is that the MIDI controller # for secondary
pedals isn't standardized, so we couldn't set aux pedal to a fixed MIDI
controller # the way we normally would with a pitch bend or mod controller.
The solution was to add a corresponding
AUX PEDAL
momentary button in
the left-hand controls section. This lets you assign
any
hardware MIDI
controller to the button - an actual pedal, or a button on a MIDI/USB
controller, and it's easy to do thanks to Cherry Audio's super simple rightclick MIDI assign function (right-click the
AUX PEDAL
button, select
MIDI
Learn
from the menu, whack the button/pedal/MIDI yogurt maker/etc.,
controller is assigned).
We've replicated the Aux Pedal's functions, which are as follows:
Latch Pedal- Allows specific keyboard notes to be held while playing
other non-held notes to be concurrently played.
Note Gate- Disables or enables the entire layer using the pedal. This is
used with dual-layer patches to bring in or mute one of the layers.
Poly Chord Buffer- This lets you "enter" a chord, then trigger it using the
left pedal.
For more info about the preceding
Latch Pedal, Note Gate
, and
Poly Chord
Buffer
functions, please see the Parameter Program/Control/Aux
Pedal Mode section.
Glide Enable/Disable- The Aux Pedal acts as a momentary control when
Aux Pedal Enables Glide
is checked in the GLIDE
SHAPE
menu. For more
info, please see the Left-Hand Controls/Aux Pedal Button section.
Cherry Audio Chroma User Guide - 63
Page 64

Cherry Audio Chroma User Guide - 64
Page 65
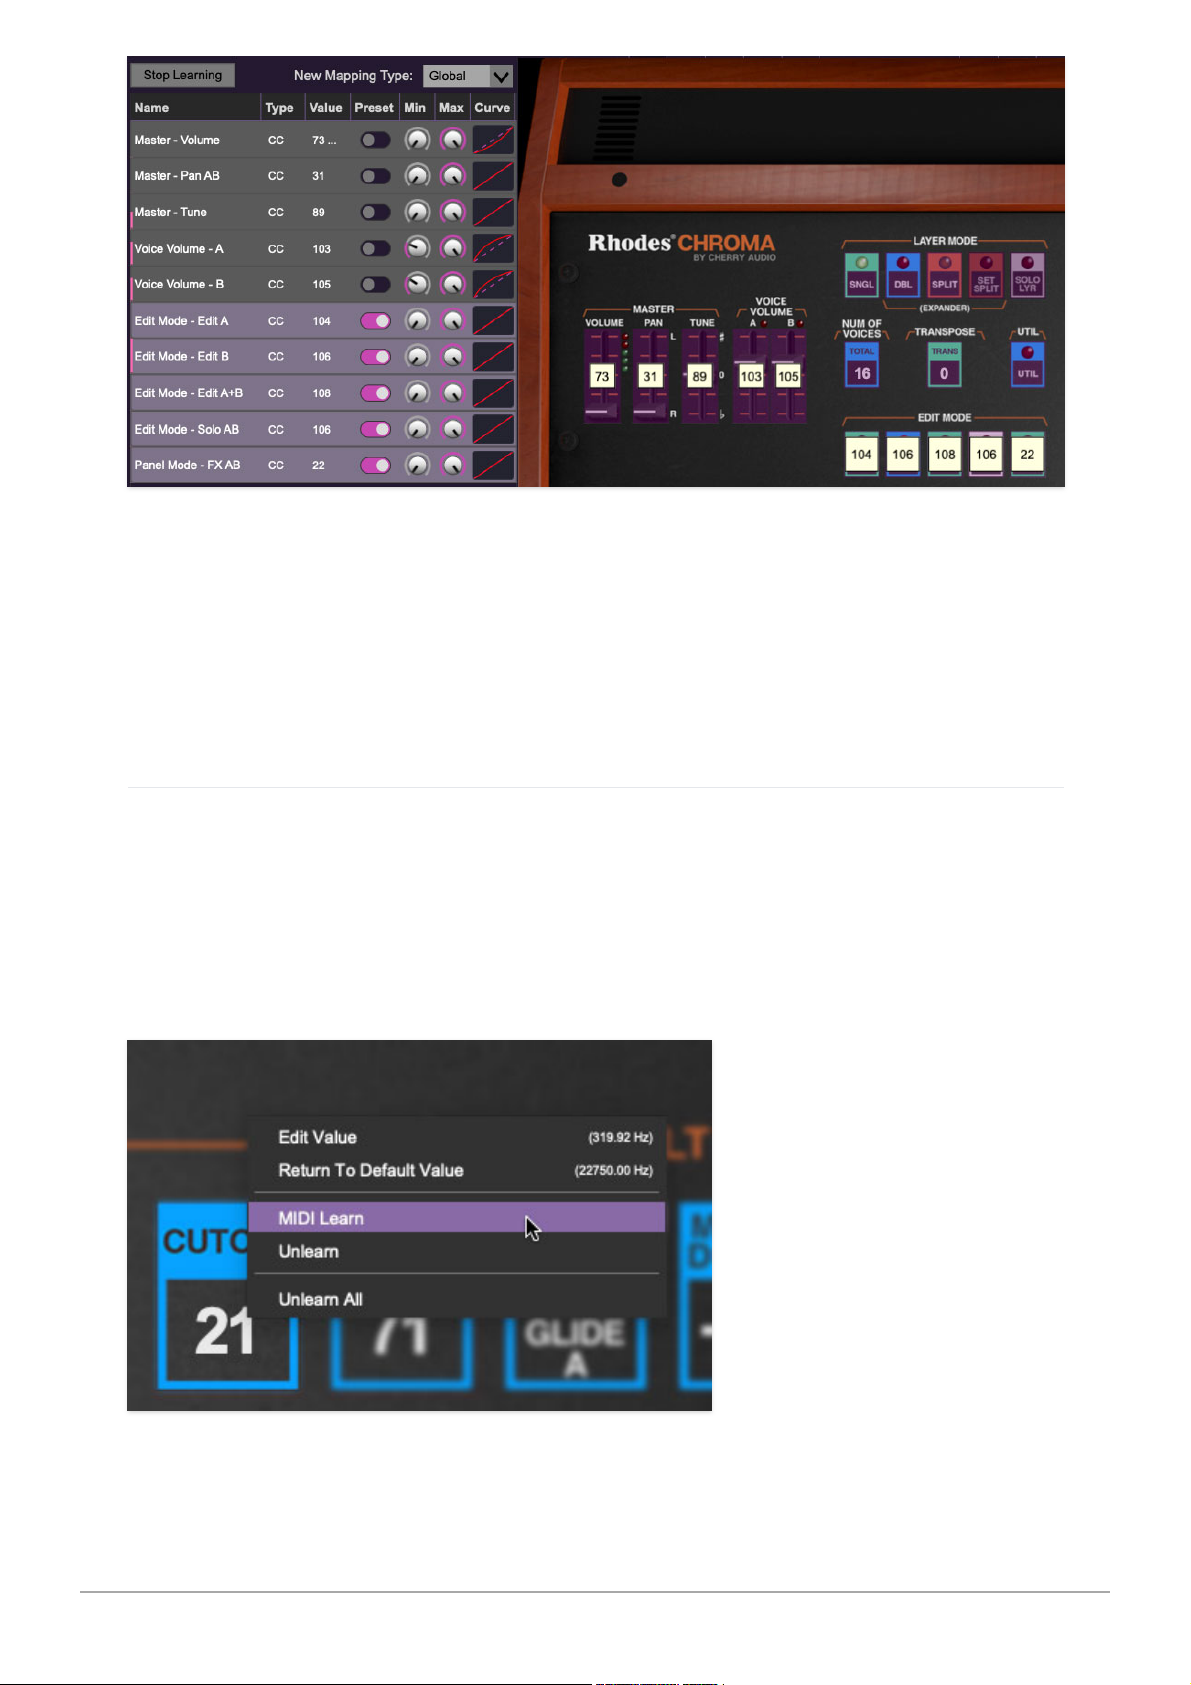
Assigning internal and external hardware controls adds a whole new
dimension of control and musicality to patches, and it's really easy to do. The
MIDI Tab is where all controller assignments can be viewed and tweaked.
First we'll show how to assign an external hardware controller to a Chroma
control, then we'll go over all parameters in the MIDI Tab.
Basic External Hardware Control Assignment
This is the quick, "I just want to assign a hardware control right now!,"
section. We recommend reading this entire section to best take advantage of
Chroma's MIDI control assignments.
In this example, we’ll assign a hardware slider control to FILTER section
CUTOFF
control.
Cherry Audio Chroma User Guide - 65
Page 66
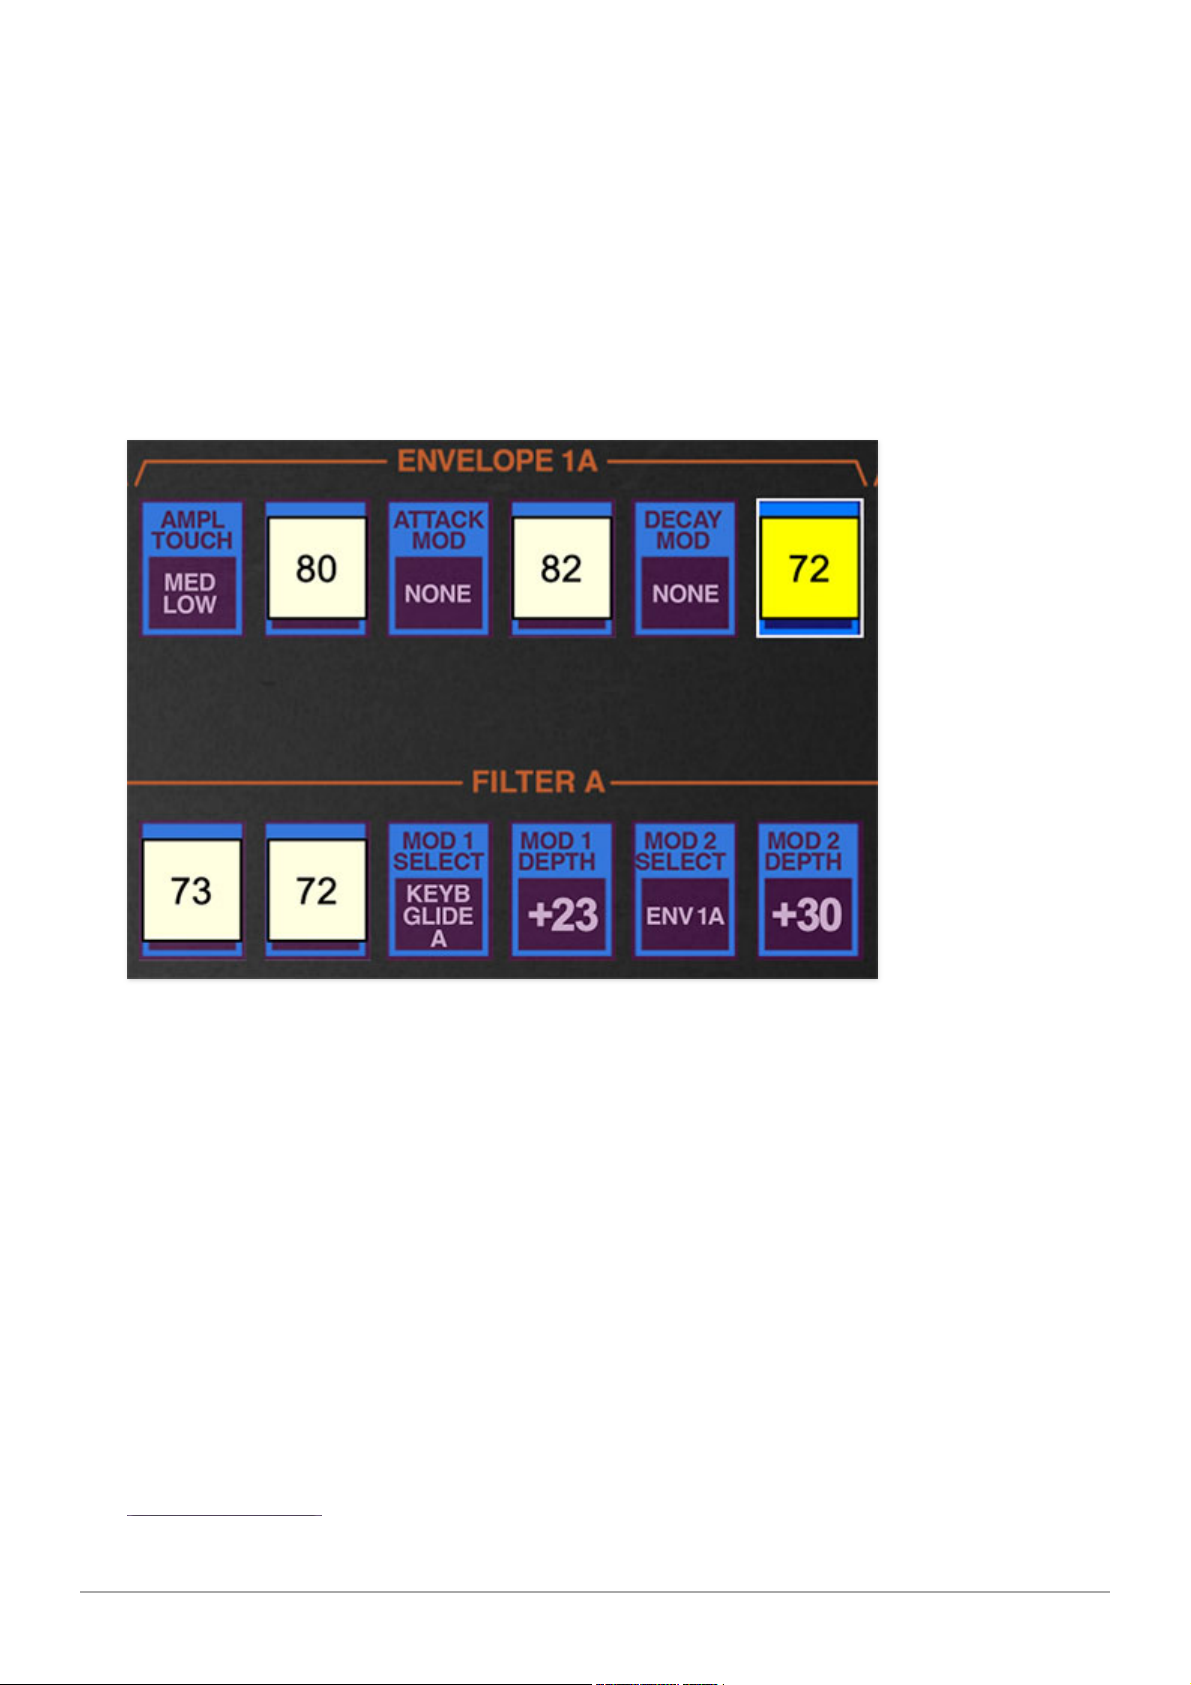
Begin by right-clicking anywhere on the
CUTOFF
control in the FILTER section
and selecting
MIDI Learn.
A transparent purple overlay appears over the
control indicating that it's in learn mode. Now move the desired hardware
control device. The purple overlay disappears and the hardware control will
move the onscreen control. If you change your mind (or accidentally select
the wrong control), learn mode can be cancelled by right-clicking and
selecting
Stop Learning
.
This is the basic procedure for assigning hardware controllers to any Chroma
control.
Once a MIDI controller has been assigned, in addition to real-time control of a
Chroma parameter, you’ll also be able to record and play back controller
data from a DAW.
The MIDI Tab
This is command central for all MIDI controller assignments. Here you’ll be
able to see information about all currently assigned controllers and adjust
control ranges.
Cherry Audio Chroma User Guide - 66
Page 67
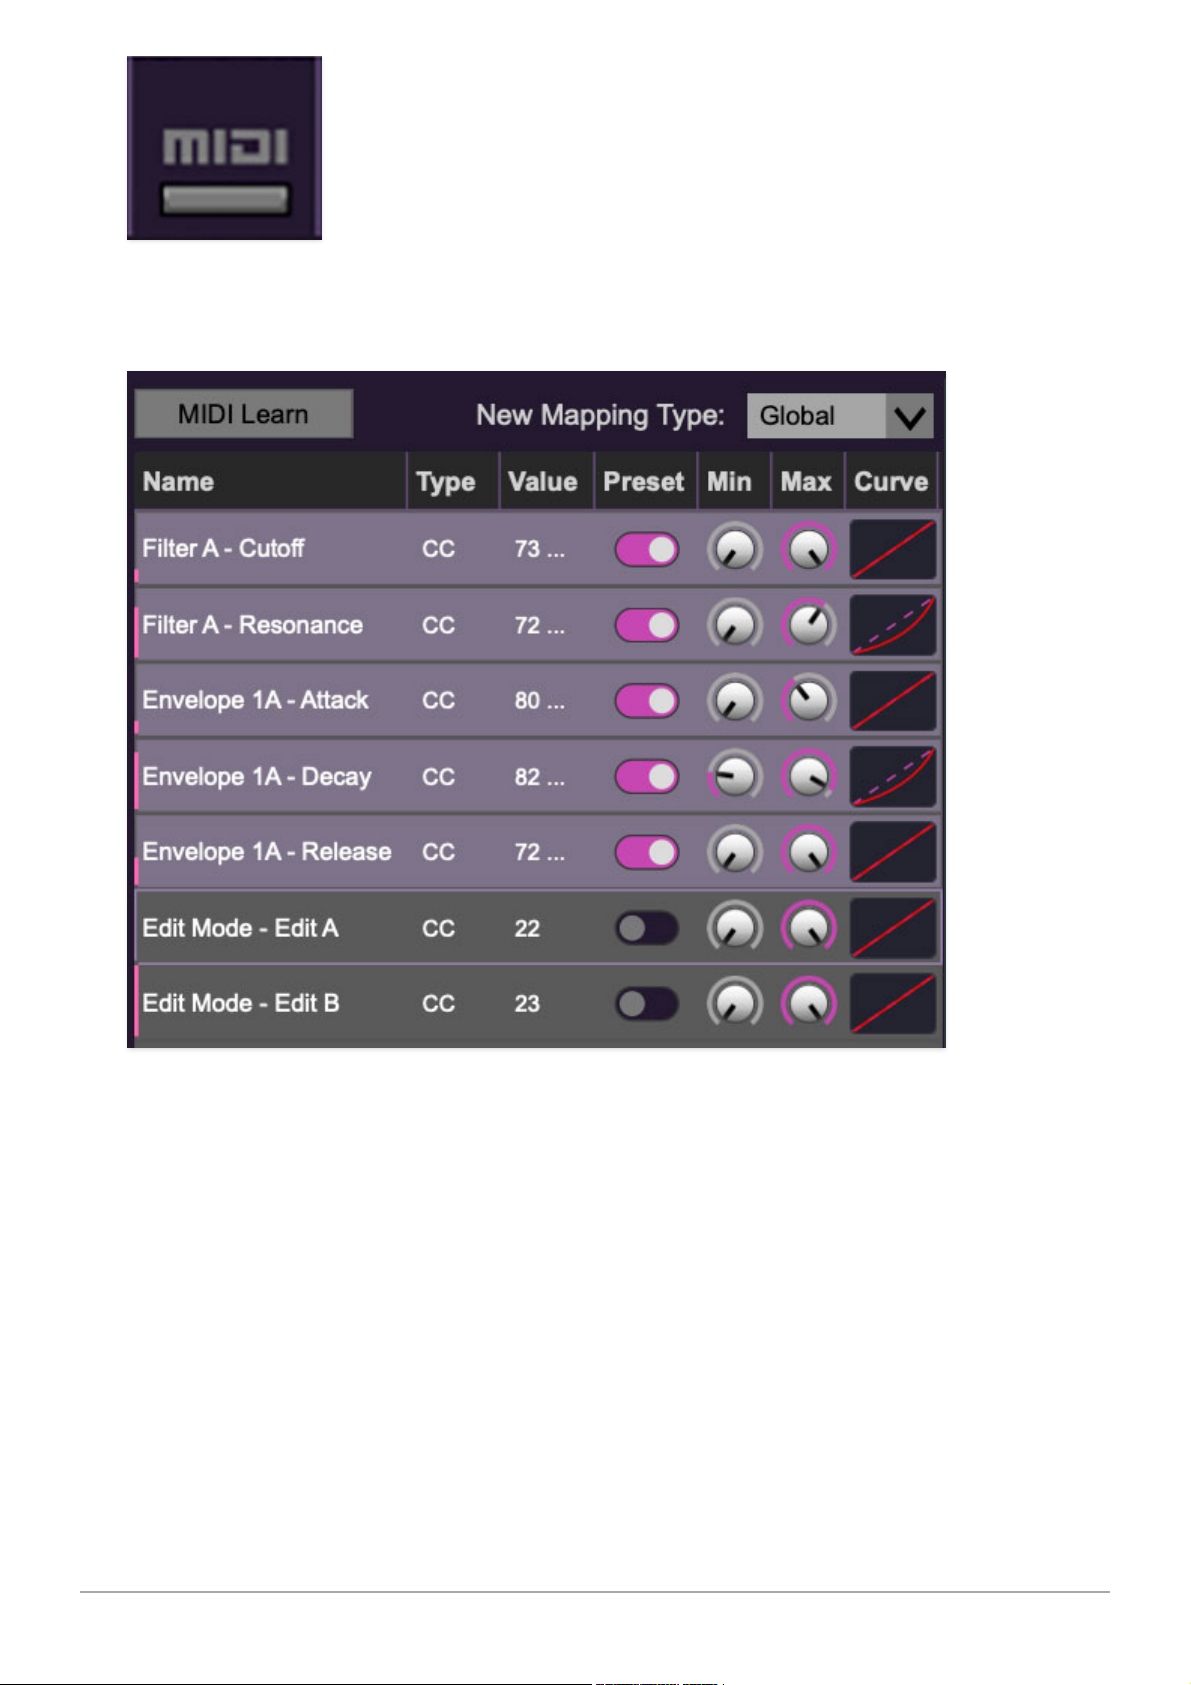
To view or hide the MIDI Tab, click the
MIDI
button in the top toolbar.
MIDI Learn button- This is almost exactly the same as enabling MIDI learn
mode by right-clicking a control. Click the
MIDI Learn
button to enter learn
mode (all controls turn purple). Unlike right-clicking on specific controls,
where Chroma automatically exits controller assignment mode, clicking the
MIDI Learn
knob "stays on" to enable assignment of multiple hardware
controls. This is handy for quickly assigning a bunch of hardware knobs,
sliders, or the buttons of a grid-style controller.
When in MIDI learn mode, any previously assigned controller numbers will
show in squares. These indicate the MIDI continuous controller number of the
assigned hardware control (these are also displayed in the
MIDI
library tab at
left).
Cherry Audio Chroma User Guide - 67
Page 68

To assign multiple controls, click
MIDI Learn
, click an on-screen control, move
the desired hardware knob or slider, continue clicking and assigning onscreen controllers until all desired controls are assigned, then click
Stop
Learning
to exit learn mode.
Remember that a single hardware knob/slider/button isn't limited to
controlling just one parameter - a single hardware controller can
simultaneously operate as many controls as you'd like. Combined with the
MIDI Tab's controller range and inversion controls explained below, this can
be a very powerful and customizable way to control parameters.
New Mapping Type- This popup menu selects whether newly assigned MIDI
mappings will be global (affects all sounds and doesn't change when
different presets are selected) or saved with individual presets.
MIDI Tab Columns
Name- Displays the name of the parameter being controlled.
Type- There are five possible types of Chroma controller automation:
Note- Notes played on a MIDI keyboard controller, expressed as C-1 to G9
CC (MIDI Continuous Controller)- The standard 128 MIDI controller
numbers as defined in the MIDI spec. More specifically, these are the
controllers transmitted by hardware knob and slider controls. MIDI CC’s
can be used to control parameters in real-time or recorded and played
back within DAW software.
MMC (MIDI Machine Control)- The MIDI control protocol for tape
machine-style transport controls. Back in the dark ages, this was used to
control wonky old Tascam and Fostex reel-to-reel monsters, but it's useful
if your MIDI controller has tape-style transport control buttons.
Pressure- Most modern keyboard controllers transmit controller data
when keys are pressed and released as they're held down. The vast
majority of keyboard controllers with aftertouch transmit "mono"
aftertouch only; in other words, aftertouch data is the sum of all keys to
one single data stream. Some controllers transmit separate controller
data for each key - this is known as poly aftertouch.
Pressure data configured in the MIDI tab is mono only, however,
poly AT can be set as a mod source via any of Chroma's
Mod
Select
popup menus.
Cherry Audio Chroma User Guide - 68
Page 69

Key- This allows keys of the computer QWERTY keyboard to at as button
controls for Chroma's onscreen controls.
Value-Displays the specific automation controller. In the case of a
Note
this
would show a MIDI note number (C-1 to G9, for a MIDI CC, this would be the
MIDI CC controller number, etc. Clicking on the value opens a pop-up menu
where all values are displayed and can be selected.
Preset-This slider works in conjunction with the
New Mapping Type
popup
control. In the left position (gray background), the MIDI mapping is global
(affects all sounds and doesn't change when different presets are selected),
in the right position (lavender background), the MIDI mapping is saved with,
and only affects the current sound preset.
The
Preset
switch is super nifty, because it means that MIDI mappings can
easily be changed to global or per-preset status at any time.
Min- Sets a limit on the lowest value any automation control can set a
mapped controller to. This actually recalibrates the range of the automation
controller to the remaining parameter range.
Max- Sets a limit on the highest value any automation control can set a
mapped controller to. This actually recalibrates the range of the automation
controller to the remaining parameter range.
Curve- These allow the customization of how incoming MIDI CC controls
affect the movement of Chroma's onscreen controls, ranging from
exponential to linear to logarithmic curves.
Super Cool Min-Max Tricks
- Not only can parameter ranges be limited via
the
Min
and
Max
knobs, mapped control destinations can be completely
inverted by setting the
Min
knob all the way up and the
Max
knob all the way
down (or anywhere in between).
Limiting and inverting parameter ranges with the
Min/Max
controls is
particularly useful when multiplexing a single hardware control to operate
multiple parameters. Because
Min/Max
, range inversion and
Curve
settings
can be separately set for each onscreen control, the customization options
are super flexible.
MIDI Tab Column Configuration
Right-Click Menu
Cherry Audio Chroma User Guide - 69
Page 70
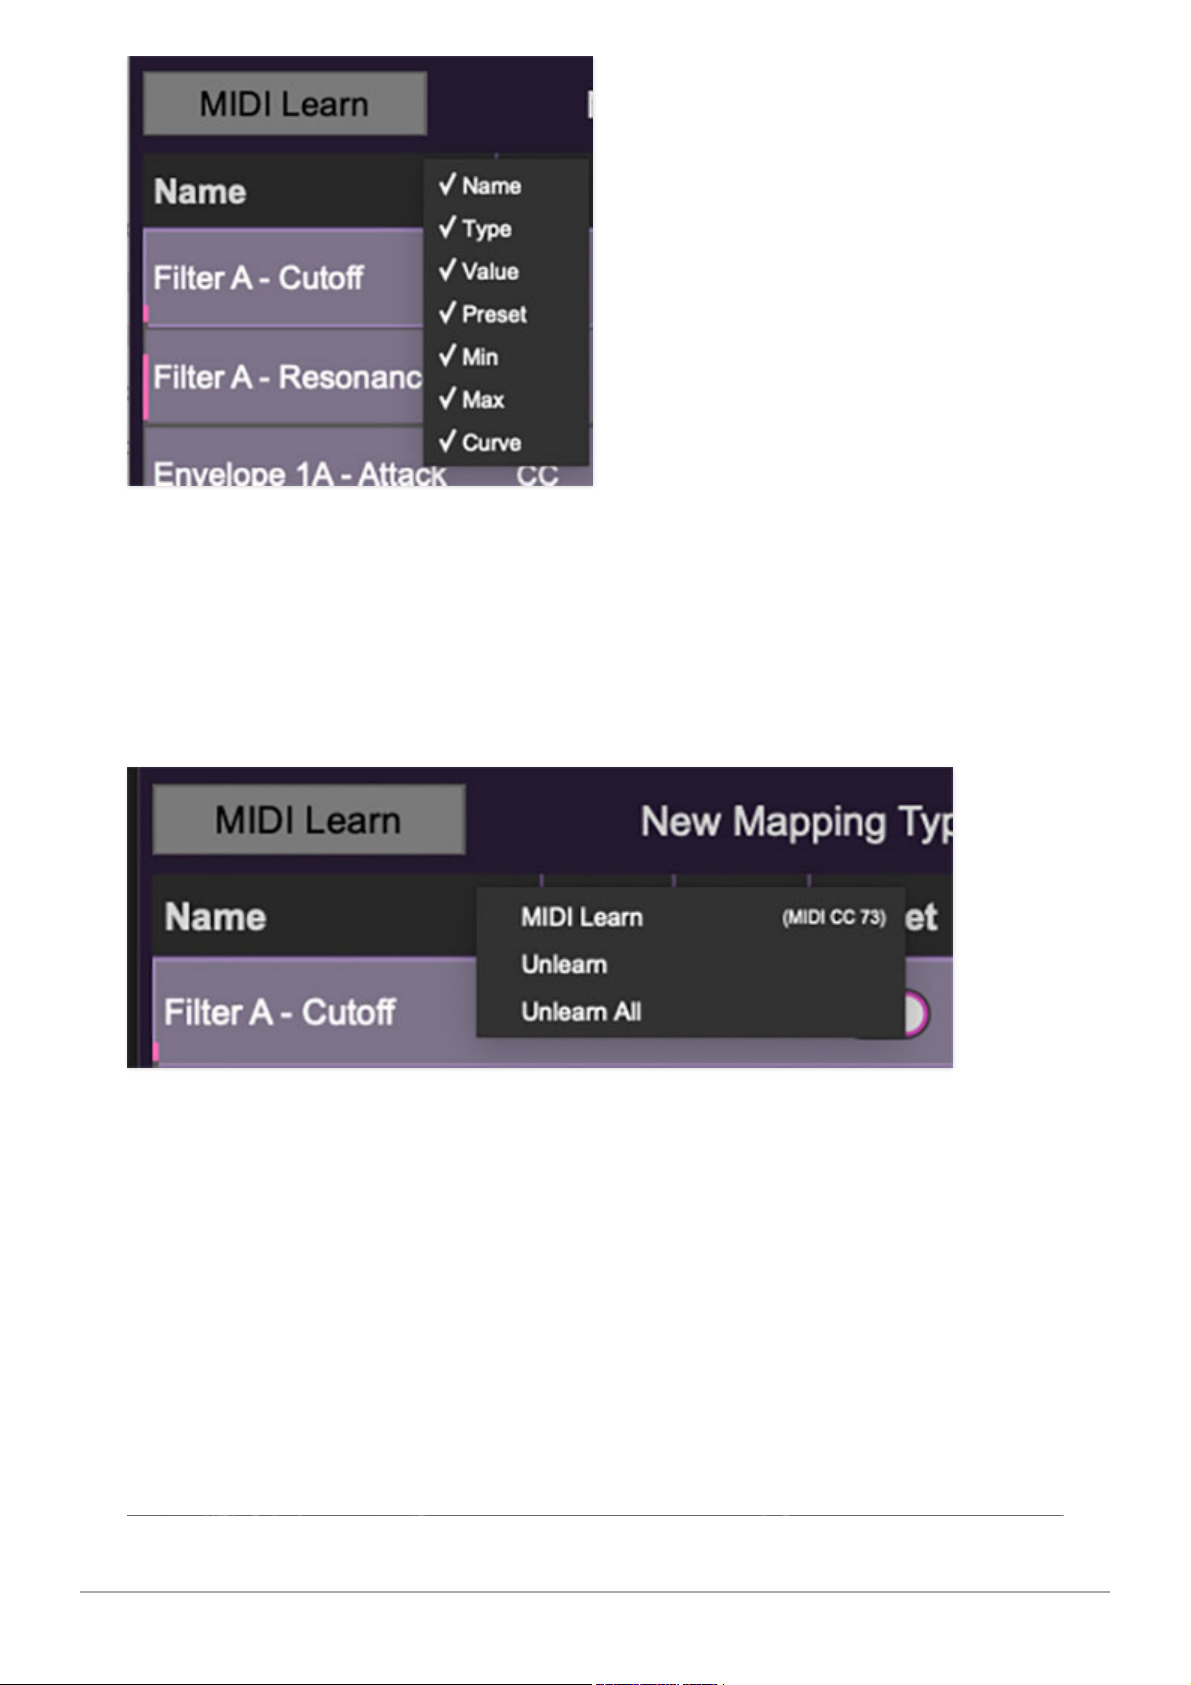
Right-clicking anywhere in the top row (
Name, Type, Value
, etc.) displays the
column configuration menu. Checking/unchecking these allows hiding and
display of each column. This has no effect on assignments.
MIDI Tab Parameters Right-Click
Right-clicking on an assigned parameter opens the menu above.
MIDI Learn- This is used to change the controller assigned to a particular
parameter.
Unlearn- Deletes the selected automation parameter.
Unlearn All-Deletes all controller assignments for the patch. Chroma will
display a warning dialog prior to deletion in order to thwart potential unlearnrelated disasters.
Cherry Audio Chroma User Guide - 70
Page 71
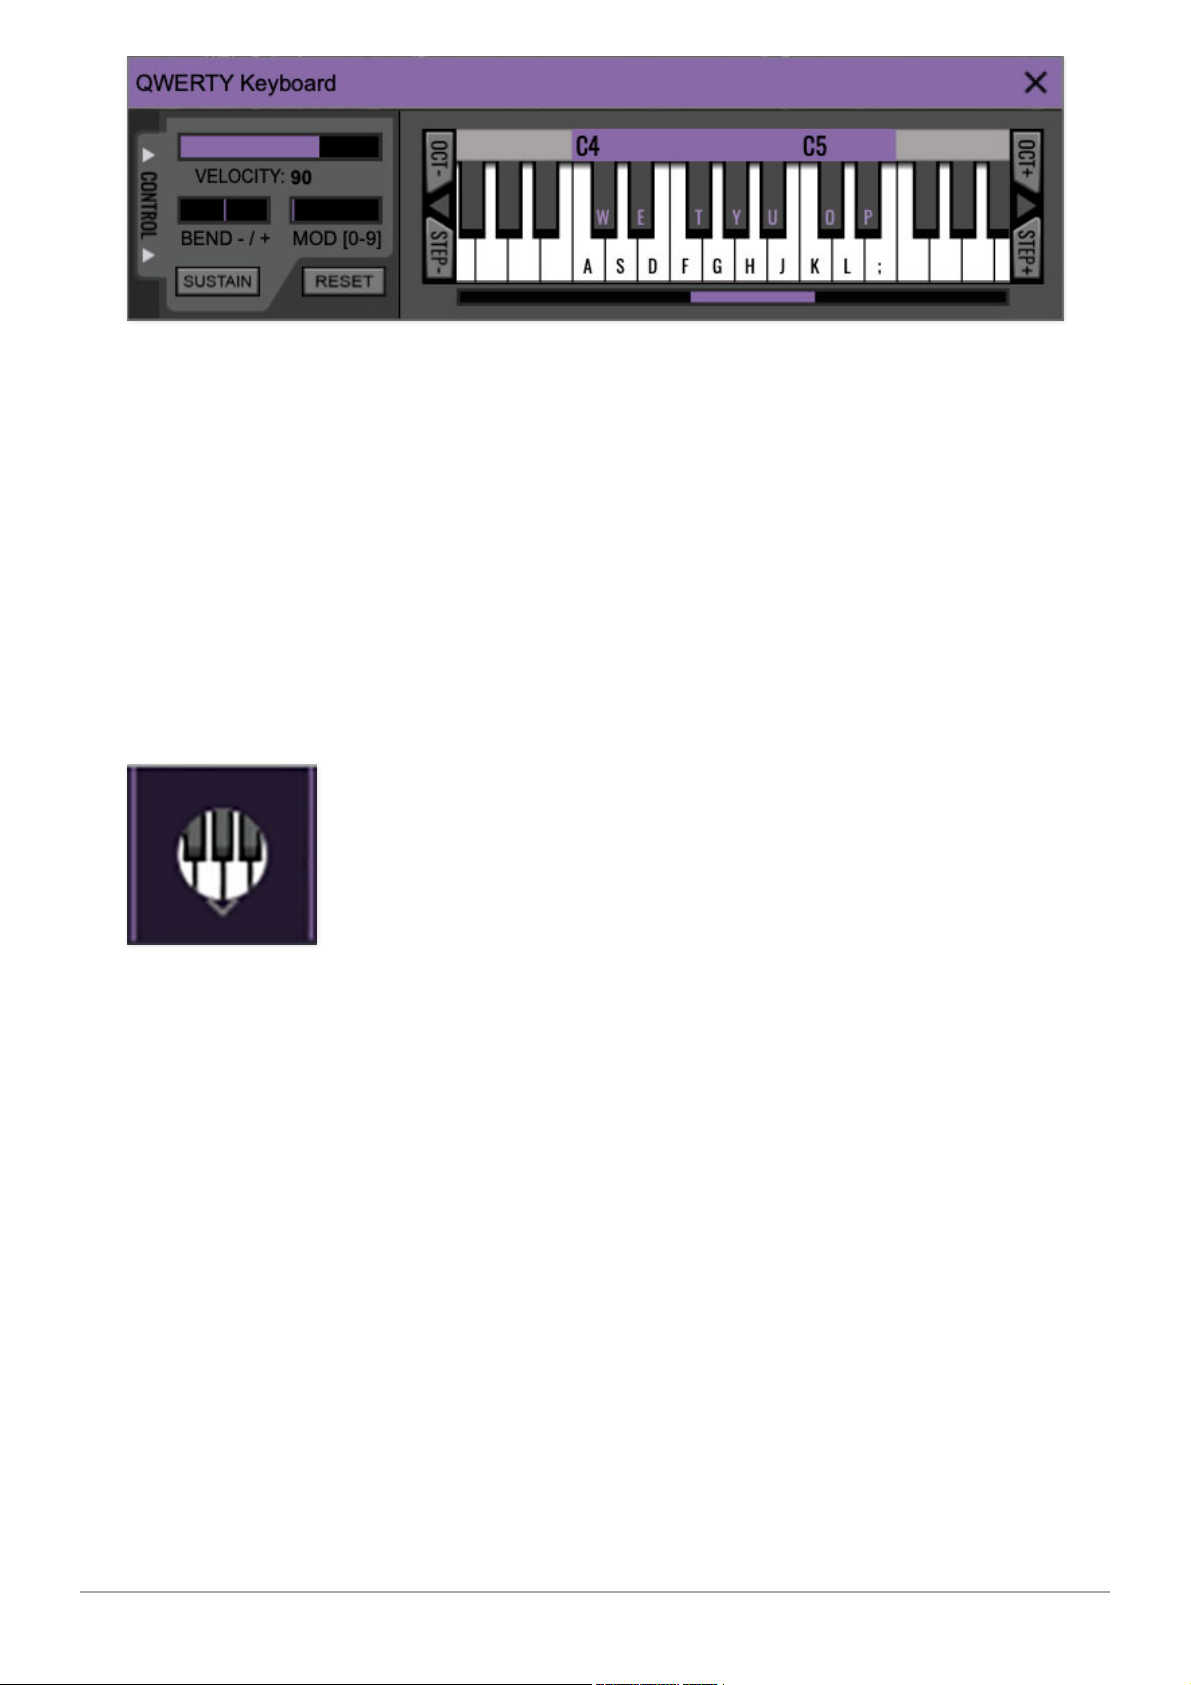
If you don't have a MIDI keyboard attached to your computer, the onscreen
keyboard can be used to play notes, but clicking on pictures of keys gets old
pretty quick, and it's impossible to play chords that way
(unless you know something we don't).
The better solution playing Chroma in lieu of a standard MIDI/USB keyboard
controller is what we call the QWERTY Musical Typing Keyboard, or "MTK" for
short. This allows your computer's keyboard to be used as a polyphonic
controller, and also enables a few other tricks.
Following is a list of MTK keyboard modifiers and functions:
Opening and Closing the MTK - click the the circular keyboard icon in the
top toolbar. To close the MTK, click the keyboard icon in the top toolbar, or
click the X in the top right corner.
Play Notes- To trigger notes, simply press the corresponding computer
keyboard key or mouse click the onscreen keys.
Adjust Currently Visible MTK Range- Slide the purple scroll bar
horizontally to adjust the currently visible keyboard range.
Adjust Overall Visible Keyboard Range- Clicking and dragging the right
edge of the MTL window allows the overall size of the window to be adjusted.
This lets you view more or less of the onscreen keyboard. Note that the MTK
window's borders cannot exceed the overall outside dimensions of the Eight
Voice window.
Cherry Audio Chroma User Guide - 71
Page 72

Shift Range Up/Down Octave- Click the
Oct-
and
Oct+
buttons at the top
left and right of the onscreen MTK. The current range is displayed above the
keyboard.
Shift Range Up/Down Semitone- Click the
Step-
and
Step+
buttons at the
bottom left and right of the onscreen MTK. The current range is displayed
above the keyboard.
Hide/View Controllers- Clicking
Control
at the far left hides and displays
velocity, bender, mod, and sustain control parameters. Hiding the control
view makes more space available for the keyboard.
Set Note Velocity- Move the purple
Velocity
bar to adjust the output
velocity of notes.
Pitch Bend- To pitch a note or notes, press the + or - computer keyboard
keys while playing a note. Bend Depth will be the sum of all PITCH section
pitch bend mod bus settings. Since you'll generally use MOD 3 for pitch
bend, just set the
MOD 3 SELECT
menu to
Pitch Bend
, and then use the
MOD
3 DEPTH
control to set the bend depth in half-steps. Notes can also be
pitchbent by clicking the mouse in the
Bend
area.
Mod Wheel- To add mod wheel modulation, press the number keys from
0-9
(above the character keys) while playing a note. The modulation amount will
vary from none (0) to full modulation (9). Note that modulation will "stick" at
the selected number; to disable modulation, click the 0 key. Mod can also be
engaged by clicking the mouse in the mod bar area.
Sustain- The
Sustain
button mimics the functionality of a standard sustain
pedal. Click the [TAB] key to engage sustain, or [SHIFT]+[TAB] to lock it. The
Sustain
button can also be engaged by mouse clicking it.
Reset- Initializes all MTK parameters including keyboard range and control
parameters.
Cherry Audio Chroma User Guide - 72
Page 73
Clicking the settings gear icon opens a window with multiple tabs for
configuring various "under-the-hood" settings. These are mostly set-andforget kind of parameters - all the stuff you'll use most is on the front panel,
where it belongs!
General
Add Undo For Control Changes With The Mouse- Enabling this allows
undo of knob, switch, and button adjustments. You’ll want this on if you
want the ability to undo all aspects of patch editing and programming.
Create A Log File For Usage- This creates a text doc of all of Chroma's
internal and routines during use. It is mainly intended for our tech staff
should you experience any issues. Clicking
Show Log Folder
opens the
folder containing Chroma log file docs.
Load Last Preset On Startup (Standalone Only)- Automatically loads
the last preset used when Chroma standalone version is started.
Preset Folder- Displays the current location of Chroma's sound presets.
This can be changed by clicking and typing in the field.
Browse... - Displays the current location of preset folder in the file
manager.
Set Default- Sets the current displayed
Preset Folder
path as the
default location
Clear Cache Files- Deletes all log files, temporary sounds, and the
image cache.
Cherry Audio Chroma User Guide - 73
Page 74

Interface
Allows customization of Chroma's user interface settings.
Reset To Default Window Size- Resets the Chroma workspace to
default size. Use this to reset the window size if the window somehow
becomes too large for your display and can't be resized.
Tooltip Delay- Tooltips are those informative bits of text that pop up
when hovering over a control (go ahead and try it, we’ll wait…). The
Tooltip Delay
setting defines how long you must hover before the tooltip
pops up.
Knob Movement- Defines how mouse movements relate to turning
onscreen knobs. It defaults to
Vertical Drag
, but can be changed to
Horizontal Drag
, or
Rotary Drag
. There is currently no setting for
Imperial
Drag
, a sweet 90s alt-rock band featuring ex members of Jellyfish.
On Control Double-Click- Defines what happens when the mouse is
double-clicked on a control. If
Edit Value
is selected, an exact number can
be entered by typing the number and hitting [ENTER] or [RETURN]. If
Sets
Default Value
is selected, double-clicking a control resets it to its default
value.
Mouse Wheel Adjusts Control Value- Enabling this lets you adjust
knob, slider, and switch values by moving the mouse wheel. This works
great with a standard mouse wheel, but you'll want to disable it if you're
using an Apple Magic Mouse (which will move the control AND scroll the
window).
Show Tooltips When Adjusting Controls With Mouse- Displays
parameter tooltips/values when the mouse is hovered over a control or as
a control is moved with mouse button down.
Show Tooltips When Automating Controls- Enabling this causes
control tooltip flags to show when automation data is being received.
MIDI Program Changes Should Change Current Preset- Allows MIDI
program change messages to change Chroma patches.
Ask To Save Modified Presets- This opens a dialog window asking if
you'd like to save changes if a patch has been edited and a new patch is
selected. If you're the type that likes to click through presets and tweak a
control here and there, it can be annoying to have a popup window asking
if you'd like to save every time you switch presets - if you're that person,
keep this off.
Cherry Audio Chroma User Guide - 74
Page 75
Remember MIDI Mappings For New Plug-in Instances- When
enabled, Chroma remembers all global MIDI Tab controller settings.
Account
Settings for your personal login information and account.
Email- Displays the email address of the current login.
Update Login Info- Clicking this opens the same email and password
login screen you’ll see when initially launching Chroma and allows
changes to be made.
View Account Settings- This opens your personal account page on the
Cherry Audio Store website containing information about modules
purchased and more.
Software Update
We often fix bugs and make improvements; below are options defining
how Chroma handles updates.
Check For Update- Click this to see if an updated version of Chroma is
available.
Status:
Automatically Install Updates- Updates are automatically downloaded
and installed.
Ask Before Installing Updates- By default, Chroma automatically
downloads new versions of modules when available. Checking this box
defeats automatic updates and will ask if you’d like to install updates
when they become available.
We’ll never make changes that can potentially break existing
patches, butif you’re using Chroma for live performances or in
other “mission critical” situations, we recommend enabling
Ask
Before Installing Updates
.
Cherry Audio Chroma User Guide - 75
Page 76
Never Install Updates- Chroma never automatically installs updates.
Show Updates On Toolbar- Checking this will display an icon in the
toolbar next to the logo letting you know there's an update available.
Show Notifications From Cherry Audio- We occasionally will fire off inapp advertisements; disabling this checkbox will hide them. We hate
repetitive, annoying ads as much as you, so we won't use this feature too
often. When we do, it'll be for something super cool (like a killer sale)!
Audio/MIDI
Settings for audio and MIDI hardware input and output. This tab is only
visible in the standalone version of Chroma.
Output- Use this drop-down menu to choose a physical audio output
source. This defaults to
Built-In Line Output
, i.e. your computer’s onboard
system audio, but you’ll get better fidelity with an external professional
audio interface.
Sample Rate- This sets Chroma's global sample rate. Lower sample rates
offer better performance, but if you have a fast computer, high sample
rates may offer slightly improved fidelity.
Audio Buffer Size- As with any digital audio app, this defines
performance vs. note latency, and will largely depend upon computer CPU
speed. A professional external audio interface will almost always exhibit
better performance than “built-in” system audio. Lower settings will result
in less latency (in the form of faster response to notes played), but will
increase the chances of audio gapping or crackling noise.
Active MIDI Inputs- Displays all available MIDI input sources, i.e.
keyboards, pad controls, MIDI knob/fader control surfaces, etc. Check
boxes to enable one or more devices. If you're using a fader controller
with touch-sensitive sliders (Mackie Control, for example) and Chroma
plays weirdo notes when you lean on the faders, uncheck it here to make
that stop (incidentally, this happens to me all the time and scares the
crap out of me).
Cherry Audio Chroma User Guide - 76
Page 77

Bluetooth MIDI- Allows Chroma to receive MIDI from Bluetooth sources
when enabled.
Cherry Audio Chroma User Guide - 77
Page 78
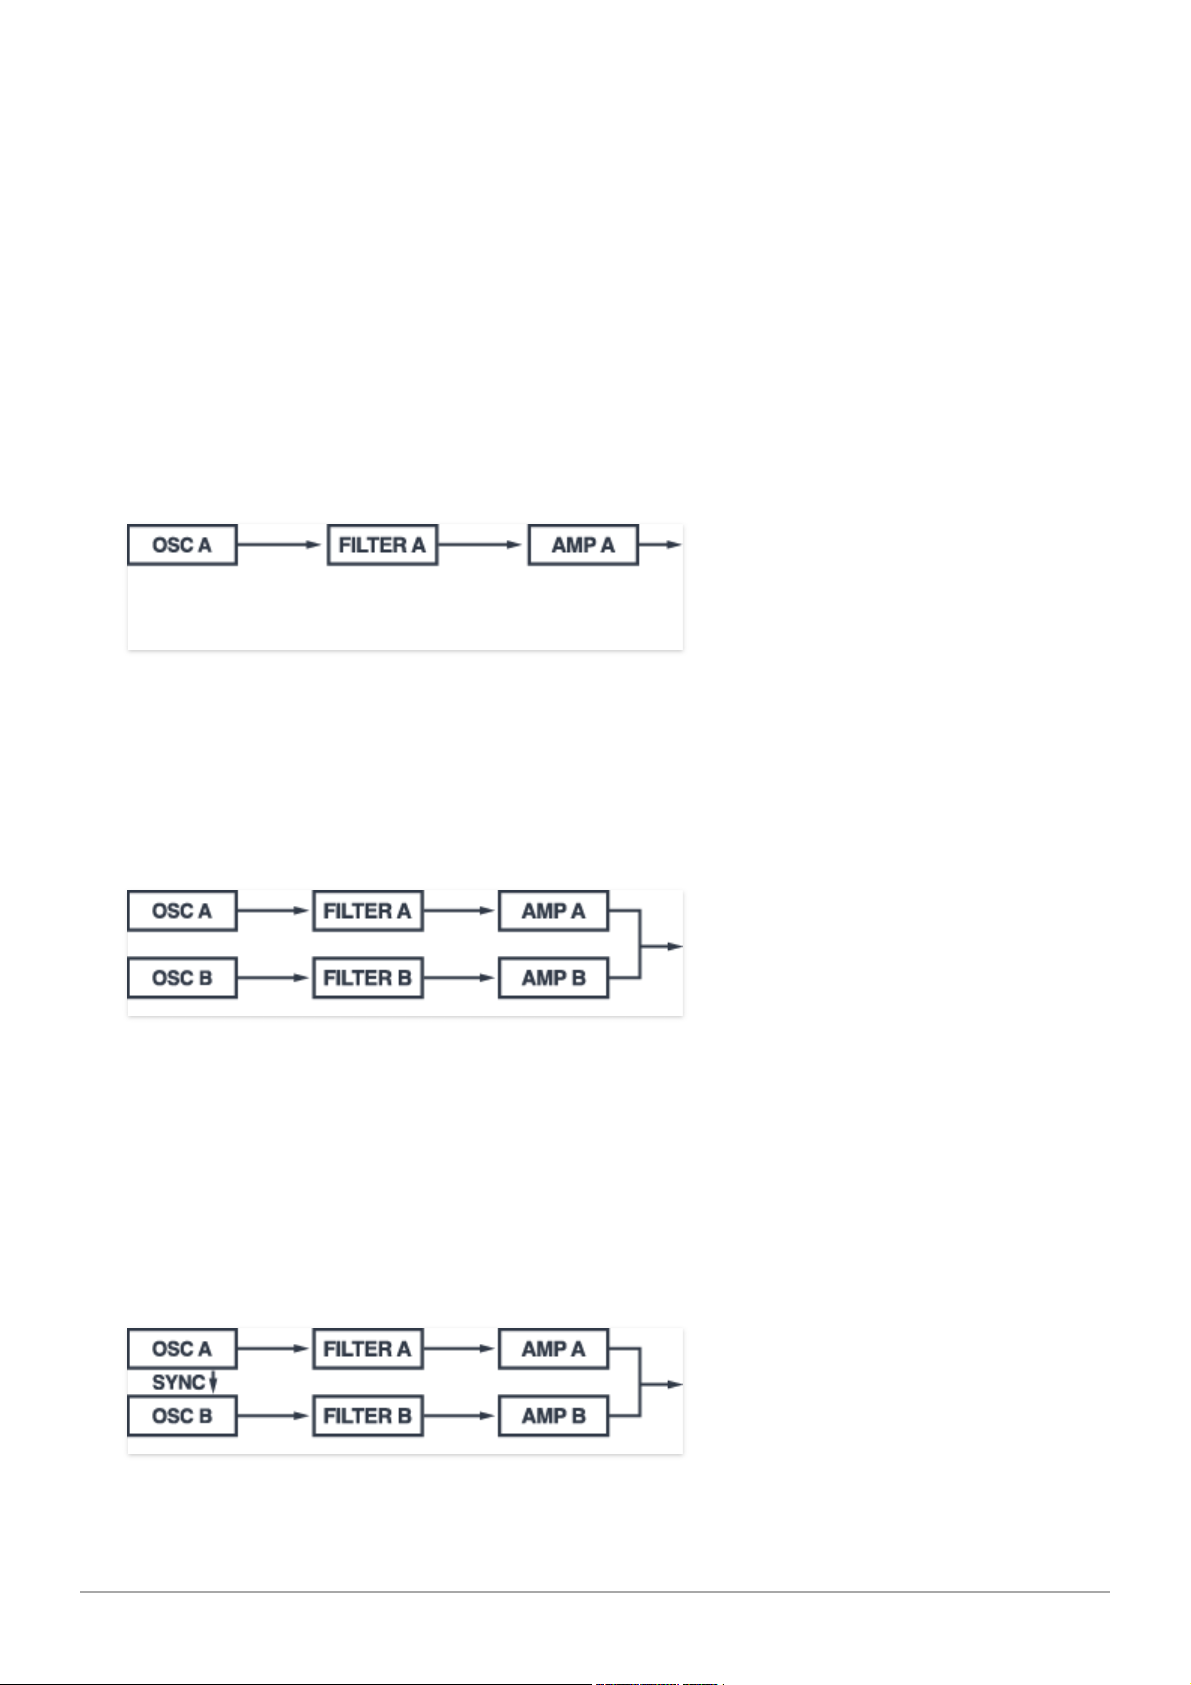
As discussed in the PATCH PARAMETERS / CONTROL chapter, the
PATCH
CONFIGURATION
button selects the basic synthesis setup of Chroma's A and
B voice paths (or C and D for the Expander). There are a total of 16 possible
configurations, divided across five categories.
So we don't go nuts typing (and driving you mad with parentheticals like this
one), all examples in this section will refer to voice paths A and B,
and it will be understood that these are identical to the C and D
voice paths in the Expander.
Remember that Patch Configuration can be set not only by clicking its button
in the CONTROL section, but also by clicking directly on the Patch
Configuration block diagram.
Single Layer- The most basic of the patch configurations, this consists of a
single oscillator>filter>amp voice path. The B voice path is disabled, as are
all associated controls in the MASTER and EDIT MODE sections. It should go
without saying that Single Layer mode should be used for simple sounds.
Dual Layers- The same as Single Layer, but with two independent
oscillator>filter>amp voice paths. Dual Layer is useful for standard twooscillator polysynth patches, such as detuned pads. Because it has
independent filters, interesting timbres are possible using individual filter
cutoff frequency settings, or setting one filter to lowpass mode and the other
to highpass mode.
Cherry Audio Chroma User Guide - 78
Page 79
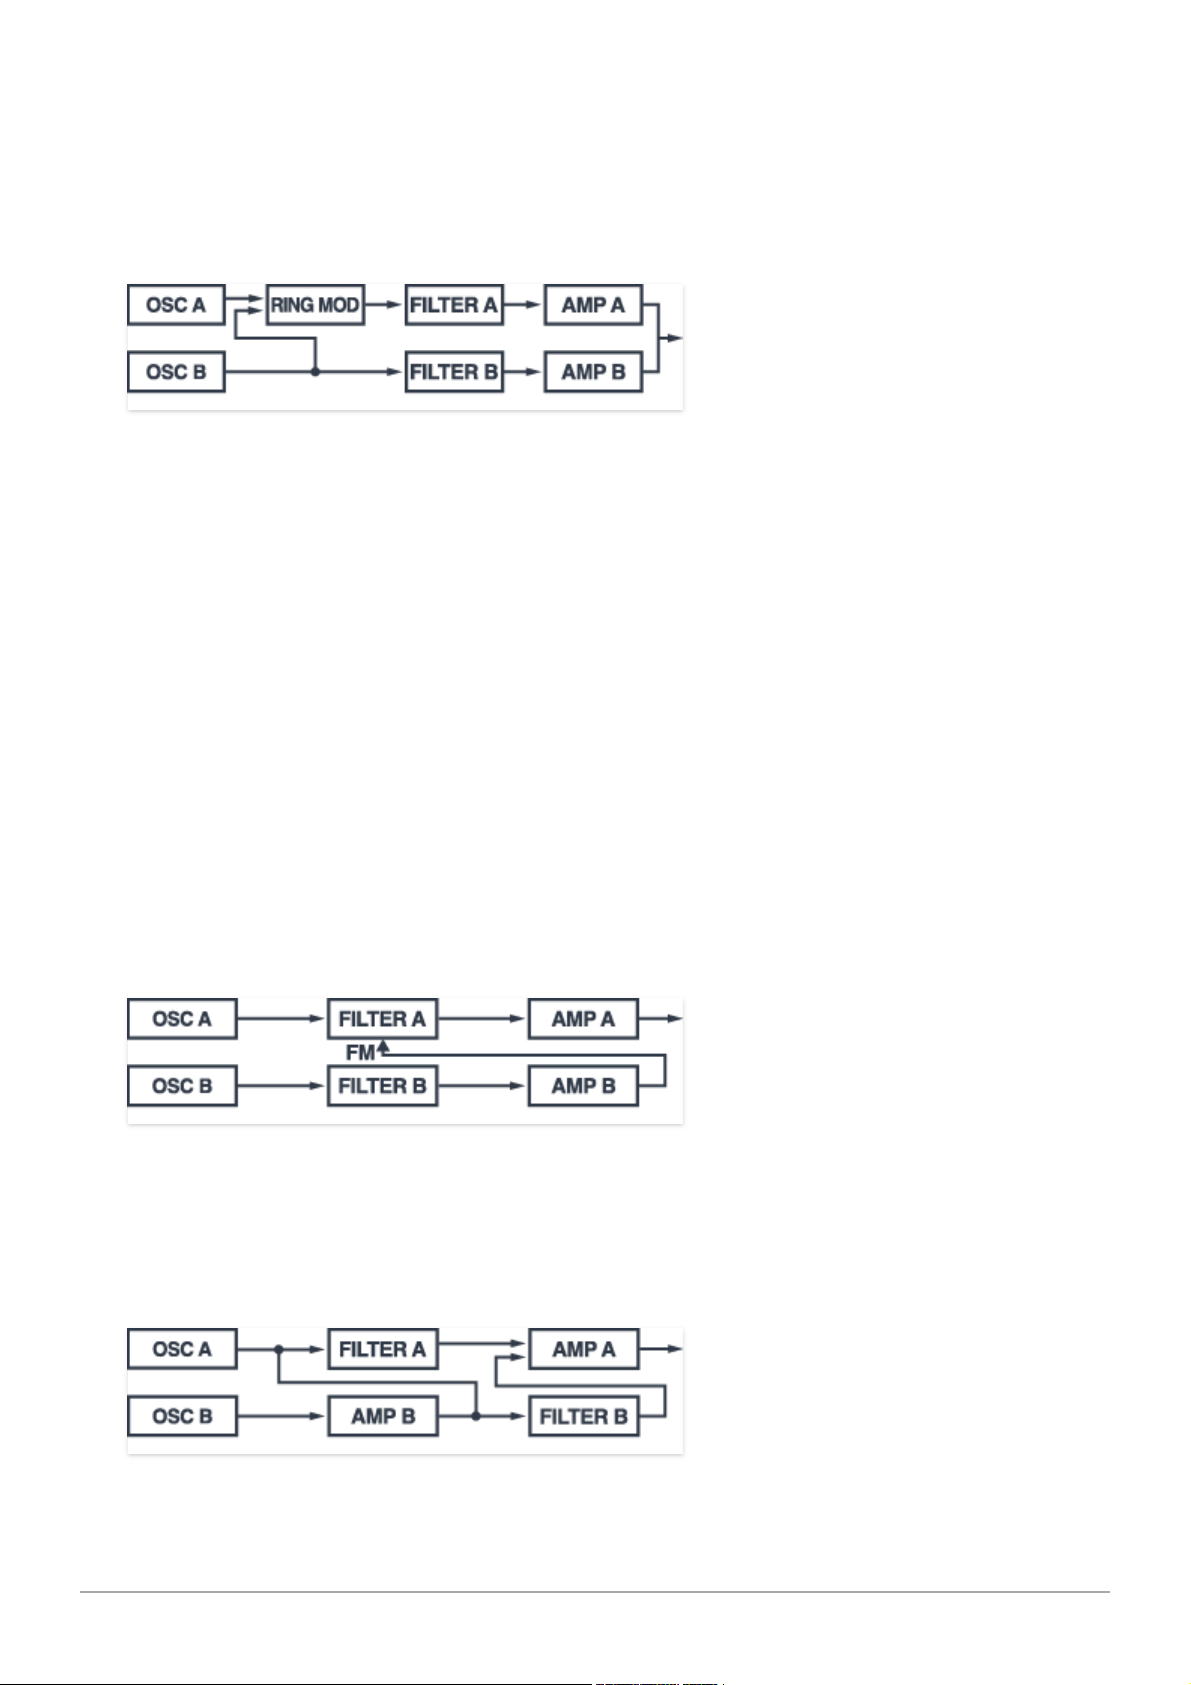
Dual Layers + Osc Sync- This is the same as Dual Layers, but adds the
ability to hard sync the frequency of Oscillator B to Oscillator A. To get
familiar "tearing" sync sounds, alter or modulate Oscillator B's frequency
controls in the PITCH B section. Reduce the VOICE VOLUME A slider for a
more emphasized sync tone.
Dual Layers + Ring Modulation- This is like the Dual Layers voice
configuration, but with a ring modulator in place of oscillator A. For those not
familiar with ring mod, following is a brief recap that I lazily copied from
some other Cherry Audio manual:
When two audio sources are inputted, the output contains only the sum and
difference frequencies of the two signals, while removing common
frequencies. The audio result is useful for creating sounds with inharmonic
frequency content, which is useful for synthesizing bell and metallic sounds.
Ring mod is heard through the A channel; we recommend manipulating (and
modulating) PITCH A and B controls. Also be aware that ring mod makes
use of oscillator pulse waves only regardless of the current WAVE
SHAPE setting, so make sure WAVE SHAPE
WIDTH
is at a setting
other than minimum or maximum.
Filter Modulation- The standard Dual Layers voice path, but instead of
being used for audio, the B path is used to modulate the A path's cutoff
frequency for dramatic audio-rate modulation.
Cherry Audio Chroma User Guide - 79
Page 80
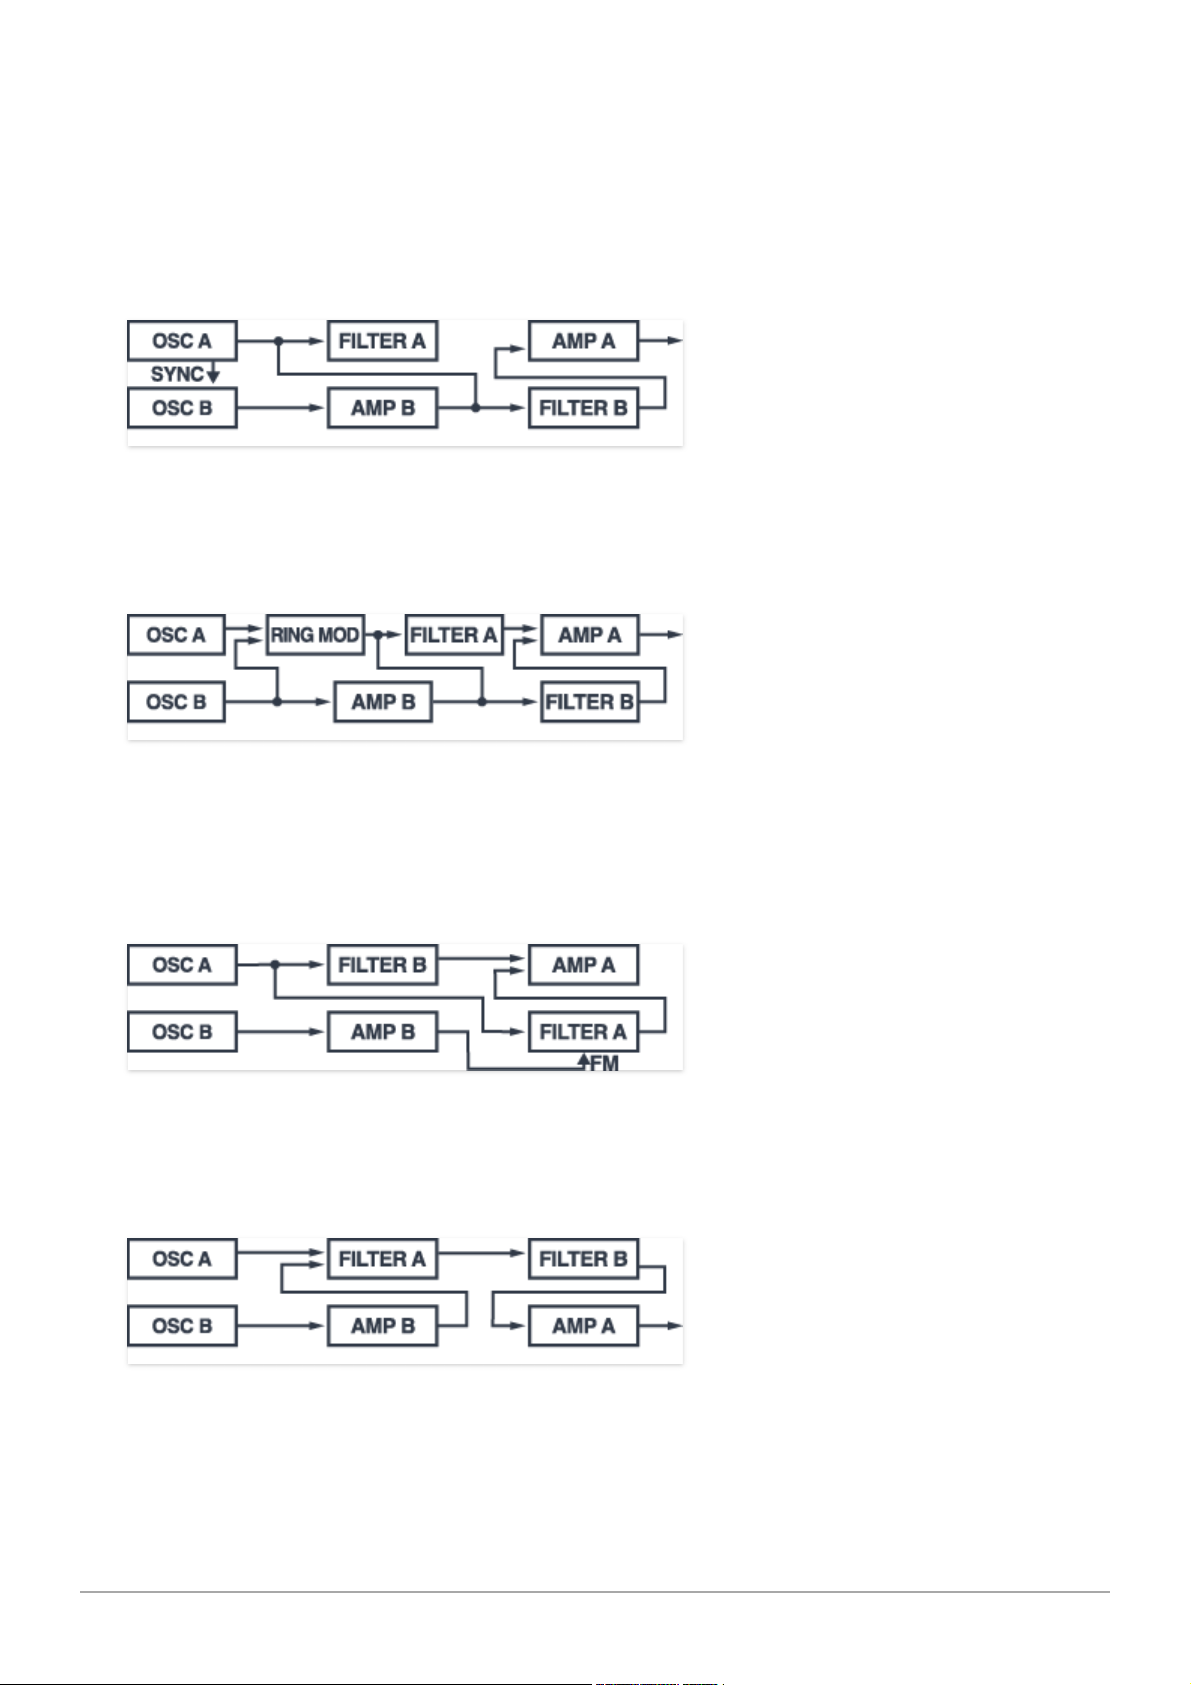
Parallel Filters- This routes both oscillators to both filters in parallel, with
oscillator B volume controlled by Amp B, and Amp acting as a master volume
for the entire patch. A notch filter can be created by setting of the filters to
highpass mode. Phasey effects can be created by manipulating cutoff - this
works especially well when EDIT MODE
EDIT A+B
is chosen, effectively
moving both cutoff sliders at once.
Parallel Filters + Osc Sync- Like the preceding Parallel Filters voice path,
but adds sync between the OSC A and B.
Parallel Filters + Ring Mod- Like the Parallel Filters voice path, but
replaces Osc A with a ring modulator. This can be used for ring mod effects
with notch filtering as described in the Parallel Filters section.
Parallel Filters + Filter FM- Same as the Filter FM voice path, but AMP B's
output modulates the cutoff frequency of Filter A.
Series Filters- This routes both oscillators to both filters in series with Osc B
volume controlled by Amp B, and Amp A acting as a master volume for the
Cherry Audio Chroma User Guide - 80
Page 81
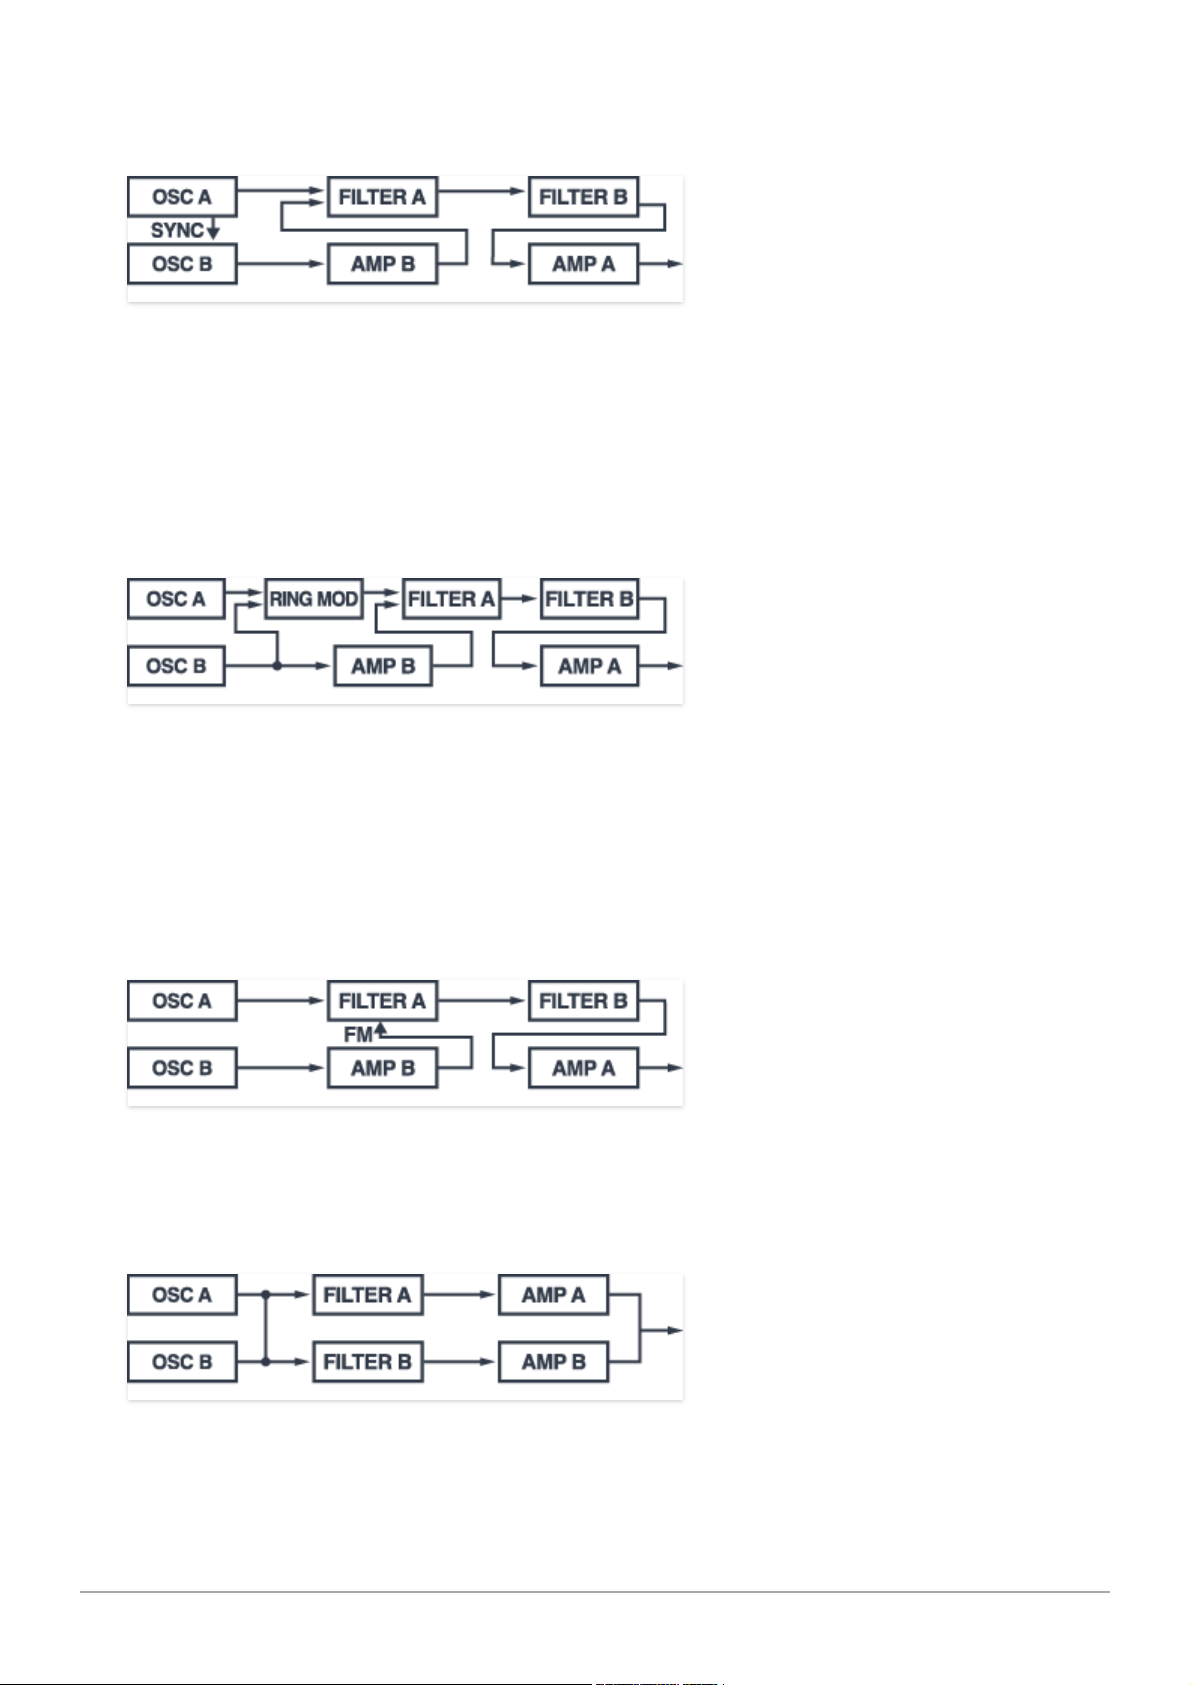
entire patch. Because Chroma's filters are 12dB/oct, this "stacking" creates a
steeper 24 dB/oct response.
Series Filters + Osc Sync- Like the preceding Series Filters voice path, but
adds sync between the Osc A and B. To mute Osc A (i.e. to better isolate the
synced Osc B), set WAVE SHAPE A
WAVE SHAPE
to Pulse and
WIDTH
to 0. Use
this voice configuration for oscillator sync sounds with a 24 db/oct filter
response.
Series Filters + Ring Mod- Like the Series Filters voice path, but replaces
Osc A with a ring modulator. To mute Osc B (i.e. to better isolate the ringmodded OscA), set WAVE SHAPE A
WAVE SHAPE
to Pulse and
WIDTH
to 0.
Use this voice configuration for ring mod sounds with a 24 db/oct filter
response.
Series Filters + Filter FM- Like the Series Filters voice path, but the output
of Amp B modulates Filter A cutoff frequency.
Cherry Audio Chroma User Guide - 81
Page 82
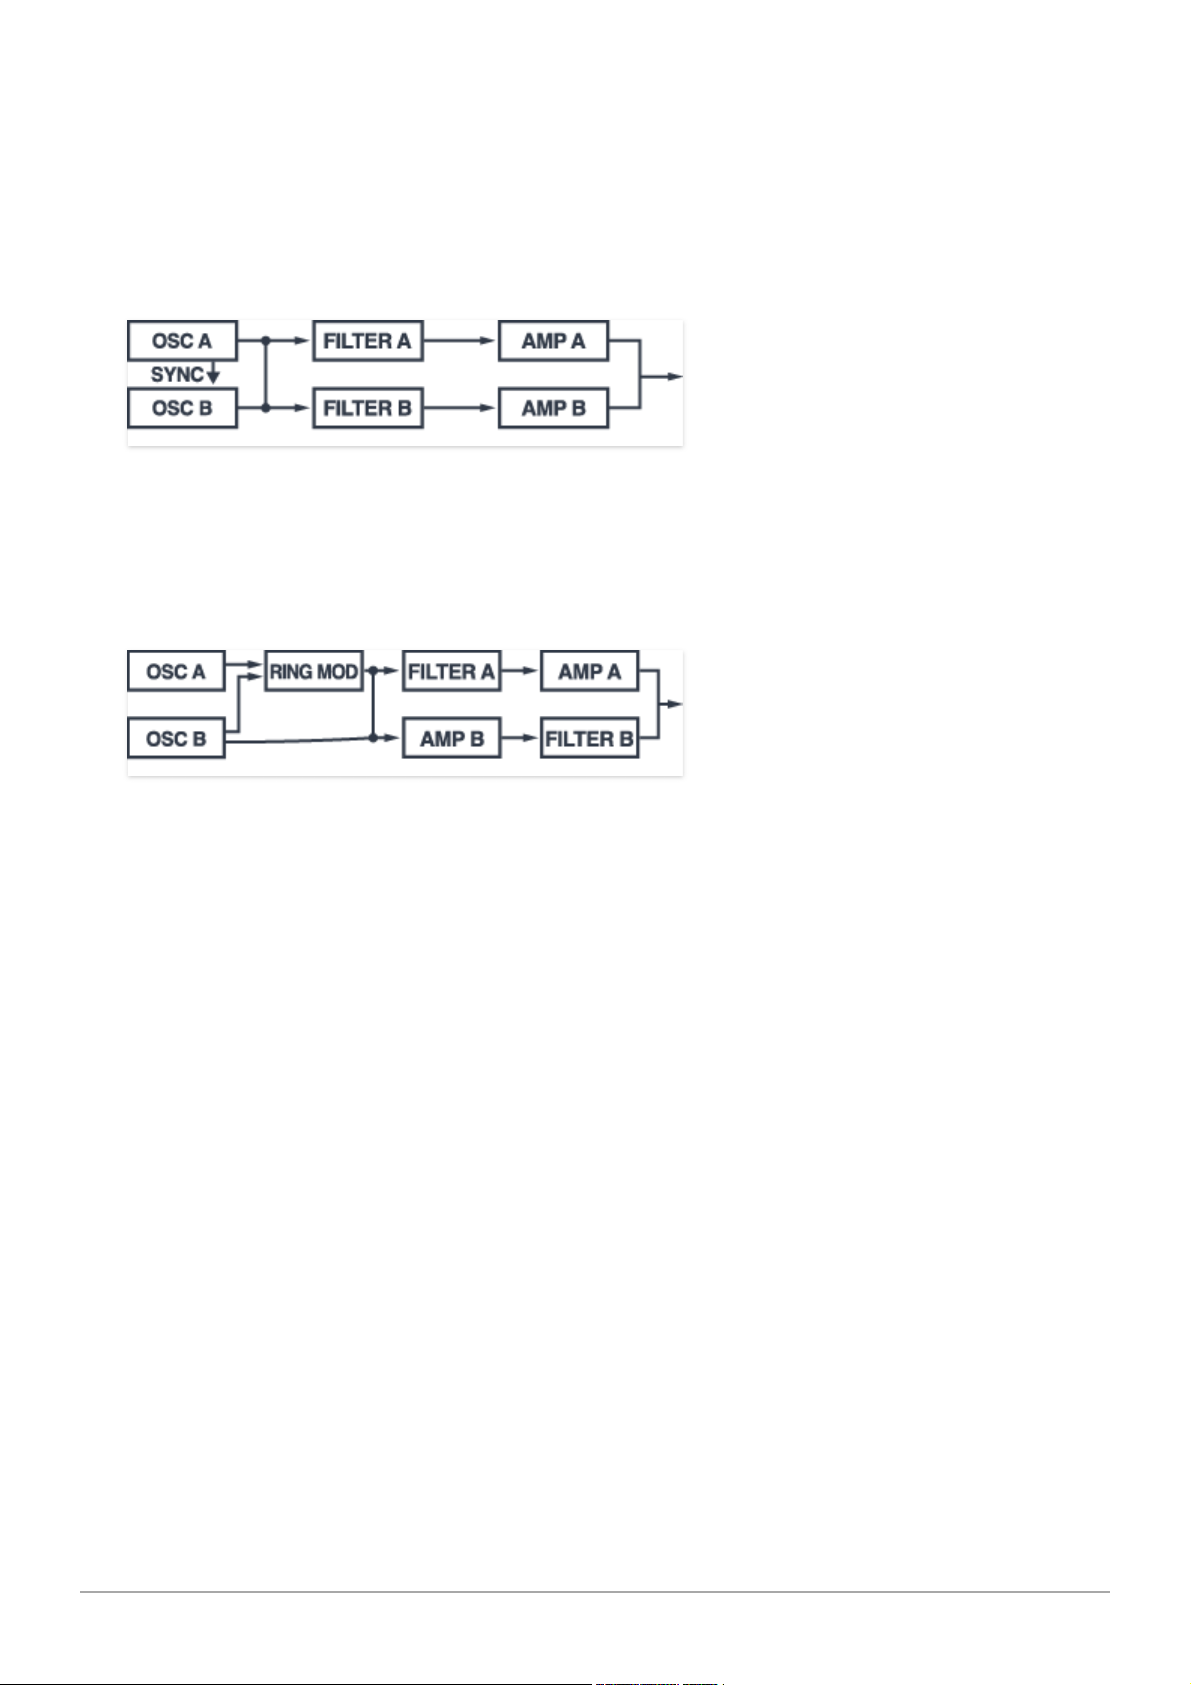
Variable Filters- Osc A and B outputs are mixed, then fed into both filters.
Each amp controls levels from each filter, allowing the creation of
asymmetrical notches. (Incidentally, I saw Asymmetrical Notches open for
The Modern Lovers at The Rat in Boston in '79). This Patch Configuration is
useful for creating phase-y/flange-y timbres when one of the filters is set to
highpass mode and cutoff is modulated.
Variable Filters + Osc Sync- Same as Variable Filters but Osc B is synced
to Osc A. This is useful for notch-filtered sync sounds, and "duo timbre" filter
effects with sync.
Variable Filters + Ring Mod- Same as Variable Filters but Osc A is replaced
with a ring modulator. Useful for atonal/bell tones with notch filtering.
Cherry Audio Chroma User Guide - 82
Page 83
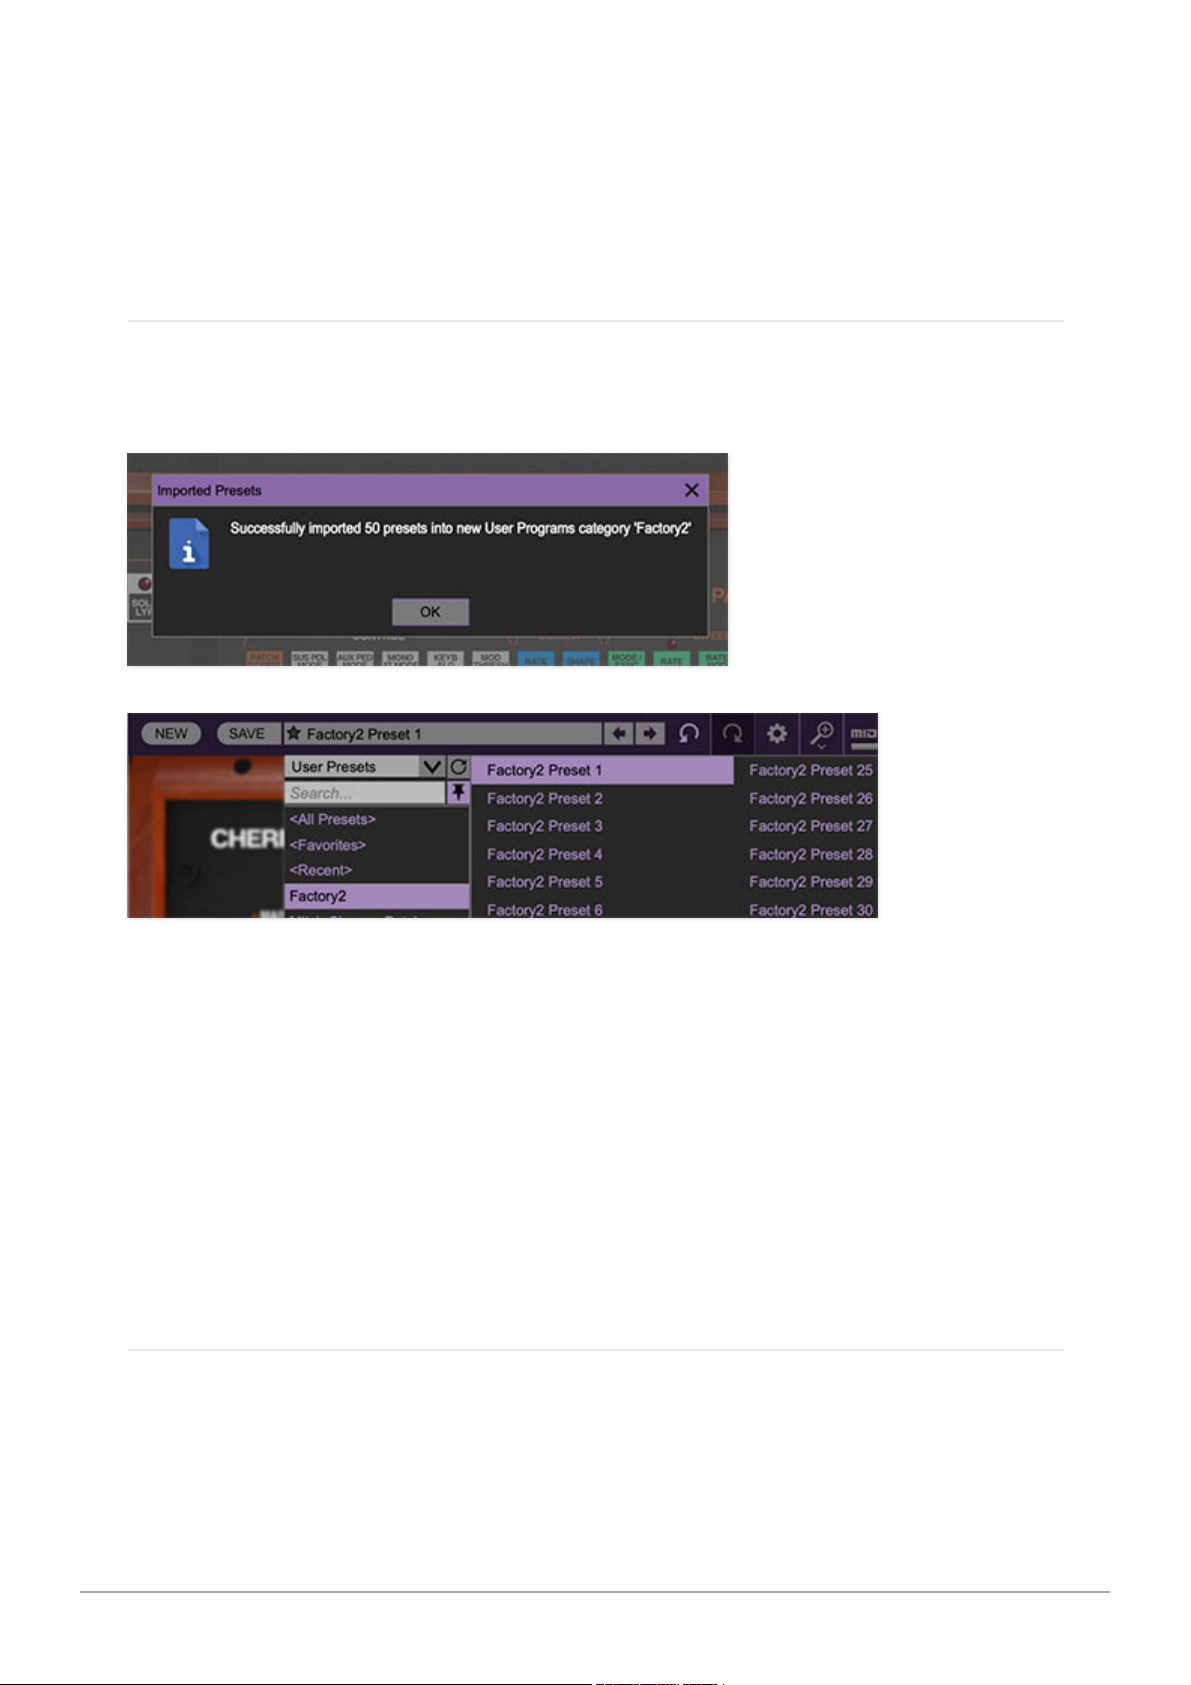
Original Rhodes Chroma patch data in sysex format can easily be imported
directly into Cherry Audio Chroma via drag-and-drop. These must be in
"Syntech" .syx format. Public domain sound banks can be found online
through the usual search engine channels.
IMPORTING SOUND BANKS AND INDIVIDUAL
PATCHES USING A COMPUTER
To import an entire 50-patch sound bank, simply drag and drop the bank
anywhere over the Chroma's UI.
If the bank is valid, you'll see a confirmation window and new category
containing the banks is created in the presets browser.
Importing a single patch essentially works the same way - drag and drop the
sysex file anywhere on the Chroma UI, but for single patches, you won't see
a confirmation message and no new banks are created. The patch will be
live, but you'll need to manually save it with the
SAVE
button at the top left
of the preset browser.
EXPORTING SOUND BANKS AND INDIVIDUAL
PATCHES FROM A RHODES CHROMA
If you're lucky enough to own a vintage Chroma or Expander with a MIDI
retrofit installed, patch banks and individual patches can be transferred to
Cherry Audio Chroma via MIDI.
Cherry Audio Chroma User Guide - 83
Page 84

You'll need to refer to your MIDI retrofit documentation for information on
initiating MIDI sysex dumps of single patches or banks on the Rhodes
Chroma side, but the procedure is essentially that you'll initiate a "Syntech"
sysex dump on the Rhodes Chroma and Cherry Audio Chroma will
automatically recognize and receive it.
As with dragging and dropping banks on a computer, if an entire bank is
sysex sent, Cherry Audio Chroma will display a confirmation message and
create a new category in the preset browser. If a single patch is sysex sent,
Cherry Audio Chroma won't display a message, but the patch will be live and
playable, and you'll want to save it using the
SAVE
button at the top left of
the preset browser.
On Chroma and Expander units equipped with the Chroma CPU Plus (CC+)
upgrade, single patches can be sent via sysex by pressing SET SPLIT followed
by pressing the Preset 20 button. Entire banks can be sent via sysex by
pressing SET SPLIT + Preset 36 to enter "CC+ Program Mode," followed by
pressing Preset 23 to send the entire bank of 50 presets. Press SET SPLIT +
Preset 36 again to exit "CC+ Program Mode."
Cherry Audio Chroma User Guide - 84
Page 85
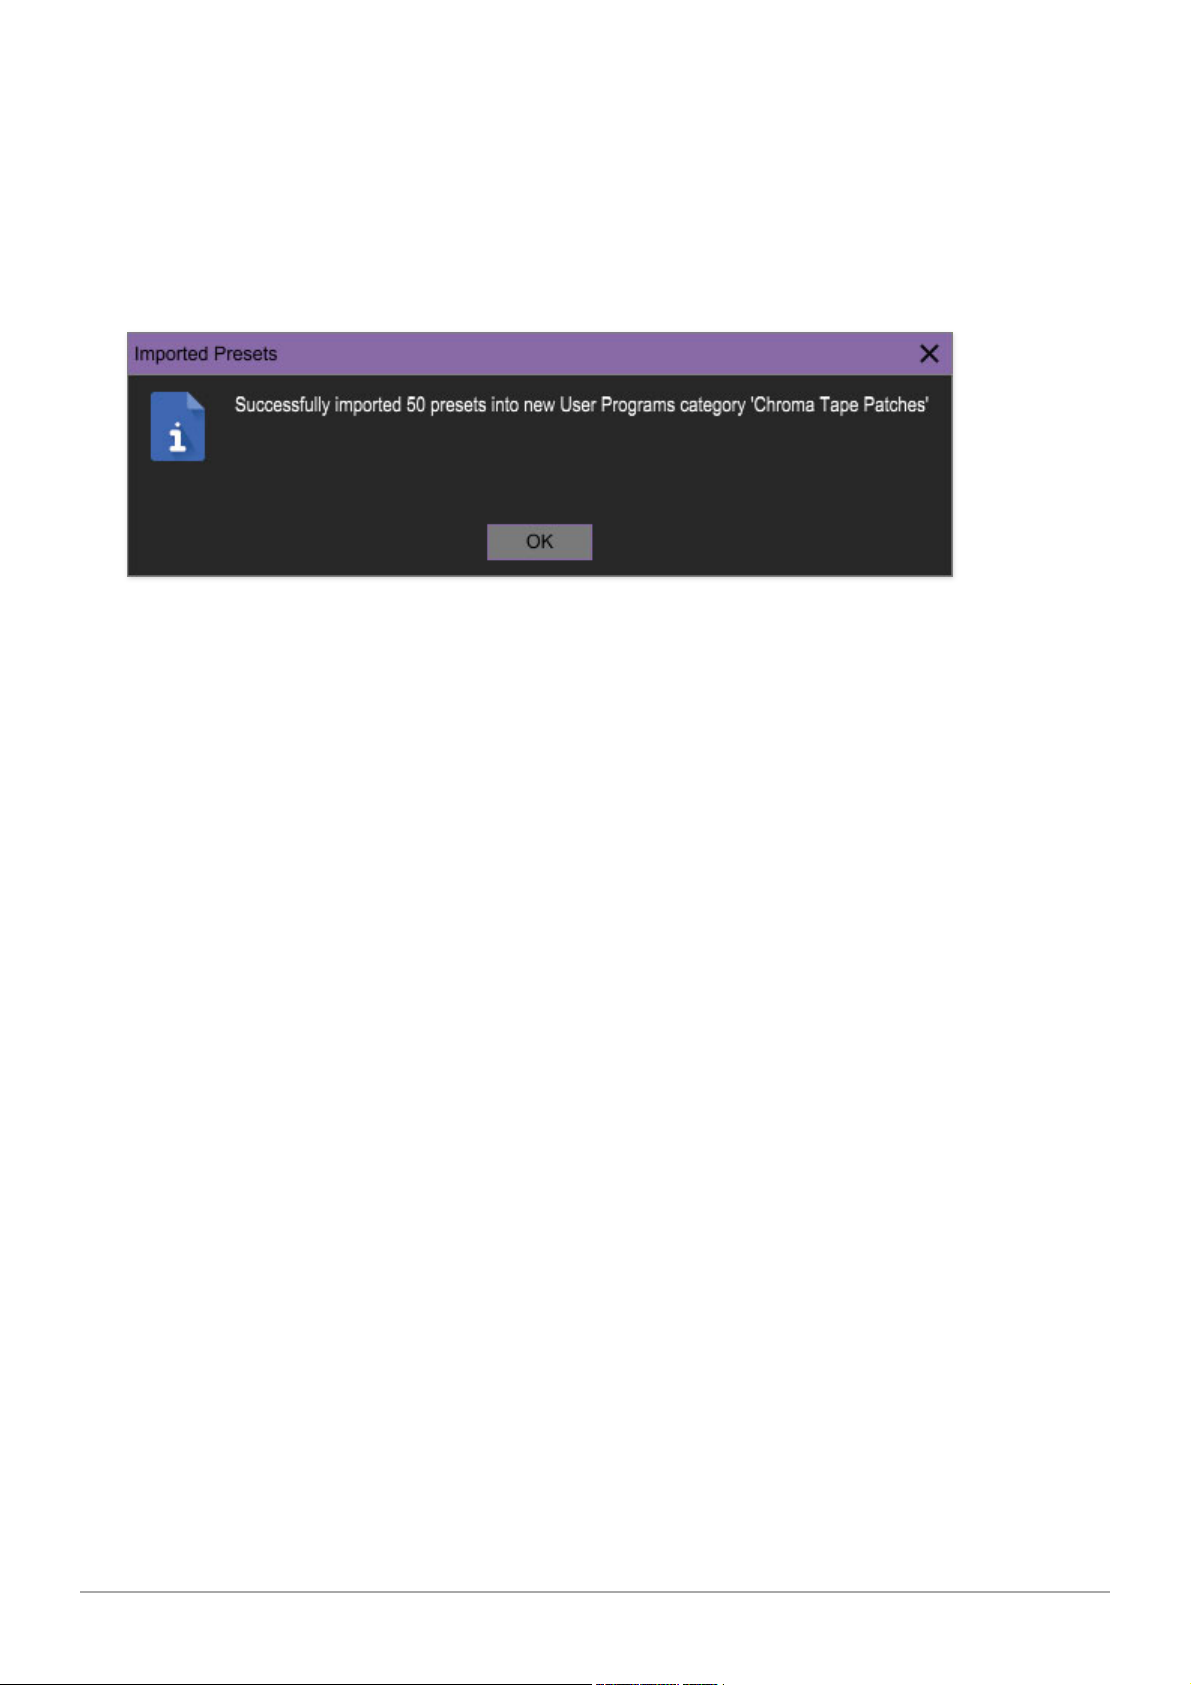
Cherry Audio Chroma can import 50-program cassette tape data backups
made with the original Rhodes Chroma. The recording files need to be
uncompressed .wav files, either mono or stereo, and all sample rates and bit
depths are acceptable.
To import a 50-program tape data recording, drag the .wav file onto the
Chroma's interface. If the import is successful the following window is seen:
If the recorded data is corrupted or incomplete, an error message will be
displayed. The good news is that .wav recordings are far less finicky than
cassette tapes, so your chances of success are far better than in olden
times!
Cherry Audio Chroma User Guide - 85
 Loading...