

Certgate AirID User Manual

AirID - User Manual
Trademarks
ŝƌ/
The information contained in this document is subject to change without prior notice.
Table of Content
x 1. Device Layout
o 1.1. Overview
o 1.2. Package Contents
o 1.3. Hardware Features
x 2. Technical Specification
x 3. Menu Layout
o 3.1. AirID
o 3.2. Connection
o 3.3. Pairing Code
o 3.4. Settings
o 3.5. AirID Info
o 3.6. Card Info
o 3.7. Prefered Device
x 4. Using AirID
o 4.1. Windows
4.1.1. Installation
4.1.2. Deleting the Connection
4.1.3. AirID Central App
o 4.2. iOS

1. Device Layout
1.1. Overview
AirID is a wireless smart card reader that you can carry with you at all times. The AirID reader
communicates via a secure Bluetooth Low Energy (BLE) connection with your device and makes
the inserted smart card available for cryptographical operations such as data encryption or
authentication.
AirID is powered by a rechargeable Li-Po battery. The battery is charged by plugging the AirID
into either a computer or external USB wall adapter using the USB cable provided. The LCD
display shows all setting information and status of the reader. The user-friendly jog-dial control
element helps you to navigate through the settings of the device.
Bluetooth Connected Mode Usage
With the AirID is it possible to protect Apps with smart card based-security via Bluetooth Low
Energy (BLE).
Note: Because of the sandbox architecture of iOS and Android, the AirID driver needs to be
integrated into an app to use AirID with this specific app.
Examples of apps with AirID integration:
x cgPhone
x SecurePIM
x your company specific apps*
*contact your company administrator!
If you would like to integrate AirID into your app, contact our support
at support@certgate.com.
USB Connected Mode Usage
AirID can be used as a standard CCID USB reader on all most all PCs with an common
operanting system (Windows, OS X and Linux).
1.2. Package Contents
Check the product box for the following items:
x AirID smart card reader
x Bumper (landscape and portrait variant)
x USB cable
x transparent plastic strap for use AirID as ID badges
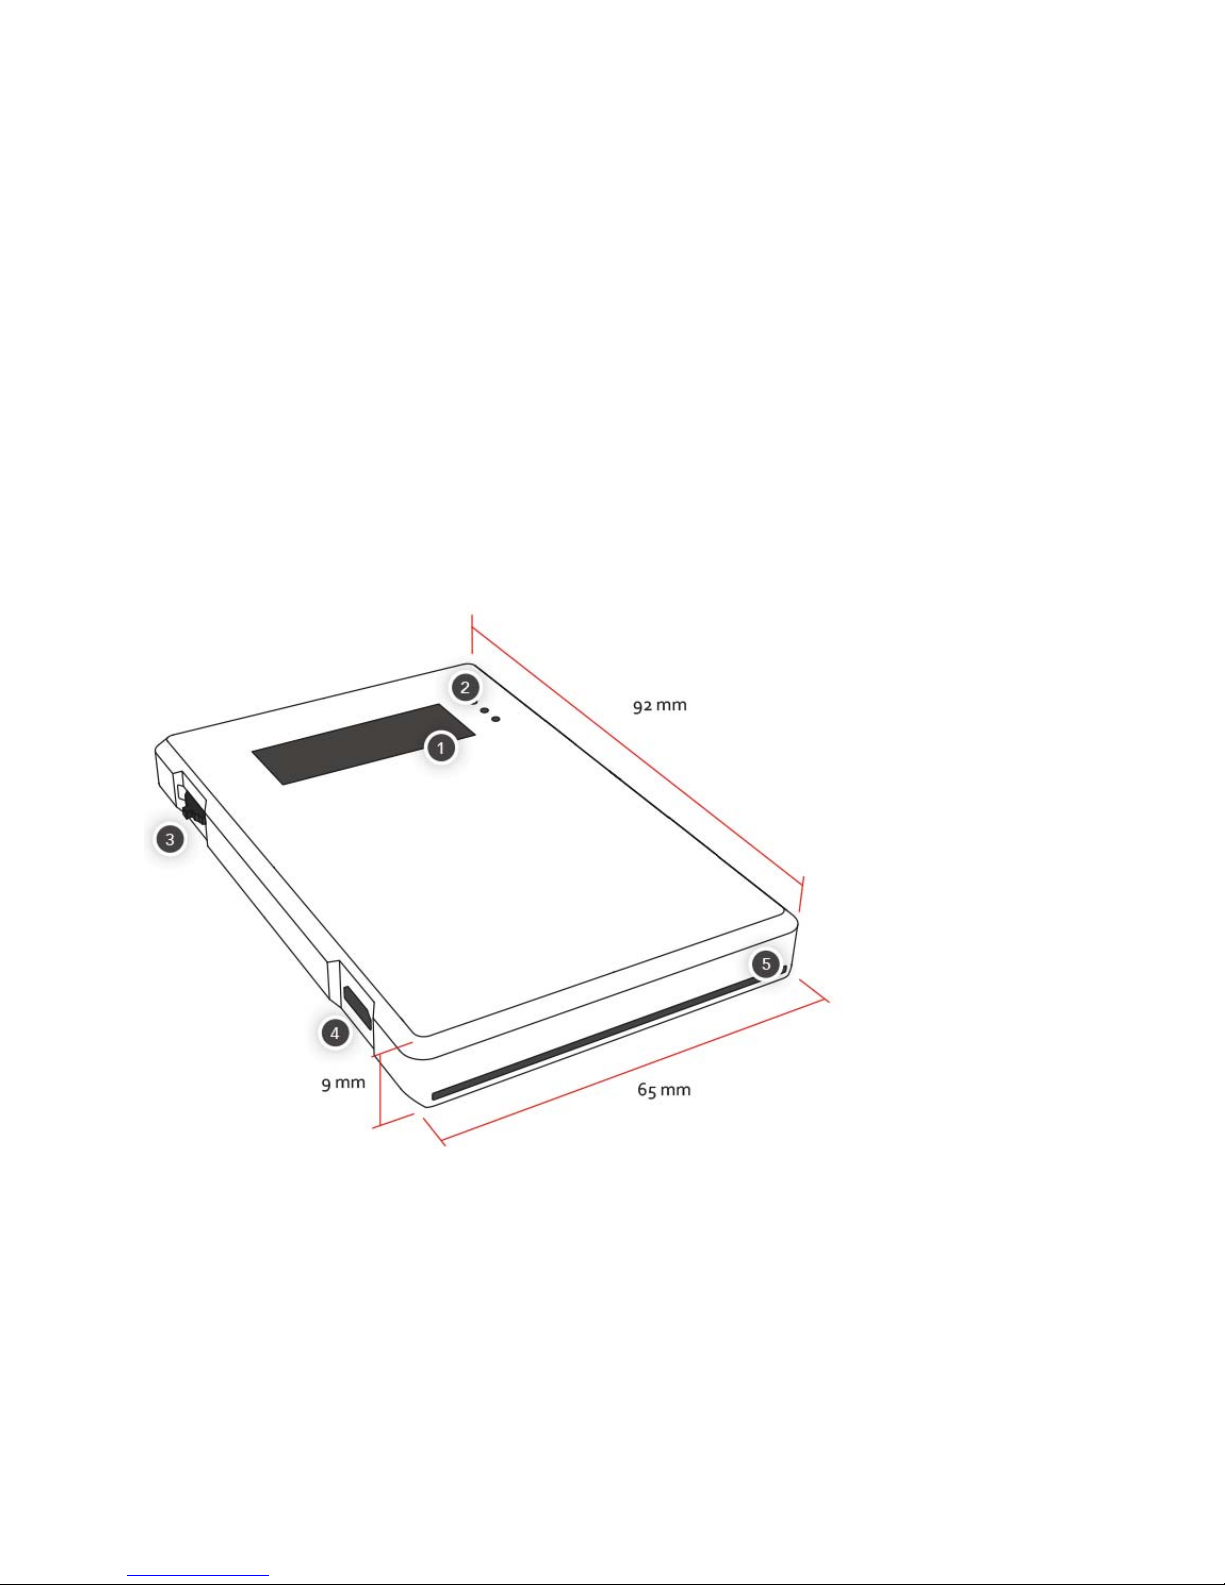
1.3. Hardware Features
Device Features
Front View
1 Low Power LCD Display
2 LED indicator
3 Jog dial control element
4 USB interface
5 Smart card internal slot
Back View
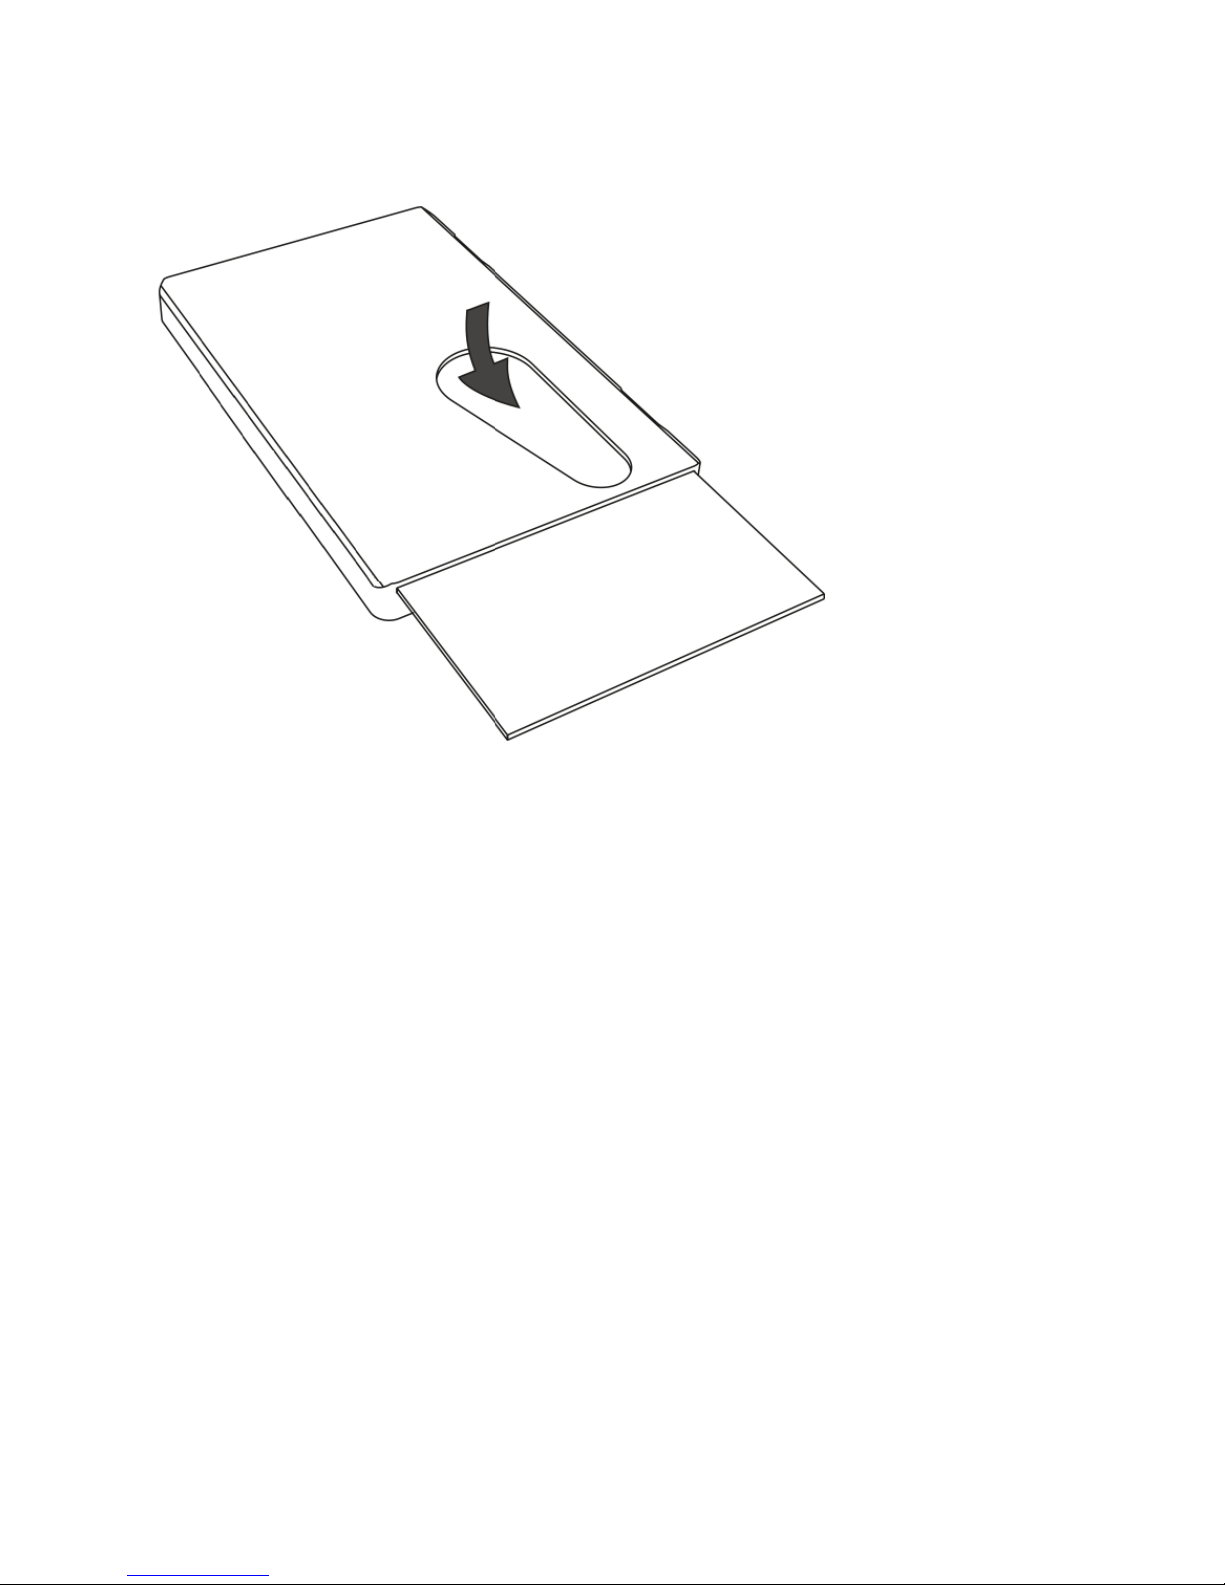
Insert and remove a smart card
Insert the card chip first. The double header of the AirID reader can read the chip regardless of
which side the chip is on.
To remove the card, simply slide it with the finger through the cut-out.
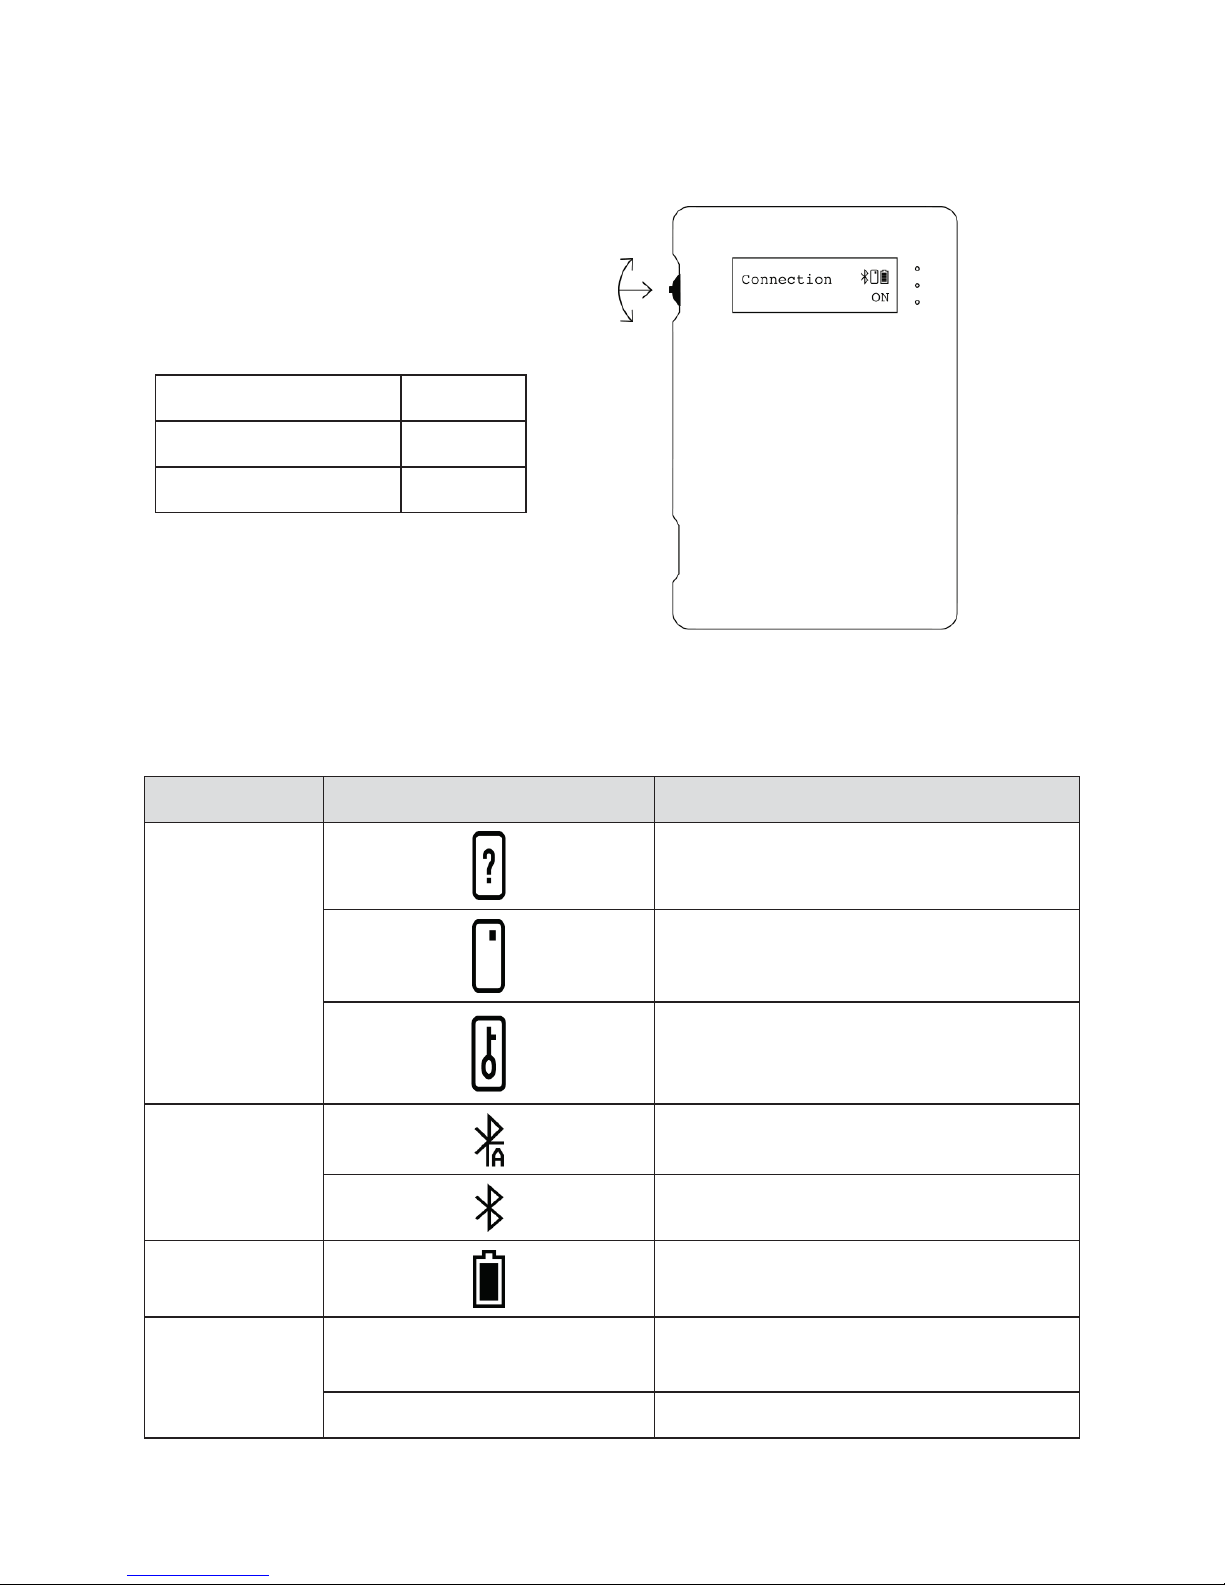
Control Element
AirID is designed for easy menu
navigation using a 3
jog dial control element.
Action
Function
up and down scrolling
navigation
press
select
Status
Status Indicator
Meaning
Smart card
status
card inserted, card unreadable
card insert
card access blocked (coverage)
Connection
status
Bluetooth and advertising activated
Bluetooth activated and connected
Battery status
remaining battery capacity
LED
on while battery charging, off when
battery charging is done
blue
on while smart card activities
-way version of
Status Indicator
Following status indicators exists on AirID
ed and card supported
red
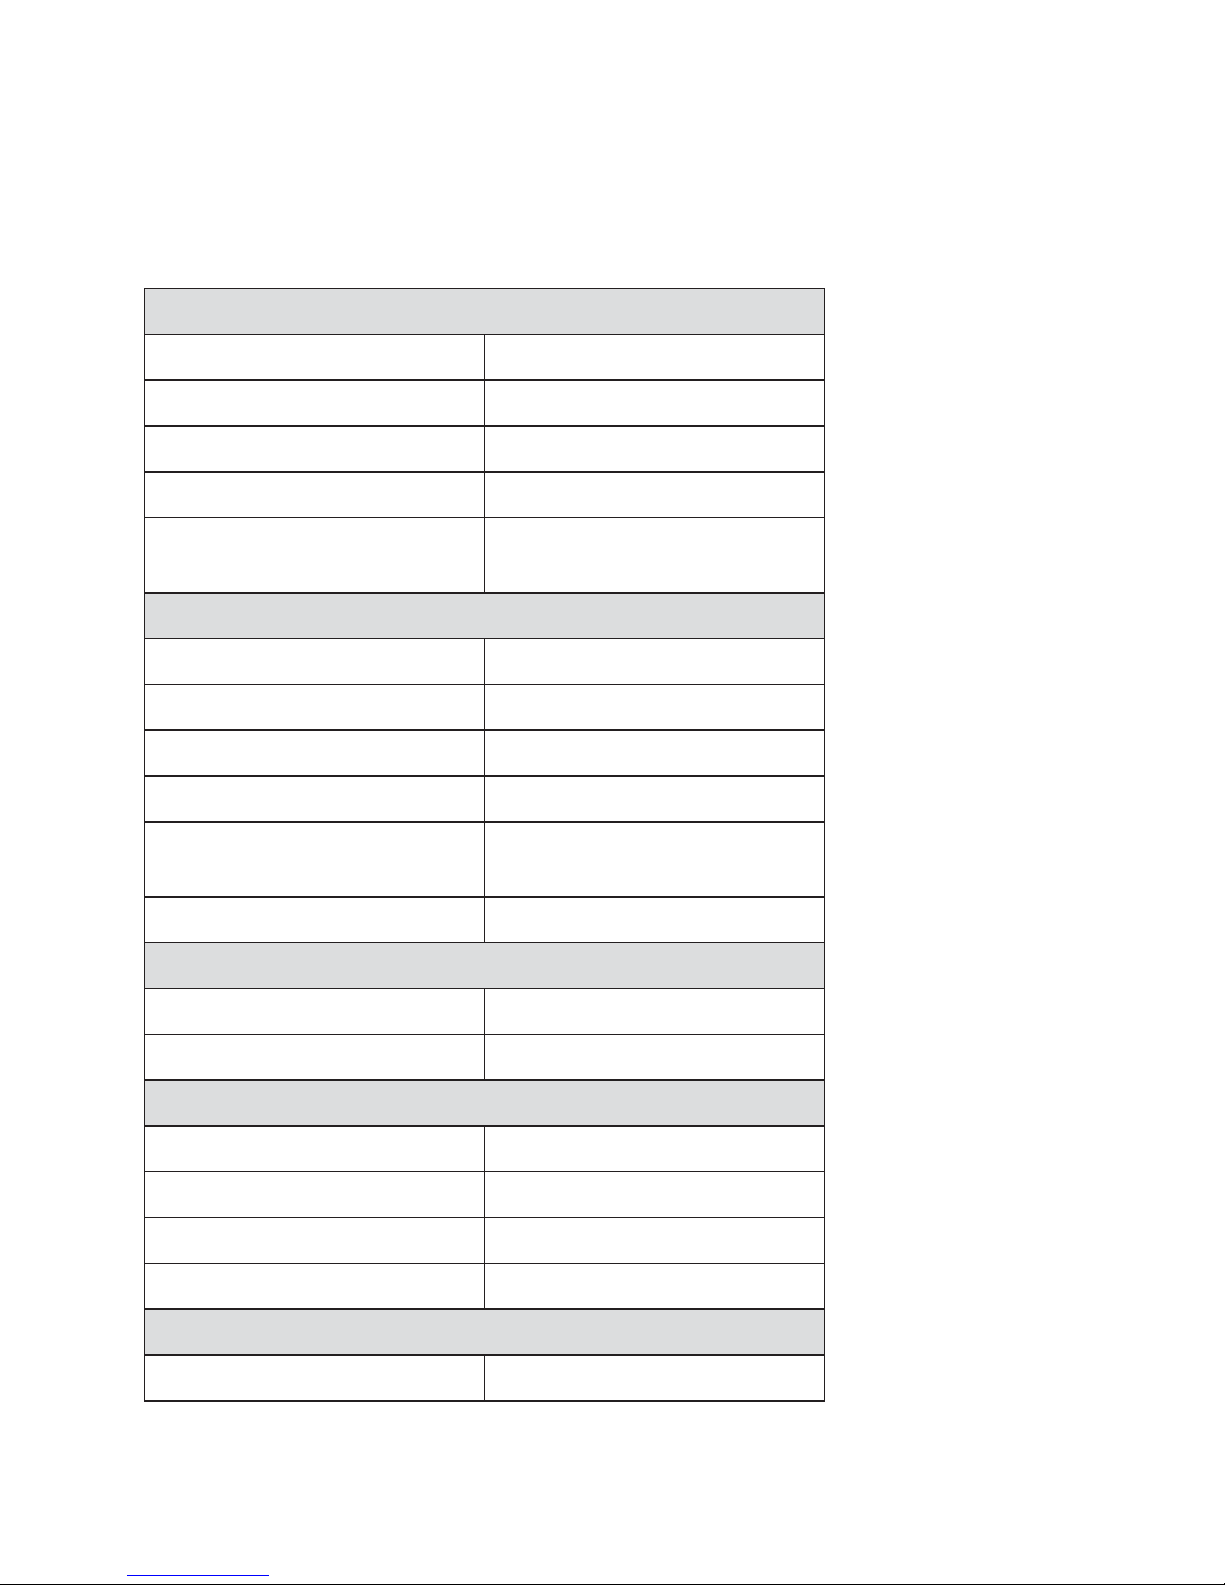
2. Technical Specification
Enclosure
Shape
rectangular plus Bumper
Dimension
90 x 60 x 9 mm (plus Bumper)
Bumper
utilizable
Weight
ca. 50 g
Orientation of hanger with
bumper
4
Human interface
Display type
LCD, 132x32
Display size
ca. 9 x 30 mm
Control element
Jog Dial (up/down/select)
USB port
USB-2.0-Micro-B
LED visible
2 (red: on while charging, blue:
on while smart card powered on)
Acoustic feedback
Buzzer
Bluetooth
Bluetooth Version
BLE chip
BGM13P, SiLabs
Battery
Battery type
NEXcell NEX422339PA
Battery size and weight
4.5 x 24.0 x 41.5 mm, 8g
Capacity
340mAh
Battery charging
via USB
Smart card interface
smart card size
ID1, contact interface (ISO7816)
This chapter provides the specification for the AirID model.
4.2
 Loading...