

Page 1
Instructions for use
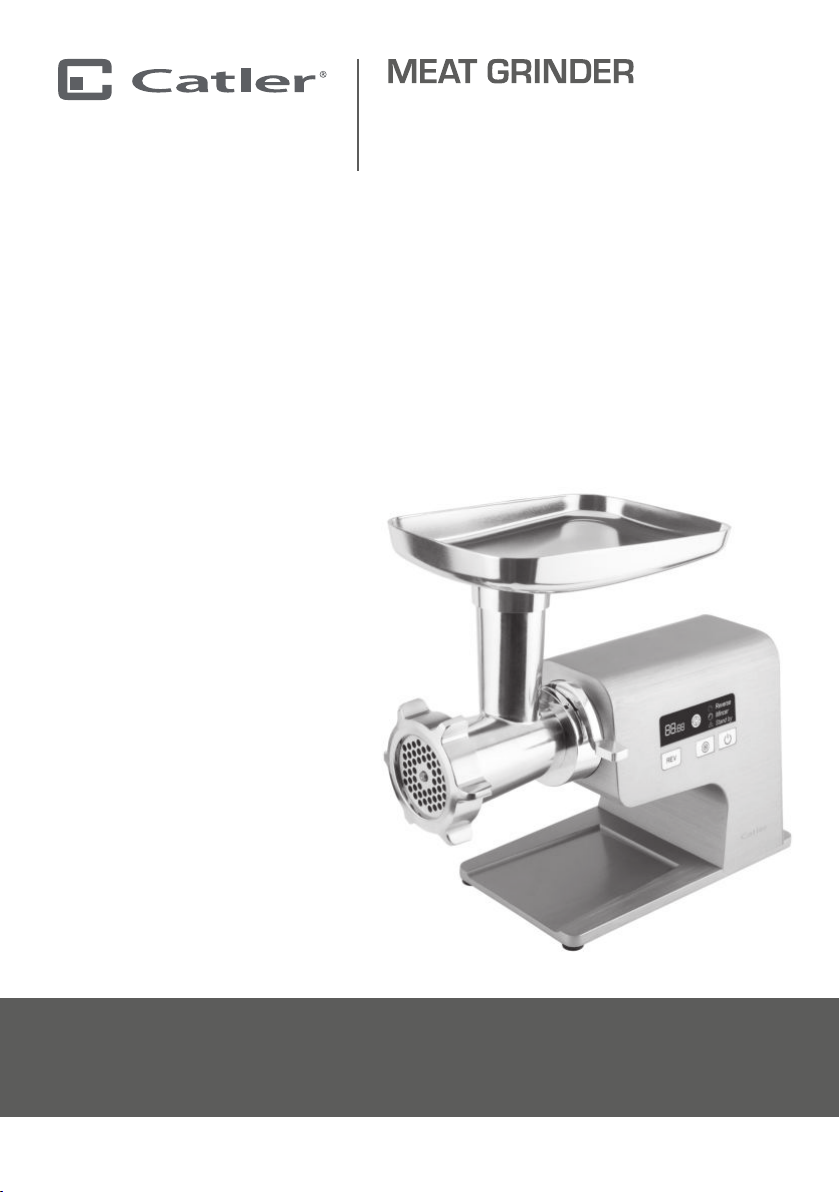
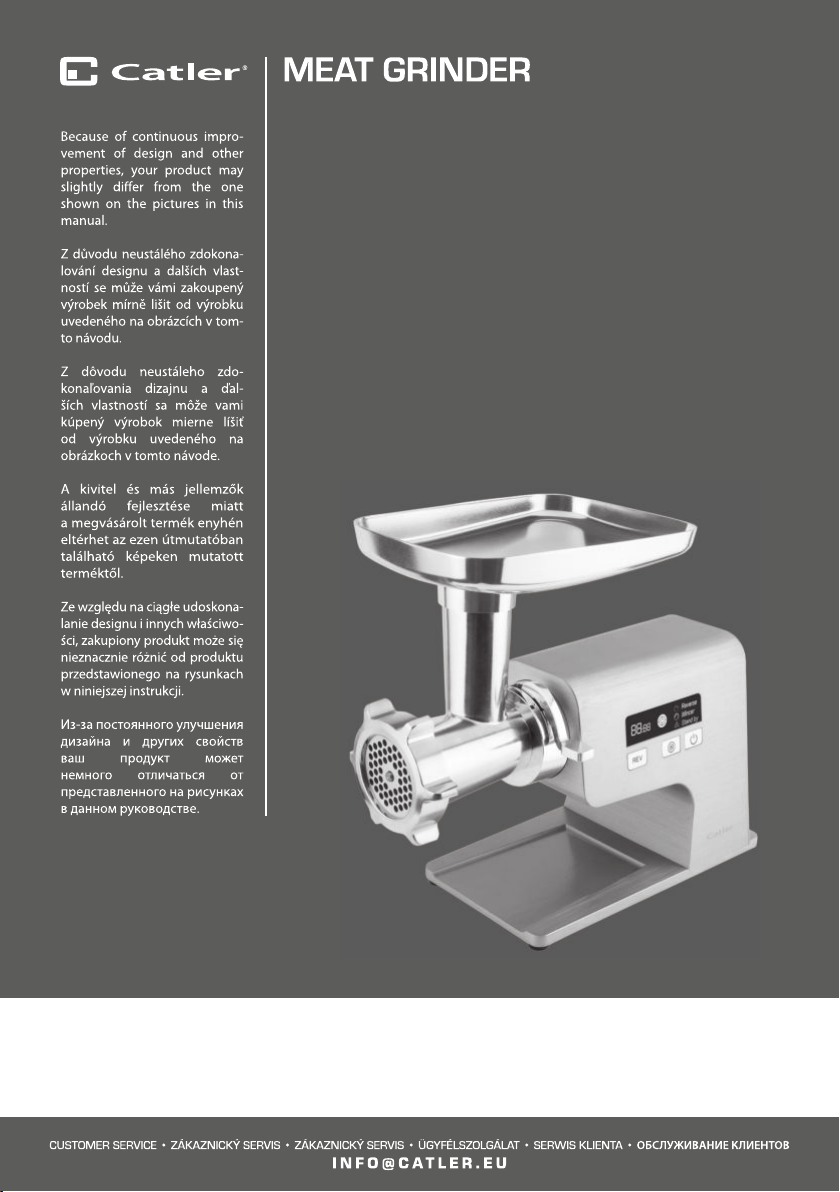
MEAT GRINDER
MG 800
Page 2

MEAT GRINDER
Page 3

TABLE OF CONTENTS
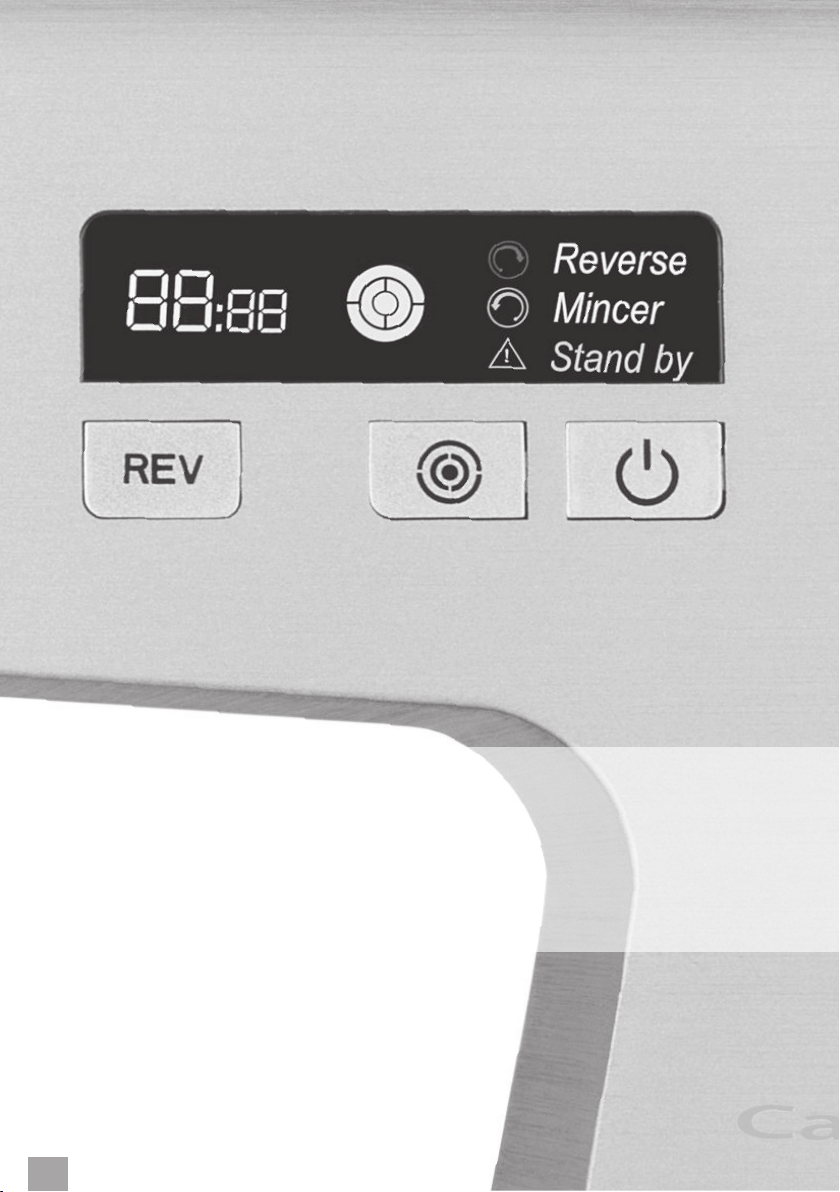
5 Catler recommends safety rst
8 Know your meat grinder MG 800
10 Operating your meat grinder MG 800
14 Care and cleaning
10 Before rst use
10 Assembling the meat grinder
11 Using the meat grinder
11 Kubbe preparation
12 Sausage preparation
13 Speed selection
13 Overheat protection
14 Disassembling of the meat grinder
14 Cleaning accessories
14 Cleaning the grinder
15 Storage
TABLE OF CONTENTS
3
Page 4
Congratulations
for purchasing your new meat grinder MG 800.
CONGRATULATIONS
4
Page 5

CATLER RECOMMENDS SAFETY FIRST
We understand the importance of safety and so from the initial design concept to production
itself we focus primarily on your safety. Nevertheless, we ask that you please be careful and
follow the following instructions when using electrical appliances:
IMPORTANT SAFETY INSTRUCTIONS FOR
USING YOUR MG 800 MEAT GRINDER
• This appliance must not be used by children.
Keep the appliance and its power cord out of
reach of children.
• This appliance may be used by persons with
physical, sensory, or mental impairments or
lack of inexperience and knowledge only if they
are properly supervised or have been informed
about how to use of the product in asafe
manner and understand the potential dangers.
• Children must not play with the appliance.
• If the power cord is damaged, have it replaced
in aprofessional service centre in order to
prevent adangerous situation. It is forbidden
to use the appliance with the power cord
damaged.
• Misuse may cause injury.
• Be careful when manipulating with the grinder
knife. Blades of the grinder knife are very sharp
and there is arisk of aserious injury.
CATLER RECOMMENDS SAFETY FIRST
5
Page 6

• The parts of the appliance and the accessories
that get in contact with food, clean according
to the instructions provided in this manual.
• Always unplug the appliance from the power
outlet if you leave it unattended and before
assembling, disassembling, or cleaning.
• Switch the appliance off and unplug it from
the power supply before changing the
accessories or accessible parts that move when
in operation. Always wait till the accessories
or rotating parts completely have stopped.
Use the appliance only with the supplied
accessories.
• Use the appliance according to the instructions provided in this user´smanual. Otherwise,
there is arisk of injury.
• This appliance is designed for household use only. The appliance is not designed for
commercial use. Do not use this appliance in moving vehicles or on boats, outdoors, or for
any purpose other than intended. Otherwise, there is arisk of personal injury.
• Before rst use, make sure that the voltage in your power socket matches the nameplate
voltage on the unit bottom. In case of any doubt, please contact aqualied electrician.
• Put the appliance on astable, heat-resistant, at and dry surface away from the
countertop edge.
• Avoid placing the appliance on or in the vicinity of heat sources, such as hot plates, ovens
or gas burners. Vibrations during operation may cause the appliance to move.
• Do not use this appliance with aprogrammable switch, timer switch or any other device
that automatically switches the appliance on.
• Before turning the appliance on, check that it is correctly assembled. Ensure the screw ring
is correctly tightened.
• Do not attempt to grind bones, nut shells or other hard ingredients.
• Do not leave the appliance in continuous operation under aheavy load for aperiod longer
than 5 minutes. Before turning it on again, allow it to cool down for at least 10 minutes.
• Never use your ngers or other objects to push food through the feed chute. Always use
the supplied pusher.
• If food gets stuck inside the grinding chamber, use the REV button for areverse move of
the worm shaft to remove the stuck food.
• Never run the appliance empty. There is arisk of damage.
CATLER RECOMMENDS SAFETY FIRST
6
Page 7

• Always switch the appliance o and unplug it from the power supply once food
processing has been completed.
• To prevent potential electric shock, do not submerge this appliance, its base or power
cord in water or any other liquid.
• Regularly check the appliance status. Never use adamaged appliance or appliance with
adamaged accessory, power cord or plug.
• Do not disconnect the appliance from the power socket by pulling the power cord. This
could damage the power cord or the power socket. Disconnect the cord from the power
socket by gently pulling the plug of the power cord.
IMPORTANT SAFETY INSTRUCTIONS FOR USING ELECTRICAL EQUIPMENT
• Fully unwind the power cord before use.
• Do not leave the power cord hanging over the edge of atable or countertop or allow it
to touch ahot surface or to become tangled up. Do not put heavy objects on the power
cord.
• For safety reasons, we recommend connecting the appliance in an independent electrical
circuit separated from other appliances. Do not use adapter plugs or extension cords to
connect the appliance to apower outlet.
• We recommend that you inspect the appliance regularly. Do not use the appliance if it is
damaged in any way or if the power cord or plug are defective. All repairs or adjustments
must be performed at the nearest Catler authorised service centre.
• Any maintenance other than standard cleaning must be performed at authorised Catler
service centre.
• We recommend installing aresidual current device (standard safety switches in your
power outlet) to provide ahigher level of protection when using the appliance. We
recommend installing aresidual current device (with anominal residual operating current
of no more than 30 mA) in the electric circuit in which your appliance is to be connected.
For further expert advice, please contact your electrician.
The user’smanual is also available at www.catler.eu.
FOR HOUSEHOLD USE ONLY.
CATLER RECOMMENDS SAFETY FIRST
7
Page 8
KNOW YOUR MEAT GRINDER MG 800
1
13
2
3
4
14
5
6
7
8
9
10
11
12
15
KNOW YOUR MEAT GRINDER MG 800
8
19
18
16
17
Page 9

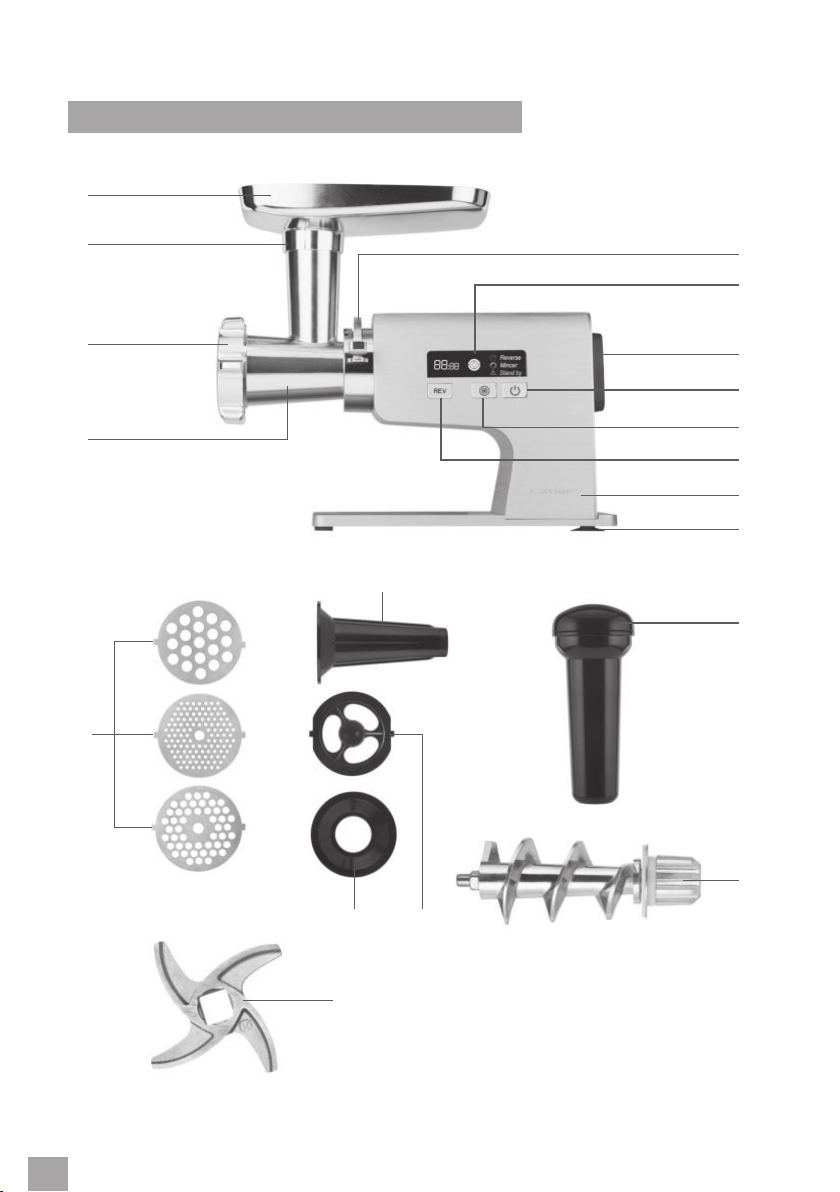
1. Food tray
2. Feed chute
3. Fixing ring
4. Grinding attachment
5. Locking handle for attaching the grinding attachment
6. Display
7. Ventilation vents
8.
button (turn on/o)
button – speed setting (low or high)
9.
10. REV button (reverse function)
11. Motor unit
12. Feed with suction cups – provide better stability when operating the meat grinder
13. Grinding discs
14. Sausage attachment
15. Food pusher
16. Worm shaft
17. Kubbe attachment
18. Cover
19. Grinding knife
KNOW YOUR MEAT GRINDER MG 800
9
Page 10
OPERATING YOUR MEAT GRINDER MG 800
BEFORE FIRST USE
Before rst use, remove all packaging
and advertising labels / stickers from the
appliance. Make sure you have removed all
accessories from the package. Check the
appliance or any accessory are not damaged.
Wipe the outer surface of the motor unit with
asoft sponge slightly moistened in warm
water with alittle washing-up liquid. Wipe
dry using aclean wiping cloth.
Other accessories wash in warm water with
alittle washing-up liquid. Rinse with clean
water and wipe dry.
Before assembling the grinder ensure all
parts are completely dry.
ASSEMBLING THE MEAT GRINDER
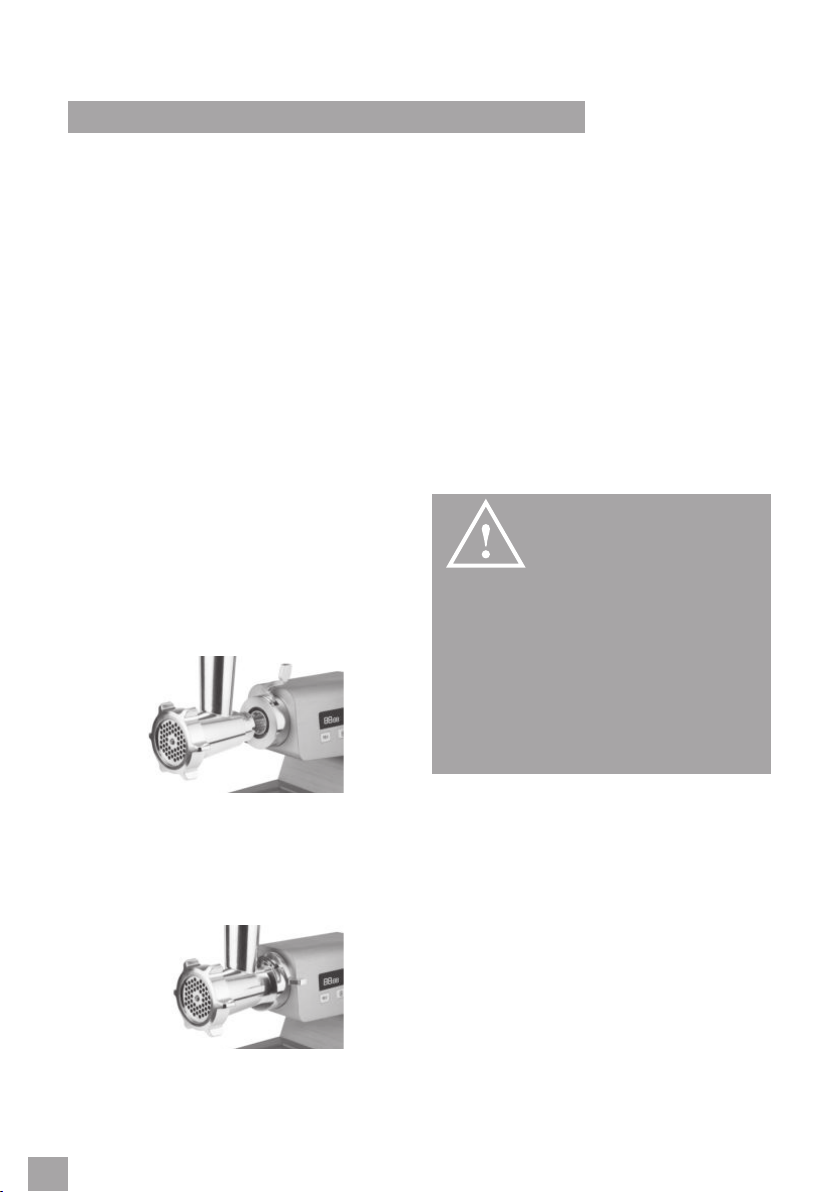
1. Place the grinder on adry, at, and solid
surface.
2. Push slightly the locking handle
clockwise till it points the open lock
symbol and keep it in this position.
chamber. If necessary, turn the warm
shaft to t easier into the axis of the
motor unit.
6. Install the grinding knife to the worm
shaft. It is important the blades are
oriented out of the grinding chamber. If
the grinding knife is placed properly, the
grinder will not grind meat.
7. Attach one of the grinding discs on the
grinding knife. Select agrinding disc
depending on the preferred grinding
roughness and intended meat use. Make
sure that the tab in the grinding chambre
is engaged with the notch in the grinding
disc.
WARNING!
WHEN
ATTACHING THE
GRINDING KNIFE, BE
VERY CAREFUL NOT
TO GET INJURED
3. Insert the grinding attachment vertically
into the inlet hole in the grinder.
4. Push the locking handle clockwise until it
is locked.
5. Insert the worm shaft into the grinding
OPERATING YOUR MEAT GRINDER MG 800
10
WITH ITS EDGE.
8. Now attach the screw cap and screw
it properly by turning clockwise. Now
attach the xing ring and screw it
properly by turning clockwise. Ensure the
xing ring is rmly tightened. However,
do not use excessive force not to damage
the thread.
9. Place the food tray on the feed chute
and insert the food pusher into the feed
chute.
The grinder is now ready to use.
Page 11
USING THE MEAT GRINDER
1. Ensure the meat grinder is properly
assembled – according to the
instructions above.
2. Place the assembled meat grinder on
adry, at, and solid surface in areach of
apower socket.
3. Prepare meat you want to grind. It is
recommended to cut meat into smaller
pieces. Remove bones, tendons etc. Do
not mince too stringy pieces of meat.
Never mince frozen meat.
4. Place the prepared meat on the food tray.
5. Place acontainer for minced meat under
the grinder outlet.
6. Insert the power cord plug into apower
socket.
7. Press the
start.
8. Press the
You can set low or high speed.
9. Use the food pusher to gradually insert
the food into the feed chute. Avoid
overlling of the feed chute with
excessive amount of food. To remove
meat residues from the grinding
chamber, we recommend inserting aslice
of bread or awhite bread roll in the feed
chute and grind them.
button and the grinder will
button to set the speed.
WARNING!
TO PUSH
MEAT THROUGH
THE FEED CHUTE,
ALWAYS USE THE
SUPPLIED PUSHER.
NEVER USE YOUR
FINGERS OR OTHER
ITEMS.
10. When all food is processed, press the
button to switch the grinder o. Then
unplug the power cord plug from the
power socket.
11. If food gets stuck in the grinder, switch
the grinder o by pressing the
button and press the REV button to start
the reverse function. Once the stuck food
has been released from the grinding
chamber, press the
the grinder and continue in processing.
12. Remove the food tray from the feed
chute and place aside the bowl with
minced meat.
13. Clean the meat grinder according to the
instructions in the chapter “Care and
Cleaning”.
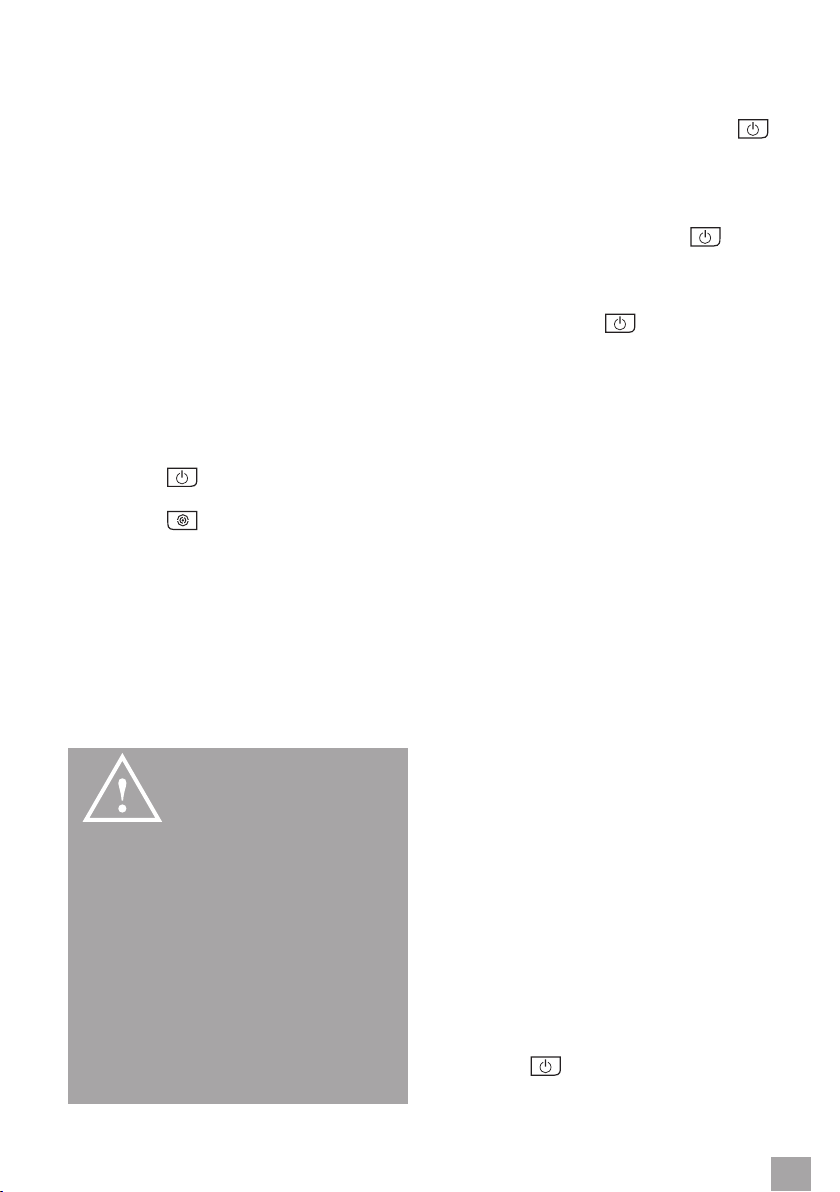
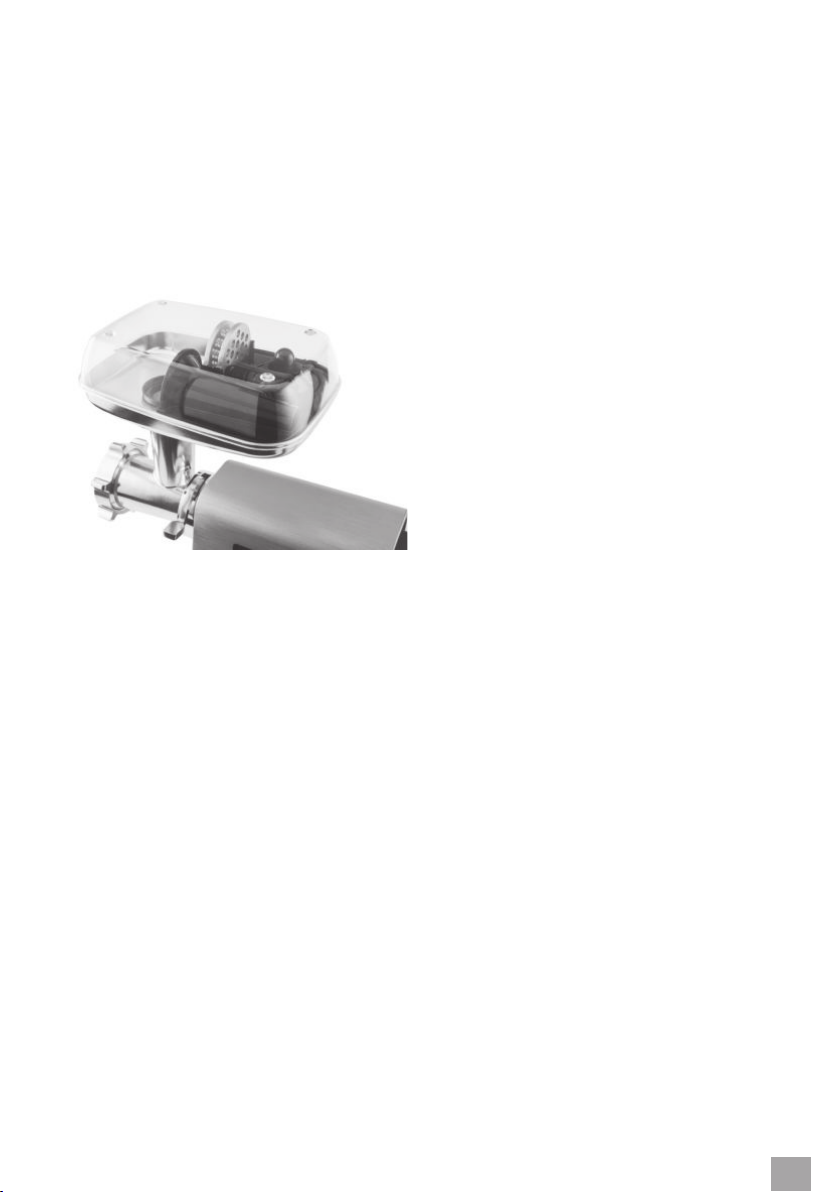
KUBBE PREPARATION
Kubbe (also kubbeh or kibbeh) is agroup of
dishes from the Middle East, which is based
on spiced ground meat, onion and usually
wheat semolina with dierent llings. Balls
are formed and they are baked or fried.
1. Assemble the grinder according to the
steps 1–5 in the part “Assembling the
meat grinder”.
2. Install the kubbe attachment to the
worm shaft and then install the cover.
3. Now attach the xing ring and screw it
properly by turning clockwise. Ensure the
xing ring is rmly tightened. However,
do not use excessive force not to damage
the thread.
4. Place the food tray on the feed chute
and insert the food pusher into the feed
chute.
5. Prepare the meat mixture according to
the recipe and place it on the food tray.
6. Place acontainer for minced meat under
the grinder outlet.
7. Insert the power cord plug into apower
socket.
8. Press the
start.
button and the grinder will
button to start
OPERATING YOUR MEAT GRINDER MG 800
11
Page 12
9. Use the food pusher to gradually insert
the meat mixture into the feed chute.
WARNING!
TO PUSH
MEAT THROUGH
THE FEED CHUTE,
ALWAYS USE THE
SUPPLIED PUSHER.
NEVER USE YOUR
FINGERS OR OTHER
ITEMS.
10. When all food is processed, press the
button to switch the grinder o. Then
unplug the power cord plug from the
power socket.
11. Remove the food tray from the feed
chute and clean the meat grinder
according to the instructions in the
chapter “Care and Cleaning”.
and wait until it gets soften. Then place
the full length of sausage skin on the
attachment. Make aknot at the end of
the sausage skin so that the sausage
mixture does not spill out of the sausage
skin.
7. Place atray for sausages under the
grinder outlet.
8. Insert the power cord plug into apower
socket.
9. Press the
start.
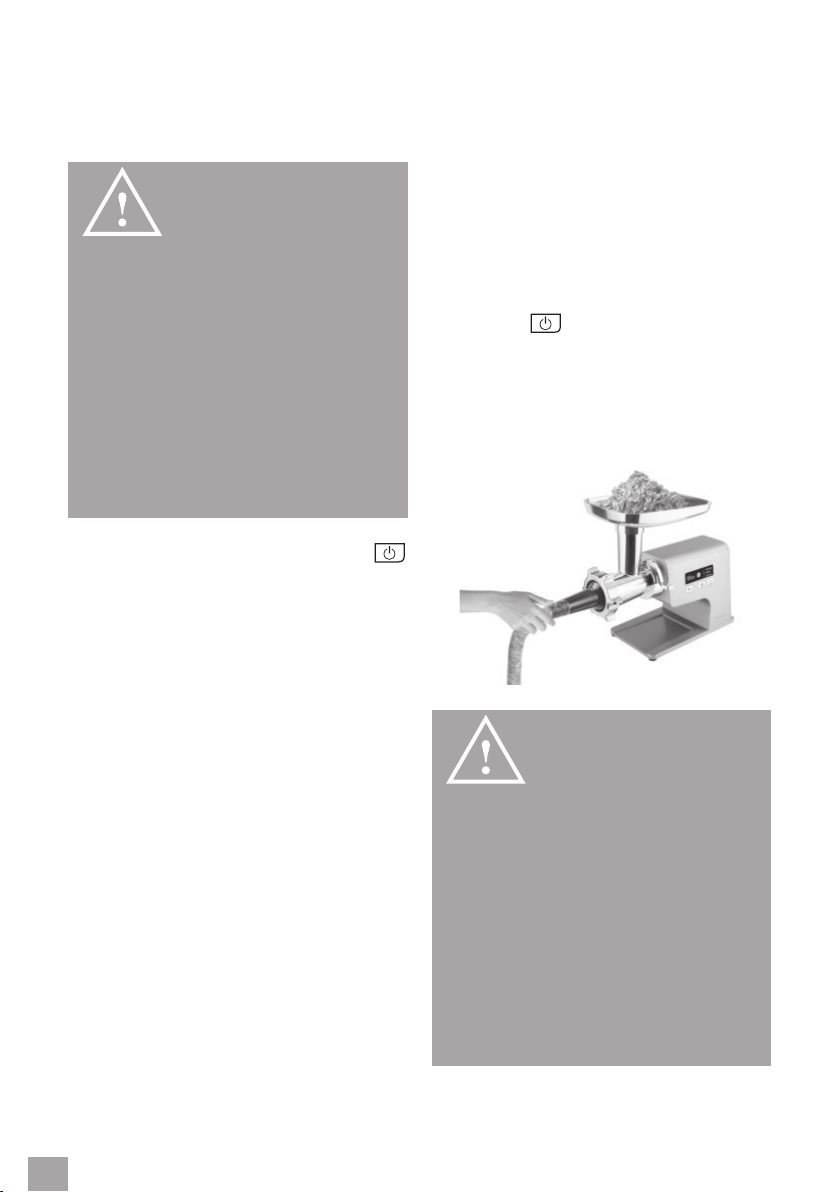
10. Hold the sausage skin on the attachment
with one hand while pushing the mixture
through the feed chute with the other
hand using the pusher.
button and the grinder will
SAUSAGE PREPARATION
1. Assemble the grinder according to the
steps 1–7 in the part “Assembling the
meat grinder”.
2. Install the sausage attachment.
3. Now attach the xing ring and screw it
properly by turning clockwise. Ensure the
xing ring is rmly tightened. However,
do not use excessive force not to damage
the thread.
4. Place the food tray on the feed chute
and insert the food pusher into the feed
chute.
5. Prepare the mixture for sausage and
place it on the food tray.
6. Soak the sausage skin in lukewarm water
OPERATING YOUR MEAT GRINDER MG 800
12
WARNING!
TO PUSH
MEAT THROUGH
THE FEED CHUTE,
ALWAYS USE THE
SUPPLIED PUSHER.
NEVER USE YOUR
FINGERS OR OTHER
ITEMS.
Page 13

11. Once sausage has reached the desired
length, press the
button to interrupt
the process. Press the sausage skin
right at the attachment outlet with your
ngers and rotate the sausage several
times around its axis. The turn the
grinder back on and proceed in the same
manner until the entire mixture has been
processed.
NOTE:
The natural sausage skin must be
soaked in lukewarm water for about
10 minutes before use. If the sausage
skin gets stuck on the attachment
while being lled, wet it slightly with
lukewarm water.
While lling, make sure that the mixture
is loosely, yet evenly distributed in the
casing. If there were excessive amount of
mixture in the skin, it could break during
cooking or frying.
12. When all food is processed, press the
button to switch the grinder o. Then
unplug the power cord plug from the
power socket.
13. Remove the food tray from the feed
chute and clean the meat grinder
according to the instructions in the
chapter “Care and Cleaning”.
SPEED SELECTION
The grinder is provided with two speeds
– low and high – in the grinder mode (the
display shows “Mincer”).
The speed can be selected also before
turning on the grinder by pressing the
button.
OVERHEAT PROTECTION
The grinder is equipped with athermal fuse
that protect motor from irreversible damage
due to the overheating. The thermal fuse
is activated at the moment when the inner
operation temperature reaches 85°C. In such
case, the grinder is switched o, awarning
light will ash on the display and an audible
warning will sound. Unplug the power cord
from the power socket and allow it to cool
down for about 1 hour. Then insert the power
cord plug into the power socket and switch
the grinder on.
If the grinder does not start, contact an
authorised service centre.
NOTE:
You can select the neness or
coarseness of the sausage mixture
by choosing the grinding disc. If you
prefer coarser sausage mixture, use the
grinding disc with the biggest holes and
vice versa.
OPERATING YOUR MEAT GRINDER MG 800
13
Page 14

CARE AND CLEANING
Clean the grinder after each use. Before
cleaning the appliance, always disconnect
the plug of the power cord from the mains
socket.
WARNING!
DO NOT
IMMERSE THE
APPLIANCE, POWER
CORD OR POWER
CORD PLUG IN
WATER OR OTHER
LIQUID.
WARNING!
DO NOT USE
SHARP OBJECTS,
CHEMICALS,
THINNERS, PETROL,
OR OTHER SIMILAR
SUBSTANCES.
NEVER CLEAN THE
MEAT GRINDER
DISASSEMBLING OF THE MEAT GRINDER
1. Remove the food tray from the feed
chute.
2. Release the xing ring and remove
the grinding disc and knife, kubbe
attachment with the cover or sausage
attachment.
3. Carefully pull the worm shaft out of the
grinding chamber. If necessary, turn it
slightly to release it.
4. Turn the locking handle anti-clockwise till
it points the open lock symbol.
5. Carefully remove the grinding
attachment from the motor unit.
CLEANING ACCESSORIES
Wash th xing ring, grinding discs, grinding
knife, worm shaft, grinding chamber, food
tray, food pusher, kubbe attachment, cover,
sausage attachment in warm water with
alittle washing-up liquid. Rinse with clean
water and wipe dry.
WARNING!
WHEN
HANDLING THE
GRINDING KNIFE, BE
VERY CAREFUL NOT
TO GET INJURED
WITH ITS EDGE.
WITH ASTEAM
APPLIANCE.
CARE AND CLEANING
14
CLEANING THE GRINDER
Wipe the outer surface of the motor unit with
asoft sponge slightly moistened in warm
water with alittle washing-up liquid. Wipe
dry using aclean wiping cloth.
Page 15
STORAGE
Store the grinder in ahorizontal position in
awell-ventilated dry place out of reach of
children and animals. It is recommended to
lubricate the grinding knife, grinding discs
and worm shaft with alittle of vegetable oil.
You can store the accessories on the food
tray.
CARE AND CLEANING
15
Page 16
INSTRUCTIONS AND INFORMATION REGARDING THE DISPOSAL OF USED PACKAGING
MATERIALS
Dispose of packaging material at apublic waste disposal site.
DISPOSAL OF USED ELECTRICAL AND ELECTRONIC APPLIANCES
The meaning of the symbol on the product, its accessory or packaging indicates that this product shall not
be treated as household waste. Please, dispose of this product at your applicable collection point for the
recycling of electrical & electronic equipment waste. Alternatively in some states of the European Union or
other European states you may return your products to your local retailer when buying an equivalent new
product. The correct disposal of this product will help save valuable natural resources and help in preventing
the potential negative impact on the environment and human health, which could be caused as aresult of
improper liquidation of waste. Please ask your local authorities or the nearest waste collection centre for
further details. The improper disposal of this type of waste may fall subject to national regulations for nes.
For business entities in the European Union
If you wish to dispose of an electrical or electronic device, request the necessary information from your seller
or supplier.
Disposal in other countries outside the European Union
If you wish to dispose of this product, request the necessary information about the correct disposal method
from local government departments or from your seller.
The product applies all regulations of EU.
Changes to the text, design and technical specications may occur without prior notice and we reserve the right to make
these changes.
The original version is in the Czech language.
Address of the manufacturer: FAST ČR, a.s., USanitasu 1621, Říčany CZ-251 01
16
Page 17
WWW.CATLER.EU
 Loading...