

Page 1
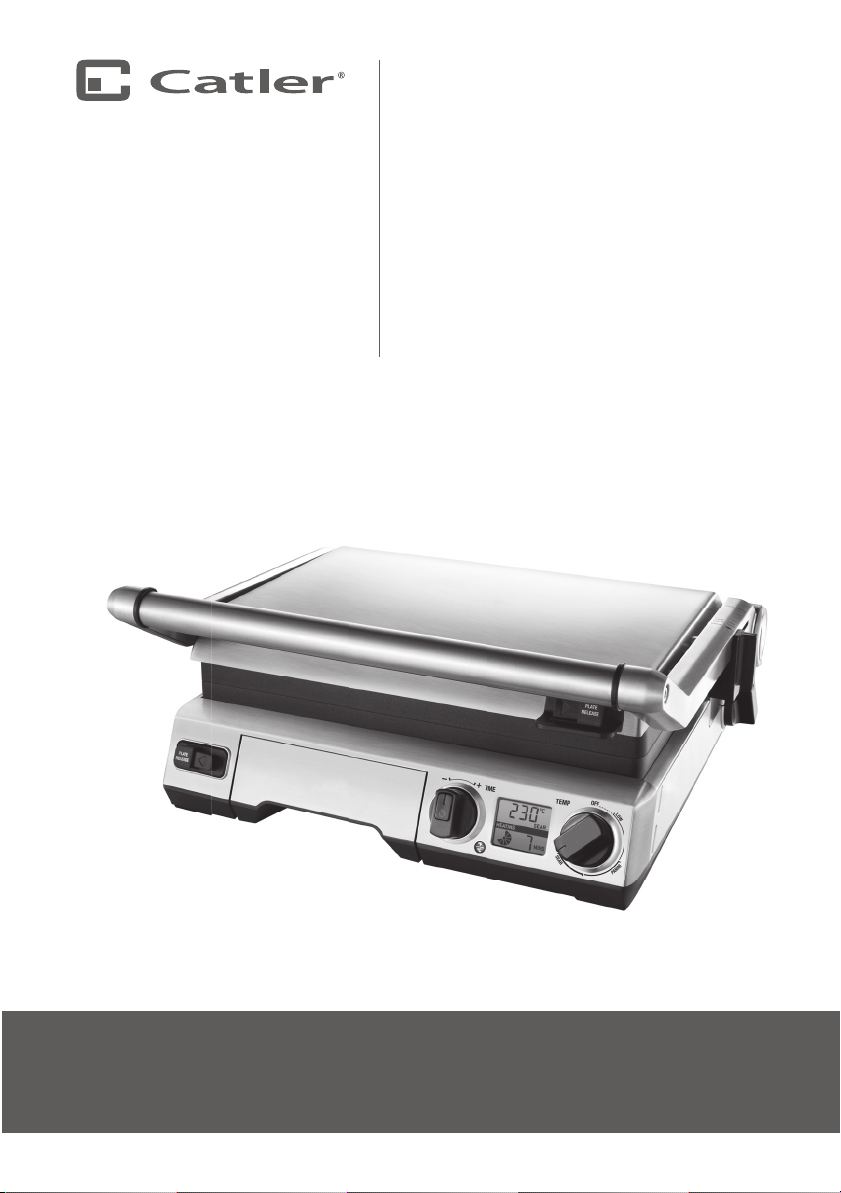
THE SMART
Instructions
for use
GRILL
™
GR 8030
Page 2

THE
SMART
™
GRILL
Page 3

CONTENTS
5 Catler recommends safety rst
8 Know your Catler product
11 Assembling your Catler product
13 Operating your Catler product
22 Grilling tips
25 Care & cleaning
28 Troubleshooting
30 Recipes
CONTENTS
3
Page 4
Congratulations
on the purchase of your new Catler product.
4
CONGRATULATIONS
Page 5

CATLER RECOMMENDS SAFETY FIRST
We at Catler are very safety conscious. We design and manufacture
consumer products with the safety of you, our valued customer,
foremost in mind. In addition, we ask that you exercise adegree of
care when using any electrical appliance and adhere to the following
precaution:
IMPORTANT SAFEGUARDS FOR YOUR CONTACT GRILL GR 8030
WARNING:
AFTER PUTTING INTO OPERATION, THE TOP PLATE
GETS VERY HOT. DO NOT TOUCH THE HOT SURFACE.
TO LIFT UP THE TOP PLATE, USE ONLY THE LEVELLING
HANDLE! WHEN TURNED OFF THE DEVICE, THE TOP
PLATE WILL STAY WARM FOR SOME TIME. BEFORE ANY
FUTHER OPERATION, LET THE DEVICE COOL DOWN. IF
YOUR SKIN GETS IN TOUCH WITH AHOT SURFACE, YOU
RISK ABURN!
• Carefully read all instructions
before operating and save for
future reference.
• Remove any promotional
stickers or labels before using
the Contact Grill for the rst
time.
• Do not place the Contact Grill
near the edge of abench or
table during operation. Ensure
the surface is level, clean and
free of water, etc.
• Do not place the Contact Grill
on or near ahot gas or electric
burner, or where it could touch
aheated oven. Use the Contact
Grill well away from walls.
• Provide adequate space
above and on all sides for air
circulation around the Contact
Grill.
• Do not place the Contact
Grill on any surface that may
be a ected by heat. The
use of aheat resistant mat
is recommended on these
surfaces.
• Contact Grill is not intended
to be operated by means of
en external timer or separate
CATLER RECOMMENDS SAFETY FIRST
5
Page 6

remote control system.
• Always ensure the Contact Grill
is properly assembled before
use.
• Do not touch hot surfaces. Use
the handle to lift and open the
top plate. Take care when using
the Adjustable Grilling Height
Control.
• Do not leave the Contact Grill
unattended when in use.
• Do not place anything on top
of the Contact Grill when the
lid is closed, when in use and
• Always switch the Contact
Grill o , then switch o at the
power outlet, then unplug
and allow to cool, if appliance
is not in use, before cleaning,
before attempting to move
the appliance, disassembling,
assembling and when storing
the appliance.
• Keep the exterior housing and
the non-stick cooking plates
clean. Follow the cleaning
instructions provided in this
book.
when stored.
IMPORTANT SAFEGUARDS FOR ALL ELECTRICAL APPLIANCES
• Fully unwind the cord before
use.
• To protect against electric
shock, do not immerse cord,
plug or appliance in water or
any other liquid.
• Do not let the cord hang over
the edge of atable or counter,
touch hot surfaces, or become
knotted.
• It is recommended to inspect
the appliance regularly. Do
not use the appliance if power
supply cord, plug or appliance
becomes damaged in any way.
6
CATLER RECOMMENDS SAFETY FIRST
Return the entire appliance to
the nearest authorised Catler
service center for examination
and/or repair.
• Any maintenance other than
cleaning should be performed
at an authorised service center.
• This appliance is for household
use only. Do not use this
appliance for anything other
than its intended use. Do not
use in moving vehicles or
boats. Do not use outdoors.
• The installation of aresidual
current device (safety switch)
Page 7

is recommended to provide
additional safety protection
when using electrical
appliances. It is advisable that
asafety switch with arated
not exceeding 30mA be
installed in the electrical circuit
supplying the appliance. See
your electrician for professional
advice.
residual operating current
CAUTION: HOT SURFACE
THE TEMPERATURE OF ACCESSIBLE SURFACES
MAY BE HIGH WHEN THE APPLIANCE IS OPERATING.
• This appliance is not intended
for use by young children
or in rm persons without
supervision.
• Young children should be
supervised to ensure that they
do not play with the appliance.
• This appliance can be used
by children aged from 8 years
and above and persons with
reduced physical, sensory
or mental capabilities or
lack of experience and
knowledge if they have
been given supervision or
instruction concerning use of
the appliance in asafe way
and understand the hazards
involved.
• Children shall not play with the
appliance.
• Cleaning and user maintenance
shall not be made by children
unless they are older than 8
and supervised.
• Keep the appliance and its cord
out of reach of children less
than 8 years.
SAFE THESE INSTRUCTIONS
CATLER RECOMMENDS SAFETY FIRST
7
Page 8

your Catler product
8
ASSEMBLING YOUR FOOD PROCESSOR FP 8010
Know
Page 9
KNOW YOUR CATLER PRODUCT
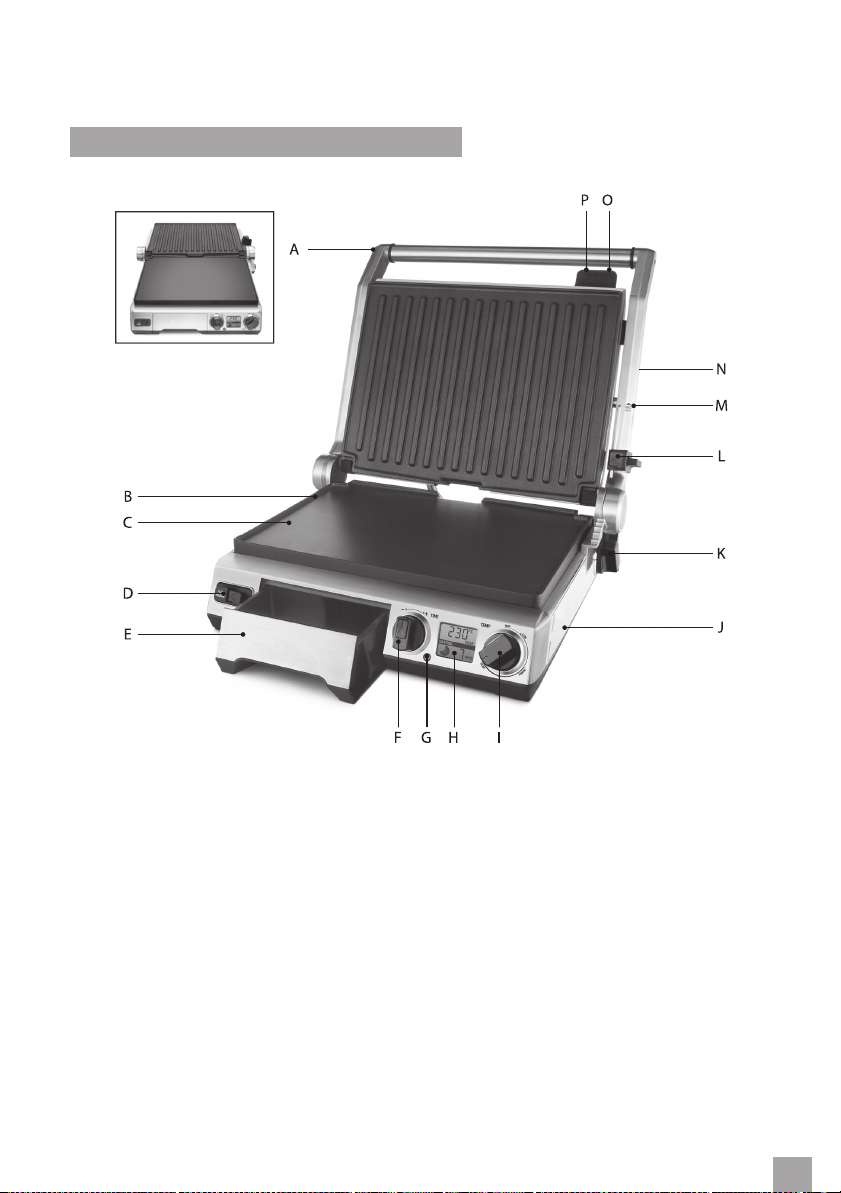
Open Flat BBQ Mode
Enough space for
grilling on both desks
simultaneously.
A. Stainless Steel Housing with Die-Cast
Arms
B. Cast Aluminium, Non-Stick Plates
Coated with titanium infused
Quantanium™ for scratch resistance and
oil free cooking.
C. Removable, Dishwasher Safe Plates
Flat plate for eggs and pancakes, ribbed
plate to sear meats.
D. Bottom PLATE RELEASE
Removes the bottom cooking plate.
Independently remove the top and
bottom cooking plates for easy cleaning
or to interchange plate positions.
E. Integrated, Removable Drip Tray
Catches excess fat for healthier cooking.
In BBQ mode, the unique design drains
fat from both plates into the same drip
tray.
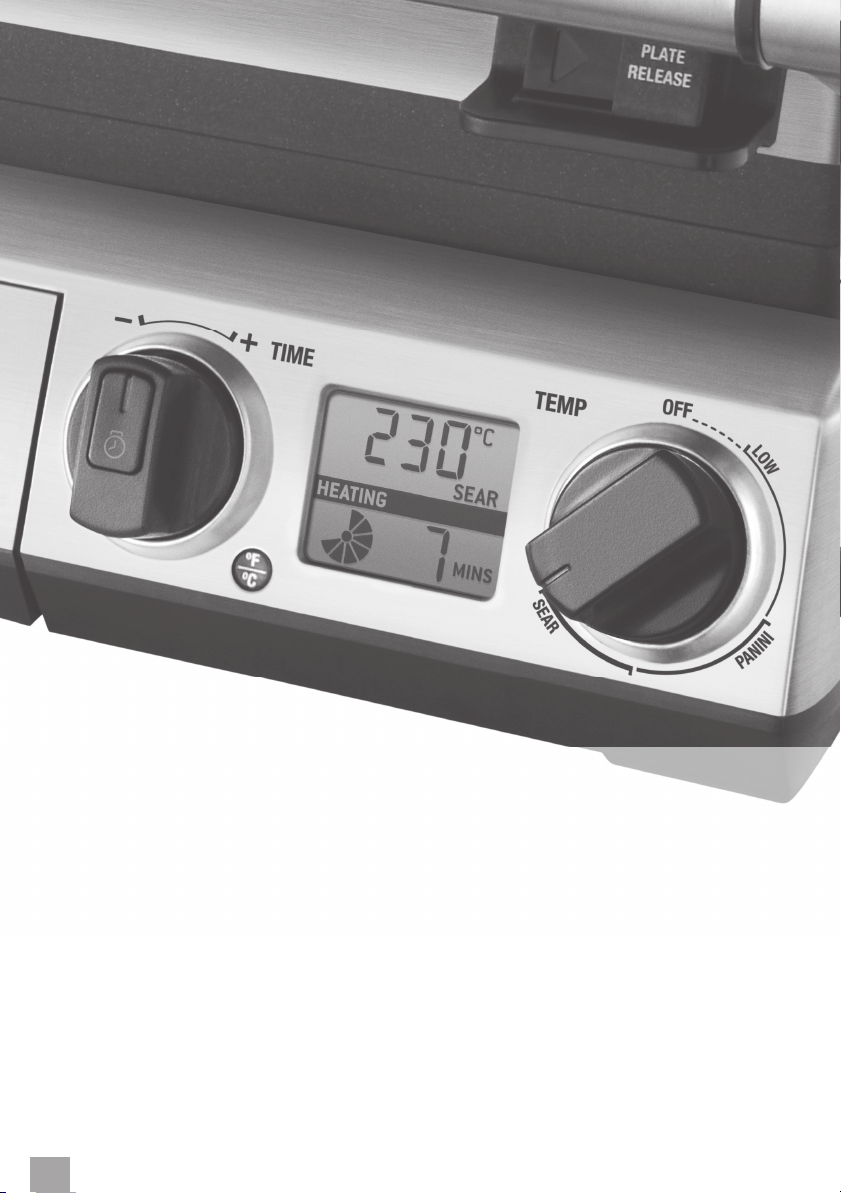
F. 30 Minute Timer Dial with Sound Alert
Pressing the centre button of the dial
activates the count-down timer.
G. Temperature Conversion Button
Converts the default Celsius reading to
Fahrenheit.
H. Temperature Responsive LCD
Backlight illuminates blue (stand by) and
orange (heating/ready).
KNOW YOUR CATLER PRODUCT
9
Page 10

I. Temperature Dial (160°C–230°C)
With LOW, PANINI (sandwich) and SEAR
modes.
J. Cord Storage
Located on the underside of the grill.
K. Adjustable Plate Tilt
Adjusts the angle of the bottom cooking
plate to drain fats, or can be made at for
eggs and pancakes.
L. Multipurpose Control Feature
Controls the grilling height to reduce the
weight of the top plate on delicate foods;
locks the plates for upright storage;
release of BBQ Mode.
M. BBQ MODE Marking
N. Adjustable Height Setting Marking
O. Levelling Support
Integrated into the top plate release, use
to adjust the position of the oating top
plate.
P. Top PLATE RELEASE
Removes the top cooking plate.
1-Hour auto shut-o automatically stops
heating the cooking plates after 1 hour of no
activity.
ELEMENT IQ™
Sensors detect when the cooking plates drop
in temperature and compensate by injecting
heat for rapid recovery back to the selected
cooking temperature. 2400 watt embedded
heating elements ensure consistently
high heat for faster cooking and reduced
preheating time.
10
KNOW YOUR CATLER PRODUCT
Page 11

Assembling
your Catler product
11
Page 12
ASSEMBLING YOUR CATLER PRODUCT
PREPARING THE GRILL FOR USE
1. Remove and safely discard any packing
material and promotional labels from the
grill
2. Wipe the cooking plates and drip tray
with asoft damp sponge. Dry thoroughly.
3. Ensure the drip tray is correctly inserted
into the grill.
4. Ensure the cooking plates are correctly
inserted and securely locked into
position.
NOTE
The grill features 2 × PLATE RELEASE.
These allow you to independently
remove the top and bottom cooking
plates for easy cleaning, or to
interchange plate positions.
To use the PLATE RELEASE: Always
ensure the grill is completely cool.
Use the handle to open the top plate
to a90 degree position. Use the ‘Plate
Release’ on the front, right side of the
top plate to remove the top cooking
plate, and the ‘Plate Release’ on the left
side of the control panel to remove the
bottom cooking plate. Once released,
gently slide the plates o the grill.
NOTE
If the cooking plates are incorrectly
inserted, the LCD screen will display
INSERT PLATE. Use the 2 × PLATE
RELEASE to remove the plates then
re-insert so they securely lock into
position. Always ensure the grill is
completely cool before releasing and
removing the cooking plates.
5. Place the grill on a at, dry surface.
Ensure there is aminimum distance
of 10cm of space on both sides of the
appliance.
6. Unwind the power cord completely and
insert the power plug into agrounded
wall outlet.
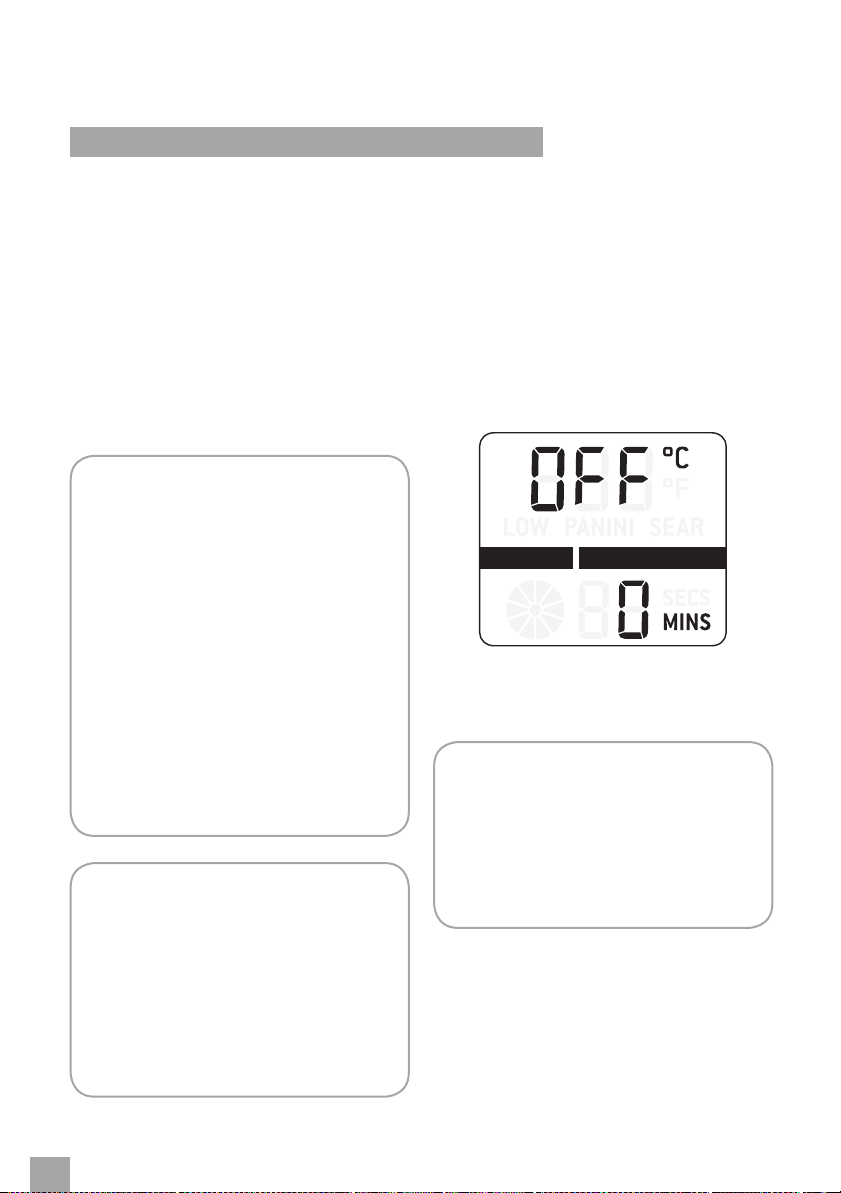
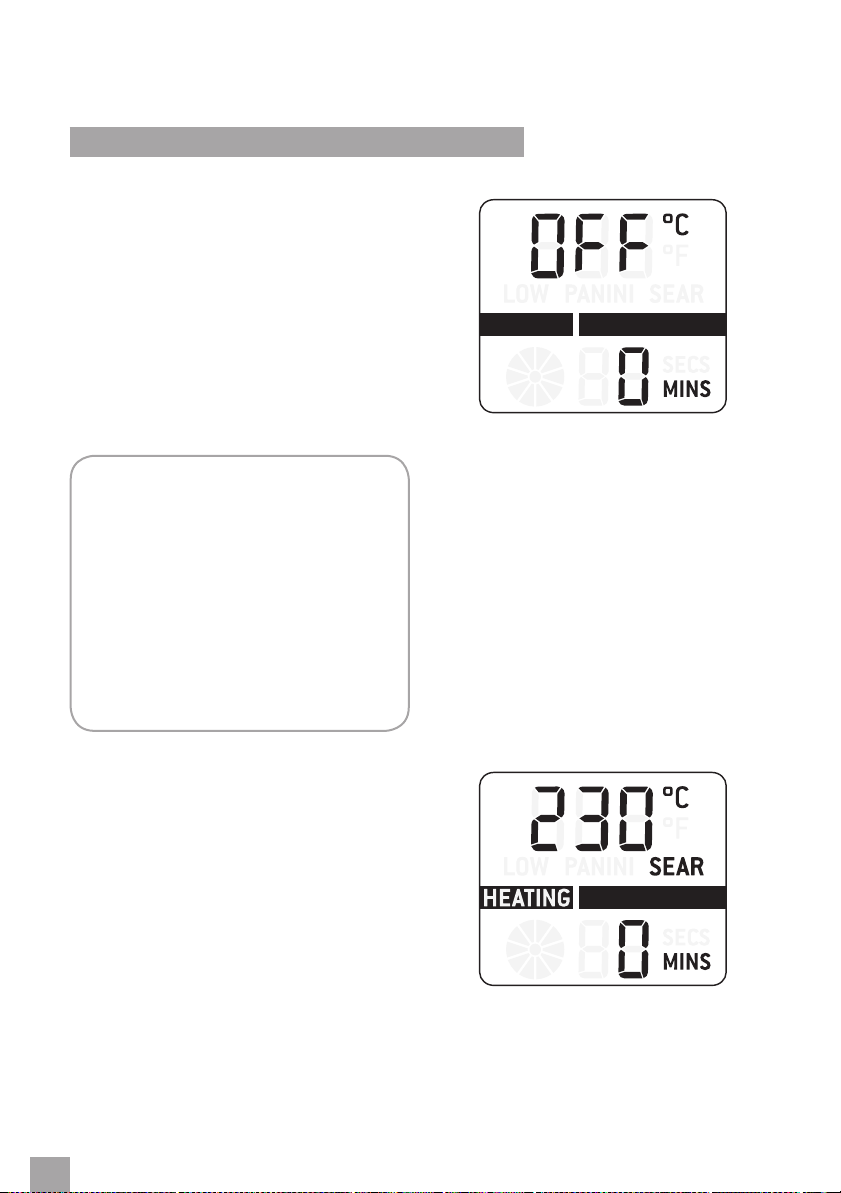
7. The grill alert will sound and the LCD
screen will display OFF and the default ‘0’
zero time.
8. The grill is now ready for the preheating
cycle.
NOTE
When the grill is turned on and
heating for the rst time, it may emit
a ne smoke haze. This is due to the
protective substances on the heating
elements. It is safe and not detrimental
to the performance of the grill.
12
ASSEMBLING YOUR CATLER PRODUCT
Page 13

Operating
your Catler product
Page 14
OPERATING YOUR CATLER PRODUCT
USE IN OPEN FLAT BBQ MODE
The grill opens at to provide an extra large
grilling surface. The ribbed cooking plate
is perfect for searing meats while the at
cooking plate is ideal for eggs, pancakes and
vegetables.
1. Ensure the drip tray is correctly inserted
into the grill.
2. Ensure the cooking plates are correctly
inserted and securely locked into
position.
6. To preheat the grill:
NOTE
If the cooking plates are incorrectly
inserted, the LCD screen will display
INSERT PLATE. Use the 2 × PLATE
RELEASE to remove the plates then
re-insert so they securely lock into
position. Always ensure the grill is
completely cool before releasing and
removing the cooking plates. Refer to
page 12 for more information on using
the PLATE RELEASE.
3. Place the grill on a at, dry surface.
Ensure there is aminimum distance
of 10cm of space on both sides of the
appliance.
4. Unwind the power cord completely and
insert the power plug into agrounded
wall outlet.
5. The grill alert will sound and the LCD
screen will display OFF and the default ‘0’
zero time.
a) Ensure the top plate of the grill is in the
closed, OPEN position. This will ensure
faster, more e cient preheating.
b) Turn the Temperature dial to adjust the
temperature in 5°C/10°F increments.
Rotate the dial to SEAR (210°C–230°C)
for fast preheating, PANINI (Sandwich)
(180°C–205°C), LOW (160°C–175°C) or
select an alternative temperature. The
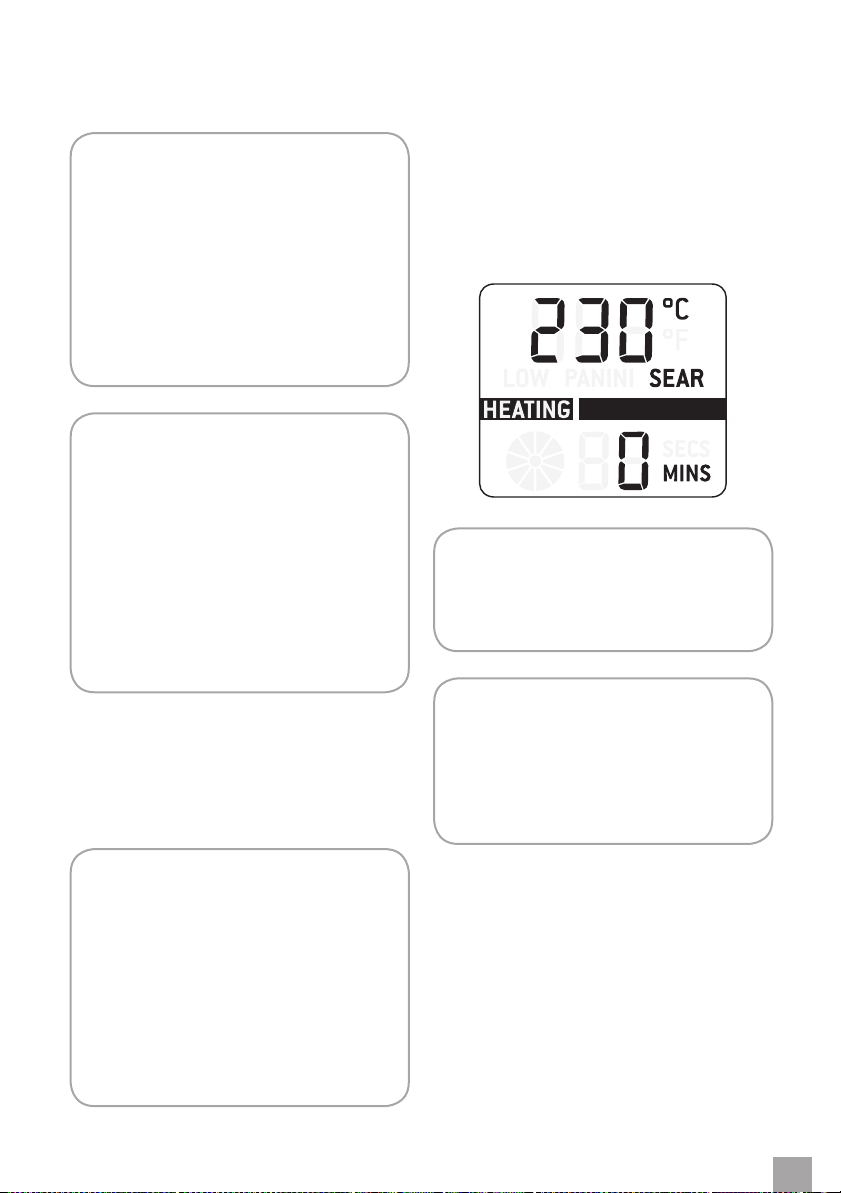
grill will start to heat and the LCD screen
will illuminate orange and display the
selected temperature, HEATING and the
default ‘0’ zero time.
14
OPERATING YOUR CATLER PRODUCT
c) Allow the grill to preheat.
Page 15
NOTE
The grill features atemperature
conversion button on the left side
of the LCD screen. The temperature
reading on the grill is preset to
Celsius. Pressing the temperature
conversion button converts the Celsius
temperature reading into Fahrenheit.
The corresponding °C or °F symbol will
be displayed on the LCD screen.
NOTE
If you have changed the default Celsius
temperature reading to Fahrenheit,
the setting will remain in the memory
of the grill until the Temperature
Conversion Button is pressed asecond
time or the grill is unplugged from
the wall outlet. When the grill is
plugged back into the wall outlet, the
temperature reading will automatically
return to the preset Celsius setting.
7. While the grill is preheating, adjust the
angle of the cooking plates to the desired
position by turning the PLATE TILT dial.
The PLATE TILT dial is located on the
lower back, right side of the grill.
8. Once the grill has preheated to the
selected temperature, the grill alert
will sound and HEATING will no longer
illuminate. The LCD screen will display
the selected temperature and the default
‘0’ zero time.
NOTE
Always allow the grill to completely
preheat to the selected temperature
before cooking.
NOTE
The LCD screen may display HEATING
during the cooking process.
This is normal, indicating that
the correct temperature is being
maintained.
NOTE
We recommend using:
- The angle position to drain fats for
healthier cooking.
- The at position for cooking eggs,
pancakes, Turkish bread, foccacias
and leaner meats. The unique indent
between the two cooking plates
channels juices from both plates into
the same drip tray while cooking.
9. To open the grill into BBQ mode:
a) Ensure the grill has completely preheated
and the LCD screen no longer displays
HEATING.
b) Ensure the top cooking plate is in the
closed, OPEN position. It must be in the
BBQ mode position to release the lock
and open the grill into BBQ mode.
OPERATING YOUR CATLER PRODUCT
15
Page 16
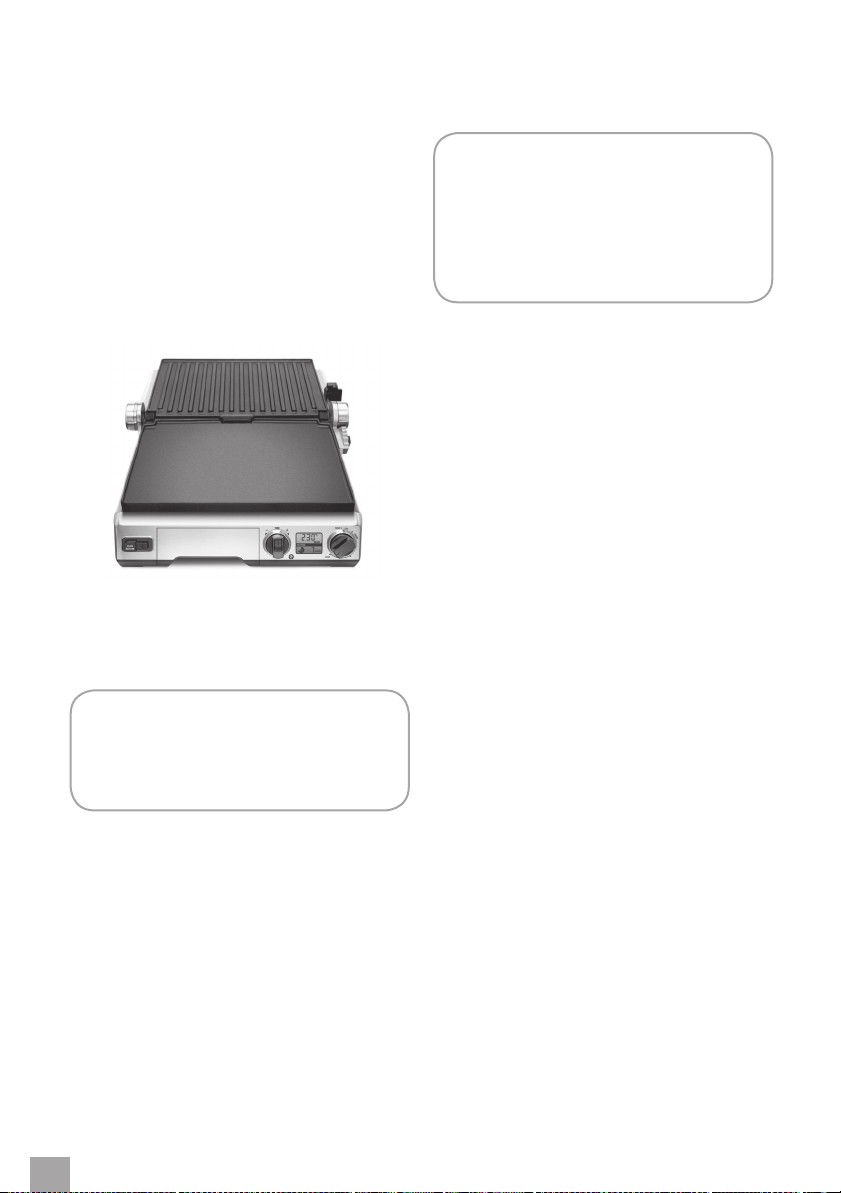
c) With your left hand, grip the handle.
With your right hand, pull the adjustable
height control clip on the right side
of the grill towards you, into the BBQ
mode position. Continue to pull the
clip forward and simultaneously lift the
handle to open, then gently lower the
top plate into the horizontal BBQ mode
position.
10. Place food on either or both of the
cooking plates. Refer to grilling tips
(page 22) and recipes (page 30).
NOTE
Do not use spray-on, non-stick coatings
as these will a ect the performance of
the non-stick cooking plates.
NOTE
The LCD screen may display HEATING
during the cooking process.
This is normal, indicating that
the correct temperature is being
maintained.
11. The grill features an optional countdown
timer which monitors the time elapsed
during cooking. To activate the countdown timer:
a) Ensure the grill has completely
preheated, the LCD screen no longer
displays HEATING and food has been
placed on the cooking plates.
b) Turn the timer dial to adjust the time in
one minute increments up to 30 minutes.
Rotate the dial clockwise to increase the
time, or counter-clockwise to reduce
the time. The LCD screen will display the
selected time.
c) Press the centre button of the timer
dial once to activate the setting. The
LCD screen will display acount-down
indicator and the time will begin to count
down.
16
OPERATING YOUR CATLER PRODUCT
Page 17

NOTE
The count-down timer can be stopped
or paused at any time by pressing the
centre button of the timer dial asecond
time. The LCD screen will no longer
display the count-down indicator.
However, the grill will not turn o , it
will remain heating. To reset or clear
the timer either:
- Rotate the timer dial clockwise
to increase the time, or
counterclockwise to reduce the time.
Or,
- Press the centre button of the
timer dial and hold for 3 seconds
until the time on the LCD screen
displays ‘0’ zero. Rotate the timer dial
clockwise to increase the time, or
counterclockwise to reduce the time.
NOTE
The grill features a1-Hour auto shuto feature. This ensures the grill is not
accidentally left on for an extended
period of time. If the temperature or
timer dials are not adjusted within
1 hour, the auto shut-o feature will
automatically stop heating the cooking
plates. The LCD screen will display OFF
for 5 minutes then cease to illuminate.
However, the default display OFF
and ‘0’ zero time will still be visible.
To re-activate the grill, adjust the
temperature or timer dials.
13. When the food is cooked, remove from
the cooking plates using heat proof
plastic or wooden utensils.
12. Once the selected time has elapsed, the
grill alert will sound and the default ‘0’
zero time will be displayed. However,
the grill will not turn o . It will remain
heating, maintaining the selected
temperature, ready for the next cooking
cycle.
NOTE
The cooking and heating cycle can be
stopped at any time by turning the
Temperature Dial to the OFF position.
The LCD screen will display OFF and
the default ‘0’ zero time.
Allow the grill to cool completely and
disconnect from the wall outlet.
NOTE
Never use metal or sharp utensils as
these can cause damage to the nonstick coating of the cooking plates.
WARNING:
Fully unwind the power cord from the
cord storage before use.
OPERATING YOUR CATLER PRODUCT
17
Page 18
USE AS ACONTACT GRILL
OR SANDWICH PRESS
1. Ensure the drip tray is correctly inserted
into the grill.
2. Ensure the cooking plates are correctly
inserted and securely locked into
position.
NOTE
If the cooking plates are incorrectly
inserted, the LCD screen will display
INSERT PLATE. Use the 2 × PLATE
RELEASE to remove the plates then
re-insert so they securely lock into
position. Always ensure the grill is
completely cool before releasing and
removing the cooking plates. Refer to
page 10 for more information on using
the PLATE RELEASE.
3. Place the grill on a at, dry surface.
Ensure there is aminimum distance
of 10cm of space on both sides of the
appliance.
4. Unwind the power cord completely and
insert the power plug into agrounded
wall outlet.
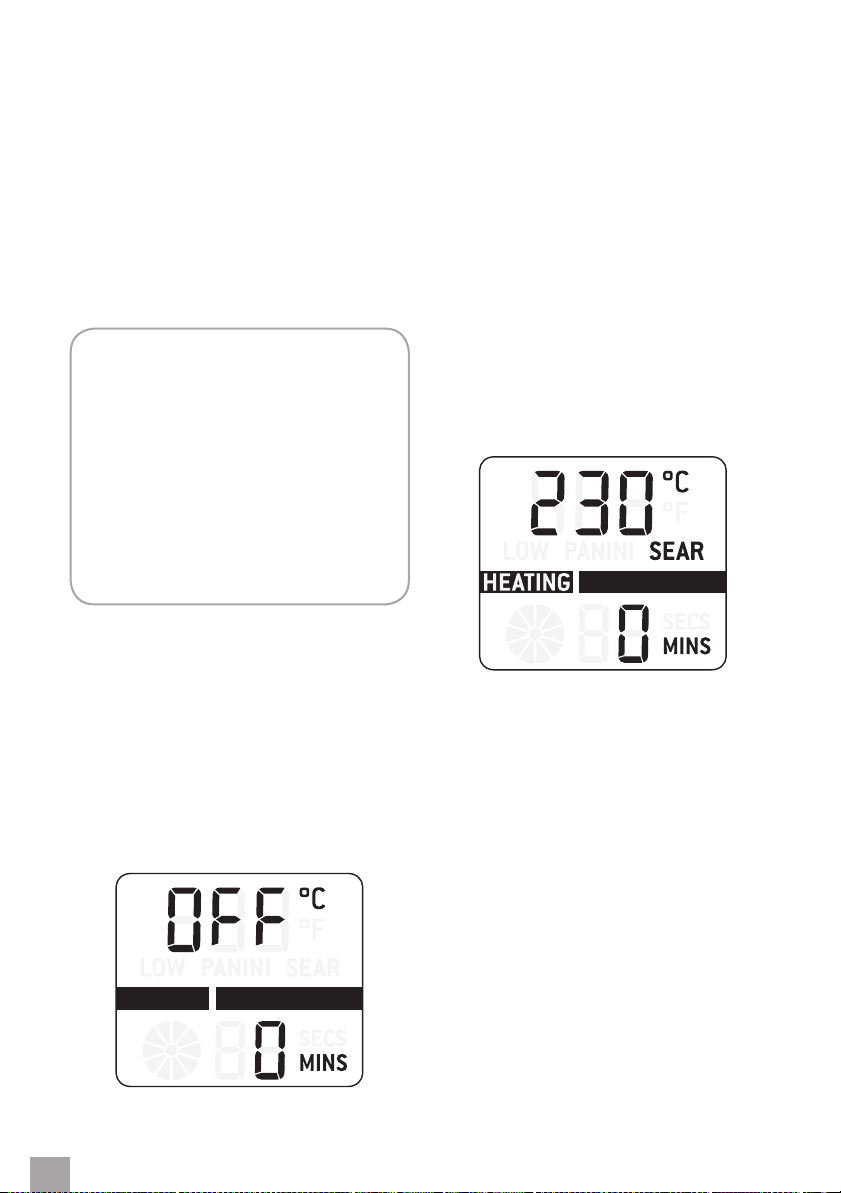
5. The grill alert will sound and the LCD
screen will display OFF and the default ‘0’
zero time.
6. To preheat the grill:
a) Ensure the top plate of the grill is in the
closed, ‘OPEN’ position. This will ensure
faster, more e cient preheating
b) Turn the Temperature dial to adjust the
temperature in 5°C/10°F increments.
Rotate the dial to ‘SEAR’ (210°C-230°C)
for fast preheating, ‘PANINI’(Sandwich)
(180°C-205°C), ‘LOW’ (160°C-175°C) or
select an alternative temperature. The
grill will start to heat and the LCd screen
will illuminate orange and display the
selected temperature, ‘HEATING’ and the
default ‘0’ zero time.
c) Allow the grill to preheat.
18
OPERATING YOUR CATLER PRODUCT
Page 19
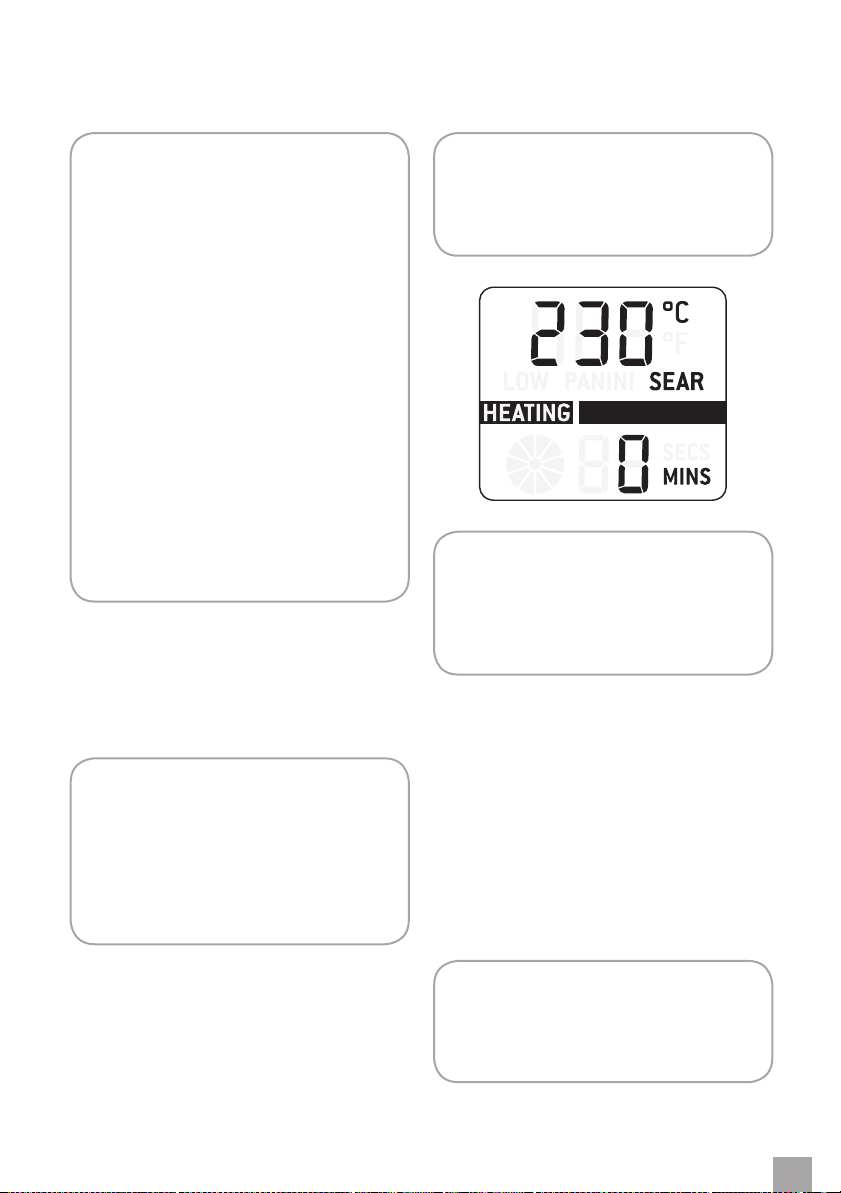
NOTE
The grill features atemperature
conversion button on the left side
of the LCD screen. The temperature
reading on the grill is preset to
Celsius. Pressing the Temperature
Conversion Button converts the Celsius
temperature reading into Fahrenheit.
The corresponding °F or °C symbol
will be displayed on the LCD screen. If
you have changed the default Celsius
temperature reading to Fahrenheit,
the setting will remain in the memory
of the grill until the temperature
conversion button is pressed asecond
time or the grill is unplugged from
the wall outlet. When the grill is
plugged back into the wall outlet, the
temperature reading will automatically
return to the preset Celsius setting.
7. While the grill is preheating, adjust the
angle of the bottom cooking plate to the
desired position by turning the PLATE
TILT dial. The PLATE TILT dial is located on
the lower back, right side of the grill.
NOTE
We recommend using:
- The angle position to drain fats for
healthier cooking.
- The at position for cooking eggs,
pancakes, Turkish bread, foccacias
and leaner meats.
NOTE
Always allow the grill to completely
preheat to the selected temperature
before cooking.
NOTE
The LCD screen may display HEATING
during the cooking process. This is
normal, indicating that the correct
temperature is being maintained.
9. To open the grill:
a) Ensure the grill has completely preheated
and the LCD screen no longer displays
‘HEAT!
b) Ensure the top cooking plate is closed.
The Adjustable Height Control clip,
located on the right side of the top plate,
should be in the ‘OPEN’ .
c) Use the handle to open the top plate to
a90 degree position.
10. Place food on the bottom cooking plate.
8. Once the grill has preheated to the
selected temperature, the grill alert
will sound and HEATING will no longer
illuminate. The LCD screen will display
the selected temperature and the default
‘0’ zero time.
NOTE
Do not use spray-on, non-stick coatings
as these will a ect the performance of
the non-stick cooking plates.
OPERATING YOUR CATLER PRODUCT
19
Page 20
NOTE
For best cooking results when toasting
sandwiches on the PANINI setting.
- Always place sandwiches in the
centre bottom plate.
- Toasting should take approximately
5–8 minutes. Exact toasting time will
be amatter of preference and the
type of bread and llings used. For
more tips and tricks, refer to grilling
tips (page 22) and recipes (page 30).
NOTE
The LCD screen may display HEATING
during the cooking process. This is
normal, indicating that the correct
temperature is being maintained.
11. Use the handle to close the top cooking
plate. The top cooking plate has two
features designed to produce optimum
cooking results:
a) Floating top plate. The top cooking plate
is hinged, allowing the top plate to be
positioned horizontally on the food
surface. This ensures the front of the
food is as evenly cooked as the back. It
also allows the top plate to oat above
the food surface, radiating heat to create
open sandwich style melts.
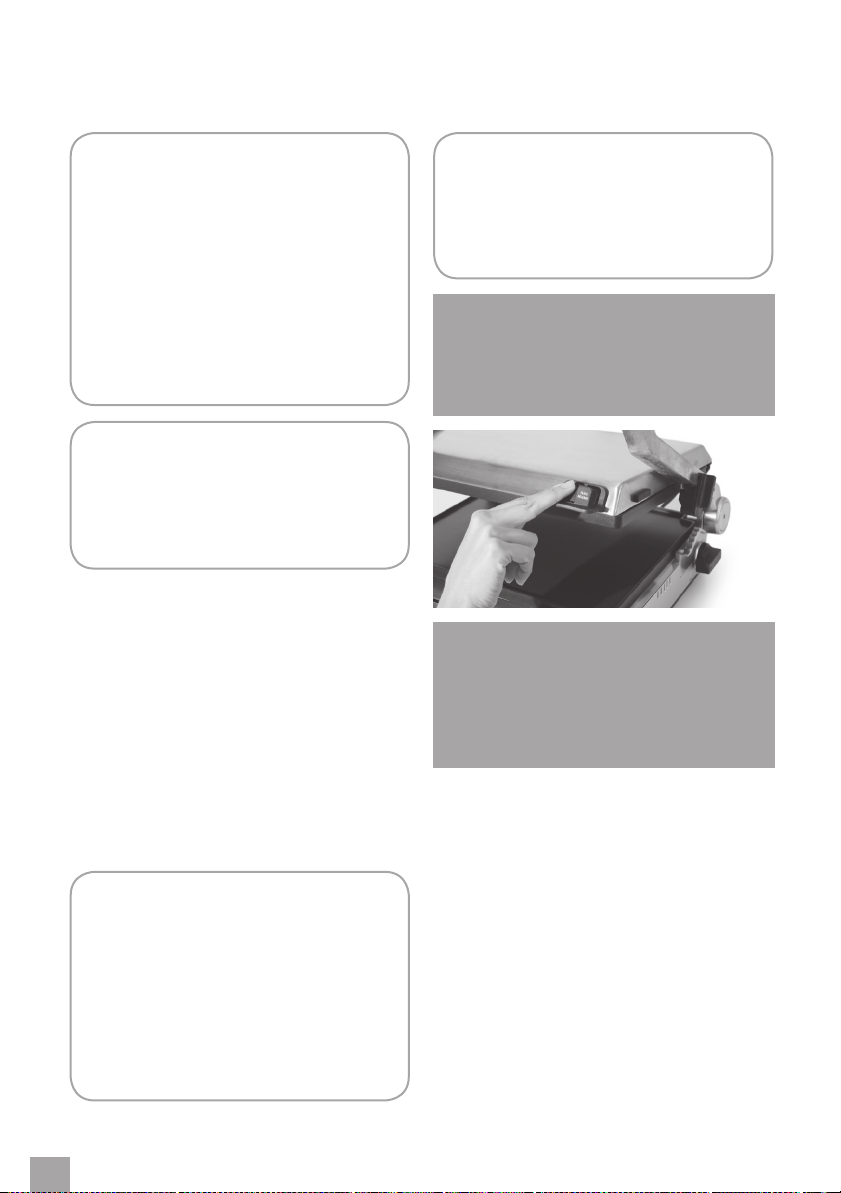
NOTE
The surfaces of the grill are hot during
and after operation. Always use the
integrated leveling support/PLATE
RELEASE on the front, right side of the
top cooking plate when adjusting the
position of the top plate.
Alternatively, use protective hot pads
or insulated oven mitts.
NOTE
Never use the leveling handle to open
the top cooking plate. Always use
the handle to open and close the top
cooking plate.
WARNING:
The levelling support may get hot
during and after operation. Always
use the levelling support as pictured.
WARNING:
Never grip the levelling support or
use it to open the top cooking plate.
Always use the grill handle to open
and close the top cooking plate.
b) Adjustable height control. This
feature reduces the weight of the top
plate on delicate foods like sh and
accommodates varying thicknesses of
food like artisan breads. Located on the
right side of the top plate, the clip xes
the top plate to arange of positions
above the bottom plate. To set the
adjustable height control, use the handle
to lift the top plate and simultaneously
move the adjustable height control
clip to the desired height. Then slowly
lower the top plate until it rests on the
adjustable height control clip.
20
OPERATING YOUR CATLER PRODUCT
Page 21

12. The grill features an optional countdown
timer which monitors the time elapsed
during cooking. To activate the countdown timer:
a) Ensure the grill has completely
preheated, the LCD screen no longer
displays HEATING and food has been
placed on the bottom cooking plate.
a) Turn the Timer dial to adjust the time in
one minute increments up to 30 minutes.
Rotate the dial clockwise to increase the
time, or counter-clockwise to reduce
the time. The LCD screen will display the
selected time.
Press the centre button of the timer dial
a)
once to activate the setting. The LCD
screen will display acount-down indicator
and the time will begin to count down.
NOTE
The count-down timer can be stopped
or paused at any time by pressing the
centre button of the timer dial asecond
time. The LCD screen will no longer
display the count-down indicator.
However, the grill will not turn o , it
will remain heating.
To reset or clear the timer either:
- Rotate the Timer Dial clockwise
to increase the time, or
counterclockwise to reduce the time.
Or,
- Press the centre button of the
timer dial and hold for 3 seconds
until the time on the LCD screen
displays ‘0’ zero. Rotate the timer dial
clockwise to increase the time, or
counterclockwise to reduce the time.
maintaining the selected temperature,
ready for the next cooking cycle.
NOTE
The cooking and heating cycle can be
stopped at any time by turning the
temperature dial to the OFF position.
The LCD screen will cease to illuminate,
displaying OFF and the default ‘0’ zero
time. Allow the grill to cool completely
and disconnect from the wall outlet.
NOTE
The grill features a1-Hour auto shuto
feature. This ensures the grill is not
accidentally left on for an extended
period of time. If the temperature or
timer dials are not adjusted within
1 hour, the auto shut-o feature will
automatically stop heating the cooking
plates. The LCD screen will display OFF
for 5 minutes then cease to illuminate.
However, the default display OFF
and ‘0’ zero time will still be visible.
To re-activate the grill, adjust the
temperature or timer dials.
14. When the food is cooked, remove from
the cooking plates using heat proof
plastic or wooden utensils.
NOTE
Never use metal or sharp utensils as
these can cause damage to the nonstick coating of the cooking plates.
13.
Once the selected time has elapsed, the
grill alert will sound and the default ‘0’
zero time will be displayed. However, the
grill will not turn o . It will remain heating,
WARNING:
Fully unwind the power cord from the
cord storage before use.
OPERATING YOUR CATLER PRODUCT
21
Page 22

Grilling Tips
Page 23

GRILLING TIPS
GRILLING TIPS
Meats
Recommended cuts:
• Beef - sirloin (New York), rump, rib eye
(scotch llet), llet.
• Lamb - trim lamb leg steaks, llet eye of
loin, cutlets and diced lamb.
• Pork - butter y loin steaks, spare ribs, leg
steaks, llets, diced pork.
• It is not recommended to cook items
with thick bones such as T-bone steaks.
• Tougher cuts such as beef blade,
topside steak, lamb forequarter or neck
chops can be used. To tenderize these
cuts, marinate them for afew hours
or overnight in amarinade with wine
or vinegar to help break down the
connective tissue.
• If using amarinade recipe or
premarinated meats from your meat
retailer, drain excess marinade o and
dab the meat with paper towels before
placing on the grill. Some marinades
contain high sugar levels which can
scorch on the cooking plate.
• Do not salt meat before cooking. Salt
will draw out the juices, toughening the
meat.
• Do not pierce meat with afork or cut
meat while cooking. This will let the
juices escape, resulting in atougher, dry
steak. Use tongs instead
• Do not over cook meat. Some meats are
better served pink and juicy.
• Parboiling sausages can alleviate the
need to pierce sausages before cooking.
• When removing sh pieces from the grill,
use a at heat resistant plastic spatula to
support the food.
JUDGING DONENESS
There is an art to determining when your
steak, lamb chop or cutlet is cooked to the
correct degree of doneness – rare, medium
rare, medium, medium well or well done –
but it is easily mastered with these handy
hints and tips.
Rare
Cook for afew minutes per side, depending
on thickness. Turn once only. Cook until
steak feels very soft with back of tongs.
Ameat thermometer will show the internal
temperature of arare steak as 55–60°C.
Medium rare
Cook on one side until moisture is just
visible on top surface. Turn once only. Cook
on the other side until surface moisture is
visible. Steak will be cooked to medium
rare when it feels soft with back of tongs.
Ameat thermometer will show the internal
temperature of amedium rare steak as
60–65°C.
Medium
Cook on one side until moisture is pooling on
top surface. Turn once only. Cook on second
side until moisture is visible. Steak will be
cooked to medium when it feels springy
with back of tongs. Ameat thermometer will
show the internal temperature of amedium
steak as 65–70°C.
Medium well
Cook on one side until moisture is pooling
on top surface. Turn and cook on second side
until moisture is pooling on top. Reduce heat
slightly and continue to cook until steak feels
rm with back of tongs. Ameat thermometer
will show the internal temperature of
amedium well steak as 70–75°C.
GRILLING TIPS
23
Page 24

Well done
Cook on one side until moisture is pooling
on top surface. Turn and cook on second side
until moisture is pooling on top. Reduce heat
slightly and continue to cook until steak feels
very rm with back of tongs.
Ameat thermometer will show the internal
temperature of awell done steak as 75°C.
NOTE
The information above has been kindly
donated by the Meat and Livestock
Association of Australia.
NOTE
Steaks do not need turning if cooking
in contact position. Turn steaks once
only when grilling in open at BBQ
mode.
WARNING:
Do not immerse the body, power cord
or power plug in water or any other
liquid as this may cause electrocution.
24
GRILLING TIPS
Page 25

Care and cleaning
Page 26

CARE & CLEANING
Ensure the grill is turned OFF by turning the
Temperature dial to the OFF position.
The grill is OFF when the LCD screen displays
OFF and the default ‘0’ zero time.
Remove the power plug from the wall outlet.
Allow the grill to cool completely before
disassembling and cleaning.
Always clean the outer body, drip tray and
cooking plates after each use to prevent
abuild-up of ingredients.
NOTE
Do not use abrasive cleansers or metal
scouring pads on any of the interior
or exterior surfaces of the grill. These
will scratch the surfaces and damage
the non-stick coating on the cooking
plates.
CLEANING THE OUTER BODY
Wipe the outer body with asoft, damp
sponge. Anon-abrasive liquid cleanser or
mild spray solution may be used to avoid
build-up of stains. Apply the cleanser to the
sponge, not the grill surface, before cleaning.
Rinse. Let all surfaces dry thoroughly prior to
inserting the power plug into awall outlet.
CLEANING THE DRIP TRAY
After each use, slide out the drip tray and
discard contents. Wash the tray in warm
soapy water with asoft, damp sponge.
Anon-abrasive liquid cleanser may be
used to avoid build-up of stains. Apply the
cleanser to the sponge, not the tray, before
cleaning.
Rinse and dry thoroughly. Always ensure
to re-insert the drip tray into the grill after
cleaning and prior to inserting the power
plug into awall outlet.
WARNING:
Extreme caution must be used when
handling the drip tray containing hot
fats and juices.
CLEANING THE COOKING PLATES
1. Wipe the cooking plates with asoft cloth
to remove food residue.
2. Alternatively, release and remove the
cooking plates:
− Always ensure the grill is completely
cool.
− Use the handle to open the top plate
to a90 degree position.
− Use the PLATE RELEASE on the front,
right side of the top plate to remove
the top cooking plate, and the PLATE
RELEASE on the left side of the control
panel to remove the bottom cooking
plate.
− Once released, gently slide the plates
o the grill.
3. Place the cooking plates in the
dishwasher (top shelf only).
4. Alternatively, wash the cooking plates
in hot soapy water with asoft, damp
sponge. Anon-abrasive liquid cleanser
may be used to avoid build-up of stains.
Apply the cleanser to the sponge, not the
plate, before cleaning. Remove stubborn
residue with anon-abrasive plastic
scouring pad or nylon washing brush.
26
CARE & CLEANING FOR YOUR CATLER PRODUCT
Page 27

NOTE
The underside of the cooking plate
may discolor over time and can form
alayer of corrosion. This is normal. Any
discoloration that may occur to either
side of the cooking plate will only
detract from the appearance of the
plate and will not a ect the cooking
performance.
To remove discoloration or corrosion,
use anon-abrasive plastic scouring pad
or nylon washing brush. Rinse and dry
thoroughly.
NOTE
Ensure the round pad on the underside
of the plate is clean.
5. Rinse and dry thoroughly. Always
ensure the cooking plates are correctly
re-inserted and securely locked back
into position after cleaning and prior
to inserting the power plug into awall
outlet.
STORAGE
1. Ensure the grill is turned OFF by turning
the Temperature dial to the OFF position.
The grill is OFF when the LCD screen
displays OFF and the default ‘0’ zero time.
Remove the power plug from the wall
outlet.
2. Allow the grill, cooking plates and drip
tray to cool completely.
3. Ensure the grill, cooking plates and drip
tray are clean and dry.
4. Ensure the drip tray is correctly reinserted into the grill.
5. Ensure the cooking plates are correctly
re-inserted and securely locked into
position.
6. Ensure the cooking plates are locked
together by sliding the adjustable height
control away from you, into the LOCK
position.
7. Wrap the power cord in the cord storage
located on the underside of grill.
8. Store on a at, dry, level surface.
Alternatively, the grill may be stored in an
upright position.
NOTE
Do not use abrasive cleansers or metal
scouring pads to clean the cooking
surface of the plates. These will
damage the non-stick coating on the
cooking plates.
CARE & CLEANING FOR YOUR CATLER PRODUCT
27
Page 28

Troubleshooting
Page 29
TROUBLESHOOTING
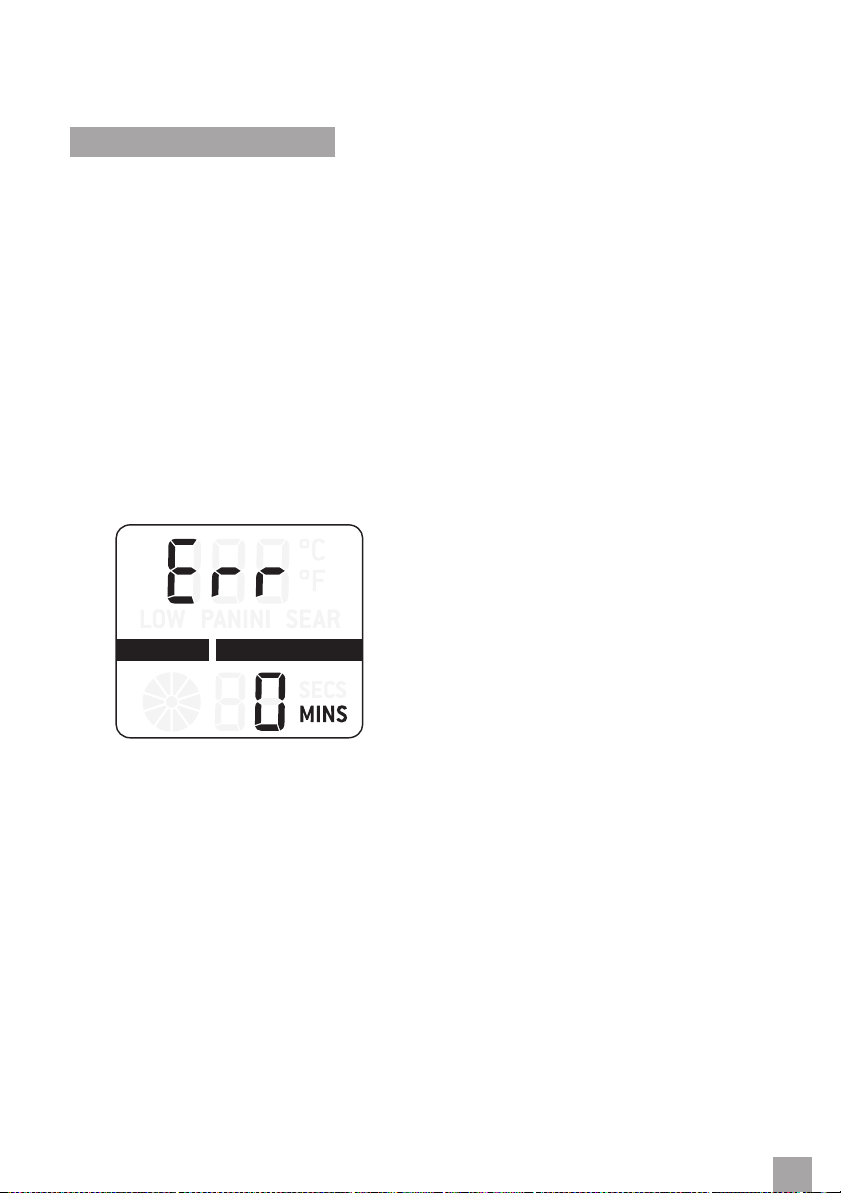
ERROR MODE
When the LCD screen displays ‘Err’ error
mode:
1. Unplug the grill from the wall outlet
2. Ensure the grill is completely cool.
3. Ensure the cooking plates are correctly
and securely inserted into position.
4. Re-insert the plug into the wall outlet.
5. The LCD screen should no longer display
‘Err’ error Mode.
6. If the problem continues, call Catler
Customer Service.
TROUBLESHOOTING
29
Page 30

Recipes
Page 31

MEAT
AUSSIE BURGER
Serves 4
INGREDIENTS
500g minced beef
1 cup fresh bread crumbs
1 small onion, peeled and nely chopped
1 teaspoon commercially prepared crushed
garlic
1 tablespoon dried parsley akes
1 egg, lightly beaten
To cook and serve;
6 bacon rashers
6 hamburger buns or full grain rolls 1 × 250g
tin beetroot slices, drained
2 vine ripened tomatoes thinly sliced, tomato
sauce
6 cheddar cheese slices
1
/4 iceberg lettuce heart, shredded
METHOD
1. Pre-heat grill using SEAR setting.
2. Combine all ingredients in alarge mixing
bowl and mix thoroughly.
Form mince into 4 patties. Set aside.
3. Place patties on bottom plate of
preheated grill and allow the top plate to
rest on the patties.
4. Adjust the grilling height control to the
thickness of the pattie. Cook for 4–5
minutes.
5. Place bacon on grill. Lightly spread buns
with butter or margarine.
6. Place apattie on each bun and top with
bacon, beetroot, tomato, tomato sauce
and cheese. Add lettuce to burgers and
place reserved roll halves on top.
MARINATED NEW YORK CUT STEAK
Serves 4
INGREDIENTS
1 cup/250ml red wine
2 tablespoons olive oil
1 tablespoon Dijon style mustard
1 teaspoon commercially prepared minced
garlic
4 New York cut steaks - cut 3cm thick
METHOD
1. Pre-heat grill using SEAR setting.
2. Marinade at room temperature for 30
minutes to 1 hour.
3. Remove steaks from marinade and place
on preheated grill. Cook for 3 minutes for
medium rare.
Serve with creamy mashed potato and acrisp
salad.
RECIPES
31
Page 32

CHILLI BEEF SALAD WITH CASHEWS
Serves 4
OREGANO LAMB KEBABS
Serves 4
INGREDIENTS
500g rump or sirloin steak
3 mild red chillies, chopped
2 tablespoons soy sauce
1 teaspoon crushed ginger
1
/2 teaspoon crushed garlic
Salad greens
To serve
1
/2 cup chopped cashew nuts
soy sauce
METHOD
1. Preheat grill to SEAR temperature setting
until the HEATING display turns o .
2. Slice steak into thin strips and combine
with chilli, soy, ginger and garlic. Allow to
marinate for 20 minutes.
3. Place salad greens in individual serving
bowls.
4. Turn the base plate tilt dial to at, open
the grill and cook beef on preheated at
plate for 1–2 minutes each side.
5. Place on top of greens and sprinkle with
cashew nuts and soy sauce.
INGREDIENTS
1 tablespoon olive oil
1 tablespoon lemon juice
1 tablespoon dried oregano leaves
1 teaspoon commercial prepared minced
garlic
500g boneless lean lamb, cut into 3cm cubes
freshly ground black pepper
4 kebab skewers
METHOD
1. Pre-heat grill using SEAR setting.
2. Combine oil with lemon juice, oregano
and garlic in alarge mixing bowl. Add
lamb and marinate for 30 minutes before
threading onto 4 kebab skewers.
3. Season each kebab generously with
pepper and place on preheated grill.
4. Allow the top plate to rest lightly on
lamb. Cook for 4–5 minutes.
Serve with crusty bread and aGreek salad of
salad leaves, black olives and crumbled feta
cheese.
32
RECIPES
Page 33

RED WINE AND ROSEMARY LAMB STEAKS
Serves 8
THAI GREEN CURRY LAMB CUTLETS
Serves 4
INGREDIENTS
8 × 125g lamb steaks
2 tablespoons rosemary leaves
1
/3 cup red wine
freshly ground black pepper
1
/4 teaspoon crushed garlic
To serve
Steamed green beans
METHOD
1. Preheat grill to SEAR temperature setting
until the HEATING display turns o .
2. Place steaks in ashallow dish. Combine
rosemary, wine, pepper and garlic and
pour over steaks. Allow to marinate for at
least 20 minutes.
3. Turn the base plate tilt dial to at, open
the grill. Place prepared steaks onto
preheated ribbed grill plate and cook for
3 minutes each side until cooked to your
liking. Serve with steamed green beans.
NOTE
If using amarinade recipe or premarinated meats from your meat
retailer, drain excess marinade o and
dab with paper towels before placing
on the grill. Some marinades contain
high sugar levels which can scorch on
the grill plate when cooked.
INGREDIENTS
1 tablespoon Thai green curry paste
3 tablespoons coconut cream
1 tablespoon chopped coriander
12 lamb cutlets, trimmed
To serve
Steamed rice and greens
METHOD
1. Pre-heat grill using SEAR setting.
2. Combine curry paste, coconut cream
and coriander. Spoon over cutlets and
marinade for 20 minutes.
3. Place cutlets on preheated grill and lower
top plate and cook for 4 minutes each
side or until cooked to your liking.
Serve with steamed rice and greens.
RECIPES
33
Page 34

CHICKEN
TERIYAKI CHICKEN FILLETS
Serves 4
INGREDIENTS
4 half chicken breast llets
1 tablespoon mirin
2 tablespoons soy sauce
2 teaspoons caster sugar
2 teaspoons cooking sake
METHOD
1. Pre-heat grill using SEAR setting until the
green READY light illuminates.
2. Combine mirin, soy sauce, sugar and
sake. Place chicken in astainless steel
baking dish and pour prepared marinade
over. Allow to stand for 30 minutes
before cooking.
3. Place chicken on preheated grill and
allow top plate to gently rest on chicken.
4. Cook for 4–5 minutes until chicken is
cooked through.
5. Remove and allow to rest for 5 minutes
before serving on abed of steamed
rice. Garnish with lemon wedges and
accompany with asalad of green leaves.
Serve with lemon wedges steamed rice salad of
green leaves.
GRILLED CHICKEN WITH LEMON THYME
Serves 4
INGREDIENTS
4 chicken breast llets
2 teaspoons olive oil
2 teaspoons crushed garlic
2 tablespoons lemon thyme leaves
1 teaspoon grated lemon rind
2 tablespoons lemon juice
cracked black pepper
To serve
lemon wedges
crisp green salad
METHOD
1. Preheat grill to SEAR temperature setting
until the HEATING display turns o .
2. Place chicken breasts in large at dish.
Combine oil, garlic, lemon thyme, lemon
rind and juice and pepper and mix well.
Pour over chicken breasts. Allow to
marinate for 15 minutes.
3. Turn the base plate tilt dial to at, open
the preheated grill, place chicken on
ribbed grill and cook for 3 minutes each
side or until cooked to your liking Slice
breasts diagonally, serve with lemon
wedges and agreen salad.
NOTE
Mirin is sweet Japanese rise wine. It is
used mainly as cooking avoring. It is
sometimes called "sweet saké" and that
what it is. But Mirin is not drunk itself, it
is used preferably for cooking.
34
RECIPES
Page 35

SEAFOOD
LEMON AND SOY MARINATED SALMON
Serves 4 as an entrée
INGREDIENTS
300g piece salmon llet, skin removed
2 tablespoons soy sauce
1 teaspoon wasabi paste
2 tablespoons lemon juice
2 teaspoons sesame oil
To serve
Pickled ginger
Sauteed spinach
METHOD
1. Preheat grill to SEAR temperature setting
until the HEATING display turns o .
2. Cut salmon into 1cm thick slices.
Combine soy, wasabi, lemon juice and
sesame oil. Pour over salmon and allow
to marinate for 20 minutes.
3. Turn the base plate tilt dial to at, open
the grill, place salmon on preheated at
plate and cook for 20–30 seconds each
side or until seared.
Serve salmon with spinach and ginger.
HOT GINGERED PRAWNS
Serves 4
INGREDIENTS
1 kg green king prawns, peeled with tails
intact
1 teaspoon crushed garlic
1
/4 cup soy sauce
1
/4 cup dry white wine
1 tablespoon nely shredded ginger
350ml Thai sweet chilli sauce
Wooden skewers, soaked in water
To serve
Steamed jasmine rice
Sauteed Chinese broccoli
METHOD
1. Preheat grill to SEAR temperature setting
until the HEATING display turns o .
2. Thread prawns onto soaked wooden
skewers approximately 4 per skewer.
3. Combine remaining ingredients and mix
well, pour over prawn skewers. Place
skewers on pre-heated grill and lower
top plate, cook for 1 minute or until pink
and tender.
Serve with steamed rice and broccoli.
RECIPES
35
Page 36

BABY OCTOPUS WITH CHILLI
AND GARLIC
Serves 4
ATLANTIC SALMON STEAK WITH
TARRAGON AND PEPPER CRUST
Serves 4
INGREDIENTS
750g baby octopus, cleaned
2 tablespoons olive oil
1 tablespoon Thai style sweet chilli sauce
juice and zest of 1 lime
1 teaspoon commercially prepared minced
garlic
freshly ground black pepper
To garnish; lime wedges coriander sprigs
METHOD
1. Pre-heat grill using SEAR setting.
2. In alarge mixing bowl combine octopus
with oil, chilli sauce, lime zest, juice and
garlic. Toss well to combine and season
with pepper.
3. Place octopus on pre-heated grill and
lower press. Allow to cook for 3 minutes
4. Remove from grill and serve in abowl on
abed of vermicelli noodles, garnish with
lime and coriander.
INGREDIENTS
2 tablespoons olive oil
2 tablespoons dried tarragon leaves
freshly ground black pepper
4 Atlantic salmon steaks - weighing approx.
180g each
To garnish; lime or lemon wedges
METHOD
1. Pre-heat grill using SEAR setting.
2. Combine oil with tarragon and
agenerous and coarse grinding of black
pepper.
3. Adjust the grilling height control to just
touch the top of the sh steak.
4. Allow to cook for 2 minutes for sh to
be golden on the outside and ‘rosy’ pink
on the inside. Cook alittle longer if you
prefer your sh more cooked.
5. Remove from grill and serve immediately.
To serve; shoe string fries or steamed baby
potatoes.
36
RECIPES
Page 37

SANDWICH
BAGEL WITH SMOKED SALMON
AND CAPERS
Serves 4
INGREDIENTS
4 bagels – split
4 tablespoons cream cheese
8 slices smoked salmon
6 shallots, peeled and sliced nely lengthwise
1 tablespoon capers, drained and chopped
1 lemon freshly ground black pepper
METHOD
1. Preheat grill to PANINI (sandwich)
temperature setting until the HEATING
display turns o .
2. Spread base of bagels with cream cheese.
Lay salmon slices over, divide shallots
between the 4 bagels, sprinkle over
capers and squeeze with lemon juice.
Season with pepper and place top on
bagel.
3. Place in pre-heated grill and allow top
plate to gently rest on bagels using the
adjustable height control.
4. Allow to toast for 1
1
/2 minutes or until
required doneness. Remove from press
and serve immediately.
SMOKED CHICKEN WITH BASIL
AND FRESH MANGO
Serves 4
INGREDIENTS
8 slices ‘large’ wholegrain pre-sliced bread
butter or margarine
250g sliced smoked chicken – smoked
chickens are available from better delis and
supermarkets– char-grilled rotisserie chicken
can be substituted
1 medium size ripe mango, peeled and sliced
3–4 tablespoons whole egg mayonnaise
1
/2 cup basil leaves roughly torn freshly
1
ground black pepper
METHOD
1. Preheat grill to PANINI (sandwich)
temperature setting until the HEATING
display turns o .
2. Lightly spread bread with butter or
margarine. Arrange chicken on half the
bread, then place mango slices over
chicken. Spoon mayonnaise over the
mango and scatter with basil leaves.
Season with pepper.
3. Top with remaining bread and place
sandwiches in preheated grill. Allow grill
to gently rest on bread, cook until golden
brown.
4. Remove from grill. Cut each sandwich in
half and serve immediately.
RECIPES
37
Page 38

ROAST CHICKEN ROLL WITH SEMIDRIED
TOMATOES AND ROCKET
Serves 4
PASTRAMI ON TURKISH WITH MUSTARD
MAYONNAISE
Serves 6
INGREDIENTS
4 slices pita bread
6 tablespoons mayonnaise
250g sliced or chopped char-grill rotisserie
chicken
1 cup semi-dried tomatoes, roughly chopped
1 bunch rocket leaves, roughly torn
freshly ground black pepper
sea salt
METHOD
1. Preheat grill to PANINI (sandwich)
temperature setting until the HEATING
display turns o .
2. Place pita bread at on work surface.
Spread with mayonnaise (then keeping
all ingredients on one end of bread)
divide chicken between pita and top with
tomatoes and rocket.
3. Season generously and then roll pita
rmly but not too tightly. Place in preheated grill and allow top plate to rest
gently on bread
4. Allow to cook until pita is alight golden
brown.
5. Remove from grill and serve immediately
as is or cut each pita in half and wrap in
apaper napkin to serve.
INGREDIENTS
Turkish bread cut into 6 equal sections
butter or margarine
18 slices pastrami
6 tablespoons mustard mayonnaise
2 vine-ripened tomatoes, sliced
2 cups baby spinach leaves
12 slices Swiss style cheese
Freshly ground black pepper
METHOD
1. Preheat grill to PANINI (sandwich)
temperature setting until the HEATING
display turns o .
2. Cut each section of Turkish bread
through the centre and set aside top
pieces. Lightly spread Turkish bread with
butter or margarine. Divide the pastrami
between the Turkish bread. Spread
pastrami with mustard mayonnaise.
3. Arrange tomato slices over and then
baby spinach leaves. Place cheese over
each Turkish bread and then top with
reserved bread slices.
4. Place Turkish bread in preheated grill and
allow grill to gently rest on bread
5. Allow to cook until Turkish bread is lightly
browned and cheese has melted slightly.
38
NOTE
Pastrami is delicacy from conserved
lean meat, mainly prepared from beef
brisket or beef round, origin from
Romania, meat is pickled in a special
brine, then smoked and nally cooked.
RECIPES
Page 39

INSTRUCTIONS AND INFORMATION REGARDING THE DISPOSAL OF USED PACKAGING
MATERIALS
Dispose of packaging material at a public waste disposal site.
DISPOSAL OF USED ELECTRICAL AND ELECTRONIC APPLIANCES
The meaning of the symbol on the product, its accessory or packaging indicates that this product shall not
be treated as household waste. Please, dispose of this product at your applicable collection point for the
recycling of electrical & electronic equipment waste. Alternatively in some states of the European Union or
other European states you may return your products to your local retailer when buying an equivalent new
product. The correct disposal of this product will help save valuable natural resources and help in preventing
the potential negative impact on the environment and human health, which could be caused as a result of
improper liquidation of waste. Please ask your local authorities or the nearest waste collection centre for
further details. The improper disposal of this type of waste may fall subject to national regulations for nes.
For business entities in the European Union
If you wish to dispose of an electrical or electronic device, request the necessary information from your seller
or supplier.
Disposal in other countries outside the European Union
If you wish to dispose of this product, request the necessary information about the correct disposal method
from local government departments or from your seller.
This product meets all the basic EU regulation requirements that relate to it.
Changes to the text, design and technical speci cations may occur without prior notice and we reserve the right to make
these changes.
39
Page 40
THE SMART
Due to continued product
improvement, the products
illustrated/photographed in
this brochure may vary slightly from the actual product.
GRILL
™
WWW.CATLER.EU
CUSTOMER SERVICE
 Loading...