

Carnes WPDB07B Installation Manual
Installation guide for recirculation option
WPDB07B and WPDB11B series
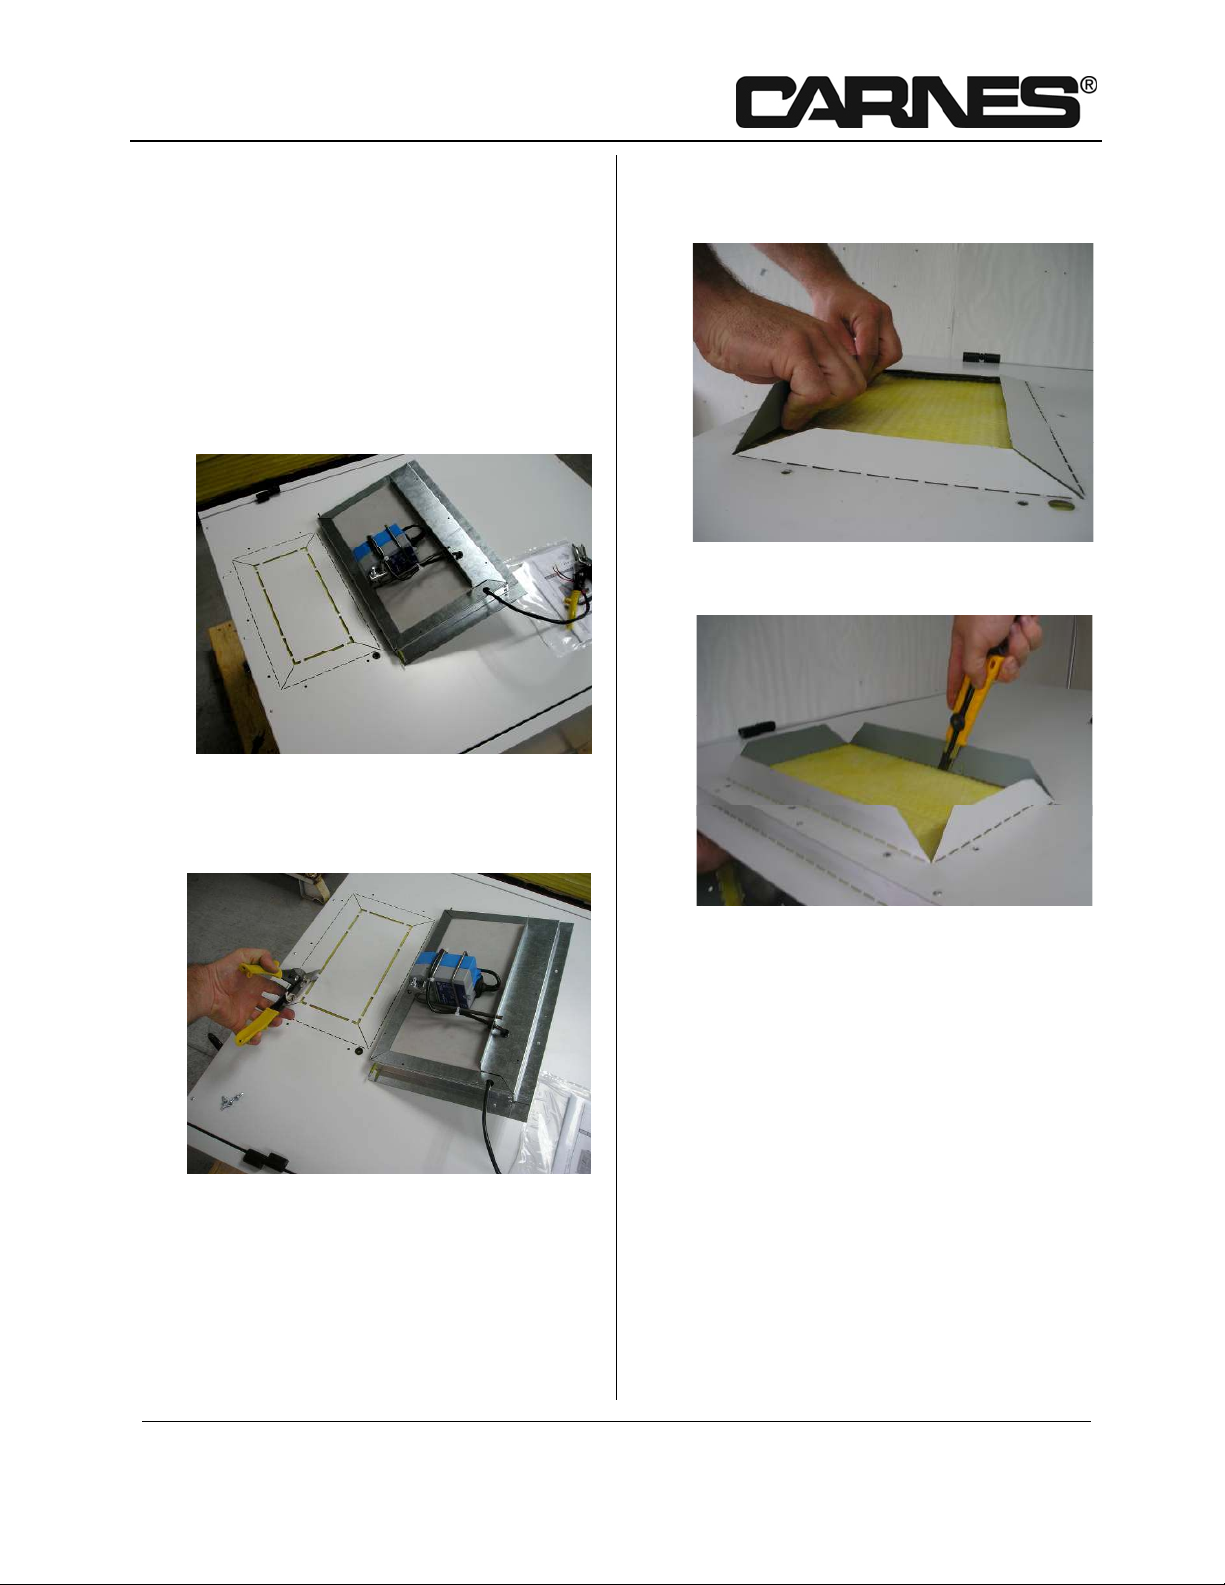
1 Verify the material.
amper assembly
• D
• Metal frame
• Screw bag
• Jumper
• Plastic bushing
• Screwdriver Phillips #2
• Small flat screwdriver
• Metal scissor
• Knife
2 Cut the internal section on the top of the
unit.
448 S. Main Street - P.O. Box 930040 - Verona, WI 53593-0040
Phone 608.845.6411 - Fax 608.845.6504 - carnes@carnes.com - www.carnes.com
3 Fold the four side of the duct side.
4 Cut the insulation along the duct side.
1 / 3 V10-01
Installation guide for recirculation option
WPDB07B and WPDB11B
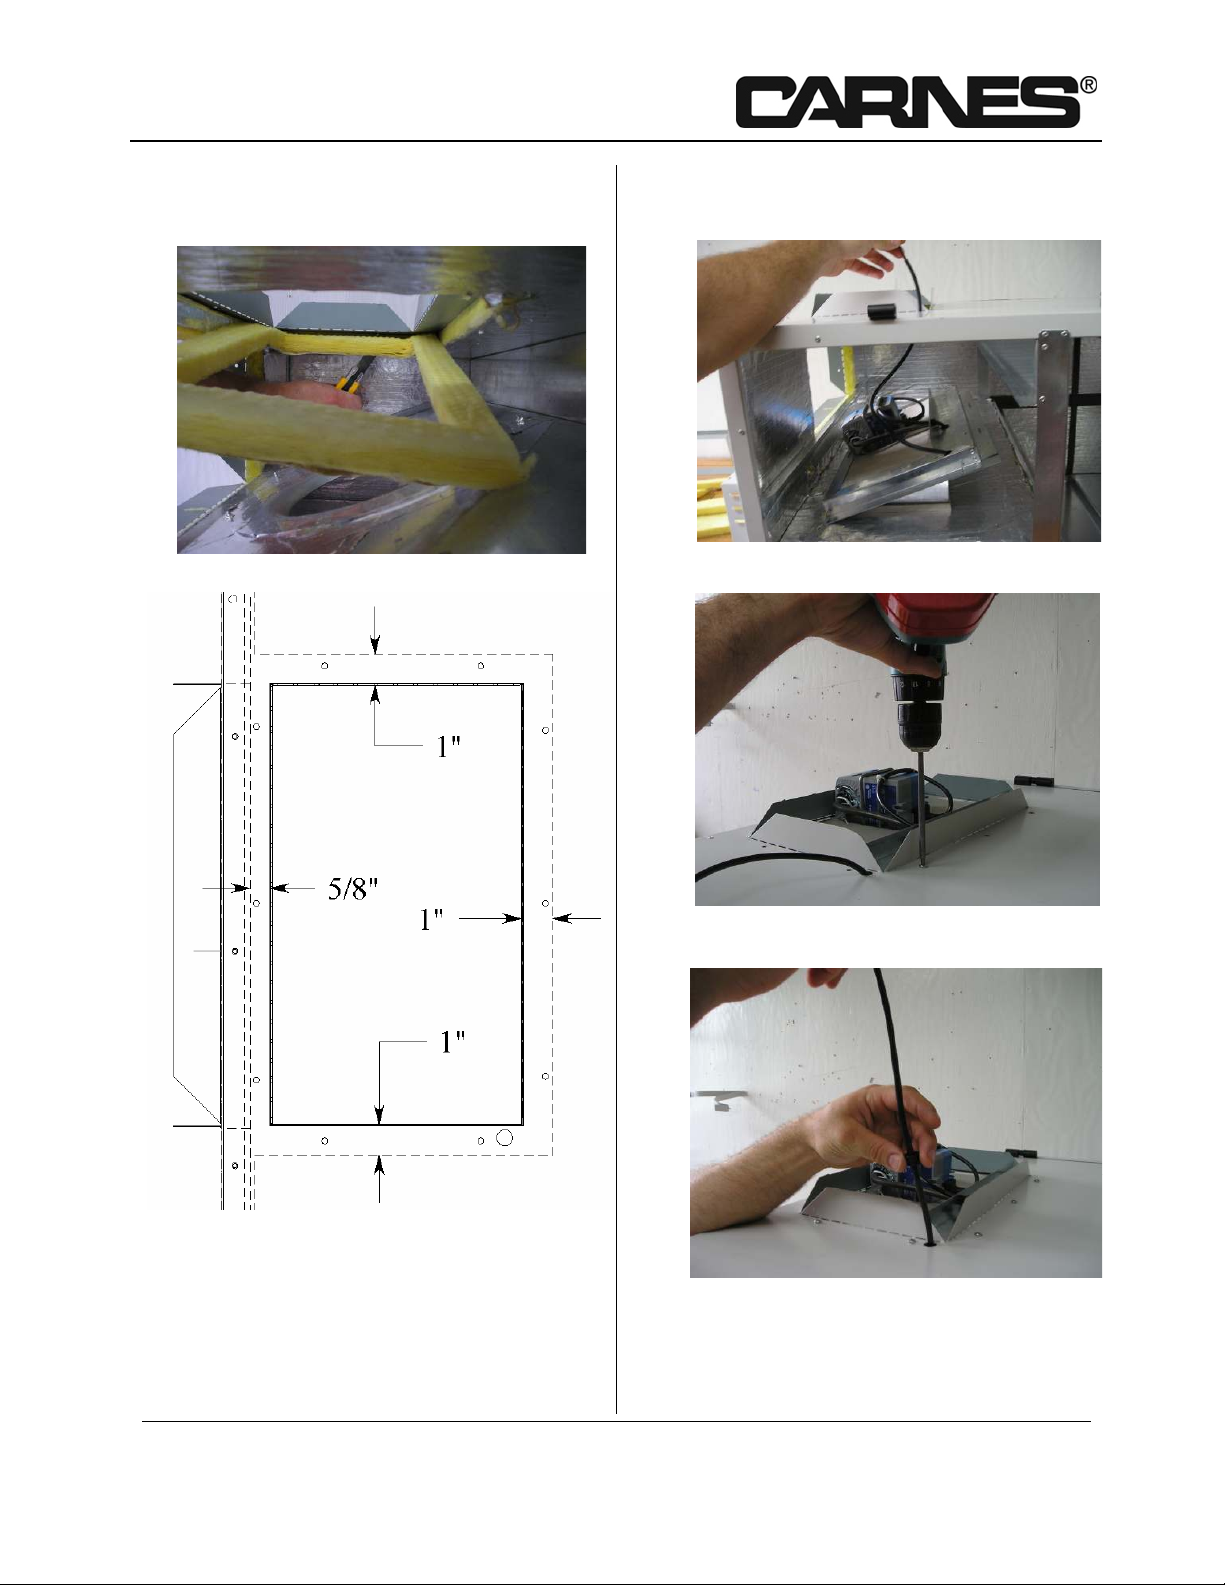
5 Cut the insulation accordingly to the
ensions below.
dim
448 S. Main Street - P.O. Box 930040
Phone 608.845.6411 - Fax 608.845.6504 - carnes@carnes.com - www.carnes.com
2
s
e
ries
6 Pass the actuator wire in the hole.
7 Fix the damper with the supplied screw.
8 Install the plastic bushing.
Verona, WI 53593-0040
-
/ 3 V10-01
 Loading...