

Page 1
canon Snojifiy 50/20
English Edition INSTRUCTIONS
Page 2

- 1
____________________________________________________
____
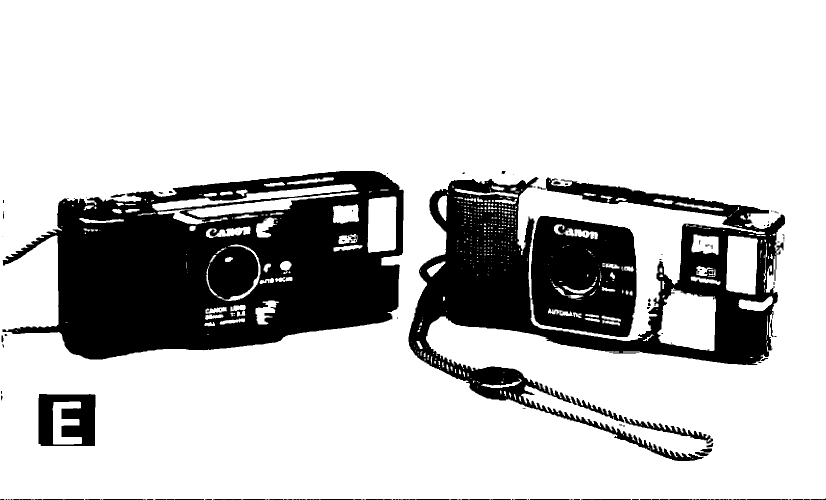
Thank you for purchasing the Canon Snappy
50 or Snappy 20. You are now the owner of a
unique camera. With such features as auto
exposure, auto film advance, auto film rewind,
built-in flash and autofocus (Snappy 50 only),
taking pictures becomes so easy and so
much fun. Read these instructions carefully
— then you’ll be ready to shoot with confi
dence.
Unfold the front and back flaps of this booklet for refer
ence to camera parts while you read Circled numbers
after part names in the text correspond to numbers on pp
3 & 2 2.
—
Page 3

NOMENCLATURE
ASA Film Speed Switch'3
Frame Counter ®
Shutter Button (J'
___
__
_
Page 4
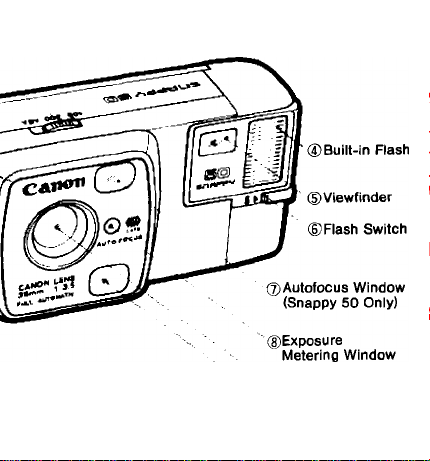
®Uens
' ® Autolocus Window
(Snappy 50 Only)
Page 5
Page 6

j Contents
BASIC OPERATION
Loading the Batteries
1.
Opening the Lens Shield ...
2.
Checking the Batteries
3.
Setting the ASA (ISO)
4.
Film Speed
Loading the Film
5.
Shooting
6.
Shooting Distance
7.
Using the Built-in Flash
8.
Flash Shooting
9.
Distance Range
Rewinding the Film
10.
• Neckstrap
• Care of the Camera ........................
SPECIFICATIONS
.......................................
..........................
...............
............
........................
.......................
...................................
...................
_____
................
..................
.............................
.......
6
.......
7
.......
8
.......
8
.......
9
....10
....12
....14
....15
....17
....18
....19
....19
.... 20
Page 7

BASIC OPERATION
1. Load the batteries.
2. Open the lens shield.
3. Check the batteries.
4. Set the ASA film speed.
5. Load the film.
6. Look into the viewfinder. Compose the picture so that your
subject is centered in the viewfinder.
7. Press the shutter button halfway. If the red viewfinder
lamp blinks rapidly, switch to flash and wait for the flashready lamp to light up.
8. Press the shutter button all the way to take the picture.
9. At the end of the roll, rewind the film.
Page 8
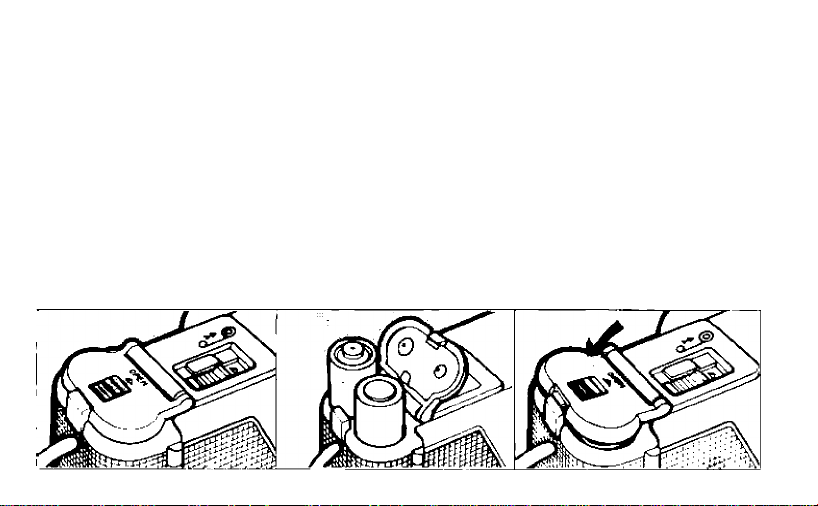
Loading the Batteries
These cameras will not work without
batteries. Use two new size-AA 1.5V
batteries of the same brand. We recom
mend using alkaline (LR6) batteries.
Carbon-zinc batteries can also be used,
but their life is shorter. DO NOT use
Ni-Cd batteries.
1 Wipe the battery terminals with a
clean, dry cloth to ensure proper
contact.
2 Push the battery chamber button H
in the direction of the arrow and
open the cover.
3. Load the batteries, making sure to
place them in the correct J 3 order
indicated on the diagram inside the
battery chamber.
4. Snap the cover shut.
Page 9
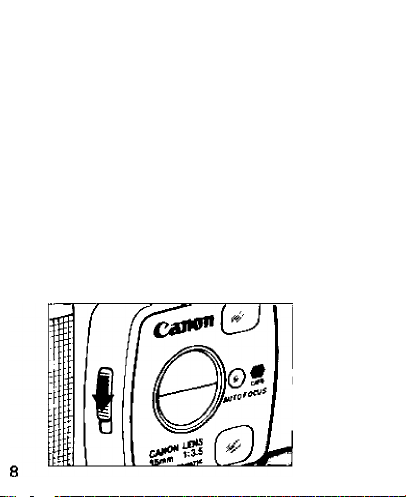
Q Opening the Lens Shield
To open the lens shield, push the lens
shield opening switch ® down. When
the lens shield Is closed, it is impossi
ble to shoot. This function prevents tak
ing pictures with the lens shield closed.
Page 10

Checking the Batteries
Check the batteries before using the
camera.
1. Cover the lens area of the camera
\with your hand and press the shutter
button ® halfway while looking
through the viewfinder.
2 If the viewfinder lamp blinks rapidly,
battery power is sufficient.
3. If the viewfinder lamp does not blink,
replace both batteries with new ones.
Using new alkaline batteries at normal
temperatures, you can shoot:
1. Approximately thirty rolls of 36-ex
posure film without flash; or
2. Approximately five rolls of 36-ex
posure film using flash for each ex
posure.
• Replace the batteries when auto film ad
vance and flash recycling become slower
or stop completely.
Page 11
Battery power is reduced in very iow tem
peratures (0°C or 32°F), making regular
photography difficult. If you plan to take
pictures in cold conditions, keep the
camera warm until just before you shoot. It
is a good idea to carry spare batteries;
keep them warm also until they are
needed. Don't throw away batteries that
have become temporarily unusable
because of cold weather. Once they have
been restored to room temperature, you
may be able to use them again.
If you don't expect to use the camera for
about three weeks or longer, remove the
batteries so that they don't leak and cor
rode the camera's electrical contacts.
-Viewfinder Lamp
Page 12

Setting the ASA (iso)
Film Speed
B
For correct exposure, set the ASA film
speed switch (D according to the ASA fiim
speed indicated on the fiim’s cartridge
and box. Press the ASA film speed
switch (D and align the white dot with
the ASA 100 or 400 mark.
I Notes]
1 Please use film with an ASA 100 or ASA
400 rating.
2. Reset the film speed switch each time you
load film with a different ASA rating.
Page 13

Loading the Film
Use color or black and white film in
standard 35mm cartridges. Load the
film in subdued lighting only.
1. Pull the back cover opening knob @
down to open the back cover ® .
2. Insert the film cartridge into the film
chamber. Gently press down on the
cartridge so that it ciicks into place;
the back cover opening knob then
automaticaliy snaps back to its origi
nal position.
10
Page 14

3 Pull the film leader across the back
so that its tip is aligned with the
orange line in the lower right-hand
corner of the film chamber. If the film
leader extends past the orange line,
manually wind the excess film back
into the film cartridge. Film will not
wind properly if there is too much
film slack.
4. Place the film between the film
Page 15

guides, and be sure that the film per- [vjQ
forations are engaged with the
sprocket teeth. Then close the back
cover.
Press the shutter button CD until the OK
frame counter (
2
) reaches “1.” If the
frame counter moves, the film is
transporting properly. If it does not
move, reload the film.
Film Chamber
Film Guide
Sprocket Teeth
Orar^ge Line
11
Page 16

Shooting
1. Look through the viewfinder O and
compose the picture so that the main
subject is centered in the viewfinder.
2. Gentiy press the shutter button ®
HALFWAY. If the viewfinder lamp
blinks rapidly, switch to flash. This
lamp warns you when insufficient
light may cause overly dark or blur
red pictures.
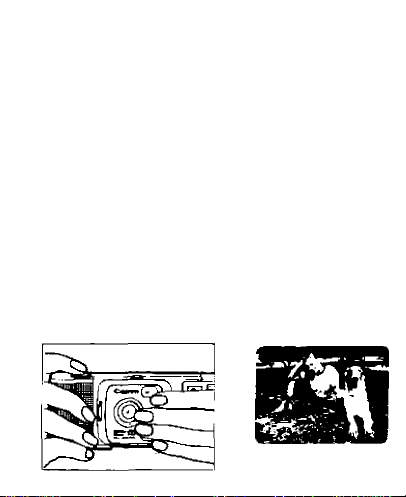
3. Hold the camera in both hands with
at least one elbow steadied against
your body. Then gently press the
shutter button all the way down to
take the picture.
12
Page 17

4. After you take your finger off the
shutter button, the camera’s built-in
power winder will automatically ad
vance the film to the next frame. As
the film advances, the frame counter
will also advance one frame. It can
count up to 36 frames.
Page 18

I Notes
1
Be sure the flash, lens, and exposure
metering window are not blocked by your
fingers or hair. With the Snappy 50, also
make sure not to cover the autofocus win
dows.
The Snappy 50 is an ACTIVE autofocus
system camera, which means the vast
majority of subjects will be accurately
focused for you. There are a few subjects.
#1,
%
H
1 \
!
J
Page 19

however, for which the autofocus system
is not perfectly suited.
These are:
e Glossy subjects (the exterior of a car,
glass)
e Subjects with little or no reflectance (black
hair, fireworks, blackout curtains)
e Subjects with an object In front of them (an
animal in a cage)
13
Page 20

Shooting Distance
When taking pictures, make sure your
subject is standing within the camera’s
shooting distance range: Snappy 50 ... 1.3m (approximately 4-1/2 ft.)
Snappy 20 ... 1.5m (approximately 5 ft.)
to infinity (oo)
to infinity (oo)
SnCflfUf 50 : Keep 1.3m or more apart.
StUlflJiy 20 ■ Keep 1.5m or more apart.
14
Page 21

Using the Built-in Flash
Switch to flash photography if the view
finder lamp blinks rapidly when you
press the shutter button halfway. Use of
the flash will prevent blurred and overly
dark photos.
1 Push the flash switch out in the
direction of the arrow.
2 Wait for the flash-ready lamp ® to
glow; then shoot.
Notes
Do not continuously press the shutter but
ton halfway while waiting for the fiashready iamp to glow; the flash will not
charge.
If you take the shot before the flash-ready
lamp glows, exposure will not be correct.
The flash cannot be used to "fill in"
shadows in daylight photography.
15
Page 22

No flash
16
Using the flash
Page 23

Flash Shooting Distance Range
The shooting distance range within
which the built-in fiash can be used is:
StUUUUI mi 1.3—4.5m (approximateiy 4-1/2 — 15 ft.) with ASA 100 or ASA 400
" negative film
SnOilfiy 20 1.5—4.0m (approximately 5 — 13 ft.) with ASA 100 negative film
2.7—8.0m (approximately 9—26 ft.) with ASA 400 negative film
1.3m _ 4.5m
■■»■■■ Snappy 50
Ki^ ■'5m 4.0m
NO 1 OK ^1
(with ASA 100 or 400 negative fiim)
Snappy 20 (with ASA 100 negative film)
Snappy 20 (with ASA 400 negative fiim)
17
Page 24

Rewinding the Film
You can tell you have come to the end
of a roll of film when film advance stops
automatically and when the shutter but
ton becomes impossible to push.
IMPORTANT: DO NOT open the back
cover until you have rewound the film.
1 To rewind the film, simultaneously
press the unlock button Q and slide
the film rewind switch 51 with your
finger in the direction of the arrow.
Once the rewind switch has locked
Page 25

into position, you may withdraw your
finger.
During rewinding, the frame counter
d) counts backwards. When it re
turns to “S,” rewinding stops auto-
maticaily, and the fiim rewind switch
returns to its originai position.
Puii the back cover opening knob @
down, open the cover, and remove
the film cartridge from the film cham
ber. Be sure to shield the film from
direct sources of iight when unioad-
ing it.
Page 26

Neckstrap
Each camera is provided with a built-in
neckstrap © . Simply slide the adjuster
& to set the strap to the desired
length.
Page 27

Саге of the Camera
1. To clean the camera's glass sur
faces, use only a blower brush,
cleaning fluid, and tissue made
specially for camera lenses. First
remove dust with the biower
brush. Then apply a few drops of
fluid to the tissue (NEVER apply
fluid directly to the lensi) and
gentfy wipe the lens in a circular
motion. Keep the autofocus and
auto exposure windows clean in
the same manner. For non-glass
surfaces, brush off dust with a
blower brush, silicon cloth, or
chamois leather. The film com
partment also requires gentle
cleaning from time to time to re
move dust which may scratch the
film. To clean the film compart-
19
Page 28

merit, use only a blower brush; do
not apply any fluids to the rear
lens.
2. The best thing you can do for your
camera is to use it regularly. If you
must store it for a iong time, first
remove the batteries. Then wrap
the camera in a clean, soft cloth
and store it in a cool, dry, dustfree area. Always keep the camera
out of direct sunlight and very hot
spots, such as the trunk or glove
compartment of a car. Keep it out
of humid and dusty places.
3. Replace the batteries every year;
even if they are not used, they will
discharge gradually.
20
.J
Page 29

SPECIFICATIONS
Type "Snappy 50": 35mm lens-shutter
camera with automatic film loading, automatic
film advance, power film rewind, automatic
exposure, and autofocus.
"Snappy 20”: 35mm lens-shutter camera
with automatic film loading, automatic film ad
vance, power film rewind, and automatic ex
posure.
Format 24mm x 36mm
Lens "Snappy 50": Canon 35mm f/3.5.
“Snappy 20”: Canon 35mm f/4.5.
Construction: 4 elements in 4 groups.
Lens Shield Open position; shooting is pos
sible. Closed position; shooting is impossible.
Focusing "Snappy 50"; Canon ACTIVE
autofocus system,
"Snappy 20": Fixed focus.
Shooting Distance Range "Snappy 50":
1.3m (4.3ft.) to infinity (oo).
"Snappy 20": Pan focus, 1.5m (4 9ft.) to
infinity (oo).
Shutter Programmed electromagnetic shut
ter; also serves as diaphragm blades.
Viewfinder Reverse Galilean finder. Mag-
Page 30

Page 31

®aííe;y ГЛ
=䔣a"®
Co„
Ор^^.Ро'-ег
Page 32

nification: 0.45x. Viewfinder iamp (camera
shake warning/battery check LED).
Back Cover Opened by pulling the back
cover opening knob.
Film Advance Winding is automatic by
pressing and releasing the shutter button for
shooting.
Film Rewinding Automatic upon pressing
unlock button and pushing film rewind switch.
Indicated by frame counter. Film Rewinding
stops automatically.
Frame Counter Additive type; automatically
resets to "S" by opening back cover. Counts
back with film rewind.
Automatic Exposure Coupling Range “Snap
py 50": EV 8.6 to EV 15 with ASA 100.
"Snappy 20”: EV 9.3 to EV 15 with ASA
too.
ASA Film Speed Switch ASA 100 & 400.
Built-in Flash Switches to flash photography
by sliding the flash switch.
Guide Number 11 (ASA100-m)
Flash Shooting Distance "Snappy 50":
1.3m to 4.5m (app. 4-1/2 to 15ft.) with ASA
Page 33

100 or ASA 400.
"Snappy 20”: 1.5m to 4.0m (app. 5 to
13ft.) with ASA 100. 2.7m to 8m (app. 9 to
26ft.) with ASA 400.
Flash Recycling Time Less than eight sec
onds (interval between firing of flash and re
lighting of fiash-ready iamp) with new aikaline
batteries.
Battery Life Using new alkaiine batteries at
normai temperatures: Without fiash, approximateiy 30 roiis of 36 exposure fiim. Using
fiash for each exposure, approximateiy 5 roiis
of 36 exposure fiim.
Power Source Two size-AA 1.5 V alkaiine or
carbon-zinc batteries. (Ni-Cd batteries cannot
be used.)
Dimensions 148.2 (W) x 58.3 (H) x 43.6 (D)
mm (5-5/16" x 2-5/16" x 1 -11 /16")
Weight "Snappy 50": 247g (8-11/16 oz.)
without batteries.
"Snappy 20": 237g (8-3/8 oz.) without
batteries.
Subject to change without notice.
21
Page 34

Canon
CANON INC. 7>1. Nisbi-Shinjuku 2'Chome Stiinjuku-ku, Tokyo 180 Japan
USA
_____________
CANADA
__________
ciinnpc ДСЯ1РД 2628, leih Slrael, NE Calgary, Alberta T2E 7K7, Canada
CENTRAL 6 Unit! 4 El B. IliPil Tradtog CenPi. North Circular Road, London NW10 OJF United Kingdom
SOUTH AMERICA_____CANON LATIN AMERICA. INC. OEPTO. DE VENTAS
SOUTHEAST ASIA
OCEANIA
___________
JAPAN
___________
PUB. C-IE-090L
MallInQ addraaa: P 0 Box 6050, Dai-ichi Saimei Building, Tokyo 160. Japan
.CANON U.S.A.. INC. HEADQUARTERS
On« Canon Pli2i, Lake Success, NY 11042 USA
CANON U.S.A., INC. MANHATTAN SERVICE CENTER
eoo
Third Avanua, N«w York. N Y lOOie.USA
CANON U.S.A., INC. ATLANTA BRANCH
0360 Paaehlrea biduslrisl EHvd Nofcroaa Georgia 30071, USA
CANON U.S.A., INC. CHICAGO BRANCH
140 Indualnal Drive, Elmhursl Illinois 601 ZB, U S A
CANON U.S.A, INC. LOS ANQELES BRANCH
123 Paularino Avenue Easl Costa Mesa Csliromia 92626, U.SA
CANON U.S.A., INC. LOS ANQELES SERVICE CENTER
3321 Wilahire BNd LOS Angeles. CalHomia 90010 USA
CANON U.S.A.. INC. SAN FRANCISCO OFFICE
776 Market Street San Francisco. CaMonea 94102 USA
CANON U.S.A., INC. HONOLULU OFFICE
Bldg B-2, 1050 Ala Moatta Blvd. Honolulu, Hawai 96614, USA
CANON CANADA INC. HEADQUARTERS
3245 American Drive, Mississauge, Ontario L4V 1N4, Canada
CANON CANADA INC. MONTREAL SERVICE CENTRE
10662 CBle de Liesse, Lachine Quebec H8T 1Д6. Canada
CANON CANADA INC. CALGARY OFFICE
CANON EUROPA N.V,
F 0 Box 7907, 1006 AC Amsterdam The Nalharlands
CANON FRANCE-PHOTO CINEMA S.A.
30, boulevard Vilal-Bouhot. He da la Jalla, 92521 NeulHv-sur-Saine Franca
CANON UK LTD.
Apartaoi] /022. Feneiatá f, ЯпобЫсв da Panama
CANON LATIN AMERICA, INC. CENTRO DE SERVICIO Y REPARACION
Apartado 2016. Zonm Ubte da CoUn. Repùbliee da PanamA
____
CANON HONGKONG TRADING CO.. LTD.
Golden Bear kiduslrial Centro 7/F., 66-62 Chai Wan Кок Street
Tauen Wan, New Tarrilorias, Hong Kong
CANON SINGAPORE PTE. LTD.
Unit 100B, Block C, Singapore Warehouse BO, Martin Road Singapore 0923
.CANON AUSTRALIA PTY, LTD.
22 lamba Road, Artarmon, NSW 2064, Australis
CANON SALES CO.. INC.
11-28 Mila, 3-Choma Mmalo-ku Tokyo ЮВ. Japan
0183N30
Page 35

PRINTED IN JAPAN
 Loading...