

Canon SELPHY CP730, SELPHY CP720 Guide
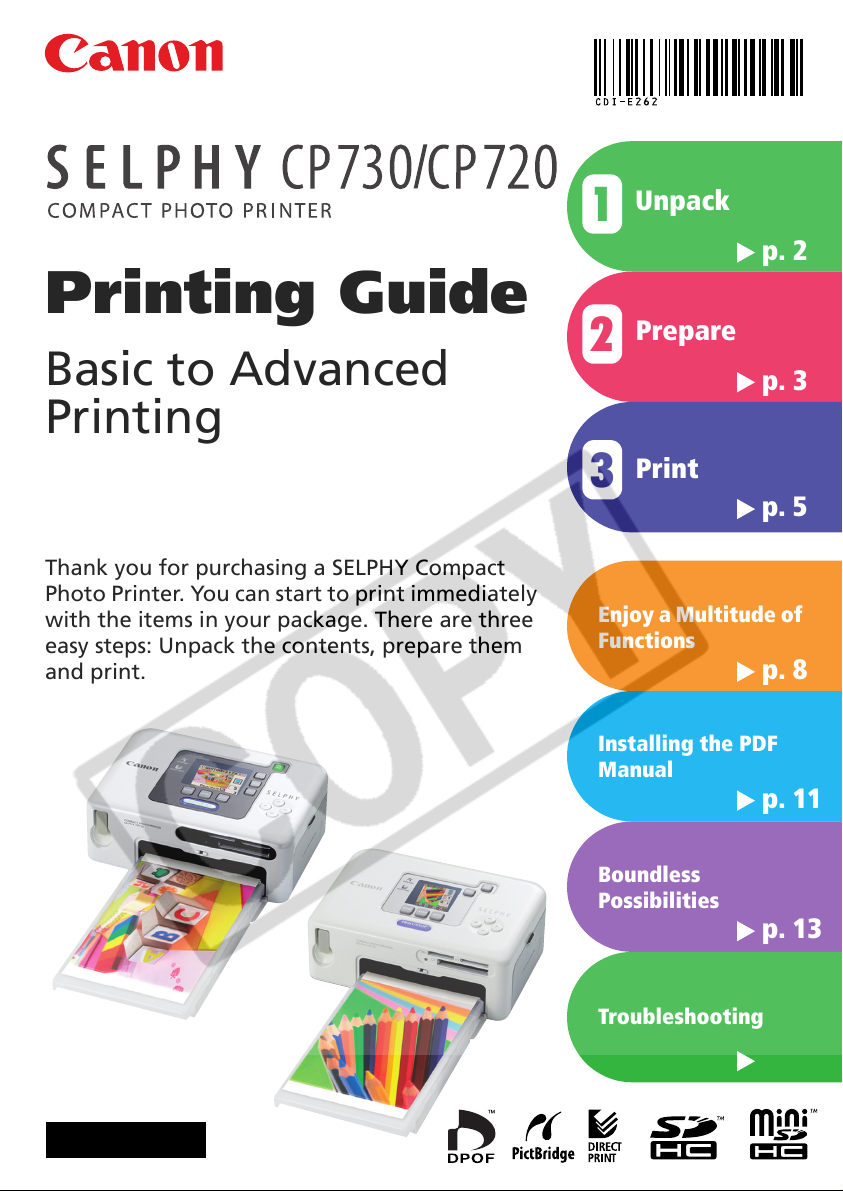
Printing Guide
Unpack
1
Prepare
2
p. 2
Basic to Advanced
Printing
Thank you for purchasing a SELPHY Compact
Photo Printer. You can start to print immediately
with the items in your package. There are three
easy steps: Unpack the contents, prepare them
and print.
p. 3
Print
3
p. 5
Enjoy a Multitude of
Functions
p. 8
Installing the PDF
Manual
p. 11
Boundless
Possibilities
p. 13
ENGLISH
Troubleshooting
p. 16
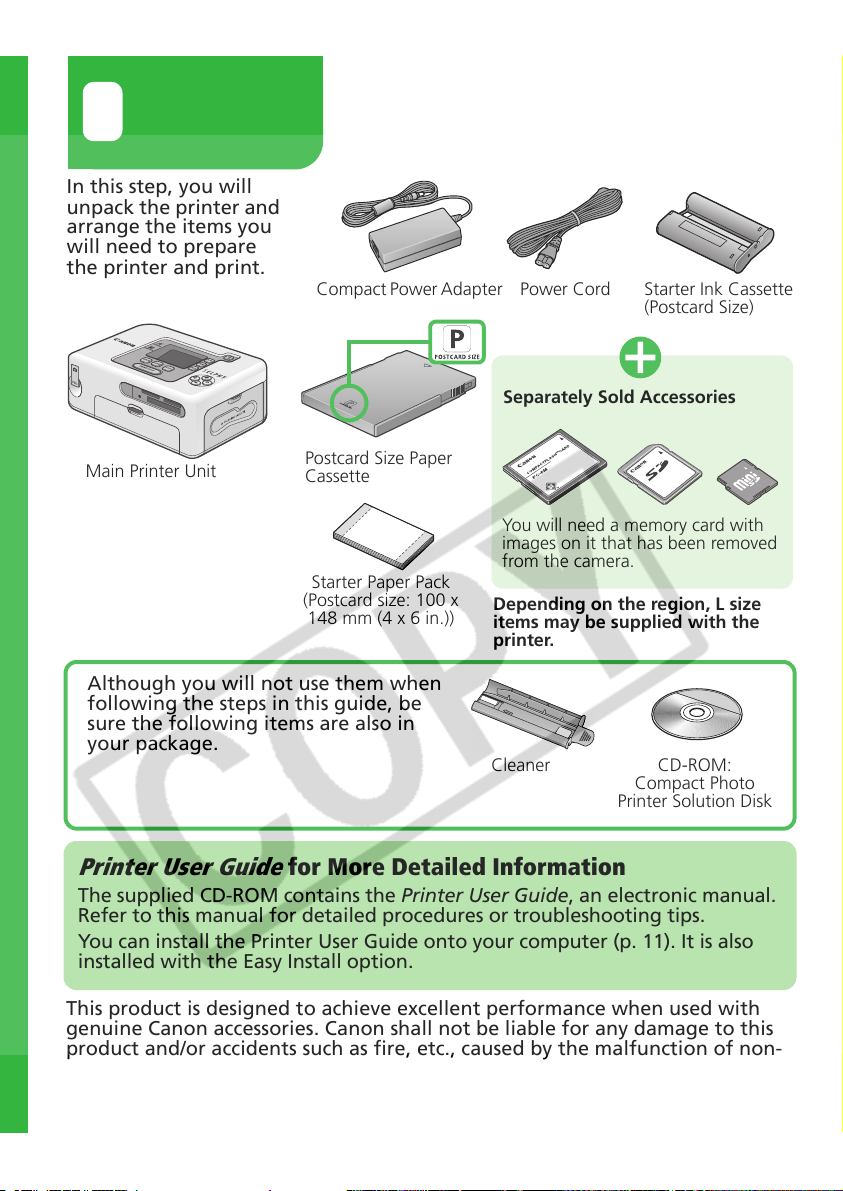
Unpack
1
In this step, you will
unpack the printer and
arrange the items you
will need to prepare
the printer and print.
Compact Power Adapter
Power Cord
Separately Sold Accessories
Starter Ink Cassette
(Postcard Size)
Main Printer Unit
Although you will not use them when
following the steps in this guide, be
sure the following items are also in
your package.
Printer User Guide
The supplied CD-ROM contains the Printer User Guide, an electronic manual.
Refer to this manual for detailed procedures or troubleshooting tips.
You can install the Printer User Guide onto your computer (p. 11). It is also
installed with the Easy Install option.
This product is designed to achieve excellent performance when used with
genuine Canon accessories. Canon shall not be liable for any damage to this
product and/or accidents such as fire, etc., caused by the malfunction of non-
genuine Canon accessories (e.g., a leakage and/or explosion of a battery pack).
Please note that this warranty does not apply to repairs arising out of the
malfunction of non-genuine Canon accessories, although you may request
such repairs on a chargeable basis.
Postcard Size Paper
Cassette
You will need a memory card with
images on it that has been removed
from the camera.
Starter Paper Pack
(Postcard size: 100 x
148 mm (4 x 6 in.))
Depending on the region, L size
items may be supplied with the
printer.
Cleaner
for More Detailed Information
CD-ROM:
Compact Photo
Printer Solution Disk
2
Prepare
2
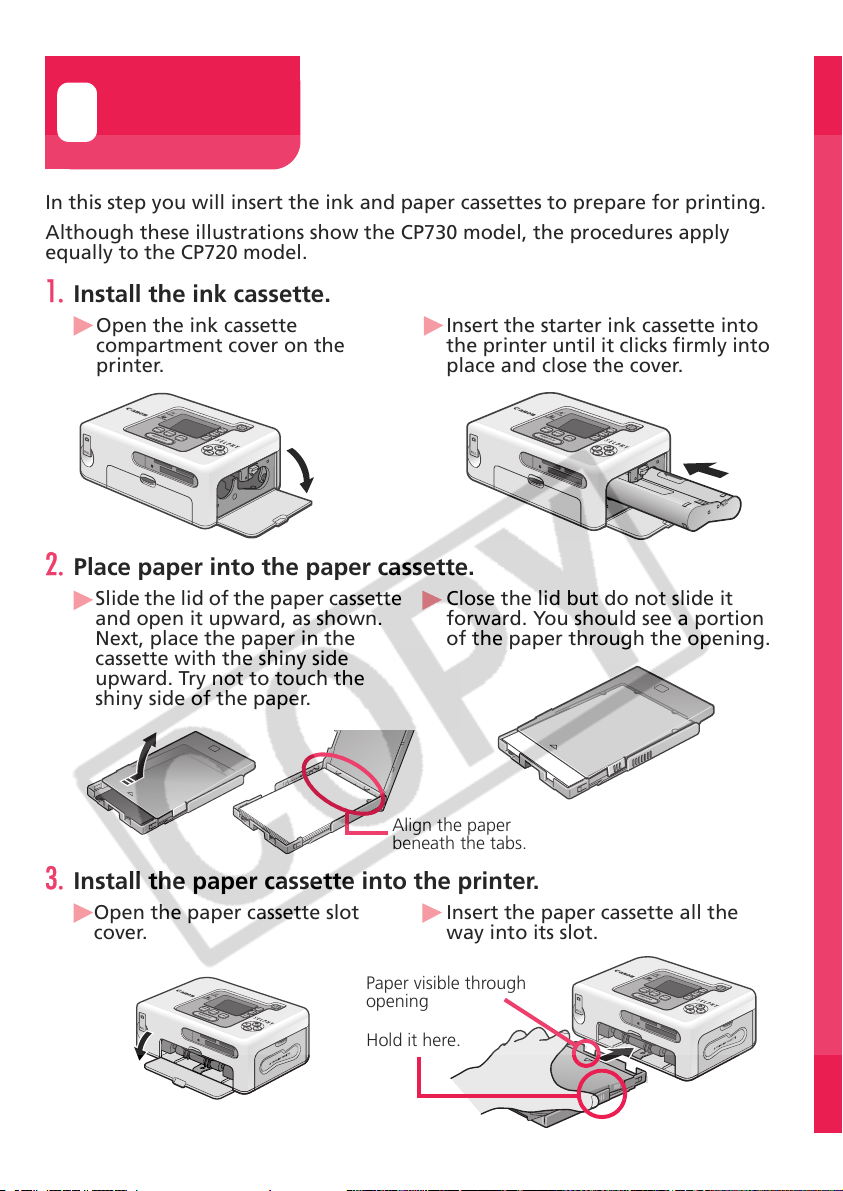
In this step you will insert the ink and paper cassettes to prepare for printing.
Although these illustrations show the CP730 model, the procedures apply
equally to the CP720 model.
1. Install the ink cassette.
Open the ink cassette
compartment cover on the
printer.
Insert the starter ink cassette into
the printer until it clicks firmly into
place and close the cover.
2. Place paper into the paper cassette.
Slide the lid of the paper cassette
and open it upward, as shown.
Next, place the paper in the
cassette with the shiny side
upward. Try not to touch the
shiny side of the paper.
Close the lid but do not slide it
forward. You should see a portion
of the paper through the opening.
Align the paper
beneath the tabs.
3. Install the paper cassette into the printer.
Open the paper cassette slot
cover.
Paper visible through
opening
Hold it here.
Insert the paper cassette all the
way into its slot.
3
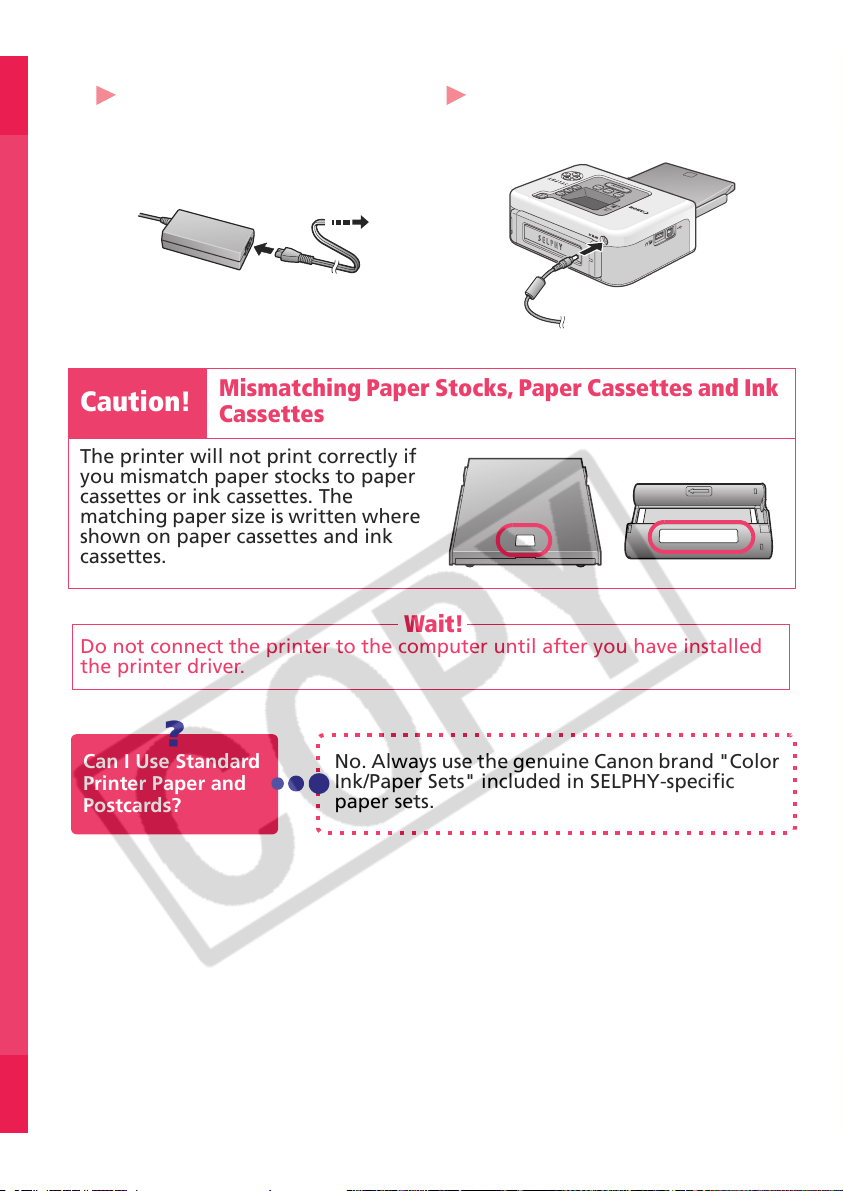
4. Attach the power cord.
Plug the power cord into the
compact power adapter and then
into a power outlet.
Mismatching Paper Stocks, Paper Cassettes and Ink
Caution!
The printer will not print correctly if
you mismatch paper stocks to paper
cassettes or ink cassettes. The
matching paper size is written where
shown on paper cassettes and ink
cassettes.
Cassettes
Wait!
Do not connect the printer to the computer until after you have installed
the printer driver.
Attach the compact power adapter
connector to the printer's DC IN
terminal.
Can I Use Standard
Printer Paper and
Postcards?
4
?
No. Always use the genuine Canon brand "Color
Ink/Paper Sets" included in SELPHY-specific
paper sets.
Print
3
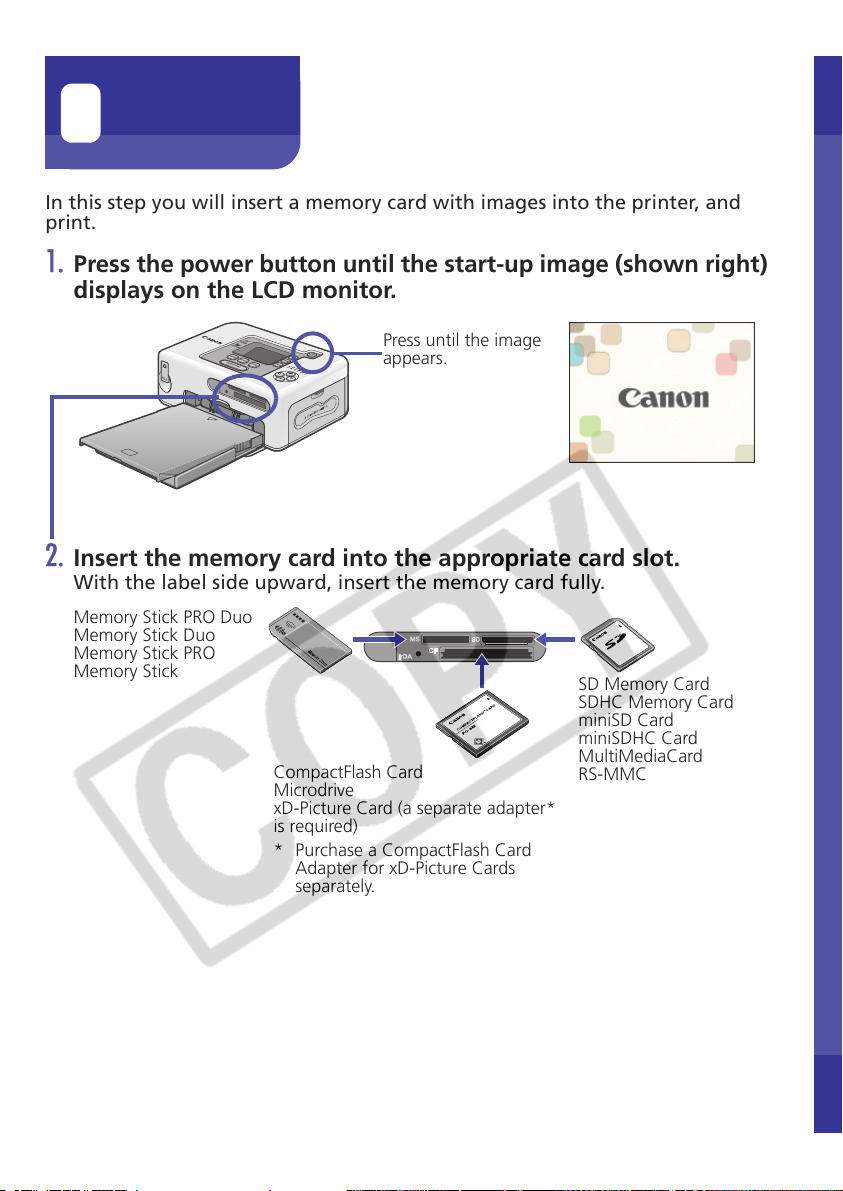
In this step you will insert a memory card with images into the printer, and
print.
1. Press the power button until the start-up image (shown right)
displays on the LCD monitor.
Press until the image
appears.
2. Insert the memory card into the appropriate card slot.
With the label side upward, insert the memory card fully.
Memory Stick PRO Duo
Memory Stick Duo
Memory Stick PRO
Memory Stick
CompactFlash Card
Microdrive
xD-Picture Card (a separate adapter*
is required)
* Purchase a CompactFlash Card
Adapter for xD-Picture Cards
separately.
SD Memory Card
SDHC Memory Card
miniSD Card
miniSDHC Card
MultiMediaCard
RS-MMC
5
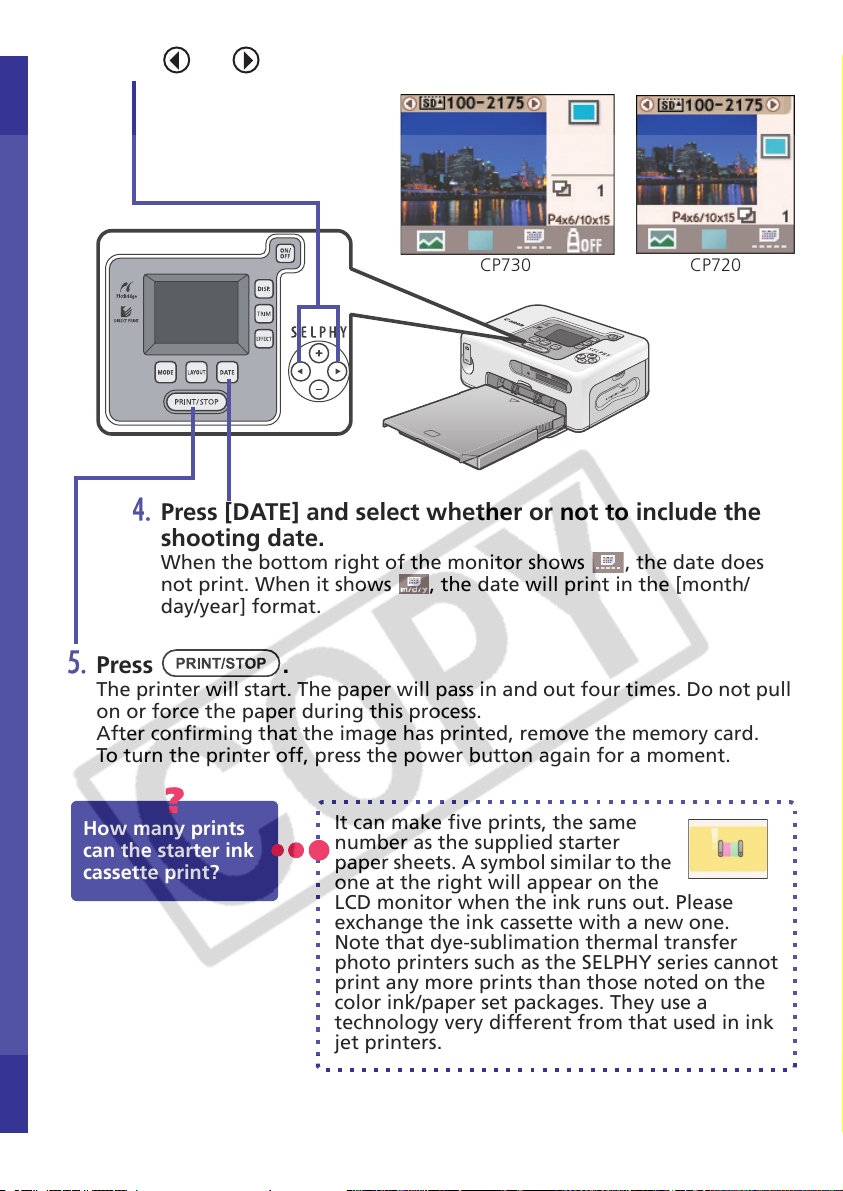
3. Press or to select an image to print.
CP730 CP720
4. Press [DATE] and select whether or not to include the
shooting date.
When the bottom right of the monitor shows , the date does
not print. When it shows , the date will print in the [month/
day/year] format.
5. Press .
The printer will start. The paper will pass in and out four times. Do not pull
on or force the paper during this process.
After confirming that the image has printed, remove the memory card.
To turn the printer off, press the power button again for a moment.
?
How many prints
can the starter ink
cassette print?
6
It can make five prints, the same
number as the supplied starter
paper sheets. A symbol similar to the
one at the right will appear on the
LCD monitor when the ink runs out. Please
exchange the ink cassette with a new one.
Note that dye-sublimation thermal transfer
photo printers such as the SELPHY series cannot
print any more prints than those noted on the
color ink/paper set packages. They use a
technology very different from that used in ink
jet printers.
 Loading...