

Canon Prima Super 105, Prima Super 105 date User Manual
This camera manual library is for reference and historical purposes, all rights reserved.
This page is copyright by mike@butkus.org M. Butkus, N.J.
This page may not be sold or distributed without the expressed
permission of the producer
I have no connection with any camera company
If you find this manual useful, how about a donation of $3 to: M. Butkus, 29 Lake
Ave., High Bridge, NJ 08829-1701 and send your E-mail address too so I can thank
you. Most other places would charge you $7.50 for a electronic copy or $18.00 for a
hard to read Xerox copy. These donations allow me to continue to buy new manuals
and maintain these pages. It'll make you feel better, won't it?
If you use Pay Pal, use the link below. Use the above address for a check, M.O. or
cash. Use the E-mail of butkusmi@ptd.net for PayPal.
back to my “Orphancameras” manuals /flash and light meter site
Only one “donation” needed per manual, not per multiple section of a manual !
The large manuals are split only for easy download size.

IO5zggr
PRIMA
PRIMA
tr E
tr
E
E
I
Engtisrr
ttutiuno
rrangais
fl
rspanol
E
oeutscrr
El
Portugu6s
E
This
www.orphancameras.com
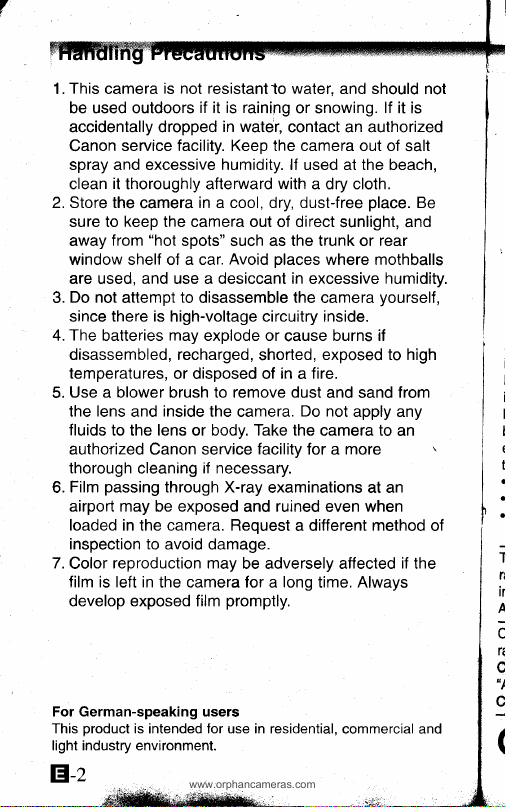
1.
camera
be used outdoors
accidentally dropped
Canon
spray and excessive humidity. lf used at the beach,
it
clean
2. Store the
sure to keep the camera out of direct
from
away
window shelf of a car.
are used, and use a desiccant in excessive
Do not
3.
since there is high-voltage circuitry inside.
The
4.
batteries may explode or
disassembled, recharged,
temperatures,
Use a blower brush to remove dust
5.
lens
the
fluids
to the lens or body. Take the
authorized Canon service
thorough
passing
Film
6.
airport may be exposed
loaded in the camera. Request
inspection to
7.
reproduction may
Color
film is left in
develop exposed film
For German-speaking users
product
This
light industry environment.
El-z
*l{ffiea.r$Se*
is not resistantto water.
if it is raining
in water,
and should not
or snowing.
lf
contact an authorized
service facility. Keep the camera out of
thoroughly afterward with a dry cloth.
camera
in a cool, dry, dust-free
place.
sunlight, and
"hot
spots" such as the trunk or rear
Avoid
places
where mothballs
humidity.
attempt
to
disassemble the camera
cause
shorted,
or disposed of
in a fire.
yourself,
burns if
exposed to high
and sand
inside
and
cleaning
through X-ray
the camera.
if necessary.
Do not
camera
facility
for a more
examinations at an
ruined
and
even
a different
apply any
to
when
method
avoid damage.
be adversely affected
the camera for a
long
time. Always
promptly.
is intended for use in residential,
commercial and
-'-
it is
salt
Be
from
an
if
the
i
i
I
i
I
t
\
of
(
t
a
a
o
i
ri
ir
A
c
r1
c
"t
G
(

t
F'
This
device complies
is
subject to the following
not cause harmful
accept
any
may cause
Do not
make any
unless otherwise
or modifications
stop operation
This
equipment
limits
for a class
FCC
Rules. These
protection
installation.
radio frequency
accordance with
interference
However,
in
I
harmful
I
be determined
encouraged
the following
.
.
.
This
radio noise
interference-causing
Apparatus",
Cet appareil num6rique
radio6lectriques
Classe
"Appareils
Canada.
against harmful
there
particular
a
interference
Reorient
or
Increase
the separation
Consult the
helo.
digital
apparatus
prescrites
B
Numeriques",
The
I
European
E
emissions
with Part
interference,
interference
undesired
This
to
installation.
to try to
measures:
relocate
dealer
ICES-003
CE
received,
operation.
changes
specified
should
be made,
of the
equipment.
has been
B digital
device,
limits
are designed
equipment
energy and, if
the instructions,
radio
communications.
guarantee
is no
to radio
by turning
the equipment
correct the interference
the receiving
between the
or an experienced
does not exceed
from
equipment
of the Industry
respecte
applicables
dans la
NM8-003
Mark
is a Directive
Community
15
of the FCC Rules.
two
conditions:
and
or modifications
in the instructions.
tested
interference
generates,
not installed
that interference
lf this
equipment
or television
digital
standard
aux appareils
norme
(EC)
,.
(1)
(2)
this
including interference
to the
you
could
and found
pursuant
may
apparatus
les limites
to comply with
to
provide
to
in
a residential
uses and
and used in
cause
does
reception,
off
and on, the
antenna.
equipment
radio/TV
the
Class B limits
entitled
Canada.
de bruits
num6riques
sur le mat6riel
par
6dict6e
conformity
Operation
This device
device must
equipment
lf such
changes
be required
part
15
of the
reasonable
can radiate
harmful
will
not
cause
which
by
one or more
and receiver.
technician
as set
out in the
"Digital
brouilleur:
l'lndustrie
mark
of the
may
that
to
occur
user is
for
de
tr-:
":rry
the
can
of
for
titr'}wffiWm
tr
1,w
l
you
www.orphancameras.com
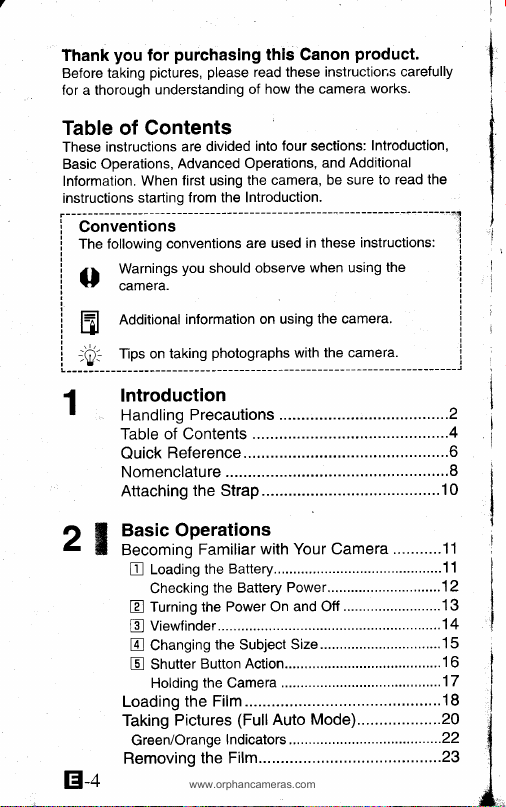
Thank
Before taking
for a thorough
purchasing
for
please
pictures,
understanding
thls Canon
read these instructions
how the camera
of
product.
works.
carefully
Table of Contents
instructions
These
Operations,
Basic
Information.
instructions
i c;;;ii-"
The following conventions
i
i rr
U
r
ii
I m
rql-i
_;O:
i
i'u-l
1
r
O il
z
t Becomino
El-+
are divided
Advanced Operations,
first using the
When
from the Introduction.
starting
Warnings
camera.
Additional
Tips on taking
you
information on using
into
are used in
observe
should
photographs
Introduction
Handling
Table of Contents
Quick
Nomenclature
Attaching
Precautions
Reference
..............
the Strap
Basic Operations
Familiar
LoaOlig
E
Checking
Turning the Power
E
Viewfinder...................
E
Changing
E
E
Loading
Taking
Green/Orange
Removing
Button
Shutter
Holding
the Film
Pictures
the Film.....
with Your Camera
Battery...
the
the Battery
the Subject Si2e.....,.........................15
Action..........
the Camera
(Full
Indicators
four
sections:
camera, be
when using
with
Introduction,
Additional
and
sure to
these instructions:
the camera.
the camera.
....................2
..................8
......................10
....................11
Power..........
On and Off
Auto
...................1
...................
..................14
.....................17
Mode)........ ...........2O
...................22
..................23
read the
- --l
- --
the
........4
..........6
...........11
......'.'.16
........18
I
i
i
i
I
2
...13
I
A.
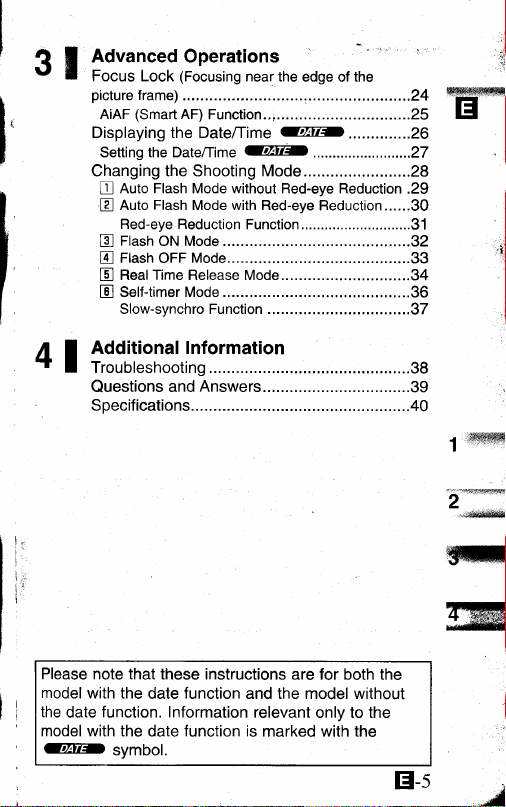
Advanced Operations
3il
Focus Lock
picture
AiAF
Displaying the Date/Time
Setti ng the Date/Ti m s
Changing the Shooting Mode........................28
Auto Flash Mode without Red-eye Reduction
E
Auto
E
E
E
E
E
Additional Information
4l
Troubleshooting..........
Questions
(Focusing
frame)
(Smart
AF)
Flash
Red-eye
Reduction Function............................31
Flasn
ON Mode
Ftasn OFF Mode... ....................33
Reat Time Release Mode.............................34
Self-timer
Slow-synchro Function
Mode.........
and
near.the
edge of the
........-,........
Function..
Mode with Red-eye
i..............................25
@IE)
QIE-
.........................27
Reduction......30
Answers.................................39
Specifications..............
1.
...............24
ffiffi#effifi
tr
.............26
.29
......32
...............36
..............37
.................38
.................40
1
zilm
,.$
$fw
t,,
i'
ir
li
i
Please note that
model
with the
the
date
model with the
@rc-
these instructions are for both the
function
date
function. Information
symoot.
date
function is
and the model without
relevant
marked with the
only to the
tr-s
ffi
uw
rlff

Quick
www.orphancameras.com
For
Reference
further details,
refer to the
page
indicated
by
(-
f).
1. Load the
(-
11)
2. Load the
Pull the
3.
it reaches
until
position
tip
the back
close
(-
18)
Turn the
4.
G!reD.(-
power
The
i
the lens
and
battery.
(-
the
mark.
cover.
18)
film
Then
to
film.
film tip across
mode dial
13)
is turned on
is set.
tr-o

5. Change the subject size
as desired.
6. Position the AF frame
over the subject and
lightly
button
(*
16)
.
Keep
pressed
.
Check that the
indicator is lit and then
compose the
(-
15)
press
the
halfway
the shutter button
shutter
down.
halfway down.
green
picture.
tr
7. Press the
fullY.
.
ln low light or backlight,
the flash fires
automatically.
When the film has
8.
finished and rewound,
remove the film.
shutter button
16;
1-
(-
23)
El-t

Nomenclature
www.orphancameras.com
VieMinder
Button
Shutter
Window
(*
Lens
16)
(-
l) is shorthand
"
Metering
for
Window
Light Receptor
AF
Dial
Mode
Red-eye
Self-timer
(-
36)
31,
"See page
(-
29;
Reduction/
Lamp
I".
Zoom Lever
Telephoto)
/tll
El-s
(
@l
(-
Wide-angle
15)

LCD Panel
Battery
Cover
MODE Button
@E-
(-
12)
(-
11)
SET
(-
SELECT
@E-
(-26)
Viewfinder
Tripod Socket
*O
Film Rewind Button
(-
23)
rUE)
Button
27)
Button
(-
27)
(-
14)
Orange
Green
Indicator
Indicator
Film Check Window
Strap Clasp
(-
(*
Back
Latch
22)
22)
Cover
tr-q
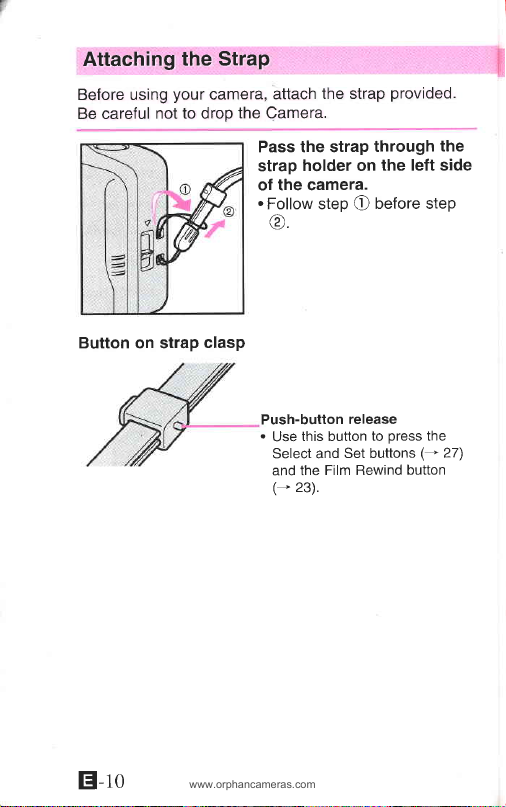
Attaching
www.orphancameras.com
Before using
Be careful
not to drop
the Strap
your
camera,
the Camera.
the strap
attach
Pass the strap
holder on
strap
of the camera.
.
Follow step
e
@
provided.
through
the
the left side
before step
Button on strap
E-to
clasp
Push-button
.
this button
Use
Select and
Film Rewind
and the
(-
23).
release
press
to
Set buttons
button
the
(-
27\
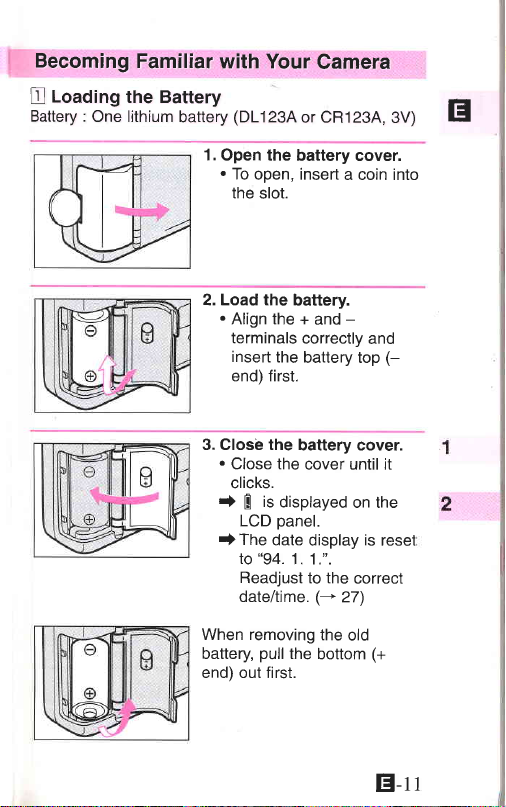
Becoming
Loading
E
Battery :
One lithium
Familiar
the Battery
battery
1.
with Your
(DL123A
Open the
.
To
the
battery cover.
open, insert
slot.
Camera
or CR123A,
3V)
a coin into
tr
2. Load the
.
Align the +
terminals
insert
end) first.
3. Closb the
.
Close the
clicks.
rf
I
When removing
battery,
end) out first.
battery.
and
correctly
the
battery top
battery cover.
cover until it
is
displayed
E
panel.
LCD
The
date
display
"94.
to
1.1.".
Readjust to the
date/time.
pull
the
(-
bottom
the
and
on the
is
correct
27)
old
(-
reset
(+
E-tt
Becoming
www.orphancameras.com
Familiar
Your Gamera
with
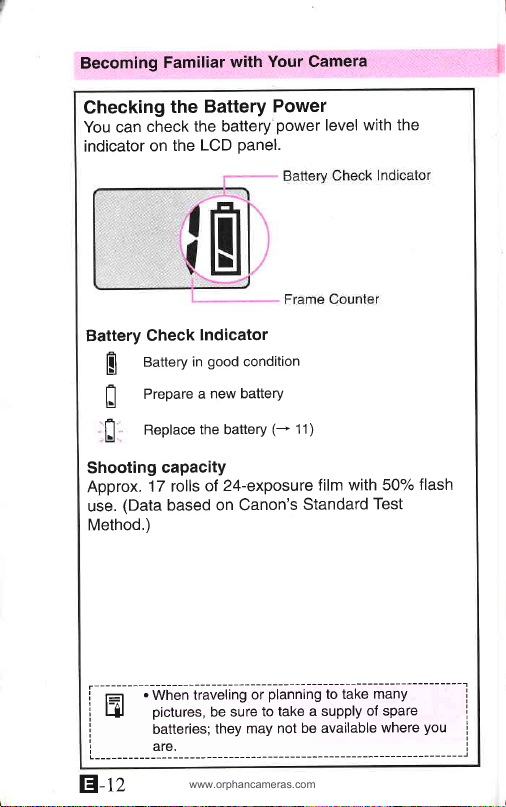
Checking
You can
indicator
Battery
B
il
,il,'
Shooting
Approx.
use.
Method.)
i r=
l-ll pictures,
I
i
L- --
El-rz
the
the battery
check
the LCD
on
Check
Battery in
Prepare
RePlace
capacity
17 rolls
(Data
based
;Wffil'*"ri"s
O"tteries;
Battery
Indicator
good
new battery
a
the battery
of 24'exposure
be sure
Power
power
panel.
condition
(*
on Canon's
-Jpl;fihs
to take
may not
they
- -119:-------------
level
11)
with 50%
film
Standard
t" 6riJ'.nl;v-
a supply
be available
with the
Test
of spare
where
----------J
flash
you
I
i
i
 Loading...