

Canon PowerShot £1, PowerShot E1 Getting Started
Canon
HwerShot
DIGITAL
Getting
E GLISH
CAMERA
Started
£1
II
CDI-E389
111111111111
Chec
·
the
Pac
a
ontents
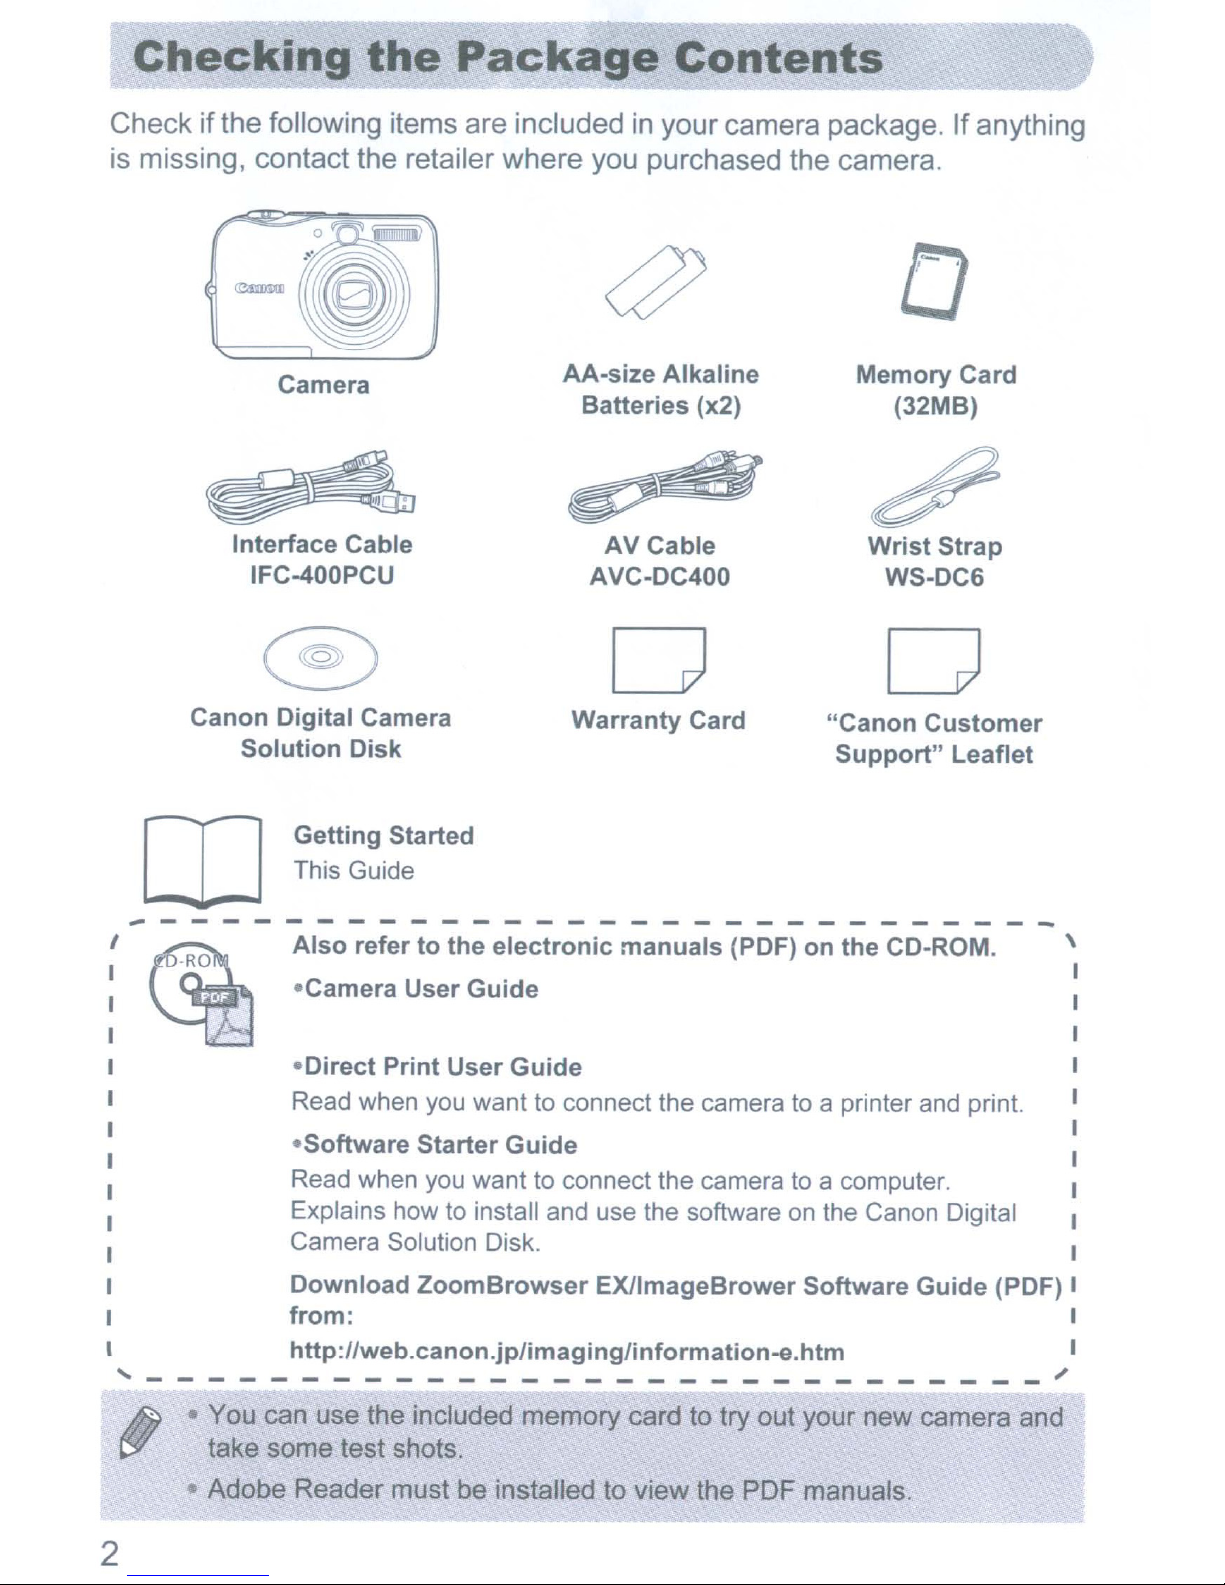
Checkifthe
is missing,
~
Interface Cable
Canon
Solution
following items
contact
Camera
IFC-400PCU
Digital Camera
the retailer
Disk
are
includedinyour
where
you purchased
if
AA-size
Batteries
~
AVC-DC400
Warranty
AV
Cable
D
camera package.Ifanything
Alkaline
(x2)
Card
the
camera.
Q
Memory
(32MB)
~
Wrist
WS-DC6
D
"Canon
Support"
Card
Strap
Customer
Leaflet
Getting Started
This Guide
rn
~----------------------------~
I
,---------------------------
• You can use the included memory card to try out your new camera and
take some test shots.
Also
-Camera User
-Direct
Read when you want to connect the cameratoa printer and print.
-Software
Read when you want to connect the cameratoa computer.
Explains how to install and use the software
Camera Solution Disk.
Download
from:
http://web.canon.jp/imaginglinformation-e.htm
refertothe
Guide
Print
User
Starter
Zoom
electronic
Guide
Guide
Browser
manuals
EXllmageBrower
(PDF)
on
on
Software Guide (PDF)
the
CD-ROM.
the Canon Digital
\
~
Adobe Reader must be installed to view the PDF manuals.
2
Conventions
Used
in
this
Guide
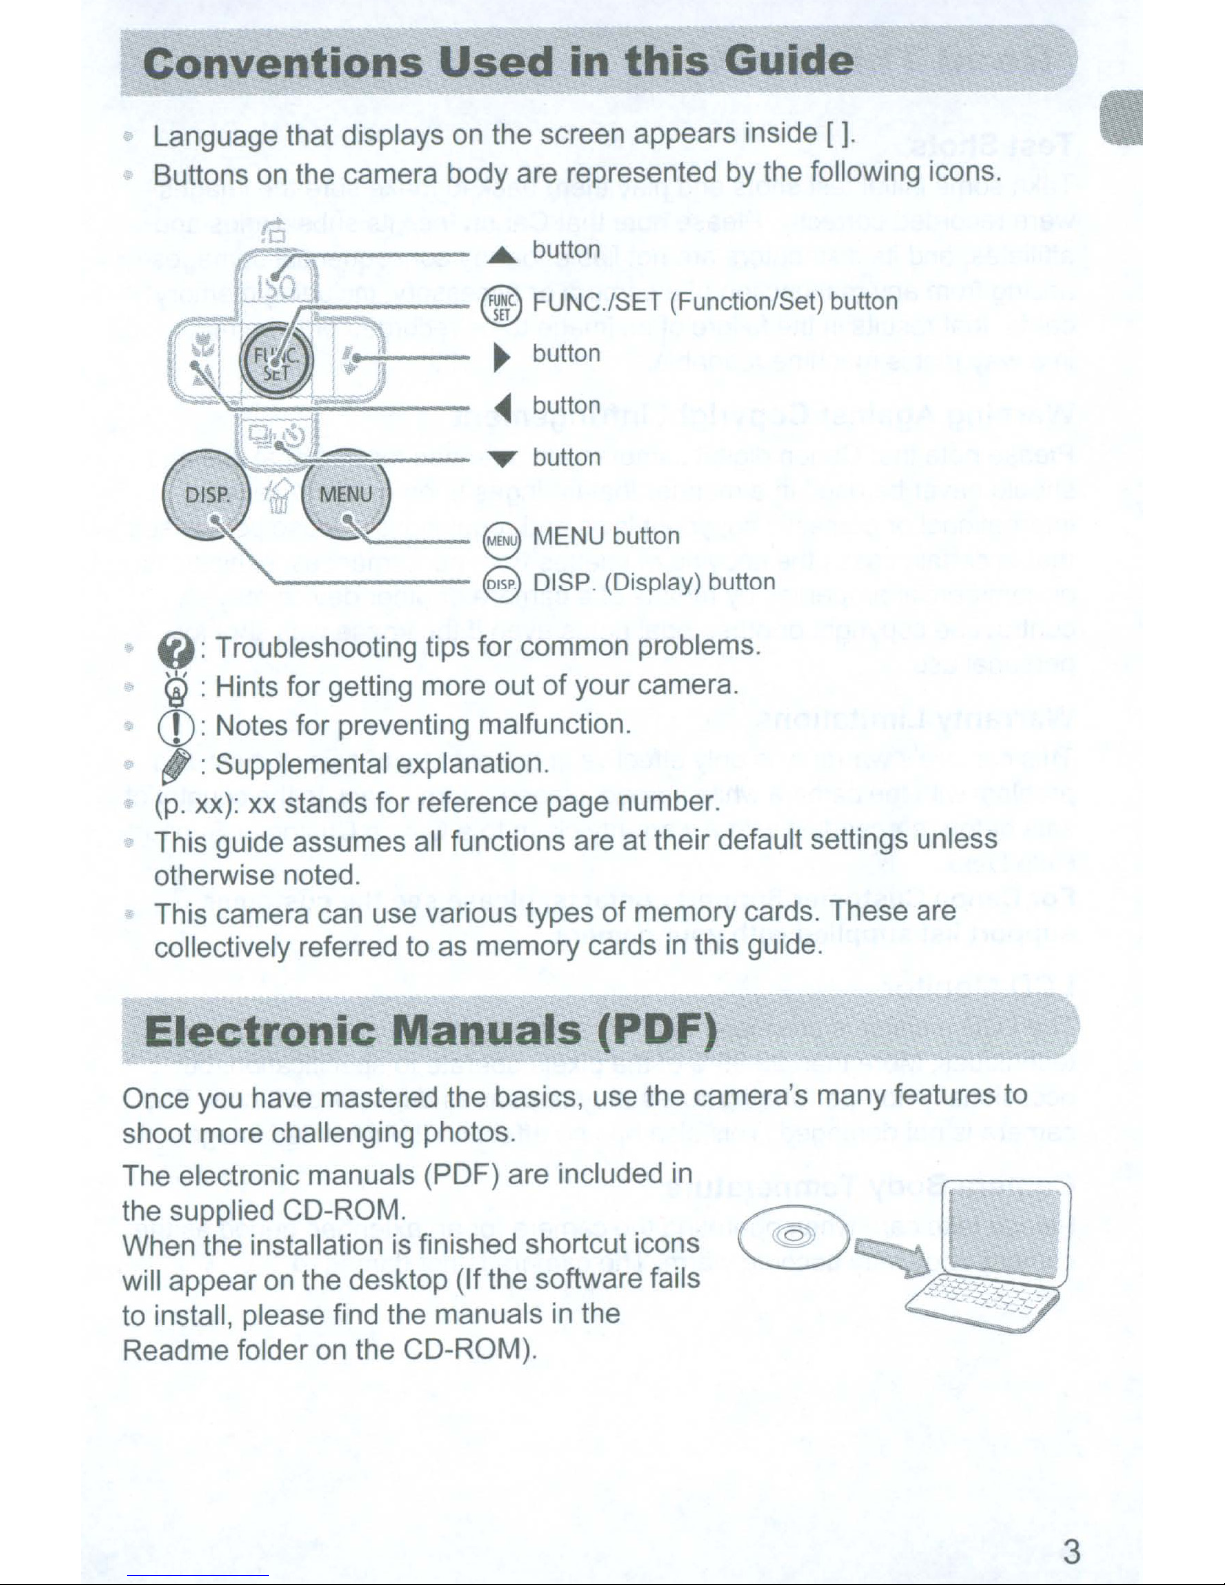
• Language that displays
Buttons on the camera body are represented by the following icons.
~~~----
J1!!!1!!!!~CJ-ii;;,;;;;;;::---
-~~~~--
---
"-------
on
the screen appears inside [
~
button
@FUNC.lSET(Function/Set)button
~
button
~
button
T button
8 MENU button
8 DISP. (Display) button
].
@: Troubleshooting tips for common problems.
~
: Hints for getting more out
of
your camera.
CD:
Notes for preventing malfunction.
. : Supplemental explanation.
(p.
xx): xx stands for reference page number.
This guide assumes all functions are at their default settings unless
otherwise noted.
This camera can use various types of memory cards. These are
collectively referred to
Electron·c
Once you have mastered the basics, use the camera's many features to
shoot more challenging photos.
The electronic manuals (PDF) are included
the supplied CD-ROM.
When the installation is finished shortcut icons
will appear
on
the desktop (If the software fails
as
memory cardsinthis guide.
anuals
(PDF)
in
to install, please find the manuals
Readme folder on the CD-ROM).
in
the
3
Read
This
First
Test Shots
Take some initial test shots and play them back to make sure the images
were recorded correctly. Please note that Canon Inc., its subsidiaries and
affiliates, and its distributors are not liable for any consequential damages
of
arising from any malfunction
in
cards, that results
in
a way thatismachine readable.
the failure
a camera or accessory, including memory
of
an image to
be
recorded or to
be
recorded
Warning Against Copyright Infringement
Please note that Canon digital cameras are intended for personal use and
be
should never
used
in
a manner that infringes upon or contravenes
international or domestic copyright laws and regulations. Please
in
that
or commercial properties by means
contravene copyright or other legal rights even if the image was shot for
personal use.
certain cases the copying
of
images from performances, exhibitions,
of
a camera or other device may
be
advised
Warranty Limitations
This camera's warranty
problem with the camera while abroad, please return it back to the country
sale before proceeding with a warranty claim to a Canon Customer Support
Help Desk.
For Canon Customer Support contacts, please see the customer
support list supplied with your camera.
is
only effective in the country of sale. If thereisa
of
LCD Monitor
The LCD monitorisproduced with extremely high-precision manufacturing
techniques. More than
occasionally non-performing pixels may appear as bright or dark dots. The
99.99%
of
the pixels operate to specification, but
is
camera
not damaged. This also has no effect on the recorded image.
Camera Body Temperature
Please take care when operating the camera for an extended period as the
camera body may become warm. The camera
4
is
not damaged.
5
Safety
Before using the camera, please ensure that you read the safety precautions
described below. Always ensure that the camera is operated correctly.
Precautions
The safety precautions noted
to yourself and other persons, or damage to the equipment.
Be sure to also check the guides included with any separately sold accessories you
use.
it
it
Warnings Denotes the possibility of serious injury or death.
Cautions Denotes the possibilityofinjury or damagetothe equipment.
on
the following pages are intendedtoprevent injuries
A Warnings
Equipment
Do
not
look
through
etc.).
Exposure to the intense light may damage eyesight.
Store
Strap: Putting the strap around a child's neck could resultinasphyxiation.
Memory card, day/date battery: Dangerous if accidentally swallowed. If this occurs,
contact a doctor immediately.
Do
Exposure to the intense light produced by the flash may damage eyesight.
particular, remain at least one meter (39 inches) away from infants when using the
flash.
Do
expressly
To
dropped
Stop
otherwise
Do
This could resultinfire or electrical shock.
If liquid
the camera power off and remove the batteries.
Do
equipment.
Use
this
equipment
not
trigger
not
attempttodisassembleoralter
avoid
not
not
only
the
or
operating
allow
or
use
recommended
the flash in close
describedinthis
riskofinjury,
otherwise damaged.
the camera
behaves abnormally.
liquidsorforeign
foreign objects come into contact with the camera interior, immediately turn
organic
the camera
outofthe reachofchildren
do
immediatelyifit
solvents
power
viewfinderatbright
proximity
any
guide.
not
touch
objectstoenter
such
as
sources.
the
alcohol,
to
partofthe
light
and
infants.
human
interiorofthe
emits
the camera.
benzine,
eyes.
equipment
smoke,
or
sources
cameraifit
a strange smell,
thinnertoclean
(the
sun,
In
thatisnot
has been
or
the
6
Safety Precautions
Batteries
Use
only
recommended batteries.
Do
not
place batteries nearorin direct flame.
Do
not
let batteries
liquids.
Do
not
attempttodisassemble, alterorapply heattobatteries.
Avoid
This may cause explosions or leaks, resultinginfire, injury and damage to the
surroundings.
contacts these substances, immediately flush with water and seek medical
assistance.
dropping
In
Before you discard batteries,
Contacting other metal materialsinwaste containers may lead to fire or explosions.
come
or
subjecting
the event that a battery leaks and the eyes, mouth, skin or clothing
into
contact
with water (e.g. sea water)
batteriestosevere impacts.
cover
the terminals
with
tapeorother
or
other
insulators.
A Cautions
Do
not
aim the cameraatbright
Doing so may cause malfunction or damage the image sensor (CCO).
Be careful
nottobang the cameraorsubjectitto
when hangingitby the strap.
Be careful
This could lead to injury or damage the camera.
nottobumporpush
When using the camera on a beach
allow
This may cause the camera to malfunction.
Avoid using, placing
- Places subject to strong sunlight.
- Places subject to temperatures above 40
- Humid or dusty areas.
These could cause leakage, overheating or explosion, resulting
injuries. High temperatures may also cause deformation
Remove and store
Ifthe batteries are left inside the camera, damage caused by leakage may occur.
Do
covering the flash
This may cause the camera to malfunction.
dustorsandtoenter the camera.
or
storing
the
batteries when you are
not
use the flash
with
with
dirt,
your
light
strongly
sources (the sun, etc.).
on the lens.
or
at a windy location, be careful
the camera in the
0
C (1040F).
not
dustorother
items
fingersorclothing.
strong
following
using
impactsorshocks
places.
in
fire, burns or other
of
the casing.
the camera.
not
to
stucktothe surface,orwhen
For CA, USA
Included lithium battery contains Perchlorate Material - special handling may apply.
See www.dtsc.ca.gov/hazardouswaste/perchloratel for details.
only
7
LCD
Do not sitina chair with the camerainyour pocket.
Doing so may cause malfunction or damage the LCD monitor.
When putting the camerainyour bag, ensure that hard objects do not come into
contact with the LCD monitor.
If this occurs, it may cause malfunctionordamage the LCD monitor.
Do not attach accessories to the strap.
Doing so may cause malfunction or damage the LCD monitor.
Monitor
Precautions
8
Table
Checking the Package Contents 2
Conventions Used
Electronic Manuals (PDF) 3
Read This First 4
Safety Precautions 6
LCD Monitor Precautions 8
Attaching the Wrist Strap/Holding the Camera 9
Table of Contents 9
Inserting the Batteries and Memory Card 10
of
Contents
in
this Guide 3
Setting the Date and Time
Setting the Display Language
Pressing the Shutter Button
Taking Pictures
Viewing Images 20
Erasing Images
Printing Images 22
Shooting Movies 24
Viewing Movies
Transferring Images to a Computer 27
Accessories
Separately Sold Accessories
Attaching the
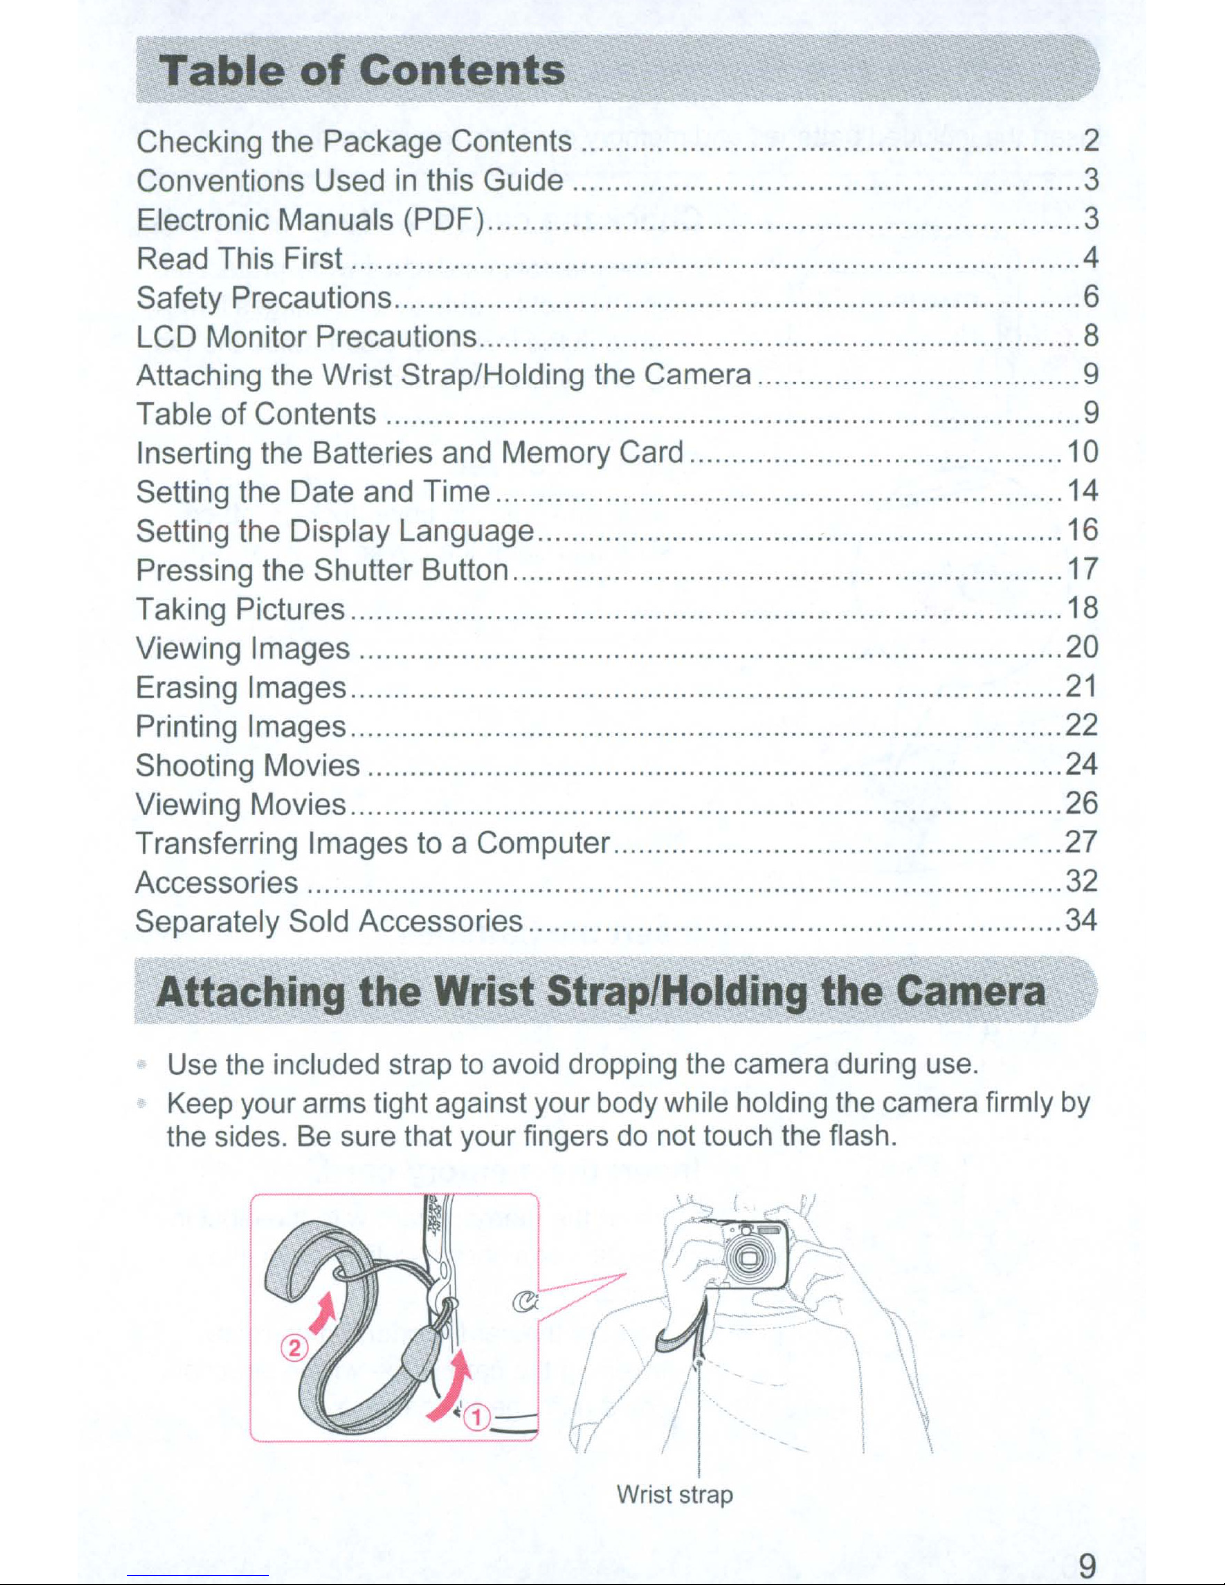
Use the included strap to avoid dropping the camera during use.
Wrist
Strap/Holding
the
Camera
14
16
17
18
21
26
32
34
Keep your arms tight against your body while holding the camera firmly by
the sides. Be sure that your fingers do not touch the flash.
Wrist strap
9
Inserting
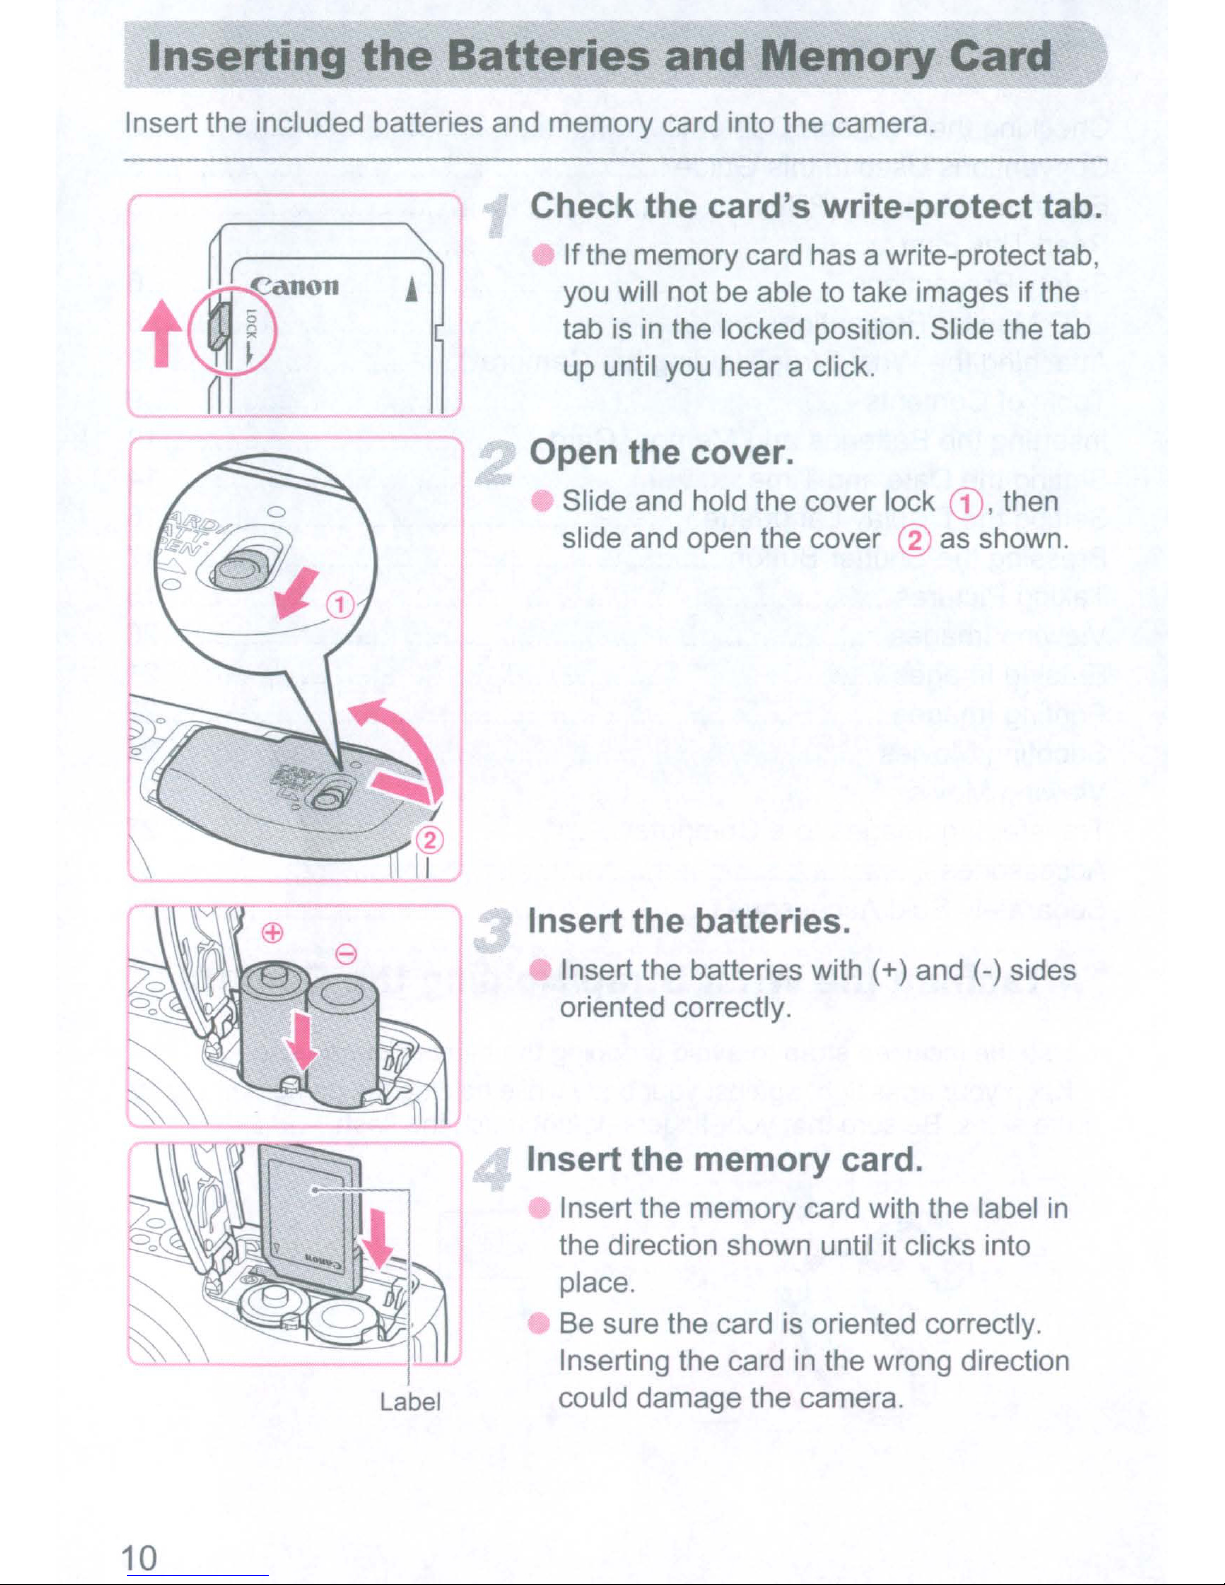
Insert the included batteries and memory card into the camera.
the
Batteries and Memory Card
Check the card's write-protect tab.
Ifthe memory card has a write-protect tab,
you will not be able to take images if the
tab is in the locked position. Slide the tab
up until you hear a click.
Open the cover.
Slide and hold the cover lock
slide and open the cover
J),
~
as shown.
Insert the batteries.
Insert the batteries with (+) and (-) sides
oriented correctly.
then
Label could damage the camera.
10
Insert the memory card.
Insert the
the direction shown until it clicks into
place.
Be sure the card is oriented correctly.
Inserting the card
memory
card with the label
in
the wrong direction
in
Inserting the Batteries and Memory Card
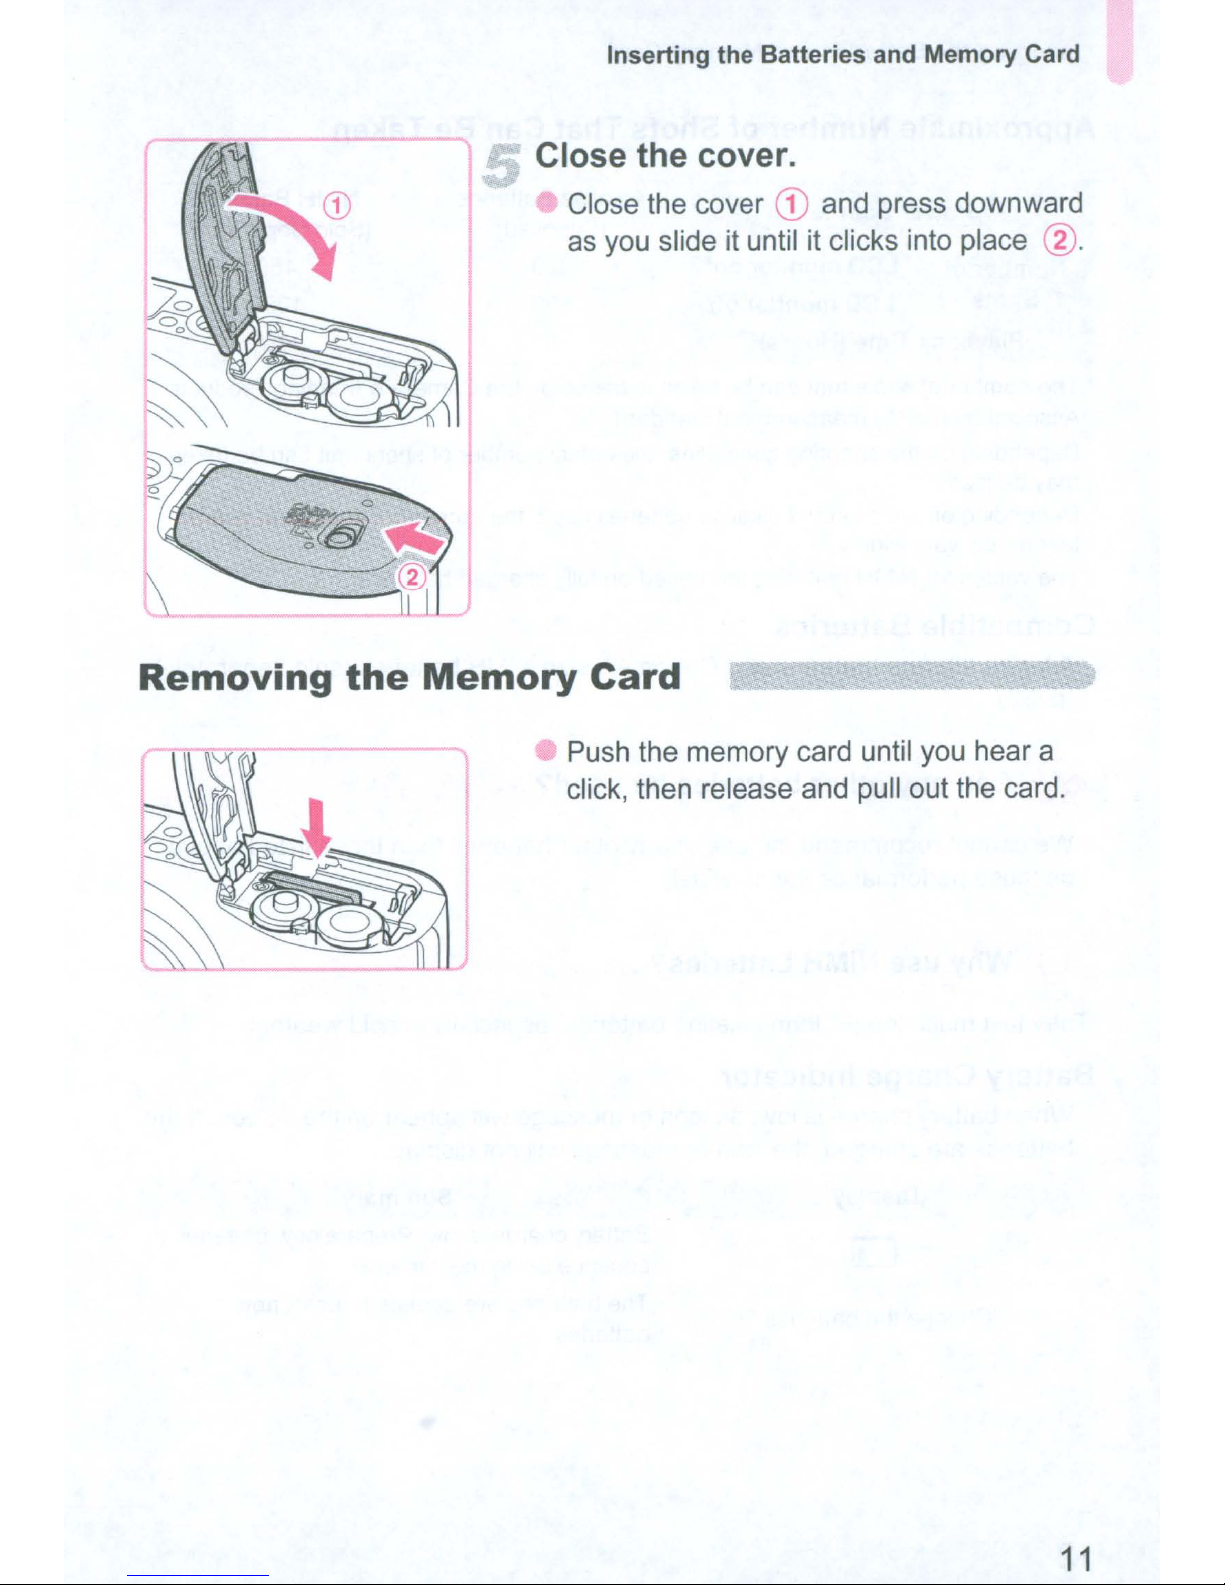
Close the cover.
Removing
the
Memory
Close the cover
as
you slide it until it clicks into place
\.!
and press downward
Card
Push the memory card until you hear a
~.
click, then release and pull out the card.
11
Inserting the Batteries and Memory Card
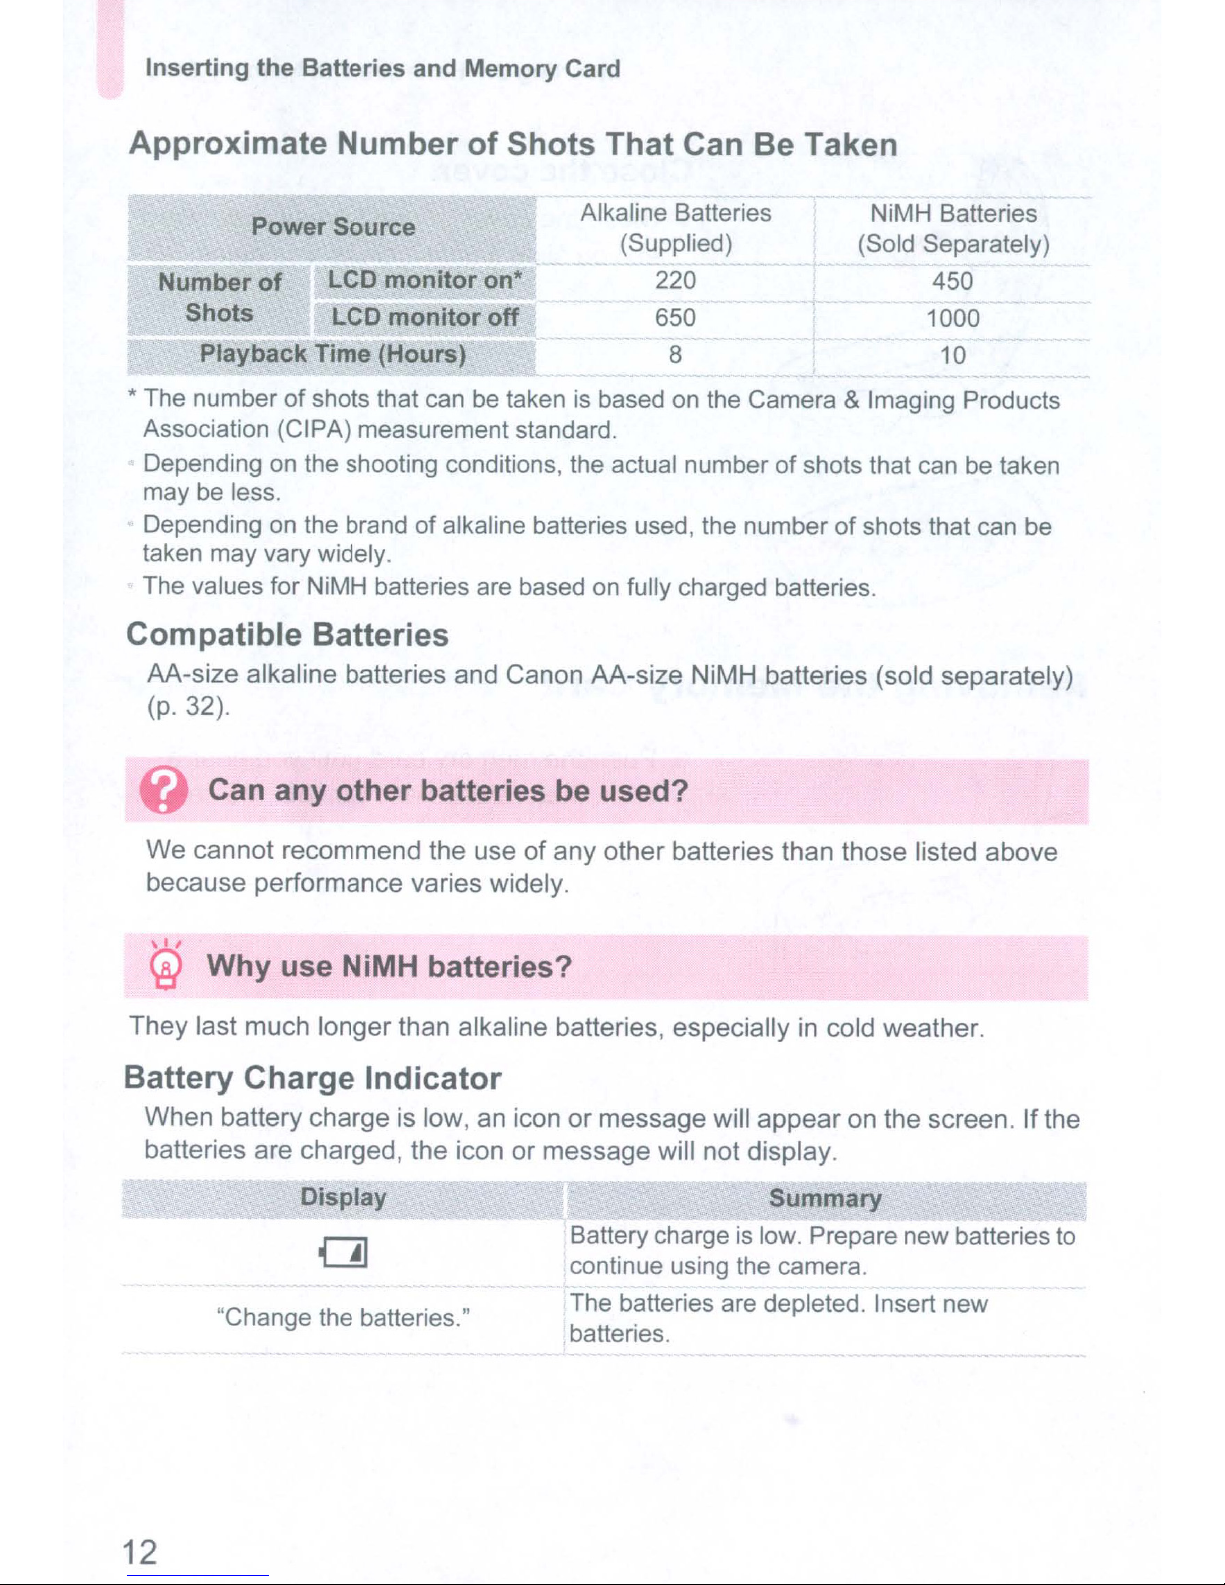
Approximate
Power Source
Number
Shots LCD
* The
numberofshots
Association (CIPA) measurement standard.
Depending on the shooting conditions, the actual
may
be less.
Depending on the brand
taken
The values for NiMH batteries are based on fully charged batteries.
of
Playback Time (Hours)
may
vary widely.
Compatible
AA-size alkaline batteries and Canon AA-size NiMH batteries (sold separately)
(p. 32).
Number
LCD
monitor
monitor
that
can be taken is based on the Camera & Imaging Products
of
Batteries
of
Shots
on*
off
alkaline batteries used, the
That
Alkaline Batteries
(Supplied)
Can Be Taken
220
650
8
numberofshots
NiMH Batteries
(Sold Separately)
450
1000
10
that
can be taken
numberofshots that can be
Can
We cannot recommend the use of any other batteries than those listed above
because performance varies widely.
any
other
batteries be used?
,,
Why
They last much longer than alkaline batteries, especiallyincold weather.
Battery Charge
When battery charge is low, an icon or message will appear on the screen. If the
batteries are charged, the icon or message will not display.
'Change
use NiMH batteries?
Indicator
Display
Ol
the batteries."
Summary
Battery charge is low. Prepare
continue using the camera.
The batteries are depleted. Insert
batteries.
new
batteries to
new
12

Inserting the Batteries and Memory Card
Approximate NumberofShots That Can Be Saved
in
a Memory
Card
!:=::=::.":;::.;::::;;;,:::-=
Memory
Number
Values
The number of shots that
subject
are
and
How do you check the number of shots that can be saved?
The numberofshots that can be saved appear on the screen when the camera
is in Shooting Mode (p. 18).
card
:;;:::;:::;:::::::::;
of
Shots
based
the memory
on
32
MB
(supplied)
11
a cameraatdefault settings.
can
be
saved will vary depending
card
used.
2 GB
749
on
camera settings,
8 GB
2994
the
Number of shots that
can
be
saved
Compatible Memory Cards
SO memory cards
SOHC memory cards
MultiMediaCards
MMCplus memory cards
HC MMCplus memory cards
What
SO
and SOHC memory cards have a write-protect tab. If this tab isinthe locked
position, "Card Locked!" will appear on the screen and you will not
take
or
is
the Write-Protect Tab?
erase images.
be
able to
13
 Loading...