

Canon P20-DX User Manual

CONTENTS
1. Keys and Controls . . . . . . . . . . . . . . . . . . . . . . . . . . . . . . . 3
2. How to Replacing the Ink Roller . . . . . . . . . . . . . . . . . . . . 7
3. How Insert Printing Paper . . . . . . . . . . . . . . . . . . . . . . . . 8
4. How to Load and Replace Dry Batteries . . . . . . . . . . . . . . 10
5. Canon AD Adapter AD-4II . . . . . . . . . . . . . . . . . . . . . . . . 11
6. Overflow Interlock Function . . . . . . . . . . . . . . . . . . . . . . . 11
7. Calculation Examples . . . . . . . . . . . . . . . . . . . . . . . . . . . . 14
2

1. Key and Controls
Numeral Keys/Decimal Point Key: For entering numbers.
Addition and Subtraction Keys
Subtotal Key: For obtaining intermediate results of addition and subtraction
and the number of items (the number of times the “+” or “–“ keys have been
pressed).
Total Key: For obtaining results of addition and subtraction and the number
of items (the number of times the “+” or “–“ keys have been pressed).
Multiplication and Division Keys
Equal Key: For obtaining results of multiplication and division.
Clear Key: For clearing all registered calculations except memory.
Clear Entry Key: For correcting incorrect entries.
3

Percent Plus/Minus Key: For performing percentage add-on and discount cal-
culations.
Memory Plus/Equal Key: For obtaining a calculation result and adding the
result automatically to the memory. This key is also used to add a number to
the memory.
Memory Minus/Equal Key: For obtaining a calculation result and subtracting
the result automatically from the memory. This key is also used to subtract a
number from the memory.
Subtotal Recall Memory Key: Used to recall the memory contents. The
memory register is not cleared.
Total Recall Memory Key: Used to recall the memory contents. At the same
time the memory register is cleared.
4

Power On/Paper Feed Key: Used to feed the paper when the power switch is
on, and also used to reactivate the display if the Automatic Power Off Function
(see p.6) turns the calculator off.
Decimal Point Selector Switch: For designating the decimal point position for
calculation results.
F (Floating Decimal Point): All effective numbers up to 10 digits are printed or
displayed.
+ (Add-Mode): Addition and subtraction are performed with an automatic
2-digit decimal. The “+” key need not be depressed for individual entries.
Power and Printer Switch: This switch is used to turn the power on and off
and also to turn the print function on and off. Slide the switch to the center
position to turn the power on. Setting the switch at the leftmost position turns the
print function on.
5

When printing is not required (i.e. the printer switch is OFF), the calculator can be
used as an ordinary display model.
Input Buffer Register Function: The buffer register allows all numbers, basic
function and other function keys to be depressed while numbers are being printed.
The calculator remembers up to 9 key entries in the register, and calculates them
in the sequence entered.
Automatic Power Off Function: When the power switch is turned ON but none
of the keys is depressed for more than about six minutes, the display goes out
automatically.
In this case, depress the “Power On/Paper Feed” key to start the calculation,
0 will appear on the display.
6
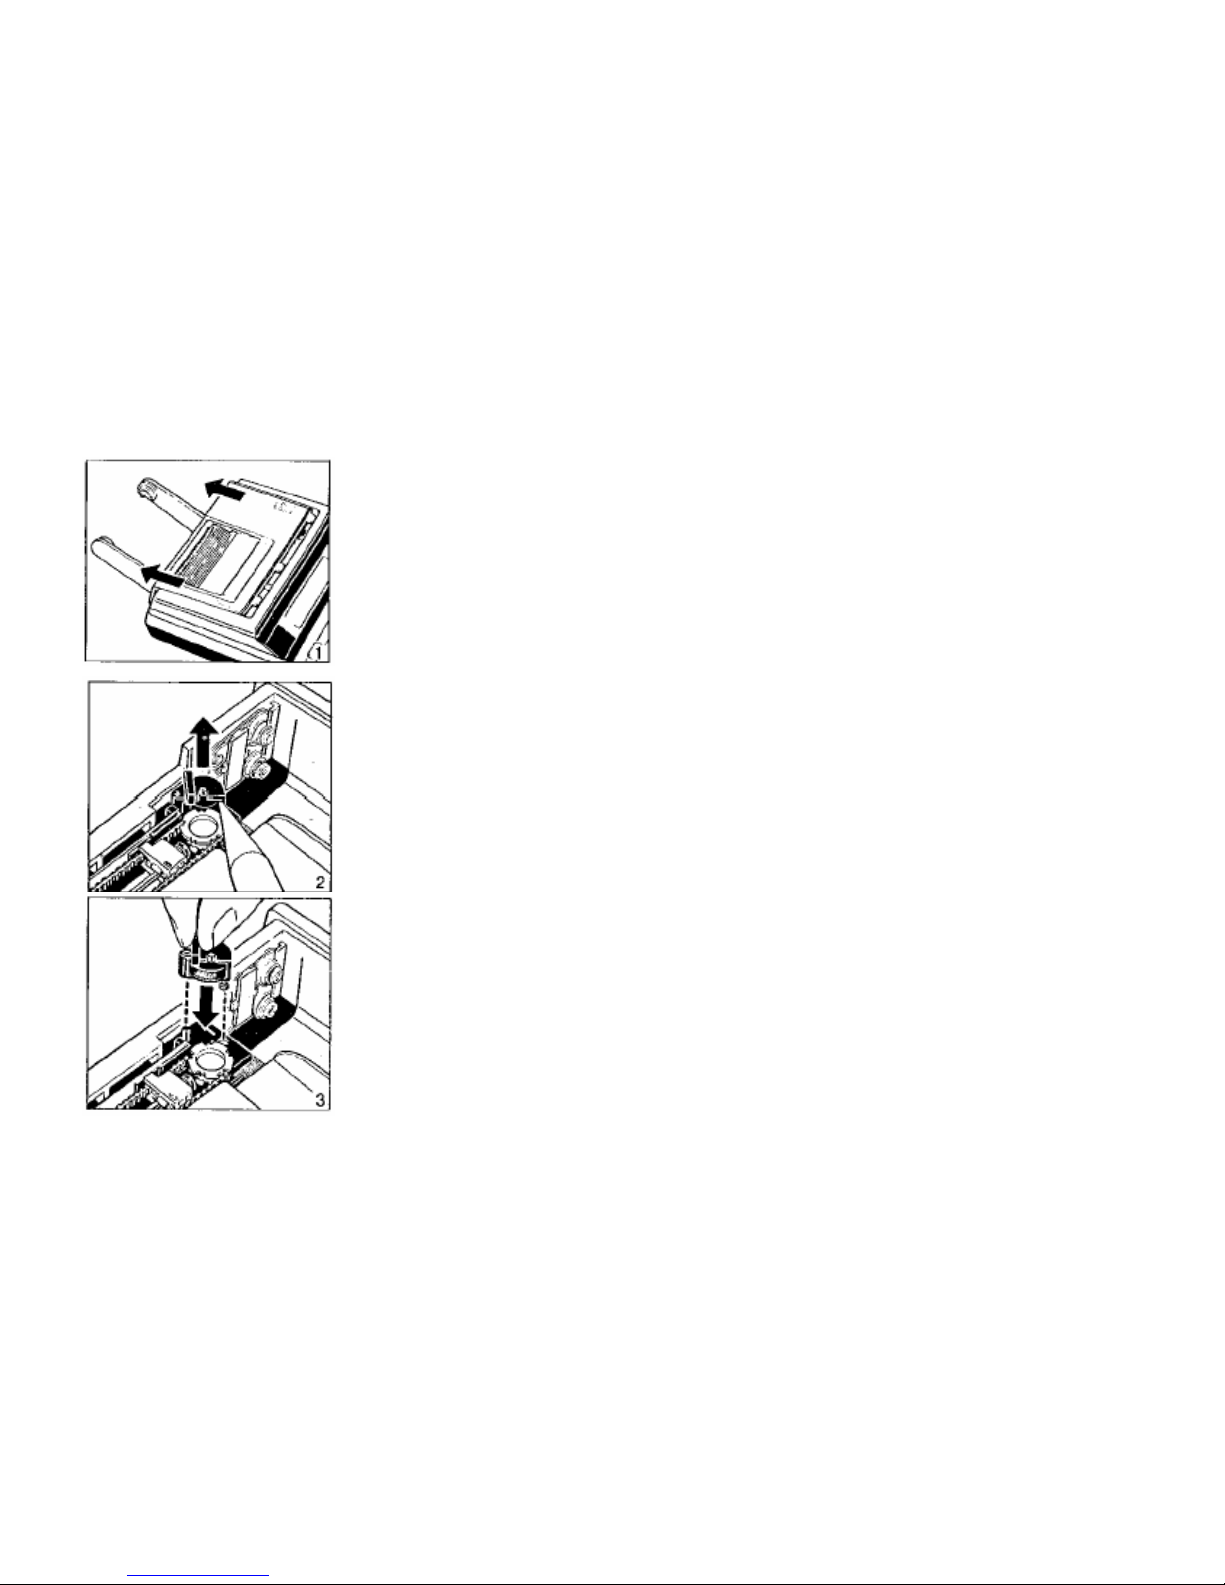
2. How to Replace the Ink Roller
1) Remove the printer cover.
2) Remove the old ink roller by inserting the tip of a pen or
other pointed object to the right of the retainer pin and
lifting the roller out.
3) Set a new Canon CP-12 ink roller into position.
4) Replace the printer cover.
7
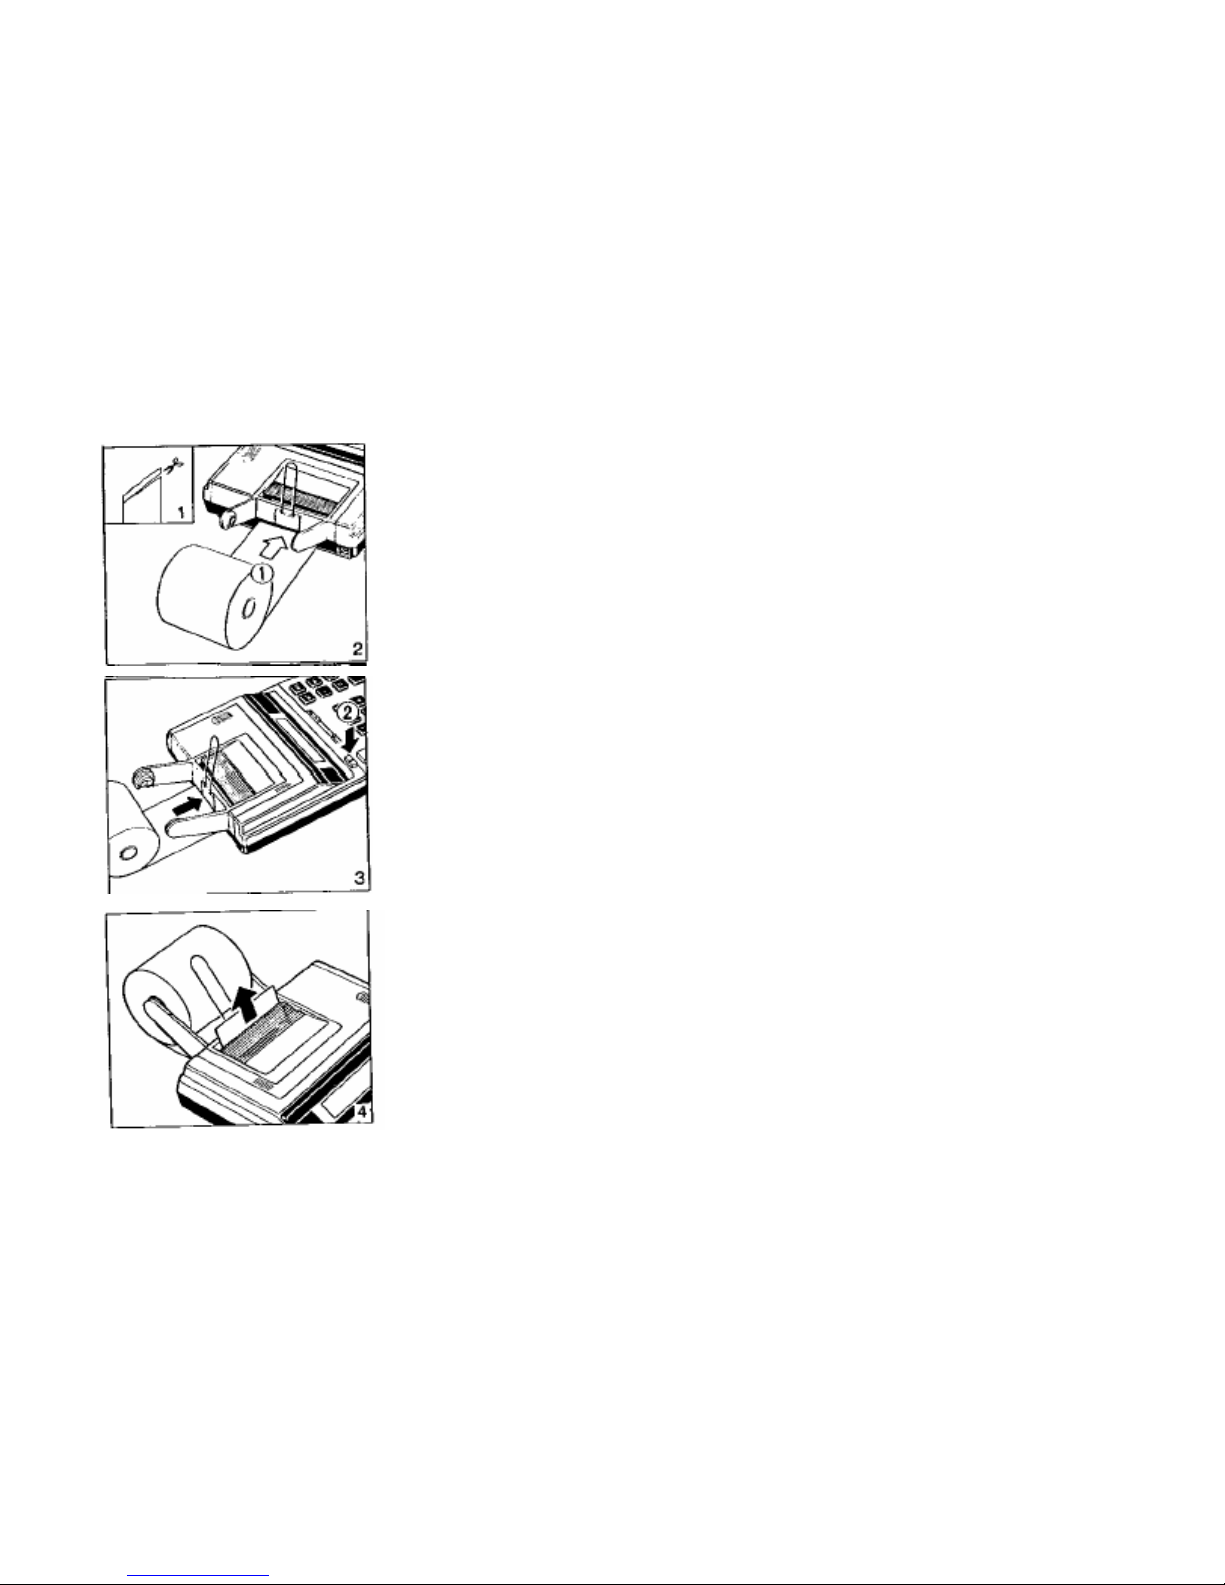
3. How to Insert Printing Paper
1) The edge of the paper should be positioned as shown in
figure (1).
2) Lift the paper deflection hook and insert the edge of the
paper into the slit as far as possible.
3) Turn the power switch ON.
4) Press the paper feed key to advance the paper (fig.2).
5) Slightly pull apart both arms of the paper holder and
insert the printing paper.
• Keep the paper deflection hook raised at this time.
Once the printing paper is set in the holder, flip
this hook down on to the roll of printing paper.
6) Insert the edge of the printing paper in the slot at the back
of the calculator and then press the paper feed key to
advance the paper.
8

Replacement
Low battery voltage may cause printing defects, random paper advances or the
inability of the “C” key to clear the overflow.
Printer Error Lock
When the printer is on, low battery voltage may cause printer error lock. In this
case, depress the “C” key to clear the error lock, and the calculator can be used as
an ordinary display model. However, the batteries should be replaced as soon as
possible.
9
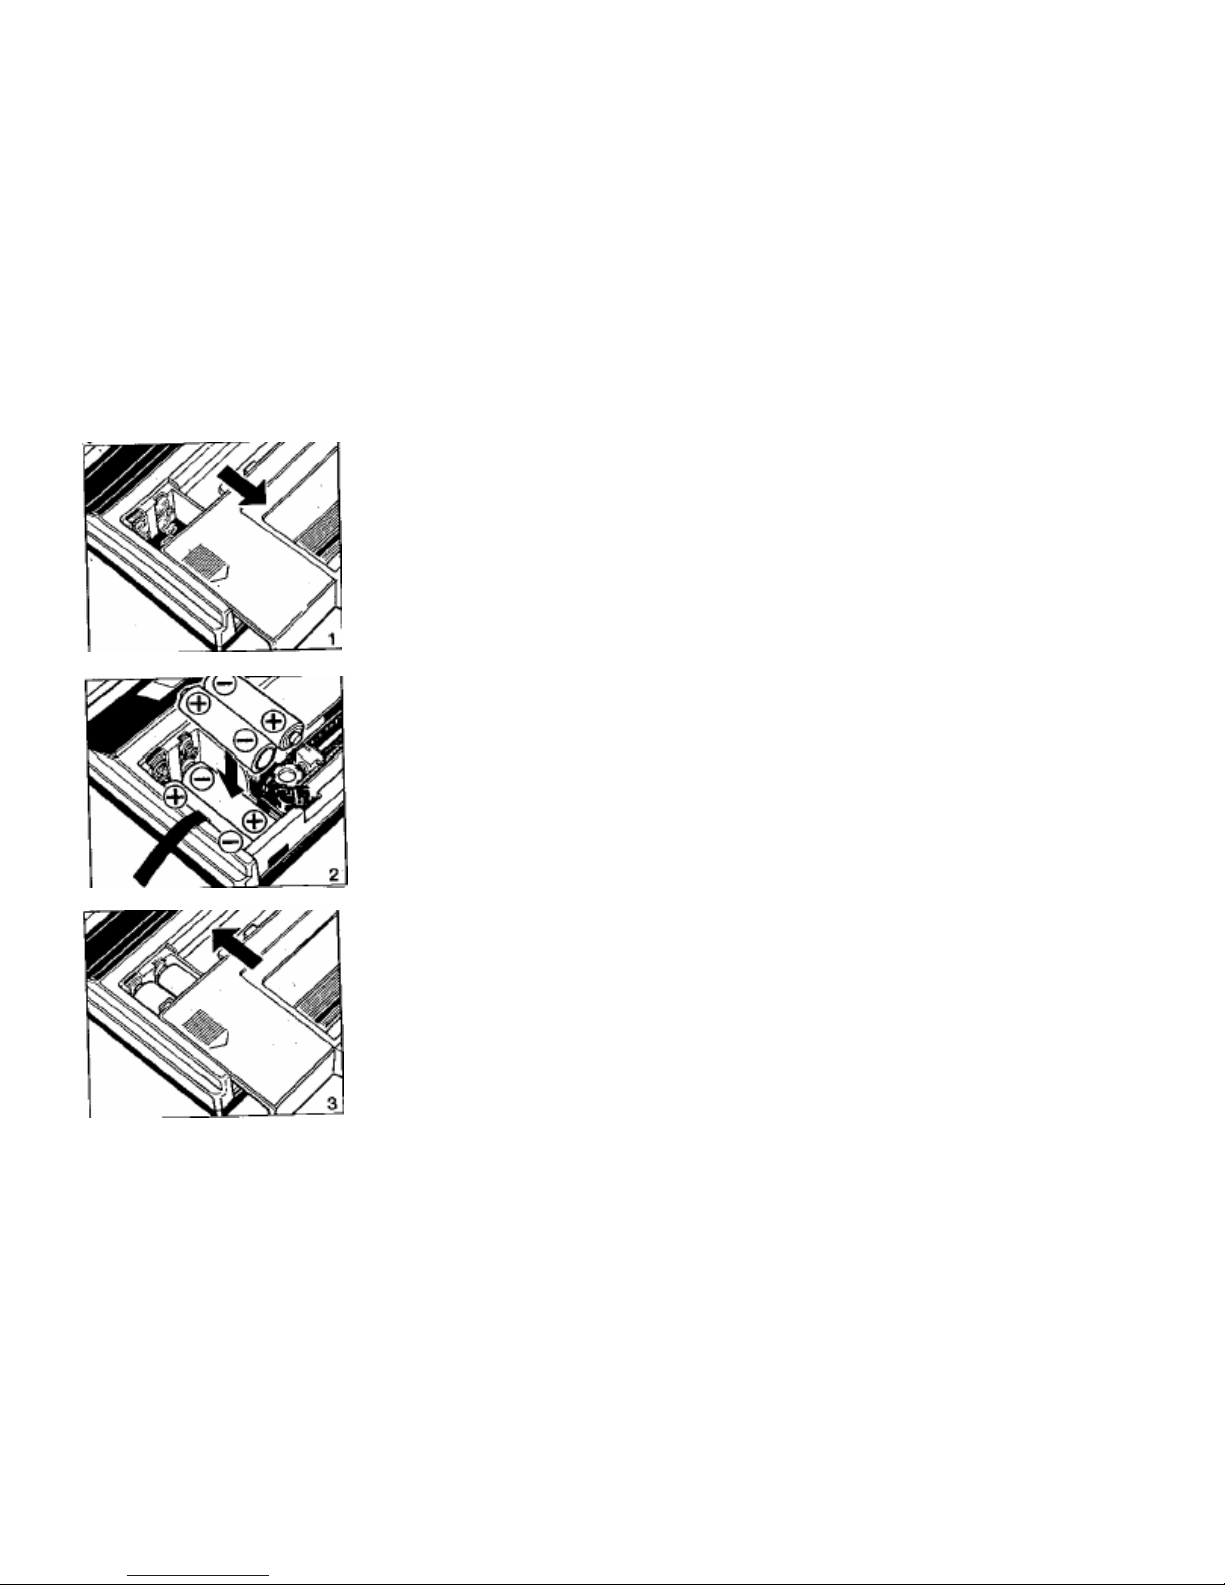
4. How to Load and Replace Dry Batteries
Loading
1) Remove the cover of the battery chamber on the bottom
of the P20-DX by sliding it in the direction of the arrow.
2) Load four new penlight batteries (size AA) into the
battery chamber as illustrated, by inserting the (-) end
first.
3) Replace the cover.
• The P20-DX will not operate if batteries are loaded
improperly.
10
 Loading...