

A basic guide to the
Océ Variolink
3
2
1
7
6
5 4
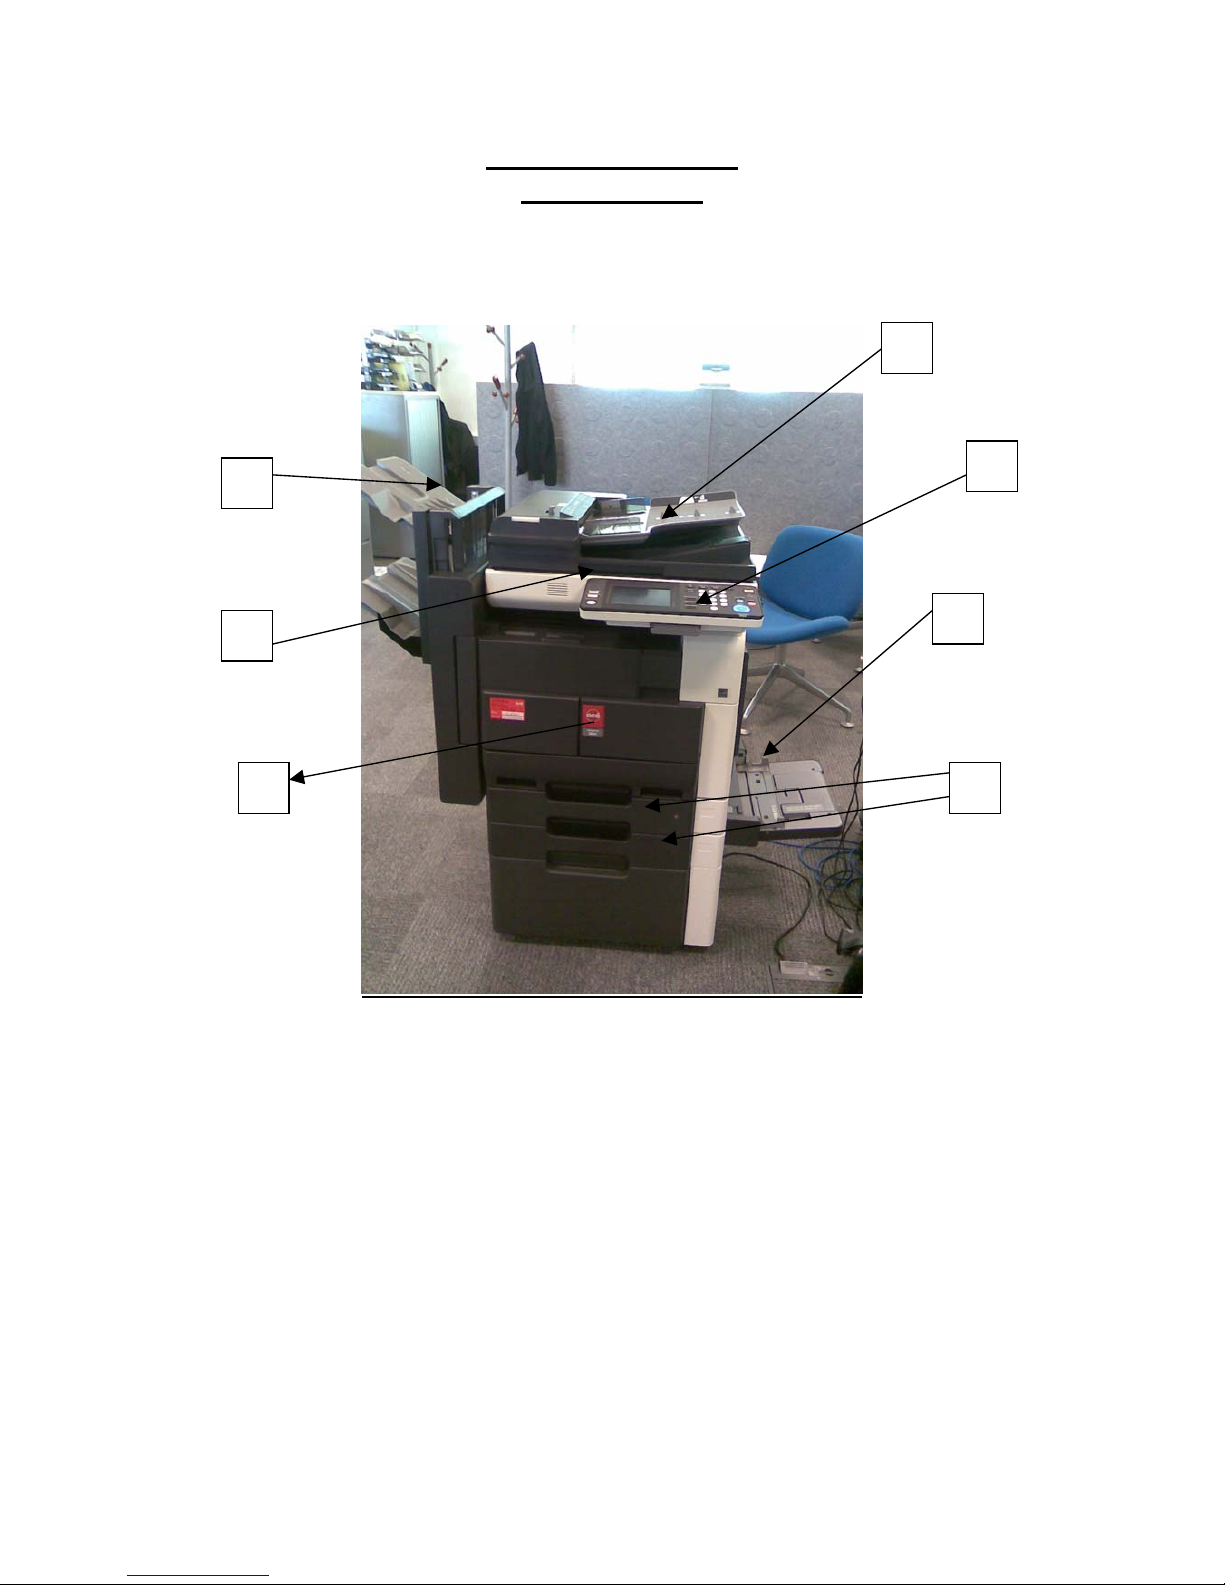
1 – Automatic Document Feeder (ADF)
2 – Controller Panel
3 – Bypass Tray
4 – Paper Trays
5 – Front Panel (Toner entry)
6 – Top Lid Handle
7 – Finishing Trays

Control Panel Explained
2
1
1 – Reset button
2 – Copying Functions screen
7
6
5
4
3
3 – Stop button
4 – Start button
5 – Cancel button
6 – Number Keypad
7 – Finisher trays
1 – Pressing the reset button will cancel any functions selected and
revert the machine back to its default settings.
2 – The Copy screen selects the screen, displaying all the
photocopying functions.
3 – Pressing the Stop button will stop a started job.
4 – Pressing start will start a copy job.
5 – The cancel button clears any number or screen keypad entry.
6 – The keypad is used to enter the number of copies required.
7 – The Fax/Scan screen selects the screen displaying scanning and
faxing options (if configured).
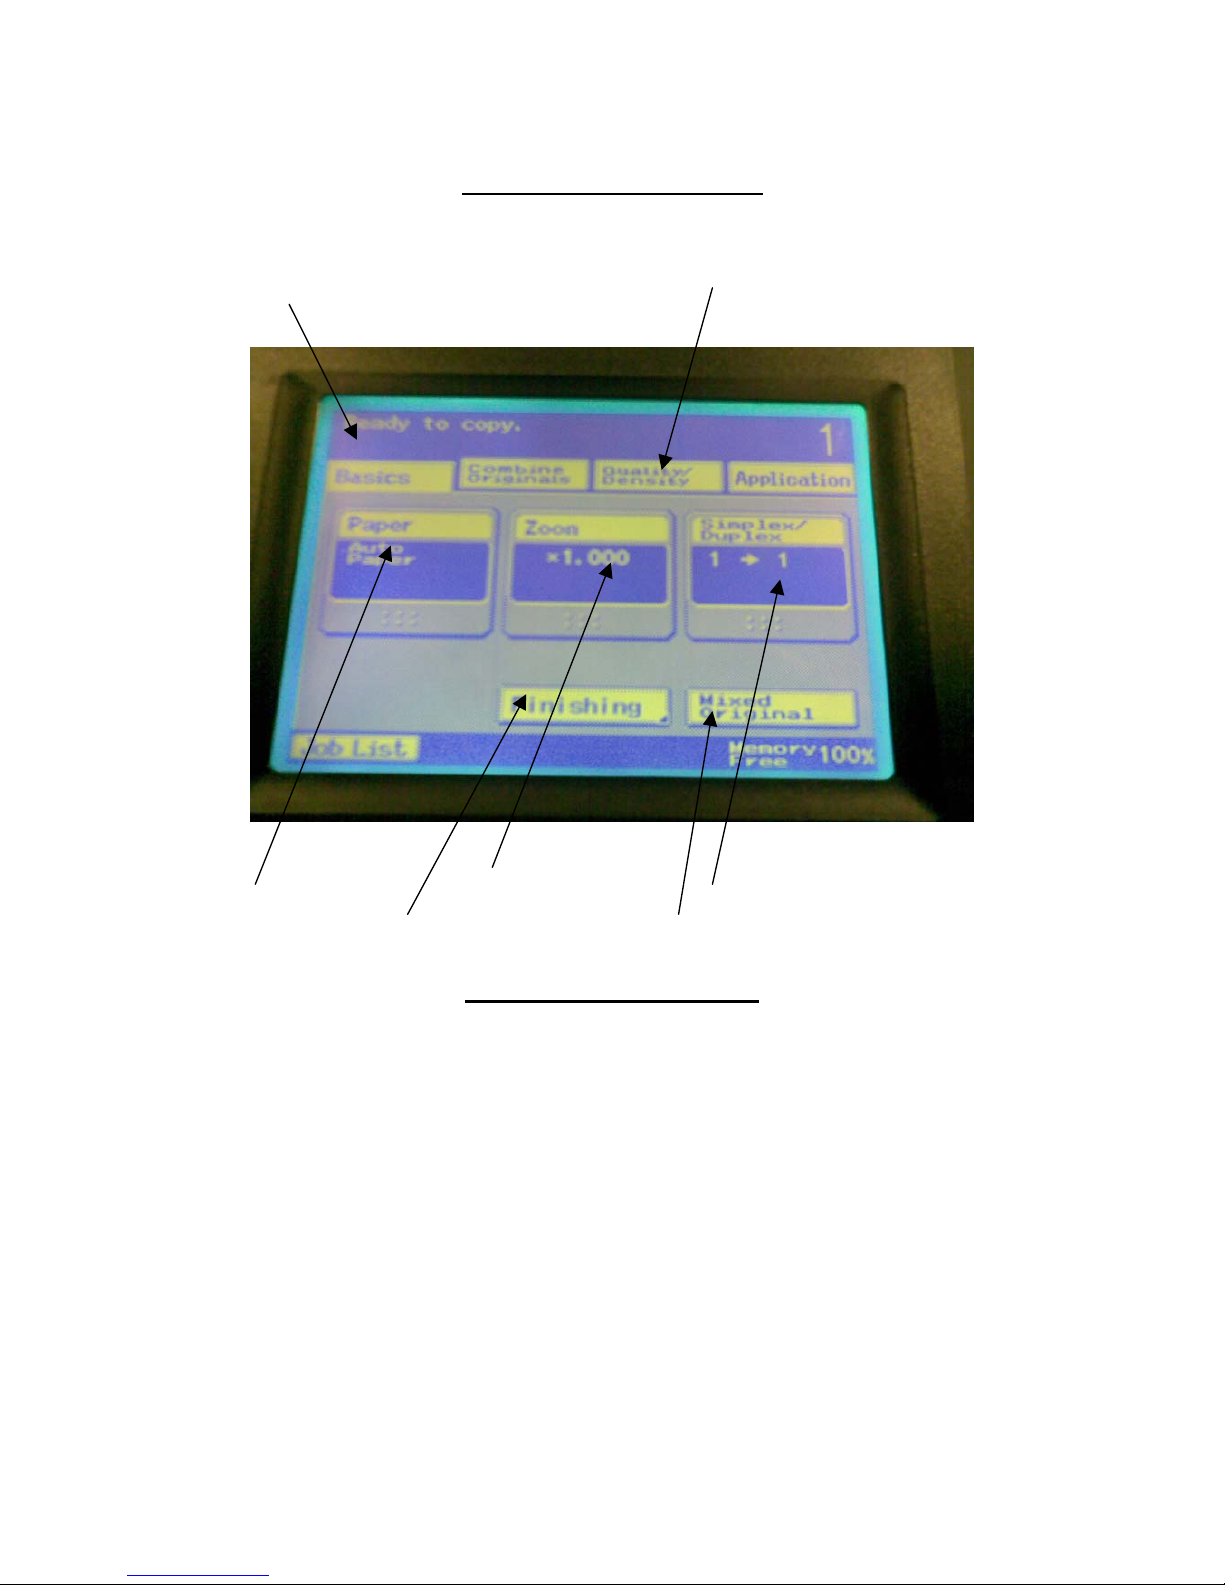
Main Screen Explained
Basic Screen Quality Densit
y
Paper screen Zoom Screen Simplex / Duplex Screen
Finishing Screen Mixed Original button
Mixed Original Explained
The mixed Original button allows a user to put different paper sizes
together in the document feeder (e.g. A4 and A3). Normally the
sensors on the Automatic Document Feeder would only recognise the
largest paper size and assume that each sheet is the same size.
By selecting the Mixed Original button, it will search for different
sizes and then select the correct paper to copy the document on. E.g.
the machine will know to select A4 from the tray with A4 paper in it,
and A3 from the tray with A3 in it.
 Loading...