


FACSIMILE USER’S GUIDE
Preface i

Trademarks
Canon and LASER CLASS are registered trademarks and RAPID Fusing
System is a trademark of Canon, Inc.
Copyright
Copyright © 2001 by Canon, Inc. All rights reserved. No part of this
publication may be reproduced, transmitted, transcribed, stored in a
retrieval system, or translated into any language or computer language
in any form or by any means, electronic, mechanical, magnetic, optical,
chemical, manual, or otherwise, without the prior written permission of
Canon, Inc.
As an ENERGY STAR Partner, Canon has determined
that the Canon LASER CLASS® 3170 and 3175 meet
the Energy Star guidelines for energy efficiency.
Super G3 is a phrase used to describe the new
generation of fax machines that use ITU-T V.34
standard 33.6Kbps* modems. Super G3 High Speed
Fax machines allow transmission time of
approximately 3 seconds* per page which results in
reduced telephone line charges.
* Approximately 3 seconds per page fax transmission
time based on CCITT/ITU-T No.1 Chart, (JBIG,
Standard Mode) at 33.6Kbps modem speed. The
Public Switched Telephone Network (PSTN) currently
supports 28.8Kbps modem speeds or lower,
depending on telephone line conditions.
ii Preface

Users in the U.S.A.
PRE-INSTALLATION REQUIREMENTS FOR CANON
FACSIMILE EQUIPMENT
A. Location
Supply a suitable table, cabinet, or desk. See Appendix A for the
unit’s dimensions and weight.
B. Order Information
1. Only a single telephone line (touch-tone or rotary) is to be used.
2. Order an RJ11-C modular wall jack (USOC code), which should
be installed by the phone company. If the RJ11-C wall jack is not
present, telephone/fax operation is not possible.
3. Order a normal business line from your telephone company’s
business representative. The line should be a regular voice grade
line or the equivalent. Use one line per unit.
DDD (Direct Distance Dial) line
-if not-
IDDD (International Direct Distance Dial) line if you communicate overseas
Canon recommends an individual line following industry standards, e.g.
the 2500 (Touch Tone) or 500 (Rotary/Pulse Dial) telephones. A dedicated extension off a PBX unit without “Call Waiting” can be used with
your facsimile unit. Key telephone systems are not recommended
because they send non- standard signals to individual telephones for
ringing and special codes, which may cause a fax error.
C. Power Requirements
The facsimile unit should be connected to a standard 120 volt AC, threewire grounded outlet only. Do not connect this unit to an outlet or
power line shared with other appliances that cause electrical noise.
Air conditioners, electric typewriters, copiers, and machines of this sort
generate electrical noise which often interferes with communications
equipment and the sending and receiving of documents.
Preface iii

CONNECTION OF THE EQUIPMENT
This equipment complies with Part 68 of the FCC rules. On the rear
panel of this equipment is a label that contains, among other information, the FCC Registration Number and Ringer Equivalence Number
(REN) for this equipment. If requested, this information must be given
to the telephone company. This equipment may not be used on coin
service provided by the telephone company. Connection to party lines is
subject to state tariffs.
The REN is used to determine the quantity of devices which may be
connected to the telephone line. Excessive REN’s on the telephone line
may result in the devices not ringing in response to an incoming call. In
most, but all areas, the sum of the REN’s should not exceed five(5.0). To
be certain of the number of devices that may be connected to the line, as
determined by the total REN’s contact the telephone company to determine the maximum REN for the calling area.
An FCC compliant telephone cord and modular plug is provided with
this equipment. This equipment is designed to be connected to the
telephone network or premises wiring using a compatible modular jack
which is Part 68 compliant.
(Note: RENs are associated with loop-start and ground-start ports. Do
not use for E&M or digital ports.)
Even if the dual-line option is installed, the REN is applicable to each
port.
This equipment if it uses an optional telephone receiver is hearing aid
compatible.
IN CASE OF EQUIPMENT MALFUNCTION
Should any malfunction occur which cannot be corrected by the procedures described in this User’s Guide, disconnect the equipment from the
telephone line and unplug the power cord. The telephone line should
not be reconnected or the switch turned on until the problem is completely resolved. Users should contact their local authorized Canon
Facsimile Service Dealer for servicing of equipment.
iv Preface

RIGHTS OF THE TELEPHONE COMPANY
Should the equipment cause harm to the telephone network, the
telephone company may temporarily disconnect service. The telephone
company also retains the right to make changes in facilities and services
which may affect the operation of this equipment. When such changes
are necessary, the telephone company is required to give adequate prior
notice to the user. Also, you will be advised of your right to file a
compliant with the FCC if you believe it is necessary.
WARNING!
The Telephone Consumer Protection Act of 1991 makes it unlawful for
any person to use a computer or other electronic device to send any
message via a telephone facsimile machine unless such message clearly
contains in a margin at the top or bottom of each transmitted page or on
the first page of the transmission, the date and time it is sent and an
identification of the business or other entity, or other individual sending
the message and the telephone number of the sending machine or such
business, other entity, or individual.
In order to program this information into your fax machine, you should
complete the procedure to register your name, unit number, time, and
date on page 3-12.
Preface v

WARNING FOR THE LASER CLASS® 3170/3175
Do not make any changes or modifications to the equipment unless
otherwise specified in the manual. If such changes or modifications
should be made, you could be required to stop operation of the
equipment.
This equipment has been tested and found to comply with the limits for
a Class B digital device, pursuant to Part 15 of the FCC Rules. These
limits are designed to provide reasonable protection against harmful
interference in a residential installation. This equipment generates, uses
and can radiate radio frequency energy and, if not installed and used in
accordance with the instructions, may cause harmful interference to
radio communications. However, there is no guarantee that interference
will not occur in a particular installation. If this equipment does cause
harmful interference to radio or television reception, which can be
determined by turning the equipment off and on, the user is encouraged
to try to correct the interference by one or more of the following
measures:
– Reorient or relocate the receiving antenna.
–Increase the separation between the equipment and receiver.
– Connect the equipment into an outlet on a circuit different from that
to which the receiver is connected.
– Consult the dealer or an experienced radio/TV technician for help.
Use of shielded cable is required to comply with Class B limits in Subpart
B of Part 15 of FCC Rules.
WARNING FOR THE ETHERNET BOARD EB-52 FX (INSTALLED)
This equipment has been tested and found to comply with the limits for
a Class A digital device, pursuant to Part 15 of the FCC Rules. These
limits are designed to provide reasonable protection against harmful
interference when equipment is operated in a commercial environment.
This equipment generates, uses and can radiate radio frequency energy
and, if not installed and used in accordance with the instructions, may
cause harmful interference to radio communications. Operation of this
equipment in a residential area is likely to cause harmful interference in
which case the user will be required to correct the interference at his own
expense.
* Use of shielded cable is required to comply with Class A limits in
Subpart B of Part 15 of FCC Rules.
vi Preface

Do not make any changes or modifications to the equipment unless
otherwise specified in the manual. If such changes or modifications
should be made, you could be required to stop operation of the
equipment.
Preface vii

WARNING FOR THE LASER CLASS® 3170MS
Facsimile Transceiver, Model H12168
This device complies with Part 15 of the FCC Rules. Operation is subject
to the following two conditions:
(1) This device may not cause harmful interferences,
and
(2) this device must accept any interference received, including
interference that may cause undesired operation.
Note: This equipment has been tested and found to comply with the
limits for a Class B digital device, pursuant to Part 15 of the FCC Rules.
These limits are designed to provide reasonable protection against
harmful interference in a residential installation. This equipment
generates, uses and can radiate radio frequency energy and, if not
installed and used in accordance with the instructions, may cause
harmful interference to radio communications. However, there is no
guarantee that interference will not occur in a particular installation. If
this equipment does cause harmful interference to radio or television
reception, which can be determined by turning the equipment off and
on, the user is encouraged to try to correct the interference by one or
more of the following measures:
– Reorient or relocate the receiving antenna.
–Increase the separation between the equipment and receiver.
– Connect the equipment into an outlet on a circuit different from that
to which the receiver is connected.
– Consult the dealer or an experienced radio/TV technician for help.
Use of shielded cable is required to comply with Class B limits in Subpart
B of Part 15 of FCC Rules.
Do not make any changes or modifications to the equipment unless
otherwise specified in the manual. If such changes or modifications
should be made, you could be required to stop operation of the
equipment.
Canon U.S.A. Inc.
One Canon Plaza, Lake Success, NY 11042, U.S.A.
TEL No.(516)328-5600
viii Preface

WARNING FOR THE ETHERNET BOARD EB-52 FX (INSTALLED)
This equipment has been tested and found to comply with the limits for
a Class A digital device, pursuant to Part 15 of the FCC Rules. These
limits are designed to provide reasonable protection against harmful
interference when equipment is operated in a commercial environment.
This equipment generates, uses and can radiate radio frequency energy
and, if not installed and used in accordance with the instructions, may
cause harmful interference to radio communications. Operation of this
equipment in a residential area is likely to cause harmful interference in
which case the user will be required to correct the interference at his own
expense.
* Use of shielded cable is required to comply with Class A limits in
Subpart B of Part 15 of FCC Rules.
Do not make any changes or modifications to the equipment unless
otherwise specified in the manual. If such changes or modifications
should be made, you could be required to stop operation of the
equipment.
Preface ix

Users in Canada
PRE-INSTALLATION REQUIREMENTS FOR CANON
FACSIMILE EQUIPMENT
A. Location
Supply a suitable table, cabinet, or desk. See Appendix A: Specifications for details about unit's weight and dimensions.
B. Order Information
1. Provide only a single line or touch-tone or rotary telephone set
terminated with a standard 4-pin modular phone plug. (Touchtone is recommended if available in your area.)
2. Order an RJ11-C modular wall jack (USOC code), which should
be installed by the phone company. If the RJ11-C wall jack is not
present, telephone/fax operation is not possible.
3. Order a normal business line from your telephone company’s
business representative. The line should be a regular voice grade
line or the equivalent. Use one line per unit.
DDD (Direct Distance Dial) line
-if not-
IDDD (International Direct Distance dial) line if you communicate overseas
Canon recommends an individual line following industry standards
such as the 2500 (touch tone) or 500 (rotary/pulse dial) telephones. A
dedicated extension off a PBX without Camp On signals is also permitted
with a fax unit. Key telephone systems are not recommended because
they send non-standard signals to individual telephones for ringing, or
send special codes which may cause a fax error.
C. Power Requirements
The power outlet should be a three-prong grounded receptacle (single
or duplex). It should be independent from copiers, heaters, air conditioners or any electrical equipment that is thermostatically controlled.
The rated value is 120 volts and 15 amperes. The RJ11-C modular jack
should be relatively close to the power outlet to facilitate installation.
x Preface

NOTICE
The Industry Canada label identifies certified equipment. This certification means that the equipment meets certain telecommunications
networks protective, operational and safety requirements. The Department does not guarantee the equipment will operate to the user’s
satisfaction.
Before installing this equipment, users should ensure that it is permitted
to be connected to the facilities of the local telecommunications company.
The equipment must also be installed using an acceptable method of
connection. In some cases, the company’s inside wiring associated with
a single-line individual service may be extended by means of a certified
connector assembly (telephone extension cord). The customer should be
aware that compliance with the above conditions may not prevent
deterioration of service in some situations.
The Ringer Equivalence Number (REN) assigned to each terminal device
provides an indication of the maximum number of terminal allowed to
be connected to a telephone interface. The termination on an interface
may consist of any combination of devices subject only to the requirement that the sum of the Ringer Equivalence Number of all the devices
does not exceed 5.
The REN of this equipment is 0.3.
Even if the dual-line option is installed, the REN is applicable to each
port.
Repairs to certified equipment should be made by an authorized Canadian maintenance facility designated by the supplier. Any repairs or
alterations made by the user to this equipment, or equipment malfunctions, may give the telecommunications company cause to request the
user to disconnect the equipment.
Users should ensure for their own protection that the electrical ground
connections of the power utility, telephone lines and internal metallic
water pipe system, if present, are connected together. This precaution
may be particularly important in rural areas.
Preface xi

CAUTION
Users should not attempt to make such connections themselves, but
should contact the appropriate electric inspection authority, or electrician, as appropriate.
This Class B digital apparatus meets all requirements of the Canadian
Interference-Causing Equipment Regulations.
Cet appareil numérique de la classe B respecte toutes les exigences du
Règlement sur le matériel brouilleur du Canada.
WARNING FOR THE ETHERNET BOARD EB-52 FX (INSTALLED)
This Class A digital apparatus meets all requirements of the Canadian
Interference-Causing Equipment Regulations.
Cet appareil numérique de la classe A respecte toutes les exigences du
Règlement sur le matériel brouilleur du Canada.
xii Preface

IMPORTANT SAFETY INFORMATION
1. Read these safety instructions and refer to them later if you have any
questions.
2. Follow all warnings and instructions marked on the LASER CLASS
3170 Series.
3. Place the LASER CLASS® 3170 Series on a level surface. To avoid
serious damage from falling, never place the LASER CLASS® 3170
Series on an unstable cart, stand, or table.
4. Do not use the LASER CLASS® 3170 Series near water.
5. Slots and openings on the cabinet and on the back or bottom are
provided for ventilation. To ensure reliable operation of the LASER
CLASS® 3170 Series and to protect it from overheating, never block
or cover these openings. Do not block the openings by placing the
unit on a bed, sofa, rug, or other similar surface, or near a radiator or
heat register. Do not place the LASER CLASS® 3170 Series in a closet
or built-in installation unless proper ventilation is provided.
6. Operate the LASER CLASS® 3170 Series only from the type of power
source indicated on the unit’s label. If you are not sure of the type of
power available, consult your dealer or local power company.
®
7. The LASER CLASS® 3170 Series is equipped with a 3-prong, grounding-type plug provided with a third (grounding) pin. This plug will
only fit into a grounding-type outlet. This is a safety feature. If you
are unable to insert the plug into your outlet, contact an electrician to
replace your outlet. Do not defeat the safety purpose of the grounding-type plug by breaking off the third prong or using a 3-to-2
adapter.
8. Do not allow anything to rest on the power cord, and do not locate
the LASER CLASS® 3170 Series where the cord will be walked on.
Preface xiii

9. If you use an extension cord with the LASER CLASS® 3170 Series,
make sure that the total of the ampere ratings on the products
plugged into the extension cord does not exceed the extension cord
ampere rating. Also, make sure that the total ampere rating of all
products plugged into the wall outlet does not exceed the current
amperage of the circuit breaker.
10. Do not push objects of any kind into the slots or openings on the
cabinet as they may touch dangerous voltage points or short out
parts, which could result in a risk of fire or electric shock.
11.To avoid spillage in or around the LASER CLASS® 3170 Series do not
eat or drink around the fax. If you spill liquid or if any substance
falls into the unit, immediately unplug the LASER CLASS® 3170
Series and call your Authorized Canon Dealer immediately.
12. Unplug the LASER CLASS® 3170 Series from the wall outlet before
cleaning.
13. Except as explained elsewhere in this manual, do not attempt to
service the LASER CLASS® 3170 Series yourself. Opening and
removing interior covers may expose you to dangerous voltage
points or other risks. Refer all servicing to your local Authorized
Canon Service Dealer.
xiv Preface

14. Unplug this product from the wall outlet and refer servicing to
qualified service personnel under the following conditions:
❏ When the power cord or plug is damaged or frayed.
❏ If liquid has been spilled into the unit.
❏ If the LASER CLASS
®
3170 Series has been exposed to rain or
water.
❏ If the LASER CLASS
®
3170 Series does not operate normally
when you have followed the instructions in the User’s Guide.
Adjust only those controls that are covered by the operating
instructions in the User’s Guide. Improper adjustment of other
controls may result in damage and may require extensive work by
a qualified technician to restore the product to normal operation.
❏ If the LASER CLASS
®
3170 Series has been dropped or the
cabinet has been damaged.
❏ If the LASER CLASS
®
3170 Series exhibits a distinct change in
performance, indicating a need for service.
You must register your fax number, your name or company name, and
the date-and time in the LASER CLASS® 3170 Series before you use it.
This is required by the FCC rules governing the use of fax equipment.
(➞3-12)
THE OPTIONAL HANDSET EMITS LOW LEVEL
ELECTROMAGNETIC WAVES. IF YOU USE A CARDIAC
PACEMAKER AND FEEL ABNORMALITIES, PLEASE MOVE AWAY
FROM THIS PRODUCT AND CONSULT YOUR DOCTOR.
Preface xv
xvi Preface
Laser Safety
This fax complies with 21 CFR Chapter 1 Subchapter J as a Class 1 laser
product under the U.S. Department of Health and Human Services
(DHHS) Radiation Performance Standard according to the Radiation
Control for Health and Safety Act of 1968. This means that the fax does
not produce hazardous radiation.
Since radiation emitted inside the fax is completely confined within
protective housings and external covers, the laser beam cannot escape
from the machine during any phase of user operation.
CDRH Regulations
The Center for Devices and Radiological Health (CDRH) of the U.S. Food
and Drug Administration implemented regulations for laser products on
August 2, 1976. These regulations apply to laser products manufactured
from August 1, 1976. Compliance is mandatory for products marketed in
the United States.
USE OF CONTROLS, ADJUSTMENTS, OR PERFORMANCE OF
PROCEDURES OTHER THAN THOSE SPECIFIED IN THIS USER’S
GUIDE MAY RESULT IN HAZARDOUS RADIATION EXPOSURE.
The label is attached to the laser scanner unit inside the fax and is not in
a user access area.

Contents
Chapter 1 Welcome ! ....................................................................................................... 1-1
Main Features.......................................................................................... 1-2
Options ..................................................................................................... 1-5
Customer Support .................................................................................. 1-6
Chapter 2 Setting Up ...................................................................................................... 2-1
How to Use This Guide ......................................................................... 2-3
Where to Set Up the Fax ........................................................................ 2-4
Space Around the Fax ............................................................................ 2-6
Power Requirements .............................................................................. 2-7
General Precautions ............................................................................... 2-8
Moving the Fax Unit ............................................................................ 2-10
Unpacking: Have You Got Everything? .............................................2-11
For the LASER CLASS® 3170 Series ......................................... 2-13
For the LASER CLASS® 3175 Only .......................................... 2-14
For the LASER CLASS® 3170MS Only ..................................... 2-14
Options Available ........................................................................ 2-16
Supply........................................................................................... 2-16
Parts of the Fax...................................................................................... 2-17
Front View ........................................................................................ 2-17
Rear View .......................................................................................... 2-18
Handset (option) .............................................................................. 2-18
Removing the Shipping Material ....................................................... 2-19
Removing the Shipping Tapes ....................................................... 2-19
Removing the Packing Materials Inside the Fax Unit ................ 2-19
Removing the Packing Materials from Paper Cassette 1 ........... 2-21
Removing the Protective Plastic Sheet ......................................... 2-22
Assembling the Fax .............................................................................. 2-23
Installing the Toner Cartridge ........................................................ 2-23
Attaching the Document Output Tray and
the Upper Output Tray ................................................................... 2-26
Attaching the Document Feeder Tray ........................................... 2-27
Installing Paper Cassette 2
(For the LASER CLASS® 3175 Only) ............................................. 2-28
Loading Paper in Paper Cassettes 1 and 2 ................................... 2-31
Connecting the Handset (option) .................................................. 2-38
Connecting the Telephone Line ..................................................... 2-39
Connecting an Extension Phone .................................................... 2-40
Turning on the Power ..................................................................... 2-41
Using the MP Tray ................................................................................ 2-43
Contents xvii

Loading the MP Tray ....................................................................... 2-43
Turning on and off USE MP TRAY and
Setting the Paper Size in the USE MP TRAY Menu .................... 2-48
Selecting Paper Delivery ..................................................................... 2-50
Setting Face-down Paper Delivery for Upper and
Lower Output Trays ........................................................................ 2-50
Using the Face-up Tray ................................................................... 2-53
Using the Optional Dual-Line ............................................................ 2-54
Connecting Two Telephone Lines ................................................. 2-54
How the Two Telephone Lines Operate ....................................... 2-56
Registering the Telephone Numbers for the Lines ..................... 2-57
Chapter 3 Getting Started .............................................................................................. 3-1
Operation Buttons (One-touch panels closed) ................................... 3-2
Operation Buttons (One-touch panels open) ..................................... 3-4
Using the Menus and Buttons .............................................................. 3-5
General Guidelines for Registering Information .......................... 3-5
Using the Menus ................................................................................ 3-5
To Open a Menu and Select an Item .......................................... 3-6
To Return to the Previous Level.................................................. 3-6
To Return to Standby Immediately ............................................ 3-6
Entering Names for Registration ..................................................... 3-7
To Correct a Mistake ..................................................................... 3-8
Menu Button Summary Table .......................................................... 3-9
Checking and Setting the Telephone Line ........................................ 3-10
Registering Required Sender Information ........................................ 3-12
What is Sender Information? ......................................................... 3-12
Registering the Sender Information (TX TERMINAL ID) .............. 3-13
Registering Sender Names .................................................................. 3-18
Registering a Sender Name ............................................................ 3-18
Changing or Erasing a Sender Name ........................................... 3-20
Using the Energy Saver Mode
(For the LASER CLASS
®
3170/3175 Only) ....................................... 3-21
Turning the Energy Saver Feature ON ......................................... 3-21
Returning to the Full Power Mode ............................................... 3-23
Chapter 4 Setting Up and Using Speed Dialing ....................................................... 4-1
Read This before Entering Telephone Numbers ................................ 4-2
Entering Pauses for Dialing ............................................................. 4-2
Adjusting the Length of a Pause ..................................................... 4-3
What is Speed Dialing? .......................................................................... 4-5
One-touch Speed Dialing ............................................................. 4-5
Coded Speed Dialing.................................................................... 4-5
Group Dialing................................................................................ 4-5
Setting Up One-touch Speed Dialing .................................................. 4-6
Setting Up Coded Speed Dialing ....................................................... 4-15
xviii Contents

Setting Up Group Dialing ................................................................... 4-24
Using Speed Dialing ............................................................................ 4-29
Using One-touch Speed Dialing .................................................... 4-29
Using Coded Speed Dialing ........................................................... 4-31
Using Group Dialing ....................................................................... 4-33
Using Directory Dialing ...................................................................... 4-35
Chapter 5 Using the Fax as a Copier ............................................................................ 5-1
Preparing the Document ....................................................................... 5-2
Setting a Document on the Fax ............................................................. 5-3
Performing the Document Settings...................................................... 5-4
Making Copies ........................................................................................ 5-6
Chapter 6 Sending Documents ..................................................................................... 6-1
Setting a Document for Sending .......................................................... 6-2
Preparing the Document .................................................................. 6-2
Setting the Document on the Fax .................................................... 6-3
Adjusting the Scanning Settings ...................................................... 6-4
Selecting a Sender Name ....................................................................... 6-6
Using Regular Dialing ........................................................................... 6-7
Canceling Sending a Document ........................................................... 6-8
To Cancel Sending on a Single-Line ........................................... 6-8
To Cancel Sending on a Dual-Line ............................................. 6-9
Dialing Long Distance with Regular Dialing ................................... 6-10
Overview of Sending Methods ........................................................... 6-12
Memory Sending ............................................................................. 6-12
Direct Sending .................................................................................. 6-15
Manual Sending ............................................................................... 6-17
Re-dialing When the Line is Busy ...................................................... 6-19
What is Automatic Redialing? ....................................................... 6-19
Setting Up Redialing ....................................................................... 6-20
Auto Redial Setup Summary .................................................... 6-21
Sequential Broadcasting to More Than One Location..................... 6-22
Sending Documents at a Preset Time ................................................ 6-24
Sending a Document with a Subaddress/Password....................... 6-27
Subaddress/Password Sending with Speed Dialing ................. 6-27
Subaddress/Password Sending with the Operation
Panel Buttons.................................................................................... 6-28
Chapter 7 Receiving Documents .................................................................................. 7-1
Receiving Documents Automatically .................................................. 7-2
Contents xix

Setting the Automatic Receive Mode.............................................. 7-2
Messages Displayed When Receiving a Document...................... 7-2
Turning on and Adjusting the Auto Switch Time ......................... 7-5
Receiving Documents Manually with the Optional Handset .......... 7-7
Receiving a Document Manually at the Fax .................................. 7-7
Receiving a Document Manually with
an Extension Telephone .................................................................... 7-8
Changing the Remote Receive ID.................................................... 7-9
Canceling Receiving a Document ....................................................... 7-11
To Cancel Receiving on a Single-Line .......................................7-11
To Cancel Receiving on a Dual-Line ........................................ 7-12
Transferring Documents ...................................................................... 7-13
Before You Set Up Document Transfer ......................................... 7-13
Setting Up the Fax for Document Transfer .................................. 7-14
Turning the Transfer Mode ON and OFF ..................................... 7-17
Turning Transfer Mode ON ....................................................... 7-17
Turning Transfer Mode OFF ...................................................... 7-18
Changing the Transfer Settings ...................................................... 7-18
Canceling the Transfer Settings ..................................................... 7-20
Chapter 8 Using the Memory Features........................................................................ 8-1
When the Fax Displays RECEIVED IN MEMORY ............................ 8-2
Displaying the Transaction History ..................................................... 8-3
Printing a Memory List.......................................................................... 8-5
Printing a Document in the Memory................................................... 8-6
Sending a Document in Memory to a Different Destination ........... 8-7
Erasing a Document from the Memory............................................... 8-9
Deleting a Document with the Delete File Button ........................ 8-9
Deleting a Document with the Memory Reference Button ....... 8-10
Setting Up and Using a Memory Box ................................................. 8-11
Before You Create Memory Boxes ................................................. 8-12
When You Create a Memory Box .................................................. 8-12
Access Settings ............................................................................ 8-13
Main Settings ............................................................................... 8-13
Feature Settings ........................................................................... 8-14
Creating a Memory Box .................................................................. 8-14
Changing the Memory Box Settings ............................................. 8-22
Canceling a Memory Box ............................................................... 8-23
Sending a Document Stored in the Memory Box........................ 8-24
Printing a Document Received in a Memory Box....................... 8-25
What Happens to Memory after a Power Failure............................ 8-27
How Your Registered Data Is Protected ....................................... 8-27
About the Backup Battery .............................................................. 8-27
Chapter 9 Using a Relay Network................................................................................ 9-1
xx Contents

What is Relay Broadcasting?................................................................. 9-2
Setting Up and Using a Standard Relay Unit ..................................... 9-3
Setting Your Fax as a Relay Unit ..................................................... 9-4
Changing the Relay Broadcast Settings .......................................... 9-7
Deleting the Relay Group ................................................................. 9-9
Sending a Document to a Relay Unit for Relay Broadcasting ....... 9-10
Sending a Document to a Relay Unit with Speed Dialing......... 9-12
Sending with the Relay Broadcast Button.................................... 9-12
Chapter 10 Using Confidential Mailboxes ................................................................. 10-1
Setting Up and Using the Standard Mailbox Features.................... 10-2
Creating a Mailbox .......................................................................... 10-2
Changing Mailbox Settings ............................................................ 10-6
Canceling a Mailbox ........................................................................ 10-7
Receiving a Confidential Document ............................................. 10-8
Sending a Confidential Document ................................................... 10-10
Sending a Confidential Document with Speed Dialing ........... 10-10
Sending a Confidential Document with
the Confidential Mailbox Button .................................................. 10-11
Chapter 11 Setting Up and Using Polling ................................................................... 11-1
What is Polling? .....................................................................................11-2
Before You Use Polling Receiving .................................................. 11-2
Polling Other Fax Machines to Receive a Document .......................11-3
Polling to Receive at a Preset Time ................................................ 11-5
Changing the Preset Polling Settings........................................... 11-12
Canceling Preset Polling ................................................................11-13
Setting Up Polling Sending ................................................................11-15
Before You Can Be Polled to Send ................................................ 11-15
Setting Up a Polling Box ................................................................11-15
Scanning a Document into the Memory for Polling Sending .. 11-20
Changing the Polling Box Setup ...................................................11-21
Canceling a Polling Box .................................................................11-23
Chapter 12 Other Special Features ............................................................................... 12-1
Using the Telephone ............................................................................. 12-2
Tone Dialing on a Pulse Line .............................................................. 12-3
Setting and Using the Program Button ............................................. 12-5
Setting Up and Using the Optional Stamp Feature ......................... 12-8
Setting Up the Stamp Feature ........................................................ 12-8
Turning the Stamp Feature ON/OFF ......................................... 12-10
How the Fax Operates with Default Settings ................................. 12-12
Chapter 13 Restricting Use of the Fax ......................................................................... 13-1
Contents xxi

Setting and Using the System Settings Password............................ 13-2
Setting the System Settings Password .......................................... 13-2
Changing or Canceling the System Settings Password.............. 13-4
Restricting Fax Operation ................................................................... 13-6
Setting Operation Restrictions ....................................................... 13-6
Operating the Fax with Restrictions ON ..................................... 13-11
Sending a Document with Restrictions ON ........................... 13-11
Making a Copy with Restrictions ON.................................... 13-12
Printing a Report with Restrictions ON ................................ 13-13
Using the Telephone with Restrictions ON ........................... 13-13
Turning Restrictions OFF and ON .............................................. 13-14
Receiving Documents from Registered Senders Only .................. 13-16
Using Memory Lock........................................................................... 13-17
Setting a Time and Password for Memory Lock ....................... 13-17
Turning the Memory Lock ON .................................................... 13-20
Turning the Memory Lock OFF and Printing Documents ...... 13-20
Setting Up and Using PIN Codes..................................................... 13-21
Setting a PIN Code ........................................................................ 13-21
Dialing with a PIN Code after the Number ............................... 13-24
Dialing with a PIN Code before the Number ............................ 13-25
Setting PIN Code Access for Speed Dialing .............................. 13-26
Using Speed Dialing with PIN Code Access ............................. 13-27
Forced PIN Code Access............................................................... 13-28
Chapter 14 Printing Reports and Lists ........................................................................ 14-1
Printing the Speed Dialing Lists......................................................... 14-2
Printing the User Data List.................................................................. 14-5
Printing the List of Sender Names ..................................................... 14-6
Reports ................................................................................................... 14-8
Printing the Activity Management Report................................... 14-9
Setting and Using Activity Reports..............................................14-11
Memory Lists ...................................................................................... 14-17
Chapter 15 Maintenance & Frequently Asked Questions ....................................... 15-1
Removing Document Feed Jams ........................................................ 15-2
Removing Printer Feed Jams .............................................................. 15-4
Locating a Paper Jam ...................................................................... 15-5
1. Face-up tray area ..................................................................... 15-6
2. Output trays area .................................................................... 15-6
3. Imaging area ............................................................................ 15-8
4. MP tray area............................................................................ 15-11
5. Paper Cassette 1 area ............................................................ 15-12
6. Paper Cassette 2 area ............................................................ 15-13
Storing Recording Paper ................................................................... 15-15
xxii Contents

Recommended Paper .................................................................... 15-15
Storing the Paper Supply .............................................................. 15-16
Changing the Toner Cartridge .......................................................... 15-17
Storing Toner Cartridges ................................................................... 15-22
Handling Cartridges ..................................................................... 15-22
Storing Cartridges ......................................................................... 15-23
Disposing of Used Toner Cartridges ........................................... 15-23
Periodic Cleaning ............................................................................... 15-24
Cleaning the Fax Unit ................................................................... 15-24
Cleaning the Transfer Guide Area............................................... 15-25
Cleaning the Scanning Area ......................................................... 15-27
Refilling the Stamp Ink Compartment (option) ............................. 15-33
Error Code Table (listed by number) ............................................... 15-35
List of LCD Display Messages (Alphabetic List) ........................... 15-38
Questions and Answers ..................................................................... 15-42
Documents Are Not Being Sent Correctly. ................................. 15-42
Documents Are Not Being Received Correctly. ........................ 15-45
Documents Are Not Being Copied.............................................. 15-46
Having Other Problems. ............................................................... 15-46
Recording the User Reminder Sheets .............................................. 15-48
Chapter 16 Summary of Important Settings .............................................................. 16-1
Opening the Data Registration Menu ............................................... 16-2
Summary of User Data Settings ......................................................... 16-3
User Settings.......................................................................................... 16-4
Report Settings ...................................................................................... 16-7
TX (Send) Settings .............................................................................. 16-10
RX (Receive) Settings ......................................................................... 16-13
Fax’s Printer Set .................................................................................. 16-16
File Settings ......................................................................................... 16-20
System Settings ................................................................................... 16-27
Dual Line Options .............................................................................. 16-32
Relationship between BATCH TX, QUICK ON-LINE TX, and
Timer Settings ..................................................................................... 16-34
Appendix A Specifications ............................................................................................... A-1
General .................................................................................................... A-1
Operation ................................................................................................ A-3
Dial Features .......................................................................................... A-3
Networking Features ............................................................................ A-4
Copier Features ...................................................................................... A-4
Telephone Features ................................................................................ A-5
Power ...................................................................................................... A-5
Operating Environment........................................................................ A-5
Weight ..................................................................................................... A-5
Contents xxiii

Dimensions ............................................................................................. A-6
Appendix B Documents You Can Scan ........................................................................... B-1
Document Media to Avoid ............................................................... B-1
Specifications for Paper Documents You Can Scan ...................... B-1
Document Thickness ......................................................................... B-1
Document Size ................................................................................... B-2
Scanning Area on the Document ..................................................... B-2
Printing Area ...................................................................................... B-3
Glossary ................................................................................................................................. G-1
Index ......................................................................................................................................... I-1
xxiv Contents

Chapter 1
Welcome !
Thank you for purchasing the new Canon LASER CLASS® 3170 Series.
This new facsimile unit with its features and options, and greater flexibility enabled by full support of ITU-T subaddress/password sending and
receiving, will help you expand your work capacity and efficiency.
This Facsimile User’s Guide shows you how to get the most out of your
new facsimile unit. Whether you are sending a quick memo to the home
office on the other side of town or automatically receiving from a branch
overseas or across the country, this book shows you how to do it all
quickly and easily.
Take a few minutes to browse through this User’s Guide so you know
what it contains. You do not have to read it all at once from cover to
cover.
We have done our best to give you an accurate, easy-to-use User’s Guide,
but if you still have some questions about how to use your facsimile unit,
feel free to contact your local authorized Canon dealer sales or service
representatives. They will be glad to answer your questions.
Welcome !
Model LASER CLASS® 3170 is used for illustration purposes in this
manual. When there is any difference among three models, it is clearly
indicated in the text, e.g., “LASER CLASS® 3170MS only.”
Chapter 1 Welcome ! 1-1
Main Features
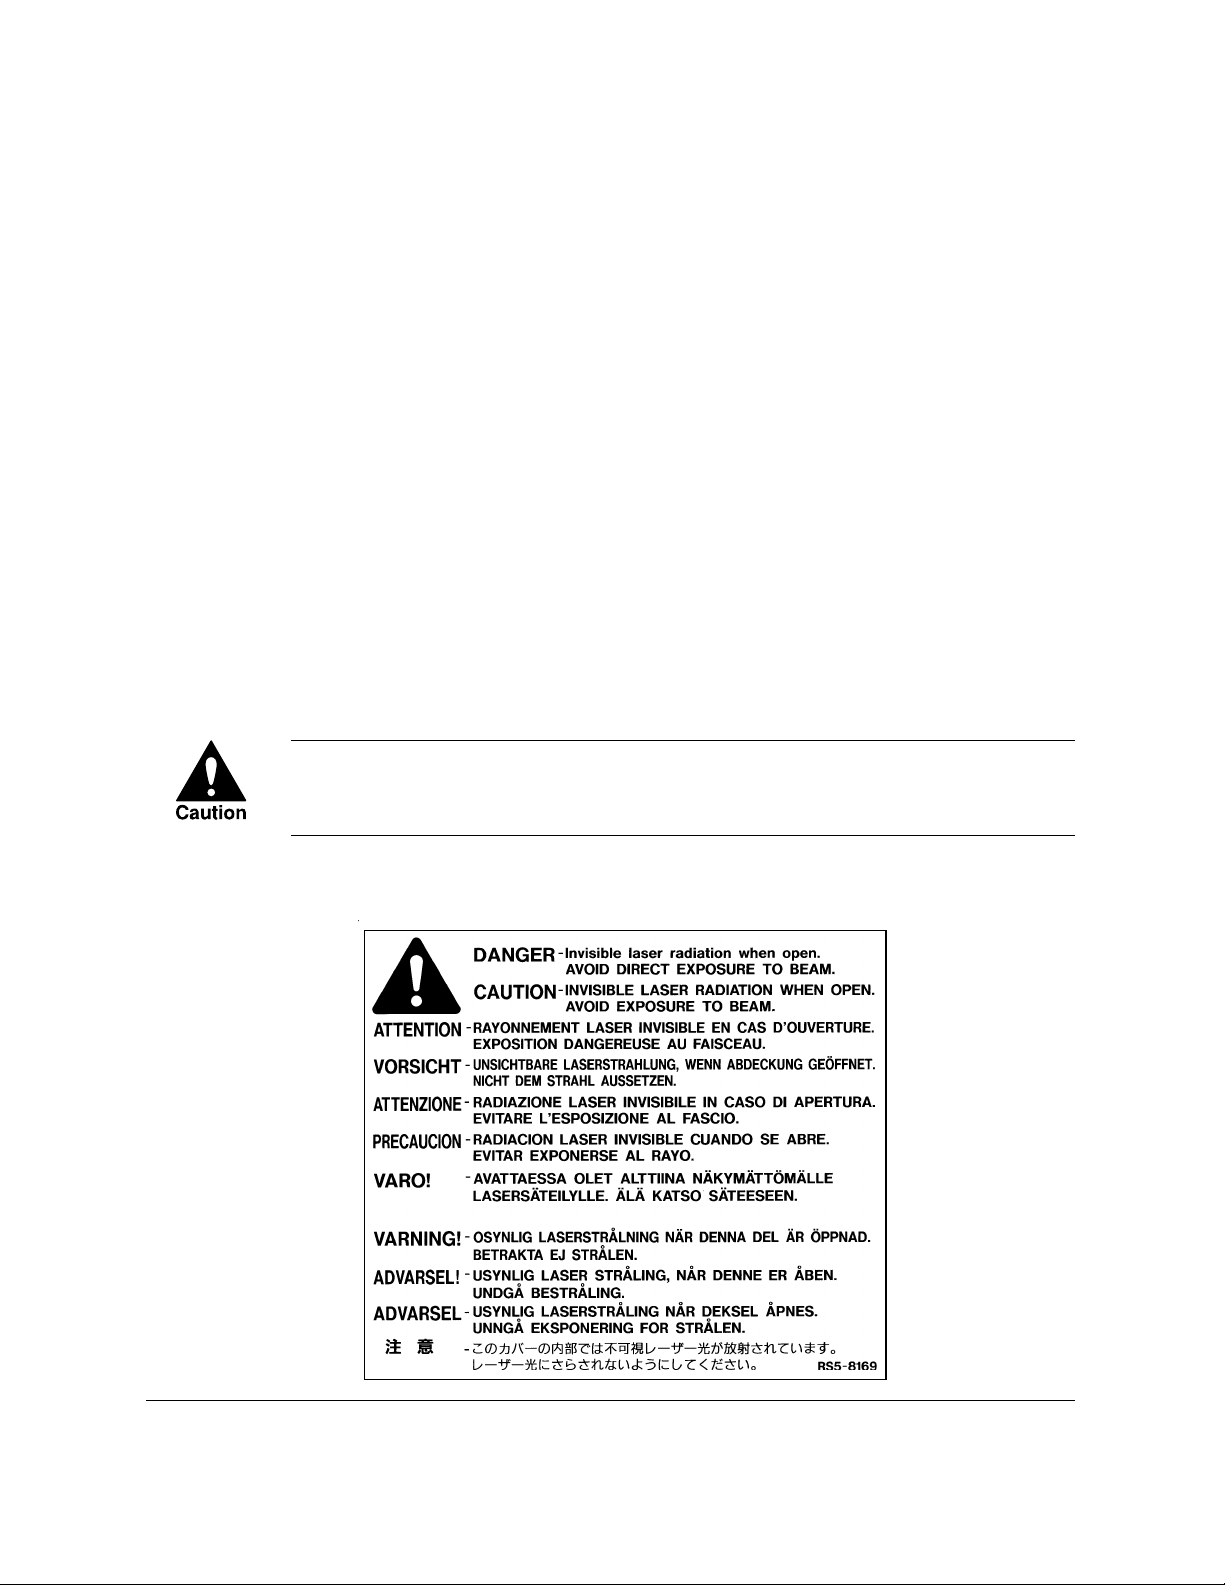
SEND
Improved speed
Your fax unit is equipped with the ITU-T standard
V. 34 mode which enables transmission speeds up to
33,600 bps, more than double the rate of older G3 fax
models.
Subaddresses
ITU-T
ITU-T
100 sheets
500 sheets
Quality Images !
Passwords
Cut sheets OK !
You don’t need
special recording
paper !
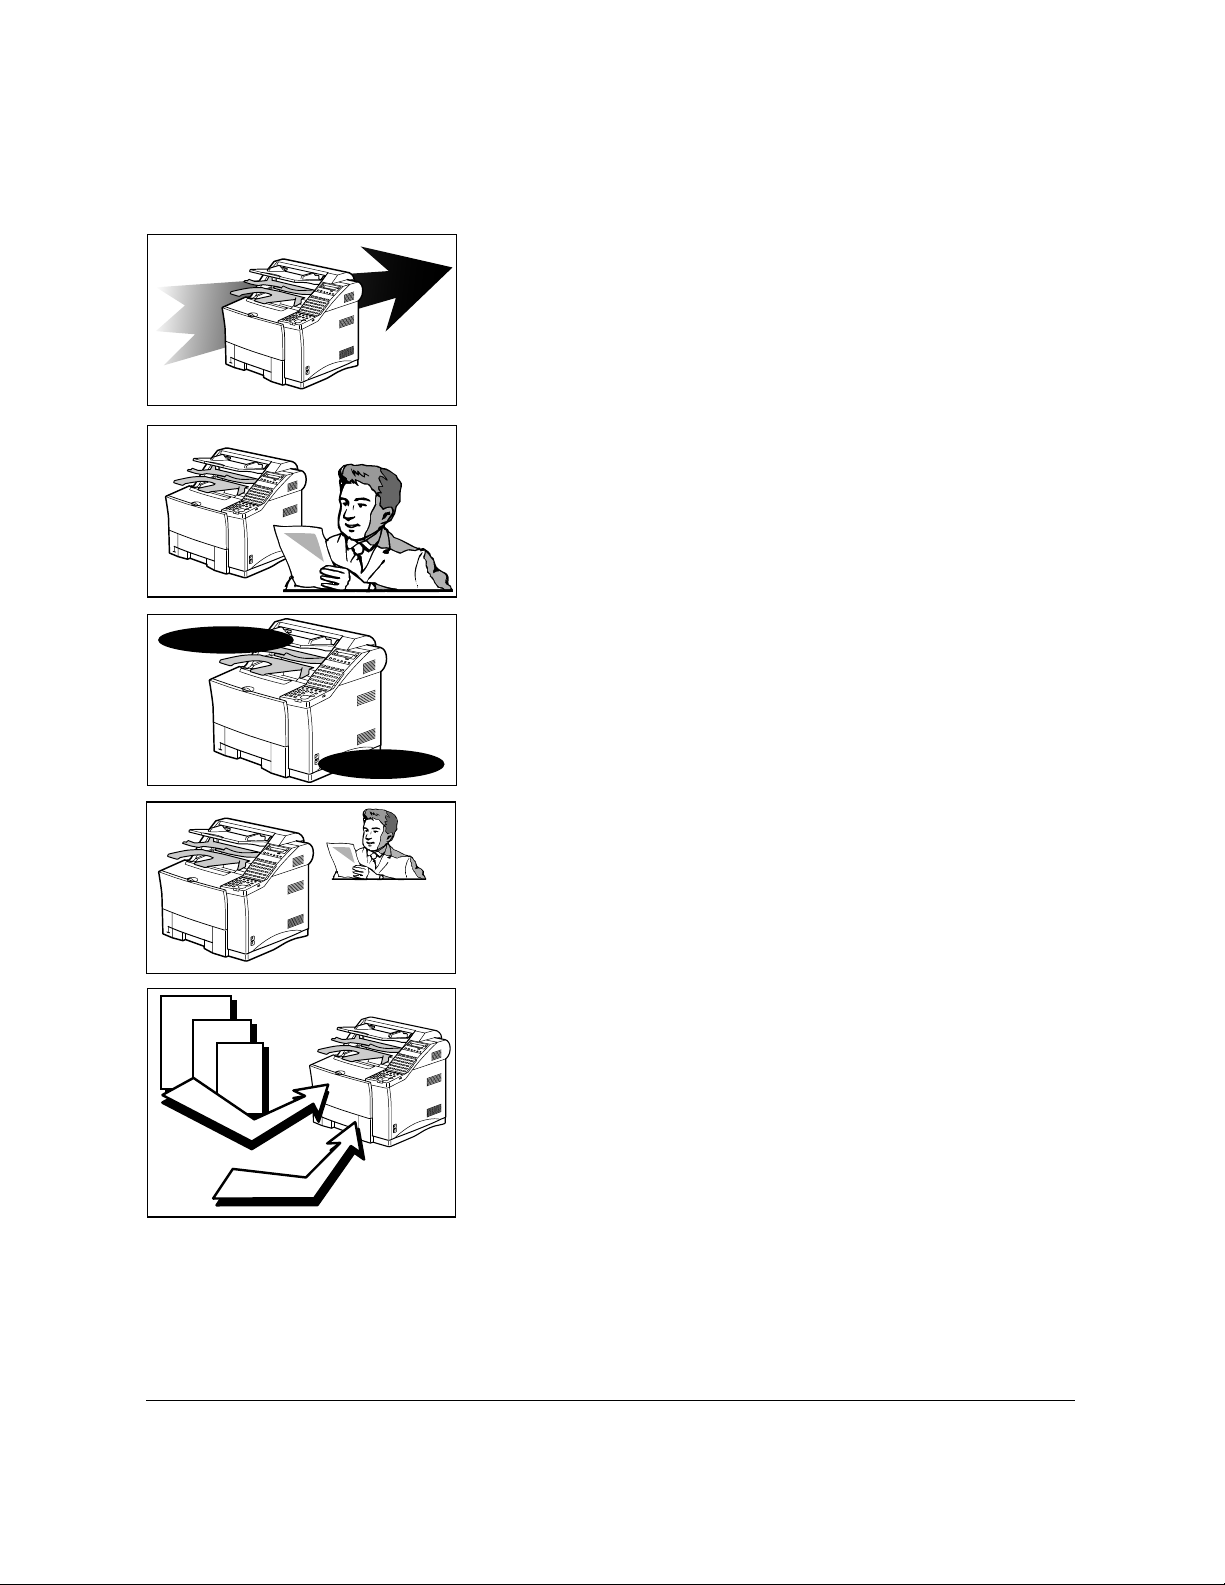
Ultra High Quality (UHQ) image
Canon’s ultra-high quality image processing produces
excellent reproductions in documents you send and
copy.
Full support of ITU-T subaddresses and passwords
You can employ ITU-T subaddresses and passwords
to communicate not only with other Canon faxes, but
fax machines of other manufacturers as well.
Laser beam printer
Quiet, clean laser technology guarantees quality
reproduction.
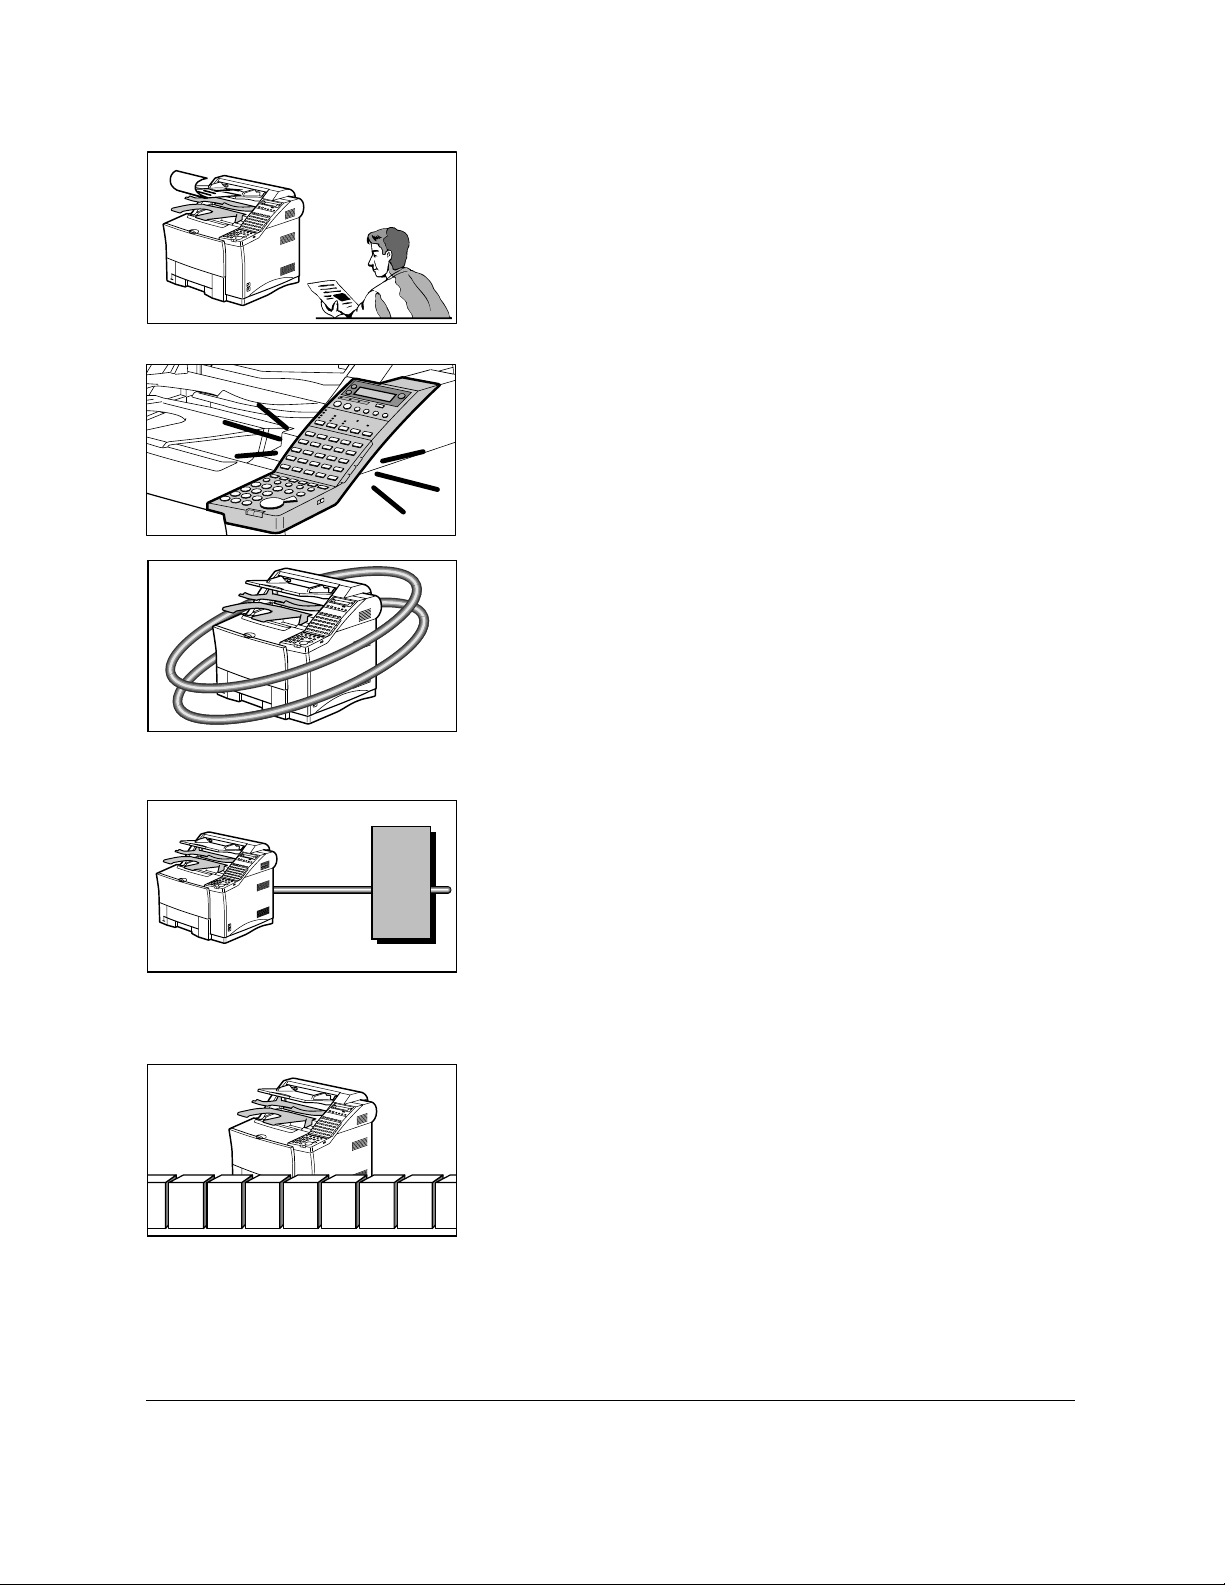
Large paper capacity
A large paper capacity means less time spent loading
paper in the paper cassettes. The MP (Multi-Purpose)
tray holds a stack of up to 100 sheets. Paper Cassette 1
holds 500 sheets, for a total of 600 sheets. Paper
Cassette 2, available as an option for the LASER
CLASS® 3170/3170MS and standard for the LASER
CLASS® 3175, holds another 500 sheets for a total of
1100 sheets. All cassettes and the MP tray can be
adjusted to fit a variety of standard paper sizes, and
are easy to access and re-fill.
1-2 Welcome ! Chapter 1

One-touch Dial
72
128
Coded Speed Dial
Relay sending
Confidential sending
Sequential broadcasting
Polling
Automatic dialing
Includes One-touch and Coded Speed Dialing,
Directory Dialing, as well as Group dialing which
allows you to send the same document to several
destinations at the touch of a button.
Welcome !
Variety of send and receive features
Includes multiple broadcasting, polling, relay sending
and receiving, and confidential mailbox sending and
receiving.
ECM send and receive
ECM (error correction mode) reduces errors during
sending and receiving on noisy or poor quality
telephone lines.
Incoming
document
Automatic sending
Sending
Receiving
Receiving
in memory
Recording
documents
into memory
Memory
Receiving in memory when you run out of paper or
toner
If you run out of paper or toner while you are
receiving a document, the fax unit continues to
receive by putting the remainder of the document in
the fax memory so you can print it out after you refill
the paper cassette or replace the toner cartridge. A
memory backup function also safeguards the contents
of the memory for approximately 12 hours after a
power failure.
Delayed sending
Scan a document into the memory and set for sending
at a later time so you can take advantage of holiday or
late night telephone rates.
Dual access
Even while you are sending or receiving a document,
you can continue to use the fax to register information
with the fax or record documents into the memory.
Chapter 1 Welcome ! 1-3
Sending starts
immediately
Quick-on-line TX
Before the fax is finished scanning a long document, it
will start dialing and sending the pages that are
already scanned. By the time the last page is scanned,
the document transmission is well under way.
Easy to use
A larger display and operation panel with larger
buttons makes the fax easier to use.
Economical and quiet
Canon’s RAPID Fusing System™ realizes quiet operation while you save money. If the fax machine remains
idle for a specified length of time, the fax machine
automatically shuts itself down and enters the low
energy sleep mode, and will remain in this low energy
mode until the fax machine receives a document
transmission or until you press the
Energy Saver button.
PIN code
70 Private memory boxes50 Private memory boxes
PBX
Better security with PIN Codes
For PBXs (private branch exchanges) that require PIN
(Personal Identification Number) codes to acquire an
outside line, you can now turn on the PIN code
feature with a user software switch included with the
user data settings. For better security, the PIN codes
are not displayed on the LCD display during dialing
(only a “C” appears), and they do not appear in
printed activity reports.
Expanded transaction features
You can create up to 50 private memory boxes and set
them up to receive documents. If the other party’s fax
can use ITU-T subaddresses and passwords, you can
set up and use memory boxes even if the other party’s
fax unit is not a Canon fax.
1-4 Welcome ! Chapter 1

;;;
;
JBIG
JBIG, Improved image data compression
JBIG is a new ITU-T standard image data compression
method. JBIG's compression method allows data to be
compressed more efficiently* than MMR, a conventional compression method. JBIG is especially effective when transmitting halftone image documents.
Because the smaller data size requires less transmission time, JBIG saves you time and money.
*Actual compression ratio may vary with image.
Super G3 is a phrase used to describe the new
generation of fax machines that use ITU-T V.34
standard 33.6Kbps** modems. Super G3 High Speed
Fax machines allow transmission time of
approximately 3 seconds** per page which results in
reduced telephone line charges.
** Approximately 3 seconds per page fax transmission
time based on CCITT/ITU-T No.1 Chart, (JBIG,
Standard Mode) at 33.6Kbps modem speed. The
Public Switched Telephone Network (PSTN) currently
supports 28.8Kbps modem speeds or lower,
depending on telephone line conditions.
Welcome !
Options
For details about purchasing these options, contact your local authorized
Canon dealer.
Simultaneous sending/receiving
on dual telephone line connection
LINE 1
LINE 1
Fax Memory
4MB memory module is available to expand the fax memory capacity of
the LASER CLASS® 3170 Series. For details, see Appendix A-2.
Chapter 1 Welcome ! 1-5
Dual-line Upgrade Kit II
After installation of the optional Dual-line Upgrade
Kit II, you can connect two telephone lines to the fax
unit. Either line can be used independently or simultaneously for separate transactions. For details contact
your local authorized Canon dealer.

Printer Board I
This option enables your LASER CLASS
printer. Printer Board I is a standard feature for LASER CLASS® 3170MS.
Document Distribution System*
This option enables your LASER CLASS® 3170 Series to operate as a
shared fax and network scanner in your network environment.
However, please note that this option and the Dual-line Upgrade Kit II
cannot be installed on the same fax unit.
®
3170/3175 to operate as a
Printer Options
The Canon Envelope Feeder, the Duplex Unit, the Canon Adobe
PostScript® 3TM Module I and the Ethernet Board EB-52 FX are available
as printer options for the LASER CLASS® 3170MS, and for the LASER
CLASS® 3170/3175 with Printer Board I installed. Also, 4MB, 8MB, and
16 MB RAM DIMM modules are available to expand the printer memory
capacity for the LASER CLASS® 3170 Series. For details on these options,
refer to the Printer User’s Guide.
Customer Support
Your Canon LASER CLASS® 3170 Series is designed with the latest
technology to provide trouble-free operation. The warranty card provided with this facsimile machine describes Canon’s limited warranty
for its products. Be sure to read this warranty information.
If you encounter a problem, try to solve it by referring to the information
in Chapter 15 Maintenance & Frequently Asked Questions. If you cannot
solve the problem, or if you think your Canon LASER CLASS® 3170
Series needs servicing, contact your local authorized Canon dealer.
®
1-6 Welcome ! Chapter 1

Chapter 2
Setting Up
This chapter shows you how to set up the fax unit.
Even if your fax unit has been set up for you, take a few minutes to
glance through this chapter to become familiar with how to use this
User’s Guide. You may also want to check the fax installation to confirm
that it has been done correctly.
❏ How to Use This Guide ............................................................................ 2-3
❏ Where to Set Up the Fax .......................................................................... 2-4
❏ Space Around the Fax .............................................................................. 2-6
❏ Power Requirements ................................................................................ 2-7
❏ General Precautions .................................................................................. 2-8
❏ Moving the Fax Unit ............................................................................... 2-10
Setting Up
❏ Unpacking: Have You Got Everything? ............................................... 2-11
❏ Parts of the Fax ........................................................................................ 2-17
•Front View .......................................................................................... 2-17
• Rear View ........................................................................................... 2-18
• Handset (option) ............................................................................... 2-18
❏ Removing the Shipping Material ......................................................... 2-19
• Removing the Shipping Tapes ......................................................... 2-19
• Removing the Packing Materials Inside the Fax Unit.................. 2-19
• Removing the Packing Materials from Paper Cassette 1 ............. 2-21
• Removing the Protective Plastic Sheet ........................................... 2-22
❏ Assembling the Fax ................................................................................ 2-23
•Installing the Toner Cartridge ......................................................... 2-23
•Attaching the Document Output Tray and
the Upper Output Tray ..................................................................... 2-26
•Attaching the Document Feeder Tray ............................................ 2-27
•Installing Paper Cassette 2
(For the LASER CLASS® 3175 Only)............................................... 2-28
• Loading Paper in Paper Cassettes 1 and 2..................................... 2-31
• Connecting the Handset (option).................................................... 2-38
• Connecting the Telephone Line ....................................................... 2-39
• Connecting an Extension Phone ..................................................... 2-40
•Turning on the Power ....................................................................... 2-41
Chapter 2 Setting Up 2-1

❏ Using the MP Tray .................................................................................. 2-43
• Loading the MP Tray ........................................................................ 2-43
•Turning on and off USE MP TRAY and
Setting the Paper Size in the USE MP TRAY Menu...................... 2-48
❏ Selecting Paper Delivery ........................................................................ 2-50
• Setting Face-down Paper Delivery for Upper and
Lower Output Trays .......................................................................... 2-50
• Using the Face-up Tray ..................................................................... 2-53
❏ Using the Optional Dual-Line ............................................................... 2-54
• Connecting Two Telephone Lines ................................................... 2-54
• How the Two Telephone Lines Operate ......................................... 2-56
• Registering the Telephone Numbers for the Lines ....................... 2-57
2-2 Setting Up Chapter 2

How to Use This Guide
Before you use this guide, read this list of symbols, terms, and abbreviations, and make sure you know what they mean. A complete glossary of
terms is included at the end of this User’s Guide.
(➞2-12) A number preceded by an arrow and enclosed in
parentheses references a page number in this User ’s
Guide which contains more information about the
topic of the previous sentence.
default A factory setting that remains in effect unless you
change it.
document A document is the original sheet(s) of paper you send,
receive, or copy on the facsimile.
menu A menu is a list of options or features from which
you select an item to set up or change. A menu has a
number and title which appear in the two-line display.
search buttons The search buttons ( ) change the LCD display.
Press to display the next item or choice in a menu,
or press to display the previous item or choice.
Setting Up
transaction number When you send or receive a document, your fax au-
tomatically assigns the document a unique transaction number. A transaction number is a four-digit
decimal number that will help you keep track of
documents you send and receive.
TX/RX NO. On the LCD display, TX/RX NO. is the abbreviation
used for transaction number.
RX Denotes receiving.
TX Denotes transmitting or sending.
A note describes helpful hints, restrictions, or how to avoid difficulties.
Chapter 2 Setting Up 2-3

CAUTIONS SHOW YOU HOW TO AVOID CONDITIONS OR
INCORRECT OPERATIONS THAT COULD CAUSE DAMAGE TO
YOUR HARDWARE OR SOFTWARE OR CAUSE PERSONAL INJURY.
This icon denotes feeding a document.
Where to Set Up the Fax
❏ Avoid direct sunlight. If you have to place the fax near a
window, install heavy curtains or blinds to protect the fax
from direct sunlight.
❏ Choose a flat, stable surface free of vibration.
❏ Avoid a location subject to extreme temperature fluctua-
tion. Use in a location within a temperature range of 50°F
F
50°
F
90.5°
to 90.5°F (10°C to 32.5°C).
❏ Do not set up the fax near a television, radio, or heavy
equipment like copy machines, air conditioners, computers, or large printers that can generate strong electromagnetic fields. Large equipment can generate electronic noise
that can interfere with the operation of the fax.
2-4 Setting Up Chapter 2

❏ Choose a location that is clean and free from dust and
moisture.
❏ Do not use or store the fax outdoors.
Setting Up
LINE
❏ Place the fax unit near a telephone line. You must have an
RJ11-C wall jack installed. If you need assistance, contact
your authorized Canon dealer or service representative,
or your local telephone company.
❏ To avoid damage to the fax unit from overheating, do not
block the exhaust vent. Install the fax unit approximately
4 in. (10 cm) away from walls or other equipment.
Chapter 2 Setting Up 2-5

Space Around the Fax
To ensure proper ventilation and easy operation, set up the fax in an area
that meets the minimum requirements for clearance as illustrated below.
TO AVOID DAMAGE TO THE FAX UNIT FROM OVERHEATING,
DO NOT BLOCK THE EXHAUST VENT. INSTALL THE FAX UNIT
APPROXIMATELY 4 IN. (10CM) AWAY FROM WALLS OR OTHER
EQUIPMENT.
18.5” (467 mm)
23.3” (588 mm)
PAPER CASSETTE 2
(Standard with the
LASER CLASS
3175, optional for the
LASER CLASS
3170/3170MS.)
®
®
20” (508 mm)
28.1” (713 mm)
32.6” (828 mm)
HANDSET (option)
19.8” (501 mm)
22.5” (571 mm)
2-6 Setting Up Chapter 2

Power Requirements
❏ Place the fax near a standard 120 V AC power outlet. This
fax unit is intended for domestic use. Do not attempt to
use it outside the country where you purchased it.
❏ Do not plug the power cord into an extension cord
connector or power strip shared with other plugs.
❏ Do not plug the fax into a power outlet shared with an air
conditioner, personal computer, electric typewriter, copier,
or other equipment that generates electrical noise.
Setting Up
❏ Check the plug frequently and make sure that it is firmly
plugged into the socket.
❏ Do not plug the power cord into an uninterruptable
power supply (UPS).
Chapter 2 Setting Up 2-7

General Precautions
❏ TO AVOID SERIOUS INJURY, NEVER DISASSEMBLE
THE FAX. EXPOSED POWER POINTS INSIDE THE
FAX CAN CAUSE ELECTRICAL SHOCK IF YOU
TOUCH THEM.
❏ After you unplug the fax unit, always wait at least 5
seconds before you plug it in again. Always unplug before
you move the fax.
❏ During electrical storms, disconnect the plug from the
power outlet. The fax can hold documents in the memory
for up to 12 hours.
❏ Before you attach or remove the plug from the power
outlet, make sure your hands are dry.
❏ Do not stack boxes or furniture around the power outlet.
Keep the area open so you can reach the outlet quickly. If
you notice anything unusual (smoke, strange odors,
noises) around the fax, turn the fax off immediately and
unplug it. Call for service.
2-8 Setting Up Chapter 2

❏ Before you transport the fax, remove the cartridge. To
protect the cartridge from bright light, cover it with its
original protective bag or a cloth.
❏ Keep liquids, cleaners, and other solvents away from the
fax unit. Keep metal pins, paper clips, staples and other
objects away from the fax. If something falls into the fax
unit, remove the plug from the power outlet, and call for
service.
❏ Do not set the fax unit, other equipment, or furniture on
the power cord. Never knot the power cord or wrap it
around another object.
Setting Up
OFF
❏ To avoid paper jams, never unplug the power cord, open
the printer cover or remove a paper cassette during
printing.
Chapter 2 Setting Up 2-9

Moving the Fax Unit
The fax unit is heavy. Be sure to follow these general guidelines when
lifting the fax to move it or to install Paper Cassette 2, etc.
❏ Moving the fax unit requires two people.
❏ When you lift the fax, hold it by the handles on the right
and left sides. Never try to lift the fax by gripping paper
cassettes by the front and back sides.
❏ Grip firmly the handles by the parts close to the back of
the fax unit as shown in the figure below, because the fax
unit is heavier at the back.
❏ When you lift the fax, be sure not to tilt it forward because
the paper cassette may slide out of the fax unit.
❏ Be sure to remove Paper Cassette 2, if installed, before
moving the fax and lift them separately.
2-10 Setting Up Chapter 2

Unpacking: Have You Got Everything?
As you unpack the fax, save the carton and packing material in case you
want to move or ship the fax unit in the future. Ask someone to help you
remove all items from the box.
LIFTING THE FAX UNIT REQUIRES TWO PEOPLE. TO REMOVE
THE FAX UNIT FROM THE CARTON BOX, FOLLOW THE
GENERAL GUIDELINES AND ILLUSTRATION ON PAGE 2-10.
Remove the adhesive tapes on the top of the carton box.
1.
DOCUMENT
FEEDER TRAY
Take out the document feeder tray, the accessory tray with the
2.
document output tray, documentation, the upper output tray,
power cord and telephone line, and the FX6 Toner Cartridge in its
protective bag.
DOCUMENT
OUTPUT TRAY
DOCUMENTATION
DESTINATION LABELS
TRAY LABELS
TELEPHONE LINE
POWER CORD
ACCESSORY TRAY
(cardboard)
CD-ROM (LASER CLASS® 3170MS only)
UPPER OUTPUT TRAY
Setting Up
FX6 TONER
CARTRIDGE
Chapter 2 Setting Up 2-11

Remove the four stoppers on the side of the box by squeezing the
3.
center grip.
Lift and remove the upper carton. Remove the four styrene foam
4.
blocks positioned on top of the fax unit. Then lift the fax unit by
gripping the handles on the right and left sides. (➞2-10)
FAX UNIT
2-12 Setting Up Chapter 2

Take out Paper Cassette 2 from its carton box.
5.
Paper Cassette 2 is optional for the LASER CLASS® 3170/3170MS.
Setting Up
For the LASER CLASS® 3170 Series
Check each item against this list as you remove it from the box.
❏ 1 Fax machine
❏ 1 Document feeder tray
❏ 1 Document output tray
❏ 1 Upper output tray
❏ 1 Paper Cassette 1 (letter-, legal-, A4-size, 500-sheet capacity)
❏ 1 Power cord
❏ 1 Telephone line
❏ 2 Sheets of destination labels
❏ 1 Sheet of tray labels
❏ 1 Facsimile User’s Guide
❏ 1 Warranty registration
❏ 1 Limited warranty note
❏ 1 Installation completion card
❏ 1 FX6 Toner Cartridge
Chapter 2 Setting Up 2-13

For the LASER CLASS® 3175 Only
❏ 1 Paper Cassette 2 (letter-, legal-, A4-, executive-, B5-size, 500-sheet
capacity)
For the LASER CLASS® 3170MS Only
❏ 1 Printer User’s Guide
❏ 1 CD-ROM (Printer driver)
❏ 1 Sheet of End User Licence Agreement (PCL Board)
LASER CLASS® 3170/3170MS
LASER CLASS
Paper Cassette 2 is a standard feature for
the LASER CLASS® 3175 and optional for
the LASER CLASS® 3170/3170MS.
Paper Cassette 2
®
3175
2-14 Setting Up Chapter 2

For the LASER CLASS® 3170 Series
DOCUMENT
OUTPUT
TRAY
FAX UNIT
(with Paper Cassette 1 installed)
FACSIMILE
USER'S GUIDE
DESTINATION
LABELS
××
× 2
××
UPPER OUTPUT
TRAY
DOCUMENT
FEEDER TRAY
Setting Up
FX6 TONER CARTRIDGE
For the LASER CLASS® 3175 Only
For the LASER CLASS® 3170MS Only
TRAY
LABELS
TELEPHONE
××
× 1
××
LINE
POWER
CORD
PAPER CASSETTE 2
PRINTER USER'S GUIDE CD-ROM (Printer driver)
Chapter 2 Setting Up 2-15

Options Available
For the LASER CLASS® 3170 Series
❏ HANDSET KIT L7
❏ G3 FAX OPTION MEMORY VII (4 MB)
❏ Ve rification Stamp Unit 1
❏ Dual-line Upgrade Kit II
For the LASER CLASS® 3170/3170MS
❏ Paper Cassette 2 (PF-52) (letter-, legal-, A4-, executive-, B5-size, 500-
sheet capacity)
For the LASER CLASS® 3170/3175
❏ Printer Board I
For the LASER CLASS® 3170MS, or the LASER CLASS® 3170/
3175 with Printer Board I installed
(These are printer options. For details, refer to the Printer User’s Guide.)
❏ RAM DIMM Module (4 MB)
❏ RAM DIMM Module (8 MB)
❏ RAM DIMM Module (16 MB)
❏ Ethernet Board EB-52 FX
❏ Adobe
❏ Envelope Feeder EF-52
❏ Duplex Unit DU-52
❏ Document Distribution System
®
PostScript® 3TM Module I
Supply
❏ Canon FX6 Toner Cartridge
2-16 Setting Up Chapter 2

Parts of the Fax
Take a few moments to look over the fax and become familiar with its
parts. (The illustrations below are those of the LASER CLASS 3170 with
the following options installed: handset kit, Dual-line Upgrade Kit,
Printer Board, and Paper Cassette 2.)
Front View
DOCUMENT FEEDER TRAY
Holds documents for scanning.
DOCUMENT OUTPUT TRAY
Holds sent or copied documents.
UPPER OUTPUT TRAY
Holds printed documents after they
are ejected from the fax.
PRINTER COVER
Covers the toner cartridge.
LOWER OUTPUT TRAY
Holds printed documents after they
are ejected from the fax.
PAPER GUIDES
Adjust to the width of
the paper.
MP TRAY
Adjustable to letter, A4, and legal
paper sizes. Holds about 100
sheets of paper.
PAPER VOLUME
STATUS BARS
DOCUMENT EXTENSION
TRAY
Open to support long documents
during scanning.
DOCUMENT GUIDES
Adjust to the width of the
document.
ADF COVER
Provides access to remove paper
jams and to clean the scanning
area.
LCD DISPLAY
Displays menu items and
messages.
HANDSET (option)
Detachable handset.
OPERATION PANEL
Use the operation panel buttons
to operate the LASER CLASS
3170 Series.
®
SPEAKER VOLUME
SWITCH
Adjusts the speaker’s volume.
Setting Up
PAPER CASSETTE 1
Adjustable to letter, A4 and legal paper
sizes. Holds about 500 sheets of paper.
PAPER CASSETTE 2
IN USE/MEMORY LAMP
Blinks green when the fax is transmitting or
receiving documents.
Lights green when there are documents
stored in memory.
Adjustable to letter, A4, legal, B5 and executive
paper sizes. Holds about 500 sheets of paper.
(Paper Cassette 2 is a standard feature for the
LASER CLASS® 3175, and optional for the LASER
CLASS® 3170/3170MS.)
ERROR LAMP
Blinks red when a problem occurs.
Chapter 2 Setting Up 2-17

Rear View
EXTENSION PHONE JACK
Connect the optional handset jack or an
extension phone jack here.
TELEPHONE LINE JACK (L)
Connect the telephone line here.
LIFTING HANDLE
Grip the fax here and on
the opposite side to lift the
fax unit.
PARALLEL INTERFACE
PORT
Connect a parallel interface cable.
(This port is a standard feature for
the LASER CLASS® 3170MS, and
available for the LASER CLASS
3170/3175 after installation of the
optional PCL6 Printer Board.)
FACE-UP TRAY
Holds printed documents
after they are ejected
from the fax.
TEST PRINT BUTTON
This button should only be used
by authorized Canon dealers.
Please do not press this button.
POWER SOCKET
Connect the power
cord here.
TELEPHONE LINE JACK (L2)
®
Connect an additional telephone
line here after installation of the
optional Dual-line Upgrade Kit for
the LASER CLASS® 3170 Series.
Handset (option)
RINGER VOLUME SWITCH
Adjust the volume of the ringer. Use a pen or
other pointed object to adjust the switch to
HIGH, LOW, or OFF.
OFF
LOW
HIGH
2-18 Setting Up Chapter 2

Removing the Shipping Material
All shipping materials must be removed. Shipping materials are attached inside the fax unit and inside the paper cassette to protect delicate
parts from vibration during shipping.
Removing the Shipping Tapes
Remove all the shipping tapes from the unit.
Setting Up
Removing the Packing Materials Inside the Fax Unit
Gently lift the ADF cover and remove the styrene foam sheet from
1.
inside the feeder area.
Chapter 2 Setting Up 2-19

Close the ADF cover.
2.
Open the printer cover and the MP tray.
3.
Remove the tapes and packing materials.
4.
2-20 Setting Up Chapter 2

Close the printer cover and the MP tray.
5.
• Save all the packing materials. You may want to insert them again if
you have to transport the fax unit.
• When removing the packing materials from inside the printer area, be
careful not to touch the transfer charging roller. Otherwise, the print
quality may deteriorate.
Removing the Packing Materials from Paper Cassette 1
Pull out the Paper Cassette 1 and remove it from the fax unit.
1.
Setting Up
Set Paper Cassette 1 down on a flat, stable surface.
2.
If tapes are attached to the paper cassette, remove them. Then
3.
remove the white spacers under the paper guide clips by first
pressing down on the bottom metal plate with one hand and then
sliding the white spacers inwards with the other hand.
1
2
Insert Paper Cassette 1 in the fax unit. (➞ 2-37)
4.
Chapter 2 Setting Up 2-21

Removing the Protective Plastic Sheet
The LCD on the operation panel is covered with a plastic sheet to protect
it during shipping. This protective material should be removed before
you use the fax unit.
2-22 Setting Up Chapter 2

Assembling the Fax
Follow the instructions in this section to assemble the fax and prepare it
for full operation.
Installing the Toner Cartridge
Install only a Canon FX6 Toner Cartridge in your fax machine.
INSTALLING ANY OTHER TYPE OF CARTRIDGE IN THIS FAX
UNIT COULD DAMAGE THE FAX UNIT AND VOID YOUR WARRANTY. LEAVE THE TONER CARTRIDGE IN ITS PROTECTIVE
BAG UNTIL YOU ARE READY TO INSTALL THE CARTRIDGE.
HANDLE THE TONER CARTRIDGE CAREFULLY. (➞15-22)
Open the printer cover.
1.
Setting Up
Remove the toner cartridge from its protective bag.
2.
Save the protective bag. You can use it later to cover the cartridge
if you have to remove it from the fax machine.
Chapter 2 Setting Up 2-23

Save the protective bag and all other shipping material. You will need
this material later when you dispose of the cartridge after it has run out
of toner. (➞15-18)
Hold the cartridge by the ends and rock it gently five or six times
3.
to distribute the toner evenly inside the cartridge.
Place the new cartridge on a stable, flat, clean surface, and snap
4.
the tab to detach it from the cartridge.
As you steady the cartridge with one hand, remove the seal by
5.
gently pulling the plastic tab with your other hand. Use a firm,
even pull to avoid breaking the seal.
PULL STRAIGHT OUT
• Do not pull the tab upwards or downwards; the tape may break.
• If the tab breaks off from the tape, pull the tape out by pulling on the
end of the tape where the tab was originally attached.
•Wash off any toner from your hands or clothing immediately with cold
water.
2-24 Setting Up Chapter 2

To avoid pinching your fingers between the toner cartridge and
6.
fax unit, grip the cartridge as shown below.
KEEP THE DRUM SLOT FREE
OF DUST AND OTHER
FOREIGN OBJECTS.
DO NOT TOUCH THE
PROTECTIVE SHUTTER ON
THE BOTTOM OF CARTRIDGE.
Load the cartridge in the direction indicated by the arrow. Gently
7.
slide the cartridge into the printer area until it is down inside the
fax unit and level.
Setting Up
Shut the printer cover.
8.
❏ The fax unit will not operate if the printer cover is not closed
completely.
CHECK PRINTER COVER
If you see the message above and the Error lamp blinks red
when the fax unit is plugged in (➞2-41), open the cover again
and make sure the toner cartridge is level. Then shut the
printer cover again.
Chapter 2 Setting Up 2-25

Attaching the Document Output Tray and the Upper Output Tray
Attach the upper output tray to the front of the fax unit.
1.
Slide the end of the upper output tray down into the fax unit at an
incline, lifting the end nearest you.
UPPER
OUTPUT TRAY
• Do not use the fax without first attaching the upper output tray
correctly. A paper jam may occur.
• When removing the upper output tray, lift the end nearest you slightly
and pull the tray forward.
Attach the document output tray to the front of the fax unit, just
2.
above the upper output tray.
DOCUMENT
OUTPUT TRAY
EXTENDED LIP
2-26 Setting Up Chapter 2

Make sure the knobs on each side of the tray fit into the holes on the side of
the fax unit. Back of the tray sits on top of the extended lip of the fax unit.
Attaching the Document Feeder Tray
Slide one side in position first and then the other side.
2
1
❏ Attach the supplied tray labels as shown in the illustration below. We
also recommend attaching the tray labels onto the upper and lower
output trays according to the settings you make on the SELECT
OUTPT TRAY menu to classify the outputs. (➞2-52) You can use the
blank labels to meet your specific needs.
Setting Up
Chapter 2 Setting Up 2-27

Installing Paper Cassette 2 (For the LASER CLASS® 3175
Only)
Paper Cassette 2 is standard for the LASER CLASS® 3175, and optional
for the LASER CLASS® 3170/3170MS.
Remove the tape at the front of Paper Cassette 2.
1.
Pull out the paper cassette.
2.
If tapes are attached to the paper cassette, remove them. Then
3.
remove the spacers under the paper guide clips by first pressing
down on the bottom metal plate with one hand and then sliding
the white spacers inwards with the other hand.
1
2
2-28 Setting Up Chapter 2

Remove the tapes and packings at the rear of the paper cassette.
4.
2
2
1
If a spacer is attached, remove it from the paper cassette while
5.
pressing the bottom plate.
1
2
Setting Up
Replace the cassette into Paper Cassette 2 and place it in the
6.
location you wish to use the fax after the cassette has been
installed.
You will need to move the fax unit if you want to use it in the same
location it now occupies.
Chapter 2 Setting Up 2-29

Lift up the fax unit and hold it over Paper Cassette 2.
7.
LIFTING THE FAX UNIT REQUIRES TWO PEOPLE. TO MOUNT
THE FAX UNIT ONTO PAPER CASSETTE 2, FOLLOW THE
GENERAL GUIDELINES AND ILLUSTRATION ON PAGE 2-10.
ALWAYS LIFT THE FAX UNIT BY THE LIFTING HANDLES AT THE
BOTTOM, TO AVOID TRAPPING YOUR FINGERS BETWEEN THE
FAX UNIT AND PAPER CASSETTE 2.
WHENEVER YOU MOVE THE FAX, BE SURE TO LIFT THE FAX
UNIT AND PAPER CASSETTE 2 SEPARATELY. DO NOT TRY TO
LIFT THEM TOGETHER.
If the fax unit is heavy to lift, remove Paper Cassette 1 and toner
cartridge before placing it on Paper Cassette 2.
Make sure the front of the fax unit is facing the same direction as
8.
the front of Paper Cassette 2. Slowly lower the fax unit onto the
four positioning poles on the corners of Paper Cassette 2.
2-30 Setting Up Chapter 2

Loading Paper in Paper Cassettes 1 and 2
Before you load paper, follow these general guidelines:
❏ The paper cassettes can be adjusted to hold various sizes of paper.
Paper Cassette 1 holds letter-, legal- or A4-size paper, and Paper
Cassette 2 holds letter-, legal-, A4-, executive- or B5-size paper.
You can load executive- or B5-size paper in Paper Cassette 2 only when
you use it for the printer function. When you use it as a paper supply for
fax, you can load letter-, legal- or A4-size paper only.
❏ For high-quality printings, we recommend using Canon standard 17-
24 lb.(64-90g/m2) weight paper.
❏ Use of print media not meeting the paper’s requirements may cause
severe paper jams or result in excessive mechanical wear of the fax.
❏ Do not use the following paper in the paper cassettes:
– Moist paper
– Paper that is wavy, curled or damaged
– Folded, clipped or stapled paper
– Paper containing materials that melt, vaporize, offset, discolor or
emit dangerous fumes at a temperature of 374°F (190°C) or higher
❏ To avoid paper curling, do not open paper packs until you are ready
to load the paper in the fax unit. Store unused paper from opened
packs in a cool, dry location.
❏ Let the paper run out before you refill the paper cassettes. Avoid
mixing new paper with paper remaining in the paper cassettes.
• Do not load different sizes of paper in the paper cassettes at the same
time.
• If a printed page comes out of the fax all curled up, you can correct the
problem by turning over the paper stack in the paper cassettes so that
the bottom sheet in the stack is now at the top.
• If the leading edge of the paper is curled, straighten it out as much as
possible before loading it into the paper cassettes.
• Do not set the paper-size guides so tight that the paper stack bends.
• Do not set the paper-size guides so loose that the paper stack is not
evenly aligned.
• Do not set the paper-size guides so loose that there is room between
the guides and the paper.
Setting Up
Chapter 2 Setting Up 2-31

Pull out the paper cassettes from the fax unit.
1.
Check if the selectors inside the paper cassettes are set for the size
2.
of the paper you are loading.
If the setting is correct, go on to step 3.
-if not-
Set the paper cassettes to fit the sizes of the paper you are loading.
To change the paper size for Paper Cassette 1
Adjust the paper size side guides in the following way:
2
STOPPER STOPPER
TAB
1
1
2
TAB
WHEN YOU SET TO A4 SIZE. WHEN YOU SET TO LETTER OR LEGAL SIZE.
❏ To select A4 size, push the tabs jutting out from the edge of
the cassette inwards and slide the stopper downwards to lock
the guides in position.
❏ To select letter and legal size, slide the stopper up and push
the size side guides outwards.
SIZE SIDE
GUIDES
2-32 Setting Up Chapter 2

Lift the stopper in the center of the paper size rear guide slightly,
and slide it to the mark indicating the desired paper size.
LGL
A4
LTR
WHEN YOU SET TO LETTER SIZE.
To change the paper size for Paper Cassette 2
To adjust the paper size side guides, release them by pinching the
stopper on the left guide and slide them inwards or outwards
according to the paper size you are loading.
1
2
Setting Up
Chapter 2 Setting Up 2-33

Push up the stopper of the paper size rear guide, and slide it to
the mark indicating the desired paper size.
WHEN YOU SET TO A4 SIZE.
You can load executive- or B5-size paper in Paper Cassette 2 only when
you use it for the printer function. When you use it as a paper supply for
fax, you can load letter-, legal- or A4-size paper only.
Turn the dial on the right-front side of the cassette and adjust it to
the size of paper you are loading.
A4
B5
CUSTOM
LGL
• Make sure the mark on the paper size setting dial corresponds with the
size of the installed paper, otherwise a paper jam may occur.
• Do not set the paper size dial on this unit to CUSTOM. This setting is
not supported by this fax.
2-34 Setting Up Chapter 2

Before you load a stack of paper into the paper cassettes, tap the
3.
leading edge of the paper stack on a flat surface so that the edges
are evenly aligned.
Place the stack of paper in the paper cassettes with the print side
4.
facing down. Insert the stack of paper so that it fits neatly to the
back of the paper cassettes.
When loading 500 sheets into the paper cassettes, divide the stack in two
evenly-sized stacks, then load each stack separately.
Setting Up
Chapter 2 Setting Up 2-35

Press down on the front of the paper stack to make sure the
5.
corners are below the paper size guide clips. Then press the stack
down again to make sure it is below the paper limit marks on the
side of the paper cassettes and the paper size guides hook at the
back of the cassettes.
PAPER LIMIT
MARKS
Press the paper stack down to make sure it has a clearance of
6.
approximately 0.04 in. (1 mm) from the hook of the paper size rear
guide.
2-36 Setting Up Chapter 2

Reinsert the cassette into the fax unit: Align the cassette with the
7.
rails on the fax unit, then lift slightly to insert the cassette. Slide it
all the way into the fax unit.
Make sure you insert the cassette all the way into the fax unit until it
locks into place.
Setting Up
❏ The paper volume status bars on the paper cassettes indicate the
level of the current paper supply. When you see the paper volume
status bar drop, make sure you have a supply of paper on hand to fill
the cassettes. When you see the SUPPLY REC. PAPER message on
the LCD display, re-fill the cassettes.
PAPER VOLUME
STATUS BAR
Chapter 2 Setting Up 2-37

Connecting the Handset (option)
A telephone handset is available as an option for the fax machine.
This handset is for use with Canon LASER CLASS® 3170 Series only.
Attach the handset cradle holder to the back of the cradle with the
1.
screws provided.
TOP
BOTTOM
Fit the handset cradle holder over the holes on the fax unit.
2.
Screw the handset cradle holder on the fax unit.
3.
2-38 Setting Up Chapter 2

Connect the end of the handset connector cord to the extension
4.
phone jack marked with the handset icon (
Place the handset on the handset cradle.
5.
Connecting the Telephone Line
Make sure you have an RJ11-C wall jack. If you need assistance,
1.
contact your dealer or telephone company.
).
Setting Up
Connect one end of the supplied telephone line to the fax jack
2.
marked .
Chapter 2 Setting Up 2-39

Connect the other end of the telephone line to your wall telephone
3.
jack.
If you have installed the optional Dual-line Upgrade Kit, you can
connect another telephone line to the fax unit. (➞2-54)
Connecting an Extension Phone
To connect an extension phone to the fax, you have to use the extension
phone jack.
Only one jack is provided to be used with the optional handset or an
extension phone. A separate jack is not provided for an extension phone.
Connect the extension phone cord to the extension phone jack
marked with the handset icon ( ).
2-40 Setting Up Chapter 2

Turning on the Power
Connect the power cord to the power socket on the rear of the fax
1.
unit.
Connect the other end of the power cord to the power source.
2.
THE FAX MUST BE CONNECTED TO A PROPERLY GROUNDED,
THREE-PRONG 120 V AC OUTLET.
After you connect the power cord to the power source, the fax
LCD display will light. There is no power switch on the fax unit.
Setting Up
It will take a few seconds for the unit to warm up.
PLEASE WAIT
The unit has warmed up and is ready to use when you see the
date and time display.
12/31/1999 FRI 12:20
When the date is displayed on the LCD, the fax is in the standby
mode and ready for normal operation. If the Error lamp starts
blinking red, wait for one of the following messages to appear.
Chapter 2 Setting Up 2-41

INSTALL CARTRIDGE You have not yet installed the toner
cartridge. Install the FX6 toner
cartridge. (➞2-23)
REPLACE CARTRIDGE The toner cartridge has run out of
toner. Replace the toner cartridge.
CHECK PRINTER COVER
SUPPLY REC. PAPER At least one of the paper cassettes is
The printer cover is not closed completely. If it does not close easily, do
not force it. Remove the toner cartridge, and insert it again. Make sure it
is sitting level inside the fax machine
then close the printer cover again.
empty or not seated correctly inside
the fax machine. Remove each
cassette. Make sure the stacks of paper
are below the tabs and insert the
paper cassettes in again. Push the
paper cassettes all the way in until
they lock in place.
2-42 Setting Up Chapter 2

Using the MP Tray
The MP (multi-purpose) tray can hold letter-, legal- or A4-size paper. The
capacity is approximately 100 sheets of cut-sheet paper (80 g/m2 or 21
lbs.). To use the MP tray as one of the input trays, you need to set USE
MP TRAY to ON in the FAX’S PRINTER SET menu. (➞2-48)
To use the MP tray with the LASER CLASS® 3170MS or the LASER
CLASS® 3170/3175 with the Printer Board I installed, follow the guidelines below. Otherwise, the paper-size-matching error occurs and the
message “CHECK PAPER SIZE” appears on the display.
❏ Even when you use the MP tray for the fax function, it is necessary to
set the same paper size on the printer menus as on the fax menus.
For details about setting the paper size of the MP tray on the printer
menus, refer to “Printing from the Multi-Purpose Tray” in the Printer
User’s Guide.
❏ If you use the MP tray for the printer function and load paper of
sizes other than letter, legal or A4, it is necessary to set USE MP
TRAY to OFF on the FAX’S PRINTER SET menu. (➞2-49)
The sizes and kinds of print media you can set on the MP tray differ
when you use it as an input tray for the printer function. For details on
the print media specifications for the printer function, refer to the “Print
Media Specifications” section in Appendix 4 of the Printer User’s Guide.
Setting Up
When not in use, the tray can fold up into the fax unit.
Loading the MP Tray
Before you load the paper, follow these general guidelines:
❏ For high-quality printings, we recommend using Canon standard 17-
24 lb.(64-90g/m2) weight paper.
❏ Use of print media not meeting the paper’s requirements may cause
severe paper jams or result in excessive mechanical wear of the fax.
❏ Do not use the following paper in the MP tray:
– Moist paper
– Paper that is wavy, curled or damaged
– Folded, clipped or stapled paper
– Paper with cut-outs or perforations (not recommended)
– Paper containing materials that melt, vaporize, offset, discolor or
emit dangerous fumes at a temperature of 374°F (190°C) or higher
Chapter 2 Setting Up 2-43

•Avoid pressing or applying excessive force on the MP tray as this may
cause damage.
• The paper stack must not exceed the paper limit mark.
• Do not load different sizes of paper on the MP tray at the same time.
• Do not add paper to the MP tray if paper is already loaded; incorrect
paper feed or a paper jam may occur. Only add paper when the MP
tray is empty.
• If a printed page comes out of the fax all curled up, you can correct the
problem by turning over the paper stack in the MP tray so that the
bottom sheet in the stack is now at the top.
• If the leading edge of the paper is curled, straighten it out as much as
possible before loading it into the tray.
• Do not set the paper guides so tight that the
paper stack bends.
• Do not set the paper guides so loose that the
paper stack is not evenly aligned.
• Do not set the paper guides so loose that there
is room between the guides and the paper.
• Do not place the paper into the tray at an angle.
• Do not load fanned out paper.
Make sure the edges of the paper stack are
evenly aligned when loading.
2-44 Setting Up Chapter 2

Pull the MP tray out using the handle on the panel.
1.
Pull out the extension tray using the center grip.
2.
Setting Up
The MP tray holds approximately 100 sheets of paper. Before you
3.
load paper on the MP tray, tap the edges of the stack to make sure
the leading edge and sides of the stack are even.
Chapter 2 Setting Up 2-45

4.
PAPER SENSOR
Insert the paper stack as far as it will go into the fax unit, with the
print side facing up and the top of the paper going into the fax
unit first. Then adjust the paper guides to the size of the paper.
PAPER-FEED
ROLLER
• Make sure that the leading edge of the paper is inserted all the way
into the MP tray so that it is below the paper-feed roller. The paper
sensor for the MP tray is located to the left of the paper feed roller,
when viewed from the front of the fax unit. Please note the following
points when loading small-size paper in the MP tray. (If the paper is
not loaded correctly, the paper will not be detected by the fax and a
message will appear asking you to load paper in the MP tray.)
• Make sure that the paper stack is not higher than the load-limit marks
( ) on the paper guides.
LOAD-LIMIT
MARK
2-46 Setting Up Chapter 2

• Make sure that the paper guides are set correctly. To print with the MP
tray, you also need to select the paper size in the USE MP TRAY menu.
(➞2-48)
• Make sure that the paper is loaded correctly and that the leading edge
is fully inserted into the fax unit.
• Make sure that the paper sensor is resting on top of the paper. (The
paper sensor must rest on top of the paper, not just touch the edge of
the paper.)
PAPER SENSOR
ACCEPTABLE NOT ACCEPTABLE
•To avoid damaging the MP tray, close it when not in use. Remove and
store any remaining print media. Slide the extension tray in before
closing the MP tray.
Setting Up
Chapter 2 Setting Up 2-47

Turning on and off USE MP TRAY and Setting the Paper
Size in the USE MP TRAY Menu
To use the MP tray as one of the input trays, you need to select ON for
USE MP TRAY in the FAX’S PRINTER SET menu.
Also, to use the MP tray for the fax function with the LASER CLASS
3170MS or the LASER CLASS® 3170/3175 with the Printer Board I
installed, it is necessary to set the same paper size on the printer menus
as on the fax menus. For details about setting the paper size of the MP
tray on the printer menus, refer to “Printing from the Multi-Purpose
Tray” in the Printer User’s Guide.
Follow this procedure to turn on and off USE MP TRAY and to select the
paper size in the fax menus.
Open all three of the One-touch Speed Dialing panels. Then press
1.
Data Registration.
®
Data
Registration
REGISTRATION
1. DATA REGISTRATION
Set
Press Set.
2.
DATA REGISTRATION
1. USER SETTINGS
Press the search buttons until you see the display below.
3.
DATA REGISTRATION
5. FAX’S PRINTER SET
Set
Press Set.
4.
FAX’S PRINTER SET
1. USE MP TRAY
2-48 Setting Up Chapter 2

Set
5.
Press Set.
USE MP TRAY
OFF
Press the search buttons to display ON.
6.
USE MP TRAY
ON
If you use the MP tray for the printer function and load paper of sizes
other than letter, legal or A4, it is necessary to set USE MP TRAY to OFF
on the FAX’S PRINTER SET menu.
Set
Press Set.
7.
SET MP TRAY SIZE
LTR
Press the search buttons to select the paper size you are loading
8.
onto the MP tray.
SET MP TRAY SIZE
A4
Setting Up
Set
Press Set.
9.
FAX’S PRINTER SET
2. # OF RX COPIES
Stop
Press Stop to return to standby.
10.
Chapter 2 Setting Up 2-49

Selecting Paper Delivery
The fax machine has three output trays: an upper output tray, a lower
output tray, and a face-up tray.
The paper delivery method used by the fax is determined by whether the
face-up tray is open or closed, and by the settings you make in the FAX’S
PRINTER SET menu.
Setting Face-down Paper Delivery for Upper and Lower
Output Trays
UPPER OUTPUT
TRAY
LOWER OUTPUT
TRAY
When the face-up tray is open, the fax will automatically select face-up
delivery. To select face-down delivery, make sure the face-up tray is
closed. If the extension of the face-up tray is extended, be sure to push it
back into the tray before closing.
You can also designate an output tray for each function (FAX, COPY,
REPORT, and PRINTER). Follow the procedure described below.
If no setting is made for face-down delivery, and the face-up tray is
closed, the paper is first delivered to the lower output tray. When the
paper full sensor detects the tray is full, the paper delivery switches
automatically to the upper output tray. The lower output tray can hold
approximately 200 sheets, and the upper output tray approximately 100
sheets.
2-50 Setting Up Chapter 2

Setting Up
Chapter 2 Setting Up 2-51
1.
Open the FAX’S PRINTER SET menu.
Open all three of the One-touch Speed Dialing panels. Then press
Data Registration.
Data
Registration
REGISTRATION
1. DATA REGISTRATION
Set
Press Set.
DATA REGISTRATION
1. USER SETTINGS
Press the search buttons until you see the display below.
DATA REGISTRATION
5. FAX’S PRINTER SET
Set
Press Set.
FAX’S PRINTER SET
1. USE MP TRAY
2.
Open the SELECT OUTPT TRAY menu.
Press the search buttons until you see the display below.
FAX’S PRINTER SET
7.SELECT OUTPT TRAY
Set
Press Set.
SELECT OUTPT TRAY
OFF
Press the search buttons to select ON.
SELECT OUTPT TRAY
ON

Set
Set
Press Set.
SELECT OUTPT TRAY
1.FAX
Press Set.
FAX
LOWER OUTPUT TRAY
Press the search buttons to select either the lower or upper output
3.
tray when receiving documents by fax.
FAX
UPPER OUTPUT TRAY
Set
Press Set.
4.
SELECT OUTPT TRAY
2. COPY
Select a tray for each function in the same way.
Example 1: For the LASER CLASS® 3170/3175
FAX UPPER OUTPUT TRAY
COPY UPPER OUTPUT TRAY
REPORT LOWER OUTPUT TRAY
Example 2: For the LASER CLASS® 3170MS, or for the LASER
CLASS® 3170/3175 with the Printer Board I installed
FAX UPPER OUTPUT TRAY
COPY UPPER OUTPUT TRAY
REPORT UPPER OUTPUT TRAY
PRINTER LOWER OUTPUT TRAY
•If you have installed the Printer Board I to the LASER CLASS® 3170 or
the LASER CLASS® 3175, it is recommended to designate one tray for
the fax function and the other tray for the printer function.
•Use the supplied tray labels to indicate the type of output designated
for delivery to the upper and lower output trays. (➞2-27)
2-52 Setting Up Chapter 2

Set
Press Set.
Stop
Press Stop to return to standby.
5.
•If the full paper sensor detects that the tray is full when the output tray
settings are input, the fax stops printing. If the fax is receiving
documents, they are stored in memory and the messages RECEIVED IN
MEMORY and OUTPUT TRAY FULL appear alternately on the display.
•Once you have picked up the printed paper from the output trays, do
not replace them onto the trays. It may cause paper jam.
Using the Face-up Tray
To select face-up delivery, pull down the face-up tray. The fax machine
will automatically switch to face-up delivery. The face-up tray is
particularly useful for heavier paper.
To open the face-up tray, take hold of its tab and pull down the tray.
Then grasp the end of the face-up tray and push it with your thumb to
unlock the extension tray and pull it out until it is fully extended.
Setting Up
1
TAB
2
EXTENSION TRAY
Chapter 2 Setting Up 2-53

Using the Optional Dual-Line
The optional Dual-line Upgrade Kit, allows you to connect one more
telephone line to the fax unit at the same time. This section describes
how to connect the telephone lines to the Dual-line Upgrade Kit and set
up the fax unit.
Connecting Two Telephone Lines
The Dual-line Upgrade Kit must be installed inside the fax unit by a
qualified service technician. For details, contact a local authorized Canon
dealer.
Note the following features regarding the installation of the Dual-line
Upgrade Kit:
❏ When either the Dual-line Upgrade Kit or the PCL6 Printer Board is
installed in the fax unit, the energy saver feature cannot be used.
(➞3-21)
❏ With the Dual-line Upgrade Kit installed, if you have installed the
optional handset you will not be able to use it for voice telephone
communication on Line 2.
Make sure you have two RJ11-C wall jacks. If you need assistance,
1.
contact your dealer or telephone company.
Locate the telephone line jacks on the right side ( ) and the back
2.
side ( ) of the fax unit. The jack marked is for Line 1 and the
jack marked is for Line 2.
2-54 Setting Up Chapter 2

Connect one end of Line 1 to the jack and connect one end of
3.
Line 2 to the jack.
Telephone jack marked
for Line 1 connection
Setting Up
Telephone jack marked
for Line 2 connection
Connect the other end of the two telephone lines to the wall
4.
telephone jacks.
Chapter 2 Setting Up 2-55

How the Two Telephone Lines Operate
The fax unit uses the two telephone lines in different ways.
❏ Line 1, connected to the telephone jack (on the right side of the fax
unit) marked
the fax unit.
❏ Line 2, connected to the telephone jack (on the rear of the fax unit)
marked , cannot be used for the following features:
, can be used for all communications provided by
Disabled Feature Description
MANUAL SENDING Sending documents manually (6-17)
MANUAL RECEIVING Receiving documents manually (7-7)
TALK Voice telephone communication (12-2)
MAN/AUTO SWITCH Sets the ring time before the fax
switches automatically to the
document receive mode while in
the manual receive mode
REMOTE RX Changing the remote receive ID
See
Page
(16-14)
(7-9,
16-14)
❏ You can select either telephone line for priority reception, and you
can also select which line is to be used for priority sending when
both lines are open.
❏ When Line 1 is busy receiving a document transmission, even if Line
2 is open you cannot send or receive another document transmission
manually.
❏ Even if another party calls you on Line 2, you will not be able to
receive the telephone call for voice communication.
2-56 Setting Up Chapter 2

Setting Up
Chapter 2 Setting Up 2-57
Registering the Telephone Numbers for the Lines
The telephone numbers that you register with the procedure below will
appear in the display of the other party's fax unit during document
transmissions and appear in printed reports and lists.
Follow this procedure to register telephone numbers for both lines
connected to the Dual-line Upgrade Kit.
1.
Open all three of the One-touch Speed Dialing panels. Then press
Data Registration.
REGISTRATION
1.DATA REGISTRATION
Data
Registration
2.
Set
Press Set.
DATA REGISTRATION
1.USER SETTINGS
3.
Press the search buttons until you see the display below.
DATA REGISTRATION
8.DUAL LINE OPTIONS
After the Dual-line Upgrade Kit is installed, this item is added to the
DATA REGISTRATION menu.
4.
Set
Press Set.
DUAL LINE OPTIONS
1.2nd LINE TEL #
5.
Set
Press Set.
2nd LINE TEL #
TEL =

GHI
PRS
1
4
7
Tone
Set
ABC
TUV
OPER
JKL
2
5
8
0
DEF
MNO
WXY
SYMBOLS
3
6
9
number for Line 2.
Data entry buttons
0-9 Enters a number.
Space Enters a space (spaces are optional).
Delete Deletes the rightmost digit of the number you are
entering so you can enter a new digit.
Use these buttons on the numeric keypad to enter the telephone
Clear Clears the entire entry if you want to start again.
You can register a number of up to 20 digits.
After you enter the telephone number for Line 2, press Set.
6.
2nd LINE TEL #
DATA ENTRY OK
DUAL LINE OPTIONS
2.2nd LINE TYPE
Set
Press Set.
7.
2nd LINE TYPE
TOUCH TONE
Use the search buttons to alternate the settings and display the
8.
setting that you need.
2nd LINE TYPE
TOUCH TONE
2nd LINE TYPE
ROTARY PULSE
The fax unit is set to operate through a tone line without making
any adjustments.
2-58 Setting Up Chapter 2

Set
Set
Press Set.
9.
DUAL LINE OPTIONS
3.TX LINE PRIORITY
Press Set.
10.
TX LINE PRIORITY
LINE1 TX PRIORITY
The fax unit is set to operate with the first setting (LINE1 TX
PRIORITY) without making any adjustments.
Setting Up
Press the search buttons until you see the setting you need.
11.
LINE1 TX PRIORITY When both lines are open, transmission is
sent on Line 1. If Line 1 is busy and Line 2
is open, transmission is sent on Line 2.
LINE2 TX PRIORITY When both lines are open, transmission is
sent on Line 2. If Line 2 is busy and Line 1
is open, transmission is sent on Line 1.
LINE1 TX PROHIBIT Even if both lines are open, transmission
is sent on Line 2. Line 1 is only available
for receiving.
LINE2 TX PROHIBIT Even if both lines are open, transmission
is sent on Line 1. Line 2 is only available
for receiving.
Set
Press Set then press Stop to return to standby.
12.
Stop
Chapter 2 Setting Up 2-59

2-60 Setting Up Chapter 2

Chapter 3
Getting Started
This chapter describes some important settings that you should perform
before you use the fax.
Regarding the settings needed to use the fax as a printer, refer to the
Printer User’s Guide. To use the LASER CLASS® 3170/3175 as a printer,
the PCL6 Printer Board needs to be installed.
Before you use the fax you should set the correct date and time, register
the fax unit telephone number, and register the unit name (your personal
name or a company name). If these tasks have been done for you, then
you may want to enter your own sender name. (➞3-18)
First, we will describe the operation panel buttons and give a brief
introduction to the basic procedures for browsing through the menus
and finding the items you want. Then we will guide you step by step
through the basic procedures that must be performed before you use the
fax for the first time.
Getting Started
❏ Operation Buttons (One-touch panels closed) ...................................... 3-2
❏ Operation Buttons (One-touch panels open) ........................................ 3-4
❏ Using the Menus and Buttons ................................................................. 3-5
• General Guidelines for Registering Information ............................ 3-5
• Using the Menus ................................................................................. 3-5
• Entering Names for Registration ...................................................... 3-7
• Menu Button Summary Table ............................................................ 3-9
❏ Checking and Setting the Telephone Line........................................... 3-10
❏ Registering Required Sender Information .......................................... 3-12
• What is Sender Information? ........................................................... 3-12
❏ Registering the Sender Information (TX TERMINAL ID) ................ 3-13
❏ Registering Sender Names .................................................................... 3-18
• Registering a Sender Name ............................................................. 3-18
• Changing or Erasing a Sender Name ............................................. 3-20
❏ Using the Energy Saver Mode
(For the LASER CLASS® 3170/3175 Only) .......................................... 3-21
•Turning the Energy Saver Feature ON ........................................... 3-21
• Returning to the Full Power Mode ................................................. 3-23
Chapter 3 Getting Started 3-1

Operation Buttons (
One-touch panels closed
)
LCD Display
Displays messages and prompts during operation. Displays
selections, text, numbers and names when registering
information.
Change Cartridge
Lights when toner in the toner cartridge runs low. Replace the
toner cartridge.
Rec. Paper
Lights when the paper cassettes run out of paper. Re-fill the
cassettes with paper.
Printer Operation Panel
Used for printer function.
For details, refer to the Printer User’s Guide.
Resolution
Sets the resolution for documents you send.
Contrast
Adjusts the lightness/darkness of documents you send or copy.
Document Type
Adjusts quality for documents with only text or with both photos
and text.
One-Touch Speed Dialing Buttons
Dial numbers registered under One-touch Speed Dialing
buttons.
Change
Cartridge
Rec. Paper
On Line Job Alarm
Go
Ultra Fine
Super Fine
Fine
Standard
Resolution
1
6
11
Shift
Darker Direct TX
Standard
Lighter
Contrast
2
7
12
PRT. Message
Menu
Document Type
13
Item Value
Text Manual RX
Text / Photo
3
8
4
9
14
Enter/Cancel
5
10
15
Energy
Saver
One-Touch Speed Dialing Panels
The first panel displays buttons 1-25. Open the first panel to
access buttons 26-50. Open the second panel to access
buttons 51-72. Open the third panel to access the registration
buttons.
Program
Registers multi-step setting normally done by pressing buttons
on the operation panel so you can do them at the press of
single button.
Transaction
Displays information about previous sending and receiving
transactions.
Delete File
Deletes documents waiting in memory for sending.
Pause
Enters pauses between digits or after the entire phone number
when dialing or registering facsimile numbers.
Numeric Keypad
Use the buttons on the numeric keypad to enter phone
numbers when dialing. These buttons also enter text, numbers,
and symbols when registering names and numbers.
Tone
Connects to information services that accept tone dialing only,
even if you are using a rotary pulse.
16
21
Program
Pause
GHI
PRS
17
22
Transaction Delete File
Coded Dial Redial Hook Directory
18
23
19
24
P
ABC3DEF
1
JKL6MNO
4
TUV
7
OPER SYMBOLS
Tone
2
5
8
0
WXY
9
Clear
Start/Scan
In Use/
Memory
20
25
Set
Copy
Stop
Error
3-2 Getting Started Chapter 3

Energy Saver
Switches the fax out of the energy saver mode.
PRT. Message
Switches the LCD display between the fax messages and the
printer messages.
Manual RX
Switches the fax between the auto and manual receive mode.
Direct TX
Sets the fax in the direct sending mode so you can send a document ahead of other
documents stored in the fax memory. Direct sending scans a document and sends it
immediately without storing the document in the memory.
Set
Selects a menu item during data registration.
Directory
Allows you to search for fax/telephone numbers by the name
under which they are registered for speed dialing and then use
the number for dialing.
Search buttons for directory dialing.
Coded Dial
A press on the button followed by a three-digit code dials the telephone number
registered for Coded Speed Dialing under that three-digit code.
Redial
Redials the previous number dialed manually with the buttons on the numeric keypad.
Hook
Allows you to dial, even with the handset still in the handset rest.
Copy
Copies a document.
Clear
Clears an entire entry during information registration.
Stop
Cancels sending, receiving, data registration, and other
operations and returns the fax to the standby mode.
Start/Scan
Starts sending, receiving, copying and other operations.
Error
Blinks red when paper jam occurs or the fax is running
out of paper or toner. The problem is described by a
message in the LCD display above.
In Use/Memory
Blinks green when the fax is using the telephone line.
Lights green when there are documents in the memory.
Getting Started
Chapter 3 Getting Started 3-3

Operation Buttons (One-touch panels open)
+
Data
Registration
Memory Box
Delayed
Transmission
Memory
Reception
Polling
Transfer Report
Confidential
Mailbox
Memory
Reference
Stamp(Option)
Pin Code Space
Relay
Broadcast
Press + to enter a plus sign in a fax number.
Pin Code
Displays the PIN code message so you can enter
the PIN code for dialing through a PBX.
TTI Selector
Enters a registered sender's name to appear at the
top of the document you are sending.
Subaddress
Allows you to enter an ITU-T subaddress so you
can send a document with a subaddress.
Password
Allows you to enter an ITU-T password so you can
send a document with a password.
TTI Selector Subaddress Password Delete
Data Registration
Starts data registration for speed dialing, sender information, and
other important settings for sending and receiving.
Delayed Transmission
Sets a time for delayed sending.
Polling
Sets a document for polling sending, and also used for polling
receiving.
Confidential Mailbox
Sets a document for sending to a confidential mailbox so you can
print documents received in the mailbox.
Relay Broadcast
Sets a document to be sent to another fax for relay sending.
Memory Box
Sets a document to be stored in a memory box, or opens a
memory box so you can print documents received in the memory
box.
Search buttons
Scrolls the display so you can see other options
and selections in the menus during data
registration.
ff
ee
f
e Cursor buttons
ff
ee
Moves the cursor left or right during data
registration.
Space
Enters a space between letters and numbers on
the LCD display when you are registering
information.
Delete
During a step when you are registering or entering
a number, press this button to delete the number.
(This button deletes number entries only.)
Memory Reception
Switches the fax in and out of the memory lock mode. In the
memory lock mode, the fax stores all documents it receives in
the memory.
Transfer
Switches the fax in and out of transfer mode. In the transfer mode
the fax unit sends all documents it receives to another fax
machine at your home or another office.
Memory Reference
Performs operations with documents currently stored in the
memory, including printing a list of documents, printing a
document, sending a document to another destination, or
deleting a document.
Report
Prints reports about information registered in the fax.
Stamp(Option)
Switches the fax in and out of the stamp mode. In the stamp
mode, the fax marks all documents scanned for sending in
memory mode or direct sending mode. If you want to use the
stamp feature, call your authorized Canon dealer and request
installation of this option.
3-4 Getting Started Chapter 3

Chapter 3 Getting Started 3-5
Getting Started
Using the Menus and Buttons
This section provides a brief overview on how to use the menu buttons
to open menus, make selections, and register data.
General Guidelines for Registering Information
Always keep these points in mind while you are using the menus:
❏ If you pause and do not press a button for 60 seconds, the fax returns
to the standby mode automatically. You must then start the procedure again from the beginning.
❏ If your fax is set to manual receiving and the fax rings while you are
registering information, pick up the handset. If you hear a slow beep
tone, the other party is trying to send you a document. Press Stop
and press Start/Scan to receive the document.
Using the Menus
The fax employs a menu system you can use to register important
information or to set up important features. Here we describe how to
display and operate these menus. The content and purpose of each menu
is described in another chapter. (➞16-3)
1.
Open all three of the One-touch Speed Dialing panels so you can
see the operation panel buttons.
Data
Registration
2.
Press Data Registration.
REGISTRATION
1.DATA REGISTRATION
Set
3.
Press Set.
DATA REGISTRATION
1.USER SETTINGS

Set
Press the search buttons to display the name of the next or previ-
4.
ous menu title.
DATA REGISTRATION
1.USER SETTINGS
DATA REGISTRATION
7.SYSTEM SETTINGS
Note that displaying menu names with the search buttons is rotational. If
you press with the last menu name displayed, the display rotates to
the first menu name. If you press with the first menu displayed, the
display rotates to the last selection.
To Open a Menu and Select an Item
Press the search buttons until the name of the menu you want to open is
displayed, then press Set.
Press the search buttons to browse through the menu items then press
Set to go to the next level.
To Return to the Previous Level
Data
Registration
Stop
3-6 Getting Started Chapter 3
Press Data Registration to return to the previous level so you can continue
browsing. If you continue to press Data Registration you will return to the
standby mode.
To Return to Standby Immediately
Press Stop to return to standby.
If you do not press a button for 60 seconds, the fax will automatically
return to standby.

Entering Names for Registration
When you come to a step that requires entering a name for data registration, follow the procedure below.
In a display that requires a name entry, the letter or number in the upper
right corner of the LCD display tells you the entry mode.
UNIT NAME :A
_
Press * to change the entry mode.
1.
Display Entry mode What it does
:A Text Allows you to enter upper and lower case
letters. You can also press # to enter a
symbol.
:1 Number Allows you to enter numbers. You can
also press # to enter a symbol.
Getting Started
GHI
PRS
Tone
The numeric keypad buttons are clearly labeled with one number
and some letters.
ABC
DEF
1
2
3
JKL
MNO
4
5
6
TUV
WXY
9
8
7
SYMBOLS
OPER
0
Press the appropriate button to enter the letter or number.
2.
Keep pressing the button until the upper or lower case letter you
want appears.
If you go past the letter you want, you will have to keep pressing
the button until it appears again.
Each button contains the upper and lower case letters for its group of
letters. (For example: ABCabc)
Chapter 3 Getting Started 3-7

If the next letter you want to enter is under another button, just
3.
press that button to move the cursor right and enter the first letter
of that group with a single button press.
-if not-
If the next letter you want to enter is under the same button you
just pressed, press e to move the cursor to the right one space.
Then keep pressing the button again until the letter you want
appears.
❏ You can also enter symbols. Just press # until you see the
symbol you want.
❏ To enter a space, press Space.
To Correct a Mistake
Use the cursor buttons to move the cursor left or right to position it
under the incorrect letter. Then enter the correct letter.
-if not-
Clear
Press Clear to delete the entire entry so you can start again.
C
3-8 Getting Started Chapter 3

Menu Button Summary Table
When you come to a step where you must enter a number or name for
data registration—in this section or in any part of this Facsimile User’s
Guide—refer to the table below.
To see some of the buttons described below, you may have to open all
three of the One-touch Speed Dialing panels.
Buttons for registering information
The search buttons display the next or previous menu
item.
Press to display the next item of the menu. If you press
when the last item is displayed, the display rotates to
the first item on the menu.
Press to display the previous item of the menu. If you
press when the first item is displayed, the display
rotates to the last item on the menu.
Set Press Set to select the current item and display the next
level of the menu.
*
ABC
WXY
to
2
9
Switches the entry modes.
:A Text entry mode. You can enter letters.
:1 Number entry mode. You can enter numbers.
More than one letter is assigned to a button. Press * to enter
the text entry mode then press the button for the letter you
want to enter. If the letter you want to enter is not displayed
first, keep pressing the button until it appears. If the next
letter is under another button, just press that button to enter
the first letter of the group and then keep pressing the
button until the letter you want appears.
Getting Started
-if not-
If the next letter is under the same button, press e to
move the cursor right one space then press the button
again to enter the first letter of the group. Keep pressing
the button until the letter you want appears.
f e The cursor buttons move the cursor left or right.
# Press # to enter a symbol. You can enter symbols in the
text or number entry mode. Keep pressing # until the
symbol you want is displayed. You can enter these
symbols:
- . * # ! " , ; : ^ `_ = / | ' ? $ @ % & + ( ) [ ] { } < >
Chapter 3 Getting Started 3-9
 Loading...