

Page 1
User's Guide
User's Guide
IMPORTANT:
Read this manual carefully before using your printer.
Save this manual for future reference.
ENG
Page 2

LBP5360
Laser Printer
User's Guide
Page 3

Manuals for the Printer
The manuals for this printer are arranged as follows. Please refer to them for detailed information.
Guides with this symbol are PDF manuals included on the accompanying CD-ROM.
CD-ROM
Installation
•
•
Connecting to a Computer
•
Basic Operations
•
Troubleshooting
Installing the Printer Driver
•
•
Printing a Document
•
Using the Supplied Software
Setting Up the Network Environment for
•
Printing
•
Managing the Printer in the Network
Environment
User's Guide
(This Manual)
Driver Guide
Network Guide
CD-ROM
CD-ROM
CD-ROM
Operating/Setting the Printer from the Web
•
Browser
Remote UI Guide
CD-ROM
To view the manuals in PDF format, Adobe Reader/Adobe Acrobat Reader is required. If Adobe Reader/Adobe Acrobat Reader is not installed on your
system, please download it from the Adobe Systems Incorporated website.
Page 4

How This Manual Is Organized
Chapter 1
Chapter 2
Chapter 3
Chapter 4
Chapter 5
Chapter 6
Chapter 7
Chapter 8
Chapter 9
Chapter 10
Before You Start
Installing the Printer
Using the Printer
Loading and Outputting Paper
The Printing Environment
Printing Environment Settings
Routine Maintenance
Troubleshooting
Installing the Optional Accessories
Appendix
Considerable effort has been made to ensure that this manual is free of inaccuracies and omissions. However, as we are constantly improving our
products, if you need an exact specification, please contact Canon.
Page 5

Contents
Preface . . . . . . . . . . . . . . . . . . . . . . . . . . . . . . . . . . . . . . . . . . . . . . . . . . . . . . . . viii
How To Use This Manual . . . . . . . . . . . . . . . . . . . . . . . . . . . . . . . . . . . . . . . . . . viii
Symbols Used in This Manual . . . . . . . . . . . . . . . . . . . . . . . . . . . . . . . . . . . . . viii
Keys and Buttons Used in This Manual . . . . . . . . . . . . . . . . . . . . . . . . . . . . . . viii
Illustrations Used in This Manual . . . . . . . . . . . . . . . . . . . . . . . . . . . . . . . . . . . .ix
Abbreviations Used in This Manual . . . . . . . . . . . . . . . . . . . . . . . . . . . . . . . . . . x
Legal Notices . . . . . . . . . . . . . . . . . . . . . . . . . . . . . . . . . . . . . . . . . . . . . . . . . . . . .xi
Model Name. . . . . . . . . . . . . . . . . . . . . . . . . . . . . . . . . . . . . . . . . . . . . . . . . . . . xi
EMC Directive (220 - 240 V model) . . . . . . . . . . . . . . . . . . . . . . . . . . . . . . . . . .xi
Laser Safety . . . . . . . . . . . . . . . . . . . . . . . . . . . . . . . . . . . . . . . . . . . . . . . . . . . . xi
International Energy Star-Program . . . . . . . . . . . . . . . . . . . . . . . . . . . . . . . . . xii
WEEE Directive . . . . . . . . . . . . . . . . . . . . . . . . . . . . . . . . . . . . . . . . . . . . . . . . xiii
License Notice . . . . . . . . . . . . . . . . . . . . . . . . . . . . . . . . . . . . . . . . . . . . . . . . . xiii
Tr ademarks. . . . . . . . . . . . . . . . . . . . . . . . . . . . . . . . . . . . . . . . . . . . . . . . . . . . xiii
Copyright . . . . . . . . . . . . . . . . . . . . . . . . . . . . . . . . . . . . . . . . . . . . . . . . . . . . . xiv
Disclaimers. . . . . . . . . . . . . . . . . . . . . . . . . . . . . . . . . . . . . . . . . . . . . . . . . . . . xv
Legal Limitations on the Usage of Your Product and the Use of Images . . . . . xvi
Important Safety Instructions . . . . . . . . . . . . . . . . . . . . . . . . . . . . . . . . . . . . . . xvii
Installation . . . . . . . . . . . . . . . . . . . . . . . . . . . . . . . . . . . . . . . . . . . . . . . . . . . xvii
Power Supply . . . . . . . . . . . . . . . . . . . . . . . . . . . . . . . . . . . . . . . . . . . . . . . . . . xix
Handling . . . . . . . . . . . . . . . . . . . . . . . . . . . . . . . . . . . . . . . . . . . . . . . . . . . . . . xx
Maintenance and Inspections . . . . . . . . . . . . . . . . . . . . . . . . . . . . . . . . . . . . . xxi
Consumables . . . . . . . . . . . . . . . . . . . . . . . . . . . . . . . . . . . . . . . . . . . . . . . . . xxiii
Chapter 1 Before You Start
Features and Benefits . . . . . . . . . . . . . . . . . . . . . . . . . . . . . . . . . . . . . . . . . . . . 1-2
User Manual CD-ROM Menu . . . . . . . . . . . . . . . . . . . . . . . . . . . . . . . . . . . . . . . 1-5
System Requirements . . . . . . . . . . . . . . . . . . . . . . . . . . . . . . . . . . . . . . . . . . 1-5
Using The CD-ROM Menu . . . . . . . . . . . . . . . . . . . . . . . . . . . . . . . . . . . . . . . 1-6
Parts and Their Functions . . . . . . . . . . . . . . . . . . . . . . . . . . . . . . . . . . . . . . . . . 1-7
Printer. . . . . . . . . . . . . . . . . . . . . . . . . . . . . . . . . . . . . . . . . . . . . . . . . . . . . . . 1-7
Front View. . . . . . . . . . . . . . . . . . . . . . . . . . . . . . . . . . . . . . . . . . . . . . . . . 1-7
Rear View . . . . . . . . . . . . . . . . . . . . . . . . . . . . . . . . . . . . . . . . . . . . . . . . . 1-8
Inner View. . . . . . . . . . . . . . . . . . . . . . . . . . . . . . . . . . . . . . . . . . . . . . . . . 1-9
Control Panel . . . . . . . . . . . . . . . . . . . . . . . . . . . . . . . . . . . . . . . . . . . . . . . . 1-10
Display . . . . . . . . . . . . . . . . . . . . . . . . . . . . . . . . . . . . . . . . . . . . . . . . . . . . . 1-12
ii
Page 6

Optional Accessories . . . . . . . . . . . . . . . . . . . . . . . . . . . . . . . . . . . . . . . . . . . .1-13
Paper Feeder. . . . . . . . . . . . . . . . . . . . . . . . . . . . . . . . . . . . . . . . . . . . . . . . .1-13
Expansion RAM . . . . . . . . . . . . . . . . . . . . . . . . . . . . . . . . . . . . . . . . . . . . . . . 1-14
Hard Disk . . . . . . . . . . . . . . . . . . . . . . . . . . . . . . . . . . . . . . . . . . . . . . . . . . . . 1-15
Chapter 2 Installing the Printer
Installation Procedure. . . . . . . . . . . . . . . . . . . . . . . . . . . . . . . . . . . . . . . . . . . . .2-2
Installation Site . . . . . . . . . . . . . . . . . . . . . . . . . . . . . . . . . . . . . . . . . . . . . . . . . .2-3
Installation Environment. . . . . . . . . . . . . . . . . . . . . . . . . . . . . . . . . . . . . . . . . .2-3
Temperature/Humidity Conditions . . . . . . . . . . . . . . . . . . . . . . . . . . . . . . .2-3
Power Supply Requirements . . . . . . . . . . . . . . . . . . . . . . . . . . . . . . . . . . . 2-4
Installation Requirements. . . . . . . . . . . . . . . . . . . . . . . . . . . . . . . . . . . . . . 2-4
Installation Space. . . . . . . . . . . . . . . . . . . . . . . . . . . . . . . . . . . . . . . . . . . . . . .2-5
Required Peripheral Space . . . . . . . . . . . . . . . . . . . . . . . . . . . . . . . . . . . . 2-5
Foot Positions. . . . . . . . . . . . . . . . . . . . . . . . . . . . . . . . . . . . . . . . . . . . . . .2-6
Precautions for Handling . . . . . . . . . . . . . . . . . . . . . . . . . . . . . . . . . . . . . . . . .2-7
Confirming the Package Contents. . . . . . . . . . . . . . . . . . . . . . . . . . . . . . . . . . .2-8
Carrying the Printer to the Installation Site and Removing the
Packing Materials on the Outside of the Printer . . . . . . . . . . . . . . . . . . . . . . .2-10
Installing the Toner Cartridges . . . . . . . . . . . . . . . . . . . . . . . . . . . . . . . . . . . . .2-16
Loading Paper . . . . . . . . . . . . . . . . . . . . . . . . . . . . . . . . . . . . . . . . . . . . . . . . . . 2-26
Connecting the Cables . . . . . . . . . . . . . . . . . . . . . . . . . . . . . . . . . . . . . . . . . . . 2-27
Connecting the Power Cord . . . . . . . . . . . . . . . . . . . . . . . . . . . . . . . . . . . . . .2-27
Connecting to a Computer. . . . . . . . . . . . . . . . . . . . . . . . . . . . . . . . . . . . . . .2-29
Using a LAN Cable . . . . . . . . . . . . . . . . . . . . . . . . . . . . . . . . . . . . . . . . .2-29
Using a USB Cable . . . . . . . . . . . . . . . . . . . . . . . . . . . . . . . . . . . . . . . . . 2-32
Using a Printer Cable. . . . . . . . . . . . . . . . . . . . . . . . . . . . . . . . . . . . . . . .2-34
Turning the Printer ON and Checking the Printer Operation. . . . . . . . . . . . .2-35
Tu r ning the Printer ON. . . . . . . . . . . . . . . . . . . . . . . . . . . . . . . . . . . . . . . . . .2-35
Registering a Paper Size . . . . . . . . . . . . . . . . . . . . . . . . . . . . . . . . . . . . . . . . 2-36
Specifying a Paper Type . . . . . . . . . . . . . . . . . . . . . . . . . . . . . . . . . . . . . . . . 2-37
Checking the Operations with Configuration Page Print . . . . . . . . . . . . . . . .2-37
Printing Configuration Page Print. . . . . . . . . . . . . . . . . . . . . . . . . . . . . . .2-37
Contents of Configuration Page Print. . . . . . . . . . . . . . . . . . . . . . . . . . . . 2-38
When the Printer Does Not Operate Properly . . . . . . . . . . . . . . . . . . . . . . . .2-40
Changing the Language Used in the Display. . . . . . . . . . . . . . . . . . . . . . . . .2-41
Tu r ning the Printer OFF . . . . . . . . . . . . . . . . . . . . . . . . . . . . . . . . . . . . . . . . . 2-42
When Not Using a Hard Disk . . . . . . . . . . . . . . . . . . . . . . . . . . . . . . . . . . 2-43
When Using a Hard Disk (Only When a Hard Disk Is Installed) . . . . . . .2-43
iii
Page 7

Chapter 3 Using the Printer
Power Saving (Power Save Mode) . . . . . . . . . . . . . . . . . . . . . . . . . . . . . . . . . . 3-2
Online and Offline . . . . . . . . . . . . . . . . . . . . . . . . . . . . . . . . . . . . . . . . . . . . . . . 3-5
Placing the Printer Online . . . . . . . . . . . . . . . . . . . . . . . . . . . . . . . . . . . . . . . 3-5
Placing the Printer Offline . . . . . . . . . . . . . . . . . . . . . . . . . . . . . . . . . . . . . . . 3-6
Printing/Saving Jobs (Only When the Hard Disk Is Installed) . . . . . . . . . . . . 3-7
Job Process Method Types . . . . . . . . . . . . . . . . . . . . . . . . . . . . . . . . . . . . . . 3-7
Printing with a Password Specified (Secured Print/Encrypted Secured Print)
Printing a Job Saved in a Box (Stored Job Print). . . . . . . . . . . . . . . . . . . . . 3-11
Canceling a Job . . . . . . . . . . . . . . . . . . . . . . . . . . . . . . . . . . . . . . . . . . . . . . . . 3-14
Outputting Data (Forced Output) . . . . . . . . . . . . . . . . . . . . . . . . . . . . . . . . . 3-14
Canceling a Job (Cancel Job) . . . . . . . . . . . . . . . . . . . . . . . . . . . . . . . . . . . 3-15
Canceling the Process Currently Being Performed (Soft Reset) . . . . . . . . . 3-16
Canceling All the Jobs (Hard Reset) . . . . . . . . . . . . . . . . . . . . . . . . . . . . . . 3-17
Chapter 4 Loading and Outputting Paper
Paper Requirements . . . . . . . . . . . . . . . . . . . . . . . . . . . . . . . . . . . . . . . . . . . . . 4-2
Usable Paper . . . . . . . . . . . . . . . . . . . . . . . . . . . . . . . . . . . . . . . . . . . . . . . . . 4-2
Paper Size . . . . . . . . . . . . . . . . . . . . . . . . . . . . . . . . . . . . . . . . . . . . . . . . 4-2
Paper Type . . . . . . . . . . . . . . . . . . . . . . . . . . . . . . . . . . . . . . . . . . . . . . . . 4-3
Abbreviations of Paper Sizes . . . . . . . . . . . . . . . . . . . . . . . . . . . . . . . . . . 4-7
Printable Area. . . . . . . . . . . . . . . . . . . . . . . . . . . . . . . . . . . . . . . . . . . . . . . . . 4-7
Unusable Paper . . . . . . . . . . . . . . . . . . . . . . . . . . . . . . . . . . . . . . . . . . . . . . . 4-8
Storing Paper . . . . . . . . . . . . . . . . . . . . . . . . . . . . . . . . . . . . . . . . . . . . . . . . . 4-9
Storing Printouts. . . . . . . . . . . . . . . . . . . . . . . . . . . . . . . . . . . . . . . . . . . . . . 4-10
Paper Source . . . . . . . . . . . . . . . . . . . . . . . . . . . . . . . . . . . . . . . . . . . . . . . . . . 4-11
Paper Source Type . . . . . . . . . . . . . . . . . . . . . . . . . . . . . . . . . . . . . . . . . . . . 4-12
Paper Capacity of Paper Source . . . . . . . . . . . . . . . . . . . . . . . . . . . . . . . . . 4-12
Selecting a Paper Source. . . . . . . . . . . . . . . . . . . . . . . . . . . . . . . . . . . . . . . 4-13
Precautions for Handling the Multi-purpose Tray or Paper Cassette . . . . . . 4-14
Output Tray . . . . . . . . . . . . . . . . . . . . . . . . . . . . . . . . . . . . . . . . . . . . . . . . . . . . 4-15
Output Tray. . . . . . . . . . . . . . . . . . . . . . . . . . . . . . . . . . . . . . . . . . . . . . . . . . 4-15
Paper Capacity of the Output Tray . . . . . . . . . . . . . . . . . . . . . . . . . . . . . . . . 4-16
Printing from the Paper Cassette . . . . . . . . . . . . . . . . . . . . . . . . . . . . . . . . . . 4-17
Precautions on Loading Paper. . . . . . . . . . . . . . . . . . . . . . . . . . . . . . . . . . . 4-18
Loading Paper in the Paper Cassette. . . . . . . . . . . . . . . . . . . . . . . . . . . . . . 4-19
When Loading Standard Size Paper . . . . . . . . . . . . . . . . . . . . . . . . . . . 4-20
When Loading Custom Size Paper (Non-Standard Size Paper)
or Paper at a Size of Foolscap or 16K . . . . . . . . . . . . . . . . . . . . . . . . . . 4-25
Specifying the Size of the Paper in the Paper Cassette. . . . . . . . . . . . . . . . 4-31
Specifying the Type of the Paper in the Paper Cassette . . . . . . . . . . . . . . . 4-33
. . . 3-9
iv
Page 8

Printing from the Multi-purpose Tray. . . . . . . . . . . . . . . . . . . . . . . . . . . . . . . .4-35
Loading Paper in the Multi-purpose Tray . . . . . . . . . . . . . . . . . . . . . . . . . . . .4-36
When Loading Paper (Other than Envelopes) . . . . . . . . . . . . . . . . . . . . . 4-37
When Loading Envelopes . . . . . . . . . . . . . . . . . . . . . . . . . . . . . . . . . . . . 4-43
Specifying the Size of the Paper in the Multi-purpose Tray . . . . . . . . . . . . . .4-48
Specifying the Type of the Paper in the Multi-purpose Tray . . . . . . . . . . . . . . 4-50
2-sided Printing . . . . . . . . . . . . . . . . . . . . . . . . . . . . . . . . . . . . . . . . . . . . . . . . .4-53
Switching Between Automatic 2-sided Printing and 1-sided Printing. . . . . . .4-54
Loading Paper When Performing Automatic 2-sided Printing . . . . . . . . . . . . 4-55
When Feeding Paper from the Paper Cassette . . . . . . . . . . . . . . . . . . . .4-55
When Loading Paper in the Multi-purpose Tray. . . . . . . . . . . . . . . . . . . .4-56
Manual 2-sided Printing . . . . . . . . . . . . . . . . . . . . . . . . . . . . . . . . . . . . . . . . . 4-56
Loading Paper When Performing Manual 2-sided Printing . . . . . . . . . . . . . .4-58
Chapter 5 The Printing Environment
Menu Functions . . . . . . . . . . . . . . . . . . . . . . . . . . . . . . . . . . . . . . . . . . . . . . . . . .5-2
Menu Functions . . . . . . . . . . . . . . . . . . . . . . . . . . . . . . . . . . . . . . . . . . . . . . . .5-2
Setting Priority . . . . . . . . . . . . . . . . . . . . . . . . . . . . . . . . . . . . . . . . . . . . . . . . .5-3
Menu Categories . . . . . . . . . . . . . . . . . . . . . . . . . . . . . . . . . . . . . . . . . . . . . . .5-3
Printer Status to Enter the Menu Operation. . . . . . . . . . . . . . . . . . . . . . . . . . . 5-4
How to Use the Operation Keys . . . . . . . . . . . . . . . . . . . . . . . . . . . . . . . . . . . . .5-5
How to View the Display . . . . . . . . . . . . . . . . . . . . . . . . . . . . . . . . . . . . . . . . . . .5-7
Menu Structure . . . . . . . . . . . . . . . . . . . . . . . . . . . . . . . . . . . . . . . . . . . . . . . .5-7
How to View the Display. . . . . . . . . . . . . . . . . . . . . . . . . . . . . . . . . . . . . . . . . .5-7
Menu Functions and Menu Operation . . . . . . . . . . . . . . . . . . . . . . . . . . . . . . . . 5-9
SETUP Menu. . . . . . . . . . . . . . . . . . . . . . . . . . . . . . . . . . . . . . . . . . . . . . . . . .5-9
SETUP Menu Functions . . . . . . . . . . . . . . . . . . . . . . . . . . . . . . . . . . . . . . .5-9
Operating Procedure for the SETUP Menu . . . . . . . . . . . . . . . . . . . . . . . .5-9
UTILITY Menu . . . . . . . . . . . . . . . . . . . . . . . . . . . . . . . . . . . . . . . . . . . . . . . .5-11
UTILITY Menu Functions . . . . . . . . . . . . . . . . . . . . . . . . . . . . . . . . . . . . .5-11
Operating Procedure for the UTILITY Menu . . . . . . . . . . . . . . . . . . . . . .5-11
JOB Menu . . . . . . . . . . . . . . . . . . . . . . . . . . . . . . . . . . . . . . . . . . . . . . . . . . .5-12
JOB Menu Functions . . . . . . . . . . . . . . . . . . . . . . . . . . . . . . . . . . . . . . . . 5-12
Operating Procedure for the JOB Menu . . . . . . . . . . . . . . . . . . . . . . . . . 5-12
RESET Menu. . . . . . . . . . . . . . . . . . . . . . . . . . . . . . . . . . . . . . . . . . . . . . . . .5-13
RESET Menu Functions . . . . . . . . . . . . . . . . . . . . . . . . . . . . . . . . . . . . . . 5-13
Operating Procedure for the RESET Menu . . . . . . . . . . . . . . . . . . . . . . . 5-13
CANCEL JOB Menu . . . . . . . . . . . . . . . . . . . . . . . . . . . . . . . . . . . . . . . . . . .5-14
CANCEL JOB Menu Functions . . . . . . . . . . . . . . . . . . . . . . . . . . . . . . . .5-14
Operating Procedure for the CANCEL JOB Menu. . . . . . . . . . . . . . . . . . 5-14
SELECT FEEDER Menu . . . . . . . . . . . . . . . . . . . . . . . . . . . . . . . . . . . . . . . .5-15
SELECT FEEDER Menu Functions. . . . . . . . . . . . . . . . . . . . . . . . . . . . . .5-15
Operating Procedure for the SELECT FEEDER Menu . . . . . . . . . . . . . . .5-15
Initializing the SETUP Menu . . . . . . . . . . . . . . . . . . . . . . . . . . . . . . . . . . . . . . . 5-17
v
Page 9

Chapter 6 Printing Environment Settings
Setting Items . . . . . . . . . . . . . . . . . . . . . . . . . . . . . . . . . . . . . . . . . . . . . . . . . . . 6-2
SETUP Menu . . . . . . . . . . . . . . . . . . . . . . . . . . . . . . . . . . . . . . . . . . . . . . . . . 6-2
UTILITY Menu . . . . . . . . . . . . . . . . . . . . . . . . . . . . . . . . . . . . . . . . . . . . . . . 6-10
JOB Menu . . . . . . . . . . . . . . . . . . . . . . . . . . . . . . . . . . . . . . . . . . . . . . . . . . 6-11
RESET Menu . . . . . . . . . . . . . . . . . . . . . . . . . . . . . . . . . . . . . . . . . . . . . . . . 6-11
SELECT FEEDER Menu . . . . . . . . . . . . . . . . . . . . . . . . . . . . . . . . . . . . . . . 6-12
SETUP Menu Settings . . . . . . . . . . . . . . . . . . . . . . . . . . . . . . . . . . . . . . . . . . . 6-13
CONTROL MENU Options. . . . . . . . . . . . . . . . . . . . . . . . . . . . . . . . . . . . . . 6-13
FEEDER MENU Options . . . . . . . . . . . . . . . . . . . . . . . . . . . . . . . . . . . . . . . 6-22
LAYOUT MENU Options. . . . . . . . . . . . . . . . . . . . . . . . . . . . . . . . . . . . . . . . 6-31
QUALITY MENU Options . . . . . . . . . . . . . . . . . . . . . . . . . . . . . . . . . . . . . . . 6-35
INTERFACE MENU Options . . . . . . . . . . . . . . . . . . . . . . . . . . . . . . . . . . . . 6-45
USER MAIN. Options. . . . . . . . . . . . . . . . . . . . . . . . . . . . . . . . . . . . . . . . . . 6-51
PCL SETUP Options . . . . . . . . . . . . . . . . . . . . . . . . . . . . . . . . . . . . . . . . . . 6-56
UFR II SETUP Options . . . . . . . . . . . . . . . . . . . . . . . . . . . . . . . . . . . . . . . . 6-61
UTILITY Menu Settings . . . . . . . . . . . . . . . . . . . . . . . . . . . . . . . . . . . . . . . . . . 6-62
JOB Menu Settings . . . . . . . . . . . . . . . . . . . . . . . . . . . . . . . . . . . . . . . . . . . . . 6-65
RESET Menu Settings . . . . . . . . . . . . . . . . . . . . . . . . . . . . . . . . . . . . . . . . . . . 6-69
SELECT FEEDER Menu Settings . . . . . . . . . . . . . . . . . . . . . . . . . . . . . . . . . . 6-71
Chapter 7 Routine Maintenance
Replacing Toner Cartridges . . . . . . . . . . . . . . . . . . . . . . . . . . . . . . . . . . . . . . . 7-2
When a Message Appears. . . . . . . . . . . . . . . . . . . . . . . . . . . . . . . . . . . . . . . 7-2
Replacing a Toner Cartridge. . . . . . . . . . . . . . . . . . . . . . . . . . . . . . . . . . . . . . 7-3
Precautions for Handling Toner Cartridges . . . . . . . . . . . . . . . . . . . . . . . . . 7-16
Storing Toner Cartridges . . . . . . . . . . . . . . . . . . . . . . . . . . . . . . . . . . . . . . . 7-18
Cleaning the Fixing Roller. . . . . . . . . . . . . . . . . . . . . . . . . . . . . . . . . . . . . . . . 7-19
Adjusting the Printing Position . . . . . . . . . . . . . . . . . . . . . . . . . . . . . . . . . . . 7-21
Checking the Printing Position . . . . . . . . . . . . . . . . . . . . . . . . . . . . . . . . . . . 7-21
Adjusting the Printing Position . . . . . . . . . . . . . . . . . . . . . . . . . . . . . . . . . . . 7-23
Cleaning the Outside of the Printer . . . . . . . . . . . . . . . . . . . . . . . . . . . . . . . . 7-27
Moving the Printer . . . . . . . . . . . . . . . . . . . . . . . . . . . . . . . . . . . . . . . . . . . . . . 7-30
Handling the Printer. . . . . . . . . . . . . . . . . . . . . . . . . . . . . . . . . . . . . . . . . . . . . 7-38
Chapter 8 Troubleshooting
When You Have Trouble Printing. . . . . . . . . . . . . . . . . . . . . . . . . . . . . . . . . . . . 8-2
Paper Jams. . . . . . . . . . . . . . . . . . . . . . . . . . . . . . . . . . . . . . . . . . . . . . . . . . . . . 8-4
Paper Jam Area . . . . . . . . . . . . . . . . . . . . . . . . . . . . . . . . . . . . . . . . . . . . . . . 8-7
Procedure for Clearing Paper Jams . . . . . . . . . . . . . . . . . . . . . . . . . . . . . . . . 8-8
When the Message that Indicates a Paper Jam Does Not Disappear . . . . . 8-22
When the Duplex Unit Is Not Installed Properly . . . . . . . . . . . . . . . . . . . . . . 8-27
vi
Page 10

Message List . . . . . . . . . . . . . . . . . . . . . . . . . . . . . . . . . . . . . . . . . . . . . . . . . . .8-33
Service Call Display . . . . . . . . . . . . . . . . . . . . . . . . . . . . . . . . . . . . . . . . . . . . .8-48
When You Cannot Obtain Appropriate Printout Results . . . . . . . . . . . . . . . . 8-50
Problems with the Power or Printer Operation. . . . . . . . . . . . . . . . . . . . . . . .8-50
Problems with the Printout Results . . . . . . . . . . . . . . . . . . . . . . . . . . . . . . . .8-54
Print Quality Problems . . . . . . . . . . . . . . . . . . . . . . . . . . . . . . . . . . . . . . . . . . 8-58
Adjusting the Color Balance . . . . . . . . . . . . . . . . . . . . . . . . . . . . . . . . . . . . . .8-67
Chapter 9 Installing the Optional Accessories
Installing the Paper Feeder. . . . . . . . . . . . . . . . . . . . . . . . . . . . . . . . . . . . . . . . . 9-2
Moving the Printer . . . . . . . . . . . . . . . . . . . . . . . . . . . . . . . . . . . . . . . . . . . . . . 9-3
Removing the Packing Materials and Installing the Paper Feeder. . . . . . . . . .9-8
Installing RAM . . . . . . . . . . . . . . . . . . . . . . . . . . . . . . . . . . . . . . . . . . . . . . . . . . 9-15
Installing a Hard Disk . . . . . . . . . . . . . . . . . . . . . . . . . . . . . . . . . . . . . . . . . . . .9-22
Chapter 10 Appendix
The Lists Common to All the Settings in the Operation Mode . . . . . . . . . . . 10-2
The Lists Common to Certain Settings in the Operation Mode . . . . . . . . . .10-4
Typeface Samples . . . . . . . . . . . . . . . . . . . . . . . . . . . . . . . . . . . . . . . . . . . . . . . 10-5
Scalable Fonts (PCL). . . . . . . . . . . . . . . . . . . . . . . . . . . . . . . . . . . . . . . . . . . 10-5
Bitmapped Fonts (PCL) . . . . . . . . . . . . . . . . . . . . . . . . . . . . . . . . . . . . . . . . .10-7
Symbol Sets Supported . . . . . . . . . . . . . . . . . . . . . . . . . . . . . . . . . . . . . . . . . .10-8
Character Code Tables . . . . . . . . . . . . . . . . . . . . . . . . . . . . . . . . . . . . . . . . .10-8
ISO Substitution Tables . . . . . . . . . . . . . . . . . . . . . . . . . . . . . . . . . . . . . . . . 10-27
Specifications . . . . . . . . . . . . . . . . . . . . . . . . . . . . . . . . . . . . . . . . . . . . . . . . . 10-31
Hardware Specifications . . . . . . . . . . . . . . . . . . . . . . . . . . . . . . . . . . . . . . . 10-31
Controller Specifications . . . . . . . . . . . . . . . . . . . . . . . . . . . . . . . . . . . . . . . 10-33
Software Specifications . . . . . . . . . . . . . . . . . . . . . . . . . . . . . . . . . . . . . . . .10-34
Dimensions of Each Part . . . . . . . . . . . . . . . . . . . . . . . . . . . . . . . . . . . . . . . . 10-35
Index . . . . . . . . . . . . . . . . . . . . . . . . . . . . . . . . . . . . . . . . . . . . . . . . . . . . . . . . . 10-37
vii
Page 11
Preface
Thank you for purchasing the Canon LBP5360. Please read this manual thoroughly before
operating the printer in order to familiarize yourself with its capabilities, and to make the most
of its many functions. After reading this manual, store it in a safe place for future reference.
How To Use This Manual
Symbols Used in This Manual
The following symbols are used in this manual to explain procedures, restrictions,
handling precautions, and instructions that should be observed for safety.
WARNING
CAUTION
IMPORTANT
NOTE
Indicates a warning concerning operations that may lead to death or
injury to persons if not performed correctly. In order to use the printer
safely, always pay attention to these warnings.
Indicates a caution concerning operations that may lead to injury to
persons, or damage to property if not performed correctly. In order to
use the printer safely, always pay attention to these cautions.
Indicates operational requirements and restrictions. Be sure to read
these items carefully in order to operate the printer correctly, and to
avoid damage to the printer.
Indicates a clarification of an operation, or contains additional
explanations for a procedure. Reading these notes is highly
recommended.
Keys and Buttons Used in This Manual
The following button names are a few examples of how keys and buttons to be
pressed are expressed in this manual:
• Keys on the Control Panel: Key icon + (Key Name)
Example: (Online)
(Utility)
• Buttons on Computer Operation Screen: [Button Name]
Example: [OK]
[Details]
viii
Page 12
Illustrations Used in This Manual
• Although the names of the indicators or keys are not indicated in the illustrations
of the control panel used in this manual, the names are indicated on the control
panel depending on the country or region.
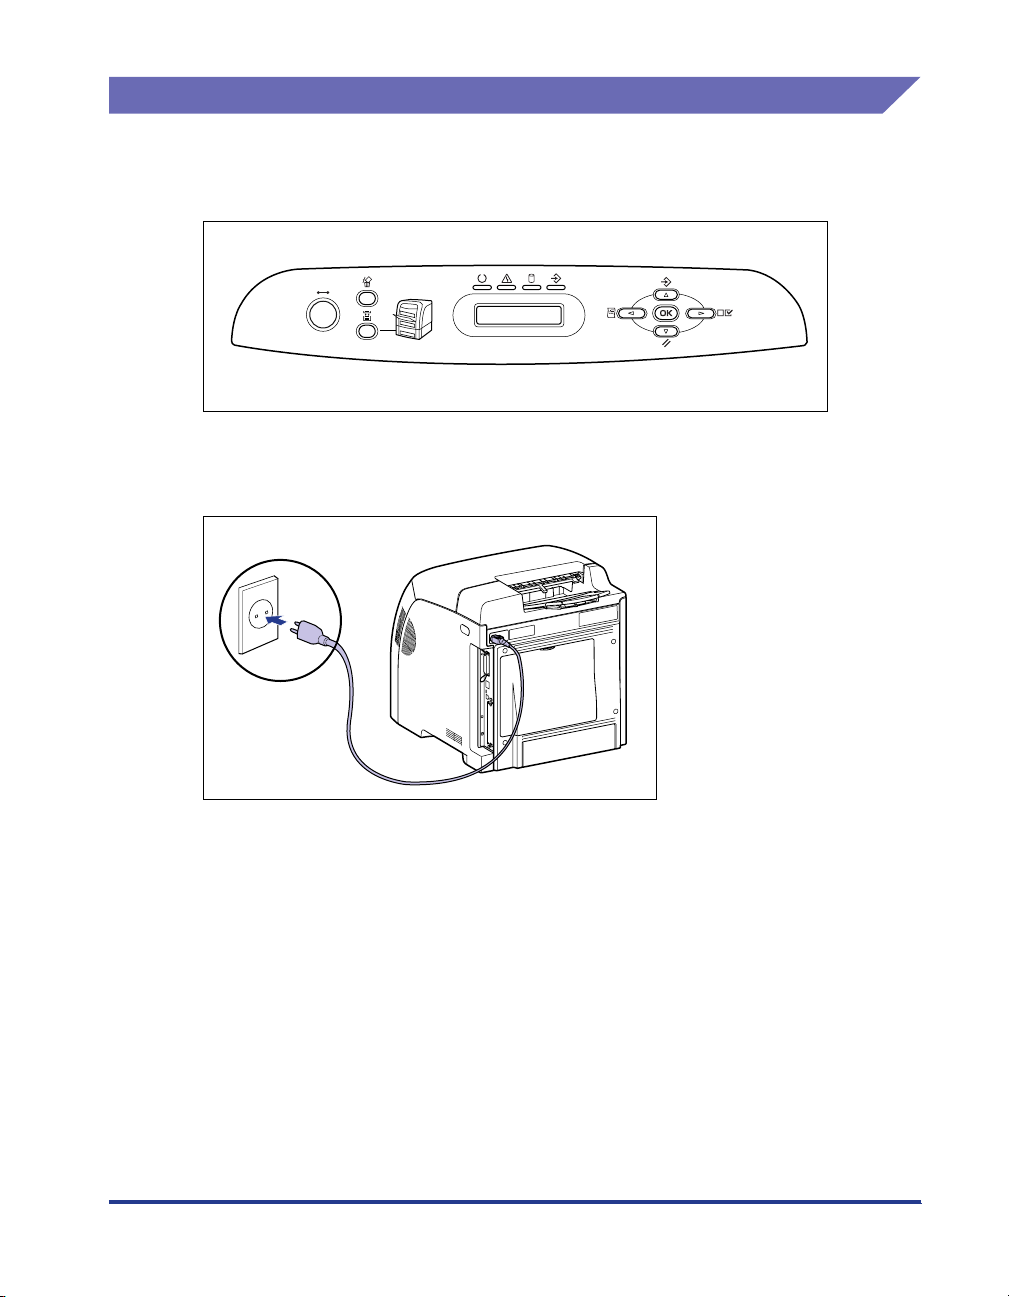
• Although the power cord used in this manual is as the one in the following
illustration, the form of the power cord may differ depending on the country or
region.
ix
Page 13

Abbreviations Used in This Manual
In this manual, product names and model names are abbreviated as follows:
Microsoft
Microsoft
Microsoft
Microsoft
Microsoft
Microsoft
Microsoft
®
Windows
®
Windows
®
Windows
®
Windows
®
Windows Server
®
Windows Vista
®
Windows
®
®
®
®
®
98 operating system: Windows 98
Millennium Edition operating system: Windows Me
2000 operating system: Windows 2000
XP operating system: Windows XP
TM
2003 operating system: Windows Server 2003
TM
operating system Windows Vista
operating system: Windows
x
Page 14

Legal Notices
Model Name
The following names may be provided for the safety regulations in each sales
region of this Laser Beam Printer.
110 - 127 V model: L11184A
220 - 240 V model: L11184E
EMC Directive (220 - 240 V model)
"This equipment has been tested in a typical system to comply with the technical
requirements of EMC Directive."
• Use of shielded cable is necessary to comply with the technical requirements of
EMC Directive.
The product is in conformity with the EMC directive at nominal mains input 230 V,
50 Hz although the rated input of the product is 220 - 240 V, 50/60 Hz.
C-tick marking on the rating label means that we declare the product is in
conformity with the relevant requirements at nominal mains input 230 V, 50 Hz
although the rated input of the product is 220 - 240 V, 50/60 Hz.
Laser Safety
This product complies with 21 CFR Chapter 1 Subchapter J as a Class I laser
product under the U.S. Department of Health and Human Services (DHHS)
Radiation Performance Standard according to the Radiation Control for Health and
Safety Act of 1968. Also, this product is certified as a Class 1 laser product under
IEC60825-1:1993 and EN60825-1:1994. This means that the product does not
produce hazardous laser radiation.
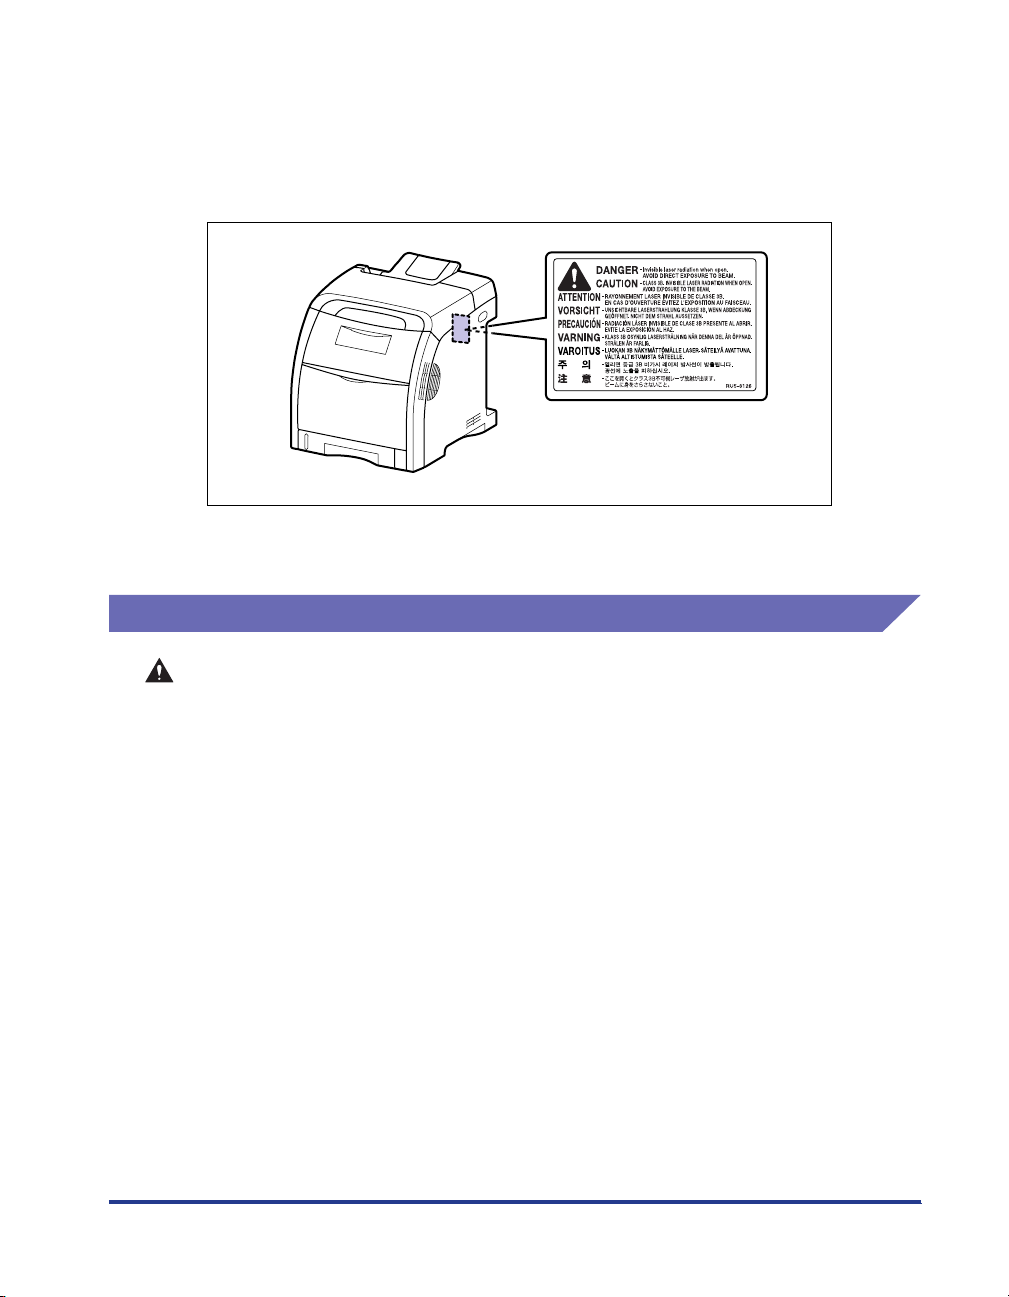
Since radiation emitted inside the product is completely confined within protective
housings and external covers, the laser beam cannot escape from the machine
during any phase of user operation. Do not remove protective housings or external
covers, except as directed by the equipment's manuals.
xi
Page 15
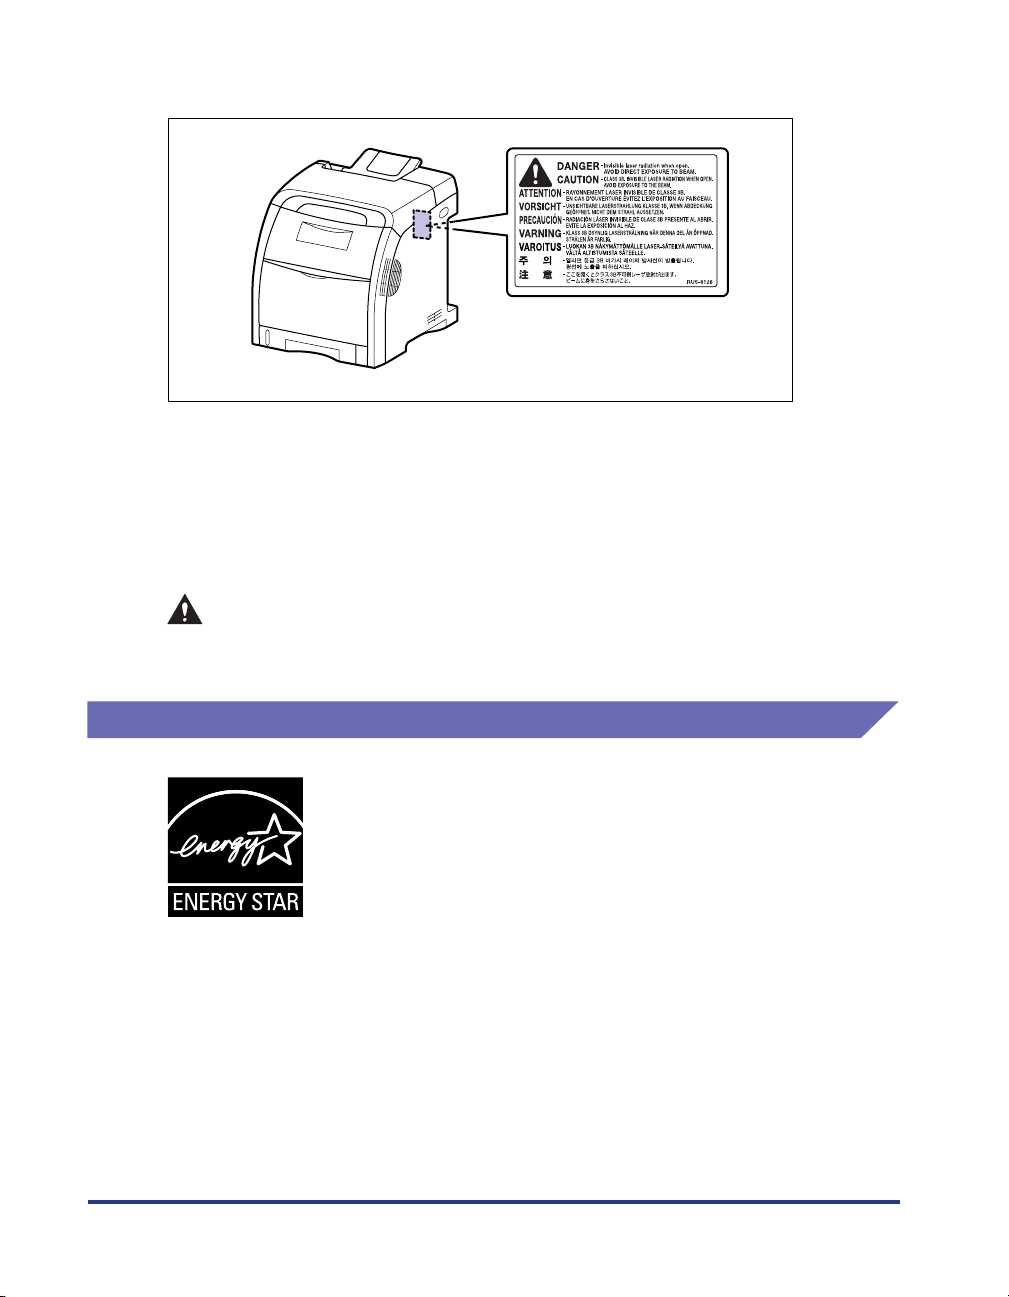
The label shown below is attached to the laser scanner unit inside the machine.
CLASS 1 LASER PRODUCT
LASER KLASSE 1
APPAREIL A RAYONNEMENT LASER DE CLASSE 1
APPARECCHIO LASER DI CLASSE 1
PRODUCTO LASER DE CLASE 1
APARELHO A LASER DE CLASSE 1
CAUTION
Use of controls, adjustments, or performance of procedures other than those
specified in this manual may result in hazardous radiation exposure.
International Energy Star-Program
As an ENERGY STAR Partner, Canon Inc. has determined that
this product meets the ENERGY STAR Program for energy
efficiency.
The International ENERGY STAR Office Equipment Program is an
international program that promotes energy saving through the
use of computers and other office equipment.
The program backs the development and dissemination of
products with functions that effectively reduce energy
consumption. It is an open system in which business proprietors
can participate voluntarily.
The targeted products are office equipment, such as
computers, displays, printers, facsimiles, and copiers. The
standards and logos are uniform among participating nations.
xii
Page 16

WEEE Directive
European Union (and EEA) only.
This symbol indicates that this product is not to be disposed of
with your household waste, according to the WEEE Directive
(2002/96/EC) and your national law. This product should be
handed over to a designated collection point, e.g., on an
authorized one-for-one basis when you buy a new similar product
or to an authorized collection site for recycling waste electrical
and electronic equipment (EEE). Improper handling of this type of
waste could have a possible negative impact on the environment
and human health due to potentially hazardous substances that
are generally associated with EEE. At the same time, your
cooperation in the correct disposal of this product will contribute to
the effective usage of natural resources. For more information
about where you can drop off your waste equipment for recycling,
please contact your local city office, waste authority, approved
WEEE scheme or your household waste disposal service. For
more information regarding return and recycling of WEEE
products, please visit www.canon-europe.com/environment.
(EEA: Norway, Iceland and Liechtenstein)
License Notice
This product contains UFST (Universal Font Scaling Technology) under license
from Agfa Corporation.
Copyright © 1997-2001 Agfa Monotype Corporation.
Trademarks
Canon, the Canon Logo, LBP, and NetSpot are trademarks of Canon Inc.
Adobe, Adobe Acrobat, and Adobe Reader are trademarks of Adobe Systems
Incorporated.
Apple, AppleTalk, Mac OS, Macintosh, and TrueType are trademarks of Apple
Computer, Inc.
PCL and PCL 5 are trademarks of Hewlett-Packard Company.
Microsoft and Windows are registered trademarks of Microsoft Corporation in the
United States and other countries.
xiii
Page 17

Windows Server and Windows Vista are trademarks of Microsoft Corporation.
UNIX is a registered trademark of The Open Group in the United States and other
countries.
Ethernet is a trademark of Xerox Corporation.
Concerning typeface credit, the actual names on a FONTS LIST for this machine
may differ from those listed below.
CG and UFST are trademarks of Agfa Monotype Corporation or its affiliated
companies and may be registered in some jurisdictions.
Marigold is trademark of AlphaOmega Typography, Inc.
ITC Avant Garde Gothic, ITC Bookman, ITC Lubalin Graph, ITC Mona Lisa, ITC
Symbol, ITC Zapf Chancery, and ITC Zapf Dingbats are registered trademarks of
International Typeface Corporation.
Clarendon, Helvetica, New Century Schoolbook, Palatino, and Times are
trademarks of Linotype-Hell AG and its subsidiaries. Univers is a trademark of
Linotype-Hell AG and its subsidiaries and may be registered in some jurisdictions.
Coronet is a registered trademark of Ludlow Type Foundry.
Wingdings is a trademark of Microsoft Corporation.
Albertus, Arial, Century Gothic, and Times New Roman are trademarks of the
Monotype Corporation plc., and may be registered in some jurisdictions.
CG Omega is a product of Agfa Corporation and CG Times, based on Times New
Roman under license from the Monotype Corporation plc, is a product of Agfa
Corporation.
Other product and company names herein may be the trademarks of their
respective owners.
Copyright
Copyright 2006 by Canon Inc. All rights reserved.
No part of this publication may be reproduced or transmitted in any form or by any
means, electronic or mechanical, including photocopying and recording, or by any
information storage or retrieval system without the prior written permission of
Canon Inc.
xiv
Page 18

Disclaimers
The information in this manual is subject to change without notice.
CANON INC. MAKES NO WARRANTY OF ANY KIND WITH REGARD TO THIS
MATERIAL, EITHER EXPRESS OR IMPLIED, EXCEPT AS PROVIDED HEREIN,
INCLUDING WITHOUT LIMITATION, THEREOF, WARRANTIES AS TO
MARKETABILITY, MERCHANTABILITY, FITNESS FOR A PARTICULAR
PURPOSE OF USE OR AGAINST INFRINGEMENT OF ANY PATENT. CANON
INC. SHALL NOT BE LIABLE FOR ANY DIRECT, INCIDENTAL, OR
CONSEQUENTIAL DAMAGES OF ANY NATURE, OR LOSSES OR EXPENSES
RESULTING FROM THE USE OF THIS MATERIAL.
xv
Page 19

Legal Limitations on the Usage of Your Product and the Use of Images
Using your product to scan, print or otherwise reproduce certain documents, and
the use of such images as scanned, printed or otherwise reproduced by your
product, may be prohibited by law and may result in criminal and/or civil liability. A
non-exhaustive list of these documents is set forth below. This list is intended to be
a guide only. If you are uncertain about the legality of using your product to scan,
print or otherwise reproduce any particular document, and/or of the use of the
images scanned, printed or otherwise reproduced, you should consult in advance
with your legal advisor for guidance.
• Paper Money • Tr avelers Checks
• Money Orders • Food Stamps
• Certificates of Deposit • Passports
• Postage Stamps (canceled or
uncanceled)
• Identifying Badges or Insignias • Internal Revenue Stamps (canceled
• Selective Service or Draft Papers • Bonds or Other Certificates of
• Checks or Drafts Issued by
Governmental Agencies
• Motor Vehicle Licenses and
Certificates of Title
• Immigration Papers
or uncanceled)
Indebtedness
• Stock Certificates
• Copyrighted Works/Works of Art
without Permission of Copyright
Owner
xvi
Page 20

Important Safety Instructions
Please read these "Important Safety Instructions" thoroughly before operating the
printer. As these instructions are intended to prevent injury to the user or other
persons or destruction of property, always pay attention to these instructions. Also,
since it may result in unexpected accidents or injuries, do not perform any operation
unless otherwise specified in the manual. Improper operation or use of this
machine could result in personal injury and/or damage requiring extensive repair
that may not be covered under your Limited Warranty.
Installation
WARNING
• Do not install the printer near alcohol, paint thinner, or other flammable substances.
If flammable substances come into contact with electrical parts inside the printer, it
may result in a fire or electrical shock.
• Do not place the following items on the printer. If these items come into contact with
a high-voltage area inside the printer, this may result in a fire or electrical shock.
If these items are dropped or slipped inside the printer, immediately turn OFF the
power switch aaaa and disconnect the USB cable bbbb if it is connected. Then, unplug the
power plug from the AC power outlet cccc and contact your local authorized Canon
dealer.
- Necklaces and other metal objects
xvii
Page 21
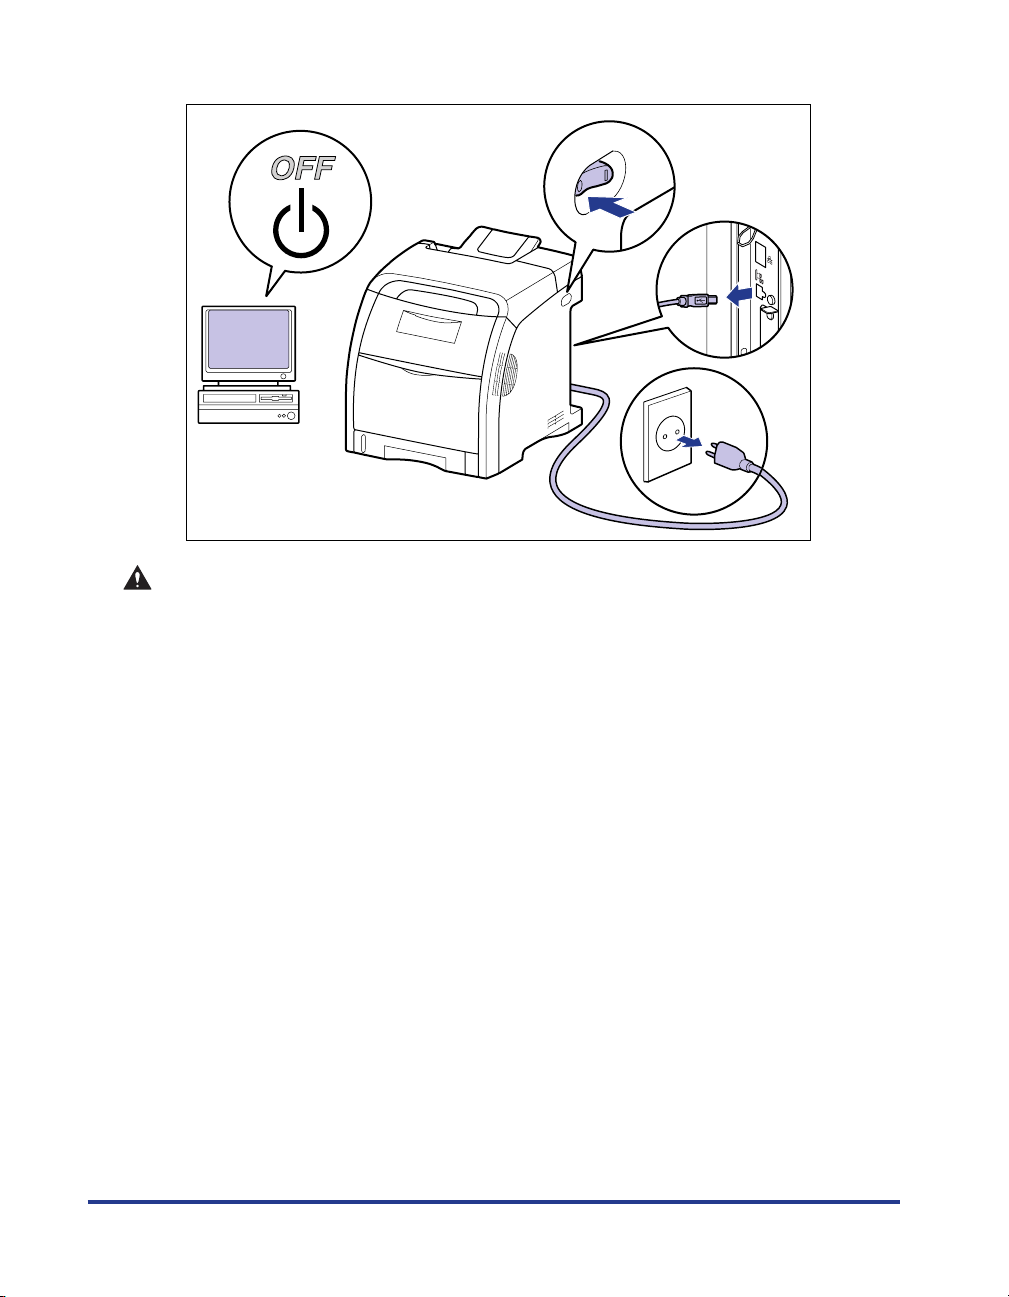
- Cups, vases, flowerpots, and other containers filled with water or liquids
a
a
b
c
CAUTION
• Do not install the printer in unstable locations, such as unsteady platforms or
inclined floors, or in locations subject to excessive vibrations, as this may cause the
printer to fall or tip over, resulting in personal injury.
• Never block the ventilation slots on the printer. The ventilation slots are provided for
proper ventilation of working parts inside the printer. Never place the printer on a soft
surface, such as a sofa or rug. Blocking the ventilation slots can cause the printer to
overheat, resulting in a fire.
• Do not install the printer in the following locations, as this may result in a fire or
electrical shock.
-A damp or dusty location
-A location exposed to smoke and steam such as cookeries and humidifiers
-A location exposed to rain or snow
-A location near water faucets or water
-A location exposed to direct sunlight
-A location subject to high temperatures
-A location near open flames
• When installing the printer, gently lower the printer onto the floor or other machine to
avoid catching your hands, as this may result in personal injury.
• When connecting the interface cable, connect it properly following the instructions in
this manual. If not connected properly, this may result in malfunction or electrical
shock.
• When moving the printer, follow the instructions in this manual to hold it correctly.
Failure to do so may cause you to drop the printer, resulting in personal injury. (See
"Moving the Printer," on p. 7-30)
xviii
Page 22

Power Supply
WARNING
• Do not damage or modify the power cord. Also, do not place heavy objects on the
power cord, or pull on or excessively bend it, as this could cause electrical damage
and result in a fire or electrical shock.
• Keep the power cord away from a heat source; failure to do this may cause the power
cord coating to melt, resulting in a fire or electrical shock.
• Do not plug or unplug the power plug with wet hands, as this may result in electrical
shock.
• Do not plug the power cord to a multiplug power strip, as this may cause a fire or
electrical shock.
• Do not bundle up or tie the power cord in a knot, as this may result in a fire or
electrical shock.
• Insert the power plug completely into the AC power outlet, as failure to do so may
result in a fire or electrical shock.
• Do not use power cords other than the power cord provided, as this may result in a
fire or electrical shock.
• As a general rule, do not use extension cords or plug extension cords to a multiple
power strip. If extension cords must be used or plugged to a multiple power strip,
however, use them observing the following points on user's own authority. If you use
extension cords improperly, this may result in a fire or electrical shock.
- Do not connect one extension cord to another.
- Make sure that the voltage of the power plug is the one indicated in the rating label
(attached on the back of the printer) when you use the printer.
- Use an extension cord that allows the current value greater than the necessary one
indicated in the rating label (attached on the back of the printer).
- When you use an extension cord, untie the cord binding, and insert the power plug
completely into the extension cord outlet to ensure a firm connection between the
power cord and the extension cord.
-Periodically check that the extension cord is not overheated.
CAUTION
• Do not use power supplies with voltages other than those specified herein, as this
may result in a fire or electrical shock.
• Always grasp the plug when unplugging the power cord. Pulling on the power cord
may expose or snap the core wire, or otherwise damage the power cord. If the power
cord is damaged, this could cause current to leak, resulting in a fire or electrical
shock.
• Leave sufficient space around the power plug so that it can be unplugged easily. If
objects are placed around the power plug, you will be unable to unplug it in an
emergency.
xix
Page 23

Handling
WARNING
• Do not attempt to disassemble or modify the printer. There are high-temperature and
• Electrical equipment can be hazardous if not used properly. To avoid injury, do not
• If the printer makes strange noises, or emits smoke, heat or unusual smells,
• Do not use highly flammable sprays near the printer. If gas from these sprays comes
• Always turn OFF the printer and computer, and disconnect the interface cables when
• Do not drop paper clips, staples, or other metal objects inside the printer. Also, do
• When plugging or unplugging the USB cable when the power plug is plugged in an
high-voltage components inside the printer which may result in a fire or electrical
shock.
allow children access to the interior of any electrical product and do not let them
touch any electrical contacts or gears that are exposed.
immediately turn OFF the printer and computer, and disconnect the USB cable if it is
connected. Then, unplug the power plug from the AC power outlet and contact your
local authorized Canon dealer. Otherwise, this may result in a fire or electrical shock.
into contact with the electrical components inside the printer, it may result in a fire or
electrical shock.
moving the printer. Otherwise, the power cord or interface cables may be damaged,
resulting in a fire or electrical shock.
not spill water, liquids, or flammable substances (alcohol, benzene, paint thinner,
etc.) inside the printer. If these items come into contact with a high-voltage area
inside the printer, this may result in a fire or electrical shock. If these items are
dropped or slipped inside the printer, immediately turn OFF the printer and computer,
and disconnect the USB cable if it is connected. Then, unplug the power plug from
the AC power outlet and contact your local authorized Canon dealer.
AC power outlet, do not touch the metal part of the connector, as this may result in
electrical shock.
xx
CAUTION
• Do not place heavy objects on the printer, as they may tip over or fall resulting in
personal injury.
• Be careful when handling the main board, expansion board, and RAM. Touching the
edges or a sharp portion of the main board, expansion board, RAM, ROM may result
in personal injury.
• Turn OFF the power switch for safety when the printer will not be used for a long
period of time such as overnight. Also, turn OFF the power switch on the right of the
printer and unplug the power plug for safety when the printer will not be used for an
extended period of time such as during consecutive holidays.
• Keep your hands or clothing away from the roller in the output area. Even if the
printer is not printing, sudden rotation of the roller may catch your hands or clothing,
resulting in personal injury.
Page 24
• The laser beam can be harmful to human bodies. Since radiation emitted inside the
printer is completely confined within protective housings and external covers, the
laser beam cannot escape from the printer during any phase of user operation. Read
the following remarks and instructions for safety.
-Never open covers other than those instructed in this manual.
- Do not remove the caution label attached to the cover of the laser scanner unit.
- If the laser beam escapes from the printer, exposure may cause serious damage to
your eyes.
Maintenance and Inspections
WARNING
• When cleaning the printer, turn OFF the printer and computer, remove the USB cable,
and then unplug the power plug. Failure to observe these steps may result in a fire or
electrical shock.
• Unplug the power plug from the AC power outlet regularly, and clean the area around
the base of the power plug's metal pins and the AC power outlet with a dry cloth to
ensure that all dust and grime is removed. If the power plug is plugged for a long
period of time in a damp, dusty, or smoky location, dust can build up around the
power plug and become damp. This may cause a short circuit and result in a fire.
• Clean the printer using a slightly dampened cloth with water or a mild detergent
diluted with water. Do not use alcohol, benzene, paint thinner, or other flammable
substances. If flammable substances come into contact with electrical parts inside
the printer, it may result in a fire or electrical shock.
• There are some areas inside the printer which are subject to high-voltages. When
removing jammed paper or when inspecting the inside of the printer, do not allow
necklaces, bracelets, or other metal objects to touch the inside of the printer, as this
may result in burns or electrical shock.
• Do not throw a used toner cartridge into open flames, as this may cause the toner
remaining inside the cartridge to ignite, resulting in burns or a fire.
xxi
Page 25
CAUTION
• Never attempt to service this printer yourself, except as explained in this manual.
There are no user serviceable parts inside the printer. Adjust only those controls that
are covered in the operating instructions. Improper adjustment could result in
personal injury and/or damage requiring extensive repair that may not be covered
under your Limited Warranty.
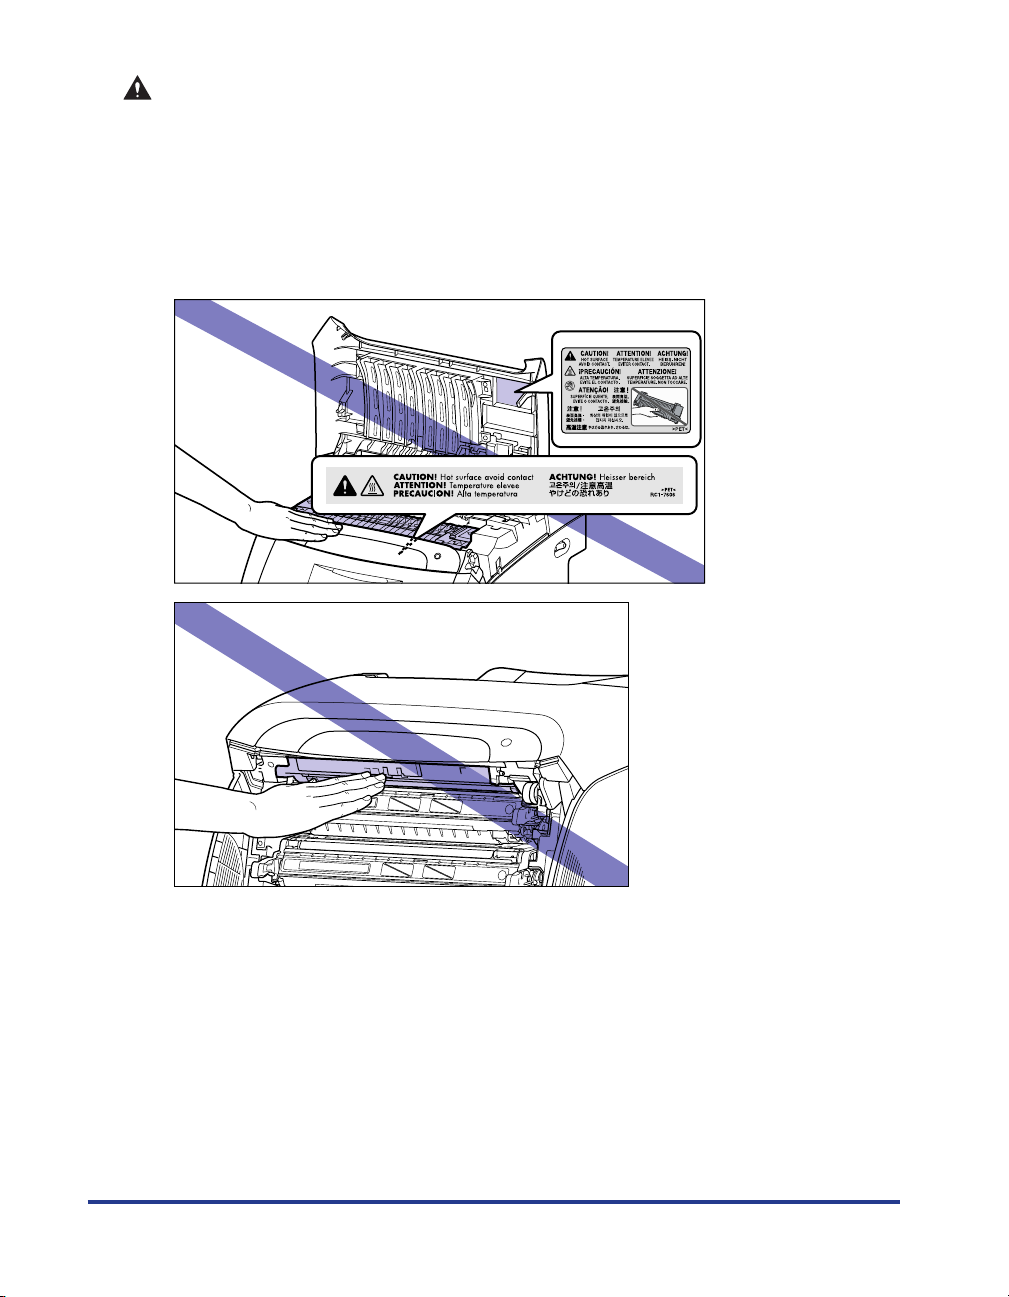
• The fixing unit and its surroundings inside the printer become hot during use. When
removing jammed paper or when inspecting the inside of the printer, do not touch the
fixing unit and its surroundings, as doing so may result in burns or electrical shock.
xxii
• When removing jammed paper or replacing a toner cartridge, take care not to allow
the toner to come into contact with your hands or clothing, as this will dirty your
hands or clothing. If they become dirty, wash them immediately with cold water.
Washing with warm water will set the toner and make it impossible to remove the
toner stains.
• When removing paper jammed inside the printer, remove the jammed paper gently to
prevent the toner on the paper from scattering and getting into your eyes or mouth. If
the toner gets into your eyes or mouth, wash them immediately with cold water and
immediately consult a physician.
• When loading paper or removing jammed paper, take care not to cut your hands with
the edges of the paper.
Page 26

• When removing a used toner cartridge from the toner cartridge slot, remove the
cartridge carefully to prevent the toner from scattering and getting into your eyes or
mouth. If the toner gets into your eyes or mouth, wash them immediately with cold
water and immediately consult a physician.
Consumables
WARNING
• Do not throw a used toner cartridge into open flames, as this may cause toner
remaining inside the cartridge to ignite and result in burns or a fire.
• Do not store a toner cartridge or copy paper in places exposed to open flames, as
this may cause the toner or paper to ignite and result in burns or a fire.
CAUTION
Keep toner cartridges and other consumables out of the reach of small children. If
these items are ingested, consult a physician immediately.
xxiii
Page 27

xxiv
Page 28

Before You Start
This chapter describes the major features and basic functions of this printer.
Features and Benefits. . . . . . . . . . . . . . . . . . . . . . . . . . . . . . . . . . . . . . . . . . . . . . . . . . . . 1-2
User Manual CD-ROM Menu . . . . . . . . . . . . . . . . . . . . . . . . . . . . . . . . . . . . . . . . . . . . . . 1-5
System Requirements . . . . . . . . . . . . . . . . . . . . . . . . . . . . . . . . . . . . . . . . . . . . . . . . . . . . . . . . .1-5
Using The CD-ROM Menu . . . . . . . . . . . . . . . . . . . . . . . . . . . . . . . . . . . . . . . . . . . . . . . . . . . . . .1-6
Parts and Their Functions. . . . . . . . . . . . . . . . . . . . . . . . . . . . . . . . . . . . . . . . . . . . . . . . . 1-7
Printer . . . . . . . . . . . . . . . . . . . . . . . . . . . . . . . . . . . . . . . . . . . . . . . . . . . . . . . . . . . . . . . . . . . . . .1-7
Control Panel . . . . . . . . . . . . . . . . . . . . . . . . . . . . . . . . . . . . . . . . . . . . . . . . . . . . . . . . . . . . . . .1-10
Display . . . . . . . . . . . . . . . . . . . . . . . . . . . . . . . . . . . . . . . . . . . . . . . . . . . . . . . . . . . . . . . . . . . .1-12
Optional Accessories . . . . . . . . . . . . . . . . . . . . . . . . . . . . . . . . . . . . . . . . . . . . . . . . . . .1-13
Paper Feeder . . . . . . . . . . . . . . . . . . . . . . . . . . . . . . . . . . . . . . . . . . . . . . . . . . . . . . . . . . . . . . .1-13
Expansion RAM . . . . . . . . . . . . . . . . . . . . . . . . . . . . . . . . . . . . . . . . . . . . . . . . . . . . . . . . . . . . .1-14
Hard Disk . . . . . . . . . . . . . . . . . . . . . . . . . . . . . . . . . . . . . . . . . . . . . . . . . . . . . . . . . . . . . . . . . .1-15
1
CHAPTER
1-1
Page 29

Features and Benefits
1
This section describes the major features.
■ High Quality A4 Full Color Print
This printer is fitted with an A4 full color laser printer engine. Moreover, 600dpi/multi-value
data process resolution delivers high quality full-color printing on A4 size paper.
■ High Speed Printing
Before You Start
Adoption of high-speed CPU and new-type PDL has increases the speed of the controller
processing. Moreover, the four development drums have shortened the time of color
printing, which used to require four times longer time than when printing in black and
white, to as short as printing in black and white (printing 21 sheets of paper per minute).
■ Easy Maintenance
The toner cartridges (Canon Genuine Cartridges) of four colors (Cyan, Magenta, Yellow,
and Black) in which toner and drum are integrated relieve you from toner replenishment
and drum replacement that tend to stain your hands, achieving easy routine maintenance
that only requires replacement of these toner cartridges. Furthermore, because the cover
is located on the front, you can easily replace the toner cartridges and remove paper
jammed inside the printer. This feature is achieved by centralizing all the operations
(feeding paper, development, and transferring and fixing toner) at the front of the printer
and simplifying the paper transport path.
■ Paper Handling
In addition to the standard multi-purpose tray and universal cassette, the optional
500-sheet paper feeder is available, enabling the continuous automatic feeding of up to
850 sheets of paper (80 g/m
standard, the printer can perform automatic 2-sided printing on the paper loaded in the
multi-purpose tray or paper cassette. By doing so, you can save paper and make the file
space more efficient.
2
) of 3 different sizes. Equipped with the duplex unit as
1-2
■ User-Friendly Color Control
The user interface with color matrixes delivers intuitive and easy to use color tone
adjustment. The sample print function that outputs the samples of images after
adjustment on a sheet of paper allows you to easily and rightly check the colors that you
want to use.
The auto color function that automatically detects color pages frees you from having to
switch between the black-and-white mode and color mode. As a matter of course,
LBP5360 is equipped with ColorGear, Canon's original color management system that
recreates the colors as you expect. This system achieves the user-friendly control of color
matching that corrects color by each element of text, photographs, and pictures that make
up a document.
Features and Benefits
Page 30

■
■
■
■
■
Network Printer
Equipped with a 10BASE-T/100BASE-TX print server as standard. Because LBP5360
compatible with the TCP/IP, AppleTalk , and SMB protocols, you can instantly use this
printer as a network printer that supports various kinds of host/operating system
environments. Also the high-speed DMA transfer that directly transfers data to the printer
memory and automatic interface switch function enable fine printing process in a network
environment.
NOTE
For details on the operating systems that the print server equipped with this printer
support and the configuration procedures, see "Network Guide".
Well-developed Security Functions
By installing an optional hard disk, you can use the "Secured Print" function that requires
entering a password on printing and the "Encrypted Secured Print" function in which the
security for data communication is reinforced. The "Hard Disk Data All Erase" function that
completely erases all the data in the hard disk and the capability of using SSL for
communication by the Remote UI achieve a safer printing environment.
NOTE
For details on software required for printing encrypted secured print jobs, see "Driver
Guide". For the procedure for installing the software, see Readme.txt in "Encrypted
Secured Print Driver Add-in For Client PC", the CD-ROM supplied with the optional hard
disk.
Software Compatibility and Language Switching
The printer supports Hewlett-Packard's PCL 5c printer languages, which enables the
printer to work with a wide variety of software applications supporting PCL. This printer
also supports UFR II. UFR II, a printing system compatible with the latest operating
systems, distributes the printing process to a computer and printer, achieving a
high-speed print output. Also, a high-speed print output is enabled without expanding the
printer memory.
Energy Saving
The on-demand fusing technology of the printer provides improved energy efficiency.
1
Before You Start
Because of this power saving feature, the printer meets the guidelines for the International
Energy Star Program.
Interface Features
The printer uses a USB port that supports Microsoft Plug & Play technology. It also comes
with a print server as standard, being used as a network printer for Ethernet.
Features and Benefits
1-3
Page 31

■
■
■
Typefaces
The printer comes with 80 scalable typefaces in 27 typeface families (Agfa 80 MicroType
fonts), all compatible with application software supporting Microsoft Windows. In addition,
10 bitmapped typefaces of the Line Printer family are also included. The printer uses the
Universal Font Scaling Technology (UFST) for outline fonts, provided under license from
Agfa Monotype Corporation. 31 TrueType screen fonts are also included along with Canon
Font Manager for easy management of installed fonts in Microsoft Windows 98/Me and
Windows 2000/XP.
1
Printer Drivers and Utilities
LBP5360 is provided with the printer driver for PCL 5c that supports Windows 98/Me/
2000/XP/Server 2003/Vista and UFR II Printer Driver that supports Windows 2000/XP/
Server 2003/Vista and Mac OS X, allowing you to print from a various kinds of system
environment.
Before You Start
Also, NetSpot Device Installer supplied with LBP5360 simplifies the management and
settings of the printer on a network environment.
IMPORTANT
The supplied CD-ROM does not include the printer driver for Macintosh. Download the
printer driver for Macintosh that supports this printer from the Canon website. If you
cannot find the printer driver for Macintosh that supports this printer on the Canon
website, contact your local authorized Canon dealer.
Remote UI Support
The printer supports a Remote UI function that allows you to control or monitor the status
of the printer from a computer. (See Remote UI Guide.)
1-4
Features and Benefits
Page 32

User Manual CD-ROM Menu
The User Manual CD-ROM Menu is software that enables you to select and view
PDF Manuals included on the CD-ROM via your computer screen. Follow the
instructions below to use the User Manual CD-ROM Menu.
System Requirements
The User Manual CD-ROM Menu can be used in the following system
environments.
Operating System
Memory The memory required to run the above operating systems.
Computer A computer that can run the above operating systems.
Display A resolution of 1024 x 768 pixels or higher.
IMPORTANT
Depending on the configuration of your computer, some functions may not operate
correctly. If the PDF manual does not open from the CD-ROM Menu, open the PDF file
directly from the [english] folder in the [Manuals] folder on the User Manual CD-ROM.
Windows
Windows 98
Windows Me
Windows 2000 (Service Pack 3 or later)
Windows XP (Service Pack 1a or later)
Windows Server 2003
Windows Vista
1
Before You Start
Macintosh
Mac OS X
User Manual CD-ROM Menu
1-5
Page 33

Using The CD-ROM Menu
This section describes how to use the CD-ROM Menu. When you insert the User
Manual CD-ROM provided into the CD-ROM drive, the Language Selection screen
is displayed. Clicking a language on this screen displays the following menu.
(The sample screen shot shown here is for Windows users.)
1
Before You Start
NOTE
For Macintosh users, double-click the [START] icon to start the CD-ROM Menu. The
Language Selection screen is displayed.
a
b c
aaaaBROWSE MANUAL
You can read any of the listed guides by clicking on
the desired guide. After clicking on the desired
guide, Acrobat Reader starts, and the PDF manual
is displayed.
1-6
User Manual CD-ROM Menu
bbbbRETURN
Return to the Language Selection screen.
ccccEXIT
Exit the CD-ROM menu.
Page 34

Parts and Their Functions
Printer
This printer consists of components that perform various functions. This section
describes the name and function of each part in order for you to use this printer
properly to make full use of its functions.
The following are the parts and functions of the printer unit.
CAUTION
Never block the ventilation slots on the printer. The ventilation slots are
provided for proper ventilation of working parts inside the printer. Blocking the
ventilation slots can cause the printer to overheat, resulting in a fire.
Front View
The following are the parts on the front side of the printer and their functions.
b
a
n
c
d
e
f
g
h
1
Before You Start
m
l
k
aaaaVentilation Slots
Ventilate air to cool the insides of the printer.
bbbbAuxiliary Tray (Output Tray)
Pulled out to prevent the paper from hanging out of
the output tray when outputting Legal size paper to
the output tray.
ccccOutput Tray
Outputs paper with the printed side facing down.
(See p. 4-15)
i
j
ddddTop Cover
Opened when removing jammed paper. (See p. 8-4)
eeeePower Switch
Tu r ns the power of the printer ON/OFF. (See p.
2-35)
ffffControl Panel
Displays the printer status and allows you to specify
the settings. (See p. 1-10)
Parts and Their Functions
1-7
Page 35

ggggFront Cover
Opened when replacing a toner cartridge or
removing jammed paper. (See p. 7-2)
hhhhVentilation Slots
Ventilate air to cool the insides of the printer.
iiiiLift Handles
Hold these handles when moving the printer. (See p.
1
7-30)
jjjjPaper Cassette
Can be loaded with up to 250 sheets of plain paper
(80 g/m2). (See p. 4-17)
kkkkAuxiliary Tray (Multi-purpose Tray)
Be sure to pull out the auxiliary tray when loading
paper in the multi-purpose tray.
Before You Start
Rear View
The following are the parts on the rear side of the printer and their functions.
a
k
j
i
h
g
f
llllTray Extension
Opened to prevent the paper from hanging out of
the multi-purpose tray when loading long-size paper,
such as A4.
mmmmMulti-purpose Tray
Load paper when feeding the paper from the
multi-purpose tray. (See p. 4-35)
nnnnPaper Guides
Adjust the position of the paper guides to the width
of the paper loaded in the multi-purpose tray. You
can load paper up to the load limit marks on this
tray.
b
c
de
aaaaPower Socket
Connect the supplied power cord to this socket.
bbbbRating Label
The serial number (Serial No.) for printer
identification is indicated on this label. The number
is required for receiving service or repairs. The
current value indicated in this rating label shows the
average power current consumption.
ccccVentilation Slots
Ventilate air to cool the insides of the printer.
1-8
Parts and Their Functions
ddddCassette Protective Cover
Prevents dirt and dust from entering the paper
cassette. When Legal size paper is loaded in the
paper cassette, the cassette protective cover rises
automatically.
eeeeRear Cover
Opened when installing an optional RAM module or
hard disk.
ffffExpansion Slot
An optional hard disk is installed in this slot. (See p.
9-22)
Page 36

ggggUSB Connector
Connected to the USB cable. Connect the USB
cable to this connector when the computer is
equipped with a USB interface.
hhhh100 Indicator (Green)
Comes on when the printer is connected to a
network by 100BASE-TX.
iiii10 Indicator (Green)
Comes on when the printer is connected to a
network by 10BASE-T.
Inner View
The following are the parts inside the printer and their functions.
jjjjLAN Connector
Connects to a 10BASE-T/100BASE-TX LAN cable.
kkkkParallel Connector
Connected to the IEEE1284-compatible 8-bit
parallel interface cable. Connect the parallel
interface cable when the printer port of the computer
supports a parallel interface.
1
Before You Start
a
b
c
d
e
f
aaaaK (Black) Toner Cartridge Slot
The K (black) toner cartridge is installed in this slot.
bbbbY (Yellow) Toner Cartridge Slot
The Y (yellow) toner cartridge is installed in this slot.
ccccC (Cyan) Toner Cartridge Slot
The C (cyan) toner cartridge is installed in this slot.
ddddM (Magenta) Toner Cartridge Slot
The M (magenta) toner cartridge is installed in this
slot.
eeeeETB (Electro static Transfer Belt) Unit
Tr ansfers toner of four colors onto paper while
transporting it.
ffffDuplex Unit
Used when performing 2-sided printing.
Parts and Their Functions
1-9
Page 37

Control Panel
The control panel on the top of the printer allows you to check the printer status and
use the printer functions.
1
Before You Start
aaaa Cancel Job Key
On offline:
Cancels the job when the (Job) indicator is on or
blinking. Does not function when the (Job)
indicator is off.
On online:
Cancels the job when the (Job) indicator is on or
blinking. Does not function when the (Job)
indicator is off.
bbbb Ready Indicator (Green)
On:
The printer is ready to print. (If the printer has
entered Power Save Mode when it is online, only the
(Ready) indicator (green) is on, and all the other
indicators are off.)
Blinking:
The printer is performing a self-diagnostic test. The
printer is in a warm-up state.
Off:
The printer cannot print.
cccc Message Indicator (Orange)
On:
The printer cannot print because a problem has
occurred in the printer. (If the printer has entered
Power Save Mode when it is offline, only the
(Message) indicator (orange) is on, and all the other
indicators are off.)
Off:
The printer is in a normal state.
a gbcde f
n k hijm l
dddd HDD Indicator (Green)
On:
Data is being read from the hard disk or being
written to the hard disk.
Off:
Data is not being read from the hard disk or being
written to the hard disk.
eeee Job Indicator (Green)
On:
The printer is receiving print data, or any print data
remains in the printer memory.
Blinking:
The printer is processing print data.
Off:
There is no print data in the printer memory.
ffff Job ( ) Key
On offline:
Does not function when the printer is offline.
On online:
Displays the JOB menu.
On menu operation:
Goes back to the previous menu (Goes back up the
hierarchy).
gggg[OK] Key
On offline:
Does not function when the printer is offline.
On online:
Does not function when the printer is online.
On menu operation:
Goes to the next menu (Goes down the hierarchy).
In a lowest menu level (When a setting value is
displayed), determines the setting.
1-10
Parts and Their Functions
Page 38

hh
hh
Settings ( ) Key
On offline:
Displays the SETUP menu.
On online:
Displays the SETUP menu. However, the [User
Maintenance Menu] options cannot be specified
when the printer is online.
On menu operation:
Displays the next right item in the menu. Increases
the setting value.
iiii Reset ( ) Key
On offline:
Displays the RESET menu.
On online:
Displays the RESET menu.
On menu operation:
Goes to the next menu (Goes down the hierarchy).
In a lowest menu level (When a setting value is
displayed), determines the setting.
jjjj Utility ( ) Key
On offline:
Does not function when the printer is offline.
On online:
Displays the UTILITY menu.
On menu operation:
Displays the next left item in the menu. Decreases
the setting value.
kkkkDisplay
Displays the printer status, messages, the settings
and setting values of the menu functions. (See p.
1-12)
llllPaper Source Indicators (Green)
On:
The indicator for the currently selected paper source
comes on.
Blinking:
There is no paper in the currently selected paper
source, or the paper cassette is not set. For the
multi-purpose tray, the indicator comes on even
when no paper is loaded.
Off:
No paper source is selected. No paper cassette
including the optional one or paper feeder is set.
mmmm Feeder Selection Key
On offline:
Displays the SELECT FEEDER menu.
On online:
Displays the SELECT FEEDER menu.
On menu operation:
Does not function.
nnnn Online Key/Online Indicator (Green)
Tu r ns on (online)/off (offline) the connection to the
computer.
This key also has the function that, when an error
has occurred, releases the printer from the error
temporarily and continues the paused job. However,
depending on the error, you may not be able to
cancel it out.
The (Online) indicator under the (Online)
key indicates the following printer status with its
status.
On:
Online (The printer can receive print data from the
computer.)
Off:
Offline (The printer cannot receive print data from
the computer.)
However, if the printer has entered Power Save
Mode, the (Online) indicator is off even when
the printer is online. (See p. 3-5)
1
Before You Start
Parts and Their Functions
1-11
Page 39

Display
The display on the printer's control panel is shown as the following. It displays the
printer status, messages, items and settings of the menu functions.
1
aaaaStatus/Operation Field
Displays the printer status and operation mode.
Before You Start
When the printer is ready to print When operating the printer
a
00 READY A4
b
using the control panel
CONTROL MENU
bbbbPaper Source/Paper Size Field
Displays the size of paper in the currently selected
paper source using an abbreviation. The names of
the following paper sizes are indicated by an
abbreviation. (Legal: LG, Letter: LT, Executive: EX,
Statement: ST, Foolscap: FC, Envelope DL: DL,
Envelope COM10: CO, Envelope C5: EC5,
Envelope Monarch: MO, Envelope B5: EB5, Index
Card: IC, Custom Size: 80 to 99, Custom Size R:
80R to 99R, Free/Mixed Sizes: FR)
→
1-12
Parts and Their Functions
Page 40

Optional Accessories
The following optional accessories are available in order to use this printer to its full
extent. Purchase them to fulfill your needs. For the optional accessories, contact
your local authorized Canon dealer.
Paper Feeder
This printer is supplied with 2 paper sources: the paper cassette and multi-purpose
tray. By installing the optional paper feeder, up to 3 paper sources can be used.
PAPER FEEDER PF-93 consists of a paper feeder and paper cassette.
The paper cassette can be loaded with up to approximately 500 sheets of plain
paper (80 g/m2) at sizes of A4, B5, A5, Legal, Letter, Executive, Foolscap, 16K, and
custom size paper at the following sizes.
• When loading paper in portrait orientation: Width 148.0 to 215.9 mm; Length
210.0 to 355.6 mm
• When loading paper in landscape orientation (Only when UFR II Printer Driver is
used): Width 210.0 to 215.9 mm; Length 210.0 to 215.9 mm
1
Before You Start
PAPER FEEDER PF-93
Optional Accessories
1-13
Page 41

Expansion RAM
Expansion RAM is an extended memory that expands the amount of memory. This
printer comes with 128 MB of memory. One expansion RAM module can be added,
and the memory capacity can be expanded up to a maximum of 384 MB.
1
Before You Start
(+ XX MB) in the table indicates the capacity of the optional expansion RAM that is
Total RAM Capacity
(Expanded RAM Capacity)
128 (Standard) A4 x 2
256 (+ 128 MB) A4 x 4
384 (+ 256 MB) A4 x 6
Guaranteed Paper Size for Printing
required in addition to the standard RAM.
The values in the Guaranteed Paper Size for Printing column in the table are those
when performing 1-sided color printing with GRADATION LEVEL set to HIGH 1.
The paper size is based on the A or B series paper sizes. The paper sizes
(dimensions) are Legal, Foolscap, A4, Letter, 16K, Executive, B5, Envelope B5,
Envelope C5, A5, Statement, Envelope COM10, Envelope DL, Envelope Monarch,
and Index Card in descending dimension order.
The guaranteed paper sizes for printing vary depending on the settings for
GRADATION LEVEL, 2-SIDED PRINT, and COLOR MODE on printing. Calculate
the sizes based on the paper sizes in the table above.
Item Setting Value Scale Factor
GRADATION LEVEL
HIGH 1 100 %
HIGH 2 50 %
1-14
2-SIDED PRINT.
OFF 100 %
ON 50 %
COLOR 100 %
COLOR MODE
BLACK & WHITE 400 %
Optional Accessories
Page 42

NOTE
Be sure to use a 3.3V SDRAM DIMM compatible with this printer as the expansion RAM
module. It is recommended that you should use Canon Expansion RAM ER-128 or
ER-256 as the expansion RAM.
SDRAM DIMM (3.3V) compatible with this printer
Hard Disk
You can use a hard disk that can be built in the printer to save the received print
jobs temporarily. By installing the hard disk, you can use various functions such as
print job spooling, encrypted secured print, secured print, electronic sort, and RIP
Once.
Usable
Notch
Hard Disk KIT HD-93
IMPORTANT
When you are using a hard disk, set MODE TIMEOUT in the SETUP menu to a setting
other than OFF. It is recommended that you should specify the default setting, "15
seconds".
1
Before You Start
Optional Accessories
1-15
Page 43

1
Before You Start
1-16
Optional Accessories
Page 44

Installing the Printer
CHAPTER
This chapter describes the procedure from taking this printer out of the package to installing
the printer.
Installation Procedure . . . . . . . . . . . . . . . . . . . . . . . . . . . . . . . . . . . . . . . . . . . . . . . . . . . .2-2
Installation Site . . . . . . . . . . . . . . . . . . . . . . . . . . . . . . . . . . . . . . . . . . . . . . . . . . . . . . . . .2-3
Installation Environment . . . . . . . . . . . . . . . . . . . . . . . . . . . . . . . . . . . . . . . . . . . . . . . . . . . . . . . .2-3
Installation Space . . . . . . . . . . . . . . . . . . . . . . . . . . . . . . . . . . . . . . . . . . . . . . . . . . . . . . . . . . . . .2-5
Precautions for Handling . . . . . . . . . . . . . . . . . . . . . . . . . . . . . . . . . . . . . . . . . . . . . . . . . . . . . . .2-7
Confirming the Package Contents . . . . . . . . . . . . . . . . . . . . . . . . . . . . . . . . . . . . . . . . . .2-8
Carrying the Printer to the Installation Site and Removing the Packing Materials on the Outside of the Printer
Installing the Toner Cartridges . . . . . . . . . . . . . . . . . . . . . . . . . . . . . . . . . . . . . . . . . . . . 2-16
Loading Paper . . . . . . . . . . . . . . . . . . . . . . . . . . . . . . . . . . . . . . . . . . . . . . . . . . . . . . . .2-26
Connecting the Cables . . . . . . . . . . . . . . . . . . . . . . . . . . . . . . . . . . . . . . . . . . . . . . . . . .2-27
Connecting the Power Cord . . . . . . . . . . . . . . . . . . . . . . . . . . . . . . . . . . . . . . . . . . . . . . . . . . . .2-27
Connecting to a Computer . . . . . . . . . . . . . . . . . . . . . . . . . . . . . . . . . . . . . . . . . . . . . . . . . . . . .2-29
Tu r ning the Printer ON and Checking the Printer Operation . . . . . . . . . . . . . . . . . . . . .2-35
Turning the Printer ON . . . . . . . . . . . . . . . . . . . . . . . . . . . . . . . . . . . . . . . . . . . . . . . . . . . . . . . .2-35
Registering a Paper Size . . . . . . . . . . . . . . . . . . . . . . . . . . . . . . . . . . . . . . . . . . . . . . . . . . . . . .2-36
Specifying a Paper Type . . . . . . . . . . . . . . . . . . . . . . . . . . . . . . . . . . . . . . . . . . . . . . . . . . . . . .2-37
Checking the Operations with Configuration Page Print . . . . . . . . . . . . . . . . . . . . . . . . . . . . . .2-37
When the Printer Does Not Operate Properly . . . . . . . . . . . . . . . . . . . . . . . . . . . . . . . . . . . . . .2-40
Changing the Language Used in the Display . . . . . . . . . . . . . . . . . . . . . . . . . . . . . . . . . . . . . .2-41
Turning the Printer OFF . . . . . . . . . . . . . . . . . . . . . . . . . . . . . . . . . . . . . . . . . . . . . . . . . . . . . . .2-42
2
. . . 2-10
2-1
Page 45

Installation Procedure
According to your installation condition, perform the relevant procedure. When you
do not install the optional accessories, skip the procedures indicated with
(Optional).
2
Installing the Paper Feeder (See p. 9-2)
1
Installing the Printer Unit (See p. 2-10)
2
(Optional)
Installing the Printer
Installing the Toner Cartridges (See p. 2-16)
3
Loading Paper (See p. 4-19, p. 4-36)
4
Installing RAM (See p. 9-15)
5
Installing a Hard Disk (See p. 9-22)
Connecting the Power Cord (See p. 2-27)
6
Connecting the Printer Unit and a Computer (See p. 2-29)
7
(Optional)
2-2
Installation Procedure
Page 46

Installation Site
In order to use this printer in a safe and comfortable manner, install the printer in a
place that fulfills "Temperature/Humidity Conditions", "Power Supply
Requirements", and "Installation Requirements" described in "Installation
Environment".
IMPORTANT
Before installing the printer, be sure to read "Important Safety Instructions," on p. xvii.
Installation Environment
Select an installation site for this printer in view of the following environmental
conditions.
Temperature/Humidity Conditions
Use the printer in a location where the temperature and humidity are in the
following ranges.
•Ambient temperature: 10 to 30 °C (50 to 86 °F)
•Ambient humidity: 10 to 80 % RH (no condensation)
2
Installing the Printer
IMPORTANT
• Water droplets (condensation) may form inside the printer under the following
circumstances. Leave the printer for two hours or more to adjust the surrounding
temperature and humidity before using it.
- When the room where the printer is installed is heated rapidly
- When the printer is moved from a cool or dry location to a hot or humid location
• If water droplets form inside the printer, the paper transport path will not function
properly, and this may result in paper jams or poor print quality.
■ To customers using an ultrasonic humidifier
If you use an ultrasonic humidifier in conjunction with tap water or well water, impurities in
the water will be dispersed through the air. These can be trapped inside the printer,
causing degradations in printing quality. When you are using these humidifiers, it is
therefore recommended that you use purified water or other water that is free of
impurities.
Installation Site
2-3
Page 47

Power Supply Requirements
The maximum power consumption of this printer is 1257 W* or less. Electrical noise
or a dramatic drop in mains voltage may cause the printer to operate incorrectly or
lose data, and can also cause the computer to fail.
* The instantaneous peak on startup when all the optional accessories are installed
in the printer shall not be counted.
Use power supplies rated for voltages in the following ranges.
2
•220 to 240 V (± 10 %) 50/60 Hz (± 2 Hz)
IMPORTANT
• An AC power outlet should be used exclusively for the printer. Any other sockets of the
AC power outlet should not be used.
• Do not plug the power plug into the auxiliary outlet on a computer.
• Do not plug the power plug of the printer and that of machinery which consumes a large
amount of electricity or generates electrical noise, such as a copy machine, air
conditioner, or shredder, into the same AC power outlet.
Installing the Printer
Installation Requirements
Install the printer in the following locations.
•A location where sufficient space can be secured
•A well-ventilated room
•A flat, even surface
•A sturdy platform that can easily support the weight of the printer and optional
accessories
WARNING
Do not install the printer near alcohol, paint thinner, or other flammable
substances. If flammable substances come into contact with electrical parts
inside the printer, it may result in a fire or electrical shock.
2-4
CAUTION
••••Do not install the printer in the following locations, as this may result in a fire or
electrical shock.
-A damp or dusty location
-A location exposed to smoke and steam such as cookeries and humidifiers
-A location exposed to rain or snow
-A location near water faucets or water
-A location exposed to direct sunlight
-A location subject to high temperatures
-A location near open flames
Installation Site
Page 48

••••Do not install the printer in unstable locations, such as unsteady platforms or
inclined floors, or in locations subject to excessive vibrations, as this may
cause the printer to fall or tip over, resulting in personal injury.
IMPORTANT
Do not install the printer in the following locations, as this may result in damage to the
printer.
- An environment where the temperature and/or humidity can change dramatically, or
where condensation occurs
-A poorly ventilated room
-A location near products that generate magnetic waves or electromagnetic waves
- In rooms such as laboratories where chemical reactions occur
-A place where salt content, corrosive gases such as ammonia, or toxic gases are
contained
-A platform that may warp from the weight of the printer and optional accessories, or the
printer is liable to sink (such as a carpet or mat)
Installation Space
Select an installation location where you can secure the following amounts of free
space around the printer, and a surface that can support the weight of the printer.
The dimensions of the space required around the components and the positions of
the feet are as follows.
2
Installing the Printer
Required Peripheral Space
■ Standard state
Front Surface
1312
637
612
100100
150
100
Installation Site
(mm)
772.1
2-5
Page 49

■ State with the paper feeder installed
2
Installing the Printer
Front Surface
637
612
Foot Positions
■ Printer unit
Front Surface
1312
100100
150
102 282.9 140.1
33304.674.4
(mm)
100
913
(mm)
33304.674.4
2-6
102 282.9 140.1
NOTE
The front feet are 3 mm high and their top surface is 12 mm square.
The rear feet are 3.2 mm high and their top surface is 12 mm in diameter.
Installation Site
Page 50

■ PAPER FEEDER PF-93
Front Surface
115 267 186
(mm)
NOTE
The front feet are 3 mm high and their top surface is 12 mm square.
The rear feet are 3.5 mm high and their top surface is 16 mm x 17 mm rectangular.
Precautions for Handling
CAUTION
If an error should occurred to the hard disk in the printer unit, the received,
recorded, and saved data may be deleted. It is recommended not to record or
save important data on the hard disk. Canon assumes no responsibility
whatsoever for any damages or losses arising from data loss by the customers.
26.529286.5
115 267 186
26.529286.5
2
Installing the Printer
Installation Site
2-7
Page 51

Confirming the Package Contents
Make sure that all the following items are contained in the package before installing
the printer. If any item is missing or damaged, please contact your local authorized
Canon dealer.
2
Installing the Printer
Printer
(The paper cassette and
toner cartridges are already installed.)
User Software CD-ROM
• Printer Driver
• USB class driver
• Driver Guide
User Manual CD-ROM
• Manuals
- User's Guide
- Remote UI Guide
- Network Guide
• Canon Font Manager
IMPORTANT
The supplied CD-ROM does not include the printer driver for Macintosh. Download the
printer driver for Macintosh that supports this printer from the Canon website. If you
cannot find the printer driver for Macintosh that supports this printer on the Canon
website, contact your local authorized Canon dealer.
Power cord
(The form of the supplied
power cord may differ from
the one in the above
illustration.)
Output tray
Ferrite core
2-8
Confirming the Package Contents
Page 52

NOTE
• This printer does not come with an interface cable. Have an appropriate one available for
the computer you are using or the connecting method. Use a USB cable with the
following symbol.
• Canon Font Manager is included in the [Canonfm] folder on the User Manual CD-ROM.
2
Installing the Printer
Confirming the Package Contents
2-9
Page 53

Carrying the Printer to the Installation Site and Removing the Packing Materials on the Outside of the Printer
After securing the installation site, carry the printer to the installation site and
remove the packing materials on the outside of the printer. When carrying the
printer, carry it after pulling out the paper cassette.
2
Installing the Printer
CAUTION
Do not carry the printer with the paper cassette attached. If you do so, the paper
cassette may drop resulting in personal injury.
IMPORTANT
• When installing the optional paper feeder, place it on the installation site before carrying
the printer unit to the site. For details on installing the paper feeder, see "Installing the
Paper Feeder," on p. 9-2.
• Secure sufficient space around the printer at the installation site so that you can install
the optional accessories and connect cables.
• The removed packing materials are required when transporting the printer for relocation
or maintenance. Keep them where they will not get lost.
NOTE
The packing materials may be changed in form or position to be placed, or may be added
or removed without notice.
2-10
1
Pull out the paper cassette.
Pull out the paper cassette gently a.
a
Carrying the Printer to the Installation Site and Removing the Packing Materials on the Outside of the
Printer
Page 54

While holding the paper cassette with both hands, remove it from the printer unit
as shown in the figure b.
b
2
Carry the printer unit to the installation site.
Carry the printer with 2 or more people by holding the center of the lift handles on
the lower portion of the printer and lifting it up at the same time.
2
Installing the Printer
Carrying the Printer to the Installation Site and Removing the Packing Materials on the Outside of the
Printer
2-11
Page 55

2
CAUTION
••••This printer weighs approximately 25.8 kg without the paper cassette
installed. The printer must be carried by 2 or more people, and care must
be taken to avoid hurting your back or other portions of your body when
carrying the printer.
••••Be sure not to hold the printer by the paper cassette, output area, or any
portions other than the lift handles. If you do so, you may drop the printer,
resulting in personal injury.
Installing the Printer
2-12
IMPORTANT
Carry the printer with the tape that secures the rear cover, etc. attached.
3
Put the printer down carefully at the installation site.
CAUTION
Put the printer down slowly and carefully. Be careful not to hurt your
hands.
Carrying the Printer to the Installation Site and Removing the Packing Materials on the Outside of the
Printer
Page 56

4
Remove the paper on which cautions are described.
5
Remove the tape attached to the printer (11 locations).
2
Installing the Printer
Carrying the Printer to the Installation Site and Removing the Packing Materials on the Outside of the
Printer
2-13
Page 57

6
Install the output tray.
Insert the projections of the output tray in the printer a, then tilt the output tray
b.
a
2
Installing the Printer
b
Install the output tray until it clicks so that (A) on the back of it is hooked on (B) of
the printer as shown in the figure.
(A)
(B)
2-14
Carrying the Printer to the Installation Site and Removing the Packing Materials on the Outside of the
Printer
Page 58

7
Set the paper cassette in the printer.
Push the paper cassette into the printer firmly until the front side of the paper
cassette is flush with the front surface of the printer.
2
Installing the Printer
CAUTION
When setting the paper cassette in the printer, be careful not to catch your
fingers.
Carrying the Printer to the Installation Site and Removing the Packing Materials on the Outside of the
Printer
2-15
Page 59

Installing the Toner Cartridges
The toner cartridges to which packing materials are attached are already installed
in the printer.
2
Installing the Printer
Be sure to take out the toner cartridges once, and then remove the packing
materials using the following procedure.
CAUTION
Take care not to allow the toner to come into contact with your hands or
clothing, as this will dirty your hands or clothing. If they become dirty, wash
them immediately with cold water. Washing with warm water will set the toner
and make it impossible to remove the toner stains.
IMPORTANT
Dispose of the packing materials according to local regulations.
NOTE
• For details on how to handle a toner cartridge, see "Precautions for Handling Toner
Cartridges," on p. 7-16.
• The packing materials may be changed in form or position to be placed, or may be added
or removed without notice.
1
Open the front cover.
Holding the opening of the front cover, open it gently.
2-16
Installing the Toner Cartridges
Page 60

IMPORTANT
The toner cartridges are installed in order of black, yellow, cyan, and magenta from
the top as shown in the figure.
Black
Yellow
Cyan
Magenta
2
Place paper (A4 size paper is recommended) on the transfer
belt of the ETB unit (A) as shown in the figure so that the
paper is not shifted.
2
Installing the Printer
(A)
IMPORTANT
• When installing or removing the toner cartridges, be sure to place paper on the
transfer belt of the ETB unit to protect the belt.
Installing the Toner Cartridges
2-17
Page 61

2
• Do not place any object on or touch the transfer belt (A) of the ETB unit. The
transfer belt of the ETB unit is supplied with a function that cleans itself, therefore,
do not clean the belt even when the toner is on it. If the ETB unit is broken or
transfer belt is damaged, this may result in misfeeds or deterioration in print quality.
(A)
Installing the Printer
2-18
(A)
Installing the Toner Cartridges
Page 62

3
Holding the toner cartridge by the blue tabs on the both sides,
pull it horizontally.
Holding the toner cartridge with your both hands firmly, pull it out so that you do
not touch the transfer belt of the ETB unit.
2
IMPORTANT
Do not touch the high-voltage contact (A) or the electrical contacts (B) shown in the
figure, as this may result in damage to the printer.
(A)
(B)
Installing the Printer
Installing the Toner Cartridges
2-19
Page 63

4
Hold the toner cartridge as shown in the figure, shake it
gently 5 or 6 times to evenly distribute the toner inside the
cartridge.
2
Installing the Printer
IMPORTANT
• If toner is not distributed evenly, this may result in deterioration in print quality. Be
sure to carry out this procedure properly.
• Be sure to shake the toner cartridge gently. If you do not shake the cartridge gently,
toner may spill out.
2-20
Installing the Toner Cartridges
Page 64

5
a
Place the toner cartridge on a flat surface, fold back the tab of
the sealing tape
(approx. 48 cm long) gently
bb
aaaabb
, and then pull out the sealing tape
cc
cc
while supporting the toner
cartridge.
Remove the sealing tape by hooking your fingers into the tab and pulling it out
straight in the direction of the arrow.
b
2
Installing the Printer
c
CAUTION
If the sealing tape is pulled out forcefully or stopped at midpoint, toner
may spill out. If the toner gets into your eyes or mouth, wash them
immediately with cold water and immediately consult a physician.
Installing the Toner Cartridges
2-21
Page 65

2
Installing the Printer
IMPORTANT
• Do not pull the sealing tape diagonally, upwards, or downwards. If the tape is
severed, it may become difficult to pull out completely.
• Pull out the sealing tape completely from the toner cartridge. If any tape remains in
the toner cartridge, this may result in poor print quality.
• When pulling out the sealing tape, be careful not to hold the drum protective shutter
(A) with your hands.
(A)
2-22
Installing the Toner Cartridges
Page 66

6
a
Hook your finger into the tab and remove the packing
materials as shown in the figure.
b
7
Hold the toner cartridge properly with the arrowed side facing
up as shown in the figure.
2
Installing the Printer
Installing the Toner Cartridges
2-23
Page 67

2
Installing the Printer
IMPORTANT
Do not hold the toner cartridge in a manner that is not directed in this procedure.
8
Hold the toner cartridge with both hands and install it into the
printer.
Align (A) of the toner cartridge with the slots (B) to which the label of the same
color is attached, then insert the cartridge until it stops.
(A)
(B)
2-24
(B)
(A)
IMPORTANT
Be sure to install the toner cartridge by pushing it firmly. If the toner cartridges are
not installed firmly, this may result in deterioration in print quality.
Installing the Toner Cartridges
Page 68

9
After removing all the packing materials on the toner
cartridges and installing the cartridges, remove the paper.
IMPORTANT
When removing the paper, be careful not to touch or damage the transfer belt of
the ETB unit.
10
Close the front cover.
Holding the opening of the front cover, close it gently.
2
Installing the Printer
CAUTION
When closing the front cover, be careful not to catch your fingers.
IMPORTANT
• If you cannot close the front cover, check if the toner cartridge is installed properly.
If you try to close the front cover forcefully, this may result in damage to the printer.
• Do not leave the front cover open for a long time after installing the toner cartridge.
Installing the Toner Cartridges
2-25
Page 69

Loading Paper
By default, this printer feeds paper from two paper sources: the paper cassette
(Cassette 1) and multi-purpose tray. Also, paper can be fed from up to 3 paper
sources by installing the optional paper feeder (Cassette 2).
2
Installing the Printer
For details on the procedure for loading paper or installing the optional paper feeder
in the printer, see the following directions.
•When loading paper in the paper cassette
•When loading paper in the multi-purpose tray
•When installing the optional paper feeder in the printer
•When loading paper in the paper cassette of the paper feeder
For details on the output trays of this printer, see "Output Tray," on p. 4-15.
See "Loading Paper in the Paper Cassette," on p. 4-19
See "Loading Paper in the Multi-purpose Tray," on p. 4-36
See "Installing the Paper Feeder," on p. 9-2
See "Loading Paper in the Paper Cassette," on p. 4-19
2-26
Loading Paper
Page 70

Connecting the Cables
Connecting the Power Cord
This section describes the procedure for connecting the power cord. When
connecting the power cord, see "Important Safety Instructions," on p. xvii.
IMPORTANT
• One AC power outlet should be used exclusively for the printer.
• Do not plug the power plug into the auxiliary outlet on a computer.
• Do not connect this printer to an uninterruptible power source. This may cause printer
malfunction or breakdown at the occurrence of a power failure.
1
Make sure that the power switch of the printer is OFF.
The printer is OFF when " " of the power switch is pressed.
2
Installing the Printer
Connecting the Cables
2-27
Page 71

2
Installing the Printer
2
Plug the supplied power cord into the power socket.
3
Plug the power plug into the AC power outlet.
2-28
NOTE
The form of the supplied power cord may differ from the one in the above
illustration.
Connecting the Cables
Page 72

Connecting to a Computer
This section describes how to connect the printer to a computer and network.
This printer is equipped with a LAN connector, USB connector, and parallel
connector (supports only unidirectional communication).
Using a LAN Cable
By connecting the printer to a network such as Ethernet to be shared on the
network, you can use the printer from a computer on the network. You can use
UNIX, Windows, Mac OS, and other operating systems.
This printer includes a print server that supports 10BASE-T/100BASE-TX and is
compatible with the TCP/IP, AppleTalk (EtherTalk), and SMB protocols.
Connect the LAN connector on this printer and a hub port with a Category 5 twisted
pair cable. Have cables or a hub ready as needed. For compatible cables and hubs,
contact your local authorized Canon dealer.
Computer with
10BASE-T Connector
Computer with
100BASE-TX Connector
2
Installing the Printer
LAN Connector
Ethernet Cable
Hub
CAUTION
Before connecting the network cable to the printer, be sure to turn the printer
OFF, and then unplug the power plug from the AC power outlet. Failure to
observe these steps may result in an electrical shock.
IMPORTANT
If more than one devices are connected to an AppleTalk network, turn on each device at
an interval of ten seconds or longer.
Connecting the Cables
2-29
Page 73

NOTE
• This printer recognizes the type of Ethernet (100BASE-TX or 10BASE-T) automatically.
• If both 100BASE-TX devices and 10BASE-T devices are on the same network, a device
such as a switching hub that supports both 100BASE-TX and 10BASE-T is required. For
more details, contact your local authorized Canon dealer.
• If you connected this printer to a network, check the MAC address of the print server with
Configuration Page Print, and then configure the network operating system (UNIX, etc.)
and print server. For more details, see "Network Guide".
2
Installing the Printer
1
Attach the ferrite core to the LAN cable as shown in the figure.
Attach the ferrite core at 5 cm or less from the end of the connector (A)
connected to the printer.
(A)
5 cm or less
NOTE
A ferrite core is supplied with the printer.
2-30
Connecting the Cables
Page 74

2
Connect the LAN cable to the LAN connector of the printer.
Connect a LAN cable that is compatible with the LAN connector of the network
board according to the network.
2
3
Connect the other end of the LAN cable to the hub.
● Installing the Software
After connecting the LAN cable, install the software for this printer. For more
details, see "Driver Guide".
IMPORTANT
The supplied CD-ROM does not include the printer driver for Macintosh. Download
the printer driver for Macintosh that supports this printer from the Canon website. If
you cannot find the printer driver for Macintosh that supports this printer on the
Canon website, contact your local authorized Canon dealer.
Installing the Printer
Connecting the Cables
2-31
Page 75

Using a USB Cable
Connect the printer to a computer equipped with a USB port using a USB cable.
WARNING
When plugging or unplugging the USB cable when the power plug is plugged in
an AC power outlet, do not touch the metal part of the connector, as this may
result in electrical shock.
IMPORTANT
2
Installing the Printer
• Do not plug or unplug the USB cable while the computer and printer are ON, as this may
result in damage to the printer.
• This printer uses bi-directional communication. Operation of the printer when connected
via unidirectional communication equipment has not been tested, and as a result, Canon
cannot guarantee printer operation when the printer is connected using unidirectional
print servers, USB hubs or switching devices.
NOTE
• The appropriate USB interface varies depending on the operating system of the
connected computer as follows. For more details, contact your local authorized Canon
dealer.
- Windows 98/Me: USB Full-Speed (USB1.1 equivalent)
- Windows 2000/XP/Server 2003/Vista: USB 2.0 Hi-Speed/USB Full-Speed (USB1.1
equivalent)
- Mac OS X 10.3.2 or earlier: USB Full-Speed (USB 1.1 equivalent)
- Mac OS X 10.3.3 or later: USB 2.0 Hi-Speed/USB Full-Speed (USB1.1 equivalent)
• When you connect this printer to a computer with a USB cable, use a computer with
manufacturer's guarantee of USB proper operation.
• This printer does not come with a USB cable. Have an appropriate one available for the
computer you are using. Use a USB cable with the following symbol.
2-32
1
Make sure that the printer and computer are OFF.
Connecting the Cables
Page 76

2
Connect the B-type (square) end of the USB cable to the USB
connector on the printer.
3
Connect the A-type (flat) end of the USB cable to the USB port
on the computer.
2
Installing the Printer
NOTE
If you are not sure about the USB cable that is supported by the computer you are
using, contact the store where you purchased the computer.
● Installing the Software
After connecting the USB cable, install the software for this printer. For more
details, see "Driver Guide".
IMPORTANT
The supplied CD-ROM does not include the printer driver for Macintosh. Download
the printer driver for Macintosh that supports this printer from the Canon website. If
you cannot find the printer driver for Macintosh that supports this printer on the
Canon website, contact your local authorized Canon dealer.
Connecting the Cables
2-33
Page 77

2
a
b
b
Installing the Printer
Using a Printer Cable
If the printer port of the computer you are using is a parallel interface (IEEE1284
compatible), use a printer cable that matches the connector of the computer.
CAUTION
Before connecting the network cable to the printer, be sure to turn the printer
OFF, and then unplug the power plug from the AC power outlet. Failure to
observe these steps may result in an electrical shock.
1
Connect the centronics 36 pin connector of the printer cable
to the parallel connector on the printer
fastening pins
b.
a, and then secure the
2-34
2
Connect the other end of the printer cable to the printer port
on the computer.
● Installing the Software
After connecting the printer cable, install the software for this printer. For more
details, see "Driver Guide".
Connecting the Cables
Page 78

Turning the Printer ON and Checking the Printer Operation
This section describes the procedures for turning the printer ON and checking the
printer operation.
Turning the Printer ON
IMPORTANT
• Do not turn the printer ON immediately after turning it OFF. If you want to turn the printer
ON again after turning it OFF, wait at least 10 seconds after turning the printer OFF
before turning it ON again.
• If the printer does not operate properly or an error message appears, see "When the
Printer Does Not Operate Properly," on p. 2-40.
• Be sure to set the paper cassette in the printer before you turn the power ON for the first
time after you install the printer.
NOTE
When you turn the power ON for the first time after you install a hard disk or when a
problem has occurred to the hard disk, the printer is ready to print after approximately 60
seconds after it is turned ON because the hard disk is formatted after the printer is turned
ON.
1
Press " " of the power switch to turn the printer ON.
2
Installing the Printer
Turning the Printer ON and Checking the Printer Operation
2-35
Page 79

The indicators and display on the control panel come on, and the printer initiates
a self-diagnostic test on the printer unit and optional accessories.
If no abnormality is found during the self-diagnostic test, the (Online)
indicator, (Ready) indicator and Paper Source indicator for the currently
selected paper source come on, <00 READY> appears in the display, and the
printer is ready to print.
2
Installing the Printer
(Online) Indicator
Paper Source Indicator
The following information is displayed in the display.
Printable and not
processing print data
(Ready) Indicator
00 READY
Size of paper in the
A4
currently selected
paper source
Registering a Paper Size
This printer's paper cassette cannot automatically detect the paper size. Therefore,
in CASSETTE(n) SIZE (n = 1, 2) in the FEEDER MENU options in the SETUP
menu, you need to register the size of the paper loaded in the paper cassette.
When paper is loaded in the multi-purpose tray, you need to register the size of the
loaded paper in TRAY PAPER SIZE in the FEEDER MENU options in the SETUP
menu.
For details on the procedures for registering a paper size, see the following
directions.
•When registering the size of the paper in the paper cassette
See "Specifying the Size of the Paper in the Paper Cassette," on p. 4-31
•When registering the size of the paper in the multi-purpose tray
See "Specifying the Size of the Paper in the Multi-purpose Tray," on p. 4-48
When printing from DOS, UNIX, or other operating system on which the printer
driver cannot be used, also set STD PAPER SIZE (See p. 6-24) in the FEEDER
MENU options in the SETUP menu to the size of the loaded paper.
2-36
Turning the Printer ON and Checking the Printer Operation
Page 80

Specifying a Paper Type
Specify the paper type using the control panel according to the type of the loaded
paper. The printer applies the appropriate print mode to the paper type. When you
loaded paper in the paper cassette, specify the type of the loaded paper in
CASSETTE(n) TYPE (n = 1, 2) in the FEEDER MENU options in the SETUP menu.
When you loaded paper in the multi-purpose tray, specify the type of the loaded
paper in TRAY PAPER TYPE in the FEEDER MENU options in the SETUP menu.
For details on the procedures for specifying a paper type, see the following
directions.
•When specifying the type of the paper in the paper cassette
See "Specifying the Type of the Paper in the Paper Cassette," on p. 4-33
•When specifying the type of the paper in the multi-purpose tray
See "Specifying the Type of the Paper in the Multi-purpose Tray," on p. 4-50
When printing from DOS, UNIX, or other operating system on which the printer
driver cannot be used, also set STD PAPER TYPE (See p. 6-27) in the FEEDER
MENU options in the SETUP menu to the type of the loaded paper.
Checking the Operations with Configuration Page Print
Before using the printer for the first time, be sure to perform Configuration Page
Print to check the operations using the following procedure. Configuration Page
Print prints printer information such as a list of the menu settings and the number of
the total print pages.
NOTE
• Configuration Page Print is designed to be printed on A4 size paper. Load a sheet of A4
size paper in the paper cassette or multi-purpose tray.
• The settings specified using the menu of the printer's control panel are reflected to
Configuration Page Print. For example, when the automatic 2-sided printing function is
specified, Configuration Page Print will be printed with two pages on both sides of paper.
However, always a sheet of paper is printed regardless of the number of copies.
2
Installing the Printer
Printing Configuration Page Print
Print Configuration Page Print using the following procedure.
1
Press " " of the power switch to turn the printer ON.
2
Make sure that the printer is online.
If the printer is not online, press the (Online) key.
Turning the Printer ON and Checking the Printer Operation
2-37
Page 81

3
Press the (Utility) key.
UTILITY MENU
2
Installing the Printer
CONFIG.PAGE
CONFIG.PAGE is displayed in the display.
4
Press [OK].
CONFIG.PAGE
EXECUTING
CONFIG.PAGE
Configuration Page Print is printed.
→
→
(Approx. 1 sec.)
→
Contents of Configuration Page Print
Configuration Page Print prints information as shown in the following figure.
Configuration Page Print allows you to confirm information such as a list of the
setting values specified in the printer function menu, the versions of the software
and hardware equipped with the printer, and number of the total print pages. You
can check the number of total print pages using "Page Count" on the lower right of
Configuration Page Print.
2-38
Turning the Printer ON and Checking the Printer Operation
Page 82

IMPORTANT
This is a sample of Configuration Page Print. The contents may partially differ from the
Configuration Page Print printed by your printer.
2
Installing the Printer
Turning the Printer ON and Checking the Printer Operation
2-39
Page 83

When the Printer Does Not Operate Properly
If the printer does not operate even after turning it ON or print Configuration Page
Print properly, the following causes are conceivable.
Symptom Cause Remedy
2
Installing the Printer
The printer cannot be turned
ON.
The indicators on the control
panel do not come on.
The printer does not operate.
The power plug is unplugged
from the AC power outlet.
There is a break in the power
cord.
The printer is not ON. Turn the printer ON.
The printer is in Power Save
Mode.
The printer is offline.
The interface cable is
disconnected.
Plug the power plug into the
AC power outlet.
If the printer is turned ON
after replacing the power
cord with the one that is of
the same type and is used
for other device, there is a
break in the power cord. In
this case, purchase a new
power cord and replace it
with the broken one.
The printer will be ready to
print after you send print data
or press any key on the
control panel.
Press the (Online) key to
turn on the (Online)
indicator.
Connect the interface cable
firmly to the interface
connectors on the computer
and printer unit.
2-40
The amount of the paper
loaded in the paper cassette
or multi-purpose tray
exceeds the load limitation.
Paper is not loaded properly
A paper jam occurs each
time you print.
Turning the Printer ON and Checking the Printer Operation
in the paper cassette or
multi-purpose tray.
Unusable paper is loaded in
the paper cassette or
multi-purpose tray.
There is still jammed paper
inside the printer.
Reduce the amount of paper
to within the load limitation
and print again.
Load the paper properly and
print again.
Replace the paper with one
that can be used and print
again.
Remove any jammed paper
and print again.
Page 84

Symptom Cause Remedy
Nothing is printed on the
paper.
Multiple sheets of paper
were fed at a time.
Align the paper stack in the
paper cassette or
multi-purpose tray properly
and load it again. If you are
using transparencies, coated
paper, or labels, fan them
thoroughly and load them
again.
Ta ke the toner cartridge out
of the printer, pull out the
sealing tape, and reinstall the
toner cartridge.
See "Message List" (p. 8-33)
and solve the problem.
The (Message) indicator
is on and a message is
displayed in the display.
The toner cartridge was
installed with the sealing
tape still attached.
Some problem has occurred.
Changing the Language Used in the Display
The default value of the language used in the display is [ENGLISH].
You can change the display language to [FRENCH], [GERMAN], [ITALIAN], or
[SPANISH] using the following procedure.
1
Press the (Settings) key.
SETUP
CONTROL MENU
2
Select CONTROL MENU using [ ] and [ ], then press [OK].
→
2
Installing the Printer
CONTROL MENU
POWER SAVE MODE
→
→
Turning the Printer ON and Checking the Printer Operation
2-41
Page 85

3
Select PANEL LANGUAGE using [ ] and [ ], then press
[OK].
2
Installing the Printer
PANEL LANGUAGE
=ENGLISH
4
Select the display language using [ ] and [ ], then press
→
→
[OK].
FRENCH
=FRENCH
The display language is changed.
PANNEAU LANGUES
→
→
→
Turning the Printer OFF
Tu rn the printer OFF using the following procedure. The procedure for turning the
printer OFF is different between when a hard disk is used and when it is not used.
IMPORTANT
• When using the hard disk, be sure to turn the printer OFF as the procedure for the
protection of the hard disk. (See p. 2-43)
• If the printer is connected to a network, make sure that other computers are not sending
print data to the printer before turning the printer OFF.
• If you turn the printer OFF when the (Job) indicator is on, all the print data remaining
in the printer memory will be erased. If there is any necessary print data remaining in the
printer, wait until it is output, or press the (Reset) key in the offline state and then
select FORM FEED to output the data before turning the printer OFF.
• Do not turn the power OFF when the printer is in any of the following status:
- During printing
- While the printer is running a self-diagnostic test immediately after turning the power
ON
- While a message informing you that the NVRAM is being initialized or being written is
displayed
- While <02 WARMING UP> or <02 CALIBRATING> is displayed
• When you are using a hard disk, make sure that the (HDD) indicator is not on. If you
turn the printer OFF while the (HDD) indicator is on (while data is being read from the
hard disk or being written to the hard disk), the hard disk may be damaged and disabled.
2-42
Turning the Printer ON and Checking the Printer Operation
Page 86

When Not Using a Hard Disk
When you are not using a hard disk, turn the printer OFF using the following
procedure.
1
Make sure that the (Job) indicator is off.
Off
2
Press " " of the power switch on the printer.
2
Installing the Printer
When Using a Hard Disk (Only When a Hard Disk Is Installed)
When using the optional hard disk, turn the printer OFF using the following
procedure.
IMPORTANT
• If you perform a shutdown when any job of which you stopped the operation or of
secured print in the hard disk, the message <JOBS REMAIN> is displayed. If you
perform a shutdown, all the jobs are deleted. However, the jobs stored in the boxes are
saved in the hard disk as it is. When you want to continue to print, press the (Online)
key to place the printer online.
• Once you perform a shutdown, you cannot cancel the operation in midstream. When you
want to turn the printer ON again, turn the printer OFF once following the instruction of
the message, and then turn the printer ON.
Turning the Printer ON and Checking the Printer Operation
2-43
Page 87

1
Make sure that the (Job) indicator and (HDD) indicator
are off.
Off
2
2
Press the (Reset) key.
Installing the Printer
RESET
SOFT RESET
3
Select SHUT DOWN using [ ] and [ ], then press [OK].
SHUT DOWN
4
Confirm the message, then press [OK].
OK?
EXECUTING
TURN OFF POWER
When the printer is ready to be turned OFF after the process for it is performed,
the message <TURN OFF POWER> appears.
→
→
→
2-44
Turning the Printer ON and Checking the Printer Operation
Page 88

5
When the message <TURN OFF POWER> appears, press " "
of the power switch on the printer.
2
Installing the Printer
Turning the Printer ON and Checking the Printer Operation
2-45
Page 89

2
Installing the Printer
2-46
Turning the Printer ON and Checking the Printer Operation
Page 90

Using the Printer
This chapter describes the basic functions of this printer.
Power Saving (Power Save Mode) . . . . . . . . . . . . . . . . . . . . . . . . . . . . . . . . . . . . . . . . . .3-2
Online and Offline . . . . . . . . . . . . . . . . . . . . . . . . . . . . . . . . . . . . . . . . . . . . . . . . . . . . . . .3-5
Placing the Printer Online. . . . . . . . . . . . . . . . . . . . . . . . . . . . . . . . . . . . . . . . . . . . . . . . . . . . . . .3-5
Placing the Printer Offline. . . . . . . . . . . . . . . . . . . . . . . . . . . . . . . . . . . . . . . . . . . . . . . . . . . . . . .3-6
Printing/Saving Jobs (Only When the Hard Disk Is Installed). . . . . . . . . . . . . . . . . . . . . . 3-7
Job Process Method Types . . . . . . . . . . . . . . . . . . . . . . . . . . . . . . . . . . . . . . . . . . . . . . . . . . . . .3-7
Printing with a Password Specified (Secured Print/Encrypted Secured Print). . . . . . . . . . . . . . .3-9
Printing a Job Saved in a Box (Stored Job Print) . . . . . . . . . . . . . . . . . . . . . . . . . . . . . . . . . . . .3-11
Canceling a Job . . . . . . . . . . . . . . . . . . . . . . . . . . . . . . . . . . . . . . . . . . . . . . . . . . . . . . .3-14
Outputting Data (Forced Output) . . . . . . . . . . . . . . . . . . . . . . . . . . . . . . . . . . . . . . . . . . . . . . . .3-14
Canceling a Job (Cancel Job) . . . . . . . . . . . . . . . . . . . . . . . . . . . . . . . . . . . . . . . . . . . . . . . . . .3-15
Canceling the Process Currently Being Performed (Soft Reset) . . . . . . . . . . . . . . . . . . . . . . . .3-16
Canceling All the Jobs (Hard Reset) . . . . . . . . . . . . . . . . . . . . . . . . . . . . . . . . . . . . . . . . . . . . .3-17
3
CHAPTER
3-1
Page 91

Power Saving (Power Save Mode)
You can reduce power consumption efficiently by using POWER SAVE MODE
when the printer is idle or not in use.
There are the following two kinds of Power Save Mode.
IMPORTANT
3
Using the Printer
Even if the power switch is turned OFF, power is consumed only slightly while the power
plug is inserted into the AC power outlet. To cut the power consumption completely,
unplug the power plug from the AC power outlet.
NOTE
•
The (Job) indicator is on while a job is being stored into a box even if the printer is in
Power Save Mode (The printer can store jobs into the boxes only when a hard disk is
installed in the printer).
•
You can release Power Save Mode by setting TIMER SETTINGS to WAKE UP TIME
(See p. 6-18).
•
To configure the printer so that it does not enter Power Save Mode, set POWER SAVE
MODE (See p. 6-13) to OFF.
•
To configure the printer so that it does not enter Power Save Mode when an error is
occurring in the printer (when the (Message) indicator is on, or the number in the
message blinks), set PWR SAVE IN ERR (See p. 6-14) to OFF.
3-2
Power Saving (Power Save Mode)
Page 92

■ Power Save Mode 1 (Panel Off Mode) ... Power-saving effect: Small
The printer enters Power Save Mode 1 when it is in either of all the conditions in Condition
1 or Condition 2.
Condition 1 Condition 2
POWER SAVE MODE is set to
ON or PANEL OFF.
The panel operation has not
been performed and no data has
been sent from the computer for
the time specified in POWER
SAVE TIME (See p. 6-14).
(You can select 5 minutes, 15
minutes, 30 minutes, 60
minutes, or 180 minutes for
POWER SAVE TIME, and the
default value is 30 minutes.)
NOTE
•
When the printer enters Power Save Mode 1, only the (Ready) indicator comes on.
However, when the printer is offline, only the (Message) indicator comes on.
•
Power Save Mode 1 can be released when the printer is in any of the following status:
- When any key on the control panel is pressed
- When an error is occurring
- When the printer is online and receives data from the computer (except for when the
printer is storing a job into a box)
- When WAKE UP TIMER (See p. 6-17) in TIMER SETTINGS is set to ON, and the time
specified in WAKE UP TIME (See p. 6-18) has elapsed
- When the settings for [Utility Menu] are specified in the Remote UI
- When the settings for [Perform Calibration] are specified in the Remote UI
- When the settings for [Device Control] are specified in the Remote UI
- When the [User Maintenance Menu] page in the [Device Settings] menu in the Remote
UI is displayed or specified its settings
POWER SAVE MODE is set to ON or PANEL OFF.
When POW. SAVE TIMER (See p. 6-18) in TIMER
SETTINGS is set to ON, and the time specified
POWER SAVE TIME (See p. 6-19) has elapsed
Panel operation has not been performed.
No data has been sent from the computer.
The printer is not starting up.
During a shutdown (Only when the hard disk is
installed)
While the hard disk is being initialized (Only when the
hard disk is installed)
3
Using the Printer
Power Saving (Power Save Mode)
3-3
Page 93

■ Power Save Mode 2 (Printer Power Save Mode) ... Power-saving effect:
Large
The printer enters Power Save Mode 2 when it is in all the following conditions.
Condition
The printer has already entered Power Save Mode 1.
POWER SAVE MODE is set to ON.
The 15 minutes for which the printer remains in the printer status has passed since the
printer was turned ON or Power Save Mode 2 was released.
There is no job on the print queue.
3
A service call is not occurring.
A paper jam is not occurring.
No cover is open.
The toner cartridge is installed.
Using the Printer
NOTE
•
When the printer enters Power Save Mode 2, only the (Ready) indicator comes on.
However, when the printer is offline, only the (Message) indicator comes on.
•
Power Save Mode 2 can be released when the printer is in any of the following status:
- When any key on the control panel is pressed
- When an error occurs (However, Power Save Mode 2 may not be released depending
on the error type.)
- When the printer is online and receives data from the computer (except for when the
printer is storing a job into a box)
- When WAKE UP TIMER (See p. 6-17) in TIMER SETTINGS is set to ON, and the time
specified in WAKE UP TIME (See p. 6-18) has elapsed
- When the settings for [Utility Menu] are specified in the Remote UI
- When the settings for [Perform Calibration] are specified in the Remote UI
- When the settings for [Device Control] are specified in the Remote UI
- When the [User Maintenance Menu] page in the [Device Settings] menu in the Remote
UI is displayed or specified its settings
3-4
Power Saving (Power Save Mode)
Page 94

Online and Offline
When the printer can receive data from the computer and print the data, the printer
is in the state of "Online", and when the printer is disconnected with the computer
and cannot receive data, the printer is in the state of "Offline".
To perform the settings for each menu using the control panel, switch the printer
status as follows:
: The status that you can enter the menu
x: The status that you cannot enter the menu
3
SETUP Menu *
SELECT FEEDER Menu
RESET Menu
JOB Menu x
UTILITY Menu x
* The [User Maintenance Menu] options cannot be specified when the printer is online.
Placing the Printer Online
When printing from the computer, the printer has to be online. Before printing, make
sure that the printer is online. If not, place the printer online using the following
procedure. The printer comes online automatically after you turn it ON.
1
Press the (Online) key.
The (Online) indicator comes on, and the printer is ready to print.
IMPORTANT
When an error is occurring in the printer (when the (Message) indicator is on, or
the number in the message blinks), the printer does not come online. Eliminate the
cause of the error before you place the printer online.
When the printer is
online
When the printer is
offline
Using the Printer
Online and Offline
3-5
Page 95

3
Using the Printer
NOTE
If the printer has entered Power Save Mode, the (Online) indicator is off even
when the printer is online, and only the (Ready) indicator is on. If the printer
receives data while it is in Power Save Mode, the mode is released, the
(Online) indicator comes on, and the printer is ready to print.
Placing the Printer Offline
To configure the printer so that it does not receive data from the computer or
specify the settings for all the options in the SETUP menu, place the printer offline
using the following procedure.
1
Press the (Online) key.
The (Online) indicator goes off, allowing you to specify the settings on the
control panel.
IMPORTANT
This printer comes online automatically if left in the offline state for five minutes or
longer. However, when an error is occurring in the printer (when the (Message)
indicator is on, or the number in the message blinks), or while you are performing
any setting, such as selecting the menu functions or a paper source, or when
specifying the paper size, the printer does not come online.
3-6
Online and Offline
Page 96

Printing/Saving Jobs
(Only When the Hard Disk Is Installed)
If you install an optional hard disk in this printer, you can use various print job
process functions with the printer driver for this printer.
NOTE
You cannot use this function on the DOS application, UNIX or other computer on which
the printer driver cannot be used. Print jobs are processed in the [Print] mode.
Job Process Method Types
You can use the following functions with the printer driver for this printer.
NOTE
•
The message <53 SEC.PRINT ERR> or <53 STORE ERROR> appears when the
amount of data or number of jobs exceeds the limit that you can save on the hard disk. If
either of these messages appear, skip the error by pressing the (Online) key.
However, the jobs in which you skipped the error are deleted. Therefore, delete any
unnecessary job from among the jobs saved on the hard disk before performing a
secured print or saving a job.
•
If you want to use the encrypted secured print function in which the security for data
communication is reinforced, you need to install software required for printing encrypted
secured print jobs. For details on software required for printing encrypted secured print
jobs, see "Driver Guide". For the procedure for installing the software, see Readme.txt in
the CD-ROM "Encrypted Secured Print Driver Add-in For Client PC" supplied with the
optional hard disk.
3
Using the Printer
■ [Print] Mode
Performs regular printing.
NOTE
You can use this mode even if a hard disk is not installed in the printer.
■ [Secured Print] Mode
Allows you to specify a user name and password for print jobs. Print jobs are saved on the
hard disk in the printer, and you can print by entering passwords from the printer's control
panel or the Remote UI. This function is convenient when you print a confidential
document etc. that you do not want others to read.
Printing/Saving Jobs (Only When the Hard Disk Is Installed)
3-7
Page 97

NOTE
•
The jobs saved on the hard disk using the [Secured Print] mode are deleted in the
following circumstances:
- When the printer is turned OFF
- When a hard reset or soft reset is performed
- After a secured print job is printed
- When no printing operation has been performed by the printer's control panel or
Remote UI for a fixed period
•
The time interval from when no printing operation is not performed by the Remote UI or
printer's control panel for a fixed period until the printer deletes encrypted secured print
jobs is set to "1 hour" in the default settings. You can change the setting for the time
interval. For more details, see "SECURING TIME," on p. 6-20.
3
Using the Printer
■ [Store] Mode
This mode is used for saving print jobs in the hard disk (boxes) in the printer. To print any
of the saved jobs, specify the job in a box using the printer's control panel or Remote UI.
The Remote UI is convenient when you print the forms that you use frequently, because it
allows you to specify the number of copies or pages to be printed. Also, because you can
specify the box when saving data, you can classify the jobs by use.
NOTE
The print jobs printed in the [Store] mode are saved on the hard disk, and they are not
deleted even after turning the printer OFF. When you want to delete these jobs, use the
Remote UI.
■ [Interrupt] Mode
This mode is used for pausing the job currently being processed and start printing the
specified job on ahead. The paused print jobs are saved on the hard disk in the printer
and printed again after the print job that interrupted is completed.
NOTE
While the print job that interrupted is being processed, no more job can interrupt the job.
■ [Edit and Preview] Mode
This mode is used for editing multiple print jobs in [Canon PageComposer]. The edit
function allows you to change the page order, display the preview of printout results, or
print with the number of copies specified. This function is convenient when you print
documents to make a simple booklet or edit and print document data from multiple
applications or files into a booklet.
3-8
NOTE
You can use this mode even if a hard disk is not installed in the printer.
Printing/Saving Jobs (Only When the Hard Disk Is Installed)
Page 98

Printing with a Password Specified (Secured Print/
Encrypted Secured Print)
In a secured print or encrypted secured print, a password-protected job is saved in
the printer, and the job is printed by the printer's control panel or Remote UI. For
details on using the Remote UI, see "Remote UI Guide".
This section describes the procedure for printing using the printer's control panel.
1
Print a secured print job or encrypted secured print job using
the printer driver on the computer.
NOTE
•
Print a secured print job by selecting [Secured Print] in the printer driver, and then
entering the user name and password.
•
Specify the user name for a secured print with 15 or less alphanumeric characters
and the password with 1 to 7 characters.
•
For the character restriction for the password for an encrypted secured print and
the procedure for printing encrypted secured print jobs, see Online Help of the
encrypted secured print driver.
You can display the Online Help from the Encrypted Secured Print Driver Add-in
For Client PC after installing the printer driver.
3
Using the Printer
2
Move to the printer when printing.
NOTE
•
Secured print jobs/encrypted secured print jobs are deleted in the following
circumstances:
- When the printer is turned OFF
- When a hard reset or soft reset is performed
- After a secured print job/encrypted secured print job is printed
- When no printing operation has been performed by the printer's control panel or
Remote UI for a fixed period
•
The time interval from when no printing operation is not performed by the Remote
UI or printer's control panel for a fixed period until the printer deletes encrypted
secured print jobs is set to "1 hour" in the default settings. You can change the
setting for the time interval. For more details, see "SECURING TIME," on p. 6-20.
Make sure that the printer is online.
3
If the printer is not online, press the (Online) key.
Printing/Saving Jobs (Only When the Hard Disk Is Installed)
3-9
Page 99

4
Press the (Job) key.
JOB
3
Using the Printer
SECURED PRINT
The JOB menu is displayed.
5
Select SECURED PRINT or ENCRYPTED PRINT using [ ] and
[], then press [OK].
SECURED PRINT
UserName01
6
If the user names appear, select the target user name using
[] and [ ], then press [OK].
UserName01
FileName01.txt
7
If the file names appear, select the name of the target file
using [ ] and [ ], then press [OK].
FileName02.txt
→
→
→
→
→
→
3-10
PASSWORD
8
<PASSWORD> is displayed. Press [OK].
PASSWORD
_
Printing/Saving Jobs (Only When the Hard Disk Is Installed)
Page 100

Select a number using [ ] and [ ], then move a digit using
9
[] and [ ].
Repeat this operation to enter the password.
1
1
NOTE
•
Only numbers can be entered from the control panel.
•
Depending on the version of the encrypted secured print driver, you can specify
alphabetic characters and marks for passwords. Print an encrypted secured print
job from the Remote UI if the password contains any alphabetic characters or
marks (See Remote UI Guide).
10
After entering the specified password, press [OK].
1234
The specified file is printed. If you enter a wrong password, the entered password
disappears. In this case, re-enter the correct password.
3
Using the Printer
Printing a Job Saved in a Box (Stored Job Print)
In a stored job print, a job is saved on the hard disk in the printer by specifying
[Store] from the computer, and the job is printed by the printer's control panel or
Remote UI. For details on using the Remote UI, see "Remote UI Guide".
This section describes the procedure for printing using the printer's control panel.
NOTE
•
The saved jobs remains in the hard disk even after being printed. When you want to
delete the saved jobs, use the Remote UI. (See Remote UI Guide)
•
Using the printer driver, you can change the name of the data to be saved when printing
the data. Enter the name with 24 or less alphanumeric characters.
Select [Store] in the printer driver on the computer, specify
1
the box in which you want to store the job, and then print.
NOTE
Up to the total of 100 jobs in all the boxes can be saved.
Printing/Saving Jobs (Only When the Hard Disk Is Installed)
3-11
 Loading...