

Page 1
Moving the Printer
Follow this procedure before moving the printer to protect its internal parts during
moving or shipping.
• To prevent stains from spillage of waste ink, never hold the printer at an
angle when moving it.
• If tipping the printer at an angle or standing it on end is unavoidable during
moving or shipping, contact a service center or the dealer where you
purchased the printer.
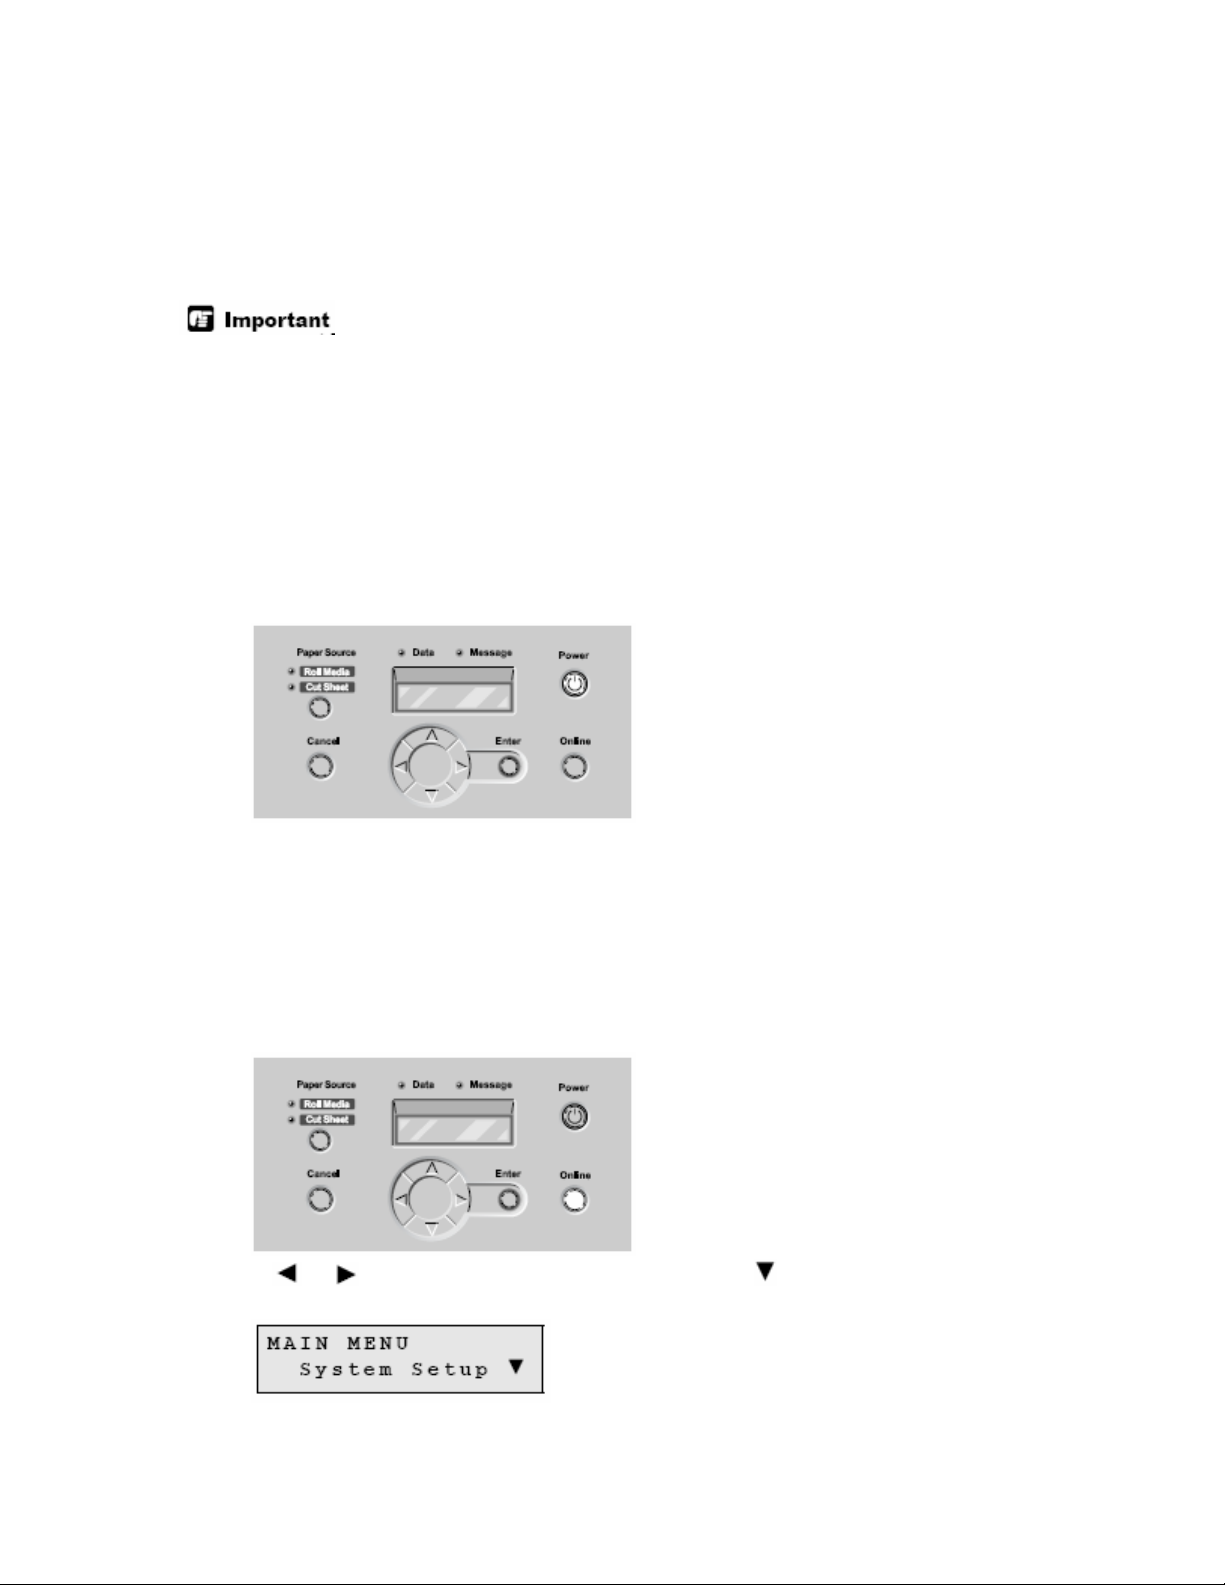
1 If the printer is off, press the Power button to switch the printer on.
After a few seconds “Online” is displayed in the operation panel and the
Online lamp lights.
2 Press the Online button twice to display “MAIN MENU”.
3 Press or to select “System Setup” then press .
Page 2
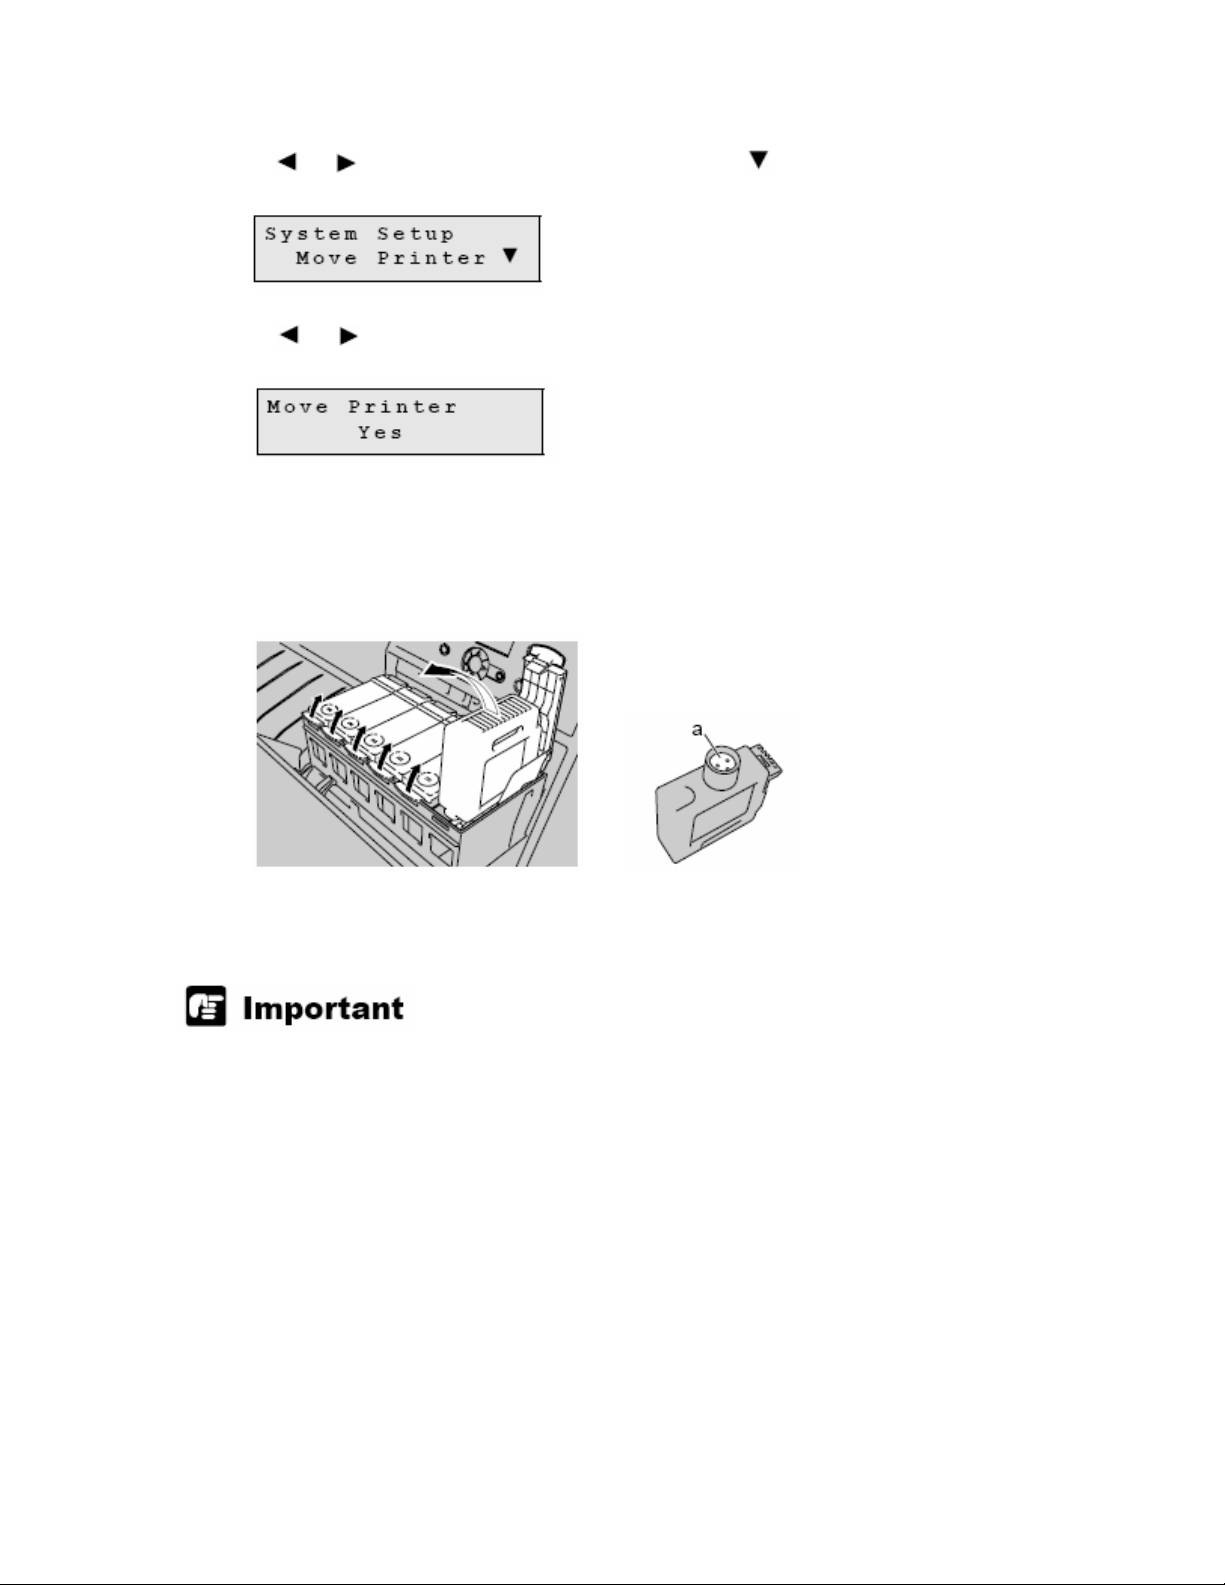
4 Press or to select “Move Printer” then press .
5 Press or to select “Yes” then press Enter.
When “Remove Ink Tank” is displayed, the right cover opens automatically. If
the right cover does not open completely, open it manually.
6 Open the ink tank cover, then remove all the ink tanks.
Place each ink tank in a vinyl or plastic bag and seal it.
• Be sure to wrap the ink port (a) carefully to protect it and to prevent it from
leaking and staining your clothing or the work area.
7 Lock all ink tank covers, then close the right cover.
Page 3

“Ink Draining...” is displayed and ink in the tubes is drawn off. This requires
about 9 minutes. After the tubes are drained, “Turn Power Off!” is displayed.
8 Hold down the Power button for more than 3 seconds to switch the printer off,
disconnect the power cord and ground wire, then disconnect the interface cable.
9 Open the tray and pull out the roll media tray.
10 Remove the roll holder.
11 Remove the roll media from the roll holder, then pack the roll holder and
holder stopper.
Page 4

12 Remove the hex screw, then remove the belt stopper.
13 Close the roll media tray, then close the tray.
14 Raise the upper cover.
Page 5

• To avoid damaging the printer, never touch any part inside the printer
unless instructed to do so.
15 Use the belt stopper removed at Step 12 to pinch the belt, then attach the
hex screw to fasten the belt in place.
16 Tape down the paper release lever.
17 Close the upper cover.
18 Tape each printer cover in the reverse order of tape removal during setup.
(P.1-16 of the Setup Guide)
19 If the output stacker or optional media take-up unit is installed, follow the
setup procedure in reverse order to remove it. (P.1-14 Setup Guide or Media
Take-up Unit Setup Guide)
Page 6

20 Follow the stand setup procedure in reverse order to remove it. (P.1-10 of
the Setup Guide)
21 Follow the stand assembly procedure in reverse order to disassemble it.
(P.1-6 of the Setup Guide)
22 Re-attach the shipping material to the roll holder and the printer unit, then
store them in the original boxes. This completes preparing the printer for moving.
This completes preparing the printer for moving.
• After the printer reaches its destination, follow the procedures in “Chapter
1, Setting Up the Printer” to set up the printer again at the new site.
The printer could be damaged if transported after the power cord is removed or if
it is turned off while “Move Printer” is displayed before it automatically shuts off.
If the printer is disconnected or switched off accidentally, re-install the ink tanks
and repeat the procedure from Step 1. (P.1-27 of the Setup Guide)
•
 Loading...