

Page 1

Canon
1000D
This guide explains how to set digital functions»
shoot images, and playback images. You can take
this guide with you for shooting. For detailed
instructions, refer to the EOS lOOOD Instruction
Manual.
CEL^SJtSAEID
PRINTED INTHEEU ©CANON INC 2008
Page 2
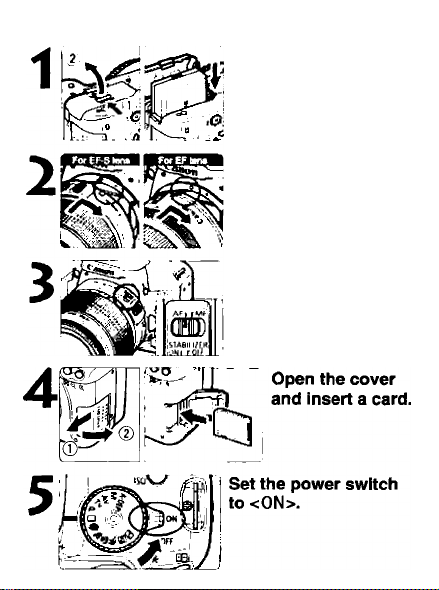
Quick Start Guide
Insert the battery.
Attach the lens.
When attaching an EF-S lens,
align It with the white Index on
the camera. For other lenses,
align it with the red index.
Set the lens focus mode switch to <AF>.
Page 3
Set the Mode Dial to <0> (Full Auto).
All the necessary camera
settings will be set automatically
Focus the subject.
Aim the AF point over the
subject and press the shutter
button halfway to autofocus.
Take the picture.
Press the shutter button
completely to take the
picture.
View the image.
, The captured image will be
' 1 displayed for about 2 sec. on
the LCD monitor.
Q • The ★ on the right of the function indicates that the function is
available only in Creative Zone modes (P.Tv, Av,M, A-DEP).
♦ Battery Life
Temperature
At 23 C / 73 F
No Flash 50% Flash Use
Approx. 600 shot& Approx. 5D0 shots
Page 4
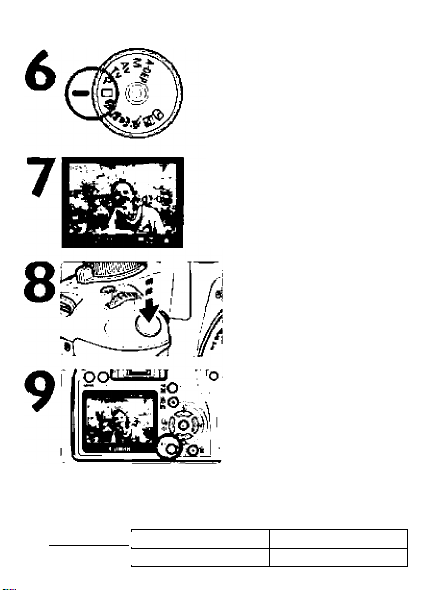
Setting Digital Functions
litonu
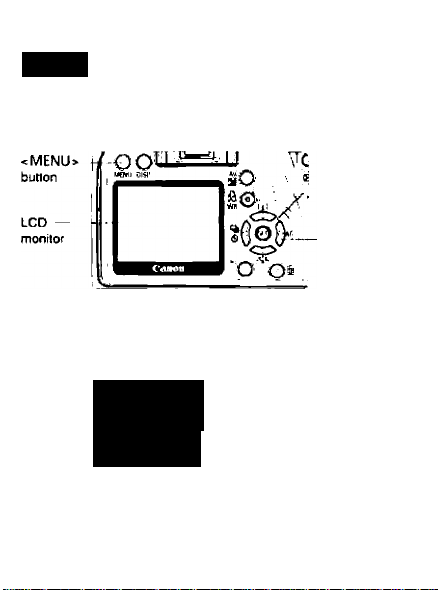
To use a menu, you press the <MENU> button. <%►> cross
keys, and <@> button while looking at the LCD monitor on the
camera back
0- <
0
> button
Cross keys
S' Playback
a' Shooting —
Tab
hr' Set-up
My Menu
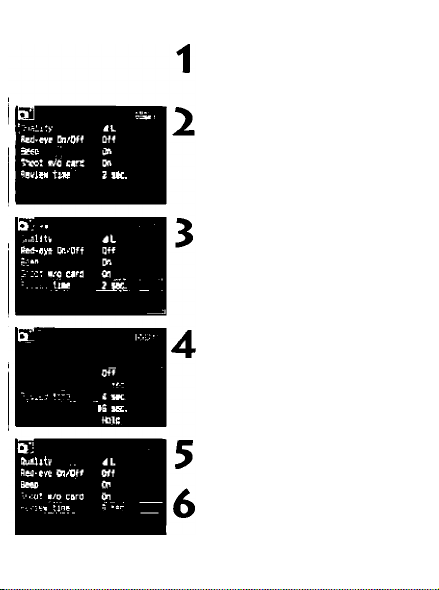
■Guality
Rsd-eye On/Off
Beep
S»»ot n/o card
Revie* tme
Menu items Menu settings
* The tabs are not displayed in Basic Zone modes
such as Full Auto.
Page 5
Display the menu.
• Press the <MENU> button to
display the menu.
Select a tab.
• Press the <-^^> key to select
a menu tab.
• You can also turn the
dial to select a tab.
<£5a>
Select a menu item.
• Press the < > key to select
the menu item, then press
<©>■
Select the setting.
Press the < Ji^>or <
key to select the setting. (Some
settings require you to press
either the <ATa or key
to select IL)
Set the desired setting.
• Press <©> to set it.
Exit the menu.
• Press the < MENU > button to
return to the shooting settings
display
Page 6

E' Playback
'Protect ¿msgeB
TOtftI« File numberir»i Continwus
ir m
Print order
Transfsr order
Hiitogfim BrigtitnessAdto aley
rV^ Set-up 2
'¿y. '-\
LCD Dr igiithfis^
Langu^fiE^
Video lystem
Seri$or dloBT^ins
Liye.viw fLinctwn setUngs
Ftssh control
These screens apply when a Creative Zone mode is set.
■ [ /№/^] menu screens or the Items Indicated by the
^ symbol are not displayed when a Basic Zone mode is set.
-*■1—^■-^~Г'
Ji/ii/'Cli l&r3e'
&igiish
PAL
WiW rtrtitt
Forut
LCO Bff/on Otn
Screen color t
1 rV! Set-up 3
(inoa
snutter btn.
Page 7

Image-recording Quality
Select [Q' Quality]
For the selected recording quality
®, the respective pixel count ®
and number of possible shots ©
will be displayed
Quality
JL
dL 2 0 982
JM 1 2 1630
JS Low
ds
GESQ
CB-t-dL
a
High
quality
Medium
quality
quality
High
quality
# In Basic Zone modes, the (ffl and 1^4-JL recording quality
modes are not displayed.
# The file size, number of possible shots, and maximum burst
during continuous shooting vary depending on the shooting
conditions. The figures displayed are only estimates
# The maximum burst during continuous shooting is displayed on
the bottom right in the viewfinder.
Pixels
Approx 101
megapixels (10M)
Approx 5 3
megapixels (5 3U)
Approx 2 5
megapixels (2 5Mj
Approx 10 1
megapixels (l0Uj
File Size
(Approx MB)
98-I-38
Possible
Shots
38
2.3
1 3
07 2016
98
514
859
1474
199
143
Maximum
Burst
514
982
059
1630
1474
2816
5
4
Page 8

Styte
Description
Standard Vivid colors and sharp images
Portrait Nice skin tones and slightly sharp images
Landscape Vivid blue skies and greenery and very sharp images
Neutral
Faithful
yionochrome
Natural colors and dull tones
Accurate subject colors as obtained under a color
temperature of 5200K
Black-and-white images.
Page 9

Setting Digital Functions I
ISO Speed*
I Turn the <i^> dial or press the
I When "Auto” is selected, the ISC
I :sc nmt- I
White Balance*
WB
vOa
Mho
200
800
1U0
wo
ISO100
’ • li ■
4
Press the <ISO> button.
key to select ihe ISO spen'd
speed is set automatically. Whrj
you press the shutter button
halfway, the ISO speed setting
will be displayed.
Low ISO
1600
High ISO grain).
Press the <lWB> button,
Press the key to select
Ih© while balance, then press
¡EE
For bricjht scenes and sill
subjects (less noise and
200
finer gramf
400
800
For low light and moving
I
Auto
Daylight
Shade
Cloudy, twilight, sunset
Tungsten light
White fluorescent light
Flash
Custom
Page 10

Shooting Operation
Nomenclafure
<ISO> ISO Speed
set button
- Power switch
- Mode Dial
I— Built-in flash/
AF-assist beam
Page 11

Shooting Settings Dispiay
Shutter speed —i
Flash exposurecompensation
Shooting mode
Drive mode
Battery check —
r~ma cm il I
OK NG
Picture Style
Main Dial pointer
ISO speed
Aperture
White balance
correction
White balance
White balance
bracketing
Shots remaining
— AF mode
— Metering mode
(mage-recording quality
Viewfinder Information
AF points
AE lock —
Flash-ready/FE lock
Flash exposure
compensation
Shutter speed -
Aperture
AF point display indicator <•>
— ISO speed
Focus confirmation
light
' Max. bursi
White balance correction
ISO speed
Monochrome shooting
— Exposure level indicator
Page 12

Basic Zone Uodes
All the settings necessary for
shooting are set automatically.
V You just press the shutter button,
and the camera does the rest.
ione
Full Auto
Portrait
Landscape
Close-up
A
Sports
•is.,
Night Portrait
B
CD Flash Off
• Select the shooting mode to suit your
subject
• Aim an AF point on the subject.
• Press the shutter button halfway to
focus.
• Check the display.
• Compose the shot and press the
shutter button completely
Creative Zone Modes
You can set the shutter speed
and/or aperture and change the
exposure as desired. By
changing the camera settings,
you can obtain various effects.
P: Program AE
The camera automatically sets the shutter speed and aperture
In the same way as the <D> mode The shooting procedure is
the same as with Basic Zone modes
• Set the Mode Dial to <P>.
Page 13

Tv: Shutter-priority AE
• Set the Mode Dial to <Tv>
• Turn the <i^> dial to set the desired
shutter speed, then focus the subject
► The aperture will be set automatically
• If the aperture display blinks, turn
the <£S^> dial until it stops blinking
Av: Aperture-priority AE
• Set the Mode Dial to < Av >
• Turn the dial to set the desired
aperture, then focus the subject
► The shutter speed will be set
automatically
• If the shutter speed display blinks, turn
the <£S> dial until it stops blinking
Using the Buiit-in Fiash
In Basic Zone Modes
If necessary, the built-in flash will pop-up automatically in low-light
or backlit conditions (except in the <aS> <iS^><CD> modes)
Creative Zone Modes
Press the < i >
button to pop up
the built-in flash,
then shoot
Wide-angle: 18 mm Telephoto: 55 mm
ISO Speed
Approx 1-3 7m(3 3-121t1) Approx 1-2 3m (3 3-7 511)
100
Approx 1-7 4m (3 3-24 311) Approx 1-4 6m (3 3-15 lit)
400
1600
Approx 1-14 9m (3 3-48 9ft)
(using EF-S 10-55mm f/3 5-5 6 IS lens)
Approx 1-9 3m (3 3-30 5ft)
Page 14

AF: AF Mode*
I • Press the <► AF> button
• Press the <-4^> key to select the
ONE SHOT (One-Shot AF):
Al FOCUS (Al Focus AF):
C№&Wr AIWU5 Al^EHVO
EI3 AF Point*
Al SERVO (Al Servo AF):
AF mode, then press <©>.
For still subjects
Switches the AF mode automaticaiiy
For moving subjects
Press the <HE> button
Press the < v> key to select the
AF point.
While looking at the viewfinder,
you can select the AF point by
turning the <iSi> diai until the
desired AF point flashes in red.
Pressing <©> toggies the AF
point selection between the
center AF point and automatic AF
point selection.
Page 15

(H Metering Mode*
mi
IS
w
r
Kviluttivi cc
Qi Drive Mode*
n Qj d>0 (i)2
Press the < A [S> button.
Press the < key to select the
metering mode, then press <©>
tS Evaluative metering:
Standard metering mode
[c] Partial metering:
Approx. 10% at center
O Center-weighted average
B3
¡ID
metering:
Metering weighted at the center
and averaged for the entire scene
Press the <'^Qic5)> button.
Press the <-^^> key to select the
drive mode, then press <©>.
□ : Single shooting
Qi: Continuous shooting
(5)10:10-sec. self-timer *
(5)2: 2-sec. self-timer
^c: Continuous shots after
self-timer *
■ The <(5)io> and <(5)c> drive modes
can be selected in all shooting
modes
Page 16

Playback Operation ^
DISP. H
Erase
Protect
Shooting Information
Exposure compensation amount
Shuner speed
Flash exposure -
compensation amount
Metering mode -
Shooting mode
Image-recording
Playback number/
Total images recorded
White balance correction
Menu [Protect Images)
Aperture—j
quality
Í5/Z5 12.'06/2008 i6;30;00
White balance -
P OQ 33*1 IQ
CE 0, ÿ, 0
Û SPGB
File siie
- Protect
- Folder number -
I File number
Original decision (image
verification) data appended
Select image
► Magnify
Reduce
Histogram
(Brightness/RGB)
Picture Style and
settings
ISO speed
Color space
Date and time
 Loading...