

Page 1

<< Previous Next >>
Getting Your Multifunction
Back On Your Network
After A Router Or Network Change
PIXMA MX340
Windows OS
1
Page 2

<< Previous Next >>
If any of the following situations exist, you will need to
Uninstall and Re-Install the MP Drivers
• You have replaced your Router or Access Point
• You want to use a different wireless network
• Router settings have been changed.
2
Page 3

<< Previous Next >>
Uninstalling and Re-installing Your Multifunction
to Your Network
PIXMA MX340
Windows OS
Uninstalling the Multifunction Drivers 4
Preparing to Connect My Multifunction to My Network 6
Network Requirements 6
Important Information You Need Before Adding Your Multifunction 7
Downloading & Installing the Drivers 8
Download the Driver 8
Installing the Driver 10
3
Page 4

Uninstalling the Multifunction Drivers
<< Previous Next >>
Note: Login as a user with Administrator privileges to uninstall . Turn off any programs running in the background, such as
antivirus programs and firewalls before beginning.
1. Select 'Program' (for Windows 2000), or 'All
Programs' (for Windows XP / Vista / 7) from the Start
menu.
2. Select the name of the printer model to remove and
select 'MP Drivers Uninstaller.‘
4
Page 5
Uninstalling the Multifunction Drivers
<< Previous Next >>
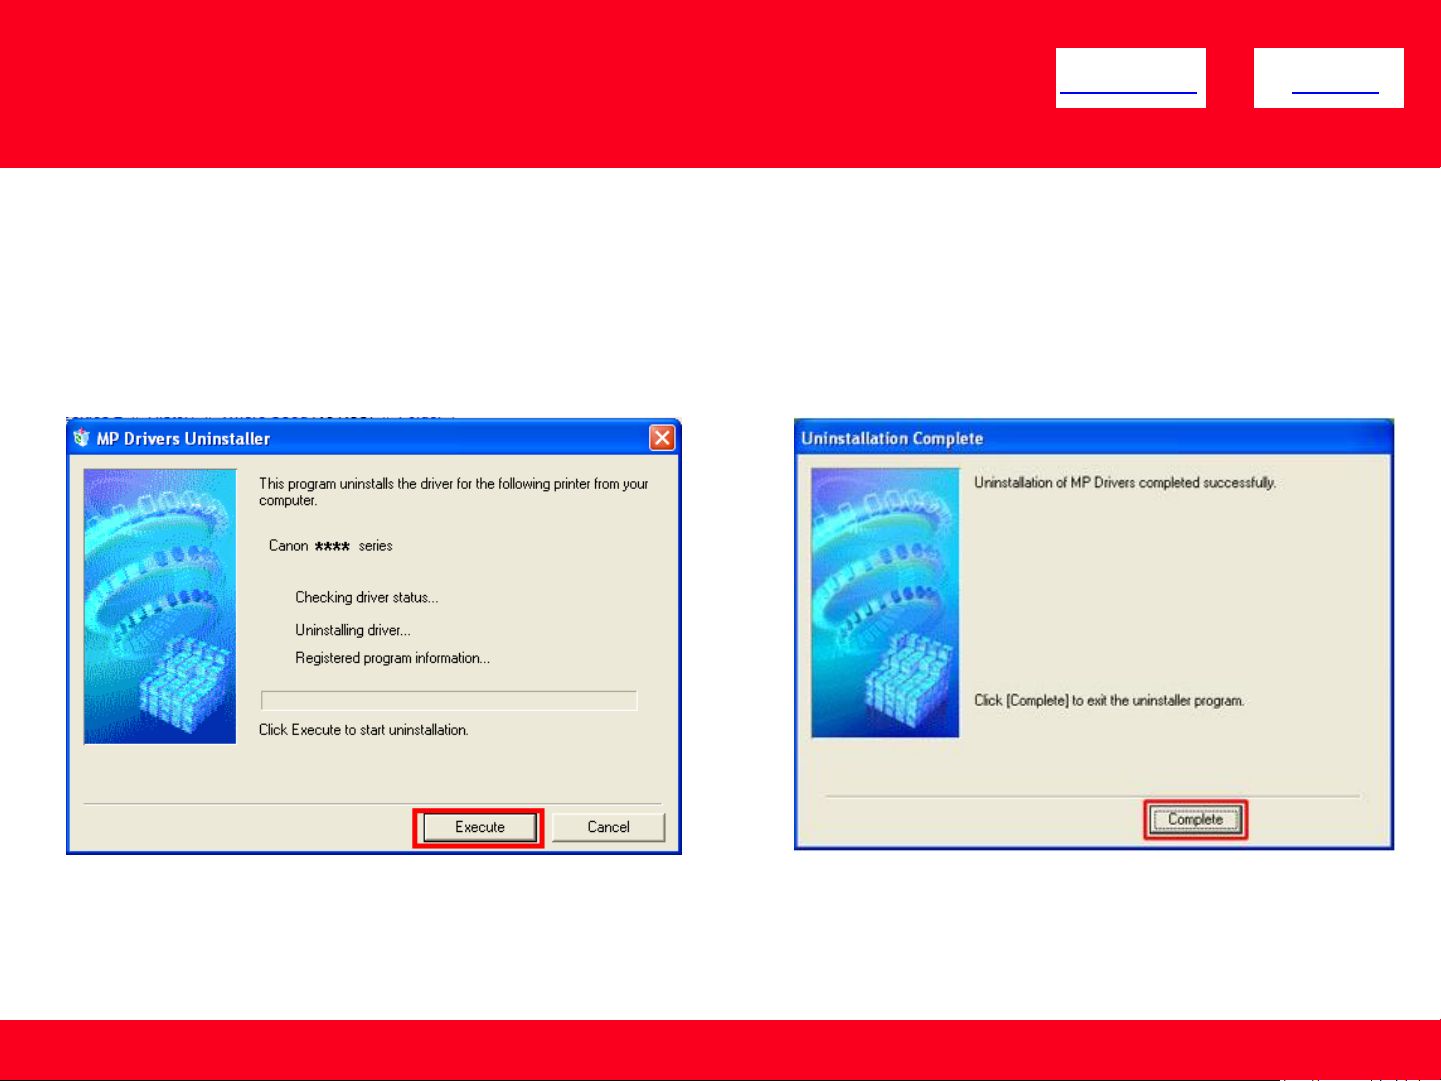
3. When the MP Drivers Uninstaller window is
displayed, click 'Execute.‘
4. When the confirmation window is displayed, click
'Yes.'
5. When the Uninstallation Complete window is
displayed, click 'Complete.'
5
Page 6

Preparing to Connect My Multifunction
<< Previous Next >>
To My Network
Network Requirements
Before connecting the machine to the network, make sure that configuration of the computer and access point or router is
complete, and that the computer is connected to the network.
Notes on Network Connection
• The configuration, router functions, setup procedures and security settings of the network device vary depending on your
system environment. For details, refer to your device's instruction manual or contact its manufacturer.
• The machine cannot be used over a wireless and wired connection at the same time.
Wireless Connection
Connect to your network environment over a wireless connection.
6
Page 7

Preparing to Connect My Multifunction
To My Network
An "Ad-hoc connection," which establishes a direct
connection to the computer over a wireless connection
without using an access point, is not supported.
<< Previous Next >>
Be sure to prepare an access point.
Important Information You Need Before Adding Your Multifunction
The following information is required to connect to your access point or router.
• Access Point Name/Network Name:
Also referred to as SSID. A name to identify the specific access point.
• Network Key:
Also referred to as encryption key, WEP key or WPA/WPA2 passphrase, Pre-Shared key.
A password required to set to prevent unauthorized access to communication.
Check your access point or router for the following information, and then write it down.
NOTE: For details on how to check the following information, refer to the manual of your access point or router, or contact its manufacturer.
7
Page 8

Downloading and Installing the Drivers
<< Previous Next >>
Downloading the Driver
To use the machine by connecting it to a computer, software including the drivers needs to be copied (installed) to the computer's hard disk. The
installation process takes about 20 minutes. (The installation time varies depending on the computer environment or the number of applications
to be installed.)
Step One
Go to the Canon USA Download Library
Click here to go MX340 download library page
Step Two
In the Drivers / Software Selection section, select
your operating system in the Select OS dropdown menu.
8
Page 9

Downloading and Installing the Drivers
<< Previous Next >>
Step Three
In the Drivers section, click the link* (red printing) for the MP Driver
Step Four
On the next screen, read the information and instructions and
click I Agree - Begin Download
Once the file has been downloaded, double-click it to begin the
installation process
IMPORTANT:
• Quit all running applications before installation.
• Log on as the administrator (or a member of the
Administrators group).
• Do not switch users during the installation process.
• Internet connection may be required during the installation.
Connection fees apply.
• It may be necessary to restart your computer during the
installation process. Follow the on-screen instructions. The
installation resumes once your computer has restarted.
If the firewall function of your security software is turned on, a
warning message may appear that Canon software is
attempting to access the network. If such a warning message
appears, set the security software to always allow access.
NOTE: The driver names will vary based on operating
system (OS) selected. Make sure you have selected the
correct OS and select the driver that states “MP Driver.”
9
Page 10

Downloading and Installing the Drivers
<< Previous Next >>
Installing the Driver
NOTE: If a User Account Control screen appears, click Continue or Yes (depending on Windows version) to continue.
NOTE: If the same screen reappears in subsequent steps, click Continue or Yes.
Step One
Click Next on the Welcome screen.
Step Two
Select your place of residence and click Next.
10
Page 11

Downloading and Installing the Drivers
<< Previous Next >>
Step Three
Click Yes for the License Agreement.
Step Four
At the Connection method window, click Use the printer on
network and then click Next.
If the Please Allow All Install Wizard Processes screen appears,
click Next.
Installation starts. Follow any on-screen instructions to install the
software.
11
Page 12

Downloading and Installing the Drivers
<< Previous Next >>
Step Five
Confirm the printer is powered on and then click OK.
Step Six
Click Next on the Set Up New Printer window.
12
Page 13

Downloading and Installing the Drivers
Step Seven
If the Confirm Connection Access Point screen appears, make
sure that the target access point is displayed,then click Yes.
<< Previous Next >>
13
Page 14

Downloading and Installing the Drivers
Step Eight
<< Previous Next >>
If the Detected Access Points List screen appears, select
the target access point name/network name (SSID),
enter the network key and click Connect.
If the Confirm Connection Access Point screen appears, make sure
that the target access point is displayed,then click Yes.
14
Page 15

Downloading and Installing the Drivers
<< Previous
Step Nine
Remove the Wireless LAN setup cable, then click Next.
Step Ten
Click Complete on the Setup Completion screen.
Wireless setup is now complete
15
 Loading...