

Page 1
INSTRUCTION BOOK
Heat Pump Tumble Dryer
GCH 970NA2T
English
2
Suomi
Français
Dutch
Italiano
50
14
62
26
Page 2
INDEX
Introduction
Delivery Information
Unpacking the Product
Safety Reminders
Use
Installation
The Laundry
Environmental Issues
Gias Service
Installation
Electrical Requirements
Adjusting the Feet
Ventilation
Drain Hose Kit: Fitting Instructions
Preparing the Load
Clothes Preparation
Do Not Tumble Dry
Energy Saving
Sorting the Load
Controls and Indicators
Selecting the Programme
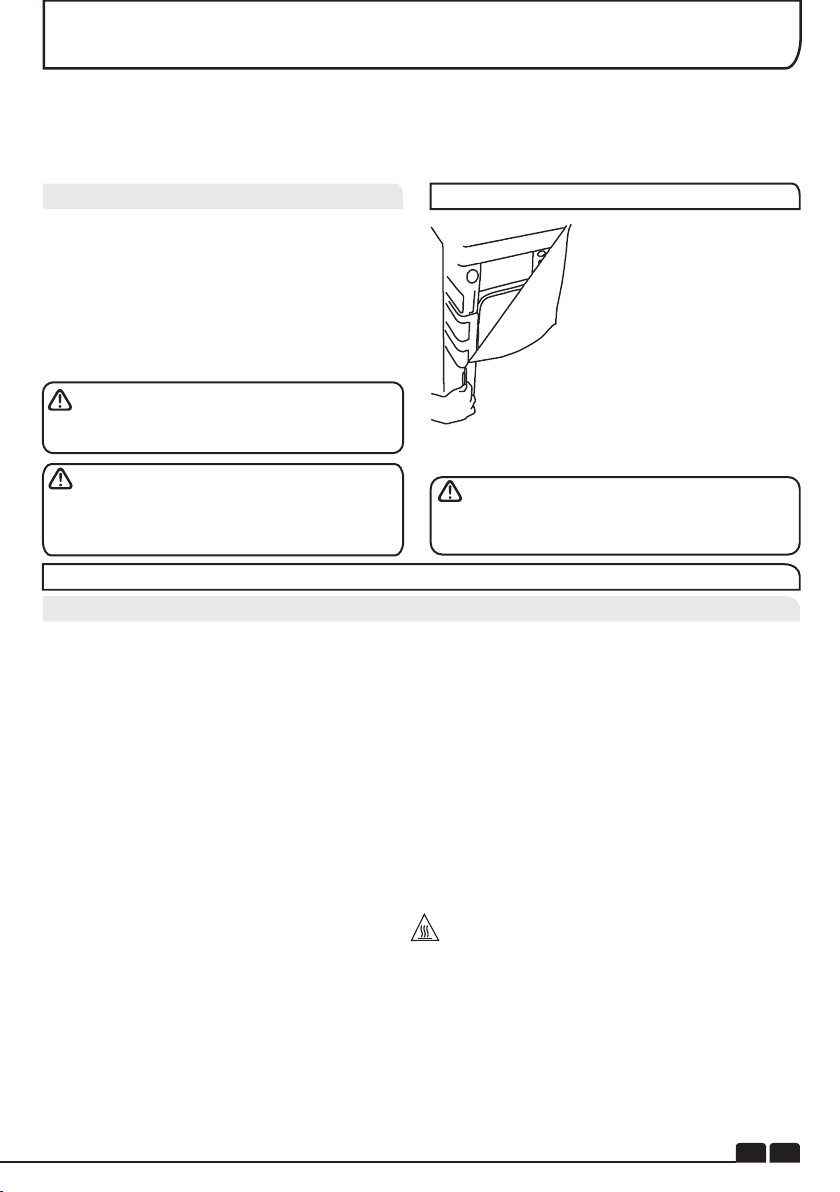
Door and Filter
Opening the Door
Filter
Filter Care Indicator
To Clean the Condenser Filter
Water Container
To Remove the Container
Operation
Delay Start Function
Cancelling and Resetting the Programme
Cleaning and Routine Maintenance
Cleaning the Dryer
Technical Specifications
Troubleshooting
Customer Service
Spares
Gias Service
3
3
3
3
3
4
4
4
4
5
5
5
5
6
7
7
7
7
7
8
9
10
10
10
10
10
11
11
11
12
12
12
12
12
13
13
13
13
EN 2
Page 3
INTRODUCTION
Please read and follow these instructions carefully and operate the machine accordingly. This
booklet provides important guidelines for safe use, installation, maintenance and some useful
advice for best results when using your machine.
Keep all documentation in a safe place for future reference or for any future owners.
Delivery Information
Please check that the following items are
delivered with the appliance:
● Instruction manual
● Guarantee card
● Energy label
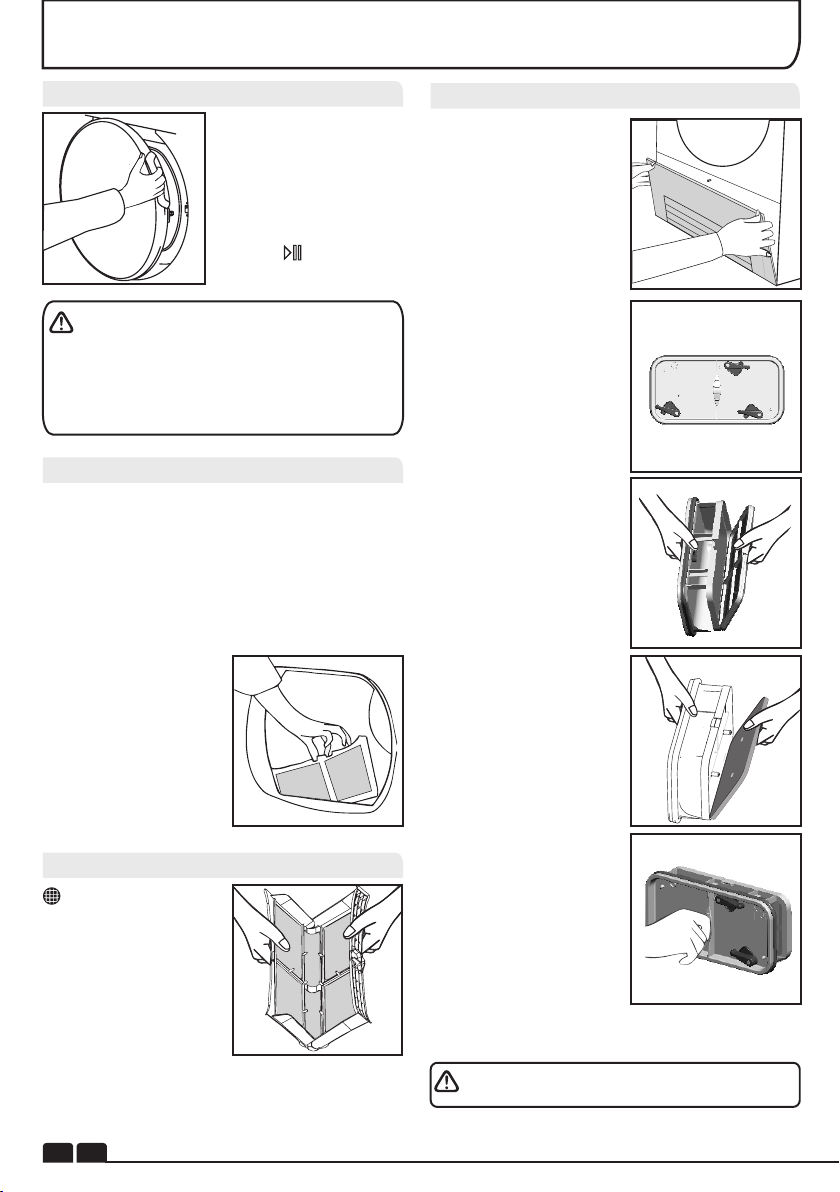
UNPACKING THE PRODUCT
Remove the machine from
its packaging close to the
f i n a l l o c a t i o n o f t h e
machine.
1- Cut carefully around the
base of the packaging and
up one corner.
Check that no damage has occurred to the
machine during transit. If it has, call for service
by GIAS.
Failure to comply with the above can
compromise the safety of the appliance. You
may be charged for a service call if a problem
with your machine is caused by misuse.
Dispose of the packaging safely. Make
sure it is out of the reach of children,it is a
potential source of danger.
2- Remove the polythene
sleeve and lift the dryer off
the polystyrene base.
SAFETY REMINDERS
Use
● This appliance is not intended for use by persons (including children) with reduced physical,
sensory or mental capabilities,or lack of experience and knowledge, unless they have been given
supervision or instruction concerning use of the appliance by a person responsible for their safety.
● Children should be supervised to ensure that they do not play with the appliance.
● WARNING Misuse of a tumble dryer may create a fire hazard.
●This machine is solely for domestic use, i.e. to dry household textiles and garments.
●This machine should only be used for its intended purpose as described in this manual. Ensure
that the instructions for installation and use are fully understood before operating the appliance.
● Do not touch the appliance when hands or feet are damp or wet.
● Do not lean on the door when loading the machine or use the door to lift or move the machine.
●Do not allow children to play with the machine or its controls.
● WARNING Do not use the product if the fluff filter is not in position or is damaged; fluff could be
ignited.
● WARNING Where the hot surface symbol is located the temperature rise during operation
of the tumble dryer may be in excess of 60 degrees C.
● Remove the plug from the electricity supply. Always remove the plug before cleaning the
appliance.
● Do not continue to use this machine if it appears to be faulty.
● Lint and fluff must not be allowed to collect on the floor around the outside of the machine.
● The drum inside may be very hot. Always allow the dryer to complete the cool down period before
removing the laundry.
EN 3
Page 4
SAFETY REMINDERS
Installation
● Check that the product has no visible signs of
damage before use. If damaged do not use and
please call GIAS Service.
● Do not use adapters, multiple connectors
and/or extensions.
● Never install the dryer against curtains and be
sure to prevent items from falling or collecting
behind the dryer.
● The appliance must not be installed behind a
lockable door, a sliding door or a door with a
hinge on the opposite side to that of the tumble
dryer.
The Laundry
●Do not dry unwashed items in the tumble dryer.
● WARNING Do not tumble dry fabrics treated
with dry cleaning fluids.
●WARNING Foam rubber materials can, under
certain circumstances, when heated become
ignited by spontaneous combustion. Items
such as foam rubber (latex foam), shower caps,
waterproof textiles, rubber backed articles and
clothes or pillows fitted with foam rubber pads
MUST NOT be dried in the tumble dryer.
● Always refer to the laundry care labels for
directions on suitability for drying.
● Clothes should be spin dried or thoroughly
wrung before they are put into the tumble dryer.
Clothes that are dripping wet should not be put
into the dryer.
● Lighters and matches must not be left in
pockets and NEVER use flammable liquids
near the machine.
● Glass fibre curtains should NEVER be put in
this machine. Skin irritation may occur if other
garments are contaminated with the glass
fibres.
● Items that have been soiled with substances
such as cooking oil, acetone, alcohol, petrol,
kerosene, spot removers, turpentine, waxes
and wax removers should be washed in hot
water with an extra amount of detergent before
being dried in the tumble dryer.
● Fabric softeners, or similar products, should
be used as specified by the fabric softener
instructions.
Environmental Issues
● All pa cka gin g mate rials used are
environmentally-friendly and recyclable.
Please help dispose of the packaging via
environmentally-friendly means. Your local
council will be able to give you details of current
means of disposal.
● To ensure safety when disposing of an old
tumble dryer disconnect the mains plug from
the socket, cut the mains power cable and
destroy this together with the plug. To prevent
children shutting themselves in the machine
break the door hinges or the door lock.
European Directive 2002/96/EC
This appliance is marked according
t o the E u ro pea n d ir ect i ve
2002/96/EC on Waste Electrical and
Electronic Equipment (WEEE).
By ensuring this product is disposed of correctly,
you will help prevent potential negative
consequences for the environment and human
health, which could otherwise be caused by
inappropriate waste handling of this product.
The symbol on the product indicates that this
product may not be treated as household waste.
Instead it shall be handed over to the applicable
collection point for the recycling of electrical and
electronic equipment.
For more detailed information about treatment,
recovery and recycling of this product, please
contact your local city office,your household
waste disposal service or the shop where you
purchased the product. Disposal must be
carried ou t in ac cordance with lo cal
environmental regulations for waste disposal.
GIAS Service
● To ensure the continued safe and efficient
operation of this appliance we recommend that
any servicing or repairs are only carried out by
an authorised GIAS service engineer.
If the appliance is not running properly or
breaks down, switch it off and disconnect the
plug from the socket. Consult GIAS Service for
possible repair.
EN 4
Page 5
INSTALLATION
Electrical Requirements
Tumble dryers are supplied to operate at a
voltage of 220-240V, 50 Hz single phase. Check
that the supply circuit is rated to at least 6A.
Electricity can be extremely dangerous.
This appliance must be earthed.
The socket outlet and the plug on the
appliance must be of the same type.
Do not use multiple adapters and/or
extension leads.
Th e plu g sho uld b e acc ess ible for
disconnection after the appliance has been
installed.
CE Appliance complies with European Directive
2004/108/EC, 2006/95/EC and subsequent
amendments.
You may be charged for a service call if a
problem with your machine is caused by
incorrect installation.
VENTILATION
Adequate ventilation must be provided in the
room where the tumble dryer is located to
prevent gases from appliances burning other
fuels, including open fires, being drawn into the
room during operation of the tumble dryer.
● Exhaust air must not be discharged into a
flue which is used for exhausting fumes from
appliances burning gas or other fuels.
● Check regularly that the air flowing through
the dryer is not restricted.
● Check the fluff filter after use, and clean, if
necessary.
●The inlet and outlets should be kept free from
obstructions. To ensure adequate ventilation
the space between the bottom of the machine
and the floor must not be obstructed. There
should be a gap of at least 12mm between the
machine and any obstructions.
● Prevent items from falling or collecting behind
the dryer as these may obstruct the air inlet and
outlet.
● NEVER install the dryer up against curtains.
If the mains cord on this appliance is
damaged, it must be replaced by a special cord
which is ONLY obtainable from the spares
service. It must be installed by a competent
person.
Do not plug the machine in and switch it
on at the mains until the installation is
completed.For your safety, this dryer must be
correctly installed. If there is any doubt about
installation, call GIAS Service for advice.
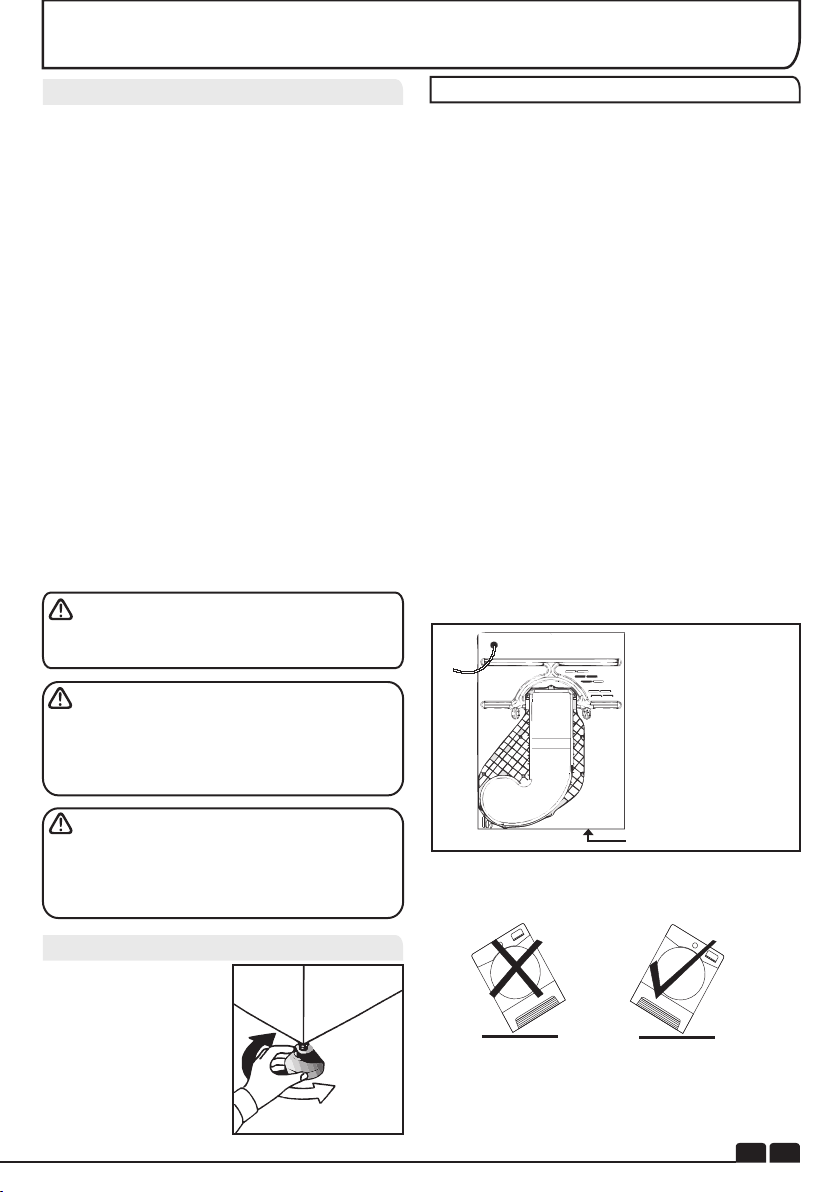
Adjusting the Feet
Once the machine is in
place the feet should
be adjusted to ensure
that the machine is
level.
Air Outlets in the Base
Important: During transport ensure that the
dryer is in an upright position, if it's necessary
you can only flip in the side shown;
Caution: If the product is in different side, wait
at least 4 hours before switching on so that the
oil can flow back into the compressor. Failure to
do this could result in damage to the
compressor.
EN 5
Page 6
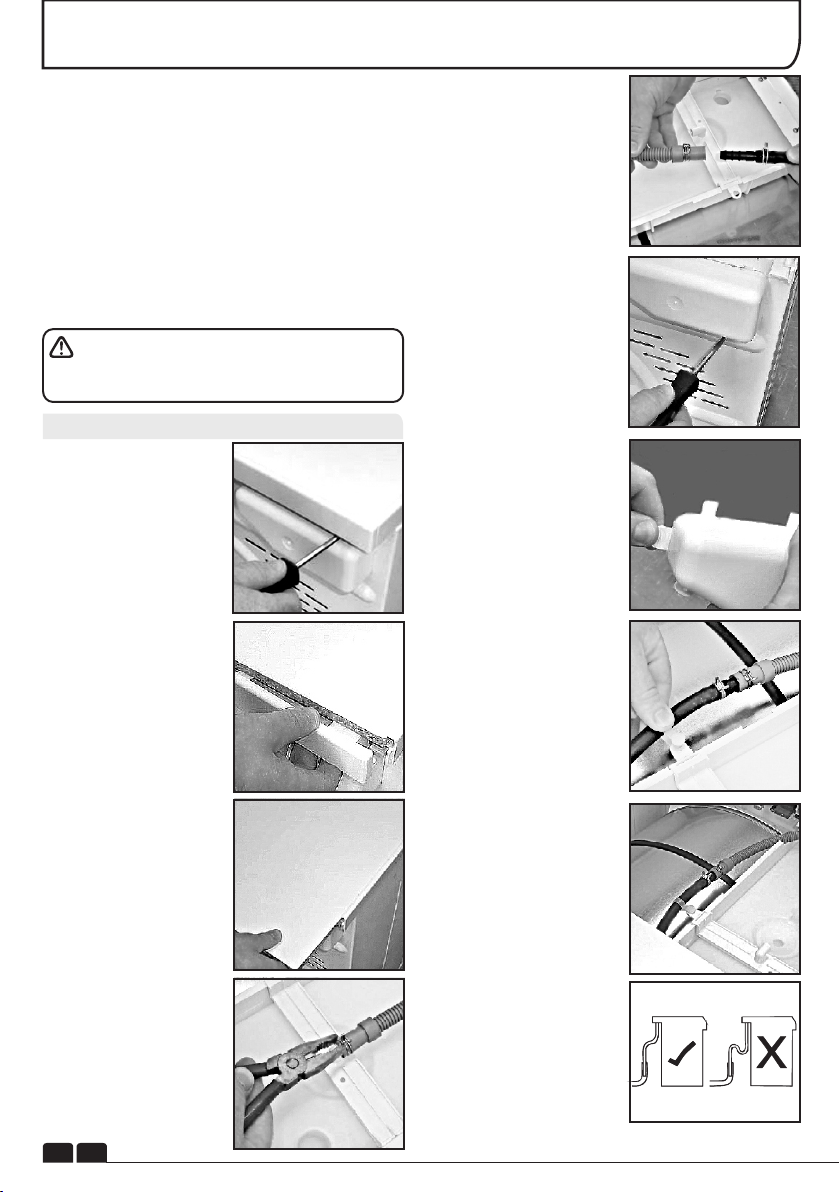
DRAIN HOSE KIT: FITTING INSTRUCTIONS
To avoid having to empty the water container
after each drying cycle, the water normally
collected during the drying cycle can be
discharged directly to a waste water drain pipe
(the same drainage system as household
sinks).Water Bye-Laws prohibit connection to
a surface water drain. The waste water drain
pipe system should be located adjacent to the
tumble dryer.
The kit is composed: 1 hose, 1 straight
hose connector, 1 pipe clip and 1 plastic tie.
WARNING! Switch off and remove the
tumble dryer plug from the electricity supply
before carrying out any work.
Fit the Kit as Follows:
1 . U n s c r e w a n d
remove the 3 screws,
at the rear of the
machine, retaining the
worktop trim.
2. Remove the rear
worktop trim and the
worktop surface by
carefu lly sliding it
towards the rear of the
machine.
3. The waste water
container is situated at
the right-hand side of
the machine (viewed
from the rear). A grey
hose connects to the
bridge above the water
container. Using pliers,
r e m o v e t he pi p e
retaining clip from the
bridge.
4. Pull the hose off the
bridge connection.
5. Attach the hose from
the ki t, using th e
connector and pipe
clips supplied, to the
hose removed from the
bridge connection.
6. Take off the water
container cover from
the rear of the machine
by removing the two
screws and unclipping
the cover.
7. Break off the tab on
the side of the cover
and replace the cover
on the machine, refit
the screws. You should
now have revealed a
hole in the back of the
cabinet next to the
Cover.
8. Feed the drain hose
through the hole in the
cabinet.
9. Locate the grey pipe
in the cutout of the tray
and secure the pipe
assembly to the bridge
with the plastic tie.
10. Carefully slide the
worktop bac k into
position ensuring that
the hose is not trapped
a n d r e pl a ce t he
worktop rear trim with
the 3 screws.
11. Connect the new
drain hose to the waste
water pipe. Make sure
that the new hose does
not kink when pushing
the tumble dryer into
position. Ensure that
the guideline s, as
shown, are followed
when routing the new
external hose.
12. Connect to the
m a in s el e c tr i c i ty
supply.
13. After emptying the
waste water container
switch the machine ON
(and press the 'START'
button on electronic
models) to commence
w it h t h e d r y i n g
program.
EN 6
Page 7
PREPARING THE LOAD
Before using the tumble dryer for the first time:
● Please read this instruction book thoroughly.
● Remove all items packed inside drum.
● Wipe the inside of the drum and door with a
damp cloth to remove any dust which may
have settled in transit.
Clothes Preparation
Make sure that the laundry you are going to dry
is suitable for drying in a tumble dryer, as shown
by the care symbols on each item.
Check that all fastenings are closed and that
pockets are empty. Turn the articles inside out.
Place clothes loosely in the drum to make sure
that they don't get tangled.
Do Not Tumble Dry:
Woollens, silk, delicate fabrics, nylon stockings,
delicate embroidery, fabrics with metallic
decorations, garments with PVC or leather
trimmings, training shoes, bulky items such as
sleeping bags, etc.
IMPORTANT: Do not dry articles which
have been treated with a dry cleaning fluid or
rubber clothes (danger of fire or explosion).
During the last 15 minutes (roughly) the
load is always tumbled in cool air
Energy Saving
Only put into the tumble dryer laundry which
has been thoroughly wrung or spin-dried. The
drier the laundry the shorter the drying time thus
saving electricity.
ALWAYS
● Try to dry the maximum weight of laundry, this
will save time and electricity.
● Check that the filter is clean before every
drying cycle.
NEVER
● Exceed the maximum weight, this will waste
time and electricity.
● Put dripping wet items into the tumble dryer,
this may damage the appliance.
Maximum Drying Weight
● Cottons Max. 7 kg
● Synthetics Max. 3,5 kg
Do not overload the drum, large items when
wet can exceed the maximum admissible clothes
load (for example: sleeping bags, duvets).
Sort the Load as Follows
● By care symbols
These can be found on the collar or inside seam:
Suitable for tumble drying.
. .
Tumble drying at high temperature.
.
Tumble drying at low temperature only.
Do not tumble dry.
If the item does not have a care label it must be
assumed that it is not suitable for tumble drying.
● By amount and thickness
Whenever the load is bigger than the dryer
capacity, separate clothes according to
thickness (e.g. towels from thin underwear).
● By type of fabric
Cottons/linen: Towels, cotton jersey, bed and
table linen.
Synthetics: Blouses, shirts, overalls, etc. made
of polyester or polyamid, as well as for
cotton/synthetic mixes.
● By drying level
Sort into: iron dry, cupboard dry, etc. For delicate
articles press the button to select low drying
temperature.
Do not install the product in a room where
there is a risk of frost occurring. At temperature
around freezing point the product may not be
able to operate properly: there is a risk of
damage if the water is allowed to freeze in the
hydraulic circuit (valves, hoses, pumps).
For a better product performance the ambient
room temperature must be between +2°C and
+35°C.
EN 7
Page 8
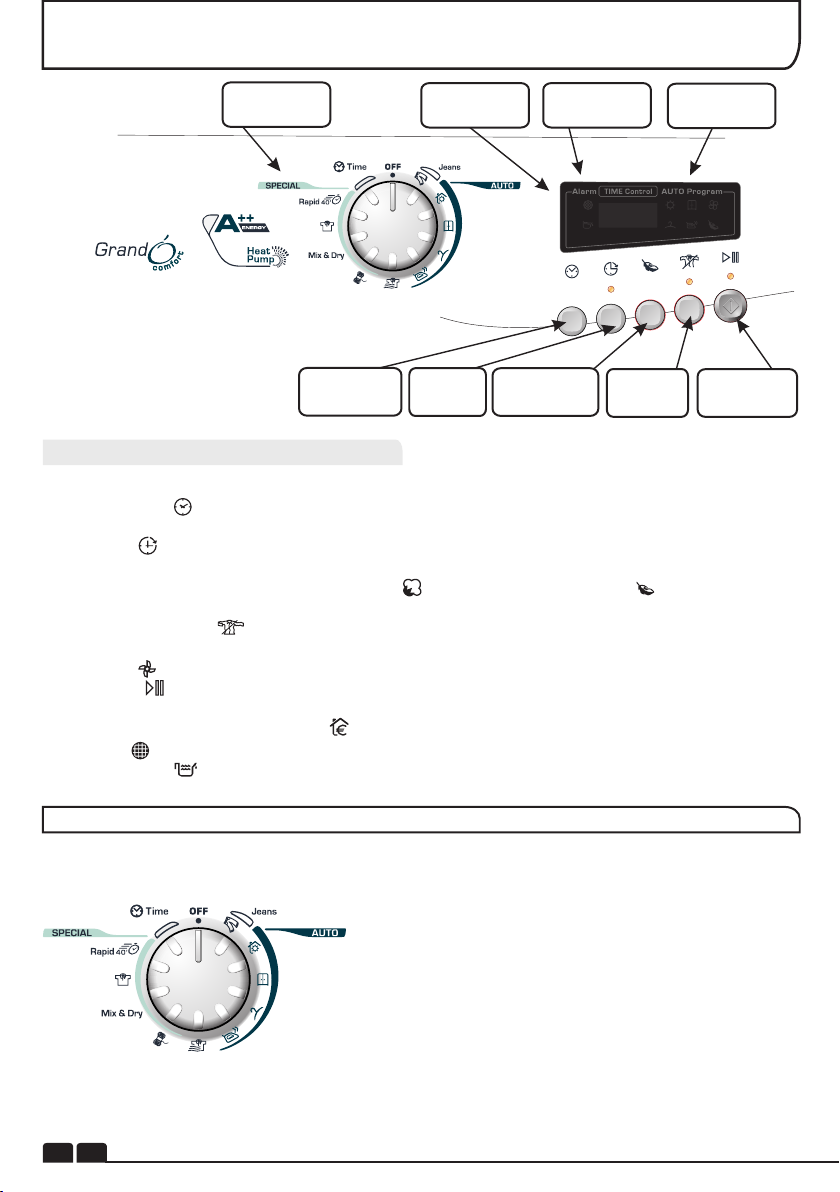
CONTROLS AND INDICATORS
Programme
Selector
Time Selection
Button
Empty Water
Indicator
Delay Start
Button
Acrylic
Synthetic
Button
Filter Care
Indicator
Anti-Crease
Button
Program
Display
Start/Pause
Button
Control Panel and Indicator Lights
Knob: You can turn it in both directions to choose the required programme.
Time selection :To modify the drying timing of required programme; it works only with certain
programmes.
Delay start :To delay the start of the drying cycle and to dry your laundry when electricity costs
less (please see dedicated section)
Delicate fabrics : When pulled, this indicator turns off and this new one turns on; with this
special function, the drying temperature is lower to better protect your delicate clothes.
Anti- Crease Button – Select the anti-crease function at the end of drying cycle. The drum
keeps moving at regular phases to refresh the laundry.
Cool down : This indicator turns on during the final cool phase of the cycle.
Start/Pause : To start the programme required or to pause the cycle.
Automatic programmes: Depending on desired programme, specific indicators turn on (please
see “programme list”); ECO indicator turns on when you select a low consumption programme.
Filter care : When on, please clean the filters.
Full water tank : When on, please empty the water tank.
SELECTING THE PROGRAMME
EN 8
This machine has a special Sensor Dry to help you
choose your preferred programme simply by selecting the
level of dryness wanted.
For small loads and pre-dried clothes, please use a
Timing programme and select “Delicate fabrics” button to
lower the temperature inside the drum.
If the Sensor does not detect any item, this Dryer will work
for only 10 minutes before starting the Cool down phase.
If the load is too big or too wet, this Dryer will automatically
work for 3 hours and then start the Cool down phase.
At the end of each programme, there is always the Cool
Down phase: it is a cool-air refresh phase of around 15
minutes.
Page 9

SELECTING THE PROGRAMME
PROGRAMME
Perfect Home
Store Dry
Hang Dry
Iron Dry
No Crease
Wool
Mix & Dry
IDEAL FOR
Clothes you want completely dryed, e.g. towels, bathrobes, table clothes
or sheet. Time: around 3h.
Clothes you want to fold and store without ironing, e.g. shirts in mixed
fabrics, socks, baby clothes. Time: around 2h and 45 min.
Clothes you don’t need to iron, but just hang after the drying cycle. Time:
around 2h and 30 min.
Leave clothes slightly damp to allow easier ironing. Time: around 1h and
50 min.
Clothes you just need to refresh. Good for items of clothing which have been
left prior to ironing or if they have been dried outside or on radiators. This
programme has a specific Anti-Crease function that relaxes fibres and
makes easier ironing. Time: 9 min + 3 min cool down.
To soften your woollen clothes or to simply refresh them after a long time in
the wardrobe. Time: 12 min.
To dry mixed cotton and synthetic clothes: save time and no need to
separate the washing and dry them in different cycles. Time: around 2h
(max 4 kg).
Shirts
Rapid 40’
Time
Jeans
To dry shirts both cotton and synthetic fabrics. Time: 1h for 2kg of synthetic
shirts (around 10 shirts); 1h and 20 min for 3 kg of cotton shirts (around 10
shirts).
For dry, refreshed and ready to dress clothes in onyl 40 minutes. Sensor
system keeps under control the temperature to have always the best result.
Max 2 kg.
If you want to choose drying times, from 30 to 180 minutes. By selecting “20
min” you choose a “cool programme”, ideal to refresh clothes and to remove
eventual smells.
To dry up to 4 kg of Jeans (around 5 pairs). The programme works for around
2h, but timing can change according to the load and washing spin speed.
Jeans programme can only be used for 100% cotton items, please do not
mix colours nor dry jeans with embroideries or accessories.
EN 9
Page 10
DOOR and FILTER
Opening the Door
Pull on handle to open
the door.
To restart the dryer,
close the door and
press .
WARNING! When the tumble dryer is in
use the drum and door may be VERY HOT.
Never stop a tumble dryer before the end of the
drying cycle unless all items are quickly
removed and spread out so that the heat is
dissipated.
Filter
IMPORTANT: To maintain the efficiency of the
dryer check that the fluff filter is clean before
each drying cycle.
Do not operate the dryer without the filters.
Clogged filters can increase the drying time
and cause damage which may result in
expensive repair costs.
1 . P u ll t h e f i l t e r
upwards.
2. Open filter as shown.
3.Gently remove lint
using a soft brush or
your fingertips.
4 . S n a p t h e fi l te r
together and push
back into place.
Filter Care Indicator
Lights when the filter
needs cleaning.
Check and clean the
main filter in the door
and the condenser
filters allocated in the
bottom of the dryer,If
the la un dry is not
drying check that the
filter is not clogged.
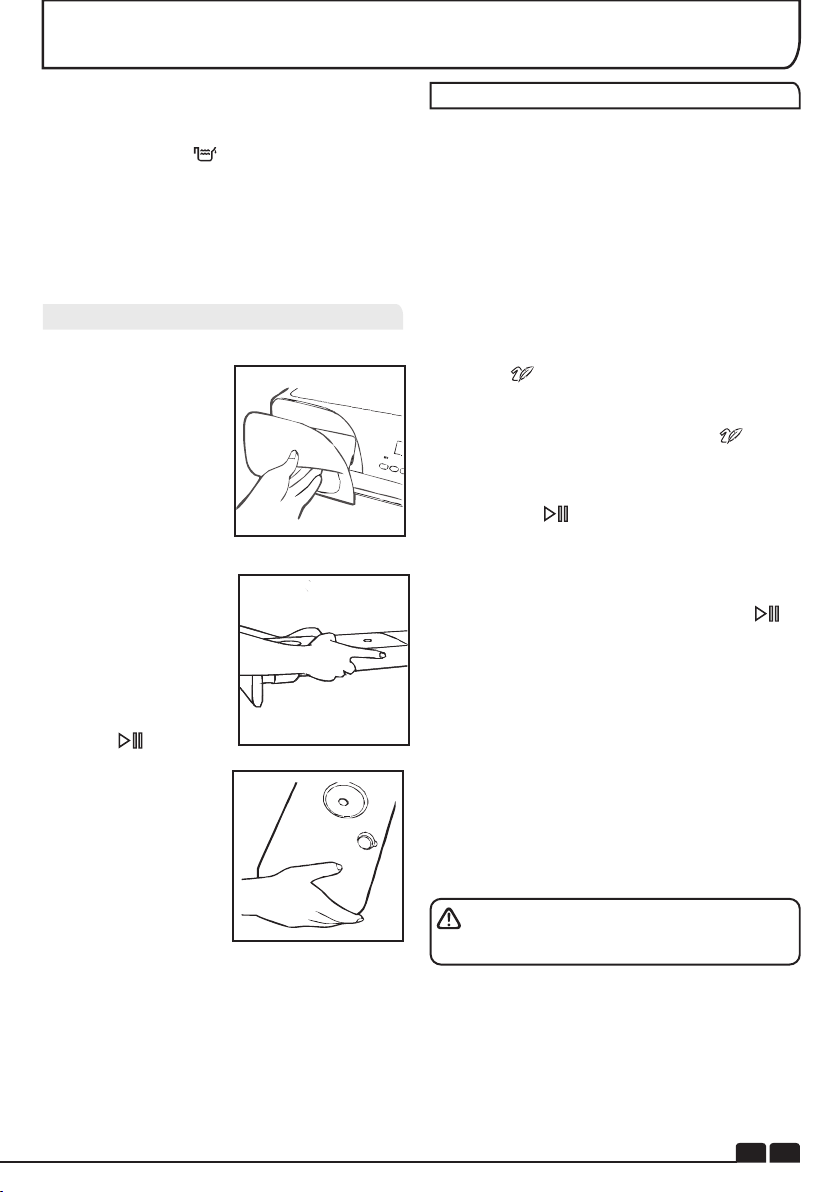
To Clean the Condenser Filter
1 . R e m o v e t h e
kickplate.
2. Turn the two locking
levers anti-clockwise
and pull out the front
cover.
3. Gently remove the
filter frame and clean
any dust or fluff with a
cloth from the filter. Do
not use water to clean
the filter.
4. Remove the sponge
gently from its place
and then wash the
sponge by holding it
under a running tap
turning it so to remove
any dust or fluff.
5. Refit the front cover
ensuring it is in the
c o r r e c t w a y ( a s
indicated by the arrow)
and pushed firmly into
place. Lock the two
levers by turning them
clockwise.
6. Refit the kickplate.
DO NOT USE WATER TO CLEAN THE FILTER.
EN 10
Page 11
WATER CONTAINER
The water removed from the laundry during
the drying cycle is collected in a container
inside the door of the dryer. When the
container is full the indicator on the control
panel will light, and the container MUST be
emptied. However, we recommend that the
container is emptied after each drying cycle.
NOTE: Very little water will collect during the
first few cycles of a new machine as an internal
reservoir is filled first.
To Remove the Container
1. Gently pull out the
t r a y u n t i l i t i s
completely removed.
Support the tray with
both hands. When it is
full the water container
will weigh about 4kg.
2 . Ti l t t h e wa t e r
container to empty the
water out through the
rear hole.
When emptyslide the
water container back
into position.
PUSH FIRMLY INTO
PLACE.
3. Press to restart
the cycle.
OPERATION
1. Open the door and load the drum with
laundry. Ensure that garments do not hinder
closure of the door.
2. Gently close the door pushing it slowly until
you hear the door 'click' shut.
3. Turn the Programme Selector dial to select
the req u ired dry i ng p rogr amme (see
Programme Guide).
4. If drying synthetics, acrylics or delicate items,
press the button to reduce the heat level.
The indicator will light up when the machine is in
low heat setting. To deselect in the first few
minutes of the programme, press the button
, after this time reset the machine to change the
setting.
5. Press the button. The dryer will start
automatically and the indicator above the
button will be continuously lit.
6. If the door is opened during the programme to
check the laundry, it is necessary to press to
recommence drying after the door has been
closed.
7. When the cycle is nearing completion the
machine will enter the cool down phase, the
clothes will be tumbled in cool air allowing the
load to cool down.
NOTE: If you have the
option of drainage near
the dryer it is possible
to use the discharge kit
to provide a permanent
drain for the water
collected by the dryer.
This will remove the
need to empty the
wate r tray. All t he
i n f o r m a t i o n f o r
assembly of the kit is
contained in the kit
envelope.
8. Following the completion of the cycle the
drum will rotate intermittently to minimize
creasing. This will continue until the machine is
switched OFF or the door is opened.
Do not open the door during the automatic
programs in order to obtain a proper drying.
EN 11
Page 12
OPERATION
Delay Start Function
The Delay Start Function allows the user to delay the start of the drying cycle by 1 to 24 hours.
When the function is first selected the display will show a delay of 1 hour, subsequent presses of
the button will increase the delay with 1 hour steps.
To commence the programme press and the appliance will complete the drying cycle at the
end of this time. The indicator light will flash to indicate that the start delay is in progress.
Cancelling and Resetting the Programme
To cancel a programme press the button for 3 seconds. In the TIME CONTROL display 0:00
Light will flash to indicate that it has been reset.
CLEANING AND ROUTINE MAINTENANCE
Cleaning the Dryer
● Clean the filter and empty the water
container after every drying cycle.
● Regularly clean the filters.
● After each period of use, wipe the inside of
the drum and leave the door open for a while to
allow circulation of air to dry it.
● Wipe the outside of the machine and the
door with a soft cloth.
● DO NOT use abrasive pads or cleaning
agents.
● To prevent the door sticking or the build up
of fluff clean the inner door and gasket with a
damp cloth after every drying cycle.
WARNING! The drum, door and load may
be very hot.
Technical Specifications
Drum capacity 115 litres
Maximum load 7 kg
Height 85 cm
Width 60 cm
Depth 60 cm
Energy Label Band A ++
Information for Test Laboratory
EN 61121 Programme
-DRY COTTON
-IRON DRY COTTON
-EASY-CARE TEXTILE
Programme To Use
-HANG DRY
-IRON DRY
-HANG DRY + SYNTHETIC
Note:Install and use the drain hose to discharge
the condensing water.
IMPORTANT Always switch off and
remove the plug from the electricity supply
before cleaning this appliance.
For electrical data refer to the rating label
on the front of the dryer cabinet (with the door
open).
EN 12
Page 13

What Might be the Cause of...
Defects you can remedy yourself
Before calling GIAS Service for technical
advice please run through the following
checklist. A charge will be made if the machine
is found to be working or has been installed
incorrectly or used incorrectly.
If the problem persists after completing the
recommended checks, please call GIAS
Service, they may be able to assist you over the
telephone.
Time display to end could change during
dr ying cy cle . T he time to en d i s
continuously checked during the drying
cycle and the time is adjusted to give the
best estimation time. The displayed time
may increase or decrease during the cycle
and this is normal.
Drying time is too long/clothes are not dry
enough…
● Have you selected the correct drying
time/programme?
● Were the clothes too wet? Were the clothes
thoroughly wrung or spindried?
● Does the filter need cleaning?
● Is the dryer overloaded?
● Has the option been selected from a
previous cycle?
TROUBLESHOOTING
The dryer is noisy…
● Switch off the dryer and contact GIAS Service
for advice.
The Indicator is on…
● Does the filter need cleaning?
The Indicator is on…
● Does the water container need emptying?
CUSTOMER SERVICE
Should there still be a problem with your dryer
after completing all the recommended checks,
please call GIAS Service for advice.
They may be able to assist you over the
telephone or arrange for a suitable appointment
for an engineer to call under the terms of your
guarantee. However, a charge may be made if
any of the following applies to your machine:
● Is found to be in working order.
● Has not been installed in accordance with the
installation instructions.
● Has been used incorrectly.
The dryer does not operate…
● Is there a working electricity supply to the
dryer? Check using another appliance such as
a table lamp.
● Is the plug properly connected to the mains
supply?
● Is there a power failure?
● Has the fuse blown?
● Is the door fully closed?
● Is the dryer switched on, both at the mains
supply and at the machine?
● Has the drying time or the programme been
selected?
● Has the machine been switched on again after
opening the door?
Spares
Always use genuine spares, available direct
from GIAS Service.
GIAS Service
For service and repairs call your local GIAS
Service engineer.
The manufacturer declines all responsibility
in the event of any printing mistakes in this
booklet. The manufacturer also reserves the
right to make appropriate modifications to
its products without changing the essential
characteristics.
EN 13
Page 14

INDEX
Introduction
Informations Sur La Livraison
Déballage Du Produit
Rappels De Sécurité
Utilisation
Installation
Le Linge
Protection De L'environnement
Service Gias
Installation
Besoins Électriques
Ajustement Des Pieds
Ventilation
Kit Tuyau D’évacuation : Instructions de Montage
Préparation De La Charge
Préparation Des Vêtements
Tri De La Charge
Ne Séchez Pas En Machine
Économies D’énergie
Guide De Séchage
Commandes Et Indicateurs
Sélection Du Programme
Porte Et Filtre
Ouverture De La Porte
Filtre
Indicateur Entretien Filtre
Réservoir D’eau
Pour Retirer Le Réservoir
Condenseur
Pour Retirer Le Condenseur
Fonctionnement
Départ Différé
Annulation Et Réinitialisation Du Programme
Nettoyage Et Entretien De Routine
Nettoyage Du Sèche-linge
Spécifications Techniques
Dépistage De Pannes
Service Clientèle
Pièces De Rechange
Service Gias
15
15
15
15
15
16
16
16
16
17
17
17
17
18
19
19
19
19
19
19
20
21
22
22
22
22
22
22
23
23
23
24
24
24
24
24
25
25
25
25
FR
38
Page 15

INTRODUCTION
Veuillez lire et suivre ces instructions avec soin et utiliser la machine en conséquence. Ce livret
contient des instructions importantes sur la sécurité d'utilisation, l'installation et l'entretien de la
machine, ainsi que des conseils utiles pour obtenir les meilleurs résultats possibles lors de son
utilisation. Conservez toute la documentation dans un endroit sûr pour pouvoir vous y reporter à une
date ultérieure ou la transmettre aux prochains propriétaires
Informations Sur La Livraison
Vérifiez que les articles suivants ont bien été
livrés avec l’appareil :
● Manuel d'utilisation
● Carte de garantie
● Étiquette d'énergie
Vérifiez que la machine ne s'est pas
détériorée en transit. Si c'est le cas, contactez
GIAS pour une opération de dépannage.
Le non-respect de ces instructions peut
compromettre la sécurité de votre appareil. Un
appel de service peut vous être facturé si la
défaillance de votre appareil est causée par une
mauvaise utilisation.
RAPPELS DE SÉCURITÉ
Utilisation
● Cet appareil ne doit pas être utilisé par des personnes (notamment des enfants) jouissant de
capacités mentales, sensorielles ou physiques réduites ou d'un manque d'expérience ou de
connaissances, sauf si elles sont surveillées ou ont reçu des instructions concernant l'utilisation de cet
appareil par une personne responsable de leur sécurité.
● Les enfants doivent être surveillés afin de s'assurer qu'ils ne s'amusent pas avec l'appareil.
● ATTENTION La mauvaise utilisation d’un sèche-linge risque de causer un d’incendie.
● Cette machine est conçue uniquement pour usage domestique, à savoir pour sécher le linge
domestique et les vêtements.
● Cette machine ne doit être utilisée que pour l’emploi auquel elle est destinée et qui est décrit dans ce
manuel. Assurez-vous d'avoir bien compris les instructions d'installation et d'utilisation avant de faire
fonctionner la machine.
● Ne touchez pas la machine si vous avez les mains ou les pieds mouillés ou humides.
● Ne vous appuyez pas sur la porte lorsque vous chargez la machine et n'utilisez pas la porte pour
soulever ou déplacer la machine.
● Ne laissez pas des enfants jouer avec la machine ou avec ses commandes.
● ATTENTION N’ utilisez pas cette machine si le filtre à peluches n’ est pas en place ou s’ il est
endommagé ; les peluches risquent en effet de s’allumer.
● ATTENTION L’augmentation de température pendant le fonctionnement du sèche-linge peut être
supérieure à 60°C là où se trouve le symbole de surface chaude .
● Débranchez du courant de secteur. Retirez toujours la prise avant de nettoyer la machine.
● Cessez d’utiliser la machine si elle semble défectueuse.
● Veillez à ce que les peluches ne puissent pas s’accumuler sur le sol, à l’extérieur de la machine.
● Il se peut que l’intérieur du tambour soit très chaud. Veillez à ce que le sèche-linge termine
son cycle de refroidissement avant d’en sortir le linge.
DÉBALLAGE DU PRODUIT
Retirez la machine de
l’emballage, à proximité de
son emplacement définitif.
1. Coupez délicatement
au to ur de la base de
l'emballage en remontant
vers l'angle supérieur.
2. Retirer le manchon en
polyéthylène et sortez le
sèche-linge de la base en
polystyrène.
Mettez l'emballage au rebut en toute
sécurité. Conservez hors de portée des enfants
car il représente une source de danger
potentielle.
39
FR
Page 16

RAPPELS DE SÉCURITÉ
Installation
● Vérifiez que la machine ne présente aucun
signe visible de détérioration avant de l’utiliser.
En cas de détérioration, assurez-vous de ne
pas l’utiliser et de contacter le service GIAS.
● N'utilisez pas d'adaptateurs, de multi-prises
et/ou de rallonges.
● Veillez à ne pas installer le sèche-linge contre
des rideaux et assurez-vous que rien ne pourra
tomber ou s’accumuler derrière le sèche-linge.
● Cet appareil ne doit pas être installé derrière
une porte verrouillable, une porte coulissante
ou une porté munie de gonds placée en face de
la porte du sèche-linge.
Le Linge
● Ne séchez pas des vêtements non lavés dans le
sèche-linge.
● ATTENTION NE séchez PAS les tissus qui ont
été traités avec des liquides de nettoyage à sec.
● ATTENTION Quand elles sont chauffées, les
mousses alvéolaires peuvent dans certains cas
brûler par combustion sponta-née. Les articles
tels que le caoutchouc mousse (mousse de latex),
les bonnets de douche, le textile imperméable, les
articles caoutchoutés et les vêtements ou
coussins rembourrés de caoutchouc mousse NE
DOIVENT PAS être séchés dans le sèche-linge.
● Reportez-vous toujours aux étiquettes d’
entretien du linge pour vérifier le mode de séchage
recommandé.
● Les vêtements doivent être essorés en machine
ou à la main avant d’ être placés dans le sèchelinge. Les vêtements qui dégoulinent NE
DOIVENT PAS être mis dans le sèche-linge.
● Enlevez les briquets et les allumettes des
poches et veillez à ne JAMAIS utiliser de liquides
inflammables à proximité de la machine.
● Les rideaux en fibres de verre ne doivent
JAMAIS être placés dans cette machine. La
contamination d’autres vêtements par les fibres de
verre peut entraîner des irritations de la peau.
● Les articles qui ont été souillés par des
substances telles que huile de cuisson, acétone,
alcool, pétrole, kérosène, produit anti-taches,
térébenthine, cire et décapant pour cire doivent
être lavés à l'eau chaude avec une quantité
supplémentaire de déter-gent avant d'être séchés
dans le sèche-linge.
● Les agents adoucissants, et autres produits
similaires, doivent être utilisés conformément aux
instructions fournies par le fabricant du produit.
Protection De L'environnement
● Tous les matériaux de conditionnement
utilisés sont écologiques et recyclables.
Veuillez les éliminer de manière écologique.
Votre municipalité pourra vous donner le détail
exact des méthodes d’élimination en vigueur.
● Pour assurer la sécurité lors de l’élimination
d’un vieux sèche-linge, veuillez débrancher la
fiche du courant de secteur, couper le câble
d’alimentation et le détruire avec la fiche. Pour
empêcher que les enfants ne s’enfer-ment
dans la machine, cassez les charnières de la
porte ou son dispositif de verrouillage.
Directive Européenne 2002/96/CE
Cet appareil est commercialisé en
accord avec la directive européenne
2002/96/CE sur les déchets des
équ i p eme n t s é l ec t r i que s et
électroniques (DEEE).
En vous assurant que ce produit est correctement recyclé, vous participez à la prévention
d e s c on s é q u e n c e s n é g a t iv e s s u r
l’environnement et la santé publique qui pourrait
être causé par une mise au rebut inappropriée
de ce produit. Le symbole sur ce produit indique
qu’il ne doit pas être traité comme un déchet
ménager. Il doit être rapporté jusqu’à un point de
rec yclag e d es d échet s é lectr iques et
électroniques. La collecte de ce produit doit se
faire en accord avec les réglementations
environnementales concernant la mise au rebut
de ce type de déchets. Pour plus d’information
au sujet du traitement, de la collecte et du
recyclage de ce produit, merci de contacter votre
mairie, votre centre de traitement des déchets ou
le magasin où vous avez acheté ce produit.
Service GIAS
● Pour veiller au fonctionnement efficace et
sans risque de cet appareil, nous vous
recommandons de faire exclusivement appel à
un technicien GIAS agréé pour son entretien
ou sa réparation éventuelle.
Si l’appareil ne fonctionne pas correctement
ou s’il tombe en panne, mettez-le à l’arrêt et
débranchez-le du courant de secteur. Consultez
le service GIAS pour prévoir une éventuelle
réparation.
FR
40
Page 17

INSTALLATION
Besoins Électriques
Les sèche-linges sont prévues pour une
tension monophasée de 220-240V, 50 Hz.
Vérifiez que la tension nominale du circuit
d'alimentation est réglée sur 6A minimum.
L’électricité peut être extrêmement
dangereuse.
Cet appareil doit être mis à la terre.
La prise de courant et la fiche de la machine
doivent être du même type.
N'utilisez pas de multi-prises et/ou de
rallonges.
La fich e doit ê tre a ccessibl e pou r
débrancher l’appareil une fois qu’il a été
installé.
La machine est conforme aux directives
européennes 2004/108/EC, 2006/95/EC et à
leurs modifications ultérieures.
Un appel de service peut vous être facturé
si la défaillance de votre appareil est causée
par une installation incorrecte.
VENTILATION
La pièce où se trouve le sèche-linge doit avoir une
ventilation adéquate de manière à ce que les gaz
des appareils qui brûlent d’autres combustibles, y
compris les cheminées, ne soient pas attirés dans
la pièce pendant que le sèche-linge est en
marche.
● L’air d’échappement ne doit pas être évacué par
un conduit qui est également utilisé pour évacuer
les fumées d’échappement d’appareils qui brûlent
du gaz ou d’autres combustibles.
● Vérifiez régulièrement que l’ air peut circuler
librement autour du sèche-linge.
● Vérifiez le filtre à peluches après usage, et
nettoyez-le le cas échéant.
● Les entrées et sorties doivent être libres
d’obstructions. Pour veiller à une ventilation
adéquate, l’espace entre le bas de la machine et le
sol ne doit pas être obstrué. Il doit y avoir un
espace d’au moins 12 mm entre la machine et
d'éventuelles obstructions.
● Veillez à ce que rien ne puisse tomber ou
s’accumuler entre les côtés et l’arrière du
sèchelinge, afin de ne pas obstruer l'entrée et la
sortie d’air.
● N’ installez JAMAIS le sèche-linge contre des
rideaux.
Si le cordon électrique de cet appareil
estendommagé, il doit être remplacé par un
cordon spécial qui est UNIQUEMENT disponible
auprès du service des pièces de rechange. Il doit
être installé par une personne compétente.
Ne branchez pas l'appareil et ne mettez pas
en marche l'interrupteur de secteur tant que
l'installation n'est pas terminée. Par mesure de
sécurité, veillez à installer ce sèche-linge
correctement. En cas de doute concernant son
installation, veuillez demander conseil à GIAS
Service.
Ajustement Des Pieds
Lorsque la machine est
en place, les pieds
doivent être ajustés
pour mettre la machine
de niveau.
Important : Pendant le transport, l’appareil doit être
stocké dans sa position normale d’utilisation. Si
nécessaire, l’appareil peut être incliné comme montré
ci-dessous.
Attention : Si le produit est transporté différemment,
attendez au moins 4 heures avant d’allumer
l’appareil, ceci afin que le gaz liquide retourne dans le
compresseur. En cas de non respect de cette
pro c é d ure, l e comp r e s seur p o urra i t ê tre
endommagé.
FR
41
Page 18

KIT TUYAU D’ÉVACUATION : INSTRUCTIONS DE MONTAGE
Afin d’éviter d’avoir à vider le réservoir d’eau après
chaque cycle de séchage, l’eau qui est
normalement recueillie pendant le cycle de
séchage peut être évacuée directement par un
tuyau d’évacuation d’eaux sales (le même
système de vidange que celui des éviers
domestiques). Les arrêtés municipaux en matière
d’évacuation d’eau interdisent la connexion à un
égout d’eau de surface. Le système de vidange
d’eaux sales doit être placé à proximité du sèchelinge.
ATTENTION ! Éteignez la machine et
retirez la prise du sèche-linge de l’alimentation
électrique secteur avant d’entreprendre tout
travail.
Le kit est composé: 1 tuyau, 1 connecteur de tuyau
droit, 1 étrier de tuyau et une attache en plastique.
Installez le Kit En Suivant les Instructions ci-après :
1.Dévissez et retirez les
trois vis pla cées à
l’arrière de la machine
e n c on s er v an t l a
garniture du plan de
travail.
2. Retirez la garniture
arrière du plan de travail
et le plan de travail en le
f a i s a n t g l i s s e r
d é l i c ate m en t v e rs
l’arrière de la machine.
3. Le réservoir d’eaux
sales se trouve du côté
droit de la machine (vue
de l’arrière). Un tuyau
gris est branché sur le
ra c c o rd p la c é au dessus du réservoir. À
l’a i d e d ’ une pinc e ,
retirez l’étrier de fixation
du tuyau du raccord.
4. Retirez le tuyau du
raccord..
5. Fixez le tuyau du kit
e n u t i l i s a n t l e
connecteur et les étriers
de tuyau fournis au
tuyau d é m onté d u
raccord.
6. Retirez le couvercle
du réservoir de l’arrière
de l a m a chine e n
dévissant les deux vis et
e n d é c l i p s a n t l e
couvercle.
42
FR
7. Brisez l’onglet placé
sur le côté du couvercle
et replacez le couvercle
sur la machine puis
refixez les vis. Vous
devez maintenant avoir
mis à jour un orifice à
l’arrière de l’armoire à
côté du couvercle.
8. Glissez le tuyau de
vidange par l’orifice de
l’armoire.
9. Repérez le tuyau gris
dans la découpe du
réservoir et fixez le bloc
tuyau au raccord avec
l’attache en plastique.
1 0 . Fa i t e s gli s s er
délicatement le plan de
travail dans sa position
d’ o r i g in e e n vo u s
assurant que le tuyau
n’est pas coincé puis
remettez en place la
garniture arrière du plan
de travail à l’aide des
trois vis.
1 1 . B r a n c h e z l e
nou v e a u tuy a u de
vidange au tuyau d’eaux
sales. Assurez-vou s
que le nouveau tuyau ne
forme pas un coude
lorsque vous repoussez
le sèche-linge dans sa
po s i ti on d’ o r ig i n e.
Assurezvous
que l e s d i r e ctive s
i n d i q u é e s s o n t
respectées lors de la
mise e n plac e d u
nouveau tuyau externe.
1 2 . Ra c co r d ez l a
machine à l’aliment a ti on é l e c t ri qu e
secteur.
13. Après avoir vidé le
réservoir d’eau sale,
allumez la machine (et
appuyez sur le bouton
“MAR C H E ” s u r l e s
modèles électroniques)
p o u r l a n c e r l e
p r o g r a m m e d e
séchage.
Page 19

PRÉPARATION DE LA CHARGE
Avant d’utiliser le sèche-linge pour la première
fois :
● Veuillez lire ce manuel d’instruction en détail.
● Retirez tous les articles qui se trouvent à
l’intérieur du tambour.
● Essuyez l’intérieur du tambour et de la porte
avec un chiffon humide pour éliminer la
poussière éventuelle qui aurait pu s’y infiltrer en
transit..
Préparation Des Vêtements
Vérifiez sur les étiquettes comportant les
symboles d’entretien que le linge que vous
souhaitez sécher convient au séchage en
machine.
Vérifiez que toutes les fermetures sont fermées
et queles poches sont vides. Mettez les articles
à l’envers. Placez les vêtements en vrac dans le
tambour en veillant à ce qu’ils ne s’emmêlent
pas les uns avec les autres.
Ne séchez pas en machine :
Les lainages, la soie, les tissus délicats, les bas
de nylon, les broderies délicates, les tissus
ayant des décorations métalliques, les
vêtements avec des bordures en PVC ou en
cuir, les chaussures de sport, les articles
volumineux comme les sacs de couchage, etc.
IMPORTANT : Ne séchez pas les articles
qui ont été traités avec un liquide de nettoyage
à sec ou les vêtements en caoutchouc (risque
d’incendie ou d’explosion).
Pendant les 15 dernières minutes (approximativement), les vêtements sont toujours
échés à l'air froid.
Économies D’énergie
Ne mettez que du linge essoré en machine ou à la
main dans le sèche-linge. Plus le linge est sec,
plus le temps de séchage sera court, ce qui
économisera de l’énergie.
TOUJOURS
● Essayez de sécher le poids de linge
maximum,pour économiser du temps et de
l’électricité.
● Vérifiez que le filtre est propre avant chaque
cyclede séchage.
JAMAIS
● Ne dépassez pas le poids maximum pour ne
pas gaspiller du temps ou de l’électricité.
● Ne mettez pas d'articles dégoulinant d’eau
dans le sèche-linge pour ne pas endommager
l’appareil.
Poids De Séchage Maximum
● Coton 7 kg maxi
● Synthétiques 3,5 kg maxi
Ne surchargez pas le tambour ; lorsqu’ils
sont mouillés, les grands articles peuvent
dépasser le poids de maximum admissible (ex :
sacs de couchage, couettes).
Triez La Charge Comme Suit :
● Par symbole de soin d’entretien
Vous les trouverez sur le col ou la couture intérieure :
Convient pour séchage en machine.
. .
Séchage à haute température.
Séchage à basse température
.
uniquement.
Ne séchez pas en machine.
Si le vêtement ne comporte aucune étiquette de
conseils de lavage, considérez qu'il ne convient pas
pour le séchage en machine.
● Par quantité et épaisseur
Lorsque la charge est plus importante que la
capacité du sèche-linge, séparez les vêtements
selon leur épaisseur (ex : les serviettes des
sousvêtements fins).
● Par type de tissu
Coton/toile de lin : Serviettes, jersey en coton,
linge de lit ou de table.
Synthétiques : Chemisiers, chemises, blouses etc.
en polyester ou polyamide, ainsi que pour les
mélanges de coton/synthétique.
● Par degré de séchage
Triez selon : sec pour repassage, sec pour
rangement, etc. Pour les articles délicats, appuyez
Sur le bouton pour sélectionner une température
de séchage basse.
Ne pas installer le produit dans une pièce où le
risque de formation de glace est possible. A la
température de congélation de l'eau, le produit
risque de ne pas fonctionner correctement.
Si l'eau du circuit hydraulique se glace, les
composants suivants risquent d'être endommagés :
soupape, pompe, tubes. Afin de garantie les
meilleures prestations du produit, la température de
la pièce doit être comprise entre +2°C et +35°C.
FR
43
Page 20

COMMANDES et INDICATEURS
Sélecteur de
programmes
Bouton
Sélection
temps
Voyant vidage
réservoir d'eau
Bouton départ
différé
Voyant entretien
filtre
L'option Séchage
Délicat
Bouton
Défroissage
Display
Bouton
Marche/Arrét
Panneau de commande et témoins indicateurs
Sélecteur de programmes: En tournant le sélecteur, il permet de choisir le programme désiré
Sélection Temps : Permet de modifier la durée du programme choisi; il peut être utilisé pour
certains programmes uniquement .
Départ différé : Permet de différer le départ du cycle de séchage, par exemple pour utiliser
l'appareil pendant les heures creuses (pour cela, se référer à la section dediée).
Textiles Délicats : En appuyant sur ce bouton,le voyant s'éteint et l'indicateur délicats s'allume;
le séchage s'effectuera à températures modérées pour un meilleur soin du linge.
Défroissage : Permet de programmer un cycle anti-plis à la fin du séchage. Le tambour en
mouvement continus évite d'alourdir le linge sec.
Ventilation : S'allume quand le cycle est dans la phase finale de refroidissement.
Départ/Pause : permet de lancer le programme selectionné ou de suspendre le cycle.
Programmes Automatiques : En fonction du programme choisi, les voyants s'allument (voir liste
programmes); l'indicateur ECO : indique qu'un programme à faible consommation a été choisi.
Nettoyage filtre : Quand cet voyant s'allume, il est nécessaire de nettoyer le filtre.
Réservoir d'eau : Quand cet voyant s'allume, il est nécessaire de vider le réservoir de l'eau de
condensation.
SÉLECTION DU PROGRAMME
44
FR
Ce sèche-linge est doté d'un capteur de séchage qui
permet de sélectionner le programme préféré en fonction
du résultat de séchage désiré.
Pour les charges réduites ou les tissus pré-séchés, il est
conseillé d'utiliser un programme à durée déterminée, en
appuyant sur le bouton "Textiles Délicats" de manière à
avoir une temperature réduite à l'intérieur du tambour.
Dans le cas où le capteur ne détecte pas la présence de
linge, le séche-linge ne fonctionnera que pendant 10
minutes avant de se mettre en mode refroidissement.
Si la charge est trop importante ou trop humide, le séchelinge fontionne automatiquement pendant 3 heures avant
de se mettre en mode refroidissement.
A la fin de chaque prog ramme, la phase de
refroidissement a toujours lieu à avec de l'air froid et dure
en moyenne 15 minutes.
Page 21

SÉLECTION DU PROGRAMME
PROGRAMME
Perfect Home
Sec
Prêt à Ranger
Prêt à repasser
Anti-Plis
Laine
Mix & Dry
Idéal Pour
Du linge que l'on veut complètement sec, par exemple les serviettes en
éponge, les peignoirs, les nappes et les draps. Durée: environ 3 heures.
Du linge qui peut être rangé sans être repassé, comme les pulls en tissus
mixtes, les chaussettes, les vêtements pour enfants. Durée: environ 2
heures et 45 minutes.
Du linge qui ne nécessite pas de repassage, mais qu'il faut suspendre à
un cintre après le séchage. Durée : 2 heures et 30 minutes.
Du linge que l'on préfère garder légèrement humide, afin de faciliter le
repassage. Durée: environ 1 heure et 50 minutes.
Du linge à rafraîchir, idéal pour du linge qui à été laissé dans le bac à linge
pendant quelques jours ou après les avoir séchés à l'extérieur ou sur des
radiateurs. Le cycle a une fonction anti-plis qui relaxe les fibres et facilite le
repassage. Durée: 9 minutes + 3 minutes de refroidissement.
Pour rendre les lainages plus doux ou pour les rafraîchir après une longue
période passée dans l'armoire. Durée: 12 minutes.
To dry mixed cotton and synthetic clothes: save time and no need to
separate the washing and dry them in different cycles. Time: around 2h (max
4 kg).
Chemises
Rapide 40'
Temps
Jeans
Sécher les chemises en coton ou en fibres synthétiques. Durée: 1 heure
pour 2 Kg de chemises en fibres synthétiques (environ 10 chemises ); 1
heure et 20 minutes pour 3 Kg de chemises en coton (environ 10 chemises).
Permet d'avoir des vêtements secs, rafraîchis et prêts à porter en
seulement 40 minutes. Le capteur contrôle constamment la température
pour un meilleur résultat de séchage. Max 2 Kg de linge.
Si besoin, ce programme permet de choisir manuellement la durée de
séchage, de 30 à 180 minutes. En sélectionnant "20 minutes" on choisi un
programme à froid, idéal pour éliminer d'éventuelles odeurs.
Pour sécher jusqu'à 4 Kg de jeans (environ 5 paires de Jeans). Le
programme dure environ 2 heures, mais la durée peut varier en fonction de
la charge et de la vitesse d'éssorage utilisée lors du cycle de lavage. Il est
conseillé d'utiliser le cycle Jeans pour les articles 100% Coton, en faisant
attention à ne pas mélanger les couleurs et à ne pas sécher les jeans ayant
des broderies et des accessoires.
45
FR
Page 22

PORTE et FILTRE
Ouverture De La Porte
Tirez sur la poignée
pour ouvrir la porte.
Pour remett r e le
s è c h e - l i n g e e n
marche, fermez la
porte et appuyez .
ATTENTION ! Lorsque le sèche-linge est
en cours d’utilisation, il se peut que le tambour
et la porte soient TRES CHAUDS. N'arrêtez
jamais le sèche-linge avant la fin du cycle de
séchage sauf si tous les articles sont
rapidement retirés et étendus de façon à
dissiper la chaleur.
Filtre
IMPORTANT: Pour garder une efficacité
constante du sèche-linge, vérifier que le filtre
soit propre avant chaque cycle de séchage
Ne pas utiliser le sèche-linge sans le filtre. Un
filtre encrassé peut augmenter la durée de
séchage et causer des dégâts qui peuvent
entraîner des coûts de réparation importants.
1. Tirez le filtre vers le
haut.
2. Ouvrez le filtre,
comme illustré.
3. Retirez doucement
les peluches à l’aide
d’une brosse douce ou
du bout des doigts.
4. Réenclenchez le
filtre et poussez-le en
place.
Indicateur Entretien Filtre
Vérifier et nettoyer
le filtre situé dans la
porte ai nsi que le
c o n d e n s e u r s i t u é
derrière la plaque de
protection, en bas du
sèche-linge.
Si le linge n’est pas
sec, vérifier que le filtre
ne soit pas encrassé.
Nettoyage du condenseur
1. Enlever la plaque de
protection
2. Tourner les deux
leviers de blocage dans
le sens contraire des
aiguilles d’une montre
et retirer la porte.
3. Retirez doucement la
p o u s si èr e o u l e s
pel u c h e s a v e c u n
chiffon. Ne pas utiliser
d’eau pour nettoyer le
condenseur.
4. Enlever délicatement
l ’ é p o n g e d e s o n
emplacement et laver
l’éponge en la passant
sous un filet d’eau afin
d’enlever tout reste de
p o u s si è r e o u d e
peluches.
5 . R e m e t t e z
c o r r e c t e m e n t l e
condenseur en place
(en suivant la flèche) en
le poussant fermement.
B l o q u e z l e s d e u x
leviers en position en
les tournant dans le
sens des aiguilles d’une
montre.
6. Remettez la plaque
de protection en place.
FR
46
Page 23

CONDENSEUR
RÉSERVOIR D’EAU
L’eau récupérée du linge pendant le cycle de
séchage est recueillie dans un bac situé en bas
du sèche-linge. Quand le réservoir est plein,
l’indicateur s’allume sur le panneau de
commande et le réservoir DOIT ABSOLUMENT être vidé. Cependant, nous
recommandons de vider le réservoir après
chaque cycle de séchage.
NOTE : Il n'y a que très peu d'eau qui est
récupéré pendant les premiers cycles d'une
nouvelle machine, car le réservoir intérieur est
rempli en premier.
Pour Retirer Le Réservoir
1. Tirez doucement le
r é s e r v o i r j u s q u ' à
l'extraire complètement.
Tenez-le fermement à
deux mains.
Lorsque le réservoir est
plein, il pèse environ 4
kg.
2. Inclinez le réservoir
d'eau pour vidanger
l'eau par le trou arrière.
Une fois vidé, remettez
le réservoir d'eau dans
sa position d'origine.
P O U S S E Z - L E
F E R M E ME N T E N
PLACE.
3.Appuyer sur la touche
de départ pour lancer le
cycle.
N O T E : S i v o u s
disposez d'une bouche
d'évacuation proche du
sè c h e - l i n g e, i l e s t
possible d'installer le kit
d'évacuation de façon
p e r m a n e n t e p o u r
v i d a n g e r l ' e a u
acc u mulé e da n s l e
sèche-linge. Il n'y aura
ainsi plus besoin de
vider le réservoir d'eau.
Toutes les informations
d'assemblage du kit sont
fournies avec celui-ci.
FONCTIONNEMENT
1.Ouvrir la porte et charger le linge dans le
tambour.Vérifier qu'aucun vêtement n'entrave
la fermeture de la porte.
2. Fermer doucement la porte en la poussant
jusqu'à ce que vous entendiez un déclic.
3. Tournez le sélecteur de programme et choisir
le programme de séchage souhaité (consultez
le guide de programmation pour de plus amples
détails)
4. Pour sécher des articles délicats,
synthétiques ou acryliques,appuyez sur le
bouton pour diminuer la température de
séchage. Le voyant s'allume lorsque vous
sélectionnez cette option. Pour désactiver ce
mode, appuyez de nouveau et programmez de
nouveau l'appareil.
5. Appuez sur le bouton . Le sèche-linge
démarre automatiquement et le voyant situé au
dessus du bouton s'allume.
6. Si vous ouvrez la porte pendant le cycle de
séchage pour vérifier le linge, il est nécessaire
d'appuyer sur le bouton , pour recommencer
le séchage une fois la porte refermée.
7. Lorsque le cycle est bientôt terminé, la phase
de ventilation à froid commence. Les
vêtements sont séchés avec de l'air froid afin de
les refroidir.
8. Lorsque le programme est terminé, le voyant
END s'allume sur le display.
9. A la fin du cycle, le tambour continuera à
tourner de manière intermittente afin de
minimiser les plis. Cette opération se poursuit
jusqu'à ce que la porte s'ouvre.
Afin d'assurer un séchage efficace dans les
meilleures conditions, ne pas ouvrir la porte lors
des cycles de séchage automatiques.
FR
82
FR
47
Page 24

FONCTIONNEMENT
Départ Différé
La fonction départ différé permet de différé le départ du cycle de séchage de 1 à 24 heures.
Lorsque cette fonction est selectionnée pour la première fois, l'afficheur indique un délai d'une
heure. Il convient d'appuyer plusieurs fois sur le bouton pour repousser successivement le
démarrage d'heure en heure, et ce jusqu'à 24H maximum.
Pour démarrer le programme, appuyez sur . Le voyant lumineux clignotera et l'afficheur
indiquera le temps restant du cycle.
Annulation et Réinitialisation du Programme
Pourt annuler le programme, appuyez sur la touche pendant 3 secondes. La machine
indiquera qu'elle à été réinitialisée par le clignotement de 0:00 sur l'afficheur.
NETTOYAGE ET ENTRETIEN DE ROUTINE
Nettoyage Du Sèchelinge
● Nettoyez le filtre et videz le réservoir d’ eau
après chaque cycle de séchage.
●Nettoyer le filtre à intervalles réguliers
● Après chaque période d’utilisation, essuyez
L’intérieur du tambour et laissez la porte
ouverte pendant un moment pour qu’il puisse
sécher grâce à la circulation d’air.
● Essuyez l’extérieur de la machine et la porte
avec un chiffon doux.
● N’UTILISEZ PAS de tampons ou d’ agents
de nettoyage abrasifs.
●Pour empêcher que la porte n'adhère ou que
les peluches s'accumulent, nettoyez après
chaque fin de cycle la surface intérieure et le
joint de la porte avec un chiffon humide.
ATTENTION! Il est possible que le
tambour, la porte et la charge soient très
chauds.
Spécifications Techniques
Capacité du tambour 115 litres
Charge maximale 7 kg
Hauteur 85 cm
Largeur 60 cm
Profondeur 60 cm
Étiquette d'énergie A ++
Information pour Laboratoire d'essai
EN 61121 Programme
Programme
Pour utiliser
-
-Coton Sec
-Coton Sec Au Fer
-Les Tissus Délicats
Pr t ranger é à
-
Pr t repasser é à
-
Pr t ranger é à
+ Délicat
Remarque : Installer et utiliser le kit d'évacuation
pour évacuer l'eau issue de la condensation.
IMPORTANT Coupez toujours le courant et
débranchez la fiche de l’alimentation électrique
avant de nettoyer cet appareil.
Pour les données électriques, veuillez
consulter l’étiquette des valeurs nominales qui
se trouve à l’avant de l’armoire du sèche-linge
(avec la porte ouverte).
FR
48
Page 25

DÉPISTAGE DE PANNES
Qu'est-ce qui peut être à l'origine de...
Défauts que vous pouvez rectifier vousmême
Avant d’appeler le service GIAS pour obtenir des
conseils, veuillez suivre la liste des vérifications
ci-dessous. L’intervention sera facturée si la
machine fonctionne correctement ou si elle a été
installée ou utilisée de manière incorrecte. Si le
problème persiste alors que vous avez terminé
les vérifications recommandées, veuillez appeler
le service GIAS qui pourra peut-être vous aider
par téléphone.
Le temps restant affiché peut varié pendant le
cycle de séchage. Le temps est constamment
ajusté au cours du cycle afin de donner la
meilleure estimation possible. Le fait que le
temps restant augmente ou diminue pendant
le cycle est normal.
La période de séchage est trop longue/les
vêtements ne sont pas suffisamment secs…
●Avez-vous sélectionné le temps de séchage/le
programme qui convient ?
● Les vêtements étaient-ils trop mouillés ? Les
vêtements avaient-ils été adéquatement essorés
en machine ou à la main ?
● Le filtre doit-il être nettoyé ?
● Faut-il nettoyer le condenseur ?
● Le sèche-linge est-il surchargé ?
● Les entrées, sorties et la base du sèche-linge
sont-elles libres d'obstructions ?
● Avez-vous sélectionné le bouton au cours
d’un cycle précédent ?
Le sèche-linge ne fonctionne pas…
● Le sèche-linge est-il branché sur une
alimentation électrique adéquate ? Vérifiez à
l’aide d’un autre appareil, par exemple une lampe
de chevet.
● La fiche est-elle bien branchée sur
l’alimentation de secteur ?
● Y a-t-il une panne de courant ?
● Le fusible a-t-il sauté ?
● La porte est-elle bien fermée ?
● Le sèche-linge est-il en position de marche, au
niveau du courant de secteur et de la machine ?
● La période de séchage ou le programme a-t-il
été sélectionné ?
● La machine a-t-elle été remise en marche après
l’ouverture de la porte ?
● Le sèche-linge s’est-il arrêté parce que le
réservoir d’eau est plein et qu’il faut le vider ?
Le sèche-linge est bruyant…
● Arrêtez le sèche-linge et contactez le service
GIAS pour obtenir des conseils.
L'indicateur est allumé…
● Le filtre doit-il être nettoyé ?
● Faut-il nettoyer le condenseur ?
L'indicateur est allumé…
● Le réservoir d’eau doit-il être vidé ?
SERVICE CLIENTÈLE
En cas de problème après avoir effectué toutes
les inspections recommandées, veuillez
contacter le Service. Il pourra vous aider par
téléphone ou organiser la visite d'un technicien,
en vertu des conditions de votre garantie.
Cependant, vous serez facturé dans l’un des
cas suivants :
● Si la machine est en bon état de marche.
● Si la machine n’a pas été installée
conformément aux instructions d’installation.
● Si la machine a été utilisée incorrectement.
Pièces De Rechange
Utilisez toujours des pièces de rechange du
fabricant, disponibles auprès du service GIAS.
Service GIAS
Pour les entretiens et les réparations, contactez
votre technicien local du service GIAS.
Le constructeur décline toute responsabilité
en cas d’erreurs d’impression dans le
présent document. Le constructeur se
réserve le droit d’apporter les modifications
nécessaires à ses produits sans en changer
les caractéristiques de base.
FR
49
Page 26

INDEX
Inleiding
Afleveringsinformatie
Uitpakken Van Het Product
Veiligheidsaanwijzingen
Gebruik
Installatie
De Was
Het Milieu
Gias-service
Installatie
Elektrische Vereisten
De Voeten Verstellen
Montageset Voor Afvoerslang: Montage Instructies
De Lading Voorbereiden
Voorbereiding Van De Kleren
Sorteren Van Het Wasgoed
Niet In De Droogtrommel Doen
Energie Besparen
Richtlijnen Voor Het Drogen
Bediening & Indicatielampjes
Het Programma Kiezen
Deur En Filter
De Deur Openen
Filter
Filter Schoonmaken Indicatielampje
Watercontainer
Om Het Reservoir Te Verwijderen
Condensator
De Condensator Verwijderen
Bediening
Het Programma Annuleren En Resetten
Start Uitstel Functie
Schoonmaken En Onderhoudsbeurten
Schoonmaken Van De Droger
Technische Specificaties
Problemen Oplossen
Klantenservice
Reserveonderdelen
Gias-service
27
27
27
27
27
28
28
28
28
29
29
29
29
30
31
31
31
31
31
32
33
34
34
34
34
34
35
35
35
36
36
36
36
36
36
37
37
37
37
NL 50
Page 27

INLEIDING
Lees deze instructies zorgvuldig door en gebruik deze machine op basis van deze aanwijzingen. Dit
boekje geeft u naast belangrijke richtlijnen voor het veilige gebruik de veilige installatie en het veilige
onderhoud van de machine ook enkele nuttige tips over hoe u de beste resultaten bekomt wanneer u met
deze machine wast.
Bewaar alle documentatie op een veilige plek zodat u of de toekomstige eigenaars van de machine ze in de
toekomst opnieuw kunnen raadplegen.
Afleveringsinformatie
Controleer dat de volgende items samen met de
wasmachine werden geleverd:
● Handleiding
● Garantiekaart
● Energiekeurmerk
Controleer of de machine schade heeft
opgelopen tijdens het vervoer. Indien dit het
geval is, neem dan contact op met GIAS.
Als u de bovenstaande aanwijzingen niet
opvolgt, kan de veiligheid van de machine niet
worden gegarandeerd. Indien het probleem met
uw machine wordt veroorzaakt door misbruik,
kunnen de kosten van de onderhoudsbeurt aan u
worden doorberekend.
VEILIGHEIDSAANWIJZINGEN
Gebruik
● Deze machine is niet bedoeld voor gebruik door personen (waaronder kinderen) met een verminderd
fysiek, motorisch of mentaal vermogen, of personen zonder ervaring en kennis, tenzij zij onder toeziend oog
staan of instructies hebben gekregen over de machine door een persoon die verantwoordelijk is voor hun
veiligheid.
● Kinderen moeten in de gaten gehouden worden, om erop toe te zien dat ze niet spelen met de machine.
● WAARSCHUWING Misbruik van een droogtrommel kan brand veroorzaken.
● Deze machine is alleen voor huishoudelijk gebruik, m.a.w. voor het drogen van huishoudelijk textiel en
kleding.
● Dit apparaat mag uitsluitend gebruikt worden voor het doel waarvoor het vervaardigd is, zoals dat in deze
handleiding beschreven wordt. Verzeker u ervan dat u de instructies voor de installatie en het gebruik
volledig begrijpt voordat u de machine gebruikt.
● Raak de machine niet aan als uw handen of voeten nat of vochtig zijn.
● Leun niet tegen de deur als u de machine laadt en gebruik de deur niet om de machine op te tillen of te
verplaatsen.
● Sta niet toe dat kinderen met de machine of de bediening ervan spelen.
● WAARSCHUWING Gebruik het apparaat niet als de pluizenfilter niet geplaatst of beschadigd is; pluis kan
ontbranden.
● WAARSCHUWING Op de plaats van het symbool voor warm oppervlak kan de temperatuur tijdens
het drogen tot meer dan 60 graden C stijgen.
● Haal de stekker uit het stopcontact. Haal altijd de stekker uit het stopcontact voordat u de machine
schoonmaakt.
● Blijf deze machine niet gebruiken als ze een gebrek lijkt te hebben.
● Pluizen of dons mogen zich niet op de grond rondom de buitenkant van de machine ophopen.
● De trommel kan vanbinnen erg heet worden. Wacht altijd met het uithalen van het wasgoed tot de
afkoelingsperiode van de droger voorbij is.
UITPAKKEN VAN HET PRODUCT
Verwijder de machine uit de
verpakking op de plek waar
u de machine wilt plaatsen.
1. Snij voorzichtig rond de
voet van de verpakking en
langs een hoek omhoog.
2. Verwijder de hoes van
polyethyleen en til de droger
van de polystyrene voet.
Gooi de verpakking veilig weg. Zorg dat
de verpakking buiten bereik van kinderen blijft,
het vormt een potentieel gevaar.
51
NL
Page 28

VEILIGHEIDSAANWIJZINGEN
Installatie
● Controleer het apparaat op zichtbare
beschadigingen vooraleer u het gebruikt.
Gebruik het niet als het beschadigd is maar
neem contact op met GIAS-Service.
● Gebruik geen adapters, meervoudige stekkers
en/of verlengsnoeren.
● Installeer de droger nooit tegen gordijnen aan
en zorg ervoor dat er geen artikelen achter de
droger kunnen vallen en zich daar kunnen
ophopen.
● De machine mag niet worden geïnstalleerd
achter een afsluitbare deur, een schuifwand of
een deur met een klink aan de andere zijde van
de deur t.o.v. de droogtrommel.
De Was
● Geen ongewassen wasgoed in de droogtrommel
drogen.
● WAARSCHUWING Geen stoffen in de
droogt romm el do en die met c hemi sche
reinigingsvloeistoffen zijn behandeld.
● WAARSCHUWING Materialen uit schuimrubber
kunnen onder bepaalde omstandigheden,
wanneer ze verhit worden, spontaan ontbranden.
Artikelen zoals schuimrubber (latexschuim),
douchekapjes, waterproef textiel, artikelen met
een rubberzijde en kleding of kussens met
schuimrubberen pads MOGEN NIET in de
droogtrommel worden gedroogd.
● Bekijk altijd de wasvoorschriften op het wasgoed
om te controleren of u het in de droger mag drogen.
● Kleren moeten gecentrifugeerd of grondig
uitgewrongen worden, voordat zij in de
droogtrommel gestopt worden. Druipnatte kleren
mogen NIET in de droger gestopt worden.
● Aanstekers en lucifers mogen niet in zakken
blijven zitten en gebruik NOOIT ontvlambare
vloeistoffen in de buurt van het apparaat.
●Glasvezelgordijnen mogen NOOIT in dit apparaat
worden gestopt. Er kunnen zich huidirritaties
voordoen als andere kledingstukken met de
glasvezels in aanraking geweest zijn.
● Wasgoed dat is verontreinigd met substanties,
zoals kookolie, aceton, alcohol, petroleum,
kerosine, vlekverwijderaars, terpetine, wax en
waxverwijderaars, moeten in heet water gewassen
worden met extra wasmiddel voordat ze in de
droogtrommel worden gedroogd.
● Wasverzachters en vergelijkbare producten
moeten worden gebruikt volgens de Aanwijzingen
die op de wasverzachter staan vermeld.
Het Milieu
● A l le v e r p a k k in g sm a te r i a l e n z ij n
milieuvriendelijk en recycleerbaar. Doe de
v e r p a k k i n g s m a t e r i a l e n o p e e n
milieuvriendelijke manier van de hand. Uw
gemeente kan u informeren over de beste
manier om deze materialen weg te ruimen.
● Wanneer u een oude wasmachine van de
hand doet, moet u voor alle veiligheid de
stekker uit het stopcontact halen, het
stroomsnoer afknippen en dit samen met de
stekker vernietigen. Om te voorkomen dat
kinderen zichzelf in de machine opsluiten,
breekt u de scharnieren of het slot van de deur.
Europese Richtlijn 2002/96/EC
Di t appa raat v oldoet aan de
Europese richtlijnen 2002/96/EC
voor elektrische en elektronische
afval.
Door dit apparaat correct te verwijderen, helpt u
het potentiële negatieve gevolg voor de omgeving
en menselijke gezondheid te voorkomen, welke
anders door onjuiste verwijdering zou kunnen
worden veroorzaakt.
Het symbool op het product duidt aan dat dit
pr od uct niet beha nd eld zal worde n al s
huishuidelijk afval. In plaats daarvan zal het
apparaat naar het verzamelpunt voor de recycling
van elektrische en elektronische uitrusting gaan.
De verwijdering moet in overeenstemming met
p l a a t s e l i j ke m i li eu v o o r s c h r i f te n v o o r
afvalverwerking uitgevoerd worden. Voor meer
gedetailleerde informatie over de verwijderingvan
dit product, neemt u contact op met uw
gemeenlijke reinigingsdienst of de dealer waar u
het apparaat heeft gekocht.
GIAS-Service
● Om te zorgen voor een continue veilige en
efficiënte werking van dit apparaat, bevelen wij
Aan dat servicing of reparaties alleen worden
ui tgevoerd door een bevoegde GIAS
onderhoudsmonteur.
Als de machine niet correct functioneert of
kapot gaat, schakelhet dan uit en haal de stekker
uit het stopcontact. Wendt u tot GIAS-Service
voor reparaties.
NL
52
52
Page 29

INSTALLATIE
Elektrische Vereisten
Drogers worden geleverd om te kunnen werken op
een voltage van 220 240 V, 50 Hz monophase.
Controleer of het voedingscircuit ten minste 10A
bedraagt.
Elektriciteit kan erg gevaarlijk zijn.
Deze machine moet geaard zijn.
Het stopcontact en de stekker van de machine
moeten van hetzelfde soort zijn.
Gebruik geen meervoudige adapters en/of
verlengsnoeren.
Nadat het apparaat is geïnstalleerd, moet de
stekker bereikba ar bl ij ven o m uit het
stopcontact te halen.
CE apparaat voldoet aan de Europese richtlijn
200 4 /10 8 /EC , 2 006/ 95/E C e n vol g end e
aanvullingen.
Indien het probleem met uw machine wordt
Veroorzaakt door een verkeerde installatie,
kunnen de kosten van de onderhoudsbeurt aan
u worden doorberekend.
VENTILATIE
De kamer waarin de droger geplaatst wordt, moet
voldoende geventileerd worden om te voorkomen
dat gassen van mechanismen die werken via
brandstofverbranding, zoals een open haard, in de
kamer gezogen worden wanneer de droger in
werking is.
● Afzuiglucht mag niet in een via een afvoer
waarlangs uitlaatstoffen van mechanismen die
gas of andere brandstoffen verbranden, worden
afgevoerd.
● Controleer regelmatig dat de lucht die door de
droger stroomt, niet geblokkeerd wordt.
● Controleer na gebruik de pluizenfilter en maak
die indien nodig schoon.
● De aanvoeren en afvoeren moeten vrij
gehouden worden van obstructies. Om te zorgen
voor voldoende ventilatie moet de ruimte tussen
de onderkant van de machine en de vloer vrij
blijven. Er moet een opening van ten minste 12
mm zijn tussen de machine en enig obstakel.
● Voorkom dat artikelen achter de droger vallen of
zich daar ophopen omdat deze de luchtaanvoer
en afvoer kunnen belemmeren.
● Installeer de droger NOOIT tegen gordijnen aan.
Als de stroomkabel van het toestel
beschadigd is, dan moet hij vervangen worden
door een speciaal snoer dat ALLEEN bij de dienst
Reserveondelen verkrijgbaar is. De kabel moet
door een bekwaam persoon worden geïnstalleerd.
Sluit de machine niet aan en start deze niet
voordat de installatie is voltooid. Voor uw veiligheid
moet deze droger op de juiste manier worden
geïnstalleerd. Als er ook maar enige twijfel bestaat
over de installatie, bel dan de GIASService voor
advies.
De Voeten Verstellen
Als de machine is
geplaatst, moeten de
voeten worden versteld
zoda t de machine
waterpas staat.
Air Outlets in the Base
Belangrijk: Het apparaat moet in een
rechtopstaande positie worden vervoerd.
Indien nodig, mag de droger alleen worden
gedraaid volgens getoonde zijde;
Let op: Als het apparaat in een andere positie
werd vervoerd, wacht dan ten minste vier uur
voordat u het apparaat aanzet, zodat de
vloeis tof in de comp ressor zich kan
stabiliseren. Als u dit na laat kan dit leiden tot
schade aan de compressor.
NL
53
5
Page 30

Afvoerslang kit: Montage-instructies
Om te voorkomen dat het waterreservoir moet
worden geleegd na elk droogcyclus, kan het
water dat normaal gesproken wordt verzameld
tijdens het droogproces direct worden afgevoerd
naar een afvalwaterafvoerpijp (Hetzelfde
afvoersysteem als bij huishoudelijke wastafels).
Gemeenschappelijke water regelgeving verbiedt
het aansluiten op het oppervlaktewater. De
afvoerslang moet naast de droger worden
geplaatst.
De kit bestaat uit: een slang, een rechte pijp-
aansluiting, een pijpbeugel en plastic tie-rap. .
WAARSCHUWING! Schakel eerst de
machine uit en trek de stekker uit het
stopcontact, voor uw de droger gebruikt.
Bevestig de kit als volgt::
1 . D r a a i d e d r i e
sch r o e v e n a a n de
ach t erzijd e v a n d e
m a c h i n e l o s e n
ve rwi jder deze met
b e h o u d v a n h e t
werkblad (worktop trim).
2.V e r w i j d e r h e t
achterst e werkbla d
(worktop trim) en het
bovens t e werkblad
(worktop surface) door
het voorzichtig naar de
achterkant v a n de
machine te schuiven.
3.De afvoerbak bevindt
zich aan de rechterkant
van de machine (gezien
vanaf de achterkant).
Een grijze slang is
verbonden met de brug
boven de watertank.
Ve r w i j d e r d e oude
pijpbeugel met behulp
van een tang van de
brug.
4. Koppel de slang van
de brug-verbinding.
5. Bevestig de slang uit
de kit, met behulp van
de geleverde brug en
pijpbeugels, aan de
verwijderde slang van
de brug-verbinding.
NL
54
6. Verwijder de deksel van
het waterreservoir aan de
a c h t er k an t v a n d e
machine door de twee
schroeven te verwijderen
en de deksel open te
klikken
.
7. Breek het lipje aan de
zijkant van de deksel af en
plaats de deksel weer op
de ma c h in e , p l aa ts
vervolgens de schroeven.
U zou nu een gat moeten
zien aan de achterkant
van de kast naast het
deksel.
8. Plaats de afvoerslang
door de opening van de
kast.
9. Verbindt de grijze slang
en bevestig de slang aan
de brug met behulp van de
plastic tie-rap.
10. Schuif voorzichtig het
werkblad terug op zijn
plaats en bevestig deze
met de 3 schroeven. Zorg
ervoor dat de slang niet
geknelt raakt.
11 . S lu i t d e n i eu w e
afvoerslang aan op de
waterslang. Zorg ervoor
dat de nieuwe slang niet
verstrengeld raakt als u de
droogtrommel op zijn
plaats schuift en volg de
h i e r b e s c h r e v e n
instructies bij de installatie
van de nieuwe externe
slang.
12. Sluit de machine aan
op de voeding.
13. Schakel de machine
na het legen van de
afvoerbak op AAN(of druk
op de 'START' knop bij
elektronische modellen)
om het droogprogramma
te starten.
Page 31

HET WASGOED VOORBEREIDEN
Alvorens de droogtrommel voor de eerste keer te
gebruiken:
● Lees deze handleiding a.u.b. aandachtig door.
● Verwijder alle artikelen die in de trommel zijn
Gepakt.
● Veeg de binnenkant van de trommel en de deur
met een vochtige doek af om alle stof te verwijderen
dat zich tijdens het vervoer kan hebben verzameld.
Voorbereiding van de Kleren
Zorg ervoor dat het wasgoed dat u wilt drogen,
geschikt is voor het drogen in een droogtrommel,
zoals wordt aangegeven door de wasvoorschriften
op ieder artikel.
Controleer dat alle sluitingen dicht zijn en dat de
Zakken leeg zijn. Keer de kleren binnenstebuiten.
Leg de kleren losjes in de trommel om ervoor te
zorgen dat ze niet in elkaar verward raken.
Niet In De Droogtrommel Drogen:
Wol, zijde, fijn goed, nylon kousen, fijn
borduurwerk, stoffen met metalen versieringen,
kledingstukken met pvc of leren randen,
trainingsschoenen, artikelen met een groot
volume zoals slaapzakken, enz.
BELANGRIJK: Stop geen artikelen in de
droogtrommel, die zijn behandeld met een
chemische reinigingsvloeistof en ook geen rubber
kleren (gevaar voor brand of explosie).
Tijdens de laatste 15 minuten (ongeveer) draait
de was in koude lucht.
Energiebesparing
Stop alleen wasgoed in de droogtrommel dat
grondig is uitgewrongen of gecentrifugeerd.
Hoe droger het wasgoed, hoe korter de
droogtijd waardoor elektriciteit wordt bespaard.
ALTIJD
● Probeer altijd om het maximale gewicht aan
wasgoed te drogen, zo bespaart u tijd en
elektriciteit.
● Controleer altijd voor iedere droogcyclus of de
filter schoon is.
NOOIT
● Stop nooit meer dan het maximale gewicht in
de droger, dit is verspilling van tijd en
elektriciteit.
● Stop nooit druipnat wasgoed in de
droo g t rommel, dit kan het a p paraat
beschadigen.
Maximaal te Drogen Gewicht
● Katoen Max. 7 kg
● Synthetische stoffen Max. 3,5 kg
Overlaadt de trommel niet. Grote stukken
kunnen wanneer ze nat zijn de maximaal
to e g e la t e n w a s lad i n g o v e rs c hri j d en
(bijvoorbeeld: slaapzakken, donsdekens).
Sorteer Het Wasgoed Als Volgt:
● Op wasvoorschrift
Deze vindt u in de kraag of in de binnennaad:
Kan in de droogtrommel gedroogd
worden.
. .
Drogen in de droogtrommel op hoge
temperatuur.
.
Drogen in de droogtrommel alleen op
lage temperatuur.
Niet in de droogtrommel drogen.
Als de stof geen wasvoorschrift heeft, kunt u er
van uitgaan dat het niet geschikt is voor de
droogtrommel.
● Op hoeveelheid en dikte
Altijd wanneer de hoeveelheid wasgoed groter is
dan de capaciteit van de droger, sorteer de
kleren op dikte (b.v. handdoeken apart van dun
ondergoed).
● Op type stof
Katoen/linnen: Handdoeken, jersey katoen,
beden tafellinnen.
Synthetische stoffen: Blouses, overhemden,
overalls, enz. gemaakt van polyester of
p o l y ami d e, e v e n als v o or g e m e n g d
katoen/synthetisch.
● Op de temperatuur van het drogen
Sorteer op: strijkdroog, kastdroog, enz. Voor fijn
goed druk op de -knop om een lage
droogtemperatuur in te stellen.
Installeer het apparaat niet in een ruimte
waar het kan vriezen.
Bij een temperatuur rond het vriespunt kan de
droger mogelijk niet goed functioneren:
er is een kans op schade als het water gaat
bevriezen in de leidingen,kleppen en de pomp.
Voor een betere prestatie van het product moet
de temperatuur van de ruimte tussen de+2°C en
+35°C graden zijn.
NL
55
Page 32

BEDIENINGSKNOPPEN EN INDICATIELAMPJES
Programmakeu
zeschakelaar
Bedieningspaneel / Indicatielampjes
Filter Schoonmaken
Indicatielampje
Tijds Instelling
Toets
Watercontainer
Legen indicatielampje
Startkeuze
Knop
Programma
Display
Acryl / Synthetisch
Toets
Start/Pause
Toets
Anti- Kreuk
Toets
Programma Keuze knop - Kies het gewenste programma
Tijds instelling toets – Hiermee kunt u de tijdsduur van een programma aanpassen It can
be used only with the selection of: Mix&Dry, Shirts and Time Programs
Uitgestelde start – Hiermee kun u de aanvangstijd van de droogcyclus instellen.
Acryl/Synthetisch Toets – Wanneer u hierop drukt zal de standaard indicator vervagen en
de zal oplichten.
Anti- Kreuk toets – Hiermee selecteerd u een anti kreuk programma.
Start/Pause toets – Druk om het gekozen droogprogramma te starten of pauzeren
Memo Toets– Hiermee kunt u en programma opnemen, door tegelijk de Anti-kreuk en de Acryl /
Synthetisch toets gedurende 3 seconden in te drukken, 2 minuten na het gekozen
droogprogramma.
Filter reinigen indicator – Brandt wanneer de filter schoongemaakt moet worden
Water Reservoir legen – Brandt wanneer de watercontainer vol is
Programma Display – De bijbehorende lampjes branden bij het gekozen programma.
- Indicator zal branden als de eco-programma is geselecteerd
Refresh – Brandt als het programma begint met de koelfase.
HET PROGRAMMA KIEZEN
De Hoover Sensor Wasdroger biedt veel opties voor het gewenste
drogen van de was. In de onderstaande tabel staan de
programma's en functie van ieder programma Vermeld.
Opmerking: De sensor zal misschien een kleine lading artikelen
niet ontdekken. Gebruik imerprogramma’s voor kleine ladingen en
aparte artikelen of voorgedroogde stoffen met een laag
vochtgehalte. Stel het programma tussen 30 en 75 minuten
afhankelijk van de grootte van de lading en de vereiste droogte en
slecteer een hoge of lage temperatuur afhankelijk van het soort
stof.
Als de sensor het artikel niet waarneemt, zal de droger slechts 10
minuten draaien, waarna het op afkoelen overgaat.
Als de lading te groot of te nat is om te drogen, zal de droger na
ongeveer 3 uur Automatisch op afkoelen overgaan.
56
NL
Page 33

HET PROGRAMMA KIEZEN
Programma's
Perfect Home
Kastdroog
Niet strijkdroog
Strijkdroog
Anti- Kreuk Toets
Wol
Mix & Dry
Ideaal Voor
Kledij dat u volledig gedroogd wenst, vb. handdoeken, badjassen,
tafelkleden of lakens. Tijd: ongeveer 3u.
Kledij dat u wil vouwen en opbergen zonder te strijken, vb. overhemden in
gemengde stoffen, sokken, babykleren. Tijd: ongeveer 2u en 45 min.
Kledij die niet moet worden gestreken maar enkel worden opgehangen na
de droogcyclus. Tijd: ongeveer 2u en 30 min.
Laat de kledij nog licht vochtig om gemakkelijker te strijken. Tijd: ongeveer
1u en 50 min.
Kledij die u enkel wenst te verfrissen. Ideaal voor kleding dat eerder klaar lag
om te strijken of dat buiten of op een radiator is gedroogd. Dit programma
heeft een speciale functie tegen het kreuken. Het ontspant de vezels en
vergemakkelijkt het strijken. Tijd: 9 min + 3 min afkoelen.
Om uw wollen kleren zacht te maken of te verfrissen na een poosje in de
kast te hebben gehangen. Tijd: 12 min
Om gemengd katoen en synthetische kleren te drogen: u bespaart tijd en u
hoeft de was niet te scheiden en te drogen in verschillende cycli. Tijd:
ongeveer 2u (maximum 4 kg).
Shirts
Rapid 40’
Tijd
Jeans
Om overhemden zowel katoen als synthetische stoffen te drogen. Tijd: 1u
voor 2kg synthetische overhemden (ongeveer 10 overhemden); 1u en 20
min voor 3 kg katoenen overhemden (ongeveer 10 overhemden).
Droogt, verfrist en maakt uw kleren instant klaar in slechts 40 minuten. Het
sensorsysteem houdt de temperatuur onder controle om het beste resultaat
na te streven. Maximum 2 kg.
U kan droogtijden kiezen, gaande van 30 tot 180 minuten. Door „20 min“ te
selecteren kiest u een „koel programma“, ideaal om kleren te verfrissen en
mogelijke geuren te verwijderen.
Droogt tot 4 kg Jeans (ongeveer 5 stuks). Het programma werkt ongeveer
2u, maar de timing kan veranderen volgens de lading en de zwiersnelheid.
Het jeansprogramma kan enkel worden gebruikt voor jeans van 100%
katoen. Meng liever geen kleuren noch jeans met borduursel of
toebehoren.
57
NL
Page 34

DEUR en FILTER
De Deur Openen
Trek aan de hendel
om de deur te openen.
O m d e d r o g e r
opnieuw te starten,
doet u de deur dicht
en drukt u op .
WAARSCHUWING! Wanneer de droger in
gebruik is, kunnen de trommel en de deur ERG
WARM worden. De droger nooit uitzetten voor
het einde van de droogcyclus, tenzij het
wasgoed snel uit de droger wordt gehaald en
uitgespreid om de hitte af te voeren.
Filter
BELANGRIJK: Controleer, om ervoor te
zorgen dat de droger efficiënt blijft werken, voor
iedere droogcyclus of de pluizenfilter schoon is.
1. Trek de filter omhoog.
2. Open de filter zoals
getoond wordt.
3. Haal de pluizen met
een zacht borsteltje of
met uw vingertoppen
voorzichtig weg.
4. Klik de filter samen en
duw hem terug op zijn
Plaats.
Filter Schoonmaken Indicatielampje
brandt wanneer het
filter schoongemaakt
moet worden.
Als het wasgoed niet
d r o o g w o r d t ,
controleer dan of de
filter verstopt is.
Geen water gebruiken om het filter te reinigen!
De Condens Filter Schoonmaken
1.V e r w i j d e r d e
schopplaat.
2.D r a a i d e t w e e
sluithendels tegen de
klok in en haal
de condensator uit de
machine.
3. Haal de condens-unit
uit de machine en haal
voorzichtig alle stof of
pluizen met een doek
weg. Gebruik geen
wa ter om de filter
schoon te maken
4. Verwijder voorzichtig
de spons van zijn plaat
en was hem daarna
door hem onder een
stromende kraan te
houden en hem zo te
draaien dat alle stof of
pluiz e n ve r w i j d erd
worden
5. P l a a t s d e
condensator opnieuw.
Zorg ervoor dat u hem
in de juiste richting
plaatst (volgens de pijl)
en druk hem stevig aan.
Draai de twee hendels
weer met de klok mee
aan.
6. Breng de schopplaat
weer op haar plaats..
NL
58
Page 35

CONDENSATOR
Belangrijk: Zet het apparaat altijd uit en trek
de stekker uit het stopcontact alvorens u de
condensator schoonmaakt.
Controleer regelmatig of de condensator
schoon is om de efficiëntie van de droger te
handhaven.
Om het reservoir te verwijderen
1. T r e k d e l a d e
voorzichtig naar buiten
tot het helemaal is
v e r w i j d e r d .
Ondersteun de lade
met twee handen .
W a n n e e r d e
watercontainer vol is,
zal deze ongeveer 4kg
wegen..
2.H o u d d e
watercontainer schuin,
zodat het water door
het gat achterin kan
wegstromen.
Als de watercontainer
leeg is, schuift u deze
weer op zijn Plaats.
DRUK GOED OP ZIJN
PLAATS.
3. Druk om de
cyclus te herstarten
O P M E R K I N G :
W a n n e e r u e e n
afvoermogelijkheid bij
de droger heeft, kunt u
de afvoerset gebruiken
w a a r m e e e e n
permanente afv oer
ontstaat voor het door
de droger verzamelde
water. Hierdoor hoeft
de waterlade niet meer
geleegd te worden. U
vindt alle informatie
over de montage van
de set in de verpakking
van de set.
BEDIENING
1. Doe de deur open en laad de trommel met
wasgoed. Zorg ervoor dat de kledingstukken
het sluiten van de deur niet belemmeren.
2. Doe de deur voorzichtig dicht u hoort dan
een 'klik'.
3. Draai de programma knop naar het door u
gewenste programma(zie programma Gids).
4. Voor synthetische, acryl of fijne artikelen
drukt u de toets om de temperatuur te
verlagen. Het indicatie lampje gaat branden als
de temp. is verlaagd. Om uit te schakelen
tijdens de eerste paar minuten van het prog.
druk de toets. Na deze periode moet u de
machine resetten om deze instelling te
wijzigen.
5. Druk op de toets. De droger zal
automatisch starten en de indicator boven deze
toets zal gaan branden.
6. Als de deur geopend is geweest tijdens de
cyclus moet u opnieuw op deze toets
drukken om het programma te hervatten, zorg
dat de deur gesloten is.
7. Als de cyclus bijna ten einde is zal de
machine een koelfase ingaan om de kleding af
koelen.
8. Als het programma klaar is zal het END
indicatielampjeop het display gaan branden.
9. Nadat de cyclus is afgerond, zal de trommel
met tussenpozen draaien om kreukelvorming
te minimaliseren. Er zal een signaal klinken, dit
stopt als u de machine uitgeschakeld of de deur
opent.
Om een goede droging te verkrijgen de de
deur niet openen tijdens een programma.
NL
59
Page 36

BEDIENING
Start Uitstel
Uitgestelde start functie geeft de mogelijkheid de start van de droogcyclus uit te stellen van 1
to 24 uur.
Wanneer de functie is gekozen, toont het bedieningspaneel een uitstel van 1 uur. Iedere volgende
druk op de knop zal de uitgestelde start met 1 uur verlengen.
Om de uitstel te bevestigen druk op en zal na het verstrijken van die tijd de droogcyclus
starten. Het lampje zal gaan knipperen om aan te geven dat de startuitstel is geactiveerd.
Het Programma Annuleren En Resetten
Om een programma te stoppen gedurende 3 sec. indrukken. In het TIJD display 0:00
Lampje gaat knipperen om aan te geven dat het programma is gereset.
SCHOONMAKEN EN ONDERHOUDSBEURTEN
Schoonmaken Van De Droger
● Maak het filter schoon en leeg het
waterreservoir na iedere droogcyclus.
● Maak de filters regelmatig schoon.
● Veeg na iedere gebruiksperiode de
binnenkant van de trommel af en laat de deur
een poosje open zodat ze kan drogen door de
circulatie van de lucht.
● Veeg de buitenkant van de machine en de
deur af met een zachte doek.
● G E E N s c h u u r s p o n s j e s o f
schoonmaakmiddelen gebruiken.
● Om te voorkomen dat de deur plakt of pluis
zich ophoopt, moet u de binnendeur
regelmatig schoonmaken met een natte doek.
WAARSCHUWING! De trommel, de deur
en het wasgoed kunnen erg warm zijn.
Technische Specificaties
Trommelcapaciteit 115 liter
Maximale lading 7 kg
Hoogte 85 cm
Breedte 60 cm
Diepte 60 cm
Energieniveaugroep A ++
Testspecificaties
Testspecificaties
EN 61121 Programma Programmakeuze
-Katoen drogen
-Strijkdroog Katoen
-Delicate kleding
Let Op: Installeer en gebruik de afvoerslang
om het condenswater af te voeren..
BELANGRI JK Voor u dit apparaat
schoonmaakt, moet u het altijd uitschakelen en
de stekker uit het stopcontact halen.
De elektrische gegevens vindt u op het
kwalificatieetiket op de voorkant van de droger
(met de deur open).
-Niet strijkdroog
-Strijkdroog
- + SynthetischNiet strijkdroog
NL 60
Page 37

PROBLEMEN OPLOSSEN
Wat Zou De Reden Kunnen Zijn Voor...
Defecten die u zelf kunt oplossen
Voordat u de GIAS-Service voor technisch
advies belt, kunt u de volgende controlelijst
afgaan. Er zullen kosten worden aangerekend
als blijkt dat de machine werkt of dat de machine
niet juist werd geïnstalleerd of gebruikt. Als het
probleem zich na de aanbevolen controles nog
steeds voordoet, belt u GIAS-Service, zodat zij
u telefonisch kunnen helpen.
De weergegeven tijd in het display kan
wijzigen tijdens het drogen. De droogtijd
wordt continue aangepast tijdens de cyclus
en geeft een geschatte tijd weer. De tijd zal
tijdens het drogen meer of minder worden
dit is heel normaal.
De droogtijd is te lang/kleren zijn niet droog
genoeg…
● Hebt u de juiste droogtijd/het juiste
programma gekozen?
● Waren de kleren te nat? Waren de kleren
grondig uitgewrongen of gecentrifugeerd?
● Moet het filter schoongemaakt worden?
● Moet de condensator schoongemaakt
worden?
● Is de droger te vol geladen?
● Worden de aan- en afvoeren en het onderstuk
van de droger niet geblokkeerd?
● Is de -knop geselecteerd voor een
voorgaande cyclus?
De droger werkt niet…
● Staat er spanning op het elektriciteitssnoer
van de droger? Controleer dit door het met een
ander apparaat te gebruiken, zoals een
tafellamp.
● Is de stekker op de juiste manier verbonden
met de netspanning?
● Is de stroom uitgevallen?
● Is de zekering doorgeslagen?
● Is de deur helemaal dicht?
● Staat de droger aan, zowel bij de netspanning
als bij de machine?
● Is de droogtijd of het programma ingesteld?
● Is de machine opnieuw ingeschakeld nadat de
deur open is geweest?
● Is de droger gestopt omdat het waterreservoir
vol is en geleegd moet worden?
De droger maakt herrie…
● Schaker de droger uit en neem contact op met
GIAS-Service voor advies.
Het indicatielampje staat aan…
● Moet het filter schoongemaakt worden?
● Moet de condensator schoongemaakt
worden?
Het indicatielampje staat aan…
● Moet het waterreservoir geleegd worden?
KLANTENSERVICE
Als er nog steeds een probleem mocht zijn met
uw droger nadat u alle aanbevolen controles
hebt uitgevoerd, bel dan a.u.b. de GIASService voor advies. Zij kunnen u misschien
aan de telefoon helpen of volgens de
bepalingen van de garantie een afspraak
maken met een technicus die u komt opzoeken.
Er kunnen evenwel kosten in rekening worden
gebracht als een van de volgende punten op uw
machine van toepassing is:
● De machine blijkt goed te werken
● Ze is niet ge Installatievoorschriften.
● Ze is op een onjuiste manier gebruikt.
Reserveonderdelen
Gebruik altijd originele reserveonderdelen.
Deze zijn direct beschikbaar via GIAS-Service.
GIAS - Service
Voor onderhoud en reparaties belt u met uw
locale GIAS onderhoudsmonteur.
De fabrik an t aanvaardt g ee n verantwoordelijkheid voor drukfouten in dit boekje.
De fabrikant behoudt ook hetrecht voor om
de producten waar nodig aan te passen
zonder de hoofdkenmerken te veranderen.
NL
61
Page 38

40008074
 Loading...