

Page 1

MSA20M_IT_vi.fm Page 1 Friday, October 26, 2001 1:09 PM
FORNO A MICROONDE
Istruzioni d’uso
MSA 20 M
Forno.........................................................................................2
Accessori...................................................................................2
Pannello di controllo..................................................................2
Come utilizzare questo libretto d’istruzioni................................3
Precauzioni di sicurezza...........................................................3
Installazione del forno a microonde ..........................................4
Cosa fare in caso di dubbio o se avete un problema................5
Cottura / Riscaldamento............................................................5
Livelli di potenza........................................................................5
Regolazione del tempo di cottura..............................................6
Scongelamento manuale degli alimenti ....................................6
Uso della modalità Riscaldamento Istantaneo..........................6
Regolazioni per Riscaldamento Istantaneo..............................6
Guida al vasellame per cottura .................................................7
Pulizia del vostro forno a microonde.........................................8
Specifiche tecniche ...................................................................8
Code No. : DE68-01088A
Page 2
MSA20M_IT_vi.fm Page 2 Friday, October 26, 2001 1:09 PM
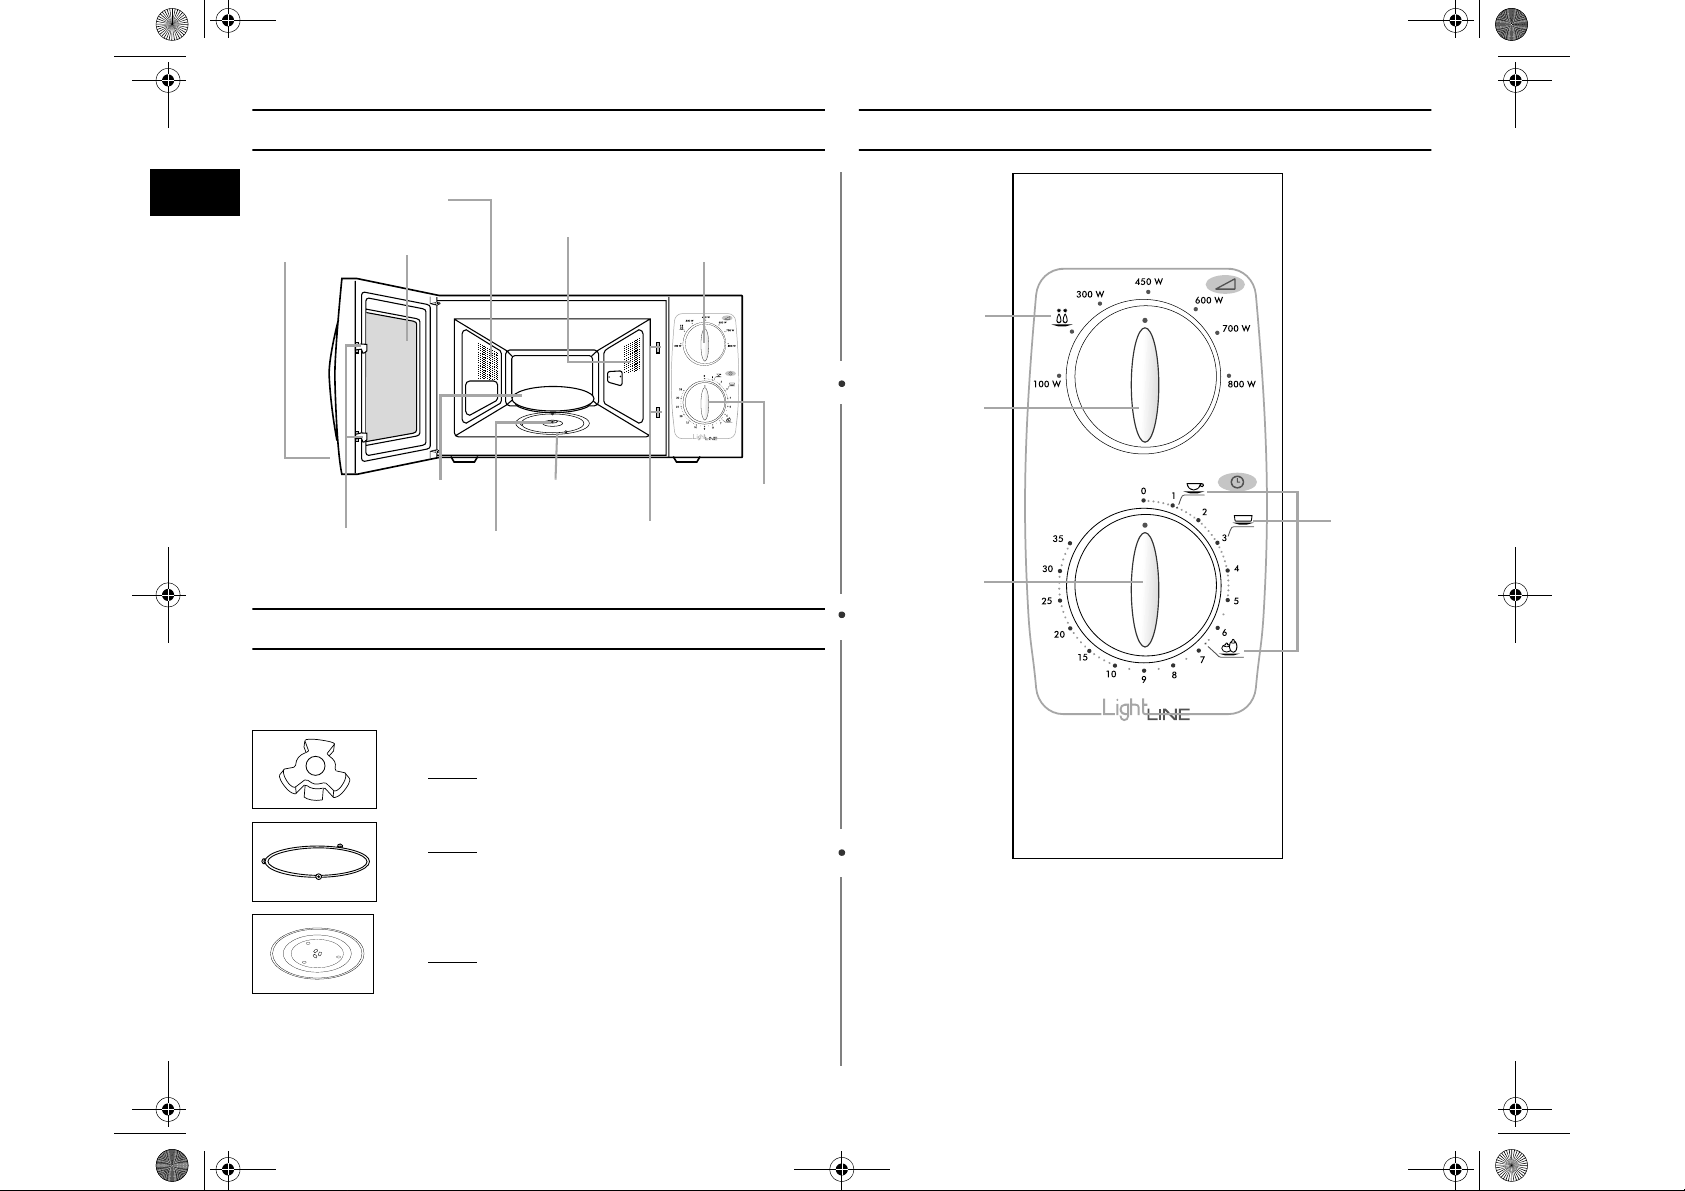
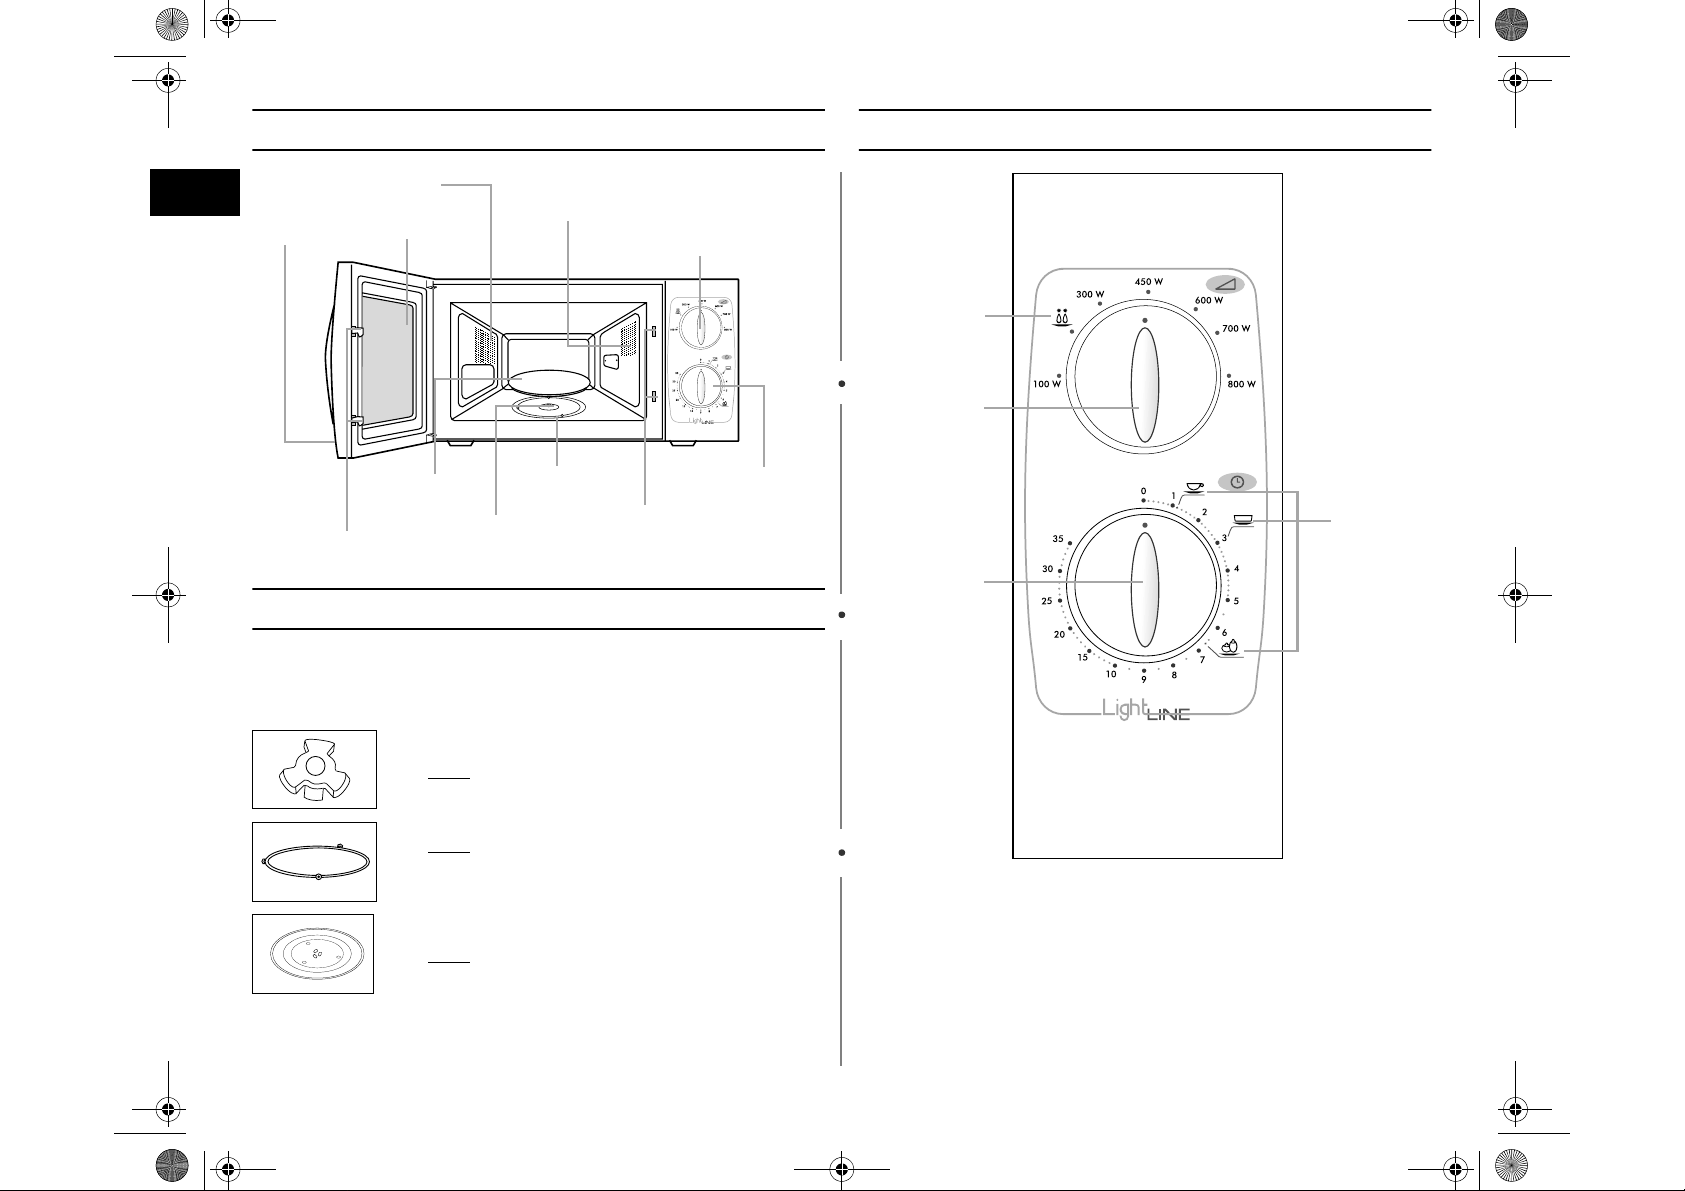
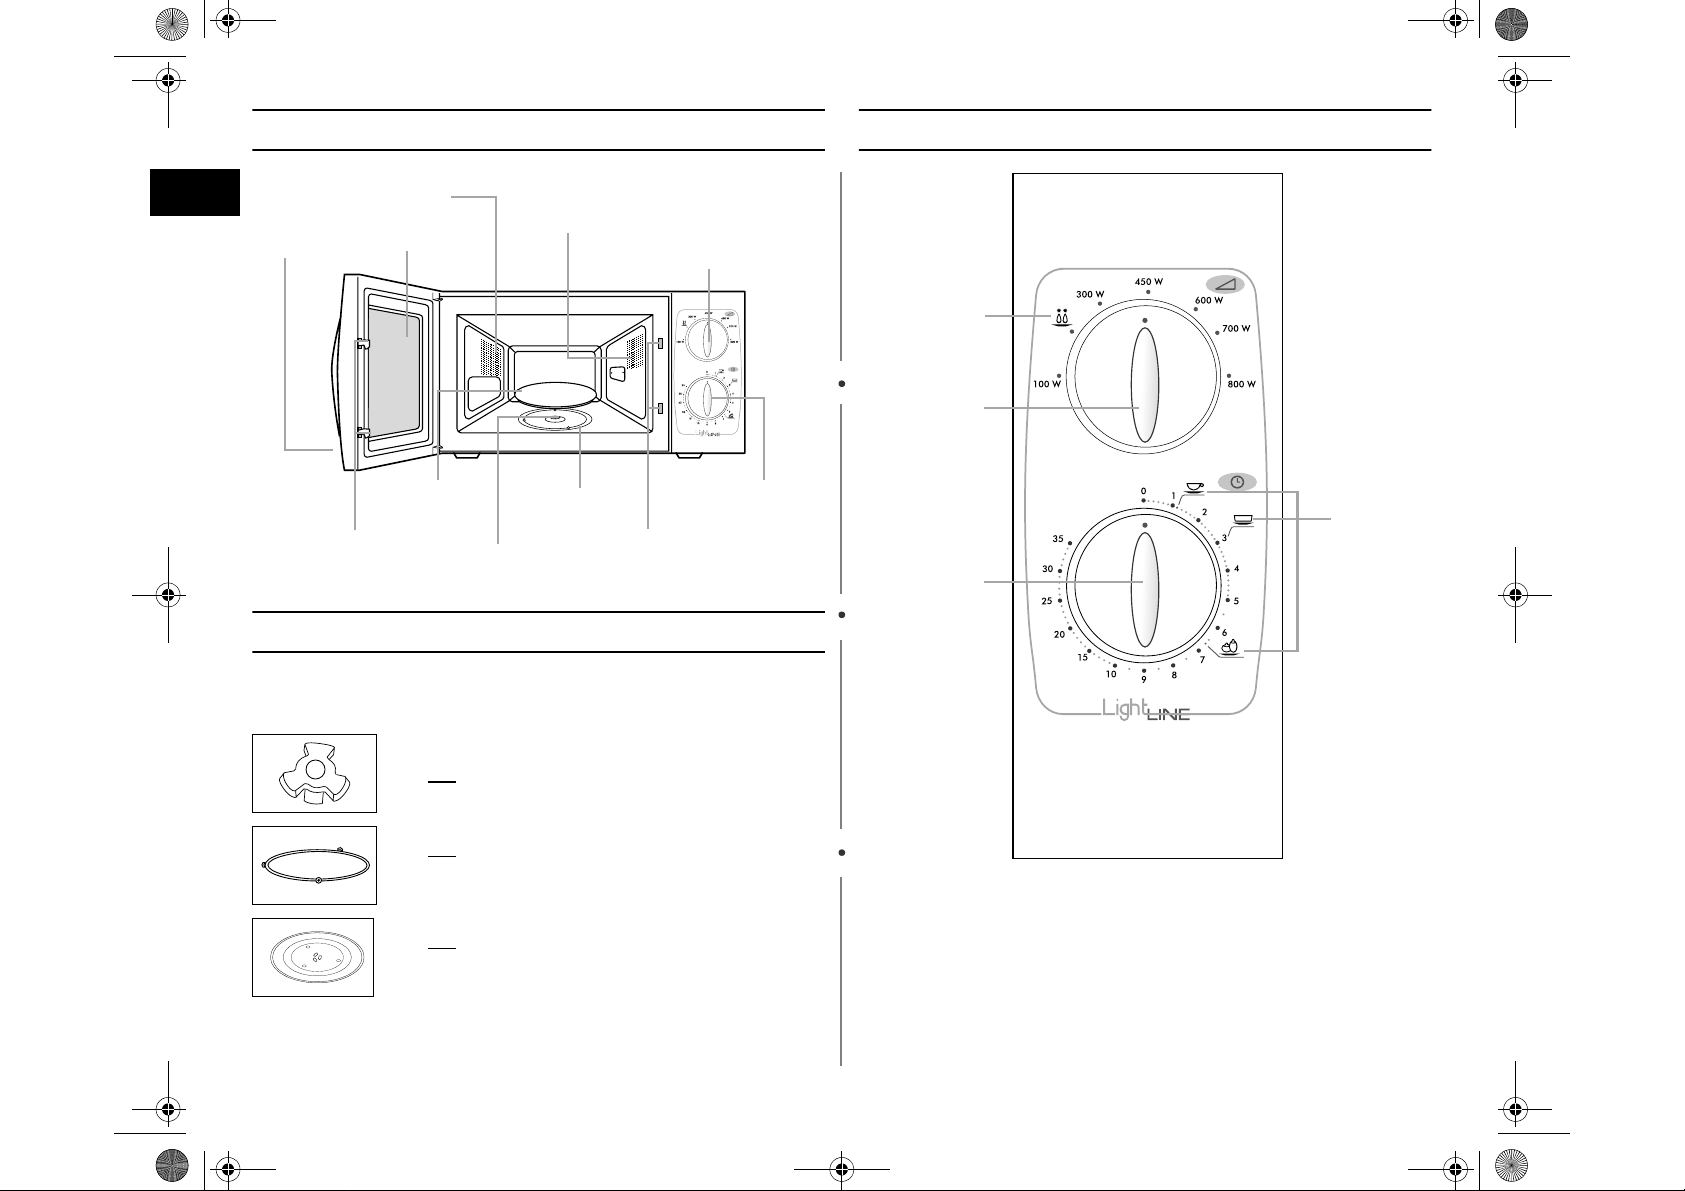
Forno
IT
FORI DI VENTILAZIONE
MANIGLIA
CHIUSURE
DELLA PORTA
PORTA
PIATTO
ROTANTE
LUCE
ANELLO DI
SUPPORTO
ACCOPPIATORE
CONTROLLO DELLA
POTENZA DI
COTTURA
BLOCCO DI
SICUREZZA
Accessori
A seconda del modello acquistato, saranno forniti vari accessori
utilizzabili in modi diversi.
1. Accoppiatore, già posizionato sull’albero motore sulla
base del forno.
Scopo:
l’accoppiatore fa girare il piatto rotante.
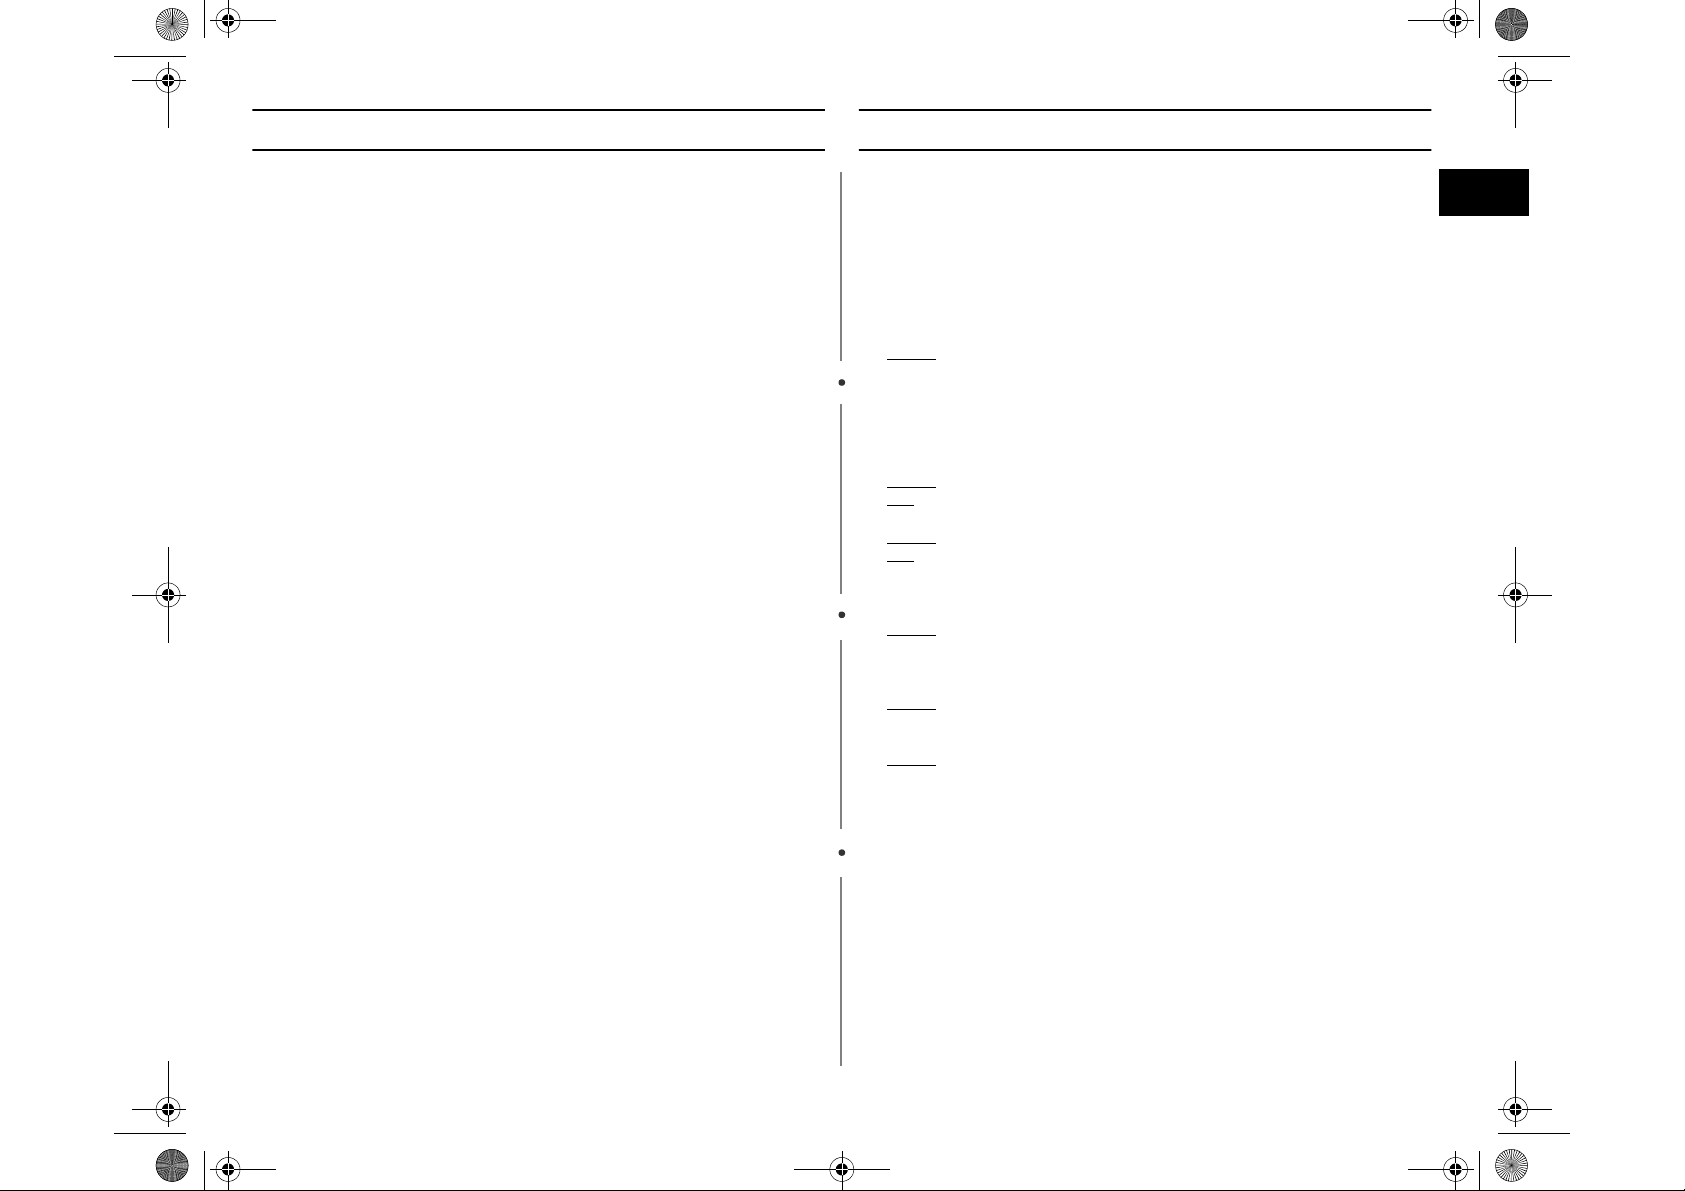
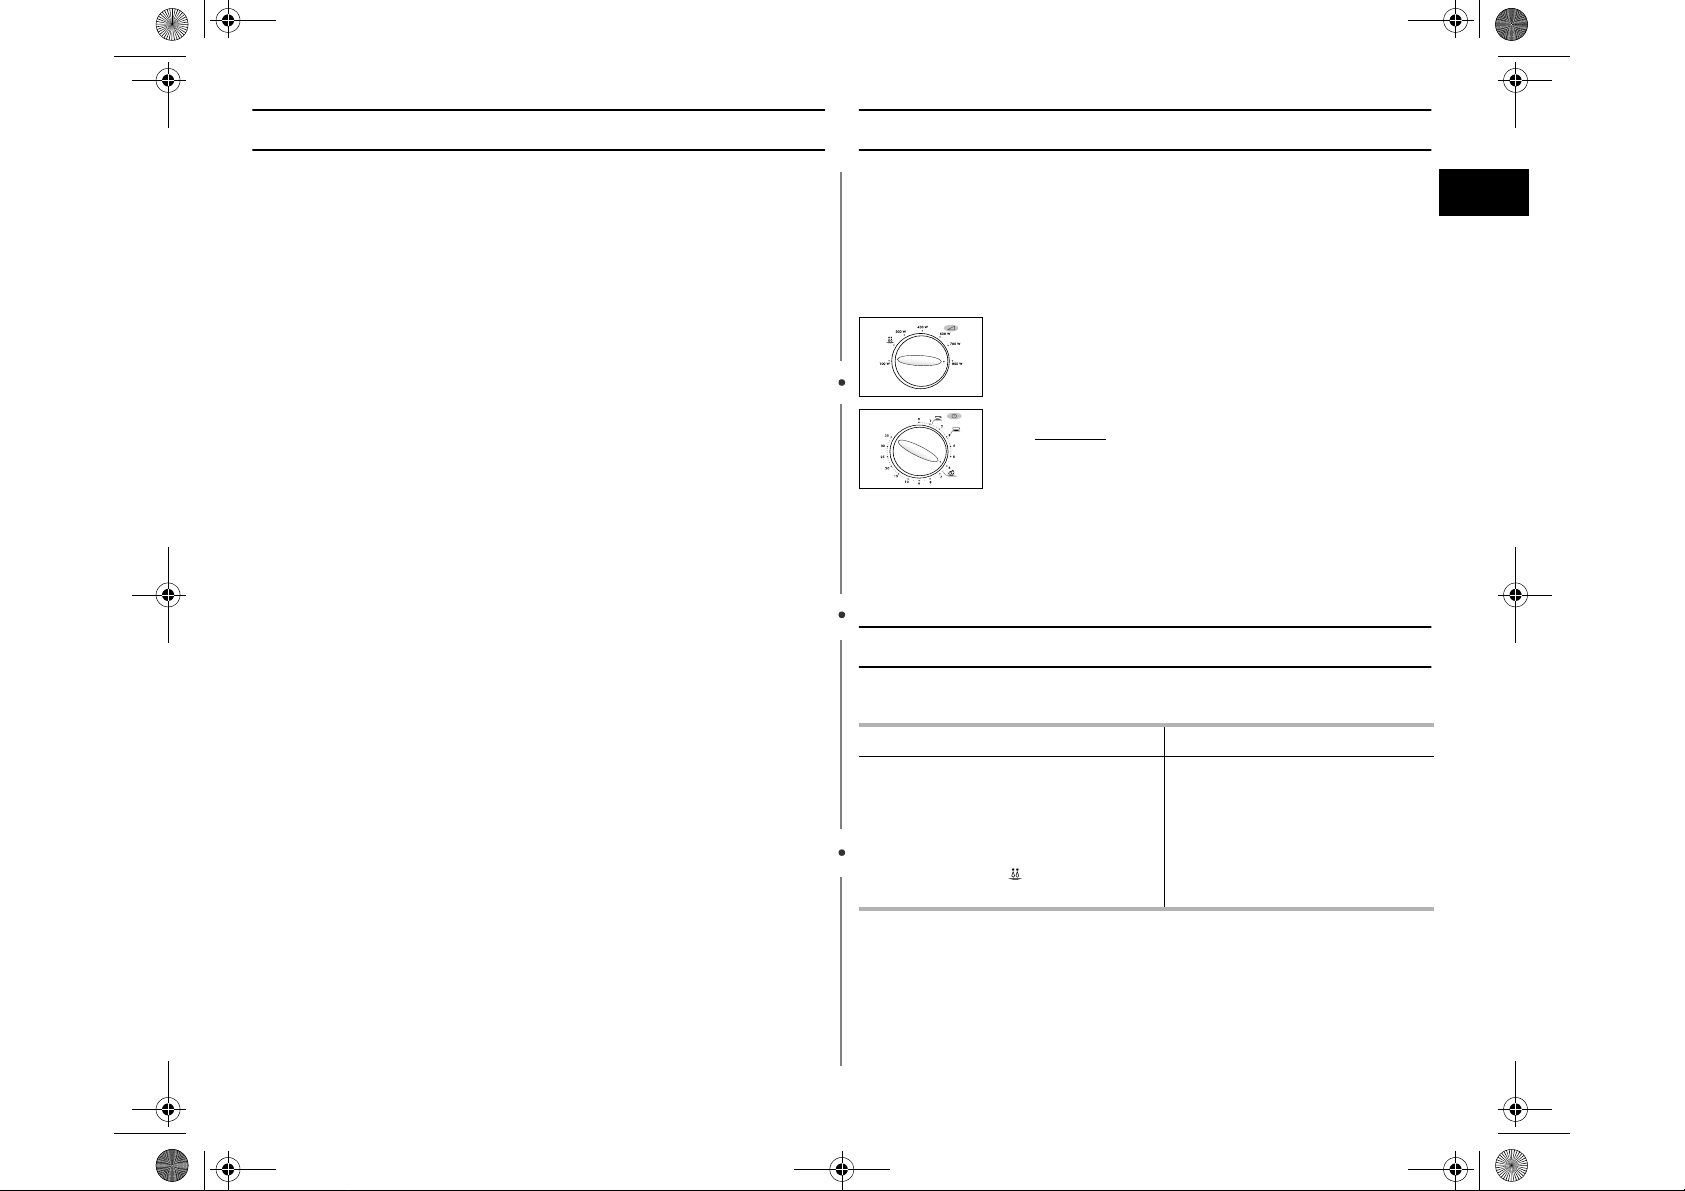
Pannello dicontrollo
1
2
TIMER
4
3
2. Anello di supporto, da posizionare nel centro del forno.
Scopo:
l’anello di supporto sostiene il piatto rotante.
3. Piatto rotante, da posizionare sull’anello di supporto
con il centro inserito sull’accoppiatore.
Scopo:
il piatto rotante serve come superficie di cottura
principale; può essere rimosso facilmente per la
pulizia.
☛ NON mettere in funzione il forno a microonde senza l'anello di
supporto e il piatto rotante.
1. MODO SCONGELAMENTO
2. MANOPOLA DI CONTROLLO DELLA
POTENZA DI COTTURA
3. TIMER
4. RISCALDAMENTOISTANTANEO
2
Page 3

MSA20M_IT_vi.fm Page 3 Friday, October 26, 2001 1:09 PM
Come utilizzarequesto libretto d’istruzioni
Avete appena acquistato un forno a microonde CANDY. Le istruzioni
d’uso contengono molte informazioni preziose sulla cottura con il
vostro forno a microonde:
• Precauzioni di sicurezza
• Accessori adatti e stoviglie per la cottura
• Consigli utili per la cottura
Sul frontespizio del libretto troverete le illustrazioni del forno e, più
importante, il pannello di controllo, in modo che possiate trovare i
pulsanti più facilmente.
Le procedure passo-passo utilizzano du diversi simboli.
☛✉
Importante Nota
PRECAUZIONI PER EVITARE EVENTUALE ESPOSIZIONE
ECCESSIVA ALL’ENERGIA DELLE MICROONDE
La mancanza nell’osservare le seguenti precauzioni di sicurezza può causare
esposizione dannosa all’energia delle microonde.
(a) In nessun caso si deve cercare di far funzionare il forno con la porta aperta o
manomettere i dispositivi di blocco di sicurezza (chiusure della porta) o
inserire qualsiasi cosa nei fori del dispositivo di blocco di sicurezza.
(b) Nonmettere nessun oggetto tra la porta del forno e la parte anteriore o
lasciare accumulare cibo o residui della pulizia sulle superfici di guarnizione.
Tenere pulite la porta e le superfici di guarnizione della porta dopo l’uso
strofinando prima con un panno umido e poi con un panno asciutto morbido.
(c) Non mettere in funzione il forno danneggiato fino a che non sia stato riparato
da un tecnico qualificato dell’assistenza ai microonde addestrato dal
produttore. È particolarmente importante che la porta del forno si chiuda
correttamente e che non vi siano danni a:
(1) Porta, guarnizioni della porta e superfici di guarnizione della porta.
(2) Cardini della porta (rotti o allentati).
(3) Cavo di alimentazione.
(d) Ilforno non deve essere regolato o riparato da nessuno fatta eccezione per i
tecnici qualificati dell’assistenza ai microonde addestrati dal produttore.
Precauzioni di sicurezza
Importanti istruzioni sulla sicurezza.
Leggere attentamente e conservare per future consultazioni.
Prima di cucinare cibo o liquidi nel forno a microonde, seguire con
attenzione le seguenti precauzioni di sicurezza.
1. NON utilizzare stoviglie metalliche per la cottura nel forno a microonde:
• Contenitori metallici
• Stoviglieda tavola con rifiniture in oro o argento
• Spiedi, forchette, ecc.
: possono verificarsi un arco elettrico o delle scintille che possono
Motivo
2. NON riscaldare:
• Bottiglie a chiusura ermetica o sottovuoto, brocche, contenitor
• Cibo con la pelle o il guscio.
Motivo
Consiglio
3. NON mettere in funzione il microonde quando è vuoto.
Motivo
Consiglio
4. NON coprire le feritoie di ventilazione posteriori con panni o carta.
Motivo
5. Usare SEMPRE guanti da forno quando si toglie un piatto dal forno.
Motivo
6. NON toccare gli elementi riscaldanti o le pareti interne del forno.
Motivo
7. Per evitare il rischio di incendio nella cavità del forno:
• Non riporre materiali infiammabili nel forno.
• Rimuovere legacci metallici da carta o borse in plastica.
• Non utilizzare il forno a microonde per asciugare i giornali.
• Se si vede del fumo, tenere chiusa la porta del forno e spegnere o
8. Fare particolare attenzione quando si riscaldano liquidi e alimenti per neonati.
• Lasciare SEMPRE un tempo di riposo di almeno 20 secondi dopo che il
• Durante il riscaldamento, se necessario, mescolare e dopo il
• Fare attenzione quando si maneggia il contenitore dopo il riscaldamento.
• Esiste il rischio di ebollizione ritardata.
• Per evitare l'ebollizione ritardata e un'eventuale scottatura, mettere un
danneggiare il forno.
es.) contenitori di cibo per neonati
es.) uova, noci col guscio, pomodori
: l’aumento della pressione può causarne l’esplosione.
: togliere i gusci e bucare la pelle, ecc.
: le pareti del forno si possono danneggiare.
: lasciare sempre un bicchiere d’acqua nel forno.
L’acqua assorbirà le microonde in caso di accensione accidentale
del forno quando è vuoto.
: i pannio la carta possono prendere fuoco poiché dal forno è
emessa aria calda.
: alcunipiattiassorbonolemicroondeeilcalorevienesempre
trasferito dal cibo al piatto. Di conseguenza i piatti sono caldi.
: sebbene non sembri, queste pareti possono essere abbastanza
caldedascottareancheacotturaterminata.Nonfarentrarein
contatto materiali infiammabili con una qualunque zona interna del
forno. Lasciare raffreddare prima il forno.
scollegare il forno dalla rete di alimentazione.
forno è stato spento affinché la temperatura si possa uniformare.
riscaldamento mescolare SEMPRE.
Se il contenitore è troppo caldo, ci si può scottare.
cucchiaio in plastica o una sbarretta in vetro nelle bevande e mescolare
prima, durante e dopo il riscaldamento.
IT
3
Page 4

MSA20M_IT_vi.fm Page 4 Friday, October 26, 2001 1:09 PM
Precauzioni disicurezza (continua)
IT
Motivo: durante il riscaldamento dei liquidi il punto di ebollizione può
• In caso di scottatura, seguite queste istruzioni di PRONTO SOCCORSO:
* Immergere la zona scottata in acqua fredda per almeno 10 minuti.
* Coprire con una fasciatura pulita e asciutta.
* Non applicare creme, oli o lozioni.
• NON riempire MAI il contenitore fino al bordo e scegliere un contenitore
che sia più ampio in cima che in fondo, in modo da evitare che il liquido
trabocchi bollendo. Le bottigliecon colli stretti possono anche esplodere
se surriscaldate.
• Controllare SEMPRE la temperatura del cibo per neonati o del latte prima
di darli al bambino.
• NON scaldare MAI un biberon con la tettarella inserita, poiché potrebbe
esplodere se surriscaldato.
9. Fare attenzione a non danneggiare il cavo di alimentazione.
• Non immergere il cavo di alimentazioneo la spina in acqua e tenere il
cavo di alimentazione lontano dalle superfici riscaldate.
• Non mettere in funzione questa apparecchiatura se il cavo di
alimentazione o la spina sono danneggiati.
10. Rimanere alla lunghezza di un braccio dal forno quando si apre la porta.
Motivo
11. Tenere l'interno del forno pulito.
Motivo
12. Può essere avvertito un suono a scatto durante il funzionamento,
specialmente quando il forno funziona in modo scongelamento.
Motivo
13. Quando il forno a microonde funziona senza carico, l'alimentazione sarà
interrotta automaticamente per sicurezza. Si può mettere in funzione il forno
normalmente dopo averlo lasciato a riposo per almeno 30 minuti.
essere ritardato; ciò significa chel'ebollizione può iniziare dopo
che il contenitore è stato rimosso dal forno. Ci si può scottare.
: l'aria calda o il vapore rilasciati possono provocare scottature.
: particelledi cibo o schizzi d'olio che aderiscono alle paretidel forno
o sul fondo possono causare il danneggiamento della vernice e
ridurre l'efficienza del forno.
: quando l'uscita di corrente elettrica cambia, si può sentire questo
suono. Ciò è normale.
ISTRUZIONI DI SICUREZZA IMPORTANTI
Durante la cottura, di quando in quando guardare nel forno mentre si sta
riscaldando o cuocendo il cibo nei contenitori usae getta di plastica, carta o altro
materiale infiammabile.
IMPORTANTE
Ai bambini NON dovrebbe MAI essere permesso diusare o giocare con il forno a
microonde. Non devono neanche essere lasciati senza sorveglianza vicino al
forno a microonde quando è in funzione. Oggetti di interesse per i bambini non
dovrebbero essere riposti o nascosti sopra il forno.
ATTENZIONE
Radiazioni a microonde le persone non devono essere esposte all energia a
microonde che puo’essere irradiata dal magnetron o da alto dispositivio
generatore di microonde nel caso di una utilizzazione o una connessione non
corretta. Tutte le connessioni a microonde di entrata e di uscita, le guide d’onda,
le flange e l giunti devono essere sicuri. Non fare funzionare il generatore il
generatore senza un carico previsto per assorbire l’energia a microonde. Non
guardare mai all’interno di una guide d’onda aperta o di una antenna mentre il
generatoree’in funzione.
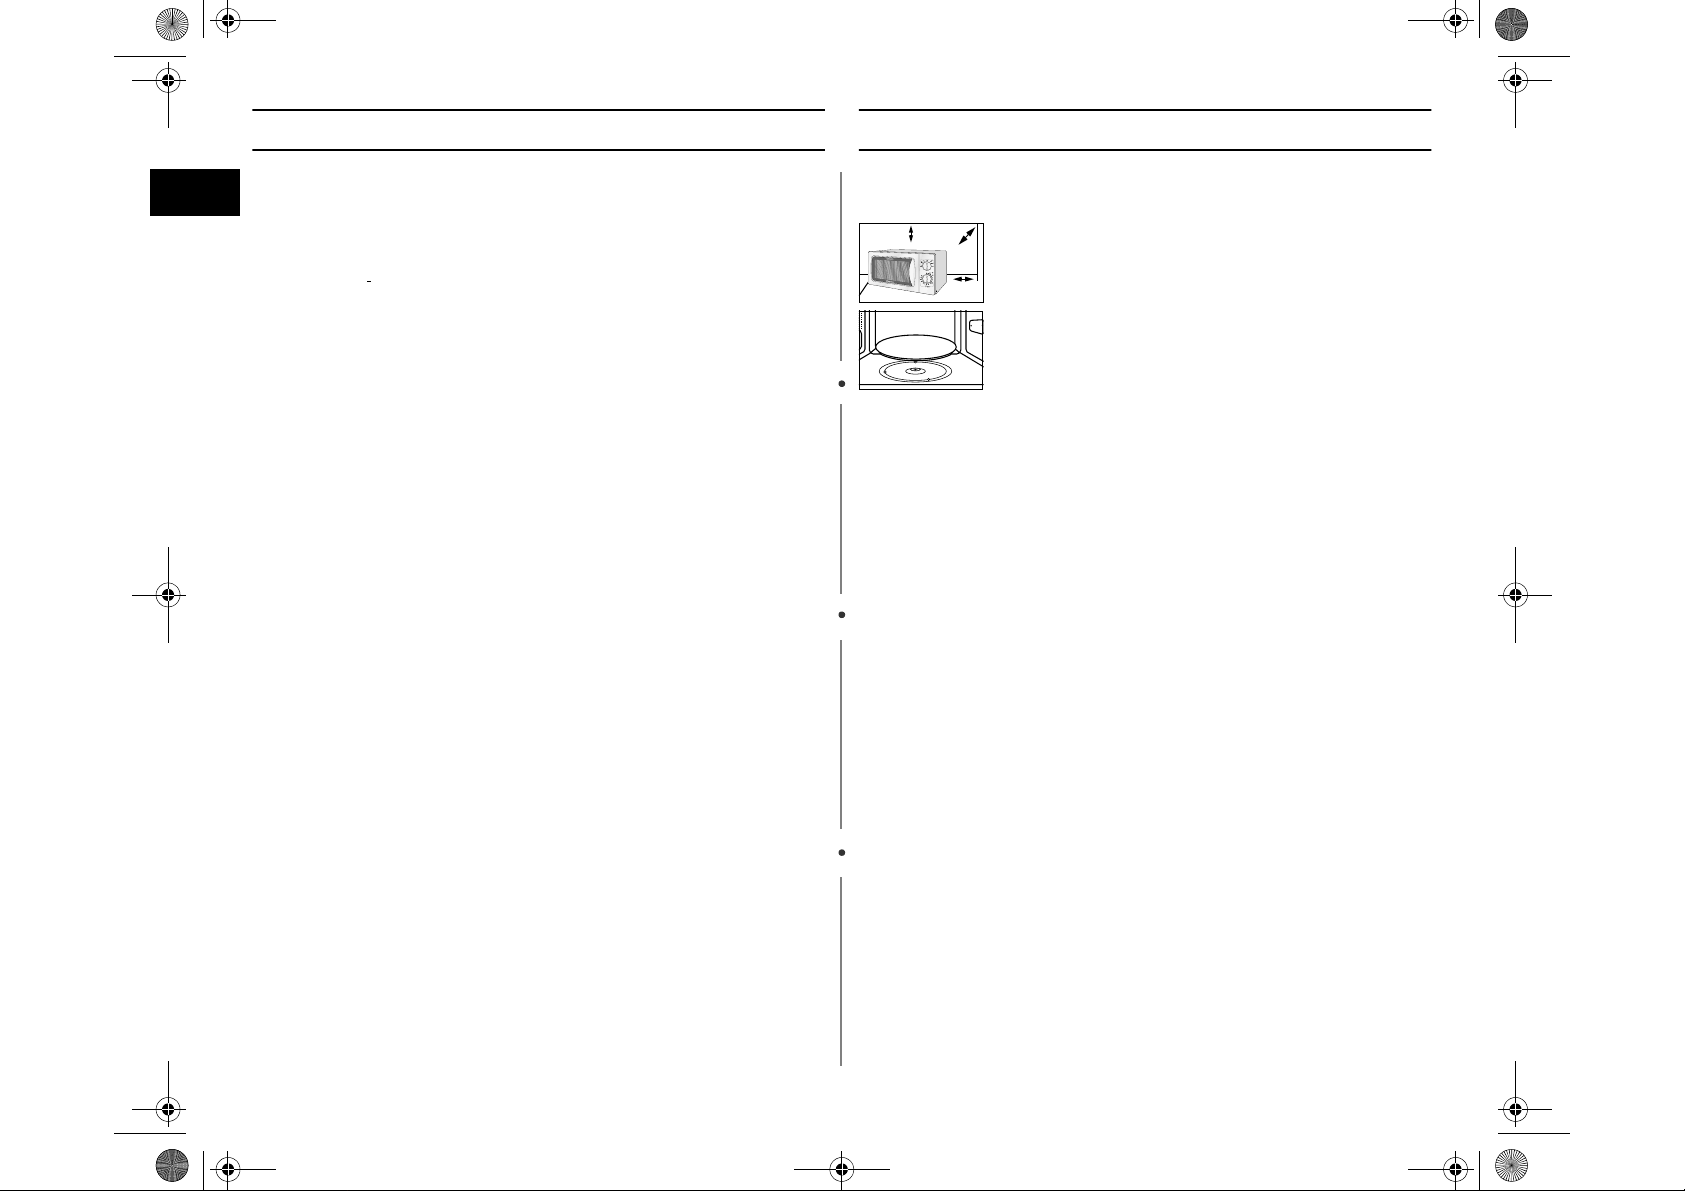
Installazionedel forno a microonde
Collocare il forno su una superficie piatta e pianaabbastanza forte da
reggere con tranquillità il peso del forno.
20 cm
10 cm
sopra
dietro
☛ NON bloccare MAI gli sfiati dell'aria poiché il forno potrebbe
surriscaldarsi espegnersi automaticamente. Rimarrà inutilizzabile
fino a raffreddamento sufficiente.
☛ Per vostra sicurezza personale, inserite il cavo in una presa
tripolare con collegamento a terra 230 Volt, 50Hz, CA. Se il cavo
di alimentazione di questa apparecchiatura è danneggiato, deve
essere sostituito con un cavo speciale (I-SHENG SP022, KDK
KKP4819D, EUROELECTRIC 3410, SAMIL SP-106B,
MOONSUNG EP-48E, HIGH PROJECT H.P3). Per la
sostituzione contattare il rivenditore locale.
☛ Non installare il forno a microonde in posti molto caldi o umidi
come nei pressi di un forno tradizionale o di un termosifone. Le
specifiche di alimentazione del forno devono essere rispettate e
qualsiasi cavo di prolunga utilizzato deve avere le stesse
caratteristiche del cavo di alimentazione fornito con il forno. Pulire
l'interno e la guarnizione della porta con un panno umido prima di
usare il forno a microonde per la prima volta.
1. Quando si istalla il forno, assicurarsi che vi sia una
ventilazione adeguata per il forno stesso lasciando uno
spazio di almeno 10 cm (4 pollici) dietro e sui lati del
10 cm
sul lato
forno e uno spazio di 20 cm al di sopra.
2. Rimuovere tutti i materiali di imballaggio all'interno del
forno.
Installare l'anello di supporto e il piatto rotante.
Controllare che il piatto rotante giri liberamente.
3. Il forno a microonde deve essere posizionato in modo
tale che la spina sia accessibile.
4
Page 5
MSA20M_IT_vi.fm Page 5 Friday, October 26, 2001 1:09 PM
Cosa farein caso di dubbio o se avete un
problema
In caso si verifichi uno dei problemi elencati sotto, provare le soluzioni
fornite.
◆ Questo è normale.
• Condensazione all'interno del forno
• Flussod'ariaattornoallaportaealrivestimentoesterno
• Riflesso di luce attorno alla porta e al rivestimento esterno
• Il vapore fuoriesce dalla porta o dalle aperture di ventilazione
◆ Il forno non si avvia quando si girare il TIMER.
• La porta è completamente chiusa?
◆ Il cibo non è affatto cotto
• Il timer è stato impostato correttamente?
• La porta è chiusa?
• Avete sovraccaricato il circuito elettrico e provocato la bruciatura di un
fusibile o lo scatto di un interruttore?
◆ Ilciboèotroppo cotto o poco cotto
• È stata impostata la durata di cottura corretta per il tipo di cibo?
• È stato scelto un livello di potenza corretto?
◆ Nel forno si verificano scintille o scoppiettii (arco)
• È stato usato un piatto con rifiniture metalliche?
• È stata lasciata una forchetta o un altro utensile metallico nel forno?
• La pellicola di alluminio è troppo vicina alle pareti interne?
◆ Il forno provoca interferenze con radio o televisioni
• Si può osservare una leggera interferenza con televisioni o radio quando
il forno è in funzione. Ciò è normale. Per risolvere questo problema,
istallare il forno lontano da televisioni, radio e antenne.
✉ Se le indicazioni summenzionate non vi permettono di risolvere il
problema, contattare Il rivenditore locale o il servizio di assistenza
CANDY.
Cottura /Riscaldamento
La procedura seguente spiega come cucinare o riscaldare il cibo.
Controllare SEMPRE le impostazioni di cottura prima di lasciare il
forno incustodito.
Per prima cosa, collocare il cibo nel centro del piatto rotante. Chiudere
la porta.
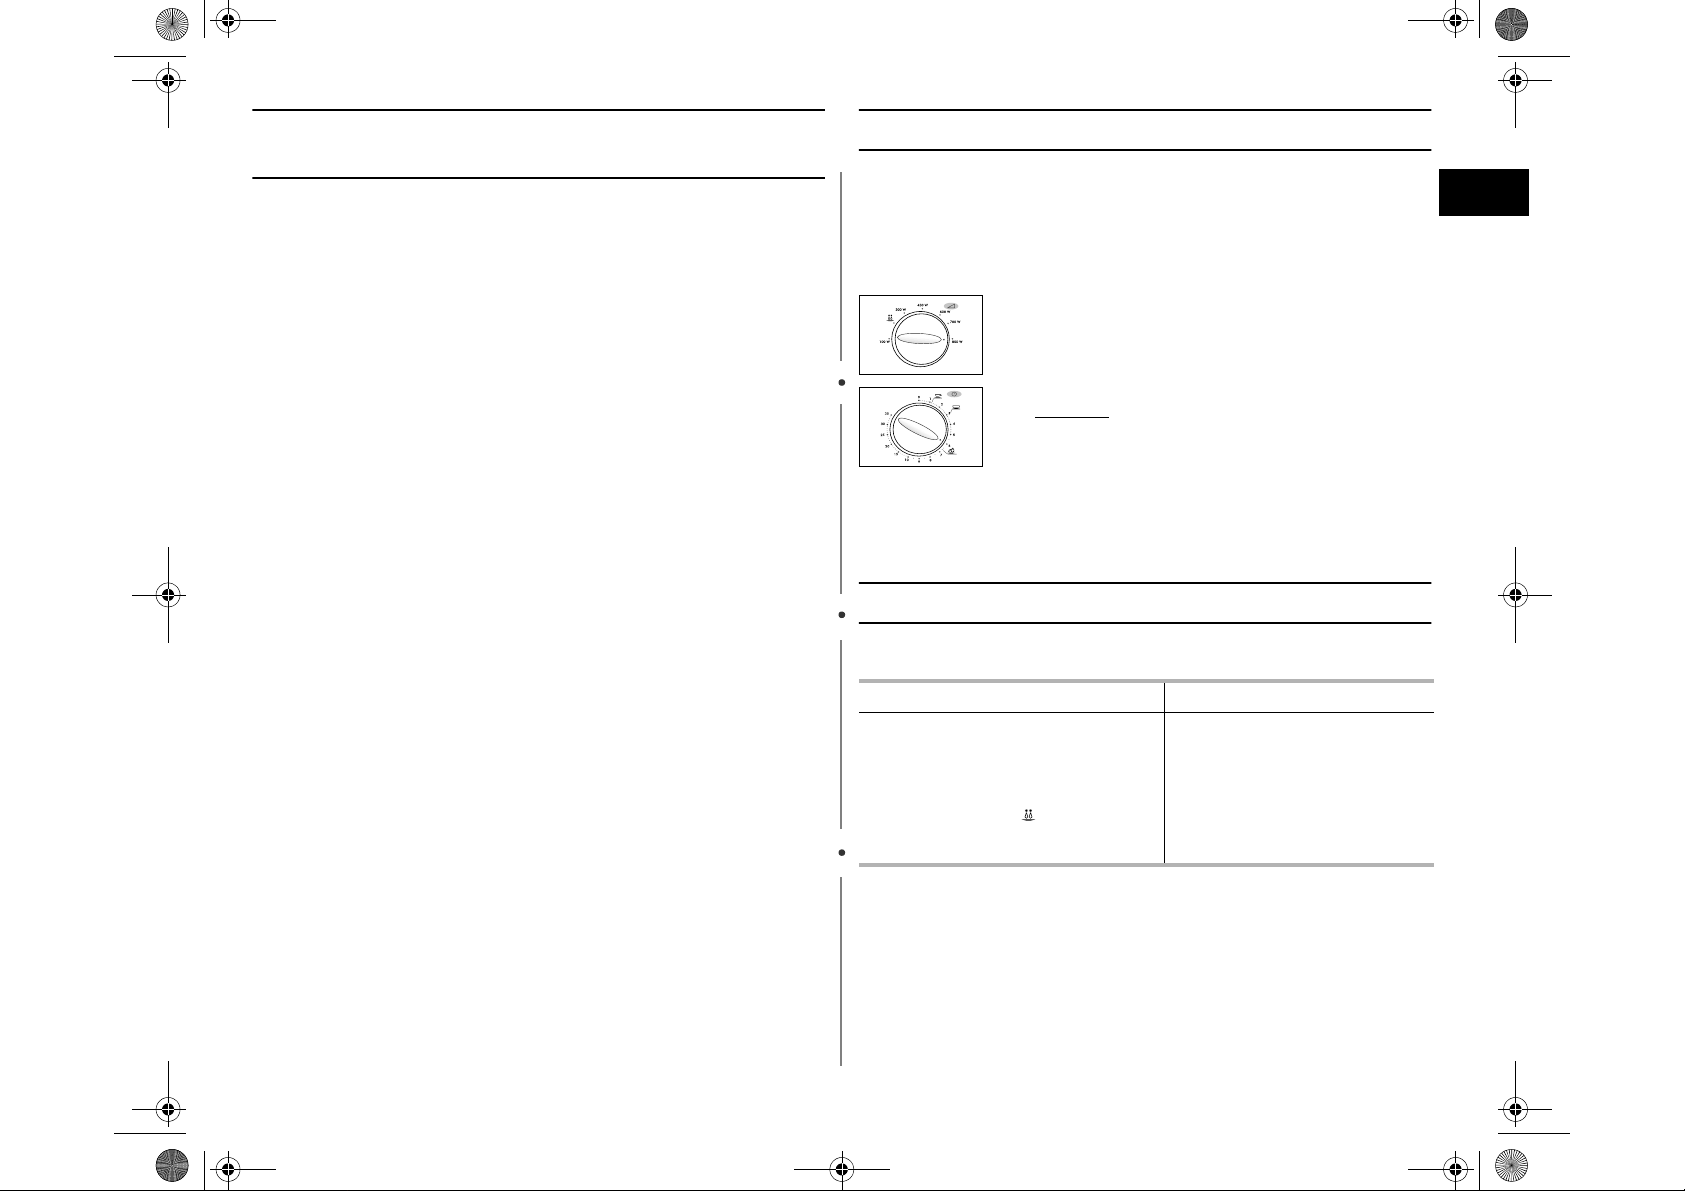
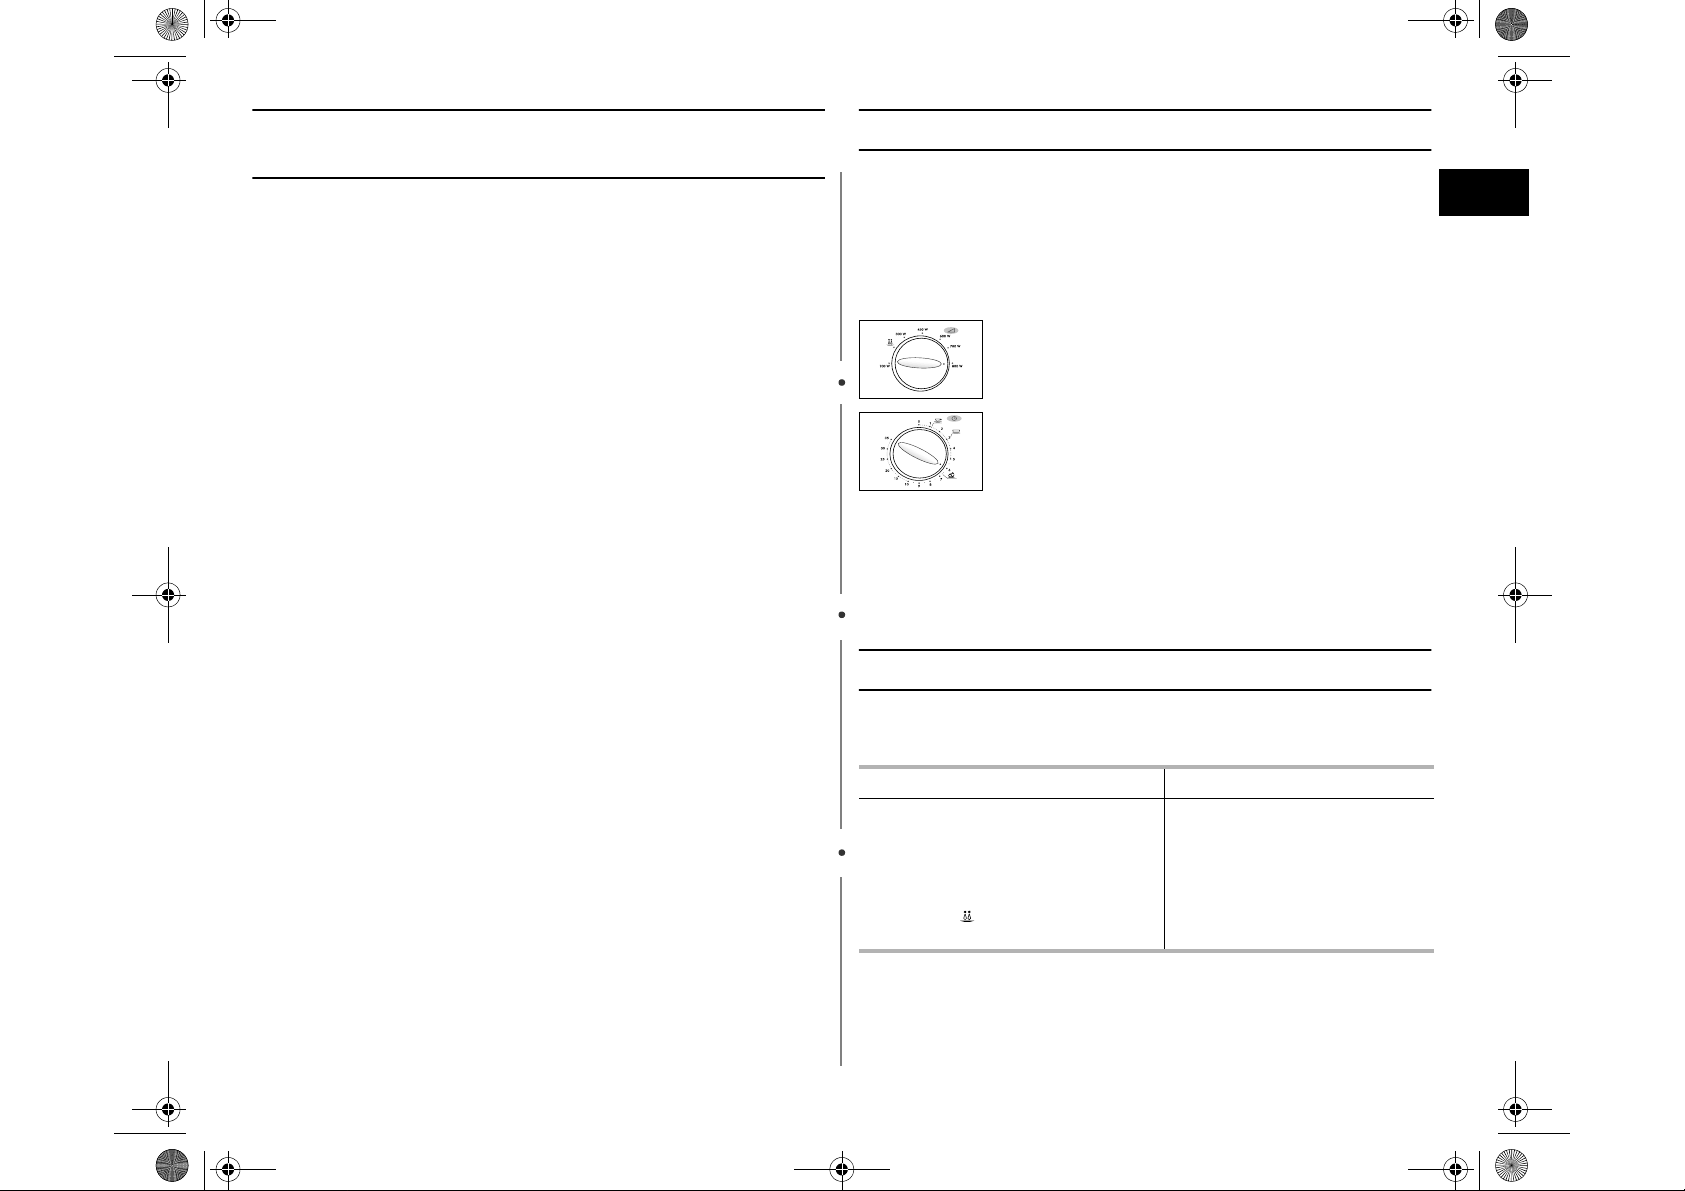
1. Girate ilCONTROLLO DELLA POTENZA DI COTTURA
su su potenza massima (800 W).
2. Con il TIMER selezionate il tempo corrispondente.
Risultato :
La luce delforno si accende e il piattorotante
inizia a girare.
☛ Non accendere mai il forno a microonde quando è vuoto.
✉ Per modificare il livello di potenza durante la cottura, girate la
manopola di
CONTROLLO DELLA POTENZA DI COTTURA.
Livellidipotenza
Si può scegliere tra i livelli di potenza seguenti.
Livelli di potenza
ALTO
RISCALDAMENTO
MEDIO ALTO
MEDIO
MEDIO BASSO
SCONGELAMENTO ( )
BASSO
Uscita
800 W
700 W
600 W
450 W
300 W
180 W
100 W
IT
✉ Se si seleziona un livello di potenza più alto, il tempo di cottura
deve essere diminuito.
✉ Se si seleziona un livello di potenza più basso, il tempo di cottura
deve essere aumentat
5
Page 6
MSA20M_IT_vi.fm Page 6 Wednesday, December 19, 2001 3:50 PM
Regolazione deltempo di cottura
IT
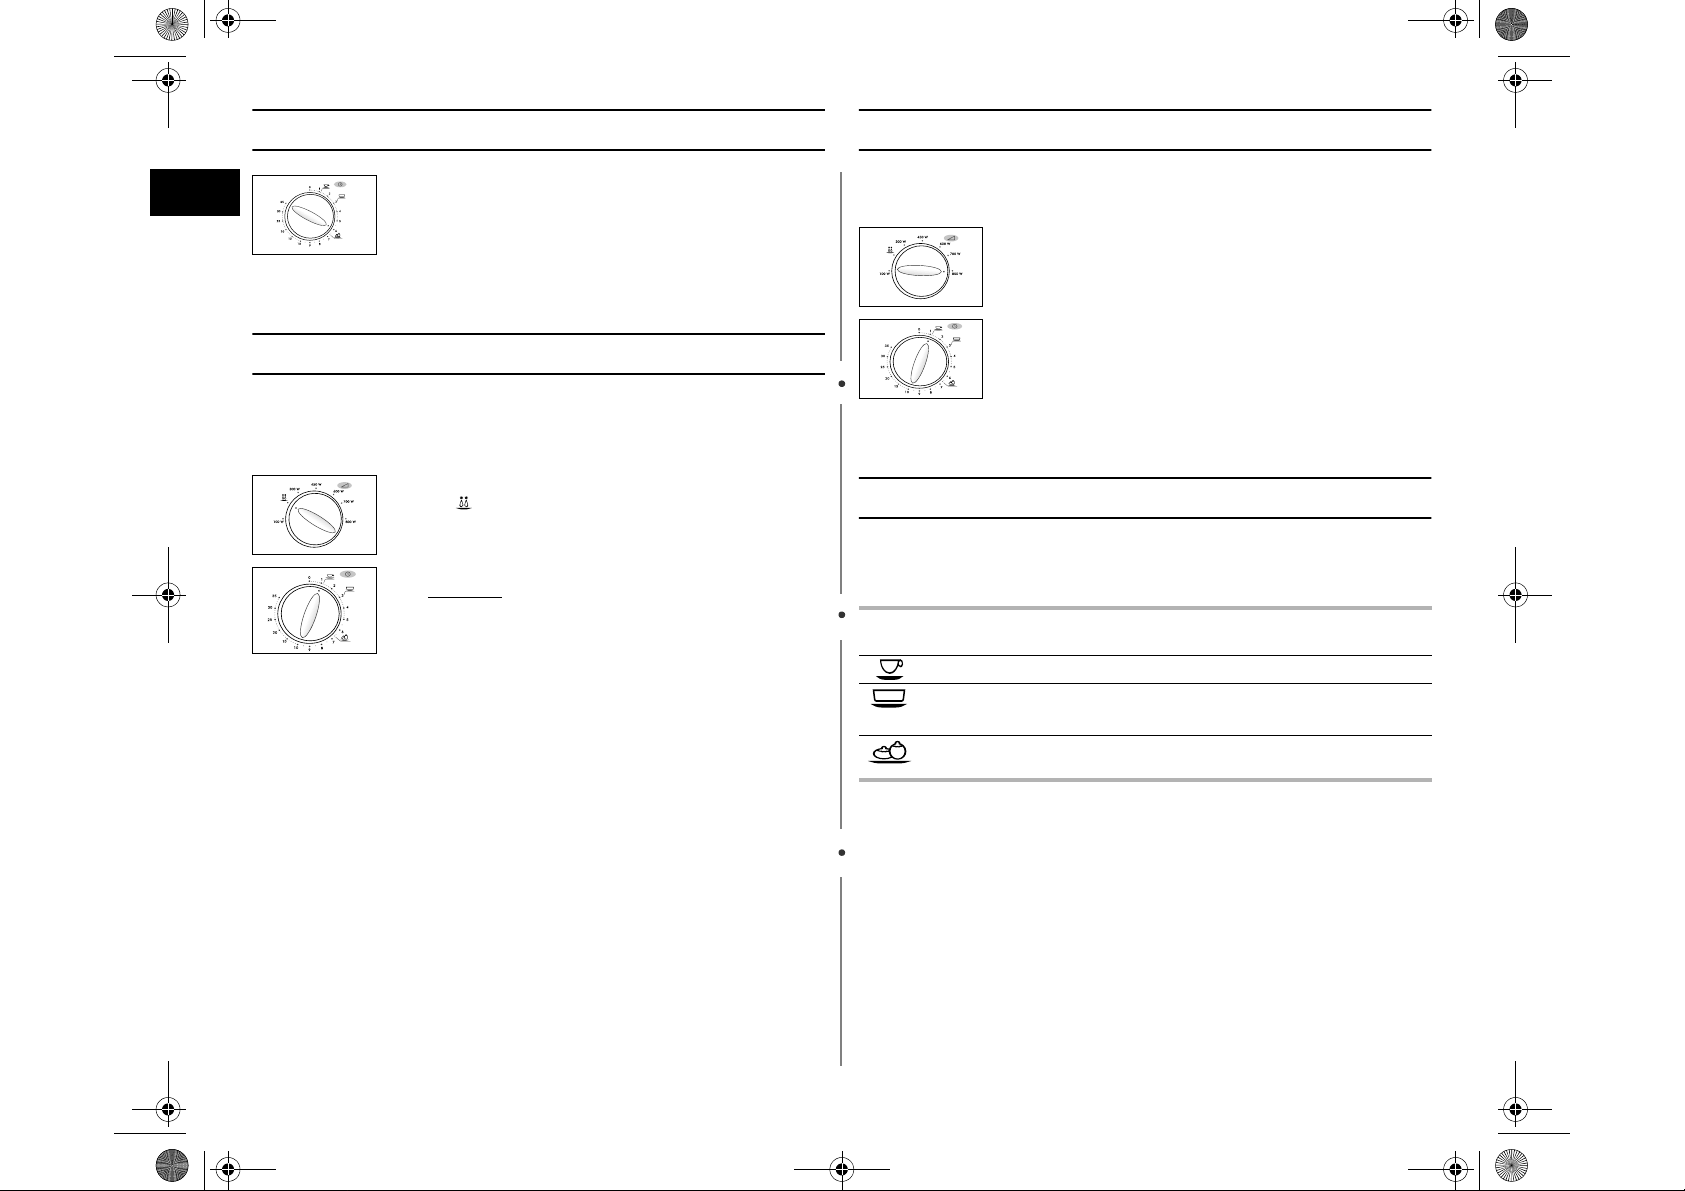
Con il TIMER selezionate il tempo corrispondente.
Scongelamentomanuale degli alimenti
La modalità Scongelamento vi permette di scongelare carne, pollame,
pesce e Pane/Dolci. Mettete gli alimenti congelati nel centro del piatto
girevoleechiudetelaporta.
1. Girate il CONTROLLO DELLA POTENZA DI COTTURA
su (180W).
2. Con il TIMER selezionate il tempo corrispondente.
Risultato :
✉ Usare solo recipienti idonei per il microonde.
inizia lo Scongelamento.
Uso dellamodalità Riscaldamento Istantaneo
Per prima cosa, collocare il cibo nel centro del piatto rotante e
chiudere la porta.
1. Girate ilCONTROLLO DELLA POTENZA DI COTTURA
su su potenza massima.
2. Con il TIMER selezionate Riscaldamento Istantaneo.
(bevande o minestre/sughi, verdura fresca).
✉ Usare solo recipienti idonei per il microonde.
Regolazioni perRiscaldamento Istantaneo
Ecco alcuni consigli e raccomandazioni da seguire durante il
riscaldamento di alimenti con la Modalità Riscaldamento Istantaneo.
Simboli Alimenti Porzioni Tempo di
Bevande 150 ml 1 min 10 sec 1-2 min.
Minestre/Sughi
(freddi)
Verdura fresca 300-350 g 6 min 40 sec 3 min.
200-250 ml 3 min 2-3 min.
Cottura
Tempo di
Riposo
6
Page 7
MSA20M_IT_vi.fm Page 7 Friday, October 26, 2001 1:09 PM
Guida alvasellame per cottura
Per la cottura in forno microonde, le microonde devono essere capaci
di penetrare i cibi, senza che siano riflesse od assorbite dal piatto
impiegato.
Per cui bisogna scegliere con cura il vasellame per la cottura. Se
questo incorpora il marchio sicuro per microonde, non vi dovete
preoccupare.
La seguente tabella elenca diversi tipi di vasellame ed indica come e
quando possono essere usati in un forno a microonde.
Vasellame per Cottura Sicuro per
microonde
Fogli d’alluminio
Porcellana e terracotta
Poliestere a perdere
piatti di carta
Confezioni di fast food
• Contenitori di
tazze di polistirolo
• Sacchetti di carta
ogiornali
• Cartariciclata o
filettature
metalliche
Vetreria
•StoviglieFornoTavola
•Vetreriafine
• Brocche di vetro
Metallo
• Piatti
• Nastriperchiusura
sacchetti surgelati
✓ ✗ Si può impiegare in piccole quantità
✓ La porcellana, ceramica, terracotta,
✓ Alcuno surgelati sono impacchettati in
✓
✗
✗
✓
✓
✓
✗
✗
Commenti
per proteggere zone contro la scotta
de cibi. L’arco può capitare se il foglio
è troppo vicino alle pareti del
microonde o se si impiega troppa
quantità di fogli.
gres sono di solito adeguati, a meno
che siano decorati con filettature
metalliche.
questi piatti.
Si possonousare per scaldare deicibi.
Il surriscaldamento può provocare che
il polistirolo si squagli.
Può incendiarsi.
Può provocare l’arco voltaico.
Possono impiegarsi, a meno che siano
decorate con filettature in metallo.
Possono usarsi per scaldare cibi o
liquidi. I vetri delicati possono rompersi
o spezzarsi se si riscaldano
subitamente.
Bisogna togliere il coperchio.
Adeguato soltanto per scaldare.
Possono causare arco voltaico o
fuoco.
Carta
• Piatti, tazze,
tovagliolo e carta
da cucina
• Cartariciclata
Plastici
• Contenitori
• Pellicola per
alimenti
• Sacchetti per
surgelati
Carta incerata o a tenuta
d’olio
✓ : Raccomandato
✓✗ : Fate Attenzione
✗ :Nonsicuro
✓
✗
✓
✓
✓ ✗
Per durate de cottura piccole e per
scaldare. Inoltre per assorbire
l’eccesso d’umidità.
Possono causare arco voltaico
In particolare se è un termoplastico
resistente al calore. Alcuni altri plastici
possono deformarsi o scolorirsi ad alte
temperature. Non impiegate plastici di
melamina.
Può impiegarsi per mantenere
l’umidità. Non deve toccare il cibo.
Avete cura quando togliete il film
poiché può sprigionarsi vapore molto
caldo.
Soltanto se può impiegarsi per bollire
o è sicura per il forno. Non deve
essere a tenuta d’aria. Incidere con
una forchetta se si rende necessario.
✓ Può impiegarsi per mantenere
l’umidità e per evitare spruzzi
IT
7
Page 8

MSA20M_IT_vi.fm Page 8 Friday, October 26, 2001 1:09 PM
Pulizia delvostro forno a microonde
Le seguenti parti del vostro forno a microonde devono essere pulite
IT
regolarmente per evitare che il grasso e particelle degli alimenti si
accumulino:
• Superfici interne ed esterne
• Sportello e guarnizioni sportello
• Piatto girevole e anelli rullo
☛ Assicuratevi SEMPRE che le guarnizioni dello sportello siano
pulite che lo sportello si chiuda correttamente.
1. Pulite le superfici esterne con un panno morbido e caldo, acqua e sapone.
Risciacquate ed asciugate.
2. Togliete qualsiasi schizzo e macchia dalle superfici interne o dagli anelli del
rullo con un panno insaponato. Risciacquate ed asciugate.
3. Per ammorbidire le particelle degli alimenti indurite e togliere gli odori, mettete
una tazzina di succo di limone diluito sul piatto girevole e riscaldate per dieci
minuti alla massima potenza.
4. Lavate il piatto che puòandare anche in lavastoviglie, quandoè necessario.
✉ NON buttate acqua negli sfiati. Non usate MAI prodotti abrasivi o
solventi chimici. Fate particolare attenzione quando pulite le
guarnizioni dello sportello per assicurarvi che non si
accumulino particelle.
Specifiche tecniche
La CANDY è alla ricerca costante per migliorare i propri prodotti.
Pertanto le specifiche ed il manuale d’istruzioni sono soggetti a
cambiamenti senza preavviso.
Modello MSA 20 M
Alimentazione
Consumo
Microonde
Potenza d’uscita
Frequenza di funzionamento
Magnetron
Metodo di raffreddamento
Dimensioni
Capacità 20 litri
Peso
(LxAxP)
Esterno
Interno del forno
Netto
230V ~ 50 Hz
1150 W
100 W / 800 W (IEC-705)
2450 MHz
OM75S(31)
Motore del ventilatore di raffreddamento
489 x 275 x 371 mm
306 x 211 x 320 mm
circa 12.5 kg
8
Page 9

MSA20M_D_vi.fm Page 1 Wednesday, October 24, 2001 10:37 AM
MIKROWELLENGERÄT
Bedienungsanleitung
MSA 20 M
Das Mikrowellengerät................................................................2
Zubehör.....................................................................................2
Bedienfeld ................................................................................2
Verwendung dieser Bedienungsanleitung ................................3
Sicherheitshinweise ..................................................................3
Installation Ihres Mikrowellengeräts..........................................4
Wenn Sie sich nicht sicher sind oder beim
Garen/Aufwärmen Problemeauftreten.....................................5
Aufwärmen/Garen.....................................................................5
Leistungsstufe...........................................................................5
Die Garzeit anpassen................................................................6
Manuelles Auftauen von Speisen .............................................6
Gebrauch der Funktion Instant-Aufwärmen..............................6
Einstellungen für Instant-Aufwärmen........................................6
Leitfaden für Kochgeschirr........................................................7
Reinigung Ihres Mikrowellengeräts...........................................8
Technische Daten .....................................................................8
Page 10
MSA20M_D_vi.fm Page 2 Wednesday, October 24, 2001 10:37 AM
Das Mikrowellengerät
LÜFTUNGSÖFFNUNGEN
D
GRIFF
TÜRRIEGEL
TÜR
DREHTELLER
BELEUCHTUNG
WALZENRING
KOPPLER
SICHERHEITSVERRIEGELUNGSÖFFNUNGEN
KONTROLLSCHALTE
R FÜR DIE
KOCHLEISTUNG
ZEITSCHALTER
Zubehör
Je nach Modell, für das Sie sich entschieden haben, werden mehrere
Zubehörteile mitgeliefert, die auf verschiedene Weise eingesetzt
werden können:
1. Koppler, bereits über der Motorwelle im Boden des
Geräts angebracht.
Zwec:
Der Koppler sorgt für die Rotation des
Drehtellers.
Bedienfeld
1
2
4
3
2. Walzenring, in die Mitte des Garraums einzusetzen.
Zwec:
3. Drehteller: auf den Walzenring aufzusetzen, wobei das
Mittelstück auf dem Koppler aufsitzt.
Zwec:
Der Walzenring trägt den Drehteller.
Der Drehteller dient als Hauptgarfläche; er
kann zum Säubern problemlos
abgenommen werden.
☛ VerwendenSie die Mikrowelle NICHT ohne den Walzenring und
den Drehteller.
1. AUFTAUEN
2. KONTROLLSCHALTER FÜR DIE
KOCHLEISTUNG
3. ZEITSCHALTER
4. INSTANT-AUFWÄRMEN
2
Page 11
MSA20M_D_vi.fm Page 3 Wednesday, October 24, 2001 10:37 AM
Verwendung dieser Bedienungsanleitung
Sie haben soeben ein CANDY-Mikrowellengerät erworben. Ihre
Bedienungsanleitung enthält wertvolleInformationen über das Garen
mit Ihrer Mikrowelle:
• Sicherheitshinweise
• Geeignetes Zubehör und Kochgeschirr
• Nützliche Küchentips
Vorne in Ihrem Bedienungsheft finden Sie Abbildungen Ihres
Mikrowellengeräts und, was noch wichtiger ist, das Bedienfeld, damit
Sie die entsprechenden Tasten schneller finden.
Die Schritt-für-Schritt-Verfahren verwenden zwei verschiedene
Symbole:
☛✉
Wichtig Bemerkung
SICHERHEITSHINWEISE, UM EINEN M
MIT ÜBERMÄSSIGER MIKROWELLENENERGIE ZU
VERMEIDEN
Wenn die folgenden Sicherheitshinweise nicht beachtet werden, setzt man sich
unter Umständen gesundheitsschädlicher Mikrowellenenergie aus.
(a) Aufkeinen Fall sollte man versuchen, das Mikrowellengerät bei geöffneter Tür
zu betreiben, an den Sicherheitsriegeln (Türriegeln) zu hantieren oder
Gegenstände in die Sicherheits-Verriegelungsöffnungen zu stecken.
(b) Schieben Sie keinen Gegenstand zwischen die Gerätetür und die Frontseite.
Achten Sie darauf, daß sich auf den Dichtflächen keine Rückstände von
Speisen oder Reinigungsmitteln ablagern. Stellen Sie sicher, daß die Tür und
die Dichtflächender Tür stets sauber sind, indem Sie nachdem Gebrauch erst
mit einem feuchten Tuchdarüberwischen und anschließend mit einem
weichen, trockenen Tuch nachwischen.
(c) Verwenden Sie niemals ein beschädigtes Mikrowellengerät, sondern lassen
Sie es durch einen qualifizierten Kundendiensttechniker, der vom Hersteller
geschult wurde, reparieren.
(1) Tür, Türdichtungen und Dichtflächen
(2) Türscharniere (gebrochen oder locker)
(3) Netzkabel
(d) Das Mikrowellengerät sollte nur durch einen qualifizierten
Kundendiensttechniker, der vom Hersteller geschult wurde, repariert oder
reguliert werden.
ÖGLICHEN KONTAKT
Sicherheitshinweise
Wichtige Sicherheitshinweise.
Sorgfältig lesen und für Gebrauch in Zukunft aufbewahren. Bevor
Sie Speisen oder Getränke in Ihrem Mikrowellengerät erhitzen,
achten Sie bitte darauf, daß die folgenden Sicherheitsvorkehrungen
erfüllt sind:
1. Verwenden Sie KEIN Kochgeschirr aus Metall in Ihrer Mikrowelle:
• Metallbehälter
• Geschirr mit Gold- oder Silberdekor
• Spieße, Gabeln etc.
Grund
: Es kann zu elektrischer Lichtbogen- oder Funkenbildung kommen,
die das Gerät beschädigen kann.
2. Erhitzen Sie KEINE:
• Luftdicht oder vakuum-versiegelten Flaschen, Gläser, Behälter.
Bsp.: Gläser mit Babynahrung
• Luftdichten Lebensmittel.
Bsp.: Eier, Nüsse in der Schale, Tomaten
Grund
: Der erhöhte Druck kann zur Explosion führen.
Tip:
3. Setzen Sie das Mikrowellengerät NICHT in Betrieb, wenn es leer ist
Grund
Tip:
4. Decken Sie die hinteren Lüftungslöcher NICHT mit Stoff oder Papier ab.
Grund
5. Verwenden Sie IMMER Topfhandschuhe oder-lappen, wenn Sie einen Teller
aus dem Garraum nehmen.
Grund
6. Berühren Sie KEINE Heizelemente oder die Innenwände des Garraums.
Grund
7. Um Brandgefahr im Garraum zu vermeiden:
• Lagern Sie kein brennbares Material im Garraum
• Entfernen SieDrahtverschlüsse von Papier- oder Plastiktüten
• Trocknen Sie kein Zeitungspapier in der Mikrowelle
• Wenn Sie Rauch feststellen, halten Sie die Gerätetür geschlossen und
8. Geben Sie vor allem Acht, wenn Sie Flüssigkeiten oder Babynahrung
erhitzen.
• Falls erforderlich, rühren Sie während des Erhitzens um, und rühren Sie
• Geben Sie Acht, wenn Sie nach dem Erhitzen den Behälter anfassen, da
• Es besteht ein Risiko von verzögertem Kochen.
Entfernen Sie Verschlüsse und schneiden Sie Haut, Tüten etc. ein.
: Die Innenwände könnten beschädigt werden
Lassen Sie stets ein Glas Wasser im Garraum. Das Wasser
absorbiert die Mikrowellen, wenn Sie versehentlich das Gerät
einschalten.
: Das Stoff- oderPapiermaterial könnte Feuer fangen, wenn Heißluft
austritt.
: Manche Teller absorbieren Mikrowellen, und das Gargut überträgt
immer Wärme auf den Teller. Die Teller sind daher heiß.
: Diese Wände können auch noch nach Ende des Garvorgangs
Verbrennungen hervorrufen, auch wenn sie nicht den Eindruck
erwecken. Achten Sie darauf, daß kein brennbares Material mit
Bereichen des Garraums in Kontakt kommt. Lassen Sie den
Garraum immer erst abkühlen
schalten Sie das Gerät aus oder ziehen Sie das Netzkabel.
IMMER nach dem Erhitzen um.
dieser sehr heiß werden kann.
D
3
Page 12

MSA20M_D_vi.fm Page 4 Wednesday, October 24, 2001 10:37 AM
Sicherheitshinweise(Fortsetzung)
D
• Um ein verzögertes Kochen und mögliches Verbrühen zu vermeiden,
sollten Sie einen Plastiklöffeloder Glasstabin das Getränk geben undvor,
während und nach dem Erhitzen umrühren.
Grund
: Beim Erhitzen von Flüssigkeiten kann sich der Siedepunkt
verzögern, d.h., daß das Kochen erst einsetzen kann,
nachdem der Behälter bereits entnommen wurde. Dabei kann
• Im Falle einer Verbrühung treffen Sie folgende Erste-Hilfe-Maßnahmen:
* Kühlen Sie den verbrühten Bereich mindestens 10 Minuten in kaltem
* Legen Sie einen sauberen, trockenen Verband auf
* Tragen Sie keine Cremes, Öle oder Lotionen auf.
• Füllen Sie einen Behälter NIEMALS bis zum Rand und wählen Sie einen
Behälter, der oben weiter ist als unten, damit die Flüssigkeit nicht
überkocht. Flaschen mit engem Hals können zudem bei Überhitzung
explodieren.
•PrüfenSieIMMER die Temperatur von Babynahrung oder -milch, bevor
Sie das Baby füttern.
• Erhitzen Sie ein Babyfläschchen NIEMALS mit aufgesetztem
Gummisauger, da die Flasche bei Überhitzung explodieren kann.
9. Achten Sie darauf, das Netzkabel nicht zu beschädigen.
• Tauchen Sie das Netzkabel oder den Netzstecker nicht in Wasser und
halten Sie das Netzkabel von heißen Flächen fern.
• Verwenden Sie dieses Gerät nicht, wenn das Netzkabel oder der
Netzstecker beschädigt sind.
10. Halten Sie eine Armeslänge Abstand vom Gerät, wenn Sie die Gerätetür
öffnen.
Grund
11. Halten Sie den Garraum sauber.
Grund
12. Beim Betrieb des Geräts, vor allem im Auftau-Modus, können klickende
Geräusche zu hören sein.
Grund
13. Wenn das Mikrowellengerät in leerem Zustand funktioniert, schaltet das Gerät
sich, aus Sicherheitsgründen, automatisch aus. Nach 30 Minuten können Sie
das Gerät wieder in Betrieb nehmen.
es zu Verbrühungen kommen.
Wasser
: Ausströmende heiße Luft oder Dampf können Verbrennungen
hervorrufen.
: Speisereste oder Ölspritzer, die am Boden oder den Wänden des
Garraums kleben, können Lackschäden hervorrufen und die
Leistungsfähigkeit des Geräts herabsetzen.
: Dieses Geräusch ist normal. Es entsteht manchmal bei einem
Wechsel der elektrischen Leistungsabgabe.
WICHTIGE SICHERHEITSHINWEISE
Sehen Sie hin und wieder in den Garraum, wenn Essen in Einwegbehältern aus
Plastik, Papier oder anderen brennbaren Materialien erwärmt oder gegart wird.
WICHTIG
Kleinen Kindern sollte es NIEMALS erlaubt sein, das Mikrowellengerät zu
bedienen oder damit zu spielen. Bei Betrieb des Geräts sollten sich kleine Kinder
niemals unbeaufsichtigt in der Nähe aufhalten. Gegenstände, die für Kinder
interessant sind, sollten niemals in oder direkt über der Mikrowelle aufbewahrt
oder versteckt werden.
InstallationIhres Mikrowellengeräts
Stellen Sie das Gerät auf einer flachen, ebenen Oberfläche auf, die das
Gewicht des Geräts sicher tragen kann.
20 cm
nach oben
10 cm
nach hinten
zu beiden
1. Wenn Sie Ihr Mikrowellengerät installieren, überzeugen
Sie sich, daß das Gerät ausreichend Luftzufuhr hat,
10 cm
Seiten
indem Sie nach hinten und zu beiden Seiten mindestens
10 cm Freiraum und nach oben mindestens 20 cm
Freiraum lassen.
2. Entnehmen Sie alles Verpackungsmaterial aus dem
Gerät.
Setzen Sie den Walzenring und den Drehteller ein.
Überzeugen Sie sich, daß der Drehteller frei rotieren
kann.
3. Wenn Sie Ihr Mikrowellengerät installieren, überzeugen
Sie sich, daß der Stecker erreichbar bleibt.
☛ Verstopfen Sie niemals die Lüftungsöffnungen, da sich das Gerät
sonst überhitzen kann und sich automatisch ausschaltet. Es läßt
sich erst wieder in Betrieb nehmen, wenn es genügend abgekühlt
ist.
☛ Zu Ihrer persönlichen Sicherheit schließen Sie das Kabel an eine
3polige 230V, 50Hz AC geerdete Steckdose an. Wenn das Netzkabel
dieses Geräts beschädigt ist, muß es durch ein Spezialkabel ersetzt
werden
(I-SHENG SP022, KDK KKP4819D, EUROELECTRIC
3410, SAMIL SP-106B, MOONSUNG EP-48E, HIGH PROJECT
Wenden Sie sich zum Austausch des Kabels an Ihren
H.P 3).
Fachhändler.
☛ Installieren Sie das Mikrowellengerät nicht in heißer oder
feuchter Umgebung, etwa neben einem Backofen oder
Heizkörper. Die Netzanschlußdaten des Geräts müssen beachtet
werden, jedes Verlängerungskabel muß denselben Standard
aufweisen wie das mit dem Gerät gelieferte Netzkabel. Wischen
Sie Garraum und Türdichtung mit einem feuchten Tuch ab, bevor
Sie Ihr Mikrowellengerät erstmals in Betrieb nehmen.
4
Page 13
MSA20M_D_vi.fm Page 5 Wednesday, October 24, 2001 10:37 AM
WennSie sich nicht sicher sind oder beim Garen/
Aufwärmen Probleme auftreten
Wenn eins der unten aufgelisteten Probleme auftaucht, probieren Sie
die vorgeschlagenen Lösungen aus:
◆ Dies ist normal:
• Kondensation im Garraum
• Luftströmung um die Gerätetür und das Außengehäuse
• Lichtreflexion um die Gerätür und das Außengehäuse
• Dampf, der um die Tür oder aus den Lüftungsöffnungen austritt
◆ Das Gerät schaltet sich nicht ein, wenn Sie den ZEITSCHALTER drehen.
• Ist die Tür richtig geschlossen?
◆ Das Gargut wird überhaupt nicht erwärmt.
• Haben Sie die Garzeit richtig eingestellt mit dem ZEITSCHALTER?
• Ist die Tür geschlossen?
• Haben Sie eventuellden Stromkreis überlastet und einen Kurzschluß
verursacht?
◆ Das Gargut wird entweder zu stark oder zu schwach gegart.
• War die Garzeit an die Art derSpeise angepaßt?
• War die richtige Leistungsstufe eingestellt?
◆ Im Garraum kommt es zu Funkenbildung und Knacken (Lichtbogenbildung).
• Haben Sie einenTeller mit Metalldekor verwendet?
• Haben Sie eine Gabel oder sonstiges Metallbesteck im Garraum
vergessen?
• Berührt Alufolie die Innenwände?
Aufwärmen/Garen
Im Folgenden wird erläutert, wie Sie Speisen garen oder aufwärmen.
Überprüfen Sie IMMER die Geräteeinstellungen, bevor Sie sich von
dem eingeschalteten Gerät entfernen.
Geben Sie erst das Gargut auf den Drehteller. Schließen Sie die Tür.
1. Wählen Sie mit dem KONTROLLSCHALTER FÜR DIE
KOCHLEISTUNG die maximale Leistungsstufe (800W).
2. Stellen Sie die Garzeit ein, indem Sie den
ZEITSCHALTER nach Erfordernis drehen.
Die Beleuchting schaltet sich ein und derDrehteller dreht.
☛ Schalten Sie das Mikrowellengerät NIEMALS in leerem Zustand
ein.
✉ Sie können die Leisungsstufe während des Kochens ändern, indem
Sie den
nach Erfordernis drehen.
KONTROLLSCHALTER FÜR DIE KOCHLEISTUNG
Leistungsstufe
D
◆ Das Gerät verursacht Störungen bei Radio- oder Fernsehgeräten.
• Wenn das Mikrowellengerät in Betrieb ist, können geringfügige Störungen
an Radio oder Fernseher auftreten. Dies ist normal. Um das Problem zu
beheben, stellen Sie das Mikrowellengerät abseits von Fernsehern,
Radios und Antennen auf.
✉ Wenn Sie mit Hilfe der obigen Hinweise das Problem nicht lösen
können, wenden Sie sich bitte an Ihren Fachhändler oder
CANDY-Kundendienst.
Sie haben die Wahl zwischen den unten aufgeführten
Leistungsstufen:
Leistungsstufe
HOCH
AUFWÄRMEN
MITTEL bis HOCH
MITTEL
MITTEL bis NIEDRIG
AUFTAUEN( )
NIEDRIG
Ausgabeleistung
800 W
700 W
600 W
450 W
300 W
180 W
100 W
✉ Wenn Sie eine höhere Leistungsstufe wählen, muß die Garzeit
verkürzt werden.
✉ Wenn Sie eine niedrigere Leistungsstufe wählen, muß die
Garzeit verlängert werden.
5
Page 14

MSA20M_D_vi.fm Page 6 Wednesday, December 19, 2001 4:05 PM
Die Garzeit anpassen
D
Sie können die restliche Garzeit anpassen, indem Sie den
ZEITSCHALTER nach Erfordernis drehen.
Manuelles Auftauenvon Speisen
Die Einstellung Auftauen ermöglicht Ihnen, Fleisch, Geflügel und
Fisch aufzutauen.
Legen Sie zuerst die tiefgefrorene Speise in die Mitte des sich
drehenden Plattentellers und schließen Sie dann die Tür.
1. Stellen Sie den KONTROLLSCHALTER FÜR DIE
KOCHLEISTUNG auf (180W).
2. Den ZEITSCHALTER auf die entsprechende Zeit
einstellen.
Ergebnis :
✉ Verwenden Sie nur Geschirr, das mikrowellengeeignet ist.
Beginn des Auftauens.
Gebrauch der Funktion Instant-Aufwärmen
Zuerst die Speise in die Mitte des sich drehenden Plattentellers legen
und die Tür schließen.
1. Den KONTROLLSCHALTER FÜR DIE
KOCHLEISTUNG auf Höchstleistung stellen.
2. Den ZEITSCHALTER auf Instant-Aufwärmen einstellen.
(Getränke, Suppen/Soßen, frisches Gemüse).
✉ Verwenden Sie nur Geschirr, das mikrowellengeeignet ist.
Einstellungen für Instant-Aufwärmen
Hier einige Tips und Ratschläge, die Sie beim Kochen oder Erhitzen
von Speisen bei der Einstellung Instant-Aufwärmen befolgen sollten.
Symbole Serviertyp Portion Kochzeit Ruhezeit
Getränke 150 ml 1 Min 10 Sek. 1-2 Min.
Suppen/Soßen
(gekühlt)
Frisches
Gemüse
200-250 ml 3 Min 2-3 Min.
300-350 g 6 Min 40 Sek. 3 Min.
6
Page 15
MSA20M_D_vi.fm Page 7 Wednesday, October 24, 2001 10:37 AM
Leitfaden fürKochgeschirr
Um Lebensmittel im Mikrowellengerät garen zu können, müssen die
Mikrowellen das Lebensmittel durchdringen können, ohne vom
verwendeten Geschirr reflektiert oder absorbiert zu werden.
Aus diesem Grund muss geeignetes Geschirr ausgewählt werden. Ist
das Geschirr als mikrowellengeeignet markiert, brauchen Sie sich
keine Sorgen zu machen.
Die folgende Tabelle enthält verschiedene Geschirrtypen mit Angabe,
ob und wie es in einem Mikrowellengerät benutzt werden muss.
Geschirr Mikrowellen
geeignet
Aluminiumfolie ✓ ✗ Kann in kleinen Mengen zum Schutz
Bräunungsplatte
Porzellan- und
Tongeschirr
Polyester-Karton
Geschirr
Fast-Food Verpackung
• Polystyrol Tassen
und Behälter
• Papierbeteloder
Zeitungspapier
• Recycling-Papier
oder
Metallausrüstung
Glasware
• Feuerfestes
Glasgeschirr
• Dünne Glasware
• Glaskrüge
✓ Höchstens acht Minuten vorwärmen.
✓ Porzellan, Keramik, glasierte
✓ Einige tiefgefrorene Lebensmittel sind
✓
✗
✗
✓
✓
✓
Anmerkungen
vor Bereichen gegen Überkochen
benutzt werden. Befindet sich dieFolie
zu nahe den Wänden oder wird zu viel
Folie benutzt, kann Funkenbildung
eintreten.
Tonwaren und feines Porzellan sind
gewöhnlich geeignet, außer sie sind
mit einem Metallrand verziert.
in solchem Einweggeschirr verpackt.
Kann zum Erwärmen von
Lebensmitteln benutzt werden.
Überhitzen kann ein Schmelzen des
Polystyrols verursachen.
Kann sich entzünden.
Kann Funkenbildung verursachen.
Kann benutzt werden, wenn nichtmit
einem Metallrand verziert.
Kann zum Erwärmen von warmen
Lebensmitteln oder Flüssigkeiten
benutzt werden. Dünnes Glaskann bei
plötzlicher Erwärmung zerbrechen
oder reißen.
Deckel entfernen. Nur zum Erwärmen.
Metall
• Geschirr
• Gefrierbeutel-Clips
Papier
• Teller,Tassen,
Servietten und
Küchenpapier
• Recycling-Papier
Kunststoff
• Behälter
•Folie
• Gefrierbeutel
Wachspapier
✓
=Empfohlen
✗
✗
✓
✗
✓
✓
✓ ✗
Kann Funkenbildung oder Feuer
verursachen.
Für kurze Garzeiten und Erwärmen.
Auchzum Absorbierenüberschüssiger
Feuchtigkeit.
Kann Funkenbildung verursachen.
Vor allem, wenn aus wärmebeständigen Thermoplastik. Einige
andere Kunststoffe können sich bei
hoher Temperatur verformen oder
verfärben. Keinen Melamin-Kunststoff
verwenden.
Kann zum Erhalt der Feuchtigkeit
benutzt werden. Sollte Lebensmittel
nicht berühren. Die Folie vorsichtig
entfernen, das heiber Dampf
entweicht.
Nur wenn siede- oder ofenfest. Darf
nicht luftdicht sein. Bei Bedarf mit
einer Gabel Luftlöcher einstechen.
✓ Kann zum Erhalt der Feuchtigkeit und
Vermeidung von Spritzen benutzt
werden.
✓ ✗
= Vorsicht
✗
= Unsicher
D
7
Page 16
MSA20M_D_vi.fm Page 8 Wednesday, October 24, 2001 10:37 AM
Reinigung IhresMikrowellengeräts
Die hier angeführten Teile Ihres Mikrowellengeräts sollten
D
regelmäßig gereinigt werden, um die Anreicherung von Fett- und
Essensresten zu vermeiden:
• die inneren oder äußeren Oberflächen
• die Tür und die Türverschlüsse
• der sich drehende Plattenteller und die Rollringe
☛ Vergewissern Sie sich STETS, daß die Türverschlüsse sauber
sind und die Tür richtig schließt.
1. Reinigen Sie die äußeren Oberflächen mit einem weichen Lappen und
warmem Seifenwasser. Klarspülen und trocknen.
2. Etwaige Spritzer oder Flecken anden inneren Oberflächen oder an den
Rollringen mit einem seifigen Lappen entfernen. Klarspülen und trocknen.
3. Um hart gewordene Essensreste zu lösen und Gerüche zu beseitigen, eine
Tasse mit verdünntem Zitronensaft auf den sich drehende Plattenteller stellen
und zehn Minuten bei Höchstleistung erhitzen.
4. Den geschirrspülerfesten Teller immer wann nötig waschen.
✉ Achten Sie darauf, daß KEIN Wasser in die Luftlöcher kommt.
NIEMALS abreibende Reinigungsmittel oder chemische
Lösungsmittel verwenden. Gehen Sie insbesondere beim
Reinigen der Türverschlüsse gewissenhaft vor, um
sicherzustellen, daß sich keine Partikel abgesetzt haben:
• Die Anhäufung von Partikel führt dazu, daß die Tür nicht richtig
schließt.
Technische Daten
CANDY strebt ständig danach, ihre Produkte zu verbessern. Aus
diesem Grund sind die technischen Daten und diese
Bedienungsanweisungen Gegenstand von Änderungen ohne
Ankündigung.
Modell MSA 20 M
Netzspannung
Leistungsaufnahme
Microwelle
Ausgangsleistung
Stromfrequenz
Magnetron
Kühlmethode
Abmessungen
(BxHxT)
Außenseite
Garraum
Volumen
Gewicht
Netto
230V ~ 50 Hz
1150 W
100 W / 800 W (IEC-705)
2450 MHz
OM75S(31)
Cooling fan motor
489 x 275 x 371 mm
306 x 211 x 320 mm
20 Liter
Circa 123.5 kg
8
Page 17
MSA20M_FR_vi.fm Page 1 Friday, October 26, 2001 1:11 PM
FOUR À MICRO–ONDES
Mode d’emploi
MSA 20 M
Le four .......................................................................................2
Accessoires...............................................................................2
Tableau de commandes ...........................................................2
Utilisation du mode d’emploi .....................................................3
Précautions de sécurité.............................................................3
Installation.................................................................................4
Que faire en cas de doute ou de problème...............................5
Cuire / Réchauffer .....................................................................5
Niveaux de puissance...............................................................5
Changer le temps de cuisson...................................................6
Décongélation manuelle............................................................6
La fonction Réchauffage instantané.........................................6
Réglages de la fonction Réchauffage instantané.....................6
Guide d’ustensiles.....................................................................7
Nettoyage de votre four à micro-ondes.....................................8
Caractéristiques techniques......................................................8
Page 18
MSA20M_FR_vi.fm Page 2 Friday, October 26, 2001 1:11 PM
Le four
F
OUÏES DE VENTILATION
CONTRÔLE DE LA
PUISSANCE
VARIABLE
MINUTEUR
POIGNÉE
LOQUETS DE
VERROUILLAGE
PORTE
PLATEAU
TOURNANT
LUMIÈRE
COUPLEUR
ANNEAU
TOURNANT
ENCOCHES DE
VERROUILLAGE
Accessoires
Dépendant du modèle que vous avez acheté, vous avez obtenu
quelques accessoires, que vous pouvez utiliser de manières différentes.
1. Coupleur, placé déjà sur une partie du moteur au fond
du four.
But:
Le coupleur fait tourner l’anneau tournant.
Tableaude commandes
1
2
4
3
2. Anneau tournant, doit être placé au centre du four.
3. Plateau tournant, doit être placé sur le coupleur.
L’anneau tournant supporte le plateau tournant.
But:
But:
le plateau tournant serve comme la surface de
cuire principal. Vous pouvez l’enlever
simplement pour le nettoyer.
☛ NE PAS utiliser le four sans l’anneau tournant et le plateau
tournant.
1. DÉCONGÉLATION
2. CONTRÔLE DE LA PUISSANCE
VARIABLE
3. MINUTEUR
4. RÉCHAUFFAGE INSTANTANE
2
Page 19

MSA20M_FR_vi.fm Page 3 Friday, October 26, 2001 1:11 PM
Utilisation dumode d’emploi
Vous avez acheté un four à micro–ondes CANDY. Votre mode
d’emploi contient beaucoup d’informations valables sur l’emploi de
votre four à micro–ondes :
• Précautions de sécurité
• Accessoires et ustensiles
• Uneguidedecuisson
Au début du livret vous trouverez des illustrations du four et, plus
important, du tableau de commandes que vous aiderez à trouver les
boutons plus facilement.
Dans les procédures pas à pas, deux symboles différents sont
employés:
☛✉
Important Remarque
PRECAUTIONS A EVITER L’EXPOSITION POSSIBLE A
l’ENERGIE MICRO
Si vous n’observez pas les précautions de sécurité suivantes, vous risquez de
vous exposer à l’énergie micro-ondes nuisibles.
(a) N’essayez jamais de fairefonctionner le four avec la porte ouverte. Il est
important de ne pas enlever ni altérer les loquets de sécurité (loquets de
verrouillage) ou d’insérer quelque chose dans les encoches de verrouillage.
(b) Vous ne devez jamais placer un objet devant la porte du four. Eviter que les
restes d’aliments ou les résidus du nettoyant s’accumulent sur les surfaces.
Assurez–vous que la porte et les surfaces des fermeturesrestent propres en
les nettoyant d’abord avec une étoffe humide et ensuite avec une étoffe
douce et sèche.
(c) Ne faites pas fonctionner le four s’il est endommagéavant qu’il soit réparé par
un technicien de service micro–ondes formé par le fabricant.
Il est particulièrement important que la porte du fourse ferme correctementet
que les éléments suivants ne soient pas endommagées:
(1) La porte, les fermetures de la porte et les surfaces des fermetures
(2) Les charnières de la porte (ni cassés, ni desserrés),
(3) Le câble secteur
(d) Cefourdoit êtreexclusivement réviséou réparépar untechnicien de service
micro–ondes formé par le fabricant.
–ONDES EXCESSIVE.
Précautions de sécurité
Précautions de sécurité importantes.Lire attentivement et garder pour
emploi dans le futur. Avant de faire chauffer des aliments ou des
liquides dans votre four à micro-ondes, veuillez vérifier que les
précautions de sécurité suivantes ont été prises.
1. NE PAS utiliser d’ustensiles de cuisson métalliques dans le four à microondes.
• Boîtes métalliques
• Assiettes et plats ornés de doruresou argentés
• Brochettes, fourchettes, etc.
Raison : Un arc électrique ou des projections peuvent se produire et
endommager le four.
2. NE PAS faire chauffer :
• De bouteilles, pots, conserves hermétiquement fermés ou sous-vide
Ex) Comme les petits pots pour bébé
• D’aliments hermétiques par nature
Ex) comme les oeufs, les noix dans leur coquille, les tomates
Raison : L’augmentation de la pression peut provoquer leur explosion.
Conseil : Enlever le couvercle, percer l’enveloppe, le sac, etc. de quelques
trous
3. NE PAS faire fonctionner le four à micro-ondes à vide.
Raison : Les parois du four pourraient être endommagées.
Conseil : Toujours laisser un verre d’eau à l’intérieur du four.
L’eau absorbera les micro-ondes si vous faites démarrer le four
accidentellement alors qu’il est vide
4. NE PAS obstruer les ouïes de ventilation situées à l’arrière avec du papier ou
du tissu.
Raison : Le papier ou le tissu pourrait s’enflammer car de l’air chaud est
évacué du four.
5. TOUJOURS mettre des gants pour enlever un plat du four.
Raison : Certains plats absorbent les micro-ondes et la chaleur est toujours transférée
des aliments vers le plat. Les plats sont donc chauds.
6. NE PAS toucher les éléments chauffants, ni l’intérieur du four.
Raison : Ces parois peuvent être suffisamment chaudes pour brûler, même
une fois la cuisson terminée et même si elles ne semblentpas être
chaudes. Ne pas mettre en contact de matériaux inflammables
avec l’intérieur du four. Laisser d’abord le four refroidir.
7. Afin de éviter le risque d’incendie à l’intérieur du four :
• Ne pas ranger de matériaux inflammables dans le four
• Enlever les liens métalliques torsadés des emballages en papier ou en
plastique
• Ne pas utiliser le four à micro-ondes pour faire sécher des journaux
• En cas d’émanation de fumée, laissez la porte du four fermée et éteindre
ou débrancher le four.
8. Prendre toutes les précautionsnécessaires pour faire chauffer des liquides ou
des aliments pour bébé.
• TOUJOURS laisser reposer au moins 20 secondes après l’extinction du
four, afin que la température se répartisse uniformément.
• Remuer pendant la cuisson, si nécessaire,mais TOUJOURS remuer
après la cuisson.
F
3
Page 20
MSA20M_FR_vi.fm Page 4 Friday, October 26, 2001 1:11 PM
Précautions de sécurité (suite)
• Prendre garde à la manipulation du plat, après cuisson. Vous pouvez
F
vous brûler s’il est très chaud.
• Il y a des risques de projections bouillantes, même après la cuisson
• Pour éviter ces projections bouillantes et de possible brûlures, vous
pouvez placer une cuillère en plastique ou une baguette en verre dans le
liquide et remuer avant,pendant et après la cuisson.
Raison :
• En cas de brûlures, suivez ces instructions de PREMIERS SECOURS :
* Immerger la zone brûlée dans l’eau froide pendant au moins 10
* Couvrir avec un vêtement propre et sec.
* N’appliquer aucune crème, huile ou lotion.
• NE JAMAIS remplir le récipient jusqu’au bord et choisir un récipient plus
large en haut qu’en bas afin d’éviter que le liquide ne déborde au moment
de l’ébullition. Les bouteilles avec un col rétréci peuvent également
exploser en cas de surchauffe.
• TOUJOURS vérifier la température des aliments ou du lait pour bébé
avant de le lui donner.
• NE JAMAIS faire chauffer un biberon avec la tétine, le biberon pourrait
exploser en cas de surchauffe.
9. Veiller à ne pas endommager le câble secteur
• Ne pas faire tremper le câble secteur dansl’eau et le tenir éloigné des
surfaces chaudes.
• Nepas faire fonctionner cet appareil si son câble ou sa prise secteur sont
endommagés.
10. Se tenir éloigné du four lors de l’ouverture de la porte.
Raison : L’air chaud ou la vapeur qui s’en échappe peut provoquer des
11. Maintenir l’intérieur du four propre.
Raison : Des particules alimentaires ou des projections d’huile sur les parois
du four peuvent endommagerla surface et réduire l’efficacité du four.
12. Vous remarquerez peut-être un déclic pendant le fonctionnement du four
(particulièrement lors des opérations de décongélation).
Raison : C’est normal et dû au changement de la puissance électrique.
13. Lorsque le four à micro-ondes fonctionne à vide, le secteurest
automatiquement coupé par mesure de sécurité. Vous pourrez le faire
fonctionner à nouveau normalement après 30 min.
Lorsque des liquides chauffent, le point d’ébullition peut être
différé ; cela signifie que des projections bouillantes peuvent
se produire après avoir retiré le récipient du four et peuvent
provoquer des brûlures.
minutes.
brûlures.
Installation
Placer le four sur une surface plate et horizontale qui est assez forte
pour porter le poids du four.
10 cm
20 cm
au-dessus
derrière
☛ Ne jamais bloquer les ouvertures de ventilation. Ainsi le four peut
se surchauffer et se débrancher automatiquement. On ne peut
pas faire fonctionner le four jusqu’au moment où il s’est refroidi
suffisamment.
☛ Par mesure de sécurité personnelle, branchez le câble secteur à
une prise de terre à 3 broches, 230 Volt, 50Hz, CA. Si le câble
secteur est endommagé, vous devez le remplacer par un câble
spécial (I-SHENG SP022, KDK KKP4819D, EUROELECTRIC
3410, SAMIL SP-106B, HIGH PROJECT H.P 3, MOONSUNG
EP-48E). Contactez votre revendeur local pour le faire remplacer.
☛ Ne pas installer le four dansun environnement chaud et humide,
par exemple à côté d’un four traditionnel ou un radiateur. Vous
devez tenir compte des spécifications de raccordement du four et
si vous utilisez une rallonge, cette rallonge doit correspondre aux
spécifications du câble fourni avec le four. Avant d’utiliser votre
four pour la première fois, nettoyez l’intérieur fu four, la porte et
ses fermetures au moyen d’une étoffe humide.
1. Assurez-vous que la ventilation est suffisante en laissant
10 cm d’espace au minimum derrière le four et à côté du
10 cm
côté
à
four et 20 cm au minimum au-dessus du four.
2. Enlevez tous les matériaux d’emballage à l'intérieur du
four.
Installez l’anneau tournant et le plateau tournant.
Contrôlez si le plateau peut tourner librement.
3. On doit positionner le four tellement que la prise soit
accessible.
CONSIGNES DE SÉCURITÉ IMPORTANTES
Pendant la cuisson, regardez de temps en temps à l’intérieur du four lorsque les
aliments se trouvent dans des emballages jetables en plastique, en papier ou
autres matériaux combustibles.
IMPORTANT
Les jeunes enfants ne doivent JAMAIS utiliser ou jouer avec le four à microondes. Ni être laissés sans surveillance près du four à micro-ondes lors de son
utilisation. Les objets qui intéressent les enfants ne doivent pas être placés ni
cachés au-dessus du four.
4
Page 21
MSA20M_FR_vi.fm Page 5 Friday, October 26, 2001 1:11 PM
Que faireen cas de doute ou de problème
Si vous rencontrez un des problèmes listés ci-dessous, essayez une des
solutions proposées.
◆ Ce qui est normal :
• Présence de condensation à l’intérieur du four
• Courant d’air autour de la porte et à l’extérieur
• Réflexion lumineuse autour de la porte et à l’extérieur
• Vapeur s’échappant de la porte ou des évents
◆ Le four ne démarre pas lorsque vous tournez le MINUTEUR .
• La porte est-elle complètement fermée ?
◆ Les aliments ne sont pas du toutcuits
• Avez-vous réglé correctement le minuteur?
• La porte est-elle fermée?
• Avez-vous surchargé le circuit électrique et provoquer une coupure de
courant ?
◆ Les aliments sont soient trop, soient pas assez cuits.
• La durée de cuisson était-elle appropriée à ce type d’aliment ?
• La puissance choisie était-elle appropriée ?
◆ Des éclaboussures et des craquements se produisent à l’intérieur du four
(arc)
• Avez-vous utilisé un plat avec des parties métalliques ou des dorures ?
• Avez-vouslaissé une fourchette ou tout autre ustensile métallique dans le
four ?
• Le papier d’aluminium se trouve-t-il trop près des parois ?
◆ Le four provoque des interférences avec les postes de radio ou de télévision
• De faibles interférences peuvent être observées sur les postes de
télévision ou de radio lorsquele four fonctionne. C’est normal. Pour
résoudre ce problème, éloignez le four des postes de télévision ou de
radio et des antennes.
✉ Si les conseils donnés ci-dessus ne résolvent pas le problème,
contactez votre revendeur local ou le service après-vente de
CANDY.
Cuire /Réchauffer
La procédure suivante explique comment cuire ou réchauffer les
aliments. TOUJOURS vérifier les réglages de cuisson avant de laisser
le four sans surveillance.
Placez d’abord les aliments au centre du plateau tournant. Refermez
la porte.
1. Réglez la puissance en tournant le bouton pour le
CONTRÔLE DE LA PUISSANCE sur le maximum
(800W).
2. Réglez le temps de cuisson en tournant le MINUTEUR.
Résultat :
Lalumièredufours’allumeetleplateause
met à tourner.
☛ Ne jamais mettre en marche le four à micro-ondes lorsqu’il est
vide.
✉ Vous pouvez changer la puissance pendant la cuisson en
tournant le bouton pour le CONTRÔLE DE LA PUISSANCE.
Niveaux depuissance
Vous pouvez choisir un des niveaux de puissance mentionné ici.
Niveau de Puissance Puissance dégagée
MAXIMUM
RÉCHAUFFAGE
MOYENNE FORTE
MOYENNE
MOYENNE BASSE
DÉCONGÉLATION( )
BASSE
800 W
700 W
600 W
450 W
300 W
180 W
100 W
F
✉ Si vous choisissez une puissance plus élevée, il faut réduire le temps
de cuisson.
✉ Si vous choisissez une puissance moindre, il faut augmenter le
temps de cuisson.
5
Page 22

MSA20M_FR_vi.fm Page 6 Wednesday, December 19, 2001 4:06 PM
Changer le temps de cuisson
F
Vous pouvez changer le temps de cuisson qui reste en
tournant le MINUTEUR.
Décongélation manuelle
Au moyen de la fonction Décongélation vous pouvez décongeler de la
viande, de la volaille ou des poissons. Placez d’abord les aliments
surgelés au centre du plateau tournant.
Refermez la porte.
1. Réglez la puissance en tournant le bouton pourle
CONTRÔLE DE LA PUISSANCE sur (180W).
2. Sélectionnez le temps de cuisson approprié en tournant
le MINUTEUR.
Résultat :
✉ N’utiliser que des récipients adaptés aux foursà micro-ondes.
La décongélation commence.
La fonctionRéchauffage instantané
Placez d’abord les aliments au centre du plateau tournant. Refermez
la porte.
1. Réglez la puissance en tournant le bouton pour le
CONTRÔLE DE LA PUISSANCE sur le maximum.
2. Tournez le MINUTEUR pour sélectionner le réchauffage
instantané (boissons, soupe/sauce, légumes frais).
✉ N’utiliser que des récipients adaptés aux fours à micro-ondes.
Réglages de la fonction Réchauffage instantané
Le tableau suivant indique les programmes Réchauffage/Cuisson
instantané, les quantités, les temps de repos et des recommandations
utiles.
Symbole Aliment Portion Temps de
cuisson
Boissons 150 ml 1 min 10 sec 1-2 min.
Soupe/Sauce
(refroidies)
Légumes frais 300-350 g 6 min 40 sec 3 min.
200-250 ml 3 min 2-3 min.
Temps de
repos
6
Page 23
MSA20M_FR_vi.fm Page 7 Friday, October 26, 2001 1:11 PM
Guide d’ustensiles
Pour cuisiner dans votre four à micro-ondes, il faut employer des plats
laissant passer les micro-ondes afin qu’elles puissent chauffer les
aliments sans être réfléchies ou absorbées par le plat.
Il est donc essentiel de bien choisir le type de plat employé. S’il est
indiqué sur votre plat qu’il est adapté pour la cuisine au four microondes, aucune inquiétude.
Les tableaux suivants vous présentent la liste des plats adaptés et la
méthode de cuisson au micro-ondes.
Ustensiles de cuisine Adapté à la
cuisson au
micro-ondes
Papier aluminium ✓ ✗ Peut être employé en petites quantités
Plat à brunir
Porcelaine et plats en
terre cuite
Plats en carton
Emballagedefast-food
•Tassesen
polystyrène
•Sacsenpapierou
papier journal
• Papier recyclé ou
contenant du métal
✓ Ne pas préchauffer pendant plus de
✓ La porcelaine, la terre cuite, la faïence
✓ Certains aliments congelés sont
✓
✗
✗
Commentaires
afin d’empêcher certaines partiesde
trop cuire. Des étincelles peuvent se
produire si le papier est trop près de la
paroi du four ou si vous avez utilisé
trop de papier.
huit minutes.
et la porcelaine tendre peuvent
généralement être utilisées, sauf si
elles sont décorées avec du métal.
emballés dans ce type de plats. Ils
peuvent être employés pourréchauffer
les aliments.
Ne pas les laisser chauffer trop
longtemps ou le polystyrène pourrait
fondre.
Peut prendre feu.
Peut provoquer des étincelles.
Plats en verre
•Platsde
présentation
adaptés à la
cuisson en four
• Plats en verre fin
• Pots en verre
Métal
•Plats
• Cordons de
fermeturedessacs
congélation
Papier
• Assiettes, tasses,
serviettes de table
et essuie-tout
• Papier recyclé
Plastique
• Barquettes
• Scellofrais
• Sacscongélation
Papier paraffiné ou
sulfurisé
✓
✓
✓
✗
✗
✓
✗
✓
✓
✓ ✗
Peut être utilisé, sauf s’il est décoré
avec du métal.
Peut être utilisé pour réchauffer des
aliments oudes liquides. Les objets en
verre fragile peuvent se briser ou se
fendre s’ils sont brutalement chauffés.
Retirer le couvercle. Pour réchauffer
uniquement.
Peut provoquer des étincelles ou
prendre feu.
Pour les temps de cuisson et le
réchauffement très brefs. Egalement
pour absorber une trop grande
humidité.
Peut provoquer des étincelles.
Tout particulièrement s’il s’agit de
thermoplastique résistant à la
chaleur.D’autres plastiques peuvent
se voiler ou se décolorer à des
températures élevées. Ne pas utiliser
de plastique mélaminé.
Peut être employé afin de retenir
l’humidité. Ne doit pas entrer en
contact avec les aliments.
Uniquement s’il supporte la
température d’ébullition ou va au four.
Ne doit pas être hermétique. Percer
avec une fourchette si nécessaire.
Peut être utilisé pour retenir l’humidité
et empêcher les éclaboussures.
✓ Peut être utilisé pour retenir l’humidité
et empêcher les éclaboussures.
F
✓
= Recommandé
7
✓ ✗
= Faire attention
✗
= Incertain
Page 24
MSA20M_FR_vi.fm Page 8 Friday, October 26, 2001 1:11 PM
Nettoyage devotre four à micro-ondes
Les parties suivantes de votre four à micro-ondes doivent être
F
nettoyées régulièrement afin d’éviter que des particules de graisse ou
d’aliments ne s’accumulent :
• Surfaces intérieures et extérieures
• Porte et système de fermeture
• Plateau et anneau tournants
☛ TOUJOURS veiller à ce que la porte et son système de
fermeture soient propres et ferment correctement.
1. Nettoyer les surfaces extérieures avec une éponge douce imbibée d’eau
chaude savonneuse, rincer puis sécher.
2. Enlever les éclaboussures et les taches des surfaces intérieures et de
l’anneau. Rincer et sécher.
3. Pour enlever les particules d’aliments durcies et supprimer les odeurs, placer
une tasse d’eau additionnée de jus de citron sur le plateau tournant et faites
chauffer pendant dix minutes à la puissance maximum.
4. Laver le plateau-tournant (résistantau lave-vaisselle) lorsque c’est
nécessaire.
✉ NE PAS faire couler d’eau dans les évents. NE JAMAIS utiliser
de produits abrasifs ni de solvants chimiques. Faire très attention
au nettoyage du système de fermetureet veiller à ce qu’aucune
particules :
• ne s’y accumule
• empêche la porte de se fermer correctement
Caractéristiques techniques
CANDY s’efforce d’améliorer ses produits en permanence. Les
spécifications de conception etles instructions destinées à l’utilisateur
sont donc soumises à modificationssans avertissement.
Modèle MSA 20 M
Alimentation
Consommation
Micro-ondes
Puissance de sortie
Fréquence de fonctionnement
Magnétron
Système de refroidissement
Dimensions (LXHXP)
Extérieur
Four/intérieur
Capacité du four 20 litres
Poids
Net
230V ~ 50 Hz
1150 W
100 W / 800 W (IEC-705)
2450 MHz
OM75S(31)
Moteur à ventilateur de refroidissement
489 x 275 x 371 mm
306 x 211 x 320 mm
Environ 12.5 kg
8
Page 25

MSA20M_SP_vi.fm Page 1 Friday, October 26, 2001 1:12 PM
HORNO MICROONDAS
Instrucciones de usuario
MSA 20 M
Horno.........................................................................................2
Accesorios.................................................................................2
Panel de control .......................................................................2
Uso de este folleto de instrucciones .........................................3
Precauciones de seguridad.......................................................3
IInstalación de su horno microondas .......................................4
Qué hacer si usted tiene una duda o tiene un problema..........5
Calentar / Cocinar .....................................................................5
Niveles de potencia...................................................................5
Ajuste del tiempo de cocción ....................................................6
Descongelado manual de alimentos.........................................6
Uso del modo Calentado Instantáneo.......................................6
Graduaciones de Calentado Instantáneo.................................6
Guía de utensilios de cocina.....................................................7
Limpieza de su hornomicroondas............................................8
Especificaciones técnicas .........................................................8
Page 26

MSA20M_SP_vi.fm Page 2 Friday, October 26, 2001 1:12 PM
Horno
E
ORIFICIOS DE VENTILACIÓN
AGARRADERA
DE LA PUERTA
CIERRES DE LA PUERTA
PUERTA
PLATO
GIRATORIO
LUZ
ANILLO
RODANTE
ACOPLADOR
BOTÓN DE CONTROL
DE LA POTENCIA
VARIABLE DE COCCIÓN
ORIFICIOS DE
SEGURIDAD
Accesorios
Dependiendo del modelo que usted haya comprado, se le
suministrarán varios accesorios que pueden ser usados en una
variedad de formas.
1. Acoplador, colocado ya sobre el eje del motor en la
base del horno.
Propósito:
El acoplador hace rotar el plato giratorio.
BOTÓN DEL
CRONÓMETRO
Panel de control
1
2
4
3
2. Anillo rodante, para ser colocado en el centro del
horno.
Propósito:
3. Plato giratorio, para ser colocado sobre el anillo
rodante con el centro ajustado en el acoplador.
Propósito:
En el anillo rodante se apoya el plato
giratorio.
Elplatogiratoriosirvecomolasuperficie
principal para cocinar; se puede sacar
fácilmente para su limpieza.
☛ NO opere el horno microondas sin el anillo rodante y el plato giratorio.
1. DESCONGELAR
2. BOTÓN DEL CONTROL DE LA
POTENCIA DE COCCIÓN
3. BOTÓN DEL CRONÓMETRO
4. CALENTADO INSTANTÁNEO
2
Page 27

MSA20M_SP_vi.fm Page 3 Friday, October 26, 2001 1:12 PM
Uso deeste folleto de instrucciones
Usted ha comprado un horno microondasCANDY. Las instrucciones
de usuario contienen mucha información valiosa sobre cómo cocinar
con su horno microondas:
• Precauciones de seguridad
• Accesorios y utensilios de cocina apropiados
• Sugerencias útiles para cocinar
En la parte del frente del folleto usted encontrará ilustraciones del
horno, y lo más importante, del panel de control, de manera que usted
pueda encontrar los botones en forma más sencilla.
Los procedimientos paso-a-paso usan dos símbolos diferentes.
☛✉
Importante Nota
PRECAUCIONES PARA EVITAR POSIBLES EXPOSICIONES A
UNA EXCESIVA ENERGÍA MICROONDAS
La falla en observar las siguientes precauciones de seguridad puede resultar en
una exposición dañina a la energía microondas.
(a) Bajo ninguna circunstancia se debería intentar operar el horno con la puerta
abierta o tapar las hendijas de seguridad (cierres de las puertas) o insertar
alguna cosa en los orificios de seguridad.
(b) Nocoloque ningún objeto entre la puerta del horno y la parte frontal o permita
que residuos de alimentos o de limpiadores se acumulen en las superficies de
cierre. Asegure que la puerta y las superficies decierre de la puerta se
mantengan limpias después de usar el horno pasando primero un paño
húmedo y luego un paño seco suave.
(c) No opere el horno, si está dañado, hasta que haya sido reparado por un
técnico calificado en servicio de microondas y entrenado por el fabricante.
Es particularmente importante que la puerta del horno cierre correctamente y
que no haya daño en:
(1) Puerta, cierres de la puertay superficies de cierre
(2) Bisagras de la puerta (rotaso sueltas)
(3) Cable de conexión
(d) El horno no debería ser ajustado o reparado por alguien que no sea un
técnico calificado adecuadamente en servicio de microondas y entrenado por
el fabricante.
Precauciones de seguridad
Importantes instrucciones de seguridad.
Lea con cuidado y conservelas para futura referencia.
Antes de cocinar alimentos o liquidos en su hornode microondas, por
favor verifique que se tomen las siguientes precaucionesde seguridad.
1. NO use ningún utensilio de cocina metálico en el horno de microondas:
• Recipientes metálicos
• Vajilla con filetes dorados o plateados
• Brochetas, tenedores, etc.
: Se pueden ocasionar arcos o chispas eléctricas que pueden
Razón
2. NO caliente:
• Botellas, frascos, recipientes herméticos o cerrados al vacío
• Alimentos con cubierta hermética.
Razón: El aumento de la presión puede causar que ellos exploten.
Sugerencia:Saque las tapas, agujeree las cáscaras, bolsas, etc.
3. NO opere el horno microondas cuando está vacío.
Razón
Sugerencia
4. NO cubra las ranurasde ventilación en la parte de atrás con paños o papel.
Razón
5. SIEMPRE use guantes para horno cuando saque un recipiente del horno.
Razón
6. NO toque los suplementos de calentado o las paredes interiores del horno.
Razón
7. Para evitar el riesgo que se origine fuego en la cavidad del horno:
• No guarde materiales inflamables en el horno
• Saque ataduras de alambre de las bolsas plásticas o de papel
• No use su horno de microondas para secar papel de diario
• Si se observa humo, mantenga la puerta del horno cerrada y apague o
8. Tome particular cuidado cuando caliente líquidos y alimentos para bebés.
• SIEMPRE permitauntiempodereposodealmenos20segundos
• Revuelva durante el calentado, si es necesario, y SIEMPRE revuelva
dañar el horno.
Ej: Frascos de alimento para bebés
Ej: Huevos, fruta seca con su cáscara, tomates
: Las paredes del horno pueden dañarse.
:Deje un vaso con agua en el interior del horno en todo momento.
El agua absorberá las microondas si accidentalmente usted
enciende el horno cuando está vacío.
: Los paños o papel pueden prenderse fuego con el aire caliente
que es expulsado del horno.
: Algunos recipientes absorben las microondas y el calor siempre
se transfiere desde el alimento al recipiente. Los recipientes por
lo tanto están calientes.
: Dichas paredes pueden estar lo suficientemente calientes como
para quemar aún despuésque la cocción ha finalizado, aunque
no parezca que así lo estén. No permita que materiales
inflamables entren en contacto con cualquier área interna del
horno. Deje que primero se enfríe el horno.
desconecte el horno del suministro de electricidad
después que el horno ha sido apagado de manera que la temperatura
pueda igualarse.
después de calentar.
E
3
Page 28

MSA20M_SP_vi.fm Page 4 Friday, October 26, 2001 1:12 PM
Precaucionesde seguridad (continuación)
• Tenga cuidado cuando manipula el recipiente después de calentar. Se
E
puede quemar si el recipiente está demasiado caliente.
• Existe riesgo de ebullición demorada eruptiva.
• Para evitar la ebullición demorada y escaldadura posible, se debería
poner una cuchara de plástico o varilla de vidrio en las bebidas y revolver
antes, durante y después de calentar.
: Durante el calentamiento de líquidos el punto de ebullición se
Razón
• En el caso de escaldadura, siga estasinstrucciones de PRIMEROS
AUXILIOS:
* Sumerja el área escaldada en agua fría por al menos 10 minutos.
* Cúbrala con un apósito limpio y seco.
* No aplique ninguna crema, aceite o loción.
• NUNCA llene el recipiente hasta el tope y elija un recipiente que sea más
anchoenlapartesuperiorqueenlaparteinferiorparaevitarqueel
líquido se derrame al hervir. Las botellas con cuellos angostos pueden
también explotar si se recalientan.
• SIEMPRE verifique la temperatura del alimento para bebés o leche antes
de dársela al bebé.
• NUNCAcaliente el biberón con la tetinapuesta, el biberón puede explotar
si se recalienta.
9. Tenga cuidado de no dañar el cable de conexión.
• No sumerja el cable de conexión o el enchufe en agua, y mantenga el
cable lejos de superficies calientes.
• No opere este artefacto eléctrico si tiene elcable de conexión o enchufe
dañado.
10. Manténgase a una distancia de un brazo del horno cuando abre la puerta.
Razón
11. Mantenga limpio el interior del horno.
Razón
12. Usted puede notar un sonido de “chasquido” durante cualquier operación
(especialmente cuando el horno está en descongelar).
Razón
13. Cuando el horno de microondas está funcionando sin ninguna carga, la
electricidad serácortada automáticamente por seguridad. Usted puede operar
el horno normalmente después de esperar por más de 30 minutos.
puede demorar; esto quiere decir que la ebullición eruptiva
puede comenzar después que el recipiente se ha sacado del
horno. Se puede escaldar.
: El aire o vapor caliente liberado puede causar escaldaduras.
: Las partículas de alimentos o aceites salpicados y pegados a las
paredes o piso del horno pueden causar daño a la pintura y
reducir la eficiencia del horno.
: Este sonido es normal cuando la salida de la corriente eléctrica
no es uniforme.
INSTRUCCIONES IMPORTANTES DE SEGURIDAD
Al cocinar, usted debería mirar hacia adentro del horno cada tanto cuando se
están calentando o cocinando alimentos en recipientes desechables de plástico,
papel o de materiales combustibles.
IMPORTANTE
A los niños pequeños NUNCA se les debería permitir usar o jugar con el horno
de microondas. Tampoco deberían ser dejados sin atención cerca del horno de
microondas cuando está en uso. Los artículos de interés para los niños no
deberían guardarse o esconderse encima del horno.
IInstalaciónde su horno microondas
Coloque el horno en una superficie plana, a nivel, que sea lo
suficientemente fuerte para soportar en forma segura el peso del
horno.
10 cm por
20 cm
por encima
detrás
en los costados
☛ Nunca bloquee las ranuras de ventilación en la medida que el
horno puede recalentarse y automáticamente apagarse. Será
inoperable hasta que se haya enfriado lo suficiente.
☛ Para su seguridadpersonal, enchufe el cable en un tomacorriente de
3-pin, 230 Volt, 50Hz, con cable a tierra. Si el cable de conexión de
este artefacto eléctrico está dañado, debe ser reemplazado por el
fabricante o su agente de servicio o una persona de similares
calificaciones para evitar un choque eléctrico
KDK KKP4819D, EUROELECTRIC 3410, SAMIL SP-106B,
MOONSUNG EP-48E, HIGH PROJECT H.P 3).
☛ No instale el horno de microondas en alrededores húmedos o
calientes como cercano a un horno tradicional o a un radiador.
Las especificaciones de suministro de energía del horno deben
ser respetadas y cualquier extensión de cable usado debe ser del
mismo tipo que el cable de conexión suministrado con el horno.
Limpie el interior y el cierre de la puerta con un paño húmedo
antes de usar el horno de microondas por primera vez.
1. Cuando usted instale su horno, asegúrese que haya
ventilación adecuada para el horno dejando almenos 10
cm de espacio por detrás, y en los costados del horno y
10 cm
20 cm deespacio por encima del horno.
2. Saque todos los materiales de envasado del interior del
horno.
Instale el anillo rodante y el plato giratorio.
Verifique que el plato giratorio rote con libertad.
3. Este horno microondastiene que ser colocado de
manera que un tomacorriente esté accesible.
(I-SHENG SP022,
4
Page 29

MSA20M_SP_vi.fm Page 5 Friday, October 26, 2001 1:12 PM
Qué hacersi usted tiene una duda o tiene un
problema
Si usted tiene cualquiera de los problemas que se listan a continuación
recurra a las soluciones ofrecidas.
◆ Esto es normal:
• Condensación en el interior del horno
• Flujo de aire alrededor de la puerta y de la carcasa exterior
• Reflexiónde la luz alreded orde la puerta y de la carcasa exterior
• Vapor que se escapa desde los alrededores de la puerta o las ranuras de
ventilación
◆ El horno no se prende cuando usted gira el botón del CRONÓMETRO.
• ¿La puerta está cerrada completamente?
◆ Los alimentos no se cocina en absoluto
• ¿Ha programado correctamente el cronómetro?
• ¿La puerta está cerrada?
• ¿Ha sobrecargado el circuito eléctrico y causado que un fusible se
quemara o se disparara un interruptor de corriente?
◆ Los alimentos están sobre-cocidos o poco cocidos
• ¿Se programó la duración apropiada para el tipo de alimento?
• ¿Se eligió un nivel de potencia apropiado?
◆ Ocurren chisporroteos y crujidos en la parte interior del horno (formación del
arco)
• ¿Ha usado un plato con filete metálico?
• ¿Ha dejado un tenedor u otro utensilio de metal en el interior del horno?
• ¿El papel de aluminio está demasiado cerca de las paredes interiores?
◆ El horno causa interferencia con radios o televisores
• Una ligera interferencia se puede observar entelevisores o radioscuando
el horno está funcionando.Esto es normal. Para resolver este problema,
instale el horno lejos de televisores, radios o antenas.
✉ Si las directivas de más arriba no lo habilitan a resolver el
problema, contacte a su distribuidor local o al servicio CANDY
post-venta.
Calentar/ Cocinar
El siguiente procedimiento explica cómo cocinar o calentar alimentos.
SIEMPRE verifique la graduación para cocinar antes de dejar el
horno solo.
Primero, coloque el alimento en el centro del plato giratorio. Luego,
cierre la puerta.
1. Fije el nivel de potencia al máximo girando el botón del
CONTROL DE POTENCIA DE COCCIÓN. (POTENCIA
MÁXIMA: 800W).
2. Fije el tiempo girando el botón del CRONÓMETRO.
Resultado :
La luz del horno seenciende y el plato
giratorio comienza a girar.
☛ Nunca encienda el horno microondas cuando esté vacío.
✉ Usted puede cambiar el nivel de potencia durante la cocción
girando el botón del CONTROL DE POTENCIA DE COCCIÓN.
Niveles de potencia
Usted puede elegir dentro de los niveles de potencia siguientes.
Nivel de potencia
ALTO
CALENTAR
MEDIO ALTO
MEDIO
MEDIO BAJO
DESCONGELAR ( )
BAJO
Corriente de salida
800 W
700 W
600 W
450 W
300 W
180 W
100 W
E
✉ Si usted selecciona el nivel de potencia más alto, el tiempo de
cocción se debe disminuir.
✉ Si usted selecciona el nivel de potencia más bajo, el tiempo de
cocción se debe aumentar.
5
Page 30

MSA20M_SP_vi.fm Page 6 Wednesday, December 19, 2001 4:06 PM
Ajuste del tiempo de cocción
E
Ajuste el tiempo remanente girando el botón del
CRONÓMETRO.
Descongelado manualde alimentos
El modo de Descongelar le permite descongelar carne, aves, pescado o
Pan/Torta. Primero, coloque el alimento congelado en el centro del
plato giratorio y cierre la puerta.
1. Gire el botón del CONTROL DE LA POTENCIA DE
COCCIÓN a (180W).
2. Gire el botón del CRONÓMETRO para seleccionar el
tiempo apropiado.
Resultado :
✉ Use solamente recipientes que sean seguros para microondas.
Comienza el descongelado.
UsodelmodoCalentadoInstantáneo
Primero, coloque el alimento en el centro del plato giratorio y cierre la
puerta.
1. Gire el botón del CONTROL DE LA POTENCIA DE
COCCIÓN a Max. Potencia.
2. Gire el botón del CRONÓMETRO para seleccionar
Calentar Instantáneo (bebidas, sopa / salsa, vegetales
frescos).
✉ Use solamente recipientes que sean seguros para microondas.
Graduaciones de Calentado Instantáneo
A continuación algunas sugerencias y recomendaciones a seguir
cuando cocine o caliente alimentos con el modo Calentado
Instantáneo.
Símbolos Tipo de Porción Porción Tiempo de
cocción
Bebidas 150 ml 1 min 10 seg 1-2 min.
Sopa / Salsa
(heladas)
Vegetales
frescos
200-250 ml 3 min 2-3min.
300-350 g 6 min 40 seg 3 min.
Tiempo de
reposo
6
Page 31

MSA20M_SP_vi.fm Page 7 Friday, October 26, 2001 1:12 PM
Guía deutensilios de cocina
Para cocinar alimentos en el horno de microondas, el microondas
debe ser capaz de penetrar los alimentos, sin ser reflejadas o
absorbidas por la vajilla usada.
Se debe tener entonces sumo cuidado cuando elija los utensilios a
usar. Si los utensilios están marcados como seguros para microondas,
no necesita preocuparse.
La tabla siguiente tiene una lista de varios tipos de utensilios e indica
si y cómo deberían usarse en un horno microondas.
Utensilio Seguro para
microondas
Papel de aluminio
Recipiente para
caramelo
Porcelana y cerámica
Recipientesdesechables de
cartón poliester
Envasado de comida-rápida
• Recipientes de
poliestireno
• Bolsas de papel o
diaro
• Vasos o copas de
papel reciclado o
con filetes de
metal
✓ ✗ Puede ser usado en pequeñas
✓ No precaliente por más de ocho
✓ Porcelana, alfarería, cerámica
✓ Algunos alimentos congelados son
✓
✗
✗
Comentarios
cantidades para proteger algunas
áreas de la sobre-cocción. Puede
ocurrir que se forme el arco eléctrico si
el papel está demasiado cerca de la
pared del horno o si seusa demasiado
papel.
minutos.
esmaltada y porcelana de hueso son
habitualmente apropiadas, a menos
que estén decoradas con un filete de
metal.
empaquedos en estos recipientes.
Pueden usarse para entibiar
alimentos. Elsobre-calentado puede
causar que el poliestireno se derrita.
Pueden prenderse fuego.
Pueden causar que se forma el arco
eléctrico.
Vasos y copas
• Recipientes del
horno-a-la-mesa
• Cristalería fina
• Jarras de vidrio
Metal
• Recipientes
• Ataduras de torcer
de bolsas para
congelador
Papel
• Platos, tazas,
servilletas y toallas
de papel
• Papel reciclado
Plástico
• Recipientes
• Película adherente
•Bolsaspara
congelador
Papel encerado o a prueba
de grasitud
✓
= Recomendado
✓
✓
✓
✗
✗
✓
✗
✓
✓
✓ ✗
Pueden usarse, a menos que estén
decoradas con un filete de metal.
Pueden usarse para entibiar alimentos
o líquidos. El cristal delicado puede
romperse o astillarse si se calienta
súbitamente.
Debe sacarse la tapa. Apropiado
solamente para entibiar.
Pueden causar la formación del arco o
fuego.
Para períodos cortos de cocción y
entibiado. También para absorber
exceso de humedad.
Puede causar la formación del arco.
Particularmente si es termoplástico
resistente al calor. Algunos otros
plásticos pueden deformarse o
descolorirse a altas temperaturas. No
use plástico de melamina.
Puede usarse para retener la
humedad. No debería tocar los
alimentos. Tenga cuidado cuando
saque la película, el vapor caliente
que se escapa puede quemarlo.
Solamente sies a prueba deebullición
o de horno. No debería estar
hermético. Pínchelo con un tenedor si
es necesario.
✓ Puede usarsepara retener humedad y
evitar el salpicado.
✓ ✗
=Atención ✗=Incierto
E
7
Page 32

MSA20M_SP_vi.fm Page 8 Friday, October 26, 2001 1:12 PM
Limpieza desu horno microondas
Las siguientes partes de su horno de microondas deberían limpiarse
E
regularmente para prevenir que partículas de grasa y alimentos se
acumulen:
• Superficies internas y externas
• Puerta y cierres de las puertas
• Plato giratorio y anillo rodante
☛ SIEMPRE asegure que los cierres de la puerta estén limpiosy la
puerta cierre apropiadamente.
1. Limpie las superficies externas con un paño suave y aguatibia, jabonosa.
Enjuague y seque.
2. Saque cualquier salpicadura o mancha sobrelas superficies interiores o sobre
el anillo rodante con un paño jabonoso. Enjuague y seque.
3. Para aflojar partículas de alimentos endurecidos y sacar los olores, coloque
una taza de jugo diluido de limón sobre el plato giratorio y caliente por diez
minutos a la máxima potencia.
4. Lave el plato en el lava vajillas cada vez que sea necesario.
✉ NO derrame agua en las rendijas de ventilación. NUNCA use
ningún producto abrasivo o solventes químicos. Tome particular
cuidado al limpiar los cierres de la puerta para asegurar que
ninguna partícula:
•Seacumule
• Prevenir que la puerta cierre correctamente
Especificaciones técnicas
CANDY strives to improve its products at all times. Both the design
specifications and these user instructions are thus subject to change
without notice.
Modelo MSA 20 M
Fuente de energía
Consumo de energía
Microondas
Corriente de salida
Frecuencia de funcionamiento
Magnetrón OM75S(31)
Método de enfriado
Dimensiones (ancho x alto x
profundidad)
Exterior
Horno
Volumen 20 litros
Peso
Neto
230V ~ 50 Hz
1150 W
100 W / 800 W (IEC-705)
2450 MHz
Motor de ventilador de enfriado
489 x 275 x 371 mm
306 x 211 x 320 mm
12.5 kg aprox
8
Page 33

MSA20M_GB.fm Page 1 Friday, October 26, 2001 1:12 PM
MICROWAVE OVEN
Owner’s Instructions
MSA 20 M
Oven..........................................................................................2
Accessories...............................................................................2
Control Panel ............................................................................2
Using this Instruction Booklet....................................................3
Safety Precautions ....................................................................3
Installing Your Microwave oven ................................................4
What to Do if You are in Doubt or Have a Problem..................5
Cooking / Reheating..................................................................5
Power Levels.............................................................................5
Adjusting the Cooking Time......................................................6
Manual Defrosting Food............................................................6
Using the Instant Reheat Feature.............................................6
Instant Reheat Settings.............................................................6
Cookware Guide .......................................................................7
Cleaning Your Microwave Oven ...............................................8
Technical Specifications............................................................8
Page 34

MSA20M_GB.fm Page 2 Friday, October 26, 2001 1:12 PM
Oven
GB
VENTILATION HOLES
DOOR
HANDLE
DOOR LATCHES
DOOR
TURNTABLE
LIGHT
ROLLER RING
COUPLER
VARIABLE COOKING
POWER CONTROL
KNOB
SAFETY INTERLOCK
HOLES
Accessories
Depending on the model that you have purchased, you are supplied
with several accessories that can be used in a variety of ways.
1. Coupler, already placed over the motor shaft in the
base of the oven.
Purpose:
The coupler rotates the turntable.
Control Panel
1
2
TIMER KNOB
4
3
2. Roller ring,tobeplacedinthecentreoftheoven.
Purpose:
3. Turntable, to be placed on the roller ring with the centre
fitting to the coupler.
Purpose:
The roller ring supports the turntable.
The turntable serves as the main cooking
surface; it can be easily removed for
cleaning.
☛ DO NOT operate the microwave oven without the roller ring and
turntable.
1. DEFROST
2. VARIABLE COOKING POWER
CONTROL KNOB
3. TIMER KNOB
4. INSTANT REHEAT
2
Page 35

MSA20M_GB.fm Page 3 Friday, October 26, 2001 1:12 PM
Using thisInstruction Booklet
You have just purchased a CANDY microwave oven. Your Owner’s
Instructions contain much valuable information on cooking with your
microwave oven:
• Safety precautions
• Suitable accessories and cookware
• Useful cooking tips
At the front of the booklet you will find illustrations of the oven, and
more importantly the control panel, so that you can find the buttons
more easily.
The step-by-step procedures use two different symbols.
☛✉
Important Note
PRECAUTIONS TO AVOID POSSIBLE EXPOSURE TO
EXCESSIVE MICROWAVE ENERGY
Failure to observe the following safety precautions may result in harmful
exposure to microwave energy.
(a) Underno circumstancesshould any attempt be made to operate the oven with
the door open or to tamper with the safety interlocks (door latches) or to insert
anything into the safety interlock holes.
(b) Do not place any object between the oven door and front faceor allow food or
cleaner residues to accumulate on sealing surfaces. Ensure that the door and
door sealing surfaces are kept clean by wiping after use first with a damp cloth
and then with a soft dry cloth.
(c) Do not operate the oven if it is damageduntil it has been repaired by a
qualified microwave service technician trained by the manufacturer.
It is particularly importantthat the oven door closes properly and that there is
no damage to the:
(1) Door, door seals and sealing surfaces
(2) Door hinges (brokenor loose)
(3) Power cable
(d) The oven should not be adjusted or repaired by anyone other than a properly
qualified microwave service technician trained by the manufacturer.
Safety Precautions
Important Safety Instructions.
Read Carefully and keep for future reference.
Before cooking food or liquids in your microwave oven, please check
that the following safety precautions are taken.
1. DO NOT use any metallic cookware in the microwave oven:
• Metallic containers
• Dinnerware with gold or silver trimmings
• Skewers, forks, etc.
Reason:
2. DO NOT heat:
• Airtight or vacuum-sealed bottles, jars, containers
• Airtightfood.
Reason:
Tip:
3. DO NOT operate the microwave oven when it is empty.
Reason:
Tip:
4. DO NOT cover the rear ventilation slots with cloths or paper.
Reason:
5. ALWAYS use oven gloves when removing a dish from the oven.
Reason:
6. DO NOT touch heating elements or interior oven walls.
Reason:
7. Toavoidtheriskoffireintheovencavity:
• Do not store flammable materials in the oven
• Remove wire twist ties from paper or plastic bags
• Do not use your microwave oven to dry newspapers
• If smoke is observed, keep the oven door closed and switch off or
8. Take particular care when heating liquids and babyfoods.
• ALWAYS allow a standing time of at least 20 seconds after the oven has
• Stir during heating, if necessary, and ALWAYS stir after heating.
• Take care when handling the container after heating. You may burn
• A risk of delayed eruptive boiling exists.
Electric arcing or sparking may occur and may damage the oven.
Ex: Baby food jars
Ex: Eggs, nuts in shells,tomatoes
The increase in pressure maycause them to explode.
Remove lids and pierce skins, bags, etc.
Theovenwallsmaybedamaged.
Leave a glass of water inside the oven at all times.
The water will absorb the microwaves if you accidentally set the
oven going whenit is empty.
The cloths or paper may catch fire as hot air is evacuated from the
oven.
Some dishes absorb microwaves and heat is always transferred
from the food to the dish. The dishes are therefore hot.
These walls may be hot enough to burn even after cooking has
finished, even though they do not appear to be so. Do not allow
inflammable materials to come into contact with any interior area of
the oven. Let the oven cool down first.
disconnect the oven from the power supply
been switched off so that the temperature can equalize.
yourself if the container is too hot.
GB
3
Page 36

MSA20M_GB.fm Page 4 Friday, October 26, 2001 1:12 PM
Safety Precautions(continued)
GB
• To prevent delayed boiling and possible scalding, you should put a plastic
spoon or glass stick into the beverages and stir before,during and after
heating.
Reason:
• In the event of scalding, follow these FIRST AID instructions:
* Immerse the scalded area in cold water for at least 10 minutes.
* Cover with a clean, dry dressing.
* Do not apply any creams, oils or lotions.
• NEVER fill the containerto the top and choosea container thatis wider at
the top than at thebottom to prevent the liquid from boiling over. Bottles
with narrow necks may also explode if overheated.
• ALWAYS check the temperature of baby food or milk before giving it to
the baby.
• NEVER heat a baby’s bottle with the teat on, as the bottle may explode if
overheated.
9. Be careful not to damage the power cable.
• Do not immerse the power cableor plug in water and keep the power
cable away from heated surfaces.
• Do not operate this appliance if it has a damaged power cable or plug.
10. Stand at arm’s length from the oven when opening the door.
Reason:
11. Keep the inside of the oven clean.
Reason:
12. You may notice a “Clicking” sound during operation(especially when the oven
is in defrosting).
Reason
13. When the microwave oven is operating without any load, the power will be cut
off automatically for safety. You can operate normally after letting it stand for
over 30 minutes.
During the heating of liquids the boiling point can be delayed;
this means that eruptive boiling can start after the container is
removed from the oven. You may scald yourself.
The hot air or steam released may cause scalding.
Food particles or spattered oils stuck to oven wallsor floor can
cause paint damage and reduce the efficiency of the oven.
: This sound is normal when the electrical power output is changing.
IMPORTANT SAFETY INSTRUCTIONS
During cooking, you should look into the oven from time to time when food is
being heated or cooked in disposable containers of plastic, paper or other
combustible materials.
InstallingYourMicrowave oven
Place the oven on a flat, level surface that strong enough to safely bear
the weight of the oven.
20 cm
10 cm
above
behind
of the side
☛ Never block the air vents as the oven may overheat and
automatically switch itself off. It will remain inoperable until it has
cooled sufficiently.
☛ For your personal safety, plug the cable into a 3-pin, 230 Volt,
50Hz, AC earthed socket. If the power cable of this appliance is
damaged, it must be replaced by a special cable (I-SHENG
SP022, KDK KKP4819D, EUROELECTRIC 3410, SAMIL SP106B, MOONSUNG EP-48E, HIGH PROJECT H.P 3). Contact
your local dealer to have it replaced.
☛ Do not install the microwave oven in hot or damp surroundings
like next to a traditional oven or radiator. The power supply
specifications of the oven must be respected and any extension
cable used must be of the same standard as the power cable
supplied with the oven. Wipe the interior and the door seal with a
damp cloth before using your microwave oven for the first time.
1. When you install your oven, Make sure there is adequate
ventilation for your oven by leaving at least 10 cm (4
inches) of space behind, on the sides of the oven and 20
10 cm
cm (8 inches) of above.
2. Remove all packing materials inside the oven.
Install the roller ring and turntable.
Check that the turntable rotates freely.
3. This microwave oven has to be positioned so that plug is
accessible.
IMPORTANT
Young children should NEVER be allowed to use or play with the microwave
oven. Nor should they be left unattended near the microwave oven when it is in
use. Items of interest to children should not be stored or hidden just above the
oven.
4
Page 37

MSA20M_GB.fm Page 5 Friday, October 26, 2001 1:12 PM
What to Do if Youare in Doubt or Have a
Problem
If you have any of the problems listed below try the solutions given.
◆ This is normal.
• Condensation inside the oven
• Air flow around the door and outer casing
• Light reflection around the door and outer casing
• Steam escaping from around the door or vents
◆ TheovendoesnotstartwhenyouturntheTIMER knob.
• Is the door completely closed?
◆ The food is not cooked at all
• Have you set the timer correctly?
• Is the door closed?
• Have you overloaded the electric circuit and caused a fuseto blowor a
breaker to be triggered?
◆ The food iseither overcooked or undercooked
• Was the appropriate cooking length set for the type of food?
• Was an appropriate power level chosen?
◆ Sparking and cracking occur inside the oven (arcing)
• Have you used a dish with metal trimmings?
• Have you left a fork or other metal utensil inside the oven?
• Is aluminium foil too close to the inside walls?
◆ The oven causes interference with radios or televisions
• Slight interference may be observed on televisions orradios whenthe
oven is operating. This is normal.To solve this problem, install the oven
away from televisions, radios and aerials.
✉ If the above guidelines do not enable you to solve the problem,
contact your local dealer or CANDY after-sales service.
Cooking /Reheating
The following procedure explains how to cook or reheat food.
ALWAYS check your cooking settings before leaving the oven
unattended.
First, place the food in the centre of the turntable and close the door.
1. Set the power level to maximum by turning COOKING
POWER CONTROL knob. (MAXIMUM POWER: 800 W)
2. Set the time by turning TIMER knob.
Result :
Theovenlightcomesonandtheturntable
starts rotating.
☛ Never switch the microwave oven on when it is empty.
✉ You can change the power level during cooking by turning the
COOKING POWER CONTROL knob.
Power Levels
You can choose among the power levels below.
Power Level
HIGH
REHEAT
MEDIUM HIGH
MEDIUM
MEDIUM LOW
DEFROST( )
LOW
Output
800 W
700 W
600 W
450 W
300 W
180 W
100 W
GB
✉ If you select higher power level, the cooking time must be
decreased.
✉ If you select lower power level, the cooking time must be
increased.
5
Page 38

MSA20M_GB.fm Page 6 Friday, October 26, 2001 1:12 PM
Adjusting theCooking Time
GB
Adjust the remaining cooking time by rotating the TIMER
knob.
Manual Defrosting Food
The Defrost feature enables you to defrost meat, poultry, fish.
First, place the frozen food in the centre of the turntable and close the
door.
1. Turn the COOKING POWER CONTROL knob to
(180W).
2. Turn the TIMER knob to select the appropriate time.
Result :
✉ Use only recipients that are microwave-safe.
Defrosting begins.
Using theInstant Reheat Feature
First, place the food in the center of the turntable and close the door.
1. Turn the COOKING POWER CONTROL knob to Max
Power.
2. Turn the TIMER knob to select Instant Reheat.
(drinks or soup/sauce, fresh vegetables).
✉ Use only recipients that are microwave-safe.
InstantReheat Settings
Here are a few tips and recommendations to be followed whencooking
or reheating food with whe Instant Reheat and Cooking Feature.
Symbols Food Serving Size Cooking Time Standing Time
Drinks 150 ml 1 min 10 sec 1 - 2 min
Soup/Sauce
(chilled)
Fresh
vegetables
200-250 ml 3 min 2 - 3 min
300-350 g 6 min 40 sec 3 min
6
Page 39

MSA20M_GB.fm Page 7 Friday, October 26, 2001 1:12 PM
Cookware Guide
To cook food in the microwave oven, the microwaves must be able to
penetrate the food, without being reflected or absorbed by the dish
used.
Care must therefore be taken when choosing the cookware. If the
cookware is marked microwave-safe, you do not need to worry.
The following table lists various types of cookware and indicates
whether and how they should be used in a microwave oven.
Cookware Microwave-
Safe
Aluminium foil
Browning plate
China and earthenware
Disposable polyester
cardboard dishes
Fast-food packaging
• Polystyrene cups
containers
• Paper bags or
newspaper
• Recycled paper or
metal trims
Glassware
Glassware
• Oven-to-table
ware
• Fine glassware
• Glass jars
Metal
• Dishes
• Freezer bag twist
ties
✓ ✗ Can be used in small quantities to
✓ Do not preheat for more than eight
✓ Porcelain, pottery, glazed earthenware
✓ Some frozen foods are packaged in
✓
✗
✗
✓
✓
✓
✗
✗
Comments
protect areas against overcooking.
Arcing can occur if the foil is too close
totheovenwalloriftoomuchfoilis
used.
minutes.
and bone china are usually suitable,
unless decorated with a metal trim.
these dishes.
Can be used to warm food.
Overheating may cause the
polystyrene to melt.
May catch fire.
May cause arcing.
Can be used, unless decorated with a
metal trim.
Can be used to warm foods or liquids.
Delicate glass may break or crack if
heated suddenly.
Must remove the lid. Suitable for
warming only.
May cause arcing or fire.
Paper
• Plates, cups,
napkins and
Kitchen paper
• Recycled paper
Plastic
• Containers
• Cling film
• Freezer bags
Wax or grease-proof paper
Note : I would explain the meaning of “✗“and“✓”.
✓
✗
✓
✓
✓ ✗
For short cooking times and warming.
Also to absorb excess moisture.
May cause arcing.
Particularly if heat-resistant
thermoplastic. Some other plastics
may warp or discolour at high
temperatures. Do not use Melamine
plastic.
Can be used to retain moisture.
Should not touch the foo d. Take care
when removing the film as hot steam
will escape.
Only if boilable or oven-proof. Should
not be airtight. Prick with a fork, if
necessary.
✓ Can be used to retain moisture and
prevent spattering.
GB
7
Page 40

MSA20M_GB.fm Page 8 Friday, October 26, 2001 1:12 PM
Cleaning Your Microwave Oven
The following parts of your microwave oven should be cleaned
GB
regularly to prevent grease and food particles from building up:
• Inside and outside surfaces
• Door and door seals
• Turntable and Roller rings
☛ ALWAYS ensure that the door seals are clean and the door
closes properly.
1. Clean the outside surfaces with a soft cloth and warm, soapy water.Rinse and
dry.
2. Remove any splashesor stains on the inside surfaces or on theroller ring with
a soapy cloth. Rinse and dry.
3. To loosen hardened food particles and remove smells, place a cup of diluted
lemon juice on the turntable and heat for ten minutes at maximum power.
4. Wash the dishwasher-safe plate whenever necessary.
✉ DO NOT spill water in the vents. NEVER use any abrasive
products or chemical solvents. Take particular care when
cleaning the door seals to ensure that no particles:
• Accumulate
• Prevent the door from closing correctly
TechnicalSpecifications
CANDY strives to improve its products at all times. Both the design
specifications and these user instructions are thus subject to change
without notice.
Model MSA 20 M
Power source
Power consumption
Microwave
Output power
Operating frequency
Magnetron
Cooling method
Dimensions (WxHxD)
Outside
Oven cavity
Volume
Weight
Net
230V ~ 50 Hz
1150 W
100 W / 800 W (IEC-705)
2450 MHz
OM75S(31)
Cooling fan motor
489 x 275 x 371 mm
306 x 211 x 320 mm
20 liter
12.5 kg approx
8
Page 41

MICROWAVEOVENS
Manual
SERVICE
MICROWAVEOVEN
CONTENTS
1.Precaution
2.Specifications
3.OperatingInstructions
4.DisassemblyandReassembly
5-10. AlignmentandAdjustments
11-12. Troubleshooting
Page 42

PRECAUTIONS TO BE OBSERVED BEFORE AND
DURING SERVICING TO AVOID POSSIBLE
EXPOSURE TO EXCESSIVE MICROWAVE ENERGY
(a) Do not operate or allow the oven to be
operated with the door open.
(b) Make the following safety checks on
all ovens to be serviced before activating
the magnetron or other microwave
source, and make repairs as necessary:
(1) Interlock operation,
(2)properdoorclosing,
(3) seal and sealing surfaces (arcing,
wear, and other damage),
(4) damage to or loosening of hinges
and latches,
(5) evidence of dropping or abuse.
(c) Before turning on microwave power
for any service test or inspection within
the microwave generating
compartments, check the magnetron,
wave guide or transmission line, and
cavity for proper alignment, integrity,
and connections.
(d) Any defective or misadjusted
components in the interlock, monitor,
door seal, and microwave generation
and transmission systems shall be
repaired, replaced, or adjusted by
procedures described in this manual
beforetheovenisreleasedtothe
owner.
(e) A Microwave leakage check to verify
compliance with the Federal
performance standard should be
performed on each oven prior to
release to the owner.
Page 43

1.Precaution
Followthesespecialsafetyprecautions.Althoughthemicrowaveoveniscompletelysafeduringordinaryuse,
repairworkcanbeextremelyhazardousduetopossibleexposuretomicrowaveradiation,aswellaspotentially
lethalhighvoltagesandcurrents.
1-1Safetyprecautions( )
1.Allrepairsshouldbedoneinaccordance
withtheproceduresdescribedinthis
manual.Thisproductcomplieswith
FederalPerformanceStandard21CFR
SubchapterJ(DHHS).
2.Microwaveemissioncheckshouldbe
performedtopriortoservicingiftheovenis
operative.
3.Iftheovenoperateswiththedooropen:
Instructtheusernottooperatetheovenand
contactthemanufacturerandthecenterfor
devicesandradiologicalhealthimmediately.
4.NotifytheCentralServiceCenterifthe
microwaveleakageexceeds5mW/cm
2
.
5.Checkallgrounds.
6.DonotpowertheMWOfroma"2-prong"
ACcord.Besurethatallofthebuilt-in
protectivedevicesarereplaced.Restoreany
missingprotectiveshields.
7.Whenreinstallingthechassisandits
assemblies,besuretorestoreallprotective
devices,including:nonmetalliccontrol
knobsandcompartmentcovers.
8.Makesurethattherearenocabinetopenings
throughwhichpeople--particularly
children--mightinsertobjectsandcontact
dangerousvoltages.Examples:Lamphole,
ventilationslots.
9.Informthemanufacturerofanyovenfound
tohaveemissioninexcessof5mW/cm
2
,
Makerepairstobringtheunitinto
complianceatnocosttoownerandtryto
determinecause.
Instructownernottouseovenuntilithas
beenbroughtintocompliance.
11.Toavoidanypossibleradiationhazard,
replacepartsinaccordancewiththewiring
diagram.Also,useonlytheexact
replacementsforthefollowingparts:
Primaryandsecondaryinterlockswitches,
interlockmonitorswitch.
12.IfthefuseisblownbytheInterlockMonitor
Switch:Replaceallofthefollowingatthe
sametime:Primary,doorsensingswitch
andpowerrelay,aswellastheInterlock
MonitorSwitch.Thecorrectadjustmentof
theseswitchesisdescribedelsewherein
thismanual.Makesurethatthefusehasthe
correctratingfortheparticularmodelbeing
repaired.
13.DesignAlterationWarning:
Useexactreplacementpartsonly,i.e.,
onlythosethatarespecifiedinthe
drawingsandpartslistsofthismanual.
Thisisespeciallyimportantforthe
Interlockswitches,describedabove.
Neveralteroraddtothemechanicalor
electricaldesignoftheMWO.Anydesign
changesoradditionswillvoidthe
manufacturer'swarranty.Alwaysunplug
theunit'sACpowercordfromtheAC
powersourcebeforeattemptingto
removeorreinstallanycomponentor
assembly.
14.NeverdefeatanyoftheB+voltage
interlocks.DonotapplyACpowertothe
unit(oranyofitsassemblies)unlessall
solid-stateheatsinksarecorrectlyinstalled.
15.Somesemiconductor("solidstate")devices
areeasilydamagedbystaticelectricity.
Such
componentsarecalledElectrostatically
SensitiveDevices(ESDs).Examplesinclude
integratedcircuitsandfield-effect
transistors.
Immediatelybeforehandlingany
semiconductorcomponentsorassemblies,
draintheelectrostaticchargefromyour
bodybytouchingaknownearthground.
CENTRALSERVICECENTER
10.Servicetechniciansshouldremovetheir
watcheswhilerepairinganMWO.
16.Alwaysconnectatestinstrument'sground
leadtotheinstrumentchassisgroundbefore
connectingthepositivelead;alwaysremove
theinstrument'sgroundleadlast.
1
Page 44

1-2SpecialServicingPrecautions(Continued)
17.Whencheckingthecontinuityofthewitches
ortransformer,alwaysmakesurethatthe
powerisOFF,andoneoftheleadwiresis
disconnected.
18.Componentsthatarecriticalforsafetyare
indicatedinthecircuitdiagramby
shading, or.
19.Usereplacementcomponentsthathavethe
sameratings,especiallyforflameresistance
anddielectricstrengthspecifications.A
replacementpartthatdoesnothavethe
samesafetycharacteristicsastheoriginal
mightcreateshock,fireorotherhazards.
1-3SpecialHighVoltagePrecautions
1.HighVoltageWarning
Donotattempttomeasureanyofthehigh
voltages--thisincludesthefilamentvoltage
ofthemagnetron.Highvoltageispresent
duringanycookcycle.
Beforetouchinganycomponentsorwiring,
alwaysunplugtheovenanddischargethe
highvoltagecapacitor(SeeFigure1-1)
2.Thehigh-voltagecapacitorremainscharged
about30secondsafterdisconnection.Short
thenegativeterminalofthehigh-voltage
capacitortototheovenchassis.(Usea
screwdriver.)
3.Highvoltageismaintainedwithinspecified
limitsbyclose-tolerance,safety-related
componentsandadjustments.Ifthehigh
voltageexceedsthespecifiedlimits,check
eachofthespecialcomponents.
PRECAUTION
ThereexistsHIGHVOLTAGEELECTRICITY
withhighcurrentcapabilitiesinthecircuitsofthe
HIGHVOLTAGETRANSFORMERsecondary
andfilamentterminals.Itisextremelydangerous
toworkonornearthesecircuitswiththeoven
energized.
DONOTmeasurethevoltageinthehighvoltage
circuitincludingfilamentvoltageofmagnetron.
H.VCapacitor
H.V.Diode
Short
Touchchassisgroundfirstthenshorttothe
highvoltagecapacitorterminalbyusing
screwdriverorjumperwire.
PRECAUTION
Nevertouchanycircuitwiringwithyourhand
norwithuninsulatedtoolduringoperation.
PRECAUTION
Servicemenshouldremovetheirwatches
wheneverworkingclosetoorreplacingthe
magnetron.
2
Page 45

2.Specifications
2-1TableofSpecifications - MSA20M
TIMER
POWERSOURCE
POWERCONSUMPTION
OUTPUTPOWER
OPERATINGFREQUENCY
COOLINGMETHOD
MAGNETRON
OUTSIDEDIMENSIONS
OVENDIMENSIONS
SHIPPINGDIMENSIONS
SHIPPINGWEIGHTAPPROX.
35MINUTES
230V50Hz,SINGLEPHASE
1,150W
100W/800W(IEC-705)
2,450MHz
COOLINGFANMOTOR
OM75S(31)ESS
489(W)x275(H)x371(D)
306(W)x211(H)x320(D)
557(W)x329(H)x434(D)
NET 12.5kg
GROSS 14.0kg
3
Page 46

2.Specifications
2-2 TableofSpecifications - MGA20M
TIMER
POWERSOURCE
POWERCONSUMPTION
OUTPUTPOWER
OPERATINGFREQUENCY
MAGNETRON
COOLINGMETHOD
OUTSIDEDIMENSIONS
OVENDIMENSIONS
SHIPPINGDIMENSIONS
SHIPPINGWEIGHTAPPROX.
60MINUTES
230V50Hz,AC
MICROWAVE:1,300W
GRILL:1100W
FROM100TO850W
(IEC-705TESTPROCEDURE)
2,450MHz
OM75PH(31)ESS
COOLINGFANMOTOR
489(W)x275(H)x393(D)
306(W)x211(H)x320D)
557(W)x329(H)x434(D)
NET 15.0kg
GROSS 16.5kg
4
Page 47

2.Specifications
2-3 TableofSpecifications - MGB28M
TIMER
POWERSOURCE
POWERCONSUMPTION
OUTPUTPOWER
OPERATINGFREQUENCY
MAGNETRON
COOLINGMETHOD
OUTSIDEDIMENSIONS
OVENSHIPPINGDIMENSIONS
SHIPPINGWEIGHTAPPROX.
60MINUTES
230V50Hz,AC
MICROWAVE:1,500W
GRILL:1300W
FROM100TO900W
(IEC-705TESTPROCEDURE)
2,450MHz
OM75P(31)ESS
COOLINGFANMOTOR
517(W)x297(H)x445(D)
577(W)x373(H)x487(D)
NET 18.0kg
GROSS 19.5kg
5
Page 48

2.Specifications
2-4 TableofSpecifications - MGB22M
TIMER
POWERSOURCE
POWERCONSUMPTION
OUTPUTPOWER
OPERATINGFREQUENCY
MAGNETRON
COOLINGMETHOD
OUTSIDEDIMENSIONS
OVENDIMENSIONS
SHIPPINGDIMENSIONS
60MINUTES
230V50Hz,AC
MICROWAVE:1,300W
GRILL:1100W
FROM100TO850W
(IEC-705TESTPROCEDURE)
2,450MHz
OM75PH(31)ESS
COOLINGFANMOTOR
489(W)x275(H)x392(D)
330(W)x211(H)x320(D)
557(W)x329(H)x466(D)
NET 15.0kg
SHIPPINGWEIGHTAPPROX.
GROSS 16.5kg
6
Page 49

2.Specifications
2-5 TableofSpecifications - MSB22M
TIMER
POWERSOURCE
POWERCONSUMPTION
OUTPUTPOWER
OPERATINGFREQUENCY
MAGNETRON
COOLINGMETHOD
OUTSIDEDIMENSIONS
OVENDIMENSIONS
SHIPPINGDIMENSIONS
SHIPPINGWEIGHTAPPROX.
35MINUTES
230V50Hz,SINGLEPHASE
MICROWAVE:1,150W
100W/800W
(IEC-705TESTPROCEDURE)
2,450MHz
OM75SH(31)ESS
COOLINGFANMOTOR
489(W)x275(H)x387(D)
330(W)x211(H)x320(D)
557(W)x329(H)x466(D)
NET 13.5kg
GROSS 15.0kg
7
Page 50

2.Specifications
2-6 TableofSpecifications - MGB22Y
TIMER
POWERSOURCE
POWERCONSUMPTION
OUTPUTPOWER
OPERATINGFREQUENCY
MAGNETRON
COOLINGMETHOD
OUTSIDEDIMENSIONS
OVENDIMENSIONS
SHIPPINGDIMENSIONS
SHIPPINGWEIGHTAPPROX.
60MINUTES
230V50Hz,AC
MICROWAVE:1,300W
GRILL:1100W
FROM100TO850W
(IEC-705TESTPROCEDURE)
2,450MHz
OM75P(31)ESS
COOLINGFANMOTOR
489(W)x275(H)x387(D)
330(W)x211(H)x320(D)
557(W)x329(H)x466(D)
NET 15.0kg
CROSS 16.5kg
8
Page 51

2.Specifications
2-7 TableofSpecifications - MCB28E
TIMER
POWERSOURCE
POWERCONSUMPTION
OUTPUTPOWER
OPERATINGFREQUENCY
MAGNETRON
COOLINGMETHOD
OUTSIDEDIMENSIONS
OVENSHIPPINGDIMENSIONS
SHIPPINGWEIGHTAPPROX.
60MINUTES
230V50Hz,AC
MICROWAVE:1,500W
GRILL:1300W
FROM100TO900W
(IEC-705TESTPROCEDURE)
2,450MHz
OM75P(31)ESS
COOLINGFANMOTOR
517(W)x297(H)x445(D)
577(W)x373(H)x487(D)
NET 18.0kg
GROSS 19.5kg
9
Page 52

2.Specifications
2-8 TableofSpecifications - MFC32E
TIMER
POWERSOURCE
POWERCONSUMPTION
OUTPUTPOWER
OPERATINGFREQUENCY
MAGNETRON
COOLINGMETHOD
OUTSIDEDIMENSIONS
SHIPPINGWEIGHT
99MINUTES90SECONDS
230V50Hz,AC
MICROWAVE:1,500W
GRILL:1,450W
CONVECTION:1700W
900W
(IEC-705TESTPROCEDURE)
2,450MHz
OM75P(31)
COOLINGFANMOTOR
547(W)x339(H)x503(D)mm
26.0kg
30.0kg
10
Page 53

3.OperatingInstructions
3-1ControlPanel - MSA20M
3-2Features&ExternalViews
DOORLATCHES
HANDLE
342mm
489mm
VENTILATIONHOLS
TURNTATBLE
DOOR
COUPLER
ROLLERRING
LIGHT
SAFETY
INTERLOCKHOLES
m
5m
27
VARIABLECOOKING
POWERCONTROLKNOB
TIMERKNOB
206mm
371mm
11
Page 54

3.OperatingInstructions
3-3 ControlPanel - MGA20M
3-4 Features&ExternalViews
DOORLATCHES
HANDLE
DOOR
342mm
489mm
VENTILATIONHOLS
TURNTATBLE
COUPLER
GRILL
ROLLERRING
LIGHT
SAFETY
INTERLOCKHOLES
m
m
75
2
VARIABLECOOKING
POWERCONTROLKNOB
TIMERKNOB
206mm
393mm
12
Page 55

3.OperatingInstructions
3-5 ControlPanel - MGB28M
3-6 Features&ExternalViews
Door
VentilationHoles
GlassPlate
DoorLatches
517mm
Grill
Coupler
Light
RollerRing MetalRack
SafetyInterlockHole
m
m
297
ControlPanel
445mm
13
Page 56

3.OperatingInstructions
3-7 ControlPanel - MGB22M
3-8 Features&ExternalViews
Door
VentilationHoles
GlassPlate
DoorLatches
342mm
489mm
Grill
Coupler
Light
RollerRing
m
m
5
27
SafetyInterlockHole
ControlPanel
METALRACK
206mm
392mm
14
Page 57

3.OperatingInstructions
3-9 ControlPanel - MSB22MX
3-10 Features&ExternalViews
Door
VentilationHoles
GlassPlate
DoorLatches
342mm
Coupler
Light
RollerRing
m
m
75
2
SafetyInterlockHole
ControlPanel
METALRACK
206mm
387mm
15
Page 58

3.OperatingInstructions
3-11 Control Panel - MGB22Y
3-12Features&ExternalViews
Door
DoorLatches
VentilationHoles
GlassPlate
342mm
489mm
Coupler
Grill
Light
RollerRing
m
m
275
SafetyInterlockHole
ControlPanel
METALRACK
206mm
387mm
16
Page 59

3.OperatingInstructions
3-13 ControlPanel - MCB28E
3-14 Features&ExternalViews
Door
VentilationHoles
GlassPlate
DoorLatches
517mm
Grill
Coupler
m
7m
29
Light
RollerRing
SafetyInterlockHole
ControlPanel
445mm
17
Page 60

3.OperatingInstructions
3-15 ControlPanel - MFC32E
3-16 Features&ExternalViews
DOORLATCHES
VENTILATIONHOLES
DOOR
547mm
TURNTABLE
GRILL LIGHT
ROLLERRING
m
m
9
3
3
SAFETY
INTERLOCKHOLES
CONTROLPANEL
225mm
503mm
18
Page 61

4.DisassemblyandReassembly
4-1ReplacementofMagnetron,MotorAssemblyandLamp
Removethemagnetronincludingtheshieldcase,
permanentmagnet,chokecoilsandcapacitors(allof
whicharecontainedinoneassembly).
1.Disconnectallleadwiresfromthemagnetron
andlamp.
2.Removeascrewsecuringaircover.
3.Removetheaircover.
4.Removescrewssecuringthemagnetrontothe
waveguide.
5.Takeoutthemagnetronverycarefully.
6.Removenutsfromthebackpanel.
7.Takeoutthefanmotor.
8.Removetheovenlampbyrotatingtopullout
fromholeofaircover.
NOTE1:Whenremovingthemagnetron,makesure
thatitsantennadoesnothitanyadjacent
parts,oritmaybedamaged.
NOTE2:Whenreplacingthemagnetron,besureto
remountthemagnetrongasketinthecorrect
positionandmakesurethegasketisingood
condition.
Magnetron
ThermoS/W
CoverAi
H.V.Trans Screw
r
FanMotor
H.VCapacitor
4-2ReplacementofHighVoltageTransformer
1.Dischargethehighvoltagecapacitor.
2.Disconnectalltheleads.
3.Removethemountingbolts.
4.Reconnecttheleadscorrectlyandfirmly.
ThereexistsHIGHVOLTAGEELECTRICITYwithhighcurrentcapabilitiesinthecircuitsoftheHIGH
VOLTAGETRANSFORMERsecondaryandfilamentterminals.Itisextremelydangeroustoworkonornear
thesecircuitswiththeovenenergized.
DONOTmeasurethevoltageinthehighvoltagecircuitincludingfilamentvoltageofmagnetron.
Servicemenshouldremovetheirwatcheswhenever
workingclosetoorreplacingthemagnetron.
PRECAUTION
PRECAUTION
19
Page 62

4-3ReplacementofDoorAssembly - MSA20M - MSB22MX - MCB28E
4-3-1RemovalofDoor"C"
InsertflatscrewdriverintothegapbetweenDoor
"A"andDoor"C"toremoveDoor"C".Becareful
whenhandlingDoor"C"becauseitisfragile.
Thenremovethedoorassembly.
Door"A"
Door"C"
4-3-2RemovalofDoor"E"
Followingtheprocedureasshowninthefigure,
insertandbendathinmetalplatebetweenDoor
"E"andDoor"A"untilyouhearthe'tick'sound.
-Insertiondepthofthethinmetalplateshouldbe
0.5mmorless.
4-3-3RemovalofKeyDoor&Spring
RemovepinhingefromDoor"E"
DetachspringfromDoor"E"andkeydoor.
Door"E"
Door"E"
KeyDoor
Spring
20
Page 63

4-4 ReplacementofDoorAssembly - MGA20 - MGB28M - MGB22M - MGB22Y
4-4-1RemovalofDoorAssembly
Removehexboltssecuringtheupperhingeand
lowerhinge.Thenremovethedoorassembly.
SCREWS
UpperHinge
4-4-2RemovalofDoor"C"
InsertflatscrewdriverintothegapbetweenDoor
"A"andDoor"C"toremoveDoor"C".Becareful
whenhandlingDoor"C"becauseitisfragile.
Thenremovethedoorassembly.
4-4-3RemovalofDoor"E"
Followingtheprocedureasshowninthefigure,
insertandbendathinmetalplatebetweenDoor
"E"andDoor"A"untilyouhearthe'tick'sound.
-Insertiondepthofthethinmetalplateshouldbe
0.5mmorless.
SCREW
LowerHinge
Door"E"
4-4-4RemovalofKeyDoor&Spring
RemovepinhingefromDoor"E"
DetachspringfromDoor"E"andkeydoor.
21
Door"E"
KeyDoor
Spring
Page 64

4-5 ReplacementofDoorAssembly - MFC32E
4-5-1RemovalofDoorAssembly
Removescrewssecuringtheupperhingeand
lowerhinge.Thenremovethedoorassembly.
4-5-2RemovalofDoor"C"
InsertflatscrewdriverintothegapbetweenDoor
"A"andDoor"C"toremoveDoor"C".Becareful
whenhandlingDoor"C"becauseitisfragile.
Screw
LowerHinge
Door"A"
UpperHinge
Screw
Door"C"
4-5-3RemovalofDoor"E"
Followingtheprocedureasshowninthefigure,
insertandbendathinmetalplatebetweenDoor
"E"andDoor"A"untilyouhearthe'tick'sound.
1.Insertiondepthofthethinmetalplateshouldbe
0.5mmorless.
4-5-4RemovalofKeyDoor&Spring
RemovepinhingefromDoor"E"
DetachspringfromDoor"E"andkeydoor.
Door"E"
KeyDoor
Door"E"
Spring
22
Page 65

4-6 ReassemblyTest
Afterreplacementofthedefectivecomponentpartsofthedoor,reassembleitandfollowtheinstructions
belowforproperinstallationandadjustmentsoastopreventanexcessivemicrowaveleakage.
1.Whenmountingthedoortotheoven,besuretoadjustthedoorparalleltothebottomlineoftheoven
faceplatebymovingtheupperhingeandlowerhingeinthedirectionnecessaryforproperalignment.
2.Adjustsothatthedoorhasnoplaybetweentheinnerdoorsurfaceandovenfrontsurface.Ifthedoor
assemblyisnotmountedproperly,microwaveenergymayleakfromthespacebetweenthedoorandoven.
3.Dothemicrowaveleakagetest.
4-7 ReplacementofFuse
1.Disconnecttheovenfromthepowersource.
2.When the fuseblowsoutbytheoperationofinterlockmonitorswitchfailure,replacetheprimaryinterlock
switch,doorsensingswitch,monitorswitchandpowerrelay.
3.Whentheabovethreeswitchesoperateproperly,checkifanyotherpartsuchasthecontrolcircuitboard,
blowermotororhighvoltagetransformerisdefective.
4-8 ReplacementofDriveMotor
1.Takeouttheglasstray,guiderollerandcoupler
fromcavity.
2.Turntheovenupsidedowntoreplacethedrivemotor.
3.Removeascrewsecuringthedrivemotorcover.
4.Disconnectalltheleadwiresfromthedrivemotor.
5.Removescrewssecuringthedrivemotortothecavity.
6.Removethedrivemotor.
7.Whenreplacingthedrivemotor,besureto
remountitinthecorrectposition.
8.Connectalltheleadstothedrivemotor.
9.Screwthedrivemotorcovertothebaseplate
withascrewdriver.
10.Remountthecouplerinthecorrectposition.
23
DriveMotorCover
DriveMotor
BasePlate
Page 66

4-9 ReplacementofControlCircuitBoard - not electronic models
4-9-1RemovalofControlBox
1.Disconnecttheconnectorsfromthecontrol
boxassembly.
2.Removescrewssecuringthecontrolbox
assembly.
3.RemovetheknobsofthecontrolboxA'ssy.
4.Removethescrewsecuringthetimer.
SCREWS
CONTROL-BOX
24
Page 67

4-10 ReplacementofControlCircuitBoard - MGB22Y
4-10-1RemovalofControlBoxAssembly
1.Besuretogroundanystaticelectricchargein
yourbodyandnevertouchthecontrolcircuit.
2.Disconnecttheconnectorsfromthecontrol
circuitboard.
3.Removescrewssecuringthecontrolbox
assembly.
4.Removethescrewsecuringthegroundtailof
thekeyboard.
CONTROL-BOX
4-10-2RemovalofAss'yP.C.BAssembly
1.Removescrewssecuringthecontrolcircuit
board.
SCREW
2.LiftupthecontrolcircuitboardfromtheAss'y
controlbox.
ASSYPCB
SCREWS
25
Page 68

4-11 ReplacementofControlCircuitBoard - MCB28E
4-11-1RemovalofAss'yControlBox
1.Besuretogroundanystaticelectricchargein
yourbodyandnevertouchthetouchcontrol
circuitry.
2.Disconnecttheconnectorsfromthecontrol
circuitboard.
3.Removescrewssecuringthecontrolbox
assembly.
4.Removethescrewsecuringthegroundtailof
thekeyboard.
4-11-2RemovalofAss'yP.C.B
1.Pulltheleverendoftheplasticfastenerand
removetheFlexiblePrintedCircuit(FPC)of
membranepanel.
2.Removescrewssecuringthecontrolcircuit
board.
3.LiftupthecontrolcircuitboardfromtheAss'y
controlbox.
4.WhenreconnectingtheFPCconnector,make
surethattheholesontheconnectorareproperly
engagedwiththehooksonthePlasticFastener.
SCREWS
CONTROL-BOX
screw
26
Page 69

4-12 ReplacementofControlCircuitBoard - MFC32E
4-12-1RemovalofControlBox
1.Besuretogroundanystaticelectricchargein
yourbodyandnevertouchthecontrolcircuit.
2.Disconnecttheconnectorsfromthecontrol
circuitboard.
3.Removescrewssecuringthecontrolbox
assembly.
4.Removethescrewsecuringthegroundtailof
thekeyboard.
4-12-2RemovalofP.C.BAssembly
1.Pulltheleverendoftheplasticfastenerand
removetheFlexiblePrintedCircuit(FPC)of
membranepanel.
2.Removescrewssecuringthecontrolcircuit
board.
3.LiftupthecontrolcircuitboardfromtheAss'y
controlbox.
4.WhenreconnectingtheFPCconnector,make
surethattheholesontheconnectorareproperly
engagedwiththehooksonthePlasticFastener.
Screw
Controlbox
Screw
FPCConnector
4-12-3RemovalofWindowDisplay&MembranePanel
1.Windowdisplayshouldnotbedisassembledas
itsmountingtabswillbebroken.Ifrepairwork
isdifficult,replacewithAss'ycontrolpanel.
2.Themembranekeyboardisattachedtothe
escutcheonbasewithdoublefacedadhesive
tape.Therefore,applyinghotairsuchasusingof
hairdryerisrecommendedforsmoother
removal.
3.Wheninstallingnewmembranekeyboard,make
surethatthesurfaceofescutcheonbaseis
cleanedsufficientlysothatanyproblems
(shortedcontactsorunevensurface)canbe
avoided.
27
Window
Display
Membrane
panel
Page 70

5.AlignmentandAdjustments - MSA20M - MSB22MX
PRECAUTION
1.Highvoltageispresentatthehighvoltageterminalsduringanycookcycle.
2.Itisneithernecessarynoradvisabletoattemptmeasurementofthehighvoltage.
3.Beforetouchinganyovencomponentsorwiring,alwaysunplugtheovenfromitspowersourceand
dischargethehighvoltagecapacitor.
5-1HighVoltageTransformer
1.Removeconnectorsfromthetransformerterminals
andcheckcontinuity.
2.Normalresistancereadingsareasfollows:
FilamentTerminals
Secondary
Filament
Primary
(Roomtemperature=20°C)
Approx.139
Approx.0
Approx.1.94
5-2Magnetron
1.Continuitycheckscanindicateonlyanopen
filamentorashortedmagnetron.Todiagnosean
openfilamentorshortedmagnetron.
2.Isolatethemagnetronfromthecircuitby
disconnectingitsleads.
3.Acontinuitycheckacrossthemagnetronfilament
terminalsshouldindicateoneohmorless.
4.Acontinuitycheckbetweeneachfilamentterminal
andmagnetroncaseshouldreadopen.
Primary
Terminals
MagnetronAntenna
Secondary
Terminal
GasketPlate
28
CoolingFins
Page 71

6. AlignmentandAdjustments - MGA20M - MGB22M - MGB22Y
PRECAUTION
1.Highvoltageispresentatthehighvoltageterminalsduringanycookcycle.
2.Itisneithernecessarynoradvisabletoattemptmeasurementofthehighvoltage.
3.Beforetouchinganyovencomponentsorwiring,alwaysunplugtheovenfromitspowersourceand
dischargethehighvoltagecapacitor.
6-1HighVoltageTransformer
1.Removeconnectorsfromthetransformerterminals
andcheckcontinuity.
2.Normalresistancereadingsareasfollows:
FilamentTerminals
Secondary
Filament
Primary
(Roomtemperature=20°C)
Approx.115
Approx.0
Approx.1.35
6-2LowVoltageTransformer
1.Thelowvoltagetransformerislocatedonthe
controlcircuitboard.
2.Removethelowvoltagetransformer (if present), fromthe
PCBAss'yandcheckcontinuity.
3.Normalresistorreadingisshowninthetable.
6-3Magnetron
1.Continuitycheckscanindicateonlyanopen
filamentorashortedmagnetron.Todiagnosean
openfilamentorshortedmagnetron:
2.Isolatethemagnetronfromthecircuitby
disconnectingitsleads.
3.Acontinuitycheckacrossthemagnetronfilament
terminalsshouldindicateoneohmorless.
4.Acontinuitycheckbetweeneachfilamentterminal
andmagnetroncaseshouldreadopen.
Primary
Terminals
MagnetronAntenna
Secondary
Terminal
GasketPlate
29
CoolingFins
Page 72

7. AlignmentandAdjustments - MGB28M - MCB28E
PRECAUTION
1.Highvoltageispresentatthehighvoltageterminalsduringanycookcycle.
2.Itisneithernecessarynoradvisabletoattemptmeasurementofthehighvoltage.
3.Beforetouchinganyovencomponentsorwiring,alwaysunplugtheovenfromitspowersourceand
dischargethehighvoltagecapacitor.
7-1HighVoltageTransformer
1.Removeconnectorsfromthetransformerterminals
andcheckcontinuity.
2.Normalresistancereadingsareasfollows:
FilamentTerminals
Secondary
Filament
Primary
(Roomtemperature=20°C)
Approx.110
Approx.0
Approx.1.450
Ω
Ω
Ω
7-2LowVoltageTransformer
1.Thelowvoltagetransformerislocatedonthe
controlcircuitboard.
2.Removethelowvoltagetransformer (if present), fromthe
PCBAss'yandcheckcontinuity.
3.Normalresistorreadingisshowninthetable.
7-3Magnetron
1.Continuitycheckscanindicateonlyanopen
filamentorashortedmagnetron.Todiagnosean
openfilamentorshortedmagnetron:
2.Isolatethemagnetronfromthecircuitby
disconnectingitsleads.
3.Acontinuitycheckacrossthemagnetronfilament
terminalsshouldindicateoneohmorless.
4.Acontinuitycheckbetweeneachfilamentterminal
andmagnetroncaseshouldreadopen.
Primary
Terminals
Terminals Resistance
1~2(Input)
3~4(Output2.9V)
5~6(Output13V)
MagnetronAntenna
Secondary
Terminal
1,000
3.947
2.117
GasketPlate
Ω
Ω
Ω
30
CoolingFins
Page 73

8. AlignmentandAdjustments - MFC32E
PRECAUTION
1.Highvoltageispresentatthehighvoltageterminalsduringanycookcycle.
2.Itisneithernecessarynoradvisabletoattemptmeasurementofthehighvoltage.
3.Beforetouchinganyovencomponentsorwiring,alwaysunplugtheovenfromitspowersourceand
dischargethehighvoltagecapacitor.
8-1HighVoltageTransformer
1.Removeconnectorsfromthetransformerterminals
andcheckcontinuity.
2.Normalresistancereadingsareasfollows:
Secondary
Filament
Primary
(Roomtemperature=20°C)
90.0 10%
ShowsContinuity
1.45 10%
8-2LowVoltageTransformer
1.Thelowvoltagetransformerislocatedonthe
Assybaseplate.
2.Removethelowvoltagetransformerfromthe
Assybaseplateandcheckcontinuity.
3.Normalresistorreadingisshowninthetable.
Primary
Terminals
FilamentTerminals
Terminals Resistance
1~2(Input)
3~4(Output)
5~6(Output)
290Ω.
4.0
Ω
1.0
Ω
..
.
8-3Magnetron
1.Continuitycheckscanindicateonlyanopen
filamentorashortedmagnetron.Todiagnosean
openfilamentorshortedmagnetron:
2.Isolatethemagnetronfromthecircuitby
disconnectingitsleads.
3.Acontinuitycheckacrossthemagnetronfilament
terminalsshouldindicateoneohmorless.
4.Acontinuitycheckbetweeneachfilamentterminal
andmagnetroncaseshouldreadopen.
MagnetronAntenna
31
GasketPlate
CoolingFins
Page 74

9 HighVoltageCapacitor
1.Checkcontinuityofthecapacitorwiththemetersetatthehighestresistancescale.
2.Oncethecapacitorischarged,anormalcapacitorshowscontinuityforashorttime,andthenindicates9M .
3.Ashortedcapacitorwillshowcontinuouscontinuity.
4.Anopencapacitorwillshowconstant9M .
5.Resistancebetweeneachterminalandchassisshouldreadinfinite.
9-1 HighVoltageDiode
1.Isolatethediodefromthecircuitbydisconnectingitsleads.
2.Withtheohm-metersetatthehighestresistancescale,measureacrossthediodeterminals.Reversethe
meterleadsandreadtheresistance.Ameterwith6V,9Vorhighervoltagebatteriesshouldbeusedto
checkthefront-tobackresistanceofthediode(otherwiseaninfiniteresistancemaybereadinboth
directions).TheresistanceofanormaldiodewillbeinfiniteinonedirectionandseveralhundredK inthe
otherdirection.
9-2 MainRelayandPowerControlRelay
1.TherelaysarelocatedonthePCBAss'y.Isolatethemfromthemaincircuitbydisconnectingtheleads.
2.Operatethemicrowaveovenwithawaterloadintheoven.Setthepowerlevelsettohigh.
3.Checkcontinuitybetweenterminalsoftherelaysafterthestartpadispressed.
9-3 AdjustmentofPrimarySwitch,DoorSensingSwitchandMonitorSwitch
Precaution
Forcontinuedprotectionagainstradiationhazard,replacepartsinaccordancewiththewiringdiagramandbesureto
usethecorrectpartnumberforthefollowingswitches:Primaryandsecondaryinterlockswitches,andtheinterlock
monitorswitch(replacealltogether).Thenfollowtheadjustmentproceduresbelow.Afterrepairandadjustment,be
suretocheckthecontinuityofallinterlockswitchesandtheinterlockmonitorswitch.
1.WhenmountingPrimaryswitchandInterlock
MonitorswitchtoLatchBody,consultthefigure.
2.Nospecificadjustmentduringinstallationof
PrimaryswitchandMonitorswitchtothelatch
bodyisnecessary.
PrimaryInterlockSwitch
3.WhenmountingtheLatchBodytotheoven
assembly,adjusttheLatchBodybymovingitso
thattheovendoorwillnothaveanyplayinit.
Checkforplayinthedoorbypullingthedoor
assembly.Makesurethatthelatchkeysmove
smoothlyafteradjustmentiscompleted.
CompletelytightenthescrewsholdingtheLatch
Bodytotheovenassembly.
4.ReconnecttoMonitorswitchandcheckthe
continuityofthemonitorcircuitandalllatch
switchesagainbyfollowingthecomponentstest
procedures.
5.Confirmthatthegapbetweentheswitch
housingandtheswitchactuatorisnomorethan
0.5mmwhendoorisclosed.
6.
InterlockSwitchReplacement
replacingfaultyswitches,besureswitchmounting
tabsarenotbent,brokenorotherwisedeficientin
theirabilitytosecuretheswitchesinplace.
-When
BodyLatch
LeverDoor(B)
Primaryswitch
Monitorswitch(COM-NC)
Monitorswitch(COM-NO)
DoorSensingS/W
Interlock
Monitor
Switch
LeverDoor(B)
DoorSensing
Switch
DoorOpen DoorClosed
∞
0
∞
∞
0
∞
0
0
32
Page 75

9-4 OutputPowerofMagnetron
CAUTION
MICROWAVERADIATION
PERSONNELSHOULDNOTALLOWEXPOSURETOMICROWAVERADIATIONFROMMICROWAVE
GENERATOROROTHERPARTSCONDUCTINGMICROWAVEENERGY.
Theoutputpowerofthemagnetroncanbemeasuredbyperformingawatertemperaturerisetest.
Equipmentneeded:
*Two1-litercylindricalborosilicateglassvessel(Outsidediameter190mm)
*Oneglassthermometerwithmercurycolumn
NOTE:Checklinevoltageunderload.Lowvoltagewilllowerthemagnetronoutput.Makealltemperature
andtimetestswithaccurateequipment.
1.Filltheoneliterglassvesselwithwater.
2.Stirwateringlassvesselwiththermometer,andrecordglassvessel'stemperature("T1",10±1°C).
3.Aftermovingthewaterintoanotherglassvessel,placeitinthecenterofthecookingtray.Settheovento
highpowerandoperatefor49secondsexactly.(3secondsincludedasaholdingtimeofmagnetron
oscillation:)
4.Whenheatingisfinished,stirthewateragainwiththethermometerandmeasurethetemperature("T2").
5.SubtractT1fromT2.Thiswillgiveyouthewatertemperaturerise.(T)
6.Theoutputpowerisobtainedbythefollowingformula;
OutputPower= 4.187x1000x T+0.55xMcx(T
) 49:HeatingTime(sec)
2-T0
46 46:CountingTime(sec)
4.187:CoefficientforWater
1000:Water(cc)
T:TemperatureRise(T1-T2)
To:RoomTemperature
Mc:Cylindricalborosilicateglassweight
7.Normaltemperatureriseforthismodelis9°Cto11°Cat'HIGH'.
NOTE1:Variationsorerrorsinthetestprocedurewillcauseavarianceinthetemperaturerise.
Additionalpowertestshouldbemadeiftemperatureriseismarginal.
NOTE2:Outputpowerinwattsiscomputedbymultiplyingthetemperaturerise(step5)byafactorof91
timestheofcentigradetemperature.
9-5 MicrowaveHeatDistribution-HeatEvenness
Themicrowaveheatdistributioncanbecheckedindirectlybymeasuringthewatertemperatureriseat
certainpositionsintheoven:
1.Preparefivebeakersmadeof'Pyrex',having100milliliterscapacityeach.
2.Measureexactly100millilitersoffwaterloadwithameasuringcylinder,andpourintoeachbeaker.
3.Measurethetemperatureofeachwaterload.(Readingsshallbetakentothefirstplaceofdecimals.)
4.Puteachbeakerinplaceonthecookingtrayasillustratedinfigurebelow.Startheating.
5.Afterheatingfor2minutes,measurethewatertemperatureineachbeaker.
6.Microwaveheatdistributionratecanbecalculatedasfollows:
D
D
D
D
D
D
D
D
Beak
Beak
Beak
Beak
Beak
Beak
Beak
Beak
e
e
e
e
e
e
e
D/4
D/4
D/4
D/4
D/4
D/4
D/4
D/4
D/4
D/4
D/4
D/4
D/4
D/4
D/4
D/4
e
Minimum
HeatDistribution= TemperatureRise X100(%)
Maximum
TemperatureRise
Theresultshouldexceed65%.
D
D
D
D
D
D
D
D
D/4
D/4
D/4
D/4
D/4
D/4
D/4
D/4
D/4
D/4
D/4
D/4
D/4
D/4
D/4
D/4
CookingTray
CookingTray
CookingTray
CookingTray
CookingTray
CookingTray
CookingTray
CookingTray
33
Page 76

10. ProcedureforMeasurementofMicrowaveEnergyLeakage
1)Pour275±15ccof20±5°C(68±9°F)waterinabeaker
whichisgraduatedto600cc,andplacethebeakerin
thecenteroftheoven.
2)Starttooperatetheovenandmeasuretheleakageby
usingamicrowaveenergysurveymeter.
3)Setsurveymeterwithdualrangesto2,450MHz.
4)Whenmeasuringtheleakage,alwaysusethe2inch
spacerconewiththeprobe.Holdtheprobe
perpendiculartothecabinetdoor.Placethespacer
coneoftheprobeonthedoorand/orcabinetdoor
seamandmovealongtheseam,thedoorviewing
windowandtheexhaustopeningsmovingthe
probeinaclockwisedirectionatarateof1inch/sec.Iftheleakagetestingofthecabinetdoorseamis
takennearacornerofthedoor,keeptheprobeperpendiculartotheareasmakingsurethattheprobeend
atthebaseoftheconedoesnotgetcloserthan5cmtoanymetal.Ifitgetscloserthan5cm,erroneous
readingsmayresult.
5)Measuredleakagemustbelessthan4mW/cm
2,
afterrepairoradjustment.
Maximumallowableleakageis5mW/cm2.
4mW/cm
2
isusedtoallowformeasurementandmeteraccuracy
10-1 CheckforMicrowaveLeakage
1.Removetheouterpanel.
2.Pour275±15ccof20±5°C(68±9°F)waterinabeaker
whichisgraduatedto600cc,andplacethebeakerin
thecenteroftheoven.
3.Starttheovenatthehighestpowerlevel.
4.Setsurveymeterdualrangesto2,450MHz.
5.Usingthesurveymeterandspacerconeasdescribed
above,measureneartheopeningofmagnetron,the
surfaceoftheairguideandthesurfaceofthewave
guideasshowninthefollowingphoto.(butavoidthe
highvoltagecomponents.)Thereadingshouldbe
lessthan4mW/cm
2
.
AVOIDTHEHIGHVOLTAGECOMPONENTS
WARNING
10-2 NoteonMeasurement
1)Donotexceedthelimitedscale.
2)Thetestprobemustbeheldonthegripofthehandle,otherwiseafalsereadingmayresultwhenthe
operator'shandisbetweenthehandleandtheprobe.
3)Whenhighleakageissuspected,donotmovetheprobehorizontallyalongtheovensurface;thismay
causedamagetotheprobe.
4)Followtherecommendationofthemanufacturerofthemicrowaveenergysurveymeter.
10-3 LeakageMeasuringProcedure
5-13-1Recordkeepingandnotificationaftermeasurement
1)Afteradjustmentandrepairofaradiationpreventingdevice,makearepairrecordforthemeasured
values,andkeepthedata.
2)Iftheradiationleakageismorethan4mW/cm
functioningproperlyandtheidenticalpartsarereplacedaslistedinthismanualnotifythatfactto;
CENTRAL SERVICE CENTER
At least once a year have the microwave energy survey meter checked for accuracy by its manufacturer.
2
afterdeterminingthatallpartsareingoodcondition,
34
Page 77

11. Troubleshooting (not electronic models)
WARNINGFORHIGHVOLTAGE
4000VOLTSEXISTATTHEHIGHVOLTAGEAREA.DONOTOPERATETHEOVENWITH
CABINETPARTSREMOVED.DONOTREMOVETHECABINETPARTSIFTHEPOWERSUPPLY
CORDISPLUGGEDINTHEWALLOUTLET.UNPLUGTHEPOWERCORDBEFORESERVICING.
11-1ElectricalMalfunction
Parts Cause Diagnosis Remedy
Fuseblows
outwhen
dooris
opened.
Fuseis
Open
Ovenlamp
doesnot
light.
Defectiveprimary
interlockswitch
arywinding.
Defectiveinterlock
monitorswitch
Layershortofthe
secondarycoilof
H.V.Transformer
1)Fuseblownout Checkfuse. Replacethefuse.
2)Poorcontactof
powercord.
3)Defectivelamp Thefanmotorrotates,butlampdoesnotlight. Replacethelamp.
4)Defectivetimer
contacts
Checkcontinuityoftheprimaryswitchterminals
withwireremovedusingamultimeter.Ifthereis
continuityinterbetweenswitchterminalswhendoor
isopened,theswitchisdefective.
Checkcontinuityofthemonitorswitchterminals
withwireremovedbyusingamultimeter.
Ifthereiscontinuitybetweenswitchterminalsthe
doorisclosed,theswitchisdefective.
Thefusewillnotblowrightaway,butifitblowsin
afewseconds,thenthereisalayershortIfthe
fuseblowswithH.V.Transsecondaryopen,the
transformermaybefaulty.
Checkcontinuityofpowersupplycord.Also
checkwhetherthepowercordissecurelywired.
Checktheterminalsoftimerforcontinuity,turning
thetimerknobONandOFFrepeatedly.
Replacetheprimary
interlockswitch
Replacetheinterlock
monitorswitch
ReplaceH.V.Transformer
Adjustorreplace
thepowersupplycord
Replacethetimer.
Fandoes
notoperate.
5)Thermalcutout
S/Wopen
1)Defectivefan
motor.
2)Defectivecontactsoftimer
Inthiscasetheovenlampandfandonotturnon
If230Visfoundatmotorterminals,themotor
shouldbereplaced.
Theovenlampdoesnotlightandfanmotordoes
notoperate.
NOTE:Interlockmonitorswitchmustbereplacedwhenthefuseisblownout.
35
Replacethethermal
cutoutS/W
Replacethemotor.
Replacethetimer.
Page 78

11-1 ElectricalMalfunction(continved)
part Cause Diagnosis Remedy
Toincreasetheoven
waterintowaterinto
theoven.
Replacethermalcutout
switch.
Microwave
turnsoffduring
cook-ingcycle.
1)Toosmall
aload
2)Defective
magnetron
thermal
cutoutS/W
Ifasmallamountoffoodisheatedforalongtime,
periodofmicrowavemayturnoffduringoperation.
Checktoseeifthemagnetronthermalcutoutswitch
isactivatedatatemperaturehigherthan150 .
properly
shockis
felt.
Doordoenot
operate
properly
Timerdoes
notoperate.
Cookingtray
doesnot
rotate.
Incomplete
grounding
1)Brokendoor
hinges
2)Missingor
loosescrew
1)Defective
timermotor
2)Defective
contactsof
timerS/W
1)Defective
drivemotor
1)Blockingof
theventilatior
Makesurethatqroundingofthepowersupplycord
hasbeendoneproperly.
Removethecabinetforinspection.Checkthedoor
hinge.
Checkifthescrewsaresecuredwelltothedoor
hinge.
Ifthetimerdoesnotoperatewith21Vappliedto
theterminals,thetimermotoramybefaulty.
Thelampdoesnotlight. Replacetimer
Checktoseeif21Vexistsatthemotorterminals.If
so,motorwillbedefective.
Checkiftheairinletoroutletventilationisblocked
bythewallorotherobjects.
Rewire.
Replacedoorhinges.
Fastenortighten.
Replacetimer.
Replacedrivemotor.
Keepadistanceof
100mmfromthewallor
theobjects.
Magnetron
thermal
cutout
switch
OFF
2)Defectivefan
motor
3)Toosmalla
loadorno
load
Ifthefanmotordoesnotoperatewith230Vapplied
totheterminal,themotormaybefaulty.
Ifasmallamountoffoodisheatedrepeatedlyover
alongperiodoftime,microwaveturnsoffduring
operation.
36
Replacefanmotor.
Toincreasetheoven
load,placeaglassof
waterintotheoven.
Page 79

11-2 UnsatisfactoryCooking
Parts Cause Diagnosis Remedy
Foodis
notheated.
1)Opencathodeof
magnetron
2)Defective
H.V.Diode
3)Shorted
magnetron
4)Defective
magnetron
5)Poorcontactof
primaryinterlock
switch
6)Opencoilof
H.V.Trans-
former
7)ShortedH.V.
capacitor
8)Monitorfuse
blownout
Checktheterminalswithamultimetertosee
iftheheatercircuitisopen.
ChecktheH.V.Diodeforcontinuityinthereverseand
normaldirectionsusingmeter.Ifthereiscontinuity
inthereversedirection,theH.V.Diodemaybefaulty.
(InthiseventH.V.Capacitorwillbehot)
Connectmeggerleadstoquick-connectterminal&
bodyofthemagnetronifthereiscontinuity,the
magnetronmaybefusewillbeblown)faulty.(Inthis
casethemainfusewillbeblown)
Ifthereisacrackinthemagnetronantenna(dome),
themagnetronisdefective.
Checkifthescrewsaresecuredwelltothedoorhinge.
andpressingitONandOFFrepeatedly.
Checkthecontinuityofprimarycoilandsecondary
coil.Ifthereisnocontinuity,H.V.Transformeris
defective.
Checkthecontinuityofcapacitor.
Ifthecapacitorshorts,thefuseblows
Checkthemonitorfuse(onthenoisefilter)
Replacemagnetron.
ReplaceH.V.Diode.
Replacemagnetron.
Replacemagnetron.
Replaceoradjust.
Replacethe
H.V.Transformer.
Replacethe
H.V.Capacitor.
Replacethe
Monitorfuse
11-3 PartCheckList
Symptom RelatedParts CheckPoints Remedy
1)Checkiftheprimaryandsecondarycoilisopenorshorted.
*Resistanceofprimarycoil:.1.94 Approx
Microwave
cookingdoes
notwork.
Fanmotor
doesnot
rotate.
H.V.Transformer
H.V.Capacitor
H.V.Diode
Fanmotor Checkifthemotorcoilisopen. Replace.
Resistanceofsecondarycoil:Approx.139
2)CheckiftheMGTHeaterVoltageisapprox.3.3VAC.
Caution:Highvoltage!
Checkcontinuityofcapacitorbetweentwo
terminalswithH.V.wireleadremoved.
Theresistanceshouldbeapprox.10MΩ,it'sfailure..
1)Ifthereisnocontinuityinforward,directiontheH.V.Diodeisopen.
2)Ifthereiscontinuityinreversedirection,it'sshorted.
37
Replace.
Replace.
Replace.
Page 80

12. Troubleshooting (electronic models)
PRECAUTION
1.CHECKGROUNDINGBEFORECHECKINGFORTROUBLE.
2.BECAREFULOFTHEHIGHVOLTAGECIRCUIT.
3.DISCHARGETHEHIGHVOLTAGECAPACITOR.
4.WHENCHECKINGTHECONTINUITYOFTHESWITCHESORTRANSFORMER,DISCONNECT
ONELEADWIREFROMTHESEPARTSANDTHENCHECKCONTINUITYWITHOUTTHE
POWERSOURCEON.TODOOTHERWISEMAYRESULTINAFALSEREADINGORDAMAGE
TOYOURMETER.
5.DONOTTOUCHANYPARTOFTHECIRCUITORTHECONTROLCIRCUITBOARD,SINCE
STATICDISCHARGEMAYDAMAGEIT.
ALWAYSTOUCHGROUNDWHILEWORKINGONITTODISCHARGEANYSTATICCHARGE
BUILTUP.
12-1 ElectricalMalfunction
SYMPTOM CAUSE CORRECTIONS
Ovenisdead.
FuseisOK.
Nodisplayandnooperationatall.
Nodisplayandnooperationatall.
Fuseisblown.
Ovendoesnotaccept
keyinput(Program)
Timerstartscountdownbutno
microwaveoscillation.
(Noheatwhileovenlampandfan
motorturnon.)
1.Openorlooseleadwireharness
2.Openthermalcutout(Magnetron)
3.Openlowvoltagetransformer
4.DefectiveAss'yPCB
1.Shortedleadwireharness
2.Defectiveprimarylatchswitch
(NOTE1)
3.Defectivemonitorswitch(NOTE1)
4.ShortedH.V.Capacitor
5.ShortedH.V.Transformer(NOTE2)
NOTE1:Alloftheseswitchesmustbereplacedatthesametime.
(refertoadjustmentinstructions)
Checkcontinuityofpowerrelaycontactsandifithas
continuity,replacepowerrelayalso.
NOTE2:WhenH.V.Transformerisreplaced,checkdiodeand
magnetronalso.
1.Keyinputisnotin-Sequence
2.Openorlooseconnectionof
membranekeypadtoAss'yPCB
3.Shortedoropenmembranepanel
4.DefectiveAss'yPCB
1.Off-alignmentoflatchswitches
2.Openorlooseconnectionofhigh
voltagecircuitespecially
magnetronfilamentcircuit
NOTE:Largecontactresistancewill
bringlowermagnetron
filamentvoltageandcause
magnetrontoloweroutput
and/orintermittentoscillation.
3.Defectivehighvoltage
componentsH.V.Transformer
H.V.Capacitor
H.V.Diode,H.V.Fuse
Magnetron
4.Openorloosewiringofpowerrelay
5.Defectiveprimarylatchswitch
6.DefectivepowerrelayorAss'yPCB
Checkfanmotorwhenthermal
cutoutisdefective.
CheckAss'yPCBwhenL.V.T
isdefective.
Checkadjustmentofprimary,
interlockmonitor,
powerrelay,doorsensing
switch.
Refertooperationprocedure.
ReplacePCBmain.
Adjustdoorandlatchswitches.
Checkhighvoltagecomponent
accordingto
componenttestprocedureand
replaceifitis
defective.
ReplacePCBmain.
38
Page 81

12-1 ElectricalMaltunction(continved)
SYMPTOM CAUSE CORRECTIONS
Ovenlampandfanmotorturnon 1.Misadjustmentorloosewiring
ofprimarylatchswitch
2.Defectiveprimarylatchswitch
Ovencanprogrambuttimer
doesnotstart.
Microwaveoutputislow;.
Oventakeslongertimeto
cookfood.
Fanmotorturnsonwhenpluggedin Loosewiringofdoorsensingswitch Checkwireofdoorsensingswitch.
1.Openorloosewiringof
secondaryinterlockswitch
2.Off-alignmentofprimary
interlock
DefectivesecondaryinterlockS/W
3.
1.Decreaseinpowersource
voltage.
2.Openorloosewiringof
magnetronfilamentcircuit.
(Intermittentoscillation))
3.Agingofmagnetron
Adjustdoorandlatchswitches.
Adjustdoorandinterlockswitches.
Consultelectrician.
Ovendoesnotoperateandreturnto
thepluggedinmode.
Loudbuzzingnoisecanbeheard. 1.Loosefanandfanmotor
Turntablemotordoesnotrotate. 1.Openorloosewiringof
Ovenstopsoperationduring
cooking
Sparks 1.Metallicwareorcookingdishes
Unevencooking
DefectiveAss'yPCB ReplacePCBmain.
2.Loosescrewson
H.V.Transformer
3.ShortedH.V.Diode
turntablemotor.
2.Defectiveturntablemotor.
1.Openorloosewiringofprimary
interlockswitch
2.Operationofthermal
cutout(Magnetron)
touchingontheovenwall.
2.Ceramicwaretrimmedwith
goldorsilverpowderalso
causessparks.
Unevenintensityofmicrowavedue
toitscharacteristics.
Tightenscrewsoffanmotor.
TightenscrewsofH.V.Transformer.
ReplaceH.V.Diode.
Replaceturntablemotor.
Adjustdoorandlatchswitches.
Informthecustomer.
Donotuseanytypeofcookware
with
metallictrimming.
Wrapthinnerpartsofthefoodwith
aluminumfoil.
Useplasticwraporcoverwithalid.
Stironceortwicewhilecooking
foodssuchassoup,cocoa,ormilk.
Noisefromtheturntablemotor
whenitstartstooperate.
Noisemayresultfromthemotor. Replaceturntablemotor.
39
Page 82

December 2001
 Loading...