

Page 1

Instruction Manual
CTT939
Page 2
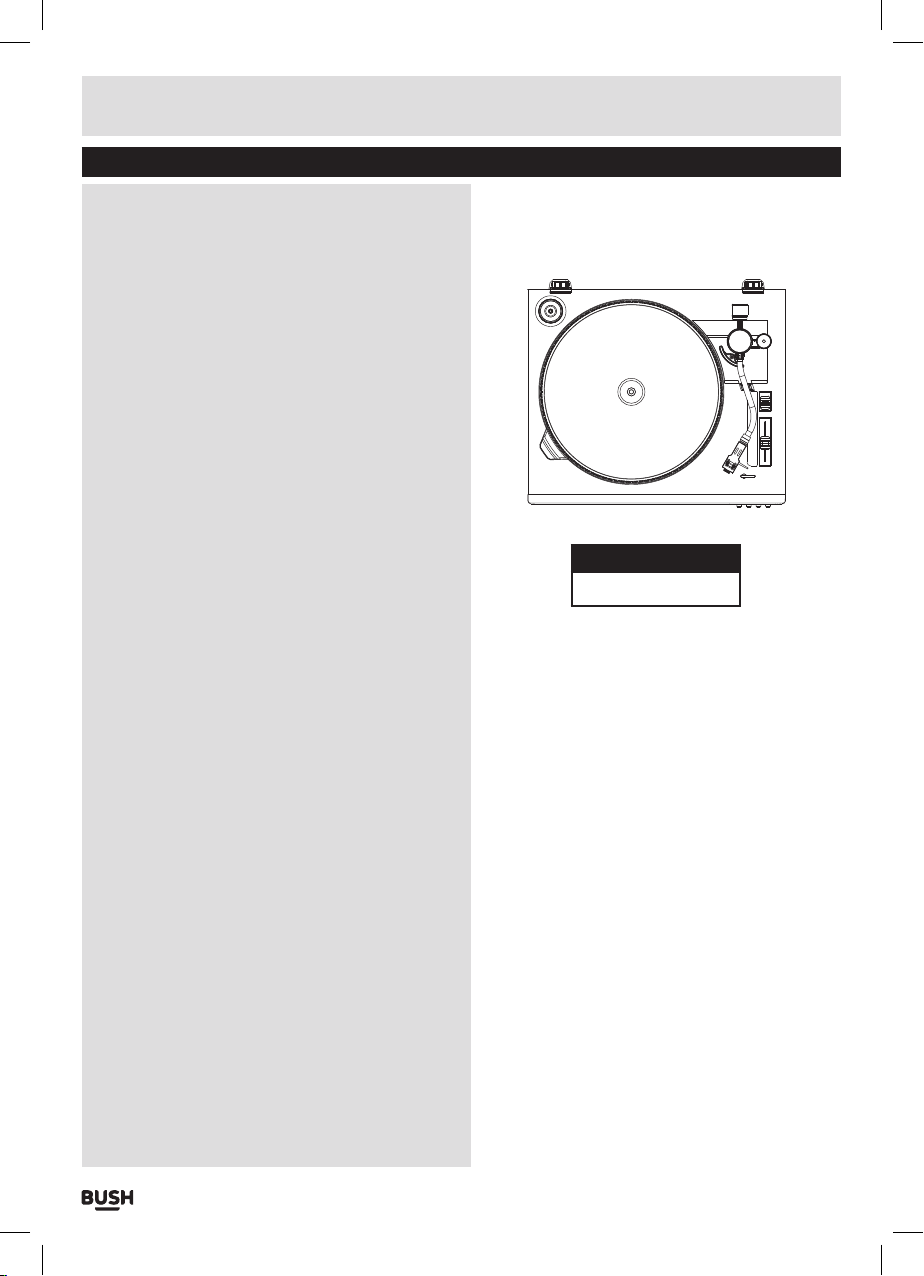
Table of contents
Disposal information ............................ 2
Accessories included ............................... 3
Overview of controls ................................ 3
Preparation for use .............................. 4
Installing the counter weight ....................... 4
Connections ....................................... 4
Further adjustments ............................... 4
Mains connection ............................... 5
Buttons and functions ........................... 5
Play button ......................................... 5
Eject button ........................................ 5
Cue button ......................................... 5
Pitch adjust ........................................ 5
Stop / start alignment ........................... 6
Auto stop alignment ................................ 6
Start position alignment ........................... 6
Transferring to a computer ....................... 6
Preparation for connection to a computer .......... 6
Connecting to a computer .......................... 6
Setting up the device on a computer ............... 7
Setting the recording levels. . . . . . . . . . . . . . . . . . . . . . . . . 7
Recording .......................................... 7
UK Mains plug information ....................... 8
Technical specifications ......................... 8
Care & maintenance ............................. 8
Product Code
CTT939
Page 1
Page 3
Safety information
Important – Please read these instructions fully before using
CAUTION: TO REDUCE THE RISK OF ELECTRIC SHOCK, DO NOT REMOVE ANY COVER. NO USER-SERVICEABLE
PARTS INSIDE, REFER ANY SERVICING TO QUALIFIED SERVICE PERSONNEL.
• Please read this owner’s guide
• Please take the time to follow the instructions in
this owner’s guide carefully. It will help you set up
and operate your system properly and enjoy all of its
advanced features.
• Please save this owner’s guide for future reference.
• The product label is located on the back of the
product.
• Heed all warnings - on the product and in the owner’s
guide.
• Do not use this apparatus near water or moisture.
• Do not use this product near a bathtub, washbowl,
kitchen sink, and laundry tub, in a wet basement,
near a swimming pool, or anywhere else that water or
moisture is present.
• Only use attachments/accessories specified by the
manufacturer.
• Unplug this apparatus during lightning storms or
when unused for long periods of time - to prevent
damage to this product.
• Refer all servicing to qualified service personnel
• Servicing is required when the apparatus has
been damaged in any way: such as liquid has been
spilled or objects have fallen into the apparatus; the
apparatus has been exposed to rain or moisture, does
not operate normally, or has been dropped -
• Do not attempt to service this product yourself.
• Opening or removing covers may expose you to
dangerous voltages or other hazards.
• To prevent risk of fire or electric shock, avoid
overloading wall outlets, extension cords, or integral
convenience receptacles.
• Use suitable power sources - Plug the product into a
suitable power source, as described in the operating
instructions or as marked on the product.
The mains plug is used as the disconnect device, the
disconnect device shall remain readily accessible.
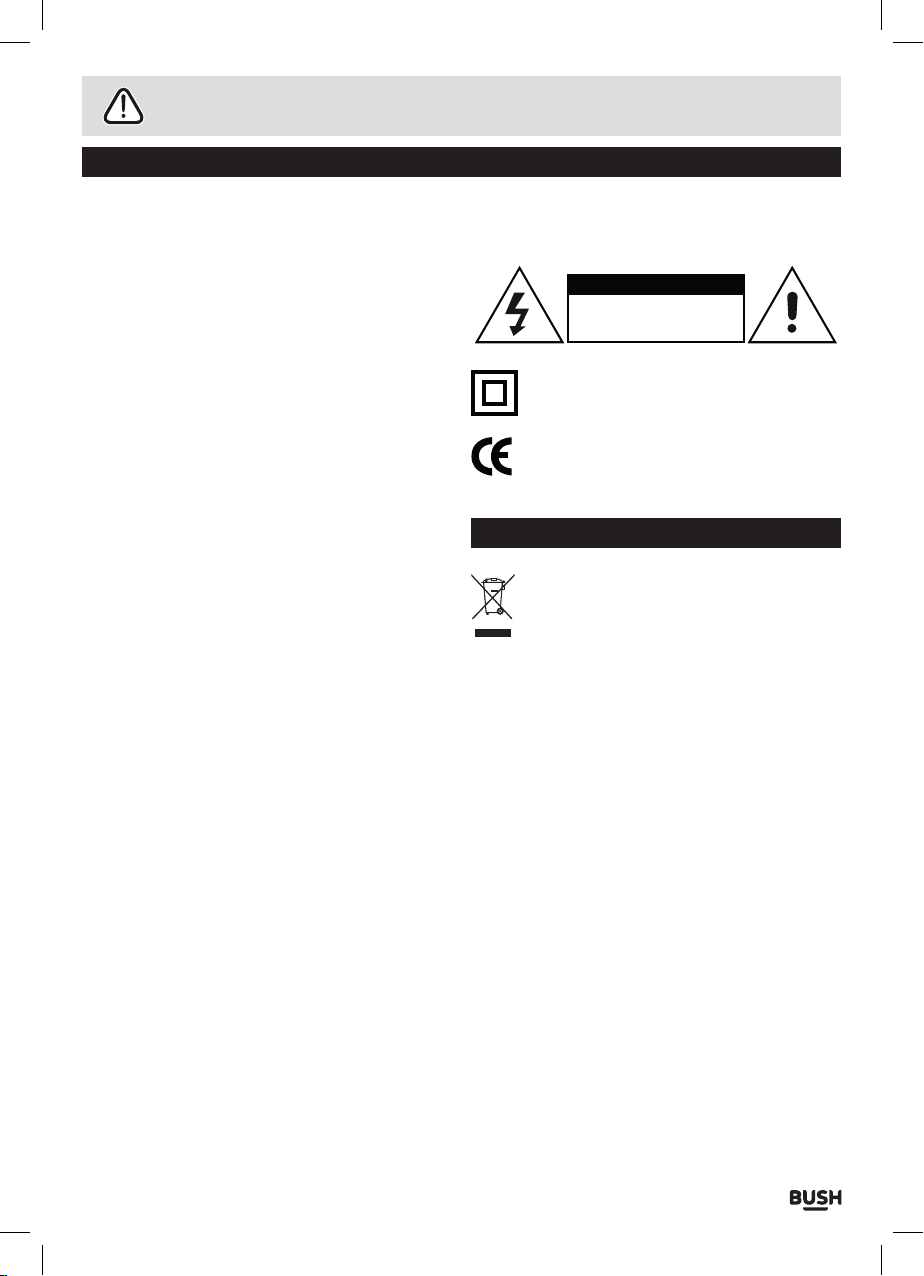
This symbol means that this unit is double
insulated. An earth connection is not required.
This product complies with European low
voltage (2006/95/EC) and electromagnetic
compatibility (2004/108/EC) directives.
Disposal information
WEEE marking “Information for the consumer”
Disposal of your old product Your product is
designed and manufactured with high quality
materials and components, which can be
recycled and reused. When this crossed out wheeled bin
symbol is attached to a product it means the product is
covered by the European Directive 2002/96/EC.
Please make yourself aware of the local collection
system for electrical and electronic products. Please act
according to your local rules and do not dispose of your
old products with your normal household waste. The
correct disposal of your old product will help prevent
potential negative consequences for the environment
and human health.
CAUTION
RISK OF ELECTRIC SHOCK!
DO NOT OPEN!
Page 2
Page 4
Functions & controls
Please familiarize yourself with the parts and accessories listed below
Accessories included
• 1 x CTT939 • 1 x Counter weight • 1 x Instruction manual • 1 x USB cable
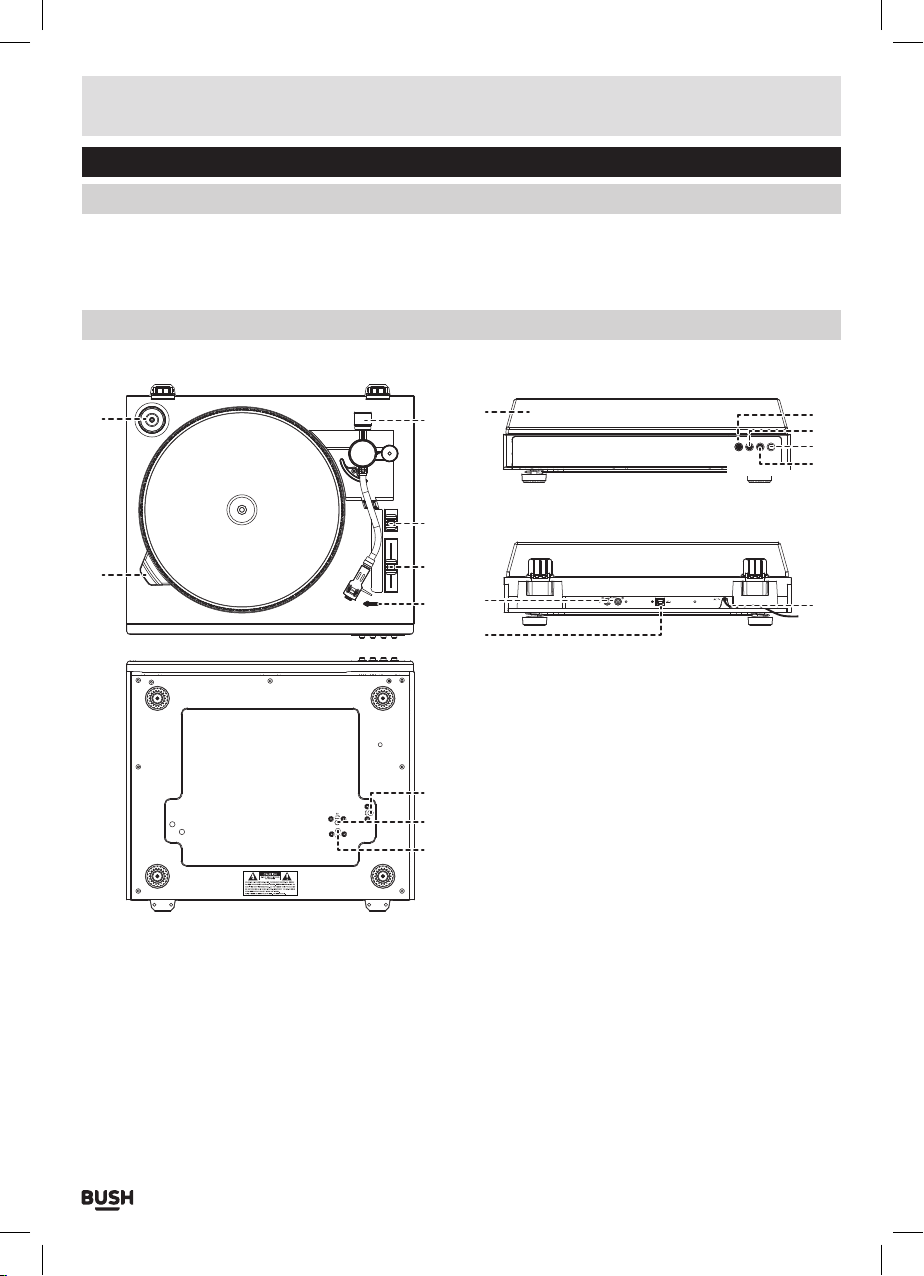
Overview of controls
6
7
1: Dust cover
2: PLAY button
3: EJECT button
4: ON/OFF power button
5: CUE LEVER UP/DOWN button
6: SPINDLE adaptor
1
8
9
10
12
11
13
15
16
17
7: STROBE illuminator
8: COUNTER WEIGHT
9: SPEED SELECTOR
10: PITCH adjustment
11: RECORD SIZE adjustment
12: RCA LINE LEVEL output sockets
13: USB output socket
14: MAINS cable
15: AUTO STOP alignment screw
16: 30CM (12”) alignment screw
17: 17CM (7”) alignment screw
2
3
4
5
14
Page 3
Page 5

Installation
Preparation for use
Installing the counter weight
The counterweight is used to balance the head shell
and cartridge assembly so that the proper amount of
pressure is applied to the record from the stylus.
1: Slide the counter weight (8) completely onto the
rear of the tone arm until it reaches the end. Rotate
clockwise until you feel a slight click.
2: Rotate the entire counterweight clockwise and
backwards until you can see the white line.
Connections
3: Rotate clockwise only the black section of the
counterweight until the line matches position 1.
4: Now rotate the entire counterweight anti-clockwise
and inwards until you reach the recommended
pressure.
NOTE: The recommended pressure of the supplied
stylus is 4-6 grams. If you purchase a replacement
stylus please take note of the recommended
pressure and set accordingly.
1: USB OUTPUT (cable supplied)
Connect this cable to a USB input on a PC or MAC
computer. to transfer vinyl records to digital files.
2: RCA LINE LEVEL OUTPUT (cable not supplied)
These cables should be connected to an audio input
on your home stereo system. Do not connect these to
a PHONO input as the output level will be too high and
could damage your stereo system.
NOTE: It is still possible to copy records to a PC
using a USB cable when connected to a home
stereo system using an RCA cable.
Page 4
Page 6

User instructions
Further adjustments
1: Raise the stylus protector towards the front of the
cartridge.
2: Remove the cable tie securing the tone arm and
keep safe for use when transporting or adjusting the
turntable.
3: Set the speed selector (9) to the required speed 33,
78 or 45 rpm.
4: Select the the size of the record you wish to play using
the SIZE SELCT control (11). Choose from 17cm (7”)
or 30 cm (12”).
Mains connection
1: Connect the mains plug to a wall outlet.
2: Press the ON/OFF power button (4) to power the
turntable on. The strobe illuminator (7) will light up to
indicate the unit is ON.
NOTE: Please ensure this connection is made
after the output connections.
NOTE: This unit is designed to enter STANDBY
mode automatically after 20 MINUTES
(approximately) of inactivity.
Press the POWER button twice to resume use.
Cue button
1: Pressing this button inwards lifts the tone arm above
the rest position so the tone arm can be located
anywhere above the record.
2: Pressing the button once more lowers the tone arm
allowing the stylus to gently contact the record and
begin playback from the custom location.
Pitch adjust
Follow the below steps to ensure the platter speed is
revolving at the correct speed.
1: During playback of a record observe the strobe
calibration dots on the platter.
Buttons and functions
Play button
1: Press to begin playback. The tone arm will lift from the
rest and locate itself on the outer edge of the record.
NOTE: it is important to set the size of the record
correctly using the SIZE SELECT control (11)
first to ensure the stylus is located in the correct
position.
Eject button
1: Press to stop playback and return the tone arm back
to the rest position.
2: The upper set of dots relate to the 33rpm setting the
mid set of dots relate to the 45rpm setting and the
lower set relate to the 78rpm setting.
3: If the strobe dots appear to be flowing to the right, the
platter is moving slower than the rated speed and you
should increase the pitch adjust (10) (slide the knob
upwards).
4: If the strobe dots appear to be flowing to the left, the
platter is moving faster than the rated speed and you
should decrease the pitch adjust (10) (slide the knob
downwards).
5: Keep adjusting the pitch adjust until the strobe dots
do not flow left or right and stay stationary.
Page 5
Page 7

User instructions
ANTI-CLOCKWISE = TOWARDS OUTER
Stop / start alignment
In order to ensure the automatic stop / start functions
operate efficiently for your own record collection some
adjustments maybe required. Follow the below steps to
fine tune.
NOTE: Before making any adjustments please
remove any records from the platter and secure
the tone arm with the supplied cable tie.
Auto stop alignment
If the tone arm does not lift and return to the rest
position in time or returns too soon (before the record is
finished) follow the instructions below.
THE TONE ARM RETURNS BEFORE THE RECORD IS
FINISHED
1: Using a small flat head screw driver turn the AUTO
STOP alignment screw (16) clockwise. the stopping
position of the tone arm will move closer to the centre
of the record.
THE TONE ARM WONT RETURN TO THE REST
POSITION.
1: Using a small flat head screw driver turn the AUTO
STOP alignment screw (16) anti-clockwise. the
stopping position of the tone arm will move further
away from the centre of the record.
NOTE: Take note of the engraved diagrams to
ensure you are turning the screws the correct
direction.
The stop position can vary on some vinyl so
may need adjustment from time to time, find an
acceptable position or manually press the EJECT
button (3).
Start position alignment
If the tone arm does not align with the start position
correctly follow the below steps to fine tune.
1: Using a small cross head screw driver adjust each
alignment screw according to the size of record.
NOTE: Please refer to the engraved diagrams next
to each adjustment screw for the adjustment
directions.
Remember to set the SIZE SELECT adjuster to the
correct size when testing alignment.
Transferring to a computer
Preparation for connection to a computer
Before getting started please download and install
the recommended software package ‘Audacity’. The
application is available for the Windows or macintosh
platform. At the time of writing this manual version
2.1.1 is the latest version as such all instructions will be
written for this version.
http://audacityteam.org
Should you wish to encode your recordings to the MP3
format a seperate plug in called ‘Lame MP3 encoder’
will also need to be downloaded and installed.
http://lame.buanzo.org/#lamewindl
Connecting to a computer
1: Power ON your computer.
2: Connect the supplied USB cable to the USB input (13)
on the rear of the turntable.
NOTE: Only the square shaped plug end of the
cable will fit the socket.
3: Connect the other end of the cable to a USB input
socket on your computer.
4: Once detected a device driver will be automatically
installed to allow your computer to recognise the
turntable as a USB device.
CLOCKWISE = TOWARDS CENTRE
Page 6
Page 8

User instructions
Setting up the device on a computer
1: Run the AUDACITY program you installed earlier.
2: Under the EDIT menu select PREFERENCES.
3: Choose the DEVICES tab (if not selected already)
and in the recording device section drop down menu
select the USB device.
4: Ensure the recording channel drop down menu is set
to ‘2 (stereo)’.
5: If the turntable is connected to a home stereo system
for playback purposes you can proceed to the next
section, if not select the RECORDING tab and tick the
‘SOFTWARE PLAYTHROUGH’ option. This will allow
the playback sound to be channelled through your PC
speakers.
Setting the recording levels
1: Begin playback of the record you wish to record so
input levels can be adjusted.
2: Within Audacity click anywhere on the recording level
bars to begin monitoring playback.
Recording
1: To begin recording make sure the tone arm is in the
rest position and press the PLAY button (2).
2: As the tone arm begins to lower to the record press
the RED RECORD button in Audacity to begin
recording.
3: When the record or track has finished press the
BEIGE STOP button.
3: The input level is controlled by the RECORDING
LEVEL slide control within Audacity. The optimum
recording level should be between the markers A & B.
4: At this point you can now save the file. Under the FILE
menu select EXPORT AUDIO.
5: Add a filename and select the location you wish to
save the file in.
6: Under the ‘Save as type’ drop down menu select a
format to save as. The WAV 16 BIT format will allow
you to burn a CD AUDIO DISC with the files if you have
a CD burner installed in your computer. The MP3
format will allow you to use with an MP3 player.
Press the OPTIONS button to set the quality of the
encoded MP3 file.
In order to save files as MP3’s you will need to
install the LAME MP3 ENCODER plug in described
on page 6.
7: Press the SAVE button to save the recorded file.
Under the FILE menu select CLOSE.
Page 7
Page 9

UK Mains plug information
For your convenience a mains plug with a fuse (3
Amp) has been fitted to this appliance. For your safety
please observe the following information.
• The unit is designed to operate on AC mains supply
230 volts, 50 Hz.
• The wires in the mains lead are coloured in
accordance with the following code:
BLUE - NEUTRAL
BROWN - LIVE
Under no circumstances should the Neutral or Live
wires be connected to the ‘E’ (Earth) terminal.
Technical specifications
Supply Voltage, Mains: ............. 230-240V~50Hz
Max. Power Consumption: ...................... 6W
Unit dimensions: ...... (W) 428 x (D) 377 x (H) 122 mm
Care & maintenance
Care and cleaning
• All care and cleaning operations should be carried out
with the unit unplugged from the mains power.
• Occasionally wipe the cabinet with a lint free duster.
Never clean the unit with liquids or solvents.
Page 8
Page 10

User instructions
Troubleshooting
In the unlikely event of difficulties with your appliance please follow the trouble shooting guide below.
If the problem persists, visit the technical support website: www.argos-support.co.uk
Problem Reason(s) Solution(s)
No power
No sound when connected to
a home stereo system
No sound when connected to
a computer
The start or stop position is
not accurate
• Power cable not connected to
wall socket
• Power socket is not switched on
• The power saving mode is
activated.
• Volume is too low
• The RCA cables are not connected
correctly.
• The stereo system is not set to the
correct input mode.
• The device was not recognised
when connected.
• The software playthorugh option
was not ticked.
• The recording level bar was not
clicked.
• The tone arm alignment is not set
correctly.
• Make sure the plug is connected
• Switch the power on
• See ’Mains connection’ page 5 for
details.
• Increase the volume
• Check the connections.
• Check which input you connected the
RCA cables to and switch to that input
mode on your stereo system.
• Re-boot the computer and try again.
• See page 7 ‘Setting up the device on a
computer section 5’ for details.
• See page 7 ‘Setting the recording
levels section 2’ for details.
• See page 6 for instructions on
alignment.
Recordings made through a
computer are distorted
The stylus is skating across
the record
The record is playing too fast
or too slow.
• The input levels are too high • Adjust the input levels. See page 7
• The counter weight is not set
correctly.
• The pitch adjustment needs fine
tuning.
‘Setting the recording levels’.
• Adjust the counterweight. See page 4
‘Installing the counter weight’.
• Increase or decrease the pitch adjust
control. See page 5 ‘Pitch adjust’.
Page 9
Page 11

Guarantee
PRODUCT GUARANTEE
This product is guaranteed against manufacturing defects for a period of
Year
This product is guaranteed for twelve months from the date of original purchase.
Any defect that arises due to faulty materials or workmanship will either be replaced,
refunded or repaired free of charge where possible during this period by the dealer from
whom you purchased the unit.
Page 10
The guarantee is subject to the following provisions:
The guarantee does not cover accidental damage, misuse, cabinet parts, knobs or
consumable items.
The product must be correctly installed and operated in accordance with the instructions
contained in this manual.
It must be used solely for domestic purpose.
The guarantee will be rendered invalided if the product is re-sold or has been damaged by
inexpert repair.
Specifications are subject to change without notice.
The manufacturer disclaims any liability for the incidental or consequential damages.
The guarantee is in addition to, and does not diminish your statutory or legal rights.
Guarantor: Argos Limited
489 - 499 Avebury Boulevard
Central Milton Keynes
MK9 2NW
 Loading...