

Page 1
Instruction Manual
CSPK115RED
CSPK115BLACK
Page 2
Contents
Safety Information 2-3
Disposal information 3
Functio ns & Controls 4
LED Stat e Indicator key 4
What’s included 5
User Instructions 5-7
Gettin g started 5
User instructions 6-7
Care and maintenance 8-11
Interna l battery removal 8
Cleaning instructions 9
Contact details 9
Troubleshooting 10
Technical specications 10
Guarantee 11
Product Codes
CS PK115
1
Page 3

Safety Information
Important – Please read these instructions fully before installation
CAUTION: T O REDUCE THE RISK O F ELECTRIC SHOCK , DO NOT REMOVE AN Y
COVER. N O USER-SERVI CEABLE PARTS INSI DE, REFER ANY S ERVICING TO
QUALIFIED SERVICE PERSONNEL.
• Please ta ke the time to follow th e instructions i n this owner’s guide c arefully. It will
help you set u p and operate your syste m properly and enj oy all of its advanced
features.
• Please save t his owner’s guide f or future referenc e.
• The produ ct label is locate d on the bottom of the p roduct.
• Do not use th is apparatus near wa ter or moisture.
• Do not use th is product near a bat htub, washbowl, kit chen sink, and laund ry tub, in
a wet baseme nt, near a swimming p ool, or any where else that wat er or moisture is
present.
• Only use at tachme nts/acc essories spec ied by the ma nufactu rer.
• Refer all ser vicing to quali ed serv ice pers onnel
Servi cing is required wh en the apparatus ha s been damaged in any way: s uch as
liquid has been spilled or objects have fallen into the apparatus; the apparatus has
been expo sed to rain or moistur e, does not operate n ormally, or has been dro pped -
Do not attempt to service this product yourself.
Opening o r removing covers m ay expose you to danger ous voltages or oth er hazards.
• To prevent risk of re o r electr ic shock, avoid overlo ading wall outlets, ex tension
cords, or integral convenience receptacles.
• Use prope r power sources - Plu g the product into a pr oper power sourc e, as describe d in the operating in structions or as m arked on the produc t.
• The mains p lug is used as the disc onnect device, t he disco nnect device shal l remain
readily accessible
2
Page 4
Safety Information
Important – Please read these instructions fully before installation
CAUTION
RISK OF ELECTRIC SHOCK!
DO NOT OPEN!
Disposal Information
The symbo l on the product or it s packaging indic ates that this prod uct
may not be tre ated as household wa ste. Instead it shoul d be handed
over to the ap plicab le collection p oint for the recycli ng of electrica l
and elec tronic equipment . By ensuring this pr oduct is dispose d of
corre ctly, you will help preven t potential negati ve consequence s for
the environment and human health, which could otherwise be caused
by inappro priate waste handl ing of this product . For more detailed
informa tion about recycl ing this product , please contact yo ur local
counci l ofce , your house hold waste di sposal servic e or the shop wh ere
the produ ct was purchased.
We apologize for any inconvenience caused by any minor inconsistencies in these
instruc tions, which may o ccur as a result of pro duct improvement s and development.
3
Page 5

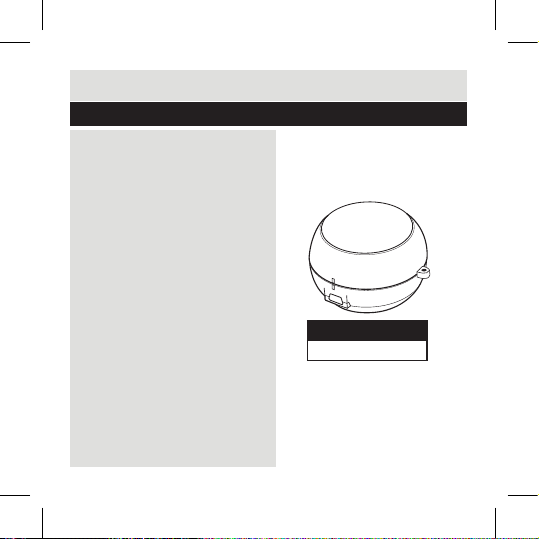
Functions & Controls
6
1
3
7
6
2
Important – Please read these instructions fully before installation
1
2
3
1. Internal speaker
2. POWER VOL HI/ VO L LO/OFF switch
6
3. Lanyard att achment loop
4. LOCK/UNLOCK indicators
5. MINI USB so cket (Charge only)
6. 3.5mm audi o jack
7. LED state indicator
LED State Indicator key
Power Of f /No Charging OFF
7
Power Off /Charging RED
Power On /N o Charging BLUE
Power On /Charging PURPLE
4
4
5
Page 6

User Instructions
What’s included
1 x Porta ble compact spea ker 1 x U SB charging cab le 1 x Instruction ma nual
Getting started
A full char ge is required be fore usi ng the com pact speaker fo r the rst t ime.
The suppl ied USB cable supp orts charging f rom a PC or Laptop. A co mpatible USB
mains adap ter can be purchase d from a good
electrical store.
1. Insert t he mini USB plug into th e MINI USB
socket (5) on t he compact speake r.
2. Conne ct the other end of the U SB cable
(the large r plug) into a free USB soc ket on a
PC or lapto p.
3. Power ON the PC o r laptop and leave to
charge the speakers internal battery for approximat ely 3 hours. The LED st ate indicator
(7) will go O FF when charged. Af ter charging
remove the m ini USB plug from th e speaker
and PC or lap top.
NOTE: See LED State Indicator Key on page 4 for fur ther details.
4. The speaker is now ready for use.
5
Page 7

User Instructions
User instructions
1. When fully c harged the speake r can be extended to th e PLAY position. See the below
diagrams.
A B C
A. Twist the to p half of the speaker An ti-clock wise.
B. Note the LO CK/UNLOCK i ndicators (4) do not line u p after twistin g. This unlocks
the speaker sections.
C. Exten d the top section of t he speaker as far
as it will go w ithout forcing.
2. Now the 3 .5mm audio cable c an be extended
from the b ase of the speaker (see dia gram).
6
2
Page 8

User Instructions
User instructions
3. Conne ct the 3.5mm audio j ack to your audio sour ce.
Such as an M P3 player or any audio dev ice with a
3.5mm earphone output.
4. Set the POW ER VOL HI/ VOL LO/OF F switch (2) to
VOL LO (low vol ume) or VOL HI (High volume).
NOTE: Sett ing the switch to VOL H I will reduce the
batter y duration, and wil l require re-c harging sooner
than VOL LO.
4. Press P LAY on the aud io source, and adjus t the volume to about 3 /4 of maximum.
NOTE: If you ra ise the audio sourc e volume too high the s ound may become dis torted.
5. When you have nished us ing the spea ker, detach the 3 .5 audio jac k from your audio
source, a nd feed the cable ba ck into the c hannel on the bott om of the speaker.
6. Rotate th e top section of the s peaker Clockwi se and downwards to LOCK once more.
7
MP3
Page 9

Care & Maintenance
Internal battery removal
Your product c ontains a built- in rechargable ba ttery covered by t he European
Direct ive 2006/66 /EC. To safeguar d the functional ity and safety of yo ur product,
always take yo ur produc t to an ofc ial coll ection p oint or ser vice centre wher e a
profess ional can remove th e battery.
Please inform yourself about the local rules on separate collection of batteries
becaus e the correct dis posal wi ll help preve nt negative conse quences for the
environmental and human health. Please do not dispose of your batteries with your
normal h ousehold waste. Al ways bring your prod uct to a profession al to remove the
battery.
This product complies with Electromagnetic compatibility (2004/108/EC) directives.
8
Page 10

Care & Maintenance
Important – Please read these instructions fully before installation
Impor tant: Always u nplug the appl iance f rom the power soc ket during
cleaning and maintenance.
• Ensure the unit is swi tched off and unpl ugged fr om any electrica l outlet
• Wipe the case with a s lightly moist lint f ree cloth
• Do not use any cleaning u ids cont aining alc ohol, ammonia or abr asives
• Do not spray an aeroso l at or near the objec t
• Do not allow liquids t o spill or objects t o drop into any opening s
• Do not insert shar p items into speaker r esonator or any other o penings
• Always us the origi nal packaging if it i s necessary to t ransport the uni t at any
time
If the unit i s used in a dusty envir onment, i t may be necessar y to have the unit serv iced
at your loc al dealer period ically. It is not advis able to allow large de posits of dust to
accumul ate within the unit as i t may prevent adequate c ooling. Similar ly dust deposits
which be come damp can some times lead to elect rical problem s which may cause seve re
damage to t he delicate elect ronics within t his unit.
Contact
In the unlike ly event of dif culties with your a pplianc e please fo llow the tr ouble sho oting
guide on th e next page.
If the prob lem persists, c ontact the retail er if the machine is st ill under guarante e.
Custome r helpline: 0870 600 3030
9
Page 11

Troubleshooting
Fault Solution
No sound ■ Check tha t the audio source is p laying.
Sound distorted ■ Reduce the audio sou rce volum e level.
Batte ry at ■ Recharge the inter nal battery (see page 5) .
Technical Specications
Power output 1W
Speaker unit 1” 4 O hm
Frequency response 80H z - 15Khz
S/N ratio 40 dB
■ Check the POWER/ VOLUME switch (2) is set to eit her
VOL LO or VOL HI .
■ Check the v olume on the audio so urce is above 3/4 max.
■ Remove and re -insert the 3 .5mm audio jack into t he audio
source.
■ Batter y may be too low. Re-charg e the inter nal batte ry.
■ Set the POWER/VOLUME switch (2) to VOL L O if set to
VOL HI.
10
Page 12

This pro duct is gua ranteed for twelv e months from the date o f original purch ase.
Any defec t that arises due to fau lty materials or w orkmanship will e ither be replace d,
refunde d or repaired free of c harge where poss ible during this pe riod by the dealer f rom
whom you pu rchased the unit.
The guar antee is subje ct to the follow ing provision s:
• The guara ntee does not cover ac cidental damag e, misuse, cabinet pa rts, knobs or
consumable items.
• The produ ct must be correc tly installed and o perated in accor dance with the
instructions contained in this manual.
• It must be us ed solely f or domestic purp ose.
• The guara ntee will be rendere d invalided if the pro duct is re-sol d or has been
damaged by inexpert repair.
• Speci cations are subjec t to change without not ice.
• The manufacturer disclaims any liability for the incidental or consequential damages.
• The guara ntee is in addition to, a nd does not diminis h your statutory or l egal rights.
489 - 499 Ave bury Boulevard
Central M ilton Keynes MK9 2N W
Guarantor: Argos Limited
 Loading...