

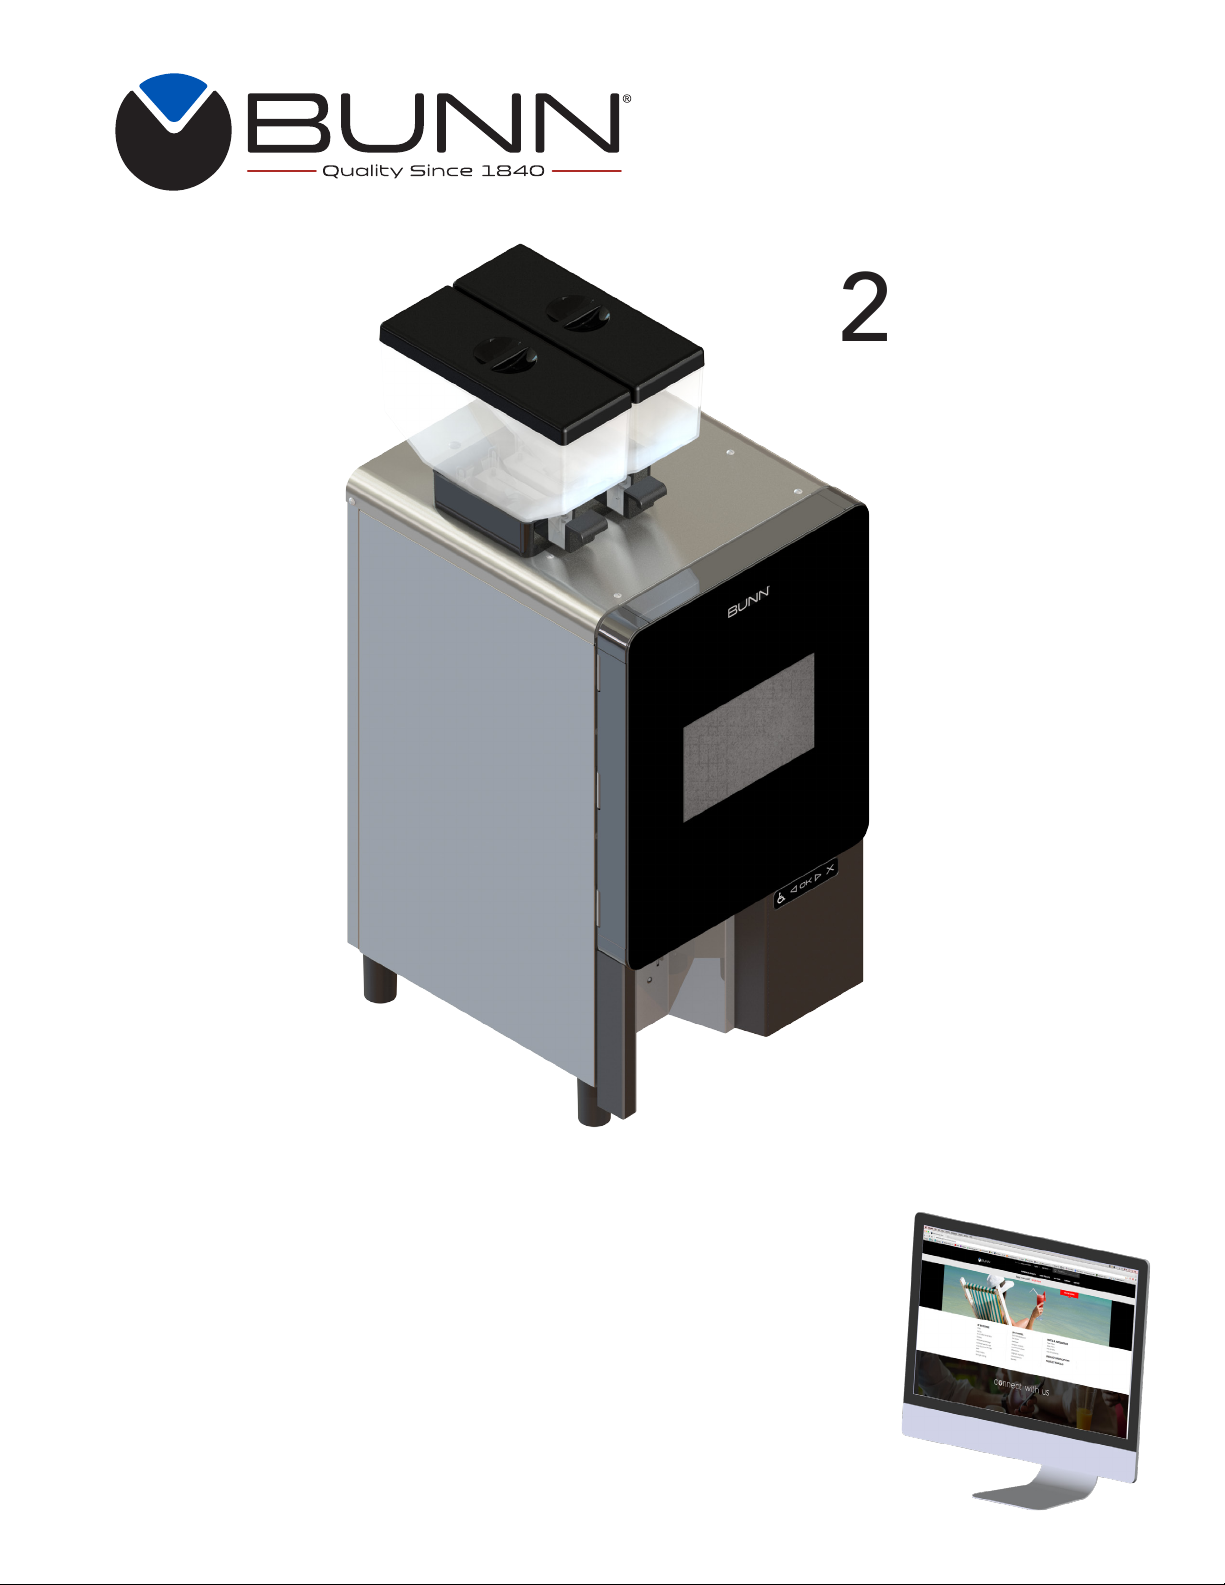
Page 1
Sure
Immersion
220
INSTALLATION & OPERATING GUIDE
BUNN-O-MATIC CORPORATION
POST OFFICE BOX 3227
SPRINGFIELD, ILLINOIS 62708-3227
PHONE: (217) 529-6601 FAX: (217) 529-6644
To ensure you have the latest revision of the Operating Manual, Illustrated Parts Catalog, Programming Manual, or Service Manual, please visit the Bunn-O-Matic website, at www.bunn.com.
This is absolutely FREE, and the quickest way to obtain the latest catalog and manual updates.
For Technical Service, contact Bunn-O-Matic Corporation at 1-800-286-6070.
53058.0000C 07/17 ©2016 Bunn-O-Matic Corporation
Page 2

BUNN-O-MATIC COMMERCIAL PRODUCT WARRANTY
Bunn-O-Matic Corporation (“BUNN”) warrants the Bunn Sure Immersion system, further described below for a warranty period of
1 year parts and labor.
These warranty periods run from the date of installation. BUNN warrants that the equipment manufactured by it will be commercially
free of defects in material and workmanship existing at the time of manufacture and appearing within the applicable warranty period.
This warranty does not apply to any equipment, component or part that was not manufactured by BUNN or that, in BUNN’s judgment, has been affected by misuse, neglect, alteration, improper installation or operation, improper maintenance or repair, damage
or casualty. This warranty is conditioned on the Buyer 1) giving BUNN prompt notice of any claim to be made under this warranty by
telephone at (217) 529-6601 or by writing to Post Office Box 3227, Springfield, Illinois 62708-3227; 2) if requested by BUNN, shipping the defective equipment prepaid to an authorized BUNN service location; and 3) receiving prior authorization from BUNN that the
defective equipment is under warranty. Additionally the following is excluded from the warranty period
Warranty Exclusions:
• Parts such as, but not limited to, hoppers and lids, drip trays, and plastic parts damaged due to improper handling or cleaning
agents.
• Replacement of wear items such as, but not limited to, O-rings, gaskets, tubes, brew box seal, hoses, and valve seats.
• Repairs made necessary due to poor water quality, such as dispense valves, coils, water inlet valves, scaling in hot water boilers.
• Improper voltage, (See equipment operations manual for voltage specifications)
• Touch screen due to improper use or damage
• Failure to perform cleaning procedures constitutes improper maintenance.
• Failure to have required preventive maintenance performed by a BUNN technician or an authorized BUNN service agent
Parts replaced under the terms of this warranty carry the remainder of the machine’s parts warranty term, or 60 days, whichever is
greater.
THE FOREGOING WARRANTY IS EXCLUSIVE AND IS IN LIEU OF ANY OTHER WARRANTY, WRITTEN OR ORAL, EXPRESS OR IMPLIED, INCLUDING, BUT NOT LIMITED TO, ANY IMPLIED WARRANTY OF EITHER MERCHANTABILITY OR FITNESS FOR A PARTICULAR PURPOSE. The agents, dealers or employees of BUNN are not authorized to make modifications to this warranty or to make
additional warranties that are binding on BUNN. Accordingly, statements by such individuals, whether oral or written, do not constitute
warranties and should not be relied upon.
If BUNN determines in its sole discretion that the equipment does not conform to the warranty, BUNN, at its exclusive option while the
equipment is under warranty, shall either 1) provide at no charge replacement parts and/or labor (during the applicable parts and labor
warranty periods specified above) to repair the defective components, provided that this repair is done by a BUNN Authorized Service
Representative; or 2) shall replace the equipment or refund the purchase price for the equipment.
THE BUYER’S REMEDY AGAINST BUNN FOR THE BREACH OF ANY OBLIGATION ARISING OUT OF THE SALE OF THIS EQUIPMENT,
WHETHER DERIVED FROM WARRANTY OR OTHERWISE, SHALL BE LIMITED, AT BUNN’S SOLE OPTION AS SPECIFIED HEREIN, TO
REPAIR, REPLACEMENT OR REFUND.
In no event shall BUNN be liable for any other damage or loss, including, but not limited to, lost profits, lost sales, loss of use of equipment, claims of Buyer’s customers, cost of capital, cost of down time, cost of substitute equipment, facilities or services, or any other
special, incidental or consequential damages.
392, A Partner You Can Count On, Air Infusion, AutoPOD, AXIOM, BrewLOGIC, BrewMETER, Brew Better Not Bitter, BrewWISE,
BrewWIZARD, BUNN Espress, BUNN Family Gourmet, BUNN Gourmet, BUNN Pour-O-Matic, BUNN, BUNN with the stylized red line,
BUNNlink, Bunn-OMatic, Bunn-O-Matic, BUNNserve, BUNNSERVE with the stylized wrench design, Cool Froth, DBC, Dr. Brew stylized
Dr. design, Dual, Easy Pour, EasyClear, EasyGard, FlavorGard, Gourmet Ice, Gourmet Juice, High Intensity, iMIX, Infusion Series, Intellisteam, My Café, Phase Brew, PowerLogic, Quality Beverage Equipment Worldwide, Respect Earth, Respect Earth with the stylized
leaf and coffee cherry design, Safety-Fresh, savemycoffee.com, Scale-Pro, Silver Series, Single, Smart Funnel, Smart Hopper, SmartWAVE, Soft Heat, SplashGard, The Mark of Quality in Beverage Equipment Worldwide, ThermoFresh, Titan, trifecta, TRIFECTA (sylized
logo), Velocity Brew, Air Brew, Beverage Bar Creator, Beverage Profit Calculator, Brew better, not bitter., Build-A-Drink, BUNNSource,
Coffee At Its Best, Cyclonic Heating System, Daypart, Digital Brewer Control, Element, Milk Texturing Fusion, Nothing Brews Like a
BUNN, Picture Prompted Cleaning, Pouring Profits, Signature Series, Sure Tamp, Tea At Its Best, The Horizontal Red Line, Ultra are
either trademarks or registered trademarks of Bunn-O-Matic Corporation. The commercial trifecta® brewer housing configuration is
a trademark of Bunn-O-Matic Corporation.
2
53058.0 032717
Page 3
Warranty ........................................................................................................................ 2
User Notices
.................................................................................................................. 3
North America Requirements
Site Requirements
Plumbing Requirements
Electrical Hookup
Initial Setup
Filter Paper Installation
Operating Interface
ADA Operating Interface
......................................................................................................... 5
................................................................................................ 5
........................................................................................................... 6
.................................................................................................................... 7
.................................................................................................. 9
...................................................................................................... 12
.............................................................................................. 15
Optional Cashless Payment System
Filter Paper Removal
.................................................................................................... 18
Service Access - Care And Cleaning
Care and Cleaning - Weekly
Service Access - Active Notices
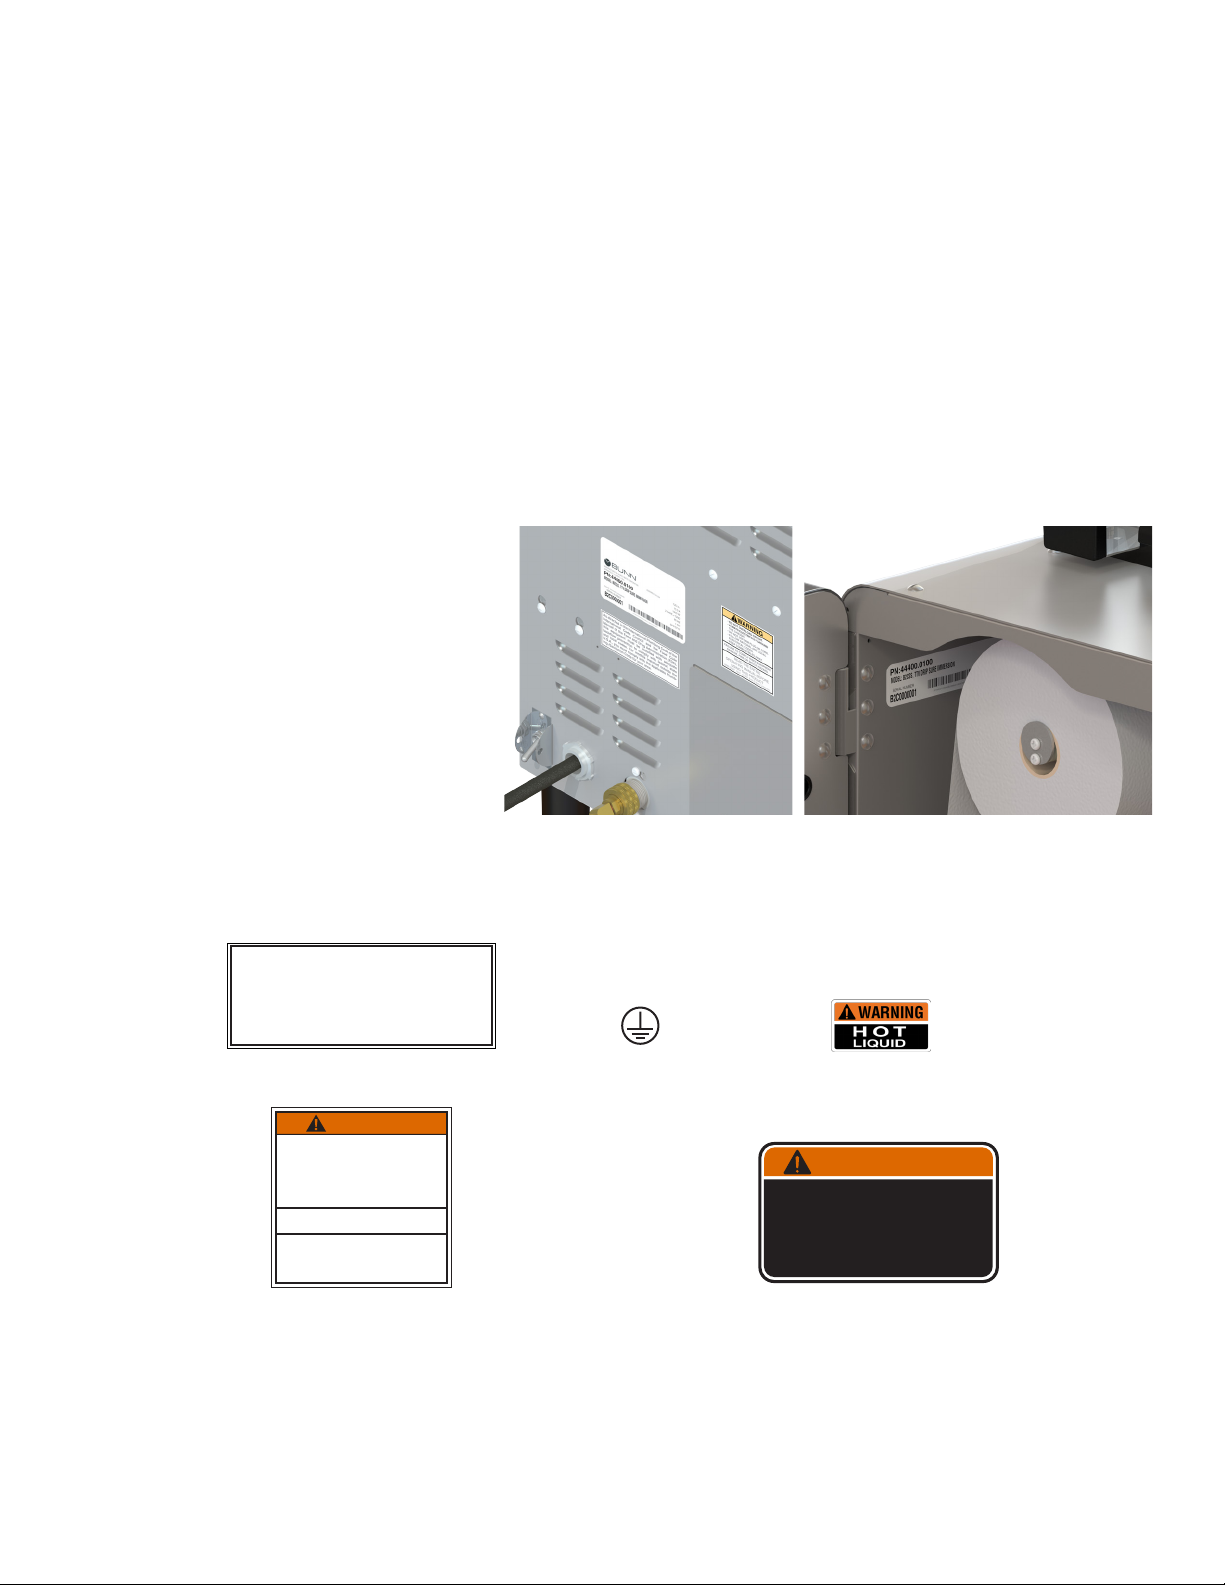
Location of the Serial Number
The serial number is located on the data
plate at the rear of the machine and inside front door on left side.
The complete serial number will need
to be documented on all work orders
and warranty tags.
CONTENTS
......................................................................................... 4
............................................................................. 17
............................................................................ 20
......................................................................................... 25
................................................................................... 27
USER NOTICES
Carefully read and follow all notices on the equipment and in this manual. They were written for your
protection. All notices are to be kept in good condition. Replace any unreadable or damaged labels.
As directed in the International Plumbing Code of the
International Code Council and the Food Code
Manual of the Food and Drug Administration (FDA),
this equipment must be installed with adequate
backflow prevention to comply with federal, state
and local codes. For models installed outside the
U.S.A., you must comply with the applicable Plumbing /Sanitation Code for your area.
00656.0001
WARNING
• DO NOT OVERLOAD CIRCUIT.
• ALWAYS ELECTRICALLY GROUND
THE CHASSIS.
• DO NOT DEFORM PLUG OR CORD.
• FOLLOW NATIONAL AND LOCAL
ELECTRICAL CODES.
• KEEP COMBUSTIBLES AWAY.
FAILURE TO COMPLY RISKS EQUIPMENT
DAMAGE, FIRE OR SHOCK HAZARD.
READ THE ENTIRE
OPERATING MANUAL BEFORE
USING THIS PRODUCT
00986.0000F 10/07 ©1994 Bunn-O-Matic Corporation
00986.0000
• Unplug the machine or turn off the main switch before servicing the interior components of the machine.
• Never operate the machine without water.
• Never touch brew module, spouts, and hot water dispense pipes. They are HOT and could cause burns.
• The machine must be operated with clean water. Make sure to use water filters and/or softeners as needed.
00824.0002
Warnings
35710.0000
WARNING
To reduce the risk of electric shock,
do not remove or open cover.
No user-serviceable parts inside.
Authorized service personnel only.
Disconnect power before servicing.
37881.0000
3
53058.0 071117
Page 4

NORTH AMERICAN REQUIREMENTS
• This appliance must be installed in locations where it can be overseen by trained personnel.
• For proper operation, this appliance must be installed where the temperature is between 41°F to 95°F (5°C to
35°C).
• Appliance shall not be tilted more than 10° for safe operation.
• An electrician must provide electrical service as specified in conformance with all local and national codes.
• This appliance must not be cleaned by pressure washer.
• This appliance can be used by persons aged from 18 years and above if they have been given supervision or
instruction concerning use of the appliance in a safe way and if they understand the hazards involved.
• Keep the appliance and its cord out of reach of children aged less than 18 years.
• Appliances can be used by persons 18 years and above with reduced physical, sensory or mental capabilities
or lack of experience and knowledge if they have been given supervision or instruction concerning use of the
appliance in a safe way and understand the hazards involved.
• Children under the age of 18 years should be supervised to ensure they do not play with the appliance.
• If the power cord is ever damaged, it must be replaced by the manufacturer or authorized service personnel
with a special cord available from the manufacturer or its authorized service personnel in order to avoid a hazard.
• Machine must not be immersed for cleaning.
• Cleaning and user maintenance shall not be made by children unless they are older than 18 years and supervised.
• This appliance is intended for commercial use in applications such as:
– staff kitchen areas in shops, offices and other working environments;
– by clients in hotel and motel lobbies and other similar types of environments;
• Access to the service areas permitted by Authorized Service personnel only.
CE REQUIREMENTS
• This appliance must be installed in locations where it can be overseen by trained personnel.
• For proper operation, this appliance must be installed where the temperature is between 5°C to 35°C.
• Appliance shall not be tilted more than 10° for safe operation.
• An electrician must provide electrical service as specified in conformance with all local and national codes.
• This appliance must not be cleaned by water jet.
• This appliance can be used by persons aged from 18 years and above if they have been given supervision or
instruction concerning use of the appliance in a safe way and if they understand the hazards involved.
• Keep the appliance and its cord out of reach of children aged less than 18 years.
• Appliances can be used by persons 18 years and above with reduced physical, sensory or mental capabilities
or lack of experience and knowledge if they have been given supervision or instruction concerning use of the
appliance in a safe way and understand the hazards involved.
• Children under the age of 18 years should be supervised to ensure they do not play with the appliance.
• If the power cord is ever damaged, it must be replaced by the manufacturer or authorized service personnel
with a special cord available from the manufacturer or its authorized service personnel in order to avoid a hazard.
• Machine must not be immersed for cleaning.
• Cleaning and user maintenance shall not be made by children unless they are older than 18 years and supervised.
• This appliance is intended to be used in household and similar applications such as:
– staff kitchen areas in shops, offices and other working environments;
– by clients in hotels, motels and other residential type environments;
– bed and breakfast type environments.
• This appliance not intended to be used in applications such as:
– farm houses;
• Access to the service areas permitted by Authorized Service personnel only.
• The A-Weighted sound pressure level is below 70 dBA.
4
53058.0 031717
Page 5
SITE REQUIREMENTS
Plumbing
1. These brewers must be connected to a cold water system with operating pressure between 20 and 90 psi
(0.138 and 0.620 MPa) from a 1⁄4" or larger supply line. Install a regulator in the line when pressure is greater
than 90 psi (0.620 MPa) to reduce it to 50 psi (0.345 MPa).
2. Shut off valve should be present between water supply and machine.
3. Flush the water line and securely attach it to the inlet fitting at the rear of the brewer.
4. Turn on the water supply.
NOTE - Bunn-O-Matic recommends 1⁄4" copper tubing for installations of less than 25 feet and 3⁄8" for more
than 25 feet from the 1⁄2" water supply line. A tight coil of copper tubing in the water line will facilitate moving
the brewer to clean the counter top. Bunn-O-Matic does not recommend the use of a saddle valve to install the
brewer. The size and shape of the hole made in the supply line by this type of device may restrict water flow.
Water Treatment
1. No Chlorine.
2. Water Hardness 6 to 10 grains or less total hardness
3. Water Filtration System
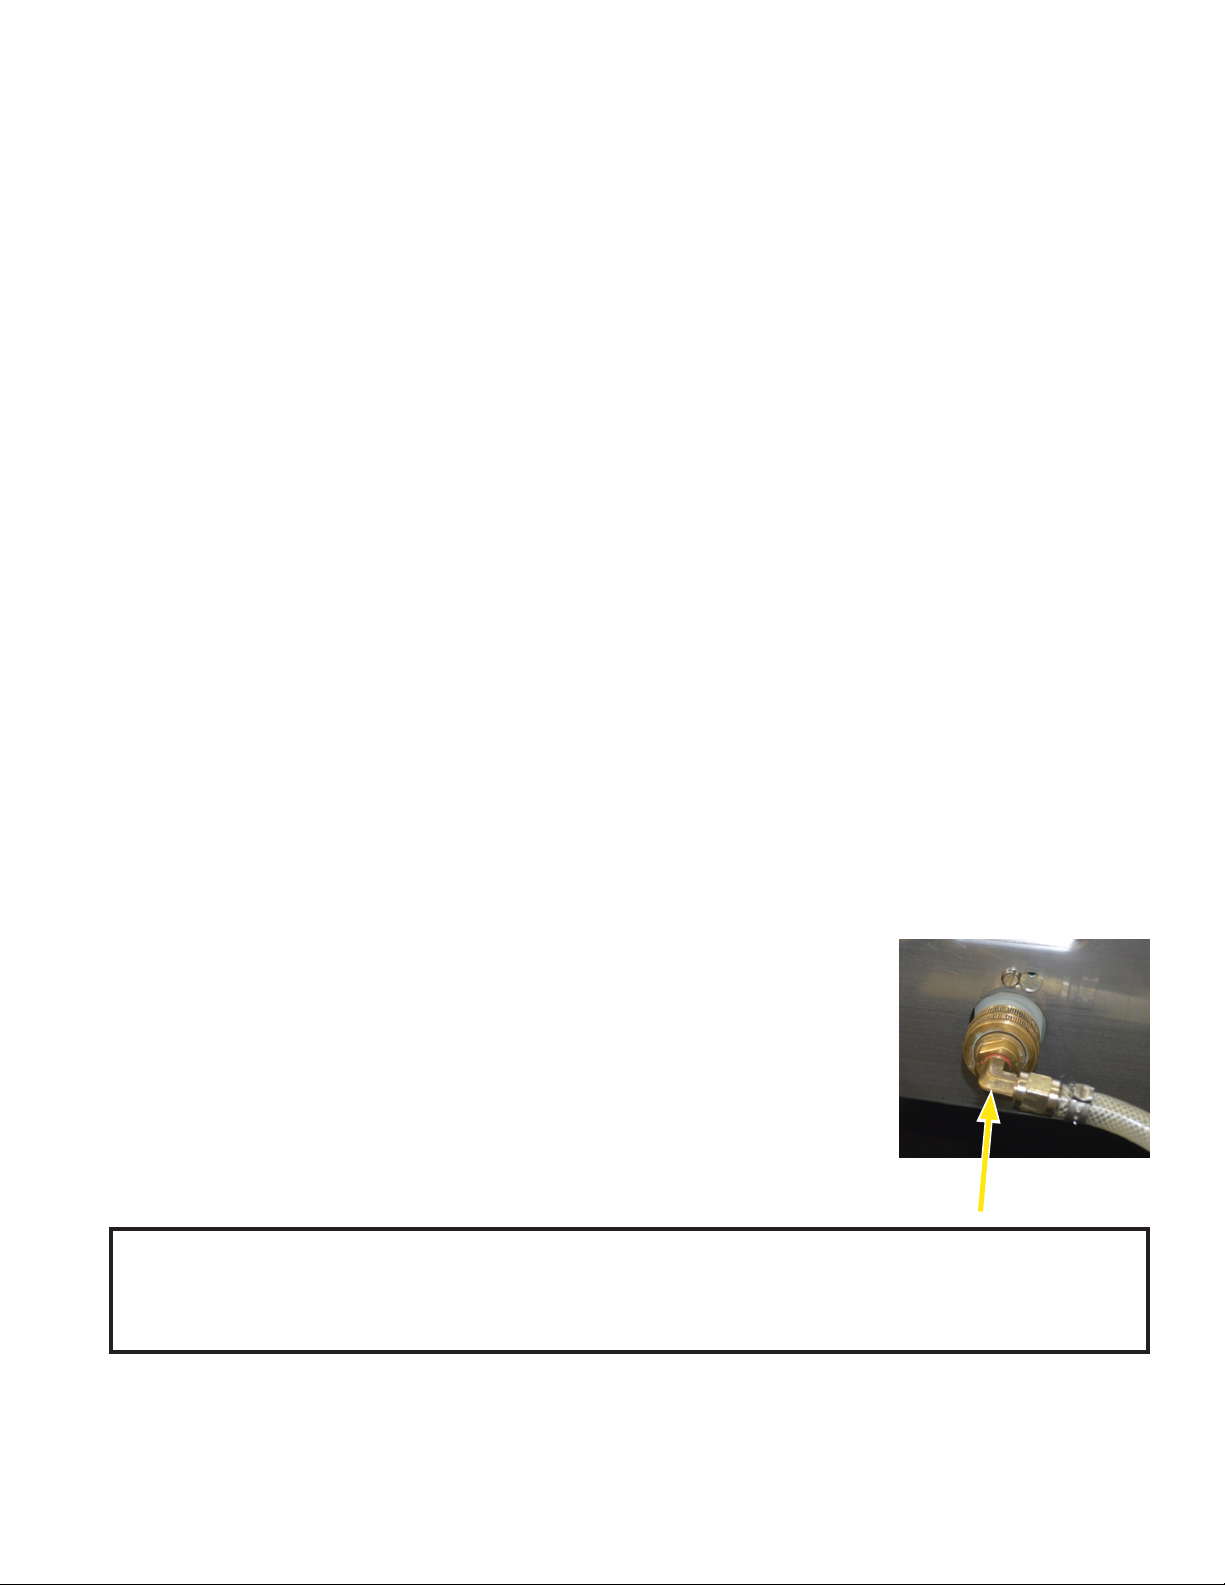
PLUMBING HOOK-UP
The plumbing connection is a 1/4"” male flare adapter located on the lower rear of the
machine
NOTE – Water pipe connections and fixtures directly connected to a potable water supply
shall be sized, installed, and maintained in accordance with federal, state, and local codes.
as shown.
As directed in the International Plumbing Code of the International Code Council and the Food Code Manual of
the Food and Drug Administration (FDA), this equipment must be installed with adequate backflow prevention
to comply with federal, state and local codes. For models installed outside the U.S.A., you must comply with
the applicable Plumbing /Sanitation Code for your area.
5
53058.0 072017
Page 6
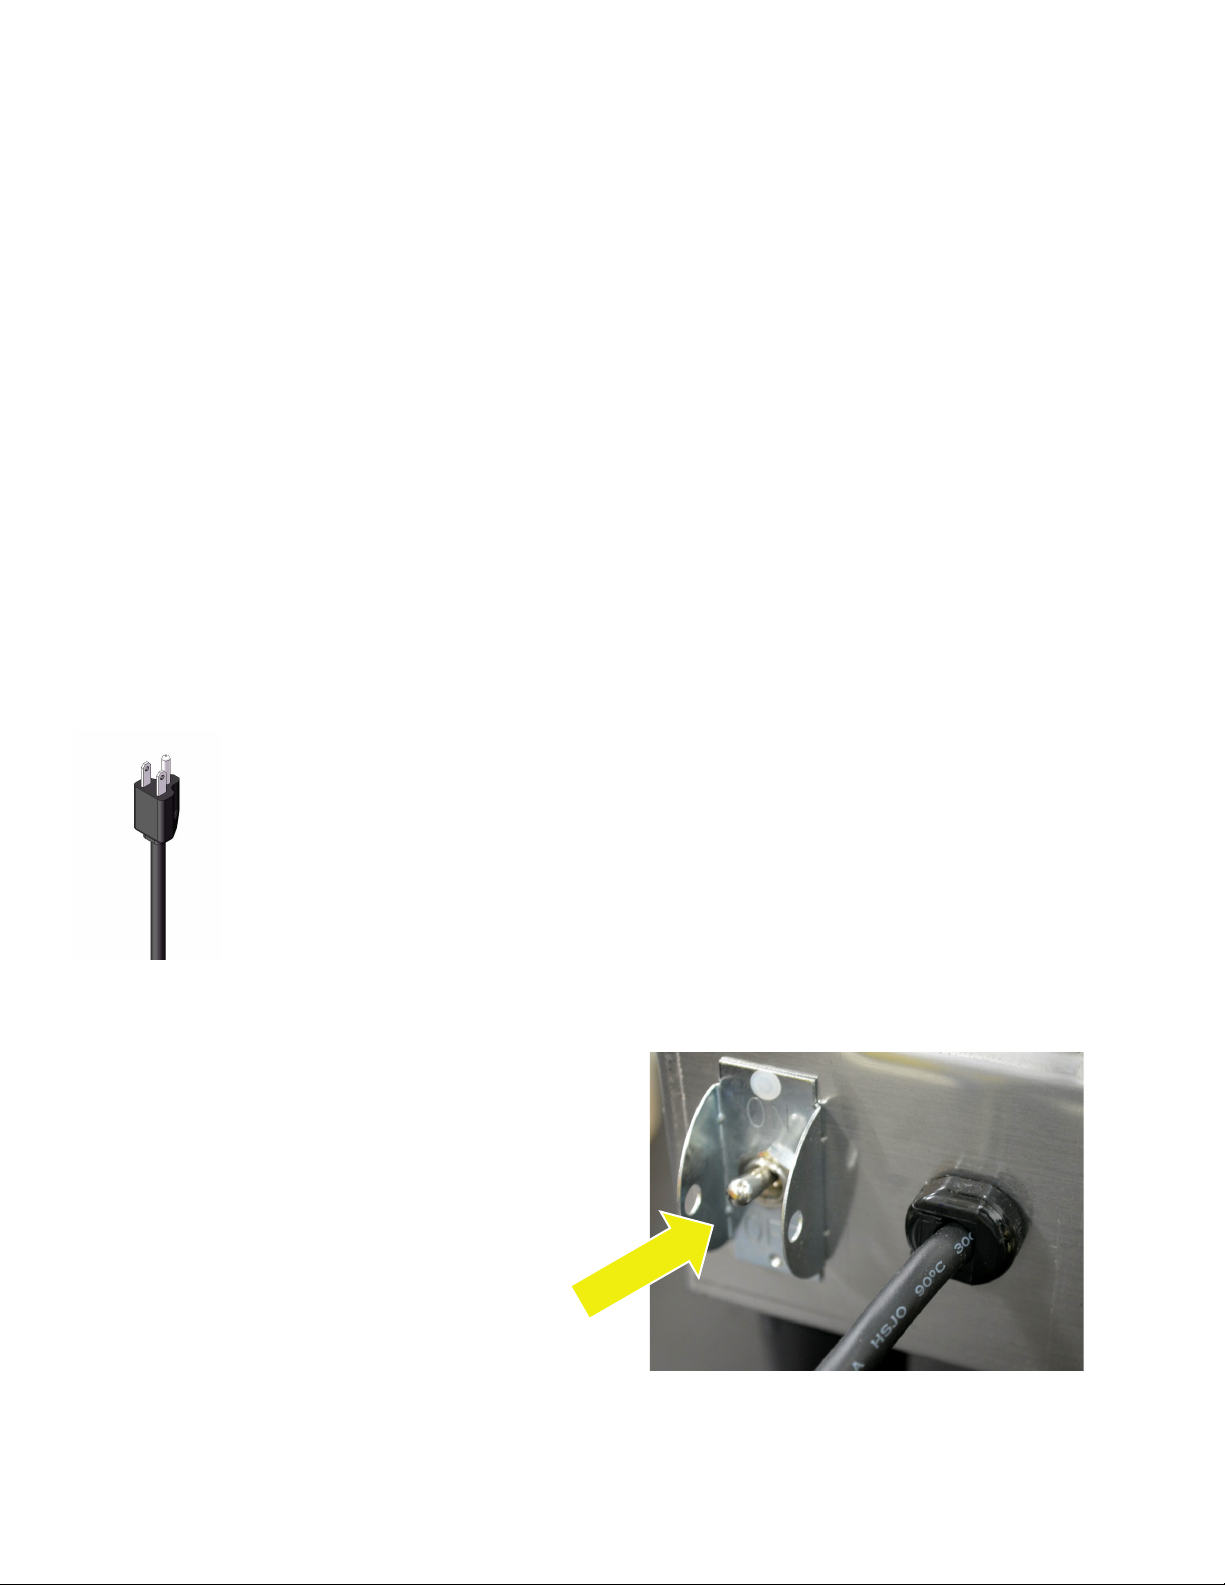
ELECTRICAL HOOKUP
FOR INDOOR USE ONLY
Site Requirements
1. Counter able to support at least 200 pounds (90kg).
2. Counter area large enough for machine.
3. Minimum clearance of 2˝ around machine.
4. Machine must be level within 2˚ for proper operation. Power
cord with L6-30 plug supplied with machine.
WARNING -
The brewer must be disconnected from the power source until specified in Initial Set-Up.
Refer to Data Plate on the Brewer, and local/national electrical codes to determine circuit requirements.
Electrical Hook-Up
CAUTION - Improper electrical installation will damage electronic components.
1. An electrician must provide electrical service as specified.
2. Using a voltmeter, check the voltage and color coding of each conductor at the electrical source.
3. Connect the dispenser to the power source.
4. If plumbing is to be hooked up later be sure the dispenser is disconnected from the power source. If
plumbing has been hooked up, the dispenser is ready for Initial Fill & Heat.
120V
Models
120 volt ac models
Note: This electrical service consists of 2 current
carrying conductors (L1 and Neutral) and a
separate conductor for chassis ground.
POWER SWITCH LOCATION
6
53058.0 071417
Page 7
INITIAL SET-UP
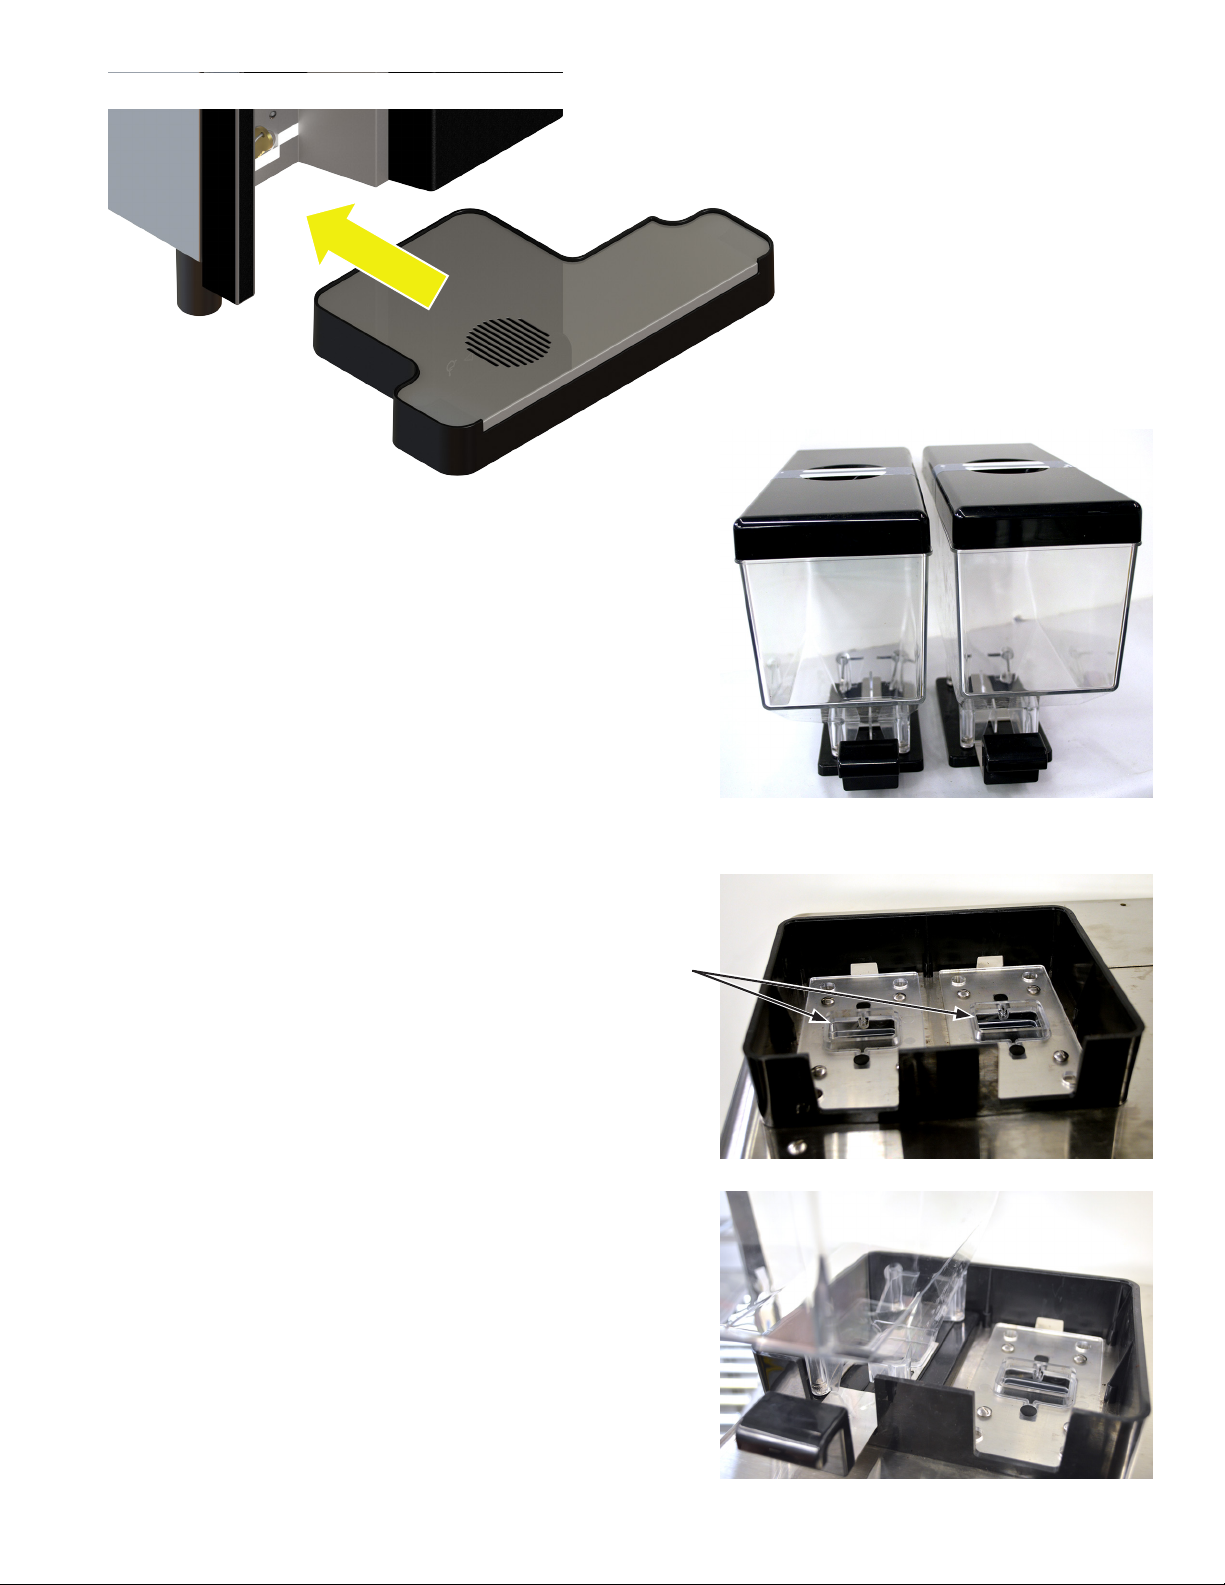
Figure 1
2. Remove the bean hoppers from the packaging, and note the
differences; shown in the image to the right; is the Left hopper
and the Right hopper (Figure 2). They cannot be installed opposite to this configuration.
1. Unpack the drip tray assembly
and slide it in between the front legs.
Remove taped keys from above drip
tray and use them to unlock the front
door. (Figure 1).
Figure 2
3. Prior to installing the bean hoppers, visually verify that
there are no obstructions or debris blocking the bean chutes
(Figure 3) or bean detection sensors (not shown).
Chutes
Figure 3
4. Shown is the left hopper set in place (Figure 4). The hopper
should sit flat.
Left Right
Figure 4
7
53058.0 071417
Page 8

INITIAL SET-UP - continued
5. Push the hopper locking lever towards the back (Figure 5).
This locks the hopper in place and allows beans to flow downward to the grinder.
6. Repeat Steps 3 and 4 for Right Hopper.
Lock Lever
7. The hoppers are ready to be filled with beans (Figure 6).
Figure 5
Figure 6
8. Unlock and open the front door to reveal the
inside of the machine. The lower right area is where the
waste bin resides. Remove packing/tape from waste bin and
brew funnel area. (Figure 7).
Figure 7
9. With the water supply line connected to the unit, turn the water on & check for leaks.
10. Connect the unit to the power source (plug it in), and turn the unit on by setting the power switch to the "ON"
position. NOTE: The door must be closed to begin the initialization sequence, it may take 60-90 seconds, and
the machine will cycle in preparation for operation.
11. Once the initialization sequence is complete, the filter paper must be loaded.
• Refer to "FILTER PAPER INSTALLATION" on next page.
8
53058.0 071917
Page 9
FILTER PAPER INSTALLATION
Installing Filter Paper
1. Open the door to access the brewing
system.
2. On the lower right, turn the paper roll
handle to the vertical position (as shown in
Figure 8), then pull forward to remove the
paper take up roller.
3. Load the filter paper as shown in Figure 9.
NOTE: Filter paper should be at least three
inches (3") past the take up roller position.
Figure 8
Figure 9
9
53058.0 072017
Page 10

FILTER PAPER INSTALLATION - continued
4. With the handle in the vertical position (as
shown in Figure 10), slide the roller through
the guide, with filter paper engaging the slot in
the roller.
5. Push the roller in until it engages the roller
drive, then turn the handle clockwise to the
horizontal position (Figure 11).
Figure 10
10
Figure 11
53058.0 031717
Page 11

FILTER PAPER INSTALLATION - continued
6. Close the door, then press and hold the "BUNN" logo icon (at the top of the screen) for three (3) seconds,
to access the "SERVICE ACCESS" screen.
7. In the lower left corner of the "SERVICE
ACCESS" screen appears a " ADVANCE PAPER"
button. Press and hold the advance paper
button. It will stop when there is a sufficient
amount of filter paper on the take-up roller.
8. Press the "BUNN" logo icon button at the
bottom of the screen to return to the home
screen.
TOUCH SCREEN
1. The machine serial number is found on the
Service Access screen, upper left corner as
shown. The Software version is shown in the
upper right corner of the Service Access screen
as shown.
2. The Information Bar located at the bottom of
the home screens (as shown), provides status
of active notice information.
11
53058.0 031717
Page 12

OPERATING INTERFACE
NOTE: The machine comes pre-loaded with four (4) recipes; two (2) hot beverage, and two (2) cold beverage.
1. The first screen to appear is a "User" interface
screen, also known as the beverage "Carousel".
Drink selections viewable are accessed by swiping left or right across the screen, or by touching the arrows located on the left and right.
Press the desired drink icon to select.
2. Once a selection has been made by touch-
ing the screen, the user is prompted to select
the desired beverage size, and then to place the
beverage container (cup) on tray below. The
user will then touch the "START" button on the
screen to begin.
Note: If the beverage selected is an iced beverage, the screen will prompt the user to fill the
cup with ice prior placing the beverage container (cup) on the tray.
3. The next screen after pressing the start button
is the "Grinding" screen. The user is shown the
coffee selection and that the coffee beans are
being ground. The user can press the "STOP"
during this process to cancel this beverage.
12
53058.0 071017
Page 13

OPERATING INTERFACE - continued
4. The next screen shown after "Grinding" is
"Immersing" where brew water is added to the
ground beans.
5. The next screen after "Immersing", is the
"Brewing" screen. The the ground beans and
brew water is allowed to sit permitting the flavors to bloom.
13
53058.0 071017
Page 14

OPERATING INTERFACE - continued
7. The next screen shown to the user is the "Dis-
pensing" screen. The user's selection is now
being dispensed.
8. If the "STOP" button has been pressed, the
user will be presented with a new screen that
indicates that the unit has "Paused" (cancelling)
the beverage selection.
9. After pressing the "RESET" button, the user
will be presented with a new screen indicating
that the machine is "RESETTING". Note: Do not
remove your cup from the drip tray while the
machine is resetting. This is a system reset &
the machine will perform a reset cycle - liquid
may be dispensed.
The user will then be returned to the original
selection screen.
14
53058.0 071017
Page 15

ADA OPERATING INTERFACE
1. To activate the ADA screen interface, the user
must press the accessibility symbol (wheelchair
icon).
This will cause the screens to be modified with a
blue banner at the top and a blue highlight around
the item being selected. The left/right arrows will
move the blue highlight from one selection to the
next.
2. From the ADA interface, the user uses the
Left and Right arrows to navigate the screens.
First, select one of beverages. Pressing the
"OK" button enters a selection. Pressing the "X"
cancels the selection.
Note: If the beverage selected is an iced beverage,
the screen will prompt the user to fill the cup with
ice prior placing the beverage container (cup) on
the tray.
3. All buttons ( previous, small, medium, large, and
start) are selected using left/right arrows. Press
"OK" to enter selection.
15
53058.0 071417
Page 16

ADA OPERATING INTERFACE
4. Press start.
5. During operation, the following screens will ap-
pear in this order: Grinding, Immersing, Brewing,
Dispensing. The user can press the "STOP" during
this process to cancel this recipe selection.
6. The Stop/Reset is automatically highlighted. The
user can cancel and reset by pressing "OK" or "X".
16
53058.0 070717
Page 17

OPTIONAL CASHLESS PAYMENT SYSTEM
1. Place cup under dispense nozzle. Select cup size. 2. Swipe credit/debit card to start process.
3. Press the “CHECKOUT” button to lock in size
selection.
4. Press the “START” button to dispense.
17
53058.0 071117
Page 18

MAINTENANCE
Removing Spent Filter Paper
When the take-up roller has reached the maximum allowable amount, the machine will signal a paper roller full
condition, and lock out brewing. The used paper must be removed.
1. To remove the used paper, press and hold the "BUNN" logo icon at the top of the screen for three (3) sec-
onds, to access the "SERVICE ACCESS" screen.
2. In the lower left corner of the "SERVICE AC-
CESS" screen appears a " ADVANCE PAPER"
button. Press & hold the advance paper button
for three (3) seconds to dispense all of the used
grounds. DOOR MUST REMAIN CLOSED!
3. Open the brewer door, and cut or tear the
filter as shown in Figure 12.
Figure 12
18
53058.0 070717
Page 19

Removing Spent Filter Paper (Continued)
4. Turn the handle for the paper take-up roller
to the vertical position (as shown in Figure 13),
then pull the handle away from the machine to
remove.
Figure 13
5. Remove the used paper roll from the machine (Figure 14), or push it into the grounds
bin.
Refer to "Filter Paper Installation" to reset the
take-up roller.
Figure 14
19
53058.0 071017
Page 20

SERVICE ACCESS - Care And Cleaning
Care and Cleaning - General Cleaning
The use of a damp cloth rinsed in any mild, non-abrasive, liquid detergent is recommended for cleaning all
surfaces on Bunn-O-Matic equipment.
Exterior Surfaces:
• Do not use any abrasive materials.
• Use a soft, dry cloth to wipe down the exterior surfaces of the dispenser to maintain the luster of the
stainless steel finish.
• Wash the stainless steel interior surfaces of the dispenser with warm, soapy water. Rinse with warm,
clear water. If the water is hard, wipe the dispenser dry with a soft cloth to prevent spotting.
• Use cleaning cloth provided, to clean the acrylic door panel.
Daily: Parts Washing
1. Remove and wash the drip tray and drip tray cover in a mild detergent solution. Rinse thoroughly.
2. Wipe the lower front panel, door, and cabinet with a clean damp cloth.
Care and Cleaning
From the "Service Access" screen, press the
"Care and Cleaning"" button to access the
Care and Cleaning screens.
Cleaning supplies included with machine. Brush and cloth for touchscreen cleaning,
low foam tablets formulated specifically for the Sure Immersion™.
20
53058.0 071817
Page 21

SERVICE ACCESS - Care And Cleaning - continued
Daily - System Rinse Cycle
Care and Cleaning - Rinse
Selecting the "Rinse" tab from the Care and
Cleaning screen will prepare the equipment for
rinsing the brew funnel and brew box. Follow
the directions shown on the screen.
Care and Cleaning - Rinse - Please Wait
Once the "Start" button has been pressed, the
care and cleaning screen will show a progress
bar - with the message "Please Wait - Rinsing".
If for any reason the rinsing process needs to
be halted, press the "Stop" button. The machine will pause. The user will then need to
press the reset button to reset the machine.
Insure the 64oz (2 liter) pitcher is ready to
capture any water that is dispensed during the
reset sequence.
21
53058.0 072017
Page 22

SERVICE ACCESS - Care And Cleaning - continued
Weekly - Care and Cleaning
From the "Service Access" screen, press the
"Care and Cleaning" button to access the
Care and Cleaning screens.
Care and Cleaning - Clean
Selecting the "Clean" tab from the "Care and
Cleaning" screen will prepare the equipment for
cleaning of the brew system. Follow the directions shown on the screen.
Press the "Start" button to begin.
NOTE: In the upper left corner of the screen is
a back arrow button that will allow the user to
return to the previous Advanced Access screen.
Care and Cleaning - Clean continued
Once the "Start" button has been pressed, the
"Care and Cleaning" screen will change providing the operator with new instructions.
Once a clean has been started, the user can not
exit without completing the cleaning or performing a stop/reset.
22
53058.0 050117
Page 23

SERVICE ACCESS - Care And Cleaning - continued
Weekly Care and Cleaning - Clean continued
Once the "Continue" button has been pressed,
the operator will be presented with a new
screen indicating that the cleaning process has
begun, and to "Please Wait ... Removing Loose
Grounds".
If at any time during the cleaning cycle, the
process needs to be halted, press the "Stop"
button. The machine will reset, and return to
the original start-up screen.
Care and Cleaning - Clean continued
During the "Removing Loose grounds" step,
there no operator interaction except for waiting.
After the "Removing Loose Grounds" step has
been completed, the operator will be prompted
with a new screen. Follow the directions
indicated on the screen. Press the "Continue"
button to resume the cleaning process.
Care and Cleaning - Clean continued
With the cleaning tablet inserted into the
funnel, and the continue button pressed, the
operator will be shown a new screen indicating
that cleaning is in process. (top of next page)
23
53058.0 050117
Page 24

SERVICE ACCESS - Care And Cleaning - continued
Care and Cleaning - Clean continued
Weekly Care and Cleaning - Touch Screen Cleaning
With internal cleaning complete, the operator
will be prompted with a new screen to "Begin
Cleaning Touch Screen", by pressing "Start".
Care and Cleaning - Touch Screen Cleaning - continued
During the "Touch Screen Cleaning", the
system will shown a countdown, indicating time
remaining to clean the touchscreen.
During the time allotted for cleaning the touch
screen, screen functions will be disabled.
Clean the touchscreen using the cloth provided
in the cleaning products. Surface should be free
of debris and dry to the touch once completed.
Once the allotted time for touch screen cleaning
has expired, the system will reset, and return to
the home screen.
24
53058.0 031717
Page 25

Care and Cleaning - Weekly Cleaning
Brew Funnel: Removal & Washing
The brew funnel can be removed for a more thorough cleaning; this is recommended weekly or more
often if required (heavy usage of the machine).
1. Open front door to remove brew funnel. Funnel must be in the upper position to be removed.
2. Slide the rubber hose (Figure 15) (attached to
the brew funnel) towards the rear of the machine
to disconnect it from the brew funnel.
3. While pressing down on both flat springs under
the funnel arms, pull the funnel down and toward
front of machine to release it from the funnel
arms (Figure 16).
Figure 15
Figure 16
25
53058.0 050117
Page 26

Care and Cleaning - Weekly Cleaning continued
4. Clean the funnel using any mild, non-abrasive, liquid detergent. Do Not use abrasives to clean as this can
damage the surface of the funnel. Rinse and Dry.
5. To reinstall the funnel, tip the top edge of the
funnel under the coffee chute, and place the metal
pins on the flat springs. Push down and toward
the rear of the machine to snap the funnel into
the funnel arms (Figure 17).
Rear of funnel
engaged under
coffee chute
6. Reconnect the rubber hose by sliding it over
the funnel inlet fitting. The hose must be fully
engaged on the fitting (Figure 18).
Engage funnel
hose fully on
inlet fitting
Figure 17
Funnel pins on
flat spring
7. Close the front door to resume normal operation.
26
Figure 18
53058.0 050117
Page 27

SERVICE ACCESS - ACTIVE NOTICES
Active Notices
From the "Service Access" screen, press the
"Active Notices"" button to access the
Active Notices screens.
Active Notices
The "Active Notices" screen will display by name
& description, any faults that have occurred,
and give probable causes, and a solution to
clear the fault.
An "Event Log" button is located in the lower
right portion of the screen, and can be used to
view previous events (Notices).
Service contact information is also provided.
Event Log
On the "Event Log" screen, press the
"Date Range" button to access the a complete
history of events based upon calander dates.
This screen will display the event name, the
date it occurred, what time of the day it occurred, how many times it happened, and the
machine's state. Use the up or down arrows
shown on the left side of the screen to scroll
through the events list.
Pressing the "Refresh Log" button located
in the lower right portion of the screen will
refresh the list.
Pressing the "Export Log" button located in the
lower right portion of the screen will allow the
user to export the log to a USB stick.
27
53058.0 050117
 Loading...