

Page 1
Diverse 4016 Classic ~ Issue 2 ~ 6th Edition ~ 1st March ’02 ~ 4416
X
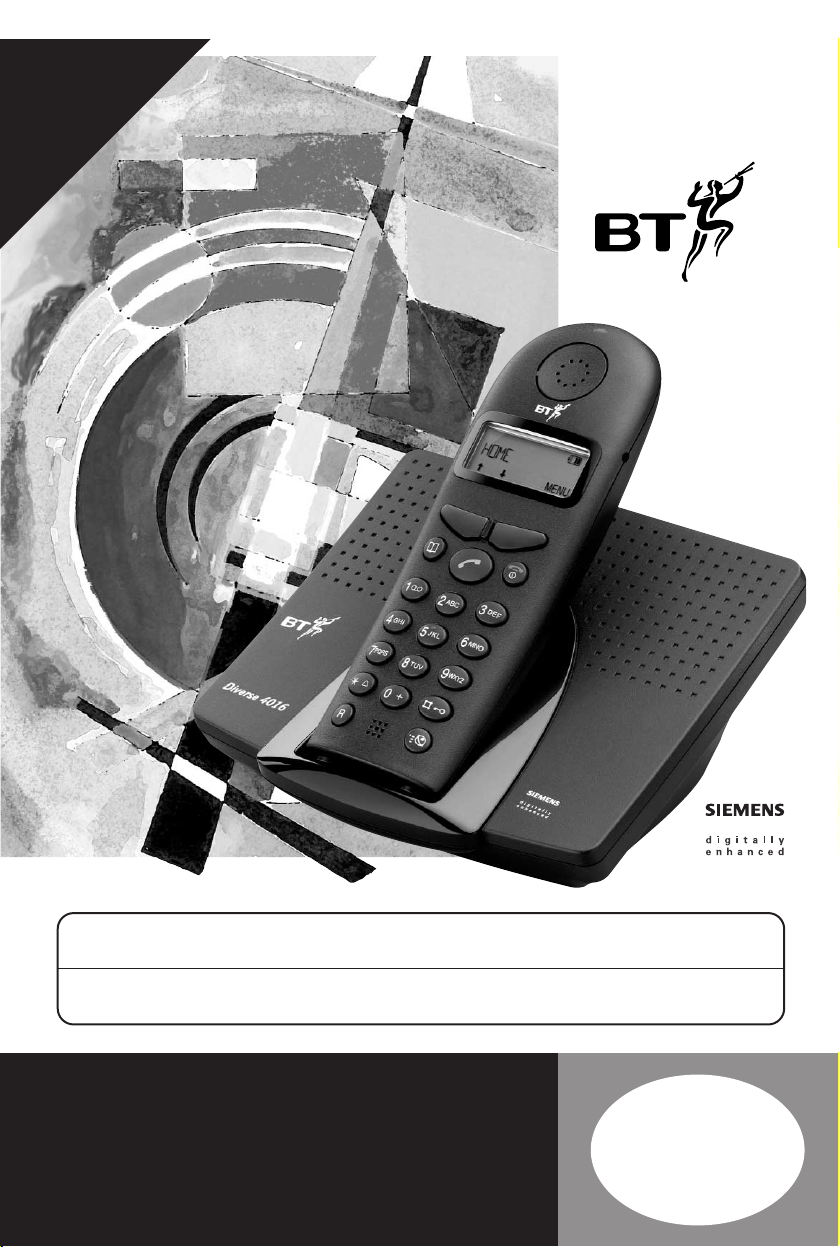
Diverse 4016 Classic
Digital Cordless Telephone Answering Machine
User
Guide
*YOU MUST
SUBSCRIBE TO A
CALLER DISPLAY AND
CALL WAITING SERVICE
BEFORE YOUR DIVERSE 4016
CLASSIC WILL DISPLAY THIS
INFORMATION. A QUARTERLY
FEE IS PAYABLE.
This equipment is not designed for making emergency telephone calls when the power fails.
Alternative arrangements should be made for access to emergency services.
This product is intended for connection to analogue public switched telephone networks
and private switchboards in the United Kingdom.
The Art of Communication
Page 2

Diverse 4016 Classic ~ Issue 2 ~ 6th Edition ~ 1st March ’02 ~ 4416
Please open this page for an ‘At a glance’
guide to your Diverse 4016 Classic.
Page 3
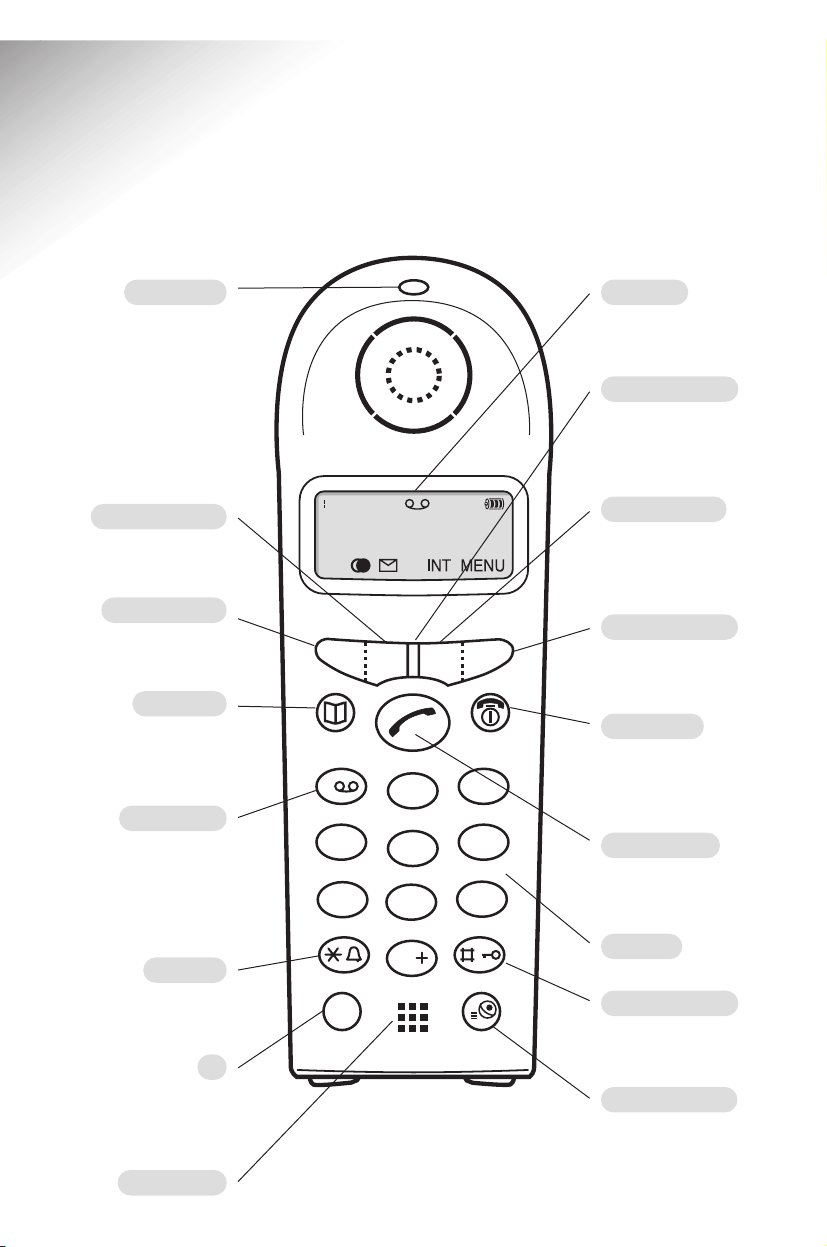
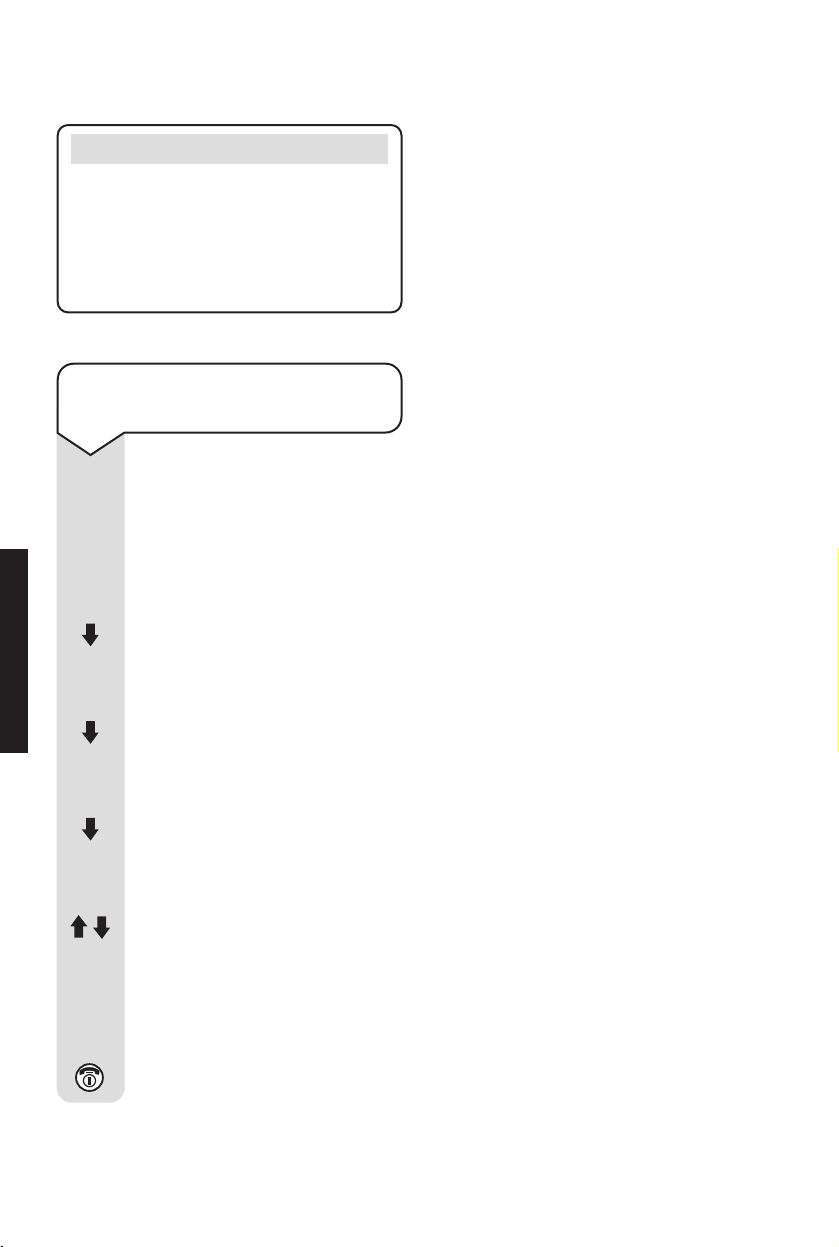
At a glance
Option buttons
Lets you select from
the menu options shown
on the display.
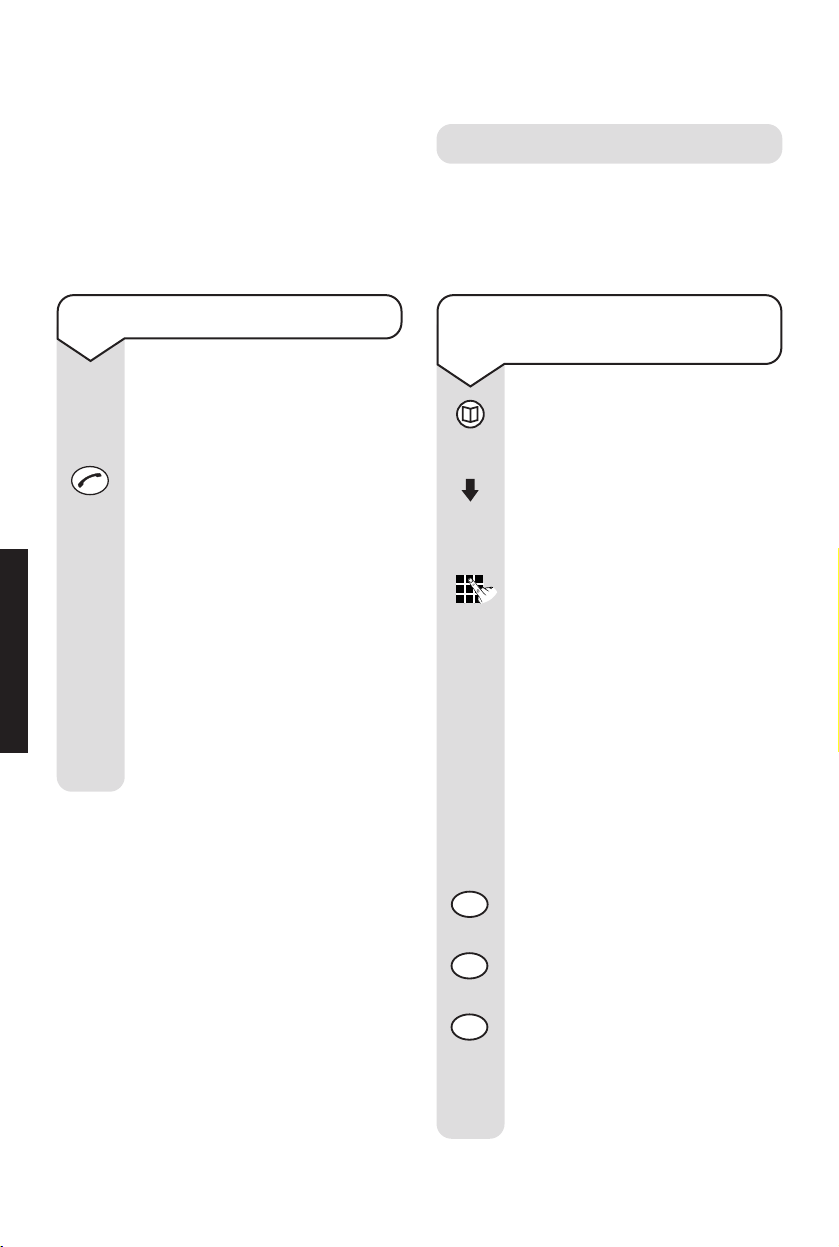
Green phone
For making and
answering calls.
One button
Apart from being the
number one button,
you can hold down to
access your answering
machine.
In use light
Lights up to indicate an
incoming call, an alarm
call or when the handset
is in use.
The light also flashes to
indicate that you have
new messages on your
answering machine.
Star/Bell
Switches the handset
ringer on and off.
Hash/Keyguard
Switches the keypad
guard on and off.
R
For use with
switchboards and certain
Network Services.
Keypad
Microphone
Display
Displays the status of
your handset.
Extra Directory
Used to store
10 additional names
and numbers.
Red phone
To end a call, return to
idle and turn the power
off and on.
Right hand side
Takes you into the
menu options.
Left hand side
To access list of internal
handsets registered to
the base
Directory
Used to store and
dial numbers in the
directory.
Right hand side
Takes you into
the calls list.
Left hand side
Takes you into
the redial list.
1
Diverse 4016 Classic ~ Issue 2 ~ 6th Edition ~ 1st March ’02 ~ 4416
9
3
6
DEF
MNO
WXYZ
1
GHI
4
PQRS
7
ABC
2
JKL
5
TUV
8
0
R
Page 4
Diverse 4016 Classic ~ Issue 2 ~ 6th Edition ~ 1st March ’02 ~ 4416
2
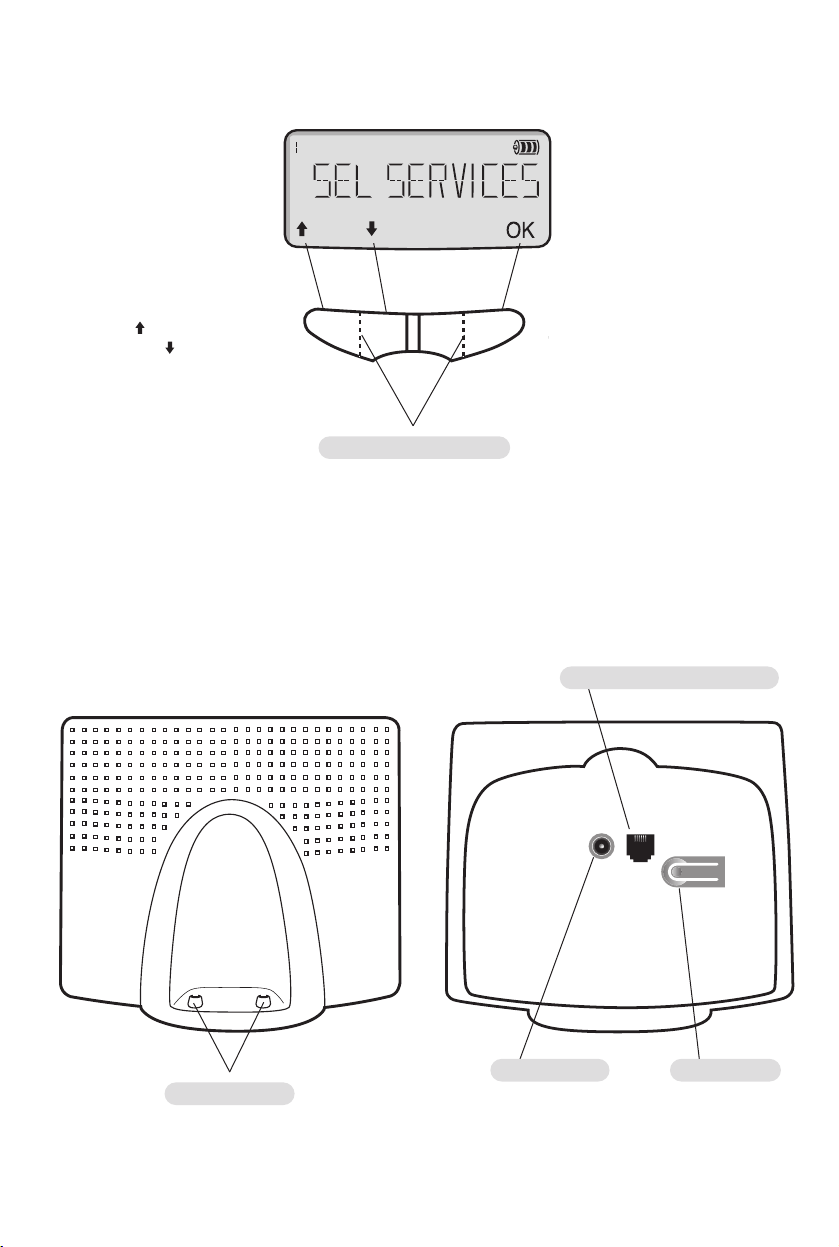
Base
Contact points
Display option buttons
The OPTION buttons allow
you to select options within
each menu that are shown
on the display.
INT MENU-> ->
Press the right side of the
button to confirm (OK)
menu selection.
Press the left side of the
button for and right side of
the button for when going
through the menu options.
Handset display
When in MENU mode
Base underside
Power socket Page button
Telephone line cord socket
Page 5

Diverse 4016 Classic ~ Issue 2 ~ 6th Edition ~ 1st March ’02 ~ 4416
3
In this guide
At a glance 1
Menu structure 4
Quick guide – handset 7
Quick guide – answering
machine 8
Quick guide to handset
display icons 9
Introduction 10
Unpacking your
Diverse 4016 Classic 10
For your records 10
Safety information 11
Setting up 12
Registering and charging
the handset 13
Using the telephone 17
Making and ending calls 17
Call timer 18
Name and number directory 18
Extra directory 20
Redial 21
Secrecy 22
Paging and internal calls 22
Alarm clock 24
Caller Display and
other Select Services 26
Caller Display 26
Calls list 26
Call Waiting 29
Call Divert 30
Withhold number 30
Ring Back 31
Handset settings 32
Keyguard 34
Base station settings 35
Base Station PIN (Personal
Identification Number) 35
Using the answering
machine 37
Play outgoing message 38
Call screening 39
New message indicator 40
Playing messages 40
Additional answering
machine settings 41
Remote access 43
Using additional handsets
and bases 44
Registering additional handsets 44
Help 47
General information 49
Guarantee 49
Technical information 50
Switchboard compatibility 50
Setting pauses 52
Index 53
Hints and tips boxes
In this user guide, we’ve included
helpful tips and important notes.
They are shown in boxes like this.
Helpline
If you experience any difficulties
with your Diverse 4016 Classic,
please call the BT Diverse Helpline
on 08457 908 070.
Page 6

Diverse 4016 Classic ~ Issue 2 ~ 6th Edition ~ 1st March ’02 ~ 4416
4
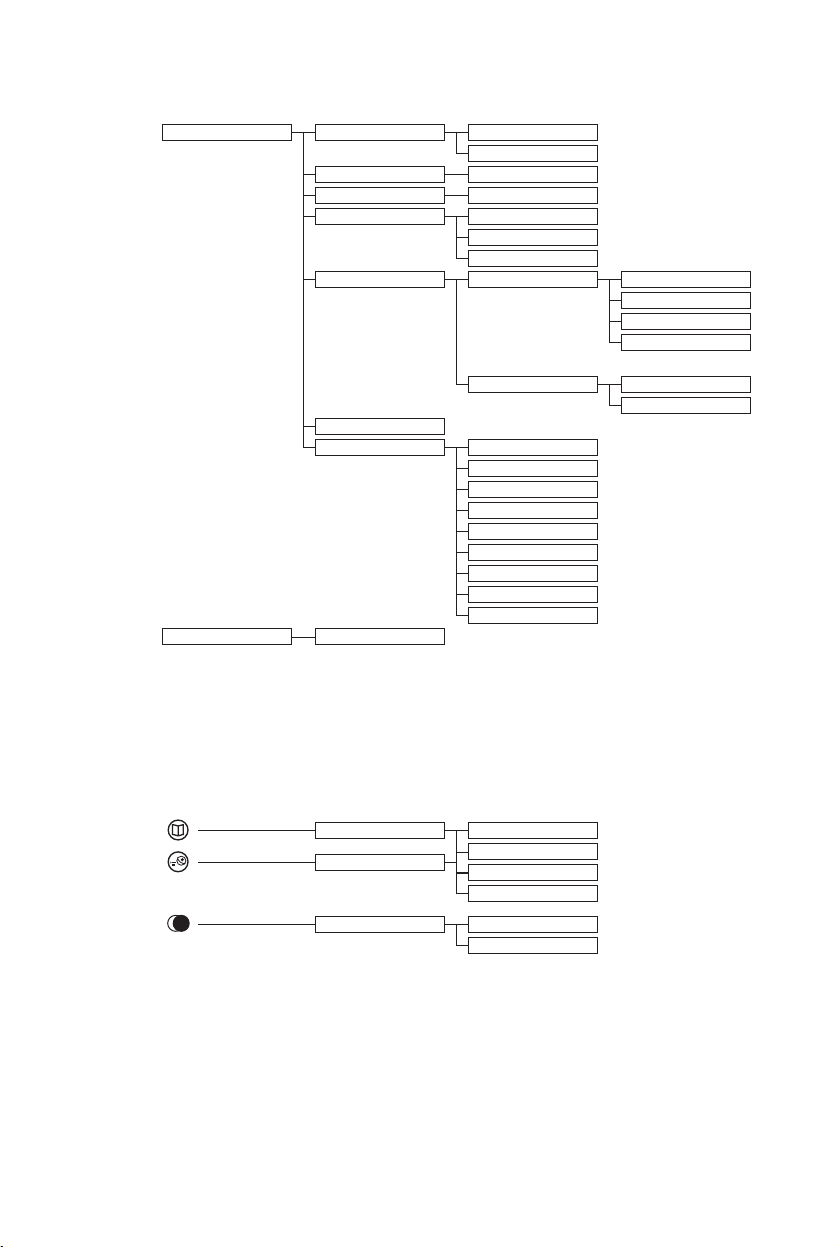
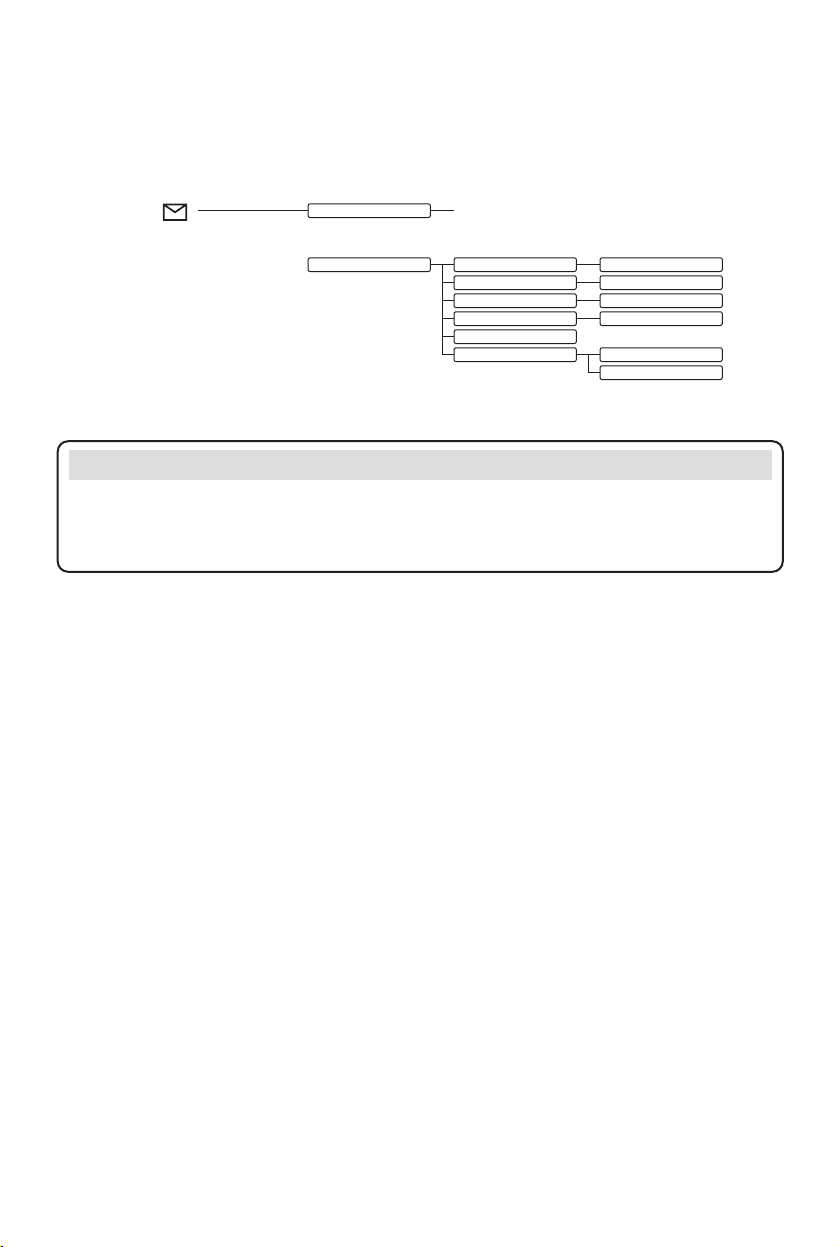
Menu Structure
Sel Services Withhold No.
Call Waiting
Ringback Off
Call Divert
Alarm Clock Enter alarm call time
Audio Set H/Set Vol set
Ringer set
Melody set
Base Set Audio Set up Speaker Vol set
Ringer Vol set
Melody set
Date/Time Date Set
Clock Set
Clock Mode 24H
12H
System PIN enter
Base Reset default
Add Features Dial Mode Tone
Pulse
DTMF-EARTH
tbr 100 MS
120 MS
180 MS
250 MS
300 MS
600 MS
Repeater sure? on/off
Barge In on/off
Page 7
Diverse 4016 Classic ~ Issue 2 ~ 6th Edition ~ 1st March ’02 ~ 4416
5
Voice Mail Set key 1 Ans Machine
Mailbox
Ans Machine on/off
Speaker On/Off on/off
Announcement Rec Anc
Play Anc
Del Anc
Message Set Msg Length 120 sec
60 sec
30 sec
maximum
Quality Long Play
High Quality
Call Screen
Ring Delay time saver
2 rings
3 rings
4 rings
5 rings
6 rings
7 rings
8 rings
9 rings
register hs PIN
Menu structure for directory, redial list, extra directory
Open redial list Edit entry
Copy to dir
Open directory Edit entry
New entry
Open extra directory
Show entry
Delete
Page 8
Diverse 4016 Classic ~ Issue 2 ~ 6th Edition ~ 1st March ’02 ~ 4416
6
IMPORTANT
If you make a mistake, you can return to the previous menu by pressing the RED
PHONE button. If you keep pressing the RED PHONE button you will return to the
idle screen.
Ans M 01 / 02 (If handset is registered to an answering machine base)
Press OK to open list
Calls 02 / 06 Delete delete entry
Press OK to open list Copy To Dir copy no. to directory
Time display date/time
Status indicate new/old
Delete List
List Mode Missed
All
Menu structure for message handling
Page 9

Diverse 4016 Classic ~ Issue 2 ~ 6th Edition ~ 1st March ’02 ~ 4416
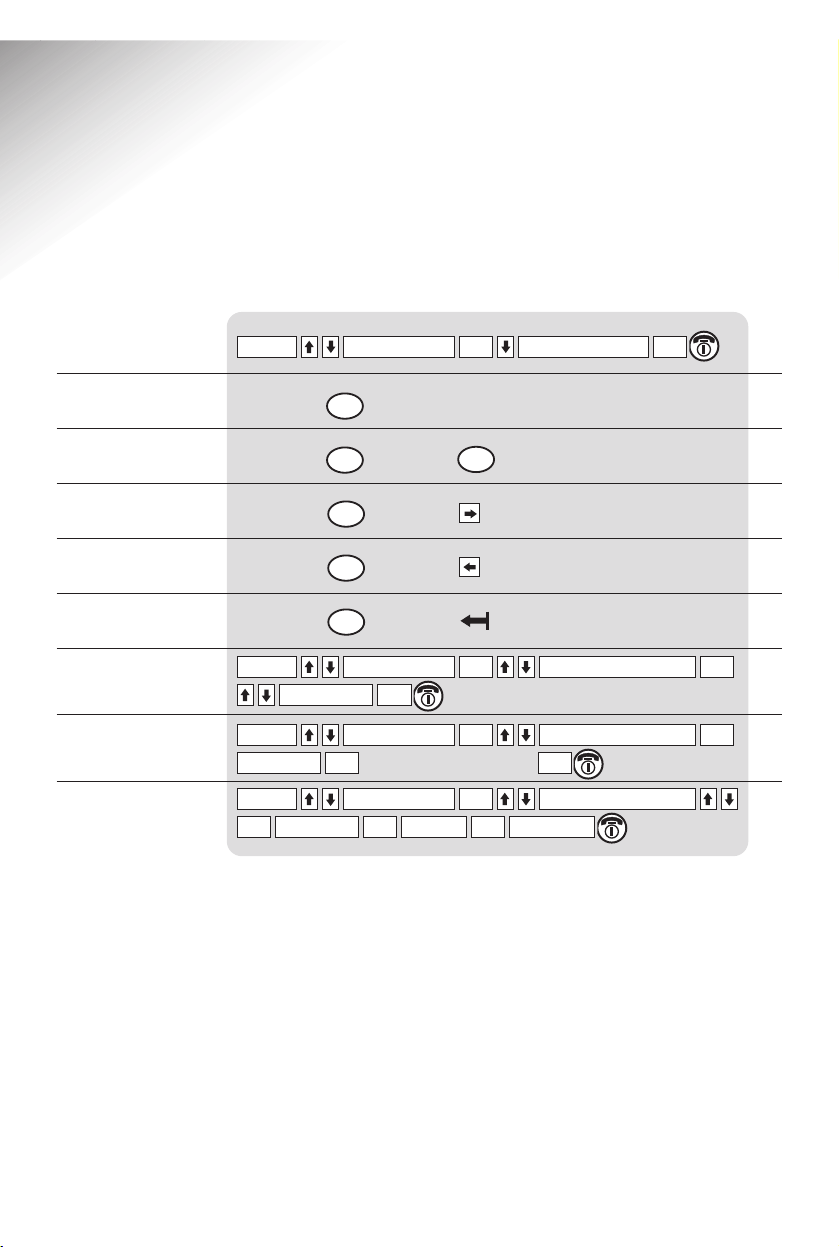
7
Quick guide
Commonly used handset functions and settings
Page
no.
Hold down
Hold down
Hold down
Select one of last 5 numbers
Enter number
Enter name
Call all or
Handset no. (e.g. 2)
Enter date
Enter time
Enter the alarm time
To select AM/PM
OK
ALARM CLOCK
MENU
OK
OKOK
ALARM CLOCK
MENU
OKAM/PMOKOKCLOCK SETOK
DATE/TIMEOKBASE SETMENU
OKOKDATE SET
OKDATE/TIMEOKBASE SETMENU
INT
INT
SAVEDOKOKH/SET VOLOKAUDIO SETMENU
OK
SAVEDOK
OKOKNEW ENTRYMENU
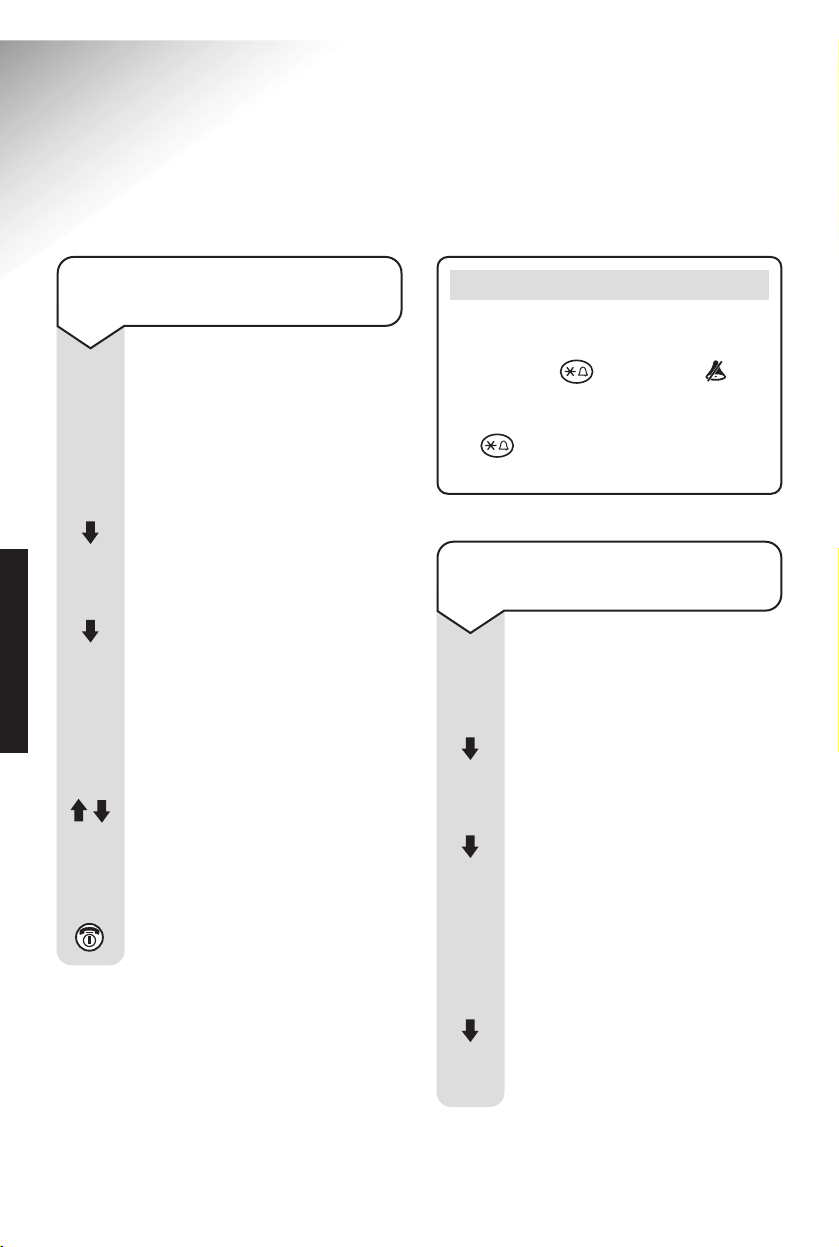
Switch handset on/off
Switch keyguard on/off
Switch handset ringer
on/off
Make an external call
To end a call
Redial a number
To store a name and
number in the directory
Dial from the directory
Dial from the Calls list
Handset earpiece volume
Make internal call
Transfer call to handset
Set date
Set time
Set the alarm
Cancel the alarm
17
34
32
17
17
21
18
19
27
33
22
23
15
15
24
25
Page 10
Diverse 4016 Classic ~ Issue 2 ~ 6th Edition ~ 1st March ’02 ~ 4416
8
Quick guide
Commonly used answering machine functions and settings
Hold down
Hold down then press
Hold down then press
Hold down then press
Hold down then press
record your message
DELETEDOKSURE?OKDEL ANCOK
ANNOUNCEMENTOKVOICE MAILMENU
OKOKREC ANC
OKANNOUNCEMENTOKVOICE MAILMENU
OKPLAY ANC
OKANNOUNCEMENTOKVOICE MAILMENU
1
OKANS MACHINEOKVOICE MAILMENU
Switch answering machine
off (factory setting on)
Play messages
Pause/continue playback
Skip forward to the next
message
Skip backward to the last
message
Delete current message
Play outgoing message
Record your outgoing
message
Delete outgoing message
37
40
40
40
40
40
38
37
39
Page
no.
1
1
1
1
2
Page 11
Diverse 4016 Classic ~ Issue 2 ~ 6th Edition ~ 1st March ’02 ~ 4416
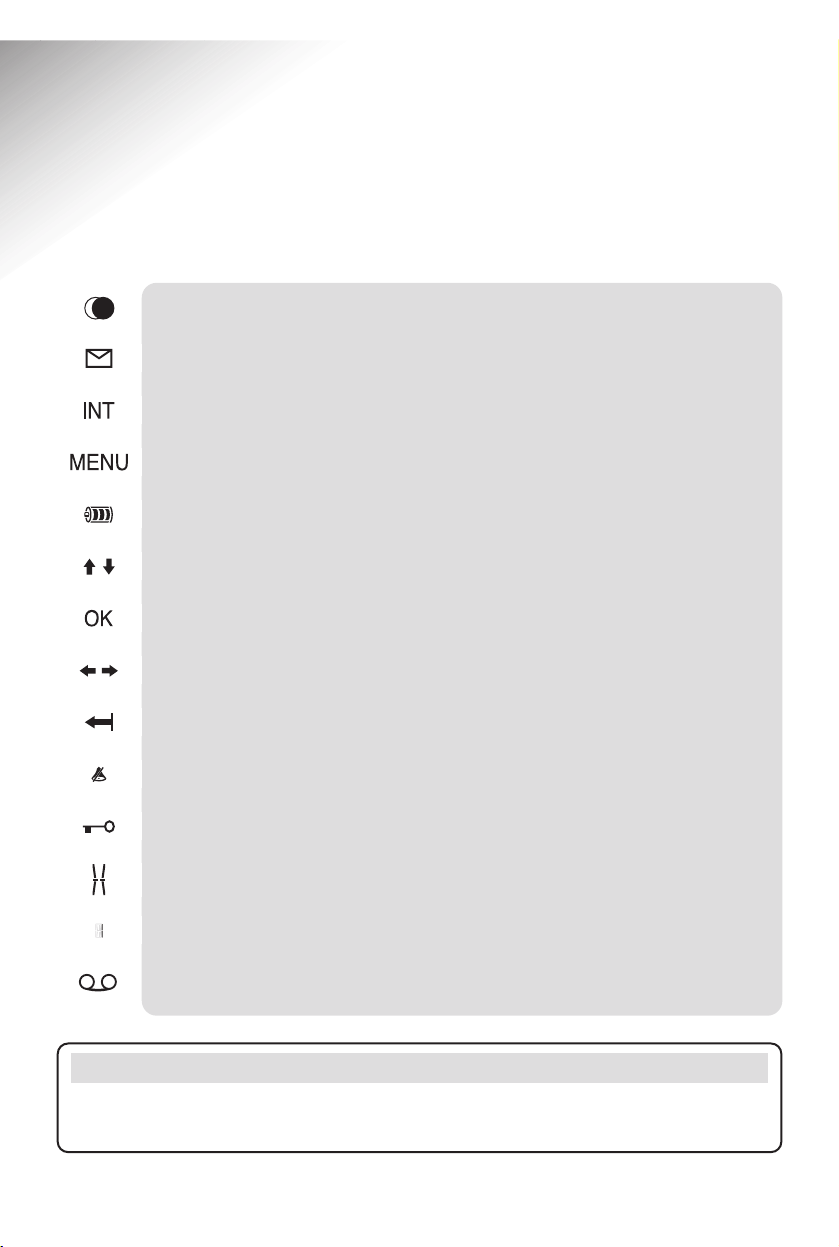
9
Quick guide to handset
display icons
Redial, lists up to the last 5 dialled number.
Flashes to indicate new messages or missed calls.
For calling other handsets.
Opens the menu.
Shows the status of the handset battery.
Scroll through the menu.
Confirms the function displayed.
Scroll left and right when entering numbers or messages.
Deletes numbers/characters (from left to right).
Do not disturb/Ringer off.
Handset locked.
Displayed when the Alarm clock is set.
Shows the number of the handset and is displayed in top left hand corner.
Indicates that the answering machine is on.
eg.
Helpline
If you experience any difficulties with your Diverse 4016 Classic, please call the
BT Diverse Helpline on 08457 908 070.
Page 12
Diverse 4016 Classic ~ Issue 2 ~ 6th Edition ~ 1st March ’02 ~ 4416
10
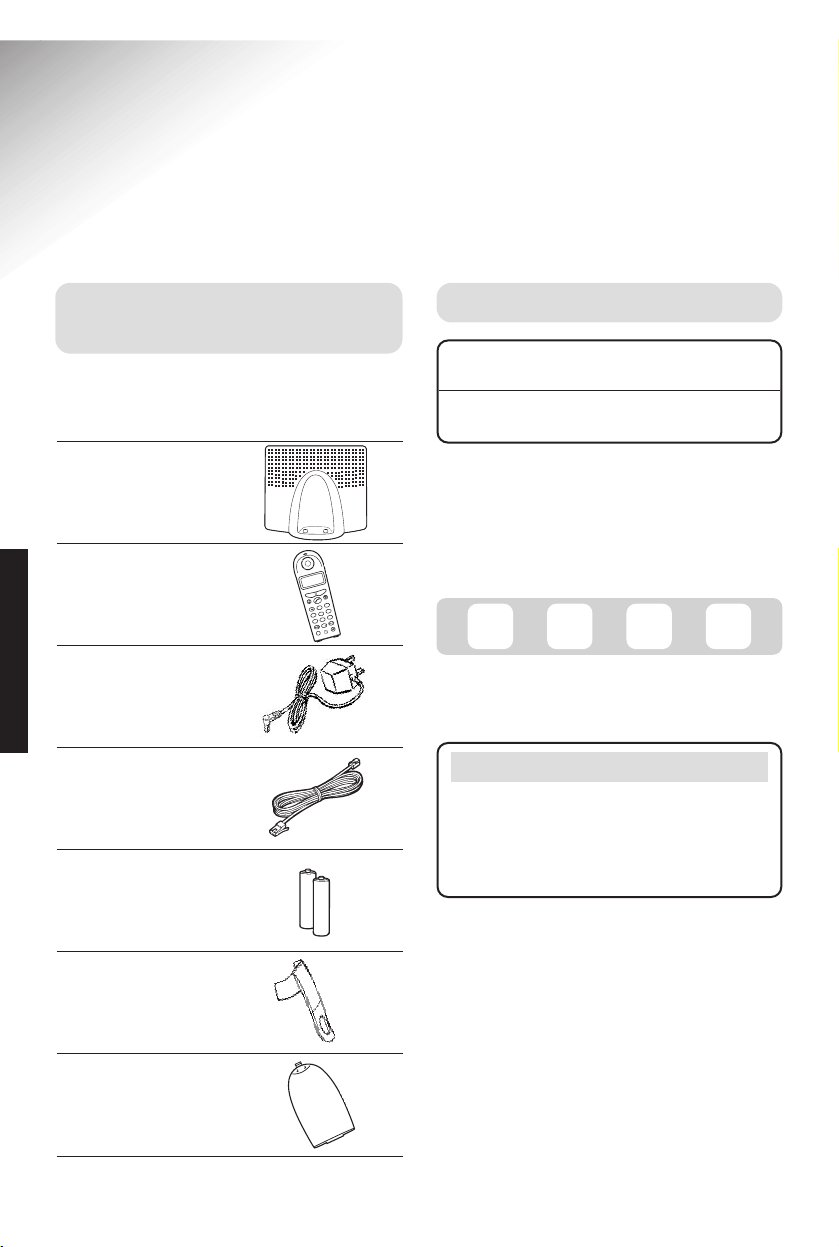
Introduction
Unpacking your
Diverse 4016 Classic
If anything is missing, please contact
your place of purchase immediately.
One Diverse 4016
Classic base station
One Diverse 4000
Classic handset
One power supply
for the base station
One telephone
line cord
Two AA rechargeable
batteries
One belt clip
Battery
compartment cover
For guarantee purposes proof of
purchase is required so please keep
your receipt.
Enter your base station PIN code here:
For more information on your base PIN
codes see page 35.
For your records
Date of purchase:
Place of purchase:
1
4
9
W
X
Y
Z
7
P
Q
R
S
8
T
U
V
G
H
I
3
D
E
F
5
J
K
L
2
A
B
C
6
M
N
O
0
R
䊳
INTRODUCTION
Helpline
If you experience any difficulties
with your Diverse 4016 Classic,
please call the BT Diverse Helpline
on 08457 908 070.
Page 13

Diverse 4016 Classic ~ Issue 2 ~ 6th Edition ~ 1st March ’02 ~ 4416
11
Safety information
General
Only use the power supply included
with the product. Using an
unauthorised power supply will
invalidate your guarantee and may
damage the telephone. Power supply
number is M-GA35-095130F.
For the handset use only approved
nickel-cadmium (NiCad) rechargeable
batteries. Never use other batteries or
conventional alkaline batteries. They
could lead to a short circuit or destroy
the battery casing. Recommended
batteries should have a power rating of
at least 600mAh 1.2V. Please see page 48
for a list of recommended batteries.
Batteries are available from the Diverse
Helpline 08457 908070.
If the Keyguard is switched on, it is
NOT possible to make calls, including
emergency numbers (999/112).
Do not open the base station or handset
(other than to change batteries). This
could expose you to high voltages or
other risks.
Radio signals transmitted between the
handset and base may cause interference
to hearing aids.
This product should not be used near
emergency/intensive care medical
equipment and we do not recommend
that they are used by people with
pacemakers.
Never dispose of batteries in a fire. There
is a serious risk of explosion and/or the
release of highly toxic chemicals.
Cleaning
Simply clean the handset and base
station with a damp (not wet) cloth, or
an anti-static wipe. Never use household
polish as this will damage the product.
Never use a dry cloth as this may cause
a static shock.
Environmental
Do not expose to direct sunlight.
The product may heat up when the
batteries are being recharged. This is
normal. However, we recommend that
you do not place the product on
antique/veneered wood to avoid damage.
Do not stand your product on carpets or
other surfaces which generate fibres, or
place it in locations preventing the free
flow of air over its surfaces.
Do not submerge any part of your
product in water and do not use it in
damp or humid conditions, such as
bathrooms.
Do not expose your product to fire,
explosive or other hazardous conditions.
There is a slight chance that your phone
could be damaged by an electrical storm.
We recommend that you unplug the
power and telephone line cord during an
electrical storm.
SAFETY INFORMATION
Page 14
Diverse 4016 Classic ~ Issue 2 ~ 6th Edition ~ 1st March ’02 ~ 4416
12
Plan the location
Situate your product close enough to
the telephone and mains power sockets
so that the cables will reach.
Make sure it is at least 1 metre away
from other electrical products to avoid
interference.
Do not situate the product in the
bathroom or other humid areas.
WARNING
Do not connect the telephone line cord
to the phone socket until your handset
is fully charged. This will prevent the
risk of the phone being answered
before the battery is charged.
Answering the phone before the battery
is fully charged may prevent it from
reaching its optimum capacity.
IMPORTANT
Please note that your handset is NOT
registered to the base station. The
Diverse 4016 handset will be easily
registered once you complete the steps
1 to 3 below.
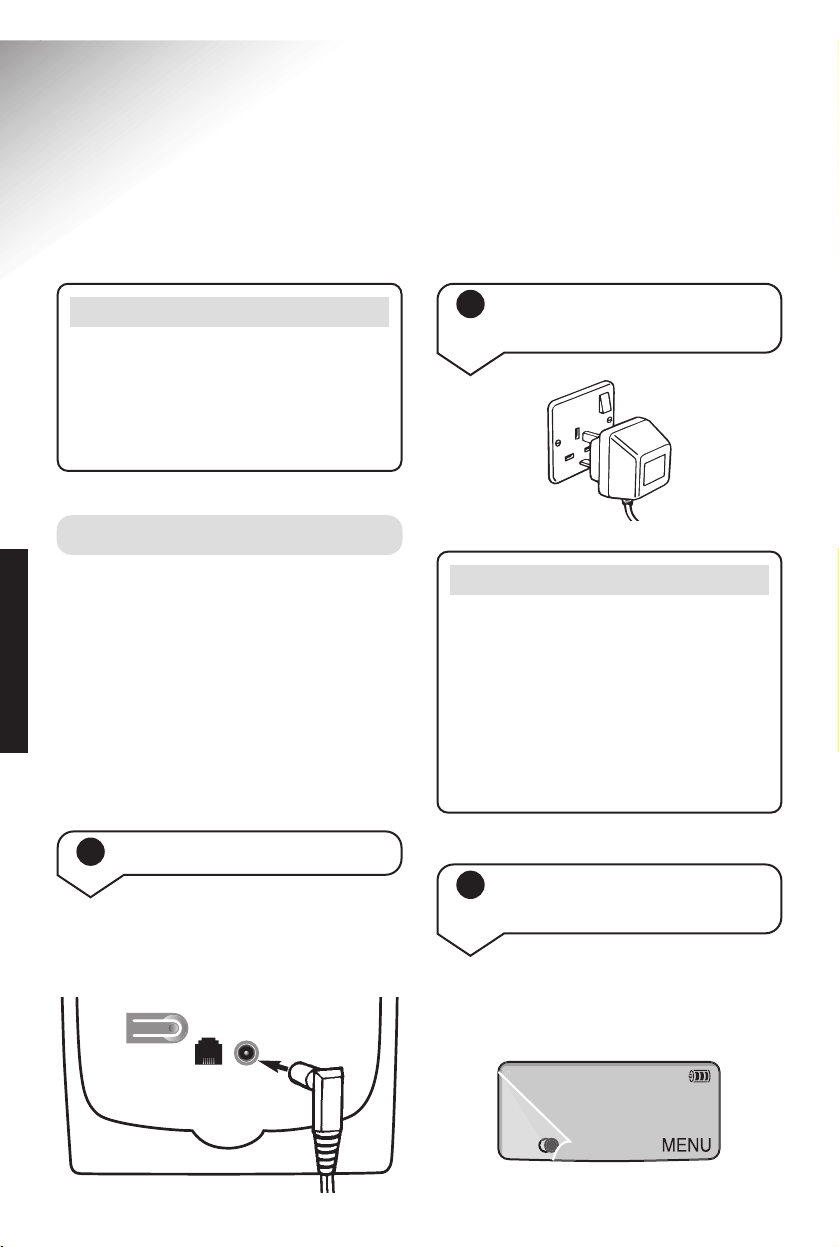
2 Plug the power supply unit
into the wall socket
Setting up
1 Connect the base station
Plug the power supply cable into the
power socket on the underside of
your base.
SETTING UP
3 Registering and charging
the handset
The display is protected by a plastic
film. You can remove this protective
plastic film from the display.
Page 15
Diverse 4016 Classic ~ Issue 2 ~ 6th Edition ~ 1st March ’02 ~ 4416
13
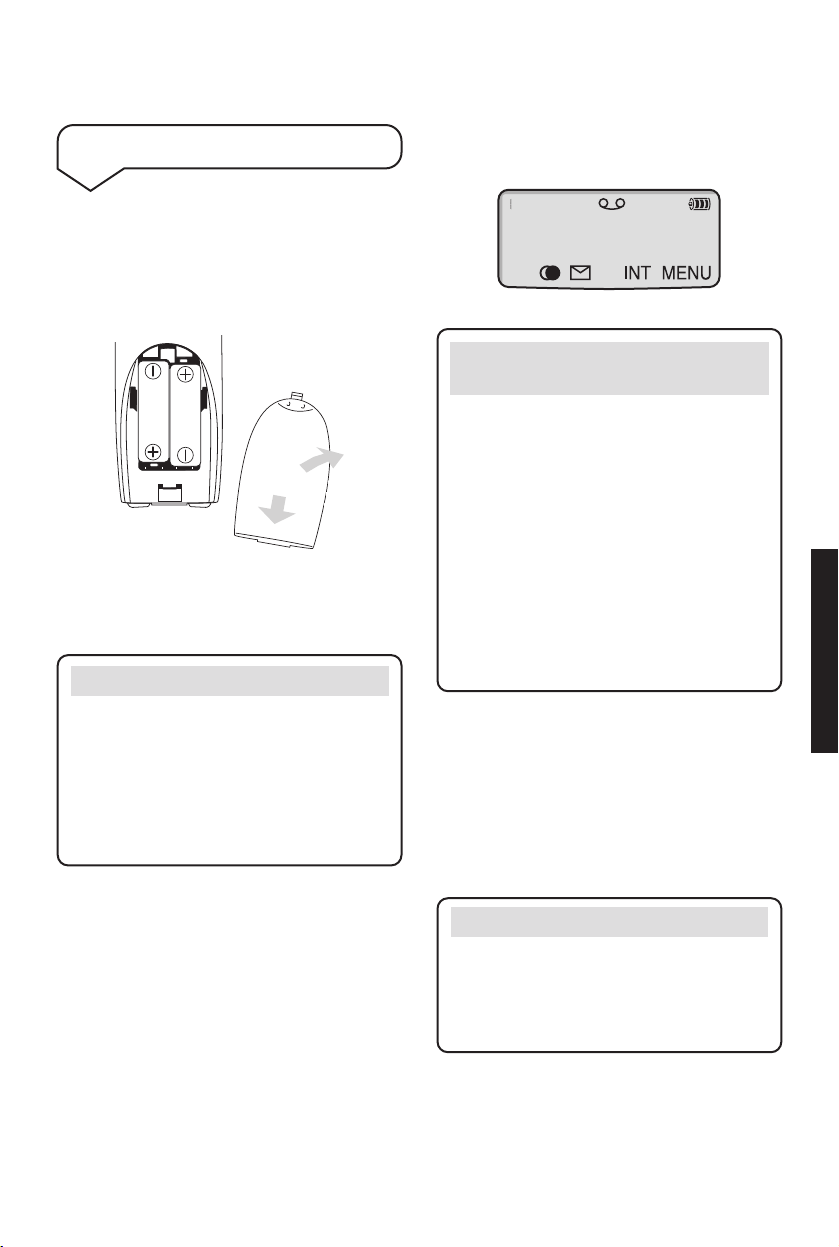
Insert the two batteries supplied,
as indicated inside the battery
compartment and slide the battery
compartment cover shut.
Insert the batteries
When the handset is registered the
display will show:
If the icons on the display
flash continuously...
It means that the handset is not
registered with the base station.
Ensure you have correctly carried out
step 3 above. If the product has still
not registered, please see “Registering
manually” on page 45.
All additional handsets you purchase
will need to be individually registered
with the base station before they will
work with the Diverse 4016 Classic.
Leave the handset for approx. 16 hours
in the base station to charge the
batteries, as they are not charged in the
factory. The battery status icon flashes
on the handset to indicate that the
batteries are being charged.
The battery cover may be found in the
packaging with the batteries.
To register your handset, place it in the
base station with the display facing
upward. After approx. one minute, the
handset's internal number is displayed
(e.g. INT 1). Successful registration is
signalled by a confirmation tone.
SETTING UP
WARNING
Under no circumstances should
non-rechargeable batteries be used.
Only use the approved batteries (please
see page 48). Using unapproved
batteries will invalidate your guarantee
and may damage the telephone.
Helpline
If you experience any difficulties
with your Diverse 4016 Classic,
please call the BT Diverse Helpline
on 08457 908 070.
Page 16
Diverse 4016 Classic ~ Issue 2 ~ 6th Edition ~ 1st March ’02 ~ 4416
14
Battery performance
After charging your handset batteries
for the first time, subsequent charging
time is approximately 4–5 hours.
Batteries and case may become warm
during charging. This is normal.
Under ideal conditions, the handset
batteries should give about 10 hours
talktime or 200 hours standby time on
a single charge. However, new NiCad
batteries do not reach their full
capacity until they have been in
normal use for several days.
Fully discharging the batteries at least
once a week will help them last as
long as possible. However, the charge
capacity of rechargeable batteries will
reduce with time as they wear out, so
reducing the talk/standby time of the
handset. Eventually they will need to
be replaced. New batteries can be
obtained from any BT shop or from
the Diverse Helpline 08457 908070.
If you replace the handset batteries
with ones that have been fully
charged, the battery indicator will not
show full until the next charge cycle
has been completed. Charge the
handset until the batteries register full
again. From then on the display will
be correct.
Out of range?
If you go out of range of a base station
for a long time while your handset is
switched ON, it may take more than
20 minutes to ‘find’ the base station
again when you come back within
range. However, by simply switching
the handset OFF for a moment, then
ON again, it will find the base station
within a few seconds.
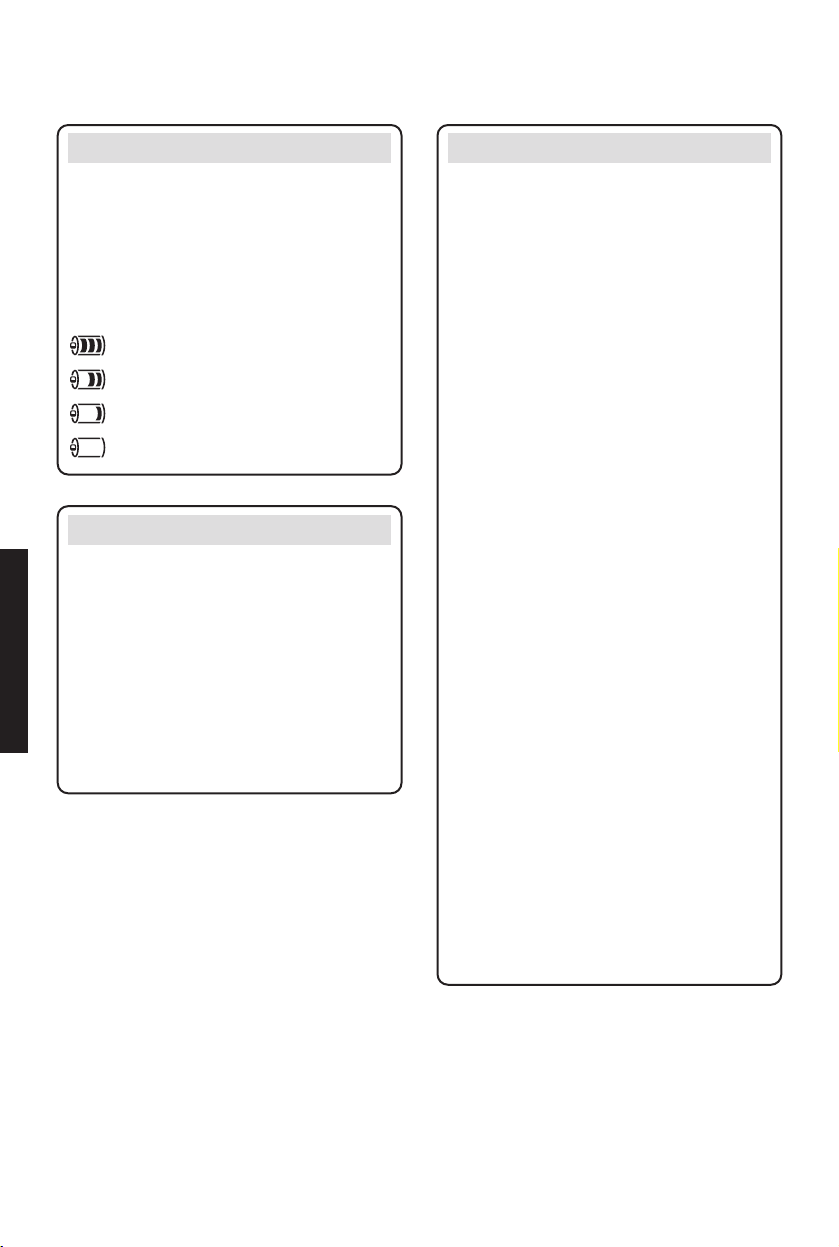
Battery level icons
When the batteries are almost flat a
beep sounds and the display shows the
empty battery icon. You will need to
recharge your handset before you can
use it. The various states of charge are
shown below:
Batteries fully charged
Batteries at 66%
Batteries at 33%
Batteries empty
SETTING UP
Page 17
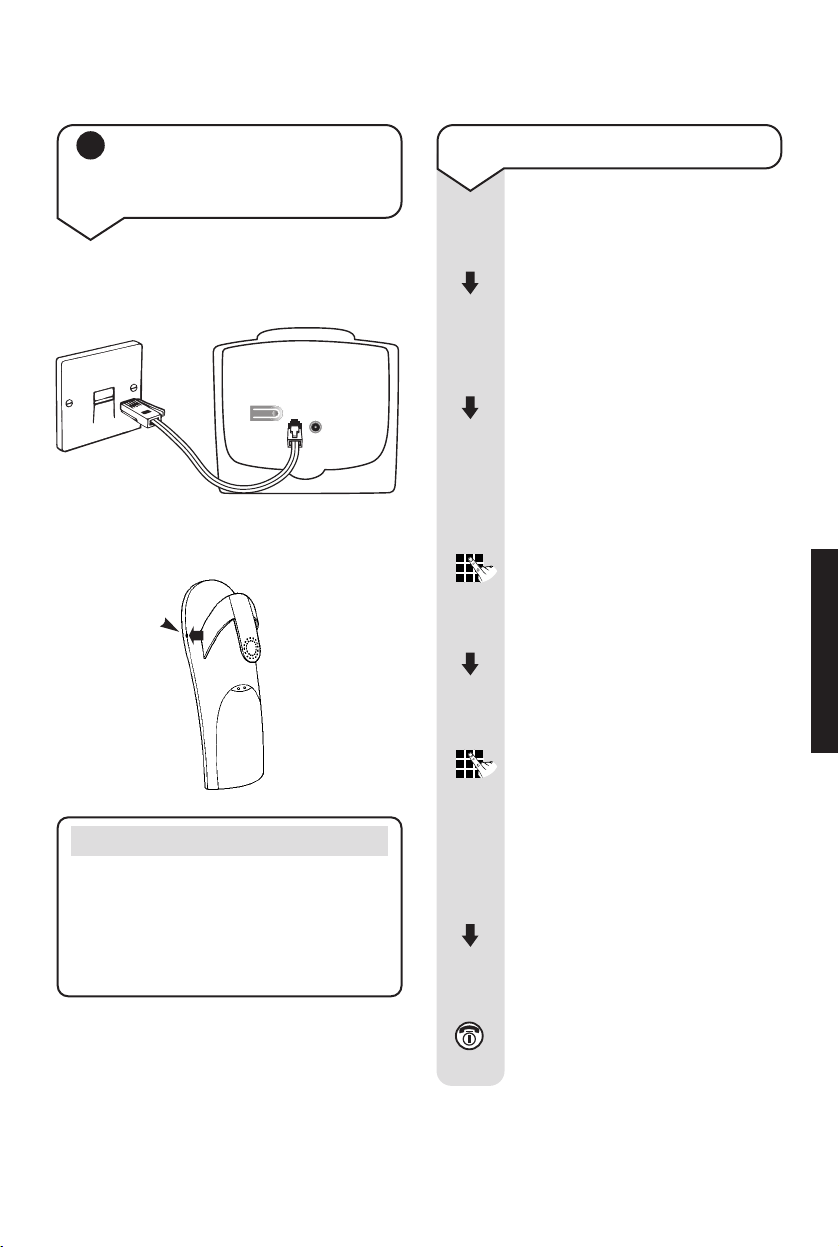
4 Connect the telephone line
cord to the base and plug
into the wall socket
Ensure that each end of the line cord is
fitted into the correct socket.
Fit the belt clip onto the back of
the handset.
Setting the date and time
Press the MENU options
button.
Press the DOWN button until
the display shows
BASE SET
.
Press the OK button. The
display will show
AUDIO SET UP
.
Press the DOWN button until
the display shows
DATE/TIME
.
Press the OK button.
The display will show
DATE SET.
Press the OK button.
Use the keypad to enter the
date (DD/MM/YY).
Press the OK button.
Press the DOWN button until
the display shows
CLOCK SET
.
Press the OK button.
Use the keypad to enter the
time in 12-hour clock format
(HH/MM).
After entering the time in the
12-hour clock format, press
the OK button.
Press the DOWN button to
choose
AM
or PM.
Press the OK button.
Press the RED PHONE button
until you return to the idle
screen.
OK
OK
OK
OK
OK
OK
OK
MENU
Diverse 4016 Classic ~ Issue 2 ~ 6th Edition ~ 1st March ’02 ~ 4416
15
Slot
Helpline
Your Diverse 4016 Classic is now
ready for use. However, If you
experience any difficulties
please call the BT Diverse Helpline
on 08457 908 070.
SETTING UP
Page 18
Diverse 4016 Classic ~ Issue 2 ~ 6th Edition ~ 1st March ’02 ~ 4416
16
Please note
If you subscribe to a Caller Display
Service the time and date will be set
with the first incoming call. However,
the year setting will have to be
changed manually, see page 15.
To set the time mode
(12 or 24-hour clock)
The handset’s default setting is
12-hour clock. To change the
clock to the 24-hour setting:
Press the MENU options
button.
Press the DOWN button until
the display shows
BASE SET
.
Press the OK button.
Press the DOWN button until
the display shows
DATE/TIME
.
Press the OK button.
Press the DOWN button until
the display shows
CLOCK MODE
.
Press the OK button.
Press the UP or DOWN button
to switch between
24 H
and
12
H
settings.
Press the OK button to
confirm the setting you want.
Press the RED PHONE until
you reach the idle screen
MENU
OK
OK
OK
OK
SETTING UP
Page 19

Diverse 4016 Classic ~ Issue 2 ~ 6th Edition ~ 1st March ’02 ~ 4416
17
Using the telephone
To switch the handset power
on and off
Press and hold the RED
PHONE button to switch the
handset off.
Press and hold the RED
PHONE button to switch the
handset on again.
Your Diverse 4016 Classic has a menu
driven display. The OPTION buttons
below the display allow you to select
options within each menu and make
adjustments to their settings. When the
phone is in idle mode, press the MENU
button to enter the main menu. During
a call, if you press the MENU button
it will open the menu for that particular
situation.
Note
To quit a menu at any time, press the
RED PHONE button. This will take
you back one step. Keep pressing the
RED PHONE button to get back to the
idle screen.
Making and ending calls
To make an external call
Ensure the handset is
switched ON.
Press the GREEN PHONE
button. You will hear the dial
tone.
Dial the number.
Preparatory dialling
Enter the phone number first.
If you make a mistake press
the DELETE button to remove
any incorrect digits.
Press the GREEN PHONE
button to dial the number.
To end a call
Press the RED PHONE button.
USING
Page 20
Diverse 4016 Classic ~ Issue 2 ~ 6th Edition ~ 1st March ’02 ~ 4416
18
To receive an external call
When the phone rings, the In
use light on top of the handset
will flash.
Press the GREEN PHONE
button to answer the call.
Or
If the handset is on the base,
simply lift it up and speak.
You do not need to press the
GREEN PHONE button.
This is called auto-talk. You
can switch autotalk off so you
always have to press the
GREEN PHONE button to
answer a call, see page 33.
Call timer
Your handset automatically times the
duration of all external calls, showing it
on the display during your call and for
a few seconds after it is finished.
Name and number directory
You can store up to 20 of your most
frequently used names and numbers,
each up to 22 digits long.
To store a name and number in
the directory
Press the DIRECTORY button.
Press the MENU options button.
Press the DOWN button until
the display shows
NEW ENTRY
.
Press OK to confirm.
Enter the telephone number
you want to store.
Press OK to confirm.
Entering names
Enter the name using the
letters on the keypad.
(See ‘Character map’ on the
following page for how to
enter special characters).
For example, to enter the
name TOM:
Press the 8 button until
T
appears on the display.
Press the 6 button until the
display shows
O
.
Then press 6 until the display
shows
M
.
Press OK to confirm.
The display will show
SAVED
and
TOM
.
MENU
OK
OK
OK
8
6
6
USING
Page 21

Diverse 4016 Classic ~ Issue 2 ~ 6th Edition ~ 1st March ’02 ~ 4416
19
To dial a number from the
directory
Press the DIRECTORY button.
If you wish, you can use the
keypad to enter the first letter
of the name, for example to
find
TOM
, press the 8 button.
Press the DOWN button to
scroll to the entry you want.
Press the GREEN PHONE
button to dial the number.
8
Press the GREEN PHONE
button to dial the number.
Or
Press the RED PHONE button
until you reach the idle screen.
Character map
As well as the standard letters and
numbers you can include special
characters in the directory entry.
1
Space
1
0
+
0
-
|
?
–-–
✱
*
/
(
)
,
#
|
--|
Press
1
st
press
2
nd
press
3
rd
press
4
th
press
5
th
press
6
th
press
A B C
To edit a directory entry
Press the DIRECTORY button.
Use the keypad to enter the
first letter of the name you
wish to edit.
Press the MENU options button.
SHOW ENTRY
is displayed.
Press the OK button.
Edit the number.
Press the OK button.
<NAME>
is displayed.
If the name is correct, press
the OK button.
Or
If you wish to edit the name,
enter a new name now.
Press the OK button.
The display will show
SAVED
.
You can either press the
GREEN PHONE button to dial
the number or the RED PHONE
button until you reach the idle
screen.
A B C
OK
OK
OK
OK
MENU
USING
Helpline
If you experience any difficulties
with your Diverse 4016 Classic,
please call the BT Diverse Helpline
on 08457 908 070.
Page 22

Diverse 4016 Classic ~ Issue 2 ~ 6th Edition ~ 1st March ’02 ~ 4416
20
To delete all entries from the
directory
Press the DIRECTORY button.
Press the MENU options button.
Press the 6 button,
DELETE?
is displayed.
Press the OK button to
confirm. All director y
numbers are deleted.
Press the RED PHONE button
until you reach the idle screen.
6
MENU
OK
To delete an entry from the
directory
Press the DIRECTORY button.
Use the keypad to enter the
first letter of the name.
Or
Use the DOWN button to find
the entry you want.
Press the MENU options button.
Press the DOWN button to
display
DELETE
.
Press the OK button to confirm.
The number is deleted.
Press the RED PHONE button
until you reach the idle screen.
Note
To cancel any procedure, press the
RED PHONE button until the display
returns to the idle screen.
MENU
OK
A B C
To store names and numbers in
the Extra directory
Press the EXTRA DIRECTORY
button.
Press the MENU button.
The structure for this directory
menu is the same as the main
name and number directory.
You can follow the instructions
starting on page 18 for storing,
dialling, editing and deleting
numbers in this directory.
Extra directory
This is an additional directory where
you are able to store up to 10 names
and numbers. It can be used for special
numbers, i.e. Doctor, Dentist, takeaway
numbers etc.
䊳
MENU
Note
This Extra directory does not ‘name
and number match’ when used with
Caller Display.
USING
Page 23

Diverse 4016 Classic ~ Issue 2 ~ 6th Edition ~ 1st March ’02 ~ 4416
21
Redial
Your handset automatically saves the
last five telephone numbers dialled into
a redial list.
To dial a number in the
redial list
Press the REDIAL options
button. The last number
dialled will be displayed.
Press the DOWN button to
scroll through the redial list.
Press the GREEN PHONE
button to dial the number.
To copy numbers shown in the
redial list to the directory
Press the REDIAL options
button.
Press the DOWN button until
the number you want is
displayed.
Press the MENU button.
Press the DOWN button until
the display shows
COPY TO DIR
.
Press the OK button.
The number is shown on the
display.
Press OK to confirm.
NAME
is displayed.
MENU
OK
OK
Note
To cancel any procedure, press the
RED PHONE button until the display
returns to the idle screen.
Enter the name to the number
you want to copy into the
directory.
Press OK to confirm.
The display will show
SAVED
and the name of the entry.
You can dial this number by
pressing the GREEN PHONE
button or return to the idle
screen by pressing the RED
PHONE button.
To delete the redial list
Press the REDIAL options
button.
Press the MENU options
button. Display shows
EDIT
ENTRY
.
Press the 6 button. Display
shows
DELETE?
Press OK to confirm
deletion of the list. You hear
a confirmation tone.
Press the RED PHONE button
until you reach the idle screen.
OK
MENU
6
OK
USING
Page 24

Diverse 4016 Classic ~ Issue 2 ~ 6th Edition ~ 1st March ’02 ~ 4416
22
Secrecy
When on a call you can talk to someone
in the same room, without your caller
hearing.
To switch secrecy on/off
During a call:
Press the INT options button.
The call is put on hold and
your caller will hear music.
To resume the call:
Press the MENU options
button. Display shows
GO
BACK
.
Press OK to confirm. You can
now speak to your caller again.
Paging and internal calls
You can alert handset users that they
are wanted, or locate a missing handset.
If you have multiple handsets registered
to the base you can make internal calls
between handsets.
Press the INT button.
Use the DOWN ARROW on
the options button to find the
handset number you want to
page or call.
Press the GREEN PHONE
button to call the handset.
If you want to page all the
handsets registered to the
base, highlight
CALL ALL
on
the display and press the
GREEN PHONE button.
INT
MENU
OK
INT
USING
Helpline
If you experience any difficulties
with your Diverse 4016 Classic,
please call the BT Diverse Helpline
on 08457 908 070.
Page 25

To transfer an external call
between handsets
You can transfer an external call
to another handset registered
to the base.
Press the INT options button.
Enter the number of the handset
to which you wish to transfer the
call. When the other handset
answers you can tell them you
are transferring the call and
press the RED PHONE button.
The call is transferred and the
original handset shows
LINE IN
USE
on the display.
INT
Diverse 4016 Classic ~ Issue 2 ~ 6th Edition ~ 1st March ’02 ~ 4416
23
To switch 3-way conversation
function on/off
You can allow your Diverse
4016 to hold 3-way calls between
handsets.
Press the MENU options
button.
Press the DOWN options
button until the display shows
BASE SET
.
Press the OK options button.
Press the DOWN options
button until the display shows
ADD FEATURES
.
Press the OK options button.
Press the DOWN options
button until the display shows
BARGE IN
.
Press the OK options button to
switch the function on.
SAVED
is displayed.
BARGE IN
is
then displayed with a tick next
to it.
Press the OK options button
again to switch off, tick is
deleted.
Press the RED PHONE button
until you reach the idle screen.
MENU
OK
OK
OK
OK
USING
To return to external call if
internal call is not transferred
To speak to your external caller
again:
Press the MENU options
button. Display shows
GO BACK
.
Press the OK options button.
Or
Press the RED PHONE button
to transfer your call to the other
handset.
MENU
OK
Page 26

Diverse 4016 Classic ~ Issue 2 ~ 6th Edition ~ 1st March ’02 ~ 4416
24
To hold a 3-way conversation
You can talk to one external
caller and another internal caller
at the same time on your Diverse
4016 Classic handset.
While another handset user is
talking to an external caller
the display shows
LINE IN USE
.
Press the GREEN PHONE
button to join the conversation.
Display shows
LISTENING IN
.
A tone is heard by all three
parties when one party enters
or leaves the call.
Press the RED PHONE button
to end your call.
Alarm clock
You can use your handset as an alarm
clock. You must set the date and time
before the alarm will work. The alarm will
ring daily until the setting is turned off.
To set the alarm
Press the MENU options
button.
Press the DOWN button to
display
ALARM CLOCK
.
Press the OK button.
Enter the time you want the
alarm to go off at, e.g. 0535.
(12 hour clock).
Press the OK button
Select
AM
or PMusing DOWN
button.
Press the OK button to
confirm.
Press the RED PHONE button
to return to the idle screen.
An asterisk appears in front of
the time to indicate that the
alarm has been set.
When the alarm goes off, the
In use light will flash. To stop
the alarm ringing, press any
button on the keypad.
MENU
OK
OK
OK
USING
Page 27

Diverse 4016 Classic ~ Issue 2 ~ 6th Edition ~ 1st March ’02 ~ 4416
25
To cancel the alarm setting
Press the MENU button.
Press the DOWN button to
highlight
ALARM CLOCK
.
Press the OK button to confirm.
The alarm is switched off and
the asterisk disappears from
the display.
Press the RED PHONE button
to return to the idle screen.
MENU
OK
To stop the alarm ringing
When the alarm goes off it
sounds like an incoming call
and lasts for about 30 seconds.
Press any button to switch the
alarm off.
USING
Helpline
If you experience any difficulties
with your Diverse 4016 Classic,
please call the BT Diverse Helpline
on 08457 908 070.
Page 28
Diverse 4016 Classic ~ Issue 2 ~ 6th Edition ~ 1st March ’02 ~ 4416
26
Caller Display and other
Select Services
IMPORTANT
To use Caller Display and Call
Waiting you must first subscribe to the
Services from your Network Provider.
For more information on
BT’s Select Services call BT free
on 0800 800 150.
Please note
Calls that are ‘withheld’, ‘unavailable’
or ‘international’ are not stored in the
Calls list, as there is no telephone
number sent via the network.
Please note
If you have a new call in your Calls
list, the icon and In use light
will flash.
If you subscribe to a Caller Display
Service you can see who is calling you
on your handset display, as well as the
date and time of their call (unless the
number has been withheld).
If you have stored a name to go with
the number in your handset directory,
the name will be displayed instead.
Please ensure that you have stored the
full telephone number, including the area
code, otherwise the name will not match
the number stored in the directory.
If the caller has withheld their number,
the display will show
WITHHELD
.
If you call from another handset, the
display shows the handset number
and
INT
.
Calls list
The Calls list contains the telephone
numbers of your last 30 callers.
Whether you take a call or not, the
caller’s details are stored in the Calls
list. You can display, scroll through and
dial numbers in the list and copy them
into the directory.
If a call is received when the Calls list is
full then the oldest entry will be
deleted automatically.
CALLER DISPLAY
Page 29

Diverse 4016 Classic ~ Issue 2 ~ 6th Edition ~ 1st March ’02 ~ 4416
27
To view the Calls list
Press the ENVELOPE options
button. A flashing envelope
indicates new calls. New calls
are displayed immediately.
If there are no new entries,
continue to open the Calls list.
Press the DOWN button to
highlight
CALLS
.
The display will show the type
of calls you have received in
your Calls list, e.g.
CALLS
02/06
means you have
received 2 new calls and have
6 old calls.
Press the OK button to display
the most recent number to call
you.
Press the UP and DOWN
buttons to scroll backwards and
forwards through the Calls list.
When you have found the
entry you want, you have the
options to:
Call a number from the
Calls list:
When the number you wish to
call is displayed, press the
GREEN PHONE button.
The number will be dialled
automatically.
Display the time of the call:
Press the MENU options
button.
Press the DOWN button to
highlight
TIME.
Press the OK options button.
The date and time of the call
are displayed.
To return to the beginning
of the calls list, press the RED
PHONE button repeatedly
until it is displayed.
Display the status of the call:
Press the OK button.
Press the MENU options
button.
Press the DOWN button to
highlight
STATUS
.
Press the OK button.
NEW
= New call.
OLD
= Previously viewed.
ANSWERED
= The call was
answered.
Press the RED PHONE button
until you reach the idle screen.
OK
OK
OK
MENU
MENU
OK
Remember
If you have missed a call the
icon will flash on the display.
CALLER DISPLAY
Page 30

Store a number from the Calls
list into the directory:
When the number you want to
store is displayed:
Press the MENU options
button.
Press the DOWN button to
highlight
COPY TO DIR
.
Press the OK button. The
number is displayed.
Press the OK button again.
Enter a name if you wish, see
page 18 for instructions.
Press the OK button.
The display shows
SAVED
. You
can either copy another entry
from the Calls list or press the
RED PHONE button until you
reach the idle screen.
Delete a number from the
Calls list.
When the number you want to
delete is displayed:
Press the MENU options
button.
DELETE
is displayed.
Press the OK button to
confirm. The display shows
DELETED
.
Delete the whole Calls list:
When any number is displayed,
press the MENU options
button.
Diverse 4016 Classic ~ Issue 2 ~ 6th Edition ~ 1st March ’02 ~ 4416
28
To set the Calls list to contain
all calls or missed calls only
Press the ENVELOPE options
button.
Use the DOWN button to
highlight
CALLS
.
Press the OK button.
Press the MENU options button.
Press the DOWN button to
highlight
LIST MODE
.
Press the OK button.
Press the DOWN button to
display either
MISSED
or
ALL
.
Press the OK button to confirm.
The display shows
SAVED
.
Press the RED PHONE button
until you reach the idle screen.
MENU
MENU
OK
MENU
OK
MENU
OK
OK
OK
OK
OK
CALLER DISPLAY
Press the DOWN button to
highlight
DELETE LIST
.
Press the OK button.
The display shows
NO CALLS
.
Press the RED PHONE button
until you reach the idle screen.
OK
Helpline
If you experience any difficulties
with your Diverse 4016 Classic,
please call the BT Diverse Helpline
on 08457 908 070.
Page 31

Diverse 4016 Classic ~ Issue 2 ~ 6th Edition ~ 1st March ’02 ~ 4416
29
Call Waiting
If you also subscribe to a Call Waiting
Service, when you are on a call and
another person tries to call you, the
second caller’s number will appear on
the handset display and you will hear an
intermittent beep through the handset.
This is to alert you to the other caller
waiting to speak to you.
To accept a waiting call
During a call when you hear
the Call Waiting beeps:
The number (or name if stored
in the directory) of the second
caller will flash on the display.
Press the MENU options
button. Display shows
ACCEPT
.
Press the OK options button.
Your current call is put on hold
and you are connected to the
second caller.
Press the RECALL button to
toggle between callers.
MENU
OK
R
To switch Call Waiting on/off
You can choose whether to
have your Call Waiting service
switched on or off depending
on what you are doing i.e. if
you are using the Internet via
your PC and do not want Call
Waiting to interrupt you.
Press the MENU options button,
SEL SERVICES
is displayed.
Press the OK options button.
Press the DOWN until the
display shows
CALL WAITING
.
Press the OK options button.
Use the UP or DOWN button
to select whether you want the
service on or off.
Press the OK options button.
Listen to your handset for the
service announcement
confirmation.
Press the RED PHONE button
until you reach the idle display.
MENU
OK
OK
OK
CALLER DISPLAY
Page 32

Call Divert
You can divert all incoming calls to
another number where you can be
reached.
Please note
Call Divert requires subscription from
your Network provider. You may be
charged a subscription fee.
To divert calls
Press the MENU options
button,
SEL SERVICES
is
highlighted.
Press the OK options button.
Use the DOWN arrow on the
options button until
CALL
DIVERT
is highlighted.
Press the OK options button.
You now have a choice of
when you want calls to be
diverted:
AUTOMATIC
– calls are put
straight through to the
number you have set.
NO ANSWER
– calls are diverted
if your phone is not answered.
I
F BUSY
– calls are forwarded
if your phone is engaged.
Diverse 4016 Classic ~ Issue 2 ~ 6th Edition ~ 1st March ’02 ~ 4416
30
MENU
OK
OK
Select your required option
and press the OK options
button, ONis displayed.
Press the OK options button
again.
Enter the phone number
where you want the calls to be
diverted to.
Press the OK options button.
You will hear a Network
message confirming your
divert request.
Press the RED PHONE button
until you reach the idle
display.
OK
OK
OK
Withhold number
Your number appears on the display of
the person you call if they subscribe to
a Caller Display service. You are able to
withhold your telephone number from
the next call you make if you wish.
To withhold your number from
being sent
Press the MENU options
button,
SEL SERVICES
is
displayed.
Press the OK options button,
WITHHOLD NO
is displayed.
OK
MENU
SELECT SERVICES
Page 33

Diverse 4016 Classic ~ Issue 2 ~ 6th Edition ~ 1st March ’02 ~ 4416
31
Ring Back
If you want to make a call and the
number is engaged you can set your
telephone to ring you back when the
caller has finished their call. To switch
this service off before your call is
returned i.e. if you have to go out
before your caller has returned your
call.
To switch Ring Back off if set
Press the MENU options
button,
SEL SERVICES
is
highlighted.
Press the OK options button.
Use the DOWN arrow on the
options button until
RINGBACK
OFF
is highlighted.
Press the OK options button.
This will cancel your ringback
call.
Listen to your handset for the
service announcement
confirmation.
Press the RED PHONE button
until you reach the idle
display.
MENU
OK
OK
Press the OK options button.
Enter the telephone number
you want to call.
Press the OK options button,
the number will be dialled but
your number will not be sent
to your caller.
OK
OK
SELECT SERVICES
Helpline
If you experience any difficulties
with your Diverse 4016 Classic,
please call the BT Diverse Helpline
on 08457 908 070.
Page 34
Diverse 4016 Classic ~ Issue 2 ~ 6th Edition ~ 1st March ’02 ~ 4416
32
To adjust the handset ringer
volume
You can choose from 5 levels
(1– 5), a ‘crescendo’ ring (6)
that increases in volume, or
you can switch the ringer off
altogether (0).
Press the MENU options button.
Use the DOWN button to
highlight
AUDIO SET
.
Press the OK button.
Press the DOWN button to
highlight
RINGER
.
Press the OK button.
You hear the current volume
level and the level is shown on
the display.
Press the UP/DOWN button
to select the level you want.
Press the OK button to confirm.
SAVED
is displayed.
Press the RED PHONE button
until you reach the idle screen.
Handset settings
To adjust the handset ringer
melody
There are 10 melodies to
choose from (1–10).
Press the MENU options button.
Press the DOWN button to
highlight
AUDIO SET
.
Press the OK button.
Press the DOWN button to
highlight
MELODY
.
Press the OK button.
You hear the current melody
and its number is shown on
the display.
Press the DOWN button to
select the melody you want.
Press the OK button.
MENU
OK
OK
OK
MENU
OK
OK
OK
Shortcut button
If you want to switch the handset
ringer off quickly you can also press
and hold the button. The
icon is displayed. To turn the handset
ringer back on press and hold down
the button again and the symbol
will disappear.
HANDSET SETTINGS
Page 35

Diverse 4016 Classic ~ Issue 2 ~ 6th Edition ~ 1st March ’02 ~ 4416
33
To switch autotalk on and off
If autotalk is switched on you
do not need to press the
GREEN PHONE button to
answer a call you can simply
pick the handset up from the
base station.
If you switch autotalk off you
always have to press the
GREEN PHONE button to
answer a call.
The default setting for autotalk
is on.
Press the MENU options button.
MENU
To adjust the earpiece volume
There are 3 volume levels to
choose from and you can even
adjust the volume during a call.
Press the MENU options button.
Press the DOWN button to
highlight
AUDIO SET
.
Press OK to confirm. The
display show
H/SET VOL
.
Press OK to confirm.
You hear the current volume
and the level is displayed.
Select the required level.
Press OK to confirm.
SAVED
is
displayed.
Press the RED PHONE button
until you reach the idle screen.
MENU
OK
OK
OK
To switch autotalk on:
Press the 9 button.
Press the 1 button.
Press the 1 button again.
To switch autotalk off:
Press the 9 button.
Press the 1 button.
Press the 0 button.
To reset your handset to the
original settings
Press the MENU options button.
Press the 9 button.
Press the 3 button.
The display shows
RESET?
.
Press OK to confirm.
This will reset:
Earpiece volume 1
Ringer volume 3
Ringer melody 1
Autotalk ON
Battery low beep ON
Redial list DELETED
This will not delete the
directory or Calls list.
This will not reset:
Handset PIN
Registration to the base station.
9
3
MENU
OK
HANDSET SETTINGS
9
1
1
9
1
0
Page 36

Diverse 4016 Classic ~ Issue 2 ~ 6th Edition ~ 1st March ’02 ~ 4416
34
Keyguard
You can lock the keypad so that it cannot
be used accidentally while carr ying it
around.
To switch keyguard on
Press and hold the #button to
switch keyguard on. You hear
a confirmation tone.
The keypad is now locked and
you cannot dial out. You can
answer calls as normal by
pressing the GREEN PHONE
button.
To switch keyguard off, press
and hold the
#
button again.
You hear a confirmation
tone and the handset is now
unlocked.
IMPORTANT
If the keyguard is active, the
emergency numbers 999 and 112 can
NOT be dialled.
HANDSET SETTINGS
Helpline
If you experience any difficulties
with your Diverse 4016 Classic,
please call the BT Diverse Helpline
on 08457 908 070.
Page 37

Diverse 4016 Classic ~ Issue 2 ~ 6th Edition ~ 1st March ’02 ~ 4416
35
Base station PIN (Personal
Identification Number)
Your base station PIN has a default
setting of
0000
but you may want to
change this to prevent unauthorised
use of your handset(s).
If you change your PIN keep a record
of the new number by writing it in the
space provided on page 10.
To change the base station PIN
Press the MENU options button.
Press the DOWN button to
highlight
BASE SET
.
Press the OK button.
Press the DOWN button to
highlight
SYSTEM PIN
.
Press the OK button.
Enter current PIN (original
setting
0000
).
Press the OK button. Display
shows
NEW PIN
.
Enter your new 4 digit PIN.
Press the OK button. Display
shows
REP PIN.
Enter your new 4 digit PIN
again.
Press the OK button to
confirm. Display shows
SAVED
.
Press the RED PHONE button
to return to the idle screen.
MENU
OK
OK
OK
OK
OK
Base station settings
To adjust the base ringer volume
There are 5 levels to choose
from (1 – 5), a ‘crescendo’ ring
(6) that increases in volume,
or you can switch the ringer
off altogether (0).
Press the MENU options button.
Press the DOWN button to
highlight
BASE SET
.
Press the OK button.
Display shows
AUDIO SET UP
.
Press the OK button.
Press the DOWN button until
the display shows
RINGER VOL
.
Press the OK button. You hear
the current volume and the
level is shown on the display.
Press the DOWN button to
select the required level.
Press the OK button to confirm.
Press the RED PHONE button
until you reach the idle screen.
MENU
OK
OK
OK
OK
BASE STATION SETTINGS
Page 38

Diverse 4016 Classic ~ Issue 2 ~ 6th Edition ~ 1st March ’02 ~ 4416
36
To adjust the base ringer
melody
There are 10 melodies to
choose from (1–10).
Press the MENU options button.
Press the DOWN button to
highlight
BASE SET
.
Press the OK button. Display
shows
AUDIO SET UP
.
Press the OK button.
Press the DOWN button to
highlight
MELODY
.
Press the OK button. You hear
the current melody and the
display shows the current
setting.
Press the DOWN button to
select the required melody.
Press the OK button to confirm.
SAVED
is displayed.
Press the RED PHONE button
until you reach the idle screen.
MENU
OK
OK
OK
OK
To reset your base station to
its original settings
Press the MENU options button.
Press the DOWN button to
highlight
BASE SET
.
Press the OK button.
Press the DOWN button to
highlight
BASE RESET
.
Press the OK button.
Enter your 4-digit PIN
(original setting
0000
).
Press the OK button.
Display shows
RESET?
.
Press the OK button to confirm.
RESET
is displayed.
This will reset:
Alarm clock OFF
Dialling mode DTMF
Pause after picking
up line/dial-out
code 3 seconds
It will delete the Calls list.
It will not reset:
The base station PIN.
Handset registration settings.
MENU
OK
OK
OK
OK
BASE STATION SETTINGS
Helpline
If you experience any difficulties
with your Diverse 4016 Classic,
please call the BT Diverse Helpline
on 08457 908 070.
Page 39
Diverse 4016 Classic ~ Issue 2 ~ 6th Edition ~ 1st March ’02 ~ 4416
37
Using the answering
machine
The answering machine is operated
entirely from the handset so you will
need to put the handset to your ear to
hear and follow instructions.
There is also a loudspeaker on your
Diverse 4016 Classic which gives you the
choice of listening to messages via the
loudspeaker or privately via your handset.
Your answering machine can be used
as soon as you have charged up your
Diverse 4016 as it has a pre-recorded
outgoing message “Hello, there is
nobody available to take your call right
now. Please leave your message after
the tone.”
You must set the time and date so that
received messages will have the time
and date added. You can set the date
and time manually (see page 15 if you
have not already done this) or if you
have subscribed to your network’s
Caller Display service, the date and
time will set automatically as soon as
you receive your first call.
To switch the answering
machine on and off
Press the MENU options
button.
Press the DOWN button until
the display shows
VOICE MAIL
.
Press the OK options button.
Press the DOWN button until
the display shows
VOICE MAIL
.
Press the OK options button.
A
✔
confirms the answering
machine is switched on.
Press the OK options button
again to switch it off.
Press the RED PHONE button
to return to the idle screen.
When the answering machine
is ON the icon will be
shown on the top of the
handset display.
MENU
OK
OK
OK
Please note
The factory setting for the Diverse
4016 is for the answering machine to
be on.
To record your own outgoing
message
Your outgoing message is the
greeting your callers hear
when your answering machine
takes their call.
ANSWER MACHINE
Page 40

The pre-recorded outgoing
message is used until you
record your own. You can always
go back to the pre-recorded
message by deleting your own
message.
A typical outgoing message
could be, “I cannot take your call
right now, please leave a message
after the tone”.
Press the MENU options
button.
Press the DOWN button until
the display shows
VOICE MAIL
.
Press the OK options button.
Press the DOWN button until
the display shows
ANNOUNCEMENT
.
Press the OK options button.
The display shows
REC ANC
.
Press the OK options button.
Put the handset to your ear
and after the beep, speak your
outgoing message.
To stop recording press the OK
options button.
The display will show
PLAYBACK
ANC
and your recording will be
played back to you.
To cancel recording, press the
RED PHONE button.
Diverse 4016 Classic ~ Issue 2 ~ 6th Edition ~ 1st March ’02 ~ 4416
38
MENU
OK
OK
OK
OK
Please note
The maximum outgoing message
length is 2 minutes and 50 seconds.
If you pause during recording for
longer than 2 seconds, recording is
stopped.
OK
To play your outgoing message
Press the MENU options
button.
Press the DOWN button until
the display shows
VOICE MAIL
.
Press the OK options button.
Press the DOWN button until
the display shows
ANNOUNCEMENT
.
Press the OK options button.
Press the DOWN button until
the display shows
PLAY ANC
.
Press the OK options button.
If you have the loudspeaker
set to ON you will hear your
outgoing message via the
loudspeaker.
Or
Put the handset to your ear
and you will hear it.
OK
OK
MENU
ANSWER MACHINE
Page 41
Diverse 4016 Classic ~ Issue 2 ~ 6th Edition ~ 1st March ’02 ~ 4416
39
To delete your outgoing
message
If you delete your own outgoing
message, the pre-recording
message is automatically
reinstated.
Press the MENU options
button.
Press the DOWN button until
the display shows
VOICE MAIL
.
Press the OK options button.
Press the DOWN button until
the display shows
ANNOUNCEMENT
.
Press the OK options button.
Press the DOWN button until
the display shows
DEL ANC
.
Press the OK options button.
The display shows
SURE?
Press the OK options button.
The display shows
DELETED
and you will hear a confirmation
tone.
MENU
OK
OK
OK
OK
Call screening
From your base station, you can listen
into a caller leaving their message. This
feature can be switched on or off. The
factory setting is on.
To use call screening
Press the MENU options
button.
Press the DOWN button until
the display shows
VOICE MAIL
.
Press the OK options button.
Press the DOWN button until
the display shows
CALL SCREEN
.
Press the OK options button.
A
✔
indicates call screening is
switched on.
Press the OK options button
again to switch it off.
The
✔
disappears.
Pressing the OK options button
again will switch it back on.
Press the RED PHONE button
until you reach the idle screen.
MENU
OK
OK
OK
ANSWER MACHINE
Page 42

Diverse 4016 Classic ~ Issue 2 ~ 6th Edition ~ 1st March ’02 ~ 4416
40
New message indicator
When you have new messages, the
In use light and the on the handset
display will flash.
Playing messages
To listen to your messages
Press the ENVELOPE options
button.
Put the handset to your ear
(or listen via the base station
loudspeaker) and your new
messages will be played back
to you.
Playback begins with the last
message received. When all new
messages have been played,
old messages will follow. At the
end of all messages, you hear
the end of messages tone.
Shortcut to your messages
Press and hold the 1 button to
access your messages.
Answering machine operation
during playback
Press the 2 button to pause
playback, then press again to
resume playback.
Press the LEFT button to repeat
the message.
Press the LEFT button twice
to skip back to the previous
message
Press the RIGHT button to play
the next message.
Press the RIGHT button twice
to skip forward to the message
after next.
Press the Delete options
button to delete the current
message.
Press the RED PHONE button
until you reach the idle screen.
To interrupt a call
If a caller is leaving a message,
you can interrupt and take the
call at the handset.
While the caller is leaving their
message:
Press the GREEN PHONE
button. The machine stops
recording and you can talk to
your caller.
ANSWER MACHINE
Helpline
If you experience any difficulties
with your Diverse 4016 Classic,
please call the BT Diverse Helpline
on 08457 908 070.
1
2
Page 43

To adjust the message length
You can specify the time limit
your callers have to leave a
message. The choices are 30
seconds, 60 seconds, 120
seconds (this is the factory
setting) or Maximum
(remaining record time).
Press the MENU options
button.
Press the DOWN button until
the display shows
VOICE MAIL
.
Press the OK options button.
Press the DOWN button until
the display shows
MESSAGE SET
.
Press the OK options button.
The display shows
MSG LENGTH
.
Press the OK options button.
Press the UP or DOWN button
to display,
MAXIMUM 30, 60
or
120
.
Press the OK options button
to confirm.
The display will show
SAVED
and you will hear a confirmation
tone.
Press the RED PHONE button
until you reach the idle screen.
MENU
OK
OK
OK
OK
The display will show
SAVED
and you will hear a confirmation
tone.
Press the RED PHONE button
until you reach the idle screen.
Diverse 4016 Classic ~ Issue 2 ~ 6th Edition ~ 1st March ’02 ~ 4416
41
To set the number of rings
You can set how many times
the answering machine will ring
before it takes the call. You
can choose between 2-9 rings
or time saver.
Time saver is the factor y
setting, this can save you the
cost of a call when you want to
ring in to find out if you have
new messages.
•If your answering machine
answers after 3 rings, you have
new messages.
•If it answers after 5 rings, you
do not have new messages.
So if you hear more than 3 rings,
you can end the call without the
cost of being connected.
Press the MENU options button.
Press the DOWN button until
the display shows
VOICE MAIL
.
Press the OK options button.
Press the DOWN button until
the display shows
RING DELAY
.
Press the OK options button.
Press the UP or DOWN button
to display the setting you want.
Press the OK options button to
confirm.
Additional answering
machine settings
MENU
OK
OK
ANSWER MACHINE
OK
Page 44
Diverse 4016 Classic ~ Issue 2 ~ 6th Edition ~ 1st March ’02 ~ 4416
42
To adjust the recording quality
The factory setting of the
recording quality is ‘long play’
which will allow a maximum
recording capacity of 15
minutes. If you set ‘high quality’
the recording capacity is cut to
approximately 7 minutes.
Press the MENU options
button.
Press the DOWN button until
the display shows
VOICE MAIL
.
Press the OK options button.
Press the DOWN button until
the display shows
MESSAGE SET
.
Press the OK options button.
Press the DOWN button until
the display shows
QUALITY
.
Press the OK options button.
Press the UP or DOWN button
to display
LONG PLAY
or
HIGH
QUALITY
.
Press the OK options button to
confirm.
The display will show
SAVED
and you will hear a confirmation
tone.
Press the RED PHONE button
until you reach the idle screen.
MENU
OK
OK
OK
OK
To switch the base station
loudspeaker on or off
When the base station
loudspeaker is on you can listen
to messages via the base
speaker as well as the handset.
However, you can switch the
base loudspeaker off.
Press the MENU options
button.
Press the DOWN button until
the display shows
VOICE MAIL
.
Press the OK options button.
Press the DOWN button until
the display shows
SPKR ON/OFF
.
Press the OK options button.
A
✔
indicates that the base
speaker is switched on.
Press the OK options button
again to switch it off.
Press the RED PHONE button
until you reach the idle screen.
MENU
OK
OK
OK
ANSWER MACHINE
Helpline
If you experience any difficulties
with your Diverse 4016 Classic,
please call the BT Diverse Helpline
on 08457 908 070.
Page 45

To control the answering
machine functions during
playback
During remote playback:
To repeat the current
message. Press twice to skip
back to previous message.
To pause/resume playback.
To skip forward to the next
message. Press twice to skip to
the following message.
To delete the current message.
1
2
3
0
Diverse 4016 Classic ~ Issue 2 ~ 6th Edition ~ 1st March ’02 ~ 4416
43
To switch on your answering
machine from another phone
If you forget to switch your
answering machine on, you
can do it from another phone.
Dial your telephone number
and let the phone ring for
approximately 1 minute.
When you hear the
announcement “Please enter
your PIN code”.
Enter the base PIN (must be
changed from
0000
).
The recording time left will be
announced.
Your answering machine is
now switched on.
Remote access
You can operate your answering
machine from any external Touchtone™
phone by phoning your Diverse 4016
Classic and entering your base station
PIN.
Using this code prevents other people
from accessing your answering machine
functions without your permission.
IMPORTANT
You must change the base station PIN
from the Original setting of
0000
for
your remote access to function. See ‘To
change the base station PIN’, page 35.
To access your answering
machine from another phone
Dial your number.
When you hear your outgoing
message:
Press the 9 button.
Enter your base PIN. Your
machine tells you whether
new messages have been
recorded and plays them.
9
ANSWER MACHINE
Page 46

Diverse 4016 Classic ~ Issue 2 ~ 6th Edition ~ 1st March ’02 ~ 4416
44
Up to six handsets can be registered
and operated from the Diverse 4016
Classic base station. This allows you to
make internal calls between two
handsets while a third is making an
external call.
Using additional
handsets and bases
ADDITIONAL
Registering additional
handsets
If you purchase new handsets to use
with your current Diverse 4016 Classic,
they will not be pre-registered to a base
station. You will need to do this before
you can use them.
To register a new Diverse 4000
handset to a Diverse 4016 base
station
For this method of registration
your handset must be in the
Diverse 4000 range.
Place your handset on the base.
Ensure that the handset is
switched on.
After about 1 minute, the
handset’s internal number will
be displayed, e.g.
INT2
.
The next available internal
number (2– 6) will be
automatically assigned to the
handset.
Note
If all internal numbers have been
assigned then the internal number 6
will be re-assigned. You can change
the internal handset number if you
wish, see page 46.
DEF
1
ABC
3
2
MNO
GHI
4
6
JKL
5
WXYZ7PQRS
TUV
9
8
0
䊳
R
DEF
1
ABC
3
2
MNO
GHI
4
6
JKL
5
WXYZ7PQRS
TUV
9
8
0
䊳
R
DEF
1
ABC
3
2
MNO
GHI
4
6
JKL
5
WXYZ7PQRS
TUV
9
8
0
䊳
R
DEF
1
ABC
3
2
MNO
GHI
4
6
JKL
5
WXYZ7PQRS
TUV
9
8
0
䊳
R
DEF
1
ABC
3
2
MNO
GHI
4
6
JKL
5
WXYZ7PQRS
TUV
9
8
0
䊳
R
DEF
1
ABC
3
2
MNO
GHI
4
6
JKL
5
WXYZ7PQRS
TUV
9
8
0
䊳
R
Page 47

Diverse 4016 Classic ~ Issue 2 ~ 6th Edition ~ 1st March ’02 ~ 4416
45
To manually register a Diverse
4000 Classic handset to
another base station
If you want to register your
handset to another base
station you will need to
manually register it.
On the handset to be registered:
Press the MENU options button.
Press the DOWN button until
the display shows
REGISTER HS
.
Press the OK button. Display
show
PIN ****
.
Enter your 4-digit Pin (original
setting
0000
).
Press the OK button. Display
flashes
REGISTER HS
.
If the base station is a Diverse
4016 or 4010 base press the
PAGE button located
underneath the base station
for approximately one second.
After approximately one
minute the handset will display
its internal number. The
handset is now registered and
the handset display will return
to the idle screen.
Please note
Diverse 2000 and 3000 handsets
and other makes of handset must be
registered manually. Handsets must
be GAP compatible.
To register Diverse 2000/
3000 series handsets and
other makes
Providing your handset is GAP
(Generic Access Profile)
compliant, you can register it
to your Diverse 4016 base.
Register your handset
according to the instructions
in its user guide.
When the handset is in
registration mode, you will
need to press the PAGE button
located on the underside of
your Diverse 4016 base
station, for approximately one
second. You will hear a
confirmation tone and after a
short period of time the
handset will be registered.
The Diverse 4016 will allocate
the next available handset
number. You will hear a
confirmation tone.
Note
If the base you are registering to is a
Diverse 4010/4016 SMS you will not
hear a confirmation tone when the
PAGE button is pressed.
If the base is not a Diverse
4016 or 4010 you will need
to follow the user guide for
the base station you are
registering the Diverse 4000
handset to.
MENU
OK
OK
ADDITIONAL
Page 48

Diverse 4016 Classic ~ Issue 2 ~ 6th Edition ~ 1st March ’02 ~ 4416
46
To change the name of a
handset
You can personalise the name
of a handset. For example,
you can change handset 1 to
ANNE or OFFICE.
Press the INT button.
Press the UP and DOWN
button to display the handset
number you want.
Press the MENU option button.
Press the DOWN button until
the display shows
EDIT NAME
.
INT
MENU
Please note
On the classic handset the name is
not displayed, only the internal
number. However, the name is sent
and displayed on internal calls.
To change the internal number
of a handset
Press the INT button.
Press the MENU option
button.
RE-ASSIGN NO.
is displayed.
Press the OK button.
Press the DOWN button to
display the handset number
you want.
Enter an available number
(1– 6).
Press the OK button to confirm.
SAVED
is displayed.
Press the RED PHONE button
until you reach the idle screen.
INT
MENU
OK
OK
To de-register a handset
Press the INT options button.
Press the UP or DOWN button
to select the handset to be
de-registered (1-6).
Press the MENU options button.
Press the DOWN button until
the display shows
DE-REG H/SET
.
Press the OK button. Display
will show
PIN ****
.
Enter your 4-digit PIN
(original setting
0000
).
Press the OK button. Display
shows
DE-REGISTER?
Press the OK button to confirm.
SAVED
is displayed.
Press the RED PHONE button
until you reach the idle screen.
INT
MENU
OK
OK
OK
ADDITIONAL
Press the OK button.
Enter the name you want.
Press the OK button to confirm.
Press the RED PHONE button
until you reach the idle screen.
OK
OK
Page 49

Diverse 4016 Classic ~ Issue 2 ~ 6th Edition ~ 1st March ’02 ~ 4416
47
Help
Problem
Handset not registering.
You have forgotten your base station PIN
number.
No display
When you press a button, nothing
happens.
No radio signal to the base – all displays
flashing.
Handset in base doesn’t charge.
Handset/base does not ring.
Your caller cannot hear you.
Caller’s number is not displayed even
though you have subscribed to Caller
Display.
The error beep – a descending tone – is
played.
During remote operation you are unable to
access messages.
The answering machine does not record
any messages or announcements.
An answering machine message does not
have a time stamp.
Possible cause
The base is not powered.
There are no batteries in the handset.
You have changed the PIN.
Handset not switched on.
Batteries exhausted.
Keyguard may be switched on.
Handset out of range.
Handset not registered.
Base not switched on.
Line is being used by another handset for
a long period.
Base is not connected to the power
supply.
Ringer is switched off.
The INT button has been,pressed, muting
the microphone.
The number has been withheld.
You have pressed the wrong button.
You have not changed the base station
PIN.
Memory is full
The date/time is not set.
Solution
Make sure that the power supply is plugged
in at the base and switched on. Make sure
that the rechargeable batteries (included)
are fitted in the handset correctly. Switch the
handset off and then back on again, place
the handset on to the base again and leave
for approx. 1 minute to try registering again.
Try entering the default PIN (0000). If you
have changed the PIN and cannot remember
the number you will need to contact the
BT Diverse Helpline on 08457 908070.
Hold down the RED PHONE button for
1 second. Charge or replace batteries.
Hold down the # button for 1 second.
Move closer to the base.
Register the handset (see page 13).
Check the base is connected properly
(see page 12).
Maximum charging power is only available
when no calls are being made. Wait until the
call is finished.
Make sure that the power supply is in at the
base and the power source is switched on.
Check that the batteries are fitted correctly.
Switch ringer back on, see page 32 and
page 35.
Select GO BACK option via the MENU
button to switch the microphone back on.
Callers can stop their number being sent
over the network.
Retry. If necessary, check the instructions.
Change the base station PIN to allow you to
access messages from another phone.
Delete old messages.
Play back and delete new messages.
Set the date/time, see page 15.
HELP
Helpline
If you experience any difficulties with your Diverse 4016 Classic, please call
the BT Diverse Helpline on 08457 908 070.
Page 50
Diverse 4016 Classic ~ Issue 2 ~ 6th Edition ~ 1st March ’02 ~ 4416
48
4000 Classic handset 4010/4016 SMS 3010 Executive
Caller Display/Call Waiting Yes Yes
Time displayed in idle mode Yes No
Language selection No No
SMS No No
Loudspeaker via the base No Yes
Room monitor No No
Walk and Talk mode No No
4000 SMS handset 4010/4016 Classic 3010/3016 Classic
Caller Display/Call Waiting Yes Yes*
Time/date displayed in idle mode Yes Yes
Language selection No No
SMS No No
Loudspeaker via the base Yes Yes
Directory transfer Yes No
Room monitor No No
Walk and Talk mode No No
Call Barring No Yes
Compatibility
The tables below give you a quick reference guide to compatibility when
registering different handsets to bases within the Diverse 3000 and 4000 range.
Approved rechargeable batteries
The list below details the approved rechargeable batteries that can be used in your
Diverse 4016 Classic handset. Only use the approved batteries.
HELP
Nickel-Cadmium (NiCd) Nickel-Metal Hydride (NiMH)
Sanyo N-3U Sanyo H-3U
GP GP60 AA KC GP GP130 AA HC
Varta 751RS GP GP150 AA HC
Mobile Power 700 Varta VH 1101
Panasonic 600 DT Panasonic HHR-110 AA
Friwo NiMH
Toshiba TH-1200 AARE
It is possible for Diverse 4000 SMS and Diverse 3000 Classic Handsets to transfer
directory entries.
*With the Diverse 3016, although you will hear the beeps when a call is waiting, the number or name of the waiting
caller will not be shown on the handset display.
Page 51

Diverse 4016 Classic ~ Issue 2 ~ 6th Edition ~ 1st March ’02 ~ 4416
49
General information
Within the 12-month guarantee period:
If you experience difficulty using the
product, prior to returning your
product, please read the Help section
beginning on page 47, or contact the
Diverse Helpline on 08457 908070 for
assistance.
In the unlikely event of a defect
occurring, please follow the Helpline’s
instructions for replacement or repair.
Outside the 12-month guarantee period:
If your product needs repair after the
guarantee period has ended, the repair
must meet the approval requirements
for connection to the telephone
network. We recommend that you call
the Helpline on 08457 908070 and
ask for details of our recommended
repair agents.
Guarantee
Your Diverse 4016 Classic is
guaranteed for a period of 12 months
from the date of purchase.
Subject to the terms listed below the
guarantee will provide for the repair of,
or at BT’s or its agent’s discretion the
option to replace the Diverse 4016
Classic, or any component thereof,
(other than batteries), which is
identified as faulty or below standard,
or as a result of inferior workmanship
or materials. Products over 28 days old
from the date of purchase may be
replaced with a refurbished product.
The conditions of this guarantee are:
• The guarantee shall only apply to
defects that occur within the 12
month guarantee period.
• Proof of purchase is provided.
• The equipment is returned to point
of purchase.
• This guarantee does not cover any
faults or defects caused by accidents,
misuse, fair wear and tear, neglect,
tampering with the equipment, or
any attempt at adjustment or repair
other than through approved agents.
• This guarantee does not affect your
statutory rights.
GENERAL INFORMATION
Page 52
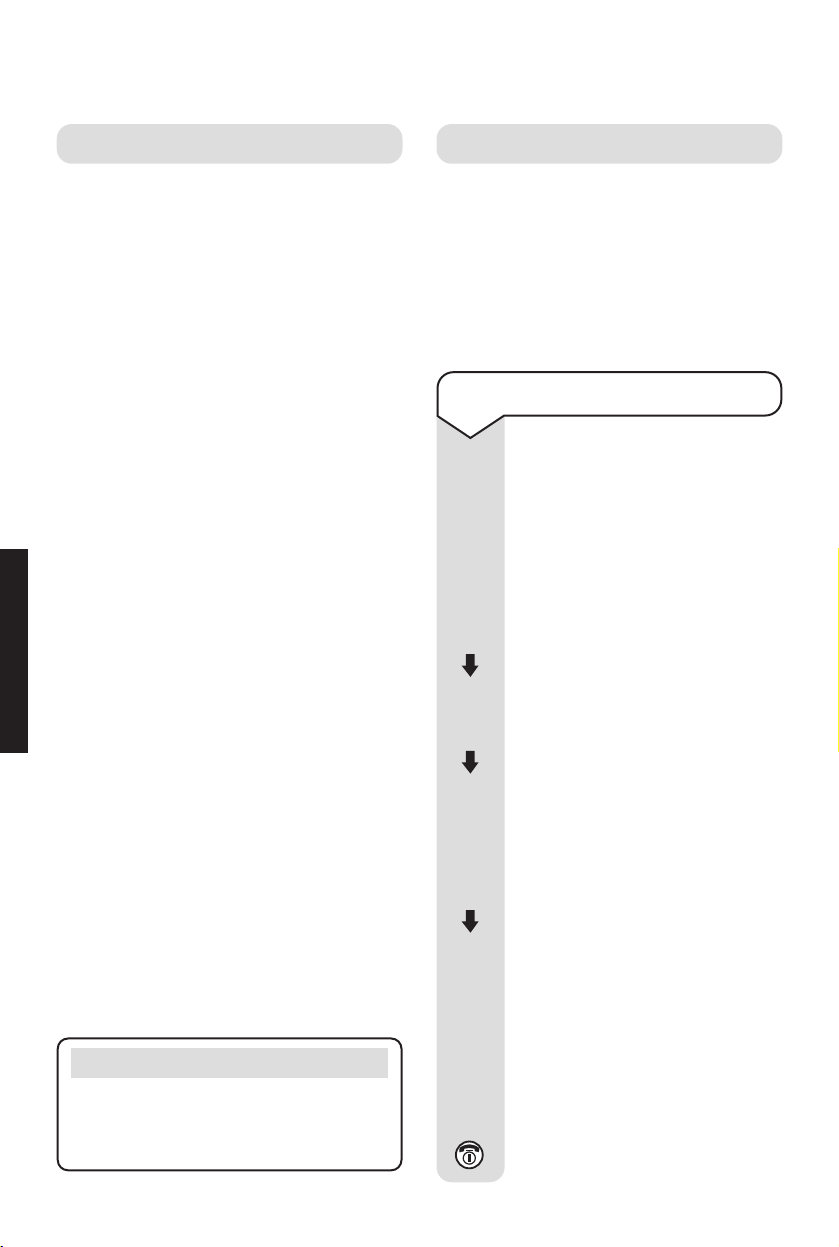
Diverse 4016 Classic ~ Issue 2 ~ 6th Edition ~ 1st March ’02 ~ 4416
50
Technical information
How many telephones can you have?
All items of telephone equipment have
a Ringer Equivalence Number (REN),
which is used to calculate the number
of items that may be connected to any
one telephone line. The Diverse 4016
Classic has a REN of 1. Any other
instrument provided by BT may be
assumed to have a REN of 1 unless
stated otherwise. A total REN of 4 is
allowed. (For example: if Diverse 4016
Classic is used in conjunction with
three extension telephones, each with a
REN of 1, the total REN is 4.)
Only use approved power supply item
code: C39 280-Z4-C478.
R&TTE
This product is intended for use within
the UK for connection to the public
telephone network and compatible
switchboards.
This equipment complies with the
essential requirements for the Radio
Equipment and Telecommunications
Terminal Equipment Directive
(1999/5/EC). In demonstration with
the Essential Requirement for the
efficient use of the radio spectrum, the
product complies with TBR6.
If you would like a copy of the
Declaration of Conformity please
contact the BT Diverse Helpline.
Switchboard compatibility
Generally this telephone may be
connected to switchboards which
support tone signalling and timed
break recall. In the event of any
difficulties please consult your
switchboard Service Provider.
To set the dialling mode
You need only adjust this
setting if your switchboard
does not operate with the preset tone dialling. You can
change the dial mode to pulse
dialling.
Press the MENU button.
Press the DOWN button until
the display shows
BASE SET
.
Press the OK button.
Press the DOWN button until
display shows
ADD FEATURES
.
Press the OK button.
Display shows
DIAL MODE
.
Press the OK button.
Press the DOWN button to
select:
– tone (with TBR)
– pulse (with Earth Recall)
– DTMF-Earth (tone with
Earth loop recall)
Press the OK button to confirm.
The display shows
SAVED
.
Press the RED PHONE button
until you reach the idle screen.
Helpline
If you are experiencing difficulty,
please call the BT Diverse Helpline
on 08457 908070.
MENU
OK
OK
OK
OK
GENERAL INFORMATION
Page 53

Diverse 4016 Classic ~ Issue 2 ~ 6th Edition ~ 1st March ’02 ~ 4416
51
To set the recall time
You need only adjust this
setting if your switchboard
requires a different recall time
to the pre-set recall time of
100 MS.
Press the MENU button.
Press the DOWN button until
the display shows
BASE SET
.
Press the OK button.
Press the DOWN button until
display shows
ADD FEATURES
.
Press the OK button.
Press the DOWN button until
display shows
TBR
.
Press the OK button.
Press the DOWN button to
select the flash time
80, 100
,
120, 180, 250, 300or600ms
.
Press the OK button to confirm.
The display shows
SAVED
.
Press the RED PHONE button
until you reach the idle screen.
To switch temporarily from
pulse to tone dialling
If you are using pulse dialling
with your switchboard but
need tone dialling to use
certain functions on your
Diverse 4016 you can switch to
tone dialling during the call.
During the call:
Press the MENU button.
Press the DOWN button until
the display shows
TEMP TONE
.
Press the OK button. Tone
dialling is now active.
MENU
OK
OK
OK
OK
MENU
OK
Please note
This setting is only for the duration of
the call.
Please note
100 MS is the standard setting for
most UK switchboards.
GENERAL INFORMATION
Page 54

Diverse 4016 Classic ~ Issue 2 ~ 6th Edition ~ 1st March ’02 ~ 4416
52
To set a pause after pressing
Recall
You can set the length of a
pause that is inserted after
pressing the RECALL button.
Press the MENU button.
Press the 8 button.
Press the 9 button.
Press the 1 button.
Press the 2 button.
Enter the pause length:
1 = None
2 = 800ms
3 = 1600ms
4 = 32ms
Press the OK options button
to confirm. The display shows
SAVED
.
8
9
1
2
MENU
Setting pauses
R
To set a pause before dialling
You can insert a pause to allow
your switchboard time to get a
line before your Diverse 4016
dials the number.
Press the MENU button.
Press the 8 button.
Press the 9 button.
Press the 1 button.
Press the 6 button.
Enter the pause length:
1 = 1 second
2 = 3 seconds
3 = 7 seconds
4 = 2.5 seconds
Press the OK options button
to confirm. The display shows
SAVED
.
Please note
If you want to insert a pause into a
telephone number you are storing in
your directory, start storing the number
(see page 18) and where a pause is
needed, press and hold the button.
A‘
P
’ will appear in the number.
R
1
8
9
6
MENU
GENERAL INFORMATION
OK
OK
Page 55

Diverse 4016 Classic ~ Issue 2 ~ 6th Edition ~ 1st March ’02 ~ 4416
53
Index
Additional handset and bases 44
Alarm clock 24
Answering machine on/off 37
Autotalk on/off 33
Base station reset 36
Base station PIN 35
Base station options
loudspeaker on/off 42
ringer melody 36
ringer volume 35
Batteries
approved list 48
charging 13
installing 13
performance 14
replacing 13
warning beeps 14
Belt clip 15
Call screening 39
Call timer 18
Call Waiting 29
Caller Display 26
Calls list 26
delete 28
dialling a number 27
display status of call 27
display time of call 27
settings 28
store number to directory 28
view 27
Calls
end 17
external 17
holding 23
internal 22
making 17
on hold 23
receiving 18
redial 21
secrecy 22
three-way 23
transferring 23
Date set 15
Delete
all directory entries 20
calls list 28
directory entry 20
own outgoing message 39
redial list 21
De-register handset 46
Dialling mode 50
temporary setting 51
Directory 18
delete an entry 20
delete all entries 20
dial a number 19
edit an entry 19
extra directory 20
store name and number 18
Display icons 9
Ending calls 17
External calls 17
Extra directory 20
Guarantee 49
Handset
change internal number 46
display 9
melody 32
INDEX
Page 56

Diverse 4016 Classic ~ Issue 2 ~ 6th Edition ~ 1st March ’02 ~ 4416
54
naming 46
on/off 17
reset 33
ringer 32
Handset quick guide 7
Help 47
Holding calls 23
Internal calls 22
Keyguard 34
Making calls 17
Menu structure 4-6
Message length adjust 41
New message indicator 40
Number of rings before answering 41
On/off
3-way conversation 23
alarm 25
answering machine 37
auto talk 33
call waiting 29
handset power 17
keyguard 34
loudspeaker 42
secrecy 22
Outgoing message
delete 39
playback 38
record own 37
Page a handset 22
Pause 52
Phone socket 15
PIN 35
Playing messages 40
Power connection 12
Preparatory dialling 17
Pulse dialling 50
Quick guide
answering machine 8
display 9
handset 7
Range warning 14
Recall time 51
Receiving calls 18
Recording quality 42
Redial 21
copy to directory 21
delete 21
dial number in redial list 21
Registering additional handsets 44
Registration 13
de-register 46
manual 45
Remote access 43
REN, how many phones can I have? 50
Reset
base settings 36
handset settings 33
Ringers on/off 32/35
Safety information 11
Secrecy 22
Select Services 26
Caller Display 26
Call Divert 30
Calls List 26
Calls Waiting 29
Ring Back 31
withhold your number 30
Setting up 12
Switchboard compatibility 50
Technical information 50
Telephone line cord 15
Three-way conversation 23, 24
Time set 15-16
Tone dialling 50
Transferring calls 23
Volume
base station ringer 35
earpiece 33
handset ringer 32
INDEX
Page 57

Diverse 4016 Classic ~ Issue 2 ~ 6th Edition ~ 1st March ’02 ~ 4416
CE compliant to R&TTE Directive (1999/5/EC)
0682
Offices worldwide
The telecommunications services described in this publication
are subject to availability and may be modified from time to time.
Services and equipment are provided subject to British
Telecommunications plc’s respective standard conditions of contract.
Nothing in this publication forms any part of any contract.
© British Telecommunications plc 2002.
Registered Office: 81 Newgate Street, London EC1A 7AJ.
Registered in England No. 1800000.
Diverse 4016 Classic Issue 2 (02/02) 6
Designed by The Art & Design Par tnership Limited.
Siemens number: A31008- G4015-P101-3- 7619
 Loading...