

Breville VIN067, IR70, IR72 Instructions For Use Manual
Steam Generator Iron
Instructions for Use
PLEASE RETAIN THESE INSTRUCTIONS FOR FUTURE REFERENCE.
These instructions refer to the Breville Steam Generator Iron VIN067 / IR70 / IR72.
Steam Generator Iron

2
2
1
2
3
4
5
6
7 8
9
10
11
The illustrations used in these instructions may differ slightly from the actual unit supplied.
FEATURES

33
3
1 Steam Generator Base unit
The base unit is large and should
always be positioned on a stable
work surface.
2 Water tank with Anti-Calc system
This water tank incorporates an anticalc cartridge which removes
limescale deposits and prolongs
the life of your iron. This is situated
inside the water tank.
3 Maximum water level indicator
Water should only be added up to
the ‘MAX’ level indication
(maximum water capacity: 1 litre).
4 Water inlet
The water tank can be removed and
filled at the sink. Do not exceed the
MAX level marking.
5 Stainless steel soleplate
This durable soleplate transfers
heat evenly during ironing to
produce professional results.
6 Steam button
Press and hold this button to
produce a continuous burst of
steam to remove stubborn creases.
The steam button will also work
when the iron is held vertically.
This is ideal for removing creases
and wrinkles from delicate fabrics
or difficult to iron items, such as
curtains.
7 Temperature settings display
The selected temperature light will
flash when iron is heating. When
the iron has reached the desired
temperature, the light will stop
flashing and light continuously.
The temperature indicator lights will
flash on and off during ironing as
the iron maintains the soleplate
temperature.
8 Temperature / Standby select
button
To set the soleplate temperature,
press the temperature select button
to cycle through the four
temperature settings.
9
Steam / Power pipe
The steam / power pipe feeds
steam and power from the base
unit into the iron.
10 Control panel
This panel allows you to set the
desired amount of steam. The
display clearly indicates when the
filter cartridge is fitted correctly and
when it needs to be changed.
11 Iron rest
The iron rest provides a stable rest
for the iron. The heat-resistant
rubber fins hold the iron securely in
place and protect the soleplate.
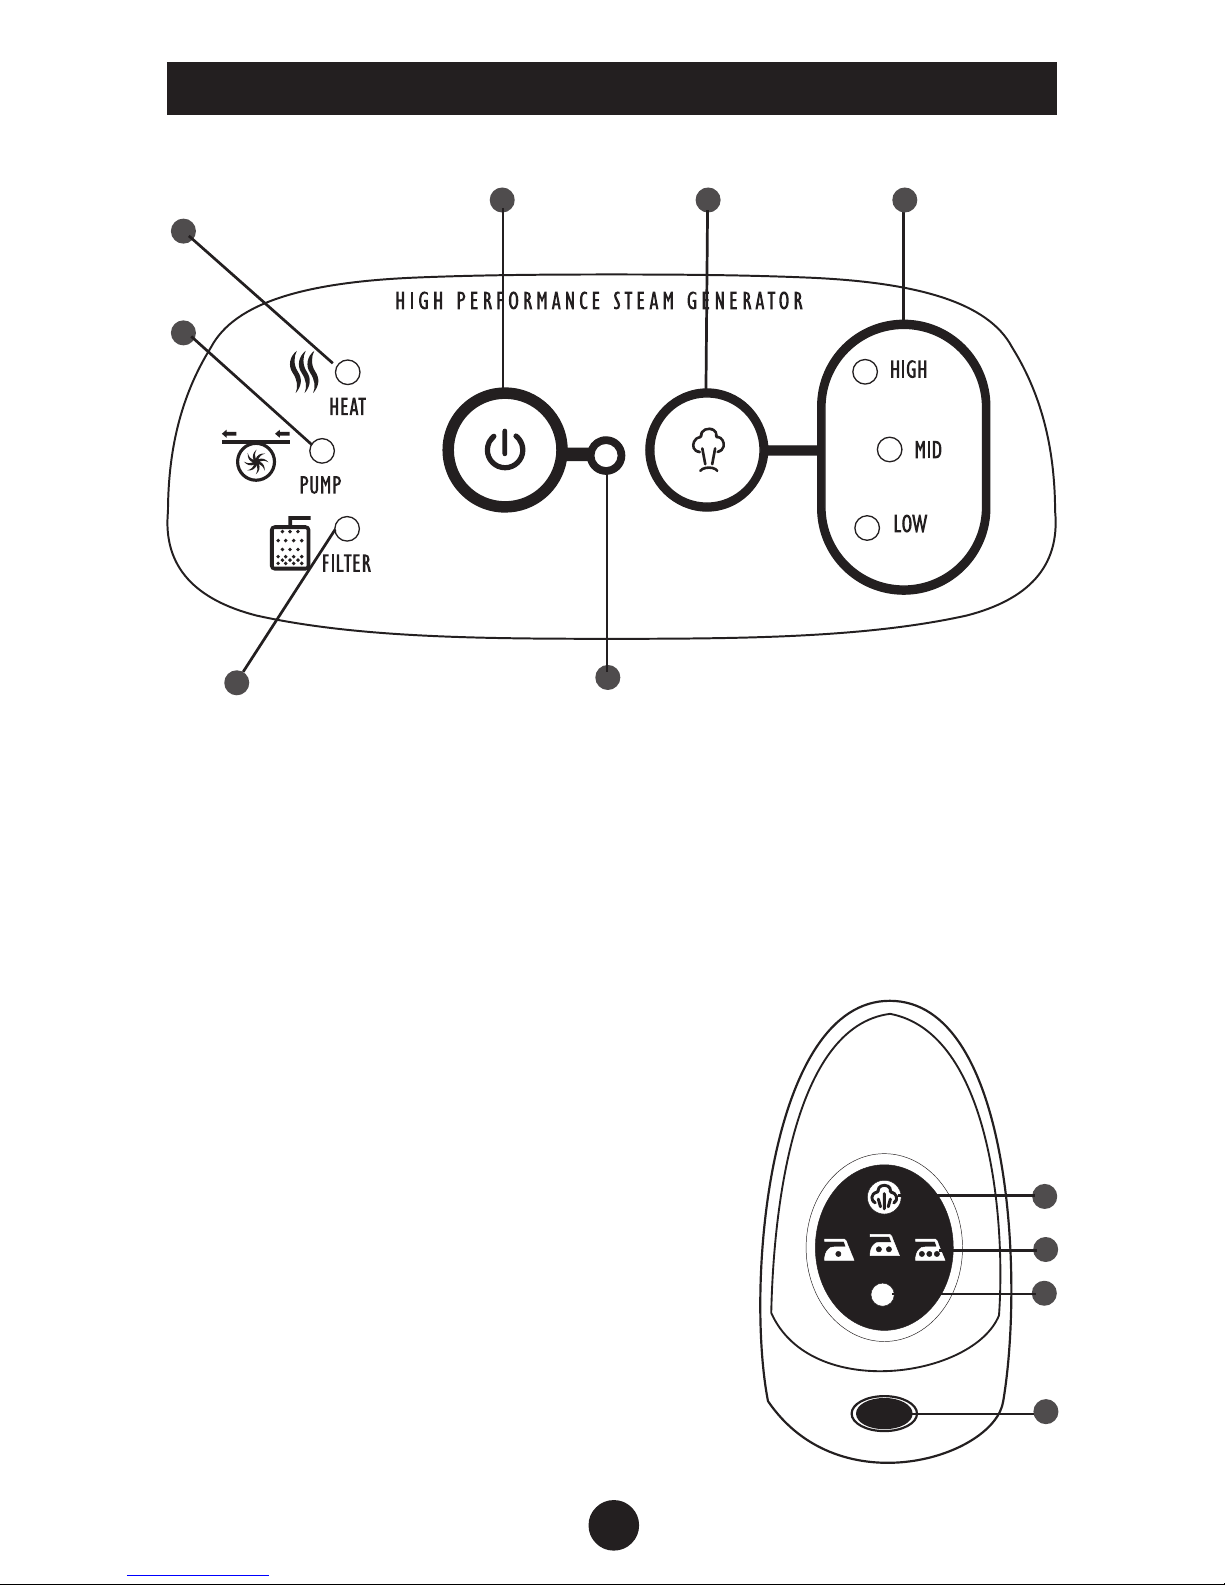
FEATURES
4
4
1 Power On/Off
2 Steam level selector
3 Steam level indicator
4 On/Off indicator
5 Change anti-calc cartridge indicator
6 Pump active indicator
7 Heat indicator
4
5
1
7
6
2 3
Temperature settings display
1 Standby indicator
2 Temperature setting
indicators
One dot = Coolest heat
Two dots = Medium heat
Three dots = High heat
3 Maximum heat setting
indicator
4 Temperature / Standby
Select Button
THE CONTROL PANEL
1
3
1
4
2
55
5
1 Remove all packaging materials
including any soleplate
protection, taking care not to
damage the soleplate or hot
water pipe. Position the steam
generator iron horizontally on
your ironing board (if large
enough) or on a heat resistant,
secure surface at the same
height as your ironing board.
Never position the steam
generator on an unstable
surface.
NOTE:
Before connecting to the
mains supply, ensure that
the supply voltage is the
same as the one indicated
on the underside of this
appliance.
2 Unwind and straighten the power
cord and hot water pipe.
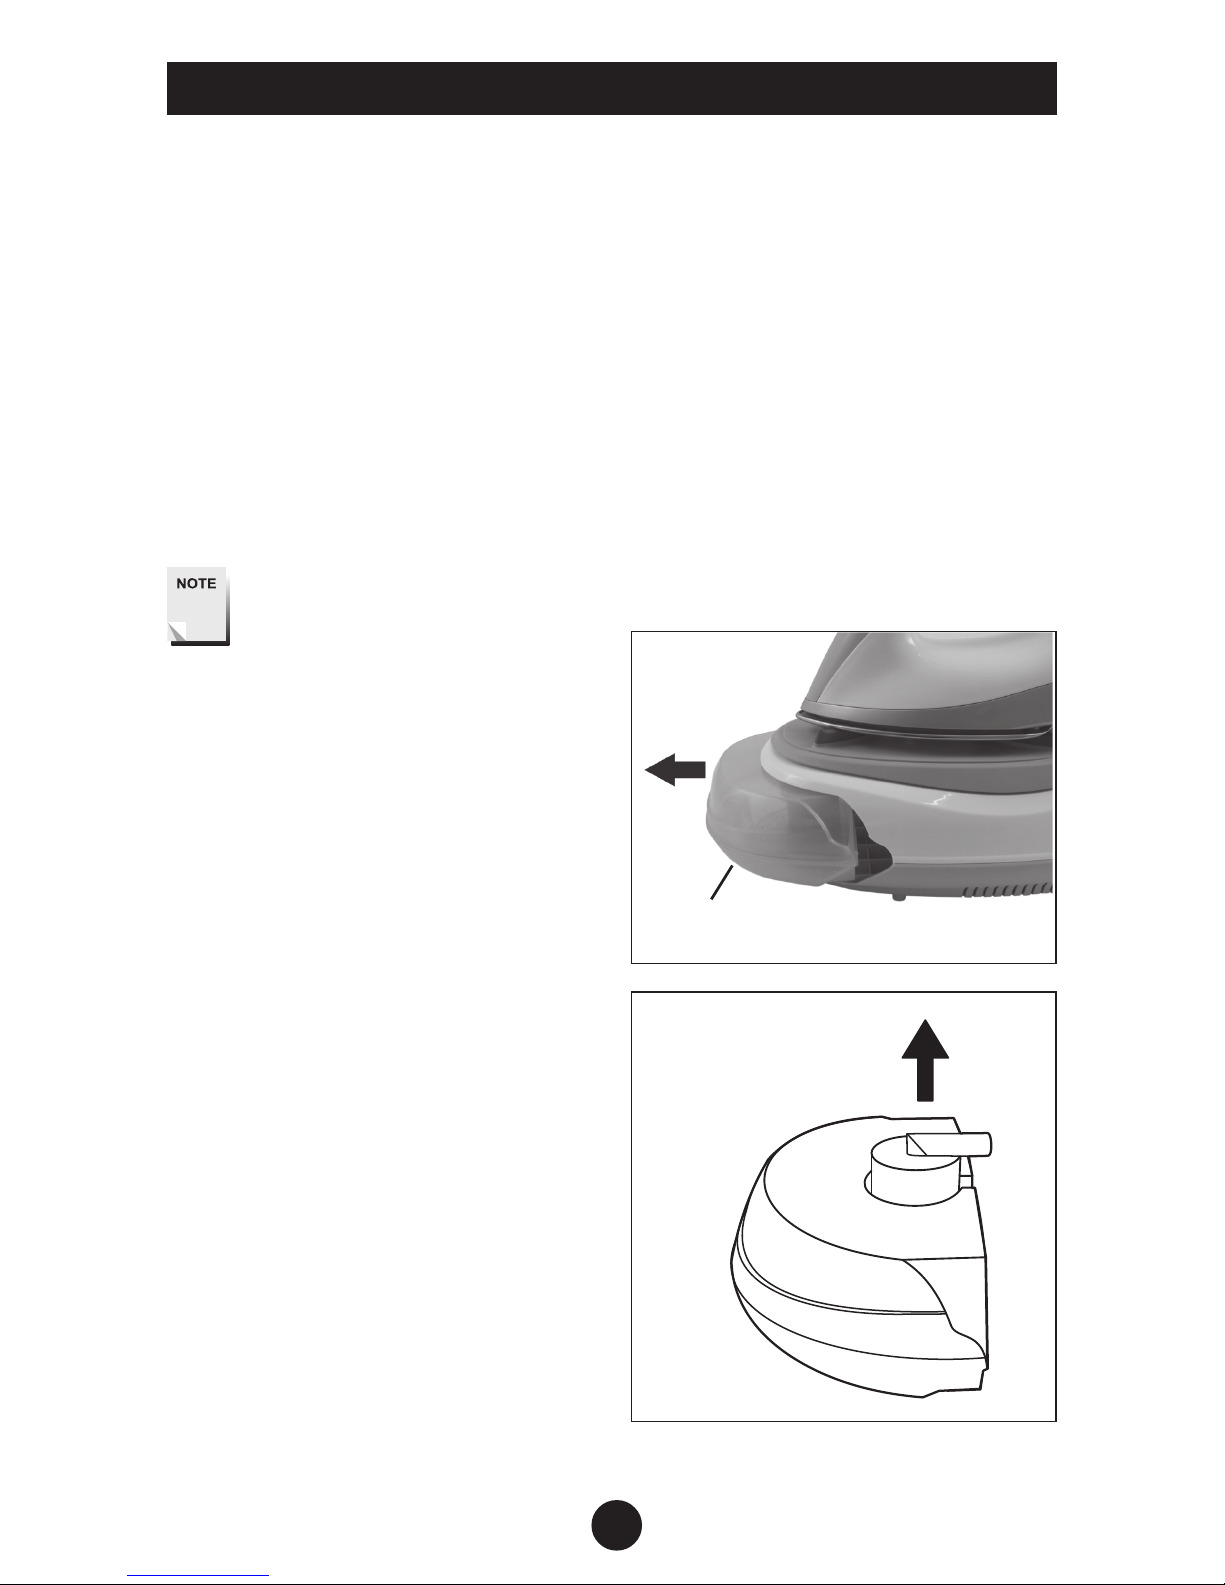
3 Remove the water tank, by
pressing the release button
located on the underside of the
tank. (Fig 1).
4 Remove the anti-calc cartridge by
lifting from the tank. (Fig 2).
5 Fill with cold tap water and
empty. This will rinse out any
foreign particles which may
remain from the manufacturing
process.
6 Refill the water tank with cold
water before replacing the anticalc filter.
7 Insert the tank into the base unit,
ensuring that it latches securely
into place.
8 Connect the plug to the mains
supply and turn the power on.
Fig 1
Release Button
Fig 2
BEFORE USE

6
6
First time use
1 When the iron is connected to the
mains supply and the power ON/
OFF button is pressed you will
hear a single beep.
2 The heat indicator on the control
panel will light to show that the
steam generator is preheating.
3 The minimum (LOW) steam
setting is selected by default.
Select the highest setting (HIGH).
4 Press the temperature / standby
select button on the iron handle
to set the soleplate temperature
to its maximum setting.
The iron will now start to heat up
and the temperature indicator
light on the handle will flash.
When the iron has reached the
desired temperature, the light will
stop flashing and light
continuously. The iron is now
ready to use.
The temperature indicator lights
will flash on and off during
ironing as the iron maintains the
soleplate temperature.
If the iron is not up to full
temperature before you use it,
water will leak through the
soleplate. If this happens, stop
using the iron until the
temperature indicator light stops
flashing to indicate that the iron is
up to temperature again.
5 Press the steam button for 30
seconds to clean the steam
generating system.
NOTE:
You will hear a repeated
buzzing sound as the pump is
primed ready for use. The
noise will subside after a
short time. This is NOT a
fault.
6 Iron an old towel to ensure that
any residues inside the iron are
not transferred to your good
laundry.
If you find it necessary to clean
the soleplate, allow the iron to
completely cool down then wipe
over it with a slightly damp cloth.
WARNING!
During use the hot water
pipe and iron rest become
very hot, avoid contact,
especially if you have
sensitive skin.
USING YOUR IRON
 Loading...