

Page 1
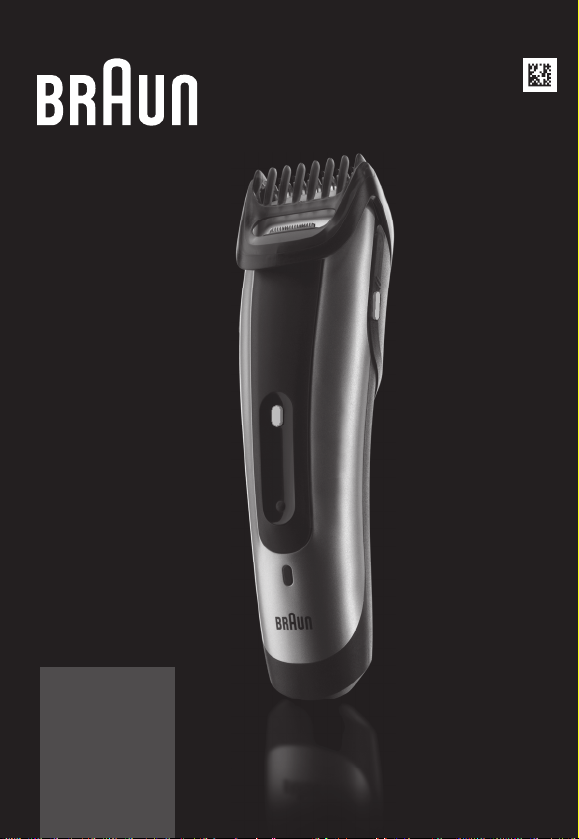
BT 5090
BT 5070
BT 5050
BT 5030
BT 5010
91392807/III-17
0
9
0
5
T
B
r
e
m
m
i
r
T
d
r
a
e
B
Type 5417, 5418
www.braun.com
Page 2
Braun Infolines
Deutsch 6
English 11
Français 19
Español 24
Português 29
Italiano 35
Nederlands 41
Dansk 46
Norsk 51
Svenska 56
Suomi 61
Ελληνικά 66
Braun GmbH
Frankfurter Straße 145
61476 Kronberg/Germany
www.braun.com
DE / AT 00 800 27 28 64 63
00 800 BRAUNINFOLINE
CH 08 44 - 88 40 10
UK 0800 783 7010
IE 1 800 509 448
FR 0 800 944 802
(service & appel gratuits)
BE 0 800 14 592
ES 900 814 208
PT 808 20 00 33
IT 800 440 017
NL 0 800-445 53 88
DK 70 15 00 13
NO 22 63 00 93
SE 020 - 21 33 21
FI 020 377 877
GR 210-9478700
HK 2926 2300
(Jebsen Consumer Service
Centre)
www.service.braun.com
DE/UK/FR/ES/PT/IT/NL/DK/NO/SE/
FI/GR
Page 3
2
1
0
•
9
•
8
•
7
•
6
•
5
•
4
•
3
•
2
•
1
2
0
m
m
1
0
1
0
•
9
•
8
•
7
•
6
•
5
•
4
•
3
•
2
•
1
1
0
•
9
•
8
•
7
•
6
•
5
•
4
•
3
3
BT5090
BT5070
4
BT5090
BT5070
5
BT5090/5070/5050
1a
1c
0
9
0
5
T
B
r
e
m
m
i
r
T
d
r
a
7
e
B
6a
6b
1b
1c
6c
a
4
8
8a
BT5090
9
BT5090
1h (BT5090/5070)
8h (BT5050/5030/5010)
Page 4
b
c
e
f
h i
5
d
g
Page 5
Deutsch
Unsere Produkte werden hergestellt, um höchste Ansprüche an Qualität,
Funktionalität und Design zu erfüllen. Wir wünschen Ihnen mit Ihrem neuen
Braun Produkt viel Freude.
Lesen Sie die Gebrauchsanweisung vollständig durch und bewahren Sie sie
als Referenz auf, da sie Sicherheitshinweise enthält.
Vorsicht
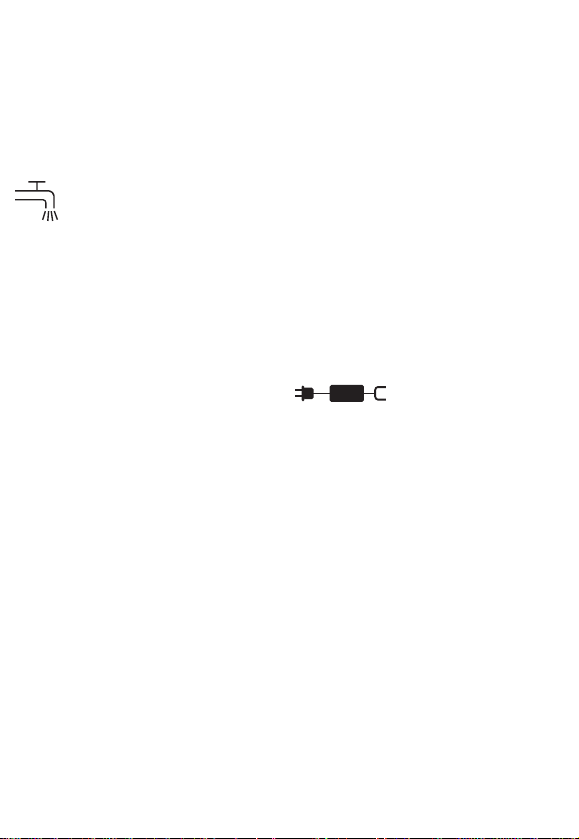
Das Gerät ist geeignet zur Reinigung unter fließendem
Wasser. Das Gerät ist vom Anschlusskabel zu trennen,
bevor es mit Wasser gereinigt wird.
Das Produkt ist mit einem Spezialkabel mit integriertem
Netzteil für Sicherheitskleinspannung ausgestattet. Es dürfen
weder Teile ausgetauscht noch Veränderungen vorgenommen
werden, da sonst Stromschlaggefahr besteht. Verwenden
Sie ausschließlich das mitgelieferte Spezialkabel.
Hat das Gerät die Markierung 491, kann jedes
Braun Netzteil der Codes 491-XXXX verwendet werden.
Das Gerät darf nicht mit beschädigtem Trimmer oder
defektem Spezialkabel verwendet werden.
Dieses Gerät kann von Kindern ab 8 Jahren und von Personen
mit reduzierten physischen, sensorischen oder mentalen
Fähigkeiten oder Mangel an Erfahrung und/oder Wissen
benutzt werden, wenn sie beaufsichtigt oder bezüglich des
sicheren Gebrauchs des Geräts unterwiesen wurden und
die daraus resultierenden Gefahren verstanden haben.
Kinder dürfen nicht mit dem Gerät spielen. Reinigung und
Benutzerwartung dürfen nicht durch Kinder durchgeführt
werden, es sei denn, sie sind älter als 8 Jahre und beaufsichtigt.
Ölflasche
Außer Reichweite von Kindern aufbewahren. Nicht verschlucken. Nicht im
Auge anwenden. Nur restentleert entsorgen.
6
Page 6

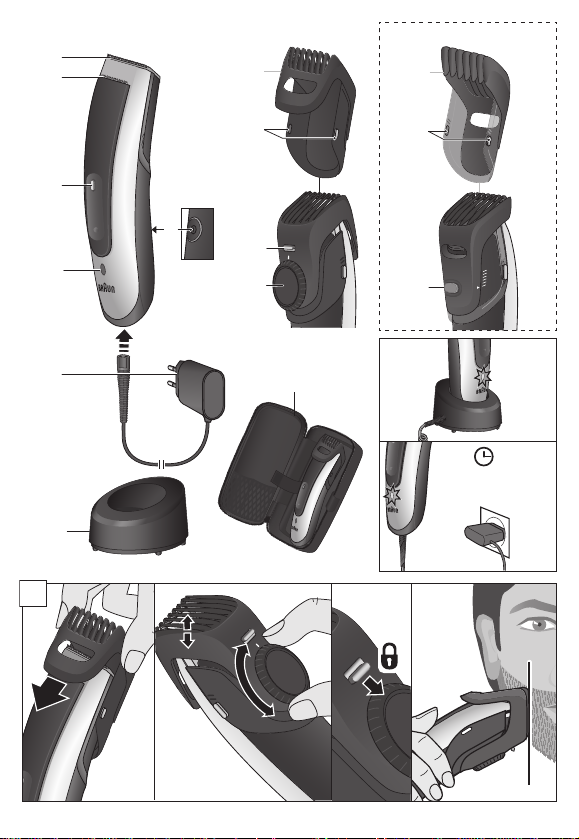
Beschreibung
1a Präzisions-Kammaufsatz zum Schneiden von Bart und kurzem Haar
1b Großer Kammaufsatz zum Schneiden von Kopfhaar*
1c Entriegelungstasten für Kammaufsatz
2 Breiter Trimmer (32 mm)
3 Präzisionstrimmer (16 mm)*
4 Entriegelungstaste Präzisionstrimmer*
5 Kontrollleuchte
6a Einschaltsperre für Präzisions-Kammaufsatz
6b Schnittlängeneinstellung für Präzisions-Kammaufsatz
6c Schnittlängeneinstellung für Kammaufsatz
7 Ein-/Ausschalter
8 Spezialkabel (Aussehen kann abweichen)
8a Ladestation*
9 Etui*
* nicht bei allen Modellen
Aufladen
Die empfohlene Umgebungstemperatur zum Laden ist 5 °C bis 35 °C.
Bei extrem niedrigen oder hohen Temperaturen kann es sein, dass der Akku
nicht richtig oder gar nicht geladen werden kann. Die empfohlene
Umgebungstemperatur zum Rasieren liegt bei 15 °C bis 35 °C. Setzen Sie
den Rasierer nicht längere Zeit Temperaturen über 50° C aus.
• Stellen Sie das ausgeschaltete Gerät in die Ladestation oder schließen Sie
es über das Spezialkabel (8) direkt ans Netz an.
• Bei der Erstladung oder wenn das Gerät einige Monate nicht benutzt wurde,
das Gerät mindestens 4 Stunden (BT 5050/5030/5010: 8 Stunden) laden.
• Wenn das Gerät voll geladen ist, durch kabellosen Gebrauch wieder
entladen. Danach wieder voll aufladen. Dies dauert ca. 1 Stunde
(BT 5050/5030/5010: 8 Stunden).
• Voll geladen kann das Gerät je nach Bart-/Haarstärke ca. 50 Minuten
kabellos betrieben werden.
• Die maximale Akku-Kapazität wird erst nach mehreren Lade-/Entladevorgängen erreicht.
Kontrollleuchte (5)
BT 5090/5070
• Die Kontrollleuchte zeigt den Ladezustand an.
• Die Kontrollleuchte blinkt grün, wenn das Gerät geladen wird. Wenn der
Akku voll geladen ist, leuchtet die Kontrollleuchte dauerhaft grün, vorausgesetzt, das Gerät ist am Netz angeschlossen.
7
Page 7

• Während der kabellosen Benutzung blinkt die Kontrollleuchte grün.
• Die Kontrollleuchte blinkt rot, wenn die Akkuladung zur Neige geht. In der
Regel können Sie Ihren Bart- bzw. Haarschnitt noch beenden.
BT 5050/5030/5010
• Die Kontrollleuchte (5) zeigt an, dass das Gerät geladen wird. Sind die
Akkus voll geladen, erlischt sie.
Kammaufsätze (1a, 1b)
• Die Kammaufsätze können abgenommen werden, indem die Entriege-
lungstasten (1c) mit Daumen und Zeigefinger gedrückt werden.
Bartschneiden
• Setzen Sie den Präzisions-Kammaufsatz (1a) auf das ausgeschaltete
Gerät (a).
• Stellen Sie sicher, dass die Einschaltsperre (6a) in der oberen Position ist
und drehen Sie die Schnittlängeneinstellung (6b) auf die gewünschte
Länge. Der Bart-Kammaufsatz gleitet automatisch nach oben oder unten
(mögliche Schnittlängeneinstellungen 1 - 10 mm in 0,5 mm Schritten).
• Um den Kammaufsatz in der gewünschten Schnittlängeneinstellung zu
sichern, schieben Sie die Einschaltsperre (6a) nach unten. Die
Schnittlänge ist festgesetzt.
• Es empfiehlt sich mit der höchsten Längeneinstellung zu beginnen und
dann stufenweise bis zur gewünschten Bartlänge zu kürzen.
• Ein-/Ausschalter (7) drücken und den Kammaufsatz mit der abgeschrägten Seite an den Bart ansetzen. Das Gerät gegen die Haarwuchsrichtung
führen (a).
• Um Verstopfung des Kammaufsatzes zu vermeiden, den Aufsatz ab und
zu mit der Bürste reinigen.
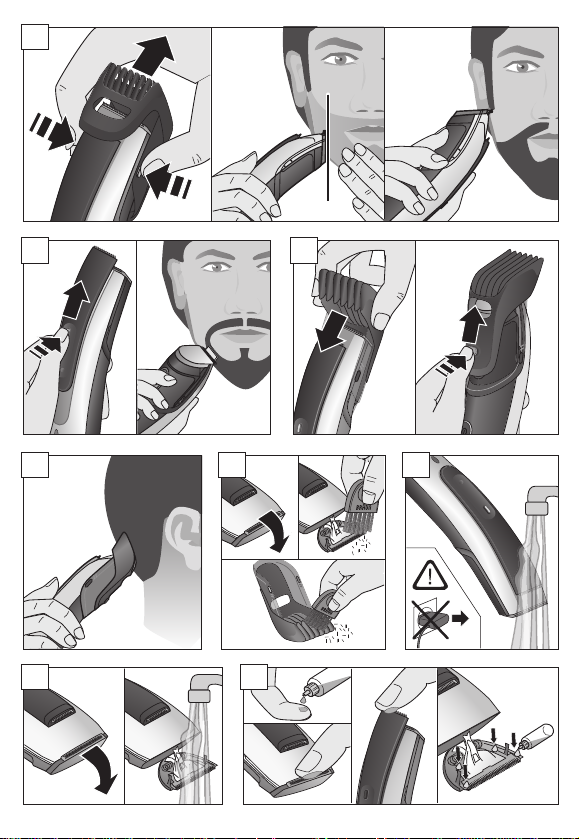
Konturen trimmen / stylen
• Der breite Trimmer (2) eignet sich sowohl für großflächiges Trimmen als
auch für das Formen und Stylen von Koteletten, Oberlippen- und Teilbärten. Den Kammaufsatz abnehmen. Die Haut straffen und den breiten
Trimmer gegen die Haarwuchsrichtung führen (b).
• Der Präzisionstrimmer (3) eignet sich zum präzisen Konturenschneiden
und zum Stylen von Linien und Kanten. Für die Anwendung den Entriegelungsknopf (4) drücken und den Präzisionstrimmer nach oben
schieben (c).
8
Page 8

Haarschneiden
Das Haar sollte sauber, gut gekämmt, entwirrt und trocken sein.
• Den großen Kammaufsatz (1b) auf das ausgeschaltete Gerät setzen (d).
• Die Schnittlängeneinstellung (6c) drücken und den Kammaufsatz auf die
gewünschte Haarlänge einstellen (mögliche Schnittlängeneinstellungen
10 - 20 mm in 2 mm Schritten).
• Wenn Sie das Haarschneiden noch nicht gewöhnt sind, beginnen Sie mit
einer höheren Einstellung und reduzieren Sie diese nach und nach. Wenn
Sie das Haar kürzer als 10 mm schneiden wollen, empfiehlt es sich, erst
mit dem großen Kammaufsatz (1b) auf 10 mm zu kürzen und dann den
kleinen Distanzkamm (1a) für die gewünschte Länge zu nehmen.
• Langsame und kontrollierte Bewegungen ausführen. Das Gerät nicht
schneller durch das Haar führen, als es dies schneiden kann.
• Zwischendurch die Haare vom Gerät schütteln oder pusten. Wenn sich
der Distanzkamm mit Haaren zusetzt, den Distanzkamm abnehmen und
reinigen.
Reinigen
Durch regelmäßiges Reinigen behalten Sie die optimale Rasierleistung bei.
Reinigen mit dem Bürstchen
• Das Gerät ausschalten. Mit dem Daumen von vorne gegen den breiten
Trimmer drücken und öffnen. Der Trimmer öffnet sich ca. 45° und kann
auch abgenommen werden (h).
• Mit der Bürste den Trimmer und das innere Gehäuse reinigen.
Reinigen mit Wasser
• Das Gerät ausschalten. Kopf und beide Trimmer unter warmes, fließendes
Wasser halten. Sie können auch den geöffneten breiten Trimmer
abwaschen.
• Das Gerät mit geöffnetem breiten Trimmer trocknen lassen.
So halten Sie Ihr Gerät in Bestform
Um eine optimale Funktion des Schneidsystems zu gewährleisten, sollte es
nach jedem Gebrauch mit Leichtmaschinenöl geölt werden (i).
Akku-Pflege
Um die maximale Kapazität der Akkus zu erhalten, sollte das Gerät ca. alle
sechs Monate durch Gebrauch vollständig entladen werden. Danach das
Gerät wieder voll aufladen.
9
Page 9

Umweltschutz
Das Gerät enthält Akkus und/oder wiederverwertbare Elektrobauteile.
Im Sinne des Umweltschutzes darf dieses Gerät am Ende seiner
Lebensdauer nicht im Hausmüll entsorgt werden, sondern kann bei
entsprechenden lokal verfügbaren Rückgabe- und Sammelstellen
abgegeben werden.
Änderungen vorbehalten.
Elektrische Angaben siehe Bedruckung auf dem Spezialkabel.
Garantie
Als Hersteller übernehmen wir für dieses Gerät – nach Wahl des Käufers
zusätzlich zu den gesetzlichen Gewährleistungsansprüchen gegen den
Verkäufer – eine Garantie von 2 Jahren ab Kaufdatum. Innerhalb dieser
Garantiezeit beseitigen wir nach unserer Wahl durch Reparatur oder
Austausch des Geräts unentgeltlich alle Mängel, die auf Material- oder
Herstellungsfehlern beruhen. Die Garantie kann in allen Ländern in Anspruch
genommen werden, in denen dieses Braun Gerät von uns autorisiert verkauft
wird.
Von der Garantie sind ausgenommen: Schäden durch unsachgemäßen
Gebrauch, normaler Verschleiß sowie Mängel, die den Wert oder die
Gebrauchstauglichkeit des Geräts nur unerheblich beeinflussen.
Bei Eingriffen durch nicht von uns autorisierte Braun Kundendienstpartner
sowie bei Verwendung anderer als Original Braun Ersatzteile erlischt die
Garantie.
Im Garantiefall senden Sie das Gerät mit Kaufbeleg bitte an einen
autorisierten Braun Kundendienstpartner. Die Anschrift finden Sie unter
www.service.braun.com oder können Sie kostenlos unter 00800/27 28 64 63
erfragen.
10
Page 10
English
Our products are designed to meet the highest standards of quality,
functionality and design. We hope you entirely enjoy your new Braun
product.
Read these instructions completely, they contain safety information.
Keep them for future reference.
Warning
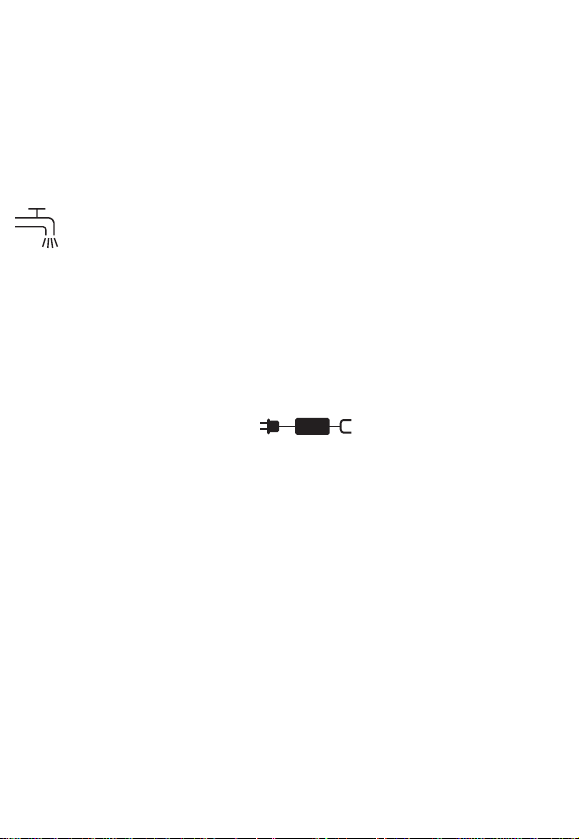
The appliance is suitable for cleaning under running
tap water. Detach the appliance from the power supply
before cleaning it with water.
The appliance is provided with a special cord set with an
integrated Safety Extra Low Voltage power supply. Do not
exchange or manipulate any part of it. Otherwise there is
risk of electric shock. Only use the special cord set provided with your appliance.
If the appliance is marked 491, you can use it
with any Braun power supply coded 491-XXXX.
Never use the appliance with damaged trimmers or special
cord set.
This appliance can be used by children aged from 8 years
and above and persons with reduced physical, sensory or
mental capabilities or lack of experience and knowledge if
they have been given supervision or instruction concerning
the safe use of the appliance and understand the hazards
involved. Children shall not play with the appliance. Cleaning
and user maintenance shall not be made by children unless
they are older than 8 years and supervised.
Oil bottle
Keep out of reach of children. Do not swallow. Do not apply to eyes.
Dispose of properly when empty.
11
Page 11

Description
1a Precision comb for trimming beard and short hair
1b Hair comb for cutting hair *
1c Release buttons for comb
2 Wide trimmer (32 mm)
3 Precision trimmer (16 mm) *
4 Release button precision trimmer *
5 Charge Indicator
6a Lock switch for precision comb
6b Length selector for precision comb
6c Length selector for hair comb
7 On/off switch
8 Special cord set (design can differ)
8a Charging stand *
9 Pouch *
* not with all models
Charging
Recommended ambient temperature for charging is 5 °C to 35 °C.
The battery may not charge properly or at all under extreme low or high
temperatures. Recommended ambient temperature for trimming is 15 °C
to 35 °C. Do not expose the appliance to temperatures higher than 50 °C for
extended periods of time.
• Place the appliance (switched off) in the charging stand or connect it
directly to an electrical outlet via the special cord set (8).
• When charging for the first time or when the appliance is not used for
a few months, leave the appliance to charge continuously for 4 hours
(BT 5050/5030/5010: 8 hours).
• Once the appliance is completely charged, discharge it through normal
use. Then recharge to full capacity. Subsequent charges will take about
1 hour (BT 5050/5030/5010: 8 hours).
• A full charge provides up to 50 minutes of cordless operating time.
This may vary according to your beard growth.
• Maximum battery capacity will only be reached after several charging/
discharging cycles.
Charge Indicator (5)
BT 5090/5070
• The charge indicator shows the battery status.
• The charge indicator blinks green when the appliance is being charged.
12
Page 12

When the battery is fully charged, the charge indicator shines permanently
green provided the appliance is connected to an electrical outlet.
• During cordless use the charge indicator blinks green.
• The charge indicator flashes red when the battery is running low.
You should be able to finish your current trimming sequence.
BT 5050/5030/5010
• The charge indicator (5) shows that the appliance is being charged.
When the battery is fully charged, the charge indicator turns off.
Comb attachments (1a, 1b)
• The combs can be taken off by pressing the release buttons (1c) with
your thumb and forefinger.
Beard trimming
• Place the precision comb (1a) on the appliance with the appliance turned
off (a).
• Make sure the lock switch (6a) is in the upper position and turn the length
selector (6b) to your desired length. The beard comb slides automatically
up or down (possible length settings 1 - 10 mm in 0,5 mm steps).
• To lock the comb at your desired length slide the lock switch (6a) down.
The length selector is fixed.
• It is advisable to begin with the highest setting and then reduce the
setting until you reach the desired beard length.
• Press the on/off switch (7). Hold the beard comb with the angled edge
against your beard and guide the trimmer against the direction of the hair
growth (a).
• To avoid clogging the beard comb with hair, clean it from time to time with
the brush.
Contour Trimming / Styling
• The wide trimmer (2) evenly cuts and trims large areas. It is ideal for
shaping sideburns, moustaches and partial short beards. Take off the
comb. While stretching the skin, guide the wide trimmer against the
direction of hair growth (b).
• The precision trimmer (3) precisely defines lines and edges and is ideal
for precise contouring. To use the precision trimmer, press the release
button (4) and slide it up (c).
13
Page 13

Hair cutting
The hair should be clean, well combed, tangle-free and dry.
• Place the hair comb (1b) on the appliance with the appliance turned off (d).
• Press the length selector (6c) and slide the comb to your desired length
(possible length settings 10 - 20 mm in 2 mm steps).
• If you are not used to clipping hair, begin with a highest setting and then
reduce the setting to avoid cutting more hair than desired. If you want to
cut your hair shorter than 10 mm, we advise to first cut it with the hair
comb (1b) down to 10 mm and then use the beard comb for the desired
length.
• Use a slow and controlled movement. Do not force the appliance through
the hair faster than it can be cut.
• In between, shake or blow off the hair. If too much hair is caught in the
comb, remove and clean it.
Cleaning
Regular cleaning ensures better trimming performance.
Cleaning with the brush
• Switch off the appliance. Open the wide trimmer by pressing with the
thumb against the trimmer from the front side. It opens by ca. 45° and can
also be taken off (h).
• Using the brush clean the trimmers and the space behind the wide
trimmer (inside the housing).
Cleaning with water
• Switch off the appliance and rinse the head and trimmers under warm
running water. You can also rinse the opened wide trimmer.
• Leave the appliance with opened wide trimmer to dry.
Keeping your appliance in top shape
To keep the cutting system working properly, oil it with light machine oil
after each use (i).
Preserving the batteries
In order to maintain the optimum capacity of the rechargeable batteries, the
appliance has to be fully discharged (by trimming/cutting) every 6 months
approximately. Then recharge the appliance to full capacity.
14
Page 14

Environmental notice
Product contains batteries and/or recyclable electric waste.
For environment protection do not dispose of in household waste,
but for recycling take to electric waste collection points provided in
your country.
Subject to change without notice.
For electric specifications, see printing on the special cord set.
Guarantee
We grant a 2 year guarantee on the product commencing on the date of
purchase. Within the guarantee period we will eliminate any defects in the
appliance resulting from faults in materials or workmanship, free of charge
either by repairing or replacing the complete appliance at our discretion.
This guarantee extends to every country where this appliance is supplied by
Braun or its appointed distributor.
This guarantee does not cover: damage due to improper use, normal wear
or use as well as defects that have a negligible effect on the value or
operation of the appliance.
The guarantee becomes void if repairs are undertaken by unauthorised
persons and if original Braun parts are not used.
To obtain service within the guarantee period, hand in or send the complete
appliance with your sales receipt to an authorised Braun Customer Service
Centre (address information available online at www.service.braun.com).
For UK only:
This guarantee in no way affects your rights under statutory law.
For Australia & New Zealand only:
Warranty
In Australia, our goods come with guarantees that cannot be excluded
under the Australian Consumer Law. You are entitled to a replacement or
refund for a major failure and for compensation for any other reasonably
foreseeable loss or damage. You are also entitled to have the goods
repaired or replaced if the goods fail to be of acceptable quality and the
failure does not amount to a major failure.
The benefi ts given by this warranty are in addition to other rights and
remedies of the consumer law.
15
Page 15

For Claims in Australia please contact:
Procter & Gamble Australia Pty Ltd
1 Innovation Road, Macquarie Park
NSW 2113
Telephone: +612 8864 5000
Facsimile: +612 8864 5574
Email: gillette@au.pgconsumers.com
For claims in New Zealand please contact:
Procter & Gamble Distributing New Zealand Limited
c/o Simpson Grierson
88 Shortland Street, Auckland 1010
New Zealand
Telephone: +649 477 6400
Facsimile: +649 477 6399
Email: gillette@nz.pgconsumers.com
Our Warranty
This appliance is also covered by a 24 Month Replacement Warranty
commencing on the date of purchase (Our Warranty).
Our Warranty applies in all States and Territories of Australia and in
New Zealand and is in addition to any mandatory statutory obligations
imposed on Procter & Gamble Australia Pty. Ltd., its distributors and its
manufacturer. Our Warranty does not purport to exclude, restrict or
modify any such mandatory statutory obligations.
Our Warranty only covers defects in the appliance resulting from faults in
workmanship or materials. Therefore, if your appliance becomes faulty as a
result of faults in workmanship or materials, it will be exchanged by your
retailer, on presentation of proof of purchase.
Our Warranty only applies to domestic or household use of this appliance
and the warranty will only apply if the correct operating instructions included
with this product have been followed. For any appliance replaced under this
warranty, Our Warranty ends on the expiry of the warranty period that applied
to the original appliance.
Our Warranty does not cover:
A. Damage arising from improper use or operation on incorrect voltages.
B. Breakages to shaver foils, glass jars, etc.
C. Normal wear due to moving parts.
16
Page 16

D. Repairs undertaken by unauthorised service personnel or use of non
genuine parts.
E. Appliances that are outside the warranty period or are not faulty.
This appliance is not intended for use by young children or infi rm persons
without supervision. Young children should be supervised to ensure that they
do not play with the appliance.
If the appliance is powered by a cord extension set or electrical portable outlet
device these should be positioned so they are not subject to splashing or
ingress of moisture.
To the extent permitted by the laws of the Commonwealth of Australia and
New Zealand and applicable laws of a State or Territory of Australia, and
without affecting any mandatory statutory obligations imposed by law,
Our Warranty is given in exchange for any other rights you may have against
Procter & Gamble Australia Pty. Ltd. or its distributors or manufacturer,
whether at law, in tort (including negligence), in equity or under statute.
Please retain proof of purchase of this appliance. If you have any questions in
relation to Our Warranty, please call our Consumer Service line (see below for
numbers).
If you intend to make a claim please telephone our Customer Service line on
the numbers set out below to obtain information about your claim and any
costs associated with claiming under Our Warranty. You will bear the cost of
returning your product to us.
Repairs and service
If you are sending your appliance for repair under Our Warranty, please pack
the appliance adequately and send it to your nearest Service Agent, at your
expense. For service or replacement parts refer to the authorised Service
Agents listed overleaf. Local Service Agents may change from time to time –
in that event please contact the Consumer Service free call number below for
updated local service agent details.
Australian Consumer Service (free call): 1 800 641 820
New Zealand Consumer Service (free call): 0 800 108 909
17
Page 17

Australian & New Zealand Service Agents
VICTORIA & TASMANIA
Statewide Services Pty Ltd trading
as J A Appliances
17-19 Hossack Avenue
Coburg North, VIC 3058
Tel. (03) 8371 9100
Fax. (03) 9355 8644
Email: jaappliances@
statewideservices.com.au
QUEENSLAND
Walters Import trading as Brisbane
Appliance Service Centre
449 Beaudesert Road
Moorooka QLD 4105
Tel. (07) 3277 0360
Fax. (07) 3274 2909
Email: basc@waltersimport.com.au
WESTERN AUSTRALIA
Mark 1 Appliances
Unit 1, 46 Abernethy Road
Belmont, WA 6104
Tel. (08) 9475 0911
Fax. (08) 9475 0922
Email: mark1app@iinet.net.au
NEW SOUTH WALES & ACT
Faulder Appliance Services Pty Ltd
Shop 4,
9 Evans Road,
Rooty Hill, NSW 2766
Tel. (02) 9625 3064
Fax. (02) 9625 3037
Email: fas16@bigpond.com
SOUTH AUSTRALIA & NT
Adelaide Service Centre
Shop B2,
Parkholme Shopping Centre
319 Oaklands Road, Parkholme
Adelaide, SA 5043
Tel. (08) 8357 5800
Fax. (08) 8357 5833
Email: ascpkh@adam.com.au
NEW ZEALAND
Key Service Ltd
7D Echelon Place East Tamaki
Manukau City
Auckland
New Zealand
(PO Box 38569, Howick, Auckland,
New Zealand)
Tel. (09) 916 0960
Fax. (09) 916 0970
Email: key-service-ltd@xtra.co.nz
18
Page 18
Français
Nos produits sont conçus pour satisfaire aux plus hautes exigences en
matière de qualité, fonctionnalité et design. Nous espérons que vous serez
pleinement satisfait de votre nouveau rasoir Braun.
Lisez l’intégralité des instructions d’utilisation, elles contiennent des
informations de sécurité. Conservez ce document pour le consulter
également ultérieurement.
Attention
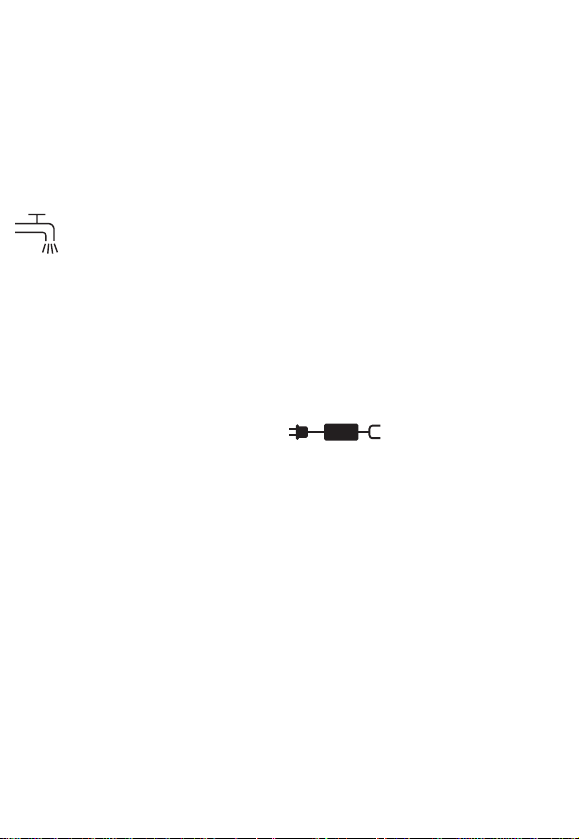
L’appareil peut être nettoyé à l’eau du robinet.
Débranchez l’appareil de la prise électrique avant de
le nettoyer à l’eau.
Cet appareil est équipé d’un cordon d’alimentation avec un
adaptateur basse tension intégré. Ne modifiez ni ne manipulez aucun de ses composants afin d’éviter tout risque
d’électrocution. Utilisez uniquement le cordon d’alimentation fourni avec votre rasoir.
Si l’appareil porte la référence 491, vous pouvez
l’utiliser avec n’importe quel alimentation marquée 491-XXXX.
Ne jamais utiliser cet appareil si les tondeuses ou le cordon
d’alimentation sont endommagés.
Cet appareil peut être utilisé par des enfants de 8 ans et
plus et par des personnes dont les capacités physiques,
sensorielles ou mentales sont réduites, ou des personnes
dénuées d’expérience ou de connaissance, si elles ont pu
bénéficier, par l’intermédiaire d’une personne responsable
de leur sécurité, d’une surveillance ou d’instructions préalables concernant l’utilisation de l’appareil en toute sécurité et les dangers encourus. Les enfants ne doivent pas
jouer avec l’appareil. Le nettoyage et l’entretien ne doivent
pas être faits par des enfants, à moins qu’ils ne soient âgés
de plus de 8 ans et qu’ils ne soient sous surveillance.
19
Page 19

Bouteille d’huile
Conservez hors de portée des enfants. Ne pas avaler. Ne pas appliquer sur
les yeux. Jeter la bouteille correctement lorsqu’elle est vide.
Description
1a Sabot de précision pour la tonte de la barbe et des cheveux courts
1b Sabot pour cheveux *
1c Boutons pour retirer le sabot
2 Bloc de coupe (32 mm)
3 Tondeuse de précision (16 mm) *
4 Bouton pour retirer la tondeuse de précision *
5 Témoin lumineux
6a Bouton de verrouillage pour le sabot de précision
6b Molette de réglage de la hauteur de coupe du sabot de précision
6c Molette de réglage de la hauteur du sabot des cheveux
7 Bouton marche/arrêt
8 Cordon d’alimentation (le design peut varier)
8a Socle de charge *
9 Pochette *
* non fournie avec tous les modèles
Mise en charge de l’appareil
La température ambiante recommandée pour charger le rasoir est comprise
entre 5 °C et 35 °C. La batterie peut ne pas se charger correctement ou pas
du tout à des températures extrêmement basses ou élevées. La température
ambiante recommandée pour se raser est comprise entre 15° C et 35 °C.
N’exposez pas votre rasoir à des températures supérieures à 50 °C pendant
une période prolongée.
• Posez l’appareil (arrêté) sur le socle de charge, ou branchez-le directement sur une prise électrique à l’aide du cordon d’alimentation (8).
• Lors de la première mise en charge ou lorsque l’appareil n’a pas été utilisé
pendant plusieurs mois, laissez l’appareil charger en continu pendant
4 heures (BT 5050/5030/5010 : 8 heures).
• Une fois que l’appareil est complètement chargé, utilisez-le normalement
jusqu’à ce qu’il soit complètement déchargé. Puis, le recharger complètement. Les mises en charge effectuées par la suite prendront environ
une heure (BT 5050/5030/5010 : 8 heures).
• Après une charge complète, l’autonomie de l’appareil est de 50 minutes.
Cette autonomie varie toutefois selon votre type de barbe.
• La capacité maximum de la batterie ne sera atteinte qu’après plusieurs
cycles de charge/décharge.
20
Page 20

Témoin lumineux (5)
BT 5090/5070
• Le témoin lumineux indique l’état de la batterie.
• Le voyant vert clignote lorsque l’appareil est en charge. Lorsque la
batterie est complètement chargée, le voyant vert s’éclaire en permanence tant que l’appareil reste branché sur une prise de courant.
• Lors de l’utilisation sans fil, la voyant vert clignote.
• Lorsque la batterie est en fin d’autonomie un voyant rouge s’éclaire.
Vous devriez néanmoins pouvoir terminer la taille en cours.
BT 5050/5030/5010
• Le témoin lumineux de charge (5) s’allume, indiquant que le rasoir est en
train de se charger. Lorsque la batterie est complètement rechargée, le
témoin de charge s’éteint.
Sabot et accessoires (1a, 1b)
• Pour retirer les sabots, appuyez sur les boutons (1c) à l’aide de vos
pouces et index.
Rasage
• Placez le sabot de précision (1a) sur l’appareil, en vous assurant que
l’appareil soit éteint.
• Assurez-vous que le bouton de verrouillage (6a) est mis dans la position
la plus haute, puis tournez la molette de hauteur de coupe (6b) vers la
longueur désirée. Le sabot de barbe glisse automatiquement vers le haut
ou vers le bas (différentes hauteurs de coupe 1-10mm, par pas de 2 mm).
• Pour bloquer le sabot à la longueur désirée, faites glisser le bouton de
verrouillage (6a) vers le bas. Le sabot est alors bloqué à la longueur désirée.
• Il est conseillé de commencer avec le réglage de la plus haute coupe,
puis de le réduire jusqu’à atteindre la longueur de barbe désirée.
• Mettre en marche en appuyant sur le bouton (7). Maintenir le sabot à
barbe contre la peau et déplacer la tondeuse dans le sens contraire de la
pousse du poil.
• Pour éviter que le sabot ne soit saturé par les poils, nettoyez-le régulièrement avec la brosse.
Coupe / Rasage des contours
• Le bloc de coupe (2) coupe et taille les zones larges. Il est idéal pour la
coupe des pattes, des moustaches et des barbes courtes. Enlevez le
sabot. Puis tendre la peau et déplacez la tondeuse dans le sens contraire
à la pousse du poil.
21
Page 21

• La tondeuse de précision (3) délimite précisément les lignes et les bords
et est idéale pour la précision des contours. Pour utiliser la tondeuse de
précision, appuyez sur le bouton (4) et faites-la coulisser vers le haut (c).
Coupe de cheveux
Les cheveux doivent être propres, bien peignés, démêlés et secs.
• Appareil arrêté, placer le sabot pour cheveux (1b).
• Appuyez sur la molette de hauteur de coupe (6c) et faites la coulisser
vers le haut (différentes hauteurs de coupe 10-20mm, par pas de 2mm).
• Si vous n’êtes pas habitué à couper vos cheveux, commencez par un
réglage de la plus haute coupe, puis diminuez-le ensuite pour éviter de
couper plus que ce que vous ne le souhaiteriez. Si vous voulez couper
vos cheveux plus courts que 10 mm, nous vous conseillons de couper
d’abord avec le sabot pour cheveux (1b) réglage 10 mm, puis d’utiliser le
sabot à barbe pour obtenir la longueur désirée.
• Déplacez la tondeuse en la faisant glisser lentement tout en contrôlant
le geste. Ne pas forcer l’appareil à couper plus vite que ce qui lui est
possible de faire.
• De temps en temps, secouez ou soufflez sur le sabot pour évacuer les
cheveux. Si trop de cheveux s’accumulent dans le sabot, retirez-le et
videz-le.
Nettoyage
Un nettoyage régulier garantit une performance de rasage optimale.
Nettoyage à la brosse
• Arrêtez l’appareil. Repoussez avec votre pouce le bloc de coupe pour le
dégrafer. Il s’ouvre à 45° et peut être également retiré (h).
• Utilisez la brosse pour nettoyer les tondeuses ainsi que l’arrière du bloc
de coupe (et l’espace entre le boîtier).
Nettoyage à l’eau
• Arrêtez l’appareil puis rincez la tête et les tondeuses à l’eau chaude
courante. Vous pouvez également rincer la tondeuse large lorsqu’elle
est sortie.
• Laissez sécher l’appareil avec le bloc de coupe ouvert pour un meilleur
séchage.
Gardez votre appareil en bon état
Pour assurer le bon fonctionnement du système de coupe, appliquez une
goutte d’huile après chaque utilisation (i).
22
Page 22

Entretien des batteries
Afin de conserver la capacité maximum des batteries rechargeables,
l’appareil doit être complètement déchargé en utilisation (rasage/taille)
environ tous les 6 mois. Puis, rechargez-le à sa pleine capacité.
Remarque environnementale
Ce produit contient des batteries rechargeables et/ou des déchets
électriques recyclables. Afin de protéger l’environnement, ne jetez
jamais l’appareil dans les ordures ménagères a la fin de sa durée de
vie. Remettez-le à votre centre service agréé Braun ou déposez-le
dans des sites de récupération appropriés conformément aux réglementations locales ou nationales en vigueur.
Sujet à toute modification sans préavis.
Voir les spécifications électriques mentionnées sur l’adaptateur basse
tension.
Garantie
Nous accordons une garantie de 2 ans sur ce produit, à partir de la date
d’achat. Pendant la durée de la garantie, Braun prendra gratuitement à sa
charge la réparation des vices de fabrication ou de matière en se réservant le
droit de décider si certaines pièces doivent être réparées ou si l’appareil
lui-même doit être échangé. Cette garantie s’étend à tous les pays où cet
appareil est commercialisé par Braun ou son distributeur exclusif.
Cette garantie ne couvre pas : les dommages occasionnés par une utilisation
inadéquate, l’usure normale ainsi que les défauts d’usures qui ont un effet
négligeable sur la valeur ou l’utilisation de l’appareil. Cette garantie devient
caduque si des réparations ont été effectuées par des personnes non
agréées par Braun et si des pièces de rechange ne provenant pas de Braun
ont été utilisées.
Pour toute réclamation intervenant pendant la période de garantie, retournez
ou rapportez l’appareil ainsi que l’attestation de garantie à votre revendeur
ou à un Centre Service Agréé Braun.
Veuillez vous référer à www.service.braun.com ou appeler le 0 800 944 802
(service consommateurs – service & appel gratuits) pour connaître le Centre
Service Agréé Braun le plus proche de chez vous.
Clause spéciale pour la France
Outre la garantie contractuelle exposée ci-dessus, nos clients bénéficient de
la garantie légale des vices cachés prévue aux articles 1641 et suivants du
Code civil.
23
Page 23

Español
Nuestros productos han sido diseñados para cumplir con los más altos
estándares de calidad, funcionalidad y diseño. Esperamos que disfrute de
su nuevo producto Braun.
Lea las instrucciones completamente, contienen información de seguridad.
Guárdelas para consultarlas en el futuro.
Advertencia
Este aparato puede lavarse con agua del grifo.
Desenchufe el aparato de la red eléctrica antes de
lavarlo con agua.
Esta afeitadora incluye un cable de conexión a la red eléctrica con un Voltaje Extra Bajo de Seguridad. No cambie
o manipule ninguna de sus partes, de otro modo podría
correr el riesgo de recibir una descarga eléctrica. Utilice
solo el cable especial suministrado con su afeitadora.
Si el aparato incluye la inscripción 491, puede
utilizarlo con cualquier cable de alimentación de Braun con
código tipo 491-XXXX.
Nunca utilice este aparato con los recortadores o con el
cable dañados.
Este aparato puede ser utilizado por niños a partir de los
8 años y personas con capacidades físicas, sensoriales o
mentales reducidas o con falta de experiencia y conocimiento
si se les dan la supervisión o instrucciones adecuadas para
el uso seguro del aparato y entienden los riesgos que su
uso implica. Los niños no deberían jugar con el aparato.
Los niños no deberían realizar la limpieza ni el mantenimiento del aparato a no ser que sean mayores de 8 años y
lo hagan bajo supervisión.
Bote de aceite lubricante
Mantenga el bote de aceite fuera del alcance de los niños. No lo ingiera.
24
Page 24

No lo aplique sobre ojos. Una vez vacío, proceda adecuadamente a su
eliminación.
Descripción
1a Peine de presición para recortar la barba y el pelo corto
1b Peine para cortar el cabello *
1c Botones para liberar el peine
2 Recortador ancho (32 mm)
3 Recortador de precisión (16 mm) *
4 Botón liberador del recortador de precisión *
5 Luz de encendido
6a Interruptor de bloqueo para peine de precisión
6b Selector de posición del peine de precisión
6c Selector de posición del peine para cortar el cabello
7 Botón de encendido y apagado
8 Cable especial de conexión a la red eléctrica (el diseño puede variar)
8a Base para recargar *
9 Funda *
* no disponible en todos los modelos
Cargar
La temperatura ambiental recomendada para la carga se sitúa entre 5 °C y
35 °C. En condiciones de temperaturas extremadamente bajas o altas la
batería podría no cargarse, o no hacerlo adecuadamente. No exponga la
afeitadora a temperaturas superiores a 50 °C durante períodos prolongados
de tiempo.
• Coloque el aparato apagado en la base para recargar o conéctelo
directamente a una toma de corriente a través del cable de alimentación
especial (8).
• Al cargar la afeitadora por primera vez o si no la ha usado en unos meses,
deje que el aparato se cargue de manera continuada durante 4 horas
(BT 5050/5030/5010: 8 horas).
• Una vez que el aparato esté completamente cargado, descargue la
batería con el uso normal. Después recárguela de nuevo por completo.
Las cargas siguientes tardarán 1 hora (BT 5050/5030/5010: 8 horas).
• Una carga completa ofrece 50 minutos de funcionamiento inalámbrico,
dependiendo del tamaño de la barba.
• La capacidad máxima de la batería sólo se alcanzará después de varios
ciclos de carga/descarga.
25
Page 25

Luz de encendido (5)
BT 5090/5070
• La luz de encendido muestra el estado de la batería.
• La luz será verde y parpadeará cuando el aparato se esté cargando.
Cuando la batería se haya cargado la luz será verde y se mantendrá fija,
siempre que el aparato esté conectado a la red eléctrica.
• Mientras el aparato se utilice de manera inalámbrica, la luz estará verde y
parpadeará.
• La luz será roja cuando la batería esté baja. La batería restante le
permitirá aún terminar el afeitado en curso.
BT 5050/5030/5010
• La luz de encendido (5) indica que la batería se está cargando. Cuando la
batería esté completamente cargada, la luz se apagará.
Accesorios de peine (1a, 1b)
• Los peines pueden soltarse pulsando los botones de liberación (1c) con
el dedo e índice.
Recortar la barba
• Coloque el peine de precisión (1a) con el aparato apagado (a).
• Asegúrese de que el interruptor de bloqueo (6a) se encuentre en la
posición superior y cambie el selector (6b) a la altura deseada. El peine
se moverá automáticamente hacia arriba o abajo (posibles posiciones:
de 1 - 10 mm a intervalos de 0,5 mm).
• Para bloquear el peine en la posición deseada mueva el interruptor de
bloqueo hacia abajo. El selector de posición quedará fijo.
• Es aconsejable comenzar con la longitud mayor y después ir reduciéndola
hasta conseguir la longitud de barba deseada.
• Presione el botón de encendido/apagado (7). Sostenga el peine para
barba con el borde angular contra la barba y deslice el recortador en el
sentido contrario del crecimiento del pelo (a).
• Para evitar que el peine de barba se atasque, límpielo de vez en cuando
con el cepillo.
Recortar / Estilizar el contorno
• El recortador ancho (2) corta y recorta de manera uniforme zonas gran-
des. Es ideal para dar forma a patillas, bigotes y barbas parciales cortas.
Retire el peine. A la vez que estira la piel, deslice el recortador ancho en
la dirección contraria del crecimiento del pelo.
26
Page 26

• El recortador de precisión (3) define con precisión las líneas y los bordes,
siendo el accesorio ideal para un contorno preciso. Para utilizar el
recortador de precisión, presione el botón liberador (4) y deslícelo hacia
arriba.
Cortar el pelo
El pelo debe estar limpio, sin nudos y seco.
• Coloque el peine para cortar el cabello (1b) en el aparato con este
apagado.
• Presione el selector de posición (6c) y mueva el peine a la posición
deseada (posibles posiciones: de 10 - 20 mm a intervalos de 2 mm).
• Si no está acostumbrado a recortar el pelo, comience utilizando una
longitud mayor y luego vaya reduciendo la longitud para evitar cortar el pelo
más de lo deseado. Si desea cortar su pelo a menos de 10 mm, le
aconsejamos cortarlo primero con el peine para cortar el cabello (1b)
hasta los 10 mm y después utilizar el peina para la barba para conseguir
la longitud deseada.
• Utilice un movimiento lento y controlado. No fuerce el aparato a través
del pelo más rápido de la velocidad necesaria para poder cortarlo.
• Mientras se corta el pelo, sacuda o quite de vez en cuando el pelo. Si se
acumula demasiado pelo en el peine, retírelo para limpiarlo.
Limpiar
Una limpieza regular asegura mejores resultados al recortar el pelo.
Limpiar con el cepillo
• Apague el aparato. Abra el recortador ancho apretando con el pulgar el
recortador desde la parte de delante. Se abrirá en un ángulo de 45° y
podrá sacarlo (h).
• Utilizando el cepillo, limpie los recortadores y el espacio de detrás del
recortador ancho (dentro de la caja).
Limpiar con agua
• Apague el aparato y enjuague el cabezal y los recortadores con agua
templada del grifo. También puede enjuagar el recortador ancho abierto.
• Deje el aparato con el recortador ancho abierto para que se seque.
Cómo mantener su afeitadora en perfecto estado
Para mantener adecuadamente el sistema de corte, ponga una gota de
aceite lubricante después de cada utilización (i).
27
Page 27

Preservar las baterías
Para mantener la capacidad óptima de las baterías recargables, debe
descargar por completo la afeitadora (al recortar/cortar) cada 6 meses
aproximadamente. Después recárguela a su capacidad máxima.
Información medioambiental
Este producto contiene baterías recargables. Para preservar el medio
ambiente, no tire este producto a la basura al final de su vida útil.
Para desecharlo puede acudir a un Centro de Asistencia Técnica
Braun o a los puntos de recogida habilitados por los ayuntamientos
de su país para su recogida.
Sujeto a modificaciones sin previo aviso.
Las especificaciones eléctricas aparecen impresas en el cable de conexión
a la red eléctrica.
Garantía
Braun concede a este producto 2 años de garantía a partir de la fecha de
compra.
Dentro del periodo de garantía, subsanaremos, sin cargo alguno, cualquier
defecto del aparato imputable tanto a los materiales como a la fabricación,
ya sea reparando, sustituyendo piezas, o facilitando un aparato nuevo
según nuestro criterio.
La garantía no ampara averías por uso indebido, funcionamiento a distinto
voltaje del indicado, conexión a un enchufe inadecuado, rotura, uso o
desgaste normal, así como defectos que supongan un impacto insignificante
en el valor o funcionamiento del producto.
La garantía perderá su efecto en caso de que se hayan realizado reparaciones
por personas no autorizadas o no se hayan utilizado, o si no son utilizados
recambios originales de Braun.
La garantía solamente tendrá validez si la fecha de compra es confirmada
mediante la factura o el albarán de compra correspondiente.
Esta garantía tiene validez en todos los países donde este producto sea
distribuido por Braun o por un distribuidor asignado por Braun:
www.service.braun.com.
En caso de reclamación bajo esta garantía, diríjase al Servicio de Asistencia
Técnica de Braun más cercano: www.service.braun.com.
Solo para España
Servicio al consumidor: Para localizar a su Servicio Braun más cercano o en el
caso de que tenga Vd. alguna duda referente al funcionamiento de este producto,
le rogamos contacte con el teléfono de atención al cliente: 900 814 208.
28
Page 28

Português
Os nossos produtos foram concebidos para alcançar os mais elevados
padrões de qualidade, funcionalidade e design. Esperamos que desfrute ao
máximo do seu novo produto Braun.
Leia atenta e cuidadosamente estas instruções de utilização, pois contêm
informações de segurança. Guarde-as para consulta futura.
Aviso
O aparelho pode ser lavado sob água corrente.
Desligue o aparelho da tomada eléctrica antes de o
limpar com água.
O aparelho vem equipado com um cabo de alimentação e
um transformador de baixa voltagem integrado. Não substitua, troque ou manipule qualquer peça do aparelho; se o
fizer, poderá correr o risco de sofrer um choque eléctrico.
Utilize apenas o cabo de alimentação especial fornecido
com o seu aparelho.
Caso o aparelho esteja marcado com
491, pode
utilizar qualquer fonte de alimentação Braun com o código
491-XXXX.
Nunca utilize o aparelho se os acessórios aparadores ou o
cabo de ligação estiverem danificados ou com defeito de
funcionamento.
Este aparelho pode ser utilizado por crianças com idade
igual ou superior a 8 anos e por pessoas com capacidades
físicas, sensoriais ou mentais reduzidas, ou com falta de
experiência e conhecimento, desde que sejam supervisionadas ou lhes tenham sido dadas instruções quanto à utilização segura do aparelho e se tiverem compreendido os
perigos envolvidos. As crianças não devem brincar com o
aparelho. Só é permitido às crianças com idade superior a
8 anos fazer a limpeza e a manutenção do aparelho quando
supervisionadas.
29
Page 29

Frasco de óleo
Manter fora do alcance das crianças. Não ingerir. Não aplicar nos olhos.
Quando o frasco estiver vazio, deite-o fora no local adequado para o efeito.
Descrição
1a Pente de precisão para corte da barba e pelo curto
1b Pente aparador para cortar cabelo *
1c Botões de libertação para o pente aparador
2 Aparador largo (32 mm)
3 Aparador de precisão (16 mm) *
4 Botão de libertação para o aparador de precisão *
5 Luz piloto
6a Interruptor de bloqueio para o pente de precisão
6b Seletor de comprimento para o pente de precisão
6c Seletor de comprimento para o pente de cabelo
7 Interruptor de ligar/desligar
8 Cabo de alimentação (o design pode variar)
8a Base de carregamento *
9 Bolsa *
* não disponível em todos os modelos
Carregamento
A temperatura ambiente ideal para carregar a sua máquina de barbear é de
5 °C a 35 °C. A bateria pode não carregar ou não carregar devidamente
em temperaturas extremamente altas ou baixas. A temperatura ideal para
se barbear é de 15 °C a 35 °C. Não exponha o aparelho a temperaturas
superiores a 50 °C por períodos prolongados.
• Usando o conjunto de cabo de alimentação (8), coloque o aparelho na
base de carregamento ou ligue-o a uma tomada eléctrica (com o motor
desligado).
• Ao carregar pela primeira vez ou quando o aparelho não tiver sido usado
durante alguns meses, deixe o aparelho carregar continuamente durante
4 horas (BT 5050/5030/5010: 8 horas).
• Quando o aparelho se encontrar totalmente carregado, deixe descar-
regar normalmente através do uso. Depois volte a recarregá-lo até à sua
capacidade máxima. Os carregamentos subsequentes demorarão
aproximadamente 1 hora (BT 5050/5030/5010: 8 horas).
• Uma bateria com máxima capacidade de carga permite uma utilização
durante 50 minutos sem ter o aparelho ligado à corrente, dependendo do
tamanho da barba.
30
Page 30

• A capacidade máxima da bateria só será atingida após vários ciclos de
carregamento/descarregamento.
Luz piloto (5)
BT 5090/5070
• A luz piloto indica o estado da batería.
• A luz piloto verde mostra que o aparelho se encontra a carregar. Quando
a bateria estiver totalmente carregada, a luz piloto verde piscará ficará
permanente, desde que o aparelho se encontre ligado a uma tomada
eléctrica.
• Durante o funcionamento sem fios, a luz piloto verde pisca.
• A luz vermelha acende quando a bateria está com carga reduzida; no
entanto, a capacidade restante será suficiente para poder acabar de aparar.
BT 5050/5030/5010
• A luz piloto (5) indica que o aparelho está a carregar. Quando a bateria
está totalmente carregada, a luz desliga-se.
Acessórios aparadores com pente (1a, 1b)
• Para retirar os pentes aparadores, pressione os botões de libertação (1c)
com o polegar e o dedo indicador.
Aparar a barba
• Posicione o pente de precisão (1a) no aparelho, com este desligado (a).
• Certifique-se de que o interruptor de bloqueio (6a) se encontra na
posição superior e ligue o seletor de comprimento (6b), para o
comprimento desejado. O pente para a barba desliza automaticamente
para cima e para baixo (possibilidades de configuração de comprimento
1 - 10 mm em intervalos de 0,5 mm).
• Para bloquear o pente no comprimento desejado, deslize o interruptor de
bloqueio (6a) para baixo. O seletor de comprimento ficará fixado.
• É aconselhável começar com a definição de comprimento maior e depois
reduzir até ao comprimento de barba desejado.
• Pressione o interruptor de ligar/desligar (7). Mantenha a extremidade
mais angular do pente aparador rente à barba e mova o aparador na
direcção oposta ao crescimento dos pêlos (a).
• Para evitar que o pente aparador para barba fique bloqueado com pêlos,
limpe-o de vez em quando com a escova de limpeza.
31
Page 31

Aparar Contornos / Estilizar
• O aparador largo (2) recorta e apara uniformemente áreas maiores.
É ideal para dar forma a patilhas, bigodes e barbas curtas. Retire o pente
aparador. Mantenha a pele esticada e oriente o aparador largo no sentido
contrário ao do crescimento dos pêlos (b).
• O aparador de precisão (3) define com precisão linhas e bordos, sendo
ideal para efectuar contornos de precisão. Para utilizar o aparador de
precisão, pressione o botão de libertação (4) e deslize-o para cima (c).
Cortar o cabelo
O cabelo deverá estar limpo, bem penteado, desembaraçado e seco.
• Coloque o pente aparador para cabelo (1b) no aparelho com o aparelho
desligado (d).
• Pressione o seletor de comprimento (6c) e deslize o pente até ao
comprimento desejado (possibilidades de configuração de comprimento
10 - 20 mm em intervalos de 2 mm).
• Se não está habituado a cortar o cabelo, é aconselhável começar com o
comprimento maior e depois reduzir até ao comprimento de cabelo
desejado, para evitar cortar mais que o desejado. Se desejar cortar o
cabelo mais curto do que 10 mm, aconselhamos que com o pente
aparador para cabelo (1b) corte até aos 10 mm e depois utilize o pente
aparador para a barba para selecionar o comprimento desejado.
• Faça movimentos lentos e controlados. Não force o aparelho contra o
cabelo mais rápido do que pode ser cortado.
• Nos intervalos, sacuda ou sopre os cabelos do aparelho. Se houver uma
grande acumulação de cabelos no pente, remova-o e limpe-o.
Limpeza
Uma limpeza regular assegura um melhor desempenho do aparelho
aparador.
Limpeza com a escova
• Desligue o aparelho. Para abrir o aparador largo pressione o polegar
contra o aparador na parte frontal; abrirá aproximadamente num ângulo
de 45º podendo ser então retirado (h).
• Com a escova, limpe os acessórios aparadores e a área por trás do
aparador largo (parte interna do corpo do aparelho).
Limpeza com água
• Desligue o aparelho e passe a cabeça e os acessórios aparadores por água
morna corrente. Também pode passar o aparador largo aberto por água.
• Deixe o aparelho com o aparador largo aberto a secar.
32
Page 32

Manter o seu aparelho em óptimo estado
Para manter o sistema de corte a funcionar correctamente, coloque
uma gota de óleo lubrificante após cada utilização (i).
Preservar as baterias
Para manter a capacidade óptima das baterias recarregáveis, o aparelho
tem que ser descarregado por completo (através da utilização) a cada
6 meses aproximadamente. Em seguida, recarregue o aparelho até à sua
capacidade máxima.
Aviso ambiental
Este produto contém baterias recarregáveis e/ou resíduos eléctricos
recicláveis. Com o intuito de proteger o ambiente, não elimine o
produto juntamente com o lixo doméstico. Entregue-o para
reciclagem num dos locais de recolha específica à disposição no seu
país.
Sujeito a alterações sem aviso prévio.
Pode ver as especificações elétricas impressas no cabo de conexão
especial.
Garantia
Braun concede a este produto 2 anos de garantia a partir da data de compra.
Dentro do período de garantia qualquer defeito do aparelho, devido aos
materiais ou ao seu fabrico, será reparado, substituindo peças ou trocando
por um aparelho novo segundo o nosso critério, sem qualquer custo.
A garantia não cobre avarias por utilização indevida, funcionamento a
voltagem diferente da indicada, ligação a uma tomada de corrente elétrica
incorreta, rutura, utilização ou desgaste normal, defeitos com um efeito
insignificante no valor ou no funcionamento do produto.
A garantia perderá o seu efeito no caso de serem efetuadas reparações
por pessoas não autorizadas ou se não forem utilizados acessórios
originais Braun.
A garantia só é válida se a data de compra fôr confirmada pela apresentação
da fatura ou documento de compra correspondente.
Esta garantia é válida para todos os países onde este produto seja distribuído
por Braun ou por um distribuidor Braun autorizado.
33
Page 33

No caso de reclamação ao abrigo de garantia, dirija-se ao Serviço de
Assistência Técnica Oficial Braun mais próximo: www.service.braun.com.
Só para Portugal
Apoio ao consumidor: Para localizar o seu Serviço Braun mais próximo
o no caso de surgir alguma dúvida relativamente ao funcionamiento deste
produto, contacte por favor este serviço pelo telefone 808 20 00 33.
34
Page 34

Italiano
I nostri prodotti sono progettati per rispondere ai più elevati standard di
qualità, funzionalità e design. Ci auguriamo che il suo nuovo prodotto Braun
soddisfi pienamente le sue esigenze.
Leggere attentamente il manuale di istruzioni, contiene informazioni sulla
sicurezza. Conservarlo per una consultazione futura.
Attenzione
Questo apparecchio è adatto per essere lavato sotto
acqua corrente. Staccare l’apparecchio dalla presa di
corrente prima di lavarlo con acqua.
L’elettrodomestico è dotato di uno speciale cavo di
alimentazione con un sistema integrato sicuro a basso
voltaggio. Non sostituire o manomettere nessuna sua
parte. In caso contrario sussiste il rischio di una scossa
elettrica. Utilizzare solamente lo speciale cavo di rete
fornito con l’apparecchio.
Se l’apparecchio è contrassegnato con 491,
è possibile usare qualsiasi alimentatore Braun con codice
491-XXXX.
Non utilizzare mai l’elettrodomestico con il rifinitore o cavo
di alimentazione danneggiati.
L’apparecchio può essere utilizzato da bambini di almeno
8 anni e persone con ridotta capacità fisica, sensoriale o
mentale o mancanza di esperienza e informazioni, se sono
supervisionati da una persona o se hanno ricevuto istruzioni
sull’utilizzo corretto dell’apparecchio e sono a conoscenza
dei rischi derivanti dall’utilizzo. I bambini non dovrebbero
giocare con l’apparecchio. La pulizia e la manutenzione
dell’apparecchio non dovrebbero essere effettuate da bambini
a meno che non abbiano più di 8 anni e siano supervisionati.
35
Page 35

Olio lubrificante
Tenere fuori dalla portata dei bambini. Non inghiottire. Non applicare su occhi.
Una volta terminata, smaltire il flaconcino nella maniera più appropriata.
Descrizione
1a Pettine di precisione per regolare la barba e i capelli corti
1b Pettine distanziatore per tagliare i capelli *
1c Pulsante di rilascio per il pettine
2 Regolabarba largo (32 mm)
3 Rifinitore di precisione (16 mm) *
4 Pulsante di rilascio per il rifinitore di precisione *
5 Spia luminosa
6a Blocco del pettine di precisione
6b Selettore di lunghezza del pettine di precisione
6c Selettore di lunghezza del pettine capelli
7 Interruttore acceso/spento
8 Speciale cavo di alimentazione (il design può variare)
8a Base di ricarica *
9 Custodia da viaggio *
* non con tutti i modelli
Carica
La temperatura ambiente consigliata per la ricarica è compresa tra 5 °C
e 35 °C. Il caricamento della batteria potrebbe non essere completo o non
avvenire del tutto in caso di temperature estremamente basse o alte.
La temperatura ambiente consigliata per la rasatura è tra 15 °C e 35 °C.
Non esporre l’apparecchio a temperature superiori a 50 °C per periodi di
tempo prolungati.
• Riporre l’apparecchio (spento) nella base di ricarica o collegarlo direttamente
ad una presa elettrica attraverso lo speciale cavo di alimentazione (8).
• Quando si ricarica l’apparecchio per la prima volta oppure dopo alcuni
mesi di non utilizzo, lasciare l’apparecchio in ricarica continua per 4 ore
(BT 5050/5030/5010: 8 ore).
• Quando le batterie ricaricabili saranno completamente cariche, utilizzare
l’apparecchio fino a che non si scarica. Di seguito ricaricare fino a piena
capacità. Le ricariche successive richiederanno soltanto un’ora circa
(BT 5050/5030/5010: 8 ore).
• La ricarica completa può garantire fino a 50 minuti di autonomia d’uso
senza cavo. E’ variabile in funzione del tipo e lunghezza di barba.
• La massima capacità potrà essere raggiunta soltanto dopo parecchi cicli
di carica/scarica.
36
Page 36

Spia luminosa (5)
BT 5090/5070
• La spia luminosa indica lo stato della batteria.
• La spia luminosa lampeggia in verde quando l’apparecchio è in carica.
Quando la batteria è completamente carica, la spia luminosa diventa di
color verde permanente e indica anche che l’apparecchio è collegato alla
presa di corrente.
• Durante l’utilizzo senza cavo la spia luminosa lampeggia di color verde.
• La spia luminosa lampeggia di color rosso quando la batteria è quasi
scarica. Si dovrebbe essere in grado di terminare la rasatura in corso.
BT 5050/5030/5010
• La spia luminosa (5) mostra che il rasoio é in fase di ricarica. La spia
luminosa si spegne quando la batteria é completamente carica.
Accessorio pettine (1a, 1b)
• I pettini possono essere sganciati premendo il tasto di rilascio (1c) con il
pollice e l‘indice.
Regolazione della barba
• Posizionare il pettine di precisione (1a) sull‘apparecchio quando spento (a).
• Assicurarsi che il dispositivo di blocco (6a) sia posizionato in alto e
ruotare il selettore di lungezza (6b) alla lunghezza desiderata. Il pettine
della barba scorre automaticamente su o giù (possibili lunghezze 1-10
mm con intervalli di 0,5 mm).
• Per bloccare il pettine alla lunghezza desiderata far scorrere il tasto di
blocco (6a) verso il basso. Il selettore di lunghezza è bloccato.
• E’ consigliabile iniziare la regolazione della dalla posizione più elevata e
ridurla progressivamente sino alla lunghezza desiderata.
• Premere l’interruttore (7). Tenere la parte superiore del pettine distanzia-
tore a contatto con la pelle e muovere l’apparecchio in direzione opposta
alla crescita dei peli.
• Onde evitare l’eccessivo accumularsi di peli residui nel pettine distanzia-
tore, pulirlo periodicamente con l’apposita spazzolina.
Regolazione di precisione dei contorni della barba
• Il regolabarba largo (2) taglia e regola ampie zone del viso. E’ ideale per
rifinire basette, baffi e barba corta parziale. Togliere il pettine
37
Page 37

distanziatore. Tenendo la pelle ben tesa, guidare il rifinitore largo nella
direzione opposta della crescita dei peli (b).
• Il rifinitore di precisione (3) ridefinisce in maniera precisa linee e bordi,
essendo così ideale per definire i contorni (c).
Tagliacapelli
I capelli devono essere puliti, ben pettinati, asciutti e senza nodi.
• Inserire l’accessorio per capelli (1b) sull’apparecchio spento (d).
• Premere il selettore di lunghezza (6c) e fare scorrere il pettine alla
lunghezza desiderata (impostazioni possibili di lunghezza 10-20 mm con
intervalli di 2 mm).
• Se non sei abituato a tagliarti i capelli da solo, comincia utilizzando una
impostazione di lunghezza più elevata, per poi ridurla successivamente,
per evitare di tagliare più capelli di quanto desiderato. Se desideri tagliarti
i capelli più corti di 10mm, ti consigliamo comunque di tagliarli fino a
10 mm con il pettine distanziatore grande e poi passare a quello piccolo
per raggiungere la lunghezza desiderata.
• Fare movimenti lenti e controllati. Non forzare o spingere l’apparecchio
tra i capelli.
• Nel frattempo, scrolla via i capelli già tagliati. Se troppi capelli rimangono
all’interno del pettine distanziatore, rimuoverlo e pulirlo.
Pulizia
La regolare pulizia assicura una migliore prestazione di rasatura.
Pulizia con la spazzolina
• Spegnere l’apparecchio. Aprire il pettine distanziatore premendo con il
pollice contro il rifinitore nella parte frontale. Si apre a circa 45° e può
essere anche tolto completamente (h).
• Utilizzare la spazzolina per pulire il sistema di taglio e lo spazio dietro il
rifinitore largo (all’interno dell’alloggiamento).
Pulizia con acqua
• Spegnere l‘apparecchio e risciacquare la testina e i pettini distanziatori sotto
acqua corrente. Si può anche risciacquare il pettine distanziatore aperto.
• Lasciare l’apparecchio con il pettine aperto per farlo asciugare.
Manutenzione
Per mantenere il sistema di taglio in perfetto stato, lubrificarlo con olio
lubrificante dopo ogni utilizzo (i).
38
Page 38

Preservare le batterie
Per mantenere l’ottimale capacità delle batterie ricaricabili, l’apparecchio
deve essere completamente scarico (utilizzandolo per radere/tagliare) ogni
sei mesi approssimativamente. Di seguito ricaricare l’apparecchio fino a
piena capacità.
INFORMAZIONE AGLI UTILIZZATORI
Il simbolo del cassonetto barrato riportato sull’apparecchiatura
o sulla sua confezione indica che il prodotto alla fine della propria
vita utile deve essere raccolto separatamente dagli altri rifiuti.
L’utente dovrà, pertanto, conferire l’apparecchiatura giunta a fine vita
agli idonei centri comunali di raccolta differenziata dei rifiuti elettrotecnici
ed elettronici. In alternativa alla gestione autonoma è possibile consegnare
l’apparecchiatura che si desidera smaltire al rivenditore, al momento
dell’acquisto di una nuova apparecchiatura di tipo equivalente. Presso i
rivenditori di prodotti elettronici con superficie di vendita di almeno 400 m2
è inoltre possibile consegnare gratuitamente, senza obbligo di acquisto, i
prodotti elettronici da smaltire con dimensioni inferiori a 25 cm.
L’adeguata raccolta differenziata per l’avvio successivo
dell’apparecchiatura dismessa al riciclaggio, al trattamento e allo
smaltimento ambientalmente compatibile contribuisce ad evitare possibili
effetti negativi sull’ambiente e sulla salute e favorisce il reimpiego e/o
riciclo dei materiali di cui è composta l’apparecchiatura.
Soggetto a modifiche senza preavviso.
Specifiche elettriche: vedere indicazioni sullo speciale cavo di ricarica.
Garanzia
Braun fornisce una garanzia valevole per la durata di 2 anni dalla data di
acquisto.
Nel periodo di garanzia verranno eliminati, gratuitamente, i guasti
dell’apparecchio conseguenti a difetti di fabbrica o di materiali, sia
riparando il prodotto sia sostituendo, se necessario, l’intero apparecchio.
Tale garanzia non copre: danni derivanti dall’uso improprio del prodotto, la
normale usura conseguente al funzionamento dello stesso, i difetti che
39
Page 39

hanno un effetto trascurabile sul valore o sul funzionamento
dell’apparecchio.
La garanzia decade se vengono effettuate riparazioni da soggetti non
autorizzati o con parti non originali Braun.
Per accedere al servizio durante il periodo di garanzia, è necessario
consegnare o far pervenire il prodotto integro, insieme allo scontrino di
acquisto, ad un Centro di Assistenza autorizzato Braun.
Contattare www.service.braun.com o il numero 800 440 017 per avere
informazioni sul Centro di Assistenza autorizzato Braun più vicino.
40
Page 40

Nederlands
Onze producten zijn ontworpen volgens de hoogste normen van kwaliteit,
functionaliteit en ontwerp. Wij hopen dat u volledig van uw nieuwe Braun
product gaat genieten.
Lees deze gebruiksaanwijzing volledig, het bevat veiligheidsinformatie.
Bewaar het voor toekomstig gebruik.
Waarschuwing
Het apparaat is geschikt voor reiniging onder stromend
water. Haal de stekker uit het stopcontact alvorens het
apparaat schoon te maken met water.
Het apparaat is voorzien van een speciale snoerset met een
geïntegreerde extra lage Voltage voeding voor veiligheid.
Ruil of manipuleer geen enkel onderdeel ervan. Anders
loopt u risico op een elektrische schok. Gebruik alleen de
speciale snoerenset die geleverd is met uw apparaat.
Indien het apparaat is voorzien van het teken
491, wil dit zeggen dat u het kan gebruiken met elke Braun
snoerenset van het type 491-xxxx.
Gebruik het apparaat nooit met beschadigde trimmers of
speciale snoerset.
Dit apparaaat is geschikt voor gebruik voor kinderen ouder
dan 8 jaar en personen met een fysieke, sensorische of
mentale beperking indien zij het product gebruiken onder
begeleiding of instructies hebben gekregen over het veilig
gebruik van het apparaat en de gevaren inzien. Laat
kinderen niet met het apparaat spelen. Laat kinderen het
apparaat niet schoonmaken of Onderhouden, behalve
onder toezicht en als ze 8 jaar of ouder zijn.
Flesje olie
Buiten bereik van kinderen houden. Niet doorslikken. Niet van toepassing
voor de ogen. Op de juiste manier verwijderen waneer het leeg is.
41
Page 41

Beschrijving
1a Precisiekam voor het trimmen van baard en korte haren
1b Haar kam voor het knippen van haar *
1c Ontgrendelingsknoppen voor de kam
2 Brede trimmer (32 mm)
3 Precisie trimmer (16 mm) *
4 Ontgrendelingsknop precisietrimmer *
5 Indicatielampje
6a Vergrendelingsknop voor precisiekam
6b Selectieknop haarlengte voor precisiekam
6c Selectieknop haarlengte voor haarkam
7 Aan-/uit-schakelaar
8 Speciaal snoerset (design kan verschillend zijn)
8a Oplaadstand *
9 Draagtas *
* niet bij alle modellen
Opladen
De aanbevolen omgevingstemperatuur voor opladen is 5 °C tot 35 °C.
Het kan zijn dat de batterij niet behoorlijk of helemaal niet functioneert
onder extreem lage of hoge temperaturen. De aanbevolen omgevingstemperatuur tijdens het scheren is 15 °C tot 35 °C. Stel het apparaat niet
bloot aan temperaturen hoger dan 50 °C gedurende langere tijd.
• Gebruik de speciale snoerset (8) en schakel het apparaat uit voor u het
oplaadt.
• Bij het opladen voor de eerste keer of wanneer het apparaat gedurende
een paar maanden niet gebruikt werd, laat het dan gedurende 4 uren
onafgebroken opladen (BT 5050/5030/5010: 8 uren).
• Wanneer het apparaat volledig is opgeladen, ontlaadt het door normaal
gebruik. Dan laden tot volle capaciteit. De volgende oplaadbeurten duren
ongeveer 1 uur (BT 5050/5030/5010: 8 uren).
• Een volledig opgeladen apparaat kan tot 50 minuten draadloos gebruikt
worden. Dit varieert afhankelijk van uw baardgroei.
• Maximale capaciteit van de batterij wordt pas bereikt na meerdere laad/
ontladings cycli.
Indicatielampje (5)
BT 5090/5070
• Het controlelampje geeft de status weer van de batterijen.
42
Page 42

• Het lampje knippert groen wanneer het apparaat wordt opgeladen.
Als de batterij volledig is opgeladen, blijft het groen licht branden
wanneer het apparaat op een stopcontact is aangesloten.
• Het lampje knippert groen wanneer u het apparaat draadloos gebruikt.
• Het lampje knippert rood wanneer de batterij bijna leeg is. U zou uw
scheerbeurt moeten kunnen afmaken.
BT 5050/5030/5010
• Het lampje (5) geeft aan dat het scheerapparaat wordt opgeladen.
Wanneer het apparaat volledig is opgeladen, zal het lampje uitgaan.
Opzetkammen (1a en 1b)
• De kammen kunnen worden verwijderd door op de ontgrendelingsknop-
pen (1c) met uw duim en wijsvinger te drukken.
Baard trimmen
• Plaats de precisiekam (1a) op het apparaat wanneer het apparaat uit
staat (a).
• Zorg ervoor dat u de vergrendelingsknop (6a) in de hoogste positie
plaatst, draai dan aan de selectieknop voor de gewenste haarlengte. De
baardkam zal automatisch naar boven of naar beneden glijden (mogelijke
instellingen van 1-10mm, in stapjes van 0,5mm).
• Draai de vergrendelingsknop (6a) naar beneden om de kam te vergrendelen
op de gewenste lengte. De selectie van de haarlengte is nu geblokkeerd.
• Wij raden u aan om met de hoogste instelling te beginnen en dan de
instelling te reduceren totdat u de gewenste baardlengte heeft.
• Druk op de aan/uit-schakelaar (7). Houd de baardkam met de afge-
schuinde kant tegen uw baard en beweeg de trimmer tegen de
haargroeirichting (a) in.
• Maak de baardkam af en toe schoon met het borsteltje om haar
verstopping te voorkomen.
Contour Trimmen / Styling
• De brede trimmer (2) knipt gelijkmatig en trimt grote gebieden. Het is
ideaal voor het vormen van bakkebaarden, snorren en gedeeltelijke korte
baarden. Haal de kam er af. Terwijl u de huid strak trekt, beweeg de grote
trimmer tegen de haargroeirichting in (b).
• De precisie trimmer (3) definieert de lijnen en randen nauwkeurig, het is
ideaal om je baard de exacte vormen en contouren te geven. Voor het
gebruik van de precisie trimmer, druk op de ontgrendelingsknop (4) en
schuif deze omhoog (c).
43
Page 43

Knippen van haar
Uw haar moet schoon, goed gekamd, knoopvrij en droog zijn.
• Plaats de haarkam (1b) op het apparaat als het apparaat uitgeschakeld
is (d).
• Druk op de haarlengte selectieknop (6c) en schuif de knop tot de gewenste
lengte (mogelijke instellingen van 10-20mm, in stapjes van 2mm).
• Als u niet gewend bent om haar te knippen, begin met een hogere
instelling en reduceer geleidelijk de afstand tussen de baardkam en de
huid om te voorkomen dat u meer haar trimt dan gewenst. Als u uw haar
korter dan 10 mm wilt knippen, adviseren we u uw haar eerst met de
haarkam (1b) tot 10 mm te knippen en dan de baardkam te gebruiken om
de gewenste lengte te bekomen.
• Gebruik een langzame en gecontroleerde beweging. Beweeg het
apparaat niet sneller door het haar dan het kan knippen.
• Schud of blaas het haar gedurende het knippen. Als er te veel haar in de
kam zit, verwijder het haar en reinig de kam.
Reiniging
Regelmatig schoonmaken zorgt voor betere trimprestaties.
Reinigen met het borsteltje
• Schakel het apparaat uit. Open de brede trimmer door met de duim tegen
de trimmer op de voorkant te drukken. Het opent met ca. 45 ° en kan ook
worden verwijderd (h).
• Gebruik het borsteltje om de trimmers en de ruimte achter de brede ton-
deuse te reinigen (binnen de behuizing).
Reinigen met water
• Schakel het apparaat uit en spoel het hoofd en trimmers onder warm
stromend water. U kunt ook de geopende brede timmer spoelen.
• Laat het apparaat drogen met de trimmer open.
Uw apparaat in topvorm houden
Om de prestatie van de messenblok optimaal te houden, dient u deze na
ieder gebruik te smeren met een druppel naaimachine olie (i).
Behoud van de batterijen
Om de optimale capaciteit van de oplaadbare batterijen te behouden moet
het apparaat om de 6 maanden volledig worden ontladen (door trimmen /
knippen). Dan laadt het apparaat op tot zijn volle capaciteit.
44
Page 44

Mededeling ter bescherming van het milieu
Dit product bevat oplaadbare batterijen en/of recyclebaar materiaal.
Ter bescherming van het milieu mag dit product niet met het gewone
huisvuil worden weggegooid. Verwijdering kan plaatsvinden bij de
bekende verzamelplaatsen in uw regio/land.
Wijzigingen voorbehouden.
Voor elektrische specificaties: zie de speciale snoerenset.
Garantie
Op dit produkt verlenen wij een garantie van 2 jaar geldend vanaf datum van
aankoop. Binnen de garantieperiode zullen eventuele fabricagefouten en/
of materiaalfouten gratis door ons worden verholpen, hetzij door reparatie,
vervanging van onderdelen of omruilen van het apparaat.
Deze garantie is van toepassing in elk land waar dit apparaat wordt geleverd
door Braun of een officieel aangestelde vertegenwoordiger van Braun.
Beschadiging ten gevolge van onoordeelkundig gebruik, normale slijtage
en gebreken die de werking of waarde van het apparaat niet noemenswaardig
beïnvloeden, vallen niet onder de garantie. De garantie vervalt bij reparatie
door niet door ons erkende service-afdelingen en/of gebruik van niet
originele Braun onderdelen.
Om gebruik te maken van onze service binnen de garantieperiode, dient u
het complete apparaat met uw aankoopbewijs af te geven of op te sturen
naar een geautoriseerd Braun Customer Service Center:
www.service.braun.com.
Bel 0 800 44 55 388 voor een Braun Customer Service Center bij u in de
buurt.
45
Page 45

Dansk
Vores produkter er skabt til at opfylde de højeste krav med hensyn til
kvalitet, funktionalitet og design. Vi håber, du vil få stor glæde af dit nye
produkt fra Braun.
Læs denne instruktionsmanual fuldstændigt da den indeholder sikkerhedsinformation. Behold den for fremtidig reference.
Advarsel
Apparatet kan rengøres under rindende vand.
Afbryd strømforsyningen til apparatet, før det
rengøres i vand.
Apparatet er forsynet med en specialledning med integreret
strøm forsyning og ekstra lav spænding for større sikkerhed.
Ingen dele må udskiftes eller manipuleres. I modsat fald
risikerer man at få elektrisk stød. Anvend kun specialkablet,
der følger med apparatet.
Hvis apparatet er mærket med 491, kan det
bruges med et hvert andet Braun-strømkabel med koden
491-XXXX.
Undgå at bruge apparatet med beskadiget trimmer eller
specialledning.
Dette apparat kan anvendes af børn fra 8 år og personer
med nedsatte fysiske, sansemæssige eller mentale evner
eller manglende erfaring eller viden, hvis de er under opsyn
og får instruktioner om sikker brug af apparatet og forstår
den involverede fare. Børn må ikke lege med apparatet.
Rengøring og brugervedligeholdelse må ikke udføres af
børn, med mindre de er over 8 år og er under opsyn.
Olieflaske
Opbevares utilgængeligt for børn. Undgå at sluge den. Undgå at få olie i
øjnene. Bortskaffes i henhold til gældende regler, når den er tom.
46
Page 46

Beskrivelse
1a Præcisionskam til trimming af skæg og kort hår
1b Hårkam til klipning af hår *
1c Udløserknapper til kam
2 Bred trimmer (32 mm)
3 Præcisionstrimmer (16 mm) *
4 Udløserknap til præcisionstrimmer *
5 Kontrollampe
6a Låseknap til præcisionsonskam
6b Længdevælger til præcisionsonskam
6c Længdevælger til hårkam
7 Tænd/sluk-knap
8 Specialledning (design kan variere)
8a Opladningsholder *
9 Pose *
* leveres ikke med alle modeller
Opladning
Anbefalet omgivende temperatur ved opladning er 5 °C til 35 °C. Batteriet
oplades måske ikke ordentligt eller slet ikke ved ekstremt lave eller høje
temperaturer. Anbefalet omgivende temperatur ved barbering er 15 °C til
35 °C. Apparatet må ikke udsættes for temperaturer over 50 °C i længere
perioder.
• Placer apparatet (slukket) i opladningsholderen eller tilslut det direkte til
en stikkontakt med specialledningen (8).
• Ved første opladning, eller når apparatet ikke har været brugt i nogle
måneder, skal det oplades uafbrudt i 4 timer (BT 5050/5030/5010:
8 timer).
• Når apparatet er fuldt opladet, aflades den ved normal brug. Derefter
genoplades det til fuld kapacitet. Efterfølgende opladninger tager ca.
1 time (BT 5050/5030/5010: 8 timer).
• En fuld opladning giver op til 50 minutters ledningsfri brug. Det kan
variere efter din skægvækst.
• Den maksimale batterikapacitet nås først efter flere cyklusser med
ladning og afladning.
47
Page 47

Kontrollampe (5)
BT 5090/5070
• Kontrollampen viser batteriernes status.
• Kontrollyset blinker grønt, når apparatet er under opladning. Når batteriet
er fuldt opladet, lyser kontrollampen konstant grøn, forudsat at apparatet
er tilsluttet lysnettet.
• Under ledningsfri brug blinker kontrollampen grønt.
• Kontrollampen blinker rødt, når batteriet er lavt. Du bør kunne færdiggøre
din igangværende trimning.
BT 5050/5030/5010
• Kontrollampen (5) viser, at apparatet er under opladning. Når batteriet er
fuldt opladet, slukker opladningslyset.
Kamtilbehør (1a, 1b)
• Kammene kan tages af ved at trykke på udløserknapperne (1c) med
tommel- og pegefinger.
Skægtrimning
• Fastgør præcisionsonskammen (1a) på apparatet når apparatet er
slukket (a).
• Sørg for at låseknappen (6a) er i øverste stilling og sæt længdevælgeren
(6b) på den ønskede længde. Skægkammen glider automatisk op eller
ned (mulige længdeindstillinger: 1-10 mm i trin af 0,5 mm).
• For at låse kammen i ønsket længde, skub låseknappen (6a) ned.
Længdevælgeren er nu låst.
• Vi anbefaler, at du starter med den længste indstilling og derefter
reducerer længden, til du når den ønskede skæglængde.
• Tryk på start/stop-knappen (7). Hold skægkammen med den rette vinkel
mod skægget, og før trimmeren mod hårets vokseretning (a).
• For at undgå at skægkammen bliver stoppet med hår, bør du jævnligt
rengøre den med børsten.
Konturtrimning / styling
• Den brede trimmer (2) klipper og trimmer større områder jævnt.
Den er ideel til at give facon til bakkenbarter, overskæg og kort skæg.
Tag kammen af. Stræk huden, og før den brede trimmer mod hårenes
vokseretning (b).
48
Page 48

• Præcisionstrimmeren (3) definerer linjer og kanter præcist, og er ideel til
at skabe præcise konturer. Tryk på udløserknappen (4) og skub den op
for at anvende præcisionstrimmeren.
Hårklipning
• Håret skal være rent, friseret igennem, ikke filtret og tørt.
• Sæt hårkammen (1b) på apparatet med apparatet slukket (d).
• Skub længdevælgeren (6c) og kammen til ønsket længde (mulige
længdeindstillinger: 10-20 mm i trin af 2 mm).
• Hvis du ikke er vant til at klippe hår, bør du starte med en længere
indstilling og derefter reducere indstillingen for at undgå at klippe mere
hår af end ønsket. Hvis du ønsker at klippe håret kortere end 10 mm,
anbefaler vi, at du først klipper det med hårkammen (1b) ned til 10 mm og
derefter bruger skægkammen til den ønskede længde.
• Brug en langsom og kontrolleret bevægelse. Tving ikke apparatet gen-
nem håret, hurtigere end den kan klippe det.
• Ryst apparatet, og pust håret væk en gang imellem. Hvis der bliver fanget
for mange hår i kammen, bør du tage den af og rengøre den.
Rengøring
Regelmæssig rengøring sikrer en bedre trimning.
Rengøring med børsten
• Sluk for apparatet. Åbn den brede trimmer ved at trykke tommelfingeren
mod trimmeren fra forsiden. Den åbnes med ca. 45° og kan også tages af.
• Brug børsten til at rengøre trimmeren og området bag den brede trimmer
(inde i kabinettet).
Rengøring med vand
• Sluk for apparatet, og skyl hoved og trimmer under varmt rindende vand.
Du kan også skylle dem åbne brede trimmer.
• Efterlad apparatet med den brede trimmer åben, så den kan tørre.
Hold dit apparat i topform
For at sikre at skæresystemet fungerer korrekt, smøres det med en let
maskinolie, hver gang trimmeren har været i brug (i).
Sådan bevares batterierne
For at bevare optimal kapacitet på de genopladelige batterier skal apparatet
aflades fuldstændigt (ved trimning/klipning) ca. hver 6. måned. Derefter
genoplades apparatet til fuld kapacitet.
49
Page 49

Miljømæssige oplysninger
Dette produkt indeholder genopladelige batterier og/eller
genbrugeligt elektrisk affald. For at beskytte miljøet, smid venligst
ikke ud med husholdsaffald, men lever til genbrug eller til elektrisk
affald på de dertil anrettede afleveringspunkter.
Kan ændres uden varsel.
Elektriske specifikationer findes på specialkablet.
Garanti
Braun yder 2 års garanti på dette produkt gældende fra købsdatoen.
Inden for garantiperioden vil Braun for egen regning afhjælpe fabrikationsog materialefejl efter vort skøn gennem reparation eller ombytning af
apparatet. Denne garanti gælder i alle lande, hvor Braun er repræsenteret.
Denne garanti dækker ikke skader opstået ved fejlbetjening, normalt slid eller
fejl som har ringe effekt på værdien eller funktionsdygtigheden af apparatet.
Garantien bortfalder ved reparationer udført af andre end de af Braun anviste
reparatører og hvor originale Braun reservedele ikke er anvendt.
Ved service inden for garantiperioden afleveres eller indsendes hele
apparatet sammen med købsbevis til et autoriseret Braun Service Center:
www.service.braun.com.
Ring 7015 0013 for oplysning om nærmeste Braun Service Center.
50
Page 50

Norsk
Våre produkter er designet for å møte de høyeste standarder når det gjelder
kvalitet, funksjonalitet og design. Vi håper at du vil få stor glede av ditt nye
Braun-produkt.
Les denne instruksjonen grundig, den inneholder sikkerhetsinformasjon.
Spar den for fremtidig bruk.
Advarsel
Du kan rengjøre apparatet under rennende vann.
Trekk ut strømledningen før apparatet rengjøres med
vann.
Produktet er utstyrt med en spesialstrømledning med ekstra
lav spenning. Du må ikke bytte ut eller endre på ledningen, da
det kan medføre risiko for elektrisk støt. Bruk kun ledningssettet som følger med barbermaskinen.
Hvis apparatet er merket 491, kan du bruke det
med alle strømledninger fra Braun merket 491-XXXX.
Bruk aldri apparatet hvis trimmerne eller spesialledningen
er skadet.
Dette apparatet kan brukes av barn fra og med 8 år og
personer med reduserte fysiske, sensoriske eller mentale
evner, eller manglende erfaring og kunnskap, hvis de er
under tilsyn eller har fått instruksjon om sikker bruk av
apparatet og forstår farene ved bruk av apparatet. Barn
skal ikke leke med apparatet. Rengjøring og vedlikehold
av apparatet skal ikke foretas av barn med mindre de er
eldre enn 8 år og har tilsyn av en voksen.
Oljeflaske
Oppbevares utilgjengelig for barn. Innholdet må ikke svelges og må ikke
komme i kontakt med øynene. Skal kastes i henhold til gjeldende regler
nar den er tom.
51
Page 51

Beskrivelse
1a Presisjonskam for trimming av skjegg og kort hår
1b Hårkam for klipping av hår *
1c Utløserknapper for kam
2 Bred trimmer (32 mm)
3 Presisjonstrimmer (16 mm) *
4 Utløserknapp for presisjonstrimmer *
5 Indikatorlys
6a Låsebryter for presisjonskam
6b Lengdevelger for presisjonskam
6c Lengdevelger for hårkam
7 På/av-bryter
8 Spesialledning (design kan variere)
8a Ladestativ *
9 Etui *
* ikke med alle modeller
Lading
Den beste temperaturen for lading er mellom 5 °C og 35 °C. Ved ekstremt
lave eller høye temperaturer vil batteriet kanskje ikke lades opp ordentlig,
eller ikke lades i det hele tatt. Anbefalt omgivelsestemperatur for barbering
er mellom 15 og 35 °C. Utsett ikke barbermaskinen for temperaturer som er
høyere enn 50 °C over lengre perioder.
• Plasser enheten (skrudd av) i ladestativet eller koble den direkte til en
elektrisk kontakt via det spesialledningssettet (8).
• Når du lader apparatet for første gang, eller når apparatet ikke har vært
i bruk på noen måneder, bør det lades opp kontinuerlig i 4 timer
(BT 5050/5030/5010: 8 timer).
• Når apparatet er helt oppladet, skal det lades ut ved normal bruk.
Deretter må du lade det opp til full kapasitet igjen. Etterfølgende ladinger
vil ta omtrent 1 time (BT 5050/5030/5010: 8 timer).
• Når apparatet er fullt ladet, gir det opptil 50 minutters ledningsfri bruks-
tid, avhengig av skjeggveksten din.
• Full kapasitet oppnås først etter flere sykluser med lading/utlading.
Indikatorlys (5)
BT 5090/5070
• Indikatorlyset viser batteriets ladestatus.
52
Page 52

• Indikatorlyset blinker mens barbermaskinen lades opp. Når batteriet er
fullt oppladet, lyser indikatorlyset kontinuerlig grønt forutsatt at apparatet
er tilkoblet strømnettet.
• Ved ledningsfri bruk viser indikatorlyset et blinkende grønt lys.
• Indikatorlyset blinker rødt når batteriet er i ferd med å bli utladet. Det bør
være nok kapasitet igjen til at du kan fullføre trimmesekvensen.
BT 5050/5030/5010
• Indikatorlyset (5) viser at apparatet lades opp. Når batteriet er fulladet,
skrus indikatorlyset av.
Kamtilbehør (1a, 1b)
• Kammene kan tas av ved å trykke inn utløserknappene (1c) med hhv.
tommel og pekefinger.
Trimming av skjegg
• Fest presisjonskammen (1a) på apparatet når apparatet er skrudd av (a).
• Sørg for at låsebryteren (6a) er i øvre stilling og sett lengdevelgeren (6b)
på ønsket lengde. Skjeggkammen glir automatisk opp eller ned (mulige
lengdeinnstillinger: 1-10 mm i steg på 0,5 mm).
• For å låse kammen i ønsket lengde, skyv låsebryteren (6a) ned.
Lengdevelgeren er nå låst.
• Vi anbefaler at du starter med den lengste innstillingen og deretter redu-
serer innstillingen til du når ønsket skjegglengde.
• Trykk på på/av-bryteren (7). Hold skjeggkammen med den vinklede
kanten mot skjegget og beveg trimmeren mot skjeggets vekstretning (a).
• For å unngå at skjeggtrimmeren tettes igjen med hår, bør du rengjøre den
innimellom med børsten.
Konturtrimming/Styling
• Den brede trimmeren (2) kutter og trimmer store områder jevnt. Den er
ideell til forming av kinnskjegg, barter og mindre områder med kort
skjegg. Ta av kammen. Beveg den brede trimmeren mot skjeggets
vekstretning samtidig som du strekker ut huden.
• Presisjonstrimmeren (3) definerer nøyaktig linjer og kanter og er ideell for
presis forming av konturer. For å bruke presisjonstrimmeren trykker du
inn utløserknappen (4) og skyver den opp (c).
53
Page 53

Hårklipp
Håret bør være nyvasket, tørket, kjemmet og uten floker.
• Sett hårkammen (1b) på apparatet med apparatet avslått (d).
• Skyv lengdevelgeren (6c) og kammen til ønsket lengde (mulige
lengdeinnstillinger: 10-20 mm i steg på 2 mm).
• Hvis du ikke er vant til å klippe hår, bør du starte med en lengre innstilling
og redusere innstillingen etter hvert for å unngå å klippe håret kortere enn
ønsket. Hvis du ønsker å klippe håret ditt kortere enn 10 mm, anbefaler vi
at du først klipper det med hårkammen (1b) ned til 10 mm og deretter
bruker skjeggkammen for å oppnå ønsket lengde.
• Klipp med sakte og kontrollerte bevegelser. Press ikke apparatet gjen-
nom håret raskere enn det greier å klippe.
• Innimellom bør du riste eller blåse bort hår fra kammen. Hvis for mye hår
blir sittende i kammen, bør du ta den av og rengjøre den.
Rengjøring
Regelmessig rengjøring sikrer bedre trimme-resultater.
Rengjøring med børsten
• Slå av apparatet. Åpne den brede trimmeren ved å trykke tommelen mot
forsiden av trimmeren. Den åpner seg ca. 45° og kan også tas av (h).
• Rengjør trimmeren og området bak den brede trimmeren (inni huset)
med børsten.
Rengjøring i vann
• Slå av apparatet og skyll hodet på trimmeren og trimmerne under
rennende, varmt vann. Du kan også skylle den åpnede brede trimmeren.
• La apparatet og den åpnede brede trimmeren tørke.
Hold apparatet i god stand
Vedlikehold kuttesystemet ved å smøre det med symaskinolje e.l. etter
bruk (i).
Vedlikehold av batteriene
For å bevare en best mulig kapasitet på de oppladbare batteriene, må
apparatet lades ut fullstendig (ved trimming/klipping) omtrent hver sjette
måned. Deretter lades det opp til full kapasitet igjen.
54
Page 54

Miljømessige opplysninger
Dette produktet inneholder oppladelige batterier og/eller
resirkulerbart elektrisk avfall. For å beskytte miljøet skal produktet
ikke kastes i husholdningsavfallet, men leveres som elektrisk avfall til
din lokale gjenvinningsstasjon.
Med forbehold om endringer.
Elektriske spesifikasjoner er angitt på spesialledningen.
Garanti
Vi gir 2 års garanti på produktet gjeldende fra kjøpsdato.
I garantitiden vil vi gratis rette eventuelle fabrikasjons- eller materialfeil,
enten ved reparasjon eller om vi finner det hensiktsmessig å bytte hele
produktet.
Garantien gjelder i alle land hvor dette apparatet selges av Braun eller en
Braun-forhandler.
Denne garantien dekker ikke: skader grunnet feil bruk, normal slitasje eller
skader som har ubetydelig effekt på apparatets verdi og
funksjonsdyktighet. Garantien blir ugyldig hvis reparasjon foretas av
uautoriserte personer, og hvis det ikke brukes originale Braun-reservedeler.
For å få service i løpet av garantiperioden skal hele apparatet leveres eller
sendes, sammen med kopi av kjøpskvittering, til et autorisert Braun
servicecenter (finn ditt nærmeste på www.service.braun.com).
Ring 22 63 00 93 for å bli henvist til nærmeste autoriserte Braun Serviceverksted.
NB
For varer kjøpt i Norge har kunden garanti i henhold til NEL’s Leveringsbetingelser.
55
Page 55

Svenska
Våra produkter har utformats för att uppfylla de högsta standarder för
kvalitet, funktionalitet och design. Vi hoppas att du kommer att ha mycket
nytta av din nya Braun-produkt.
Läs denna instruktion i sin helhet. Den innehåller säkerhetsinformation.
Spara den för framtida referens.
Varning
Apparaten kan rengöras under rinnande kranvatten.
Koppla loss nätsladden från eluttaget innan apparaten
rengörs med vatten.
Den här apparaten har en specialsladd med en inbyggd
säker elförsörjning med extra låg spänning. Du ska därför
inte byta ut eller ändra någon del av den. Det finns då en
risk för att du utsätts för elektriska stötar. Använd endast
den medföljande specialsladden.
Om apparaten är märkt med 491 kan den användas med alla Braun-strömkablar märkta med 491-XXXX.
Använd aldrig apparaten med en skadad trimmer eller en
skadad sladd.
Den här produkten får endast användas av barn från 8 års
ålder och personer med nedsatt fysisk, sensorisk eller
mental förmåga eller bristande erfarenhet/kunskap under
övervakning av en person som är ansvarig för deras säkerhet
samt efter att ha fått instruktioner om hur produkten kan
användas på ett säkert sätt. Barn ska inte leka med produkten. Rengöring och underhåll ska inte utföras av barn
om dessa inte är över 8 år och övervakas av en vuxen person.
Oljeflaska
Förvaras utom räckhåll för barn. Svälj ej. Använd inte på ögonen. Kassera
på lämpligt sätt när den är tom.
56
Page 56

Beskrivning
1a Precisionskam för trimning av skägg och kort hår
1b Hårkam för hårklippning *
1c Frigörningsknapp för kam
2 Bred trimmer (32 mm)
3 Precisionstrimmer (16 mm) *
4 Frigörningsknapp precisionstrimmer *
5 Kontrollampa
6a Låsknapp för precisionskam
6b Längdinställning för precisionskam
6c Längdinställning för hårkam
7 På-/av-knapp
8 Specialsladd (design kan variera)
8a Laddningsställ *
9 Väska *
* inte med alla modeller
Laddning
Rekommenderad omgivningstemperatur vid laddning är 5 °C till 35 °C. Vid
extremt låga eller höga temperaturer kan det hända att batteriet inte laddas
ordentligt eller inte laddas alls. Rekommenderad omgivningstemperatur för
rakning är 15 °C till 35 °C.
överstiger 50 °C under längre tidsperioder.
• Placera apparaten (avstängd) i laddningsstället eller anslut den direkt
till ett uttag med specialsladden (8).
• Vid laddning första gången eller när apparaten inte har använts på
några månader – låt den ladda oavbrutet i fyra timmar
(BT 5050/5030/5010: åtta timmar).
• När apparaten är fulladdad ska den användas tills den är helt urladdad.
Ladda sedan till full kapacitet igen. Efterföljande laddningar tar ca en timme
(BT 5050/5030/5010: åtta timmar).
• Ett fulladdat batteri ger upp till 50 minuters sladdlös användning. Tiden
kan emellertid variera på grund av skägglängden.
• Maximal batterikapacitet uppnås dock först efter flera upp- och urladd-
ningscykler.
Utsätt inte apparaten för temperaturer som
Kontrollampa (5)
BT 5090/5070
• Kontrollampan visar batteristatus.
57
Page 57

• Kontrollampan blinkar grönt när apparaten laddas. När batteriet är
fulladdat lyser kontrollampan permanent grönt om apparaten är ansluten
till ett eluttag.
• Vid sladdlös användning blinkar kontrollampan grönt.
• Kontrollampan blinkar rött när batterinivån är låg. Du bör kunna avsluta
din pågående trimning.
BT 5050/5030/5010
• Kontrollampan (5) visar att rakapparaten laddas. När batteriet är fulladdat
släcks kontrollampan.
Kamtillbehör (1a, 1b)
• Kammarna kan avlägsnas om frigörningsknapparna (1c) trycks ned med
tummen och pekfingret.
Skäggtrimming
• Placera precisionskammen (1a) på apparaten när den är avstängd (a).
• Kontrollera att låsknappen (6a) är i det övre läget och vrid
längdinställningen (6b) till önskad längd. Skäggkammen glider
automatiskt upp eller ned (möjliga längdinställningar 1–10 mm i steg om
0,5 mm).
• Lås kammen i önskad längd genom att dra låsknappen (6a) nedåt.
Längdinställningen är fixerad.
• Man bör börja på högsta inställning och sedan minska inställningen tills
man når önskad skägglängd.
• Tryck på på-/av-knapp (7). Håll skäggkammen med den vinklade kanten
mot skägget och för trimmern i riktning mot hårväxten.
• Rengör skäggkammen regelbundet med borsten för att undvika att
skäggkammen blir igensatt av hårstrån.
Konturtrimning / Styling
• Den breda trimmern (2) klipper och trimmar stora områden. Den är
idealisk för formning av t.ex. polisonger, mustascher och hakskägg.
Avlägsna kammen. För den breda trimmern mot skäggets växtriktning
med huden sträckt (b).
• Precisionstrimmern (3) definierar exakt linjer och kanter, vilket är idealiskt
för att skapa exakta konturer. Tryck på frigörningsknappen (4) och skjut
den uppåt för att använda precisionstrimmern (c).
58
Page 58

Hårklippning
Håret bör vara rent, välkammat, utrett och torrt.
• Placera hårkammen (1b) på apparaten när apparaten är avstängd.
• Tryck på längdinställningen (6c) och dra kammen till önskad längd
(möjliga längdinställningar 10–20 mm i steg om 2 mm).
• Om du inte är van vid att klippa hår bör du börja med en högre inställning
och sedan minska inställningen för att undvika att klippa mer hår än
önskat. Om du vill klippa håret kortare än 10 mm rekommenderar vi att du
först klipper det med hårkammen (1b) till 10 mm och därefter använder
skäggkammen för önskad längd.
• Klipp med en långsam och kontrollerad rörelse. Tvinga inte apparaten
genom håret snabbare än att det kan klippas.
• Skaka eller blås bort håret regelbundet. Avlägsna kammen och rengör
den om det fastnar för mycket hår i den.
Rengöring
Regelbunden rengöring ger bättre trimningsprestanda.
Rengöring med borste
• Stäng av apparaten. Öppna den breda trimmern genom att trycka med
tummen mot trimmern från framsidan. Den öppnas ungefär 45° och kan
även tas av (h).
• Använd borsten för att rengöra varje trimmer och utrymmet bakom den
breda trimmern (inuti ytterhöljet).
Rengöring med vatten
• Stäng av apparaten och skölj huvud och trimmer under varmt rinnande
vatten. Du kan även skölja den öppnade breda trimmern.
• Låt apparaten stå med öppen trimmer för att torka.
Hålla apparaten i topptrim
För att saxen ska fungera korrekt ska den smörjas med symaskinsolja efter
varje användning (i).
Vårda batterierna
För att de laddningsbara batterierna ska behålla maximal kapacitet måste
apparaten laddas ur helt (genom trimning/klippning) ungefär var sjätte
månad. Ladda sedan apparaten till full kapacitet.
59
Page 59

Miljöskyddsmeddelande
Produkten innehåller batterier och/eller återvinningsbart elavfall.
Av hänsyn till miljön ska denna apparat inte slängas med hushållsavfallet. Återvinning bör ske enligt gällande lokala föreskrifter.
Med förbehåll för ändringar.
För elektriska specifikationer, se texten på specialsladden.
Garanti
Vi garanterar denna produkt för två år från och med inköpsdatum. Under
garantitiden kommer vi utan kostnad att avhjälpa alla brister i apparaten
som är hänförbara till fel i material eller utförande, genom att antingen
reparera eller byta ut hela apparaten efter eget gottfinnande.
Denna garanti gäller i alla länder där denna apparat levereras av Braun eller
deras auktoriserade återförsäljare.
Garantin gäller ej: skada på grund av felaktig användning eller normalt
slitage, liksom brister som har en försumbar inverkan på apparatens värde
eller funktion. Garantin upphör att gälla om reparationer utförs av icke
behörig person eller om Brauns originaldelar inte används.
För att erhålla service under garantitiden ska den kompletta apparaten
lämnas in tillsammans med inköpskvittot till en auktoriserad Braun-verkstad:
www.service.braun.com.
Ring 020-21 33 21 för information om närmaste Braun-verkstad.
60
Page 60

Suomi
Tuotteemme on suunniteltu täyttämään korkeimmat laatu-, toimivuus- ja
muotoiluvaatimukset. Toivottavasti saat iloa ja hyötyä uudesta Brauntuotteestasi.
Lue nämä turvallisuutta koskevat ohjeet huolellisesti ja säilytä ne tulevaa
käyttöä varten.
Varoitus
Laitteen voi puhdistaa juoksevassa vedessä.
Irrota laite virtalähteestä ennen sen puhdistamista
vedellä.
Laitteen virtajohto on varustettu matalajännitesovittimella.
Sähköiskun vaaran välttämiseksi älä vaihda siihen mitään
osia tai tee mitään muutoksia. Käytä ainoastaan laitteen
mukana toimitettua virtajohtoa/johtoja.
Jos laitteessa on merkintä 491, voit käyttää
sitä minkä hyvänsä Braun-virtalähteen kanssa, jossa on
merkintä 491-XXXX.
Älä käytä laitetta, jos trimmeri tai virtajohto on vahingoittunut.
Yli 8-vuotiaat lapset tai sellaiset henkilöt, joiden fyysinen,
sensorinen tai henkinen toimintakyky on rajoittunut tai joilla
ei ole tarvittavaa kokemusta tai tietoa laitteen käytöstä,
voivat käyttää laitetta, jos heitä valvotaan ja ohjeistetaan
laitteen turvallisen käytön osalta ja he ymmärtävät käyttöön
liittyvät vaaratekijät. Lasten ei saa antaa leikkiä laitteella.
Laitetta saavat puhdistaa vain yli 8-vuotiaat lapset, kun
heitä valvotaan.
Öljypullo
Säilytettävä lasten ulottumattomissa. Ei saa niellä. Ei saa käyttää silmiin.
Hävitä asianmukaisesti, kun pakkaus on tyhjä.
61
Page 61

Laitteen osat
1a Tarkkuuskampa parran ja lyhyiden karvojen trimmaamiseen
1b Hiuskampa hiustenleikkaukseen *
1c Kamman vapautuspainikkeet
2 Leveä trimmeri (32 mm)
3 Tarkkuustrimmeri (16 mm) *
4 Tarkkuustrimmerin vapautuspainike *
5 Latauksen merkkivalo
6a Tarkan kamman lukkokytkin
6b Tarkan kamman pituuden valitsin
6c Hiuskamman pituuden valitsin
7 Virtakytkin
8 Virtajohto (vaihtelee mallista riippuen)
8a Latausteline *
9 Säilytyspussi *
* ei sisälly kaikkiin malleihin
Lataus
Latauksen kannalta suositeltu lämpötila on 5–35 °C. Akku ei ehkä lataudu
kunnolla tai ollenkaan erittäin kylmissä tai kuumissa olosuhteissa.
Parranajon kannalta suositeltu lämpötila on 15–35 °C. Älä säilytä laitetta
pitkään yli 50 °C:een lämpötilassa.
• Aseta laite (sammutettuna) lataustelineeseen tai kytke laite vertajohdolla
(8) suoraan verkkovirtaan.
• Kun lataat laitteen ensimmäisen kerran tai kun laitetta ei ole käytetty
muutamaan kuukauteen, anna sen latautua yhtäjaksoisesti neljän tunnin
ajan (BT 5050/5030/5010: kahdeksan tuntia).
• Kun laite on täysin latautunut, anna akun tyhjentyä kokonaan normaalissa
käytössä. Lataa tämän jälkeen akku täyteen. Seuraavat lataukset kestävät
noin tunnin (BT 5050/5030/5010: kahdeksan tuntia).
• Kun laite on ladattu täyteen, akussa riittää virtaa jopa 50 minuutin
käyttöaikaan. Aika voi vaihdella parrankasvusta riippuen.
• Täysi akkukapasiteetti saavutetaan kuitenkin vasta useiden latausten ja
purkausten jälkeen.
Latauksen merkkivalo (5)
BT 5090/5070
• Latauksen merkkivalo osoittaa akkujen latauksen tilan.
62
Page 62

• Merkkivalo vilkkuu vihreänä laitetta ladattaessa. Kun akku on täysin
latautunut, merkkivalo palaa yhtäjaksoisesti vihreänä jos laite on kytketty
verkkovirtaan.
• Käytettäessä laitetta ilman virtajohtoa merkkivalo vilkkuu vihreänä.
• Merkkivalo vilkkuu punaisena, kun akku on tyhjenemässä. Yleensä lataus
riittää meneillä olevan trimmauksen viimeistelyyn.
BT 5050/5030/5010
• Latauksen merkkivalo (5) osoittaa, että laite latautuu. Kun akku on täysin
latautunut, merkkivalo sammuu.
Kampaosat (1a, 1b)
• Kammat voi irrottaa painamalla vapautuspainikkeita (1c) peukalolla ja
etusormella.
Parran trimmaus
• Aseta tarkkuuskampa (1a) laitteeseen, sen ollessa sammutettuna (a).
• Varmista, että lukituskytkin on yläasennossa ja työnnä pituudenvalitsin
(6h) haluttuun pituuteen. Partakampa liukuu automaattisesti ylös tai alas
(pituusasetukset 1-10 mm, 0,5 mm:n välein).
• Lukitaksesi kamman haluttuun pituuteen, liuta lukituskytkin (6a) ala-
asentoon. Pituudenvalitsin on nyt lukittu valitsemaasi asentoon.
• Kannattaa aloittaa suurimmasta asetuksesta ja pienentää sitä, kunnes
parranpituus on toiveidesi mukainen.
• Paina virtakytkintä (7). Pidä partakampaa siten, että kulmikas reuna on
partaa vasten. Ohjaa trimmeriä karvojen kasvusuuntaa vastaan (a).
• Puhdista partakampa välillä harjalla, jotta se ei tukkeudu karvoista.
Rajaus/muotoilu
• Leveä trimmeri (2) leikkaa ja trimmaa laajoja alueita tasaisesti. Se on
ihanteellinen pulisonkien, viiksien ja osittaisen lyhyen parran muotoiluun.
Irrota kampa. Venytä ihoa ja liikuta leveää trimmeriä ihokarvojen kasvusuuntaa vastaan.
• Tarkkuustrimmeri (3) muotoilee tarkat linjat ja reunat, joten se on
ihanteellinen tarkkaan rajaukseen. Ota tarkkuustrimmeri käyttöön
painamalla vapautuspainiketta (4) ja työntämällä se ylös (c).
63
Page 63

Hiustenleikkaus
Hiusten tulee olla puhtaat ja kuivat sekä kammattu ja selvitetty takuista.
• Katkaise laitteesta virta ja aseta hiuskampa (1b) laitteeseen (d).
• Paina pituudenvalitsinta (6c) ja liu‘uta kampa haluamaasi pituuteen
(pituusasetukset 1-20 mm, 2 mm:n välein).
• Jos et ole tottunut leikkaamaan hiuksia, aloita suurella asetuksella ja siirry
sen jälkeen pienempään asetukseen. Näin vältyt leikkaamasta hiuksia
liikaa. Jos haluat leikata hiukset lyhyemmiksi kuin 10 mm, leikkaa ensin
hiuskammalla (1b) 10 mm:iin asti ja leikkaa hiukset sen jälkeen
partakammalla haluttuun pituuteen.
• Liikuta laitetta hitaasti ja kontrolloidusti. Älä pakota laitetta hiusten läpi
nopeammin kuin se pystyy leikkaamaan.
• Ravista tai puhalla leikattuja hiuksia laitteesta säännöllisin välein. Jos
kampaan tarttuu liikaa hiuksia, irrota kampa ja puhdista se.
Puhdistus
Säännöllinen puhdistaminen varmistaa laitteen paremman suorituskyvyn.
Puhdistus harjalla
• Sammuta laitteesta virta. Avaa leveä trimmeri painamalla trimmeriä
peukalolla etupuolelta. Se avautuu noin 45 astetta, ja sen voi myös
irrottaa (h).
• Puhdista harjalla trimmerit ja leveän trimmerin takana oleva tila
(ulkokuoren sisällä).
Puhdistaminen vedellä
• Sammuta laitteesta virta ja huuhtele ajopää ja trimmerit lämpimässä
juoksevassa vedessä. Voit huuhdella myös avatun leveän trimmerin.
• Jätä leveä trimmeri auki ja anna laitteen kuivua.
Laitteen pitäminen huippukunnossa
Jotta ajopää toimisi kunnolla, voitele se ohuella koneöljyllä jokaisen
käyttökerran jälkeen (i).
Akkujen tehokkuuden säilyttäminen
Jotta akkujen varauskyky pysyisi mahdollisimman hyvänä, niiden varaus
täytyy tyhjentää kokonaan normaalissa käytössä noin kuuden kuukauden
välein. Lataa tämän jälkeen laitteen akut täyteen.
64
Page 64

Ympäristöseikkoihin liittyviä tietoja
Tässä laitteessa on ladattavat akut ja/tai kierrätettäviä elektronisia osia.
Ympäristönsuojelullisista syistä tuotetta ei saa hävittää kotitalousjätteen
mukana käyttöiän päättyessä. Hävitä tuote viemällä se asianmukaiseen
keräyspisteeseen.
Oikeudet muutoksiin pidätetään.
Katso sähkömääräyksiä koskevat tiedot virtajohdosta.
Takuu
Tälle tuotteelle myönnämme 2 vuoden takuun ostopäivästä lukien
Suomessa voimassa olevien alan takuuehtojen TE90 mukaan. Takuuaikana
korvataan veloituksetta kaikki viat, jotka aiheutuvat materiaaliviasta tai
valmistusvirheestä. Korvaus tapahtuu harkintamme mukaan korjaamalla,
vaihtamalla viallinen osa tai vaihtamalla koko laite uuteen. Takuu on
voimassa kaikkialla maailmassa sillä edellytyksellä, että laitetta myydään ko.
maassa Braunin tai virallisen maahantuojan toimesta.
Takuun piiriin eivät kuulu seuraavat viat: viat, jotka johtuvat virheellisestä
käytöstä, normaalista kulumisesta tai viat, jolla on vähäinen merkitys laitteen
arvoon tai toimintaan. Takuun voimassaolo lakkaa, jos laitetta korjataan
muualla kuin valtuutetussa Braun-huoltoliikkeessä tai jos laitteessa käytetään
muita kuin alkuperäisiä varaosia.
Takuupalvelun saamiseksi takuuajan sisällä, vie tai lähetä laite
kokonaisuudessaan ostokuitin kera valtuutettuun Braun-huoltoliikkeeseen
(osoitetiedot löydät osoitteesta www.service.braun.com).
65
Page 65

Ελληνικά
Τα προϊόντα μας κατασκευάζονται έτσι ώστε να πληρούν τα υψηλότερα
πρότυπα ποιότητας, λειτουργικότητας και σχεδιασμού. Ελπίζουμε ότι θα
ικανοποιηθείτε απόλυτα από το νέο σας προϊόν Braun.
Διαβάστε πλήρως αυτές τις οδηγίες χρήσης. Περιέχουν σημαντικές
πληροφορίες για την ασφάλειά σας. Φυλάξτε τις για μελλοντική αναφορά.
Προειδοποίηση
Η συσκευή είναι κατάλληλη για καθαρισμό κάτω από
τρεχούμενο νερό βρύσης. Αποσυνδέστε τη συσκευή
από την παροχή ρεύματος πριν την καθαρίσετε με νερό.
Η συσκευή σας είναι εφοδιασμένη με ένα ειδικό σετ καλωδίου, το οποίο διαθέτει ενσωματωμένο Μετασχηματιστή
Πολύ Χαμηλής Τάσης για περισσότερη ασφάλεια. Για τον
λόγο αυτό δεν πρέπει να αντικαταστήσετε ή τροποποιήσετε
οποιοδήποτε μέρος του. Σε αντίθετη περίπτωση υπάρχει
κίνδυνος ηλεκτροπληξίας. Χρησιμοποιείτε μόνο το ειδικό
σετ καλωδίου που παρέχεται με τη συσκευή σας.
Εάν η συσκευή έχει την ένδειξη
491, μπορείτε να
την χρησιμοποιήσετε με οποιοδήποτε καλώδιο ρεύματος
Braun με κωδικό 491-ΧΧΧΧ.
Μη χρησιμοποιείτε ποτέ τη συσκευή με κατεστραμμένους
κόφτες ή καλώδιο ρεύματος.
Αυτή η συσκευή μπορεί να χρησιμοποιηθεί από παιδιά
8 ετών και άνω και άτομα με περιορισμένες φυσικές,
αισθητικές ή πνευματικές δυνατότητες ή έλλειψη εμπειρίας
και γνώσεων, αν υπάρχει ανάλογη εποπτεία ή οδηγίες
σχετικά με την ασφαλή χρήση της συσκευής και κατανόηση
των ενδεχόμενων κινδύνων. Τα παιδιά δεν πρέπει να παίζουν
με τη συσκευή. Ο καθαρισμός και η συντήρηση της
συσκευής δεν πρέπει να πραγματοποιούνται από παιδιά,
εκτός αν είναι άνω από 8 ετών και έχουν ανάλογη εποπτεία.
66
Page 66

Λάδι
Κρατήστε το μακριά από παιδιά. Μην το καταπίνετε. Μην το εφαρμόζετε στα
μάτια. Απορρίψτε το με ασφάλεια όταν αδειάσει.
Περιγραφή
1a Χτένι ακριβείας για περιποίηση γενειάδας και κοντών τριχών
1b Χτένι για κούρεμα μαλλιών *
1c Πλήκτρα απελευθέρωσης για το χτένι
2 Μεγάλος κόφτης (32 χιλ.)
3 Κόφτης ακριβείας (16 χιλ.) *
4 Πλήκτρο απελευθέρωσης κόφτη ακριβείας *
5 Ενδεικτική λυχνία
6a Διακόπτης ασφάλισης για το χτένι ακριβείας
6b Επιλογέας μήκους τριχών για το χτένι ακριβείας
6c Επιλογέας μήκους τριχών για το χτένι μαλλιών
7 Διακόπτης λειτουργίας
8 Ειδικό σετ καλωδίου (ο σχεδιασμός μπορεί να διαφέρει)
8a Βάση φόρτισης *
9 Θήκη *
* ‰ÂÓ ‰È·Ù›ıÂÙ·È Û fiÏ· Ù· ÌÔÓÙέÏ·
Φόρτιση
Η συνιστώμενη θερμοκρασία περιβάλλοντος για τη φόρτιση είναι από 5 °C
έως 35 °C. Η μπαταρία μπορεί να μη φορτιστεί σωστά ή και καθόλου σε
περιβάλλον με πολύ χαμηλή ή υψηλή θερμοκρασία. Η συνιστώμενη
θερμοκρασία περιβάλλοντος για το ξύρισμα είναι από 15 °C έως 35 °C.
Μην εκθέτετε τη συσκευή σε θερμοκρασίες άνω από 50 °C για μεγάλα
χρονικά διαστήματα.
• Τοποθετήστε τη συσκευή (χωρίς να την έχετε θέσει σε λειτουργία) στη
βάση φόρτισης ή συνδέστε την απευθείας σε ηλεκτρική πρίζα
χρησιμοποιώντας το ειδικό καλώδιο (8) με τον μετασχηματιστή.
• Όταν φορτίζετε την συσκευή για πρώτη φορά ή όταν η συσκευή δεν
χρησιμοποιείται για λίγους μήνες, αφήστε την να φορτιστεί συνεχόμενα
για 4 ώρες (BT 5050/5030/5010: 8 ώρες).
• Μόλις η ξυριστική μηχανή φορτιστεί πλήρως, αφήστε την να αποφορτιστεί
μέσω της φυσιολογικής χρήσης. Στη συνέχεια επαναφορτίστε την
πλήρως. Οι επόμενες φορτίσεις να διαρκούν περίπου 1 ώρα (ΒΤ
5050/5030/5010: 8 ώρες).
• Μια πλήρης φόρτιση παρέχει έως και 50 λεπτά λειτουργίας χωρίς το
καλώδιο ρεύματος, ανάλογα με το μέγεθος της γενειάδας.
• Η μέγιστη χωρητικότητα της μπαταρίας θα επιτευχθεί μόνο μετά από
ορισμένους κύκλους φόρτισης / αποφόρτισης.
67
Page 67

Ενδεικτική λυχνία (5)
BT 5090/5070
• Η ενδεικτική λυχνία δείχνει την κατάσταση των μπαταριών.
• Η ενδεικτική λυχνία αναβοσβήνει πράσινο όταν η συσκευή φορτίζεται.
Όταν η μπαταρία φορτιστεί πλήρως, η ενδεικτική λυχνία παραμένει μόνιμα
πράσινη με την προϋπόθεση ότι η συσκευή είναι συνδεδεμένη στην πρίζα.
• Κατά τη διάρκεια της χρήσης χωρίς το καλώδιο ρεύματος η ενδεικτική
λυχνία αναβοσβήνει πράσινο.
• Η ενδεικτική λυχνία αναβοσβήνει κόκκινο όταν η χωρητικότητα της
μπαταρίας είναι χαμηλή. Παρ‘όλα αυτά μπορείτε να τελειώσετε την
τρέχουσα διαδικασία περιποίησης.
BT 5050/5030/5010
• Η ενδεικτική λυχνία (5) δείχνει ότι η συσκευή φορτίζεται. Όταν η μπαταρία
φορτιστεί πλήρως, η ενδεικτική λυχνία σβήνει.
Χτένια (1a, 1b)
• Τα χτένια μπορούν να αφαιρεθούν πιέζοντας τα πλήκτρα απελευθέρωσης
(1c) με τον αντίχειρα και τον δείκτη σας.
Περιποίηση γενειάδας
• Τοποθετήστε το χτένι ακριβείας (1a) στη συσκευή ενώ είναι
απενεργοποιημένη (a).
• Βεβαιωθείτε ότι ο διακόπτης ασφάλισης (6a) βρίσκεται στην πάνω θέση
και περιστρέψτε τον επιλογέα (6b) στο επιθυμητό μήκος τριχών. Το χτένι
για τα γένια σύρεται αυτόματα προς τα πάνω ή προς τα κάτω (δυνατές
ρυθμίσεις μήκους 1 - 10 χιλ. σε κλίμακες των 0,5 χιλ.).
• Για να ασφαλίσετε το χτένι στο επιθυμητό μήκος, σύρετε τον διακόπτη
ασφάλισης (6a) προς τα κάτω. Ο επιλογέας μήκους σταθεροποιείται.
• Συνιστάται να ξεκινάτε με την υψηλότερη ρύθμιση και στη συνέχεια να την
μειώνετε έως ότου φτάσετε το επιθυμητό μήκος γενειάδας.
• Πιέστε τον διακόπτη λειτουργίας (7). Κρατήστε το χτένι για τα γένια με το
άκρο που σχηματίζει γωνία αντίθετα προς τα γένια σας και οδηγήστε τον
κόφτη με φορά αντίθετη από τη φορά ανάπτυξης των τριχών (a).
• Για να μην μπλοκάρει το χτένι με τρίχες, να το καθαρίζετε τακτικά με το
βουρτσάκι.
Περιποίηση / (Styling) Περιγράμματος
• Ο μεγάλος κόφτης (2) κόβει και περιποιείται ομοιόμορφα τις μεγάλες
περιοχές. Είναι ιδανικός για να δώσετε σχήμα στις φαβορίτες, το μουστάκι
68
Page 68

και τα επιμέρους κοντά γένια. Αφαιρέστε το χτένι. Ενώ τεντώνετε το
δέρμα, οδηγήστε τον μεγάλο κόφτη αντίθετα από τη φορά ανάπτυξης των
τριχών (b).
• Ο κόφτης ακριβείας (3) δίνει τέλειο σχήμα στις γραμμές και τις άκρες και
είναι ιδανικός για ακριβές περίγραμμα. Για να χρησιμοποιήσετε τον κόφτη
ακριβείας, πιέστε το πλήκτρο απελευθέρωσης (4) και σύρετέ τον προς τα
πάνω (c).
Κούρεμα
Τα μαλλιά πρέπει να είναι καθαρά, καλοχτενισμένα, να μην είναι μπλεγμένα
και να είναι στεγνά.
• Τοποθετήστε το χτένι μαλλιών (1b) στη συσκευή όταν δεν βρίσκεται σε
λειτουργία (d).
• Πατήστε τον επιλογέα μήκους τριχών για το χτένι (6c) και σύρετε τη χτένα
στο επιθυμητό μήκος (πιθανές ρυθμίσεις μήκους 10 - 20 mm ανά 2 mm).
• Εάν δεν είστε συνηθισμένοι να κόβετε τις άκρες των μαλλιών, ξεκινήστε με
την υψηλότερη ρύθμιση και στη συνέχεια μειώστε για να αποφύγετε να
κόψετε περισσότερα μαλλιά απ’ όσα επιθυμείτε. Εάν θέλετε να κόψετε τα
μαλλιά σας σε μήκος λιγότερο των 10 χιλ., συνιστούμε να τα κόβετε
πρώτα με το χτένι μαλλιών (1b)
έως τα 10 χιλ. και στη συνέχεια να χρησιμοποιείτε το χτένι γενιών για το
επιθυμητό μήκος.
• Χρησιμοποιήστε αργή και ελεγχόμενη κίνηση. Μην μετακινείτε τη συσκευή
στα μαλλιά πιο γρήγορα απ’ όσο μπορεί να κόψει.
• Κατά τη διάρκεια της χρήσης, τινάξτε ή φυσήξτε τις τρίχες. Εάν έχουν
πιαστεί πολλές τρίχες μέσα στο χτένι, αφαιρέστε τις και καθαρίστε το χτένι.
Καθαρισμός
Ο τακτικός καθαρισμός εξασφαλίζει καλύτερη απόδοση της συσκευής.
Καθαρισμός με το βουρτσάκι
• Θέστε τη συσκευή εκτός λειτουργίας. Ανοίξτε το μεγάλο κόφτη πιέζοντας
με τον αντίχειρα αντίθετα προς τον κόφτη από την μπροστινή πλευρά.
Ανοίγει κατά περίπου 45° και μπορεί επίσης να αφαιρεθεί (h).
• Χρησιμοποιώντας το βουρτσάκι καθαρίστε τους κόφτες και το σημείο
πίσω από τον μεγάλο κόφτη (μέσα στο περίβλημα).
Καθαρισμός με νερό
• Θέστε τη συσκευή εκτός λειτουργίας και ξεπλύνετε την κεφαλή και τους
κόφτες κάτω από χλιαρό τρεχούμενο νερό. Μπορείτε επίσης να ξεπλύνετε
τον ανοιγμένο μεγάλο κόφτη.
• Αφήστε τη συσκευή με τον μεγάλο κόφτη ανοιγμένο για να στεγνώσει.
69
Page 69

Διατηρώντας τη συσκευή σας σε τέλεια κατάσταση
Για να διατηρήσετε τη σωστή λειτουργία του κοπτικού συστήματος, να το
λιπαίνετε μετά από κάθε χρήση με λάδι μηχανής (i).
Διατήρηση των μπαταριών
Για να διατηρήσετε την άριστη χωρητικότητα των επαναφορτιζόμενων
μπαταριών, η συσκευή πρέπει να αποφορτίζεται πλήρως (με περιποίηση /
κούρεμα) περίπου κάθε 6 μήνες. Στην συνέχεια, επαναφορτίστε πλήρως τη
συσκευή.
Σημείωση για το περιßάλλον
Αυτό το προϊόν περιέχει μπαταρίες και/ή ηλεκτρικά τμήματα που
ανακυκλώνονται. Για την προστασία του περιβάλλοντος, μην τα
απορρίπτετε μαζί με τα οικιακά απορρίμματα - φροντίστε να τα
παραδώσετε για ανακύκλωση στα αρμόδια σημεία συλλογής της
περιοχής σας.
ΔÔ ÚÔ˚fiÓ ˘fiÎÂÈÙ·È Ûέ ÙÚÔÔÔ›ËÛË ¯ˆÚ›˜ ÚÔÂȉÔÔ›ËÛË.
Ηλεκτρικές προδιαγραφές βρίσκονται στο ειδικό σετ καλωδίου.
Εγγύηση
Παραχωρούμε δύο χρόνια εγγύηση, στο προϊόν, ξεκινώντας από την
ημερομηνία αγοράς. Μέσα στην περίοδο εγγύησης καλύπτουμε, χωρίς
χρέωση, οποιοδήποτε ελάττωμα προερχόμενο από κακή κατασκευή ή
κακής ποιότητος υλικό, είτε επισκευάζοντας είτε αντικαθιστώντας ολόκληρη
τη συσκευή σύμφωνα με την κρίση μας. Αυτή η εγγύηση ισχύει σε όλες τις
χώρες που πωλούνται τα προϊόντα Βraun.
Η εγγύηση δεν καλύπτει: καταστροφή από κακή χρήση, φυσιολογική φθορά
ή ελαττώματα λόγω αμέλειας του χρήστη. Η εγγύηση ακυρώνεται αν έχουν
γίνει επισκευές από μη εξουσιοδοτημένα άτομα ή δεν έχουν χρησιμοποιηθεί
γνήσια ανταλλακτικά Braun.
Για να επιτύχετε service μέσα στην περίοδο της εγγύησης, παραδώστε ή
στείλτε την συσκευή με την απόδειξη αγοράς σε ένα Εξουσιοδοτημένο
Κατάστημα Service της Braun: www.service.braun.com.
Καλέστε στο 210-9478700 για να πληροφορηθείτε για το πλησιέστερο
Εξουσιοδοτημένο Κατάστημα Service της Braun.
70
 Loading...