

Boss MR1515W, MR1515B User Manual

Congratulations on your purchase of a Audio Systems
Compact Disc Receiver. This product has been designed and
built to deliver the highest quality audio reproduction while
impervious to the harsh conditions of the marine environment.
We are sure you'll enjoy listening to your favorite music with this
R
component as part of your car audio system. For best
results please consult a professional mobile electronics installer
for application advice or troubleshooting. To guarantee top
performance we recommend using The Link installation
accessories such as RCA interconnects, power cables, and
speaker wire. Thank you for choosing Audio Systems
products for your mobile entertainment system. We can't change
the world, but we can make it sound better.
R
R
R

3
Installation .....................................................................................................4
DIN Front-Mount....................................................................................................4
Installing the unit.............................................................................................4
Removing the unit...........................................................................................5
Using the Detachable Front Panel .............................................................6
Wiring Connection ........................................................................................7
Marine Remote..............................................................................................8
Operation.....................................................................................................11
General Operation ..............................................................................................11
Radio Operation .................................................................................................13
CD Operation ......................................................................................................14
CD Changer Operation........................................................................................15
Specification................................................................................................16
Trouble Shooting.........................................................................................17
CONTENTS
4
Notes:
Read this entire manual before you
begin installation.
• This unit is designed for use in boats.
Its water resistant design makes it a
good choice for other vehicles (such
as off-road) that may be exposed to
water or other conditions that might
harm a non-marine unit.
• Choose a mounting location where the
unit will not interfere with the driver’s
operation or with other equipment in
the vehicle.
• Before completing the final installation
of the unit make all your connections,
verify your wiring, and make sure the
unit operates properly.
• Use only the parts included with the
unit to ensure proper installation. The
use of unauthorized parts can cause
malfunctions.
• Consult with your nearest dealer if
installation requires the drilling of holes
or other modifications to the boat.
• Install the unit where it does not get in
the driver’s way and cannot injure the
passenger if there is a sudden stop,
like an emergency stop.
• Do not use a mounting angle greater
than 30 degrees (above or below)
straight horizontal. Doing so will
increase the possibility of CD skipping
30˚
• Avoid installing the unit where it would
be subject to high temperature, such
as from direct sunlight, or from hot air,
from the heater, or where it would be
subject to dust, dirt or excessive
vibration.
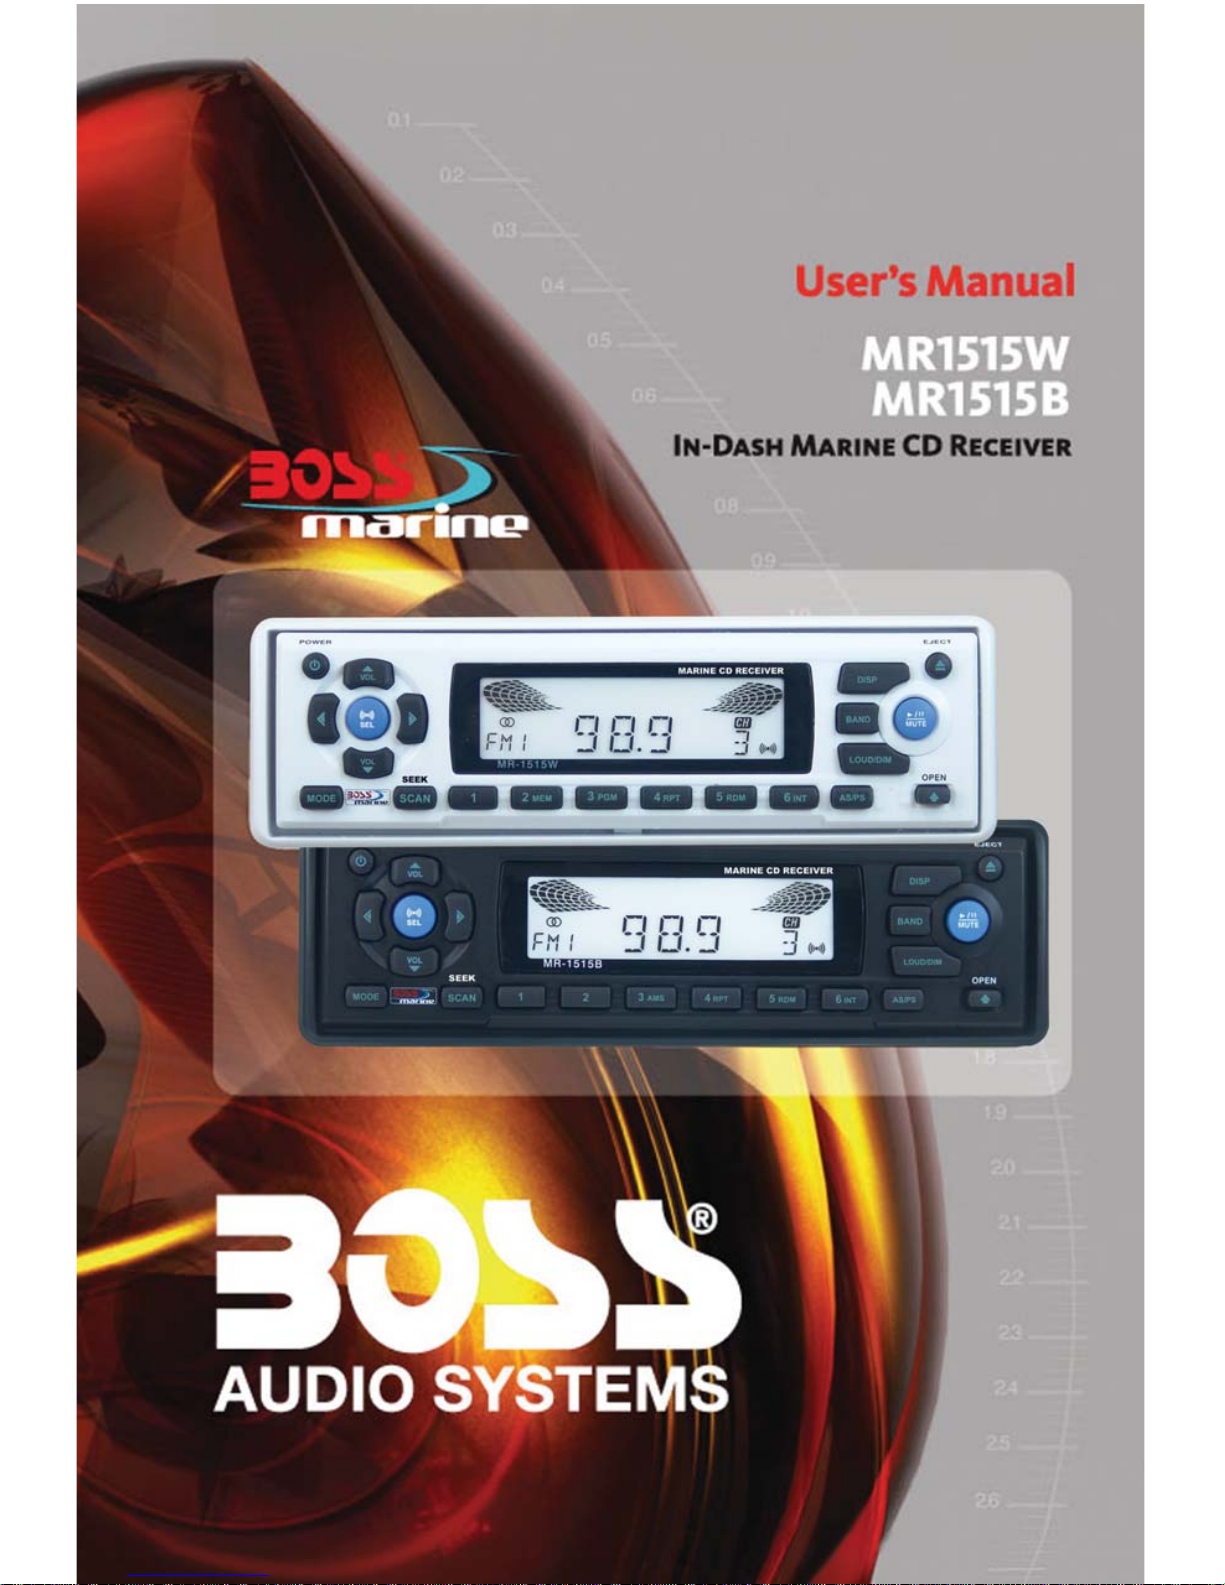
TRANSPORT SCREWS
Before installing the unit remove the two
transport screws on the top of the unit
chassis.
NOTE: After removing the screws use the
two pieces of plastic film (supplied) to
seal the two holes and keep water out.
DIN FRONT-MOUNT
Installing the unit
1. Dashboard or other mounting surface.
2. Bracket
3. Support screw
INSTALLATION
(Fig. 1)
1
3
2
182
53
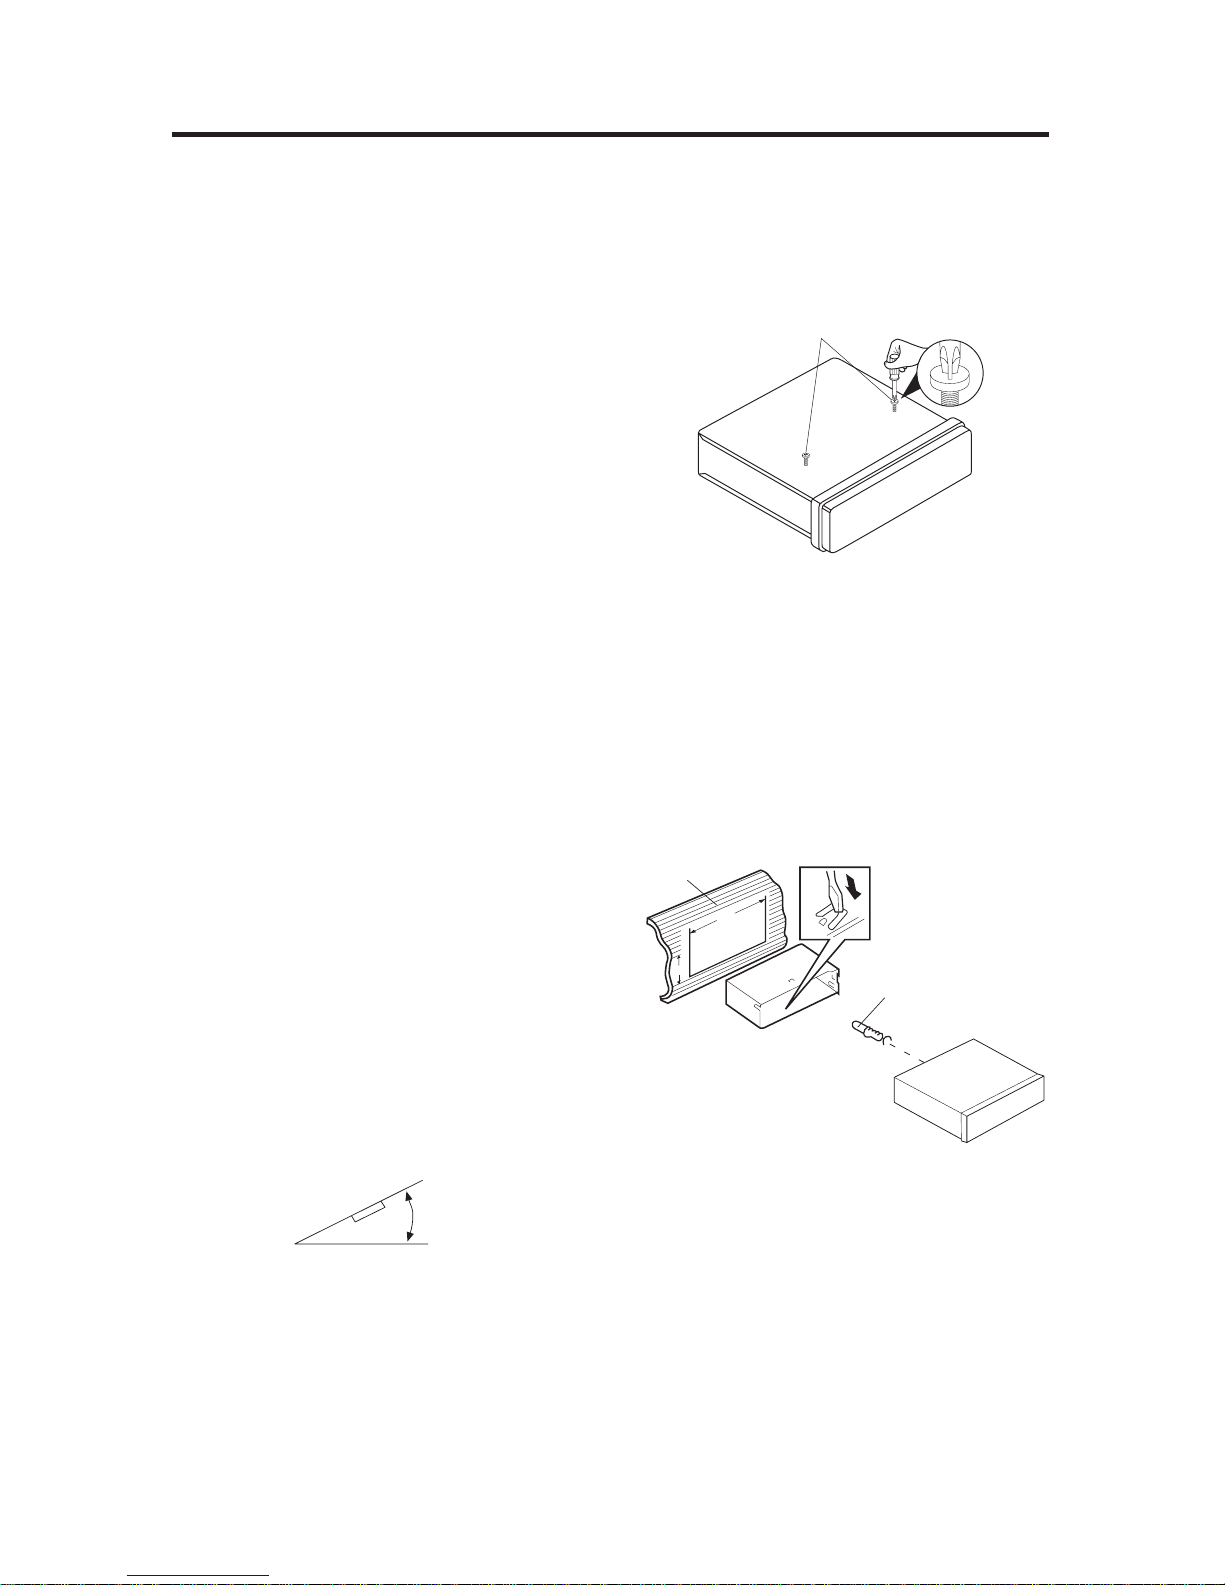
Take out screw before installation
1. Dashboard
2. Nut (5mm)
3. Spring washer
4. Screw (5x25mm)
5. Screw
6. Strap
Be sure to use the strap to secure the
back of the unit in place. The strap can
be bent by hand to the desired angle.
7. Plain washer
Removing the unit
1. Before removing the unit, press the
OPEN button to slide down the front
panel.
2. Key
Insert the keys supplied with the unit
into the grooves in the housing as
shown in figure until they click. Pulling
the keys makes it possible to remove
the unit from the dashboard.
5
INSTALLATION
(Fig. 2)
1
2
6
5
4
3
7
2
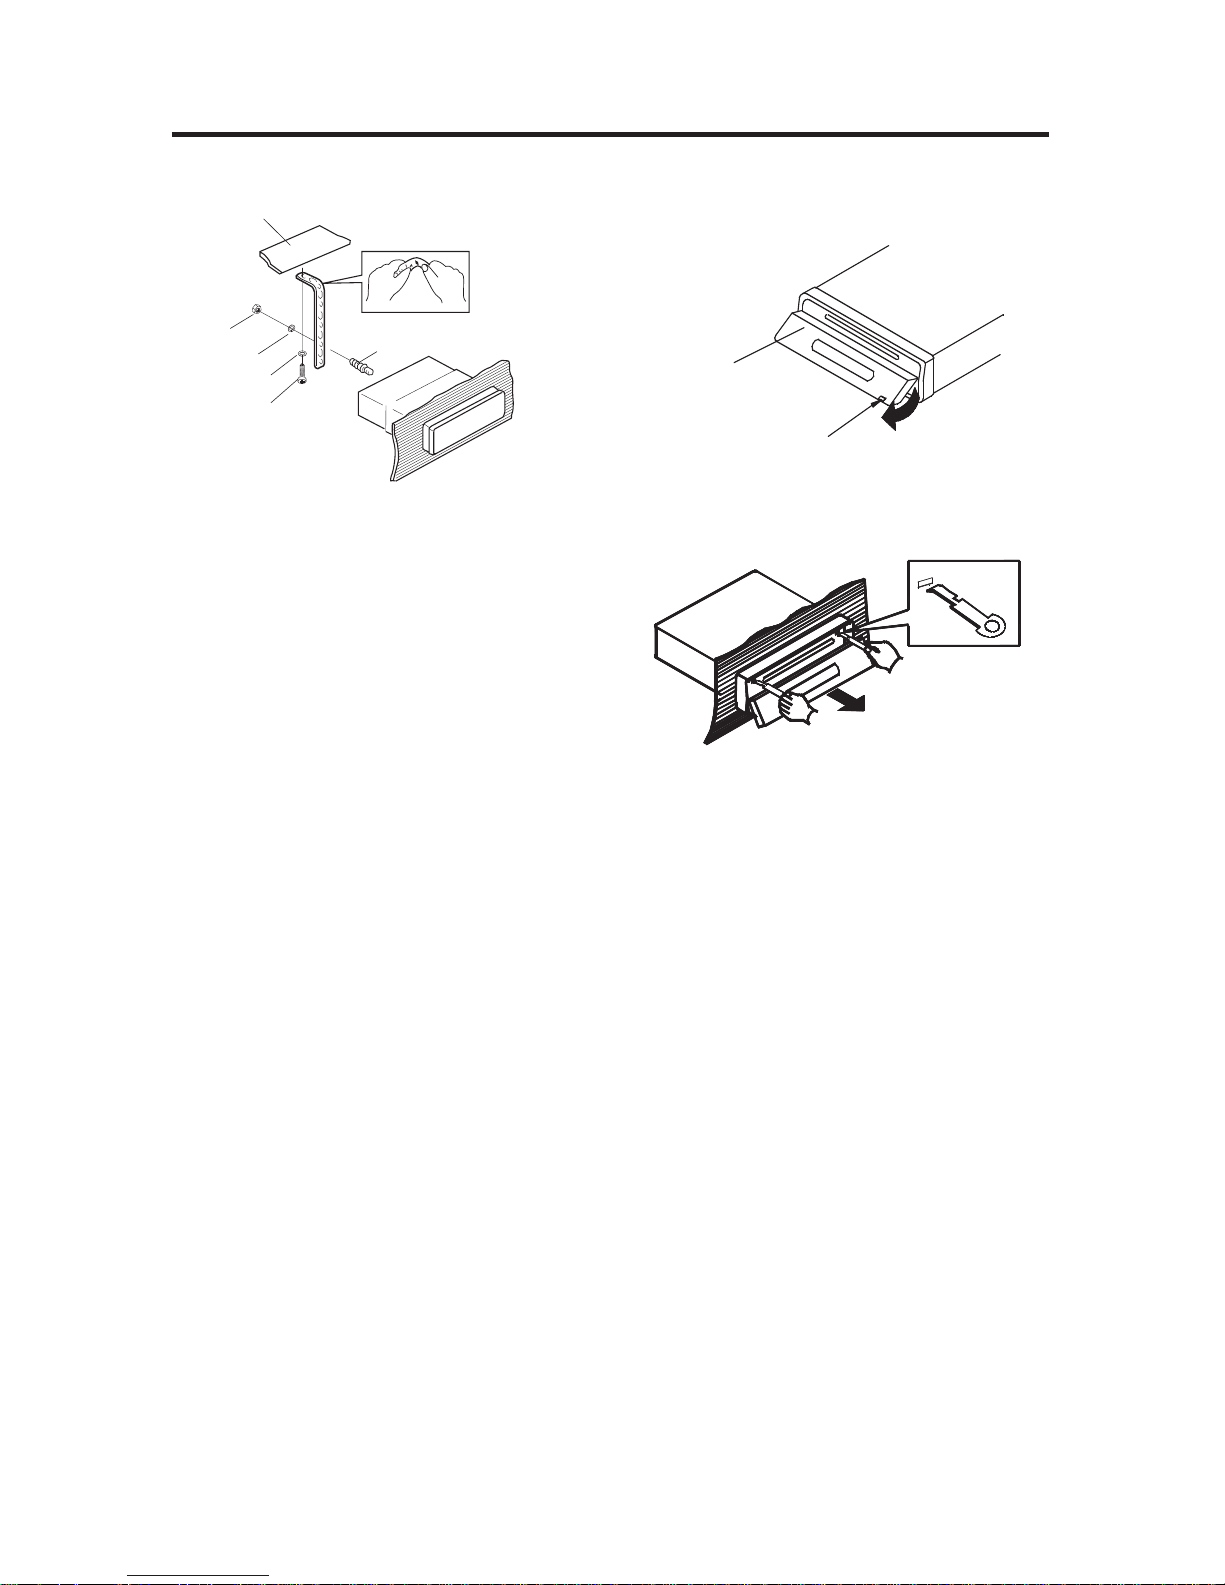
OPEN button
Front Panel
1
To Detach the Front Panel
1. Press the OPEN button, the front panel
will slide down.
2. When the front panel slides down,
press the bottom button of the front
panel upward and pull it out from the
panel bracket.
3. For safekeeping, store the front panel
in the supplied protective case
immediately after being removed.
To Reinstall the Front Panel
1. When the panel bracket is in slide down
position, insert the front panel into the
panel bracket and push the front panel
from the middle to slide it up.
2. When the panel bracket is in slide up
position, insert a side of the front panel
to its proper position and push another
side into the panel bracket, a ‘click’
sound should be heard.
3. Note that if the front panel fails to lock
in position properly, pressing control
button may not function and LCD
display may be missing some
segments. Press the OPEN button and
then re-install the front panel.
6
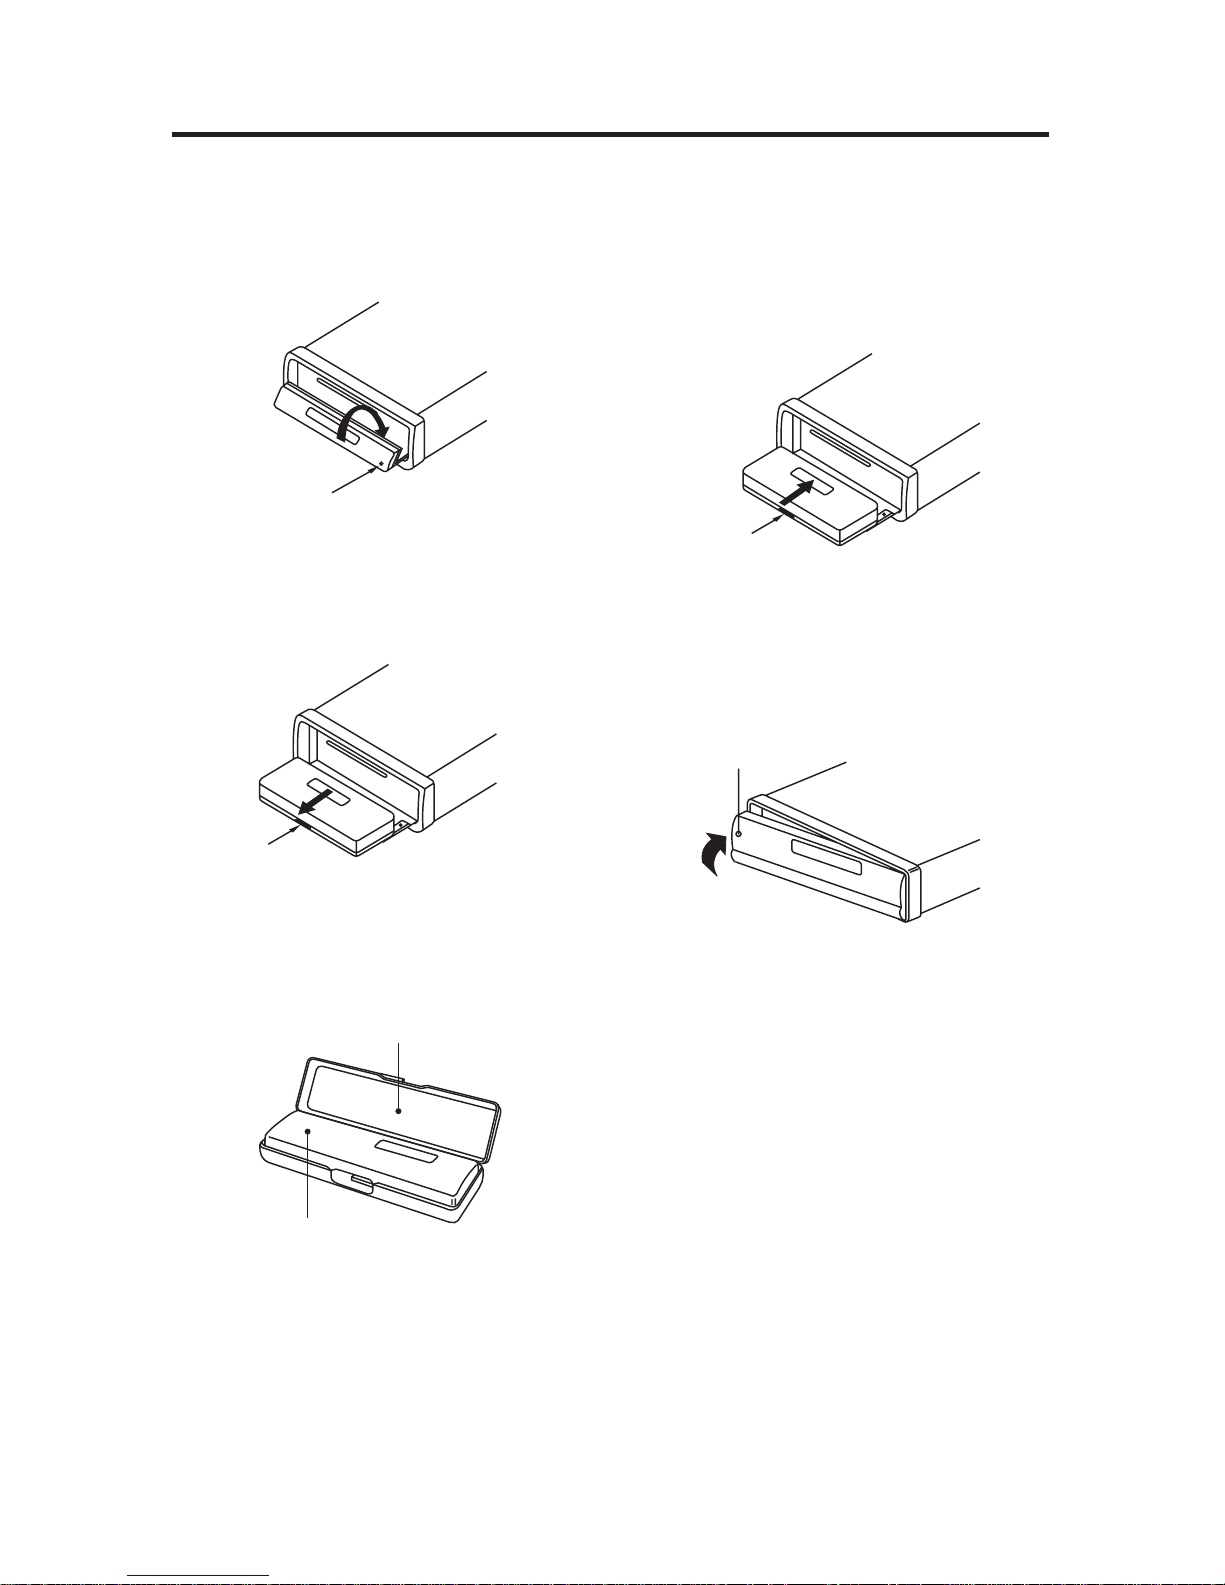
Open
Bottom
Button
Bottom
Button
Protective Case
Front Panel
Front Panel
USING THE DETACHABLE FRONT PANEL
 Loading...