

Bose Wave Radio Series Owner's Manual

The Bose
®
Wave
®
Radio
Owner’s Guide
*
Important Safety Information
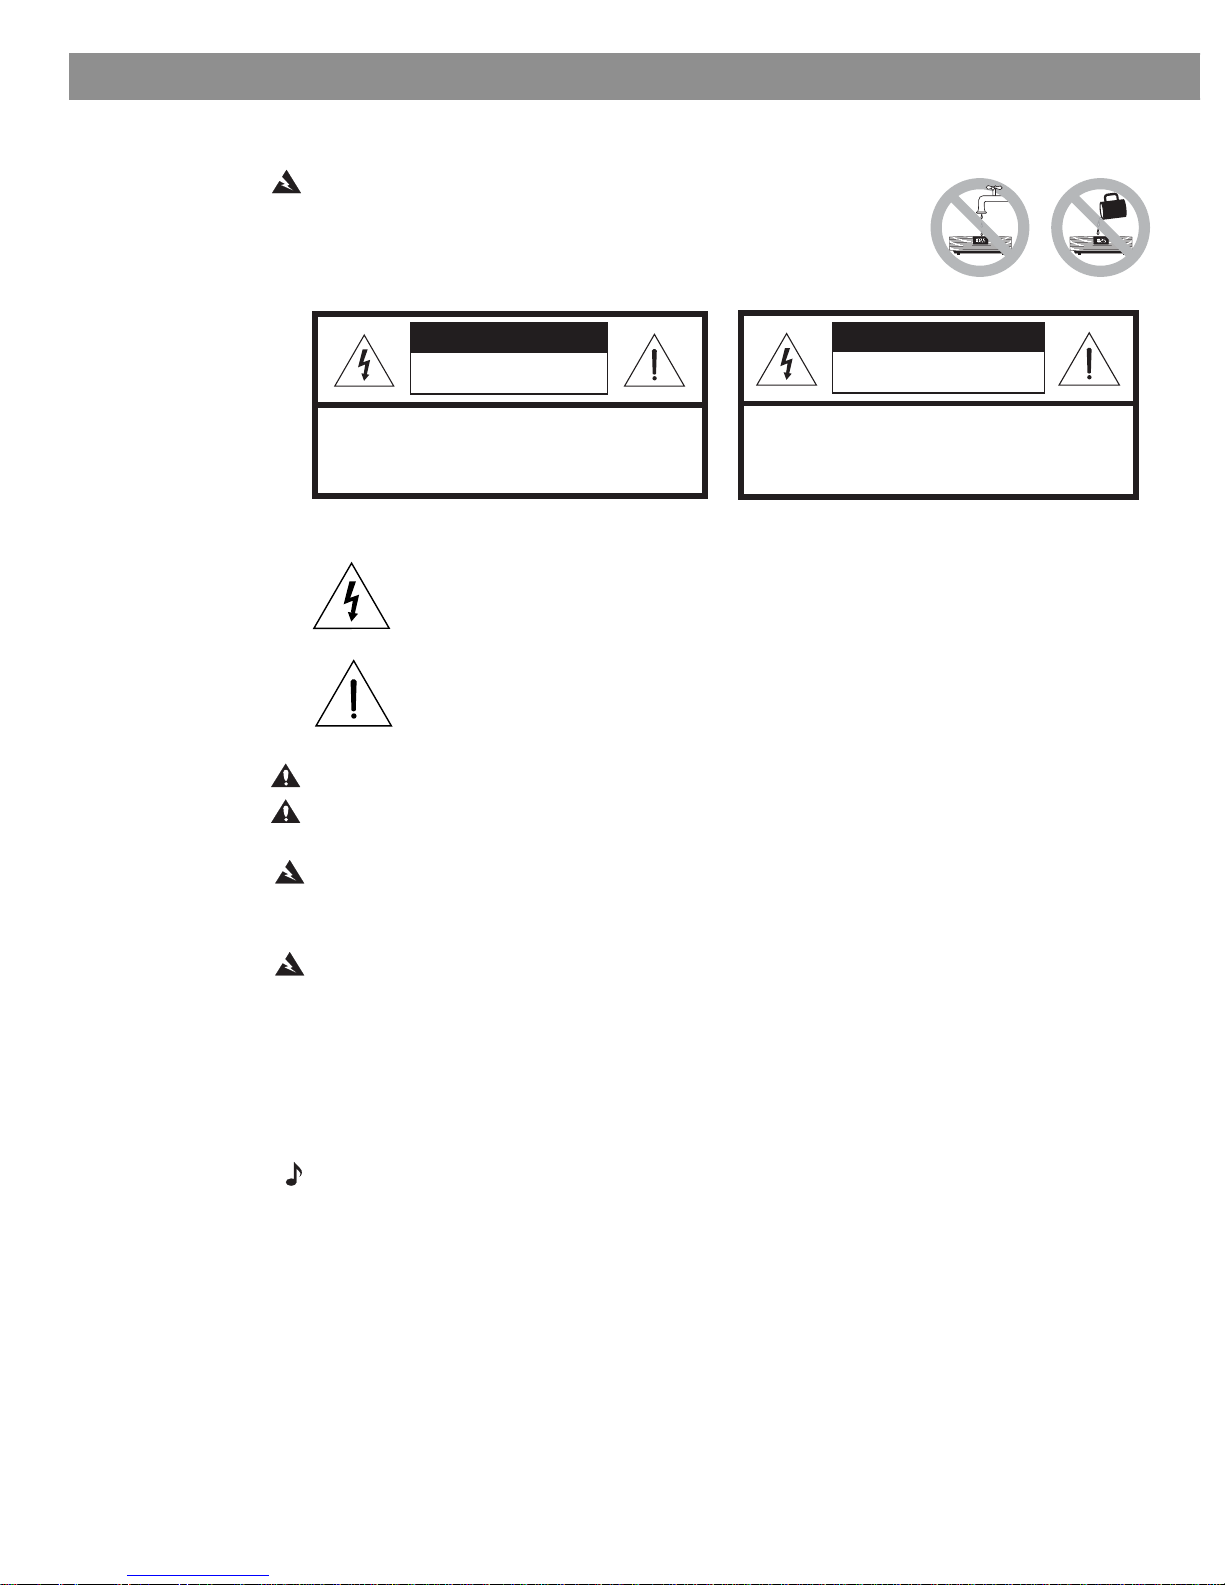
WARNING: To reduce the risk of fire or electric shock, do not
expose the Wave
®
radio to rain or moisture.
As with any electronic product, use care not to spill liquids into any
part of the radio. Liquids can cause a failure and/or a fire hazard.
CAUTION
RISK OF ELECTRICAL SHOCK
DO NOT OPEN
CAUTION: TO REDUCE THE RISK OF ELECTRIC SHOCK,
DO NOT REMOVE COVER (OR BACK).
NO USER-SERVICABLE PARTS INSIDE.
REFER SERVICING TO QUALIFIED PERSONNEL.
RISQUE DE CHOC ÉLECTRIQUE
ATTENTION : POUR RÉDUIRE LE RISQUE DE DÉCHARGE
ÉLECTRIQUE, NE RETIREZ PAS LE COUVERCLE (OU
L’ARRIÈRE). IL NE SE TROUVE ÀL’INTÉRIEURAUCUNE
PIÈCE POUVANT ÊTRE RÉPARÉE PARL’USAGER.
S’ADRESSER À UN RÉPARATEUR COMPÉTENT.
AVIS
NE PAS OUVRIR
These CAUTION marks are located on the bottom of your Wave* radio:
The lightning flash with arrowhead symbol, within an equilateral triangle, is
intended to alert the user to the presence of uninsulated dangerous voltage within
the system enclosure that may be of sufficient magnitude to constitute a risk of
electric shock.
The exclamation point within an equilateral triangle, as marked on the system, is
intended to alert the user to the presence of important operating and maintenance
instructions in this owner’s guide.
CAUTION: To prevent electric shock, match wide blade of plug to wide slot, insert fully.
ATTENTION: Pour éviter les chocs électriques, introduire la lame la plus large de la fiche dans
la borne correspondante de la prise et pousser jusqu’au fond.
WARNING: Keep the remote control battery away from children. It may cause a fire or chemi-
cal burn if mishandled. Do not recharge, disassemble, heat above 100˚C (212˚F), or incinerate. Dispose of used battery promptly. Replace only with a battery of the correct type and
model number.
WARNING: No naked flame sources, such as lighted candles, should be placed on the appa-
ratus.
Batteries
Please dispose of used batteries properly, following any local regulations. Do not incinerate.
Please read this owner’s guide
Please take the time to follow this owner’s guide carefully. It will help you set up and operate
your radio properly, and enjoy all of its advanced features. Save your owner’s guide for future
reference.
Note: DO NOT place the Wave radio on any heat-sensitive surface, such as the finished sur-
face of fine furniture. Like all electrical equipment, it generates some heat.
Bose, Wave and the Wave radio design are registered trademarks of the Bose Corporation.
2

o
Important Safety Information
1. Read these instructions – for all components
b efore using this product.
2. Keep these instructions – for future reference.
3. Heed all warnings – – on the product and in the
owner’s guide.
4. Follow all instructions.
5. Do not use this apparatus near water or
moisture – Do not use this product near a
bathtub, washbowl, kitchen sink, laundry tub, in a
wet basement, near a swimming pool, or any-
w here else that water or moisture are pr esent.
6. Clean only with a dry cloth – and as directed
by Bose® Corporation. Unplug this product from
the wall outlet before cleaning.
7. Do not block any ventilation openings.
Install in accordance with the
manufacturer’s instructions – To ensur e
reliable operation of the product and to protect it
from overheating, put the product in a position
and location that will not interfere with its proper
ventilation. For example, do not place the product
on a bed, sofa, or similar surface that may block
the ventilation openings. Do not put it in a built-in
system, such as a bookcase or a cabinet that may
keep air from flowing through its ventilation
openings.
8. Do not install near any heat sources, such
as radiators, heat registers, stoves or other
apparatus (including amplifiers) that produce heat.
9. Do not defeat the safety purpose of the
polarized or grounding-type plug. A polar-
ized plug has two blades with one wider
than the other. A grounding-type plug has
two blades and a third grounding prong. The
wider blade or third prong are provided for
your safety. If the pr ovided plug does not fit
in your outlet, consult an electrician for
replacement of the obsolete outlet.
10. Protect the power cord from being walked
on or pinched, particularly at plugs, conve-
nience receptacles, and the point where
they exit from the apparatus.
11. Only use attachments/accessories specified by the manufacturer.
12. Use only with the cart, stand, tripod,
bracket or table specified by the
manufacturer or sold with the
apparatus. When a cart is used,
use caution when moving the
cart/apparatus combination to
avoid injury from tip-over .
13. Unplug this apparatus during lightning
storms or when unused for long periods of
time – to prevent damage to this product.
14. Refer all servicing to qualified service person nel. Servicing is required when the apparatus
has been damaged in any way: such as power supply cord or plug is damaged; liquid has
been spilled or objects have fallen into the
apparatus; the apparatus has been exposed to
rain or moisture, does not operate normally, or
has been dropped – – Do not attempt to service this
product yourself. Opening or removing covers may
e xpose you to dangerous voltages or other hazards.
Please call Bose to be referred to an authorized
service center near you.
15. To prevent risk of fire or electric shock, avoid
overloading wall outlets, extension cords, or
integral convenience receptacles.
16. Do not let objects or liquids enter the product –
as they may touch dangerous voltage points or
short-out parts that could result in a fire or electric
shock.
17. See product enclosure bottom for safety
related markings.
Information about products that
generate electrical noise
If applicable, this equipment has been tested and found
to comply with the limits for a Class B digital device,
pursuant to Part 15 of the FCC rules. These limits are
designed to provide reasonable protection against
harmful interference in a residential installation. This
equipment generates, uses, and can radiate radio
frequency energy and, if not installed and used in accordance with the instructions, may cause harmful interference to radio communications. However, this is no
guarantee that interference will not occur in a particular
installation. If this equipment does cause harmful interference to radio or television reception, which can be
determined by turning the equipment off and on, you are
encouraged to try to correct the interference by one or
more of the following measures:
•
Reorient or relocate the receiving antenna.
•
Increase the separation between the equipment and
receiver.
•
Connect the equipment to an outlet on a different
circuit than the one to which the receiver is connected.
•
Consult the dealer or an experienced radio/TV technician for help.
Note: Unauthorized modification of the receiver or radi
remote control could void the user’s authority to operate
this equipment.
This product complies with the Canadian ICES-003 Class
B specifications.
2a
Important Safety Information
18. Use Proper Power Sources – – Plug the product
into a proper power source, as described in the operating
instructions or as marked on the product.
19. Avoid Power Lines – Use extreme care when
installing an outside antenna system to keep from
touching power lines or circuits, as contact with them
may be fatal. Do not install external antennas near
overhead power lines or other electric light or power
circuits, nor where an antenna can fall into such circuits
or power lines.
20. Ground All Outdoor Antennas – If an external
antenna or cable system is connected to this product, be
sure the antenna or cable system is grounded. This will
provide some protection against voltage sur ges and
built-up static charges.
Section 810 of the National Electrical Code ANSI/NFP A
No. 70 provides informaiton with respect to proper
grounding of the mast and supporting structure,
grounding of the lead-in wire to an antenna discharge
unit, size of grounding conductors, location of antennadischarge unit, connection to grounding electrodes, and
requirements for the ground electrode. Refer to the
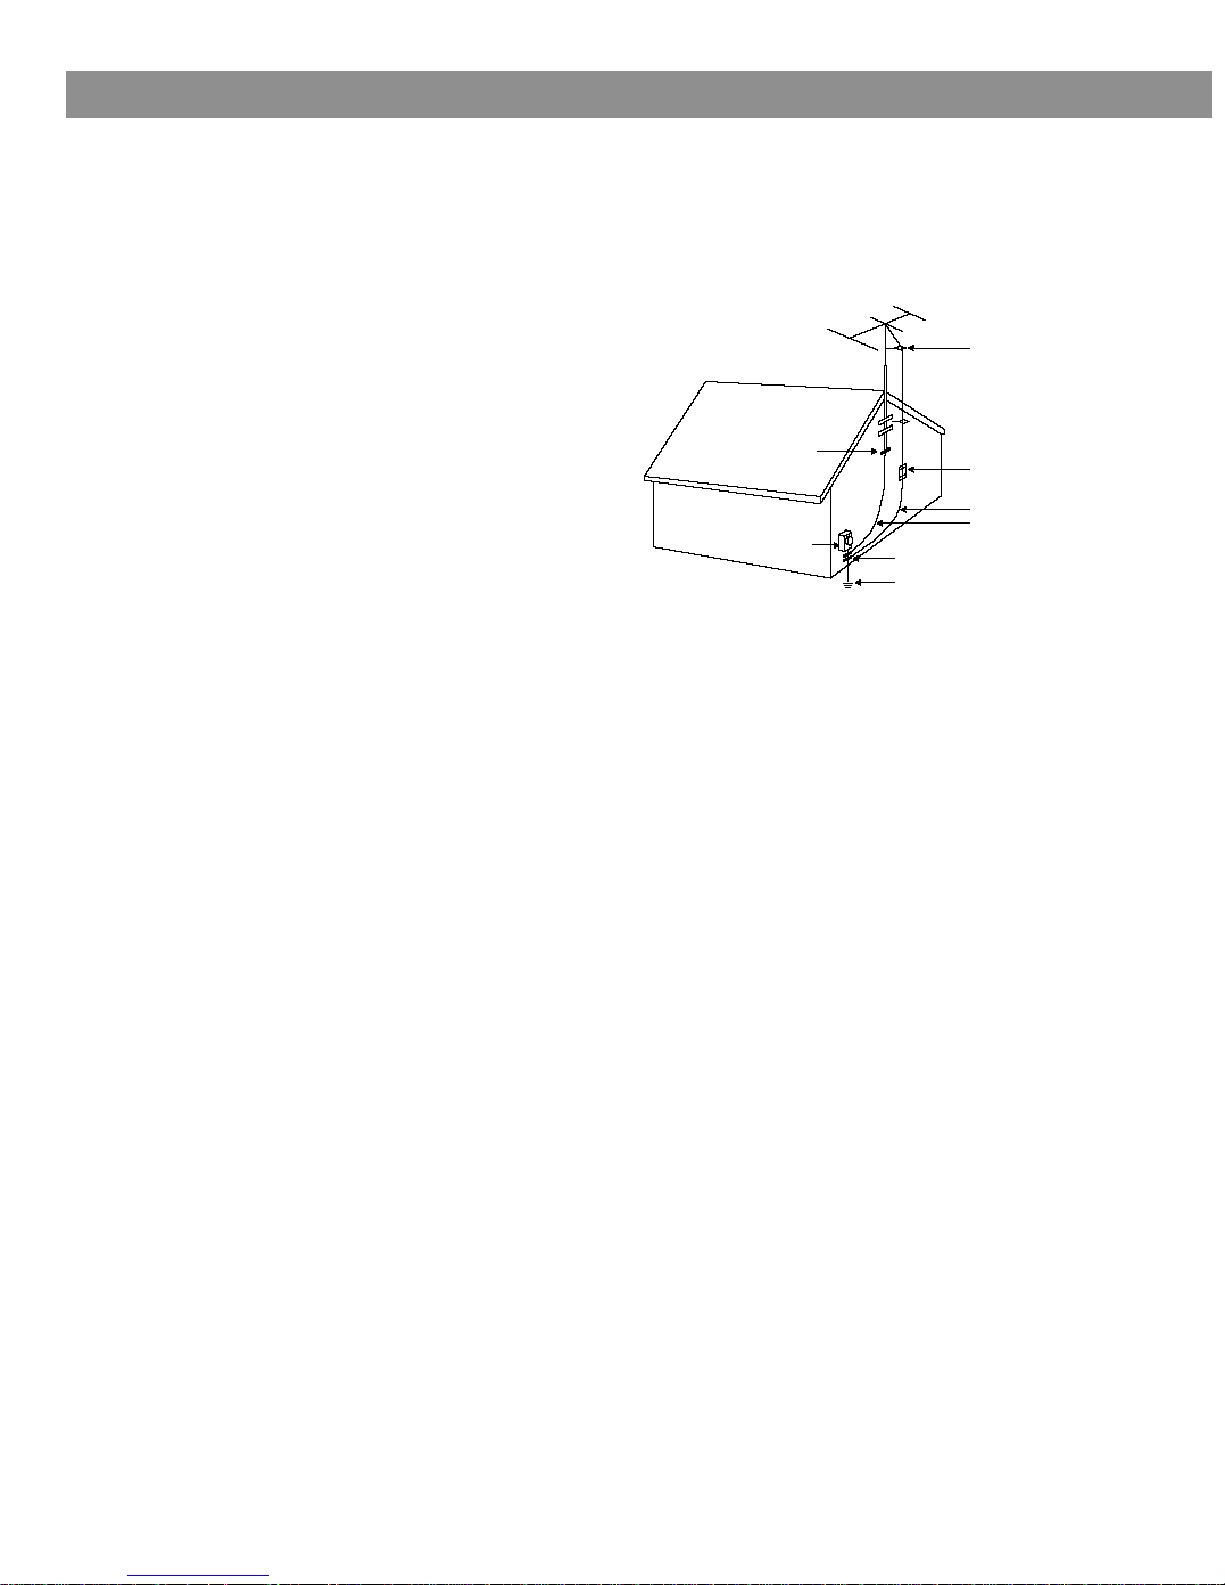
antenna grounding illustration on this page.
Antenna grounding
Example of antenna grounding as per National Electrical Code,
ANSI/NFPA 70.
Antenna lead in wire
Ground clamp
Electric service
equipment
Ground clamps
Power service grounding
electrode system
(NEC ART 250, Part H)
Antenna discharge unit
(NEC Section 810-20)
Grounding conductors
(NEC Section 810-21)
Note to CA TV system installer
This reminder is provided to call the CATV system installer’s
attention to Article 820-40 of the NEC (of USA) that provides
guidelines for proper grounding. In particular, it specifies that the
cable ground shall be connected to the grounding system of the
building, as close to the point of cable entry as is practical.
2b

Contents
Setting Up Your Wave
Before you begin . . . . . . . . . . . . . . . . . . . . . . . . . . . . . . . . . . . . . . . . . . . . . . . . . . . . . . . . . . . . 5
Unpacking the carton . . . . . . . . . . . . . . . . . . . . . . . . . . . . . . . . . . . . . . . . . . . . . . . . . . . . . . . . . 6
Selecting a location for your radio . . . . . . . . . . . . . . . . . . . . . . . . . . . . . . . . . . . . . . . . . . . . . . .6
Installing the battery . . . . . . . . . . . . . . . . . . . . . . . . . . . . . . . . . . . . . . . . . . . . . . . . . . . . . . . . . . 7
Connecting the power cord . . . . . . . . . . . . . . . . . . . . . . . . . . . . . . . . . . . . . . . . . . . . . . . . . . . . 8
Connecting the FM antenna . . . . . . . . . . . . . . . . . . . . . . . . . . . . . . . . . . . . . . . . . . . . . . . . . . . .8
Connecting the coaxial cable . . . . . . . . . . . . . . . . . . . . . . . . . . . . . . . . . . . . . . . . . . . . . . . . . . . 8
Setting up the remote control . . . . . . . . . . . . . . . . . . . . . . . . . . . . . . . . . . . . . . . . . . . . . . . . . . 9
Connecting other components . . . . . . . . . . . . . . . . . . . . . . . . . . . . . . . . . . . . . . . . . . . . . . . . . . 11
Using other components . . . . . . . . . . . . . . . . . . . . . . . . . . . . . . . . . . . . . . . . . . . . . . . . . . . . . . 11
®
Radio
Operating Your Wave Radio
Operating the remote control . . . . . . . . . . . . . . . . . . . . . . . . . . . . . . . . . . . . . . . . . . . . . . . . . . . 13
Operating the radio control panel . . . . . . . . . . . . . . . . . . . . . . . . . . . . . . . . . . . . . . . . . . . . . . .14
Reading the clock display . . . . . . . . . . . . . . . . . . . . . . . . . . . . . . . . . . . . . . . . . . . . . . . . . . . . . 15
Setting the time . . . . . . . . . . . . . . . . . . . . . . . . . . . . . . . . . . . . . . . . . . . . . . . . . . . . . . . . . . . . . 15
Customizing the display . . . . . . . . . . . . . . . . . . . . . . . . . . . . . . . . . . . . . . . . . . . . . . . . . . . . . . . 16
Listening to the radio . . . . . . . . . . . . . . . . . . . . . . . . . . . . . . . . . . . . . . . . . . . . . . . . . . . . . . . . . 17
Reading the radio display . . . . . . . . . . . . . . . . . . . . . . . . . . . . . . . . . . . . . . . . . . . . . . . . . . . . . . 18
Setting the alarms . . . . . . . . . . . . . . . . . . . . . . . . . . . . . . . . . . . . . . . . . . . . . . . . . . . . . . . . . . . 19
Using the Alarms . . . . . . . . . . . . . . . . . . . . . . . . . . . . . . . . . . . . . . . . . . . . . . . . . . . . . . . . . . . . 20
Maintaining Your Wave Radio
Taking care of your Wave radio . . . . . . . . . . . . . . . . . . . . . . . . . . . . . . . . . . . . . . . . . . . . . . . . .21
Cleaning your radio . . . . . . . . . . . . . . . . . . . . . . . . . . . . . . . . . . . . . . . . . . . . . . . . . . . . . . . 21
Replacing the batteries . . . . . . . . . . . . . . . . . . . . . . . . . . . . . . . . . . . . . . . . . . . . . . . . . . . .21
Technical information . . . . . . . . . . . . . . . . . . . . . . . . . . . . . . . . . . . . . . . . . . . . . . . . . . . . . . . . . 21
Power rating . . . . . . . . . . . . . . . . . . . . . . . . . . . . . . . . . . . . . . . . . . . . . . . . . . . . . . . . . . . . . 21
Dimensions . . . . . . . . . . . . . . . . . . . . . . . . . . . . . . . . . . . . . . . . . . . . . . . . . . . . . . . . . . . . . 21
Weight . . . . . . . . . . . . . . . . . . . . . . . . . . . . . . . . . . . . . . . . . . . . . . . . . . . . . . . . . . . . . . . . . 21
Troubleshooting . . . . . . . . . . . . . . . . . . . . . . . . . . . . . . . . . . . . . . . . . . . . . . . . . . . . . . . . . . . . . 22
Customer service . . . . . . . . . . . . . . . . . . . . . . . . . . . . . . . . . . . . . . . . . . . . . . . . . . . . . . . . . . . . 22
Limited warranty . . . . . . . . . . . . . . . . . . . . . . . . . . . . . . . . . . . . . . . . . . . . . . . . . . . . . . . . . . . . . 23
Index . . . . . . . . . . . . . . . . . . . . . . . . . . . . . . . . . . . . . . . . . . . . . . . . . . . . . . . . . . . . 24
®
Bose
Corporation . . . . . . . . . . . . . . . . . . . . . . . . . . . . . . . . . . . . . inside back page
For your records
The serial number is located on the bottom of your radio.
Wave radio serial number: ____________________________
Purchase date: ______________________________________
We suggest you keep your sales receipt with this owner’s guide.
3

4
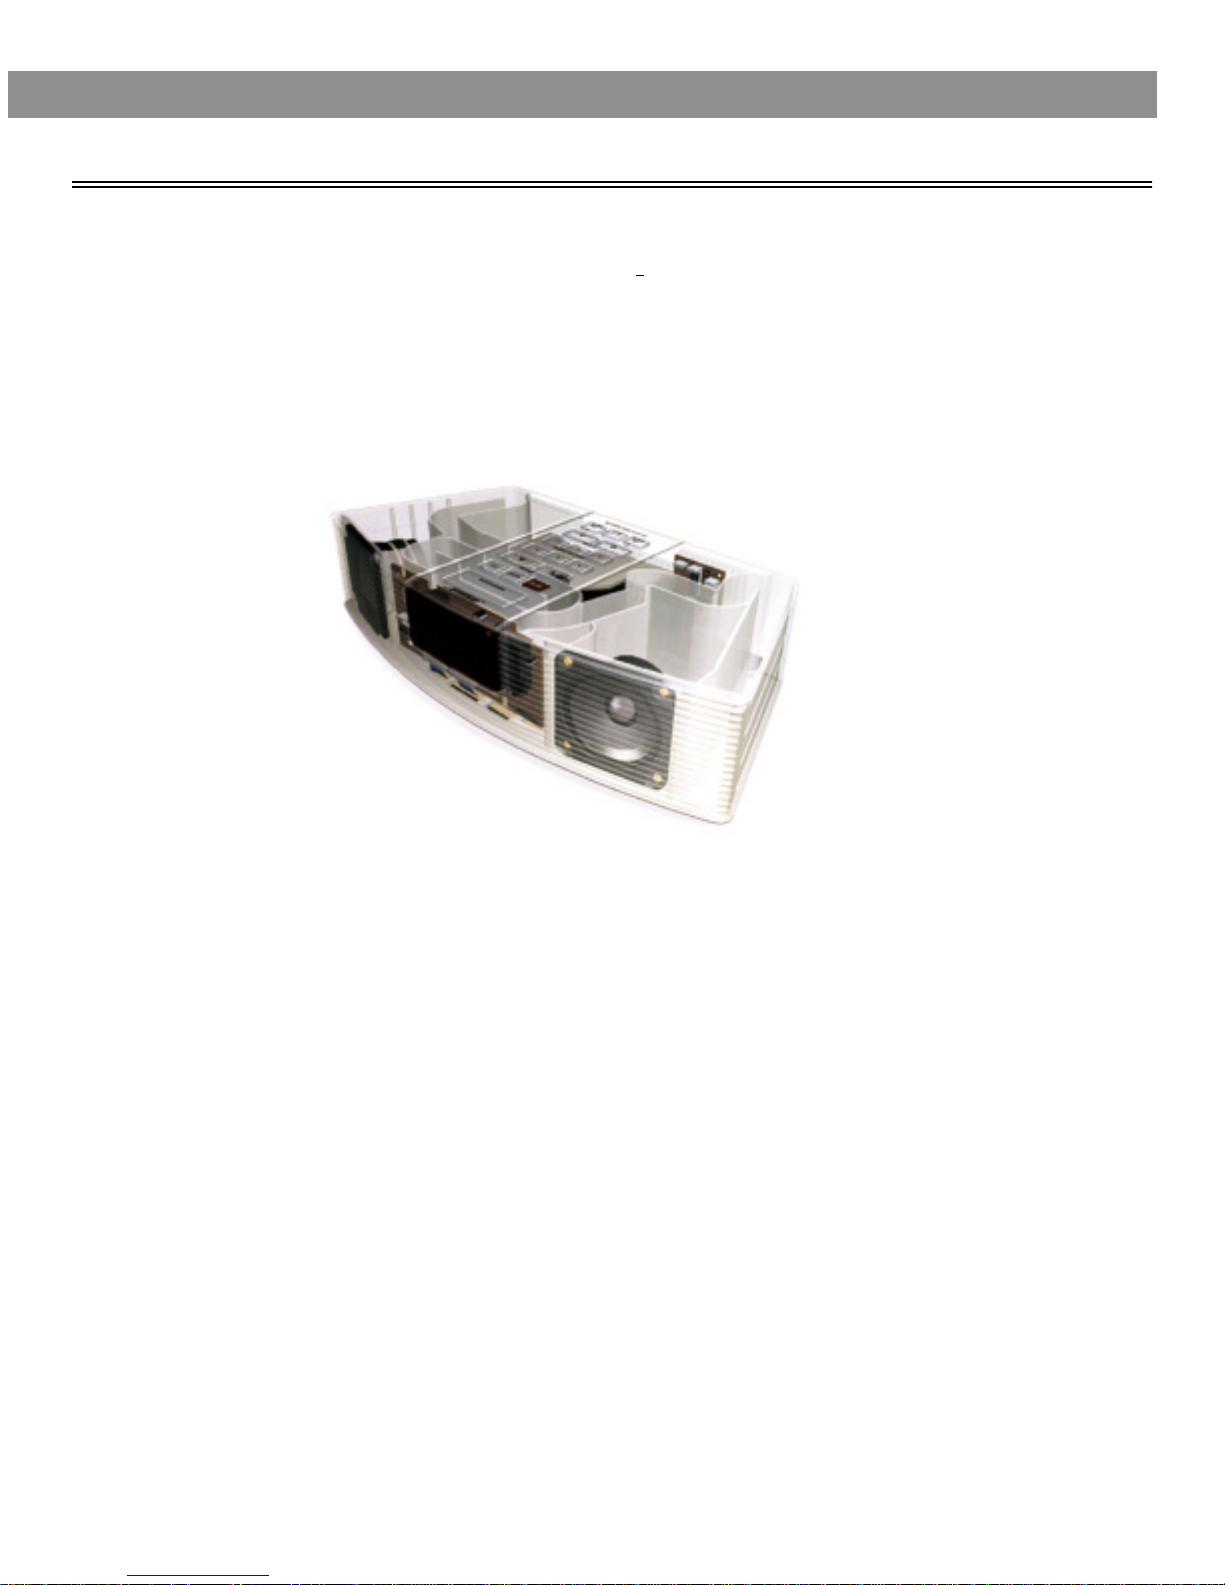
Setting Up Your Wave
Before you begin
Thank you for purchasing the Bose
Fourteen years of research by Bose Corporation bring you the benefits of award-winning pat-
ented acoustic waveguide speaker technology . Using this technology, a tube ef ficiently trans-
fers energy from a small loudspeaker to the outside air over a whole range of bass notes.
And, by folding long waveguides into intricate patterns, they fit into products small enough to
be placed comfortably in your home. There is a 37-inch (93.5-cm) long waveguide inside the
Wave radio’s enclosure, enabling this tabletop radio to produce room-filling sound with full,
rich bass.
®
Radio
®
Wave radio.
Your Wave radio also includes:
• Integrated system design for high acoustic quality requiring no complex adjustments
•A high performance stereo tuner with 6 AM and 6 FM station presets
•Two independent alarms, with battery backup power to save the settings for wakeup during
power loss
•A credit card-size infrared remote control with optional mounting strip
• Inputs for an additional sound source, such as a CD or tape player
To fully appreciate all of these features, please take the time to follow this owner’s guide carefully. It helps you set up and operate your radio and enjoy its high-fidelity sound.
5
A
l
a
r
m
M
o
d
e
Alarm
Set
Clock
Set
Presets
1
2
3
45
6
Tuning
Vo
lum
e
Sleep/Snooze
AUX
AM/F
M
On/O
ff
W
ave Radio
T
i
m
e
A
la
r
m
S
l
e
e
p
T
u
n
in
g
S
t
a
t
i
o
n
V
o
lu
m
e
M
u
t
e
A
U
X
A
M
F
M
O
n
O
f
f
1
23
4
5
6
P
re
s
e
ts
Wave Radio
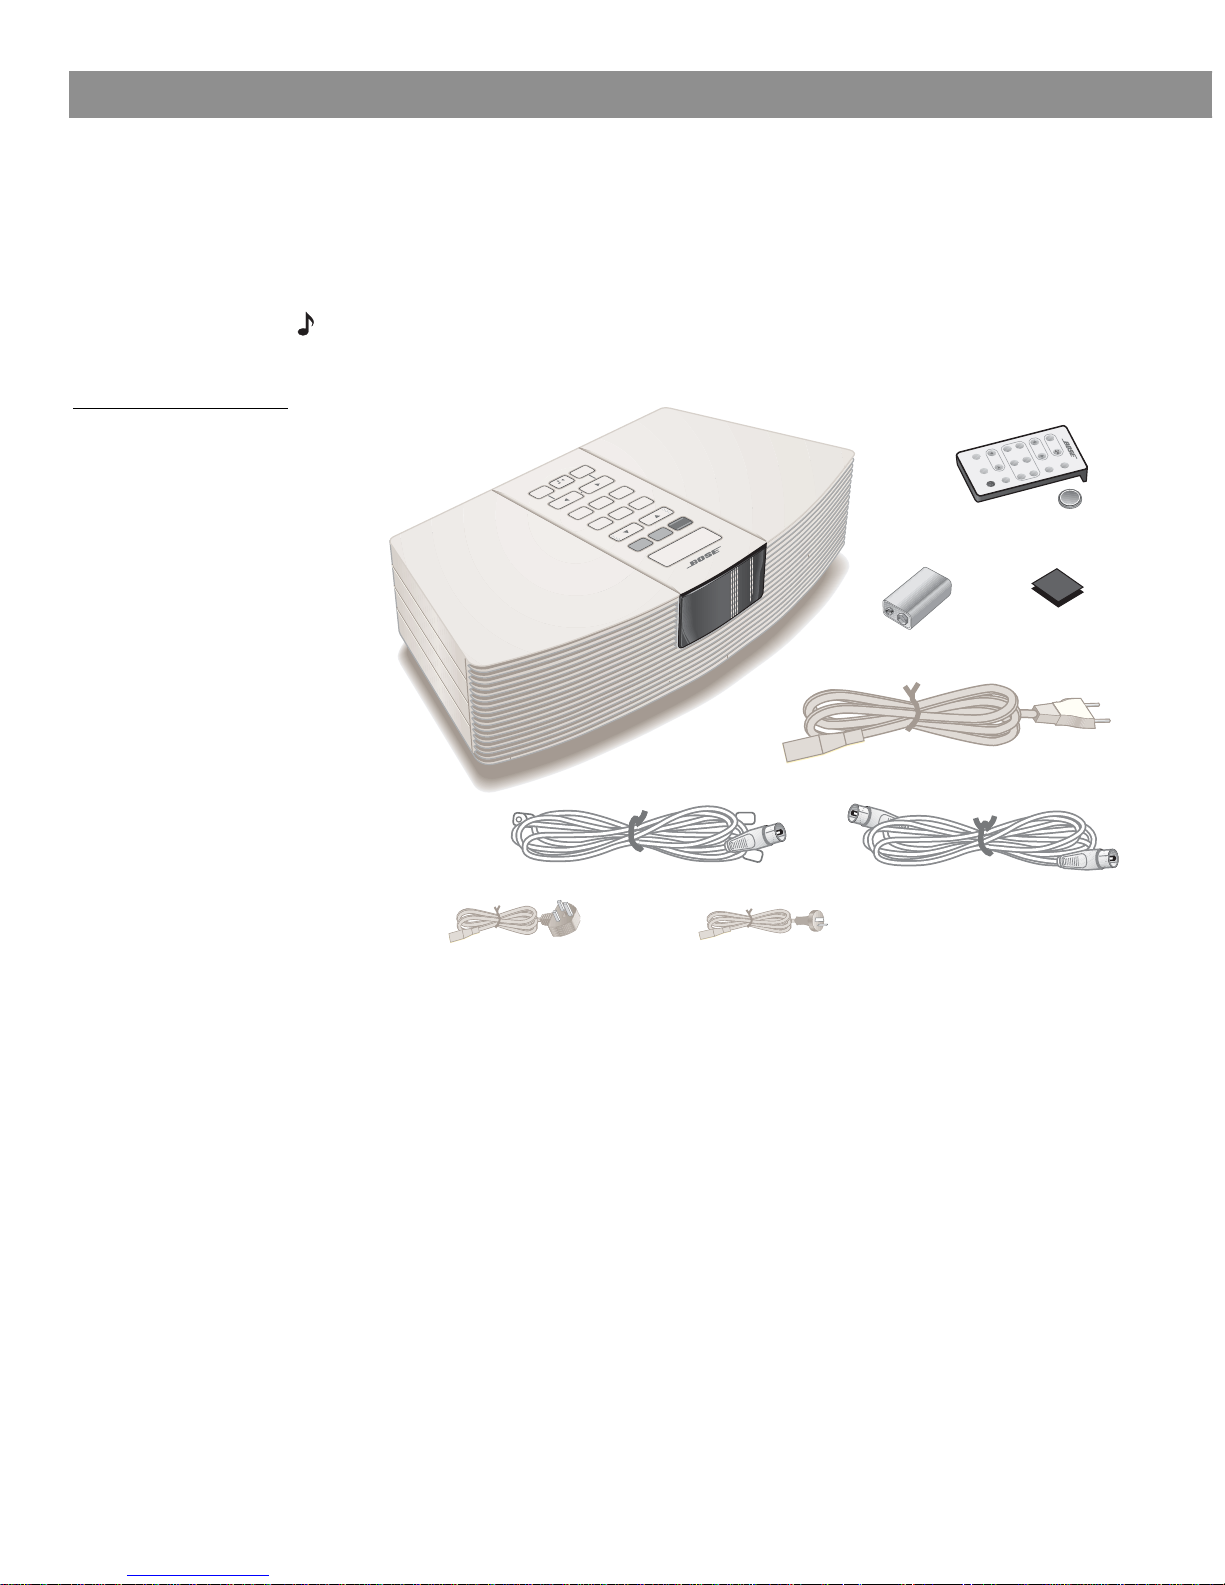
*In the UK and Australia an appropriate power cord is included.
Wave radio
Remote
control
Lithium
battery
Mounting strip
9V battery
Power cord (220 V)*
FM antenna
Coaxial cable
Setting Up Your Wave
®
Unpacking the carton
Carefully unpack your system. Save all packing materials for possible future use. The original
packing materials provide the safest way to transport your Wave radio. If any part of the pr oduct appears damaged, do not attempt to use it. Notify Bose
(See phone numbers on the inside back cover.)
Check to be sure your Wave radio contains the parts identified in Figure 1.
Note: Find the serial number on the bottom of your radio. Write it in the space provided on
page 3.
Figure 1
Carton contents:
• Wave radio
• Power cord
• 9V battery
• Remote control
• Lithium battery
• Mounting strip
Radio
®
Customer Service immediately.
Selecting a location for your radio
Please keep these guidelines in mind when selecting a location for your radio:
• Place the radio on a table or other flat surface.
• Do not place it on a metal surface or table that could interfere with AM reception.
• Do not place it on a heat-sensitive surface. Like all electrical equipment, it generates some
heat.
•To ensure reliable operation of the product and to protect it from overheating, put the product in a position and location that will not interfere with its proper ventilation.
• Do not use the radio in a damp location. It is important to prevent moisture from getting into
the unit.
• Locate it within 2 feet (61 cm) of a wall for best bass performance.
• Place it across the room from wher e you will be listening to enjoy maximum performance of
the Wave radio.
Feel free to place and position it where you find the sound most pleasing.
6
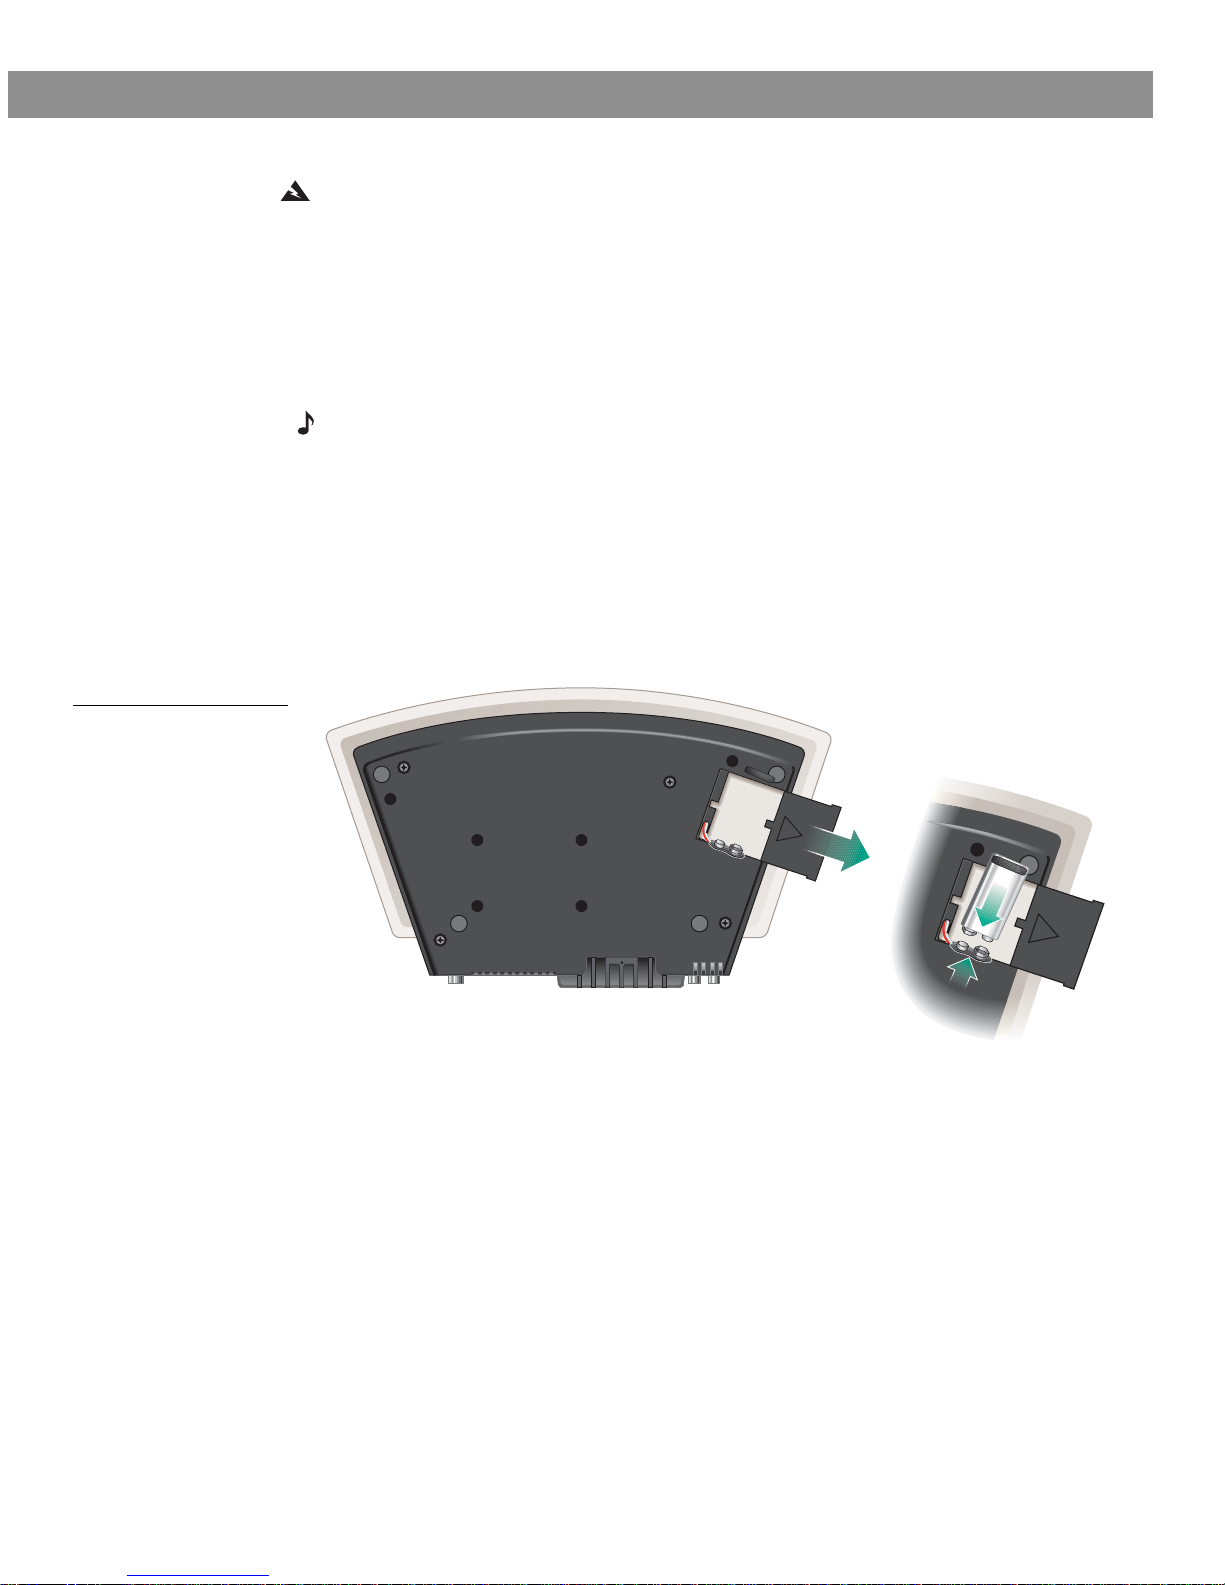
Installing the battery
WARNING: Keep the remote control battery away from children. It may cause a fire or chem-
ical burn if mishandled. Do not recharge, disassemble, heat above 100˚C (212˚F), or incinerate. Dispose of used battery promptly. Replace only with a battery of the correct type and
model number.
The 9V battery maintains clock and alarm settings and operates the Wave radio’s alarm system for approximately 48 hours during a power loss, or while the radio is temporarily
unplugged. Operating without this battery results in the loss of clock and alarm settings, and
station presets in the event of a power loss, but does not harm the radio.
Use a standard 9V battery (IEC 6F22 in Europe), available at most retail stores.
Note: The battery does not provide power for Wave radio operation or for the display.
1. Carefully turn your radio upside down.
2. Locate the battery compartment on the bottom (Figure 2).
3. Press the arrow on the cover to slide the compartment open.
4. Lift the battery clip out of the compartment and align it with the battery as shown.
5. Snap the terminals together firmly.
6. Place the battery in the compartment and slide the cover closed. Then turn the radio right
side up.
Setting Up Your Wave
®
Radio
Figure 2
Installing the battery
7
 Loading...