

Page 1
®
LIFESTYLE
38
LIFESTYLE® 48
DVD HOME ENTERTAINMENT SYSTEMS
Operating Guide
Guía de uso
Notice d’utilisation
®
A mark
of quality
Page 2
Safety Information
Please read this owner’s guide
Please take the time to follow this guide carefully. It will help you set up and operate your system properly and enjoy
all of its advanced features. Save both the Install Guide and the Operating Guide for future reference.
WARNING: To reduce the risk of fire or electric shock, do not expose the system to rain or moisture
WARNING: This apparatus shall not be exposed to dripping or splashing, and objects filled with liquids, such as vases,
shall not be placed on the apparatus. As with any electronic products, use care not to spill liquids in any part of the system. Liquids can cause a failure and/or a fire hazard.
The CAUTION marks shown here are located on the bottom of your LIFESTYLE
media center and ON the rear panel of the Acoustimass
®
module:
®
DVD home entertainment system
Français Español English
The lightning flash with arrowhead symbol, within an equilateral triangle, alerts the user to the presence of
uninsulated dangerous voltage within the system enclosure that may be of sufficient magnitude to constitute a risk of electric shock.
The exclamation point within an equilateral triangle alerts the user to the presence of important operating
and maintenance instructions in this owner’s guide.
CAUTION: Use of controls or adjustments or performance of procedures other than those specified herein may result
in hazardous radiation exposure. The compact disc player should not be adjusted or repaired by anyone except properly
qualified service personnel.
CAUTION: No naked flame sources, such as lighted candles, should be placed on the apparatus.
Class 1 laser product
The DVD player contained within the media center is classified as a CLASS 1 LASER
PRODUCT according to EN 60825-1:1994 + A11. The CLASS 1 LASER PRODUCT label is
located on the bottom of the media center.
Class B emissions limits
This Class B digital apparatus meets all requirements of the Canadian Interference-Causing Equipment Regulations.
Batteries
Batteries
Please dispose of used batteries properly, following any local regulations.
Do not incinerate.
Additional safety information
See the additional instructions on the Important Safety Instructions
sheet enclosed in the shipping carton.
©2004 Bose Corporation. No part of this work may be reproduced, modified, distributed or otherwise used without prior written permission.
Manufactured under license from Dolby Laboratories. “Dolby” and the double-D symbol are trademarks of Dolby Laboratories. Confidential
Unpublished Works. ©1992-1997 Dolby Laboratories. All rights reserved.
This product contains one or more programs protected under international and U.S. copyright laws as unpublished works. They are confidential
and proprietary to Dolby Laboratories. Their reproduction or disclosure, in whole or in part, or the production of derivative works therefrom without the express permission of Dolby Laboratories is prohibited. Copyright 1992-1996 by Dolby Laboratories, Inc. All rights reserved.
MPEG Layer-3 audio compression technology licensed by Fraunhofer IIS and THOMSON multimedia.
“DTS” and “DTS Digital Surround” are registered trademarks of Digital Theater Systems, Inc.
Music recognition technology and related data are provided by Gracenote and the Gracenote CDDB music recognition service. Gracenote is
the industry standard in music recognition technology and related content delivery. For more information visit www.gracenote.com.
CD and music-related data from Gracenote, Inc., © 2000-2003 Gracenote. Gracenote CDDB
Gracenote. This product and service may practice one or more of the following U.S. Patents #5,987,525; #6,061,680; #6,154,773;
#6,161,132; #6,230,192; #6,230,207; #6,240,459; #6,330,593, and other patents issue or pending.
Gracenote and CDDB are registered trademarks of Gracenote. The Gracenote logo and logotype, the Gracenote logo, CDDB logo and logotype
and the “Gracenote" logo are trademarks of Gracenote.
®
Client Software, copyright 2000-2003
2
Page 3

Contents
Where to find...
Introduction . . . . . . . . . . . . . . . . . . . . . . . . . . . . . . . . . . . . . . . . . . . . . . . . . . . . . . . . . . . . . . . . . . . 5
Presenting a New Way to Play . . . . . . . . . . . . . . . . . . . . . . . . . . . . . . . . . . . . . . . . . . . . . . . . . . . . 7
Controls and Capabilities . . . . . . . . . . . . . . . . . . . . . . . . . . . . . . . . . . . . . . . . . . . . . . . . . . . . . . . . 11
Welcome . . . . . . . . . . . . . . . . . . . . . . . . . . . . . . . . . . . . . . . . . . . . . . . . . . . . . . . . . . . . . . . . . . 5
What discs you can play . . . . . . . . . . . . . . . . . . . . . . . . . . . . . . . . . . . . . . . . . . . . . . . . . . . . . 5
Regarding copy protection . . . . . . . . . . . . . . . . . . . . . . . . . . . . . . . . . . . . . . . . . . . . . . . .
Check for region number compatibility . . . . . . . . . . . . . . . . . . . . . . . . . . . . . . . . . . . . . . . 5
Glossary of audio terms . . . . . . . . . . . . . . . . . . . . . . . . . . . . . . . . . . . . . . . . . . . . . . . . . . . . . . 5
What makes this LIFESTYLE
®
system uniquely yours . . . . . . . . . . . . . . . . . . . . . . . . . . . . . . . 7
How you can tell the system to “Do as I do.” . . . . . . . . . . . . . . . . . . . . . . . . . . . . . . . . . . 7
Getting your music into the system . . . . . . . . . . . . . . . . . . . . . . . . . . . . . . . . . . . . . . . . . . 8
Planning time to store your music . . . . . . . . . . . . . . . . . . . . . . . . . . . . . . . . . . . . . . . . . . . 8
How much time to allow for storing CDs . . . . . . . . . . . . . . . . . . . . . . . . . . . . . . . . . . . 9
How many CDs you can store . . . . . . . . . . . . . . . . . . . . . . . . . . . . . . . . . . . . . . . . . . . 9
What you can listen to while storing CDs . . . . . . . . . . . . . . . . . . . . . . . . . . . . . . . . . . 9
How the uMusic
TM
intelligent playback system works for you . . . . . . . . . . . . . . . . . . . . . . 9
Why presets are important . . . . . . . . . . . . . . . . . . . . . . . . . . . . . . . . . . . . . . . . . . . . . 9
Switch from one to another easily . . . . . . . . . . . . . . . . . . . . . . . . . . . . . . . . . . . . . . . . 10
Use the selection and rating buttons as you like . . . . . . . . . . . . . . . . . . . . . . . . . . . . 10
Take advantage of the system intelligence . . . . . . . . . . . . . . . . . . . . . . . . . . . . . . . . . . . . 10
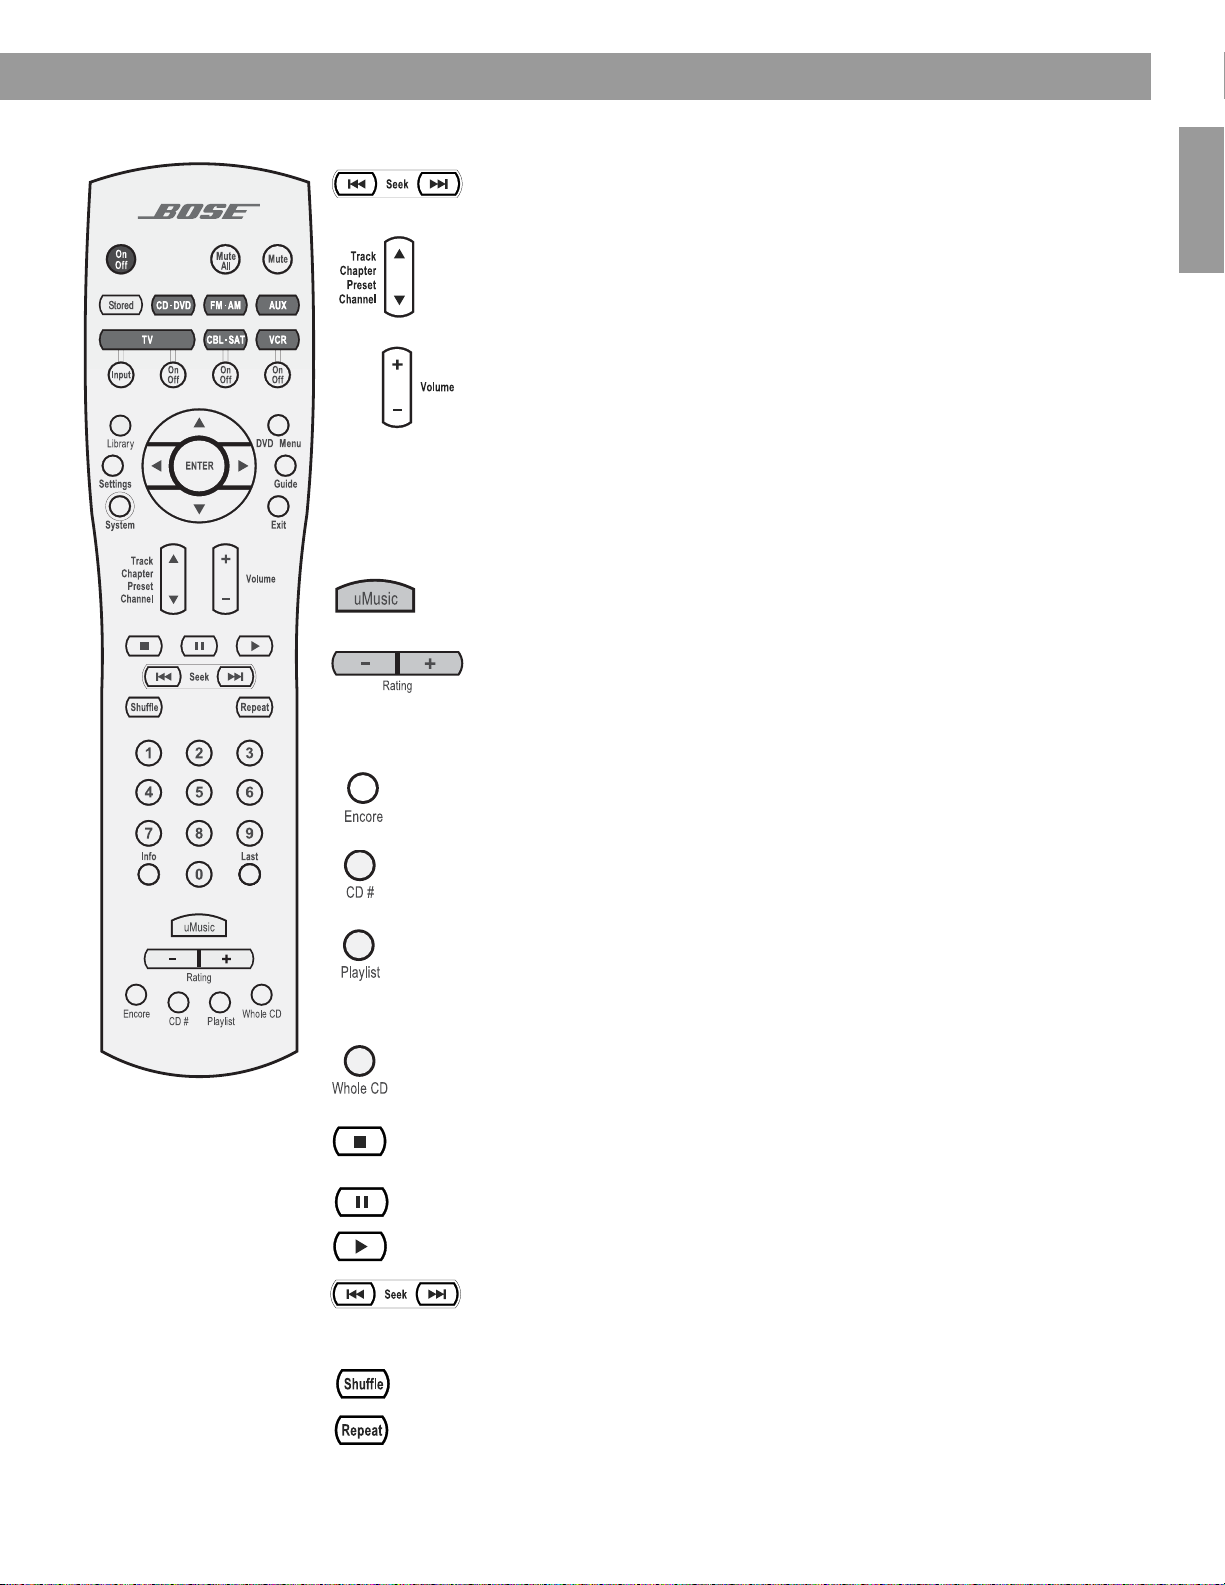
The remote control . . . . . . . . . . . . . . . . . . . . . . . . . . . . . . . . . . . . . . . . . . . . . . . . . . . . . . . . . 11
If the remote does not work as you expect . . . . . . . . . . . . . . . . . . . . . . . . . . . . . . . . . . . . 14
The media center . . . . . . . . . . . . . . . . . . . . . . . . . . . . . . . . . . . . . . . . . . . . . . . . . . . . . . . . . . . 14
Component video or progressive scan: activating your selection . . . . . . . . . . . . . . . . . . . . . . 16
English FrançaisEspañol
System Performance . . . . . . . . . . . . . . . . . . . . . . . . . . . . . . . . . . . . . . . . . . . . . . . . . . . . . . . . . . . 17
Some product pointers to ensure satisfaction . . . . . . . . . . . . . . . . . . . . . . . . . . . . . . . . . . . . . 17
To turn on other components . . . . . . . . . . . . . . . . . . . . . . . . . . . . . . . . . . . . . . . . . . . . . . 17
To watch video . . . . . . . . . . . . . . . . . . . . . . . . . . . . . . . . . . . . . . . . . . . . . . . . . . . . . . . . . . 17
To adjust what you see or hear . . . . . . . . . . . . . . . . . . . . . . . . . . . . . . . . . . . . . . . . . . . . . 18
To enjoy remarkable new LIFESTYLE
®
system features . . . . . . . . . . . . . . . . . . . . . . . . . . 18
Playing stored music . . . . . . . . . . . . . . . . . . . . . . . . . . . . . . . . . . . . . . . . . . . . . . . . . . . . . . . . 18
The basics . . . . . . . . . . . . . . . . . . . . . . . . . . . . . . . . . . . . . . . . . . . . . . . . . . . . . . . . . . . . . 18
Control options . . . . . . . . . . . . . . . . . . . . . . . . . . . . . . . . . . . . . . . . . . . . . . . . . . . . . . . . . 19
Discover the more advanced benefits . . . . . . . . . . . . . . . . . . . . . . . . . . . . . . . . . . . . . . . . . . . 20
Take advantage of what presets can do . . . . . . . . . . . . . . . . . . . . . . . . . . . . . . . . . . . . . . 20
Respond actively to speed up the learning process . . . . . . . . . . . . . . . . . . . . . . . . . . . . . 21
Use the Playlist to line up tracks for play . . . . . . . . . . . . . . . . . . . . . . . . . . . . . . . . . . . . . . 21
How to delete tracks from the Playlist: . . . . . . . . . . . . . . . . . . . . . . . . . . . . . . . . . . . . 22
How to completely clear the Playlist: . . . . . . . . . . . . . . . . . . . . . . . . . . . . . . . . . . . . . 22
Check in at the Music Library . . . . . . . . . . . . . . . . . . . . . . . . . . . . . . . . . . . . . . . . . . . . . . . . . . 22
This product incorporates copyright protected technology that is protected by method claims of certain U.S. patents and other
intellectual property rights owned by Macrovision Corporation and other rights owners. Use of this copyright protection technology must be
authorized by Macrovision Corporation, and is intended for home and other limited viewing uses only, unless otherwise authorized by
Macrovision Corporation. Reverse engineering or disassembly is prohibited.
Consumers should note that not all high definition television sets are fully compatible with this product and may cause artifacts to be displayed
in the picture. In case of 525 progressive scan picture problems, it is recommended that the user switch the connection to the “standard
definition” output. If there are questions regarding our TV set compatibility with this model 525p DVD player, please contact our customer
service center.”
This product incorporates copyright protected technology and other intellectual property rights owned by Cirrus Logic, Inc. and subject to the copyright
protection of the U.S. as well as other licensing restrictions and protections. Use of this copyright protected technology is limited solely to use with
the Cirrus Logic integrated circuits incorporated in this product. Reverse engineering or disassembly is prohibited.
Designed with UEI Technology™ Under License from Universal Electronics Inc. © UEI 2000-2002.
Legal notice: "AEC One Stop Group, Inc. ("AEC") hold the exclusive rights to the ALL MUSIC GUIDE and ALL MOVIE GUIDE data ("The Guides"). You
may not modify, copy or scan or use any other method to reproduce, duplicate, translate, republish, transmit or distribute in any way any portion of The
Guides. You may not download The Guides; any use shall be subject to all restrictions applicable thereto and contained therein. You agree to indemnify,
defend and hold harmless AEC and its affiliates, and Bose and its affiliates, against any and all claims, damages, costs or other expenses that arise
directly or indirectly out of or from (i) your unauthorized use of The Guides, (ii) your violation of this directive and/or (iii) any unauthorized activities by you in
connection with The Guides.
3
Page 4

Contents
Playing a DVD . . . . . . . . . . . . . . . . . . . . . . . . . . . . . . . . . . . . . . . . . . . . . . . . . . . . . . . . . . . . . . 23
Control options . . . . . . . . . . . . . . . . . . . . . . . . . . . . . . . . . . . . . . . . . . . . . . . . . . . . . . . . . 24
Using parental controls . . . . . . . . . . . . . . . . . . . . . . . . . . . . . . . . . . . . . . . . . . . . . . . . . . . 24
Loading and playing a CD . . . . . . . . . . . . . . . . . . . . . . . . . . . . . . . . . . . . . . . . . . . . . . . . . . . . 25
Control options . . . . . . . . . . . . . . . . . . . . . . . . . . . . . . . . . . . . . . . . . . . . . . . . . . . . . . . . . 25
Using the radio . . . . . . . . . . . . . . . . . . . . . . . . . . . . . . . . . . . . . . . . . . . . . . . . . . . . . . . . . . . . . 26
Changing stations . . . . . . . . . . . . . . . . . . . . . . . . . . . . . . . . . . . . . . . . . . . . . . . . . . . . . . . 26
Setting a radio station preset . . . . . . . . . . . . . . . . . . . . . . . . . . . . . . . . . . . . . . . . . . . . . . . 26
To reassign a preset to a different station . . . . . . . . . . . . . . . . . . . . . . . . . . . . . . . . . . 27
Using the headphones jack . . . . . . . . . . . . . . . . . . . . . . . . . . . . . . . . . . . . . . . . . . . . . . . . . . . 27
Using the sleep timer . . . . . . . . . . . . . . . . . . . . . . . . . . . . . . . . . . . . . . . . . . . . . . . . . . . . . . . . 27
To set the sleep timer . . . . . . . . . . . . . . . . . . . . . . . . . . . . . . . . . . . . . . . . . . . . . . . . . . . . 27
Controlling External Sources . . . . . . . . . . . . . . . . . . . . . . . . . . . . . . . . . . . . . . . . . . . . . . . . . . . . . 28
Using your system remote with other components . . . . . . . . . . . . . . . . . . . . . . . . . . . . . . . . . 28
For TV control . . . . . . . . . . . . . . . . . . . . . . . . . . . . . . . . . . . . . . . . . . . . . . . . . . . . . . . . . . 28
For cable/satellite control . . . . . . . . . . . . . . . . . . . . . . . . . . . . . . . . . . . . . . . . . . . . . . . . . 31
For VCR (or DVR) control . . . . . . . . . . . . . . . . . . . . . . . . . . . . . . . . . . . . . . . . . . . . . . . . . . 32
For AUX control . . . . . . . . . . . . . . . . . . . . . . . . . . . . . . . . . . . . . . . . . . . . . . . . . . . . . . . . . 32
Designating one video tuner . . . . . . . . . . . . . . . . . . . . . . . . . . . . . . . . . . . . . . . . . . . . . . . . . . . 33
Français Español English
Changing Source Settings . . . . . . . . . . . . . . . . . . . . . . . . . . . . . . . . . . . . . . . . . . . . . . . . . . . . . . . 34
Making adjustments to a particular source . . . . . . . . . . . . . . . . . . . . . . . . . . . . . . . . . . . . . . . 34
How to see your options . . . . . . . . . . . . . . . . . . . . . . . . . . . . . . . . . . . . . . . . . . . . . . . . . . 34
How to change the settings . . . . . . . . . . . . . . . . . . . . . . . . . . . . . . . . . . . . . . . . . . . . . . . . 35
Tuner setting options (FM or AM radio) . . . . . . . . . . . . . . . . . . . . . . . . . . . . . . . . . . . . . . . . . . 36
CD setting options . . . . . . . . . . . . . . . . . . . . . . . . . . . . . . . . . . . . . . . . . . . . . . . . . . . . . . . . . . 36
Stored CDs setting options . . . . . . . . . . . . . . . . . . . . . . . . . . . . . . . . . . . . . . . . . . . . . . . . . . . 37
DVD setting options . . . . . . . . . . . . . . . . . . . . . . . . . . . . . . . . . . . . . . . . . . . . . . . . . . . . . . . . . 38
TV setting options (for VCR, CBL-SAT, and AUX) . . . . . . . . . . . . . . . . . . . . . . . . . . . . . . . . . . 39
Using System Menus . . . . . . . . . . . . . . . . . . . . . . . . . . . . . . . . . . . . . . . . . . . . . . . . . . . . . . . . . . . 40
Making system adjustments . . . . . . . . . . . . . . . . . . . . . . . . . . . . . . . . . . . . . . . . . . . . . . . . . . . 40
How to see the System menu. . . . . . . . . . . . . . . . . . . . . . . . . . . . . . . . . . . . . . . . . . . . . . . 40
How to make changes . . . . . . . . . . . . . . . . . . . . . . . . . . . . . . . . . . . . . . . . . . . . . . . . . . . . 40
Stored CD data options . . . . . . . . . . . . . . . . . . . . . . . . . . . . . . . . . . . . . . . . . . . . . . . . . . . . . . 41
Using the Edit Screen . . . . . . . . . . . . . . . . . . . . . . . . . . . . . . . . . . . . . . . . . . . . . . . . . . . . 42
How to change the text . . . . . . . . . . . . . . . . . . . . . . . . . . . . . . . . . . . . . . . . . . . . . . . . 42
Audio options . . . . . . . . . . . . . . . . . . . . . . . . . . . . . . . . . . . . . . . . . . . . . . . . . . . . . . . . . . . . . . 44
Video options . . . . . . . . . . . . . . . . . . . . . . . . . . . . . . . . . . . . . . . . . . . . . . . . . . . . . . . . . . . . . . 46
Media center options . . . . . . . . . . . . . . . . . . . . . . . . . . . . . . . . . . . . . . . . . . . . . . . . . . . . . . . . 47
Remote control options . . . . . . . . . . . . . . . . . . . . . . . . . . . . . . . . . . . . . . . . . . . . . . . . . . . . . . 48
DVD lock options . . . . . . . . . . . . . . . . . . . . . . . . . . . . . . . . . . . . . . . . . . . . . . . . . . . . . . . . . . . 49
Applying parental control . . . . . . . . . . . . . . . . . . . . . . . . . . . . . . . . . . . . . . . . . . . . . . . . . . 49
To set the restriction level and passwords . . . . . . . . . . . . . . . . . . . . . . . . . . . . . . . . . 50
Reference . . . . . . . . . . . . . . . . . . . . . . . . . . . . . . . . . . . . . . . . . . . . . . . . . . . . . . . . . . . . . . . . . . . . 51
Remote control care . . . . . . . . . . . . . . . . . . . . . . . . . . . . . . . . . . . . . . . . . . . . . . . . . . . . . . . . . 51
Replacing the remote control batteries . . . . . . . . . . . . . . . . . . . . . . . . . . . . . . . . . . . . . . . 51
Changing house code settings . . . . . . . . . . . . . . . . . . . . . . . . . . . . . . . . . . . . . . . . . . . . . 51
Other switches . . . . . . . . . . . . . . . . . . . . . . . . . . . . . . . . . . . . . . . . . . . . . . . . . . . . . . . 52
For a Bose
Setting up a second room with sound . . . . . . . . . . . . . . . . . . . . . . . . . . . . . . . . . . . . . . . . . . . 52
®
Bose
link compatible products simplify your decisions . . . . . . . . . . . . . . . . . . . . . . . . . . 53
Bose
Taking care of your LIFESTYLE
®
link remote in another room . . . . . . . . . . . . . . . . . . . . . . . . . . . . . . . . . . . 52
®
link remote switch settings . . . . . . . . . . . . . . . . . . . . . . . . . . . . . . . . . . . . . . . . 53
®
system . . . . . . . . . . . . . . . . . . . . . . . . . . . . . . . . . . . . . . . . . 54
Troubleshooting . . . . . . . . . . . . . . . . . . . . . . . . . . . . . . . . . . . . . . . . . . . . . . . . . . . . . . . . . . . . 55
Contacting customer service . . . . . . . . . . . . . . . . . . . . . . . . . . . . . . . . . . . . . . . . . . . . . . . 57
Limited warranty . . . . . . . . . . . . . . . . . . . . . . . . . . . . . . . . . . . . . . . . . . . . . . . . . . . . . . . . . . . . 57
Technical information . . . . . . . . . . . . . . . . . . . . . . . . . . . . . . . . . . . . . . . . . . . . . . . . . . . . . . . . 57
END USER LICENSE AGREEMENT . . . . . . . . . . . . . . . . . . . . . . . . . . . . . . . . . . . . . . . . . . . . . 58
4
Page 5
Introduction
Welcome
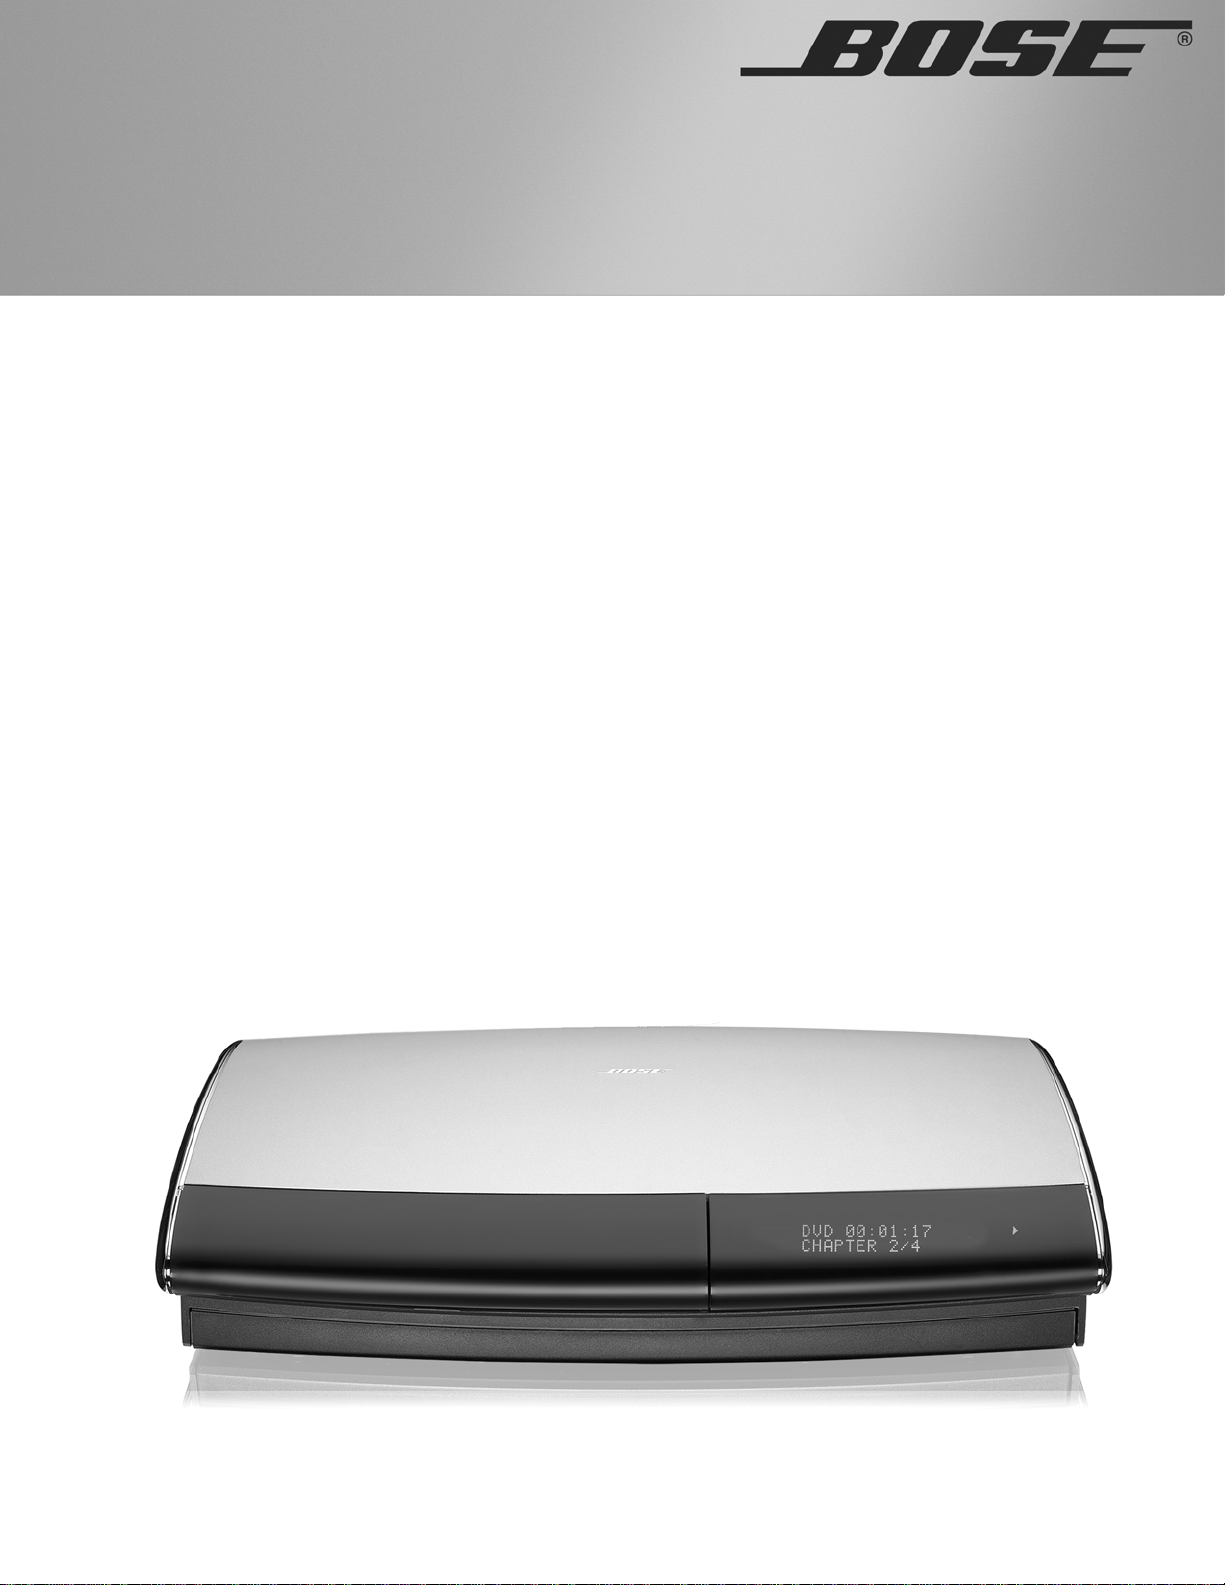
Thank you for purchasing a Bose® LIFESTYLE® 38 or 48 DVD home entertainment system.
Through proprietary Bose technologies and innovative LIFESTYLE
gant and easy-to-use system delivers superior performance for both music and video pro-
gramming.
What discs you can play
The system can play the following types of discs having the corresponding logos:
•Video DVDs
• DVD-Rs and DVD-R/Ws
• Video CDs (VCDs)
•Audio CDs
•CD-Rs or CD-R/Ws
•MP3 CDs
All tracks are burned in a single, closed session and in ISO9660 disc format. Each file name
has an “.mp3” extension and no other periods. The file tag is no higher than ID3 (ID3v2).
that meet the following criteria:
®
systems design, this ele-
Regarding copy protection
Music and other content may be protected
by international and domestic copyright
laws and may contain specific restrictions
on use and/or reproduction. Please
respect the rights of the artists and other
copyright holders.
English FrançaisEspañol
Check for region number compatibility
For any DVD player and DVD disc to be compatible, their region numbers must match.
These numbers are assigned according to where the player and disc are sold.
Check the region number on the bottom of the media center included with your
system. Then be sure to choose only DVD discs that show the same region
number on the disc label or packaging. For example, a Region 1 DVD and
corresponding player should display the mark shown on the right.
Glossary of audio terms
Aspect ratio – The shape of the rectangular picture in a TV set expressed as the width of the
picture relative to the height. For example, if a TV picture has an aspect ratio of 4:3 (read as 4
by 3), the shape of that picture is 4 units wide by 3 units high. The two standard TV aspect
ratios are 4:3 and 16:9.
Chapter – A main division of contents in a DVD title.
Component video – A video signal split into three parts: luminance and two color signals
(marked as YPbPr). It provides the highest resolution video, but cannot be processed by all
television sets.
Composite video – A video signal in which the brightness (black and white) and color information are combined. Compatible with most televisions and other video components, composite video cables use RCA jacks.
Dolby Digital – A perceptual coding system for audio, developed by Dolby Laboratories and
accepted as an international standard. Dolby Digital is the most common means of encoding
multi-channel audio.
– The logo representing Dolby Digital.
DTS – An abbreviation for Digital Theater Systems, a type of multi-channel surround sound
format used on certain CDs and many DVDs.
5
Page 6

Introduction
– The logo representing DTS.
DVD – An abbreviation most commonly known to mean Digital Video Disc or Digital Versatile
Disc. The audio/video/data storage system is based on 12-cm optical discs.
DVD video – A standard for storing and reproducing audio and video on DVD-ROM discs,
based on MPEG video, Dolby Digital audio, and other proprietary data formats.
Gracenote – Music recognition technology and related data provided as part of the service
contracted for by Bose.
IR – An abbreviation for infrared. Pertains to the type of remote that sends/receives commands on an infrared light beam.
Letterbox – A video format which has an aspect ratio wider than 4:3 and is shown with black
bars above and below the picture.
MP3 – MPEG-1 Layer III audio. This is a compressed audio format that allows the recording
of many hours of music on a single CD.
NTSC – An abbreviation for National Television System Committee and a label for the
Français Español English
video format standard established by the committee for televisions used in the US and
other countries.
PAL – An acronym for the Phase Alternate Line video format used extensively in Western
Europe.
Pan & Scan – The technique of reframing a picture to conform to a different aspect ratio by
cropping parts of the picture. DVD-video players can use the horizontal offset encoded with
the video on certain DVDs to automatically pan and scan widescreen video to a 4:3 ratio.
PCM – An abbreviation for Pulse Code Modulation. A common form of digital audio signal.
Progressive Scan – A video format which displays all lines of the picture frame in a single
pass, and refreshes the image sixty times a second. This format is not compatible with all
video displays.
RDS – A system that displays radio broadcast station and programming information.This
feature is available on European systems only.
SACD – An abbreviation for Super Audio Compact Disc, which is used for high-resolution
digital audio stored on a CD-sized disc. The new Bose
®
LIFESTYLE® systems (with which this
guide is included) play the CD-compatible portion of such discs, identified by the CD disc
logo on the front of the disc.
SCART – A type of jack commonly found on consumer electronics products manufactured
for use in Western Europe.
SCMS – A system for preventing second-generation digital copies of copyrighted audio
material. A digital recorder equipped with SCMS will record digitally from another source, but
that recording cannot then be used as a source for a second-generation recording.
S-video – Also called Y/C. A video signal that keeps the brightness and color information
separate, and is significantly better than composite video. Requires the use of an S-video
cable and is compatible with many televisions and other video components.
uMusic
TM
intelligent playback system – A revolutionary Bose play mode, which performs
like a virtual DJ by noting listener preferences and playing suitable stored CD tracks in
response.
Videostage
®
5 – Bose proprietary Videostage 5 decoding circuitry gives you a five-channel
surround sound experience from everything you listen to – VHS tapes, stereo CDs, even
mono TV programs.
YPbPr – A component analog video signal containing one luminance and two chrominance
components. Also referred to as YUV or Y, B-Y, R-Y.
6
Page 7

Presenting a New Way to Play
What makes this LIFESTYLE
The CDs you have amassed over the years are an expression of your taste in music. The ones
you play on a regular basis provide a window into your style and moods. And the tracks you
most enjoy when feeling tired, exuberant, social, or soulful exemplify these moods.
You may have chosen your LIFESTYLE
with a breakthrough new feature: the uMusic
prietary Bose
continuous stream of the music you most enjoy and adapting to your preferences as they
change.
Not only does it store your personal CD collection, the uMusic intelligent playback system
also provides a revolutionary new approach to hearing your music.
It offers immediate access and uninterrupted play, so you can enjoy far more of your favorite
music, even the tracks you’ve forgotten you own. And, as if it is listening along with you, the
system also learns to play more and more of what you prefer...for customized listening pleasure.
Underlying this new feature is the capacity to store all of the tracks from hundreds of your
CDs in the system. The actual quantity depends on the number and length of tracks on each
CD. Used as a personal music library, this feature saves you the time spent physically arranging and searching through your collection.
How you can tell the system to “Do as I do.”
That’s right, you get to instruct this new music system to play what you want, when you
want it.
®
®
system uniquely yours
®
38 or 48 system because it captures these subtleties
™
intelligent playback system. Enabled by pro-
technology, it transforms your system into a virtual DJ, capable of playing a
English FrançaisEspañol
But giving it instructions requires very little effort. Just react to your stored music as it plays
and count on this system to pay attention.
Don’t be concerned about doing it right, either, because anything you do is undo-able. For
instance, pressing
Encore
tells the system to search the database for music with characteristics
that closely match what’s playing now. This choice gets the system to narrow its focus of
selections, in response to your command. But whenever you press the
uMusic
button again,
you’ll notice the system returns to selecting form a broader range of your collection.
Even pressing the
–
(negative)rating button does not banish a track forever. It tells the system
to move on because this particular track is not right for this time of day, this activity, this
selected preset, or the person who’s listening.
Pressing the
+
(positive) rating button has the opposite effect: the system learns that you particularly like the track playing. Not that every track you like requires a + rating. But you can
provide this nudge when the track you hear is really special.
Over time, the system adjusts the type of music it plays when your preset is selected, in
response to your previous reactions. And you don’t need to worry that any response you
make now will be stored in concrete. All of your early choices and decisions are easily overridden, if you like. So don’t hesitate to tell the system just what you think now. Feel free to
experiment, and enjoy your musical mood.
Whatever that mood is, letting it be known helps the system come closer and closer to playing exactly what you’d choose...if you still had to.
7
Page 8

Presenting a New Way to Play
Getting your music into the system
Before you can enjoy these benefits, some preparation is required. It involves use of the
media center and a simple 3-step procedure for storing your music.
Note: Your system is designed to store the tracks of regular CDs only. It will not store MP3
tracks or the contents of DVDs. If an inappropriate disc type is in the disc tray when the Store
button is pressed, the media center displays an error message to indicate that storage is not
possible.
Here’s how to begin:
1. Place the first CD into the disc tray of the media center and close the tray.
2. Press the button, located on the media center control panel.
• During this process, the media center displays the message CD STORING and shows
what percentage of the task is completed.
Store
• To interrupt or stop the storing activity at any time, simply open the disc tray. To resume
storing the same disc, close the tray and press the
Store
button again.
3. When it reaches 100% and displays the text AUDIO CD STORED, remove the disc and
Français Español English
repeat steps 1-3 for each additional CD.
Storing takes about 5 minutes* per disc. For more detail, see Planning time to store you
music, below.
Tips on storing
• It is not necessary to have the system turned on while storing.
• Begin storing your favorite CDs first, for the best introductory taste of what the uMusic
™
system can do.
• It is not necessary to store CDs alphabetically.
• Using the log pages at the back of this guide is one way to track the order of the CDs you
store.
• Allow the system a little time to learn the choices you would make. But don’t worry, this DJ
is a fast learner.
• After the tracks on a CD are stored, any one of them can be deleted. You can do this in the
System menu, under Stored CDs.
Note: For information on how to use the System menu, refer to “Making system adjustments” on
page 40. For details on how to eliminate tracks, refer to “Stored CD data options” on page 41.
Planning time to store your music
Storing entails two actions: placing the tracks from each CD in a holding area and processing
the tracks for efficient storage. This frees up the holding area. While the holding area is temporarily full, no more storage is possible. As an indicator, the media center displays the message: BUSY PROCESSING CDS.
If you turn the system off, this processing goes faster. If you choose to use the system while it
is processing, the storing activity continues, but it may take a little longer.
If your CD collection is extensive, plan on several sessions to store all the tracks. Consider
the guidelines below for scheduling these sessions.
*If you notice one disc taking considerably longer to store, it may need to be cleaned. Refer to
“Cleaning discs” on page 54.
8
Page 9

Presenting a New Way to Play
How much time to allow for storing CDs
• For storing 10 discs: 1 hour, though CDs that are damaged or need cleaning take longer.
(Allow about 5 minutes per disc, with some time for inserting and removing each disc.)
• For processing (searching databases and cataloging all the tracks) 10 discs: 6 hours, while
the system is turned off.
How many CDs you can store
• Using a LIFESTYLE
• Using a LIFESTYLE
®
38 system: approximately 200 hours of music or well over 200 CDs
®
48 system: approximately 340 hours of music or well over 350 CDs
What you can listen to while storing CDs
• You can listen to the AM or FM radio tuner, other CD tracks that are already stored, or other
sources connected to the system (an analog connection is required), like your TV.
• You cannot listen to the CD that is being stored, or watch a DVD using the media center
disc tray.
• As soon as the media center displays 100%, you can listen to the CD you have just stored,
(using the CD player or Stored as the source), or you can replace the CD with a DVD and
watch a video.
®
• If your setup includes a Bose
link network, you can continue to listen to the system in
other rooms, too.
• You may notice some minor interruptions to the audio temporarily. But, if you have the
source connected using both digital and analog cables, you can still enjoy listening to it.
How the uMusic™ intelligent playback system works for you
We know that the time spent sorting through CDs to locate the tracks you prefer simply
delays your listening pleasure. Now, almost instantaneously, the uMusic system can do that
job for you: finding and playing what you most want to hear.
English FrançaisEspañol
Why presets are important
The uMusic system provides Presets 1 to 9 ready and waiting to provide each member of
your household a private space for their personal listening preferences.
By using an exclusive preset, each listener helps this intelligent system distinguish their individual reactions to what it plays. Consider each preset a center point for that person’s musical taste. Over time, the center may shift, as changes in taste and listening habits are noted
by the preset.
Feel free to assign the presets as you like, give each one a name, and press just one button
on the remote to switch quickly from one to another. Consider the benefits of reserving a
preset for:
• Different members of your family, different roommates, different generations.
For the preset selected, both the number and its name, if any, appear on the media center
display to help you keep the assignments straight.
Note: If several family members store their CD tracks on the system, be sure each one has an
assigned preset and uses that preset when listening.
• Different listening times or frames of mind: wake-up, workout, weekends, homework, yard
work, craft work, etc. For smaller households, it makes sense to change presets for different activities during your day.
Just remember that no preset is locked into its assignment. At any time, you can completely
clear the memory of a stored music preset, then reassign it to another person or purpose. It’s
strictly your choice. And you are free to use one and only one preset forever, if that’s what you
prefer.
9
Page 10

Presenting a New Way to Play
Switch from one to another easily
Pressing one or two buttons is all it takes.
• If you are not yet in the uMusic
• While in the uMusic mode system, press a number button, from 1 to 9, to activate one of
the presets.
Use the selection and rating buttons as you like
With your preset selected, do what you normally do while listening:
• Let the track play to its conclusion if you don’t want to take any action. Or,
•Press the
Seek
button to move on to the next track if you like. Or,
TM
mode, press the remote control
Stored
button to get there.
•Press
•Use the
No matter which actions above you take while listening, the system continues to select from
the entire contents of your stored music. Your preset keeps track of these responses, so the
system learns to play certain music more or less often. Yet, for tracks you rate negatively, a
small chance remains that you will hear that music in the future. Only by deleting a track from
Français Español English
the system can you ensure it will never play again.
Note: To name a preset, or delete a track from the system, select the appropriate option from
the System menu. For more information, refer to “Stored CD data options” on page 41.
Repeat
for any tracks you want to hear again. Or,
+
and – buttons to rate tracks you react to strongly.
Take advantage of the system intelligence
As it stores and processes the tracks from your CDs, this system draws information about the
tracks from internal music databases. This data includes the name of each track, performing
artist, style of music (genre), and other meaningful information that helps characterize the
music you enjoy.
As a further benefit, Bose issues update discs to keep the music databases current. So even
your newest CD acquisitions will have this information available.
Sending in the Product Registration card included with your system is
(As indicated on your card, you may be able to register on line, instead).
Using either method identifies you as the system owner who should
receive any database or software updates.
Data on each disc copies to the system
automatically, when inserted
in the disc tray.
very important.
10
Be sure to fill out your card, or the online form, and return it to Bose.
Beyond just storing this data for your use, however, the system also allows you to edit it to
better reflect your associations with the music. For instance, if the embedded data classifies
a CD as “World” music, and you consider it part of your Latin collection, you can simply
change the genre of that CD. For any CDs not covered by the database (created at home or
non-commercially produced), the system allows you to add information about that music to
make sure it is filed and displays as you like.
For details on what information can be added or changed and how to make those changes,
refer to “Stored CD data options” on page 41.
Page 11
Controls and Capabilities
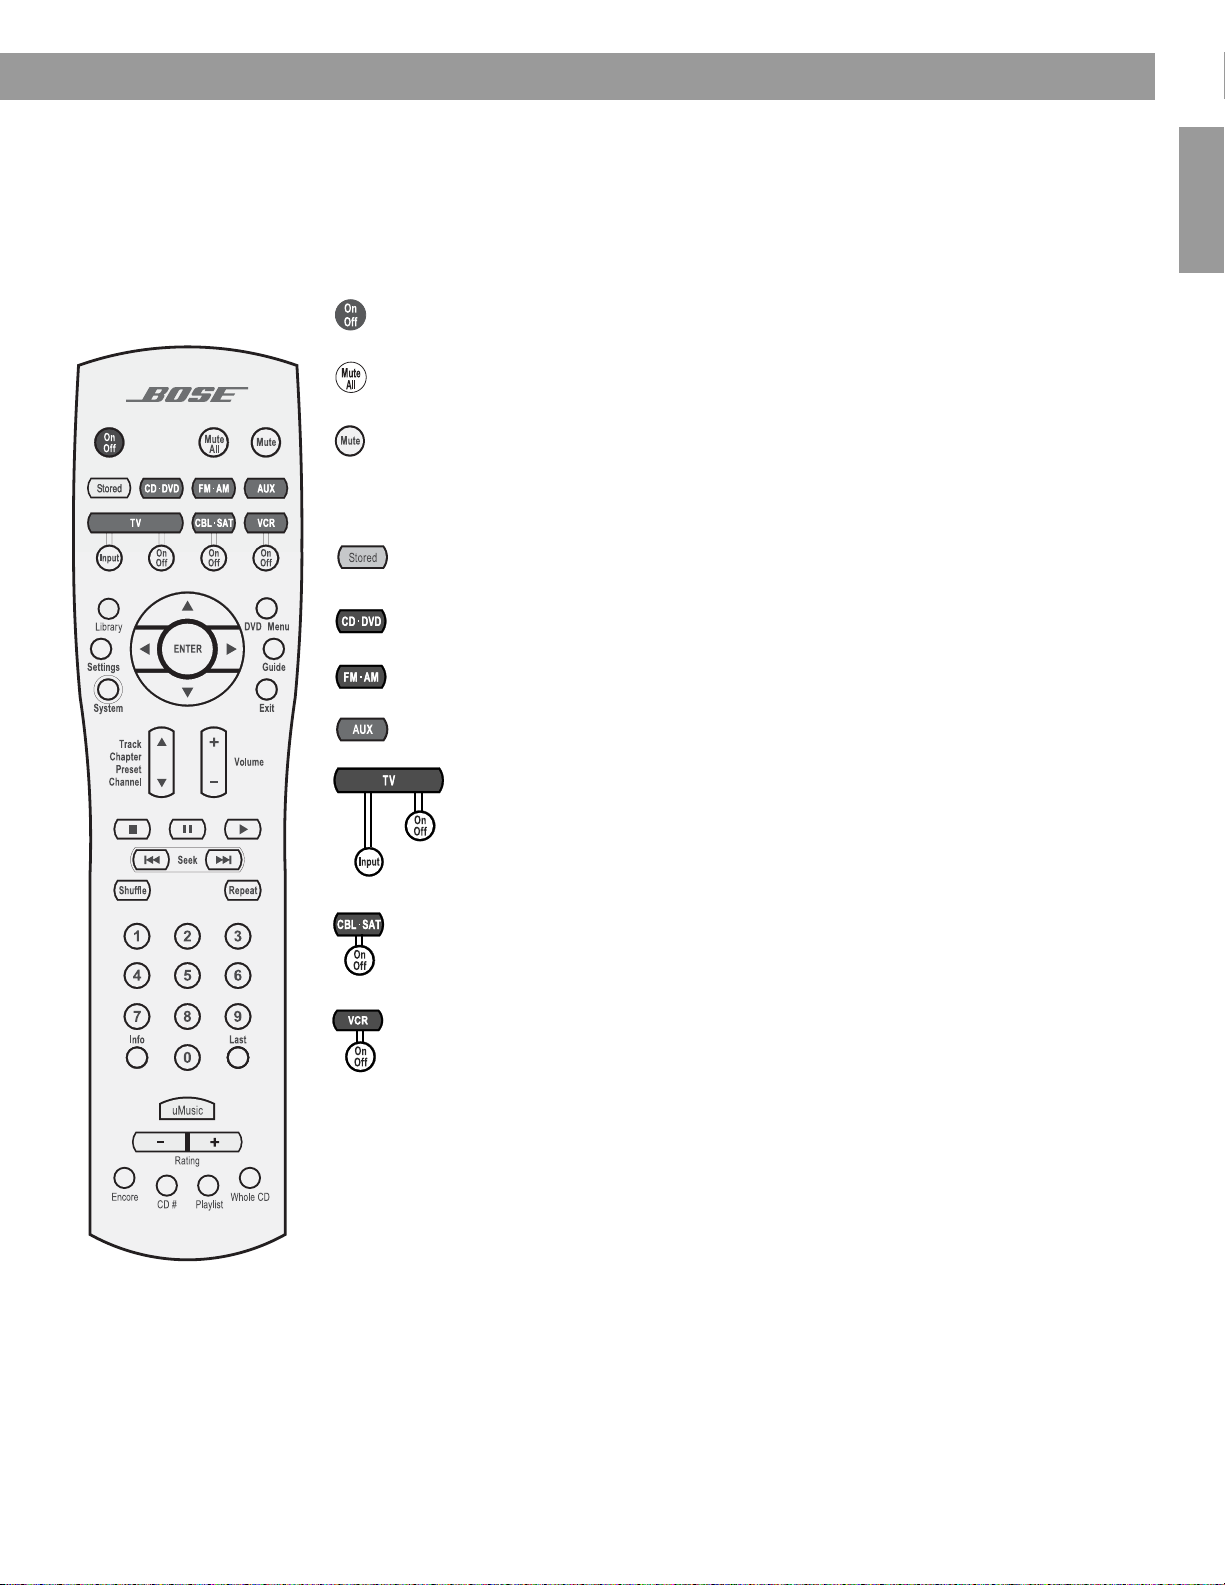
The remote control
The advanced radio-frequency remote control provided with the LIFESTYLE® system works
from almost anywhere inside your home. Simply press any button. There is no need to aim
the remote at the media center.
Power and mute
Source and input selection
Turns the system on and off. Selects the source last used.
Mutes the volume for all connected speakers (main and in other rooms).
Mutes or unmutes the volume in the current room.
™
Turns the system on and selects the uMusic
stored CD play. Overrides other stored CD modes.
Turns the system on and selects the built-in disc player as the source.
Turns the system on and selects the built-in FM/AM radio tuner set to the station
last selected. Switches between FM and AM when the radio is on.
Turns the system on and selects an AUX source connected to the media center.
intelligent playback system mode of
English FrançaisEspañol
Turns the system on and selects the TV connected to the media center as the
source.
When the remote has been set to do so*, turns the TV on and off.
When the remote has been set to do so, scrolls through the TV inputs, allow-
ing for selection of the input used to connect the media center to the TV.
Turns the system on and selects a cable box or satellite receiver connected to the
media center as the sound source.
When the remote has been set to do so*, turns your cable or satellite box on or off.
Turns your system on and elects the VCR connected to the media center as the
sound source.
When the remote has been set to do so*, turns your VCR on or off.
*You can choose to set the LIFESTYLE® remote to control your TV, cable or satellite box, or
VCR so that it will turn these devices on or off. To do that, refer to “Using your system remote
with other components” on page 28. Until then, simply turn on the TV or component using its
power button or remote control.
11
Page 12
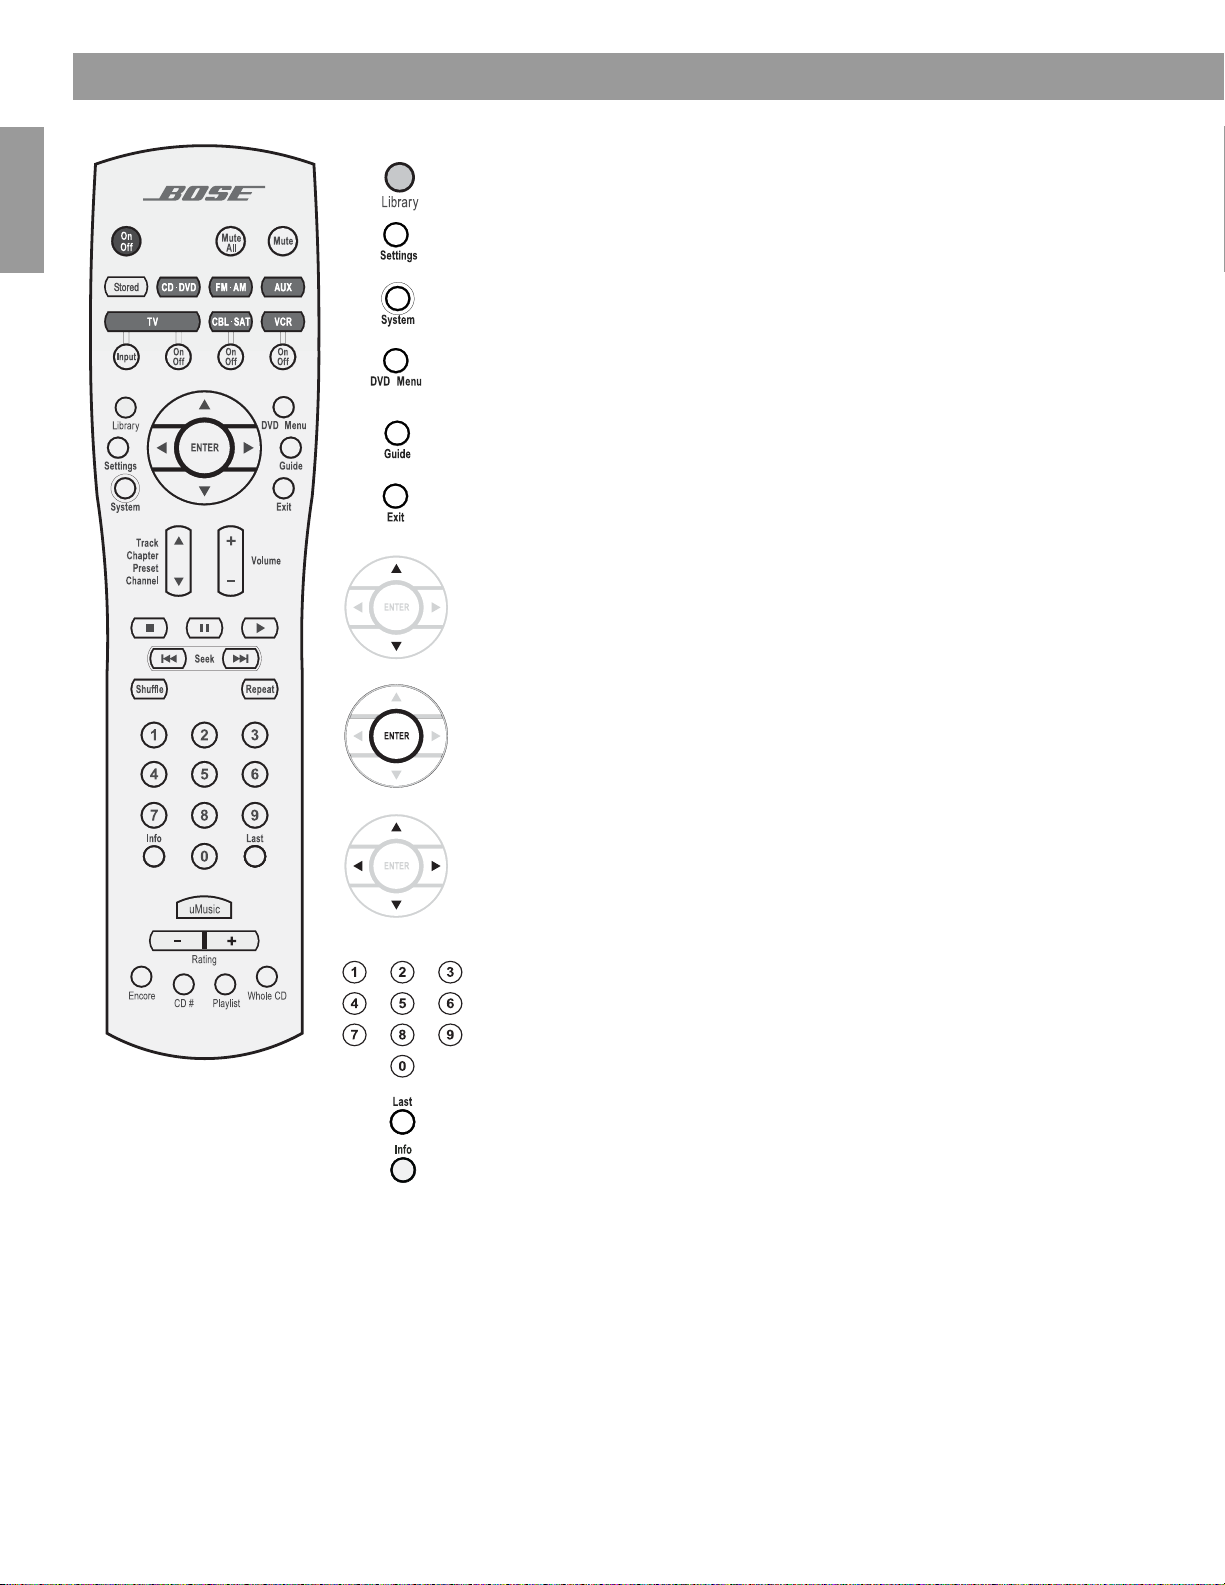
Controls and Capabilities
Menu and program selection
Enters the library of stored CD tracks.
Enters or exits the Settings menu for the current source.
Enters or exits the System menu.
Enters or exits the menu of the DVD disc that is currently loaded.
Enters the main menu of a cable or satellite box.
Displays an electronic TV listings guide.*
Exits the Settings and System menus and the Library and Info screens.
Exits the electronic TV listings.*
Français Español English
Tune the FM/AM radio up or down to the next frequency.
Selects the previous or next item in a menu list.
Enters submenus or confirms the selection of a menu item.
Move up, down, left, or right in a menu or screen.
Select a DVD chapter, CD track, radio station, TV channel or, stored music
preset that corresponds to the numbers pressed.
Also changes System and Settings menu items, when numbers apply.
Skips to the previously selected TV channel.*
Displays or exits the cable or satellite information window, if available.
Pressing and holding this button (until the change is apparent), removes
or restores track information on the media center display.
Pressing this button also opens a screen on the TV, if the TV input is
selected for the media center. This screen provides details on the stored
music playing. Pressing the Info button will toggle this information on and
off the screen, and each press advances the scrolling information on the
media center display.
12
*If the TV, cable, or satellite provides that option.
Page 13
Controls and Capabilities
Selection adjustment
Seek backward or forward to the next strong radio station, CD track, DVD
chapter or stored music track.
Skip backward or forward to the next CD track, DVD chapter, radio preset
(NOT to stored music preset), or to TV channel.
Raise or lower the volume of the current source.
Pressing + unmutes the source playing (if muted) in the current room only.
Pressing – lowers the volume.
Playback options
The first six buttons defined below are for use with your LIFESTYLE® system only. Except
Shuffle
and
Repeat
for
do so.
, the other buttons below work with a VCR or DVR when the remote is set to
English FrançaisEspañol
Selects the uMusic
overrides any previously selected modes.
Apply a negative (–) or positive (+) rating to the stored music playing.
Immediately moves on to a new track if a negative rating is applied.
For further information on rating stored music, refer to “Respond actively to speed
up the learning process” on page 21.
Queues up and plays stored music that most closely matches the style of the current
track.
Plays the tracks from a specific CD when it is pressed just before pressing the
number keys for that stored CD.
Plays all the tracks, if any, assigned to a playlist. Can be used with additional play
mode options, like Encore.
For further information on using a playlist, refer to “Use the Playlist to line up tracks
for play” on page 21.
Skips from the track most recently playing to the first track on the CD of origin and
plays that CD from beginning to end.
Stops CD, DVD, or stored music play. For DVDs and VCDs only, the system remembers the point where the music stopped. Pressing again clears that memory.
™
intelligent playback system mode for the stored source and
Pauses CD, DVD, or stored music play.
Starts CD, DVD, or stored music play.
Skip back or forward to the start of a track. Enter control of DVD play rate.
Or, when pressed and held, scan backward or forward through the current
CD or MP3 disc.
Plays CD tracks in random order. Press Shuffle again to cancel this mode.
Repeats a whole CD or track, DVD chapter, or DVD title. Press Repeat again
to cancel the repeat mode.
13
Page 14
Controls and Capabilities
k
If the remote does not work as you expect
If your system does not respond when you press a button on the remote, it could be time to
change batteries. For information on the type of batteries to use and how to change them,
refer to “Replacing the remote control batteries” on page 51
In some buildings, you may experience “dead spots” where the remote control will not
operate effectively. If this happens, move the remote a foot or two and try again. Also make
sure the cord that connects the power supply to the media center (and contains the remote
antenna) is stretched to its full length and is separated from other power cords. If these
efforts do not work, move the media center a few feet to a location where it provides a better
response.
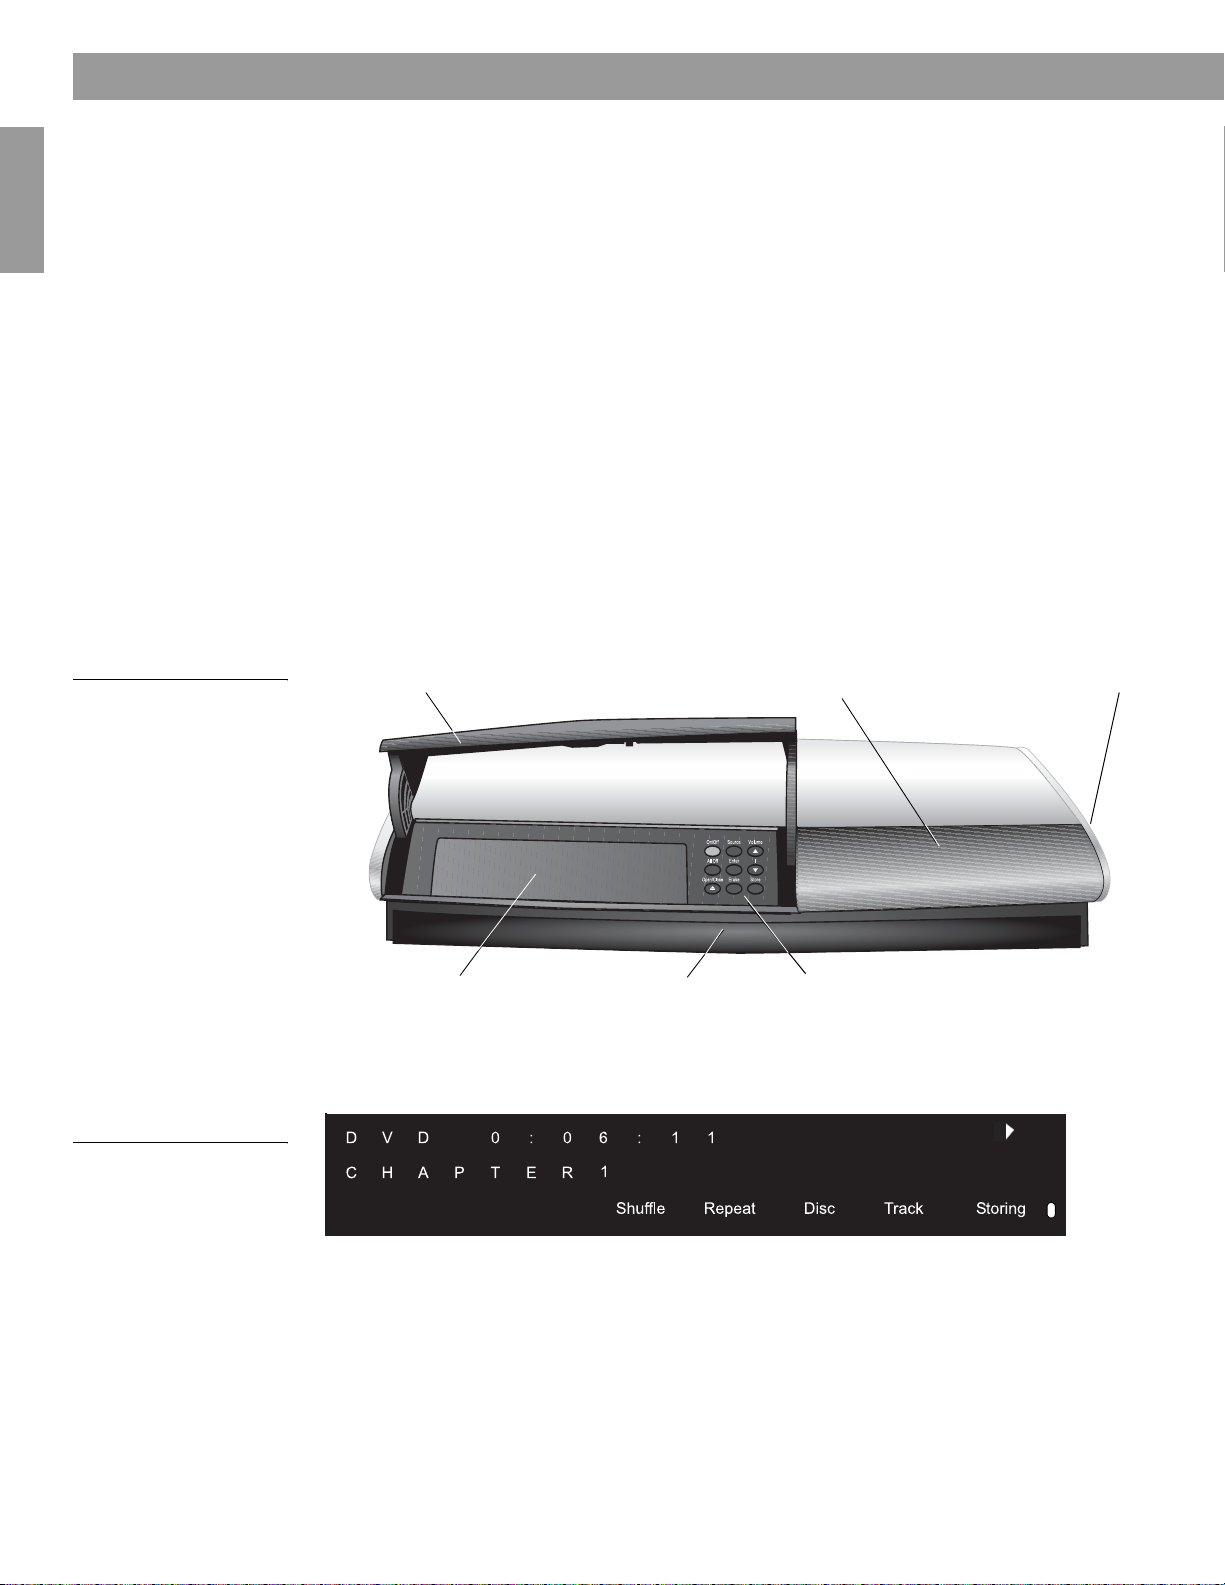
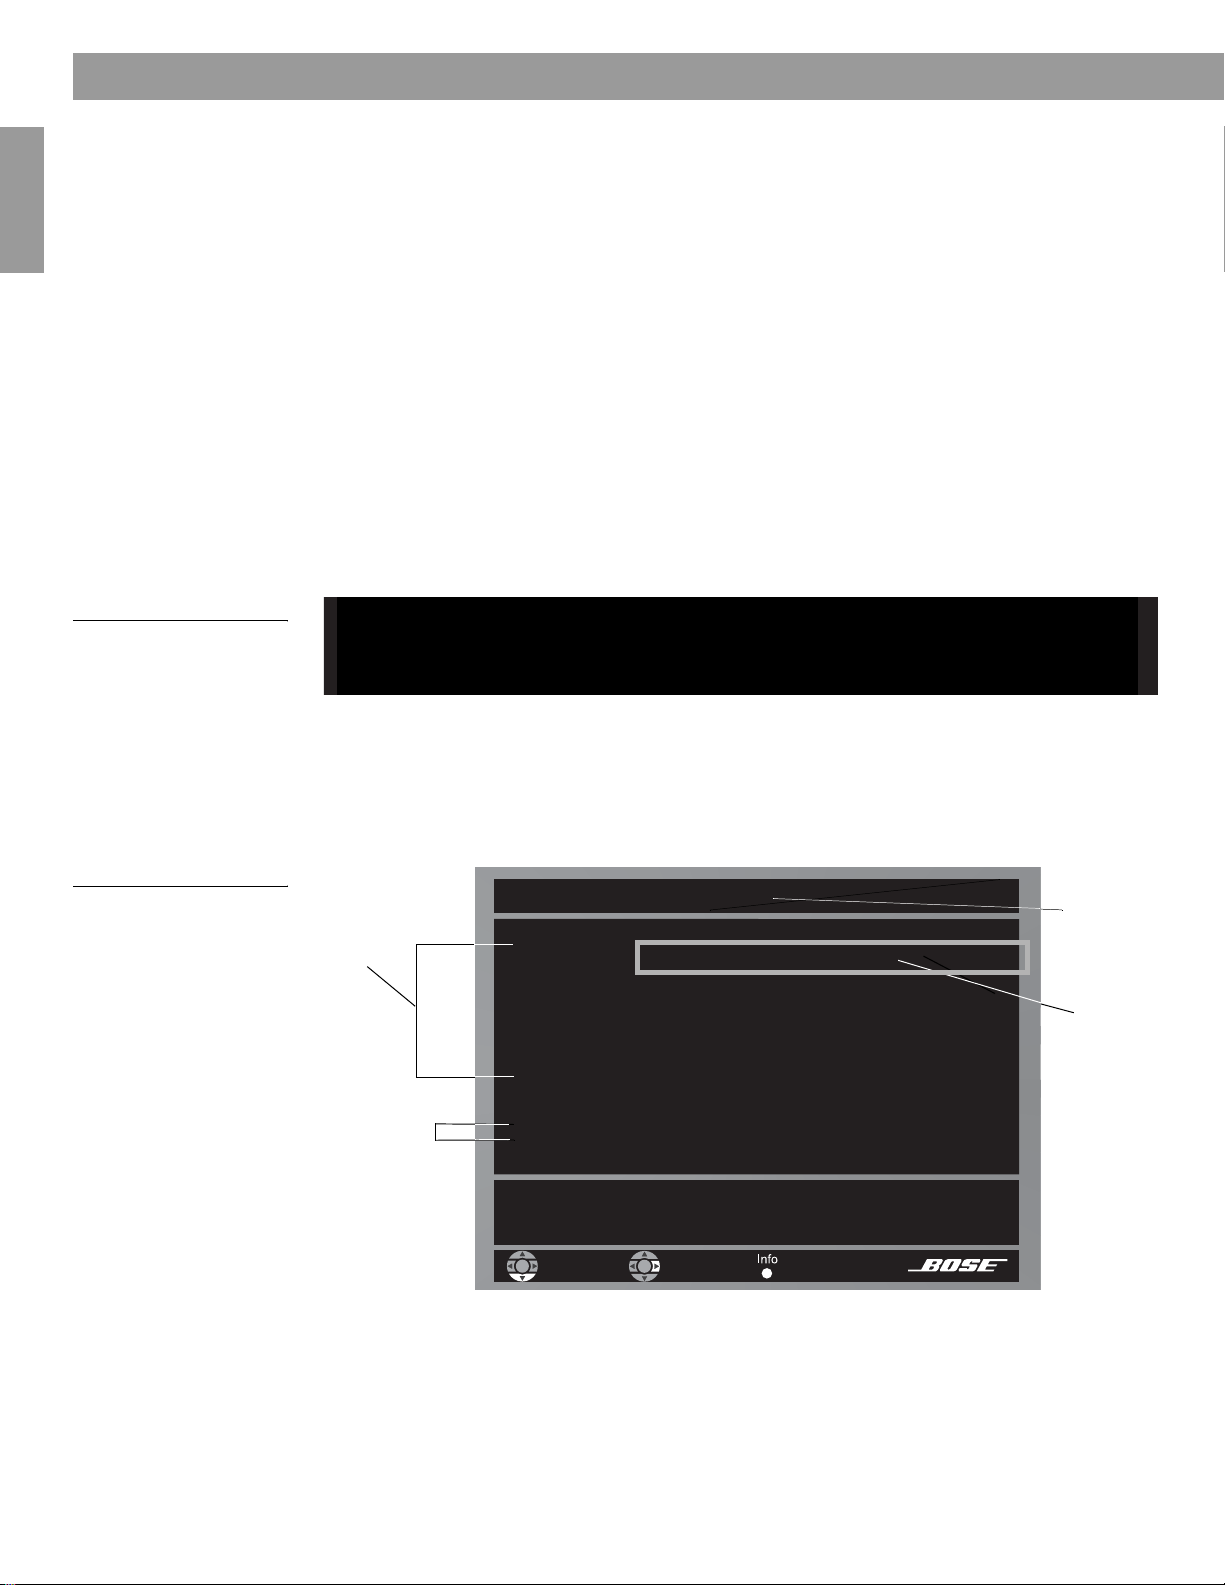
The media center
Français Español English
Figure 1
Front view of the media
center
If the batteries are fine and the suggestions concerning “dead spots,” above do not work,
you may need an antenna extender. To contact Bose
®
customer service to request one, refer
to the address list included with the system.
The disc tray and system controls are located under the front panel door of the media center.
To the right of that is the display window (Figure 1).
An IR signal emitter, located below the media center controls, enables you to control other
components using the LIFESTYLE
®
remote. Avoid blocking that emitter, so its signal will have
a clear path to other components or reflective surfaces in the room.
Front panel door – lifts up
Display window
Headphone jac
®
Figure 2
Sample of information that
appears on the media
center display
14
Disc tray
IR emitter
Controls
Display window
The media center display window indicates the state of the system, including what source is
playing, details of that program, and what option, if any, is selected (Figure 2).
When Settings menu items or messages appear in the display, they may scroll to reveal information that does not fit in the two lines available.
Page 15
Light indicators
Shuffle
Shows when a CD, MP-3 disc, or contents of an MP-3 folder contents are playing in
random order.
Controls and Capabilities
English FrançaisEspañol
On/Off Source Volume
All Off
Open/Close
Enter
Erase
Store
Repeat
Disc
Track
Storing
Shows when the track or disc playing is set to repeat.
Shows when a disc in the disc tray is playing.
Shows when a track is playing.
Shows when CD tracks are storing.
Lights briefly when a remote control command is received.
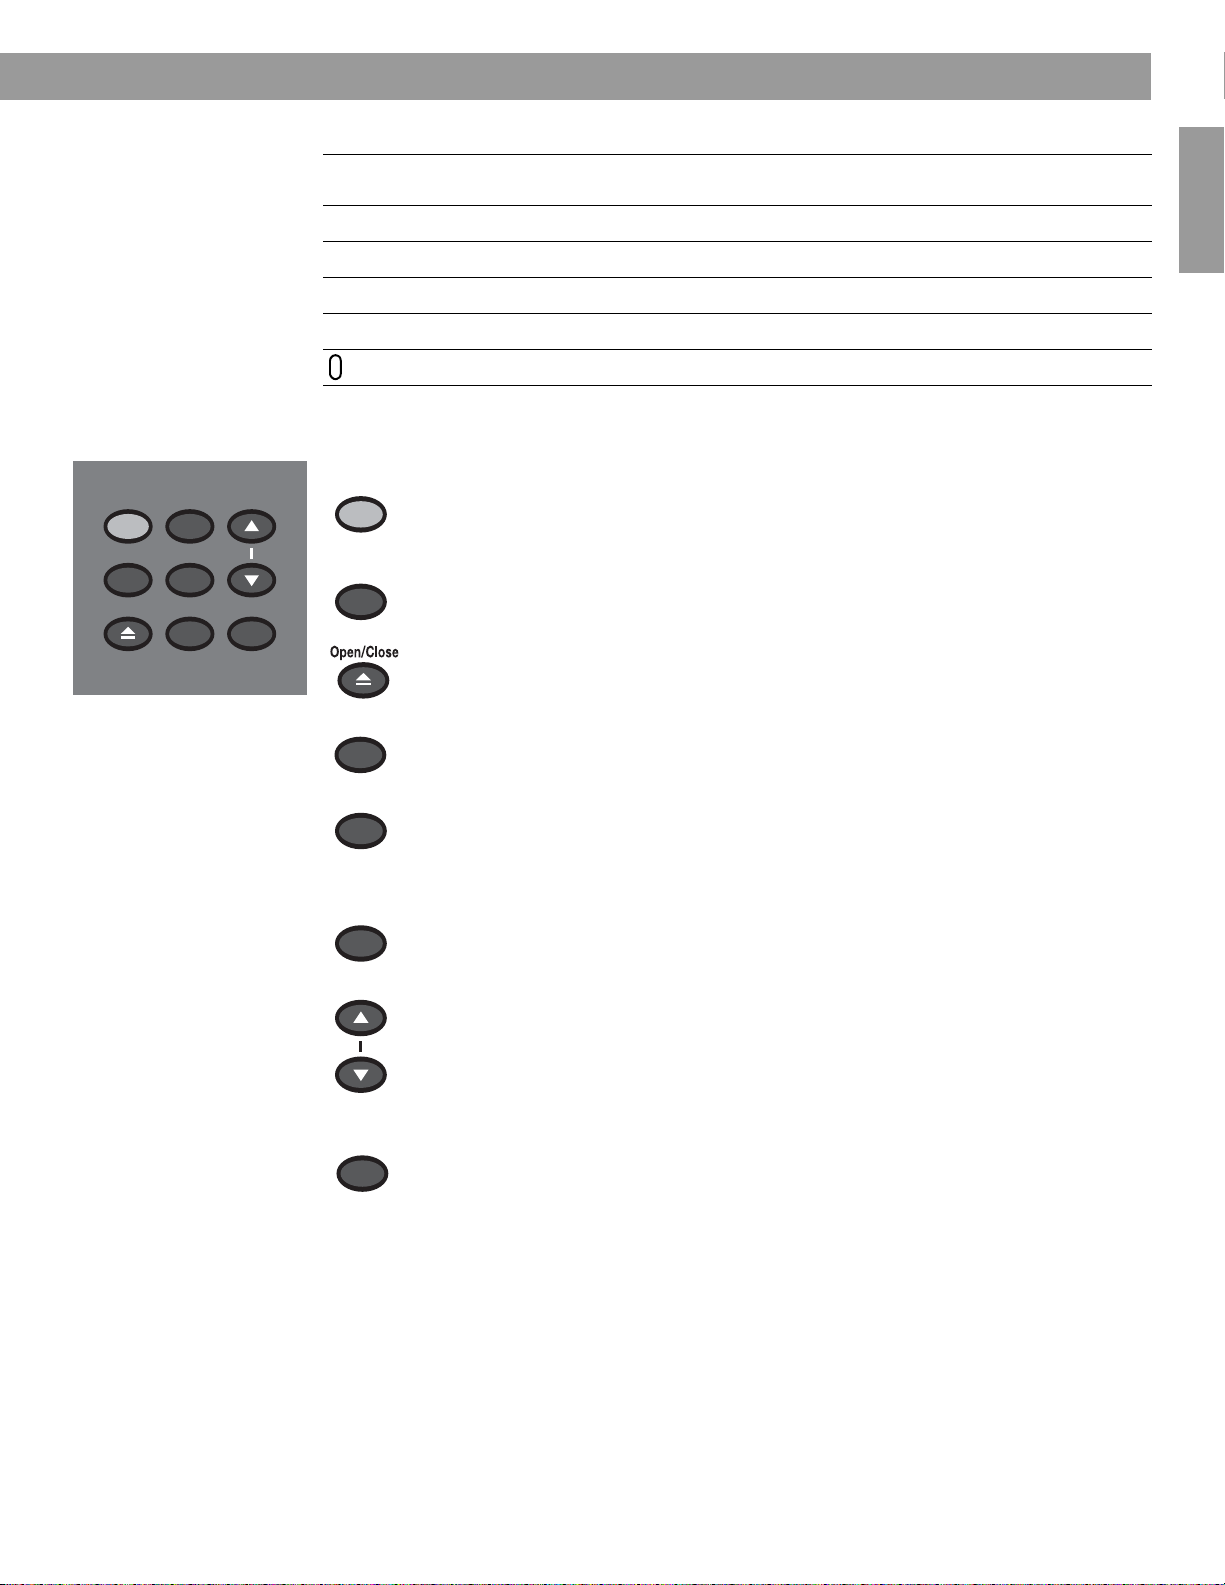
Controls
The nine control buttons work as described below.
On/Off
All Off
Source
Enter
Turns the system on or off in the main room only. Selects the source
last used when it turns the system on.
Turns off the system and all connected speakers (in all rooms).
Opens/closes the disc tray.
Steps through the available source selections.
Begins DVD play when that option appears selected on screen.
When the system is off, resets the remote control house code.
Works with the Store button to scan through the system settings
options on the media center display.
Erase
Volume
Store
Removes a radio station preset.
Raises the volume of the system and unmutes the speakers if they were
muted.
Lowers the volume of the system but does not unmute the source.
Copies the tracks from an audio CD to the internal hard drive.
When the system is off, resets the remote control house code.
Works with the Erase button to scan through the system settings
options on the media center display.
15
Page 16

Controls and Capabilities
Component video or progressive scan: activating your selection
If you have used a component video connection between the media center and the TV, you
need to make the activation settings as explained below.
With the media center turned off, use the controls on its front panel to follow these steps:
1. Press and hold the Enter button on the media center.
2. While holding the Enter button down, press the Store button.
Selections will appear on the media center display each time you press Store.
3. When Video appears as the selection on the display, release the Store and Enter buttons.
4. Use the Volume up and down buttons to scroll through the Video options.
5. Stop scrolling at the proper selection.
• For a component connection only, select:
-NTSC COMPONENT (in N. America)
-PAL COMPONENT (outside North America)
• For a component connection and progressive scan, select NTSC PROGRESSIVE.
Français Español English
Note: The system does not support PAL Progressive video.
6. With the proper selection made, press Store to confirm the selection and leave the Video
options.
The system is now ready to deliver the video signal you prefer.
16
Page 17

System Performance
Some product pointers to ensure satisfaction
To turn your system on:
•Press the
• Press the On/Off control on the media center. Or...
•Press the
This turns the system on and selects the source at the same time. Use the
way too, after you have stored music on your LIFESTYLE
To use your system with the TV and other components, review the reminders below. They are
provided to help ensure that it all works together smoothly.
Note: For information on how to set the remote to operate other components, refer to “Using
your system remote with other components” on page 28.
To turn on other components
You need to:
1. Turn on the system.
2. Select the source.
3. Turn the source on (if it is an external component).
You can use your LIFESTYLE
the TV and other components. Use the
where these settings can be made.
On/Off
button on the remote control. Or...
CD/DVD,FM/AM,TV,CBL/SAT
, or
AUX
®
remote control to do all of that, once you have set it to operate
remote button.
System
Stored
®
system.
button this
button on the remote control to see the menu
English FrançaisEspañol
To watch video
Your installation choices may require some activation settings, as indicated below.
• Getting the image to the TV screen:
- Be sure to select the proper Video Input on your TV (consistent with the video input that
the media center connects to on the back of the TV). Use the
LIFESTYLE
®
remote control (if the remote is already set to control the TV).
• Using the component video connection option:
- If you have a component video connection between the TV and the media center, be
sure to make that selection on the display of the media center. Until you do, you may
see nothing on your screen when you select DVD as the source.
• Using the progressive scan capability of your TV:
- Make sure there is a component video connection between the TV and the media
center.
- Be sure to make the Progressive selection on the display of the media center. Until you
do, you may see nothing on your screen when you select DVD as the source.
- Make sure any other video component connected to the media center is also con-
nected using a component video adapter.
Note: For information on selecting component video or progressive scan on the media center,
refer to “Component video or progressive scan: activating your selection” on page 16.
TV Input
button on the
17
Page 18
System Performance
To adjust what you see or hear
• For changes to a particular source:
- Press the
- To see your choices on the TV, be sure you have the TV on and have selected the
- For details on the changes you can make, refer to “Making adjustments to a particular
• For changes to system operation:
Settings
menu button on the LIFESTYLE® remote control. Most of these adjustments can be made as you press the up and down arrows on the remote and press
Enter to select from options that appear on the media center display.
proper Video Input for the media center.
source” on page 34.
Français Español English
Playing stored music
- Press the
- Be sure you have the TV on and its Video Input is set for the media center.
- For details on the changes you can make, refer to “Making system adjustments” on
page 40.
System
button on the LIFESTYLE® remote control.
To enjoy remarkable new LIFESTYLE® system features
You can use many features of your LIFESTYLE® system as soon as it is installed and the
setup is verified by the two discs that are included with it.
But the most innovative feature, the uMusic
tracks are stored in the system. So you need to store at least one CD first. To get the most
impact while listening to your stored music, you really need 20 or more discs stored.
Storing one disc is very simple:
• Place the first CD into the disc tray of the media center and close the tray.
• Press the Store button, located on the media center control panel.
To store additional CDs, you may want some guidelines and more details. Refer to “Getting
your music into the system” on page 8.
To further understand your options for identifying and playing the tracks you store, be sure to
read “Check in at the Music Library” on page 22 and “Stored CD data options” on page 41.
Note: This feature is functional only when CDs are stored in the system. For details on how to
store CDs, refer to “Getting your music into the system” on page 8.
™
intelligent playback system, requires that CD
18
The basics
1. Press to select the stored music source. If the system is off, this will turn it on in
the uMusic
2. Now you can simply sit back and listen, or make other choices:
• Press any number button, 1 to 9, to choose a different preset.
• Press if you have a particularly strong reaction to a selection now.
™
system mode. It begins with the last-used preset.
Page 19
System Performance
Note: Pressing – registers dislike and tells the system to immediately move on to the next track.
When you hear a track that is inappropriate for the selected preset, choose this minus rating to
lessen your chance of hearing the track again. Pressing
rent track and ones like it are pleasing now, and you want to hear all of this one.
• Press to hear only music like the piece playing.
The system checks the music databases and selects only those tracks in your collec-
tion with very similar attributes, so you can count on it to mirror that mood.
• Press to hear the other tracks, in the order arranged, on the same CD.
• Press , followed by its reference number, to move to a specific CD and hear all the
tracks on it.
Note: You can refer to the log at the back of the book (if you have noted your CDs there as you
stored them) to quickly locate a CD you want to hear.
Control options
If you want to: Do this:
Pause the selection playing… Press .
Resume play… Press again or .
+
sends a strong message that the cur-
English FrançaisEspañol
Stop a selection… Press once. Then press to continue playing
from where the track stopped.
Or, press twice to stop and reset. Then press
to restart at the beginning of the track or whole CD.
Move to another selection… Press up.
Not applicable to stored music presets.
Move to a previous selection… Press down twice, or once only, if the track you
want to skip has barely begun playing.
Not applicable to stored music presets.
Repeat a selection… Press while the track or whole CD you want to
repeat is playing.
Search backward or forward… Press and hold the arrows, according to
which direction you want to search.
Find out about what’s playing... Press to see the track data on the TV screen.
Press again to close that screen.
Press and hold to make the information on the
media center display disappear or reappear.
Search for a particular CD… Press and choose to search by:
Genre, Album, Artist...
as it applies to the CD you want to hear.
Hear music of one type or by
one performer…
Press and choose to search by:
Genre, Artist...
as it applies to the type of music
you want to hear.
19
Page 20

System Performance
Add a selection to the Playlist... Press and hold while the selection is playing.
Hear your Playlist selections... Press .
Make sure a track never plays... Press , and select
Note: For information on the quick adjustments you can make to Stored CD settings, refer to
“Stored CD setting options” on page 37. Instructions on how to enter the menu to make these
changes are available in “How to see your options” on page 34.
Discover the more advanced benefits
Enjoying the broad selection of your private music collection in powerful, lifelike multispeaker performance is the primary benefit of your uMusic
Yet this system provides the means for you to narrow its selections, to better satisfy the
Français Español English
different facets of your personality.
Take advantage of what presets can do
To get the very most from this sophisticated, multi-faceted feature, you need to set up and
use the stored music presets reserved just for this purpose.
A stored music preset is where listening preferences for different people, activities, or moods
get recorded over time. Consider each one as a different “station” that you tune to so the
system can “listen” and learn about your taste.
Note: If several people in your household have stored music on the system, it is particularly
important that they have their own presets. This helps the system differentiate preferences and
prevents it from replaying music you do not want to hear.
from the menu.
Track
Stored CD, Track Action, Delete
TM
intelligent playback system.
Figure 3
Preset 1 as indicated on the
music center display
When you first select Stored as your source (on a previously unused system), the system
automatically enters Preset 1 (Figure 3). Or, if you used a different preset recently, the system
may select that preset for you.
S T O R E D 2: 0 6 P 1
CD: 1 2 5track name
With CDs already stored in the system, use the preset you prefer to get started:
Stored
1. Press the
button on your LIFESTYLE® remote.
2. Check the media center display to see which play mode is selected.
• If it says UMUSIC you are ready to listen and enjoy.
• If it says ENCORE, CD#, PLAYLIST, or WHOLE CD, press the
uMusic
button on the
remote to get the system out of that special play mode.
20
Page 21
System Performance
3. Just listen for a while.
Notice there’s no identifiable order to what plays: not by CDs that were stored first, nor by
common artist or genre. It’s more like a freewheeling stream of tracks you may or may not
have heard recently.
4. While in Stored source, pressing a numbered button – from 2 to 9 – moves into a different
preset. The music playing will change when that happens.
Note: You can give each preset a name, up to 8 letters long, for the person or reason for using it.
For details on how to do that, refer to “Media center options” on page 47.
Respond actively to speed up the learning process
If you hear a piece you don’t like or are not in the mood for:
• Move on by pressing the or button.
The system begins to play the next track, notes that you may not be in the mood for this
one now, and prepares to learn more.
•Press the
The system logs your strongly negative response and moves to another track immediately.
If a track stands out as a real favorite:
•Press the
The system logs your response as positive and continues playing the track. You are likely to
hear more music from that artist and album sooner than some others.
If you want to register your likes and dislikes more generally:
–
rating button if the track playing is just not right for this preset.
+
rating button.
English FrançaisEspañol
•Press the
according to genre, artist, or the tracks on a CD.
Note: For details on using the Music Library, refer to “Check in at the Music Library” on page 22.
Library
button, so you can look through music stored on the system and rate it
Use the Playlist to line up tracks for play
The system includes a ready-to-use playlist, so you can line up specific tracks in the order
you choose and play them on command.
Note: If you simply want music to set a certain ambiance, you may find it quicker to choose a
preset and let the system do the selecting.
The playlist can be useful when you want a very specific type of music, your holiday favorites
for example.
How to add music to the Playlist provided:
While listening to a track in Stored source (and not in Playlist), press and hold the
button on the remote.
Playlist
Locate selections using the Music Library, then press and hold the
to a Playlist one by one. Or, you can easily add a whole batch of selections by one artist, a
genre, or from one CD.
button to add them
Playlist
21
Page 22
System Performance
How to delete tracks from the Playlist:
While listening to music in the Playlist, press and hold the
to remove plays.
How to completely clear the Playlist:
To use the Playlist again, for a different purpose, you may want to remove all the tracks listed
there now. To do that quickly, press the
and into that menu to get to the uMusic Preset Action item. Select Clear Playlist from the
options list.
Check in at the Music Library
Imagine: while using your LIFESTYLE® system, you hear music – on FM, or perhaps the score
of a movie – and suddenly you think of another song you want to hear. You know you own it,
though the name eludes you. But it won’t stop running through your head.
This is a perfect scenario for using the Music Library. If your system is turned on and the
Stored source is selected;
1. Press the
• The initial library information appears on the media center display (Figure 4).
Français Español English
Figure 4
Music Library as it appears
on the media center display
Playlist
button as the track you want
System
button on the remote, move over to
Library
button on the remote to see your choices for locating a track.
GENRE:
ALL GENRES
Library
Media Center
Figure 5
Music Library on screen
• If your TV is on and the Video Input that connects the media center to the TV is
selected, the library screen appears there (Figure 5).
• Genre is selected and ready to browse the genre options.
• Information on the display and the TV screen changes as you move around and
make selections.
Items list
Summary
of
selections
Music Library
Genre: All genres
Artist: All artists
Album: All albums
Track: All tracks
97 albums / 0 tracks (0 minutes) selected.
Left/Right: narrow selection by genre.
This filters available selections below.
navigate
Preset 1
select
details
Current
Preset
Selection
22
Page 23
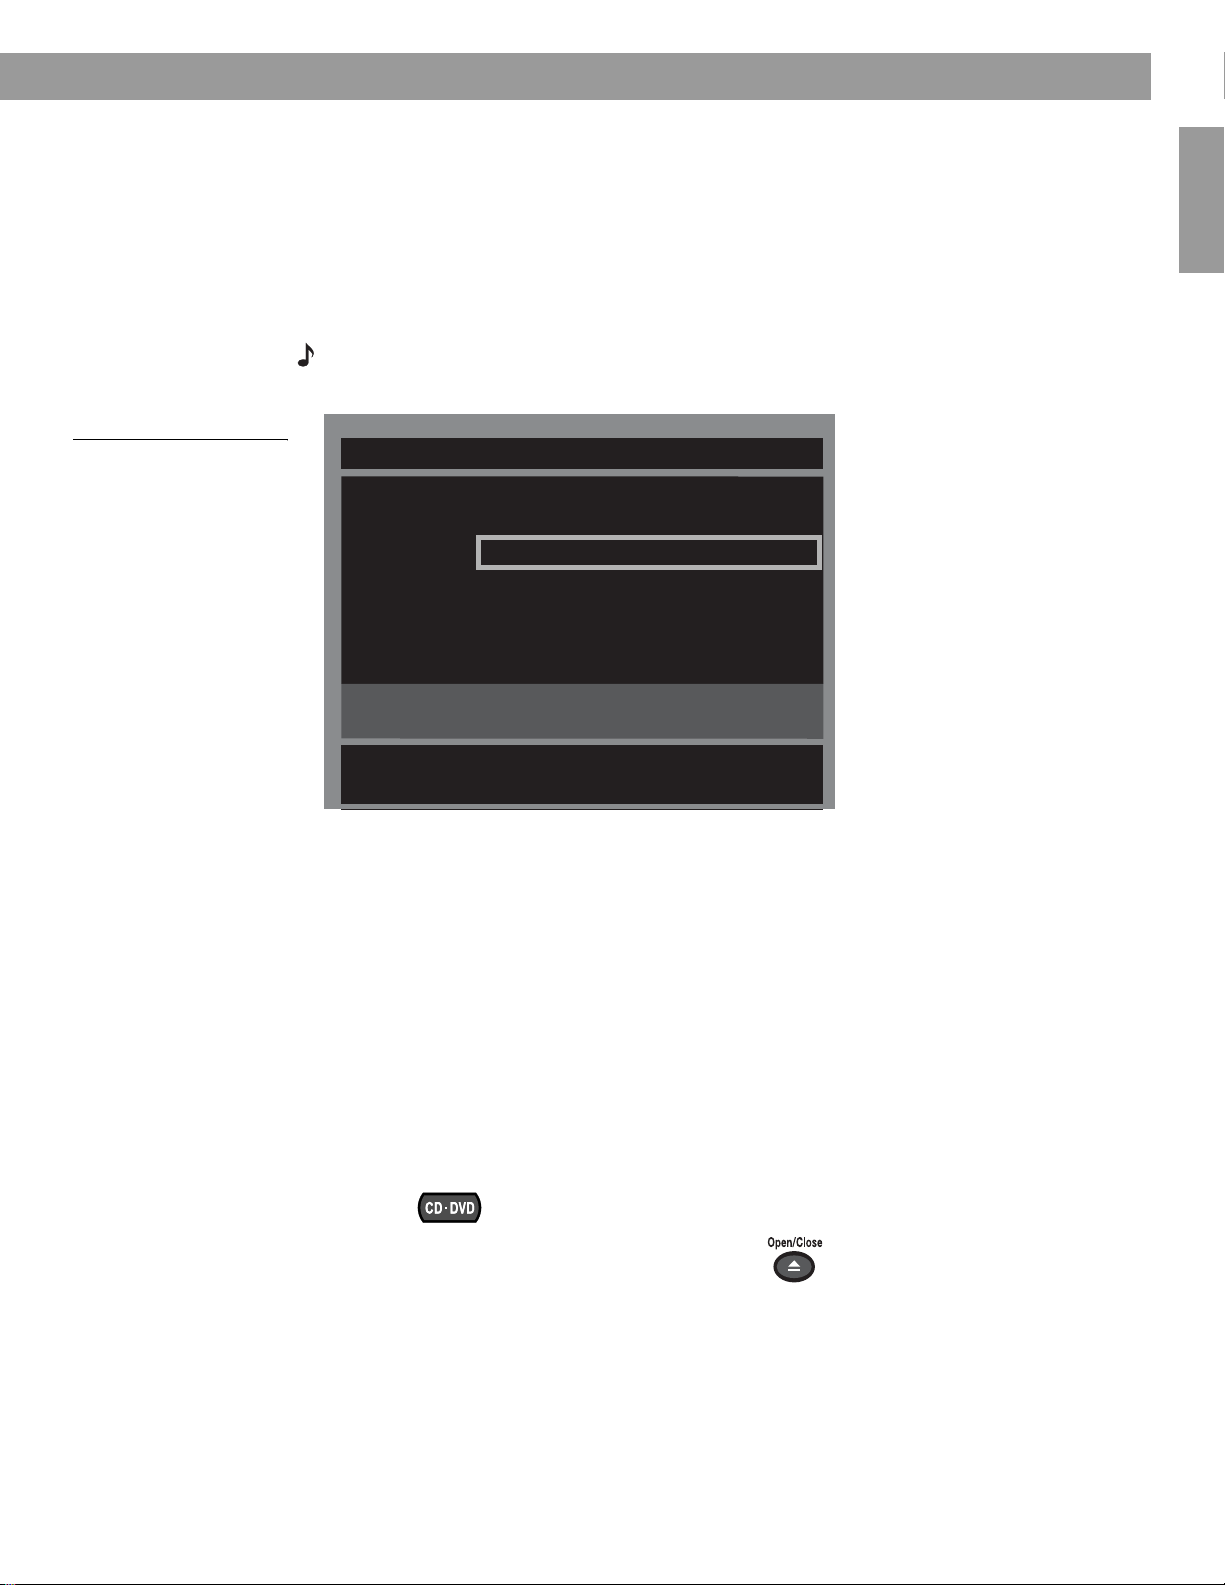
Figure 6
Track located by searching
by genre, then artist
System Performance
2. Use these actions to move around and make selections from the display or the screen:
• Press the left, right, up or down arrows to get to the option you want.
Enter
•Press
column.
• Repeat these steps for each change you want to make.
•Press the
3. Choose from new options that appear as you make a selection.
Note: For further details on moving around and making selections on screen, refer to “Making
system adjustments” on page 40.
Music Library
Genre: Rock/Pop
Artist: Jackson Browne
Album: All Albums
Track: All tracks
or the left arrow to confirm your selection and move back to the features
Exit
button on the remote control to leave the Music Library.
Preset 1
English FrançaisEspañol
Playing a DVD
1 album / 10 tracks selected.
Left/Right: narrow selection to a particular album.
This filters available selections below.
4. When you find what you want, you can use the remote control as follows:
•Press the
•Press the
•Press the
•Press
•Press the
Play
or
Enter
button to play your selection(s).
Info
button to see more data for the selection.* (!)
System
button to see data for this selection and edit it as you like.*
Exit
to leave the Music Library.
–
or + rating buttons as you locate music in the library. This gives your preset a
learning kickstart.
The symbols below represent buttons on the LIFESTYLE® remote control unless otherwise
indicated.
1. Turn on your television.
2. Press to select the DVD player. If the system is off, this will also turn it on.
3. Lift up the media center front door and press on its control panel.
4. Insert the DVD disc into the tray (label-side up).
*This appears on the TV screen only.
23
Page 24
System Performance
5. Press again to close the disc tray.
6. Press to begin play.
You may need to press the play button more than once. Most DVD videos present on-screen
selections before the movie begins.
Note: Not all DVDs offer the same features. For example, you can choose subtitles only if the
disc provides subtitle information.
Control options
If you want to: Do this:
Pause a DVD movie… Press .
Resume play… Press again or .
Stop a DVD movie… Press once. Then press to continue playing
from where the movie stopped.
Français Español English
Skip to the next chapter… Press up.
Or, press twice to stop and reset. Then press
to restart at the beginning of the DVD.
Skip to the previous chapter…
Repeat a chapter… Press while the chapter you want to repeat plays.
Search backward or forward… Press and hold .
Note: For information on the quick adjustments you can make to DVD settings refer to “Stored
CD setting options” on page 37. Instructions on how to enter the menu to make those changes
are available in “How to see your options” on page 34.
Press down twice.
Using parental controls
The parental control feature of your LIFESTYLE® system allows you to restrict access to DVD
movies with ratings you find inappropriate for members of your family.
Before you can use this feature, you choose a password and a level of restriction in the
System menu. To learn more about parental controls, refer to “To set the restriction level and
passwords” on page 50.
Note: Refer to“Troubleshooting” on page 55 if you have trouble with a password.
24
Page 25
Loading and playing a CD
The symbols below represent buttons on the LIFESTYLE® remote control unless otherwise
indicated.
Press to select the CD player and begin playing the CD loaded in the disc tray. This
also turns the system on if it is off.
To load another disc after the one playing ends:
1. Lift up the media center front door and press on its control panel.
2. Insert the audio CD into the tray.
3. Press to close the disc tray. Play begins automatically.
Control options
If you want to: Do this:
Pause a CD… Press .
Resume play of paused CD… Press or .
System Performance
English FrançaisEspañol
Stop a CD… Press . Press to restart at the beginning
of the CD.
Clear continuously scrolling track
information (for an MP3-CD) from
the media center display...
Go to next track… Press up.
Go to beginning of the track… After track has played for several seconds,
Go to a previous track… Press down:
Scan a CD backward or forward… Press and hold .
Randomly play CD tracks… Press .
Cancel random play… Press again.
Press and hold until the display changes.
Press and hold again to restore
the scrolling display of text.
press down.
•once if no music is playing.
•twice if the music has begun.
On MP3 discs, this jumps to the beginning of a track.
Repeat a track… Press .
Repeat a CD… Press again.
Cancel repeat... Press a third time.
Note: For information on the quick adjustments you can make to CD settings, refer to
“CD setting options” on page 36. Instructions on how to enter the menu to make these changes
are available in “How to see your options” on page 34.
25
Page 26
System Performance
Using the radio
Français Español English
The symbols below represent buttons on the LIFESTYLE® remote control.
Press to select the radio tuner and turn it on if the system was off. This tunes to the
FM or AM station that was last selected.
Changing stations
If you want to: Do this:
Switch between FM and AM … Press .
Seek the next strong station … Press .
Manually tune to a station … Press .
Select a preset station … Press or for the preset number.
Note: For information on the quick adjustments you can make to the radio tuner settings, refer to
“Tuner setting options (FM or AM radio)” on page 36. Instructions on how to enter the menu to
make those changes are available in “How to see your options” on page 34.
Setting a radio station preset
You can establish a preset for up to 20 AM and 20 FM stations. This enables you to tune in a
favorite station quickly. There are two ways to assign presets.
Using the Enter button on the media center control panel to automatically assign the next
preset number to a station, follow the steps below for each station you want to assign:
1. Tune to the preferred station.
2. Press the Enter button on the media center control panel.
Using the LIFESTYLE
1. Tune to the preferred station.
2. To assign the station a preset number, press and hold that number button.
• For numbers 1through 9, press a single number and hold it until the display indicates
PRESET: XX SET.
• For numbers 10 through 20, press the first number, then press and hold the second
number until the display indicates PRESET: XX SET.
Note: Assigning a preset number to a station will replace any previous assignment of that preset.
®
remote control, to assign to a specific number:
26
Page 27
To remove a station preset
Tune to the preset number you want to remove. Then follow the step below:
• On the remote control, press and hold the 0 number button until the message PRESET:
XX.ERASED appears briefly on the media center display. The removal is then complete.
To reassign a preset to a different station
1. Tune to another station. Then press and hold that preset number, which reassigns it to
the new station.
2. Press the preset number you want to remove. Then mute the system and press and hold
that preset number again.
Using the headphones jack
For private listening, you can connect headphones to the jack that is located on the right side
of the media center as you face it.
Note: Connecting headphones causes all main room speakers to be muted.
Using the sleep timer
You can set the sleep timer to turn off the LIFESTYLE® system automatically in 10 to 90
minutes, depending on the time you select. You can do this in the Settings menu for any
source that is selected.
Note: If you are unfamiliar with use of the Settings menu, refer to “Making adjustments to a particular source” on page 34.
System Performance
English FrançaisEspañol
Figure 7
Sleep timer symbol in the
source Settings menu
In the Settings menu on the media
center display or on the TV screen,
move around and make changes
by using the selection buttons.
To set the sleep timer
On both the media center display and the TV on-screen menu, the same actions apply:
Settings
1. Press the
2. Move down to the Sleep Timer symbol, the last feature in the menu (Figure 7).
Note: If you see a continuation arrow at the bottom of the menu, move to it to see the other
menu items that are not currently shown.
3. Move right into the options list and up to the delay time you want, from 10 to 90 minutes.
Note: Pressing the
4. Press
5. Press
When the time you set elapses, the timer shuts down the system and the TV (if it is on*), and
then turns itself off.
Enter
Exit
button on the LIFESTYLE® remote to enter the menu.
up
arrow when you reach the 90 minute option turns the sleep timer off.
to confirm your selection.
or
Settings
on the LIFESTYLE® remote control to leave the menu.
*For the TV to turn off automatically, the system must sense that it is on. This is contingent on
your use of the supplied TV sensor. For information on installing and testing the TV sensor,
refer to your LIFESTYLE
®
system Install Guide.
27
Page 28
Controlling External Sources
Using your system remote with other components
You can control most brands of external components, such as TVs, VCRs, and cable/satellite
boxes, using your LIFESTYLE
nents as the video tuner (channel selector) for all, to further simplify operation.
Your LIFESTYLE
of the music center to any component that your LIFESTYLE
allows you to turn on other sources in the room and make basic selections from them,
whether they are connected to the media center or to the TV.
Note: If a component is located where it cannot receive these IR signals, you can use the
supplied IR emitter cable with that component. For tips on getting the IR signals where they need
to go, or using the optional emitter, see “Connecting the optional IR emitter cable” in your Instal-
lation Guide.
®
system includes an infrared (IR) emitter that sends out signals from the front
®
remote control. You can also designate one of these compo-
®
remote is set to control. This
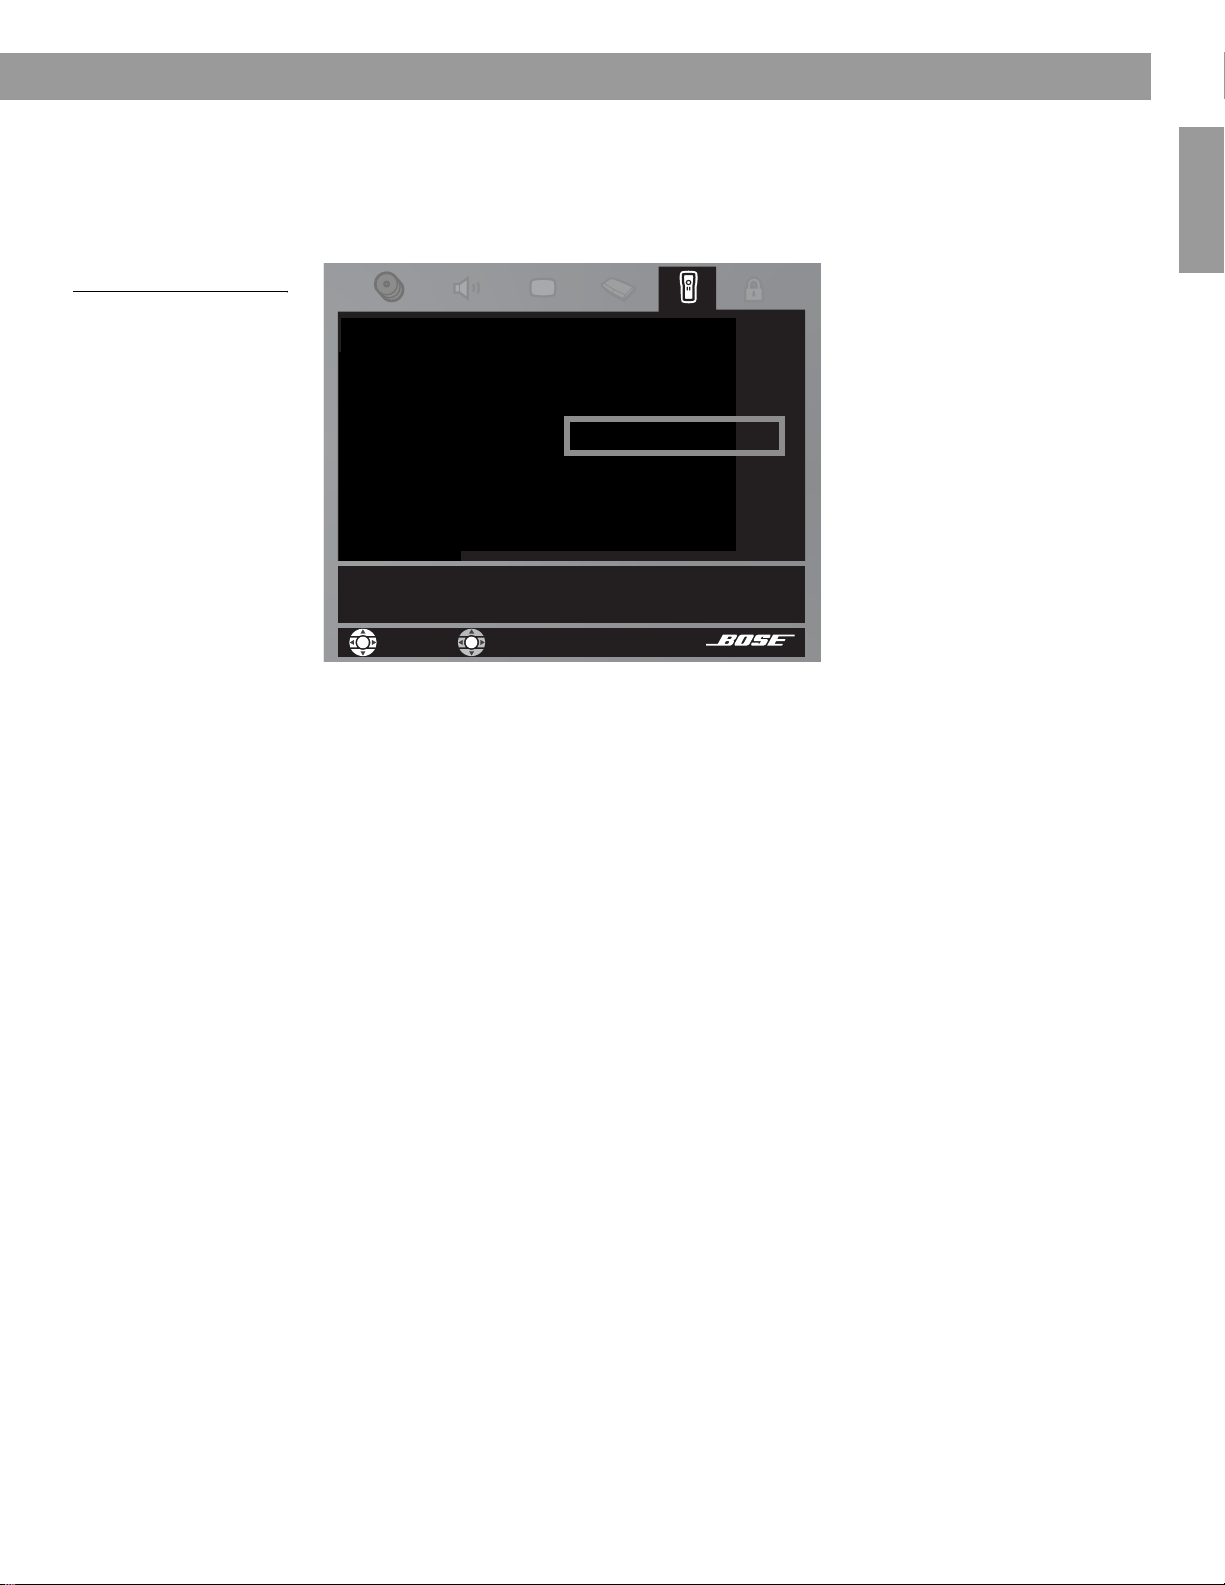
For TV control
Note: For general guidelines on using the LIFESTYLE® System menu, refer to “Making system
adjustments” on page 40.
Français Español English
Use the TV remote to turn on the TV. Be sure to select the Video Input on the TV for the media
center.
Then, using the LIFESTYLE
1. Press the
2. Press the
3. Move across the categories to
(Figure 8).
4. Press the down arrow or
TV
button to select the TV source.
System
button. The System menu will appear on the TV screen.
®
remote control:
Remote Control
Enter
to move into that menu.
to preview these menu options
Figure 8
Preview of Remote features
in the System menu
IR Control:
TV Tuner:
TV Brand:
TV Device Code:
VCR Brand:
Select your TV brand.
navigate
select
Remote
Control
- -
28
Page 29
Controlling External Sources
5. Identify the TV brand:
• From the
• Move right into the list of brands and up or down to locate the brand for your TV.
Remote Control
options in the System menu, select TV Brand (Figure 9).
English FrançaisEspañol
Figure 9
TV brand selection
•Press
IR Control:
TV Tuner:
TV Brand:
TV Device Code:
VCR Brand:
Select your TV brand.
6. Choose the device code:
• In the menu options on the left, select
• Move right to select the first code.
•Press the
Enter
to select that brand.
Remote
Control
Philharmonic
Philips
Phoenix
Phonola
navigate select
TV Device Code.
TV On/Off
button on your LIFESTYLE® remote. Press that button again.
If the TV turns off and on again, you have chosen the right code.
If not, select another code, and press the
TV On/Off
button two more times.*
• When you have chosen the right code, press the
• To have the TV come on automatically, whenever you press a video source button,
follow Step 7 on page 30. To skip this step, instead, press
System menu.
*Some manufacturers use a number of similar device codes. After selecting one, you may find
you can turn your TV on and off, but are unable to change channels or select Play or Pause.
In that case, select a different device code that provides more control.
Enter
button.
System
or
Exit
to leave the
29
Page 30
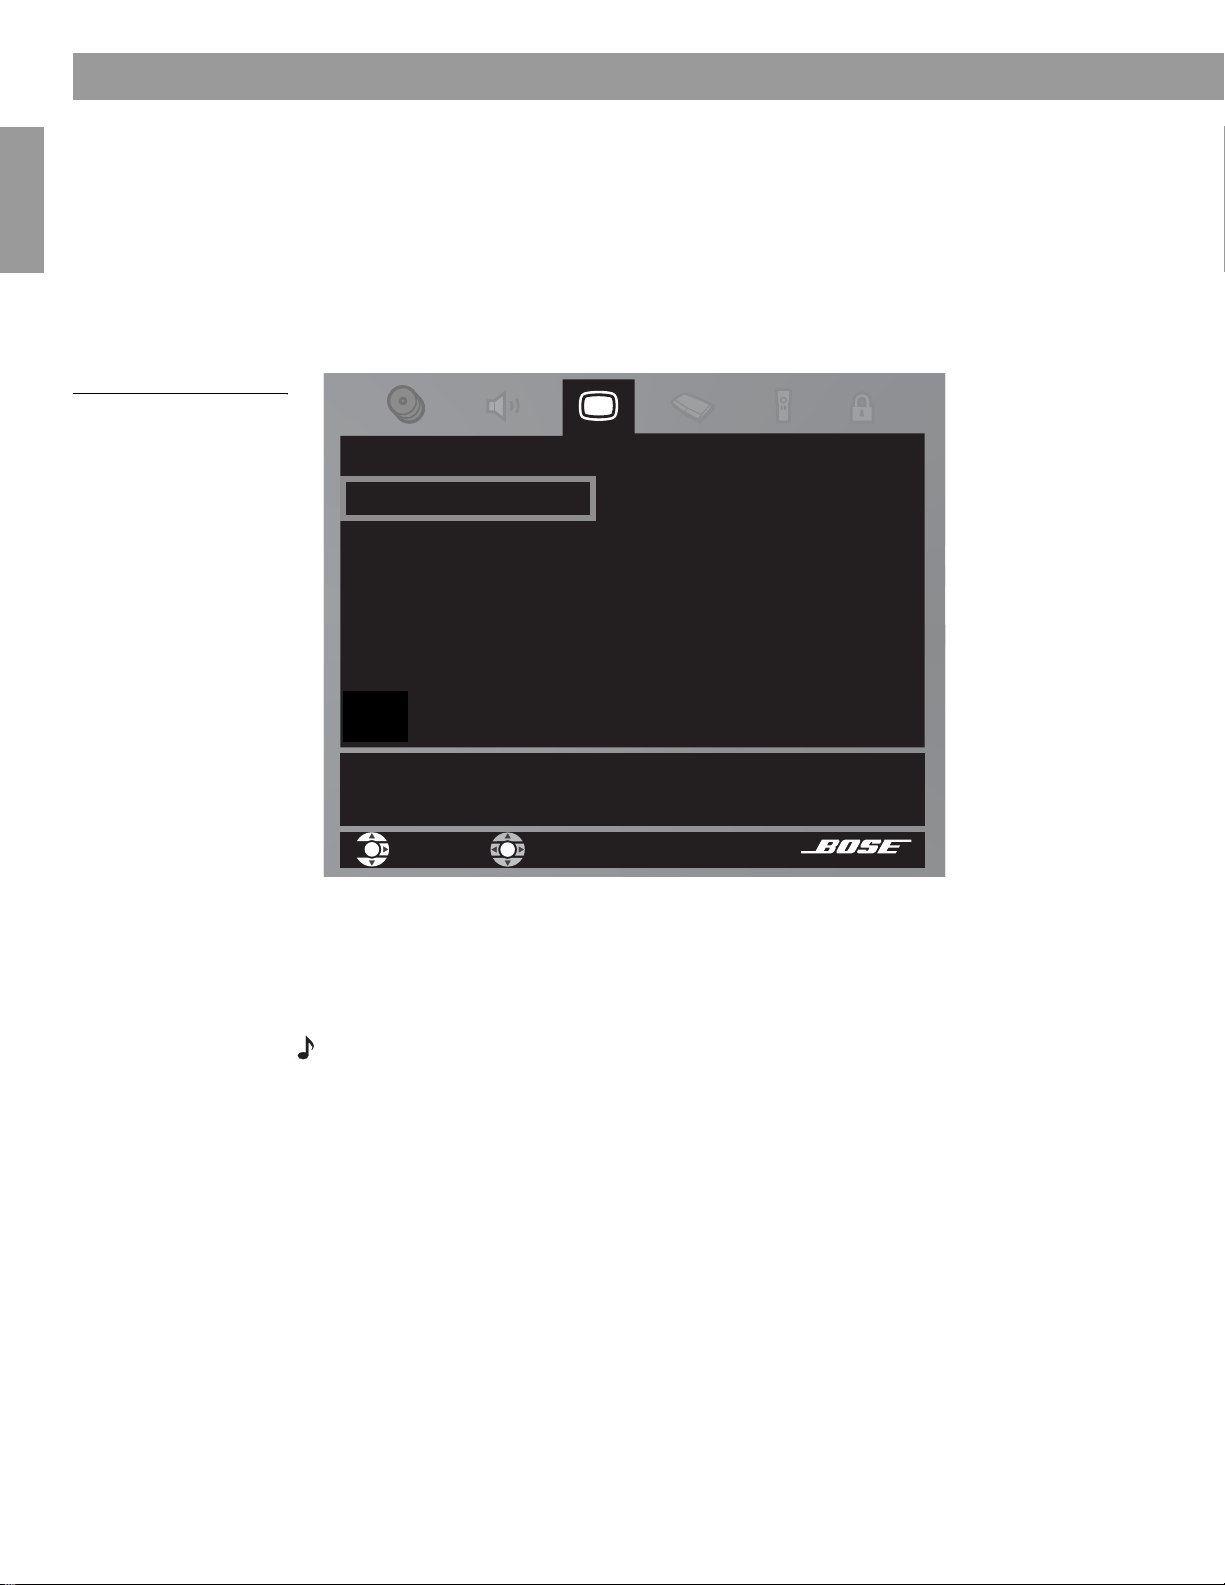
Controlling External Sources
7. Set the TV to turn on automatically*, as needed:
• Move up to the System menu categories and over to
•From the
• Move right into the list of choices and up or down to select one of the two below:
–
Automatic (for TV models that do not use a European style SCART connector)
Euro Connector (for TV models that use a SCART connector)
–
Video
options, select TV Power (Figure 10).
Video
.
Figure 10
Changing the TV Power
Français Español English
•Press the
Enter
button.
Video
TV Power:
TV Power Status:
TV Aspect Ratio:
Widescreen DVDs:
Video Connector:
Video Black Level:
The Media Center can turn your TV on automatically whenever
you select a video source.
navigate
8. Notice the TV Power Status:
TV Detected means the installed TV sensor is working.
•
TV Not Detected means the TV sensor (if installed) is not positioned properly, or a
•
SCART connector is installed.
select
Manual
TV Not Detected
- -
- Component
Normal
30
•Press
Note: For information and on using the TV sensor, refer to “Installing the TV on/off sensor” in
your Install Guide.To check for positioning of the sensor, refer to “The media center” on page 14.
*For the Automatic feature to work effectively with North American TV models, the optional
TV sensor must be installed and positioned to detect if the TV is on or off. In Europe, a
SCART connector serves this purpose. If you do not use a SCART connector, or the TV sensor is not positioned properly, the automatic feature is not an option. In that case, leave the
TV Power set to Manual. This means you must turn your TV on using its power button or with
the LIFESTYLE
System
or
Exit
to leave the System menu.
®
remote (when it is set to do so).
Page 31

Controlling External Sources
For cable/satellite control
While ou can set the LIFESTYLE® remote to control both cable and satellite boxes, you must
designate one or the other, not both, in the steps below.
The one connected to the CBL-SAT input on your media center is the one you should desig-
CBL-SAT
nate. So when you press the
ating that device.
source button and the
On/Off
button below it, you are oper-
English FrançaisEspañol
You can designate the other under
AUX Device, following instructions on page 32. Do this
only if the device is connected to the AUX input on the media center, or if the AUX input is not
being used.
Note: For general guidelines on using the LIFESTYLE
®
System menu, refer to “Making system
adjustments” on page 40.
Follow the process below:
Turn on the cable or satellite box, whichever you are setting the remote to control. Turn on the
TV and be sure to select the Video Input on the TV for the media center. Then, using the LIFESTYLE
®
remote control, press the
CBL-SAT
source button and follow the steps below:
1. Identify the device:
•From the
• Move right and
Remote Control
s
elect either Cable or Satellite by pressing
options in the System menu, select CBL/SAT Device.
Enter.
2. Identify the brand:
• In the menu options on the left, select
CBL/SAT Brand.
• Move right and up or down in the alphabetical list to locate your brand.
•Press
Enter
to select that brand.
3. Select the device code:
• From the menu options on the left, select
CBL/SAT Device Code.
• Move right to select the first code.
•Press the
CBL-SAT On/Off
button on your LIFESTYLE® remote. Press that button again.
If the Cable or Satellite box turns off and on again, you have chosen the right code.
If not, select another code, and press the
CBL-SAT On/Off
button two more times.*
• When you have chosen the right code, press the
•Press the
When you complete these settings, you can use the
or Satellite source and other LIFESTYLE
System
or
Exit
button to leave the System menu.
®
remote buttons to operate it.
Enter
button.
CBL-SAT On/Off
button to turn on your Cable
*Some manufacturers use a number of similar device codes. After selecting one, you may find
you can turn your Cable or Satellite box on and off, but are unable to change channels or
select Play or Pause. In that case, select a different device code that provides more control.
31
Page 32

Controlling External Sources
For VCR (or DVR) control
The list of VCR brands and VCR codes include selections for DVRs as well. By following the
instructions below, you can set the remote to control one or the other, but not both.
If you have both a VCR and a DVR, setting your remote to control the DVR will provide
more control options. Whether yours is a stand-alone DVR or is coupled with the VCR or
Cable/Satellite box makes no difference.
Note: For general guidelines on using the LIFESTYLE
adjustments” on page 40.
Follow the process below:
Turn on your VCR or DVR. Turn on the TV and be sure to select the Video Input on the TV for
the media center. Then, using the LIFESTYLE
and follow the steps below.
1. Identify the brand.
•From the
Remote Control
options in the System menu, select VCR Brand.
• Move right into the list of brands and up or down to locate your brand of VCR or DVR.
•Press
Français Español English
2. Choose a device code:
• In the menu options on the left, select
Enter
to select that brand.
VCR Device Code.
®
System menu, refer to “Making system
®
remote control, press the
VCR
source button
• Move right to select the first code.
•Press the
VCR On/Off
button on your LIFESTYLE® remote. Press this button again.
If the VCR or DVR* turns off and on again, you have chosen the right code.
If the VCR or DVR does not turn off and, select another code, and press the
VCR On/Off
button two more times.*
Enter
• When you have chosen the right code, press the
•Press the
System
or
Exit
button to leave the System menu.
When you complete these settings and select
VCR
as the source, you can now use the
button.
VCR On/Off
button and press Play, Pause, or Stop to control your VCR.
You can also use the
and
Repeat
buttons will allow you to skip backward or forward quickly.
Seek
buttons on the LIFESTYLE® remote. On some DVRs, pressing
Shuffle
For AUX control
If you have a component connected to the AUX input on your media center, you can set your
LIFESTYLE
If you do not have a component connected to AUX, you can still control another device by
selecting it from the list of AUX device choices: Changer, Satellite, Cable, DVR, TV or VCR.
To exercise this control, you must press the
Note: For general guidelines on using the LIFESTYLE
adjustments” on page 40.
®
remote to control it, although on and off control is not an option.
AUX
source button first.
®
System menu, refer to “Making system
32
Play,
*Some DVRs do not turn off or on, so you can use other remote buttons, like
to test for
control of that component. Also, some manufacturers use a number of similar device codes.
After selecting one, you may find you can turn your VCR or DVR on and off, but are unable to
change channels or select Play or Pause. In that case, select a different device code that provides more control.
Page 33

Controlling External Sources
Follow the process below:
Turn on your component. Turn on the TV and be sure to select the Video Input on the TV for
the media center. Then using the LIFESTYLE
continue:
1. Identify the device:
•From the
Remote Control
options in the System menu, select AUX Device.
®
remote control, press the
AUX
source button and
English FrançaisEspañol
• Move right and up or down in the list to select a component by pressing
2. Identify the brand:
• In the menu options on the left, select
• Move right and up or down in the alphabetical list to locate your brand.
•Press
Enter
3. Select the device code:
• From the menu options on the left, select
• Move right to select the first code.
• Press the Play or Channel/Track up button on the LIFESTYLE
– If the component responds, press other function buttons to make sure important
functions on the component also work.
– If the component does not respond, select a different code and try again.
• When you have chosen the best code for your component, press the
•Press the
Designating one video tuner
If you set the LIFESTYLE® remote to control several video components, you can choose one
of them as then primary channel selector. This allows your remote to change the channels on
your cable box, even when TV or VCR is the selected source. So you never need to switch to
CBL/SAT to change stations.
Note: For general guidelines on using the LIFESTYLE
adjustments” on page 40.
to select that brand.
System
or
Exit
button to leave the System menu.
AUX Brand.
AUX Device Code.
®
System menu, refer to “Making system
Enter.
®
remote control.
Enter
button.
Figure 11
Designating the TV as video
tuner
Make this selection from the
Remote Control
options in the System menu. In the TV Tuner list,
select one of your components. Then press the
Remote
IR Control:
TV Tuner:
TV Brand:
TV
VCR
Control
TV Device Code:
VCR Brand:
Choose the one you want to control.
navigate
select
System
or
Exit
button to move out of the menu.
33
Page 34

Changing Source Settings
Making adjustments to a particular source
While watching a video or listening to music on your system, you can make quick adjustments that will increase your enjoyment of the program. For example, you may want to hear
some or all of the system speakers playing, or boost the center channel volume slightly. For
this purpose, each audio source you use with this system has its own Settings menu, with
features appropriate to that source. For video sources, the TV Settings menu applies.
With a little experience, moving about and selecting options in the Settings menu for each
source becomes second nature. Just try it and see.
How to see your options
To see the settings, you must first select the source. Then, on the LIFESTYLE® remote control,
Settings
button to enter the menu.
SURROUND
CENTER CHANNEL:+4
Français Español English
Figure 12
Settings menu as it appears
on the media center display
press the
You can view the Settings menu for each source on your TV screen or, for audio sources only,
on the display panel of your media center.
If your source is the FM radio tuner, the setting options appear on the media center display
(Figure 12). The choices scroll into view as you press the down button on the remote.
>
Figure 13
Settings menu as it appears
on the TV screen, with
identifying tags
To see the Settings menu on the TV screen (Figure 13) as well, turn on the TV and select the
TV input for the media center. If the list of elements in a menu is longer than can be seen, a
small down or up arrow indicates where to move to see the others.
Title bar – Source
Menu Items –
Features of this source
Navigation cue –
Which buttons to use
Description –
What to do or expect
or AM
FM
Item name –
Feature defined
Center Channel
To soften the center-channel presentation, choose a
lower setting. To focus it, choose a higher setting.
+4
Selection box –
Option chosen
34
Note: When the Settings menu appears on the TV screen, any change you make to settings
will be visible there, as well as on the media center display.
Page 35

Changing Source Settings
How to change the settings
In the Settings menu on the media
center display or on the TV screen,
move around and make changes
by using the selection buttons shown.
On the display or the screen, the same actions apply:
• Press the left, right, up or down arrows to get to the option you want.
English FrançaisEspañol
Figure 14
Changing the number of
speakers playing
•Press
Enter
or the left arrow to confirm your selection and move back to the features column.
• Repeat those steps for each change you want to make.
•Press the
Exit
button on the remote control to leave the Settings menu.
The progression below shows how to change the number of speakers used in FM
(Figure 14 A, B & C).
A. The FM Settings menu first appears on the TV screen with 5 speakers as the default
setting.
B. Arrow buttons move right and up or down to change the number of speakers playing.
C.
Ente
r or left arrow confirms the new setting and moves back to the list of tuner attributes.
A.
B.
FMFM FM
C.
2-3-5 Speakers::2-3-5 Speakers:: 2-3-5 Speakers::
You can use the actions above to restore the original settings, too. Do this if you do not like
the effect of a change you have made, or accidentally made a change you did not intend.
The original (default) settings for each source are shown as the first option for each feature on
the pages that follow.
Note: You can restore all default settings by choosing
Restore Settings in the Systems menu,
under Media Center. This reverses all changes you have made in the Settings menu. Instead of
making this overall change, you can note the default setting listed on the pages that follow, then
re-select that setting in any of the sources.
35
Page 36
Changing Source Settings
Tuner setting options (FM or AM radio)
There are different settings menus for AM and FM. You can adjust the settings differently for
each. Two of the attributes below are available only when the tuner is set to FM.
Français Español English
CD setting options
FM
(or AM)
To get into the CD Settings menu, you must have a CD disc in the disc tray. Then select the
source.
Features
2-3-5 Speakers 5
Surround 0
Center Channel 0
Output Mode
(FM-only feature)
RDS Info
(FM-only feature
on some systems)
Sleep TImer Off
Default Setting;
Options
2, 3
-5 to +5
-5 to +5
Auto
Mono or Stereo
OffOnDisplays station and program information
10-90
Effect of this Setting
Determines the number of speakers playing.
Establishes relative surround sound volume.
Establishes relative center volume.
Sets channel distribution of radio signals.
(as available from Radio Data System).
Sets system to turn off when the selected
time elapses.
CD Features
2,3,5 Speakers 5
Surround 0
Center Channel 0
Time 0:00
Audio Track DTS
Sleep Timer Off
Default Setting;
Options Effect of this Setting
Determines the number of speakers playing.
2, 3
Establishes relative surround sound volume.
-5 to +5
Establishes relative center speaker volume.
-5 to +5
Displays elapsed time.
_:__
Advances or reverses the track to the new
time.
Plays audio tracks in the format specified.
Dolby Digital
Sets system to turn off when the selected
10-90
time elapses.
36
Page 37

Stored CD setting options
To get into the Stored CD Settings menu, you must have CD tracks stored in the system.
Select Stored as the source.
Changing Source Settings
English FrançaisEspañol
Stored
CD Features
uMusic Preset 1 (or last selected)
Play mode
(Indicator)
2-3-5 Speakers 5
Surround 0
Center Channel 0
Sleep Timer Off
Default Setting;
Options Effect of this Setting
Varies with selection of a different preset
1 through 9,
or names
uMusic
Library, Encore,
CD#, Playlist,
Whole CD,
Shuffle, Repeat
-5 to +5
-5 to +5
10-90
number, using the remote control.
Adjusts automatically as play mode or preset
selections change.
Not adjustable in the Settings menu.
Determines the number of speakers playing.
2, 3
Establishes relative surround sound volume.
Establishes relative center speaker volume.
Sets system to turn off when the selected
time elapses.
37
Page 38
Changing Source Settings
DVD setting options
To get into the DVD settings menu, you must have a DVD disc in the disc tray before you
select the source.
Three attributes (shown in italic type below) appear in the DVD menu only if you have set
Audio Processing to User Adjustable in the
Audio
options of the System menu.
DVD Features
2,3,5 Speakers 5
Surround 0
Center
Channel
Movie EQ On
Français Español English
Range
Compression
Mono
Decoding
Default Setting;
Options Effect of this Setting
2, 3
-5 to +5
-5 to +5
Off
On
Off
On
Off
Time 0:00
_:__
Title
_ of __
Determines the number of speakers playing.
Establishes relative surround sound volume.
0
Establishes relative center speaker volume.
Adjusts bass-to-treble relationship for proper
movie soundtrack reproduction.
Adjusts volume to maintain dialogue intelligibility. Keeps some sounds from overwhelming others.
Engages Videostage
to process mono programs (one-channel audio)
into 5-speaker sound.
Displays elapsed time.
Advances or reverses the film to the new time.
Advances or reverses the film to another section
of the DVD, according to the number set.
®
5 mono decoding circuitry
Chapter
___
Audio Track DTS
Dolby Digital
Subtitle
Language
Camera
Angle
A B Repeat
Sleep Timer Off
English
Other
1 of __ Determines the angle used for a movie scene
A, B
10-90
Advances or reverses the film to a new scene,
according to the number set.
Plays audio tracks in the format specified.
Determines the language used for DVD subtitles
(of the languages available on that disc).
(of the camera angles available on the disc).
Repeats a segment of the DVD after the start
and end points are defined. To begin:
4. Move backward or forward to the point in
the DVD where you want the segment to
start.
5. Press Enter.
6. Move to the point where you want it to end.
7. Press Enter.
Repeats until you press the
Sets system to turn off when the selected time
elapses.
Exit
or
Settings
button.
38
Page 39

TV setting options (for VCR, CBL-SAT, and AUX)
The settings below affect programs on the TV, even when the source of the program is VCR,
CBL/SAT or AUX. There are no separate settings menus for these sources.
Changing Source Settings
English FrançaisEspañol
Four attributes (shown in italic type below) appear in the TV menu only if you have set
Processing
TV Features
to User Adjustable in the
Default Setting;
2,3,5 speakers 5
Surround 0
Center Channel 0
Movie EQ On
Range
Compression
Mono Decoding On
Video
options of the System menu.
Options Effect of this Setting
2, 3
-5 to +5
-5 to +5
Off
On
Off
Off
Controls the number of speakers playing.
Soften or Focus the surround (rear) speakers
Soften or Focus the center speaker.
Adjusts bass-to-treble relationship for proper
movie soundtrack reproduction.
Adjusts volume to maintain intelligible
dialogue. Keeps some sounds from overwhelming others.
Engages Videostage
cuitry when the program is monaural. Processes mono TV shows and movies (one
channel programs) into five-speaker sound.
Mono decoding is off.
®
5 mono decoding cir-
Audio
Dolby Digital
1+1
Sleep Timer Off
2, Both
10-90
1
Plays audio content of selected soundtrack(s).
The content of the second soundtrack may be
a second language, for example.
Sets system to turn off when the selected time
elapses.
39
Page 40

Using System Menus
Making system adjustments
Adjustments to system properties are ones you typically make only once or not at all. If your
system operates as you want it to, there may be no need for any changes. In some cases,
however, changes are required to make the system fully compatible with the installation
options you have chosen. Making your remote control other components is one example.
How to see the System menu
The System menu appears on the TV screen only, not on the media center display. To see
the menu, you must have the TV turned on and the Video input on the TV set for the media
center.
Then, press the
selected, showing a preview of the audio features.
Note: Entering the System menu causes any DVD or VCD that is playing to pause.
System
button on the LIFESTYLE® remote control. The menu appears with
Audio
.
Figure 15
System menu and preview
of the audio feature
Français Español English
Categories – Elements of the system
Audio
Select Audio to adjust these system options:
Features – Submenus
under each category
Preview screen –
Inactive display
Navigation cue –
Which remote control buttons to use
Bass Compensation
Treble Compensation
Audio Processing
Input Levels
ADAPTiQ
Expansion Protocol
navigate
select
Guide – Action to take
How to make changes
Making system adjustments in this menu is similar to changing the settings for a source.
• Move around and make choices by using the selection buttons shown:
40
• Move right across the categories to see the preview of the features.
• Press the down arrow or
Enter
button to select
Audio
for changes.
Note: When you move into the features display, it changes from preview to an active screen with
a slightly different appearance.
• Press the left, right, up or down arrows to get to the option you want.
•Press
Enter
or the left arrow button to confirm your selection and move back to the features
column.
• Repeat those steps for each change you want to make.
•Press
Exit
to leave the Settings menu.
Page 41

Stored CD data options
Press the
Stored CD features. Press the down button to move into an active display of submenus.
Note: This choice is available from the System menu only when music from at least one CD has
been stored in the system. For information on storing your music, refer to “Getting your music
into the system” on page 8.
Figure 16
Stored CD preview
Stored
CD
Select Stored CD to adjust these system options:
CD #
CD Action
CD Playback
Genre
Album
Track
Track Action
Using System Menus
System
button on the LIFESTYLE® remote control. Move right to see a preview of
English FrançaisEspañol
navigate
select
Active display items shown in light italic type, below left, do not appear in every menu.
Active Display
Item
CD#
Number 1 or selected CD number Shows the settings for the CD with that number in the system.
Default Settings;
Options Effect of this Setting
Indicator only
CD Action Reload CD information
Delete CD
CD Playback Automatic
Link all tracks
Don’t link all tracks
Genre Rock/Pop, Classical, Jazz,
Electronica, World, Latin, Country,
Rap, Vocal Music,
Gospel/Religious, Blues,
Soundtrack, Folk/Bluegrass,
New Age, Reggae, Easy Listening,
Children, Spoken/Comedy,
Holiday, Other, Unlabeled
Changes when the CD selection changes; cannot be edited.
Replaces user edits with database information.
Requires confirmation. Then removes all information related to
this CD and displays information for another CD#.
Tracks play in order, randomly, or individually, as determined by
the style of play selected (e.g., Shuffle, uMusic, Whole CD).
Tracks play together and in order only.
Tracks do not always play in order and together.
Identifies the type of music on the CD.
Reclassifies the CD for the type of music genre selected.
Album no default; specific to the CD Selection of this item brings up an editing screen.
Artist no default; specific to the CD Selection of this item brings up an editing screen.
41
Page 42

Using System Menus
File Artist As no default; specific to the CD Selection of this item brings up an editing screen.
Editing will overwrite artist data.
May reflect any edits made to artist.
Tra ck no default; specific to the CD Selection of this item brings up an editing screen.
May require pressing
Enter
to see the options.
Track Action Edit
Using the Edit Screen
To see the Edit Screen, select one of the Active Display Items this allows editing. Album is the
first such item in the list above. Press the
Figure 17
Edit Screen as it first
appears
Français Español English
Text line
Other
character
screens
Selection of this item brings up an editing screen.
Delete Track
Requires confirmation. Then removes all information related to
this track.
Enter
button to make that selection.
special
Erase
Select “Erase” to remove a mistake.
Select “Done” when you are finished.
navigate
select
Space
Shift
Done
Exit/Done
Alphabetic
screen
How to change the text
The Edit Screen enables you to alter or replace the music database text
provided by the system. This text appears at the top of the screen.
You do not need to move into the text line to make changes. Instead, you
can add to it or enter new text by selecting characters from the alphabetic,
numeric, or special character tables (Levels 1, 2 or 3 available at the left of
the screen). Use the remote control up, down, left and right arrows to get to
a character and the
character selected appears in the text line. When you are finished, move to the Done box at
the top right and press
Enter
button to select it. Each time you press
Enter
to leave the Edit Screen or the
Enter
the new
Exit
button on the LIFESTYLE
®
remote control to leave the System menu.
To eliminate existing letters from the text line:
Letters disappear beginning at the far right and progressing to the left.
1. Move down to the Erase bar.
2. Press
3. Press
Enter
to erase the last letter in the text line.
Enter
as often as needed to remove additional characters in that line.
*The Off option for ADAPTiQ system is not a reversible selection.
42
Page 43

Using System Menus
To enter new text or add to existing text:
Letters appear to the right of existing text.
1. Move to a character and press
2. Move to the next character and press
To place a space between words:
Spaces appear to the right of the last character in the text line.
Enter
.
Enter
.
English FrançaisEspañol
1. Move to Space bar and press
2. Move to a character and press
To capitalize a letter:
The first letter of a new line of text is automatically capitalized.
1. Before typing the character, move to the Shift bar and press
2. Move to the character and press
3. Move back to the Shift bar and press
capitalize.
To enter a number or symbol:
1. Move to the number 2 at the left of the screen and press
2. Select the number(s) you want in the same way you select characters.
3. Move to the number 1 at the left of the screen and press
table.
To enter a non-English special character:
1. Move to the number 3 at the left of the screen and press
2. Select the special character(s) you want in the same way you select other characters.
3. Move to the number 1 at the left of the screen and press Enter to return to the alphabet
table.
To save the text:
1. Move to the Done bar at the top right of the screen.
Enter
2. Press
altogether, press the
to confirm completion and leave the Edit Screen. Or, to leave the System menu
Exit
button on the LIFESTYLE® remote control.
Enter
.
Enter
to begin the next word.
Enter
.
Enter
before selecting a letter you do not want to
Enter
.
Enter
.
Enter
to return to the alphabet
Enter
.
To undo all edits you’ve made:
To undo changes you have made to information about a CD, select
System menu. You can replace your changes with the original database information by
selecting
Reload CD information.
CD Action from the
43
Page 44

Using System Menus
Audio options
Figure 18
Audio preview
Français Español English
Active Display Item
Press the
System
button on the LIFESTYLE® remote control. Move right to see a preview of
audio features. Press the down button to move into an active display of submenus.
Audio
Select Audio to adjust these system options.
Bass Compensation
Treble Compensation
Audio Processing
Input Levels
ADAPTiQ
Expansion Protocol
navigate
select
Note: Listening to an audio source while you make these adjustments can be helpful. Some
changes will be immediately noticeable and therefore useful in fine tuning your selections.
Default Settings;
Options
Effect of this Setting
Bass Compensation 0
-14 to +14
(-9 to +6)
Treble Com pensa tion 0
-14 to +14:
(-9 to +6)
Audio Processing
(Movie EQ, Range Compression,
Automatic
User Adjustable
Mono Decoding)
TV Analog Input Level
TV Digital Input Level
Normal
-6, -3, +3, +6
VCR Analog Input Level
VCR Digital Input Level
CBL/SAT Analog Input Level
CBL/SAT Digital Input Level
AUX Analog Input Level
AUX Digital Input Level
Normal low-frequency reproduction
Decreased (-) or increased (+) low-frequency reproduction
Range available following ADAPTiQ® system calibration.
Normal high-frequency reproduction
Decreased (–) or increased (+) high-frequency reproduction
Range available following ADAPTiQ system calibration.
Standard Bose® processing applied
Processing options available in Source Settings menus
Standard signal level (loudness)
Decreases or increases signal level
(adjustable to match the levels of other components).
Note: You may want to adjust the inputs of external components
so they match the system’s internal FM and CD levels.
44
Page 45

Using System Menus
Default Settings;
Active Display Item
Options
ADAPTiQ Off
On
Erase
Expansion protocol
Change this only if instructed in
the owner’s guide supplied with
your Bose
®
link remote control.
Bose link
Legacy
Elimination of ADAPTiQ system adjustments is not reversible. Restoring those adjustment
requires re-use of the Setup disc 2 and the ADAPTiQ headset supplied with the system.
For information on how to use this process, refer to “Finishing the installation” in your
LIFESTYLE
®
Installation Guide.
This advanced feature of the LIFESTYLE
processing to compensate for the furnishings, speaker placement, and listening positions to
provide the most ideal sound in your room.
Effect of this Setting
No ADAPTiQ
®
audio calibration performed.
Uses ADAPTiQ system adjustments established using Disc 2.
Eliminates the ADAPTiQ system adjustments when this
selection is followed, within 5 seconds, by a press of the Erase
button on the media center controls.
Communicates only with Bose
®
link networked products*.
Communicates only with a Bose SA-1 amplifier.
®
system makes adjustments to the audio
English FrançaisEspañol
*This network can accommodate some older (non-Bose® link) products, such as the Wave
radio and Acoustic Wave
with newer Bose
®
link products.
®
music system, but with more limited functionality provided than
®
45
Page 46

Using System Menus
Video options
Press the
System
video features. Press the down button to move into an active display of submenus.
Figure 19
Video preview
TV Power
TV Power Status
TV Aspect Ratio
Widescreen DVDs
navigate
Français Español English
Default Settings;
Active Display Item
Options Effect of this Setting
TV Power Automatic
button on the LIFESTYLE® remote control. Move right to see a preview of
Important Note:
DO NOT change settings for Com-
Video
ponent video or Progressive scan
in the System menu. Doing so can
cause your TV screen to go blank,
Video Connector
Video Black Level
Video Format
Progressive Scan
making completion of the process
difficult.
Instead refer to “Component video
or progressive scan: activating
your selection” on page 16.
select
TV turns on automatically when a video source is selected.*
Manual
TV does not come on automatically.
Euro
TV responds to SCART connector input.
TV Power Status
(not a setting)
TV Not Detected
TV On
TV Aspect Ratio Normal
Widescreen
Widescreen DVDs Modified
Unmodified
Video Connector
(See Important Note above.)
Composite, S-VIDEO
Component
Video Black Level Normal
Extended
Video Format NTSC
PAL
Progressive Scan
OffOnScreen image repaints in standard style.
(See Important Note above.)
Note: For information on using the TV sensor, refer to “Installing the TV on/off sensor” in your
Install Guide.
Indicates: TV Sensor not installed or not positioned correctly.
Indicates: TV Sensor installed and functioning properly.
4:3 ratio screen display.
16:9 ratio widescreen display.
DVD video reformats, as needed, to fit a 4:3 TV screen.
DVD video does not reformat automatically.
System works with composite and/or S-video TV connection.
System works with component TV connection.
Screen black level generally appropriate for TVs.
Reduces screen black level, appropriate for certain TVs.
Correct for NTSC (U.S. standard) monitors.
Correct for PAL (European standard) monitors.
Screen image repaints in advanced style (must be supported by
the TV).
46
*The TV sensor must be installed and positioned to detect if the TV is on or off.
Page 47

Media center options
Press the
media center features. Press the down button to move into an active display of submenus.
Figure 20
Media Center preview
Select Media Center to adjust these system options
System
button on the LIFESTYLE® remote control. Move right to see a preview of
Display Brightness
Display Language
Optical Source
Digital Audio Output
Tuner Spacing
uMusic Preset
Preset Action
Restore Settings
Media
Center
Using System Menus
English FrançaisEspañol
navigate
select
Default Settings;
Active Display Item
Display Brightness 4
Display Language English
Options Effect of this Setting
Media center display lights with a mid-range brightness.
1 to 4
Darkens or lightens the media center display (4 = brightest).
On-screen display menus appear in the selected language.
Dansk, Deutsch,
Espanol, Francais,
Italiano, Nederlands,
Svenska
Optical Source None
TV, VCR, CBL/SAT, AUX
Digital Audio Format Original
No digital signal received via optical cable.
Digital signal received via optical cable for selected source.
No processing applied for signals sent to rear panel digital audio
jacks.
PCM
Increases digital audio compatibility with other devices.
Tuner Spacing U.S., European Channel spacing for AM/FM radio stations set to selected region
standard.
uMusic Preset 1
Selected preset.
2, 3, 4, 5, 6, 7, 8, 9
Preset Action Edit name
Clear Playlist
Clear ratings
Restore Settings No
Ye s
Selection of this item brings up an editing screen for naming or
renaming preset selected in the option above.
Removes all track selections from the system playlist.
Removes all stored ratings associated with the preset selected in
the option above.
User settings, if any, modify system operation.
Overwrites user settings and adjustments with the original settings
established at the factory.
47
Page 48

Using System Menus
Remote control options
Press the
remote control. Press the down button to move into an active display of submenus.
Figure 21
Remote Control preview
Select Remote Control to adjust these system options
IR Control
TV Tuner
TV Brand
TV Device Code
VCR Brand
VCR Device Code
Français Español English
Default Settings;
Active Display Item
Options Effect of this Setting
IR Control Off
System
navigate
button on the LIFESTYLE® remote control. Move right to see a preview of
Remote
Control
CBL/SAT Device
CBL/SAT Brand
CBL/SAT Device Code
AUX Device
AUX Brand
AUX Device Code
select
System does not allow IR control by another remote or does not teach IR
commands to a learning remote.
Teach
System sends out IR commands, in response to the LIFESTYLE
buttons pressed, to teach another remote to operate the system.
System receives IR commands from another remote that has been taught
to operate the system.
On
®
remote
TV Tuner CBL/SAT
Selected device serves as channel tuner for TV and other video devices.
TV, VCR
TV Brand Brand name Identifies the TV brand for the LIFESTYLE
®
remote control to operate.
TV Device Code Code number Identifies the IR code for the system to send to the TV.
VCR Brand Brand name Identifies the VCR or DVR brand for the remote.
VCR Device Code Code number Identifies the IR code for the system to send to the VCR.
CBL/SAT Device Cable
Satellite
Identifies which of two tuning devices for the LIFESTYLE
to operate.
®
remote control
CBL/SAT Brand Brand name Identifies the cable or satellite box brand for the remote control.
CBL/SAT Device Code Code number Identifies the IR code for the system to send to the cable or satellite box.
AUX Device Changer
Satellite, Cable,
Identifies which type of device for the LIFESTYLE
when AUX is selected as the source.
®
remote to operate,
DVR, TV, VCR
AUX Brand Brand name Identifies the AUX device brand for the
remote.
AUX Device Code Code number Identifies the IR code for the system to send to the AUX device.
48
Page 49
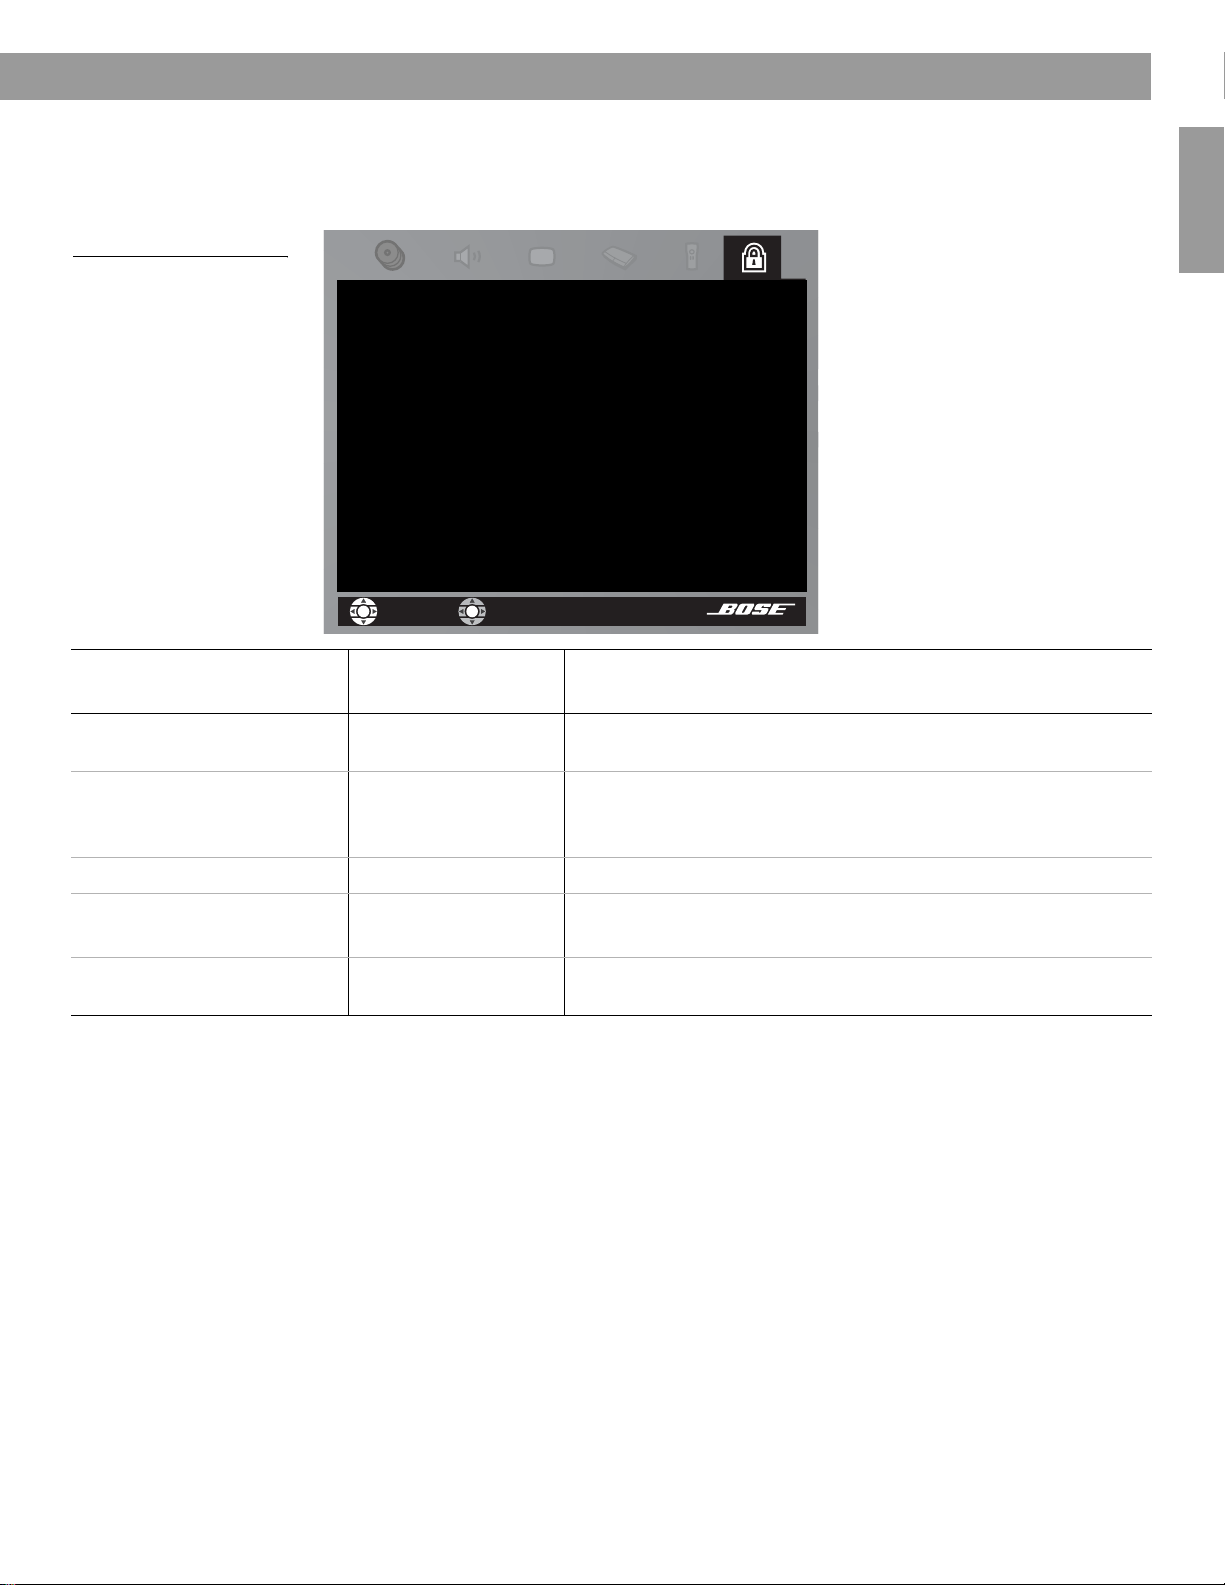
DVD lock options
Figure 22
DVD Lock Menu
Using System Menus
Press the
Lock features. Press the down button to move into an active display of submenus.
System
button on the LIFESTYLE® remote control. Move right to see a preview of DVD
Select DVD Lock to adjust these system options.
Create/Change Password
Confirm Password
Lock Unrated Discs
Lock Discs Rated Above
DVD
Lock
English FrançaisEspañol
navigate
select
Default Setting;
Active Display Item
Options
Effect of this Setting
Change Password _ _ _ _ Establishes a new four-number code to restrict access to movies
with certain ratings.
Create Password
(appears only if no
_ _ _ _ Establishes a four-number code to restrict access to movies with
certain ratings.
password has been set)
Confirm Password _ _ _ _ Re-enter the four-number password.
Lock Unrated Discs OffOnNo restriction applies to unrated DVD movies.
Restricts viewing access to unrated titles when password is set.
Lock Discs Rated Above 1 to 8 Prevents viewing of discs above the selected number when a
password is created.
Applying parental control
The parental control feature of the LIFESTYLE® system lets you restrict viewing of DVD videos
with certain ratings. To activate this feature, you need to set a level of restriction and establish
a password in the DVD Lock section of the System menu.
Your password will prevent unauthorized viewing of DVD videos that have a higher rating than
your restriction level. There are 8 levels to choose from, matched to movie ratings set by the
Motion Picture Association of America (MPAA), on the next page.
49
Page 50

Using System Menus
Parental
Control
Setting
8None
7 NC-17 Adult audiences
6 R Mature audiences
5 Mature teenage audiences
4 PG-13 Teenage audiences
3 PG Mature young audiences
2 Most audiences
1 G General
For example, by choosing a Parental Control Setting of 4, you restrict access to videos
rated above PG-13. Videos with ratings above that may be viewed only after entering the
Français Español English
password.
Your password also prevents others from changing the parental control setting without
permission.
MPAA
Rating
Audience
Restriction
To set the restriction level and passwords
With the TV turned on, select the proper TV video input for the media center.
Press the
System
button on the LIFESTYLE® remote control.
When the System menu appears on the TV screen:
1. Move right to
2. Press the Down arrow or
DVD Lock
for a preview of the selections (Figure 22 on page 49).
Enter
or button to move into an active display of submenus,
which looks different from the preview screen.
3. Use the number buttons on your LIFESTYLE
®
remote to enter four digits into the pass-
word blanks.
Enter
4. Press
5. Enter the same four digits in the new blanks and press
6. Select
7. Move right
8. Press
to register your choice.
Enter
to register them.
Lock Discs Rated Above.
and up or down to select the restriction level you want.
Enter
or the left arrow to confirm your selection and move out of the selection list.
50
Page 51
Reference
Remote control care
Changing the batteries as needed is the only regular maintenance required. However, the
switches inside the remote battery case may be changed as needed, too. Additional remotes
for use in other rooms may need their switches changed, too. For that, refer to “Bose
remote switch settings” on page 53.
Replacing the remote control batteries
Replace all four batteries when the remote control stops operating or its range seems
reduced. Alkaline batteries are recommended.
1. Slide open the battery compartment on the back of the remote (Figure 23).
2. Insert four AAA or IEC-LR3 1.5V batteries, or the equivalent, as shown. Match the + and
3. Slide the battery compartment cover back into place.
Figure 23
Installing the remote
control batteries
– symbols on the batteries with the + and – markings inside the compartment.
AAA batteries (4)
+
+
+
+
®
link
English FrançaisEspañol
Battery
compartment
Battery
compartment
cover
Changing house code settings
Each LIFESTYLE® remote control uses a house code that corresponds to the house code set
in the media center, enabling the two to communicate. If another LIFESTYLE
creates a conflict with your system, you can easily set a new house code in your media center
and its remote control(s) with steps that follow.
Using the remote control:
1. Open the remote control battery cover and locate the miniature switches (Figure 24 on
page 52).
2. Move one or more of switches 1, 2, 3, or 4 in the opposite direction from its current
setting. Use a paper clip, ball point pen, or similar object.
Note: DO NOT change any other switch settings. Moving other switches may disable your
remote control.
3. Replace the battery cover.
®
system nearby
51
Page 52

Reference
123456789
Français Español English
Figure 24
Miniature house code
switches on the Main room
(A) remote
Using the media center:
1. Lift the media center door and press the All Off button.
2. Press and hold the Enter button. Your current house code will appear in the media center
display window in the form of four rectangles, which represent the positions of switches
1 through 4:
HOUSE CODE:
Switches 1-4 down = 0 0 0 0 (current house code)
3. While holding the Enter button, press any button on the remote control.
The media center displays the new house code, which confirms its recognition of the
new code:
NEW HOUSE CODE:
(Switch 1 up, 2 down, 3 up, and 4 down = 1 0 1 0 (new house code)
4. Release the Enter button. The system remains off.
5. If you have additional remote controls, change the switches to match those of the first
remote control by following steps 1-3 above. You do not need to repeat steps 4-8.
Note: To verify your system’s house code, press Enter while the system is off. The display confirms the settings of switches 1-4.
Switches (1-4)
As set at the factory:
all switches down.
Other switches
Switch 5 determines what “stream”
or program you hear.
For more information on streams,
refer to the next section on this
page.
Switches 6-9 represent the room
where the remote will be used.
In the main room, the remote is set
as Room A with all switches down.
For a Bose
®
link remote
in another room
123456789
Setting up a second room with sound
Your LIFESTYLE® DVD home entertainment system can direct sound to more than one room
at the same time. What’s more, it can even direct sound from two different sound sources
(such as CD, AM/FM tuner, TAPE, or AUX) to these rooms through two independent
“streams.”
In other rooms with speakers (beyond the main room where the media center is located), you
can choose either of two sources, for true independence. If the system is on in the main
room, listeners in other rooms can enjoy the same program playing there or an entirely
different program.
Capable of supplying up to 14 additional rooms with Bose sound, one LIFESTYLE
can fill your entire living space with music.
Switches 1-4 need to match those
switch settings in your main remote.
Set switches 5-9 for the room where
you will use the Bose
®
link remote.
®
system
52
Page 53
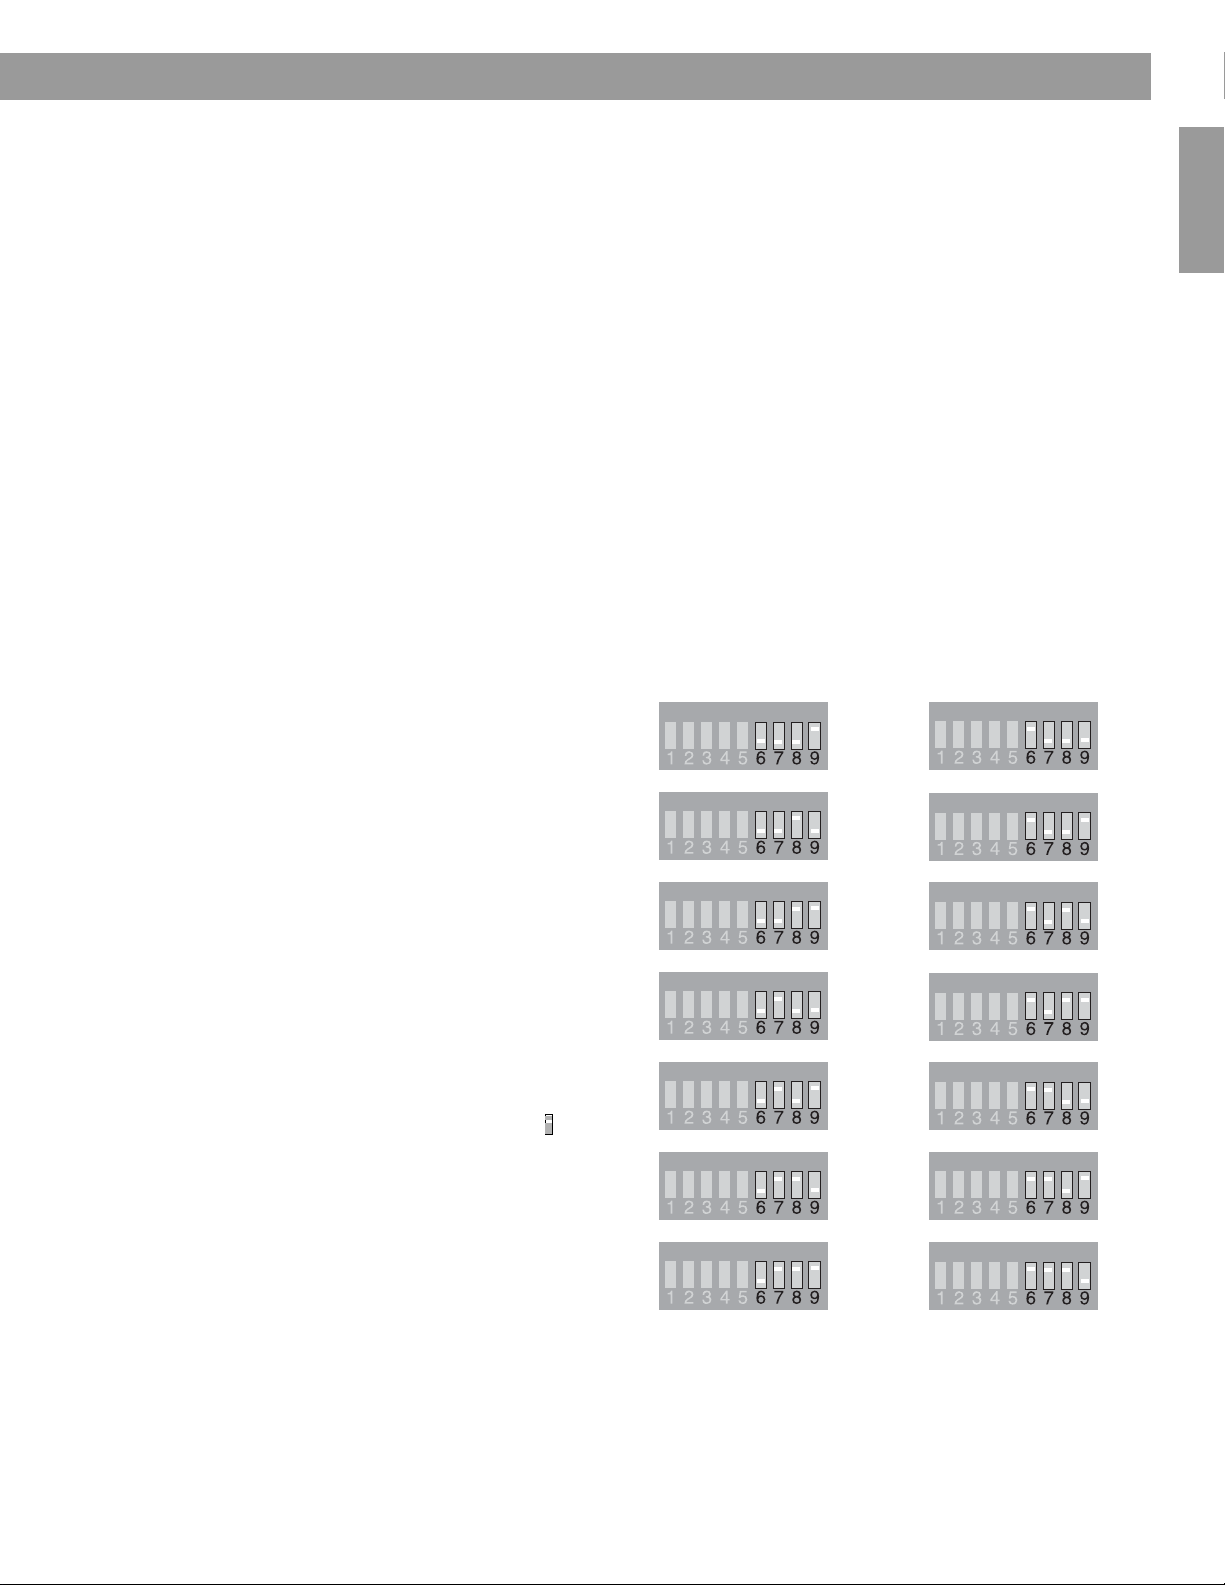
Reference
Bose® link compatible products simplify your decisions
As an option to provide sound throughout your home (or even outdoors), the Bose® link network connects all the pieces and offers a variety of Bose products of consistent quality for
use in other rooms.
These include: Bose Wave
and unpowered speakers for indoors or out. It also offers amplifiers of different power ratings,
plus the proper cables and adapters to complete your sound system. And by purchasing
a Bose
®
link remote control for each additional room, managing your whole-house music
system becomes quick and easy. Inside these remotes, one small switch allows you to
predetermine which rooms, as a group, will share the main room program stream and which
other room or group of rooms will hear the alternate stream.
For more versatility, you may prefer using a PERSONAL
your other rooms. Besides providing the ability to switch between program streams without
setting switches, this advanced remote provides an LCD screen that shows you what is
playing on both streams. So it is very easy to change from one to the other, whenever
you like.
A Bose
®
link symbol on the cartons (for the products mentioned above) helps simplify your
selections. Regardless of which you choose, the Bose
detailed instructions for using these products with the system.
For more information on your options, or to purchase additional equipment, contact your
local Bose dealer. Or, to reach Bose directly, refer to the address list included with
your system.
®
Bose
link remote switch
settings
These settings are for use only with
remote controls that have switches
inside the battery compartment.*
Make sure the house code
switches
(1, 2, 3, and 4) match those on your
main remote.
For switch 5, determine if you want
the room grouped with the main
room (A), so it receives the same
program heard there.
• If you do not change switch 5,
the room will receive the same
program stream as is heard in the
main room (A).
• If you set switch 5 up ( ), the
room will receive a different
stream than the main room (A).
®
radio/CD Series II or 3•2•1 Series II systems, powered speakers,
®
music center II remote control in
®
link remote control also provides
ON
Room
ON
Room
B
ON
ON
C
ON
ON
D
ON
ON
E
ON
ON
F
ON
ON
G
I
J
K
L
M
N
English FrançaisEspañol
ON
H
ON
O
*For Bose® link remotes that do not have switches 5-9 in the battery compartment, room settings are made in the Settings menu on the remote display screen.
53
Page 54
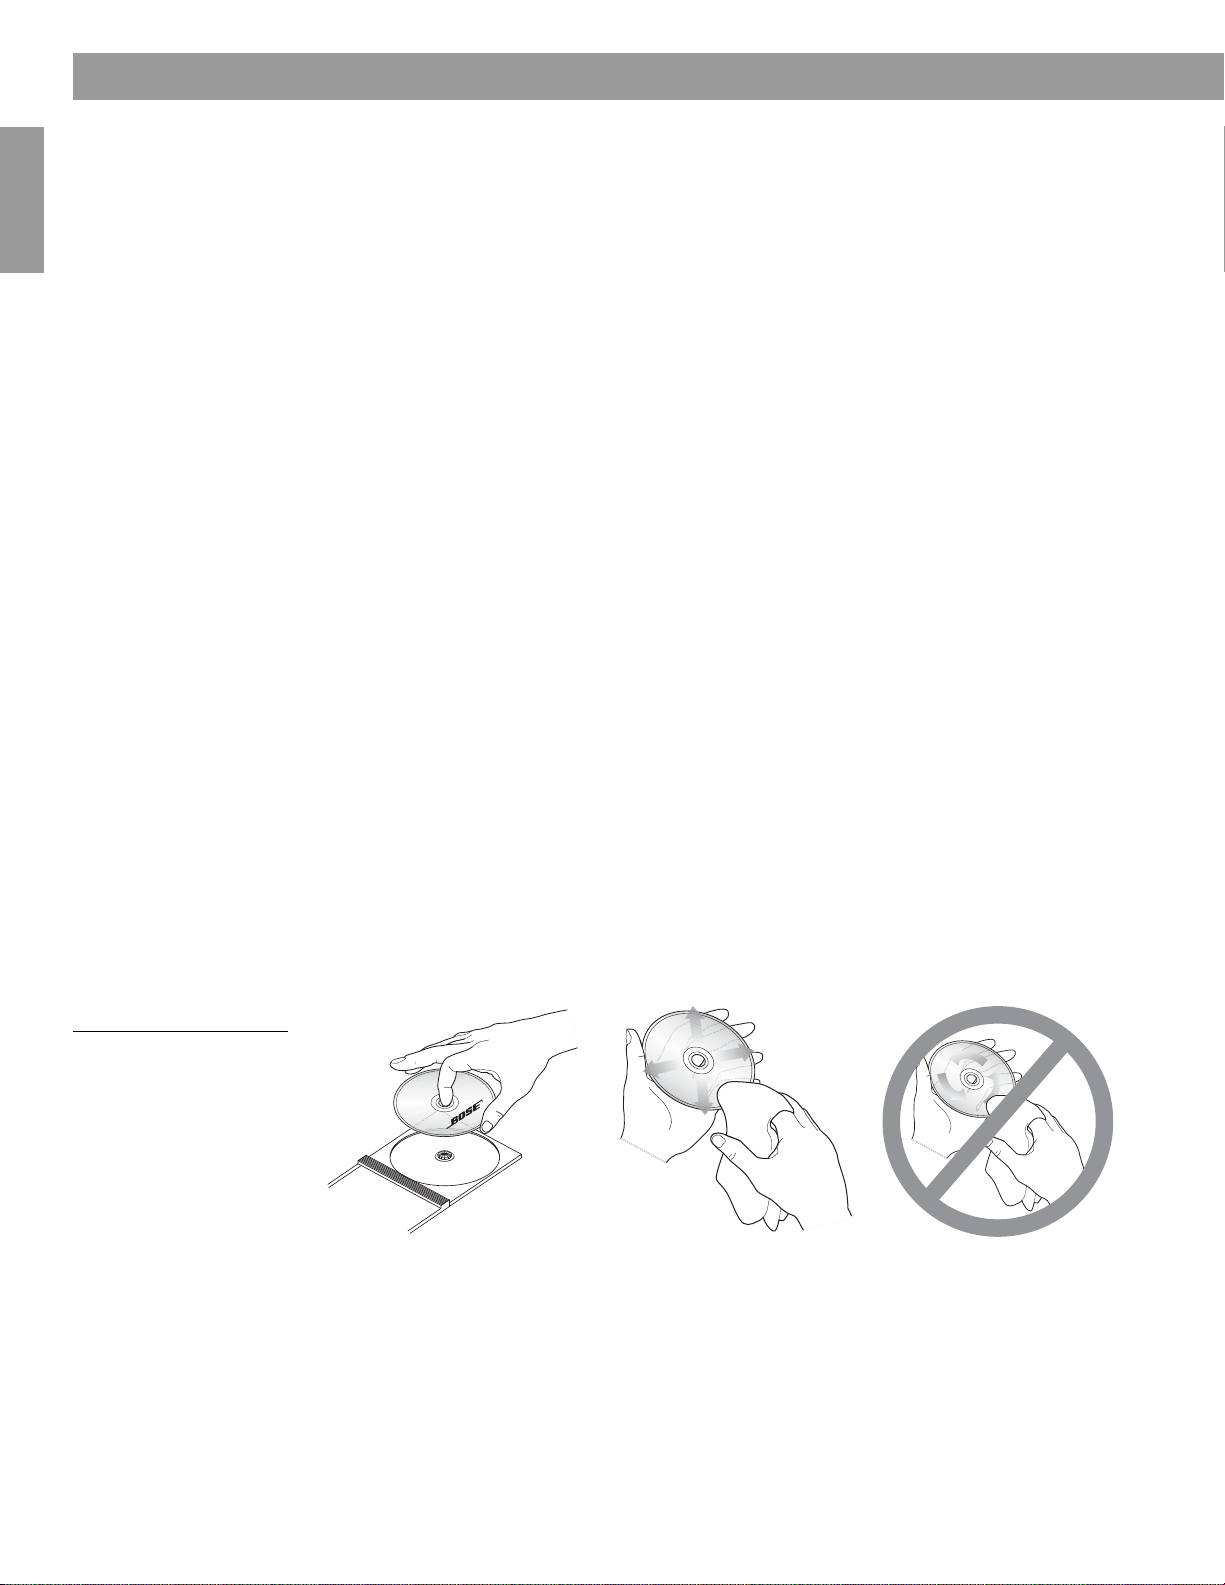
Reference
Taking care of your LIFESTYLE® system
Caring for your system may include:
• Cleaning the system’s enclosures
• Cleaning your compact discs and DVDs
• Replacing the remote control batteries (for instructions, refer to the Installation Guide)
Cleaning the media center
• Use only a soft, dry cloth to clean the outside of the media center.
• Do not use any solvents, chemicals, or cleaning solutions containing alcohol, ammonia, or
abrasives.
• Do not allow liquids to spill into any openings.
• Do not use any sprays near the system.
Cleaning the speakers
• Clean the surface of your speakers with a soft, damp cloth. You can use an ammonia-free
Français Español English
window cleaner on a soft cloth to maintain the finish.
• Do not use any sprays near the system. Do not use any solvents, chemicals, or cleaning
solutions containing alcohol, ammonia, or abrasives.
• Do not allow liquids to spill into any openings.
Figure 25
Handling and cleaning a
disc
• The speaker grille panels require no special care, although you may vacuum them carefully,
if necessary.
Cleaning discs
• Handle discs by their edges to prevent fingerprints and scratches (Figure 25).
• To remove stains or fingerprints from the surface of a disc, use a soft, lint-free, dry cloth.
Wipe in straight movements from the center of the disc to the outside. Do not use any
chemical products; they can damage the disc.
• Do not write on or attach labels to the surface of the disc.
• To minimize exposure to dust and dirt, replace discs in their cases after use. Store each
disc in its case, out of direct sunlight, high temperatures, and humidity.
54
Page 55

Troubleshooting
Problem What to do
Reference
English FrançaisEspañol
System doesn’t
do anything
• Make sure the power connector is inserted securely into the media center, the power cord
is inserted securely into the Acoustimass
are fully plugged into operating AC wall outlets.
• Be sure to press a source button (CD/DVD, AM/FM, etc.) on the LIFESTYLE
remote control.
• Unplug the media center power supply for 60 seconds, then reconnect it.
This allows the unit to reset itself after a power surge or power interruption.
No sound • Increase the volume.
• Check to see if MUTE is lit on the display. If it is, press the
to unmute the sound.
• Make sure that the power switch on the Acoustimass module is set to ON (I).
• Make sure that the audio input cable:
- connector is firmly seated in the media center Main Speaker jack
- multi-pin connector at the other end is firmly seated in the Acoustimass module
AUDIO INPUT jack.
• Check connections between the cube speakers and the module.
• Turn the media center off for 60 seconds, then on again,
to restore communication between the media center and the speakers.
• Check the connections for any external components. Make sure that you have pressed
the correct remote button for the source you want to hear.
• For CD or DVD play, be sure the disc is placed correctly, label-side up, in the disc tray.
• Connect the FM and AM antennas.
No sound from
center speaker
• Make sure the center speaker cable is connected at both ends.
• Select 3- or 5-speaker mode.
®
module, and the power pack and power cord
®
Mute
button on the remote control
Too mu ch so un d
from center speaker
No sound
from surround speakers
Surround speakers
are too loud
Storing tracks of a CD
takes much longer than
it should
Remote control
behaves erratically
or it does not work
System turns on by itself,
or behaves erratically
• Decrease the Center Channel setting.
• Select 5-speaker mode.
• Increase the Surround setting for the source being played.
• Make sure the video sound source is stereo and surround-encoded,
and the component used (TV, VCR, DVR, etc.) is stereo.
• Decrease the Surround setting for the source being played.
• Make sure that the left and right front speakers are connected to the front speaker jacks
(blue) and the left and right surround speakers are connected to the surround speaker
jacks (orange).
• Remove the CD and check for scratches, which may slow the process or make it impossi-
ble to store all tracks.
• Or, if the CD needs cleaning, refer to “Cleaning discs” on page 54.
• Check batteries and their polarity (+ and –).
• Move the remote (or the media center) a few feet to avoid an area of “dead spots”.
• Make sure the power cable between the media center and its power source is firmly
seated, uncoiled, and extended to its full length.
• Make sure the remote control and media center house codes match.
• Install a remote control extender.
• Change the house code setting to prevent signals from conflicting with another nearby
LIFESTYLE
®
system.
55
Page 56

Reference
Problem What to do
Radio does not work • Make sure antennas are connected properly.
• Move AM antenna at least 20 inches (50 cm) from the media center.
• Adjust antenna position to improve reception.
• Make sure the AM antenna is in an upright position.
• Move antennas farther from media center, TV, or other electronic equipment.
• Select another station. You may be in an area of weak signal coverage for some stations.
The disc does not play • After pressing the CD/DVD button, wait a few seconds before pressing Play.
• Make sure the disc is properly inserted (label side up).
• Eject the disc and try loading it again.
• The CD may be dirty. See “Cleaning discs” on page 54.
• Try another CD. The CD may be defective or not compatible. See “What discs you can
play” on page 5.
FM sound is distorted • Adjust antenna position to reduce interference.
FM sound is noisy
in surround mode
Français Español English
• Weak FM stations may produce static in the surround speakers. Select the 2-speaker
mode in the Settings menu to minimize noise. See “Tuner setting options (FM or AM
radio)” on page 36.
Sound is distorted • Make sure speaker cables are not damaged and the connections are secure.
• Reduce the output level from any external components connected to the media center.
No sound from
TV or CD/DVD or VCR
or AUX
LIFESTYLE
®
remote
does not control
your TV, VCR,
cable/satellite box,
or other external
component
You r T V t ur n s
on and off unexpectedly
• Check the connections.
• Make sure that component is turned on.
• Refer to the component owner’s manual.
• Make sure correct codes are set. See “For TV control” on page 28.
• Make sure that the front of the media center is not obstructed.
The IR emitter that sends commands to your external components is below the controls.
• If you still cannot control your external components successfully, you may need to connect
the external IR emitter, included with your system, to the IR EMITTER jack on the rear
panel of the media center. See “Connecting the optional IR emitter cable” in your
LIFESTYLE
®
system
Installation Guide
.
• Reposition the TV on/off sensor on the back of your TV. Or check the SCART connector if
you use one.
• Verify that the TV on/off sensor is working properly by choosing
Video in the System menu.
TV screen goes dark
or image flips repeatedly
after making a change
to a Video feature in
System settings
• Use the media center to check the Video Format and Progressive Scan settings, following
instructions in “Component video or progressive scan: activating your selection” on
page 16.
- Video Format should be set to NTSC (US standard) or PAL (European standard).
- Make sure the Progressive Scan setting is Off, unless you have used a component
video connection and progressive scan is a feature of the TV.
TV Power Status under
Scrolling information on
Media center display is
unwanted
The system will not
respond, and BOSE
LIFESTYLE appears on
the media center display
You forgot
your password
56
• Press and hold the Info button on the remote until the scrolling information disappears.
• Press and hold again to make it reappear.
• Turn the system off and then on again.
• Unplug the system and wait for 30 seconds.
• If neither of these actions restores system operation, contact Bose customer service.
Refer to the address list provided in the carton.
• Enter the numbers 2673 as temporary password to access the parental controls. Then
create a new password.
Page 57

Contacting customer service
For additional help in solving problems, contact Bose® customer service. See the address
and phone number list included with your system.
Limited warranty
Your LIFESTYLE® home theater system is covered by a transferable limited warranty.
See your product registration card for details. Please be sure to fill out the information section
on the card and mail it to Bose.
Technical information
Media center power pack power rating
USA/Canada: 120V 0.55A 50/60 Hz 33VDC 1.1A
International: 220-240V 0.30A 50/60 Hz 33VDC 1.1A
Dual voltage: 115/230V 0.55A 50/60 Hz 33VDC 1.1A
Speaker system power rating
USA/Canada: 100-120V 50/60 Hz 350W
International: 220-240V 50/60 Hz 350W
Dual voltage: 100-120/220-240V 50/60 Hz 350W
Media center inputs
AUX: 2Vrms, maximum
CBL-SAT: 2Vrms, maximum
VCR: 2Vrms, maximum
TV: 2Vrms, maximum
DIGITAL: SPDIF (1 each for TV, VCR, TAPE, and AUX)
COMPOSITE VIDEO: NTSC or PAL format 1V
S-VIDEO: Luminance 1V
Component video: NTSC or PAL 1V
OPTICAL INPUT: SPDIF digital, mapped to input
FM antenna: 75 Ω
AM antenna: 12µH
TV SENSOR: Scan frequency sensing
Media center outputs
SPEAKER ZONES 1 and 2: Variable audio, user selectable
AUDIO OUT: L and R: Fixed audio, 2 Vrms maximum
DIGITAL AUDIO OUT: SPDIF
OPTICAL OUTPUT: SPDIF, –15 to –21 dbm
COMPOSITE VIDEO: NTSC or PAL 1V
S-VIDEO: Luminance 1V
Component video: NTSC or PAL 1V
Media center dimensions
15.8"W x 11.0"D x 3.5"H
(40.1 cm x 27.9 cm x 8.9 cm)
Chrominance 0.3V
p-p
with sync on Y
p-p
p-p
Chrominance 0.3V
p-p
with sync on Y
p-p
with sync 75 Ω
p-p
p-p
with sync 75 Ω
p-p
Reference
English FrançaisEspañol
Media center weight
8.2 lb (3.7 kg)
Media center finish
Aluminum
Remote control range
65 ft (20 m)
57
Page 58

Reference
END USER LICENSE AGREEMENT
IMPORTANT: READ CAREFULLY: This End User License Agreement (“EULA”) is a legal agreement between you, the End
User (“End User” or “You”), and Bose Corporation (“Bose”) governing your use of the technology and software and data
and data content belonging to Bose, its vendors and licensors (“Technology”), that is contained in this audio/video device
(“System”). By tearing open the protective wrapping on this System, you are agreeing to be bound by the terms of this
EULA. In the event you disagree with any of the terms contained herein, DO NOT UNWRAP THIS SYSTEM. Return the
sealed System to the Bose Corporation for a full refund.
Copyright laws and international copyright treaties, as well as other intellectual property laws and treaties protect the
Technology contained within this System. The Technology is being licensed, not sold. This EULA grants you the right to
use the Technology only on this Bose System. You may NOT transfer, lend, distribute, prepare derivative works, reverse
engineer, de-compile, or disassemble the Technology, except and only to the extent that applicable law expressly permits
such activity. You agree that you will use the Technology and the System solely for your own personal non-commercial
use.
The Technology contains software that allows You to obtain vendor-supplied music-related information, including name,
artist, track, and title information (“Data”). You may use Data only be means of the intended End User functions of the
Technology. You agree not to assign, copy, transfer or transmit such Data to any third party. YOU AGREE NOT TO USE
OR EXPLOIT DATA EXCEPT AS EXPRESSLY PERMITTED HEREIN.
You agree that your non-exclusive license to use the Technology will terminate if you violate these restrictions. If your
Français Español English
license terminates, you agree to cease any and all use of the Technology or Data. Bose, its vendors and licensors reserve
all rights in the Technology, including all ownership rights. You agree that the vendors and licensors of Bose may enforce
their rights under this Agreement directly in their own name.
Bose warrants this System in accordance with the provisions of the warranty card delivered with this System. EXCEPT AS
EXPRESSLY SET FORTH THEREIN, BOSE, ITS VENDORS, AND ITS LICENSORS HEREBY DISCLAIM ALL WARRANTIES,
EXPRESS, IMPLIED, AND STATUTORY, IN CONNECTION WITH THE TECHNOLOGY, INCLUDING WITHOUT LIMITATION,
THE IMPLIED WARRANTIES OF MERCHANTABILITY, NON-INFRINGEMENT OF THIRD PARTY RIGHTS, AND FITNESS
FOR A PARTICULAR PURPOSE. IN NO EVENT WILL BOSE, ITS VENDORS, OR ITS LICENSORS BE LIABLE FOR ANY
INDIRECT, SPECIAL, INCIDENTAL, OR CONSEQUENTIAL DAMAGES ARISING OUT OF THE USE OR INABILITY TO USE
THE TECHNOLOGY. IN NO EVENT SHALL BOSE BE LIABLE FOR ANY DAMAGES.
None of the Technology shall be exported or re-exported in violation of any export provisions of the United States or any
other applicable jurisdiction. Any attempt to sublicense, assign or transfer any of the rights, duties or obligations hereunder shall be void. This Agreement shall be governed by and interpreted under the laws of the Commonwealth of Massachusetts, without regard to its conflicts of law provisions.
YOU ACKNOWLEDGE THAT YOU HAVE READ AND UNDERSTAND THIS AGREEMENT AND AGREE TO BE BOUND BY
ITS TERMS. YOU FURTHER AGREE THAT THIS AGREEMENT IS THE COMPLETE AND EXCLUSIVE STATEMENT OF THE
AGREEMENT BETWEEN YOU AND BOSE AND SUPERCEDES ANY PROPOSAL OR PRIOR AGREEMENT, ORAL OR
WRITTEN, AND ANY OTHER COMMUNICATIONS RELATING TO THE SUBJECT MATTER OF THIS AGREEMENT.
58
Page 59

Reference
English FrançaisEspañol
59
Page 60

Información de seguridad
Por favor, lea esta guía del usuario
Dedique el tiempo que sea necesario para seguir el contenido de esta guía del usuario cuidadosamente.
Le ayudará a configurar y utilizar correctamente el sistema y a disfrutar de todas sus funciones avanzadas.
Conserve la Guía de instalación y la Guía de uso para futuras referencias.
ADVERTENCIA: Con el fin de reducir el riesgo de incendio o descarga eléctrica, no exponga el sistema a la lluvia o
la humedad.
ADVERTENCIA: Este aparato no debe estar expuesto a salpicaduras ni mojarse. No coloque sobre él objetos que
contengan líquidos como, por ejemplo, un jarrón. Al igual que con cualquier producto electrónico, tenga cuidado para
no derramar líquidos en ningún componente del sistema. Los líquidos pueden provocar fallos o un incendio.
Estas marcas de PRECAUCIÓN se encuentran ubicadas en la parte inferior del centro multimedia del sistema de
entretenimiento basado en DVD de LIFESTYLE
®
y en el panel posterior del módulo Acoustimass®:
Français Español English
El símbolo de un relámpago con una flecha dentro de un triángulo equilátero indica al usuario que la
carcasa del sistema puede contener elementos de voltaje sin aislar de magnitud suficiente para constituir
un riesgo de descarga eléctrica.
El signo de exclamación dentro de un triangulo equilátero avisa al usuario de la existencia de instrucciones
de funcionamiento y de mantenimiento importantes en esta guía del usuario.
PRECAUCIÓN: El uso de controles o ajustes o la realización de procedimientos distintos de los especificados en este
documento pueden ocasionar la exposición a radiaciones peligrosas. Únicamente el personal técnico
convenientemente cualificado debe ajustar y reparar el reproductor de discos compactos.
PRECAUCIÓN: No coloque sobre el aparato ninguna fuente de llama viva, como velas encendidas.
Producto láser clase 1
El reproductor de DVD contenido en el centro multimedia está clasificado como un
PRODUCTO LÁSER DE CLASE 1 según la norma EN 60825-1:1994 + A11. La etiqueta
PRODUCTO LÁSER DE CLASE 1 está situada en la parte inferior del centro multimedia.
Pilas
Deseche correctamente las pilas usadas, según lo especifiquen las
Pilas
normas locales correspondientes. No las queme.
©2004 Bose Corporation. Ninguna parte de esta obra puede reproducirse, modificarse, distribuirse o usarse de ninguna otra manera sin
consentimiento previo por escrito.
Fabricado con licencia de Dolby Laboratories. “Dolby” y el símbolo de las dos D son marcas registradas de Dolby Laboratories. Obras confidenciales
no publicadas. ©1992-1997 Dolby Laboratories. Reservados todos los derechos.
Este producto contiene uno o más programas protegidos como trabajos inéditos por las leyes estadounidenses e internacionales de propiedad
intelectual. Dichos programas confidenciales y propiedad de Dolby Laboratories. Está prohibida la reproducción o publicación de una parte o de su
totalidad, así como la reproducción para otros fines sin la autorización previa de Dolby Laboratories. Copyright 1992-1996 de Dolby Laboratories, Inc.
Reservados todos los derechos.
La tecnología de compresión de audio MPEG Layer-3 se otorga mediante licencia de Fraunhofer IIS y THOMSON multimedia.
“DTS” y “DTS Digital Surround” son marcas registradas de Digital Theater Systems, Inc.
La tecnología de reconocimiento de música y los datos relacionados se proporcionan por parte de Gracenote y el servicio de reconocimiento de
música CDDB de Gracenote. Gracenote es el estándar de la industria en cuanto a tecnología de reconocimiento de música y contenido relacionado.
Para obtener más información, visite www.gracenote.com.
CD y datos musicales relacionados de Gracenote, Inc., © 2000-2003 Gracenote. Gracenote CDDB
Gracenote. Este producto y servicio puede estar protegido por una o más de las siguientes patentes de EE.UU.: #5,987,525; #6,061,680;
#6,154,773; #6,161,132; #6,230,192; #6,230,207; #6,240,459; #6,330,593, y otras patentes emitidas o pendientes.
Gracenote y CDDB son marcas registradas de Gracenote. El logo y el logotipo de Gracenote, el logo y el logotipo de CDDB y el logotipo “Gracenote"
son marcas registradas de Gracenote.
®
Client Software, copyright 2000-2003
2
Page 61

Contenido
Índice general
Introducción . . . . . . . . . . . . . . . . . . . . . . . . . . . . . . . . . . . . . . . . . . . . . . . . . . . . . . . . . . . . . . . . . . 5
Presentación de una nueva forma de reproducir música . . . . . . . . . . . . . . . . . . . . . . . . . . . . . . . . 7
Controles y funciones . . . . . . . . . . . . . . . . . . . . . . . . . . . . . . . . . . . . . . . . . . . . . . . . . . . . . . . . . . . 11
Bienvenida . . . . . . . . . . . . . . . . . . . . . . . . . . . . . . . . . . . . . . . . . . . . . . . . . . . . . . . . . . . . . . . . 5
Qué discos puede reproducir . . . . . . . . . . . . . . . . . . . . . . . . . . . . . . . . . . . . . . . . . . . . . . . . . . 5
Compruebe la compatibilidad de número de región . . . . . . . . . . . . . . . . . . . . . . . . . . . . . 5
Glosario de términos de audio . . . . . . . . . . . . . . . . . . . . . . . . . . . . . . . . . . . . . . . . . . . . . . . . . 5
Información sobre la protección contra copias . . . . . . . . . . . . . . . . . . . . . . . . . . . . . . . . . 5
Qué hace que LIFESTYLE
®
sea un sistema exclusivo . . . . . . . . . . . . . . . . . . . . . . . . . . . . . . . 7
Cómo decir al sistema que le imite . . . . . . . . . . . . . . . . . . . . . . . . . . . . . . . . . . . . . . . . . . 7
Trasladar su música al sistema . . . . . . . . . . . . . . . . . . . . . . . . . . . . . . . . . . . . . . . . . . . . . 8
Planificar tiempo para almacenar música . . . . . . . . . . . . . . . . . . . . . . . . . . . . . . . . . . . . . 8
Cuánto tiempo se precisa para almacenar CD . . . . . . . . . . . . . . . . . . . . . . . . . . . . . . 9
Cuántos CD pueden almacenarse . . . . . . . . . . . . . . . . . . . . . . . . . . . . . . . . . . . . . . . 9
Qué música se puede escuchar mientras se almacena un CD . . . . . . . . . . . . . . . . . . 9
Cómo funciona el sistema de reproducción inteligente uMusic™ . . . . . . . . . . . . . . . . . . 9
Por qué son importantes las preselecciones . . . . . . . . . . . . . . . . . . . . . . . . . . . . . . . 9
Cambio de una preselección a otra fácilmente . . . . . . . . . . . . . . . . . . . . . . . . . . . . . . 10
Utilización de los botones de selección y clasificación según las preferencias . . . . . 10
Cómo aprovechar las ventajas del sistema inteligente . . . . . . . . . . . . . . . . . . . . . . . . . . . 10
Control remoto . . . . . . . . . . . . . . . . . . . . . . . . . . . . . . . . . . . . . . . . . . . . . . . . . . . . . . . . . . . . 11
Si el control remoto no funciona como usted esperaba . . . . . . . . . . . . . . . . . . . . . . . . . . 14
Centro de medios . . . . . . . . . . . . . . . . . . . . . . . . . . . . . . . . . . . . . . . . . . . . . . . . . . . . . . . . . . . 14
Vídeo componente o exploración progresiva: activación de la selección . . . . . . . . . . . . . . . . 16
English FrançaisEspañol
Rendimiento del sistema . . . . . . . . . . . . . . . . . . . . . . . . . . . . . . . . . . . . . . . . . . . . . . . . . . . . . . . . . 17
Sugerencias para garantizar la satisfacción . . . . . . . . . . . . . . . . . . . . . . . . . . . . . . . . . . . . . . . 17
Para encender otros componentes . . . . . . . . . . . . . . . . . . . . . . . . . . . . . . . . . . . . . . . . . . 17
Para ver vídeo . . . . . . . . . . . . . . . . . . . . . . . . . . . . . . . . . . . . . . . . . . . . . . . . . . . . . . . . . . 17
Para ajustar lo que se ve o se oye . . . . . . . . . . . . . . . . . . . . . . . . . . . . . . . . . . . . . . . . . . . 18
Para disfrutar de las extraordinarias funciones del sistema LIFESTYLE
®
. . . . . . . . . . . . . 18
Reproducción de música almacenada . . . . . . . . . . . . . . . . . . . . . . . . . . . . . . . . . . . . . . . . . . . 18
Conceptos básicos . . . . . . . . . . . . . . . . . . . . . . . . . . . . . . . . . . . . . . . . . . . . . . . . . . . . . . 18
Opciones de control . . . . . . . . . . . . . . . . . . . . . . . . . . . . . . . . . . . . . . . . . . . . . . . . . . . . . . 19
Descubra las ventajas más avanzadas . . . . . . . . . . . . . . . . . . . . . . . . . . . . . . . . . . . . . . . . . . 20
Cómo aprovechar las ventajas de las preselecciones . . . . . . . . . . . . . . . . . . . . . . . . . . . . 20
Cómo responder activamente para acelerar el proceso de aprendizaje . . . . . . . . . . . . . . 21
Utilización de la lista de reproducción para preparar las pistas . . . . . . . . . . . . . . . . . . . . 21
Cómo eliminar pistas de la lista de reproducción: . . . . . . . . . . . . . . . . . . . . . . . . . . . 22
Cómo borrar completamente la lista de reproducción: . . . . . . . . . . . . . . . . . . . . . . . . 22
Acceso al archivo de música . . . . . . . . . . . . . . . . . . . . . . . . . . . . . . . . . . . . . . . . . . . . . . . . . . 22
Este producto incorpora tecnología de protección de copyright protegida por los aspectos metodológicos de determinadas patentes de los EE.UU. y por
otros derechos de propiedad intelectual que son propiedad de Macrovision Corporation y otras empresas. Esta tecnología de protección de copyright
sólo puede utilizarse con autorización de Macrovision Corporation y está dirigida al uso doméstico y otros usos de visualización limitada, salvo
autorización de Macrovision Corporation en otro sentido. Se prohíben la ingeniería inversa y el desensamblaje.
Los consumidores deben saber que no todos los televisores de alta definición son totalmente compatibles con este producto y pueden causar
interferencias en la imagen. En caso de tener problemas con exploración progresiva 525, es recomendable que el usuario cambie la conexión a la salida
"definición estándar". Si tiene dudas acerca de la compatibilidad de su TV con el reproductor de DVD, modelo 525p, acuda a nuestro centro de servicio
al cliente.
Este producto incorpora tecnología protegida por copyright y otros derechos de propiedad intelectual que son propiedad de Cirrus Logic, Inc. y están
sujetos a la protección de copyright de EE.UU., así como otras restricciones y protecciones de licencias. Esta tecnología de protección de copyright sólo
puede utilizarse con los circuitos integrados de Cirrus Logic incorporados en este producto. Se prohíben la ingeniería inversa y el desensamblaje.
Diseñado con UEI Technology™ bajo licencia de Universal Electronics Inc. © UEI 2000-2002.
Aviso legal: "AEC One Stop Group, Inc. ("AEC") es el titular de los derechos exclusivos de los datos incluidos en las guías ALL MUSIC GUIDE y ALL
MOVIE GUIDE ("Las guías"). No está permitido copiar, escanear ni utilizar ningún método para reproducir, duplicar, traducir, volver a publicar, difundir o
distribuir ninguna parte de Las guías. No es posible descargar Las guías; cualquier uso indebido estará sujeto a todas las restricciones aplicables e
incluidas en las mismas. El usuario acepta indemnizar, defender y eximir de toda responsabilidad a AEC y afiliados, y Bose y afiliados, ante cualquier
reclamación por daños, costes u otros gastos, ya sean directos o indirectos, que se deriven de: (i) el uso indebido de Las guías, (ii) el incumplimiento de
esta directiva, y (iii) cualquier actividad no autorizada en relación a Las guías por parte del usuario.
3
Page 62

Contenido
Reproducción de un DVD . . . . . . . . . . . . . . . . . . . . . . . . . . . . . . . . . . . . . . . . . . . . . . . . . . . . . 23
Opciones de control . . . . . . . . . . . . . . . . . . . . . . . . . . . . . . . . . . . . . . . . . . . . . . . . . . . . . . 24
Utilización de los controles parentales . . . . . . . . . . . . . . . . . . . . . . . . . . . . . . . . . . . . . . . 24
Carga y reproducción de un CD . . . . . . . . . . . . . . . . . . . . . . . . . . . . . . . . . . . . . . . . . . . . . . . . 25
Opciones de control . . . . . . . . . . . . . . . . . . . . . . . . . . . . . . . . . . . . . . . . . . . . . . . . . . . . . . 25
Uso de la radio . . . . . . . . . . . . . . . . . . . . . . . . . . . . . . . . . . . . . . . . . . . . . . . . . . . . . . . . . . . . . 26
Cambio de estación . . . . . . . . . . . . . . . . . . . . . . . . . . . . . . . . . . . . . . . . . . . . . . . . . . . . . . 26
Establecimiento de una preselección de estación . . . . . . . . . . . . . . . . . . . . . . . . . . . . . . 26
Para reasignar una emisora de radio preseleccionada a una estación diferente . . . . 27
Utilización del conector de auriculares . . . . . . . . . . . . . . . . . . . . . . . . . . . . . . . . . . . . . . . . . . 27
Utilización del temporizador de suspensión . . . . . . . . . . . . . . . . . . . . . . . . . . . . . . . . . . . . . . 27
Para configurar el temporizador . . . . . . . . . . . . . . . . . . . . . . . . . . . . . . . . . . . . . . . . . . . . 27
Control de fuentes externas . . . . . . . . . . . . . . . . . . . . . . . . . . . . . . . . . . . . . . . . . . . . . . . . . . . . . . 28
Utilización del control remoto del sistema con otros componentes . . . . . . . . . . . . . . . . . . . . 28
Para el control de la televisión . . . . . . . . . . . . . . . . . . . . . . . . . . . . . . . . . . . . . . . . . . . . . . 28
Para el control del cable/satélite . . . . . . . . . . . . . . . . . . . . . . . . . . . . . . . . . . . . . . . . . . . . 31
Para el control del VCR (o DVR) . . . . . . . . . . . . . . . . . . . . . . . . . . . . . . . . . . . . . . . . . . . . . 32
Para el control AUX . . . . . . . . . . . . . . . . . . . . . . . . . . . . . . . . . . . . . . . . . . . . . . . . . . . . . . 32
Designación de un sintonizador de vídeo . . . . . . . . . . . . . . . . . . . . . . . . . . . . . . . . . . . . . . . . 33
Français Español English
Cambio de configuración de la fuente . . . . . . . . . . . . . . . . . . . . . . . . . . . . . . . . . . . . . . . . . . . . . . 34
Realizar ajustes a una fuente concreta . . . . . . . . . . . . . . . . . . . . . . . . . . . . . . . . . . . . . . . . . . 34
Visualización de las opciones . . . . . . . . . . . . . . . . . . . . . . . . . . . . . . . . . . . . . . . . . . . . . . 34
Cambio de la configuración . . . . . . . . . . . . . . . . . . . . . . . . . . . . . . . . . . . . . . . . . . . . . . . . 35
Opciones de configuración del sintonizador (radio FM o AM) . . . . . . . . . . . . . . . . . . . . . . . . . 36
Opciones de configuración de CD . . . . . . . . . . . . . . . . . . . . . . . . . . . . . . . . . . . . . . . . . . . . . . 36
Opciones de configuración de CD almacenados . . . . . . . . . . . . . . . . . . . . . . . . . . . . . . . . . . . 37
Opciones de configuración de DVD . . . . . . . . . . . . . . . . . . . . . . . . . . . . . . . . . . . . . . . . . . . . . 38
Opciones de configuración del TV (para el vídeo, conexión de cable y satélite, y auxiliar) . . . 39
Utilización de los menús de sistema . . . . . . . . . . . . . . . . . . . . . . . . . . . . . . . . . . . . . . . . . . . . . . . . 40
Realización de ajustes de sistema . . . . . . . . . . . . . . . . . . . . . . . . . . . . . . . . . . . . . . . . . . . . . . 40
Visualización del menú Sistema . . . . . . . . . . . . . . . . . . . . . . . . . . . . . . . . . . . . . . . . . . . . . 40
Realización de cambios . . . . . . . . . . . . . . . . . . . . . . . . . . . . . . . . . . . . . . . . . . . . . . . . . . . 40
Opciones de datos de CD almacenados . . . . . . . . . . . . . . . . . . . . . . . . . . . . . . . . . . . . . . . . . 41
Utilización de la pantalla de edición . . . . . . . . . . . . . . . . . . . . . . . . . . . . . . . . . . . . . . . . . 42
Cómo cambiar el texto . . . . . . . . . . . . . . . . . . . . . . . . . . . . . . . . . . . . . . . . . . . . . . . . 42
Opciones de audio . . . . . . . . . . . . . . . . . . . . . . . . . . . . . . . . . . . . . . . . . . . . . . . . . . . . . . . . . . 44
Opciones de vídeo . . . . . . . . . . . . . . . . . . . . . . . . . . . . . . . . . . . . . . . . . . . . . . . . . . . . . . . . . . 46
Opciones del centro multimedia . . . . . . . . . . . . . . . . . . . . . . . . . . . . . . . . . . . . . . . . . . . . . . . 47
Opciones del control remoto . . . . . . . . . . . . . . . . . . . . . . . . . . . . . . . . . . . . . . . . . . . . . . . . . . 48
Opciones de bloqueo DVD . . . . . . . . . . . . . . . . . . . . . . . . . . . . . . . . . . . . . . . . . . . . . . . . . . . . 49
Aplicación del control parental . . . . . . . . . . . . . . . . . . . . . . . . . . . . . . . . . . . . . . . . . . . . . 49
Para configurar el nivel de restricción y las contraseñas . . . . . . . . . . . . . . . . . . . . . . 50
Referencia . . . . . . . . . . . . . . . . . . . . . . . . . . . . . . . . . . . . . . . . . . . . . . . . . . . . . . . . . . . . . . . . . . . . 51
Cuidado del control remoto . . . . . . . . . . . . . . . . . . . . . . . . . . . . . . . . . . . . . . . . . . . . . . . . . . . 51
Cambio de las pilas del control remoto . . . . . . . . . . . . . . . . . . . . . . . . . . . . . . . . . . . . . . . 51
Cambio de la configuración del código residencial . . . . . . . . . . . . . . . . . . . . . . . . . . . . . . 51
Otros interruptores . . . . . . . . . . . . . . . . . . . . . . . . . . . . . . . . . . . . . . . . . . . . . . . . . . . 52
Para un control remoto de conexión Bose
Configuración de una segunda habitación con sonido . . . . . . . . . . . . . . . . . . . . . . . . . . . . . . 52
Los productos compatibles con la conexión Bose
Configuración del interruptor del control remoto de conexión Bose
Cuidado del sistema LIFESTYLE
®
. . . . . . . . . . . . . . . . . . . . . . . . . . . . . . . . . . . . . . . . . . . . . . 54
®
en otra sala . . . . . . . . . . . . . . . . . . . . . . . 52
®
facilitan sus decisiones . . . . . . . . . . 53
®
. . . . . . . . . . . . . 53
Resolución de problemas . . . . . . . . . . . . . . . . . . . . . . . . . . . . . . . . . . . . . . . . . . . . . . . . . . . . . 55
Servicio de atención al cliente . . . . . . . . . . . . . . . . . . . . . . . . . . . . . . . . . . . . . . . . . . . . . . 57
Garantía limitada . . . . . . . . . . . . . . . . . . . . . . . . . . . . . . . . . . . . . . . . . . . . . . . . . . . . . . . . . . . 57
Información técnica . . . . . . . . . . . . . . . . . . . . . . . . . . . . . . . . . . . . . . . . . . . . . . . . . . . . . . . . . 58
Peso del centro de medios . . . . . . . . . . . . . . . . . . . . . . . . . . . . . . . . . . . . . . . . . . . . . 58
ACUERDO DE LICENCIA DE USUARIO FINAL . . . . . . . . . . . . . . . . . . . . . . . . . . . . . . . . . . . . 59
4
Page 63

Introducción
Bienvenida
Gracias por adquirir el sistema de entretenimiento para uso doméstico Bose® LIFESTYLE® 38
ó 48 DVD. Las tecnologías de marca registrada Bose y el diseño innovador convierten los
sistemas LIFESTYLE
programación de música y vídeo.
Qué discos puede reproducir
El sistema puede reproducir los tipos de discos siguientes, con los logotipos
correspondientes:
•DVD de vídeo
• DVD-R y DVD-R/W
• Vídeo CD (VCD)
• CD de audio
•CD-R o CD-R/W
•CD de MP3
Todas las pistas se graban en una única sesión cerrada en formato de disco ISO9660.
Cada archivo debe tener la extensión “.mp3”, sin más puntos en el nombre de archivo.
La etiqueta de archivo es inferior a ID3 (ID3v2).
que satisfagan los siguientes criterios:
®
, fáciles de usar y elegantes, en un sistema de rendimiento superior en la
Información sobre la protección
contra copias
La música y otros contenidos pueden estar
protegidos por leyes de copyright,
nacionales o internacionales, y contener
restricciones de uso o reproducción.
Respete los derechos de los intérpretes
y otros titulares de derechos de autor.
English FrançaisEspañol
Compruebe la compatibilidad de número de región
Para que el reproductor de DVD y el disco DVD sean compatibles, sus números de región
deben coincidir. Estos números se asignan según la zona de venta del reproductor y el disco.
Compruebe el número de región en la parte inferior del centro multimedia incluido
en el sistema. Después, asegúrese de elegir únicamente discos DVD en los que
aparezca el mismo número de región en la etiqueta o empaquetado. Por ejemplo,
un DVD de la región 1 y el reproductor correspondiente deben mostrar la marca
que aparece a la derecha.
Glosario de términos de audio
Capítulo: una división principal de contenido del título de un DVD.
Dolby Digital: un sistema de codificación de percepción para audio, desarrollado por Dolby
Laboratories y aceptado como estándar internacional. Dolby Digital es el medio más común
de codificar el audio de múltiples canales.
: el logotipo que representa Dolby Digital.
DTS: abreviatura de Digital Theater Systems, un tipo de formato de sonido envolvente de
varios canales que utilizan algunos CD y muchos DVD.
: logotipo que representa DTS.
DVD: acrónimo que se utiliza habitualmente y que significa Digital Video Disc o Digital
Versatile Disc. El sistema de almacenamiento de audio, vídeo y datos está basado en discos
ópticos de 12 cm.
Exploración progresiva: formato de vídeo que muestra todas las líneas de la trama de
imagen de una sola pasada y que actualiza la imagen sesenta veces por segundo. Este
formato no es compatible con todas las pantallas de vídeo.
5
Page 64

Introducción
Formato de imagen: forma rectangular de la imagen en un aparato de TV expresada como
el ancho de la imagen en relación al alto. Por ejemplo, si una imagen de TV tiene un formato
de imagen de 4:3 (4 por 3), la forma de la imagen es de 4 unidades de anchura por 3
unidades de altura. El formato de imagen de TV estándar es 4:3 y 16:9.
Gracenote: tecnología de reconocimiento de música y datos relacionados que se
proporciona como parte del servicio contratado por Bose.
IR: acrónimo de infrarrojos. Pertenece al tipo de control remoto que envía y recibe
instrucciones mediante un rayo de luz infrarroja.
MP3: audio MPEG-1 Layer III. Se trata de un formato de audio comprimido que permite
grabar muchas horas de música en un solo CD.
NTSC: acrónimo del Comité Nacional de Estándares de Televisión (National Television
System Committee) y denominación del estándar de formato de vídeo establecido por el
comité para televisiones, que se emplea en EE.UU. y en otros países.
PAL: acrónimo del formato de vídeo Phase Alternate Line, ampliamente utilizado en Europa
Occidental.
Pan & Scan: la técnica de realinear la trama de una imagen para que se adapte a un formato
de imagen mediante el recorte de partes de la imagen. Los reproductores de DVD y vídeo
pueden utilizar el desplazamiento horizontal codificado con el vídeo o algunos DVD para
crear automáticamente una forma de pan & scan de 4:3 a partir de un vídeo de pantalla
Français Español English
amplia.
Panorámico: un formato de vídeo que tiene unas relación ancho-alto mayor que 4:3 y que se
diferencia porque muestra unos márgenes negros por encima y por debajo de la imagen.
PCM: acrónimo de Modificación por Impulsos Codificados (Pulse Code Modulation). Es una
forma común de señal de audio digital.
RDS: sistema que muestra información sobre la estación de radio y la programación. Esta
función sólo está disponible en sistemas europeos.
SACD: acrónimo de Super Audio Compact Disc, que se utiliza para el sonido de CD y audio
digital de alta resolución almacenado en discos con tamaño de CD. Los nuevos sistemas
®
Bose
LIFESTYLE® (con los que se entrega esta guía) reproducen la parte compatible con CD
de estos discos, identificada mediante el logotipo de CD que hay en el disco.
SCART: un tipo de conector que se encuentra habitualmente en productos electrónicos de
consumo que se fabrican para su uso en Europa Occidental.
SCMS: un sistema que impide realizar copias digitales de segunda generación de material de
audio protegido por copyright. Un grabador digital dotado con SCMS graba digitalmente
desde otra fuente, pero no se puede utilizar esa grabación para realizar otra copia de
segunda generación.
Sistema de reproducción inteligente uMusic
TM
: revolucionario modo de reproducción de
Bose, que funciona como si fuera un DJ virtual registrando las preferencias del oyente y
reproduciendo, como respuesta, las pistas adecuadas de los CD almacenados.
S-video: también denominado Y/C, se trata de una señal de vídeo que mantiene separada la
información de brillo y color, y que es notablemente mejor que el vídeo compuesto. Se
requiere la utilización de un cable S-video y es compatible con muchas televisiones y otros
componentes de vídeo.
Vídeo componente: una señal de vídeo que se divide en tres partes: luminancia y dos
señales de color (marcadas como “YPbPr”). Proporciona una resolución de vídeo máxima,
pero no todos los televisores pueden procesarla.
Vídeo compuesto: una señal de vídeo en la que se combina la información de color y brillo
(blanco y negro). Compatible con la mayoría de las televisiones y otros componentes de
vídeo, los cables de vídeo compuesto utilizan clavijas RCA.
Vídeo DVD: estándar para almacenar y reproducir audio y vídeo en discos DVD-ROM,
basado en vídeo MPEG, audio Dolby Digital y otros formatos de datos de propiedad
registrada.
Videostage
®
5: nuestro circuito de descodificación Videostage 5 de propiedad registrada le
brinda una experiencia de sonido envolvente de cinco canales para cualquier fuente que
escuche (cintas VHS, CD estéreo, incluso programas de TV mono).
YPbPr: señal de vídeo componente analógico que contiene un componente de luminancia y
dos componentes de crominancia. También se conoce como YUV o Y, B-Y, R-Y.
6
Page 65

Presentación de una nueva forma de reproducir música
Qué hace que LIFESTYLE
Si los CD que ha ido acumulando a lo largo de los años indican su gusto por la música,
aquellos que reproduce con más frecuencia son un buen reflejo de su estilo y sus estados
de ánimo. Y los temas de los que más disfruta cuando se siente cansado, alegre o triste
ejemplifican dichos estados de ánimo.
Es posible que se haya decidido por el sistema LIFESTYLE
sutilezas mediante una nueva y avanzada función: el sistema de reproducción inteligente
uMusic
virtual, capaz de reproducir ininterrumpidamente la música que más le guste y adaptarse a
sus preferencias a medida que vayan cambiando.
El sistema de reproducción inteligente uMusic no sólo le permite almacenar su colección
personal de CD sino que también incorpora una nueva y revolucionaria forma de escuchar
música.
Proporciona acceso inmediato y horas de reproducción ininterrumpida para que pueda
disfrutar aún más de su música favorita, incluso de aquellos temas que ya no recordaba que
tenía. Y mientras lo utiliza, el sistema aprende a reproducir su música preferida para
proporcionarle mayor placer.
Además esta función tiene la capacidad de almacenar en el sistema pistas procedentes de
cientos de CD. La cantidad real dependerá del número de pistas que tenga cada CD y de su
duración. Si se utiliza como archivo de música personal, esta función le ahorrará el tiempo
que invierte en buscar y seleccionar temas de su colección.
Cómo decir al sistema que le imite
En efecto, puede ordenar a este nuevo sistema musical que reproduzca la música que desea
en cualquier momento.
™
. Gracias a la tecnología patentada de Bose®, transforma su sistema en un DJ
®
sea un sistema exclusivo
®
38 ó 48 porque capta estas
English FrançaisEspañol
Darle instrucciones requiere poco esfuerzo. Simplemente escuche su música y deje que el
sistema se ocupe del resto.
Tampoco se preocupe si se equivoca, porque todo lo que haga se puede deshacer. Por
ejemplo, si pulsa el botón
características similares a la que se está reproduciendo en el momento actual. Esta función
hace que el sistema limite el número de opciones que responden a su petición. Pero si pulsa
uMusic
el botón
amplio de su colección.
Aún pulsando el botón de clasificación
permanentemente. Indica al sistema que avance porque dicha pista no es la adecuada para
esa hora del día, actividad, preselección u oyente.
Pulsar el botón de clasificación
pista reproducida le gusta especialmente. No se trata de que asigne la clasificación + a todas
las pistas que le gusten, sino a aquellas que sean verdaderamente especiales.
Con el paso del tiempo, el sistema ajustará el tipo de música que reproduce cuando elige su
preselección, en función de la respuesta que obtenga de usted. No necesita preocuparse de
si se almacenará alguna de sus respuestas en concreto. Si lo desea, puede cambiar
fácilmente todas las elecciones que haga y las decisiones que tome. No dude en indicarle al
sistema lo que desea en cada momento. Sienta la libertad de experimentar con la música
que le gusta y disfrutar de ella.
Sean cuales sean sus gustos, al mostrarlos permitirá que el sistema los reproduzca cada vez
con mayor precisión.
otra vez, el sistema volverá a realizar la selección dentro de un rango más
Encore
(Bis), el sistema buscará en la base de datos música de
–
(negativo), la pista no desaparece
+
(positivo) tiene el efecto contrario: el sistema aprende que la
7
Page 66

Presentación de una nueva forma de reproducir música
Trasladar su música al sistema
Antes de poder disfrutar de estas ventajas, es necesario realizar algunos preparativos.
Éstos consisten en utilizar el centro multimedia y un sencillo procedimiento de tres pasos
para almacenar su música.
Nota: El sistema está diseñado para almacenar sólo pistas de CD normales. No almacena pistas
MP3 ni contenido de DVD. Si pulsa el botón Store (Almacenar) cuando la bandeja de discos
contiene un disco inadecuado, el centro multimedia mostrará un mensaje de error para indicar
que no es posible almacenar el disco.
A continuación se indican los procedimientos iniciales:
1. Coloque el primer CD en la bandeja de discos del centro multimedia y ciérrela.
2. Pulse el botón , situado en el panel de control del centro multimedia.
• Durante este proceso, el centro multimedia muestra el mensaje ALMACENAMIENTO
EN CD e indica el porcentaje que se ha completado.
• Para interrumpir o detener la actividad de almacenamiento en cualquier momento, sólo
tiene que abrir la bandeja de discos. Para reanudar el almacenamiento en el mismo
disco, cierre la bandeja y pulse el botón nuevamente.
Français Español English
3. Cuando la operación se haya completado al 100% y aparezca el mensaje CD DE AUDIO
ALMACENADO, retire el disco y repita los pasos 1a 3 para cada CD adicional.
La operación dura aproximadamente 5 minutos* por disco. Para obtener más información,
consulte “Planificar tiempo para almacenar música” más adelante.
Sugerencias sobre el almacenamiento
• No es necesario que tenga el sistema encendido mientras almacena música.
Store
Store
• En primer lugar, almacene sus CD favoritos para poder disfrutar más de las ventajas que le
ofrece el sistema uMusic
™
.
• No es preciso que almacene los CD por orden alfabético.
• Mediante las páginas de registro de la parte posterior de esta guía podrá realizar un
seguimiento del orden de los CD que almacene.
• Deje al sistema un poco de tiempo para que memorice las elecciones que desea hacer.
Pero no se preocupe demasiado, que este DJ aprende rápido.
• Una vez que las pistas de un CD se han almacenado, es posible eliminar cualquiera de
ellas. Puede hacerlo desde el menú del sistema, en CD almacenados.
Nota: Para obtener más información acerca de cómo utilizar el menú del sistema, consulte
“Realización de ajustes de sistema” en la página 40. Para obtener más información acerca de
cómo eliminar pistas, consulte “Opciones de datos de CD almacenados” en la página 41.
Planificar tiempo para almacenar música
El almacenamiento conlleva dos acciones: colocar las pistas de cada CD en un área
temporal y procesarlas para un eficaz almacenamiento. Esta acción libera espacio en el área
temporal. Cuando el área temporal está llena, no es posible seguir almacenando música.
En ese caso, el centro interactivo mostrará el mensaje PROCESANDO CD.
Si apaga el sistema, el proceso será más rápido. Si utiliza el sistema mientras la actividad de
almacenamiento está en proceso, ésta continuará adelante, pero podría llevar más tiempo.
Si dispone de una colección de CD amplia, programe varias sesiones para almacenar todas
las pistas. Para ello, tenga en cuentas las indicaciones que se ofrecen a continuación.
*Si nota que un disco tarda mucho en almacenarse, puede que requiera limpieza. Consulte
“Limpieza de discos” en la página 54.
8
Page 67

Presentación de una nueva forma de reproducir música
Cuánto tiempo se precisa para almacenar CD
• Para almacenar 10 discos: 1 hora, aunque los CD que están dañados o requieren limpieza
pueden tardar más. (Calcule 5 minutos por disco más el tiempo necesario para insertarlos
y extraerlos.)
• Para procesar (buscar en la base de datos y catalogar las pistas) 10 discos: 6 horas con el
sistema apagado.
Cuántos CD pueden almacenarse
• Con un sistema LIFESTYLE
• Con un sistema LIFESTYLE
®
38: aproximadamente 200 horas de música o más de 200 CD.
®
48: aproximadamente 340 horas de música o más de 350 CD.
Qué música se puede escuchar mientras se almacena un CD
• Puede escuchar las frecuencias de radio AM o FM, pistas de CD que tenga almacenados,
o bien música procedente de otras fuentes conectadas al sistema como el televisor (se
requiere una conexión analógica).
• No podrá escuchar un CD que esté en proceso de almacenamiento o ver un DVD utilizando
la bandeja de discos del centro multimedia.
• Tan pronto como el centro multimedia muestre 100%, podrá escuchar el CD que acaba de
almacenar (utilizando el reproductor de CD o Almacenado como fuente), o bien sustituir el
CD por un DVD y ver un vídeo.
• Si su configuración incluye una red de conexión Bose
®
, podrá continuar escuchando el
sistema desde otras habitaciones.
• Es posible que aprecie pequeñas interrupciones temporales de audio. Pero si la fuente está
conectada mediante cables digitales y analógicos, todavía podrá disfrutar de escuchar
música.
English FrançaisEspañol
Cómo funciona el sistema de reproducción inteligente uMusic
™
Sabemos que el tiempo que tarda en buscar entre los CD sus pistas preferidas sólo sirve
para retrasar los momentos de placer que le proporciona escuchar la música que le gusta.
Ahora, el sistema uMusic se encarga de hacer ese trabajo casi instantáneamente, buscando
y reproduciendo sus pistas preferidas.
Por qué son importantes las preselecciones
El sistema uMusic proporciona las preselecciones 1 a 9 para que los miembros de su familia
puedan disponer de un espacio privado para sus preferencias musicales.
Al utilizar una preselección personal, los oyentes permiten que el sistema identifique cuál es
su reacción ante la música reproducida. Cada preselección representa el gusto musical de
una persona. A medida que pase el tiempo, el centro puede cambiar si la preselección
detecta variaciones en los gustos y hábitos musicales.
Asigne las preselecciones a su gusto, deles un nombre y pulse un solo botón del control
remoto para pasar de una a otra. Tenga en cuenta las ventajas de reservar una preselección
para:
• Los distintos miembros de su familia o sus compañeros de habitación, entre otros. El
número y el nombre (si lo tiene) de la preselección seleccionada aparece en el centro
multimedia para ayudarle a realizar las asignaciones.
Nota: Si varios miembros de la familia almacenan sus pistas de CD en el sistema, asegúrese de
que cada uno de ellos tenga una preselección asignada y de que la utilice para escuchar música.
• Distintas actividades del día o distintos estados de ánimo: despertarse, entrenar, disfrutar
del fin de semana, realizar trabajos en casa, al aire libre o manuales, etc. En entornos
pequeños puede ser conveniente cambiar las preselecciones para las distintas actividades
del día.
Recuerde que las preselecciones no están bloqueadas por las asignaciones. En cualquier
momento, puede eliminar por completo de la memoria una preselección musical almacenada
y reasignarla a otra persona o darle otra finalidad. Es elección suya. También puede utilizar
siempre la misma preselección, si es lo que desea.
9
Page 68

Presentación de una nueva forma de reproducir música
Cambio de una preselección a otra fácilmente
Sólo tiene que pulsar un botón.
• Si no está en el modo de uMusic
para entrar en él.
TM
, pulse el botón
Stored
(Almacenado) del control remoto
• Si está en el modo de uMusic, pulse un botón numérico de
preselecciones.
Utilización de los botones de selección y clasificación según las preferencias
Una vez seleccionada una preselección, puede optar por realizar una de las siguientes
acciones mientras escucha música:
• Dejar que la música suene hasta que termine.
• Pulsar el botón
• Pulsar el botón
• Utilizar los botones
Independientemente de las acciones que realice mientras escucha música, el sistema
continuará realizando selecciones en todo el contenido musical que tenga almacenado.
Français Español English
La preselección registrará sus respuestas para que el sistema aprenda a reproducir
determinados temas con mayor o menor frecuencia. Aún así, existen pequeñas
probabilidades de que vuelva a escuchar pistas a las que haya asignado una clasificación
negativa. La única forma de asegurarse de que no las volverá a escuchar es eliminándolas
del sistema.
Nota: Si desea asignar un nombre a una preselección o eliminar una pista del sistema,
seleccione la opción adecuada del menú del sistema. Para obtener más información, consulte
“Opciones de datos de CD almacenados” en la página 41.
Seek
(Buscar) para moverse a la pista siguiente.
Repeat
(Repetir) para volver a reproducir las pistas que desee.
+
y – para clasificar las pistas que le gusten más o menos.
1
a 9, para activar una de las
Cómo aprovechar las ventajas del sistema inteligente
A medida que almacena y procesa las pistas de sus CD, el sistema extrae información sobre
las pistas de las bases de datos de música internas. Estos datos incluyen el nombre de las
pistas, los artistas, el estilo musical (género) y otra información relevante que le permite
identificar la música que le gusta.
Otra ventaja de Bose es que publica discos de actualización para mantener las bases de
datos al día. Por tanto, hasta los CD que haya adquirido recientemente dispondrán de esta
información.
Es muy importante que envíe la tarjeta de registro del producto
que se incluye con el sistema.
(Tal y como se indica en la tarjeta, puede registrarse en línea si lo prefiere). Cualquiera de los
métodos que utilice le permitirá identificarse como propietario del sistema a la hora de recibir
actualizaciones de software o de bases de datos. Los datos de cada disco se copian en el
sistema automáticamente cuando se insertan en la bandeja de discos.
Asegúrese de rellenar la tarjeta o el formulario en línea y enviarlo a Bose.
Además de almacenar estos datos para su uso, el sistema permite editarlos para que reflejen
mejor sus asociaciones musicales. Por ejemplo, si los datos almacenados clasifican un CD
como música “del mundo” y usted piensa que forma parte de su colección latina, puede
cambiar el género de dicho CD. Para aquellos CD que no estén incluidos en la base de datos
(ya sean creados en casa o producidos comercialmente), el sistema permite añadir
información para clasificarlos y mostrarlos según su preferencias.
Para obtener detalles sobre la información que se puede añadir o modificar y sobre cómo
hacerlo, consulte “Opciones de datos de CD almacenados” en la página 41.
10
Page 69
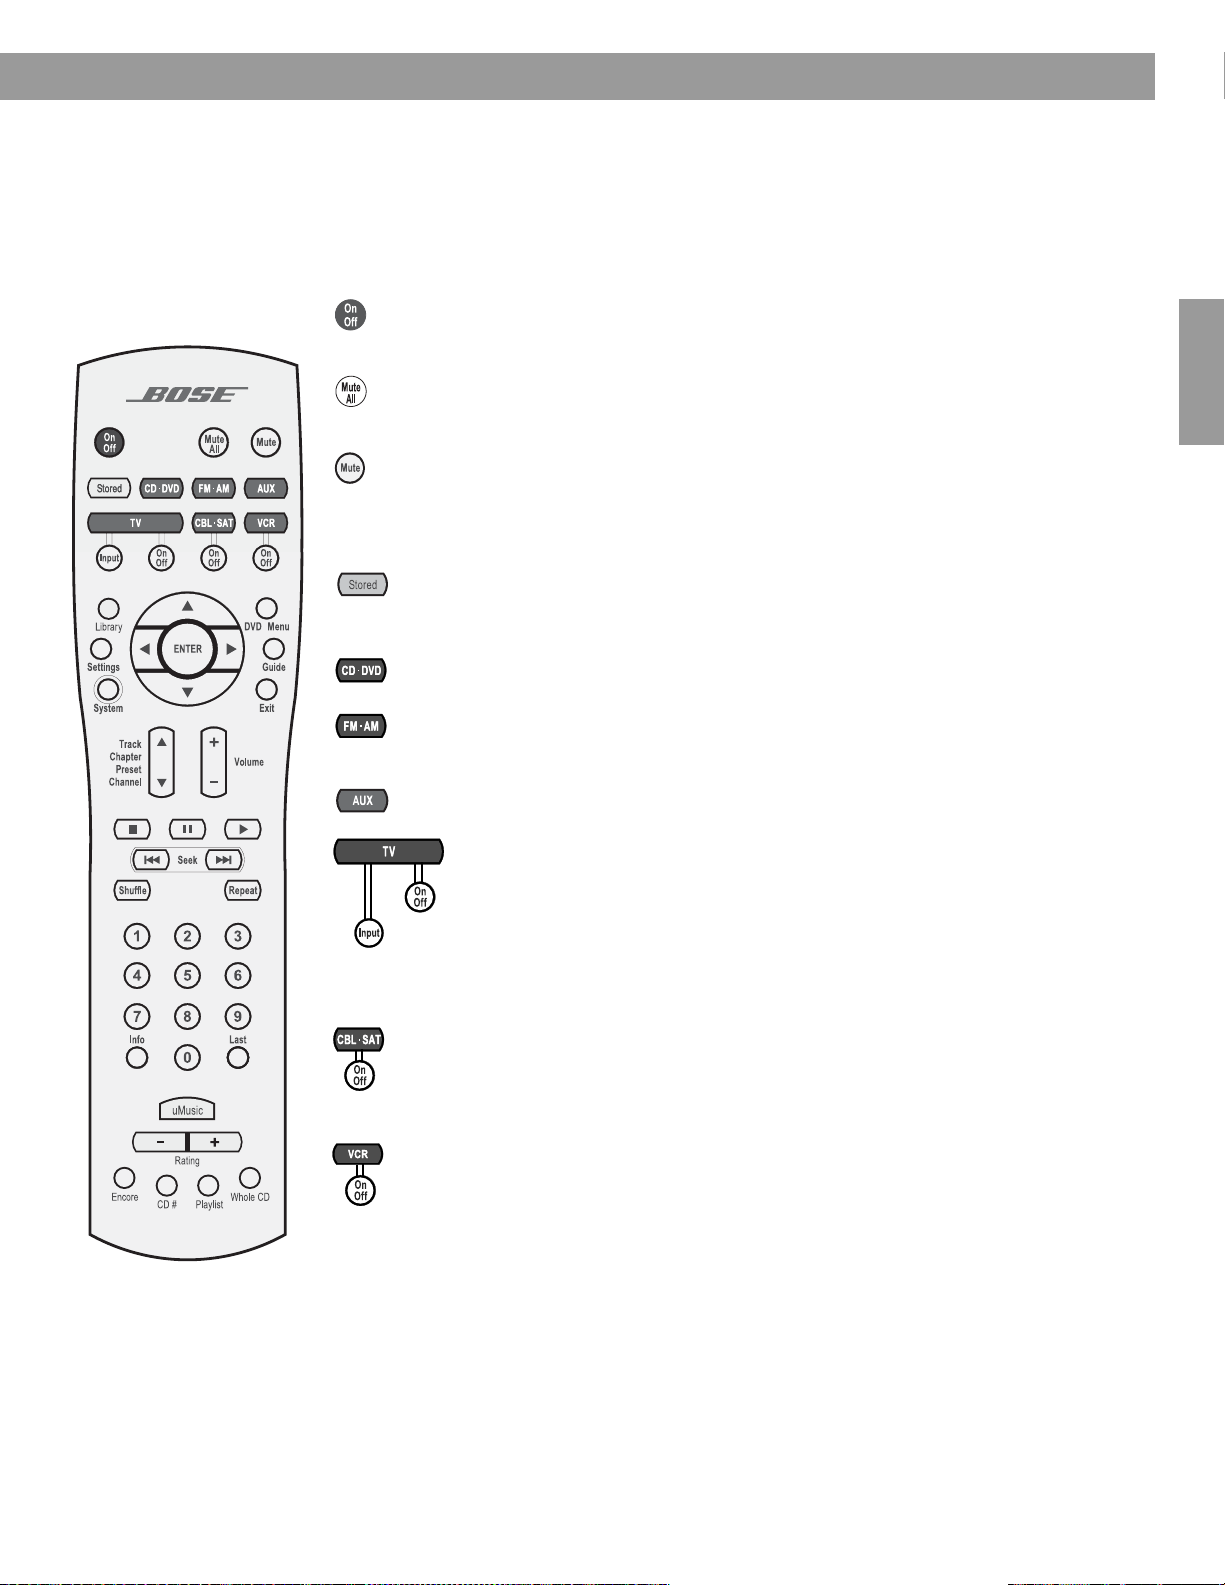
Controles y funciones
Control remoto
El control remoto de radio frecuencia avanzada que se suministra con el sistema LIFESTYLE
funciona desde prácticamente cualquier punto de su casa. Pulse cualquier botón. No es
necesario dirigir el control remoto hacia el centro de medios.
Encendido y silencio
Enciende y apaga el sistema. Selecciona la fuente que se utilizó la última
vez.
Silencia el volumen de todos los altavoces conectados (de la sala
principal y secundarias).
Silencia/vuelve a emitir sonido en la sala actual.
Selección de la fuente y la entrada
Enciende el sistema y selecciona el modo de reproducción de CD almacenados en
el sistema de reproducción inteligente uMusic
almacenados.
Enciende el sistema y selecciona como fuente el lector de discos incorporado.
Enciende el sistema y selecciona el sintonizador de radio FM/AM incorporado en la
emisora que se sintonizó la última vez. Alterna entre FM y AM cuando la radio está
encendida.
™
. Sustituye otros modos de CD
English FrançaisEspañol
®
Enciende el sistema y selecciona una fuente AUX conectada al centro multimedia.
Enciende el sistema y selecciona el TV conectado al centro multimedia como
fuente.
Cuando se ha configurado el control remoto para hacerlo*, enciende y apaga
el TV.
Cuando el control remoto se ha configurado para ello, se desplaza entre las
entradas de TV, permitiendo seleccionar la entrada utilizada para conectar el
centro multimedia al televisor.
Enciende el sistema y selecciona un receptor de satélite o cable conectado al
centro multimedia como fuente de sonido.
Cuando se configura el control remoto para hacerlo*, también enciende y apaga el
sistema de cable o satélite.
Enciende el sistema y selecciona el VCR conectado al centro de medios como
fuente de sonido.
Cuando se ha configurado el control remoto para hacerlo*, enciende y apaga el
VCR.
*Puede elegir configurar el control remoto LIFESTYLE® para que encienda y apague el TV, el
sistema de cable o de satélite o el VCR. Para ello, consulte “Utilización del control remoto del
sistema con otros componentes” en la página 28. Hasta entonces, utilice el botón de
encendido de cada dispositivo o el control remoto para encender la televisión o los demás
componentes.
11
Page 70

Controles y funciones
Selección de menú y programa
Entra al archivo de pistas de CD almacenados.
Entra o sale del menú Configuración de la fuente actual.
Entra o sale del menú Sistema.
Entra o sale del menú del disco DVD que está cargado actualmente.
Entra en el menú principal de un sistema de cable o satélite.
Muestra una guía electrónica de la programación de TV.*
Sale de los menús de configuración y de sistema, así como de las
pantallas de archivo e información.
Sale de la programación electrónica de TV.*
Français Español English
Sintoniza la radio FM/AM hacia arriba o hacia abajo en la siguiente
frecuencia.
Selecciona el elemento anterior o siguiente de la lista del menú.
Accede a los submenús o confirma la selección de un elemento de menú.
Muévase arriba, abajo, a la izquierda o a la derecha en un menú o
pantalla.
Selecciona un capítulo de DVD, pista de CD, estación de radio, canal de
TV o preselección de música almacenada que corresponda al número
que se ha pulsado.
También cambia los elementos de los menús de sistema y configuración
cuando se aplican números.
Salta al canal de TV seleccionado anteriormente*.
Muestra o sale de la ventana de información de cable o satélite, si los
hubiera.
Mantenga pulsado este botón (hasta que se produzca algún cambio) para
eliminar o restaurar la información de pistas de la pantalla del centro
multimedia.
Cuando se pulsa este botón también se abre una pantalla en el televisor
si la entrada de TV se ha seleccionado en el centro multimedia. La
pantalla incluye detalles sobre la música almacenada que se está
reproduciendo. Pulsando el botón Info puede mostrar u ocultar la
información de la pantalla. Cada vez que lo pulse, se desplazará por la
información de la pantalla del centro multimedia.
12
*Si el televisor, cable o satélite proporcionan esa opción.
Page 71

Controles y funciones
Ajuste de la selección
Busca hacia atrás o hacia adelante la siguiente estación de radio con
suficiente potencia, pista de CD, capítulo de DVD o pista de música
almacenada.
Retrocede o avanza a la siguiente pista de CD, capítulo de DVD, emisora
presintonizada (NO preselección de música almacenada) o canal de TV.
Sube o baja el volumen de la fuente actual.
Si pulsa +, la fuente vuelve a reproducir sonido (si estaba en silencio) sólo
en la habitación actual.
Si pulsa – bajará el volumen.
Opciones de reproducción
Los primeros seis botones que se definen a continuación sólo se usan con el sistema
LIFESTYLE
funcionan con VCR o DVR cuando el control remoto se ha configurado para ello.
®
. A excepción de los botones
Shuffle
(Aleatorio) y
Repeat
(Repetir), los demás botones
English FrançaisEspañol
Selecciona el modo del sistema de reproducción inteligente uMusic
fuente almacenada y sustituye los modos seleccionados previamente.
Aplica una clasificación negativa (–) o positiva (+) a la música almacenada
que se está reproduciendo.
Se mueve inmediatamente a la siguiente pista si se ha aplicado una
clasificación negativa.
Para obtener más información sobre la clasificación de música almacenada,
consulte “Cómo responder activamente para acelerar el proceso de aprendizaje” en
la página 21.
Sitúa en la cola y reproduce la música almacenada que coincida con el estilo de la
pista actual.
Reproduce la pista de un CD específico cuando se pulsa inmediatamente después
de pulsar las teclas numéricas para un CD almacenado.
Reproduce todas las pistas, si las hubiera, asignadas a la lista de reproducción.
Se puede utilizar con opciones adicionales del modo de reproducción, como
Encore (Bis).
Para obtener información acerca del uso de la lista de reproducción, consulte
“Utilización de la lista de reproducción para preparar las pistas” en la página 21.
Salta de la última pista reproducida a la primera pista del CD de origen y lo
reproduce de principio a fin.
™
para la
Detiene la reproducción del CD, DVD o música almacenada. El sistema recuerda el
punto en el que se ha detenido el disco (sólo para DVD y VCD). Si se vuelve a pulsar,
se borra la memoria.
Detiene la reproducción del CD, DVD o música almacenada.
Inicia la reproducción del CD, DVD o música almacenada.
Retrocede o avanza al principio de una pista. Entra al control de velocidad
de reproducción de DVD.
Cuando se mantiene pulsado explora hacia detrás y hacia delante el CD o
disco MP3 actual.
Reproduce las pistas del CD en orden aleatorio. Pulse Shuffle (Aleatorio) de nuevo
para cancelar este modo.
Repite un CD entero o una pista, un capítulo de DVD o un título de DVD. Pulse
Repeat (Repetir) de nuevo para cancelar el modo de repetición.
13
Page 72

Controles y funciones
Centro de medios
Français Español English
Si el control remoto no funciona como usted esperaba
Si el sistema no responde cuando se pulsa un botón del control remoto, es posible que tenga
que cambiar las pilas. Para obtener información sobre el tipo de pilas que debe usar y cómo
cambiarlas, consulte “Cambio de las pilas del control remoto” en la página 51.
En algunos edificios es posible que haya “puntos muertos” en los que el control remoto no
funcione correctamente. Si se encuentra en esta situación, muévalo unos 30 ó 60 cm y
vuelva a intentarlo. También debe asegurarse de que el cable que conecta la alimentación al
centro multimedia (y contiene la antena remota) se haya extendido completamente y
separado de otros cables. Si los esfuerzos no funcionan, mueva el centro de medios unos
metros hasta un punto desde donde ofrezca una respuesta mejor.
Si las pilas están bien y las sugerencias sobre un "punto ciego" no funcionan, es posible que
necesite un extensor para la antena. Si desea ponerse en contacto con el servicio de
atención al cliente de Bose
sistema.
La bandeja de discos y los controles del sistema están situados bajo la puerta del panel
frontal del centro multimedia. A la derecha está la pantalla de información (Figura 1).
El emisor de señal de IR situado debajo de los controles del centro multimedia permite
controlar otros componentes mediante el control remoto LIFESTYLE
emisor para que la señal pueda dirigirse sin obstáculos hacia los demás componentes o
superficies reflectantes de la habitación.
®
para solicitarlo, consulte la lista de direcciones incluida en el
®
. Evite bloquear el
Figura 1
Vista frontal del centro
de medios
Figura 2
Muestra de la información
que aparece en la pantalla
del centro multimedia.
Puerta del panel frontal: se levanta
Bandeja de discos
Ventana de información
Emisor de infrarrojos
Controles
Toma de auriculares
®
Ventana de información
La ventana de información del centro multimedia indica el estado del sistema, incluyendo la
fuente que se está reproduciendo, detalles del programa, así como la opción seleccionada,
si la hubiera (Figura 2).
14
Cuando aparecen mensajes o elementos del menú Configuración en la pantalla, es posible
que se desplacen para mostrar la información que no quepa en las dos líneas disponibles.
Page 73

Indicadores luminosos
Shuffle
Aparece cuando se reproduce el contenido de un CD, un disco MP3 o una carpeta MP3
en orden aleatorio.
Controles y funciones
English FrançaisEspañol
On/Off Source Volume
All Off
Open/Close
Enter
Erase
Store
Repeat
Disc
Pista
Storing
Aparece cuando se configura una pista o disco para que se repita.
Aparece cuando se reproduce un disco de la bandeja de discos.
Aparece cuando se está reproduciendo una pista.
Aparece cuando se están almacenando pistas de CD.
Se enciende brevemente cuando se recibe una orden del control remoto.
Controles
Los nueve botones de control funcionan como se indica a continuación.
On/Off
All Off
Source
Enter
Enciende y apaga el sistema sólo en la sala principal. Selecciona la
última fuente utilizada al encender el sistema.
Apaga el sistema y todos los altavoces conectados (de todas las
salas).
Abre/cierra la bandeja de discos.
Pasa por las selecciones de fuentes disponibles.
Comienza a reproducir el DVD cuando se selecciona esa opción en la
pantalla.
Cuando el sistema está apagado, restablece el código residencial del
control remoto.
Funciona con el botón Store (Almacenar) para explorar las opciones de
configuración del sistema de la pantalla del centro multimedia.
Erase
Volume
Store
Elimina la preselección de estación de radio.
Sube el volumen del sistema y anula el silencio de los altavoces, si
estaba activo.
Baja el volumen del sistema, pero no anula el silencio de la fuente.
Copia la pista de un CD de audio en el disco duro interno).
Cuando el sistema está apagado, restablece el código residencial del
control remoto.
Funciona con el botón Erase (Borrar) para recorrer las opciones de
configuración del sistema de la pantalla del centro multimedia.
15
Page 74

Controles y funciones
Vídeo componente o exploración progresiva: activación de la selección
Si ha utilizado una conexión de vídeo componente entre el centro multimedia y el TV, deberá
configurar la activación, tal y como se explica a continuación.
Con el centro de medios apagado, use los controles del panel frontal para seguir estos
pasos:
1. Mantenga pulsado el botón Enter (Intro) del centro multimedia.
2. Pulse el botón Store (Almacenar) mientras mantiene pulsado el botón Enter (Intro).
Las selecciones aparecerán en la pantalla del centro multimedia cada vez que pulse
Store (Almacenar).
3. Cuando Vídeo aparezca seleccionado en la pantalla, deje de pulsar los botones Store
(Guardar) y Enter (Intro).
4. Con la ayuda de los botones para subir y bajar el volumen, desplácese por las opciones
de Vídeo.
5. Cuando llegue a la opción que desea, deje de pulsar los botones.
• Para una conexión de componente sólo, seleccione:
Français Español English
-COMPONENTE NTSC (en Norteamérica)
-COMPONENTE PAL (fuera de Norteamérica)
• Para una conexión de componente y exploración progresiva, seleccione NTSC
PROGRESSIVE.
Nota: El sistema no admite vídeo progresivo PAL.
6. Una vez que haya realizado la selección adecuada, pulse el botón Store (Almacenar) para
salir de las opciones de Vídeo.
El sistema ya está listo para ofrecer la señal de vídeo que ha elegido.
16
Page 75

Rendimiento del sistema
Sugerencias para garantizar la satisfacción
Para encender el sistema:
• Pulse el botón
• Pulse el control de encendido/apagado del centro multimedia. O bien
•Pulse
Para utilizar el sistema con el televisor y otros componentes, consulte los recordatorios que
se proporcionan. Éstos le mostrarán cómo conseguir que todo funcione correctamente.
Nota: Si desea información sobre cómo configurar el control remoto para que funcione con
otros componentes, consulte “Utilización del control remoto del sistema con otros
componentes” en la página 28.
CD-DVD,FM/AM,TV,CBL/SAT
Esta acción enciende el sistema y selecciona la fuente al mismo tiempo. Utilice el botón
Stored
también de esta forma, después de almacenar música en el sistema LIFESTYLE®.
Para encender otros componentes
Tiene que:
1. Encender el sistema.
2. Seleccionar la fuente.
3. Encender la fuente (si es un componente externo).
Puede utilizar el control remoto LIFESTYLE
tiempo, después de haberlo configurado para que funcione con el televisor y otros
componentes. Utilice el botón
debe realizar las configuraciones.
On/Off
(encendido/apagado) del control remoto. O bien
o
AUX
en el control remoto.
System
(Sistema) del control remoto para ver el menú donde
®
para realizar todas estas operaciones al mismo
English FrançaisEspañol
Para ver vídeo
Las opciones de instalación pueden requerir algunos ajustes de activación, a saber:
• Trasladar la imagen a la pantalla de televisión:
– Asegúrese de seleccionar la entrada de vídeo adecuada en su televisor (que coincida
con la entrada de vídeo a la que se conecta el centro multimedia en la parte posterior
del televisor). Utilice el botón
se ha configurado el control remoto para controlar el TV).
• Utilización de la opción de conexión de vídeo de componente:
– Si dispone de una conexión de vídeo de componente entre el televisor y el centro de
medios, asegúrese de que hace esa selección en la pantalla del centro de medios.
Hasta entonces, es posible que no vea nada en la pantalla cuando seleccione DVD
como fuente.
• Utilización de la función Progressive scan en el televisor:
– Asegúrese de que haya una conexión de vídeo componente entre el televisor y el
centro multimedia.
– Asegúrese de que selecciona Progressive en la pantalla del centro de medios. Hasta
entonces, es posible que no vea nada en la pantalla cuando seleccione DVD como
fuente.
– Asegúrese de que los demás componentes de vídeo que tenga conectados al centro
multimedia también estén conectados mediante un adaptador de vídeo componente.
Nota: Para obtener información sobre la selección del vídeo componente o la exploración
progresiva en el centro multimedia, consulte “Vídeo componente o exploración progresiva:
activación de la selección” en la página 16.
TV Input
(Entrada TV) del control remoto LIFESTYLE® (si ya
17
Page 76

Rendimiento del sistema
Para ajustar lo que se ve o se oye
• Para realizar cambios en una fuente concreta:
– Pulse el botón del menú
mayoría de estos ajustes se pueden realizar pulsando las flechas arriba y abajo en el
control remoto, y Enter (Intro) para seleccionar las opciones que aparecen en la
pantalla del centro multimedia.
– Para ver sus elecciones en el televisor, asegúrese de que esté encendido y de que la
entrada de vídeo se haya configurado correctamente para el centro multimedia.
– Para ver más detalles sobre los cambios que puede realizar, consulte “Realizar ajustes
a una fuente concreta” en la página 34.
• Para realizar cambios en el funcionamiento del sistema:
Settings
(Configuración) en el control remoto LIFESTYLE®. La
– Pulse el botón
– Asegúrese de que el televisor está encendido y de que la entrada de vídeo se haya
configurado para el centro multimedia.
– Para ver más detalles sobre los cambios que puede realizar, consulte “Realización de
ajustes de sistema” en la página 40.
Français Español English
System
(Sistema) en el control remoto LIFESTYLE®.
Para disfrutar de las extraordinarias funciones del sistema
LIFESTYLE
Tan pronto como haya instalado el sistema LIFESTYLE® y haya verificado su configuración
mediante los dos discos incluidos, podrá utilizar la mayoría de sus funciones.
Pero la función más novedosa, el sistema de reproducción inteligente uMusic
se hayan almacenado pistas de CD en el sistema. Por tanto, antes de utilizarla, deberá
almacenar al menos un CD. Y para disfrutar mucho más de su música, almacene 20 o más
discos.
Almacenar un disco es muy sencillo:
• Coloque el primer CD en la bandeja de discos del centro multimedia y ciérrela.
• Pulse el botón Store (Almacenar), situado en el panel de control del centro multimedia.
Para almacenar CD adicionales, es posible que precise algunas indicaciones y más detalles.
Consulte “Trasladar su música al sistema” en la página 8.
Para entender mejor las opciones disponibles para identificar y reproducir las pistas que ha
almacenado, no olvide leer “Acceso al archivo de música” en la página 22 y “Opciones de
datos de CD almacenados” en la página 41.
®
™
, requiere que
Reproducción de música almacenada
Nota: Esta función sólo está disponible cuando se han almacenado CD en el sistema. Para
obtener más información acerca de cómo almacenar CD, consulte “Trasladar su música al
sistema” en la página 8.
Conceptos básicos
1. Pulse para seleccionar la fuente de música almacenada. Si el sistema está
apagado, se encenderá en el modo del sistema uMusic
preselección utilizada.
2. Ahora puede ponerse cómodo y escuchar su música o elegir otras opciones:
• Pulse cualquier botón numérico, de 1 a 9, para elegir diferentes preselecciones.
• Pulse si la selección actual le gusta mucho o muy poco.
18
™
. Comenzará con la última
Page 77
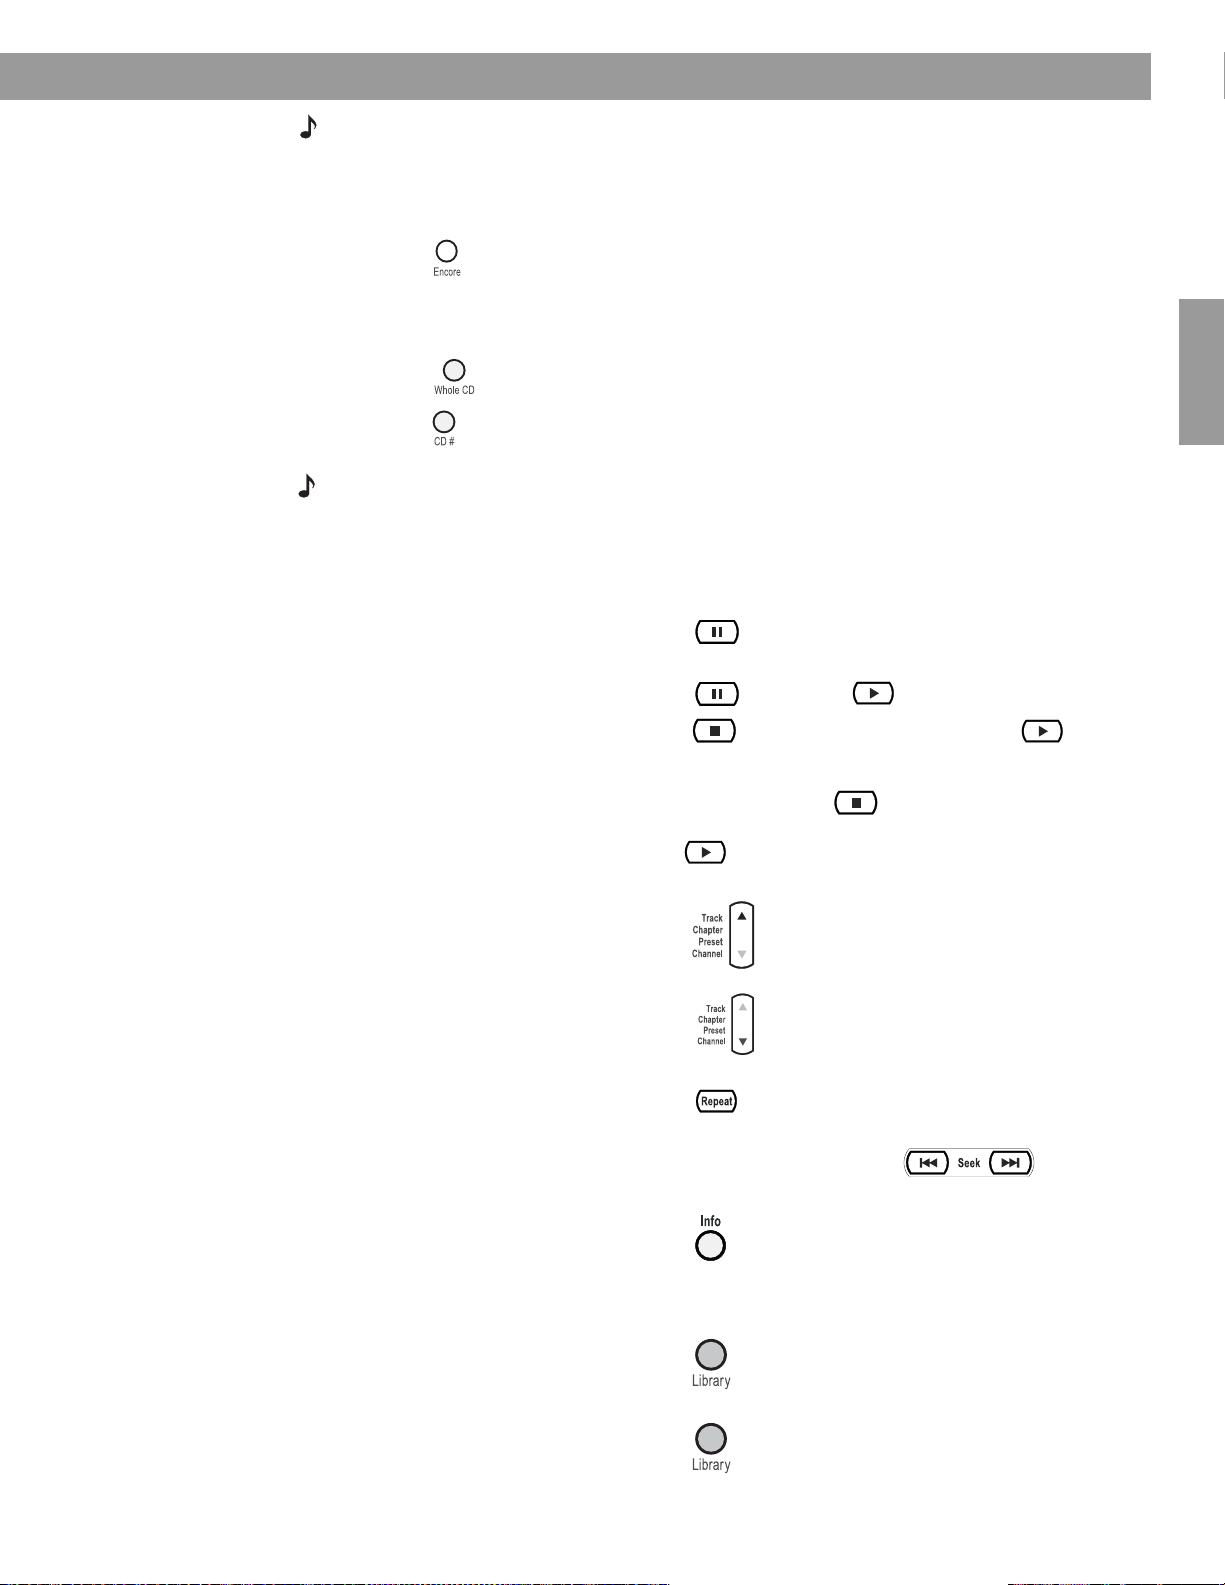
Rendimiento del sistema
Nota: Si pulsa –, quedará registrado que no le gusta y el sistema pasará inmediatamente a la
pista siguiente. Cuando oiga una pista que no es adecuada para la preselección seleccionada,
elija la clasificación del signo menos para disminuir las probabilidades de oír la pista de nuevo.
Si pulsa
escucharla por completo.
Nota: Consulte el registro de la parte posterior de la guía (si ha anotado sus CD a medida que
los almacenaba) para localizar rápidamente el CD que desea escuchar.
Opciones de control
Si quiere: Debe:
+
quedará registrado que la pista actual y otras similares le gustan y que desea
• Pulse para escuchar sólo música similar al tema que está sonando.
El sistema buscará en las bases de datos de música y seleccionará sólo aquellas
pistas de su colección que tengan características similares, para que pueda seguir
escuchando música del mismo estilo.
• Pulse para escuchar las otras pistas del CD en el orden dispuesto.
• Pulse , seguido del número de referencia, para moverse a un CD específico y
escuchar todas las pistas.
English FrançaisEspañol
Detener la reproducción de la
selección...
Reanudar la reproducción … Pulsar de nuevo o .
Detener una selección… Pulsar una vez. A continuación, pulse para
Moverse a otra selección... Pulsar hacia arriba.
Moverse a la selección
anterior…
Repetir una selección... Pulsar mientras la pista o el CD completo que
Buscar hacia atrás o hacia
delante…
Pulsar .
continuar la reproducción desde el punto en que se
detuvo la pista.
También puede pulsar dos veces para detener la
reproducción y restablecer los valores. A continuación,
pulse para reiniciar la reproducción desde el
principio de la pista o el CD completo.
No aplicable para preselecciones de
música almacenada.
Pulsar abajo dos veces, o una sola vez si la pista
que desea saltarse acaba de iniciar la
reproducción. No aplicable para
preselecciones de música almacenada.
desea escuchar se reproducen.
Mantener pulsadas las flechas , en función
de la dirección en la que desee realizar la búsqueda.
Averiguar cuál es la música que
está sonando...
Buscar un CD específico... Pulsar y elegir buscar por:
Escuchar música de un tipo o
un intérprete determinados…
Pulsar para ver datos de la pista en la pantalla del
televisor. Pulsarlo de nuevo para cerrar la
pantalla. Mantenerlo pulsado para mostrar u
ocultar la información en la pantalla del
centro multimedia.
género, álbum, artista...
en función del CD que desee escuchar.
Pulsar y elegir buscar por:
género, artista...en función del tipo de
música que desee escuchar.
19
Page 78
Rendimiento del sistema
Añadir una selección a la lista
de reproducción...
Escuchar las selecciones de su
lista de reproducción...
Asegurarse de que una pista no
se reproduzca de nuevo...
Nota: Para obtener información sobre los ajustes rápidos que puede realizar en la configuración
del CD almacenado, consulte “Opciones de configuración de CD almacenados” en la página 37.
Puede encontrar instrucciones sobre cómo acceder al menú para realizar estos cambios en
“Visualización de las opciones” en la página 34.
Descubra las ventajas más avanzadas
Poder disfrutar de la amplia selección de su colección privada de música a través de varios
altavoces de gran potencia es la principal ventaja que proporciona el sistema de
reproducción inteligente uMusic
Français Español English
Además este sistema permite limitar las selecciones para satisfacer mejor los distintos
aspectos de su personalidad.
Cómo aprovechar las ventajas de las preselecciones
Para obtener el máximo rendimiento de esta sofisticada función múltiple, debe configurar y
utilizar las preselecciones de música almacenadas y reservadas para este fin.
Una preselección de música almacenada es el lugar donde se graban las preferencias
musicales asociadas a distintas personas, actividades o estados de ánimo a lo largo del
tiempo. Considérelas como “estaciones” diferentes que se sintonizan para que el sistema las
“escuche” y aprenda cuáles son sus gustos.
Mantener pulsado mientras se reproduce la
selección.
Pulsar .
Pulsar , y seleccionar
y Eliminar pista en el menú.
pista
TM
.
CD almacenado, Acción de
Figura 3
Vista de la preselección 1
en la pantalla del centro
multimedia
Nota: Si varios miembros de su familia han almacenado música en el sistema, es importante que
tengan asignada una preselección personal. Esto permitirá que el sistema pueda distinguir las
preferencias e impedirá que escuche música que no desea.
La primera vez que seleccione Almacenado como fuente en un sistema nuevo, éste introduce
automáticamente la preselección 1 (Figura 3). Si recientemente ha utilizado una preselección
diferente, el sistema puede seleccionarla.
A L M A C E N A D O 2: 0 6 P 1
CD: 1 2 5nombre de pista
Mientras tenga CD almacenados en el sistema, seleccione una preselección para empezar:
Stored
1. Pulse el botón
(Almacenado) del control remoto LIFESTYLE®.
2. Compruebe la pantalla del centro multimedia para ver el modo de reproducción
seleccionado.
• Si dice UMUSIC podrá empezar a escuchar música y disfrutar.
• Si dice ENCORE (BIS), N.º CD, PLAYLIST (LISTA DE REPRODUCCIÓN), o WHOLE CD
(CD COMPLETO), pulse el botón
uMusic
del control remoto para que el sistema salga de
ese modo de reproducción especial.
20
Page 79
Rendimiento del sistema
3. Escuche música durante un rato.
Observe que la música reproducida no sigue ningún orden: ni según los CD que se
almacenaron en primer lugar ni según el artista o el género. Se trata más bien de un flujo
de pistas que puede o no haber escuchado recientemente.
4. Mientras está en la fuente Almacenado si pulsa un botón numérico del 2 al 9, se moverá
a una preselección diferente. La música reproducida cambiará cuando esto suceda.
Nota: Puede asignar a cada preselección un nombre que contenga hasta 8 caracteres y se
corresponda con la persona o el motivo para utilizar la preselección. Para obtener más
información acerca de cómo hacer esto, consulte “Opciones del centro multimedia” en la
página 47.
Cómo responder activamente para acelerar el proceso
de aprendizaje
Si escucha un tema que no le gusta o no le apetece oír:
• Muévase pulsando el botón o .
El sistema detecta que no le apetece oír la pista actual, comienza a reproducir la siguiente,
y se prepara para aprender más.
English FrançaisEspañol
• Pulse el botón de clasificación
preselección actual. El sistema registrará su respuesta negativa y se moverá
inmediatamente a otra pista.
Si una pista le gusta especialmente:
• Pulse el botón de clasificación
continuará reproduciendo la pista. Probablemente escuchará más música de ese artista y
álbum antes que otras opciones.
Si desea registrar sus preferencias en general:
• Pulse el botón
clasificarla en función del género, el artista o las pistas de un CD.
Nota: Para obtener detalles sobre cómo usar el archivo de música, consulte “Acceso al archivo
de música” en la página 22.
Library
(Archivo) para poder examinar la música almacenada en el sistema y
–
si la pista reproducida no es adecuada para la
+
. El sistema registrará su respuesta como positiva y
Utilización de la lista de reproducción para preparar las pistas
El sistema incluye una lista de reproducción para que pueda preparar pistas específicas en el
orden que desee y reproducirlas según lo ordene.
Nota: Si simplemente desea que la música cree un ambiente determinado, quizás sea más
rápido elegir una preselección y dejar que el sistema realice la selección.
La lista de reproducción puede ser útil cuando se desea escuchar un tipo específico de
música como, por ejemplo, sus villancicos favoritos.
Cómo añadir música a la lista de reproducción proporcionada:
Mientras escuche una pista en la fuente Almacenado (y no en la lista de reproducción),
mantenga pulsado el botón
Playlist
(Lista de reproducción) del control remoto.
Localice las seleccione mediante el archivo de música y, a continuación, mantenga pulsado
el botón
añadir un lote completo de selecciones de un artista, género o CD.
Playlist
(Lista de reproducción) para añadirlas a la lista individualmente. También puede
21
Page 80
Rendimiento del sistema
ó
Cómo eliminar pistas de la lista de reproducción:
Si está escuchando música de la lista de reproducción, mantenga pulsado el botón
(Lista de reproducción) mientras se reproduce la pista que desea eliminar.
Cómo borrar completamente la lista de reproducción:
Para volver a utilizar la lista de reproducción con un propósito diferente, es posible que desee
eliminar todas las pistas enumeradas. Para hacerlo de forma rápida, pulse el botón
(Sistema) del control remoto, muévase hasta
al elemento
Acción de preselección de uMusic. Seleccione Eliminar lista de reprod en la lista de
opciones.
Acceso al archivo de música
Imagínese que mientras utiliza el sistema LIFESTYLE®, está escuchando música en FM, o
quizás de una película, y de repente recuerda otro tema que desea oír. Sabe que lo tiene,
pero el nombre se le resiste. Y no deja de darle vueltas en la cabeza.
Ésta es la situación perfecta para utilizar el archivo de música. Si su sistema está encendido
y la fuente Almacenado se ha seleccionado:
Centro multimedia
Playlist
System
y dentro de ese menú acceda
Français Español English
Figura 4
El menú Archivo de música
se mostrará en la pantalla
del centro multimedia.
Figura 5
Archivo de música en
pantalla
1. Pulse el botón
Library
(Archivo) en el control remoto a fin de ver las opciones disponibles
para localizar una pista.
• La información inicial del archivo aparece en la pantalla del centro multimedia
(Figura 4).
GÉNERO:
TODOS LOS GÉNEROS
Library
• Si su televisor está encendido y se ha seleccionado la entrada de vídeo que lo conecta
con el centro multimedia, se abrirá la pantalla del archivo (Figura 5).
• La opción Género aparece seleccionada y lista para examinar sus opciones.
• La información de la pantalla y el televisor cambiará según se mueva alrededor y
realice selecciones.
Lista de
elementos
Archivo de música
Género: Todos los géneros
Artista: Todos los artistas
Album: Todos los álbumes
Preajuste: 1
Preselecci
actual
Selección
22
Resumen
de
selecciones
Pista: Todas las pistas
97 álbumes/1027 pistas seleccionadas.
Izquierda/Derecha: selección limitada a un género.
Esta selección filtra las selecciones disponibles debajo.
navegar seleccionar detalles
Page 81

Figura 6
Pista localizada buscando
por género y luego por
artista
Rendimiento del sistema
2. Utilice estas acciones para moverse alrededor y realizar seleccciones en las pantallas:
• Pulse las flechas izquierda, derecha, arriba o abajo para acceder a la opción deseada.
Enter
•Pulse
de funciones.
• Repita estos pasos para realizar los cambios que desee.
• Pulse el botón
3. Según realiza selecciones, elija entre las nuevas opciones que aparecen.
Nota: Para obtener más información sobre cómo moverse por la pantalla y realizar elecciones,
consulte “Realización de ajustes de sistema” en la página 40.
Archivo de música
Genre: Rock/Pop
Artist: Jackson Browne
Album: All Albums
Track: All tracks
(Intro) o la flecha izquierda para confirmar la selección y volver a la columna
Exit
(Salir) del control remoto para abandonar el archivo de música.
Preajuste: 1
English FrançaisEspañol
1 álbum/10 pistas seleccionadas
Izquierda/Derecha: selección limitada a un género.
Esta selección filtra las selecciones disponibles debajo.
4. Cuando encuentre lo que busca, puede utilizar el control remoto como se indica a
continuación:
• Pulse el botón
• Pulse el botón
• Pulse el botón
gusto.*
•Pulse
• Pulse los botones de clasificación
Esto proporciona a la preselección un punto de arranque para el aprendizaje.
Reproducción de un DVD
Los siguientes símbolos representan botones del control remoto LIFESTYLE®, salvo que se
indique lo contrario.
1. Encienda el televisor.
2. Pulse para seleccionar el reproductor de DVD. Si el sistema está apagado, así
también se enciende.
Play
(Reproducción) o
Info
(Información) para ver más datos acerca de la selección.* (!)
System
(Sistema) para ver datos para la selección actual y editarla a su
Exit
(Salir) para abandonar el menú Archivo de música.
Enter
(Intro) para reproducir sus selecciones.
–
o + a medida que localice la música en el archivo.
3. Levante la puerta delantera del centro multimedia y pulse en el panel de control.
4. Inserte el disco DVD en la bandeja (con la etiqueta hacia arriba).
*Esto sólo aparece en la pantalla del televisor.
23
Page 82

Rendimiento del sistema
5. Pulse de nuevo para cerrar la bandeja de discos.
6. Pulse para comenzar la reproducción.
Es posible que tenga que pulsar el botón de reproducción varias veces. La mayoría de los
vídeos DVD disponen de opciones en pantalla previas al inicio de la película.
Nota: No todos los DVD ofrecen las mismas funciones. Por ejemplo, sólo podrá elegir subtítulos
si el disco contiene este tipo de información.
Opciones de control
Si quiere: Debe:
Poner una película DVD en
pausa …
Reanudar la reproducción … Pulsar de nuevo o .
Detener una película DVD… Pulsar una vez. A continuación, pulsar para
Français Español English
Saltar al próximo capítulo…
Saltar al capítulo anterior…
Repetir un capítulo… Pulsar mientras se reproduce el capítulo que desea
Buscar hacia atrás o hacia
delante…
Pulsar .
continuar la reproducción desde el punto en que se
detuvo la película.
También puede pulsar dos veces para detener la
reproducción y restablecer los valores. A continuación,
pulse para reiniciar la reproducción desde el
principio del DVD.
Pulsar hacia arriba.
Pulsar hacia abajo dos veces.
repetir.
Mantener pulsado .
24
Nota: Para obtener información sobre los ajustes rápidos que puede realizar en la configuración
del DVD, consulte “Opciones de configuración de CD almacenados” en la página 37. Puede
encontrar instrucciones sobre cómo acceder al menú para realizar estos cambios en
“Visualización de las opciones” en la página 34.
Utilización de los controles parentales
La función de control parental del sistema LIFESTYLE® le permite restringir el acceso a
películas de DVD que tengan una clasificación inadecuada para miembros de su familia.
Antes de utilizar esta función, debe elegir una contraseña y un nivel de restricción en el menú
del sistema. Para obtener más información sobre los controles parentales, consulte “Para
configurar el nivel de restricción y las contraseñas” en la página 50.
Nota: Consulte “Resolución de problemas” en la página 55 si tiene problemas con la
contraseña.
Page 83

Carga y reproducción de un CD
Los siguientes símbolos representan botones del control remoto LIFESTYLE®, salvo que se
indique lo contrario.
Pulse para seleccionar el reproductor de CD y comenzar a reproducir el CD cargado
en la bandeja de discos. Así también se enciende el sistema, cuando esté apagado.
Para cargar otro disco después de que finalice el actual:
1. Levante la puerta delantera del centro multimedia y pulse en el panel de control.
2. Inserte el CD de audio en la bandeja.
3. Pulse para cerrar la bandeja de discos. La reproducción empieza automáticamente.
Opciones de control
Si quiere: Debe:
Detener temporalmente un CD… Pulsar .
Rendimiento del sistema
English FrançaisEspañol
Reanudar la reproducción del CD
detenido…
Detener un CD… Pulsar . Pulsar para volver a empezar
Borrar continuamente la información de
desplazamiento por las pistas (para un
CD de MP3) de la pantalla del centro
multimedia...
Ir a la siguiente pista… Pulsar hacia arriba.
Ir al principio de la pista… Después de reproducir la pista durante varios
Ir a la pista anterior… Pulsar hacia abajo:
Pulsar o .
desde el principio del CD.
Mantener pulsado hasta que cambie la
pantalla.Vuelva a
mantenerlo pulsado para
restaurar la pantalla de
desplazamiento de texto.
segundos, pulse hacia abajo.
•una vez si no se está
reproduciendo música.
•dos veces si la música ha
empezado a reproducirse.
Explorar un CD hacia atrás y hacia
adelante…
Reproducir aleatoriamente pistas de CD… Pulsar .
Cancelar la reproducción aleatoria… Pulsar otra vez.
Repetir una pista... Pulsar .
Repetir un CD... Pulsar otra vez.
Cancelar la repetición... Pulsar por tercera vez.
Mantener pulsado .
En discos MP3, esta acción salta al comienzo de
una pista.
25
Page 84
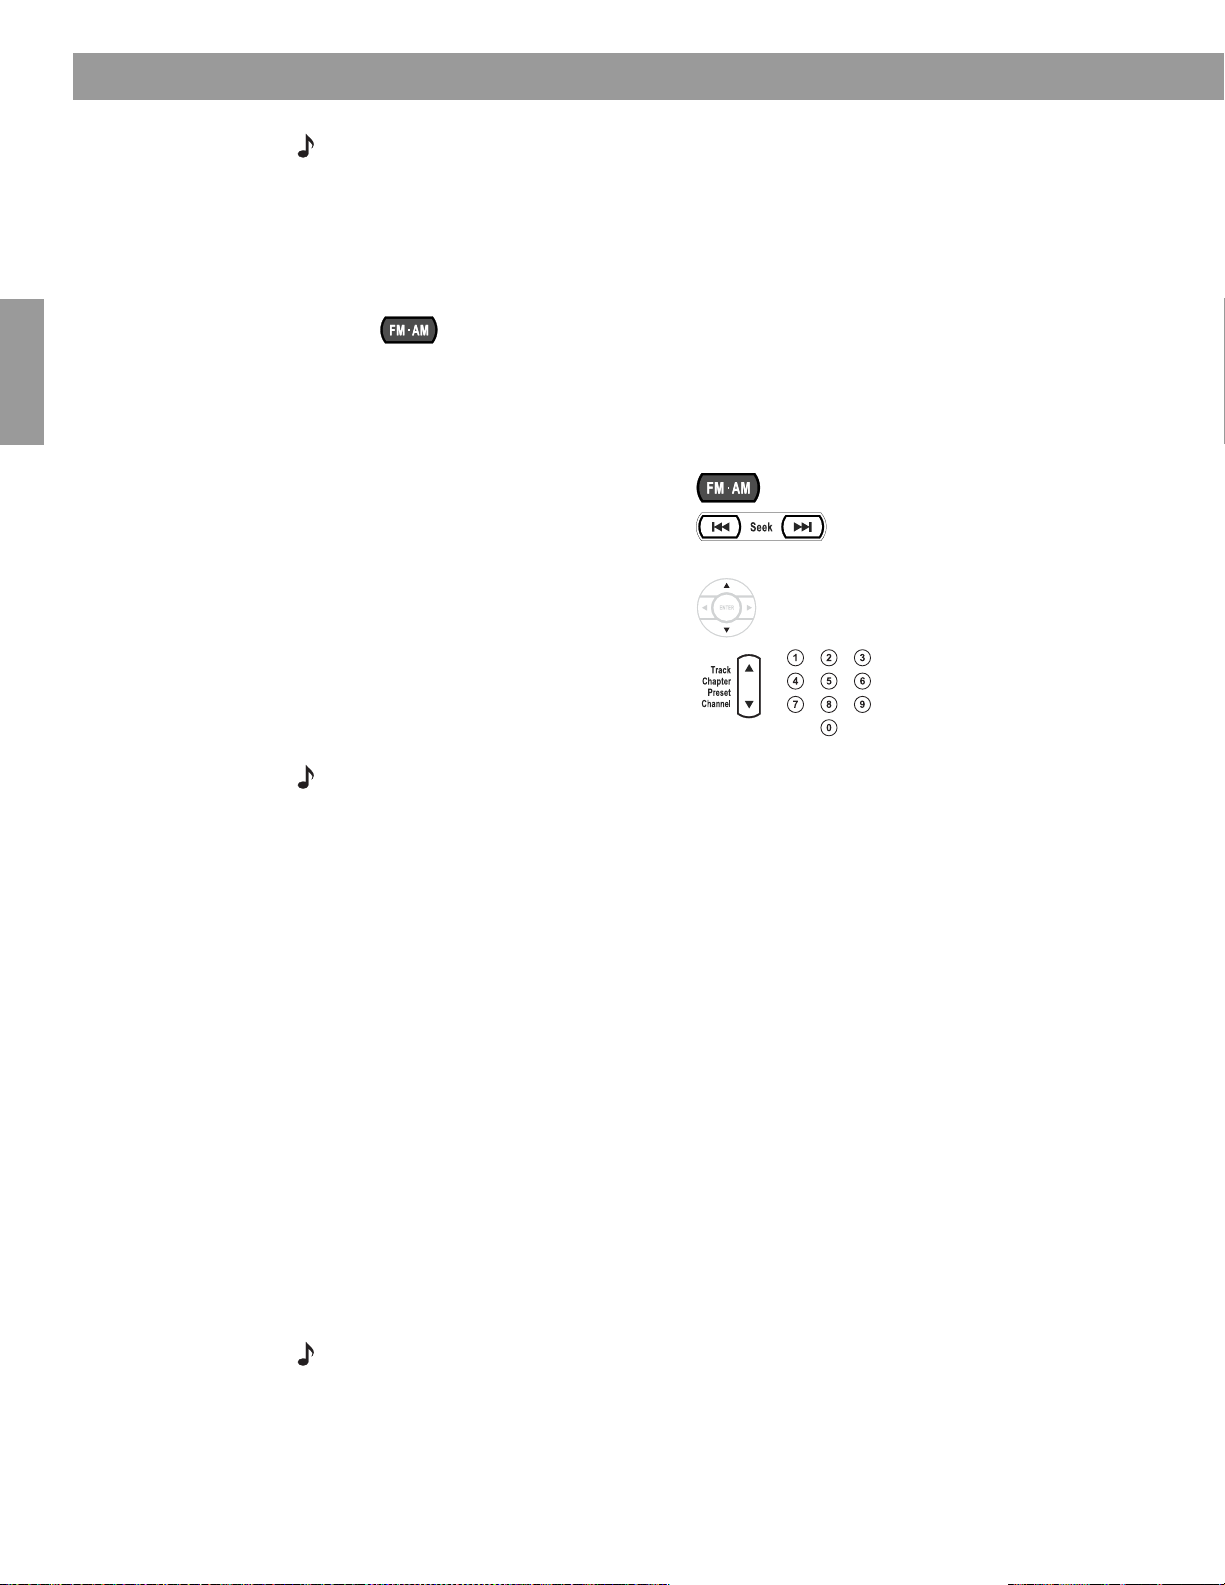
Rendimiento del sistema
Nota: Para obtener información sobre los ajustes rápidos que puede realizar en la configuración
del CD, consulte “Opciones de configuración de CD” en la página 36. Puede encontrar
instrucciones sobre cómo acceder al menú para realizar estos cambios en “Visualización de las
opciones” en la página 34.
Uso de la radio
Los siguientes símbolos representan botones del control remoto LIFESTYLE®.
Pulse para seleccionar el sintonizador de radio y encenderlo si el sistema estaba
apagado. Esto sintoniza la última estación FM o AMA seleccionada.
Cambio de estación
Si quiere: Debe:
Cambiar entre FM y AM… Pulsar .
Buscar la siguiente estación
potente…
Français Español English
Sintonizar manualmente una
estación…
Seleccionar una estación
preseleccionada…
Nota: Para obtener información sobre los ajustes rápidos que puede realizar en la configuración
del sintonizador de radio, consulte “Opciones de configuración del sintonizador (radio FM o AM)”
en la página 36. Puede encontrar instrucciones sobre cómo acceder al menú para realizar estos
cambios en “Visualización de las opciones” en la página 34.
Pulsar .
Pulsar .
Pulsar o para el número
preseleccionado.
Establecimiento de una preselección de estación
Puede presintonizar hasta 20 estaciones de AM y 20 de FM. Así puede sintonizar con rapidez
sus estaciones preferidas. Hay dos modos de asignar preselecciones.
Si utiliza el botón
automáticamente el siguiente número de presintonía a una estación, siga los pasos que se
indican a continuación para todas las estaciones que desee asignar:
1. Sintonice la emisora que le interesa.
2. Pulse el botón
Uso del control remoto LIFESTYLE
Enter
(Intro) del panel de control del centro multimedia para asignar
Enter
en el panel de control del centro multimedia.
®
para asignar un número determinado:
26
1. Sintonice la emisora que le interesa.
2. Para asignarle un número preseleccionado, pulse y mantenga pulsado el botón del
número en cuestión.
• Para los números del 1 al 9, mantenga un número pulsado hasta que la pantalla
muestre PRESELEC.: XX CONFIG.
• Para los números del 10 al 20, pulse el primer número y, rápidamente, el segundo y
manténgalo pulsado hasta que la pantalla muestre PRESELEC.: XX CONFIG.
Nota: La asignación de un número preseleccionado a una estación cambiará cualquier
asignación previa de esa preselección.
Page 85

Para eliminar una presintonización de emisora
Seleccione el número preseleccionado que desea eliminar. Siga los pasos que se indican a
continuación:
• En el control remoto, mantenga pulsado el botón 0 hasta que aparezca brevemente el
mensaje PRESELEC.: XX BORRADA en la pantalla del centro multimedia. La
eliminación se ha completado.
Para reasignar una emisora de radio preseleccionada a una estación diferente
1. Sintonice otra estación. Después, mantenga pulsado el botón del número
preseleccionado, que lo vuelve a asignar a la nueva estación.
2. Pulse el número preseleccionado que desea eliminar. Después, ponga el sistema en
silencio y mantenga pulsado el número otra vez.
Utilización del conector de auriculares
Para escuchar música en privado, puede conectar unos auriculares al conector ubicado en la
parte derecha del centro multimedia.
Nota: Al conectar los auriculares, se silenciarán todos los altavoces de la sala principal.
Utilización del temporizador de suspensión
Puede configurar el temporizador de desconexión para apagar el sistema LIFESTYLE
automáticamente dentro de un intervalo de 10 a 90 minutos, dependiendo de la hora que
seleccione. Esto se puede realizar con cualquier fuente seleccionada desde el menú Configuración.
Rendimiento del sistema
English FrançaisEspañol
®
Figura 7
Símbolo del temporizador
de desconexión en el menú
Configuración de la fuente
Nota: Si no está familiarizado con la utilización del menú Configuración, consulte “Realizar
ajustes a una fuente concreta” en la página 34.
En el menú Configuración de la pantalla del centro
multimediao del televisor, muévase para realizar los
cambios que desee mediante los botones de selección.
Para configurar el temporizador
Se realizan las mismas acciones en la pantalla del centro de medios y el menú en pantalla del
televisor:
1. Pulse el botón
2. Muévase hacia abajo, hasta el símbolo del temporizador de desconexión, la última
función del menú (Figura 7).
Nota: Si ve una flecha de continuación en la parte inferior del menú, muévase hasta ella para ver
los elementos que no aparecen en la pantalla.
3. Muévase a la derecha para acceder a la lista de opciones y hacia arriba para seleccionar
el tiempo de retardo que desea (de 10 a 90 minutos).
Nota: Si pulsa la flecha arriba cuando llegue a la opción de 90 minutos, el temporizador de
desconexión se desactivará.
4. Pulse
5. Pulse
Cuando transcurra el tiempo fijado, el temporizador apagará el sistema y el televisor (si está
encendido*) y, a continuación, se desconectará.
Enter
Exit
el menú.
Settings
(Configuración) en el control remoto LIFESTYLE® para acceder al menú.
(Intro) para confirmar la selección.
(Salir) o
Settings
(Configuración) en el control remoto LIFESTYLE® para abandonar
*Para que la televisión se apague automáticamente, el sistema debe percibir que está
encendida. Esto dependerá del uso que dé al sensor de televisor suministrado. Para obtener
información sobre cómo instalar y comprobar el sensor del televisor, consulte la Guía de
instalación del sistema LIFESTYLE
®
.
27
Page 86

Control de fuentes externas
Utilización del control remoto del sistema con otros componentes
El control remoto LIFESTYLE® le permite controlar la mayoría de marcas de componentes
externos, como televisores, aparatos de vídeo y sistemas de cable y satélite. También puede
elegir uno de estos componentes para que sirva de sintonizador de vídeo (selector de canal)
de todos los componentes, para facilitar aún más su uso.
El sistema LIFESTYLE
frontal del centro de música a cualquier componente para el que se haya configurado el
control remoto LIFESTYLE
selecciones sencillas en ellos, si están conectados al centro de medios o al televisor.
Nota: Si un componente está ubicado en un lugar donde no puede recibir las señales de IR,
puede usar el cable del emisor de IR incluido con ese componente. Si desea ver algún consejo
para ver cómo orientar las señales de IR o para utilizar el emisor opcional, consulte “Conexión del
cable del emisor IR opcional”, en la Guía de instalación.
Para el control de la televisión
Nota: Si desea consultar las directrices generales de utilización del menú Sistema de
LIFESTYLE
Français Español English
Utilice el control remoto de la televisión para encenderla. Asegúrese de que ha seleccionado
la entrada de vídeo del televisor para el centro multimedia.
A continuación, utilizando el control remoto LIFESTYLE
®
, consulte “Realización de ajustes de sistema” en la página 40.
®
incluye un emisor de infrarrojos (IR) que envía señales desde la parte
®
. Esto permite encender otras fuentes de la sala y realizar
®
:
Figura 8
Vista previa de las
funciones del control
remoto en el menú Sistema.
1. Pulse el botón
2. Pulse el botón
TV
para seleccionar la fuente de televisión.
System
(Sistema). El menú Sistema aparecerá en la pantalla del televisor.
3. Muévase por las categorías hasta
opciones de menú (Figura 8).
Enter
4. Pulse la flecha abajo o
(Intro) para acceder al menú.
Control de IR:
Sintonizador de TV:
Marca de TV:
- -
Código disposit TV:
Marca de VCR
Seleccione su marca de TV.
navegar
seleccionar
Control remoto
Control
remoto
para obtener una vista previa de esas
28
Page 87

Control de fuentes externas
5. Identificación de la marca de TV:
• En las opciones de
• Muévase a la derecha para acceder a la lista de marcas y luego hacia arriba o hacia
abajo para seleccionar la marca de su televisión.
Control remoto
del menú Sistema, seleccione Marca de TV (Figura 9).
English FrançaisEspañol
Figura 9
Selección de la marca
de TV
•Pulse
Control de IR:
Sintonizador de TV:
Marca de TV:
Código disposit TV:
Enter
(Intro) para seleccionar la marca.
Control
remoto
Philharmonic
Philips
Phoenix
Phonola
Marca de VCR
Seleccione su marca de TV.
navegar
6. Seleccione el código del dispositivo:
• En las opciones de menú de la izquierda, seleccione
• Muévase a la derecha para seleccionar el primer código.
• Pulse el botón
Si la televisión se apaga y se enciende, ha elegido el código adecuado.
Si no es así, seleccione otro código y pulse el botón
seleccionar
TV On/Off
del control remoto LIFESTYLE®. Púlselo otra vez.
Código disposit TV.
TV On/Off
dos veces más*.
• Cuando haya elegido el código correcto, pulse el botón
• Para que el televisor se encienda automáticamente al pulsar el botón de una fuente de
vídeo, vaya al paso 7 de página 30. Para omitir este paso, pulse
(Salir) para abandonar el menú del sistema.
*Algunos fabricantes utilizan varios códigos de dispositivos similares. Después de haber
seleccionado un código, es posible que pueda encender y apagar la televisión, pero que no
pueda cambiar los canales ni seleccionar Play o Pause (Reproducción o Pausa). En ese caso,
seleccione un código de dispositivo diferente que le permita tener un mayor control.
Enter
(Intro).
System
(Sistema) o
Exit
29
Page 88
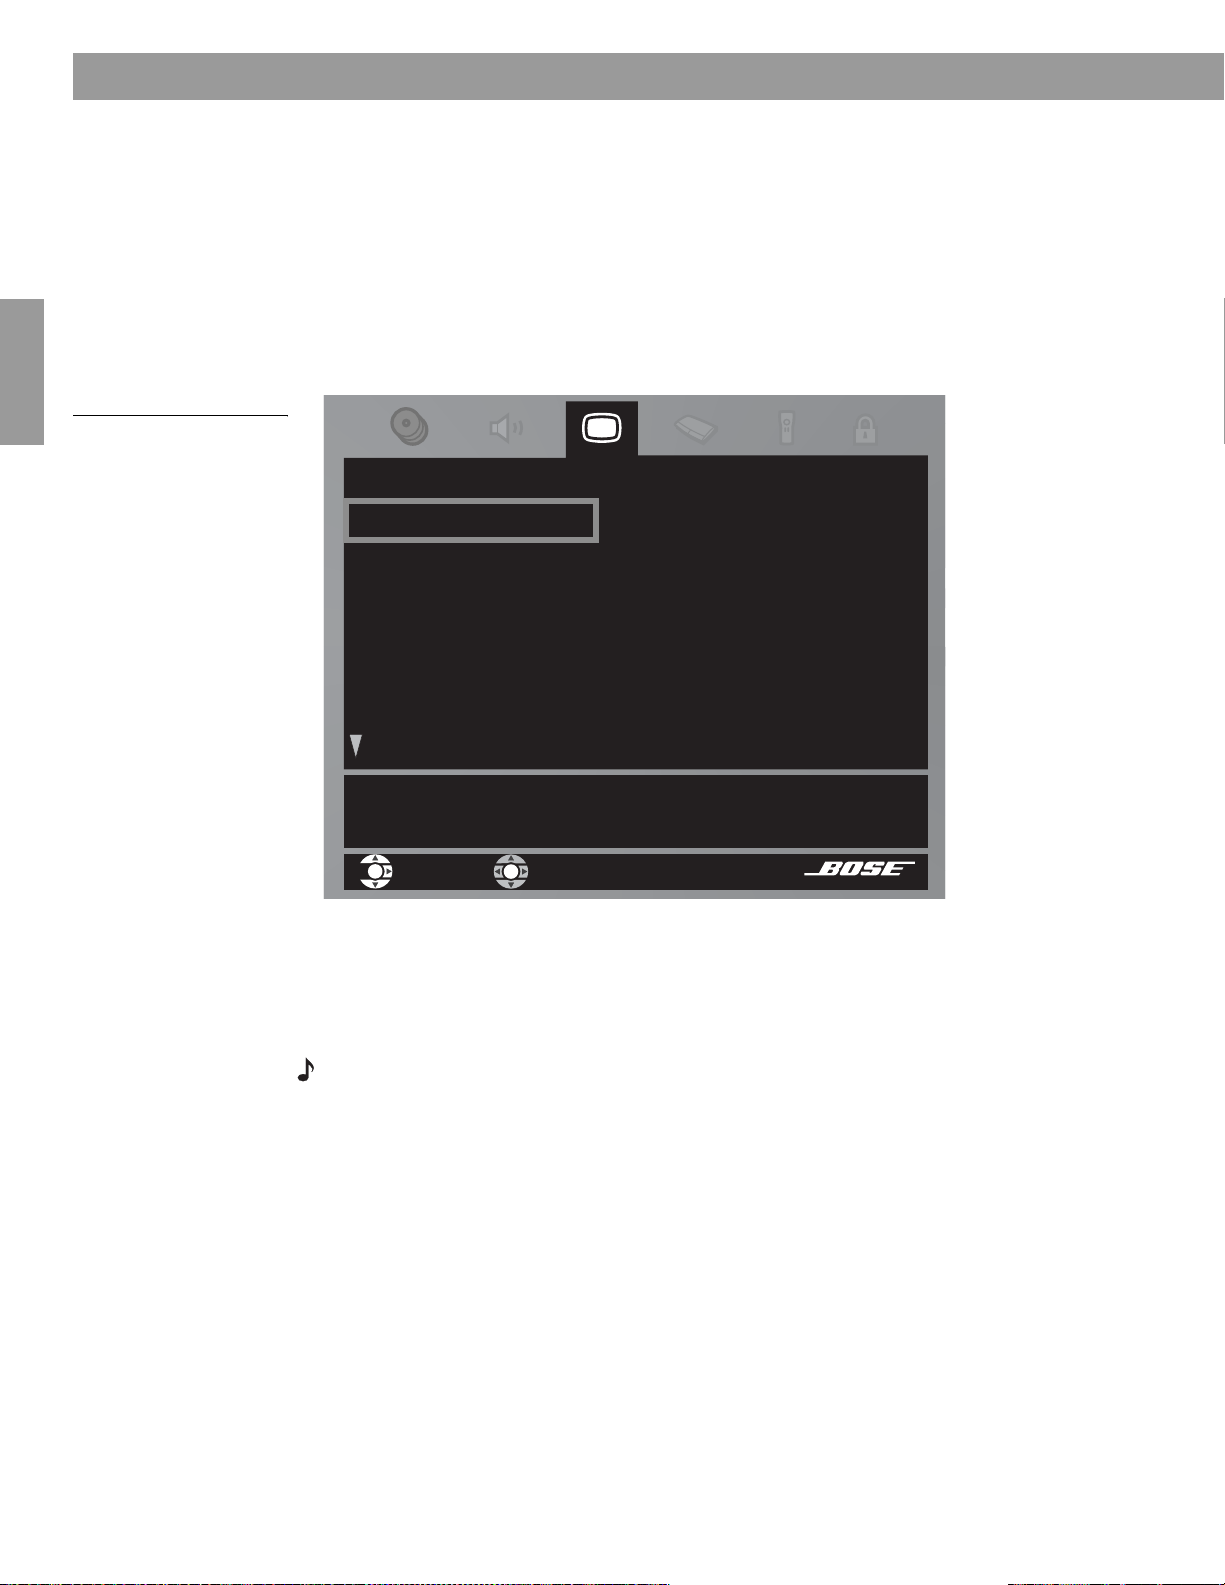
Control de fuentes externas
7. Configure el televisor para que se encienda automáticamente*, según se requiera:
• Muévase hacia arriba hasta las categorías del menú Sistema, y después a
• Desde las opciones de
• Muévase a la derecha para acceder a la lista de opciones y después arriba y abajo para
seleccionar una de las dos opciones siguientes:
–
Automático (para los modelos de televisor que no utilizan un conector europeo SCART)
–
Euro Conector (para los modelos de televisor que utilizan un conector SCART)
vídeo
, seleccione Encendido TV (Figura 10).
Vídeo
.
Figura 10
Cambio del Encendido TV
Français Español English
• Pulse el botón
Enter
(Intro).
Vídeo
Encendido TV:
Estado del encendido TV:
Formato de imagen de TV:
DVD de pantalla amplia:
Conector de vídeo:
Nivel borde vídeo:
El Centro medios puede encender automáticamente la televisión
cuando se seleccione una fuente de vídeo.
navegar
8. Observe el Estado del encendido TV:
•
TV detectado significa que el sensor de TV instalado está funcionando.
seleccionar
Manual
TV no detectado
- -
- Componente
Normal
•
TV no detectado significa que el sensor de TV (si está instalado) no está bien colocado
o que hay un conector SCART instalado.
•Pulse
Nota: Para obtener información sobre la utilización del sensor de TV, consulte “Instalación del
detector de encendido/apagado del televisor”, en la Guía de instalación.Si desea comprobar la
ubicación del sensor, consulte “Centro de medios” en la página 14.
*Para que la función Automático funcione correctamente en los modelos de televisor
norteamericanos, se debe instalar el sensor de TV opcional para que detecte si el televisor
está encendido o apagado. En Europa, un conector SCART realiza esta función. Si usted no
utiliza un conector SCART o el sensor de televisión no está debidamente colocado, la función
Automático no funcionará. En ese caso, deje
significa que tiene que encender el televisor con el botón de encendido o con el control
remoto LIFESTYLE
System
(Sistema) o
Exit
(Salir) para abandonar el menú Sistema.
Encendido TV configurado en Manual. Esto
®
(si se ha configurado para ello).
30
Page 89

Control de fuentes externas
Para el control del cable/satélite
Aunque puede configurar el control remoto LIFESTYLE® para que controle los sistemas de
cable y satélite, es necesario que elija uno u otro para realizar los pasos siguientes.
Elija el que está conectado a la entrada CBL-SAT del centro de medios. De esta forma, al
CBL-SAT
pulsar el botón de la fuente
dispositivo.
y el botón
On/Off
que hay debajo, estará utilizando ese
English FrançaisEspañol
El otro puede designarlo en
Disposit AUX, siguiendo las instrucciones que encontrará en
página 32. Hágalo así sólo si el dispositivo está conectado a la entrada AUX del centro
multimedia o si no se está usando esa entrada.
Nota: Si desea consultar las directrices generales de utilización del menú Sistema de
LIFESTYLE
®
, consulte “Realización de ajustes de sistema” en la página 40.
Siga este procedimiento:
Encienda el sistema de cable o satélite, el que desee manejar desde el control remoto.
Encienda el TV y asegúrese de que ha seleccionado la entrada de vídeo para el centro
CBL-SAT
multimedia. A continuación, pulse el botón
del control remoto LIFESTYLE® y siga los
pasos que se indican:
1. Identifique el dispositivo:
•En las opciones de
Control remoto
• Muévase a la derecha y seleccione
del menú Sistema, seleccione Dispositivo CBL/SAT.
Cable o Satélite, pulsando
Enter
(Intro).
2. Identifique la marca:
• En las opciones de menú de la izquierda, seleccione
Marca CBL/SAT.
• Muévase a la derecha y arriba o abajo en la lista alfabética para localizar la marca.
•Pulse
Enter
(Intro) para seleccionar la marca.
3. Seleccione el código de dispositivo.
• En las opciones de menú de la izquierda, seleccione
Código disposit CBL/SAT.
• Muévase a la derecha para seleccionar el primer código.
• Pulse el botón
CBL/SAT On/Off
en el control remoto LIFESTYLE®. Púlselo otra vez.
Si el sistema de cable o satélite se apaga y se enciende, ha elegido el código
adecuado. Si no es así, seleccione otro código y pulse el botón
CBL-SAT On/Off
dos veces
más.*
• Cuando haya elegido el código correcto, pulse el botón
•Pulse
System
(Sistema) o
Exit
(Salir) para salir del menú Sistema.
Una vez finalizada la configuración, puede usar el botón
de cable o satélite y otros botones del control remoto LIFESTYLE
Enter
CBL-SAT On/Off
®
(Intro).
para encender la fuente
para poder utilizarla.
*Algunos fabricantes utilizan varios códigos de dispositivos similares. Después de haber
seleccionado un código, es posible que pueda encender y apagar el sistema de cable o
satélite, pero que no pueda cambiar los canales ni seleccionar Play o Pause (Reproducción
o Pausa). En ese caso, seleccione un código de dispositivo diferente que le permita tener un
mayor control.
31
Page 90

Control de fuentes externas
Para el control del VCR (o DVR)
La lista de marcas y códigos de VCR también incluye algunos de DVR. Si sigue las
instrucciones que se indican a continuación, puede configurar el control remoto para
utilizarlo con uno de ellos, pero no con ambos.
Si dispone de un aparato de vídeo y de un DVR, la opción del DVR le proporcionará más
opciones de control. Independientemente de si se trata de un aparato de DVR autónomo
o acoplado al sistema de VCR o cable/satélite.
Nota: Si desea consultar las directrices generales de utilización del menú Sistema de
LIFESTYLE
®
, consulte “Realización de ajustes de sistema” en la página 40.
Siga este procedimiento:
Encienda el VCR o DVR. Encienda el TV y asegúrese de que ha seleccionado la entrada de
vídeo para el centro multimedia. A continuación, pulse el botón
LIFESTYLE
®
y siga los pasos que se indican:
VCR
del control remoto
1. Identifique la marca.
•En las opciones de
Control remoto
del menú Sistema, seleccione Marca de VCR.
• Muévase a la derecha para acceder a la lista de marcas y luego hacia arriba o hacia
Français Español English
abajo para seleccionar la marca de su VCR o DVR.
•Pulse
Enter
(Intro) para seleccionar la marca.
2. Seleccione el código del dispositivo:
• En las opciones de menú de la izquierda, seleccione
Código disposit VCR.
• Muévase a la derecha para seleccionar el primer código.
• Pulse el botón
VCR On/Off
del control remoto LIFESTYLE®. Púlselo otra vez.
Si el VCR o DVR* se apaga y se enciende, ha elegido el código adecuado.
Si el VCR o DVR no se apaga y se enciende, seleccione otro código y pulse el botón
VCR On/Off
• Cuando haya elegido el código correcto, pulse el botón
•Pulse
dos veces más.*
System
(Sistema) o
Exit
(Salir) para salir del menú Sistema.
Enter
(Intro).
Una vez finalizada la configuración, después de haber elegido
botón
VCR On/Off
y pulsar
Play, Pause
, or
Stop
(Reproducción, Pausa o Parada) para controlar el
VCR
como fuente, puede usar el
aparato de vídeo.
También puede utilizar los botones
Shuffle
DVR, si pulsa
(Aleatorio) y
Seek
(Buscar) del control remoto LIFESTYLE®. En algunos
Repeat
(Repetir) podrá avanzar y retroceder rápidamente.
Para el control AUX
Si tiene conectado algún componente a la entrada AUX del centro multimedia, puede
configurar el control remoto LIFESTYLE
apagarlo.
Si no tiene ningún componente conectado a la entrada AUX, de todas formas puede
controlar otro dispositivo, seleccionándolo de la lista de opciones de dispositivos AUX.
Regulador, Satélite, Cable, DVR, TV o VCR.
Para poder ejercer este control, debe pulsar primero el botón de la fuente
Nota: Si desea consultar las directrices generales de utilización del menú Sistema de
LIFESTYLE
®
, consulte “Realización de ajustes de sistema” en la página 40.
*Algunos DVR no se encienden y se apagan; por tanto, puede utilizar otros botones del control
remoto como
Play
(Reproducción) para comprobar el control de dicho componente. Además,
algunos fabricantes utilizan varios códigos de dispositivos similares. Después de haber
seleccionado un código, es posible que pueda encender y apagar el VCR o DVR, pero que no
pueda cambiar los canales ni seleccionar Play o Pause (Reproducción o Pausa). En ese caso,
seleccione un código de dispositivo diferente que le permita tener un mayor control.
®
para que lo controle, aunque no podrá encenderlo y
AUX
.
32
Page 91

Control de fuentes externas
Siga este procedimiento:
Encienda el componente. Encienda el TV y asegúrese de que ha seleccionado la entrada de
vídeo para el centro multimedia. A continuación, pulse el botón de la fuente
remoto LIFESTYLE
®
y siga adelante:
1. Identifique el dispositivo:
•En las opciones de
Control remoto
del menú Sistema, seleccione Disposit AUX.
• Muévase a la derecha y luego arriba y abajo en la lista para seleccionar un
componente, pulsando
Enter (Intro).
2. Identifique la marca:
• En las opciones de menú de la izquierda, seleccione
Marca AUX.
• Muévase a la derecha y arriba o abajo en la lista alfabética para localizar la marca.
AUX
del control
English FrançaisEspañol
•Pulse
Enter
(Intro) para seleccionar la marca.
3. Seleccione el código de dispositivo.
• En las opciones de menú de la izquierda, seleccione
• Muévase a la derecha para seleccionar el primer código.
• Pulse el botón
LIFESTYLE
Play
(Reproducción) o
®
.
– Si el componente responde, pulse otros botones de función para asegurarse de que
funcionan otras características importantes del componente.
– Si el componente no responde, seleccione un código diferente y vuelva a intentarlo.
• Cuando haya elegido el código que mejor se adapte al componente, pulse el botón
(Intro).
•Pulse
System
(Sistema) o
Exit
(Salir) para salir del menú Sistema.
Designación de un sintonizador de vídeo
Si ha configurado el control remoto LIFESTYLE® para que controle varios componentes
de vídeo, puede elegir uno de ellos como el selector primario de canal. Esto permite que
el control remoto cambie los canales de cable, aún cuando TV o VCR sean las fuentes
seleccionadas. Por tanto, no necesitará cambiar a CBL/SAT para cambiar los canales.
Nota: Si desea consultar las directrices generales de utilización del menú Sistema de
LIFESTYLE
®
, consulte “Realización de ajustes de sistema” en la página 40.
Channel/Track
Código disposit AUX.
up (Canal/pista arriba) del control remoto
Enter
Figura 11
Designación del TV como
sintonizador de vídeo
Haga esta selección en las opciones de
Sintonizador de TV, seleccione uno de sus componentes. A continuación, pulse
(Sistema) o
Exit
(Salir) para abandonar el menú.
Control remoto
Control
remoto
del menú Sistema. En la lista de
Control de IR:
Sintonizador de TV:
Marca de TV:
Código disposit TV:
Televisor
VCR
CBL/SAT
Marca de VCR
Elija el que desea que actúe como control remoto.
navegar
seleccionar
System
33
Page 92

Cambio de configuración de la fuente
Realizar ajustes a una fuente concreta
Mientras esté viendo un vídeo o escuchando música en el sistema, se pueden realizar ajustes
rápidos para mejorar la experiencia. Por ejemplo, es posible que desee escuchar algunos o todos
los altavoces del sistema, o reforzar ligeramente el volumen del canal central. Con ese fin, cada
fuente de audio que utilice con el sistema tiene su propio menú de configuración, con las
funciones correspondientes. Para fuentes de vídeo, se aplica el menú de configuración de TV.
Con un poco de práctica, podrá moverse y seleccionar las opciones del menú de
configuración de cada fuente con gran facilidad, sólo tiene que probar y ver los resultados.
Visualización de las opciones
Para ver las opciones, es necesario seleccionar primero la fuente. Después, en el control
remoto LIFESTYLE
Puede elegir ver en la pantalla del televisor el menú Configuración de cada una de las
fuentes; en el caso de las fuentes de audio puede también verlo en el panel de visualización
del centro de medios.
Si la fuente es el sintonizador de radio FM, las opciones de configuración aparecen en la
pantalla del centro multimedia (Figura 12). Las opciones van apareciendo a medida que se
Français Español English
pulsa el botón Abajo del control remoto.
®
, pulse el botón
Settings
(Configuración) para acceder al menú.
Figura 12
El menú Configuración,
tal como aparece en la
pantalla del centro de
medios.
Figura 13
El menú Configuración,
tal como aparece en la
pantalla de televisión con
etiquetas identificativas.
>
ENVOLVENTE
CANALCENTRAL:+4
Para ver el menú Configuración también en la pantalla del televisor (Figura 13), enciéndalo y
seleccione la entrada de televisión para el centro multimedia. Si la lista de elementos del
menú excede los límites de la pantalla, aparecerá una flecha arriba o abajo que indica hacia
dónde puede desplazarse el usuario para ver las otras opciones.
Barra de título: fuente
Elementos de menú:
funciones de esta fuente
Clave de navegación:
los botones que se deben usar
o AM
FM
Canal central
Nombre del elemento:
definición de la función
Casilla de selección:
Opción elegida
+4
34
Para suavizar la presentación del canal central, elija una
config. inferior. Para enfocarla, elija una config. superior.
Descripción: lo que se puede hacer o esperar
Nota: Cuando aparece el menú Configuración en el televisor, cualquier cambio que se realice en
la configuración se podrá ver en la pantalla de éste o en la del centro multimedia.
Page 93

Cambio de configuración de la fuente
Cambio de la configuración
En el menú Configuración de la pantalla
del centro multimedia o del televisor,
muévase para realizar los cambios que
desee mediante los botones de
selección que se muestran.
En la pantalla o el televisor se aplican las mismas acciones:
• Pulse las flechas izquierda, derecha, arriba o abajo para acceder a la opción deseada.
•Pulse
• Repita esos pasos para realizar los cambios que desee.
• Pulse el botón
La siguiente progresión muestra cómo cambiar el número de altavoces que se utiliza para FM
(Figura 14 A, B y C).
A. El menú de configuración de FM primero aparece en el televisor con cinco altavoces de
B. Los botones de flecha permiten desplazarse a la derecha, izquierda, arriba o abajo para
C. Utilice
Enter
(Intro) o la flecha izquierda para confirmar la selección y volver a la columna de
funciones.
Exit
(Salir) del control remoto para salir del menú Configuración.
forma predeterminada.
cambiar el número de altavoces en funcionamiento.
Enter
(Intro) o la flecha izquierda para confirmar la nueva configuración y volver a la
lista de atributos del sintonizador.
English FrançaisEspañol
Figura 14
Cambio del número
de altavoces en
funcionamiento
A.
2-3-5 Altavoces:
B..
FMFM FM
2-3-5 Altavoces:
C.
2-3-5 Altavoces:
También puede realizar las acciones anteriores para volver a la configuración inicial. Hágalo
cuando no esté satisfecho con el resultado de algún cambio realizado o si cambia algo
accidentalmente.
La configuración predeterminada original de cada fuente aparece como la primera opción de
cada función en las siguientes páginas.
Nota: Puede restaurar todos los valores predeterminados si selecciona la opción
configuración
del menú Sistemas, en Centro multimedia. Esto anula todos los cambios que
Restaurar
haya realizado en el menú de configuración. En lugar de realizar este cambio general, puede
anotar la configuración predeterminada que se muestra en las páginas siguientes y volver a
seleccionar esos valores para cualquiera de las fuentes que le interese.
35
Page 94
Cambio de configuración de la fuente
Opciones de configuración del sintonizador (radio FM o AM)
Hay un menú de configuración diferente para FM y AM, por lo que la configuración se puede
realizar de forma independiente. Dos de los siguientes atributos sólo estarán disponibles
cuando seleccione el sintonizador FM.
Configuración
predeter-
FM
(o AM) Características
minada;
Opciones
Efectos de esta configuración
2-3-5 Altavoces 5
Modo de salida
Français Español English
válida para FM)
sistemas es una
función sólo válida
Temporizador de
Opciones de configuración de CD
Para acceder al menú de configuración de CD, introduzca un CD en la bandeja de discos. A
continuación, seleccione la fuente.
2, 3
Envolvente 0
De -5 a +5
Canal central 0
De -5 a +5
Auto
(función sólo
Info RDS
(en algunos
para FM)
desconexión
Mono o Estéreo
Activar
Desactivar
Desactivar
10-90
Determina el número de altavoces en
funcionamiento.
Establece el volumen de sonido envolvente
relativo.
Establece el volumen central relativo.
Fija la distribución de las señales de radio
por canal.
Muestra información sobre los programas y
las estaciones (que ofrece el Sistema de
datos de radio).
El sistema se programa para apagarse
cuando pase el plazo seleccionado de
tiempo.
36
CD Características
2,3,5 altavoces 5
Envolvente 0
Canal central 0
Tiempo 0:00
Pista de audio DTS
Temporizador de
desconexión
Configuración
predeter-
minada;
Opciones
2, 3
De -5 a +5
De -5 a +5
_:__
Dolby Digital
Desactivar
10-90
Efectos de esta configuración
Determina el número de altavoces en
funcionamiento.
Establece el volumen de sonido envolvente
relativo.
Establece el volumen del altavoz central
relativo.
Muestra el tiempo transcurrido.
Adelanta o rebobina la pista hasta la nueva hora.
Reproduce pistas de audio en el formato que
se especifique.
El sistema se programa para apagarse
cuando pase el plazo seleccionado de
tiempo.
Page 95
Cambio de configuración de la fuente
Opciones de configuración de CD almacenados
Para acceder al menú de configuración de CD almacenados, el sistema debe incluir pistas de
CD almacenados. Seleccione Almacenado como fuente.
Configuración
CD
almacenados Características
predeterminada;
Opciones
English FrançaisEspañol
Efectos de esta
configuración
Preajuste de uMusic 1 (o última
selección)
1 a 9,
o nombres
Modo de
reproducción
(indicador)
2-3-5 Altavoces 5
Envolvente 0
Canal central 0
Temporizador de
desconexión
Library (Archivo),
N.º CD, Playlist
reproducción),
Whole CD (CD
Shuffle (Aleatorio),
Repeat (Repetir)
uMusic
Encore (Bis),
(Lista de
completo),
2, 3
De -5 a +5
De -5 a +5
Desactivar
10 a 90
Varía con una selección de
números de preselección
diferentes, utilizando el control
remoto.
Se ajusta automáticamente
según cambien el modo de
reproducción y las selecciones
preseleccionadas.
No se ajusta en el menú de
configuración.
Determina el número de
altavoces en funcionamiento.
Establece el volumen de sonido
envolvente relativo.
Establece el volumen del
altavoz central relativo.
El sistema se programa para
apagarse cuando pase el plazo
seleccionado de tiempo.
37
Page 96
Cambio de configuración de la fuente
Opciones de configuración de DVD
Para acceder al menú de configuración de DVD, introduzca un DVD en la bandeja de discos
antes de seleccionar la fuente.
En el menú de DVD aparecen tres atributos (que se muestran en cursiva), si se ha configurado
Procesamiento de audio como Manual en las opciones de
Configuración
Blo-
queo
Caracterís-
ticas
Audio
del menú Sistema.
predeter-
minada;
Opciones Efectos de esta configuración
2,3,5 altavoces 5
Envolvente 0
De -5 a +5
Central
central
Français Español English
EQ película Activar
Compresión
de rango
Descodif.
mono
Tiempo 0:00
Título
De -5 a +5
Desactivar
Activar
Desactivar
Activar
Desactivar
_ de __
Determina el número de altavoces en
2, 3
funcionamiento.
Establece el volumen de sonido envolvente
relativo.
0
Establece el volumen del altavoz central relativo.
Ajusta la relación de bajos y agudos para la
adecuada reproducción de bandas sonoras
cinematográficas.
Ajusta el volumen para mantener la inteligibilidad
de los diálogos. Protege algunos sonidos de
otros ruidos más potentes.
Activa el circuito de descodificación mono
Videostage
sonido mono (un solo canal de audio) en 5
altavoces.
Muestra el tiempo transcurrido.
_:__
Adelanta o rebobina la pista hasta la nueva hora.
Adelanta o retrocede la pista a otra sección del
DVD, según el número fijado.
®
5 para procesar los programas con
38
Capítulo
___
Pista de audio DTS
Dolby Digital
Subtítulo
Idioma
Ángulo de
cámara
Repetición de
A a B
English
Otros
1 de __ Determina el ángulo que se usa en una escena
A, B
Adelanta o retrocede la pista hasta una nueva
escena, según el número fijado.
Reproduce pistas de audio en el formato que se
especifique.
Determina el idioma que se usará en los subtítulos
del DVD (entre los idiomas disponibles en el disco).
cinematográfica (entre los ángulos de cámara
disponibles en el disco).
Repite un segmento del DVD, una vez definidos
los puntos de inicio y fin. Para empezar:
1. Muévase hacia adelante o hacia atrás,
hasta el punto del DVD en que desea que
comience el segmento.
2. Pulse Enter.
3. Muévase hasta el punto donde quiera que
termine.
4. Pulse Enter.
El fragmento se repite hasta que se pulsa el
botón
Exit
(Salir) o
Settings
(Configuración).
Page 97
Cambio de configuración de la fuente
Configuración
Blo-
queo
Caracterís-
ticas
Temporizador
desconexión
predeter-
minada;
Opciones Efectos de esta configuración
de
Desactivar
10-90
El sistema se programa para apagarse cuando
pase el plazo seleccionado de tiempo.
Opciones de configuración del TV (para el vídeo, conexión de cable y satélite, y auxiliar)
La configuración siguiente afecta a los programas del tv aunque la fuente del programa sea
un VCR, CBL/SAT o AUX. No hay menús de configuración diferentes para estas fuentes.
En el menú de TV aparecen cuatro atributos (que se muestran en cursiva), si se ha
configurado
Sistema.
Tel evisor Características
Procesamiento de audio como Manual en las opciones de
Configuración
predeter-
minada;
Opciones
2,3,5 altavoces 5
2, 3
Envolvente 0
De -5 a +5
Efectos de esta configuración
Controla el número de altavoces en
funcionamiento.
Atenúa o se centra en los altavoces de
sonido envolvente (traseros)
Vídeo
del menú
English FrançaisEspañol
Canal central 0
De -5 a +5
EQ película Activar
Desactivar
Compresión
de rango
Descodific mono Activar
Dolby Digital 1+1
(aparece para
determinados
contenidos de Dolby
Digital)
Temporizador de
desconexión
Desactivar
Desactivar
2, Ambos
Desactivar
Activar
10-90
Atenúa o se centra en el altavoz central.
Ajusta la relación de bajos y agudos para
la adecuada reproducción de bandas
sonoras cinematográficas.
Ajusta el volumen para mantener la
inteligibilidad de los diálogos. Protege
algunos sonidos de otros ruidos más
potentes.
Activa el circuito de descodificación
mono Videostage
es monoaural. Procesa programas y
películas de TV mono (un solo canal) en
sonido de cinco altavoces.
La descodificación mono está
desactivada.
1
Reproduce el contenido de audio de
pistas de sonido seleccionadas.
El contenido de la segunda pista puede
ser, por ejemplo, un segundo idioma.
El sistema se programa para apagarse
cuando pase el plazo seleccionado de
tiempo.
®
5 cuando el programa
39
Page 98

Utilización de los menús de sistema
Realización de ajustes de sistema
Los ajustes a las propiedades del sistema suelen realizarse como mucho una vez. Si su
sistema funciona como usted desea, es posible que no tenga que volver a hacer ningún
cambio. Sin embargo, en algunos casos, se requieren ciertos cambios para que el sistema
sea totalmente compatible con las opciones de instalación seleccionadas. Por ejemplo,
utilizar el control remoto con otros componentes.
Visualización del menú Sistema
El menú Sistema aparece sólo en el televisor, no en la pantalla del centro de medios. Para ver
el menú, la televisión debe estar encendida y hay que fijar la entrada de vídeo del aparato de
televisor en el centro de medios.
Figura 15
El menú Sistema y la vista
previa de la función de
Français Español English
audio
Pulse el botón
opción
Audio
System
(Sistema) en el control remoto LIFESTYLE®. El menú aparece con la
seleccionada, mostrando una vista previa de las funciones de audio.
Nota: Al acceder al menú Sistema, el DVD o VCD que se está reproduciendo entra en pausa.
Categorías: elementos del sistema
Audio
Seleccione Audio para ajustar estas opciones del sistema:
Funciones: submenús
en cada categoría
Pantalla de vista previa:
pantalla inactiva
Compensación bajos
Compensación agudos
Procesamiento de audio
Niveles de entrada
ADAPTiQ
Protocolo de expansión
navegar seleccionar
40
Clave de navegación:
los botones del control remoto que se deben usar
Guía: acciones que se van a tomar
Realización de cambios
Realizar ajustes de sistema en este menú es similar a cambiar los ajustes de una fuente.
• Utilice los botones de selección que se muestran para desplazarse y
realizar las selecciones.
• Muévase por las categorías para ver la vista previa de las funciones.
• Pulse la flecha abajo o el botón
Nota: Cuando acceda a la pantalla de funciones, pasará de ser una vista previa a convertirse en
una ventana activa, y el aspecto será ligeramente diferente.
• Pulse las flechas izquierda, derecha, arriba o abajo para acceder a la opción deseada.
•Pulse
Enter
(Intro) o la flecha izquierda para confirmar la selección y volver a la columna de
funciones.
• Repita esos pasos para realizar los cambios que desee.
•Pulse
Exit
para salir del menú Configuración.
Enter
(Intro) para seleccionar
Audio
y realizar los cambios.
Page 99
Opciones de datos de CD almacenados
Figura 16
Vista previa de CD
almacenados
Pulse el botón
ver una vista previa de las funciones de CD almacenados. Pulse el botón de flecha abajo
para acceder a una pantalla de submenús activa.
Nota: Esta opción está disponible desde el menú del sistema cuando se ha almacenado música
de al menos un CD. Para obtener más información sobre el almacenamiento de música, consulte
“Trasladar su música al sistema” en la página 8.
CD
almacenados
Seleccione CD almacenados para ajustar estas opciones
del sistema:
N.º CD
Acción de CD
Reproducción de CD
Género
Álbum
Pista
Acción de pista
System
(Sistema) en el control remoto LIFESTYLE®. Muévase a la derecha para
Utilización de los menús del sistema
English FrançaisEspañol
navegar
seleccionar
Los elementos de la pantalla activa que se muestran en cursiva clara en la parte inferior
izquierda no aparecen en todos los menús.
Elemento de la
pantalla activa
CD #
Sólo indicador
predeterminada; Opciones Efectos de esta configuración
Configuración
Número 1 o número de CD
seleccionado
Acción de CD Recargar información de CD
Eliminar CD
Reproducción
Automático
de CD
Vincular todas las pistas
No vincular todas las pistas
Género Rock/Pop, Clásico, Jazz,
Electrónica, Música del mundo,
Música latina, Country, Rap, Música
vocal, Gospel/Religioso, Blues,
Banda sonora, Folk/Bluegrass,
New Age, Reggae, Easy Listening,
Infantil, Hablada/Comedia,
Villancicos, Otros, Sin clasificar
Muestra la configuración del CD que tiene ese número en el
sistema.
Cambia cuando cambia la selección de CD; no puede editarse.
Sustituye las ediciones del usuario por información de la base
de datos.
Requiere confirmación. A continuación, elimina toda la
información asociada al CD actual y muestra la información
de otro N.º CD.
Las pistas se reproducen por orden, aleatoriamente o
individualmente, tal y como lo determine el estilo de
reproducción seleccionado (p. ej., Shuffle, uMusic, Whole CD).
Las pistas se reproducen juntas y sólo por orden.
Las pistas no siempre s reproducen juntas y por orden.
Identifica el tipo de música del CD.
Reclasifica el CD en función del tipo de género musical
seleccionado.
Álbum sin configuración predeterminada;
específico para el CD
Artista sin configuración predeterminada;
específico para el CD
La selección de este elemento abre una pantalla de edición.
La selección de este elemento abre una pantalla de edición.
41
Page 100

Utilización de los menús del sistema
Elemento de la
pantalla activa
Clasificar artista
como
predeterminada; Opciones Efectos de esta configuración
sin configuración predeterminada;
Configuración
específico para el CD
Pista sin configuración predeterminada;
específico para el CD
Acción de pista Editar
Eliminar pista
Utilización de la pantalla de edición
Para ver la pantalla de edición, seleccione uno de los elementos de la pantalla activa para
permitir la edición. El primer elemento de la lista es Álbum. Pulse el botón
realizar la selección.
Français Español English
Figura 17
La pantalla de edición tal
y como aparece la primera
vez
Línea para
el texto
La selección de este elemento abre una pantalla de edición.
Si se edita se sustituirán los datos del artista.
Puede reflejar cualquier cambio que se haya hecho para el artista.
La selección de este elemento abre una pantalla de edición.
Es posible que sea necesario pulsar
Enter
para ver estas
opciones.
La selección de este elemento abre una pantalla de edición.
Requiere confirmación. A continuación, elimina toda la
información relacionada a esta pista.
Enter
(Intro) para
Hecho
Salir/
Hecho
Pantalla
para otros
caracteres
Especial
Seleccione "Borrar" para borrar un error.
Seleccione "Hecho" cuando haya terminado.
navegar seleccionar
Borrar Espacio Mayúsculas
Pantalla para
caracteres
alfabéticos
Cómo cambiar el texto
La pantalla de edición permite modificar o reemplazar texto en la base de
datos de música proporcionada por el sistema. Este texto aparece en la
parte superior de la pantalla.
Para realizar cambios, no es necesario que acceda a la línea de texto. En
lugar de ello, puede añadir o introducir texto seleccionando caracteres
alfabéticos o numéricos, o bien caracteres especiales procedentes de las
tablas (niveles 1, 2 ó 3 disponibles a la izquierda de la pantalla). Utilice las
flechas arriba, abajo, izquierda y derecha del control remoto para acceder a un carácter y
pulse el botón
Enter
(Intro) para seleccionarlo. Cada vez que pulse
Enter
, el carácter
seleccionado aparecerá en la línea de texto. Una vez que haya terminado, acceda al cuadro
Hecho, situado en la parte superior derecha y pulse
el botón
Exit
(Salir) en el control remoto LIFESTYLE® para abandonar el menú del sistema.
Enter
para salir de la pantalla de edición o
Para eliminar letras existentes de la línea de texto:
Las letras van desapareciendo de derecha a izquierda.
42
1. Muévase hacia abajo hasta la barra de borrado.
2. Pulse
3. Pulse
Enter
(Intro) para borrar la última letra de la línea de texto.
Enter
las veces que sea necesario para eliminar caracteres adicionales de la línea.
 Loading...