How it Works
Log In / Sign Up
Buy Points
How it Works
FAQ
Contact Us
Questions and Suggestions
Users
Bosch
Loading...
M
MUZ 5FW1GB
MUZ8RV1
MUZ8SV1
2
MUZ8WS2
MUZ8ZP1
4
MUZ9AD1
MUZ9BS1
2
MUZ9CC1
5
MUZ9EB1
4
MUZ9ER1
2
MUZ9FW1
4
MUZ9HA1
6
MUZ9KR1
MUZ9MX1
5
MUZ9PP1
3
MUZ9PP2
MUZ9RV1
2
MUZ9SV1
3
MUZ9TM1
3
MUZ9VL1
7
MUZ9VLP1
6
MUZFW4
MUZS24MMW
MUZS2ER
MUZS2FWW
MUZS2KR
MUZXEB1
2
MUZXLPP1
2
MUZXLVE1
4
MVC-FAPEX
MVC-FIPM
2
MVC-FIVA4-CAM
MVC-FIVA4-ENC1
MVC-FIVA4-ENC2
MVC-FIVA4-ENC4
MVM-BVRM
3
MVS-MW
MW1-HTX
MW1-LMC
MW1-LTX
MW1-RMB
MW1-RX
MX25E
MX30E
MX30EC-21
MX30EC-31
MX775I
2
MX934I
2
MX938I
2
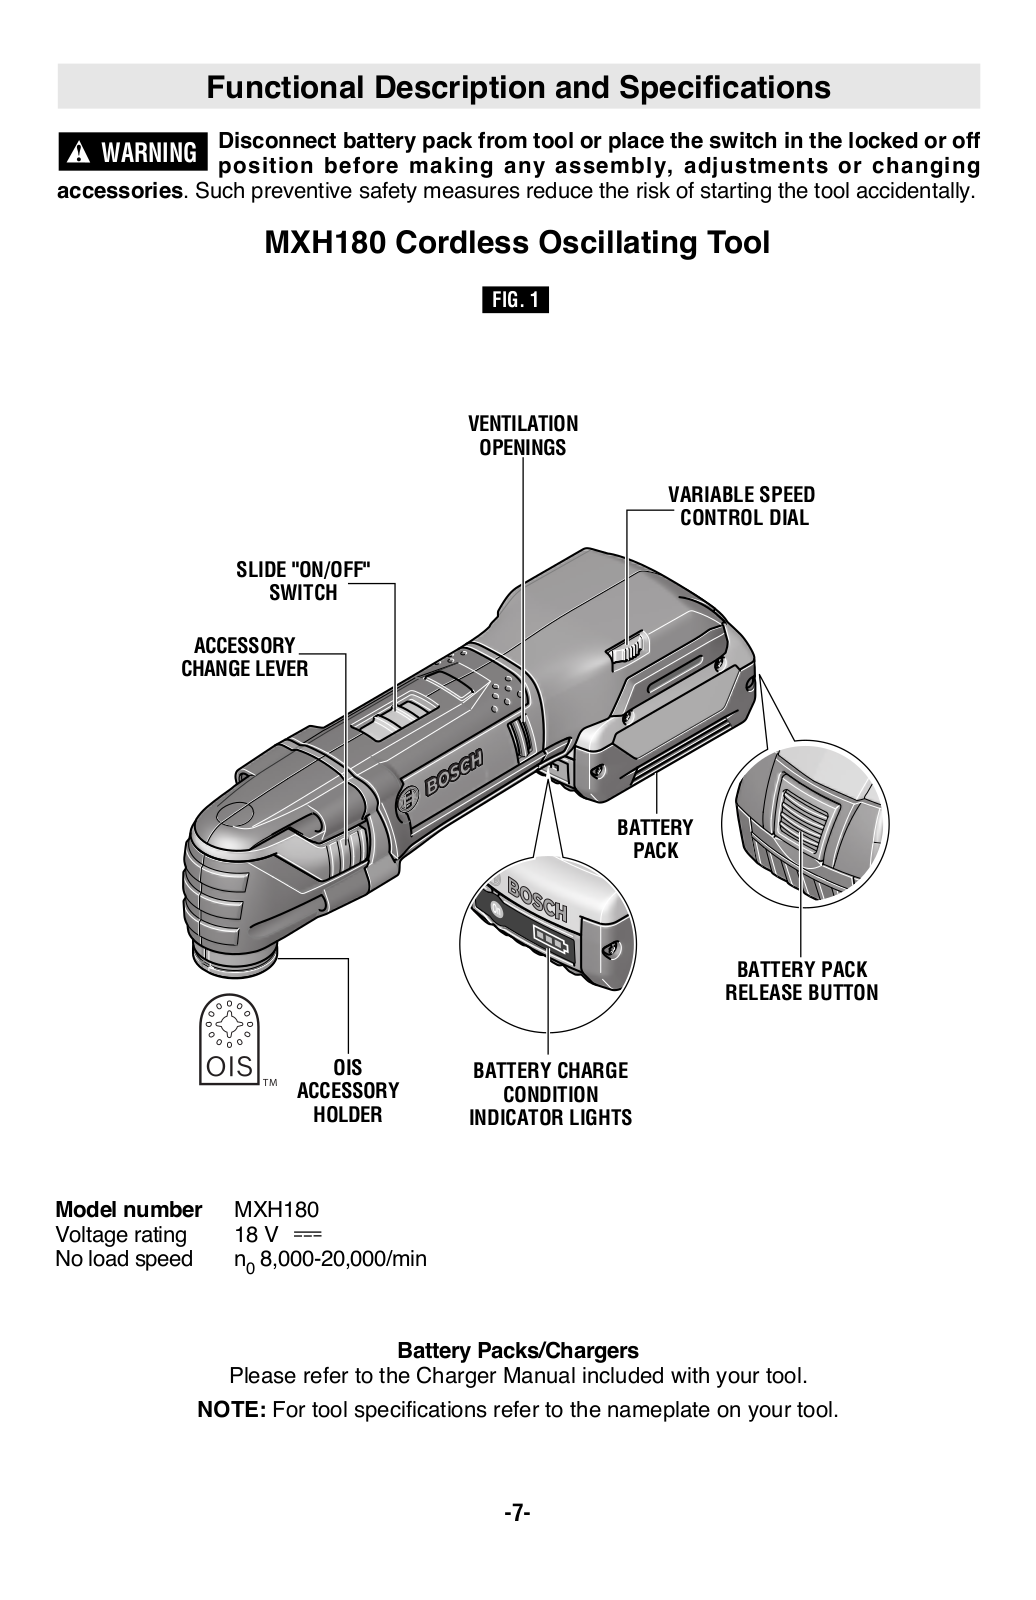
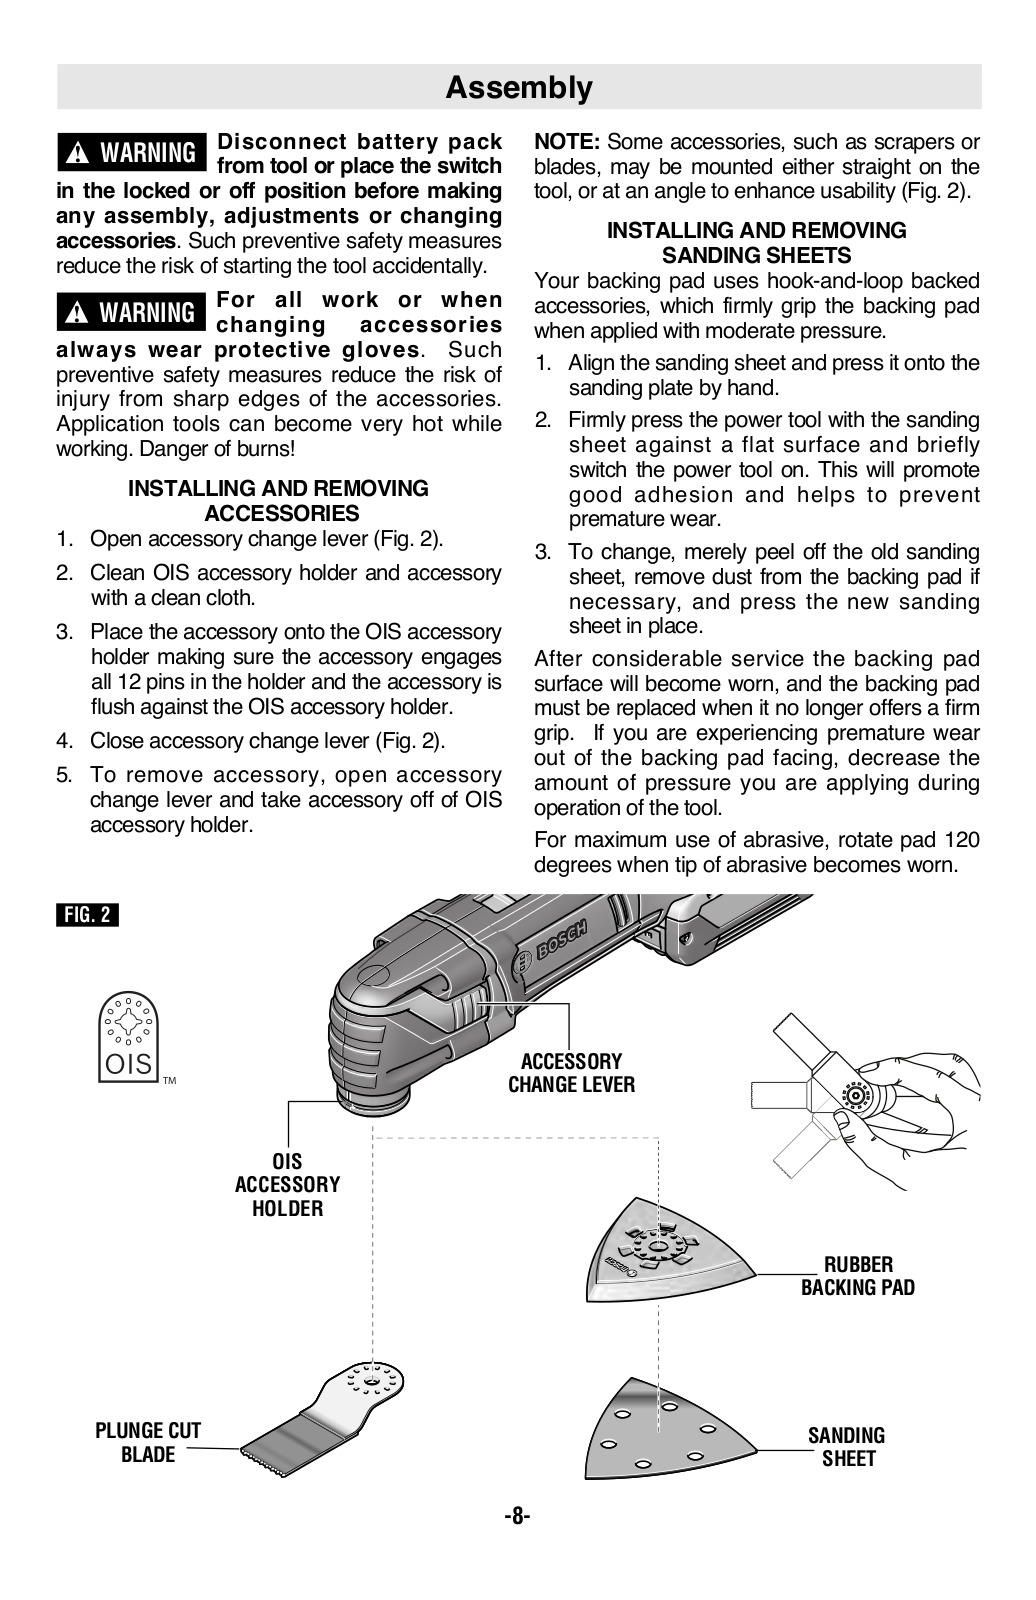
MXH180
MXH180BN
MYCKA NADOBI
My Way 2
N
NACIM
NAI-90022-AAA
2
NAN675T01
NATP-W
NBA5350.0B
NBC
NBC-225-P
3
NBC-255-P
4
NBC-255-W
8
NBC-265-P
6
NBC-265-W
3
NBC-455
2
NBC-455-11P
NBC-455-12IP
NBC-455-12P
NBC-455-21P
NBC-455-22IP
NBC-455-22P
NBC-455-28V
2
NBE-3503-AL
3
NBE-4502-AL
2
NBE-5503-AL
2
NBE-6502-AL
2
NBM 43B2.0 B
NBN 3807-0
NBN-40012-C
3
NBN-40012-V3
3
NBN-498
4
NBN-498-11P
NBN-498-21P
2
NBN-498-22IP
NBN-498-22P
NBN-498-28W
NBN-50022-C
3
NBN-50022-V3
NBN-50051-C
3
NBN-50051-V3
3
NBN-63013-B
2
NBN-63023-B
2
NBN-71013
2
NBN-71013-B
3
NBN-71013-BA
2
NBN-71022
2
NBN-71022-B
3
NBN-71022-BA
3
NBN-71027
2
NBN-71027-BA
2
Loading...
Loading...
Nothing found
MXH180BN
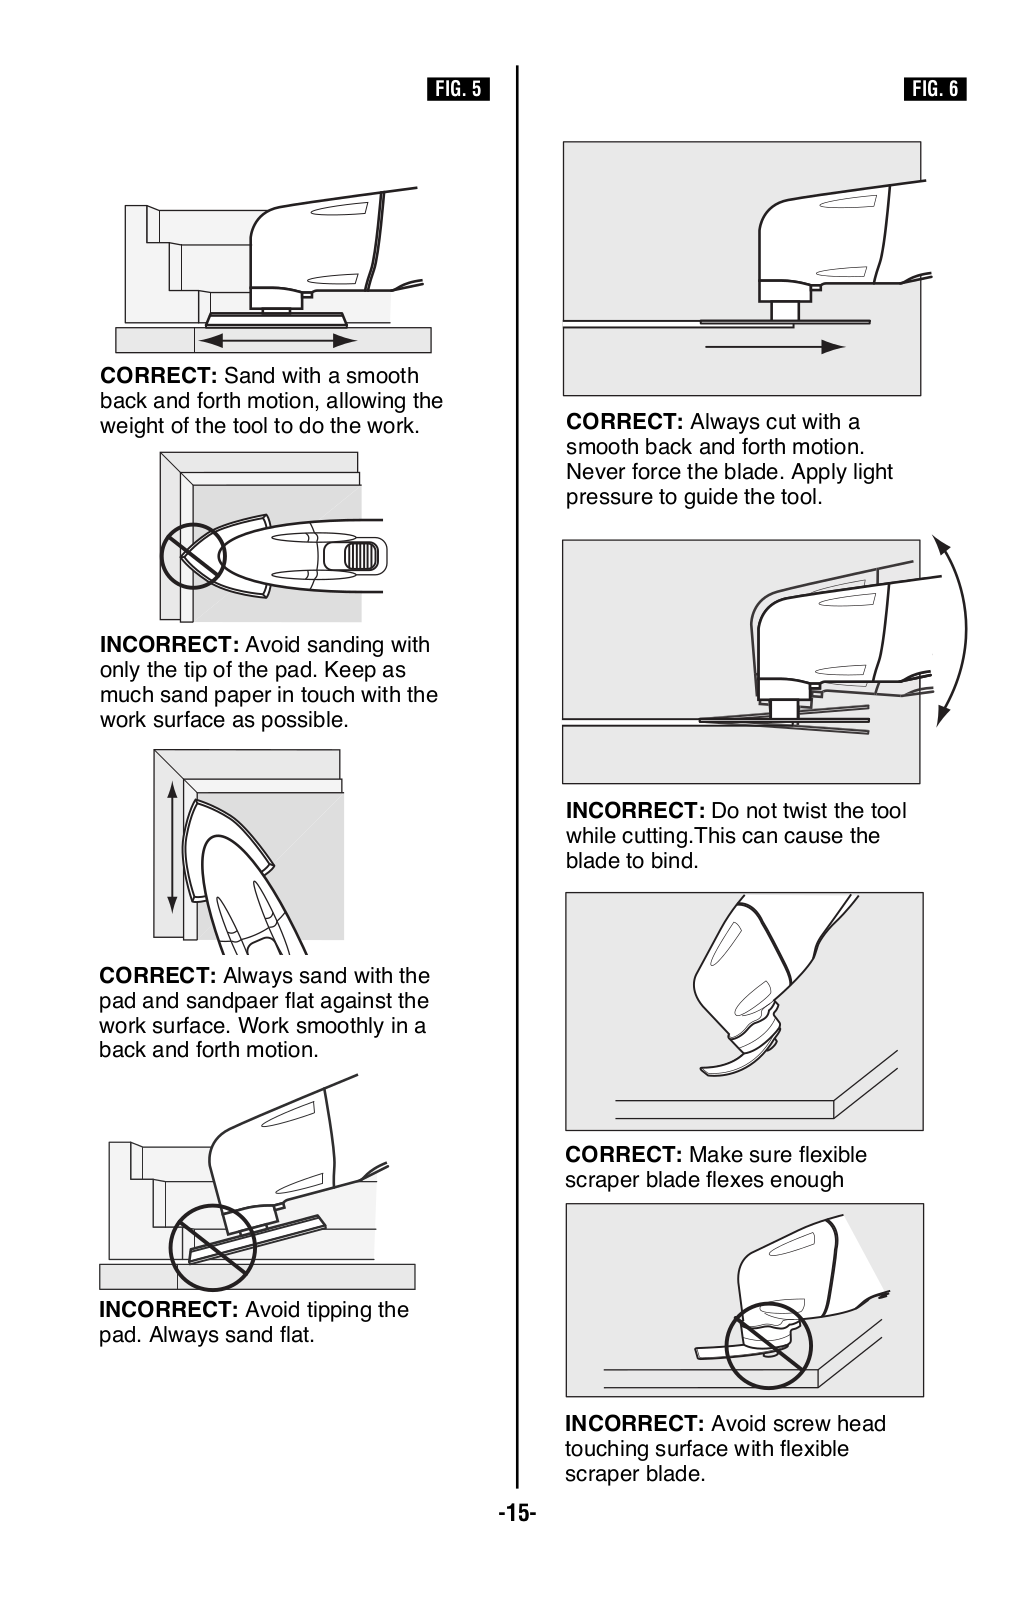
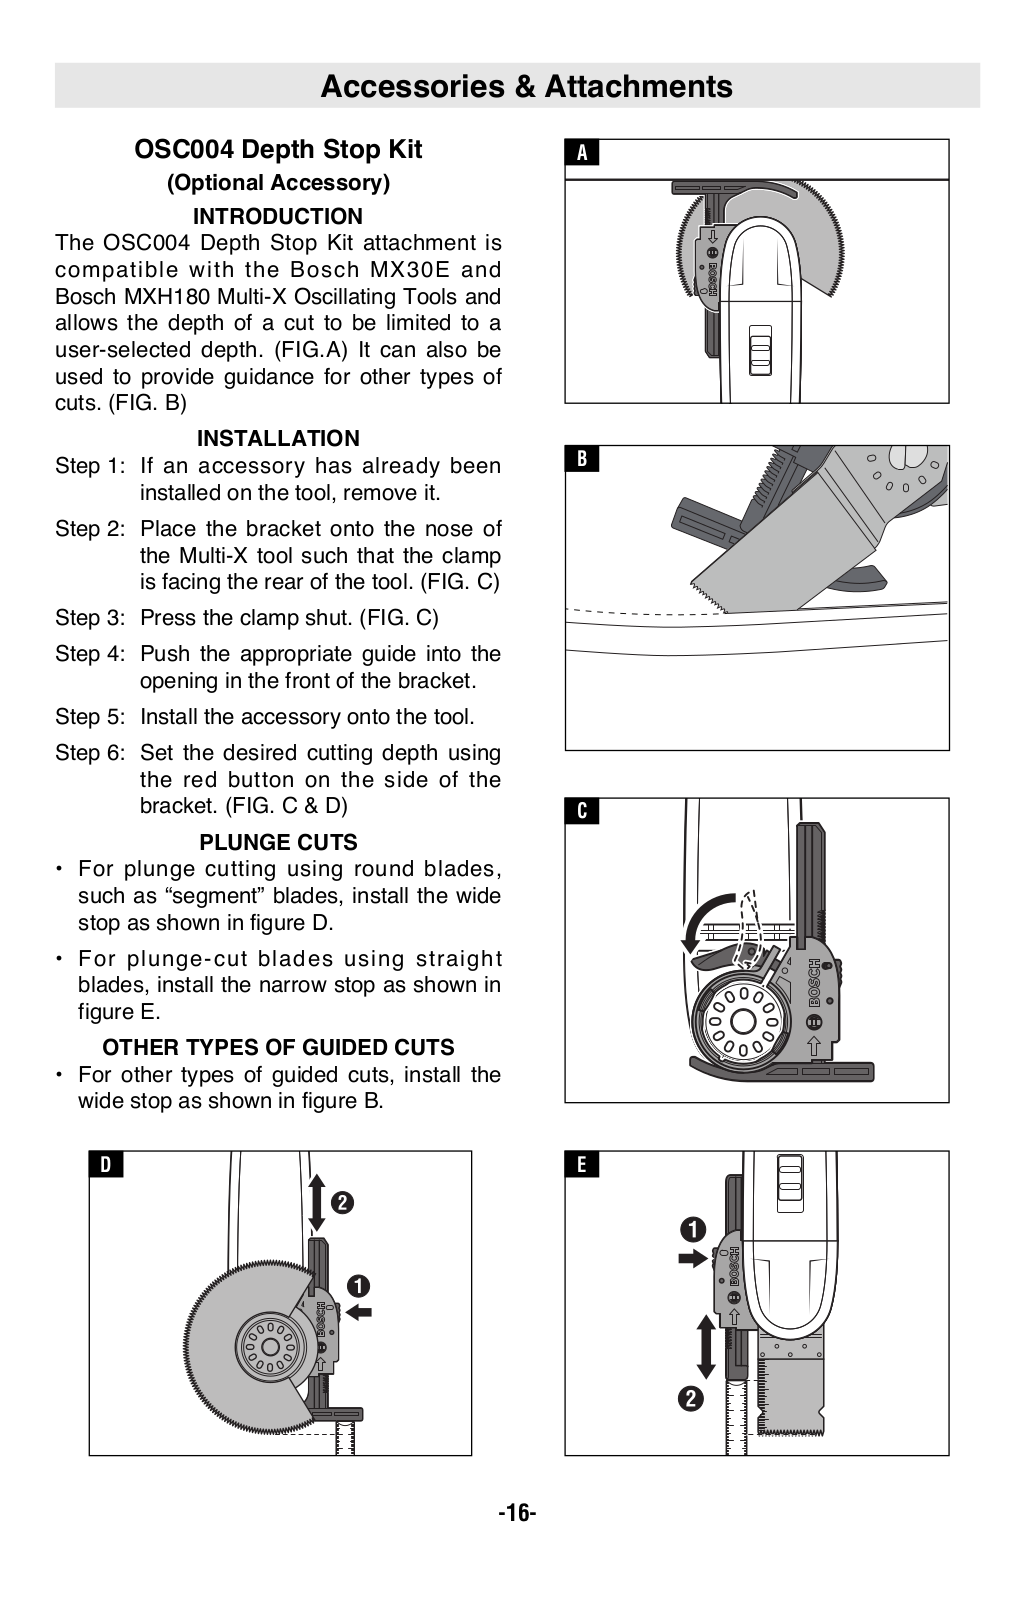
Owner’s Manual
52 pgs
4.05 Mb
0
Table of contents
Loading...
Bosch MXH180BN Owner’s Manual
...
Bosch Owner’s Manual
Download
Specifications and Main Features
Frequently Asked Questions
User Manual
Download
Loading...
+
36
hidden pages
Unhide
You need points to download manuals.
1 point = 1 manual.
You can buy points or you can get point for every manual you upload.
Buy points
Upload your manuals
 Loading...