

Page 1

Fridge-freezer
KGF..
en Instructions for use Fridge-freezer 3
it Istruzioni per l'uso Frigorifero combinato 30
Page 2

en Table of contents
Safety and warning information ........... 3
Information concerning disposal ......... 6
Scope of delivery ................................... 6
Installation location ................................ 7
Observe ambient temperature
and ventilation ........................................ 7
Connecting the appliance .................... 8
Getting to know your appliance .......... 9
Switching on the appliance ................ 10
Setting the temperature ...................... 11
Special functions .................................. 11
Alarm function ...................................... 12
Home Connect ..................................... 13
Usable capacity .................................... 17
Refrigerator compartment .................. 18
Super cooling ....................................... 18
The VitaFresh compartment ............... 19
Freezer compartment .......................... 20
it Indice
Avvertenze di sicurezza e
potenziale pericolo .............................. 30
Avvertenze per lo smaltimento .......... 33
Dotazione ............................................... 34
Luogo d’installazione ........................... 34
Osservare la temperatura ambiente
e la ventilazione .................................... 35
Collegare l’apparecchio ..................... 35
Conoscere l’apparecchio ................... 36
Accensione dell’apparecchio ............ 37
Regolare la temperatura ..................... 38
Funzioni speciali ................................... 38
Funzione di allarme ............................. 39
Home Connect ..................................... 40
Capacità utile totale ............................. 45
Il frigorifero ............................................ 46
Super-raffreddamento ......................... 47
Il vano VitaFresh ................................... 47
Max. freezing capacity ........................ 20
Freezing and storing food .................. 20
Freezing fresh food ............................. 21
Super freezing ...................................... 22
Thawing frozen food ............................ 22
Interior fittings ....................................... 23
Sticker “OK” .......................................... 23
Switching off and disconnecting
the appliance ........................................ 24
Defrosting .............................................. 24
Cleaning the appliance ....................... 24
Light (LED) ............................................ 25
Tips for saving energy ........................ 25
Operating noises ................................. 26
Eliminating minor faults yourself ....... 27
Appliance self-test ............................... 29
Customer service ................................. 29
Congelatore .......................................... 48
Max. capacità di congelamento ........ 48
Congelare e conservare ..................... 49
Congelamento di alimenti freschi ..... 49
Super-congelamento ........................... 50
Decongelare surgelati ......................... 51
Dotazione .............................................. 52
Adesivo «OK» ....................................... 53
Spegnere e mettere fuori servizio
l'apparecchio ........................................ 53
Scongelamento .................................... 53
Pulizia dell’apparecchio ...................... 53
Illuminazione (LED) .............................. 54
Risparmiare energia ............................ 55
Rumori di funzionamento ................... 55
Eliminare piccoli guasti ....................... 56
Autotest dell’apparecchio .................. 58
Servizio di assistenza clienti .............. 58
Page 3
enTable of contents
enInstructions for useFridge-freezer
Safety and warning
information
Before you switch ON the
appliance
Please read the operating and
installation instructions carefully!
They contain important
information on how to install,
use and maintain the appliance.
The manufacturer is not liable if
you fail to comply with the
instructions and warnings.
Retain all documents for
subsequent use or for the next
owner.
Technical safety
Fire hazard
The tubes of the
refrigeration circuit convey a
small quantity of an
environmentally friendly but
flammable refrigerant (R600a). It
does not damage the ozone
layer and does not increase the
greenhouse effect. If refrigerant
escapes, it may injure your eyes
or ignite.
en
If damage has occurred
■ Keep naked flames and/or
ignition sources away from the
appliance,
■ thoroughly ventilate the room
for several minutes,
■ switch off the appliance and
pull out the mains plug,
■ inform customer service.
The more refrigerant an
appliance contains, the larger
the room must be in which the
appliance is situated. Leaking
refrigerant can form a
flammable gas-air mixture in
rooms which are too small.
The room must be at least 1 m³
per 8 g of refrigerant. The
amount of refrigerant in your
appliance is indicated on the
rating plate inside the appliance.
When installing the appliance,
ensure that the mains cable is
not trapped or damaged.
If the power cord of this
appliance is damaged, it must
be replaced by the
manufacturer, Customer Service
or a similarly qualified person.
Improper installations and
repairs may put the user at
considerable risk.
Repairs may be performed by
the manufacturer, customer
service or a similarly qualified
person only.
3
Page 4

en
Only original parts supplied by
the manufacturer may be used.
The manufacturer guarantees
that only these parts satisfy the
safety requirements.
Do not use multiple sockets,
extension leads or adapters.
Fire hazard
Portable multiple outlets or
power supplies may overheat,
causing a fire.
Never leave portable multiple
outlets or portable power
supplies behind the appliance.
Important information when
using the appliance
■ Never use electrical
appliances inside the
appliance (e.g. heaters,
electric ice makers, etc.). Risk
of explosion!
■ Never defrost or clean the
appliance with a steam
cleaner! The steam may
penetrate electrical parts and
cause a short-circuit. Risk of
electric shock!
■ Do not use additional means
to accelerate the defrosting
process other than those
recommended by the
manufacturer. Risk of
explosion!
■ Do not use pointed or sharp-
edged implements to remove
frost or layers of ice. You
might damage the refrigerant
tubes.Leaking refrigerant may
cause eye injuries or ignite.
■ Do not store products which
contain flammable propellant
(e.g. spray cans) or explosive
substances in the appliance.
Risk of explosion!
■ Do not stand on or lean
heavily against the base of the
appliance, drawers, doors,
etc.
■ For defrosting and cleaning,
pull out the mains plug or
switch off the fuse. Do not pull
out the mains plug by tugging
on the power cord.
■ Store high-percentage alcohol
tightly sealed and in an
upright position.
■ Keep plastic parts and the
door seal free of oil and
grease. Otherwise, plastic
parts and the door seal will
become porous.
■ Never cover or block the
ventilation openings of the
appliance.
■ Never put frozen food straight
from the freezer compartment
in your mouth.
Risk of low-temperature burns!
4
Page 5

en
■ Avoiding placing children
and vulnerable people at
risk:
At risk here are children,
people who have limited
physical, mental or sensory
abilities, as well as people
who have inadequate
knowledge concerning safe
operation of the appliance.
Check that children and
vulnerable people have
understood the hazards.
A person responsible for
safety must supervise or
instruct children and
vulnerable people who are
using the appliance.
Only children aged 8 years
and above may use the
appliance.
Supervise children while the
appliance is being cleaned or
maintained.
Never allow children to play
with the appliance.
■ Do not store bottled or
canned liquids (especially
carbonated drinks) in the
freezer compartment.Bottles
and cans may burst!
■ Avoid prolonged touching of
frozen food, ice or the
evaporator pipes, etc.
Risk of low-temperature burns!
Children in the household
■ Keep children away from
packaging and its parts.
Danger of suffocation from
folding cartons and plastic
film!
■ Do not allow children to play
with the appliance!
■ If the appliance features a
lock:
keep the key out of the reach
of children!
General regulations
The appliance is suitable
■ for refrigerating and freezing
food,
■ for making ice.
This appliance is intended for
use in the home and the home
environment.
The refrigeration circuit has
been checked for leaks.
This appliance complies with the
relevant safety regulations for
electrical appliances and is
fitted with noise suppression.
This appliance is intended for
use up to a maximum height of
2000 metres above sea level.
5
Page 6

en
Information concerning
disposal
* Disposal of packaging
The packaging protects your appliance
from damage during transit. All utilised
materials are environmentally safe and
recyclable. Please help us by disposing
of the packaging in an environmentally
friendly manner.
Please ask your dealer or inquire at your
local authority about current means of
disposal.
* Disposal of your old
appliance
Old appliances are not worthless
rubbish! Valuable raw materials can be
reclaimed by recycling old appliances.
This appliance is labelled in
accordance with European
Directive 2012/19/EU concerning
used electrical and electronic
appliances (waste electrical and
electronic equipment - WEEE).
The guideline determines the
framework for the return and
recycling of used appliances as
applicable throughout the EU.
m Warning
Redundant appliances
1. Pull out the mains plug.
2. Cut off the power cord and discard
with the mains plug.
3. Do not take out the trays
and receptacles: children are
therefore prevented from climbing in!
4. Do not allow children to play with
the appliance once it has spent its
useful life. Danger of suffocation!
Refrigerators contain refrigerant
and gases in the insulation. Refrigerant
and gases must be disposed
of professionally. Ensure that tubing
of the refrigerant circuit is not damaged
prior to proper disposal.
Scope of delivery
After unpacking all parts, check for any
damage in transit.
If you have any complaints, please
contact the dealer from whom you
purchased the appliance or our
customer service.
The delivery consists of the following
parts:
■ Free-standing appliance
■ Interior fittings (depending on model)
■ Bag containing installation materials
■ Operating instructions
■ Installation manual
■ Customer service booklet
■ Warranty enclosure
■ Information on the energy
consumption and noises
6
Page 7
en
Installation location
A dry, well ventilated room is suitable as
an installation location. The installation
location should not be exposed to direct
sunlight and not placed near a heat
source, e.g. a cooker, radiator, etc. If
installation next to a heat source is
unavoidable, use a suitable insulating
plate or observe the following minimum
distances from the heat source:
■ 3 cm to electric or gas cookers.
■ 30 cm to an oil or coal-fired cooker.
The floor of the installation location must
not give way; if required, reinforce floor. If
the floor is uneven, compensate with
supports.
Distance from wall
When installing the appliance, ensure
that the door can be opened by 90°.
Observe ambient
temperature
and ventilation
Ambient temperature
The appliance is designed for a specific
climate class. Depending on the climate
class, the appliance can be operated at
the following temperatures.
The climate class can be found on
the rating plate. Fig. ,
Climate class Permitted ambient
temperature
SN +10 °C to 32 °C
N +16 °C to 32 °C
ST +16 °C to 38 °C
T +16 °C to 43 °C
Note
The appliance is fully functional within
the room temperature limits
of the indicated climatic class. If
an appliance of climatic class SN
is operated at colder room temperatures,
the appliance will not be damaged up to
a temperature of +5 °C.
Ventilation
Fig. "
The air on the rear panel and on the side
panels of the appliance heats up.
Conduction of the heated air must
not be obstructed. Otherwise,
the refrigerating unit must work harder.
This increases power consumption.
Therefore: Never cover or block
the ventilation openings!
7
Page 8

en
Connecting
the appliance
After installing the appliance, wait at least
1 hour until the appliance is switched on.
During transportation the oil in
the compressor may have flowed into
the refrigeration system.
Before switching on the appliance for
the first time, clean the interior of
the appliance (see chapter “Cleaning
the appliance”).
Electrical connection
The socket must be near the appliance
and also freely accessible following
installation of the appliance.
m Warning
Risk of electric shock!
If the length of the mains cable is
inadequate, never use multiple sockets
or extension leads. Instead, please
contact Customer Service for
alternatives.
The appliance complies with protection
class I. Connect the appliance to 220–
240 V/50 Hz alternating current via a
correctly installed socket with protective
conductor. The socket must be protected
by a 10 A to 16 A fuse.
For appliances operated in nonEuropean countries, check whether the
indicated voltage and current type match
the values of your electricity supply. This
information can be found on the rating
plate, Fig. ,.
m Warning
Never connect the appliance
to electronic energy saver plugs.
Our appliances can be used with mains
and sine-controlled inverters. Mainscontrolled inverters are used
for photovoltaic systems which
are connected directly to the national
grid. Sine-controlled inverters must be
used for isolated applications (e.g. on
ships or in mountain lodges) which are
not connected directly to the national
grid.
8
Page 9
Getting to know your
appliance
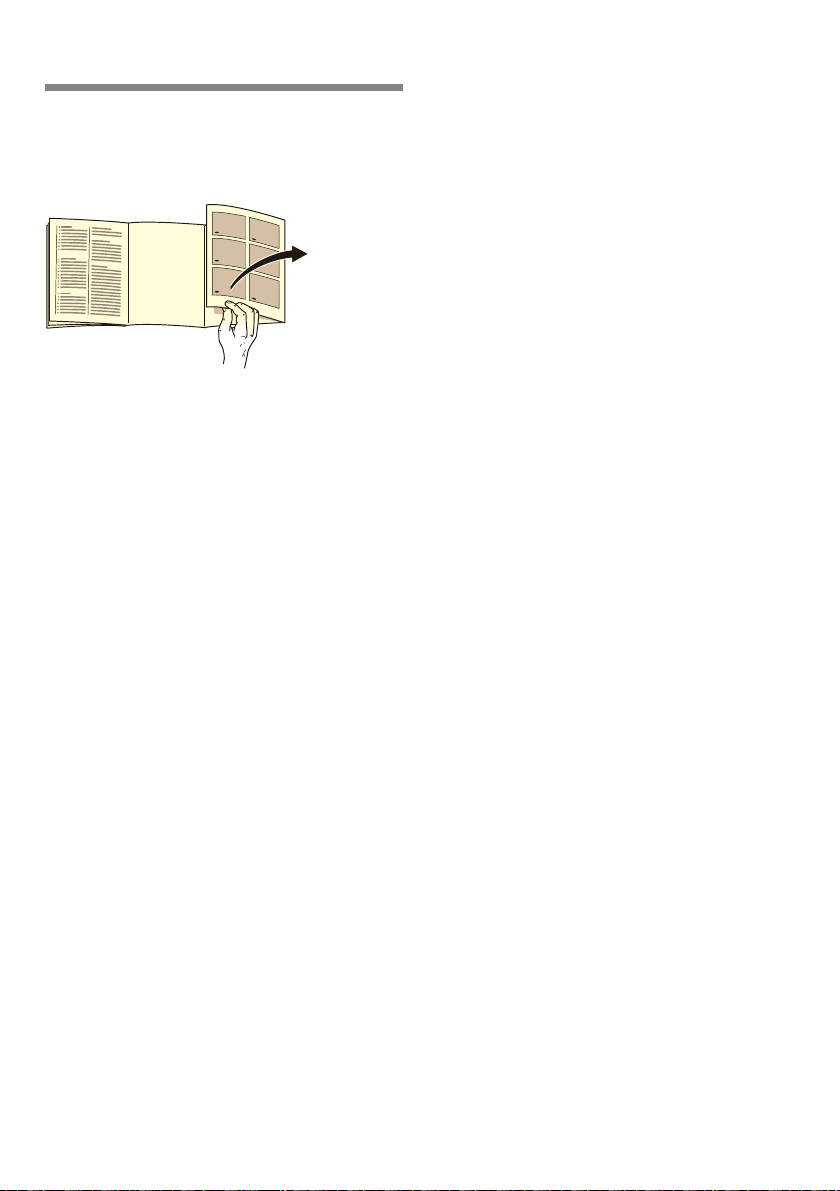
Please fold out the illustrated last page.
These operating instructions refer
to several models.
The features of the models may vary.
The diagrams may differ.
Fig. !
* Not all models.
A Refrigerator compartment
B VitaFresh compartment
C Freezer compartment
1–18 Controls
19* Butter and cheese compartment
20 Shelf for small bottles
21 Shelf for large bottles
22 Light (LED)
23* Bottle shelf
24* Breakfast set
25 Partition with humidity controller
26 Vegetable container
27 “Cool-fresh” container
28 Frozen food container
en
Controls
Fig. $
1 Temperature display freezer
compartment
The numbers correspond
to the set freezer compartment
temperatures in °C.
2 Display ALARM
This lights up if the freezer
compartment is too warm or if the
freezer compartment door is open
too long.
3 Display superfreeze
This lights up if super freezing is
in operation.
4 Temperature display VitaFresh
Indicates the set temperature of
the VitaFresh compartment.
5 Display sabbath
This lights up when the Sabbath
mode is switched on.
6 Alarm display
This lights up if the refrigerator
compartment door is open too
long.
7 Temperature display refrigerator
compartment
The numbers correspond to the
set refrigerator compartment
temperatures in °C.
8 Display supercool
This lights up if super cooling is in
operation.
9 Display vacation mode
This lights up when the vacation
mode is switched on.
10 Button “lock” function
If this function is switched on, no
settings are possible via
the controls.
9
Page 10

en
11 Button lock/alarm off
This button is used to
■ switch off the audible warning
signal (see section "Alarm
function")
■ Switch the button lock on and
off.
12 Eco mode indicator
This lights up when the eco mode
is switched on.
13 Selection button for appliance
zone
To make settings for one
appliance zone, repeatedly press
the selection button.
14 Display ALARM
This lights up if the appliance
becomes too warm.
15 Setting buttons +/-
The buttons are used to set the
temperatures of the refrigerator
and freezer compartment.
16 “super” button
Is used to switch on the super
cooling (refrigerator
compartment) as well as super
freezing (freezer compartment)
functions (see chapter Super
cooling or chapter Super
freezing).
17 Mode button
For selecting the special
functions. See chapter entitled
“Special functions”.
18 Display freshness mode
This lights up when the freshness
mode is switched on.
Switching on the
appliance
1. First insert the plug into the
connection on the back of the
appliance. Check that the plug has
been inserted all the way.
2. Then insert the other end of the cable
into the socket.
The appliance is now switched on and a
warning signal sounds.
Press the lock/alarm off button to switch
off the audible warning signal.
The ALARM display goes out when the
appliance has reached the set
temperature.
The preset temperatures are reached
after several hours. Do not put any food
in the appliance beforehand.
The factory has recommended the
following temperatures:
■ freezer compartment: -18°C
■ VitaFresh compartment: 0 °C to 2 °C
■ cooling compartment: +4°C
Operating tips
■ After the appliance has been switched
on, it may take several hours until the
set temperatures have been reached.
■ The fully automatic NoFrost system
ensures that the freezer section
remains free of ice. Defrosting is no
longer required.
■ If the door cannot be immediately re-
opened after it has been closed, wait
until the resulting low pressure has
equalised.
10
Page 11

■ The front and side panels
of the housing are partly heated
slightly.This prevents condensation
from forming.
Setting
the temperature
Fig. $
Refrigerator compartment
The temperature can be set from +2 °C
to +8 °C.
1. Press selection button 13 until
refrigerator compartment display 7 is
activated.
2. Keep pressing +/– buttons 14 until
the required temperature is indicated.
en
Special functions
Fig. $
Fresh mode
Fresh mode gives food an even longer
shelf life.
Switching on:
Press the mode button until the
freshness mode display appears.
The appliance automatically sets
the following temperatures:
■ Refrigerator section: + 2°C
■ VitaFresh compartment: 0°C
■ Freezer section: remains unchanged
Switching off:
Press the mode button repeatedly until
the freshness mode display goes off.
Perishable food should not be stored
above +4 °C.
VitaFresh compartment
The temperature can be set from -1°C to
3°C.
1. Press selection button 13 until
VitaFresh 4 display is activated.
2. Keep pressing +/- buttons until the
required temperature is indicated.
Freezer compartment
The temperature can be set from -16°C
to -24°C.
1. Select the freezer compartment using
the °C button.
2. Keep pressing the +/- buttons until the
required temperature is indicated.
Eco mode
Eco mode switches the appliance to
energy-saving operation.
Switching on:
Press the mode button until the "eco
mode" indicator appears.
The appliance automatically sets
the following temperatures:
■ Refrigerator section: +8°C
■ VitaFresh compartment: +3°C
■ Freezer section: -16°C
Switching off:
Press the mode button until the "eco
mode" indicator goes off.
11
Page 12

en
Holiday mode
If leaving the appliance for a long period
of time, you can switch the appliance
over to the energy-saving holiday mode.
When holiday mode is switched on,
automatic super freezing is switched off.
The refrigerator compartment
temperature is automatically switched to
+14 °C.
Do not store any food in the refrigerator
compartment during this time.
Switching on:
Press the mode button repeatedly until
the vacation mode display appears.
The appliance automatically sets
the following temperatures:
■ Refrigerator section: +14°C
■ VitaFresh compartment: +14°C
■ Freezer section: remains unchanged
Note
"–" appears in the VitaFresh display.
Switching off:
Press the mode button repeatedly until
the vacation mode indicator goes off.
Sabbath mode
When Sabbath mode is switched on, the
following settings are switched off:
■ Audible signals
■ Interior lighting
■ Messages on the display panel
■ The background illumination of the
display panel is reduced
■ Buttons are locked
■ Automatic super freezing
Switching Sabbath mode on and off:
Press the super button for 15 seconds.
Button lock function
To switch the button lock on and off,
press the lock/alarm off button for
5 seconds.
When the function is switched on, the D
display lights up.
The control panel is now protected
against unintentional operation.
Exception to the button lock:
The lock/alarm off button can be
pressed to switch off the button lock or if
an audible warning signal sounds.
Alarm function
In the following cases an alarm may be
actuated.
Door alarm
The door alarm switches on and ALARM
appears in the refrigerator compartment
temperature display 7 or in the freezer
compartment temperature display 1 if the
door of the compartment is left open too
long. Close the door of the compartment
to switch off the door alarm.
Temperature alarm
An interval tone sounds, ALARM appears
on the temperature display of the freezer
compartment 1.
The temperature alarm switches on if the
freezer compartment is too warm and the
frozen food is at risk of thawing.
The alarm may switch on without any risk
to the frozen food in the following
instances:
■ when switching on the appliance for
initial use.
■ when large quantities of fresh food are
placed in the appliance.
12
Page 13

Note
Do not refreeze thawing or thawed food.
Only ready meals (boiled or fried) may
be refrozen.
No longer store the frozen produce for
the max. storage period.
The temperature display indicates for
5 seconds the warmest temperature
which was reached in the freezer
compartment. Then the set temperature
is displayed again.
Switching off the alarm
Press the lock/alarm off button to switch
off the audible warning signal.
en
Home Connect
This appliance is Wi-Fi-capable and can
be remotely controlled using a mobile
device.
Note
Wi-Fi is a registered trade mark of the WiFi Alliance.
If the appliance is not connected to the
home network, the appliance functions
like a refrigerator without a network
connection and can still be manually
operated via the controls.
In order to use the Home
Connect functions, connect the
appliance with a Home Connect Wi-Fi
dongle.
If there is no Home Connect Wi-Fi dongle
included with your appliance, you can
order this from customer service.
Note
Inserting and removing the plug on the
rear side of the appliance is more difficult
than expected. Ensure that the plug is
completely plugged in.
Attach the Home Connect Wi-Fi dongle
at a height of 1 metre.
Notes
■ Please observe the safety instructions
and warnings in these instructions for
use. Ensure that these are also
adhered to when you are operating
the appliance using the Home
Connect app and are not at home.
Follow the instructions in the Home
Connect app as well.
■ Operation on the appliance always
has priority over operation via the
Home Connect app. During this time it
is not possible to operate the
appliance using the app.
13
Page 14

en
Home Connect setup
Notes
■ Observe the Home Connect
supplementary sheet, which is
available for download under http://
www.bosch-home.com with the
instructions. To do so, enter the
E-number of your appliance in the
search field.
■ After switching on the appliance, wait
at least two minutes until internal
device initialisation is complete. Only
then start setting up Home Connect.
■ To make settings with Home Connect,
the Home Connect app must be
installed on your mobile device.
Please observe the Home
Connect documents supplied for
doing this.Follow the steps specified
by the app to make the settings.
■ If the appliance is not operated for a
long time, the Home Connect menu
closes automatically. You can find
information on how to open the Home
Connect menu at the start of the
appropriate sections.
Automatic connection with the home
network (WLAN)
If a WLAN router with WPS function is
available, you can automatically connect
the refrigerator to the home network.
1. Press the super button and the lock/
alarm off button simultaneously to
open the Home Connect menu.
The display shows Cn.
Note
Press both buttons at exactly the
same time.Button operation is locked
if only the lock/alarm off button is
pressed for a longer period. Press the
lock/alarm off button again until the
lock is deactivated.
2. Press the °C button repeatedly until
the displays AC and oF are shown.
3. Press the + button.
The appliance is ready for automatic
connection.
The display shows an animation for
2 minutes.
Follow the steps below during this
period.
4. Activate the WPS function on the
home network router (e.g. using the
WPS/WLAN button; information on this
topic can be found in the router
documentation).
■ If the connection is successful, on
flashes in the refrigerator display.
You can now connect the
refrigerator with the app.
■ If the display shows oF, it was not
possible to establish a connection.
Check whether the refrigerator is
located within the range of the
home network (WLAN).
Repeat the process or establish the
connection manually.
Manual connection with the home
network (WLAN)
If the WLAN router present does not
have a WPS function, or if this is
unknown, you can manually connect the
refrigerator with the home network.
1. Press the super button and the lock/
alarm off button simultaneously to
open the Home Connect menu.
The display shows Cn.
Note
Press both buttons at exactly the
same time.Button operation is locked
if only the lock/alarm off button is
pressed for a longer period. Press the
lock/alarm off button again until the
lock is deactivated.
14
Page 15

en
2. Press the °C button repeatedly until
the displays SA and oF are shown.
3. Press the + button.
The appliance is ready for manual
connection.
The display shows an animation for
5 minutes.
Follow the steps below during this
period.
4. The refrigerator has now set up its
own WLAN network with the network
name HomeConnect.
You can now access this network with
your mobile device.
5. Open the settings menu of the mobile
device and call up the WLAN settings.
6. Connect the mobile device with the
WLAN network HomeConnect.
Password: HomeConnect
It can take up to 60 seconds to
establish the connection.
7. After successful connection, open the
Home Connect app on the mobile
device.
The app will search for the refrigerator.
8. As soon as the refrigerator has been
found, enter the network name (SSID)
and the password (Key) of your own
home network (WLAN) into the
corresponding fields.
9. Confirm with the button Transmit to
domestic appliances.
■ If the connection is successful, on
flashes in the refrigerator display.
You can now connect the
refrigerator with the app.
■ If the display shows oF, it was not
possible to establish a connection.
Enter the password again, ensuring
that it is spelt correctly.
Check whether the refrigerator is
located within the range of the
home network (WLAN).
Repeat the process.
Connecting the refrigerator to the Home
Connect app
Once the connection between the
refrigerator and the home network has
been established, you can connect the
refrigerator to the app.
1. Press super button and lock/alarm
off button simultaneously to open the
Home Connect menu.
The display shows Cn.
Note
Press both buttons at exactly the
same time.Button operation is locked
if only the lock/alarm off button is
pressed for a longer period. Press
lock/alarm off button again until the
lock is deactivated.
2. Press °C button repeatedly until the
displays PA (pairing = connect with
app) and oF are shown.
3. Press + button to connect the
appliance with the app.
The display shows an animation.
As soon as the refrigerator and the
app are connected, the display shows
on.
15
Page 16

en
4. Open the app and wait until the
refrigerator is displayed.
Use Add to confirm the connection
between the app and the refrigerator.
If the refrigerator is not automatically
displayed, click on Add appliance in
the app and follow the instructions. As
soon as your refrigerator is displayed,
add it with +.
5. Follow the instructions in the app until
the process is complete.
■ The displays show PA and on.
The refrigerator has been
successfully connected to the app.
■ If the connection has failed, please
check whether the mobile device is
connected to the home network
(WLAN).
Then connect the refrigerator to the
app again.
■ When the display shows Er, reset
the Home Connect settings and
perform set-up again from the
beginning.
Verify signal strength
You should verify the signal strength if no
connection can be established.
1. Press the super button and the lock/
alarm off button simultaneously to
open the Home Connect menu.
The display shows Cn.
Note
Press both buttons at exactly the
same time.Button operation is locked
if only the lock/alarm off button is
pressed for a longer period. Press the
lock/alarm off button again until the
lock is deactivated.
2. Press the °C button repeatedly until
the display shows SI. In the second
display, a value appears between
0 (no reception) and 3 (full reception).
Note
The signal strength should be at least
2. If the signal strength is too low, the
connection could be interrupted. Place
the router and the refrigerator closer
together, ensure that the connection is
not disturbed by shielding walls or
install a repeater to strengthen the
signal.
Resetting Home Connect settings
If the connection process does not work
or you would like to log the refrigerator
on to a different home network (WLAN),
you can reset the Home Connect
settings:
1. Press the super button and the lock/
alarm off button simultaneously to
open the Home Connect menu.
The display shows Cn.
Note
Press both buttons at exactly the
same time.Button operation is locked
if only the lock/alarm off button is
pressed for a longer period. Press the
lock/alarm off button again until the
lock is deactivated.
2. Press the °C button repeatedly until
the displays rE and oF are shown.
3. Press the + button.
■ The display shows a short
animation and then again oF.
The Home Connect settings have
been reset.
■ If the display shows Er, start the
reset again or call customer
service.
16
Page 17
en
Customer Service access
If you contact Customer Service, they
can access your appliance and view its
status after you have given your consent.
You need to have your appliance
connected to your home network for this.
Further information about Customer
Service access and its availability in your
country is available under www.homeconnect.com in the Help & Support area.
1. Contact Customer Service.
2. Confirm the start of Customer Service
access in the app.
During Customer Service access the
symbol CS appears on the control
panel.
3. As soon as Customer Service has
obtained the necessary data, they end
access.
Note
You can interrupt remote diagnosis
early by switching off Customer
Service access in the Home Connect
app.
■ Status of any possible previous
resetting to factory settings.
This initial registration prepares the
Home Connect functions for use and is
required only when you want to use
Home Connect for the first time.
Note
Please note that the Home Connect
functions can only be utilized with the
Home Connect app. You can call up
information on data protection in the
Home Connect app.
Declaration of Conformity
Robert Bosch Hausgeräte GmbH hereby
declares that the appliance with
Home Connect functionality meets the
essential requirements and the other
relevant provisions of the Directive 2014/
53/EU.
A detailed RED Declaration of Conformity
can be found online at http://
www.bosch-home.com among the
additional documents on the product
page for your appliance.
Information on data protection
When your Home Connect refrigerator is
connected for the first time to a WLAN
network that is connected to the Internet,
your refrigerator transmits the following
categories of data to the Home Connect
server (initial registration):
■ Unique appliance identification
(consisting of appliance codes as well
as the MAC address of the installed
Wi-Fi communication module).
■ Security certificate of the Wi-Fi
communication module (to ensure a
secure IT connection).
■ The current software and hardware
version of your refrigerator.
2.4 GHz band: 100 mW max.
Usable capacity
Information on the usable capacity can
be found inside your appliance on
the rating plate. Fig. ,
17
Page 18

en
Fully utilising the freezer
volume
To place the maximum amount of frozen
food in the freezer compartment, you can
remove the containers. You can then
stack the food directly on the shelf and
on the floor of the freezer compartment.
Note
Avoid contact between food and rear
panel. Otherwise the air circulation will
be impaired.
Food or packaging could freeze to
the rear panel.
Removing the fittings
Pull out the frozen food container all
the way, lift at the front and remove.
Fig. )
Refrigerator
compartment
The refrigerator compartment is the ideal
storage location for meat, sausage, fish,
dairy products, eggs, ready meals
and pastries.
Storing food
■ Allow warm food and drinks to cool
down before placing in the appliance.
Note
Do not block air outlet openings with
food, otherwise the air circulation will be
impaired. Food which is stored directly
in front of the air outlet openings may be
frozen by the cold air flowing out.
Note the chill zones in the
refrigerator compartment
The air circulation in the refrigerator
compartment creates different chill
zones:
■ The coldest zones are in front of the
air outlet openings and in the chill
compartment, Fig. !/26.
Note
Store perishable food (e.g. fish,
sausage, meat) in the coldest zones.
■ Warmest zone is at the very top of the
door.
Note
Store e.g. hard cheese and butter in
the warmest zone. The aroma of hard
cheese can then continue to develop
and butter remains spreadable.
■ Store fresh, undamaged food. The
quality and freshness will then
be retained for longer.
■ In the case of ready-made products
and bottled goods, observe the bestbefore date or use-by date specified
by the manufacturer.
■ To retain aroma, colour
and freshness, pack or cover food
well before placing in the appliance.
This will prevent the transfer
of flavours and the discolouration
of plastic parts in the refrigerator
compartment.
18
Super cooling
Super cooling sets the refrigerator
temperature to the coldest temperature
setting for approx. 6 hours. Then
the appliance automatically switches
to the temperature set prior to super
cooling mode.
Switch on super cooling mode, e.g.
■ before placing large quantities of food
in the refrigerator compartment.
■ for the fast cooling of drinks.
Page 19
en
Switching on and off
Fig. $
1. Select the refrigerator section using
the °C button.
2. Press super button.
The supercool indicator lights up.
You do not need to switch off super
cooling.After 6 hours the previously set
temperature will be automatically
restored.
Note
When super cooling is switched on,
increased operating noises may occur.
The VitaFresh
compartment
The temperature in the cool-fresh
compartment is about 0 °C. The low
temperature and the optimum moisture
provide ideal storage conditions for fresh
food.
Food can be kept fresh up to three times
longer in the cool-fresh compartment
than in the normal cooling zone – for
even longer freshness, nutrient retention
and flavour.
Vegetable container
Fig. '
The vegetable container is the optimum
storage location for fresh fruit and
vegetables. The humidity controller of the
partition and a special seal can be used
to adjust the air humidity in the vegetable
container.
The air humidity in the vegetable
container can be set according to
the type and amount of products to be
stored:
■ Mainly fruit as well as for a large load
– lower air humidity
■ Mainly vegetables as well as for a
mixed load or small load – higher air
humidity
Notes
■ Fruit sensitive to cold (e.g. pineapple,
banana, papaya and citrus fruit) and
vegetables sensitive to cold (e.g.
aubergines, cucumbers, zucchini,
peppers, tomatoes and potatoes)
should be stored outside
the refrigerator at temperatures
of approx. +8 °C to +12 °C for
optimum preservation of quality and
flavour.
■ Condensation may form in the
vegetable container depending on the
food and quantity stored. Remove
condensation with a dry cloth and
adjust air humidity in the vegetable
container with the humidity controller.
“Cool-fresh” container
Fig. !/26
The storage climate in the “cool-fresh”
container offers ideal conditions for the
storage of fish, meat, sausage, cheese
and milk.
Storage times (at 0 °C)
Depending on the initial
quality
Fresh fish, seafood up to 3 days
Poultry, meat (boiled/fried) up to 5 days
Beef, pork, lamb, sausage
(cold meat)
Smoked fish, broccoli up to 14 days
Salad greens, fennel, apricots,
plums
Soft cheese, yoghurt, quark,
buttermilk, cauliflower
up to 7 days
up to 21 days
up to 30 days
19
Page 20

en
Freezer compartment
Use the freezer compartment
■ To store deep-frozen food.
■ To make ice cubes.
■ To freeze food.
Note
Ensure that the freezer compartment
door has been closed properly. If
the door is open, the frozen food will
thaw. The freezer compartment will
become covered in thick ice. Also: waste
of energy due to high power
consumption!
Max. freezing capacity
Information about the max. freezing
capacity within 24 hours can be found
on the rating plate. Fig. ,
Prerequisites for max. freezing
capacity
■ Switch on super freezing before
placing fresh products
in the compartment (see chapter
entitled “Super freezing”).
■ Remove containers; stack food
directly on the shelf and on the floor of
the freezer compartment.
■ Freeze large quantities of food
preferably in the very top
compartment where food freezes
particularly quickly and therefore also
gently.
Freezing and storing
food
Purchasing frozen food
■ Packaging must not be damaged.
■ Use by the “use by” date.
■ Temperature in the supermarket
freezer must be -18 °C or lower.
■ If possible, transport deep-frozen food
in an insulated bag and place quickly
in the freezer compartment.
Note when loading products
■ Freeze large quantities of food
preferably in the top frozen food
container. This is where food freezes
particularly quickly and therefore also
gently.
■ Place the food over the whole area
of the compartments or the frozen
food containers.
Note
Food which is already frozen must not
come into contact with the food which
is to be frozen. If necessary, re-stack
frozen food in the frozen food
containers.
■ To ensure air circulation in the
appliance, insert frozen food container
all the way.
Freezing smaller amounts of
food
How you freeze smaller amounts of food,
so that they are frozen solid extremely
quickly, can be found in the section
Automatic super freezing.
20
Page 21

Freezing fresh food
Freeze fresh and undamaged food only.
To retain the best possible nutritional
value, flavour and colour, vegetables
should be blanched before freezing.
Aubergines, peppers, zucchini and
asparagus do not require blanching.
Literature on freezing and blanching
can be found in bookshops.
Note
Keep food which is to be frozen away
from food which is already frozen.
■ The following foods are suitable for
freezing:
Cakes and pastries, fish and seafood,
meat, game, poultry, vegetables, fruit,
herbs, eggs without shells, dairy
products such as cheese, butter and
quark, ready meals and leftovers such
as soups, stews, cooked meat and
fish, potato dishes, soufflés and
desserts.
■ The following foods are not suitable
for freezing:
Types of vegetables, which are usually
consumed raw, such as lettuce or
radishes, eggs in shells, grapes,
whole apples, pears and peaches,
hard-boiled eggs, yoghurt, soured
milk, sour cream, crème fraîche and
mayonnaise.
en
Packing frozen food
To prevent food from losing its flavour
or drying out, place in airtight containers.
1. Place food in packaging.
2. Remove air.
3. Seal the wrapping.
4. Label packaging with contents
and date of freezing.
Suitable packaging:
Cling wrap, tubular film made of
polyethylene, aluminium foil, freezer
containers.
These products are available from
specialist outlets.
Unsuitable packaging:
Wrapping paper, greaseproof paper,
cellophane, bin liners and used shopping
bags.
Items suitable for sealing packaged
food:
Rubber bands, plastic clips, string, coldresistant adhesive tape, etc.
Bags and tubular film made of
polyethylene (PE) can be sealed with a
film heat sealer.
Shelf life of frozen food
Storage duration depends on the type
of food.
At a temperature of -18 °C:
■ Fish, sausage, ready meals and cakes
and pastries:
up to 6 months
■ Cheese, poultry and meat:
up to 8 months
■ Vegetables and fruit:
up to 12 months
21
Page 22

en
Super freezing
Food should be frozen solid as quickly
as possible in order to retain vitamins,
nutritional value, appearance and flavour.
The appliance runs constantly when
super freezing has been switched on.
The freezer compartment temperatures
are much lower than in normal operation.
Switching on super freezing
Depending on the amounts of food to be
frozen, you can use super freezing in
different ways.
Note
When super freezing is switched on,
increased operating noises may occur.
Automatic super freezing
Smaller amounts of food are frozen solid
extremely quickly if you freeze them as
follows:
■ In the bottom frozen food container
■ On left
Automatic super freezing automatically
switches on when warm food items are
placed inside the freezer.
Manual super freezing
Fig. $
Freeze larger quantities of food
preferably in the top compartment. This
is where food freezes particularly quickly
and therefore also gently.
Several hours before placing fresh food
in the freezer compartment, switch on
super freezing to prevent an unwanted
temperature rise.
If the max. freezing capacity is to be
used, super freezing must be switched
on 24 hours before the fresh products
are placed in the freezer compartment.
1. Select the freezer compartment area
with °C button.
2. Press super button.
The superfreeze indicator will be lit.
Switching off super freezing
Fig. $
1. Select the freezer compartment area
with °C button.
2. Press super button.
The superfreeze display goes out.
Super freezing is now switched off.
When super freezing has finished, the
appliance automatically switches to
normal mode.
■ With automatic super freezing: As
soon as the smaller amounts of food
to be frozen have frozen solid.
■ With manual super freezing: After
approx. 2½ days.
Thawing frozen food
Depending on the type and application,
select one of the following options:
■ at room temperature
■ in the refrigerator
■ in an electric oven, with/without fan
assisted hot-air
■ in the microwave
m Caution
Do not refreeze thawing or thawed food.
Only ready meals (boiled or fried) may
be refrozen.
No longer store the frozen produce for
the max. storage period.
22
Page 23

Interior fittings
Shelves and containers
You can reposition the inner shelves
and the containers in the door as
required: pull shelf forwards, lower
and swivel out to the side. Lift
the container and remove.
Special features
(not all models)
Butter and cheese compartment
To open the butter compartment, gently
press in the middle of the butter
compartment flap.
To clean the compartment, lift
it at the bottom and take out.
Breakfast set
Fig. %
The containers for the breakfast set can
be taken out and filled individually.
You can take out the breakfast set for
loading and unloading. To do this, lift the
breakfast set and pull out. The container
holder can be moved.
Bottle shelf
Fig. &
Bottles can be stored securely on
the bottle shelf.
Ice cube tray
Fig. +
1. Fill the ice cube tray ¾ full of drinking
water and place in the freezer
compartment.
2. If the ice tray is stuck to the freezer
compartment, loosen with a blunt
implement only (spoon-handle).
3. To loosen the ice cubes, twist the ice
tray slightly or hold briefly under
flowing water.
en
Freezer calendar
Fig. *
To prevent the quality of the frozen food
from deteriorating, do not exceed the
storage duration. The figures next
to the symbols indicate the permitted
storage period of the produce in months.
In the case of commercially available
frozen food observe the date
of manufacture or use-by date.
Ice block
If a power failure or malfunction occurs,
the ice blocks can be used to slow down
the thawing process. The longest
storage time is obtained by placing
the ice pack on the food in the top
compartment.
The ice blocks can also be used to cool
food temporarily , e. g. in a cold bag.
Sticker “OK”
(not all models)
The sticker “OK” lets you check whether
the refrigerator compartment achieves
the safe temperature ranges of +4 °C or
colder recommended for food. If the
sticker does not indicate “OK”, gradually
reduce the temperature.
Note
When the appliance is switched on, it
may take up to 12 hours until the set
temperature is reached.
Correct setting
23
Page 24

en
Switching off and
disconnecting the
appliance
Switching off the appliance
Press "+" button for 10 seconds.
Refrigeration unit switches off.
Disconnecting the appliance
If you do not use the appliance for
a prolonged period:
1. Pull out the mains plug or switch off
the fuse.
2. Clean the appliance.
3. Leave appliance doors open.
Note
To avoid damage to the appliance,
appliance doors must be opened far
enough that they remain in that position
on their own. Do not jam any objects into
the door to prop it open.
Defrosting
Refrigerator compartment
While the appliance is in operation,
condensation droplets or frost form on
the back panel of the cooling
compartment. As the rear panel defrosts
automatically, it is not necessary to
remove the frost or the condensation
droplets.
Freezer compartment
The fully automatic NoFrost system
ensures that the freezer compartment
remains free of ice. Defrosting is no
longer required.
Cleaning the appliance
m Caution
■ Do not use abrasive, chloride or acidic
cleaning agents or solvents.
■ Do not use scouring or abrasive
sponges.
The metallic surfaces could corrode.
■ Never clean shelves and containers
in the dishwasher.
The parts may become deformed!
The cleaning water must not get into
the following areas:
■ Controls
■ Illumination
■ Ventilation openings
■ Openings in the separating plate
Proceed as follows:
1. Pull out the mains plug or switch off
the fuse.
2. Take out the frozen food and store
in a cool location. Place ice pack (if
available) on the food.
3. The rinsing water must not drip into
the controls, lighting, ventilation
openings or the openings in the
partition!
Clean the appliance with a soft cloth,
lukewarm water and a little pH-neutral
washing-up liquid.
4. Wipe the door seal with clear water
only and then wipe dry thoroughly.
5. After cleaning reconnect the
appliance.
6. Put the frozen food back into
the appliance.
24
Page 25

Features
All variable parts of the appliance can be
taken out for cleaning.
Note
The separating plate between the
refrigerator compartment and the
VitaFresh compartment is permanently
fixed. To prevent any damage to the
appliance, this may only be removed by
customer service or authorized
specialists.
Take out shelves in the door
Fig. #
Lift shelves upwards and take out.
Take out glass shelves
Pull the glass shelves forwards and take
out.
Removing the container
Fig. (
Pull out the container all the way and lift
to detach it.
To insert the container, place on
the telescopic rails and push into
the appliance. Attach the container by
pressing it down.
Taking out the frozen food container
Fig. )
Pull out the frozen food container all
the way, lift at the front and remove.
en
Light (LED)
Your appliance features a maintenancefree LED light.
These lights may be repaired
by customer service or authorised
technicians only.
Tips for saving energy
■ Install the appliance in a dry, well
ventilated room! The appliance should
not be installed in direct sunlight
or near a heat source (e.g. radiator,
cooker).
If required, use an insulating plate.
■ Allow warm food and drinks to cool
down before placing in the appliance.
■ Thaw frozen food in the refrigerator
compartment and use the low
temperature of the frozen food to cool
refrigerated food.
■ Open the appliance as briefly as
possible.
■ To achieve the lowest energy
consumption, leave a small wall gap
at the side.
■ The arrangement of the fittings does
not affect the energy rating of the
appliance.
25
Page 26

en
Operating noises
Note
When super freezing is switched on,
increased operating noises may occur.
Quite normal noises
Droning
Motors are running (e.g. refrigeration
units, fan). There may be an increase in
operating noise when ambient
temperatures are high.
Bubbling, humming or gurgling noises
Refrigerant is flowing through the tubing.
Clicking
Motor, switches or solenoid valves are
switching on/off.
Cracking
Automatic defrosting is running.
Preventing noises
The appliance is not level
Please align the appliance with a spirit
level. Use the height-adjustable feet
or place packing underneath them.
The appliance is not free-standing
Please move the appliance away
from adjacent units or appliances.
Containers or storage areas wobble
or stick
Please check the removable parts
and re-insert them correctly if required.
Bottles or receptacles are touching
each other
Move the bottles or receptacles slightly
away from each other.
26
Page 27

Eliminating minor faults yourself
Before you call customer service:
Please check whether you can eliminate the fault yourself based on the following
information.
Customer service will charge you for advice – even if the appliance is still under
guarantee!
Fault Possible cause Remedial action
Temperature differs greatly
from the set value.
The light does not function. The LED light is defective. See chapter “Light (LED)” section.
Appliance was open too
long.
Light is switched off after
approx. 10 min.
Displays do not illuminate. Power failure; the fuse has
been switched off; the mains
plug has not been inserted
properly.
It is too cold in the cooling
compartment or the
VitaFresh compartment.
The temperature in
the freezer compartment is
too warm.
Appliance opened
frequently.
The ventilation openings
have been covered.
Large quantities of fresh
food are being frozen.
In some cases it is adequate to switch off
the appliance for 5 minutes.
If the temperature is too high wait a few hours
and check whether the temperature has
approached the set value.
If the temperature is too low check
the temperature again the next day.
When the appliance is closed and opened,
the light is on again.
Connect mains plug. Check whether the power
is on, check the fuses.
Increase the temperature in the cooling
compartment.
Increase the temperature in the VitaFresh
compartment.
Do not open the appliance unnecessarily.
Remove obstacles.
Do not exceed max. freezing capacity.
en
27
Page 28

en
Fault Possible cause Remedial action
Appliance is not cooling,
temperature display and light
are lit.
Showroom mode is switched
on.
Press and hold °C button and @ setting button
for 5 seconds until an acknowledgement
signal sounds. Another acknowledgement
signal sounds when the buttons are released.
After a short time check whether your
appliance is cooling.
The side panels of the
appliance are warm.
Pipes run into the side panels
which heat during the
cooling process.
That is normal behaviour for the appliance and
not a fault.
Furniture touching the appliance will not be
damaged by the heat.
Freezer compartment door
was open for a long time;
temperature is no longer
reached.
The evaporator (refrigeration
generator) in the
NoFrost system is covered
in thick ice and can no
longer be defrosted fully
automatically.
To defrost the evaporator, remove the frozen
food with the compartments, insulate well
and store in a cool location.
Switch off the appliance and move it away
from the wall. Leave the appliance door open.
After approx. 20 min. the condensation begins
to run into the evaporation pan,
at the rear of the appliance.
To prevent the evaporation pan
from overflowing in this case,
mop up the condensation with a sponge.
The evaporator is defrosted when the water
stops running into the evaporation pan. Clean
the interior. Switch the appliance
back on again.
Automatic super freezing
does not switch on.
The appliance decides independently whether
automatic Super freezing is required and
automatically switches it on or off.
The following settings are
switched off:
■ Audible signals
■ Interior lighting
■ Messages on the display
Sabbath mode is switched
on.
Press super button for 15 seconds.
panel
■ Automatic super freezing
The background illumination
of the display panel is
reduced.
Buttons are locked.
28
Page 29

en
Appliance self-test
Your appliance features an automatic
self-test program which shows you
sources of faults which may be repaired
by customer service only.
Starting the appliance self-test
1. Switch off the appliance and wait 5
minutes.
2. Switch on the appliance and within the
first 10 seconds, press and hold the
°C button and the "–" setting button
for 3–5 seconds until an audible
signal sounds.
The self-test programme starts.
When the self-test ends and an audible
signal sounds twice, your appliance is
in working order.
If 5 audible signals sound, there is an
error. Inform customer service.
Ending the appliance self-test
When the programme has ended, the
appliance switches over to normal
operation.
Customer service
Your local customer service can be
found in the telephone directory or in
the customer-service index. Please
provide customer service with the
appliance product number (E-Nr.) and
production number (FD-Nr.).
This information can be found on the
rating plate. Fig. ,
To prevent unnecessary call-outs, please
assist customer service by quoting
the product and production numbers.
This will save you additional costs.
Repair order and advice
on faults
Contact information for all countries can
be found on the enclosed customer
service list.
GB 0344 892 8979 Calls charged at
local or mobile rate.
IE 01450 2655 0.03 € per minute
at peak. Off peak
0.0088 € per
minute.
US 800 944 2904 toll-free
29
Page 30

it
itIndice
itIstruzioni per l'usoFrigorifero combinato
Avvertenze
di sicurezza
e potenziale pericolo
Prima di mettere in funzione
l'apparecchio
Leggere attentamente tutte
le istruzioni per l'uso
ed il montaggio. Esse
contengono importanti
informazioni per l'installazione,
l'uso e la manutenzione
dell'apparecchio.
Il produttore non è responsabile
se voi trascurate le indicazioni
ed avvertenze del libretto
d’istruzioni per l’uso.
Conservare tutta
la documentazione per l'uso
futuro oppure per eventuali
successivi proprietari.
Elementi tecnici di sicurezza
Pericolo di incendio
Nei tubi del circuito di
raffreddamento scorre una
piccola quantità di refrigerante
non inquinante, ma infiammabile
(R600a). Non danneggia lo
strato di ozono e non aumenta
l'effetto serra. In caso di
fuoriuscita, il refrigerante può
ferire gli occhi o incendiarsi.
In caso di danni:
■ tenere lontano
dall'apparecchio fiamme
o fonti di accensione,
■ ventilare l'ambiente per alcuni
minuti,
■ spegnere l’apparecchio
ed estrarre la spina
di alimentazione elettrica,
■ informare il Servizio
Assistenza Clienti autorizzato.
La quantità di gas refrigerante
contenuta nel vostro
apparecchio, circa 8 gr.
è indicata nella targhetta
d'identificazione posta all'interno
dell'apparecchio. Nel caso in cui
il cavo di collegamento elettrico
dovesse subire danni,
è necessario sostituirlo,
coinvolgere il servizio assistenza
clienti autorizzato o un
elettricista qualificato ad
eseguire questa operazione.
Durante l'installazione
dell'apparecchio prestare
attenzione che il cavo di
alimentazione non resti
incastrato e non si danneggi.
30
Page 31

it
Se il cavo di alimentazione di
questo apparecchio subisce
danni, deve essere sostituito dal
produttore, dal suo servizio di
assistenza clienti o da persona
in possesso di simile qualifica.
Le installazioni e le riparazioni
eseguite in modo non corretto
possono mettere l'utente in
grave pericolo.
Le riparazioni vanno eseguite
dal servizio assistenza clienti
autorizzato o da personale
qualificato ad eseguire questa
operazione.
È consentito usare solo parti
di ricambio originali del
costruttore. Solo con l’impiego
di detti componenti il costruttore
garantisce che i requisiti
di sicurezza del prodotto siano
rispettati.
Non utilizzare prese multiple,
prolunghe o adattatori.
Pericolo di incendio
Le prese multiple portatili o
gli alimentatori portatili possono
surriscaldarsi e provocare un
incendio.
Non collocare prese multiple
portatili o alimentatori portatili
dietro l'apparecchio.
Nell’impiego quotidiano
■ Non introdurre mai apparecchi
elettrici all’interno di questo
elettrodomestico (es.
apparecchi di riscaldamento,
produttori di ghiaccio elettrici
ecc.). Pericolo di esplosione!
■ Non sbrinare o pulire mai
l’apparecchio con una
pulitrice a vapore! Il vapore
può raggiungere parti
elettriche e provocare un
cortocircuito. Pericolo di
scossa elettrica!
■ A parte le indicazioni del
produttore non adottare
ulteriori misure per accelerare
lo sbrinamento. Pericolo di
esplosione!
■ Non utilizzare oggetti appuntiti
o affilati per rimuovere la brina
o il ghiaccio. Si rischia di
danneggiare i tubi del
refrigerante. Il refrigerante
fuoriuscito può incendiarsi o
provocare lesioni agli occhi.
■ Non conservare
nell’apparecchio prodotti
contenenti gas propellenti
combustibili (per es.
bombolette spray) e sostanze
esplosive. Pericolo di
esplosione!
■ Non usare impropriamente lo
zoccolo, i cassetti estraibili, le
porte ecc. come predellino o
come sostegno.
31
Page 32

it
■ Per lo sbrinamento e la pulizia
estrarre la spina
d’alimentazione o disinserire
l'interruttore di sicurezza.
Estrarre la spina di
alimentazione, non tirare il
cavo di collegamento.
■ Conservare l'alcol ad alta
gradazione soltanto in
contenitori ermetici
e in posizione verticale.
■ Evitare che oli o grassi
imbrattino parti plastiche e le
guarnizioni delle porte.
Altrimenti le parti plastiche e
le guarnizioni delle porte
diventano porose.
■ Evitare assolutamente di
coprire o di ostruire le
aperture di afflusso e deflusso
dell’aria.
■ Non conservare nel
congelatore liquidi in bottiglia
e lattine (specialmente le
bevande contenenti anidride
carbonica).Bottiglie e lattine
possono scoppiare!
■ Evitare il contatto prolungato
delle mani con alimenti
congelati, ghiaccio o i tubi
dell’evaporatore ecc.
Pericolo di ustioni da freddo!
■ Per prevenire pericoli
per bambini e persone
a rischio:
Sono esposti a pericolo i
bambini e le persone con
limiti fisici, psichici o percettivi
e le persone sprovviste di
sufficiente conoscenza
sull'utilizzo sicuro
dell'apparecchio.
Accertarsi che i bambini e le
persone a rischio abbiano
compreso i pericoli.
Una persona responsabile
della sicurezza è tenuta a
sorvegliare o istruire i bambini
e le persone a rischio in
rapporto con l'apparecchio.
Permettere l’uso
dell’apparecchio solo a
bambini di età di 8 anni o
superiore.
Sorvegliare i bambini durante
la pulizia e la manutenzione.
Non permettere che i bambini
giochino con l'apparecchio.
■ Non mettere in bocca alimenti
congelati appena presi dal
congelatore.
Pericolo di ustioni da freddo!
32
Page 33

Bambini in casa
■ Non abbandonare parti
dell'imballaggio che possano
essere fonte di gioco per
i bambini.
Pericolo di soffocamento
causato da scatole di cartone,
fogli di plastica, polistirolo!
■ L'apparecchio non
è un giocattolo per bambini!
■ Per apparecchi con serratura
della porta:
conservare la chiave fuori
della portata dei bambini!
it
Avvertenze per
lo smaltimento
* Smaltimento
dell'imballaggio
L'imballaggio ha protetto l'apparecchio
da eventuali danni da trasporto. Tutti
i materiali impiegati sono EcoCompatibili e riciclabili. Il Vostro
contributo: smaltite l'imballaggio
secondo la vigenti norme.
Chiedere informazioni circa
le piattaforme di smaltimento locale alla
propria amministrazione comunale.
Norme generali
L’apparecchio è idoneo
■ per raffreddare e congelare
alimenti,
■ per preparare ghiaccio.
Questo apparecchio è destinato
all’uso domestico privato nelle
famiglie ed all’ambiente
domestico.
La tenuta ermetica del circuito
del freddo è stata controllata.
Questo apparecchio è conforme
alle vigenti norme di sicurezza
per le apparecchiature elettriche
ed è schermato contro
i radiodisturbi.
Questo apparecchio è
progettato solo per l'utilizzo fino
ad un'altezza di massimo 2000
metri sul livello del mare.
* Rottamazione
di un apparecchio dismesso
Gli apparecchi dismessi dispongono
ancora di un valore residuo! Un corretto
smaltimento nel rispetto dell’ecologia,
permette di recuperare materie prime
pregiate.
Questo apparecchio dispone di
contrassegno ai sensi della
direttiva europea 2012/19/UE in
materia di apparecchi elettrici ed
elettronici (waste electrical and
electronic equipment - WEEE).
Questa direttiva definisce le
norme per la raccolta e il
riciclaggio degli apparecchi
dismessi valide su tutto il territorio
dell’Unione Europea.
33
Page 34

it
m Avviso
In caso di apparecchi fuori uso
1. Estrarre la spina di alimentazione.
2. Troncare il cavo elettrico
di collegamento e rimuoverlo
unitamente alla spina.
3. Non estrarre i ripiani e i contenitori,
questo rende più difficile ai bambini
di entrare nel vano frigo
dell'apparecchio!
4. Vietare ai bambini di giocare con
un apparecchio dismesso. Pericolo
di asfissia!
I frigoriferi contengono gas nel circuito
refrigerante e gas nell'isolamento.
Refrigerante e gas devono essere
smaltiti in modo appropriato. Evitare
di danneggiare i raccordi del circuito
refrigerante, durante il conferimento
dell’apparecchio alla piattaforma
di riciclaggio.
Dotazione
Dopo il disimballo controllare
l’apparecchio per accertare eventuali
danni di trasporto.
In caso di contestazioni rivolgersi
al Vs. fornitore, presso il quale
l’apparecchio è stato acquistato.
La dotazione comprende i seguenti
componenti:
■ Apparecchio
■ Accessori (a secondo del modello)
■ Busta con il materiale utile
al montaggio
■ Istruzioni per l’uso
■ Istruzioni per il montaggio
■ Libretto del servizio assistenza clienti
autorizzato
■ Allegato di garanzia convenzionale
■ Informazioni sul consumo energetico
e sui possibili rumori
Luogo d’installazione
Il luogo d’installazione idoneo è un
locale asciutto, ventilabile. Il luogo
d’installazione non deve essere esposto
ad irraggiamento solare diretto e non
essere vicino ad una fonte di calore,
cucina, calorifero ecc. Se è inevitabile
l’installazione accanto ad una fonte
di calore, utilizzare un idoneo pannello
isolante, oppure rispettate le seguenti
distanze minime dalla fonte di calore:
■ Da cucine elettriche o a gas 3 cm.
■ Da stufe ad olio o a carbone 30 cm.
Il pavimento nel luogo d’installazione
non deve cedere, rinforzarlo se
necessario. Compensare gli spessori
le eventuali disuguaglianze
del pavimento.
Distanza dal muro
Installare l’apparecchio in modo da
garantire un angolo di apertura della
porta di 90°.
34
Page 35

it
Osservare
la temperatura
ambiente
e la ventilazione
Temperatura ambiente
L’apparecchio è progettato per una
specifica classe climatica. In funzione
di questa, l’apparecchio può essere
usato alle seguenti temperature
ambientali.
La classe climatica è indicata nella
targhetta porta-dati. Figura ,
Classe
climatica
SN da +10 °C a 32 °C
N da +16 °C a 32 °C
ST da +16 °C a 38 °C
T da +16 °C a 43 °C
Avvertenza
L’apparecchio è perfettamente efficiente
nei limiti di temperatura ambiente della
classe climatica indicata. Se un
apparecchio della classe climatica SN
viene messo in funzione a temperature
ambiente inferiori, possono essere
esclusi danni all’apparecchio fino ad una
temperatura di +5 °C.
Ventilazione
Figura "
L’aria lungo la parete posteriore e quelle
laterali tende a scaldarsi, l'aria riscaldata
deve poter defluire liberamente. In caso
contrario il refrigeratore deve lavorare
di più. Questo aumenta il consumo
di energia elettrica. Perciò: evitare
assolutamente di coprire o di ostruire
le aperture di afflusso e deflusso dell'aria
di raffreddamento.
Temperatura ambiente
ammessa
Collegare
l’apparecchio
Dopo avere posizionato l’apparecchio,
attendere circa 1 ore prima di metterlo
in funzione, questo assicura che l’olio
lubrificante si raccolga nella parte bassa
del motore e non penetri nel circuito
di raffreddamento.
Pulire l’interno dell’apparecchio prima
di attivarne la funzione (vedi capitolo
«Pulizia dell’apparecchio»).
Collegamento elettrico
La presa elettrica deve essere vicino
all’apparecchio ed essere accessibile
anche al termine dell'installazione
dell'apparecchio.
m Avviso
Pericolo di scossa elettrica!
Se il cavo di alimentazione non è
sufficientemente lungo, non utilizzare in
nessun caso prese multiple o prolunghe.
Contattare il servizio di assistenza clienti
per le possibili alternative.
L’apparecchio è conforme alla classe di
protezione I. Collegare l’apparecchio alla
corrente (220-240 V/50 Hz CA) tramite
una presa con conduttore di terra
installata a norma. La presa deve essere
protetta con un fusibile da 10 A a 16 A.
Per gli apparecchi che vengono utilizzati
in paesi non europei, controllare se la
tensione e il tipo di corrente indicati
corrispondono ai valori della rete
elettrica locale. Questi dati sono
disponibili sulla targhetta identificativa,
figura ,.
35
Page 36

it
m Avviso
I nostri apparecchi possono essere
collegati ad un inverter sinusoidale
di rete.
Gli inverter di rete vengono utilizzati
in abbinamento a impianti fotovoltaici
e collegati direttamente alla rete elettrica
pubblica. Usare inverter sinusoidali nel
caso di soluzioni speciali
(es. imbarcazioni oppure nelle baite
in montagna), laddove non sia
disponibile un collegamento elettrico
diretto alla rete pubblica.
Conoscere
l’apparecchio
Svolgere l’ultima pagina con le figure.
Questo libretto d’istruzioni per l’uso
è valido per vari modelli,
pertanto le dotazioni possono variare.
Nelle illustrazioni sono possibili
differenze.
Figura !
* Non in tutti i modelli.
A Frigorifero
B Vano VitaFresh
C Congelatore
1–18 Elementi di comando
19* Scomparto per burro e formaggio
20 Balconcino per bottigliette
21 Ripiano per bottiglie grandi
22 Illuminazione (LED)
23* Ripiano bottiglie
24* Set colazione
25 Ripiano di separazione con
regolatore umidità
26 Cassetto per verdure
27 Cassetto freschezza
28 Cassetto surgelati
Elementi di comando
Figura $
1 Indicatore temperatura
del congelatore
I numeri corrispondono alle
temperature del congelatore
regolate in °C.
2 Spia ALARM
Si accende quando la
temperatura nel congelatore è
troppo alta o la porta del
congelatore è aperta da troppo
tempo.
3 Indicatore superfreeze
Si accende quando il super-
congelamento è in funzione.
4 Indicazione temperatura
VitaFresh
Indica la temperatura regolata del
vano VitaFresh.
5 Spia sabbath
Si accende quando viene attivata
la modalità Sabbath.
6 Spia Allarm
Si accende quando la porta del
congelatore è aperta da troppo
tempo.
7 Indicatore temperatura del
frigorifero
I numeri corrispondono alle
temperature del frigorifero
regolate in °C.
36
Page 37

it
8 Indicatore supercool
Si accende quando il superraffreddamento è in funzione.
9 Indicatore vacation mode
Si attiva quando viene attivata la
modalità vacanza.
10 Funzione di blocco dei pulsanti
«lock»
Se questa funzione è attivata, non
sono possibili regolazioni die
elementi di comando.
11 Pulsante lock/alarm off
Questo pulsante serve per
■ la disattivazione del segnale
acustico di allarme (vedi
capitolo «Funzione di
allarme»),
■ l’attivazione e disattivazione del
bloccaggio pulsanti.
12 Indicazione «eco mode»
Viene evidenziato quando viene
attivata la modalità «eco».
13 Pulsante di selezione dell'area
dell'apparecchio
Per eseguire regolazioni per
un'area dell'apparecchio,
premere ripetutamente il pulsante
di selezione.
14 Indicatore ALARM
Si accende quando la
temperatura nell'apparecchio
aumenta troppo.
15 Pulsanti di regolazione +/-
I pulsanti servono per regolare le
temperature del frigorifero e del
congelatore.
16 Pulsante «super»
Serve per attivare le funzioni
super-raffreddamento (frigorifero)
e super-congelamento
(congelatore) (vedi il capitolo
Super-raffreddamento e/
o il capitolo Supercongelamento).
17 Pulsante «mode»
Per la selezione delle funzioni
speciali. Vedi capitolo «Funzioni
speciali».
18 Indicatore freshness mode
Si attiva quando viene attivata la
modalità freschezza.
Accensione
dell’apparecchio
1. Inserire prima la spina nel connettore
sul lato posteriore dell'apparecchio.
Controllare che la spina sia
completamente inserita.
2. Inserire poi l'altra estremità del cavo
nella presa.
Ora l'apparecchio è acceso e viene
emesso un segnale acustico di avviso.
Per disattivare il segnale acustico
premere il pulsante lock/alarm off.
L'indicazione ALARM si spegne quando
l’apparecchio ha raggiunto la
temperatura regolata.
Le temperature predefinite vengono
raggiunte dopo diverse ore. Durante
questo periodo non introdurre alimenti
nell’apparecchio.
Il produttore consiglia le seguenti
temperature:
■ Congelatore: –18 °C
■ Vano VitaFresh: da 0 °C a 2 °C
■ Frigorifero: +4 °C
37
Page 38

it
Istruzioni per il funzionamento
■ Dopo l’accensione possono
trascorrere diverse ore prima che le
temperature regolate vengano
raggiunte.
■ Grazie al sistema automatico NoFrost
nel congelatore non si forma ghiaccio.
Lo sbrinamento da parte del cliente
non è più necessario.
■ Se la porta, dopo averla chiusa,
oppone resistenza ad una nuova
apertura, attendere un attimo finché le
pressioni interne non si sono
compensate.
■ Le pareti anteriori e laterali
dell’apparecchio possono scaldarsi
leggermenteper impedire la
formazione di condensa.
Regolare
la temperatura
Figura $
Frigorifero
La temperatura può essere regolata
da +2 °C a +8 °C.
1. Premere il pulsante di selezione 13
finché non è attivo il display
frigorifero 7.
2. Premere i pulsanti +/– 14 finché non
viene visualizzata la temperatura
desiderata.
Gli alimenti delicati non devono essere
conservati a temperatura superiore
+4 °C.
Vano VitaFresh
La temperatura può essere regolata da –
1 °C a 3 °C.
1. Premere il pulsante di selezione 13
finché non si attiva l'indicatore
VitaFresh 4.
2. Premere i pulsanti +/- finché non viene
visualizzata la temperatura desiderata.
Congelatore
La temperatura può essere regolata da 16 °C a -24 °C.
1. Con il pulsante °C selezionare il
congelatore.
2. Premere i pulsanti +/- finché non viene
visualizzata la temperatura desiderata.
Funzioni speciali
Figura $
Modalità freschezza
Con la modalità freschezza gli alimenti si
conservano ancora più a lungo.
Attivazione:
premere il tasto mode finché non viene
visualizzato freshness mode.
L’apparecchio regola automaticamente
le seguenti temperature:
■ Frigorifero: + 2 °C
■ Vano VitaFresh: 0 °C
■ Congelatore: resta invariato
Disattivazione:
premere il tasto mode finché freshness
mode non scompare.
38
Page 39

it
Modalità eco
Con la modalità eco si commuta
l’apparecchio al funzionamento a
risparmio energetico.
Attivazione:
premere il pulsante mode finché non
viene visualizzato "eco mode".
L’apparecchio regola automaticamente
le seguenti temperature:
■ Frigorifero: +8 °C
■ Vano VitaFresh: +3 °C
■ Congelatore: –16 °C
Disattivazione:
premere il pulsante mode finché "eco
mode" non scompare.
Modo Vacanza
In caso di assenza prolungata si può
commutare l’apparecchio nel modo
Vacanza, per il risparmio energetico.
Attivando il modo Vacanza si disattiva il
super-congelamento automatico.
La temperatura del frigorifero viene
impostata automaticamente a +14 °C.
In questo periodo non immettere alimenti
nel frigorifero.
Attivazione:
premere il tasto mode finché non viene
visualizzato vacation mode.
Modalità Sabbath
All'attivazione della modalità Sabbath
vengono disattivate le impostazioni
seguenti:
■ Segnali acustici
■ Illuminazione interna
■ Indicazioni sul display
■ La retroilluminazione del display viene
ridotta
■ I pulsanti si bloccano
■ Super-congelamento automatico
Attivazione e disattivazione della
modalità Sabbath:
Premere il tasto super per 15 secondi.
Funzione di blocco tasti Lock
Per attivare e disattivare il blocco tasti,
premere il tasto lock/alarm off per 5
secondi.
Quando la funzione è attivata, viene
evidenziato a display D.
Il pannello di comando è ora protetto da
un uso indesiderato.
Eccezione del blocco tasti:
per disattivare il blocco tasti e in caso di
segnale acustico può essere premuto il
tasto lock/alarm off.
L’apparecchio regola automaticamente
le seguenti temperature:
■ Frigorifero: +14 °C
■ Vano VitaFresh: +14 °C
■ Congelatore: resta invariato
Avvertenza
Sul display VitaFresh compare «–».
Disattivazione:
premere il pulsante mode finché vacation
mode non scompare.
Funzione di allarme
Un segnale acustico di allarme può
essere emesso nei casi seguenti.
39
Page 40

it
Allarme porta
Se l'apparecchio resta aperto troppo a
lungo si attiva l'allarme porta e
nell'indicazione di temperatura del
frigorifero 7 o nell'indicazione di
temperatura del congelatore 1 compare
ALARM. Chiudendo la porta
corrispondente, l'allarme porta
si disattiva.
Allarme temperatura
Viene emesso un suono a intermittenza,
nell'indicazione di temperatura del
congelatore 1 compare ALARM.
L’allarme temperatura si attiva se la
temperatura nel congelatore è troppo
alta e gli alimenti congelati sono a
rischio.
Attivazione del segnale acustico di
allarme senza che questo costituisca
pericolo per gli alimenti congelati:
■ Messa in funzione dell’apparecchio.
■ Introduzione di grandi quantità di
alimenti freschi.
Avvertenza
Non ricongelare gli alimenti parzialmente
o completamente decongelati. Questi
possono essere di nuovo congelati solo
dopo avere preparato (mediante
qualsiasi tipo di cottura) pietanze pronte
all’uso.
Non utilizzare più interamente la durata
max. di conservazione
Il display della temperatura indica
per 5 secondi la temperatura più alta
raggiunta nel congelatore. Al termine
viene visualizzata la temperatura
regolata.
Home Connect
Questo apparecchio è dotato di
connessione Wi-Fi e può essere
comandato a distanza con un dispositivo
mobile.
Avvertenza
Wi-Fi è un marchio registrato di Wi-Fi
Alliance.
Se non è collegato alla rete domestica,
l'apparecchio funziona come un
frigorifero senza collegamento alla rete e
può essere comandato manualmente
con gli elementi di comando.
Per usare le funzioni di Home Connect,
connettere l'apparecchio con un Home
Connect Wi-Fi-Dongle.
Se l'apparecchio è stato fornito senza
l'Home Connect Wi-Fi-Dongle è possibile
ordinarlo tramite il nostro servizio clienti.
Avvertenza
Inserire e disinserire la spina a fianco
dell'apparecchio è più difficoltoso di
quanto previsto. Controllare che la spina
sia completamente inserita.
Posizionare l'Home Connect Wi-FiDongle ad un'altezza di 1 metro.
Avvertenze
■ Osservare le avvertenze di sicurezza
delle presenti istruzioni per l'uso e
accertarsi che vengano rispettate
quando l'apparecchio viene utilizzato
mediante l'app Home Connect e non
si è in casa.
Osservare anche le indicazioni
presenti nell'app Home Connect.
Disattivazione dell'allarme
Premere il tasto lock/alarm off per
disattivare il segnale acustico.
40
Page 41

it
■ I comandi impartiti direttamente
sull'apparecchio hanno sempre la
priorità; quando l'apparecchio viene
comandato direttamente, i comandi
tramite l'app Home Connect non sono
disponibili.
Configurazione di Home
Connect
Avvertenze
■ Osservare l'allegato Home Connect
alle istruzioni che è possibile scaricare
dall'indirizzo http://www.boschhome.com. Inserire nel campo di
ricerca il codice (E-Nr.)
dell'elettrodomestico.
■ Dopo l'accensione dell'apparecchio
attendere almeno due minuti per
consentire l'inizializzazione interna
dell'apparecchio. Configurare Home
Connect soltanto al termine.
■ Per poter eseguire le impostazioni
mediante Home Connect, l'app Home
Connect deve essere installata sul
proprio dispositivo mobile. Osservare
la documentazione fornita di Home
Connect.Seguire i passi indicati
all'interno dell'app per eseguire le
impostazioni.
■ Dopo diversi istanti di inutilizzo, il
menu di Home Connect si chiude
automaticamente. Informazioni
sull'apertura del menu di Home
Connect sono disponibili all'inizio del
capitolo corrispondente.
Connessione automatica alla rete
domestica (WLAN)
Se è disponibile un router WLAN con
funzione WPS, è possibile collegare
automaticamente il frigorifero alla rete
domestica.
1. Premere contemporaneamente il tasto
super e il tasto lock/alarm off per
aprire il menu Home Connect.
Il display indica Cn.
Avvertenza
Premere contemporaneamente i due
tasti.I tasti vengono bloccati se si
preme a lungo il tasto lock/alarm off
da solo. Premere nuovamente il tasto
lock/alarm off finché i tasti non si
sbloccano.
2. Premere il tasto °C finché i display
non visualizzano AC e oF.
3. Premere il tasto +.
L'apparecchio è pronto per la
connessione automatica.
Il display visualizza un'animazione per
2 minuti.
Durante questo intervallo eseguire le
operazioni seguenti.
4. Attivare la funzione WPS sul router
della rete domestica (ad es. con il
tasto WPS/WLAN, osservare le
informazioni riportate nella
documentazione del router).
■ Se la connessione è stata stabilita,
lampeggia on sul display del
frigorifero.
Ora è possibile collegare il
frigorifero all'app.
41
Page 42

it
■ Se il display visualizza oF significa
che non è stato possibile stabilire la
connessione.
Verificare che il frigorifero si trovi
entro il campo di copertura della
rete domestica (WLAN).
Ripetere la procedura oppure
eseguire la connessione
manualmente.
Connessione manuale alla rete
domestica (WLAN)
Se il router WLAN presente non è dotato
di funzione WPS o se l'utente non ne è a
conoscenza, è possibile collegare il
frigorifero manualmente alla rete
domestica.
1. Premere contemporaneamente il tasto
super e il tasto lock/alarm off per
aprire il menu Home Connect.
Il display indica Cn.
Avvertenza
Premere contemporaneamente i due
tasti.I tasti vengono bloccati se si
preme a lungo il tasto lock/alarm off
da solo. Premere nuovamente il tasto
lock/alarm off finché i tasti non si
sbloccano.
2. Premere il tasto °C finché i display
non mostrano SA e oF.
3. Premere il tasto +.
L'apparecchio è pronto per la
connessione manuale.
Il display visualizza un'animazione per
5 minuti.
Durante questo intervallo eseguire le
operazioni seguenti.
4. Per il frigorifero è ora configurata una
propria rete WLAN con il nome
HomeConnect.
A questa rete è ora possibile
accedere con il dispositivo mobile.
5. Aprire il menu delle impostazioni del
dispositivo mobile e richiamare le
impostazioni WLAN.
6. Collegare il dispositivo mobile alla rete
WLAN HomeConnect.
Password: HomeConnect
Per stabilire la connessione possono
essere necessari fino a 60 secondi.
7. Una volta stabilita la connessione,
aprire l'app Home Connect sul
dispositivo mobile.
L'app cerca il frigorifero.
8. Non appena viene rilevato il frigorifero,
inserire il nome della rete (SSID) e la
password (Key) della propria rete
domestica (WLAN) nei campi
corrispondenti.
9. Confermare con il pulsante Trasferisci
agli elettrodomestici.
■ Se la connessione è stata stabilita,
lampeggia on sul display del
frigorifero.
Ora è possibile collegare il
frigorifero all'app.
■ Se il display visualizza oF significa
che non è stato possibile stabilire la
connessione.
Inserire nuovamente la password
verificando che sia scritta
correttamente.
Verificare che il frigorifero si trovi
entro il campo di copertura della
rete domestica (WLAN).
Ripetere l’operazione.
42
Page 43

it
Collegamento del frigorifero con
l'app Home Connect
Una volta stabilita la connessione tra il
frigorifero e la rete domestica è possibile
collegare il frigorifero all'app.
1. Premere contemporaneamente il tasto
super e il tasto lock/alarm off per
aprire il menu Home Connect.
Il display indica Cn.
Avvertenza
Premere contemporaneamente i due
tasti.I tasti vengono bloccati se si
preme a lungo il tasto lock/alarm off
da solo. Premere nuovamente il tasto
lock/alarm off finché i tasti non si
sbloccano.
2. Premere il tasto °C finché non sono
visualizzati PA (Pairing = collegamento
all'app) e oF.
3. Premere il tasto + per collegare
l'apparecchio all'app.
Il display mostra un'animazione.
Non appena il frigorifero e l'app sono
collegati, il display mostra on.
4. Aprire l'app e attendere finché non
viene visualizzato il frigorifero.
Con Aggiungi confermare il
collegamento tra l'app e il frigorifero.
Se il frigorifero non viene visualizzato
automaticamente, fare clic su
Aggiungi apparecchio nell'app e
seguire le istruzioni. Non appena
viene visualizzato il frigorifero,
aggiungerlo con +.
5. Seguire le istruzioni dell'app fino alla
fine della procedura.
■ I display mostrano PA e on.
Il frigorifero è stato collegato
all'app.
■ Se la connessione non è stata
stabilita, verificare che il dispositivo
mobile sia connesso alla rete
domestica (WLAN).
Quindi collegare di nuovo il
frigorifero all'app.
■ Se il display mostra Er, Home
Connect resettare le impostazioni e
ripetere la configurazione dall'inizio.
Verifica dell'intensità del segnale
Se non viene instaurata la connessione
occorre verificare l'intensità del segnale.
1. Premere contemporaneamente il tasto
super e il tasto lock/alarm off per
aprire il menu Home Connect.
Il display indica Cn.
Avvertenza
Premere contemporaneamente i due
tasti.I tasti vengono bloccati se si
preme a lungo il tasto lock/alarm off
da solo. Premere nuovamente il tasto
lock/alarm off finché i tasti non si
sbloccano.
2. Premere il tasto °C finché il display
non mostra SI. Nel secondo display
viene visualizzato un valore compreso
tra 0 (nessuna ricezione) e
3 (massima ricezione).
Avvertenza
L'intensità del segnale deve essere
pari almeno a 2. Se l'intensità del
segnale è troppo bassa, la
connessione può interrompersi.
Avvicinare il router e il frigorifero,
verificare che la connessione non sia
disturbata da pareti schermanti
oppure installare un ripetitore per
rafforzare il segnale.
43
Page 44

it
Home Connect Reset delle impostazioni
Se non si riesce a stabilire la
connessione oppure se si desidera
registrare il frigorifero in un'altra rete
(WLAN), è possibile resettare le
impostazioni di Home Connect:
1. Premere contemporaneamente il tasto
super e il tasto lock/alarm off per
aprire il menu Home Connect.
Il display indica Cn.
Avvertenza
Premere contemporaneamente i due
tasti.I tasti vengono bloccati se si
preme a lungo il tasto lock/alarm off
da solo. Premere nuovamente il tasto
lock/alarm off finché i tasti non si
sbloccano.
2. Premere il tasto °C finché i display
non mostrano rE e oF.
3. Premere il tasto +.
■ Il display mostra una breve
animazione, quindi mostra
nuovamente oF.
Le impostazioni di Home Connect
sono resettate.
■ Se il display mostra Er, eseguire
nuovamente il reset oppure
contattare il servizio di assistenza
clienti.
Accesso del servizio di
assistenza clienti
Contattando il servizio di assistenza
clienti, quest'ultimo può intervenire
sull'apparecchio dietro richiesta e
rilevare il suo stato. A tal fine è
necessario che l'apparecchio sia
collegato alla rete domestica.
Per ulteriori informazioni sull'accesso da
parte del servizio di assistenza clienti e
sulla disponibilità nel proprio Paese
visitare la sezione Help&Support del sito
www.home-connect.com.
1. Contattare il servizio di assistenza
clienti.
2. Confermare l'avvio dell'accesso del
servizio di assistenza clienti nell'app.
Durante l'accesso del servizio di
assistenza clienti compare il
simbolo CS sul pannello di comando.
3. Dopo aver raccolto tutte le
informazioni necessarie il servizio di
assistenza clienti pone termine
all'accesso.
Avvertenza
La diagnosi a distanza può essere
interrotta in anticipo disattivando
l'accesso del servizio di assistenza
clienti nell'app Home Connect.
44
Page 45

it
Avvertenze sulla protezione dei
dati
Con il primo collegamento del frigorifero
Home Connect a una rete WLAN
connessa a Internet, il frigorifero
trasmette le seguenti categorie di dati al
server Home Connect (prima
registrazione):
■ Identificativo univoco dell'apparecchio
(costituito dai codici dell'apparecchio
e dall'indirizzo MAC del modulo di
comunicazione Wi-Fi installato).
■ Certificato di sicurezza del modulo di
comunicazione Wi-Fi (per la
protezione informatica della
connessione).
■ La versione attuale del software e
dell'hardware del frigorifero.
■ Lo stato di un eventuale ripristino
precedente delle impostazioni di
fabbrica.
La prima registrazione prepara
l'apparecchio per l'utilizzo delle
funzionalità Home Connect ed è
necessaria soltanto nel momento in cui
si desidera utilizzare le funzionalità Home
Connect per la prima volta.
Avvertenza
Osservare che le funzionalità Home
Connect sono utilizzabili solo in
abbinamento all'app Home Connect. Le
informazioni sulla protezione dei dati
possono essere richiamate nell'app
Home Connect.
Dichiarazione di conformità
Con la presente Robert Bosch
Hausgeräte GmbH dichiara che
l'apparecchio con funzionalità Home
Connect è conforme ai requisiti
fondamentali e alle restanti disposizioni
della direttiva 2014/53/EU.
La dichiarazione di conformità dettagliata
RED è consultabile su Internet, sul sito
http://www.bosch-home.com, alla pagina
del prodotto nei documenti
supplementari.
Banda 2,4 GHz: 100 mW max.
Capacità utile totale
I dati di volume utile sono indicati sulla
targhetta d'identificazione
dell'apparecchio. Figura ,
Sfruttare interamente il volume
utile
I contenitori possono essere rimossi per
sistemare la quantità massima di
alimenti. Gli alimenti possono essere poi
accumulati direttamente sul ripiano e sul
fondo del congelatore.
Avvertenza
Evitare gli alimenti vengano a contatto
con la parete di fondo. In tal caso
la circolazione dell’aria viene impedita.
Durante il congelamento, le confezioni
degli alimenti possono attaccarsi alla
parete di fondo.
Rimozione degli accessori
Estrarre i cassetti surgelati fino
all'arresto, sollevarli avanti ed estrarli.
Figura )
45
Page 46

it
Il frigorifero
Il frigorifero è il luogo di conservazione
ideale per carne, salumi, pesce, latticini,
uova, alimenti pronti e prodotti da forno.
Tenere presente nella
conservazione
■ Conservare alimenti freschi, integri.
Così la qualità e la freschezza si
conservano più a lungo.
■ Per i prodotti pronti ed alimenti
confezionati osservare la data minima
di conservazione o la data
di consumo indicata dal produttore.
■ Sistemare gli alimenti ben confezionati
o coperti, per conservare aroma,
colore e freschezza. Si evitano così
contaminazioni di gusto e alterazioni
di colore delle parti di plastica nel
frigorifero.
■ Fare prima raffreddare gli alimenti
e le bevande caldi, poi metterli
nell’apparecchio.
Considerare le zone più fredde
nel frigorifero
La circolazione dell’aria nel frigorifero,
genera delle zone con temperature
differenti:
■ Le zone più fredde sono avanti alle
aperture di uscita aria e nel cassetto
di raffreddamento, figura !/26.
Avvertenza
Conservare nelle zone più fredde gli
alimenti deperibili (per es. pesce,
insaccati, carne).
■ La zona meno fredda è nella parte più
alta della porta.
Avvertenza
Conservare nelle zone meno fredde
ad es. formaggio duro e burro. Il
formaggio duro può così conservare il
suo aroma e il burro resta spalmabile.
Avvertenza
Per non pregiudicare la circolazione
dell’aria, non ostruire le aperture
di uscita dell’aria con alimenti. Gli
alimenti, che sono conservati
direttamente innanzi alle aperture
di uscita dell’aria, possono anche essere
congelati dall’aria fredda che esce.
46
Page 47

it
Super-raffreddamento
Durante il super-raffreddamento il vano
frigorifero viene raffreddato quanto più
possibile per ca. 6 ore. In seguito viene
regolato automaticamente alla
temperatura impostata prima del superraffreddamento.
Inserire il super-raffreddamento per es.
■ prima d’introdurre grandi quantità
di alimenti.
■ per il raffreddamento rapido
di bevande.
Attivazione e disattivazione
Figura $
1. Con il tasto °C selezionare il vano
frigorifero.
2. Premere il tasto super.
L'indicatore supercool si accende.
Non si deve disinserire il superraffreddamento.Dopo 6 ore
l'apparecchio passa automaticamente
alla temperatura precedentemente
impostata.
Avvertenza
Con il super-raffredamento del frigo
attivo, i rumori determinati dal
funzionamento saranno maggiori.
Il vano VitaFresh
La temperatura del vano a 0 °C si
mantiene vicino a 0 °C. La bassa
temperatura e il livello di umidità ottimale
garantiscono condizioni di conservazione
ideali per gli alimenti freschi.
Nel vano a 0 °C si possono conservare
alimenti per una durata fino a tre volte
maggiore rispetto alla normale zona
frigo, per conservare più a lungo la
freschezza, le sostanze nutritive e il
gusto.
Cassetto per verdure
Figura '
Il cassetto per verdure è il luogo di
conservazione ottimale per frutta fresca e
verdura. L'umidità dell'aria nel cassetto
per verdure può essere adattata per
mezzo del regolatore umidità del ripiano
di separazione e di una speciale
guarnizione.
L'umidità dell'aria nel cassetto per
verdure può essere regolata a seconda
del tipo e della quantità dei prodotti da
conservare:
■ soprattutto frutta e in caso di carico
elevato – bassa umidità dell'aria
■ soprattutto verdura e in caso di carico
misto o di carico ridotto – alta umidità
dell'aria
47
Page 48

it
Avvertenze
■ Per la conservazione ottimale della
qualità e dell’aroma di frutta (ad es.
ananas, banane, papaie ed agrumi)
ed ortaggi (ad es. melanzane, cetrioli,
zucchine, peperoni, pomodori
e patate) che temono il freddo,
conservarle fuori del frigorifero a
temperature di +8 °C a +12 °C circa.
■ A seconda della quantità e del
prodotto conservato, nel cassetto
verdura può formarsi condensa.
Rimuovere la condensa con un panno
asciutto e adattare l’umidità dell’aria
nel cassetto verdura con il regolatore
umidità.
Cassetto freschezza
Figura !/26
Il clima di conservazione nel cassetto
freschezza offre condizioni ideali per
conservare pesce, carne, salumi,
formaggio e latte.
Tempi di conservazione
(a 0 °C)
a seconda della qualità
iniziale
Pesce fresco, frutti di mare fino a 3 giorni
Pollame, carne (cotti/arrostiti) fino a 5 giorni
Manzo, suino, agnello, salumi
(affettati)
Pesce affumicato, broccoli fino a 14 giorni
Insalata, finocchio, albicocche,
prugne
Formaggio tenero, yogurt,
ricotta, latticello, cavolfiore
fino a 7 giorni
fino a 21 giorni
fino a 30 giorni
Congelatore
Usare il congelatore
■ Per conservare alimenti surgelati.
■ Per produrre cubetti di ghiaccio.
■ Per il congelamento di alimenti.
Avvertenza
Attenzione che la porta del congelatore
sia chiusa correttamente! Se la porta è
aperta gli alimenti surgelati si
scongelano. Il congelatore forma molto
ghiaccio. Inoltre: spreco di energia
a causa di alto consumo di corrente
elettrica!
Max. capacità
di congelamento
Indicazioni sulla max. possibilità
di congelamento in 24 ore sono riportate
sulla targhetta d’identificazione. Figura ,
Condizioni per la max. capacità
di congelamento
■ Prima di introdurre prodotti freschi
inserire il super congelamento (vedi il
capitolo «Super congelamento»).
■ Estrarre il contenitore; accumulare gli
alimenti direttamente sul ripiano e sul
fondo del congelatore.
■ Congelare le quantità più grandi di
alimenti preferibilmente nello
scomparto superiore. Qui essi
vengono congelati molto rapidamente
e perciò anche salvaguardandone
le proprietà.
48
Page 49

Congelare
e conservare
Acquisto di alimenti surgelati
■ La confezione non deve essere
danneggiata.
■ Rispettare la data di conservazione.
■ La temperatura nell’espositore-
congelatore di vendita deve essere
-18 °C o inferiore.
■ Trasportare gli alimenti surgelati
possibilmente in una borsa termica
e conservarli poi al più presto
possibile nel congelatore.
Tenere presente nella
sistemazione
■ Congelare le quantità più grandi di
alimenti preferibilmente nel cassetto
surgelati più in alto. Qui congelano
in modo particolarmente rapido
e quindi anche delicato.
■ Disporre gli alimenti distesi in piano
negli scomparti o nei cassetti
surgelati.
Avvertenza
Gli alimenti già congelati non devono
entrare in contatto con gli alimenti da
congelare. Eventualmente spostare gli
alimenti surgelati nei cassetti.
■ Per assicurare la circolazione dell'aria
nell'apparecchio, introdurre il cassetto
surgelati fino all’arresto.
it
Congelare piccole quantità di
alimenti
Per scoprire come congelare piccole
quantità di alimenti in modo che
congelino completamente il più
rapidamente possibile, consultare la
sezione Super-congelamento
automatico.
Congelamento
di alimenti freschi
Per il congelamento utilizzare solo
alimenti freschi ed integri.
Per conservare al meglio valore nutritivo,
aroma e colore, sbollentare la verdura
prima di congelarla. Non è necessario
sbollentare melanzane, peperoni,
zucchine ed asparagi.
In libreria sono reperibili pubblicazioni
sul congelamento e la sbollentatura.
Avvertenza
Non mettere gli alimenti da congelare
in contatto con quelli congelati.
■ Sono idonei per il congelamento:
Prodotti da forno, pesce e frutti di
mare, carne, selvaggina, pollame,
verdura, frutta, erbe aromatiche, uova
senza guscio, latticini, come
formaggio, burro e ricotta, pietanze
pronte e residui vivande, come
minestre, piatti unici, carne e pesce
cotti a fuoco lento, vivande di patate,
sformati e dolciumi.
■ Non sono idonei per il congelamento:
Tipi di ortaggi, che solitamente si
consumano crudi, come insalate in
foglia o ravanelli, uova nel guscio, uva,
mele intere, pere e pesche, uova
sode, yogurt, latte cagliato, panna
acida, crème fraîche e maionese.
49
Page 50

it
Confezionamento di alimenti
surgelati
Conservare gli alimenti in confezioni
ermetiche, per evitare che perdano
il loro gusto o possano essiccarsi.
1. Introdurre l’alimento nella confezione.
2. Fare uscire l’aria.
3. Chiudere la confezione
ermeticamente.
4. Scrivere sulla confezione il contenuto
e la data di congelamento.
Imballaggio idoneo:
pellicola di plastica, pellicola tubolare di
polietilene, fogli di alluminio, contenitori
per surgelati.
Questi prodotti sono in vendita nel
commercio specializzato.
Imballaggio non idoneo:
carta per imballaggio, carta pergamena,
cellofan, sacchetti per rifiuti e sacchetti
per la spesa usati.
Sono idonei per chiudere le confezioni:
anelli di gomma, clip di plastica, fili per
legare, nastri adesivi resistenti al freddo
e simili.
I sacchetti e la pellicola tubolare
di polietilene possono essere sigillati
mediante saldatura con un apposito
apparecchio.
Durata di conservazione dei
surgelati
La durata di conservazione dipende dal
tipo di alimento.
Ad una di temperatura di -18 °C:
■ Pesce, salsiccia, pietanze pronte,
prodotti da forno:
fino a 6 mesi
■ Formaggio, pollame, carne:
fino a 8 mesi
■ Verdura, frutta:
fino a 12 mesi
Super-congelamento
Per conservare vitamine e valori nutritivi,
aspetto e gusto, gli alimenti devono
essere congelati completamente, anche
all'interno, nel tempo più breve possibile.
Dopo l'attivazione del supercongelamento l'apparecchio rimane in
funzione in modo continuo. Le
temperature del congelatore diventano
molto più basse rispetto al
funzionamento normale.
50
Page 51

it
Attivazione del supercongelamento
In base alla quantità di alimenti da
congelare, è possibile utilizzare il supercongelamento in modo diverso.
Avvertenza
Con il super-congelamento inserito,
maggiori sono i rumori di funzionamento.
Super-congelamento automatico
Le piccole quantità di alimenti si
congelano più rapidamente se si
congela come segue:
■ nel cassetto surgelati inferiore
■ a sinistra
Il super-congelamento automatico si
attiva automaticamente quando si
congelano alimenti caldi.
Super-congelamento manuale
Figura $
Congelare le quantità più grandi di
alimenti preferibilmente nello scomparto
superiore. Qui congelano in modo
particolarmente rapido e quindi anche
delicato.
Per evitare un indesiderato aumento
della temperatura, inserire il supercongelamento alcune ore prima di
congelare alimenti freschi.
Se si vuole utilizzare la massima
capacità di congelamento, attivare il
super-congelamento 24 ore prima di
congelare alimenti freschi.
1. Con il pulsante °C selezionare la zona
congelatore.
2. Premere il pulsante super.
L'indicatore superfreeze si accende.
Disattivazione del supercongelamento
Figura $
1. Con il pulsante °C selezionare la zona
congelatore.
2. Premere il pulsante super.
L'indicatore superfreeze si spegne.
Ora il super-congelamento è disattivato.
Al termine del super-congelamento,
l'apparecchio torna automaticamente al
funzionamento normale.
■ Con il super-congelamento
automatico: non appena la piccola
quantità di alimenti da congelare è
completamente congelata.
■ Con il super-congelamento manuale:
dopo ca. 2 giorni e ½.
Decongelare surgelati
A seconda del genere e dell’uso,
utilizzare una delle seguenti possibilità:
■ a temperatura ambiente
■ nel frigorifero
■ nel forno elettrico, con/senza ventola
aria calda
■ nel forno a microonde
m Attenzione
Non ricongelare gli alimenti parzialmente
o completamente decongelati. Questi
possono essere di nuovo congelati solo
dopo avere preparato (mediante
qualsiasi tipo di cottura) pietanze pronte
all’uso.
Non utilizzare più la durata max.
di conservazione.
51
Page 52

it
Dotazione
Ripiani e balconcini
Se necessario, i ripiani del vano interno
ed i balconcini della porta possono
essere spostati: tirare i ripiani in avanti,
abbassarli e ruotarli lateralmente.
Sollevare il balconcino ed estrarlo.
Dotazione speciale
(non in tutti i modelli)
Scomparto per burro e formaggio
Per aprire il vano «burro» premere lo
sportello al centro.
Per un corretta pulizia sollevare il vano
ed estrarlo.
Set colazione
Figura %
I contenitori del set colazione possono
essere estratti e riempiti singolarmente.
Il set colazione può essere estratto per il
carico e scarico. A tal fine sollevare
leggermente il set colazione ed estrarlo.
Il supporto del contenitore può essere
spostato.
Ripiano bottiglie
Figura &
Sul ripiano bottiglie si possono deporre
in sicurezza le bottiglie.
Vaschetta per ghiaccio
Figura +
1. Riempire la vaschetta del ghiaccio
per ¾ con acqua e riporla
nel congelatore.
2. Staccare la vaschetta del ghiaccio
eventualmente attaccata solo con un
oggetto non acuminato (manico
di cucchiaio).
3. Per staccare i cubetti di ghiaccio
mettere brevemente la vaschetta sotto
acqua corrente oppure torcerla
leggermente.
Calendario di congelamento
Figura *
Per evitare perdite di qualità degli
alimenti surgelati, non superare la durata
di conservazione. I numeri accanto ai
simboli indicano in mesi la durata
di conservazione consentita
per l’alimento congelato. In caso
di comuni alimenti surgelati commerciali
osservare la data di produzione
o di scadenza.
Accumulatori del freddo
L’accumulatore del freddo ritarda
il riscaldamento degli alimenti conservati
in caso d'interruzione dell’energia
elettrica o di guasto. La durata massima
di conservazione si raggiunge
deponendo l'accumulatore di freddo
sopra gli alimenti nello scomparto
superiore.
L’accumulatore del freddo può essere
estratto anche per raffreddare
temporaneamente alimenti, per es.
in una borsa frigo.
52
Page 53

Adesivo «OK»
(non in tutti i modelli)
Con l'adesivo «OK» è possibile
controllare se nel frigorifero sono stati
raggiunti i range di temperatura sicuri
consigliati per gli alimenti (+4 °C o
temperatura inferiore). Se l'adesivo non
indica «OK», ridurre progressivamente la
temperatura.
Avvertenza
Dopo la messa in funzione
dell'apparecchio possono passare fino
a 12 ore prima che sia raggiunta
la temperatura regolata.
it
Avvertenza
Per evitare danni all'apparecchio, le
porte devono essere aperte in modo che
restino aperte da sole. Non bloccare
oggetti in una porta per tenerla aperta.
Scongelamento
Frigorifero
Durante il funzionamento
dell'apparecchio, sulla parete posteriore
del frigorifero si formano gocce di
condensa o brina. Poiché la parete
posteriore si sbrina automaticamente,
non è necessario rimuovere la brina o le
gocce di condensa.
Corretta regolazione
Spegnere e mettere
fuori servizio
l'apparecchio
Spegnimento dell’apparecchio
Premere il pulsante «+» per 10 secondi.
Il frigorifero si spegne.
Mettere fuori servizio
l’apparecchio
Quando non si usa l’apparecchio per un
lungo periodo:
1. Estrarre la spina di alimentazione o
disinserire il dispositivo di sicurezza.
2. Pulire l’apparecchio.
3. Lasciare aperte le porte
dell’apparecchio.
Congelatore
Grazie al sistema automatico NoFrost
nel congelatore non si forma mai
ghiaccio. Uno sbrinamento non è più
necessario.
Pulizia
dell’apparecchio
m Attenzione
■ Non utilizzare prodotti per pulizia
e solventi chemici contenenti sabbia,
cloro o acidi.
■ Non usare spugne abrasive o spugne
che graffiano.
Sulle superfici metalliche potrebbe
formarsi macchie da corrosione.
■ Non lavare mai in lavastoviglie i ripiani
ed i contenitori.
Questi elementi si possono
deformare!
53
Page 54

it
L'acqua di lavaggio non deve penetrare
nelle zone seguenti:
■ Elementi di comando
■ Illuminazione
■ Aperture di ventilazione
■ Aperture nel divisorio
Procedere come segue:
1. Estrarre la spina di alimentazione o
disinserire il dispositivo di sicurezza.
2. Estrarre gli alimenti surgelati e
depositarli in un luogo fresco.
Disporre un panetto di ghiaccio (se
disponibile) sugli alimenti.
3. L'acqua non deve penetrare negli
elementi di comando,
nell'illuminazione, nelle aperture di
ventilazione o nelle aperture del piano
divisorio!
Pulire l’apparecchio con un panno
morbido, acqua tiepida e poco
detergente a pH neutro.
4. Lavare la guarnizione della porta solo
con acqua pulita e poi asciugarla
con cura.
5. Dopo la pulizia: ricollegare
l’apparecchio.
6. Introdurre di nuovo i surgelati.
Rimozione dei balconcini dalla porta
Figura #
Sollevare ed estrarre i balconcini.
Estrarre i ripiani di vetro
Tirare i ripiani di vetro in avanti ed
estrarli.
Estrarre i contenitori
Figura (
Estrarre completamente i cassetti
e liberarli dall’arresto sollevandoli.
Per inserire i cassetti deporli sulle guide
di estrazione e spingerli nell’interno. Il
cassetto si arresta premendolo in basso.
Estrarre i cassetti surgelati
Figura )
Estrarre i cassetti surgelati fino
all’arresto, sollevarli avanti ed estrarli.
Illuminazione (LED)
L’apparecchio è dotato
di un’illuminazione a LED esente
da manutenzione.
Riparazioni a questa illuminazione deve
essere eseguite solo dal Servizio
Assistenza Clienti autorizzato.
Caratteristiche
Per la pulizia tutte le parti mobili
dell’apparecchio possono essere
estratte.
Avvertenza
Il piano divisorio tra il frigorifero e il vano
VitaFresh è fisso. Per evitare di
danneggiare l'apparecchio, questo piano
può essere rimosso soltanto
dall'assistenza tecnica o dai tecnici
autorizzati.
54
Page 55

it
Risparmiare energia
■ Installare l’apparecchio
un in ambiente asciutto ventilabile.
L’apparecchio non deve essere
esposto direttamente al sole o vicino
ad una fonte di calore (per es.
calorifero, stufa).
Altrimenti usare un pannello isolante.
■ Lasciare raffreddare gli alimenti
e le bevande, se caldi, prima
di introdurli nell’apparecchio.
■ Per scongelare un alimento surgelato
metterlo nel frigorifero, si utilizza così il
freddo del surgelato per il
raffreddamento degli alimenti.
■ Aprire la porta dell’apparecchio
il tempo più breve possibile.
■ Al fine di raggiungere il minimo
consumo energetico: mantenere una
piccola distanza laterale dal muro.
■ La disposizione delle parti
dell'attrezzatura non ha influenza
sull'assorbimento di energia
dell'apparecchio.
Rumori
di funzionamento
Avvertenza
Con il super-congelamento inserito, i
rumori di funzionamento possono
aumentare.
Rumori normali
Ronzio
Motori in funzione (ad es. gruppi
frigoriferi, ventilatore). A temperature
ambiente elevate i rumori di
funzionamento possono aumentare.
Gorgoglìo, scroscio o fruscìo
Derivano dal gas refrigerante, che circola
nei i raccordi del circuito refrigerante.
Breve scatto
Motore, interruttori ed elettrovalvole
s'inseriscono/disinseriscono.
Crepitio
Sbrinamento automatico in corso.
Evitare i rumori
L'apparecchio non è correttamente
livellato
Livellare l'apparecchio con una livella
a bolla d'aria. A tal fine utilizzare i piedini
a vite o inserire uno spessore.
L'apparecchio è in contatto laterale
Allontanare l'apparecchio dai mobili
o apparecchi con i quali è in contatto.
I contenitori o i ripiani traballano o non
sono correttamente inseriti
Controllare le parti estraibili
ed eventualmente inserirle di nuovo
correttamente.
I contenitori all’interno dell’apparecchio
si toccano tra loro
Allontanare un poco le bottiglie
o i contenitori.
55
Page 56

it
Eliminare piccoli guasti
Prima di rivolgersi al customer service:
provare ad eliminare autonomamente l’inconveniente con l’aiuto delle seguenti
istruzioni.
L’intervento del Servizio Assistenza Clienti in caso di corretto funzionamento
del prodotto, è a carico del consumatore.
Guasto Causa possibile Rimedio
La temperatura si discosta
notevolmente dalle
impostazioni iniziali.
L'illuminazione non funziona. L'illuminazione con il LED
è guasta.
La porta è rimasta troppo
tempo aperta.
L'illuminazione si spegne
dopo ca. 10 min..
Nel frigorifero o nel vano
VitaFresh la temperatura è
troppo bassa.
La temperatura
nel congelatore è troppo
alta.
L’apparecchio non raffredda,
il display della temperatura e
l’illuminazione sono accesi.
Frequente apertura
della porta dell’apparecchio.
I passaggi dell’aria
per l’areazione sono ostruiti.
Congelamento di grandi
quantità di alimenti freschi.
Il programma dimostrativo è
attivo.
In alcuni casi basta spegnere l'apparecchio
per 5 minuti.
Se la temperatura è troppo alta, controllare
dopo qualche ora se vi è stata una
normalizzazione della temperatura.
Se la temperatura è troppo bassa, ricontrollare
la temperatura il giorno seguente.
Vedi capitolo «Illuminazione (LED)».
L'illuminazione si riaccende chiudendo
e riaprendo la porta.
Regolare la temperatura del frigorifero su un
valore più alto.
Regolare la temperatura nel vano VitaFresh su
un valore più alto.
Non aprire inutilmente la porta
dell’apparecchio.
Liberare le aperture.
Non superare la quantità massima
di congelamento.
Tenere premuti il tasto °C e il tasto di
regolazione @ per 5 secondi finché non viene
emesso un tono di conferma. Quando si
rilasciano i tasti si sente un ulteriore tono di
conferma.
Dopo qualche tempo controllare se
l’apparecchio raffredda.
56
Page 57

Guasto Causa possibile Rimedio
Tutte le spie spente. Interruzione dell’energia
elettrica;
è scattato il dispositivo
elettrico di sicurezza;
Collegare la spina di alimentazione.
Controllare se vi è energia elettrica
e controllare il dispositivo elettrico
di sicurezza.
la spina d’alimentazione non
è inserita correttamente.
Le pareti laterali
dell'apparecchio sono calde.
Nelle pareti laterali sono
posati tubi che si riscaldano
durante il raffreddamento.
Si tratta del funzionamento normale
dell'apparecchio, non di un guasto.
I mobili a contatto con l'apparecchio non
vengono danneggiati dal calore.
La porta del congelatore
è rimasta aperta troppo
a lungo; non è più possibile
raggiungere la temperatura.
L’evaporatore (generatore
del freddo) nel sistema
NoFrost è ostruito dal
ghiaccio, non riesce più
a sbrinarsi automaticamente.
Per sbrinare l’evaporatore estrarre gli alimenti
congelati con i contenitori e deporli ben isolati
in un luogo fresco.
Spegnere l’apparecchio. Lasciare aperta
la porta dell’apparecchio.
Dopo ca 20 min. l’acqua di sbrinamento
comincia a gocciolare nella vaschetta
d’evaporazione sul lato posteriore
dell’apparecchio.
Per evitare in questo caso che la vaschetta
d’evaporazione trabocchi, svuotarla
periodocamente.
Quando nella vaschetta d’evaporazione non
defluisce più acqua di sbrinamento,
l’evaporatore è sbrinato. Pulire il vano interno.
Rimettere l’apparecchio in funzione.
Il super-congelamento
automatico non si spegne.
L'apparecchio decide autonomamente se è
necessario il super-congelamento automatico
e lo attiva o disattiva automaticamente.
Le impostazioni seguenti
sono disattivate:
■ Segnali acustici
■ Illuminazione interna
■ Indicazioni nel display
■ Super-congelamento
La modalità Sabbath è
attivata.
Premere il tasto super per 15 secondi.
automatico
L’illuminazione di fondo del
display viene ridotta.
I tasti sono bloccati.
it
57
Page 58

it
Autotest
dell’apparecchio
Questo apparecchio dispone
di un programma automatico di autotest
che individua cause ed inconvenienti che
possono essere eliminati solo dal
Servizio Assistenza Clienti.
Avvio dell’autotest
dell’apparecchio
1. Spegnere l’apparecchio ed attendere
5 minuti.
2. Accendere l'apparecchio ed entro 10
secondi tenere premuti per
3-5 secondi il tasto °Ce il tasto di
regolazione «–» finché non viene
emesso un segnale acustico.
Il programma di autotest ha inizio.
Alla fine dell’autotest, se viene emesso
un doppio segnale acustico
l’apparecchio funziona correttamente.
Se vengono emessi 5 segnali acustici, è
presente un malfunzionamento.
Informare il servizio assistenza clienti.
Servizio di assistenza
clienti
Trovate un centro del servizio di
assistenza clienti nelle vostre vicinanze
nell'elenco telefonico o nella rubrica del
servizio di assistenza clienti. Comunicate
al servizio di assistenza la sigla del
prodotto (E-Nr.) e il numero di
fabbricazione (FD-Nr.) dell'apparecchio.
Trovate questi dati sulla targhetta
identificativa. Figura ,
Indicando il prodotto e il numero di
fabbricazione contribuite ad evitare
interventi a vuoto e a evitare spese
supplementari.
Ordine di riparazione
e consulenza in caso di guasti
Trovate i dati di contatto di tutti i paesi
nell’accluso elenco dei centri
di assistenza clienti.
I 800-829120 Linea verde
CH 0848 840 040
Terminare l’autotest
dell’apparecchio
Alla fine del programma l’apparecchio
passa in modalità funzionamento
automatico.
58
Page 59

22
1-18
19
VitaFresh 0°
23
A
superfreeze
supercool
!
24
25
26
B
20
21
27
28
C
"#
Page 60

9LWD)UHVK
$
VXSHUIUHH]H
VXSHUFRRO
%&
Page 61

'(
)*
+,
Page 62

*8001089779*
8001089779 (9904)
en, it
 Loading...