

Page 1
From
Our Reference
Tel
ST-VS/MKP-L3
n.a.
Technical note: Sony cameras on DIVAR network
Security Systems
Eindhoven
8 November 2017
Page 1 of 11
Using Sony ONVIF cameras on DIVAR network recorders
Contents:
• Requirements
• Installation
• Basic DIVAR network configuration
• Configuring VMD & streaming on Sony cameras
• DIVAR App, configuring streaming on Sony cameras
Requirements:
DIVAR Network 2000/3000/5000 Firmware 1.2.1 or later.
Sony IP camera 600 series Firmware V2.8 or later (refer to supported device list at the end of
this document).
Windows™ PC (Windows 7 or later). **
SNC-Toolbox software V1.4.4.0 or later. **
DIVAR mobile APP (optional)
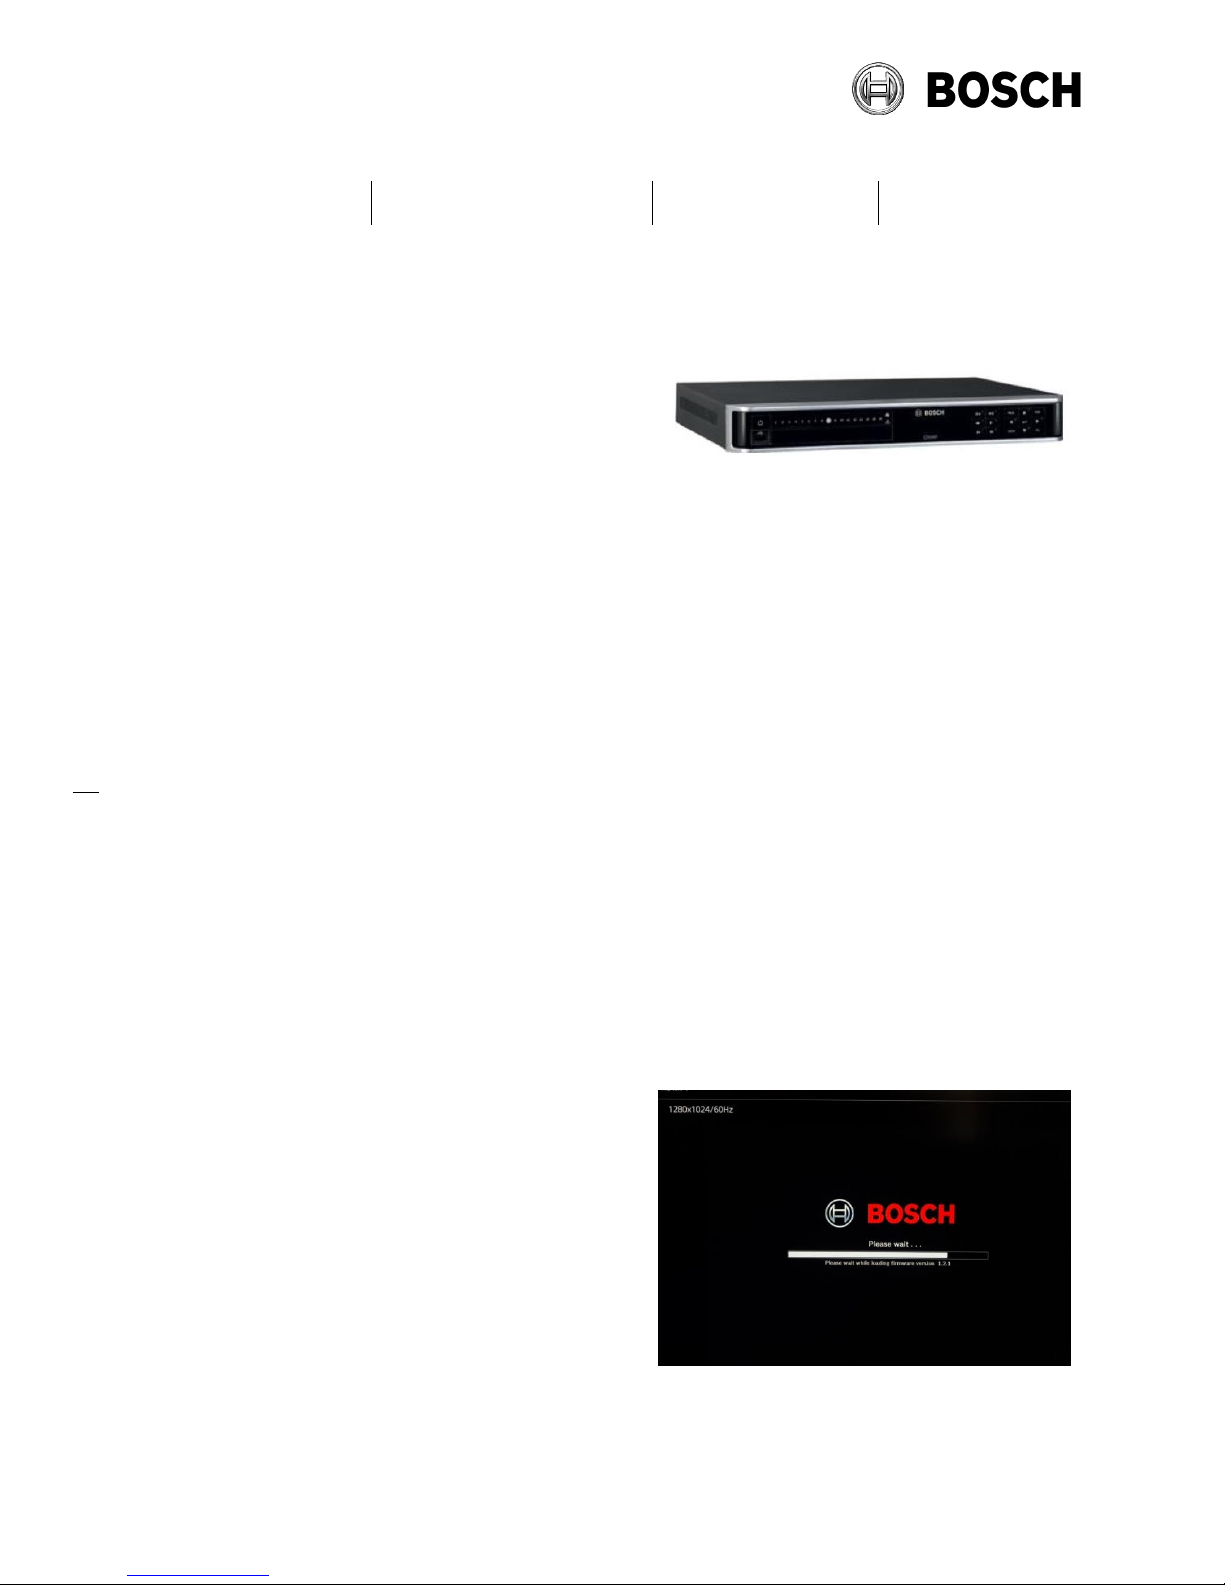
Installation: (DIVAR network 2000/3000/5000 with PoE)
A USB mouse and a display should be connected to the DIVAR.
Connect the cameras to the DIVAR network and power up the unit.
The cameras receives power from the DIVAR and take about 90 seconds to boot, after the
DIVAR unit has powered up.
When the DIVAR has booted, follow the steps
in the wizard, see next page.
Notes:
** Items are required to configure VMD
and streaming in the Sony network camera
Page 2
From
Our Reference
Tel
ST-VS/MKP-L3
n.a.
Security Systems
Eindhoven
8 November 2017
Page 2 of 11
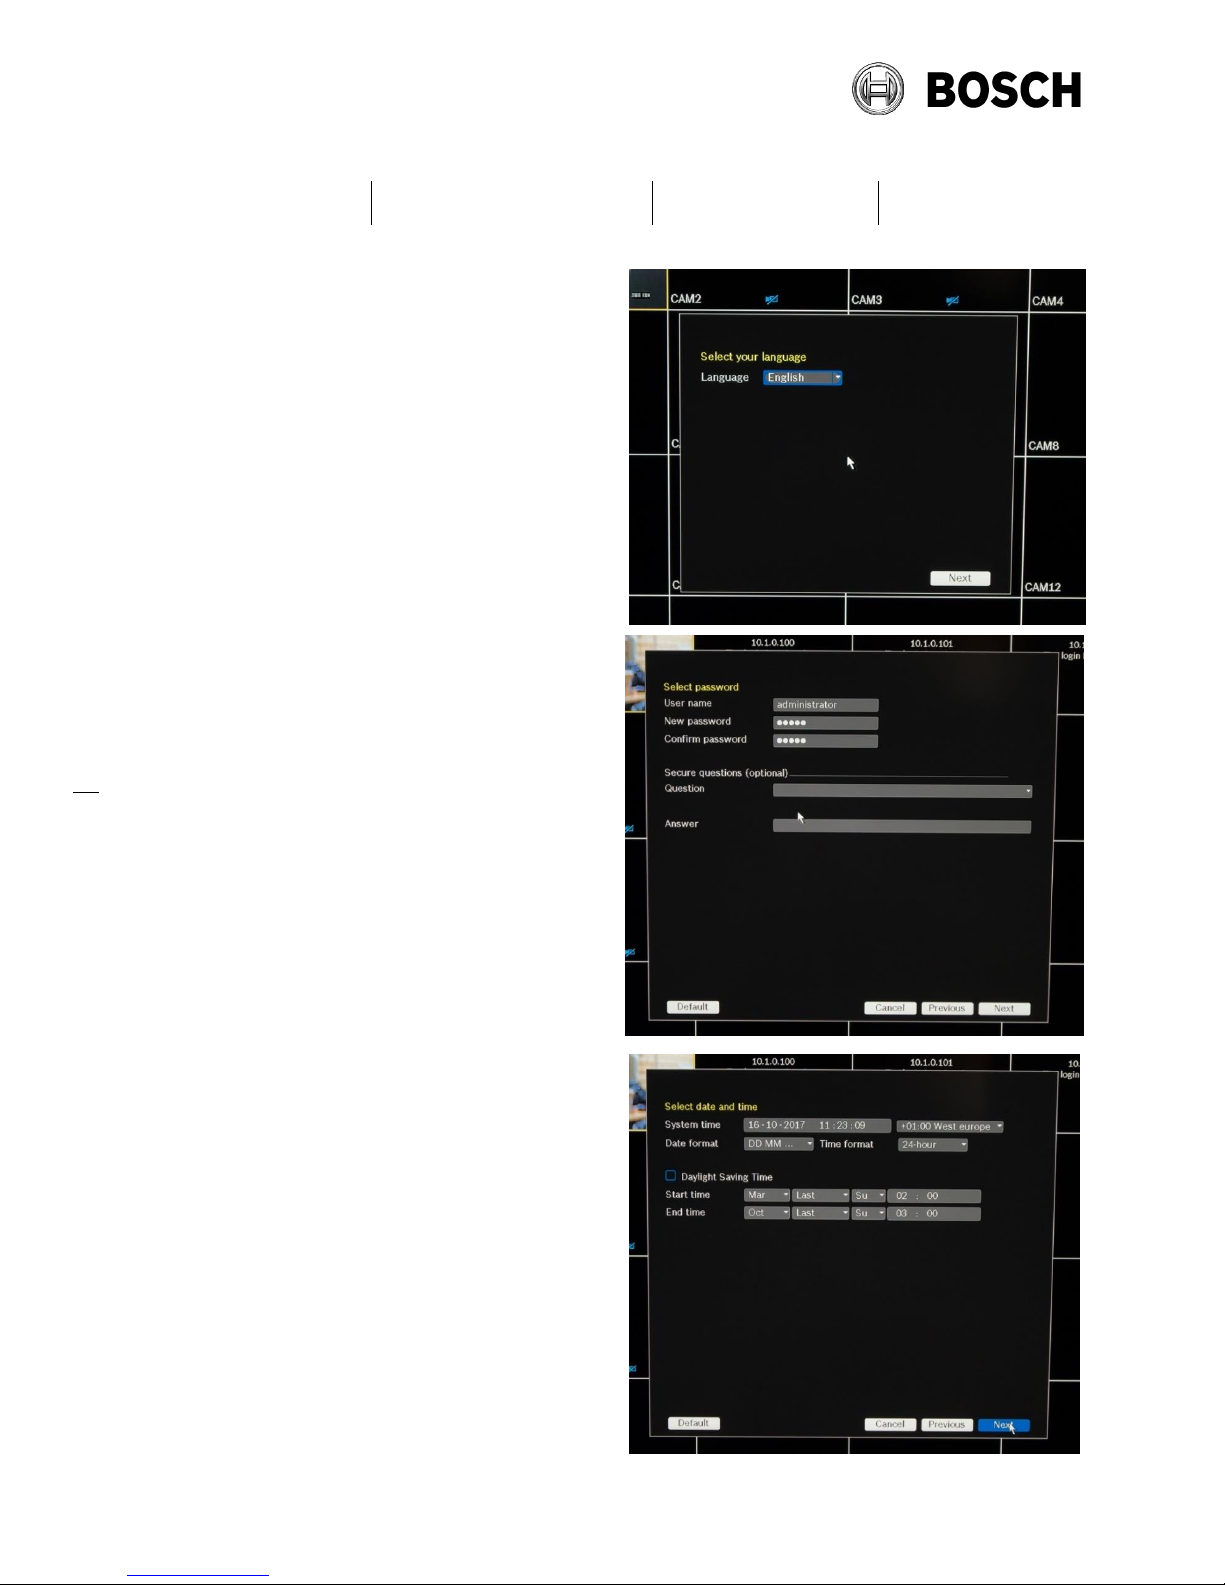
Set the device language.
Set the system password.
IMPORTANT: We recommend using a strong
password rather than the default, when the
system is in normal use.
Set the time and date as required.
Note: Correct date and time is required for
some ONVIF devices to communicate correctly.
Page 3
From
Our Reference
Tel
ST-VS/MKP-L3
n.a.
Security Systems
Eindhoven
8 November 2017
Page 3 of 11
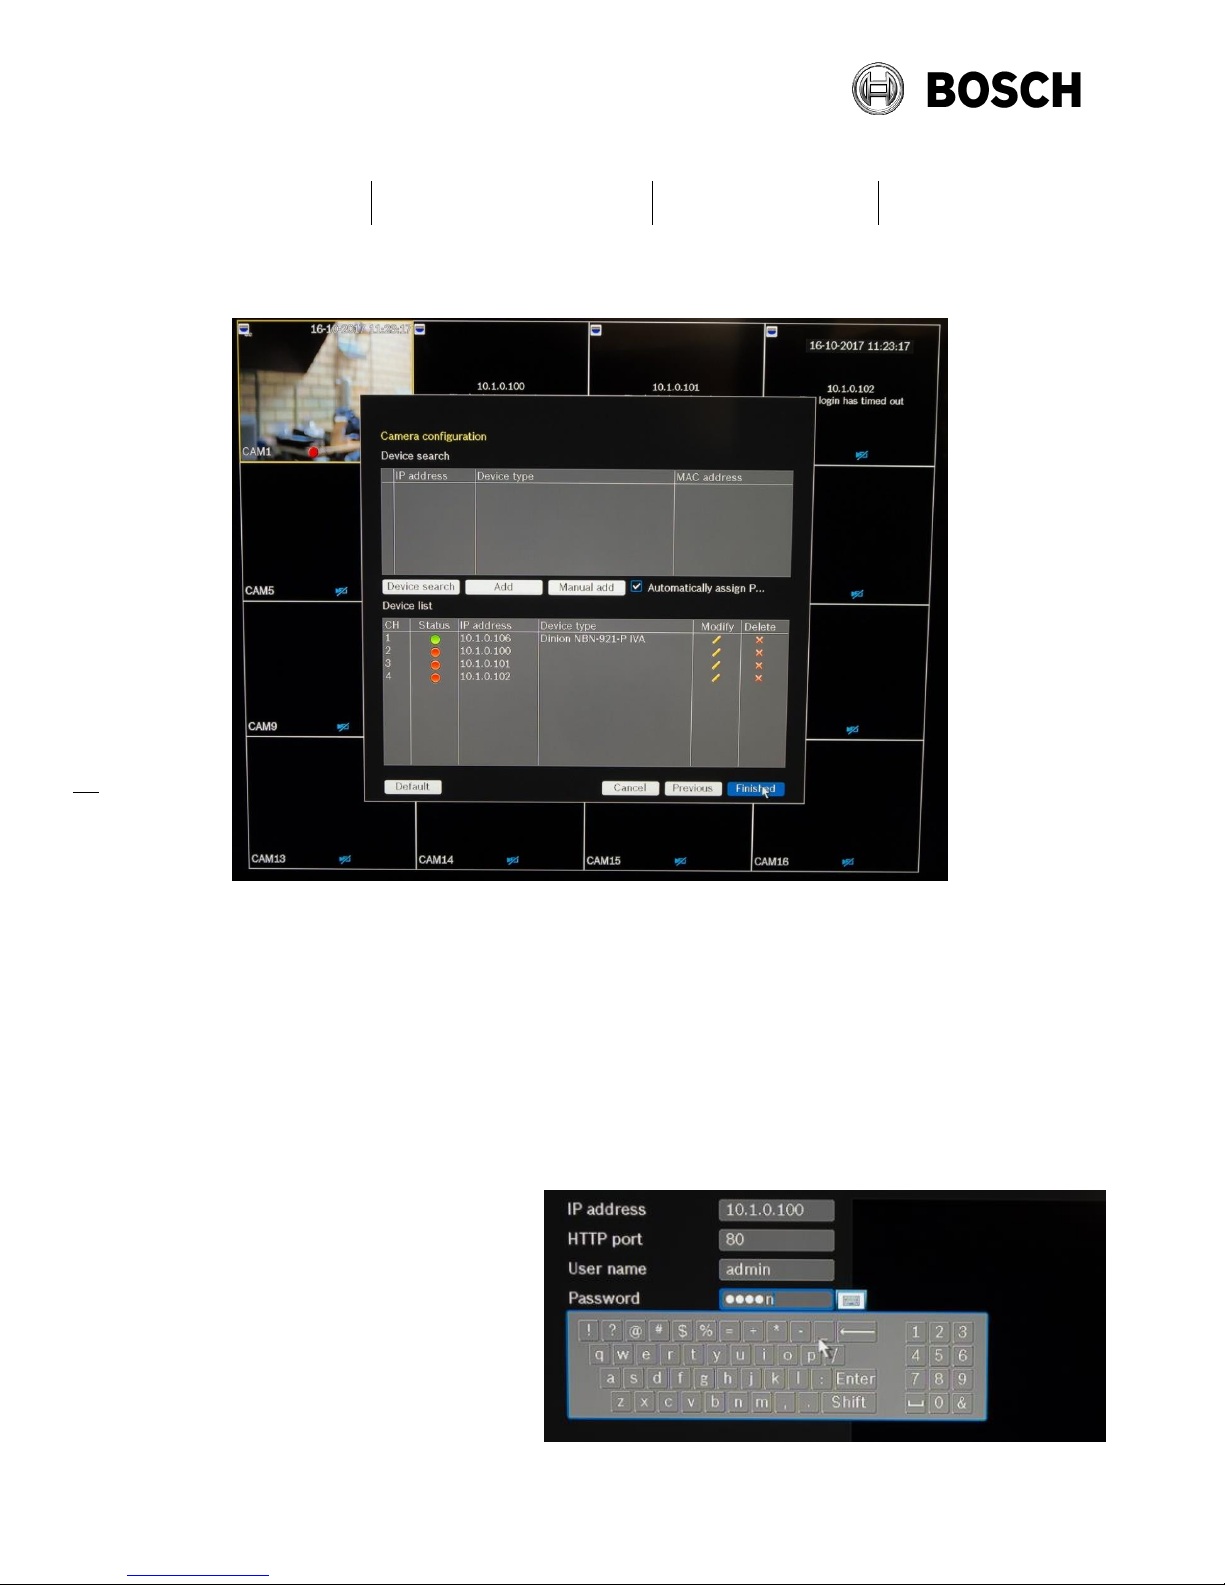
At the camera configuration page you will see detected devices automatically displayed as
shown below.
In this example 3 Sony cameras were connected and one Bosch camera. The Bosch camera
was connected automatically, however the Sony cameras were detected but connection has
timed out so a red dot is shown in the status information. The devices reporting RED status
must be modified to add the correct information. Additional cameras can be added later using
the Device search box.
Click on the Modify icon for each of these in turn and edit the login information, change the user
name and password to match the camera settings.
(default is user name: admin password: admin)
IMPORTANT: We strongly
recommend using a strong password
rather than the default, when the
system is in normal use.
NOTE: Automatic connection of Bosch
cameras depends on the firmware
version in the camera and the DIVAR
unit.
Page 4
From
Our Reference
Tel
ST-VS/MKP-L3
n.a.
Security Systems
Eindhoven
8 November 2017
Page 4 of 11
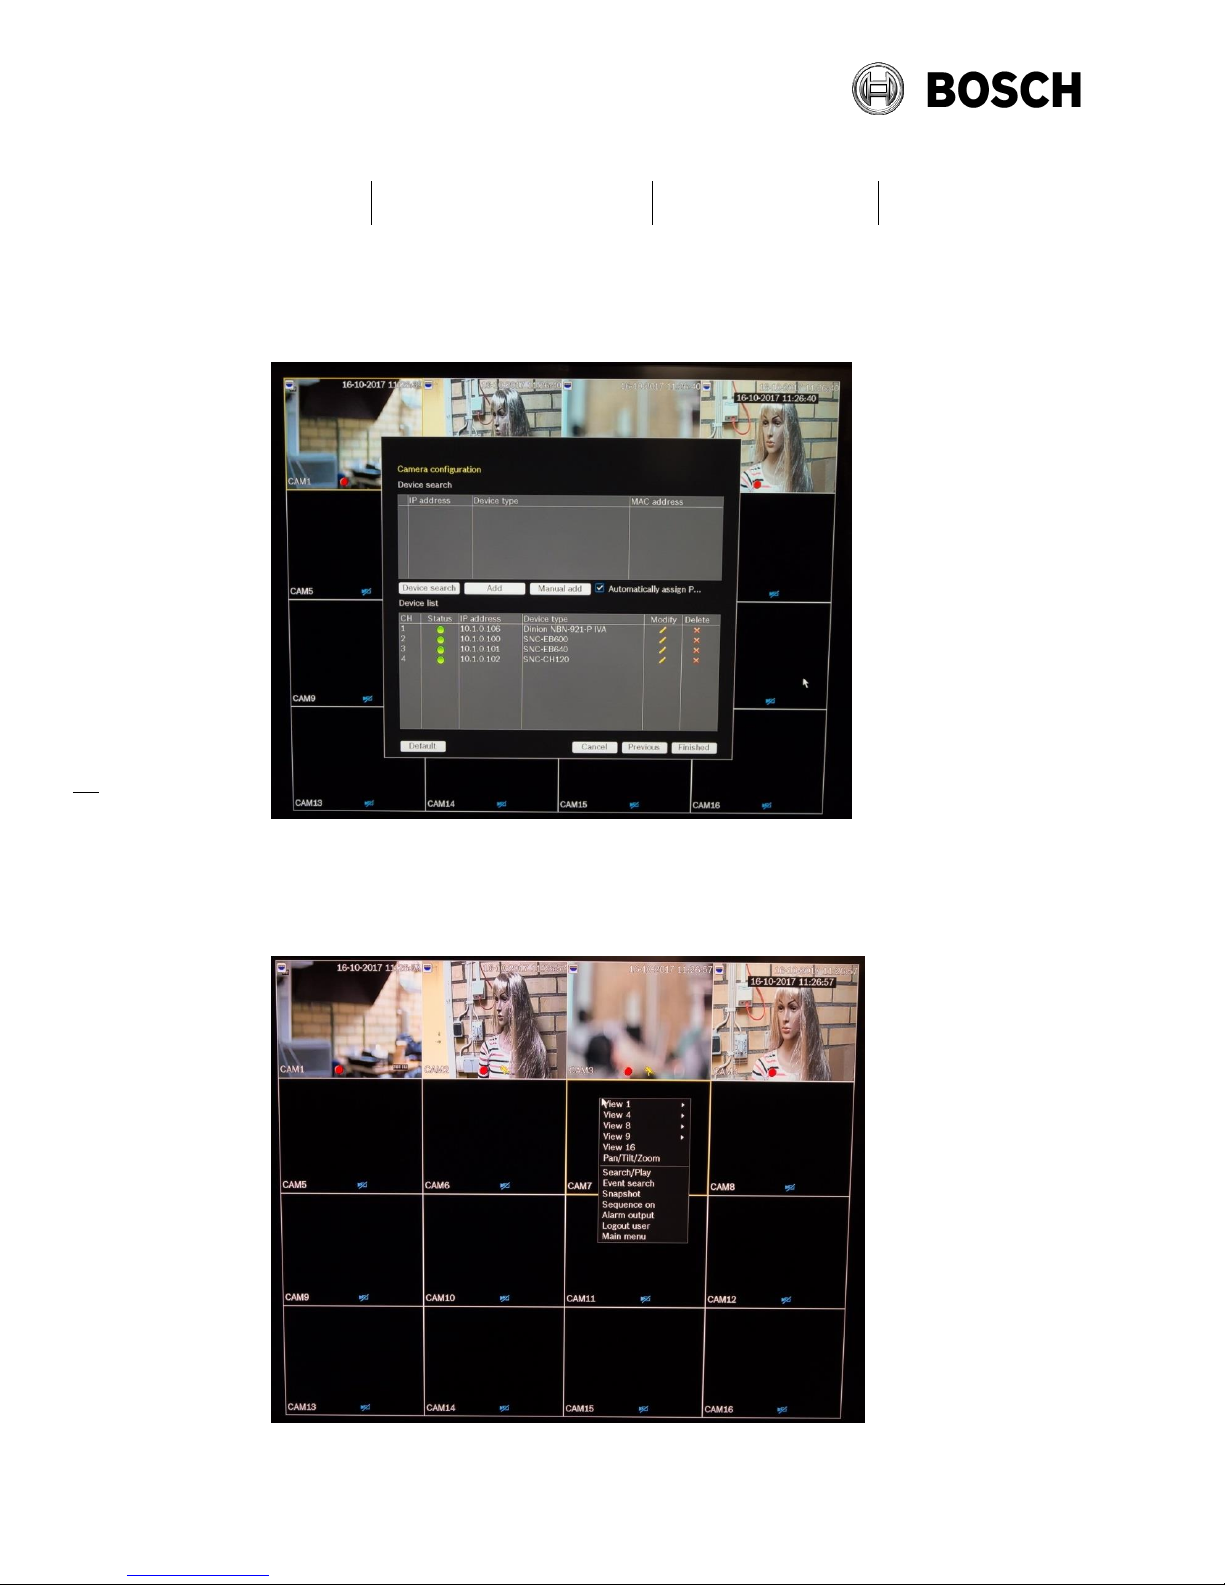
Below all the status indications are green and you can see live images from all of the cameras.
Click ‘Finished’ to close the wizard.
At this stage all cameras are live streaming and will be recording continuously.
The recording schedule and event based recording can be configured.
Right click on the mouse to open the menu, as shown below
Page 5

From
Our Reference
Tel
ST-VS/MKP-L3
n.a.
Security Systems
Eindhoven
8 November 2017
Page 5 of 11
Select the ALARM tab and Motion detect. Here we can enable motion detection based
recording for each camera.
Note: On Sony cameras motion detection must be configured in the camera web page before it
will work with the DIVAR, camera configuration is described later in this document.
Select the SCHEDULE tab. Here we can schedule when motion detection based recording is
active for each camera.
Page 6

From
Our Reference
Tel
ST-VS/MKP-L3
n.a.
Security Systems
Eindhoven
8 November 2017
Page 6 of 11
In the live view screen, the red dot in the image indicates recording. The yellow running person
indicates motion detection.
Page 7

From
Our Reference
Tel
ST-VS/MKP-L3
n.a.
Security Systems
Eindhoven
8 November 2017
Page 7 of 11
Configuring VMD & Streaming on Sony Cameras:
For motion based recording In Sony cameras Video Motion Detection is OFF by default. To
enable VMD you must log in to the camera from a Windows™ PC and change the setting in the
web browser (Internet Explorer).
Use SNC-Toolbox to find the cameras on the network. This tool can also be used for
upgrading firmware and applying settings to groups of cameras.
Open the cameras web page in Internet Explorer.
In the Setting menu, under Action Input, select the Motion detection TAB.
Page 8

From
Our Reference
Tel
ST-VS/MKP-L3
n.a.
Security Systems
Eindhoven
8 November 2017
Page 8 of 11
Configuring VMD on Sony Cameras:
Select Detection area, and add an area to the image, follow the three steps below:
Close the setting menu.
1) Click add area
2) Drag the corners
to define the area
3) Click OK to
complete
Page 9

From
Our Reference
Tel
ST-VS/MKP-L3
n.a.
Security Systems
Eindhoven
8 November 2017
Page 9 of 11
DIVAR APP - Configuring Streaming on Sony Cameras:
When the DIVAR APP is used with the DIVAR network recorder, a second, lower bit rate stream
is used for the APP viewer.
In Sony cameras, only one stream is enabled by default so to use the APP a second stream
must be enabled; follow the process below:
- In the camera’s setup menu, select Video/Audio and Video Codec.
- Enable Image 2 as shown below. Then press OK. The stream should then be available
in the DIVAR APP.
Page 10

From
Our Reference
Tel
ST-VS/MKP-L3
n.a.
Security Systems
Eindhoven
8 November 2017
Page 10 of 11
Supported Models:
Models powered directly by DIVAR network 2000
Firmware
SNC-EB640, SNC-EM641, SNC-VM641, SNC-VB640,
SNC-EB642R
V2.8 or later
SNC-EM600, SNC-EB600, SNC-VM600, SNC-VB600,
SNC-EM630, SNC-EB630, SNC-VM630, SNC-VB630,
V2.8 or later
SNC-XM632, SNC-XM631
V2.8 or later
SNC-CH120, SNC-CH140, SNC-CH220, SNC-CH240,
SNC-DH120,
SNC-DH140, SNC-DH220, SNC-DH240
SNC-CH210, SNC-CH110, SNC-DH210, SNC-DH110
V1.87 or
later
The following models may require separate power,
(PoE, PoE+, HPoE+ or 24V AC)
SNC-EM642R, SNC-VB642D, SNC-VM642R, SNCEM632RC, SNC-EB632R, SNC-VM632R, SNC-VB632D
V2.8 or later
SNC-WR632C, SNC-WR630, SNC-WR602C, SNC-WR600
V2.8 or later
SNC-XM637, XM636
V2.8 or later
SNC-VM772R, SNC-VB770
V1.06 or
later
SNC-ERxxx and SNC-EPxxx
V1.87 or
later
Note: The DIVAR network incl. PoE switch support PoE and PoE + and has below indicated
power budget, if this budget is exceeded some of the connected cameras won’t power up.
- DIVAR network 2000 8PoE has a power budget of 115W (25,5W max. per port)
- DIVAR network 2000/3000 16PoE has a power budget of 130W (25,5W max. per port)
- DIVAR network 5000 16PoE has a power budget of 200W (25,5W max. per port)
Information is subject to change without notice. For full details please refer to the web site:
www.boschsecurity.com/sonyvideosecurity
SNC-Toolbox can be downloaded from the following link:
https://www.sony.co.uk/pro/product/video-security-ip-cameras-fixed/snceb640/support/#support
Information for the Bosch Divar Network series:
https://www.boschsecurity.com/corporate/products-and-services/video-systems/vs-divar/index-
2.html
Page 11

From
Our Reference
Tel
ST-VS/MKP-L3
n.a.
Security Systems
Eindhoven
8 November 2017
Page 11 of 11
Trouble shooting
Camera does not power up – LEDS don’t light on the camera
Check the if power budget is exceeded (total 115W for 8PoE network 2000, 130W
for network 2000/3000 or 200W for network 5000 model)
Check the model is in the supported list
Check the cable
Connected camera not found in the device list
Camera can take 2 mins to boot after it is connected to the DIVAR
Camera is not set to DHCP (factory default)
Camera firmware is not supported. Please update to a version specified in the
supported device list
DIVAR firmware is not up to date. Please check the firmware version and update if
needed.
Display is 4:3 images HD 16:9 images are squeezed
Local display only supports 4:3 1280x1024 max image size
Motion detection from the camera is not working
Refer to the motion detection configuration guide
Note VMD status is not sent to the NVR when the VMD configuration menu is open
on the camera
Cannot see the VMD configuration page in the camera web page
Make sure to use Internet Explorer 10 or later. Active-X must be enabled. Note
installing Active-X plug-in can take a few minutes
 Loading...