

Page 1

Regis
t
e
r
you
r
ic
e
on
now and
enefit
s:
.com/
M
get
bos
yBosc
new
d
ev
h
free
b
ch-home
w
e
lcome
Fully automatic espresso
machine
CTL7..CTL9..
[de]GebrauchsanleitungKaffeevollautomat7
[en]Information for UseFully automatic espresso machine40
[it]Manuale utenteMacchina automatica per espresso71
[fr]Manuel d'utilisationMachine à expresso automatique104
[nl]GebruikershandleidingVolautomatische espressomachine137
[es]Manual de usuarioCafetera automática170
[uk]
[tr]Kullanım kılavuzuTam otomatik kahve pişirme makinesi237
Керівництво з експлуатації Автоматична кавомашина
203
Page 2

A B C E F
GHI
D
J
1
3
5
2
6
7
1
4
2
2
Page 3
8
1210 13
14
15
16
17
9
2223 21 19
18
20
11
3
4 5
Page 4

6 7
8 9
10 11
12 13
Page 5

14 15
16 17
18 19
20 21
Page 6
22 23
24 25
26 27
28
Page 7

Weitere Informationen und Erklärungen finden Sie online:
Inhaltsverzeichnis
de
1 Sicherheit ....................................9
1.1 Allgemeine Hinweise................. 9
1.2 Bestimmungsgemäßer Ge-
brauch ....................................... 9
1.3 Einschränkung des Nutzer-
kreises ....................................... 9
1.4 Sichere Installation .................. 10
1.5 Sicherer Gebrauch .................. 11
2 Sachschäden vermeiden ..........14
3 Umweltschutz und Sparen .......14
3.1 Verpackung entsorgen............ 14
3.2 Energie sparen........................ 14
4 Aufstellen und Anschließen .....14
4.1 Lieferumfang............................ 14
4.2 Gerät einbauen und an-
schließen ................................. 15
4.3 Gerät elektrisch anschließen... 15
5 Kennenlernen ............................15
5.1 Gerät........................................ 15
5.2 Bedienfeld ............................... 16
6 Zubehör .....................................17
7 Vor dem ersten Gebrauch ........17
7.1 Gerät vorbereiten und reini-
gen .......................................... 17
7.2 Wasserhärte ermitteln ............. 17
7.3 Wasserfilter1............................. 18
7.4 Erste Inbetriebnahme vor-
nehmen.................................... 18
7.5 Allgemeine Hinweise............... 19
8 Grundlegende Bedienung ........19
8.1 Gerät einschalten oder aus-
schalten ................................... 19
8.2 Getränkebezug........................ 19
8.3 DoubleShot und TripleShot ..... 20
8.4 Kaffeegetränk mit Milch be-
ziehen ...................................... 20
8.5 Zwei Tassen auf einmal be-
ziehen ...................................... 21
9 Mahlwerk ...................................21
9.1 Mahlgrad einstellen................. 21
10 Milchbehälter-Abstellfläche....21
10.1 Milchbehälter-Abstellfläche
verwenden ............................. 21
10.2 Eigenen Milchbehälter
verwenden1............................ 21
11 Kindersicherung .....................22
11.1 Kindersicherung aktivieren.... 22
11.2 Kindersicherung deaktivie-
ren .......................................
12 Favoriten..................................22
12.1 Favoriten aus Favoritenme-
nü anlegen............................. 22
12.2 Favoriten aus Klassiker
oder Coffee World anlegen... 22
12.3 Favorit ändern ....................... 23
12.4 Favorit löschen...................... 23
12.5 Favoriten sortieren................. 23
13 HomeConnect ........................23
13.1 HomeConnect App einrich-
ten.......................................... 24
13.2 HomeConnect einrichten ..... 24
.. 22
1
Je nach Geräteausstattung
7
Page 8

de
13.3 HomeConnect Einstellun-
gen ........................................ 24
13.4 Ferndiagnose ........................ 25
13.5 Datenschutz........................... 25
14 Grundeinstellungen ................26
14.1 Einstellungen ändern............. 26
14.2 Übersicht Einstellungen......... 26
15 Reinigen und Pflegen .............28
15.1 Geschirrspülertauglichkeit..... 28
15.2 Reinigungsmittel.................... 28
15.3 Gerät reinigen........................ 29
15.4 Tropfschale und Kaffeesatz-
behälter reinigen ................... 29
15.5 Milchbehälter reinigen........... 29
15.6 Service-Programme............... 30
16 Störungen beheben ................32
17 Transportieren, Lagern und
Entsorgen ................................37
17.1 Frostschutz aktivieren............ 37
17.2 Altgerät entsorgen................. 37
18 Kundendienst ..........................37
18.1 Erzeugnisnummer (E-Nr.),
Fertigungsnummer (FD)
und Zählnummer (Z-Nr.)........ 37
19 Technische Daten ...................38
19.1 Informationen zu freier und
Open Source Software.......... 38
20 Konformitätserklärung ...........38
8
Page 9

Sicherheit de
1 Sicherheit
Beachten Sie die nachfolgenden Sicherheitshinweise.
1.1 Allgemeine Hinweise
¡ Lesen Sie diese Anleitung sorgfältig.
¡ Bewahren Sie die Anleitung sowie die Produktinformationen für
einen späteren Gebrauch oder Nachbesitzer auf.
¡ Schließen Sie das Gerät bei einem Transportschaden nicht an.
1.2 Bestimmungsgemäßer Gebrauch
Verwenden Sie das Gerät nur:
¡ um Heißgetränke zuzubereiten.
¡ im privaten Haushalt und in geschlossenen Räumen des häusli-
chen Umfelds.
¡ bis zu einer Höhe von 2000m über dem Meeresspiegel.
1.3 Einschränkung des Nutzerkreises
Dieses Gerät kann von Kindern ab 8 Jahren und darüber und von
Personen mit reduzierten physischen, sensorischen oder mentalen Fähigkeiten oder Mangel an Erfahrung und/oder Wissen benutzt werden, wenn sie beaufsichtigt oder bezüglich des sicheren
Gebrauchs des Geräts unterwiesen wurden und die daraus resultierenden Gefahren verstanden haben.
Kinder dürfen nicht mit dem Gerät spielen.
Reinigung und Benutzerwartung dürfen nicht durch Kinder durchgeführt werden, es sei denn, sie sind 8 Jahre oder älter und werden beaufsichtigt.
Kinder jünger als 8 Jahre vom Gerät und der Anschlussleitung
fernhalten.
9
Page 10

de Sicherheit
1.4 Sichere Installation
WARNUNG‒Stromschlaggefahr!
Unsachgemäße Installationen sind gefährlich.
▶ Das Gerät nur gemäß den Angaben auf dem Typenschild an-
schließen und betreiben.
▶ Immer die mitgelieferte Netzanschlussleitung des Neugeräts ver-
wenden.
▶ Das Gerät nur über eine vorschriftsmäßig installierte Steckdose
mit Erdung an ein Stromnetz mit Wechselstrom anschließen.
▶ Das Schutzleitersystem der elektrischen Hausinstallation muss
vorschriftsmäßig installiert sein.
Ein beschädigtes Gerät oder eine beschädigte Netzanschlussleitung ist gefährlich.
▶ Nie ein beschädigtes Gerät betreiben.
▶ Nie ein Gerät mit gerissener oder gebrochener Oberfläche be-
treiben.
▶ Nie an der Netzanschlussleitung ziehen, um das Gerät vom
Stromnetz zu trennen. Immer am Netzstecker der Netzan-
schlussleitung ziehen.
▶ Wenn das Gerät oder die Netzanschlussleitung beschädigt ist,
sofort den Netzstecker der Netzanschlussleitung ziehen oder
die Sicherung im Sicherungskasten ausschalten.
▶ Den Kundendienst rufen. →Seite37
Unsachgemäße Reparaturen sind gefährlich.
▶ Nur dafür geschultes Fachpersonal darf Reparaturen am Gerät
durchführen.
▶ Nur Original-Ersatzteile dürfen zur Reparatur des Geräts verwen-
det werden.
▶ Wenn die Netzanschlussleitung dieses Geräts beschädigt wird,
muss sie durch eine besondere Anschlussleitung ersetzt wer-
den, die beim Hersteller oder bei seinem Kundendienst erhält-
lich ist.
10
Page 11

Sicherheit de
1.5 Sicherer Gebrauch
WARNUNG‒Erstickungsgefahr!
Kinder können sich Verpackungsmaterial über den Kopf ziehen
oder sich darin einwickeln und ersticken.
▶ Verpackungsmaterial von Kindern fernhalten.
▶ Kinder nicht mit Verpackungsmaterial spielen lassen.
Kinder können Kleinteile einatmen oder verschlucken und dadurch ersticken.
▶ Kleinteile von Kindern fernhalten.
▶ Kinder nicht mit Kleinteilen spielen lassen.
WARNUNG‒Stromschlaggefahr!
Eindringende Feuchtigkeit kann einen Stromschlag verursachen.
▶ Nie das Gerät oder die Netzanschlussleitung in Wasser tau-
chen.
▶ Auf die Gerätesteckverbindung darf keine Flüssigkeit überlau-
fen.
▶ Das Gerät nur in geschlossenen Räumen verwenden.
▶ Nie das Gerät großer Hitze und Nässe aussetzen.
▶ Keinen Dampfreiniger oder Hochdruckreiniger verwenden, um
das Gerät zu reinigen.
WARNUNG‒Brandgefahr!
Das Gerät wird heiß.
▶ Das Gerät ausreichend belüften.
▶ Das Gerät nie bei geschlossener Schranktür betreiben.
Eine verlängerte Netzanschlussleitung und nicht zugelassene Adapter zu verwenden, ist gefährlich.
▶ Keine Verlängerungskabel oder Mehrfachsteckdosenleisten ver-
wenden.
▶ Nur vom Hersteller zugelassene Adapter und Netzanschlusslei-
tungen verwenden.
▶ Wenn die Netzanschlussleitung zu kurz ist und keine längere
Netzanschlussleitung verfügbar ist, Elektrofachbetrieb kontaktie-
ren, um die Hausinstallation anzupassen.
11
Page 12
de Sicherheit
WARNUNG‒Verbrennungsgefahr!
Einige Geräteteile werden sehr heiß.
▶ Nie die heißen Geräteteile berühren.
▶ Nach dem Gebrauch die heißen Geräteteile vor dem Berühren
abkühlen lassen.
WARNUNG‒Verbrühungsgefahr!
Frisch zubereitete Getränke sind sehr heiß.
▶ Die Getränke bei Bedarf abkühlen lassen.
▶ Den Hautkontakt mit austretenden Flüssigkeiten und Dämpfen
vermeiden.
Ein unbeaufsichtigter Fernstart über die Home Connect App kann
zu Verbrühungen Dritter führen.
▶ Nicht während der Getränkeausgabe unter den Kaffeeauslauf
fassen.
▶ Personen, insbesondere Kinder vom Gerät fernhalten.
WARNUNG‒Verletzungsgefahr!
Eine Fehlanwendung des Geräts kann den Benutzer gefährden.
▶ Um Verletzungen zu vermeiden, das Gerät nur bestimmungsge-
mäß verwenden.
Einklemmen der Finger beim Schließen der Gerätetür.
▶ Beim Schließen der Gerätetür auf die Finger achten.
Das Mahlwerk rotiert.
▶ Nie in das Mahlwerk fassen.
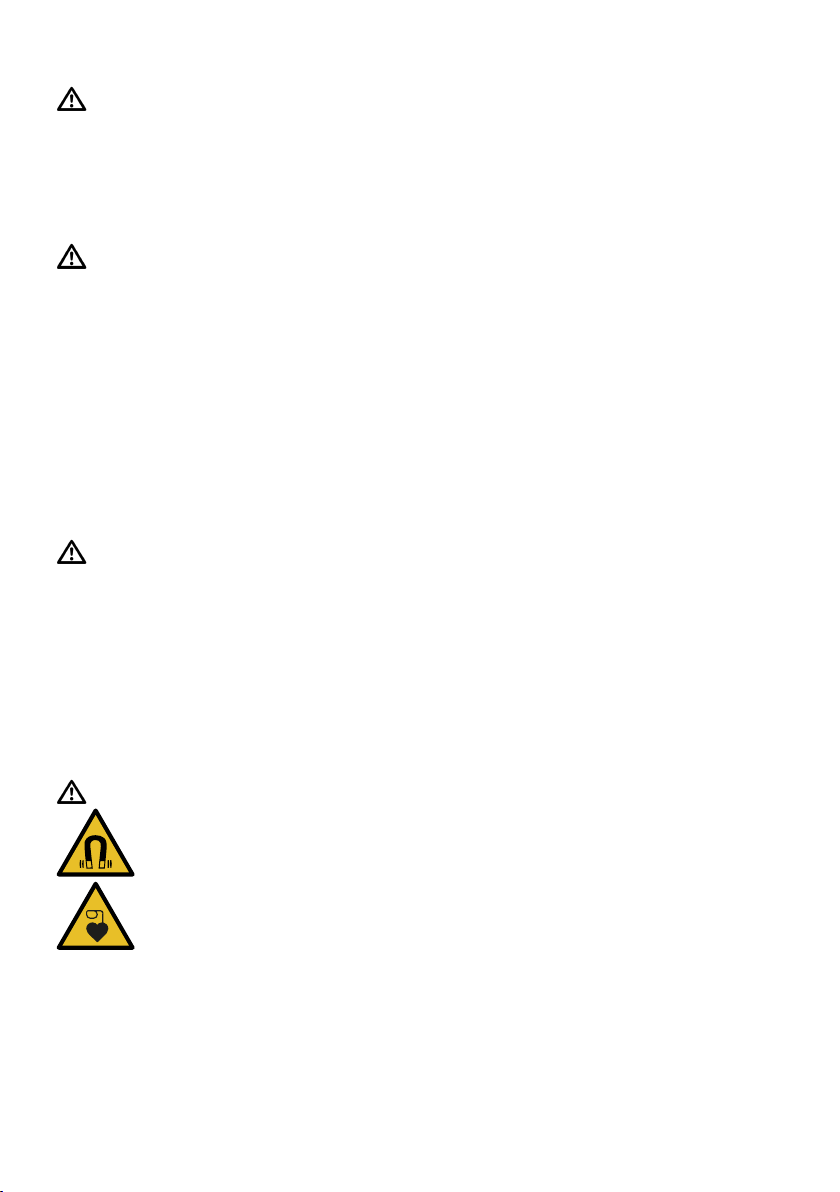
WARNUNG‒Gefahr durch Magnetismus!
Achtung Magnetismus
Achtung für Personen mit Herzschrittmacher
Das Gerät enthält Permanentmagnete. Diese können elektronische Implantate, z.B. Herzschrittmacher oder Insulinpumpen beeinflussen.
▶ Personen mit elektronischen Implantaten müssen 10cm Min-
destabstand zum Gerät und zu der Gerätetür einhalten.
12
Page 13

Sicherheit de
▶ Den Mindestabstand von 10cm auch zum Wassertank, Milch-
behälter, Tresterbehälter, Abdeckung Getränkeauslauf, Getränkeverteiler, Getränkeauslauf, Halterung Milchsystem, Brühraumabdeckung und Brüheinheit einhalten.
WARNUNG‒Gefahr von Gesundheitsschäden!
Verschmutzungen am Gerät können die Gesundheit gefährden.
▶ Die Reinigungshinweise zur Hygiene zum Gerät beachten.
13
Page 14
de vermeiden
A
B
C
D
E
F
G
vermeiden
2 Sachschäden
vermeiden
vermeiden
ACHTUNG!
Gefahr eines Schadens am Gerät.
Durch unsachgemäße Inbetriebnahme kann das Gerät Schaden nehmen.
▶ Gerät nur in frostfreien Räumen
verwenden.
▶ Wenn das Gerät unter 0°C trans-
portiert oder gelagert wurde,
3Stunden bei Raumtemperatur
warten vor Inbetriebnahme.
▶ Nach jedem Anschließen ca.5Se-
kunden warten.
Unsachgemäßer Einbau kann zu
Sachschäden führen.
▶ Die Montageanleitung des dar-
überliegenden oder darunterliegen-
den Geräts beachten.
▶ Beim Einbau über einer Wärme-
schublade eine Nischenhöhe von
590mm beachten.
Nicht befestigte Möbel können umfallen.
▶ Möbel mit einem handelsüblichen
Winkel an der Wand befestigen.
3 Umweltschutz und
Sparen
Das Intervall zur automatischen Abschaltung auf den kleinsten Wert einstellen.
a
Wenn das Gerät nicht benutzt
wird, schaltet es sich früher aus.
→"Grundeinstellungen", Seite26
Den Getränkebezug nicht vorzeitig
unterbrechen.
a
Die aufgeheizte Menge Wasser
oder Milch wird optimal genutzt.
Das Gerät regelmäßig entkalken.
a
Kalkablagerungen erhöhen den
Energieverbrauch.
4 Aufstellen und
Anschließen
4.1 Lieferumfang
Prüfen Sie nach dem Auspacken alle
Teile auf Transportschäden und die
Vollständigkeit der Lieferung.
Hinweis:Je nach Gerätetyp ist unterschiedliches Zubehör beigelegt. Dieses Zubehör ist durch einen gestrichelten Rahmen gekennzeichnet.
→Abb.
1
Kaffeevollautomat
3.1 Verpackung entsorgen
Die Verpackungsmaterialien sind umweltverträglich und wiederverwertbar.
▶ Die einzelnen Bestandteile ge-
trennt nach Sorten entsorgen.
3.2 Energie sparen
Wenn Sie diese Hinweise beachten,
verbraucht Ihr Gerät weniger Strom.
14
Milchbehälter
Milchschlauch und Ansaug-
rohr
Montageanleitung
Reinigungstablette
Entkalkungstablette
Wasserfilter
1
Je nach Geräteausstattung
1
1
1
Page 15
Kennenlernen de
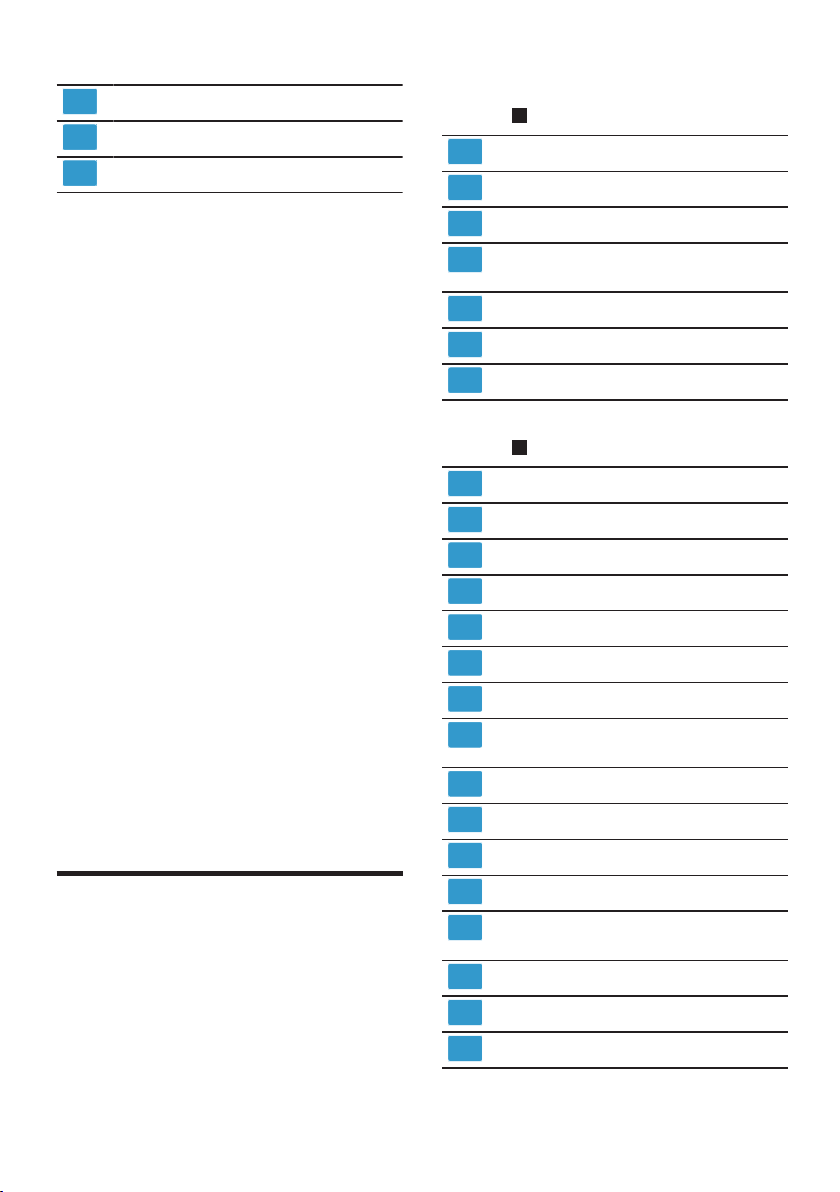
H
I
J
1
2
3
4
5
6
7
8
9
10
11
12
13
14
15
16
17
18
19
20
21
22
23
Wasserhärtestreifen
Gebrauchsanleitung
Mikrofasertuch
1
Je nach Geräteausstattung
4.2 Gerät einbauen und an-
schließen
Die Montageanleitung beschreibt verschiedene Modelle, die sich im Lieferumfang und in der Montage unterscheiden.
Hinweis:Beachten Sie die Informationen zur Sicherheit →Seite9 und
Sachschäden vermeiden →Seite14.
▶ Das Gerät entsprechend der in der
Box beiliegenden Montage-
anleitung ordnungsgemäß einbau-
en und anschließen.
4.3 Gerät elektrisch anschlie-
ßen
1. Den Kaltgerätestecker der Netzan-
schlussleitung am Gerät einste-
cken.
2. Den Netzstecker der Netzan-
schlussleitung des Geräts in eine
Steckdose in der Nähe des Geräts
stecken.
3. Den Netzstecker auf festen Sitz
prüfen.
Außenansicht
→Abb.
Innenansicht
→Abb.
2
Abstellfläche, abnehmbar
Beleuchtung
Bedienfeld
Getränkeauslauf, höhenver-
stellbar
Gerätetür
Getränkeverteiler
Abdeckung Getränkeauslauf
3
Auffangschale
Typenschild
Wassertank mit Deckel
Netzschalter
Zubehörschublade
Bohnenbehälter mit Deckel
Mahlgradeinstellung
Halterung Milchsystem, ma-
gnetisch
Brühraumabdeckung
Brüheinheit
Milchbehälter
5 Kennenlernen
5.1 Gerät
Hier finden Sie eine Übersicht über
die Bestandteile Ihres Geräts.
Hinweis:Je nach Gerätetyp sind Abweichungen in den Farben und Einzelheiten möglich.
Milchsystem
Milchbehälter-Abstellfläche,
abnehmbar
Kaffeesatzbehälter
Tropfschale
Abdeckung Tropfschale
15
Page 16
de Kennenlernen
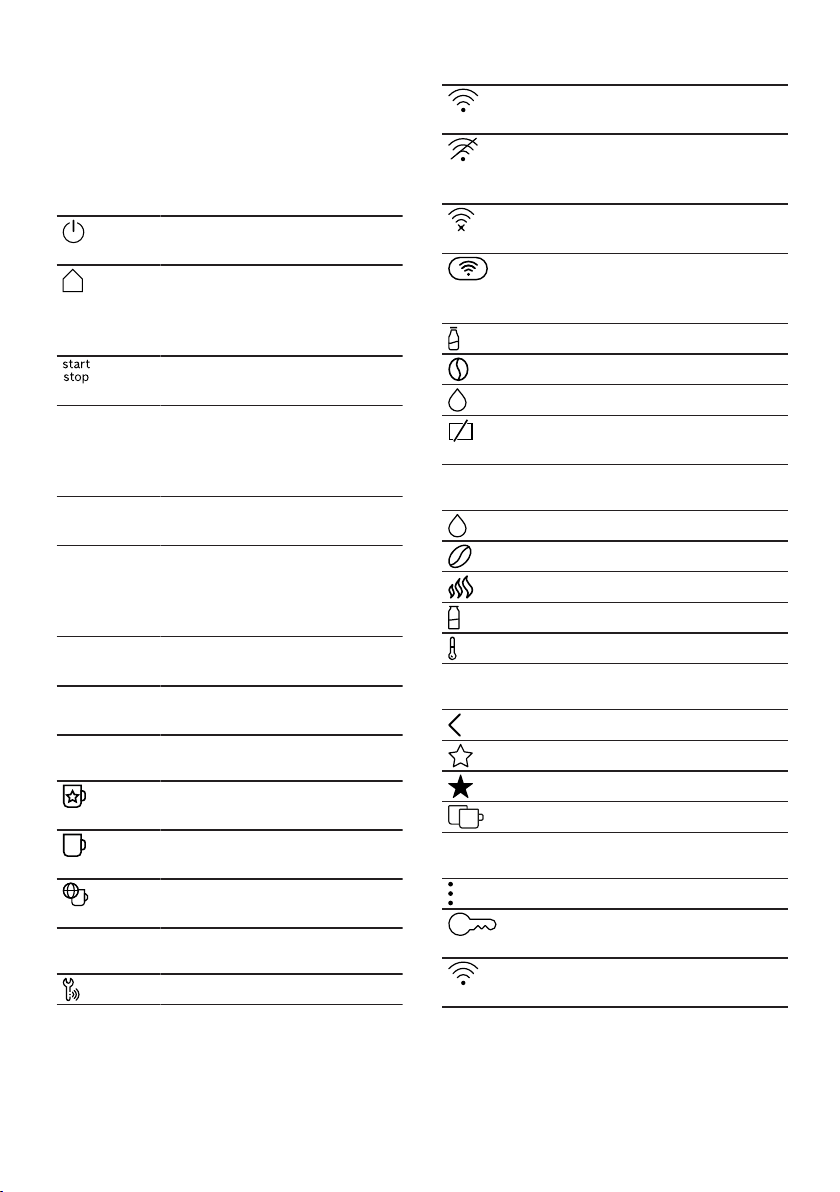
5.2 Bedienfeld
Über das Bedienfeld stellen Sie alle
Funktionen Ihres Geräts ein und erhalten Informationen zum Betriebszustand.
Gerät einschalten oder
ausschalten.
¡ Menüeinstellungen
verlassen.
¡ Zurück zum Startme-
nü navigieren.
Programm starten oder
stoppen.
Favoriten Gespeicherte Getränke
mit persönlichen Einstellungen wählen.
→Seite22
Klassiker Standardgetränke wäh-
len.
Coffee
World
Pflege &
Wartung
Einstellungen
Schnellwahl in Getränkeauswahl
Informationen
Basisgetränke wählen,
die in Verbindung mit
Home Connect erweiterbar sind.
Service-Programme aufrufen.
Einstellungen öffnen
oder verlassen.
Schnellwahl direkt zu
"Favoriten"
Schnellwahl direkt zu
"Klassiker"
Schnellwahl direkt zu
"Coffee World"
Kundendienst
Gerät ist mit HomeConnect verbunden.
Gerät ist nicht mit
HomeConnect verbunden.
Gerät hat keine Verbindung zum Server.
Playlist-Funktion ist in
der HomeConnect App
aktiviert.
Milchbehälter prüfen.
Bohnen füllen.
Wasser füllen.
"Demo-Modus" ist akti-
viert.
Getränkeeinstellungen
Menge
Stärke
Aroma
Milchanteil
Temperatur
Bedienung
Im Menü zurückgehen.
Favorit hinzufügen.
Favorit löschen.
Zwei Tassen beziehen.
Schnellwahl
Schnellwahl öffnen.
Kindersicherung aktivie-
ren oder deaktivieren.
WiFi anschalten oder
ausschalten.
16
Page 17

Zubehör de
6 Zubehör
Verwenden Sie Originalzubehör. Es ist auf Ihr Gerät abgestimmt.
Zubehör Handel Kundendienst
Reinigungstabletten TCZ8001A 00312096
Entkalkungstabletten TCZ8002A 00312093
Wasserfilter TCZ7003 00575491
Mikrofasertuch - 00460770
Pflegeset TCZ8004A 00312107
Begrenzung für Öffnungswinkel 92° - 10020041
Gebrauch
7 Vor dem ersten
Gebrauch
Gebrauch
Bereiten Sie das Gerät für die Verwendung vor.
7.1 Gerät vorbereiten und rei-
nigen
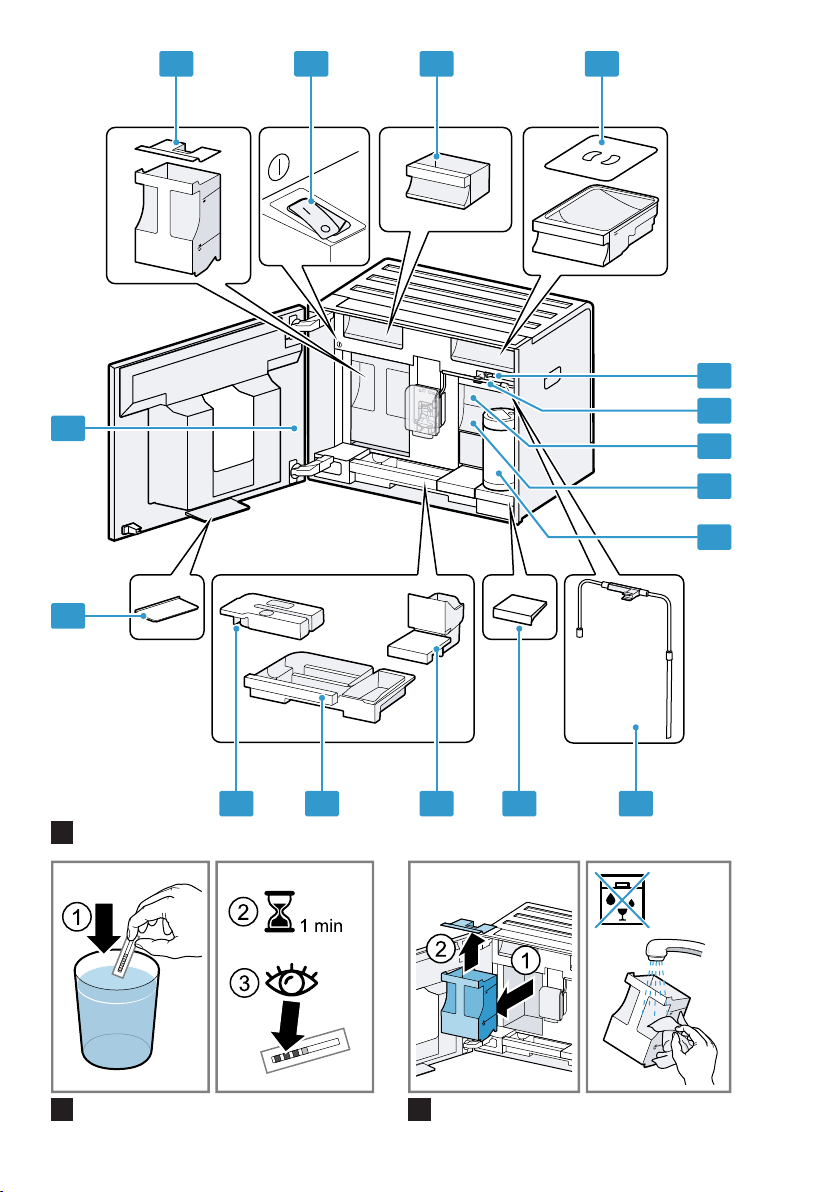
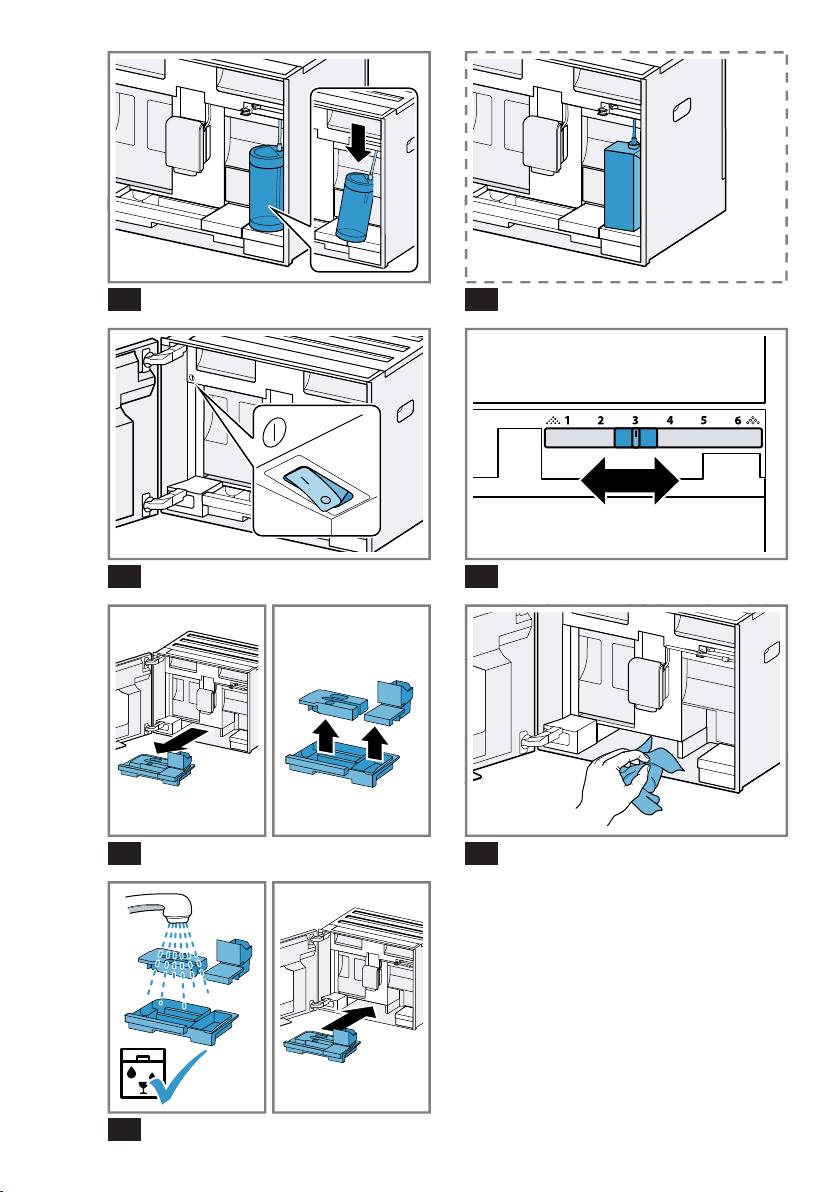
Reinigen Sie das Gerät und die Einzelteile. Folgen Sie der Bildanleitung
am Anfang dieser Anleitung.
ACHTUNG!
Ungeeignete Bohnen können das
Mahlwerk verstopfen.
▶ Ausschließlich reine, geröstete Es-
presso- oder Vollautomaten-Boh-
nenmischungen verwenden.
▶ Keine glasierten Kaffeebohnen ver-
wenden.
▶ Keine karamellisierten Kaffeeboh-
nen verwenden.
▶ Keine mit zuckerhaltigen Zusätzen
behandelten Kaffeebohnen ver-
wenden.
▶ Keinen Pulverkaffee einfüllen.
→Abb. 4-
Hinweis:Füllen Sie den Wassertank
täglich mit frischem, kaltem Wasser
ohne Kohlensäure.
23
Tipp:Um die Qualität optimal zu erhalten, lagern Sie die Kaffeebohnen
kühl und verschlossen.
Sie können die Kaffeebohnen mehrere Tage im Bohnenbehälter lagern,
ohne dass das Aroma verloren geht.
7.2 Wasserhärte ermitteln
Die richtige Einstellung der Wasserhärte ist wichtig, damit Ihr Gerät
rechtzeitig anzeigt, dass es entkalkt
werden muss. Sie können die Wasserhärte mit dem beiliegenden Teststreifen ermitteln oder bei der örtlichen Wasserversorgung erfragen.
1. Den Teststreifen kurz in frisches
Leitungswasser tauchen.
2. Den Teststreifen abtropfen lassen.
3. Die Wasserhärte nach 1Minute
am Teststreifen ablesen.
Die Tabelle zeigt die Zuordnung
der Stufen zu den Wasserhärtegraden:
Stufe deutsche
Härte in
°dH
1 1-7 < 1,3
2 8-14 1,3-2,5
1
Werkseinstellung
Gesamthärte
in mmol/l
17
Page 18

de Gebrauch
Stufe deutsche
Härte in
Gesamthärte
in mmol/l
°dH
3 15-21 2,5-3,8
1
4
1
22-30 > 3,8
Werkseinstellung
Hinweis:Wenn im Haus eine Wasserenthärtungsanlage installiert ist,
können Sie "Enthärtungsanlage" einstellen.
Tipp:Sie können die Einstellungen
jederzeit ändern.
→"Grundeinstellungen", Seite26
7.3 Wasserfilter
1
Mit einem Wasserfilter vermindern
Sie Kalkablagerungen und reduzieren
Verunreinigungen im Wasser.
Wasserfilter einsetzen
ACHTUNG!
Möglicher Geräteschaden durch Verkalkung.
▶ Den Wasserfilter rechtzeitig austau-
schen.
▶ Den Wasserfilter spätestens nach
2Monaten ersetzen.
▶ Die Displaymeldungen beachten.
1. "Pflege & Wartung" wählen.
2. "INTENZA-Filter" wählen und den
Anweisungen im Display folgen.
Wasserfilter wechseln oder entfernen
Sie können Ihr Gerät auch ohne
einen Wasserfilter betreiben.
1. "Pflege & Wartung" wählen.
2. "INTENZA-Filter" wählen.
3. "Ersetzen" oder "Entfernen" wählen
und den Anweisungen im Display
folgen.
Tipps
¡ Wechseln Sie Ihren Wasserfilter
auch aus hygienischen Gründen.
¡ Mit einem Wasserfilter müssen Sie
Ihr Gerät seltener entkalken.
¡ Wenn Sie einen Wasserfilter ver-
wenden, erhalten Sie geschmackvollere Kaffeegetränke.
¡ Spülen Sie den eingesetzten Was-
serfilter vor Gebrauch, indem Sie
eine Tasse Heißwasser beziehen,
wenn Sie Ihr Gerät längere Zeit
nicht benutzt haben, z.B. wenn Sie
im Urlaub waren.
¡ Den Wasserfilter erhalten Sie über
den Handel oder den Kundendienst.
→"Zubehör", Seite17
7.4 Erste Inbetriebnahme vornehmen
Nehmen Sie nach dem Stromanschluss die Einstellungen für die erste Inbetriebnahme vor. Die erste Inbetriebnahme erscheint nur beim ersten
Einschalten.
1. Die Gerätetür öffnen.
2. Den Netzschalter auf
→Abb.
3. Die Gerätetür schließen.
4. Das Gerät mit einschalten und
24
warten, bis das Gerät gespült hat.
5. Den Anweisungen im Display fol-
gen.
a Das Display führt durch das Pro-
gramm.
Tipp:Um kurze Informationen abzurufen, drücken Sie
stellen.
.
1
Je nach Geräteausstattung
18
Page 19

Bedienung de
Hinweise
¡ Wenn Sie HomeConnect jetzt ein-
richten möchten, folgen Sie den
Anweisungen in der HomeConnect App.
→"HomeConnect einrichten",
Seite24
¡ Wenn der "Demo-Modus" gewählt
ist, funktionieren nur die Displayanzeigen. Sie können kein Getränk
beziehen oder ein Programm
durchführen.
7.5 Allgemeine Hinweise
Beachten Sie die Hinweise, um Ihr
Gerät optimal nutzen zu können.
Hinweise
¡ Das Gerät ist ab Werk mit den
Standardeinstellungen für den optimalen Betrieb programmiert.
¡ Bei jedem Getränkebezug schaltet
sich das integrierte Gebläse ein
und ca. 5-7Minuten nach dem Getränkebezug aus.
¡ Das Mahlwerk ist werkseitig auf
einen optimalen Betrieb eingestellt.
Wenn der Kaffee nur tröpfchenweise ausgegeben wird oder zu dünn
ist und zu wenig Crema hat, können Sie den Mahlgrad anpassen.
→"Mahlgrad einstellen", Seite21
¡ Wenn Sie das Gerät in einer be-
stimmten Zeit nicht bedienen,
schaltet sich das Gerät automatisch aus. Sie können die Dauer in
den Grundeinstellungen ändern.
→Seite26 Sie können die Dauer
in den Grundeinstellungen ändern.
¡ Das erste Getränk hat noch nicht
das volle Aroma, wenn:
– Sie das Gerät das erste Mal be-
nutzen.
– Sie ein Service-Programm
durchgeführt haben.
– Sie das Gerät längere Zeit nicht
benutzt haben.
Das Getränk nicht trinken.
Bedienung
8 Grundlegende
Bedienung
Bedienung
8.1 Gerät einschalten oder ausschalten
Hinweise
¡ Den Netzschalter während des Be-
triebs nicht betätigen.
¡ Bevor Sie den Netzschalter aus-
schalten, schalten Sie das Gerät
mit
aus. Nur so kann das Gerät
automatisch spülen.
▶ drücken.
Beim Einschalten zeigt das Display
das Logo. Beim Einschalten und
Ausschalten spült das Gerät automatisch. Beim Ausschalten dampft
das Gerät zur Reinigung in die
Tropfschale ab. Wenn das Gerät
beim Einschalten noch warm ist
oder vor dem Ausschalten kein
Getränk bezogen wurde, spült das
Gerät nicht.
8.2 Getränkebezug
Erfahren Sie, wie Sie sich ein Getränk
Ihrer Wahl zubereiten.
WARNUNG
Verbrühungsgefahr!
Frisch zubereitete Getränke sind sehr
heiß.
▶ Die Getränke bei Bedarf abkühlen
lassen.
▶ Den Hautkontakt mit austretenden
Flüssigkeiten und Dämpfen vermeiden.
Hinweise
¡ Bei einigen Einstellungen wird der
Kaffee in mehreren Schritten zubereitet. Warten Sie, bis der Vorgang
komplett abgeschlossen ist.
19
Page 20

de Bedienung
¡ Wenn Sie ein Getränk mit Milch
beziehen, schließen Sie immer
einen mit Milch befüllten Behälter
mit Milchschlauch und Ansaugrohr
an.
¡ Der Milchbehälter ist speziell für
dieses Gerät entwickelt. Verwenden Sie den Milchbehälter ausschließlich zur Aufbewahrung von
Milch im Haushalt und im Kühlschrank.
¡ Wenn das Milchsystem nicht gerei-
nigt ist, können geringe Mengen
Milch beim Bezug von Heißwasser
mit austreten.
8.3 DoubleShot und TripleShot
Ihr Gerät mahlt zweimal oder dreimal
Kaffee.
Um nur die wohl schmeckenden und
gut bekömmlichen Aromastoffe zu lösen, mahlt und brüht das Gerät erneut Kaffeebohnen.
Je länger der Kaffee brüht, desto
mehr Bitterstoffe und unerwünschte
Aromen lösen sich. Bitterstoffe und
unerwünschte Aromen beeinträchtigen den Geschmack und die Bekömmlichkeit des Kaffees.
Hinweis:Die Funktionen "DoubleShot" und "TripleShot" sind abhängig
von der gewählten Getränkestärke
und der Getränkegröße.
8.4 Kaffeegetränk mit Milch beziehen
Erfahren Sie an einem Beispiel, wie
Sie einen Latte Macchiato zubereiten.
WARNUNG
Verbrennungsgefahr!
Das Milchsystem wird sehr heiß.
▶ Nie das heiße Milchsystem berüh-
ren.
▶ Das heiße Milchsystem vor dem
Berühren abkühlen lassen.
Voraussetzungen
¡ Der Milchbehälter ist eingesetzt.
¡ Das Milchsystem ist am Getränke-
verteiler angeschlossen.
¡ Der Milchbehälter ist mit ausrei-
chend Milch befüllt.
1. Ein Glas unter den Getränkeaus-
lauf stellen.
2. "Klassiker" wählen und auf "Klassi-
ker" drücken.
3. "Latte macchiato" wählen und auf
"Latte macchiato" drücken.
4. Die Getränkeparameter einstellen.
‒ Um die Füllmenge
zu ändern,
die Segmente drücken.
‒ Um die Stärke zu ändern,
drücken und die Stärke über die
Segmente einstellen.
‒ Um den Milchanteil zu ändern,
drücken und den Milchanteil
über die Segmente einstellen.
5. drücken und warten, bis der
Vorgang abgeschlossen ist.
‒ Um den Getränkebezug kom-
plett zu stoppen, auf drücken.
‒ Um nur den aktuellen Bezugs-
schritt zu stoppen, auf "Überspringen" drücken.
Hinweise
¡ Wenn Sie ca. 30Sekunden keine
Einstellung ändern, verlässt das
Gerät den Einstellmodus.
¡ Das Gerät speichert die Einstellun-
gen automatisch.
Tipps
¡ Sie können die Tassen vor dem
Bezug auch mit Heißwasser vorwärmen.
¡ Sie können auch pflanzliche Ge-
tränke anstatt Milch verwenden,
z.B. aus Soja.
20
Page 21

Mahlwerk de
¡ Die Qualität des Milchschaums ist
abhängig von der Art der verwendeten Milch oder dem pflanzlichen
Getränk.
8.5 Zwei Tassen auf einmal beziehen
Abhängig von Ihrem Getränk können
Sie 2 Tassen gleichzeitig zubereiten.
Hinweis:Wenn die Funktion "DoubleShot" oder "TripleShot" aktiv ist, ist
die Funktion zwei Tassen auf einmal
beziehen nicht möglich.
1. Das gewünschte Getränk wählen.
2.
drücken.
a Das Display zeigt die Einstellung
an.
3. Zwei Tassen links und rechts unter
den Getränkeauslauf stellen.
4. drücken.
Das Getränk wird in 2 Schritten zubereitet. Die Bohnen werden in 2
Mahlvorgängen gemahlen.
a Das Getränk wird gebrüht und läuft
anschließend in die Tassen.
5. Warten bis der Vorgang abge-
schlossen ist.
9 Mahlwerk
Ihr Gerät besitzt ein einstellbares
Mahlwerk, mit dem Sie den Mahlgrad
der Kaffebohnen individuell anpassen
können.
9.1 Mahlgrad einstellen
▶ Den Mahlgrad mit dem Schieber
zwischen sehr fein
grob einstellen.
→Abb.
Die Mahlgradeinstellung nur geringfügig ändern.
Die Einstellung des Mahlgrads
wirkt sich erst nach der zweiten
Tasse aus.
Tipp:Wenn der Kaffee nur tröpfchenweise ausgegeben wird, stellen Sie
den Mahlgrad gröber ein.
Wenn der Kaffee zu dünn ist und zu
wenig Crema hat, stellen Sie den
Mahlgrad feiner ein.
25
und sehr
10 Milchbehälter-Abstell-
fläche
Ihr Gerät erkennt, wenn auf der Abstellfläche ein Milchbehälter steht.
10.1 Milchbehälter-Abstellfläche verwenden
1. Den Milchbehälter oder den Milch-
karton anschließen und auf die Abstellfläche stellen.
2. Den Bezug starten.
Hinweis:Wenn die Meldung "Bitte
Milchbehälter einsetzen." erscheint,
ist kein Bezug möglich.
10.2 Eigenen Milchbehälter verwenden
1
1
Je nach Geräteausstattung
Bei bestimmten Gerätereihen können
Sie Ihren eigenen Milchbehälter verwenden.
1. Den eigenen Milchbehälter bereit-
stellen.
21
Page 22

de Kindersicherung
2. Den eigenen Milchbehälter tarie-
ren.
→"Übersicht Einstellungen",
Seite26
Das Gerät erkennt anhand des Gewichts die Menge der Milch im
Milchbehälter oder im Milchkarton.
Wenn zu wenig Milch im Milchbehälter ist, erscheint eine Meldung.
Hinweis:Wenn Sie den Standardmilchbehälter oder einen Milchkarton
verwenden, erkennt das Gerät dies
automatisch.
11 Kindersicherung
Um Kinder vor Verbrühungen und
Verbrennungen zu schützen, können
Sie das Gerät sperren.
11.1 Kindersicherung aktivieren
Voraussetzung:Das Gerät ist einge-
schaltet.
drücken.
1.
2. drücken.
a Die Kindersicherung ist aktiviert.
11.2 Kindersicherung deaktivieren
1.
drücken.
2. Den Finger auf dem Ring entlang
bewegen, bis der Ring gefüllt ist.
a Die Kindersicherung ist deaktiviert.
12 Favoriten
Speichern Sie individuelle Getränke
als Favoriten, um Sie schneller zu beziehen.
Ein Favorit beinhaltet ein Getränk mit
persönlichen Einstellungen. Die Einstellungen können Sie jederzeit ändern.
Hinweis:Um die Einstellungen zu
verlassen,
tränkebezug starten.
12.1 Favoriten aus Favoriten-
1. "Favoriten" drücken.
2.
drücken.
3. Ein Getränk wählen.
4. Die Getränkeparameter einstellen.
5. Auf drücken.
6. Den Namen eingeben.
7. "Speichern" drücken.
drücken oder den Ge-
menü anlegen
22
12.2 Favoriten aus Klassiker
oder Coffee World anlegen
1. Ein Getränk aus "Klassiker" oder
"Coffee World" wählen.
Page 23

HomeConnect de
2. Die Getränkeparameter einstellen.
3. Auf drücken.
4. Den Namen eingeben.
5. "Speichern" drücken.
12.3 Favorit ändern
1. "Favoriten" drücken.
2. Favorit wählen.
3. Die Änderungen vornehmen.
4. Auf
5. "Speichern" drücken.
drücken.
12.4 Favorit löschen
1. "Favoriten" drücken.
2. Favorit wählen.
3. Auf
4. "Löschen" drücken.
drücken.
12.5 Favoriten sortieren
Sie können die Reihenfolge der Favoriten ändern.
1. "Favoriten" drücken.
2. Favorit wählen.
3. Mindestens 3Sekunden auf den
gewählten Favoriten drücken.
a Das Display zeigt alle Favoriten,
Sie können den Favoriten mit dem
Finger verschieben.
a Die neue Reihenfolge ist automa-
tisch gespeichert.
Tipp:Sie können Favoriten auch
über die HomeConnect App anlegen, ändern, löschen oder sortieren.
Grundeinstellungen anzupassen oder
den aktuellen Betriebszustand zu
überwachen.
Die HomeConnect Dienste sind nicht
in jedem Land verfügbar. Die Verfügbarkeit der HomeConnect Funktion
ist abhängig von der Verfügbarkeit
der HomeConnect Dienste in Ihrem
Land. Informationen dazu finden Sie
auf: www.home-connect.com.
Um HomeConnect nutzen zu können, richten Sie zunächst die Verbindung zum WLAN-Heimnetzwerk
(Wi-Fi1) und zur HomeConnect App
ein.
Die HomeConnect App leitet Sie
durch den gesamten Anmeldeprozess. Folgen Sie den Anweisungen in
der HomeConnect App, um die Einstellungen vorzunehmen.
Tipp:Beachten Sie auch die Hinweise in der HomeConnect App.
Hinweise
¡ Beachten Sie die Sicherheitshin-
weise dieser Gebrauchsanleitung
und stellen Sie sicher, dass diese
auch dann eingehalten werden,
wenn Sie das Gerät über die
HomeConnect App bedienen.
→"Sicherheit", Seite9
¡ Die Bedienung am Gerät hat jeder-
zeit Vorrang. In dieser Zeit ist die
Bedienung über die HomeConnect App nicht möglich.
HomeConnect
13 HomeConnect
HomeConnect
Dieses Gerät ist netzwerkfähig. Verbinden Sie Ihr Gerät mit einem mobilen Endgerät, um Funktionen über
die HomeConnect App zu bedienen,
1
Wi-Fi ist eine eingetragene Marke der Wi-Fi Alliance.
23
Page 24

de HomeConnect
13.1 HomeConnect App einrichten
1. Die HomeConnect App auf dem
mobilen Endgerät installieren.
1
2. Die HomeConnect App starten
und den Zugang für HomeConnect einrichten.
Die HomeConnect App leitet Sie
durch den gesamten Anmeldeprozess.
13.2 HomeConnect einrichten
Voraussetzungen
¡ Sie haben ein mobiles Endgerät
mit einer aktuellen Version des iOS
oder Android Betriebssystems,
z.B. ein Smartphone.
¡ Das mobile Endgerät und das Ge-
rät befinden sich in Reichweite des
WLAN-Signals Ihres Heimnetzwerks.
¡ Die HomeConnect App ist auf
dem mobilen Endgerät eingerichtet.
1. Die HomeConnect App öffnen und
den folgenden QR-Code scannen.
2. Den Anweisungen in der
HomeConnect App folgen.
13.3 HomeConnect Einstellungen
Passen Sie HomeConnect Ihren Bedürfnissen an.
Sie finden die HomeConnect Einstellungen in den Grundeinstellungen Ihres Geräts. Welche Einstellungen das
Display zeigt, hängt davon ab, ob
HomeConnect eingerichtet ist und
ob das Gerät mit dem Heimnetzwerk
verbunden ist.
Übersicht Home Connect Einstellungen
Hier finden Sie eine Übersicht über die "Home Connect" Einstellungen und
Netzwerkeinstellungen.
1
Apple App Store und das Apple App Store Logo sind Markenzeichen von
Apple Inc. Google Play und das Google Play Logo sind Markenzeichen von
Google LLC.
24
Page 25

HomeConnect de
Grundeinstellung Auswahl Beschreibung
HomeConnect
Assistent
Wi-Fi Ein
Fernstart Ein
Software-Update - Hinweis:Diese Einstellung ist nur bei
Start
Verbindung trennen
Aus
Aus
Mobiles Gerät hinzufügen.
Gerät vom Netzwerk trennen.
Funkmodul bei langer Abwesenheit,
oder um Energie zu sparen, ausschalten.
Hinweis:Im vernetzten Bereitschaftsbetrieb benötigt Ihr Gerät max. 2W.
Fernstart am Gerät einschalten und
ausschalten.
Hinweis:Mit der "Home Connect" App
ist nur das Ausschalten möglich.
einem Software-Update verfügbar.
Hinweis:Wenn "Wi-Fi" und Fernstart
eingeschaltet sind, erscheint im Display
.
13.4 Ferndiagnose
Der Kundendienst kann über die
Ferndiagnose auf Ihr Gerät zugreifen,
wenn Sie sich mit dem entsprechenden Wunsch an den Kundendienst
wenden, Ihr Gerät mit dem
HomeConnect Server verbunden ist
und die Ferndiagnose in dem Land,
in dem Sie das Gerät verwenden, verfügbar ist.
Tipp:Weitere Informationen sowie
Hinweise zur Verfügbarkeit der Ferndiagnose in Ihrem Land finden Sie im
Service/Support-Bereich der lokalen
Website: www.home-connect.com.
13.5 Datenschutz
Beachten Sie die Hinweise zum Datenschutz.
Mit der erstmaligen Verbindung Ihres
Geräts mit einem an das Internet
angebundenen Heimnetzwerk
übermittelt Ihr Gerät nachfolgende
Kategorien von Daten an den
HomeConnect Server
(Erstregistrierung):
¡ Eindeutige Gerätekennung (beste-
hend aus Geräteschlüsseln sowie
der MAC-Adresse des verbauten
Wi-Fi Kommunikationsmoduls).
¡ Sicherheitszertifikat des Wi-Fi Kom-
munikationsmoduls (zur informationstechnischen Absicherung der
Verbindung).
¡ Die aktuelle Softwareversion und
Hardwareversion Ihres Hausgeräts.
¡ Status eines eventuellen vorange-
gangenen Rücksetzens auf Werkseinstellungen.
Diese Erstregistrierung bereitet die
Nutzung der HomeConnect Funktionalitäten vor und ist erst zu dem Zeitpunkt erforderlich, zu dem Sie
HomeConnect Funktionalitäten erstmals nutzen möchten.
Hinweis:Beachten Sie, dass die
HomeConnect Funktionalitäten nur
in Verbindung mit der HomeConnect
App nutzbar sind. Informationen zum
Datenschutz können in der
HomeConnect App abgerufen werden.
25
Page 26
de Grundeinstellungen
14 Grundeinstellungen
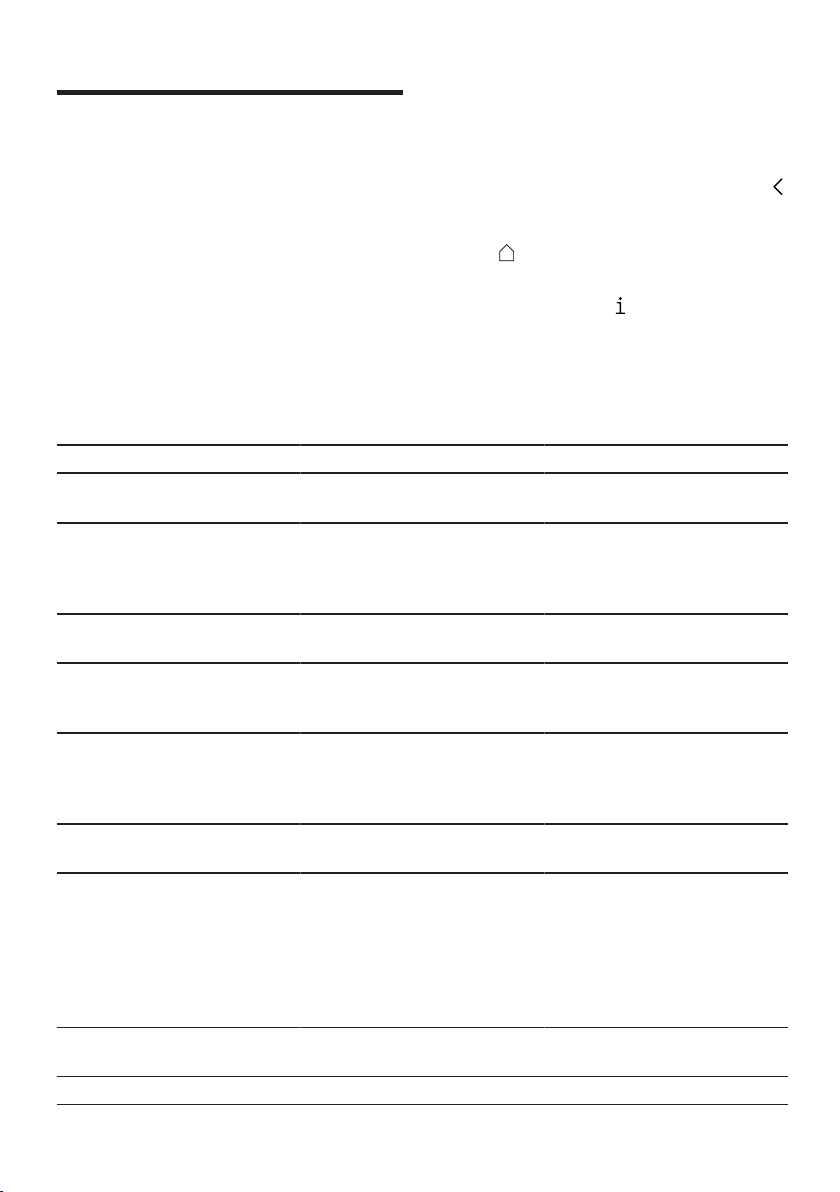
Sie können die Grundeinstellungen
Ihres Geräts auf Ihre Bedürfnisse einstellen und Zusatzfunktionen aufrufen.
14.1 Einstellungen ändern
1. "Einstellungen" wählen.
a Das Display zeigt die Liste der Ein-
2. Die gewünschte Einstellung än-
dern.
a Das Gerät speichert die Einstel-
lung automatisch.
3. Um im Menü zurückzugehen, auf
drücken.
4. Um die Einstellungen zu verlassen,
auf drücken.
Tipp:Um kurze Informationen abzurufen, drücken Sie .
stellungen.
14.2 Übersicht Einstellungen
Hier finden Sie eine Übersicht der "Einstellungen".
Sprache Sprache einstellen.
HomeConnect HomeConnect Assistent
Uhrzeit Aktuelle Uhrzeit einstel-
Display-Einstellungen Helligkeit Helligkeit in Stufen ein-
Nachtabdunkelung Display-Abdunkelung
Uhranzeige Uhrzeitanzeige nach der
Uhr Darstellung der Uhrzeit
Justierung ¡ Horizontale und verti-
Töne Tastenton Ton ausschalten und ein-
1
Je nach Geräteausstattung
→"HomeConnect ein-
richten", Seite24
len oder automatisch
über HomeConnect anzeigen lassen.
stellen.
einschalten und ausschalten.
Geräteabschaltung einschalten und ausschalten.
einstellen.
kale Ausrichtung des
Displays einstellen.
¡ Optimierung und Zen-
trierung der DisplayDarstellung an den
Blickwinkel einstellen.
schalten.
26
Page 27

Grundeinstellungen de
Lautstärke Lautstärke in Stufen ein-
stellen.
Signalton Ton ausschalten und ein-
schalten.
Startmelodie Ton beim Gerätestart
ausschalten und einschalten.
Getränkeeinstellung Brühtemperatur Brühtemperatur einstel-
len.
Milchreihenfolge Reihenfolge Milch und
Kaffee einstellen.
Latte Macchiato Pause Pause zwischen Milch
und Kaffee einstellen.
Geräteeinstellungen Beleuchtung Helligkeit der Beleuch-
tung in Stufen einstellen.
Automatisches Abschalten
Dauer einstellen, nach
der das Gerät abschal-
tet.
Wasserhärte Wasserhärte einstellen.
Milchbehälter
1
Milchkarton oder indivi-
dueller Milchbehälter ein-
stellen.
Hinweis:Wenn Sie den
Standardmilchbehälter
verwenden, erkennt das
Gerät ihn automatisch.
Personalisierung Startkategorie Menü-Anzeige nach dem
Einschalten einstellen,
z.B. "Klassiker".
Werkseinstellungen Gerät auf Werkseinstel-
lungen zurücksetzen?
Persönliche Einstellun-
gen auf Werkseinstel-
lungen zurücksetzen.
Demo-Modus Betriebsmodus für De-
monstrationszwecke
"Demo-Modus" einschal-
ten oder ausschalten.
Geräteinformation Getränkezähler Anzahl der bezogenen
Getränke anzeigen.
Reinigungsinformation Dauer bis zum nächsten
Wechsel des Wasserfil-
ters oder Start eines Ser-
vice-Programms anzei-
gen.
1
Je nach Geräteausstattung
27
Page 28

de Reinigen und Pflegen
Versionsinformation Geräteinformationen an-
zeigen.
Netzwerkinformationen Netzwerkinformationen
anzeigen.
1
Je nach Geräteausstattung
15 Reinigen und Pflegen
Damit Ihr Gerät lange funktionsfähig bleibt, reinigen und pflegen Sie es sorgfältig.
15.1 Geschirrspülertauglichkeit
Hier finden Sie eine Übersicht der Bauteile, die Sie im Geschirrspüler reinigen
können.
ACHTUNG!
Einige Bauteile sind temperaturempfindlich und können bei der Reinigung im Geschirrspüler beschädigt
werden.
▶ Die Gebrauchsanleitung des Ge-
schirrspülers beachten.
Geeignet:
¡ Tropfschale
¡ Abdeckung Tropfschale
¡ Kaffeesatzbehälter
¡ Auffangschale
¡ Milchbehälter mit Deckel und Bo-
den
¡ Abstellfläche für Milchbehälter
¡ Getränkeverteiler
¡ Milchsystem
15.2 Reinigungsmittel
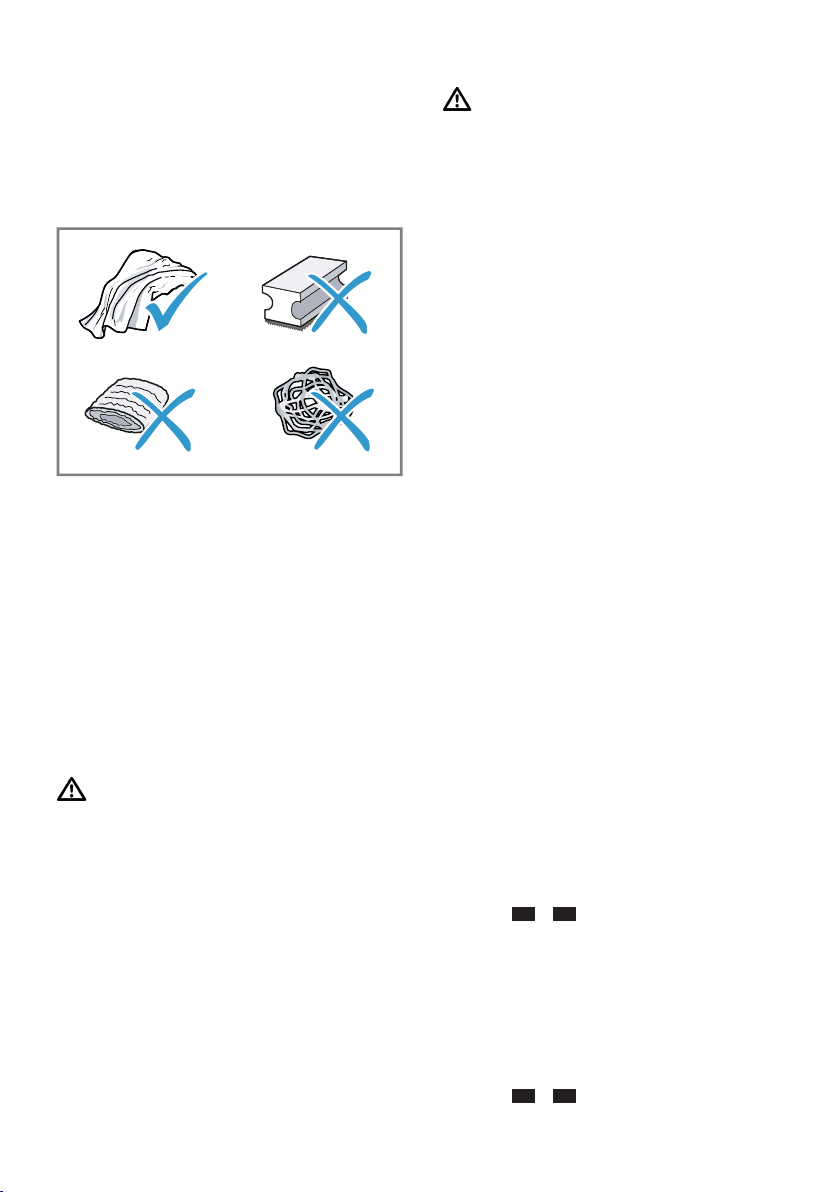
Verwenden Sie nur geeignete Reinigungsmittel.
ACHTUNG!
Ungeeignete Reinigungsmittel können die Oberflächen des Geräts beschädigen.
▶ Keine scharfen oder scheuernden
Reinigungsmittel verwenden.
▶ Nur geeignete Bauteile im Ge-
schirrspüler reinigen.
▶ Nur Programme verwenden, die
die Bauteile nicht über 60°C erhitzen.
Nicht geeignet:
¡ Wassertank
¡ Wassertankdeckel
¡ Brüheinheit
¡ Abdeckung Getränkeauslauf
¡ Brühraumabdeckung
¡ Zubehörschublade
¡ Bohnenbehälter
¡ Deckel Bohnenbehälter
▶ Keine alkoholhaltigen oder spiritus-
haltigen Reinigungsmittel verwenden.
▶ Keine harten Scheuerkissen oder
Putzschwämme verwenden.
Ungeeignete Reinigungsmittel und
Entkalkungsmittel können das Gerät
beschädigen.
▶ Zum Entkalken keine reine Zitro-
nensäure, Essig oder Mittel auf Es-
sigbasis verwenden.
28
Page 29
Reinigen und Pflegen de
▶ Kein Entkalkungsmittel mit Phos-
phorsäure verwenden.
▶ Nur speziell für das Gerät entwi-
ckelte Entkalkungstabletten und
Reinigungstabletten verwenden.
→"Zubehör", Seite17
Tipps
¡ Waschen Sie neue Schwammputz-
tücher gründlich, um eventuell anhaftende Salze zu entfernen. Salze
können Flugrost an Edelstahloberflächen verursachen.
¡ Entfernen Sie Rückstände von
Kalk, Kaffee, Milch, Reinigungsund Entkalkungslösungen immer
sofort, um die Bildung von Korrosion zu verhindern.
WARNUNG
Verbrennungsgefahr!
Einige Geräteteile werden sehr heiß.
▶ Nie die heißen Geräteteile berüh-
ren.
▶ Nach dem Gebrauch die heißen
Geräteteile vor dem Berühren ab-
kühlen lassen.
1. Das Gehäuse, die Hochglanzober-
flächen und das Bedienfeld mit
dem beigelegten Mikrofasertuch
reinigen.
2. Den Getränkeauslauf nach dem
Getränkebezug mit einem weichen,
feuchten Tuch reinigen.
3. Den Wassertank mit frischem, kla-
rem Wasser spülen.
4. Wenn das Gerät längere Zeit nicht
benutzt wurde, wie z.B. im Ur-
laubsfall, das komplette Gerät rei-
nigen, einschließlich beweglicher
Teile wie z.B. Brüheinheit oder
Wassertank.
Hinweis:Das Gerät spült automa-
tisch, wenn Sie das Gerät im kalten
Zustand einschalten oder nach dem
Bezug von Kaffee ausschalten. Das
System reinigt sich somit selbst.
15.3 Gerät reinigen
WARNUNG
Stromschlaggefahr!
Eindringende Feuchtigkeit kann einen
Stromschlag verursachen.
▶ Nie das Gerät oder die Netzan-
schlussleitung in Wasser tauchen.
▶ Auf die Gerätesteckverbindung
darf keine Flüssigkeit überlaufen.
▶ Keinen Dampfreiniger oder Hoch-
druckreiniger verwenden, um das
Gerät zu reinigen.
15.4 Tropfschale und Kaffee-
satzbehälter reinigen
Reinigen und leeren Sie die Tropfschale und den Kaffeesatzbehälter
täglich, um Ablagerungen zu vermeiden. Der Bildanleitung am Anfang
der Anleitung folgen.
→Abb. 26-
28
15.5 Milchbehälter reinigen
Reinigen Sie aus hygienischen Gründen den Milchbehälter regelmäßig.
Sie können den Milchbehälter im Geschirrspüler reinigen. Der Bildanleitung am Anfang der Anleitung folgen.
→Abb. 19-
22
29
Page 30

de Reinigen und Pflegen
15.6 Service-Programme
Wenn Sie einen Wasserfilter einsetzen oder entfernen oder um Ihr Gerät
gründlich zu reinigen, verwenden Sie
die Service-Programme. Ihr Gerät
meldet, wenn Sie ein Service-Programm durchführen sollen, z.B. Reinigen.
ACHTUNG!
Unsachgemäße oder nicht rechtzeitig
erfolgte Reinigung und Entkalkung
kann das Gerät beschädigen.
▶ Den Entkalkungsvorgang nach An-
weisung sofort durchführen.
▶ Nur Reinigungstabletten in den
Brühtopf der Brüheinheit geben.
▶ Keine Entkalkungstabletten oder
andere Mittel in den Brühtopf der
Brüheinheit geben.
Hinweise
¡ Das Display zeigt an, wie weit der
Ablauf fortgeschritten ist.
¡ Ist Ihr Gerät gesperrt, können Sie
es erst wieder nach erfolgtem Entkalkungsvorgang bedienen.
Tipp:Entnehmen und reinigen Sie
zusätzlich zum automatischen Spülvorgang regelmäßig die Brüheinheit.
Service-Programme verwenden
1. "Pflege & Wartung" wählen.
2. "Pflege & Wartung" drücken.
a Das Display zeigt eine Liste.
3. Das gewünschte Programm
drücken.
a Das Display führt durch das Pro-
gramm.
Übersicht Service-Programme
Hier finden Sie eine Übersicht der
Service-Programme.
Hinweis:Das Startbild zeigt die verbleibenden Getränkebezüge bis zur
Durchführung des Programms und
die Dauer.
INTENZA-Filter
Wasserfilter einsetzen, ersetzen oder
entnehmen.
Milchsystem
Reinigung
Milchsystem automatisch spülen.
calc'nClean Reinigen und entkal-
ken kombinieren.
Leitungen von Kalkresten und Kaffeeresten befreien.
Reinigung Leitungen von Kaf-
feeresten befreien.
Entkalken Leitungen von Kalk-
resten befreien.
Frostschutz Leitungen entleeren
zum Schutz des Geräts bei Transport
oder Lagerung.
Reinigung
Brüheinheit
Das Display zeigt
schrittweise die optimale Reinigung der
Brüheinheit.
Reinigung
Getränkesystem
Das Display zeigt
schrittweise die optimale Reinigung des
Auslaufs.
Wenn ein ServiceProgramm unterbricht, z.B. durch
einen Stromausfall,
spült das Gerät automatisch. Danach ist
das Gerät wieder betriebsbereit.
Tipps
¡ Wenn Sie die Programme "Entkal-
ken" oder "calc'nClean" starten,
stellen Sie einen Behälter mit min-
destens 0,5l Fassungsvermögen
bereit.
30
Page 31

Reinigen und Pflegen de
¡ Wenn Sie einen Wasserfilter ver-
wenden, verlängert sich der Zeitabstand, bis Sie ein Service-Programm durchführen müssen.
¡ Sie können "Entkalken" und "Reini-
gung" durch das Service-Pro-
gramm "calc'nClean" zusammen-
fassen.
31
Page 32

de Störungen beheben
16 Störungen beheben
Kleinere Störungen an Ihrem Gerät können Sie selbst beheben. Nutzen Sie die
Informationen zur Störungsbehebung, bevor Sie den Kundendienst kontaktieren. So vermeiden Sie unnötige Kosten.
WARNUNG
Stromschlaggefahr!
Unsachgemäße Reparaturen sind gefährlich.
▶ Nur dafür geschultes Fachpersonal darf Reparaturen am Gerät durchführen.
▶ Nur Original-Ersatzteile dürfen zur Reparatur des Geräts verwendet werden.
▶ Wenn die Netzanschlussleitung dieses Geräts beschädigt wird, muss sie
durch eine besondere Anschlussleitung ersetzt werden, die beim Hersteller
oder bei seinem Kundendienst erhältlich ist.
Störung Ursache und Störungsbehebung
HomeConnect funktioniert nicht ordnungsgemäß.
Gerät gibt nur Wasser
aus, keinen Kaffee.
Gerät gibt keinen
Milchschaum aus.
Unterschiedliche Ursachen sind möglich.
▶ Gehen Sie auf www.home-connect.com.
Leerer Bohnenbehälter wird vom Gerät nicht erkannt.
▶ Füllen Sie Kaffeebohnen ein.
Kaffeeschacht an Brüheinheit ist verstopft.
▶ Reinigen Sie die Brüheinheit.
Bohnen sind zu ölig und fallen nicht ins Mahlwerk.
▶ Klopfen Sie leicht an den Bohnenbehälter.
▶ Wechseln Sie die Kaffeesorte.
▶ Verwenden Sie keine öligen Bohnen.
▶ Reinigen Sie den leeren Bohnenbehälter mit einem
feuchten Tuch.
Brüheinheit ist nicht richtig eingesetzt.
1. Prüfen Sie, ob die Brüheinheit richtig eingesetzt und
fest verriegelt ist.
2. Schieben Sie den roten Hebel oben nach links.
3. Setzen Sie die Brühraumabdeckung ein.
Milchsystem ist verschmutzt.
▶ Reinigen Sie das Milchsystem im Geschirrspüler.
Milchrohr taucht nicht in Milch ein.
▶ Verwenden Sie mehr Milch.
▶ Prüfen Sie, ob das Milchrohr in die Milch eintaucht.
Gerät ist stark verkalkt.
▶ Entkalken Sie das Gerät.
32
Page 33

Störung Ursache und Störungsbehebung
Milchsystem saugt
keine Milch an.
Milchsystem ist nicht richtig zusammengesetzt.
▶ Setzen Sie das Milchsystem richtig zusammen.
Milchrohr taucht nicht in Milch ein.
▶ Verwenden Sie mehr Milch.
▶ Prüfen Sie, ob das Milchrohr in die Milch eintaucht.
Milchschaum ist zu
kalt.
Gerät gibt kein Heißwasser aus.
Milch ist zu kalt.
▶ Verwenden Sie lauwarme Milch.
Getränkeverteiler ist verschmutzt.
▶ Reinigen Sie den Getränkeverteiler im Geschirrspü-
ler.
Gerät gibt kein Getränk aus.
Im Wasserfilter ist Luft.
1. Tauchen Sie den Wasserfilter mit der Öffnung nach
oben so lange in Wasser, bis keine Luftblasen mehr
entweichen.
2. Setzen Sie den Filter wieder ein.
▶ Drücken Sie den Wasserfilter gerade und fest in
den Tankanschluss.
Entkalkungsmittelreste verstopfen Wassertank.
1. Entnehmen Sie den Wassertank.
2. Reinigen Sie den Wassertank gründlich.
Auf innerem Geräteboden befindet sich
Tropfwasser.
Brüheinheit kann nicht
entnommen werden.
Tropfschale wurde zu früh entnommen.
▶ Entnehmen Sie die Tropfschale erst einige Sekun-
den nach dem letzten Getränkebezug.
Verriegelung lässt sich nicht lösen, Brüheinheit
klemmt.
▶ Schalten Sie das Gerät aus und nach 3Minuten
wieder ein.
Mahlwerk läuft nicht
an.
Gerät ist zu heiß.
1. Trennen Sie das Gerät vom Netz.
2. Warten Sie 1Stunde, um das Gerät abkühlen zu
lassen.
Mahlwerk mahlt keine
Bohnen trotz gefülltem
Bohnenbehälter.
Bohnen sind zu ölig und fallen nicht ins Mahlwerk.
▶ Klopfen Sie leicht an den Bohnenbehälter.
▶ Wechseln Sie die Kaffeesorte.
▶ Verwenden Sie keine öligen Bohnen.
▶ Reinigen Sie den leeren Bohnenbehälter mit einem
feuchten Tuch.
Stark schwankende
Kaffee-, bzw. Milch-
Gerät ist verkalkt.
▶ Entkalken Sie das Gerät.
schaumqualität.
Störungen beheben de
33
Page 34

de Störungen beheben
Störung Ursache und Störungsbehebung
Schwankende Milchschaumqualität.
Milchschaumqualität ist abhängig von Art der verwendeten Milch oder pflanzlichem Getränk.
▶ Optimieren Sie das Ergebis durch die Auswahl der
Milch- oder der pflanzlichen Getränkesorte.
Kaffee wird nicht oder
nur tropfenweise ausgegeben.
Eingestellte Füllmenge
wird nicht erreicht.
Mahlgrad ist zu fein eingestellt.
▶ Stellen Sie den Mahlgrad gröber ein.
Gerät ist stark verkalkt.
▶ Entkalken Sie das Gerät.
Im Wasserfilter ist Luft.
1. Tauchen Sie den Wasserfilter mit der Öffnung nach
oben so lange in Wasser, bis keine Luftblasen mehr
entweichen.
2. Setzen Sie den Filter wieder ein.
Gerät ist verschmutzt.
▶ Reinigen Sie die Brüheinheit.
▶ Entkalken und reinigen Sie das Gerät.
Kaffee hat keine Crema.
Kaffeesorte ist nicht optimal.
▶ Verwenden Sie eine Kaffeesorte mit einem höheren
Anteil an Robusta-Bohnen.
▶ Verwenden Sie Bohnen mit einer dunkleren Rös-
tung.
Bohnen sind nicht mehr röstfrisch.
▶ Verwenden Sie frische Bohnen.
Mahlgrad ist nicht auf Kaffeebohnen abgestimmt.
▶ Stellen Sie den Mahlgrad feiner ein.
Kaffee ist zu sauer. Mahlgrad ist zu grob eingestellt.
▶ Stellen Sie den Mahlgrad feiner ein.
Kaffeesorte ist nicht optimal.
▶ Verwenden Sie eine Kaffeesorte mit einem höheren
Anteil an Robusta-Bohnen.
▶ Verwenden Sie Bohnen mit einer dunkleren Rös-
tung.
Kaffee ist zu bitter. Mahlgrad ist zu fein eingestellt.
▶ Stellen Sie den Mahlgrad gröber ein.
Kaffeesorte ist nicht optimal.
▶ Wechseln Sie die Kaffeesorte.
Kaffee schmeckt verbrannt.
Mahlgrad ist zu fein eingestellt.
▶ Stellen Sie den Mahlgrad gröber ein.
Kaffeesorte ist nicht optimal.
34
Page 35

Störung Ursache und Störungsbehebung
Kaffee schmeckt verbrannt.
Kaffeesatz ist nicht
kompakt und zu nass.
▶ Wechseln Sie die Kaffeesorte.
Kaffeetemperatureinstellung ist zu hoch.
▶ Stellen Sie die Kaffeetemperatur niedriger ein.
Mahlgrad ist nicht optimal eingestellt.
▶ Stellen Sie den Mahlgrad gröber oder feiner ein.
Bohnen sind zu ölig.
▶ Verwenden Sie eine andere Bohnensorte.
Displayanzeige "Bitte
Brüheinheit einsetzen." erscheint.
Displayanzeige "Bitte
Wassertank füllen." erscheint trotz vollem
Wassertank.
Abdeckung ist falsch eingesetzt.
1. Prüfen Sie, ob die Brüheinheit richtig eingesetzt und
fest verriegelt ist.
2. Schieben Sie den roten Hebel oben nach links.
3. Setzen Sie die Brühraumabdeckung ein.
Wassertank ist falsch eingesetzt.
▶ Setzen Sie den Wassertank richtig ein.
Kohlensäurehaltiges Wasser ist im Wassertank.
▶ Füllen Sie den Wassertank mit frischem Leitungs-
wasser.
Schwimmer im Wassertank hängt fest.
1. Entnehmen Sie den Wassertank.
2. Reinigen Sie den Wassertank gründlich.
Neuer Wasserfilter wurde nicht nach Anleitung gespült.
1. Spülen Sie den Wasserfilter nach der Anleitung.
2. Nehmen Sie den Wasserfilter in Betrieb.
Im Wasserfilter ist Luft.
1. Tauchen Sie den Wasserfilter mit der Öffnung nach
oben so lange in Wasser, bis keine Luftblasen mehr
entweichen.
2. Setzen Sie den Filter wieder ein.
Wasserfilter ist alt.
▶ Setzen Sie einen neuen Wasserfilter ein.
Kalkablagerungen im Wassertank verstopfen das System.
1. Reinigen Sie den Wassertank gründlich.
2. Starten Sie das Entkalkungsprogramm.
Displayanzeige "E61:
Bitte Brüheinheit reinigen." erscheint.
Brüheinheit ist verschmutzt.
▶ Reinigen Sie die Brüheinheit.
Mechanismus von Brüheinheit ist schwergängig.
▶ Reinigen Sie die Brüheinheit.
Störungen beheben de
35
Page 36

de Störungen beheben
Störung Ursache und Störungsbehebung
Displayanzeige
Falsche Spannung er-
Probleme bei der Spannungsversorgung bestehen.
▶ Betreiben Sie das Gerät nur bei 220-240V.
scheint.
Displayanzeige Gerät
neu starten erscheint.
Gerät hat eine Störung.
1. Stellen Sie den Netzschalter auf und warten Sie
60Sekunden.
2. Stellen Sie den Netzschalter auf .
Displayanzeige
calc'nClean erscheint
sehr häufig.
Enthärtetes Wasser enthält noch geringe Mengen an
Kalk.
1. Setzen Sie einen neuen Wasserfilter ein.
2. Stellen Sie die Wasserhärte entsprechend ein.
Falsches oder zu wenig Entkalkungsmittel verwendet.
▶ Verwenden Sie zum Entkalken ausschließlich geeig-
nete Tabletten.
Service-Programm ist nicht vollständig ausgeführt.
▶ Starten Sie das Service-Programm "Sonderspülen
Schritt /".
→"Service-Programme", Seite30
36
Page 37

Transportieren, Lagern und Entsorgen de
17 Transportieren,
Lagern und Entsorgen
17.1 Frostschutz aktivieren
Schützen Sie Ihr Gerät vor Frosteinwirkung bei dem Transport und der
Lagerung.
ACHTUNG!
Flüssigkeitsrückstände im Gerät können beim Transport oder der Lagerung das Gerät beschädigen.
▶ Vor dem Transport oder der Lage-
rung das Leitungssystem leeren.
1. Das Programm "Frostschutz"
durchführen.
→"Übersicht Service-Programme",
Seite30
2. Das Gerät vom Stromnetz trennen.
17.2 Altgerät entsorgen
Durch umweltgerechte Entsorgung
können wertvolle Rohstoffe wiederverwendet werden.
1. Den Netzstecker der Netzan-
schlussleitung ziehen.
2. Die Netzanschlussleitung durch-
trennen.
3. Das Gerät umweltgerecht entsor-
gen.
Informationen über aktuelle Entsor-
gungswege erhalten Sie bei Ihrem
Fachhändler sowie Ihrer Gemeinde- oder Stadtverwaltung.
Dieses Gerät ist entsprechend der europäischen
Richtlinie 2012/19/EU
über Elektro- und Elektronikaltgeräte (waste
electrical and electronic
equipment – WEEE) gekennzeichnet.
Die Richtlinie gibt den
Rahmen für eine EU-weit
gültige Rücknahme und
Verwertung der Altgeräte
vor.
18 Kundendienst
Funktionsrelevante Original-Ersatzteile gemäß der entsprechenden Ökodesign-Verordnung erhalten Sie bei
unserem Kundendienst für die Dauer
von mindestens 7 Jahren ab dem Inverkehrbringen Ihres Geräts innerhalb des Europäischen Wirtschaftsraums.
Hinweis:Der Einsatz des Kundendiensts ist im Rahmen der Herstellergarantiebedingungen kostenfrei.
Detaillierte Informationen über die
Garantiedauer und die Garantiebedingungen in Ihrem Land erhalten Sie
bei unserem Kundendienst, Ihrem
Händler oder auf unserer Website.
Wenn Sie den Kundendienst kontaktieren, benötigen Sie die Erzeugnisnummer (E-Nr.), die Fertigungsnummer (FD) und die Zählnummer (Z-Nr.)
Ihres Geräts.
Die Kontaktdaten des Kundendiensts
finden Sie im beiliegenden Kundendienstverzeichnis oder auf unserer
Website.
18.1 Erzeugnisnummer (E-
Nr.), Fertigungsnummer
(FD) und Zählnummer
(Z-Nr.)
Die Erzeugnisnummer (E-Nr.), die
Fertigungsnummer (FD) und die Zählnummer (Z-Nr.) finden Sie auf dem
Typenschild des Geräts.
37
Page 38

de Technische Daten
Um Ihre Gerätedaten und die Kundendienst-Telefonnummer schnell
wiederzufinden, können Sie die Daten
notieren.
19 Technische Daten
Spannung 220–
240V∼
Frequenz 50/ 60Hz
Anschlusswert 1500W
Maximaler Pumpen-
druck, statisch
Maximales Fassungs-
vermögen, Wassertank
(ohne Filter)
Maximales Fassungsvermögen, Bohnenbehälter
Länge der Zuleitung 170cm
Gerätehöhe 44,6cm
Gerätebreite 59,4cm
Gerätetiefe 39,6cm
Gewicht, ungefüllt 20,6kg
Art des Mahlwerks Keramik
Dieses Produkt enthält Lichtquellen
der Energie-Effizienzklasse D und F.
Die Lichtquellen sind als Ersatzteil
verfügbar und nur durch dafür geschultes Fachpersonal auszutauschen.
19.1 Informationen zu freier
und Open Source Software
Dieses Produkt enthält Software-Komponenten, die von den Urheberrechtsinhabern als freie oder Open
Source-Software lizenziert sind.
20bar
2,2l
400g
Die entsprechenden Lizenzinformationen sind auf dem Hausgerät gespeichert. Der Zugriff auf die entsprechenden Lizenzinformationen ist auch
über die HomeConnect App möglich: „Profil -> Rechtliche Hinweise ->
Lizenzinformationen“.1 Sie können die
Lizenzinformationen auf der Markenprodukt-Website herunterladen. (Bitte
suchen Sie auf der Produkt-Website
nach Ihrem Gerätemodell und weiteren Dokumenten.) Alternativ können
Sie die entsprechenden Informationen unter [email protected]
oder BSH Hausgeräte GmbH, CarlWery-Str. 34, D-81739 München anfordern.
Der Quellcode wird auf Anforderung
zur Verfügung gestellt.
Bitte senden Sie Ihre Anforderung an
[email protected] oder BSH
Hausgeräte GmbH, Carl-Wery-Str. 34,
D-81739 München.
Betreff: „OSSREQUEST“
Die Kosten für die Bearbeitung Ihrer
Anforderung werden Ihnen in Rechnung gestellt. Dieses Angebot gilt
drei Jahre ab dem Kaufdatum bzw.
mindestens für den Zeitraum, in dem
wir Support und Ersatzteile für das
entsprechende Gerät anbieten.
20 Konformitätserklä-
rung
Hiermit erklärt BSH Hausgeräte
GmbH, dass sich das Gerät mit Home Connect Funktionalität in Übereinstimmung mit den grundlegenden
Anforderungen und den übrigen einschlägigen Bestimmungen der Richtlinie 2014/53/EU befindet.
1
Je nach Geräteausstattung
38
Page 39

Konformitätserklärung de
Eine ausführliche RED Konformitätserklärung finden Sie im Internet unter
www.bosch-home.com auf der Produktseite Ihres Geräts bei den zusätzlichen Dokumenten.
2,4-GHz-Band (2400–2483,5MHz):
max. 100mW
5-GHz-Band (5150–5350MHz +
5470–5725MHz): max. 100mW
BE BG CZ DK DE EE IE EL ES
FR HR IT CY LI LV LT LU HU
MT NL AT PL PT RO SI SK FI
SE NO CH TR IS UK (NI)
5-GHz-WLAN (Wi-Fi): Nur zum Gebrauch in Innenräumen.
AL BA MD ME MK RS UK UA
5-GHz-WLAN (Wi-Fi): Nur zum Gebrauch in Innenräumen.
39
Page 40

en
Futher information and explanations are
available online:
Table of contents
1 Safety.........................................42
1.1 General information................. 42
1.2 Intended use............................ 42
1.3 Restriction on user group........ 42
1.4 Safe installation ....................... 42
1.5 Safe use .................................. 43
2 Preventing material damage ....46
3 Environmental protection and
saving energy............................46
3.1 Disposing of packaging .......... 46
3.2 Tips for saving energy............. 46
4 Installation and connection......46
4.1 Scope of delivery..................... 46
4.2 Installing and connecting the
appliance................................. 47
4.3 Connecting the appliance to
the electricity supply..............
5 Familiarising yourself with
your appliance...........................47
5.1 Appliance ................................ 47
5.2 Control panel........................... 48
6 Accessories...............................48
7 Before using for the first time ..49
7.1 Preparing and cleaning the
appliance................................. 49
7.2 Checking the water hard-
ness......................................... 49
7.3 Water filter1.............................. 50
7.4 Performing initial start-up ........ 50
7.5 General information................. 50
.. 47
8 Basic operation .........................51
8.1 Switching the appliance on
or off ........................................ 51
8.2 Dispensing beverages ............ 51
8.3 DoubleShot and tripleShot ...... 52
8.4 Dispensing a coffee drink
with milk................................... 52
8.5 Dispensing two cups at once.. 52
9 Grinder.......................................53
9.1 Setting the grinding level......... 53
10 Milk container shelf.................53
10.1 Using the milk container
shelf....................................... 53
10.2 Using your own milk
container1.............................. 53
11 Childproof lock........................53
11.1 Activating the child-proof
lock........................................ 53
11.2 Deactivating the childproof
lock......................................
12 Favourites................................54
12.1 Creating favourites from Fa-
vourites menu........................ 54
12.2 Create favourites from
Classic or Coffee World ........ 54
12.3 Changing a favourite............. 54
12.4 Deleting a favourite ............... 54
12.5 Sorting favourites .................. 54
13 HomeConnect ........................55
13.1 Setting up the HomeCon-
nect app ................................ 55
13.2 Setting up HomeConnect..... 55
.. 54
1
Depending on the appliance specifications
40
Page 41

13.3 HomeConnect settings......... 56
13.4 Remote diagnostics .............. 56
13.5 Data protection...................... 56
14 Basic settings..........................57
14.1 Changing settings ................. 57
14.2 Overview Settings.................. 57
15 Cleaning and servicing...........59
15.1 Dishwasher-safe compon-
ents........................................ 59
15.2 Cleaning agent ...................... 59
15.3 Cleaning the appliance ......... 60
15.4 Cleaning the drip tray and
coffee dregs container .......... 61
15.5 Cleaning the milk container .. 61
15.6 Service programmes............. 61
16 Troubleshooting......................63
17 Transportation, storage and
disposal ...................................68
17.1 Activating frost protection ..... 68
17.2 Disposing of old appliance ... 68
18 Customer Service....................68
18.1 Product number (E-Nr.),
production number (FD)
and consecutive numbering
(Z-Nr.) .................................... 68
en
19 Technical specifications.........69
19.1 Information regarding Free
and Open Source Software... 69
20 Declaration of Conformity ......69
41
Page 42

en Safety
1 Safety
Observe the following safety instructions.
1.1 General information
¡ Read this instruction manual carefully.
¡ Keep the instruction manual and the product information safe
for future reference or for the next owner.
¡ Do not connect the appliance if it has been damaged in transit.
1.2 Intended use
Only use this appliance:
¡ for preparing hot drinks.
¡ In private households and in enclosed spaces in a domestic en-
vironment.
¡ Up to an altitude of max. 2000m above sea level.
1.3 Restriction on user group
This appliance may be used by children aged 8 or over and by
people who have reduced physical, sensory or mental abilities or
inadequate experience and/or knowledge, provided that they are
supervised or have been instructed on how to use the appliance
safely and have understood the resulting dangers.
Do not let children play with the appliance.
Children must not perform cleaning or user maintenance unless
they are at least 8 years old and are being supervised.
Keep children under the age of 8 years away from the appliance
and power cable.
1.4 Safe installation
WARNING‒Risk of electric shock!
Incorrect installation is dangerous.
▶ Connect and operate the appliance only in accordance with the
specifications on the rating plate.
▶ Always use the supplied power cable for the new appliance.
42
Page 43

Safety en
▶ Connect the appliance to a power supply with alternating cur-
rent only via a properly installed socket with earthing.
▶ The protective conductor system of the domestic electrical in-
stallation must be properly installed.
If the appliance or the power cord is damaged, this is dangerous.
▶ Never operate a damaged appliance.
▶ Never operate an appliance with a cracked or fractured surface.
▶ Never pull on the power cord to unplug the appliance. Always
unplug the appliance at the mains.
▶ If the appliance or the power cord is damaged, immediately un-
plug the power cord or switch off the fuse in the fuse box.
▶ Call customer services. →Page68
Incorrect repairs are dangerous.
▶ Repairs to the appliance should only be carried out by trained
specialist staff.
▶ Only use genuine spare parts when repairing the appliance.
▶ If the power cord of this appliance is damaged, it must be re-
placed with a special connection cable, which is available from
the manufacturer or his Customer Service.
1.5 Safe use
WARNING‒Risk of suffocation!
Children may put packaging material over their heads or wrap
themselves up in it and suffocate.
▶ Keep packaging material away from children.
▶ Do not let children play with packaging material.
Children may breathe in or swallow small parts, causing them to
suffocate.
▶ Keep small parts away from children.
▶ Do not let children play with small parts.
WARNING‒Risk of electric shock!
An ingress of moisture can cause an electric shock.
▶ Never immerse the appliance or the power cord in water.
▶ Liquids must not be spilled on the appliance plug connection.
▶ Only use the appliance in enclosed spaces.
▶ Never expose the appliance to intense heat or humidity.
43
Page 44
en Safety
▶ Do not use steam- or high-pressure cleaners to clean the appli-
ance.
WARNING‒Risk of fire!
The appliance will become hot.
▶ Ventilate the appliance adequately.
▶ Never operate the appliance with the cupboard door closed.
It is dangerous to use an extended power cord and non-approved
adapters.
▶ Do not use extension cables or multiple socket strips.
▶ Only use adapters and power cords approved by the manufac-
turer.
▶ If the power cord is too short and a longer one is not available,
please contact an electrician to have the domestic installation
adapted.
WARNING‒Risk of burns!
Some parts of the appliance become very hot.
▶ Never touch hot appliance parts.
▶ Allow hot appliance parts to cool down before touching.
WARNING‒Risk of scalding!
Freshly prepared drinks are very hot.
▶ Leave drinks to cool down if necessary.
▶ Do not let escaping liquids or steam come into contact with
your skin.
A remote start via the Home Connect app while the appliance is
unattended may cause scalding to third parties.
▶ Do not reach under the coffee outlet during the dispensing of
drinks.
▶ Keep other persons, in particular children, away from the appli-
ance.
WARNING‒Risk of injury!
Improper use of the appliance may endanger the user.
▶ To avoid injuries, only use the appliance for its intended pur-
pose.
44
Page 45

Safety en
Trapped fingers when closing the appliance door.
▶ Be careful of your fingers when closing the appliance door.
The grinder rotates.
▶ Never reach into the grinder.
WARNING‒Danger: Magnetism!
Caution: Magnetism!
Warning for wearers of pacemakers
The appliance contains permanent magnets. They may affect electronic implants, e.g. pacemakers or insulin pumps.
▶ People with electronic implants must stand at least 10 cm away
from the appliance and appliance door.
▶ Keep a minimum distance of 10 cm from the water tank, milk
container, pulp container, beverage outlet cover, beverage dispenser, beverage outlet, milk system holder, brewing chamber
cover and brewing unit.
WARNING‒Risk of harm to health!
Soiling on the appliance may be harmful to health.
▶ To ensure hygiene, follow the cleaning instructions for the appli-
ance.
45
Page 46
en Preventing
A
B
C
D
E
F
G
Preventing
2 Preventing material
damage
Preventing
ATTENTION!
Risk of damage to the appliance. If
the appliance is not started up correctly, it may be damaged.
▶ Use the appliance in frost-free
rooms only.
▶ If the appliance has been transpor-
ted or stored below 0°C, wait
3hours at room temperature before starting it up.
▶ After plugging in, always wait ap-
prox.5seconds.
Improper installation may cause material damage.
▶ Observe the installation instruc-
tions for the appliance installed
above or below.
▶ When installing theappliance
above awarming drawer, observe
a niche height of 590mm.
Unsecured units may fall over.
▶ Secure units to the wall using a
standard bracket.
3 Environmental protec-
tion and saving energy
3.1 Disposing of packaging
The packaging materials are environmentally compatible and can be recycled.
▶ Sort the individual components by
type and dispose of them separ-
ately.
3.2 Tips for saving energy
If you follow these instructions, your
appliance will use less power.
Set the interval for automatic switchoff to the smallest value.
a
If the appliance is not being used,
it will switch itself off earlier.
→"Basic settings", Page57
Do not interrupt the dispensing process prematurely.
a
The amount of water or milk that is
heated is used optimally.
Descale the appliance regularly.
a
Limescale deposits increase the
appliance's energy consumption.
4 Installation and con-
nection
4.1 Scope of delivery
After unpacking all parts, check for
any damage in transit and completeness of the delivery.
Note:Different accessories are enclosed depending on the appliance
model. This accessory is shown in a
frame with a dashed line.
→Fig.
1
Fully automatic coffee machine
Milk container
Milk tube and suction pipe
Installation instructions
Cleaning tablet
Descaling tablet
Water filter
1
Depending on the appliance specifications
1
1
1
46
Page 47

Familiarising yourself with your appliance en
H
I
J
1
2
3
4
5
6
7
8
9
10
11
12
13
14
15
16
17
18
19
20
21
22
23
Water hardness testing strip
User manual
Microfibre cloth
1
Depending on the appliance spe-
cifications
4.2 Installing and connecting
the appliance
The installation instructions describe
various models that differ with regard
to scope of supply and installation.
Note:Observe the information on
safety →Page42 and preventing material damage →Page46.
▶ Install and connect the appliance
properly in accordance with the in-
stallation instructions provided in
the box.
4.3 Connecting the appliance
to the electricity supply
1. Insert the non-heating appliance
plug of the power cable into the
appliance.
2. Insert the mains plug of the appli-
ance's power cable in a socket
nearby.
3. Check the mains plug is inserted
properly.
Exterior view
→Fig.
Interior view
→Fig.
2
Shelf, removable
Lights
Control panel
Beverage outlet, height-ad-
justable
Appliance door
Beverage dispenser
Beverage outlet cover
3
Collecting tray
Rating plate
Water tank with lid
Mains switch
Accessory drawer
Bean container with lid
Grinding level adjustment
Holder for milk system, mag-
netic
Brewing chamber cover
Brewing unit
5 Familiarising yourself
with your appliance
5.1 Appliance
You can find an overview of the parts
of your appliance here.
Note:Individual details and colours
may differ, depending on the appliance model.
Milk container
Milk system
Milk container shelf, remov-
able
Coffee dregs container
Drip tray
Drip tray cover
47
Page 48

en Accessories
5.2 Control panel
You can use the control panel to configure all functions of your appliance
and to obtain information about the
operating status.
Switch the appliance on
or off.
¡ Exit the menu settings.
¡ Return to the Start
menu.
Start or stop the programme.
Favourites
Classic Select standard bever-
Coffee
World
Care &
maintenance
Settings Open or exit the set-
Quick selection in beverage selection
Information
Select saved beverages
with personal settings.
→Page54
ages.
Select basic beverages
which can be extended
in conjunction with
Home Connect.
Call up service programmes.
tings.
Quick selection directly
to "Favourites"
Quick selection directly
to "Classic"
Quick selection directly
to "Coffee World"
Customer service
Appliance is connected
to HomeConnect.
Appliance is not connected to HomeConnect.
Appliance is not connected to the server.
Playlist function is activated in the HomeConnect app.
Check the milk container.
Add beans.
Fill with water.
"Demo mode" is activ-
ated.
Beverage settings
Quantity
Strength
Aroma
Share of milk
Temperature
Operation
Go back in the menu.
Add favourite.
Delete favourite.
Dispense two cups.
Quick selection
Open quick selection.
Activate or deactivate
childproof lock.
Switch WiFi on or off.
6 Accessories
Use original accessories. These have been made especially for your appliance.
48
Page 49

first time en
Accessories Retail Customer service
Cleaning tablets TCZ8001A 00312096
Descaling tablets TCZ8002A 00312093
Water filter TCZ7003 00575491
Microfibre cloth - 00460770
Care set TCZ8004A 00312107
Limit stop for 92° opening angle - 10020041
first time
7 Before using for the
first time
first time
Prepare the appliance for use.
7.1 Preparing and cleaning
the appliance
Clean the appliance and individual
parts. Follow the illustrated instructions at the beginning of this manual.
ATTENTION!
Unsuitable beans can block up the
grinder.
▶ Only use pure, roasted bean mixes
that are suitable for use in fully
automatic coffee or espresso ma-
chines.
▶ Do not use glazed coffee beans.
▶ Do not use caramelised coffee
beans.
▶ Do not use coffee beans that have
been treated with additives con-
taining sugar.
▶ Do not add ground coffee.
→Fig. 4-
Note:Fill the water tank each day
with fresh, cold, non-carbonated water.
23
Tip:To keep the coffee beans at
their best, store them in a sealed
container in a cool place.
You can keep the coffee beans in the
bean container for several days
without them losing their aroma.
7.2 Checking the water hardness
It is important to set the water hardness correctly so that your appliance
indicates in good time that it needs
descaling. You can use the enclosed
test strip to check the water hardness
or ask your local water company.
1. Briefly dip the test strip in fresh tap
water.
2. Allow the water to drain off the test
strip.
3. Read the water hardness off the
test strip after 1 minute.
The table shows allocation of the
levels to the different degrees of
water hardness:
Level German
degrees in
°dH
1 1-7 < 1.3
2 8-14 1.3-2.5
3 15-21 2.5-3.8
1
4
1
22-30 > 3.8
Factory setting
Total hardness in mmol/
l
49
Page 50

en first time
Note:If a water softening system is
installed in your house, you can select "Water softening system".
Tip:You can change the settings at
any time.
→"Basic settings", Page57
7.3 Water filter
1
You can use a water filter to minimise
limescale deposits and reduce impurities in the water.
Inserting the water filter
ATTENTION!
Possible damage to the appliance
due to limescale build-up.
▶ Change the water filter in good
time.
▶ Change the water filter after
2months at the latest.
▶ Observe the display messages.
1. Select "Care & maintenance".
2. Select "INTENZA filter" and follow
the instructions on the display.
Changing or removing the water filter
You can also operate your appliance
without a water filter.
1. Select "Care & maintenance".
2. Select "INTENZA filter".
3. Select "Replace" or "Remove" and
follow the instructions on the display.
Tips
¡ You should also change your wa-
ter filter for reasons of hygiene.
¡ With a water filter you need to de-
scale your appliance less frequently.
¡ If you use a water filter, your coffee
will be more flavoursome.
¡ If your appliance has not been
used for a long time, for example if
you were on holiday, you should
rinse the water filter before use by
dispensing a cup of hot water.
¡ The water filter can be purchased
from retailers or customer service.
→"Accessories", Page48
7.4 Performing initial start-up
After connecting the appliance to the
power supply, configure the settings
for initial start-up. Initial start-up only
appears when switching on for the
first time.
1. Open the appliance door.
2. Set the mains switch to
→Fig.
3. Close the appliance door.
4. Press to switch the appliance on
24
.
and wait until the appliance has
rinsed.
5. Follow the instructions on the dis-
play.
a The display will guide you through
the programme.
Tip:To call up brief information,
press
.
Notes
¡ If you want to set up HomeCon-
nect now, follow the instructions in
the HomeConnect app.
→"Setting up HomeConnect",
Page55
¡ If "Demo mode" is selected, only
the display screens will work. You
cannot dispense a beverage or run
a programme.
7.5 General information
Please bear this information in mind
so that you can get the best out of
your appliance.
1
Depending on the appliance specifications
50
Page 51

operation en
Notes
¡ The appliance has been pro-
grammed at the factory with standard settings for optimum operation.
¡ The integrated fan switches on
each time a beverage is dispensed
and switches off again after
around 5-7minutes.
¡ The grinder has been factory-set
for optimum operation. If coffee is
only dispensed drop by drop or is
too thin and with too little crema,
you can adjust the grinding level.
→"Setting the grinding level",
Page53
¡ If you do not perform any actions
on the appliance for a certain
period, it will switch off automatically. You can change the duration
in the basic settings. →Page57
You can change the duration in the
basic settings.
¡ The first beverage will not yet have
its full aroma if:
– You are using the appliance for
the first time.
– You have run a service pro-
gramme.
– You have not used the appli-
ance for a long time.
Do not drink the beverage.
operation
8 Basic operation
operation
8.1 Switching the appliance on or off
Notes
¡ Do not press the power switch
while the appliance is operating.
¡ Before switching off the power
switch, switch the appliance off
. This is the only way for the
with
appliance to rinse automatically.
▶ Press .
When the appliance switches on,
the display shows the logo. When
the appliance is switched on or off,
it will rinse itself automatically.
When switched off, the appliance
will emit steam into the drip tray for
cleaning. The appliance will not
rinse itself if the appliance is still
warm when switched on or if no
beverage was dispensed before it
was switched off.
8.2 Dispensing beverages
Find out how to prepare a drink of
your choice.
WARNING
Risk of scalding!
Freshly prepared drinks are very hot.
▶ Leave drinks to cool down if ne-
cessary.
▶ Do not let escaping liquids or
steam come into contact with your
skin.
Notes
¡ With a number of settings your cof-
fee is prepared in several steps.
Wait until the process is fully completed.
¡ If you are dispensing a beverage
with milk, always connect a container filled with milk to the milk
hose and suction pipe.
¡ The milk container is specially de-
signed for this appliance. Only use
the milk container for storing milk
in the refrigerator and in the
house.
¡ If the milk system has not been
cleaned, small amounts of milk
may escape when hot water is dispensed.
51
Page 52

en operation
8.3 DoubleShot and tripleShot
Your appliance grinds the coffee two
or three times.
To ensure that only pleasant-tasting
and easily digestible aromatic substances are released, coffee beans
are freshly ground and brewed again
by the appliance.
The longer coffee brews, the more
bitter substances and undesirable
aromas are released. These bitter
substances and undesirable aromas
affect the taste and digestibility of
coffee.
Note:The functions "DoubleShot"
and "tripleShot" depend on the beverage strength and beverage size selected.
8.4 Dispensing a coffee drink with milk
An example explains how to make a
latte macchiato.
WARNING
Risk of burns!
The milk system can become extremely hot.
▶ Never touch the milk system when
it is hot.
▶ Allow the hot milk system to cool
down before touching it.
Requirements
¡ The milk container is inserted.
¡ The milk system is connected to
the beverage dispenser.
¡ The milk container has been filled
with sufficient milk.
1. Place a glass underneath the
beverage outlet.
2. Select "Classic" and press "Clas-
sic".
3. Select "Latte macchiato" and press
"Latte macchiato".
4. Set the beverage parameters.
‒ To change the per-cup quantity
, press the segments.
‒ To change the strength, press
and set the strength via the segments.
‒ To change the milk ratio, press
and set the milk ratio via the
segments.
5. Press and wait until the process
is complete.
‒ To completely stop dispensing
the beverage, press
‒ To only stop the current dis-
.
pensing step, press "Skip".
Notes
¡ If you do not change any settings
for approx. 30seconds, the appliance will exit settings mode.
¡ The appliance saves the settings
automatically.
Tips
¡ You can also pre-heat cups before
dispensing using hot water.
¡ You can also use plant-based al-
ternatives to milk, e.g. soya milk.
¡ The quality of the milk froth de-
pends on the type of milk or plantbased alternative used.
8.5 Dispensing two cups at once
Depending on your beverage, you
can make 2 cups at the same time.
Note:If the "DoubleShot" or
"tripleShot" function is active, the
function for dispensing two cups at
once is not possible.
1. Select the required beverage.
2. Press
a The display shows the setting .
.
52
Page 53

Grinder en
3. Place two cups on the left and
right underneath the beverage outlet.
4. Press .
The beverage is prepared in 2
steps. The beans are ground in 2
grinding operations.
a The beverage is brewed and then
runs into the cups.
5. Wait until the process is complete.
9 Grinder
Your appliance has an adjustable
grinder, which you can use to customise the grinding level of your coffee beans.
9.1 Setting the grinding level
▶ Use the slider to set the grinding
level to between very fine
very coarse .
→Fig.
25
Only change grinding level setting
slightly.
The grinding level setting only
takes effect after the second cup.
Tip:If the coffee is only dispensed
drop by drop, set a coarser grinding
level.
If the coffee is too thin with too little
crema, set a finer grinding level.
and
10.1 Using the milk container
shelf
1. Connect the milk container or milk
carton and place it on the shelf.
2. Start dispensing.
Note:If the message "Please insert
milk container." appears, dispensing
is not possible.
10.2 Using your own milk
container
With certain appliance series, you
can use your own milk container.
1. Put out your own milk container.
2. Tare your own milk container.
→"Overview Settings", Page57
The appliance uses the weight to
detect the quantity of milk in the
milk container or the milk carton. If
there is not enough milk in the milk
container, a message will appear.
Note:If you use the standard milk
container or a milk carton, the appliance detects this automatically.
1
11 Childproof lock
You can lock the appliance, to protect children against scalding and
burns.
10 Milk container shelf
Your appliance detects when there is
a milk container on the shelf.
1
Depending on the appliance specifications
11.1 Activating the child-
proof lock
Requirement:The appliance is
switched on.
1. Press
2. Press
a The childproof lock is activated.
.
.
53
Page 54

en Favourites
11.2 Deactivating the childproof lock
1. Press
2. Move your finger along the ring un-
til it is filled.
a The childproof lock is deactivated.
.
12 Favourites
Save individual beverages as favourites so that you can dispense them
more quickly.
A favourite is a beverage with personal settings. You can change the
settings at any time.
Note:To exit the settings, press
start dispensing the beverage.
12.1 Creating favourites from Favourites menu
1. Press "Favourites".
2. Press
3. Select a beverage.
4. Set the beverage parameters.
5. Press .
6. Enter the name.
7. Press "Save".
.
or
12.2 Create favourites from Classic or Coffee World
1. Select a beverage from "Classic"
or "Coffee World".
2. Set the beverage parameters.
3. Press
4. Enter the name.
5. Press "Save".
.
12.3 Changing a favourite
1. Press "Favourites".
2. Select favourite.
3. Make the changes.
4. Press
5. Press "Save".
.
12.4 Deleting a favourite
1. Press "Favourites".
2. Select favourite.
3. Press
4. Press "Delete".
.
12.5 Sorting favourites
You can change the sequence of
your favourites.
1. Press "Favourites".
2. Select favourite.
3. Press and hold the selected fa-
vourite for at least 3seconds.
a The display shows all favourites,
which can be moved using your
finger.
a The new sequence is saved auto-
matically.
Tip:You can also use the
HomeConnect app to create,
change, delete, or sort favourites.
54
Page 55
HomeConnect en
HomeConnect
13 HomeConnect
HomeConnect
This appliance is network-capable.
Connecting your appliance to a mobile device lets you control its functions via the HomeConnect app, adjust its basic settings and monitor its
operating status.
The HomeConnect services are not
available in every country. The availability of the HomeConnect function
depends on the availability of
HomeConnect services in your country. You can find information about
this at: www.home-connect.com.
To be able to use HomeConnect,
you must first set up the connection
to the WLAN home network (Wi-Fi1)
and to the HomeConnect app.
The HomeConnect app guides you
through the entire login process. Follow the instructions in the HomeConnect app to configure the settings.
Tip:Please also follow the instructions in the HomeConnect app.
Notes
¡ Please note the safety precautions
in this instruction manual and
make sure that they are also observed when operating the appliance via the HomeConnect app.
→"Safety", Page42
¡ Operating the appliance on the ap-
pliance itself always takes priority.
During this time it is not possible
to operate the appliance using the
HomeConnect app.
13.1 Setting up the
HomeConnect app
1. Install the HomeConnect app on
your mobile device.
2
2. Start the HomeConnect app and
set up access for HomeConnect.
The HomeConnect app guides
you through the entire login process.
13.2 Setting up HomeConnect
Requirements
¡ You have a mobile device with a
current version of the iOS or Android operating system, e.g. a
smartphone.
¡ The mobile device and the appli-
ance are within range of your
home network's WiFi signal.
¡ The HomeConnectapp has been
installed on your mobile device.
1
Wi-Fi is a registered trademark of the Wi-Fi Alliance.
2
Apple App Store und the Apple App Store logo are trademarks of Apple Inc.
Google Play and the Google Play logo are trademarks of Google LLC.
55
Page 56

en HomeConnect
1. Open the HomeConnect app and
scan the following QR code.
2. Follow the instructions in the
HomeConnect app.
13.3 HomeConnect settings
Adapt HomeConnect to your needs.
You can find the HomeConnect settings in the basic settings for your appliance. Which settings the display
shows will depend on whether
HomeConnect has been set up and
whether the appliance is connected
to your home network.
Overview of the Home Connect settings
Here you can find an overview of the "Home Connect" settings and network settings.
Basic setting Selection Description
HomeConnect
assistant
WiFi On
Remote start On
Software update - Note:This setting is only available
Start
Disconnect
Off
Off
Add mobile device.
Disconnect appliance from network.
Switch off the wireless module during
long absences or to save energy.
Note:In networked standby mode
your appliance requires max. 2W.
Switch remote start on the appliance
on and off.
Note:With the "Home Connect" app
only switch-off is possible.
with a software update.
Note:When "WiFi" and remote start
are switched on,
display.
appears on the
13.4 Remote diagnostics
Customer Service can use Remote
Diagnostics to access your appliance
if you contact them, have your appliance connected to the HomeConnect server and if Remote Diagnostics is available in the country in
which you are using the appliance.
56
Tip:For further information and details about the availability of Remote
Diagnostics in your country, please
visit the service/support section of
your local website: www.home-connect.com.
13.5 Data protection
Please see the information on data
protection.
Page 57

Basic settings en
The first time your appliance is
registered on a home network
connected to the Internet, your
appliance will transmit the following
types of data to the HomeConnect
server (initial registration):
¡ Unique appliance identification
(consisting of appliance codes as
well as the MAC address of the
Wi-Fi communication module installed).
¡ Security certificate of the Wi-Fi
communication module (to ensure
a secure data connection).
¡ The current software and hardware
version of your appliance.
¡ Status of any previous reset to
factory settings.
This initial registration prepares the
HomeConnect functions for use and
is only required when you want to
use the HomeConnect functions for
the first time.
Note:Please note that the
HomeConnect functions can only be
utilised with the HomeConnect app.
Information on data protection can be
retrieved in the HomeConnect app.
14 Basic settings
You can configure the basic settings
for your appliance to meet your
needs and call up additional functions.
14.1 Changing settings
1. Select "Settings".
a The display shows the list of set-
tings.
2. Change the required setting.
a The appliance saves the setting
automatically.
3. To go back to the menu, press .
4. To exit the settings, press .
Tip:To call up brief information,
press .
14.2 Overview Settings
See here for an overview of the "Settings".
Language Set language.
HomeConnect HomeConnect assistant
Time Set the current time or
Display settings Brightness Set the brightness in
Night-time dimming Switch display dimming
1
Depending on the appliance specifications
→"Setting up
HomeConnect",
Page55
automatically display via
HomeConnect.
steps.
on and off.
57
Page 58

en Basic settings
Clock display Switch the time display
on and off after the appliance has been switched
off.
Clock Set the time display.
Adjustment ¡ Set the horizontal and
vertical alignment of
the display.
¡ Adjust the optimisation
and centring of the
display to the viewing
angle.
Sounds Button tone Switch sound off and on.
Volume Adjust volume in steps.
Signal tone Switch sound off and on.
Welcome tune Switch sound off and on
when the appliance is
started.
Beverage setting Brewing temperature Set the brewing temper-
ature.
Milk sequence Select the sequence for
milk and coffee.
Latte macchiato pause Select the pause
between milk and coffee.
Appliance settings Illumination Adjust the illumination
brightness in steps.
Automatic switch-off Set the time after which
the appliance switches
off.
Water hardness Set the water hardness.
Milk container
1
Set milk carton or indi-
vidual milk container.
Note:If you use the
standard milk container,
the appliance automatic-
ally detects it.
Personalisation Start category Set the menu display
after switching on, e.g.
"Classic".
Factory settings Reset to factory settings? Reset personal settings
to the factory settings.
1
Depending on the appliance specifications
58
Page 59

Cleaning and servicing en
Demo mode Mode for demo pur-
poses
Switch "Demo mode" on
or off.
Appliance information Beverage counter Display the number of
beverages dispensed.
Cleaning information Time until the water filter
should next be changed
or a service programme
started.
Version information Display appliance inform-
ation.
Network information Display network informa-
tion.
1
Depending on the appliance specifications
15 Cleaning and servicing
To keep your appliance working efficiently for a long time, it is important to
clean and maintain it carefully.
15.1 Dishwasher-safe components
Here you can find an overview of the components you can clean in the dishwasher.
ATTENTION!
Some components are sensitive to
heat and may be damaged if they are
cleaned in a dishwasher.
▶ Follow the operating instructions of
the dishwasher.
▶ Only clean dishwasher-safe com-
ponents in the dishwasher.
▶ Only use programmes that do not
heat the components above
60°C.
Suitable:
¡ Drip tray
¡ Drip tray cover
¡ Coffee dregs container
¡ Collecting tray
¡ Milk container with lid and base
¡ Shelf for milk container
¡ Beverage dispenser
¡ Milk system
15.2 Cleaning agent
Only use suitable cleaning agents.
Not suitable:
¡ Water tank
¡ Water tank lid
¡ Brewing unit
¡ Beverage dispenser cover
¡ Brewing unit cover
¡ Accessory drawer
¡ Bean container
¡ Bean container lid
59
Page 60

en Cleaning and servicing
ATTENTION!
Unsuitable cleaning products may
damage the surfaces of the appliance.
▶ Do not use harsh or abrasive de-
tergents.
▶ Do not use cleaning agents con-
taining alcohol or spirits.
▶ Do not use hard scouring pads or
cleaning sponges.
Unsuitable cleaning and descaling
agents may damage the appliance.
▶ Do not use pure citric acid, vinegar
or any vinegar-based agents to de-
scale the appliance.
▶ Do not use descaling agent with
phosphoric acid.
▶ Only use cleaning tablets and de-
scaling tablets that have been spe-
cially developed for the appliance.
→"Accessories", Page48
Tips
¡ Wash new sponge cloths thor-
oughly to remove any salt adher-
ing to them. Salt can cause rust
film to develop on stainless steel
surfaces.
¡ Always remove any residues of
limescale, coffee, milk and clean-
ing/descaling solutions immedi-
ately to prevent corrosion.
15.3 Cleaning the appliance
WARNING
Risk of electric shock!
An ingress of moisture can cause an
electric shock.
▶ Never immerse the appliance or
the power cord in water.
▶ Liquids must not be spilled on the
appliance plug connection.
▶ Do not use steam- or high-pres-
sure cleaners to clean the appliance.
WARNING
Risk of burns!
Some parts of the appliance become
very hot.
▶ Never touch hot appliance parts.
▶ Allow hot appliance parts to cool
down before touching.
1. Clean the housing, the high-gloss
surfaces and the control panel with
the enclosed microfibre cloth.
2. Clean the beverage outlet with a
soft, damp cloth after beverages
have been dispensed.
3. Rinse the water tank with fresh,
clean water.
4. If the appliance has not been used
for a long time, e.g. after a holiday,
clean the entire appliance, including moving parts such as the brewing unit or water tank.
Note:The appliance will rinse itself
automatically if you switch it on when
it is cold or switch it off after it has
dispensed coffee. The system is
therefore self-cleaning.
60
Page 61

Cleaning and servicing en
15.4 Cleaning the drip tray
and coffee dregs container
Clean and empty the drip tray and
coffee dregs container every day to
prevent deposits. Follow the illustrated instructions at the beginning of
this manual.
→Fig. 26-
28
15.5 Cleaning the milk con-
tainer
Clean the milk container regularly for
hygiene reasons. You can clean the
milk container in the dishwasher. Follow the illustrated instructions at the
beginning of this manual.
→Fig. 19-
22
15.6 Service programmes
Use the service programmes if you
insert or remove a water filter or in
order to clean your appliance thoroughly. Your appliance will tell you
when you need to perform a service
programme, e.g. cleaning.
ATTENTION!
Improper cleaning and descaling or a
delay in doing so may damage the
appliance.
▶ Immediately perform the descaling
process in accordance with the in-
structions.
▶ Only put cleaning tablets in the
brew chamber of the brewing unit.
▶ Do not put descaling tablets or
other products in the brew cham-
ber of the brewing unit.
Notes
¡ The display indicates the progress
of the descaling or cleaning pro-
cess.
¡ If your appliance has been locked,
you can only operate it again once
the descaling process has been
carried out.
Tip:In addition to the automatic rinsing process, regularly also remove
and clean the brewing unit.
Using the service programmes
1. Select "Care & maintenance".
2. Press "Care & maintenance".
a The display shows a list.
3. Press the required programme.
a The display will guide you through
the programme.
Overview of service programmes
You can find an overview of the service programmes here.
Note:The start image shows the remaining number of beverages that
can be dispensed until running the
programme and the duration.
INTENZA filter
Milk system
cleaning
Insert, replace or remove the water filter.
Rinse the milk system automatically.
calc'nClean Combine cleaning
and descaling. Remove residues of
limescale and coffee
from the pipes.
Cleaning Remove residues of
coffee from the
pipes.
Descaling Remove residues of
limescale from the
pipes.
Frost protection
Drain the pipes to
protect the appliance
during transport or
storage.
61
Page 62

en Cleaning and servicing
Brewing unit
cleaning
Beverage
system cleaning
The display shows
optimum cleaning of
the brewing unit step
by step.
The display shows
optimum cleaning of
the outlet step by
step.
If a service programme is interrupted, e.g. due to a
power failure, the appliance will rinse itself automatically.
The appliance is
then ready for use
again.
Tips
¡ If you are starting the "Descaling"
or "calc'nClean" programme, keep
a container with a capacity of min.
0,5l at the ready.
¡ If you use a water filter, this will
prolong the time until you have to
run a service programme.
¡ You can combine "Descaling" and
"Cleaning" with the "calc'nClean"
service programme.
62
Page 63

Troubleshooting en
16 Troubleshooting
You can rectify minor faults on your appliance yourself. Read the troubleshooting information before contacting after-sales service. This will avoid unnecessary costs.
WARNING
Risk of electric shock!
Incorrect repairs are dangerous.
▶ Repairs to the appliance should only be carried out by trained specialist
staff.
▶ Only use genuine spare parts when repairing the appliance.
▶ If the power cord of this appliance is damaged, it must be replaced with a
special connection cable, which is available from the manufacturer or his
Customer Service.
Fault Cause and troubleshooting
HomeConnect is not
working properly.
Appliance only dispenses water, not coffee.
Appliance is not dispensing milk froth.
Different causes are possible.
▶ Go to www.home-connect.com.
Empty bean container is not detected by the appliance.
▶ Pour in coffee beans.
Coffee shaft on brewing unit is blocked.
▶ Clean the brewing unit.
Beans are too oily and are not falling into thegrinder.
▶ Gently tap the bean container.
▶ Change the coffee variety.
▶ Do not use oily beans.
▶ Clean the empty bean container with a damp cloth.
Brewing unit is not inserted properly.
1. Check whether the brewing unit is inserted correctly
and is securely locked.
2. Push the red lever up to the left.
3. Insert the brewing unit cover.
Milk system is soiled.
▶ Clean the milk system in the dishwasher.
Milk tube not immersed in milk.
▶ Use more milk.
▶ Check whether the milk tube is immersed in the
milk.
Heavy build-up of limescale in the appliance.
▶ Descale the appliance.
63
Page 64

en Troubleshooting
Fault Cause and troubleshooting
No milk intake by the
milk system.
The milk system is assembled incorrectly.
▶ Assemble the milk system correctly.
Milk tube not immersed in milk.
▶ Use more milk.
▶ Check whether the milk tube is immersed in the
milk.
Milk froth is too cold. Milk is too cold.
▶ Use lukewarm milk.
Appliance is not dispensing hot water.
Appliance is not dispensing drinks.
Beverage dispenser is soiled.
▶ Clean the beverage dispenser in the dishwasher.
Air is in the water filter.
1. Immerse the water filter in water with the opening
facing upwards until no more air bubbles escape.
2. Reinsert the filter.
▶ Firmly press the water filter straight down into the
tank connection.
Residues of limescale remover are blocking the water
tank.
1. Remove the water tank.
2. Clean the water tank thoroughly.
There is dripping water on the inner floor
of the appliance.
Brewing unit cannot
be removed.
Drip tray was removed too soon.
▶ Wait a few seconds after the last drink was dis-
pensed before removing the drip tray.
Locking device cannot be released, brewing unit is
jammed.
▶ Switch the appliance off and back on after
3minutes.
Grinder won't start. Appliance is too hot.
1. Disconnect the appliance from the mains.
2. Wait 1hour so the appliance can cool down.
Grinder is not grinding
any coffee beans despite full bean container.
Coffee or milk froth
quality varies widely.
Beans are too oily and are not falling into thegrinder.
▶ Gently tap the bean container.
▶ Change the coffee variety.
▶ Do not use oily beans.
▶ Clean the empty bean container with a damp cloth.
Build-up of limescale in the appliance.
▶ Descale the appliance.
64
Page 65

Fault Cause and troubleshooting
Milk froth quality varies widely.
Milk froth quality depends on the type of milk or plantbased alternative used.
▶ Optimise the result through the selection of the milk
or vegetable-based drink type.
Coffee is not dispensed or has slowed
to a trickle.
Set quantity is not
reached.
Grinding level is set too fine.
▶ Set a coarser grinding level.
Heavy build-up of limescale in the appliance.
▶ Descale the appliance.
Air is in the water filter.
1. Immerse the water filter in water with the opening
facing upwards until no more air bubbles escape.
2. Reinsert the filter.
Appliance is soiled.
▶ Clean the brewing unit.
▶ Descale and clean the appliance.
Coffee has no crema. Type of coffee is not optimal.
▶ Use a coffee variety with a higher proportion of Ro-
busta beans.
▶ Use beans with a darker roast.
Beans are no longer fresh.
▶ Use fresh beans.
Grinding level is not appropriate for coffee beans.
▶ Adjust the grinder to a finer setting.
Coffee is too acidic. Grinding level is set too coarse.
▶ Adjust the grinder to a finer setting.
Type of coffee is not optimal.
▶ Use a coffee variety with a higher proportion of Ro-
busta beans.
▶ Use beans with a darker roast.
Coffee is too bitter. Grinding level is set too fine.
▶ Set a coarser grinding level.
Type of coffee is not optimal.
▶ Change the coffee variety.
Coffee tastes burnt. Grinding level is set too fine.
▶ Set a coarser grinding level.
Type of coffee is not optimal.
▶ Change the coffee variety.
Coffee temperature setting is too high.
Troubleshooting en
65
Page 66

en Troubleshooting
Fault Cause and troubleshooting
Coffee tastes burnt. ▶ Set the coffee temperature lower.
Coffee grounds are
not compact and are
too wet.
Display shows "Please
insert brewing unit.".
The grinding level is not set optimally.
▶ Adjust the grinder to a coarser or finer setting.
Beans are too oily.
▶ Use a different type of bean.
Cover is wrongly inserted.
1. Check whether the brewing unit is inserted correctly
and is securely locked.
2. Push the red lever up to the left.
3. Insert the brewing unit cover.
Display shows "Please
fill water tank." despite
the fact that the water
tank is full.
Water tank is wrongly inserted.
▶ Insert the water tank correctly.
Carbonated water is in the water tank.
▶ Fill the water tank with fresh tap water.
Float is stuck in the water tank.
1. Remove the water tank.
2. Clean the water tank thoroughly.
New water filter was not rinsed as per instructions.
1. Rinse the water filter according to the instructions.
2. Place the water filter into operation.
Air is in the water filter.
1. Immerse the water filter in water with the opening
facing upwards until no more air bubbles escape.
2. Reinsert the filter.
Water filter is old.
▶ Insert a new water filter.
Limescale deposits in the water tank are blocking the
system.
1. Clean the water tank thoroughly.
2. Start the descaling programme.
Display shows "E61:
Please clean brewing
unit.".
Display shows "Incorrect voltage".
Brewing unit is soiled.
▶ Clean the brewing unit.
Mechanism of brewing unit is stiff.
▶ Clean the brewing unit.
There are problems with the power supply.
▶ Only operate the appliance at 220-240V.
66
Page 67
Fault Cause and troubleshooting
Display shows "Restart appliance".
Display shows
calc'nClean very frequently.
Appliance has a fault.
1. Set the mains switch to and wait 60seconds.
2. Set the mains switch to .
Decalcified water still contains small amounts of lime.
1. Insert a new water filter.
2. Set the corresponding water hardness.
Incorrect or too little descaling agent used.
▶ When descaling, only use suitable tablets.
Service programme has not been carried out in its entirety.
▶ Start the "Special rinsing step /" service pro-
gramme.
→"Service programmes", Page61
Troubleshooting en
67
Page 68

en Transportation, storage and disposal
17 Transportation, stor-
age and disposal
17.1 Activating frost protec-
tion
Protect your appliance from frost during transport and storage.
ATTENTION!
Residues of liquid in the appliance
may damage it during transport or
storage.
▶ Empty the pipe system before
transport or storage.
1. Run the "Frost protection" pro-
gramme.
→"Overview of service pro-
grammes", Page61
2. Disconnect the appliance from the
mains power supply.
17.2 Disposing of old appli-
ance
Valuable raw materials can be reused by recycling.
1. Unplug the appliance from the
mains.
2. Cut through the power cord.
3. Dispose of the appliance in an en-
vironmentally friendly manner.
Information about current disposal
methods are available from your
specialist dealer or local authority.
This appliance is labelled in accordance
with European Directive
2012/19/EU concerning
used electrical and electronic appliances (waste
electrical and electronic
equipment - WEEE).
The guideline determines the framework for
the return and recycling
of used appliances as
applicable throughout
the EU.
18 Customer Service
Function-relevant genuine spare parts
according to the corresponding Ecodesign Order can be obtained from
Customer Service for a period of at
least 7 years from the date on which
your appliance was placed on the
market within the European Economic Area.
Note:Under the terms of the manufacturer's warranty the use of Customer Service is free of charge.
Detailed information on the warranty
period and terms of warranty in your
country is available from our aftersales service, your retailer or on our
website.
If you contact Customer Service, you
will require the product number (ENr.), the production number (FD) and
the consecutive numbering (Z-Nr.) of
your appliance.
The contact details for Customer Service can be found in the enclosed
Customer Service directory or on our
website.
18.1 Product number (E-Nr.),
production number (FD)
and consecutive numbering (Z-Nr.)
You can find the product number (ENr.), the production number (FD) and
the consecutive numbering (Z-Nr.) on
the appliance's rating plate.
68
Page 69

Technical specifications en
Make a note of your appliance's details and the Customer Service telephone number to find them again
quickly.
19 Technical specifica-
tions
Voltage 220–
240V∼
Frequency 50/ 60Hz
Connection rating 1500W
Maximum static pump
pressure
Maximum capacity of
water tank (without filter)
Maximum capacity of
bean container
Length of the power
cable
Appliance height 44,6cm
Appliance width 59,4cm
Appliance depth 39,6cm
Weight, empty 20,6kg
Type of grinder Ceramic
This product contains light sources
from energy efficiency classes D and
F. These light sources are available
as spare parts and may only be replaced by trained specialist staff.
20bar
2,2l
400g
170cm
19.1 Information regarding Free and Open Source Software
This product includes software components that are licensed by the
copyright holders as free or open
source software.
The applicable licence information is
stored on your home appliance. You
can also access the applicable licence information via your
HomeConnect app: "Profile -> Legal
information -> Licence Information".
You can download the licence information on the brand product website. (Please search on the product
website for your appliance model
and additional documents). Alternatively, you can request the relevant information from oss[email protected] or BSH Hausgeräte GmbH, Carl-Wery-Str. 34, 81739
Munich, Germany.
The source code will be made available to you on request.
Please send your request to oss[email protected] or BSH Hausgeräte GmbH, Carl-Wery-Str.34, 81739
Munich, Germany.
Subject: „OSSREQUEST“
The cost of performing your request
will be charged to you. This offer is
valid for three years from the date of
purchase or at least as long as we
offer support and spare parts for the
relevant appliance.
1
1
Depending on the appliance specifications
20 Declaration of Con-
formity
BSH Hausgeräte GmbH hereby declares that the appliance with Home
Connect functionality conforms to the
69
Page 70

en Declaration of Conformity
basic requirements and other relevant provisions of Directive 2014/53/
EU.
A detailed RED Declaration of Conformity can be found online at
A detailed Declaration of Conformity
can be found online at www.boschhome.co.uk among the additional
documents on the product page for
your appliance.
1
www.bosch-home.com among the
additional documents on the product
page for your appliance.
Only applies to Great Britain
2.4 GHz band (2400–2483.5MHz):
Max. 100mW
Hereby, BSH Hausgeräte GmbH declares that the appliance with
5 GHz band (5150–5350MHz +
5470–5725MHz): Max. 100mW
HomeConnect functionality is in
compliance with relevant statutory
requirements.
1
BE BG CZ DK DE EE IE EL ES
FR HR IT CY LI LV LT LU HU
MT NL AT PL PT RO SI SK FI
SE NO CH TR IS UK (NI)
5GHz WLAN (Wi-Fi): For indoor use only.
AL BA MD ME MK RS UK UA
5GHz WLAN (Wi-Fi): For indoor use only.
1
Only applies to Great Britain
70
Page 71

Per ulteriori informazioni, si prega di fare riferimento alla Guida utente digitale.
Indice
it
1 Sicurezza ...................................73
1.1 Avvertenze generali................. 73
1.2 Utilizzo conforme all'uso pre-
visto ......................................... 73
1.3 Limitazione di utilizzo............... 73
1.4 Installazione sicura.................. 74
1.5 Utilizzo sicuro .......................... 75
2 Prevenzione
di danni materiali ......................78
3 Tutela dell'ambiente e rispar-
mio .............................................78
3.1 Smaltimento dell’imballaggio .. 78
3.2 Risparmio energetico.............. 78
4 Installazione e allacciamento ...78
4.1 Contenuto della confezione .... 78
4.2 Montaggio e allacciamento
dell'apparecchio ...................... 79
4.3 Collegamento elettrico
dell'apparecchio ...................... 79
5 Conoscere l'apparecchio..........79
5.1 Apparecchio............................ 79
5.2 Pannello di comando .............. 80
6 Accessori...................................81
7 Prima del primo utilizzo............81
7.1 Preparazione e pulizia
dell'apparecchio ...................... 81
7.2 Rilevare la durezza dell’ac-
qua .......................................... 82
7.3 Filtro dell'acqua1...................... 82
7.4 Procedura per la prima mes-
sa in funzione .......................... 83
7.5 Avvertenze generali................. 83
8 Comandi di base .......................83
8.1 Accensione o spegnimento
dell'apparecchio ...................... 83
8.2 Erogazione delle bevande....... 84
8.3 DoubleShot e TripleShot ......... 84
8.4 Erogazione di bevande al
caffè con latte.......................... 84
8.5 Preparazione di due tazze
contemporaneamente ............. 85
9 Macinacaffè ...............................85
9.1 Regolazione del grado di
macinatura............................... 85
10 Piano d'appoggio contenito-
re per latte ...............................86
10.1 Utilizzo del piano d'appog-
gio del contenitore per latte .. 86
10.2 Utilizzo del proprio conteni-
tore del latte1......................... 86
11 Sicurezza bambini...................86
11.1 Attivazione della sicurezza
bambini.................................. 86
11.2 Disattivazione sicurezza
bambini.................................. 86
12 Preferiti ....................................86
12.1 Creazione dei Preferiti dal
menu dei Preferiti .................. 87
12.2 Creare i Preferiti da Classi-
ci o Coffee World .................. 87
12.3 Modifica di un Preferito ......... 87
1
In funzione dell'allestimento dell'apparecchio
71
Page 72

it
12.4 Eliminazione di un Preferito... 87
12.5 Ordinamento dei Preferiti ...... 87
13 HomeConnect ........................87
13.1 Configurazione dell'app Ho-
meConnect........................... 88
13.2 Configurazione di Ho-
meConnect........................... 88
13.3 Impostazioni HomeCon-
nect........................................ 88
13.4 Ricerca guasti remota........... 89
13.5 Protezione dei dati ................ 89
14 Impostazioni di base...............90
14.1 Modifica le impostazioni........ 90
14.2 Panoramica Impostazioni...... 90
15 Pulizia e cura ...........................92
15.1 Idoneità per il lavaggio in
lavastoviglie........................... 92
15.2 Detersivi................................. 93
15.3 Pulizia dell’apparecchio ........ 93
15.4 Lavaggio del raccogligocce
e del contenitore dei fondi
di caffè................................... 94
15.5 Pulizia del contenitore per
latte........................................ 94
15.6 Programmi di servizio............ 94
16 Sistemazione guasti................96
17 Trasporto, immagazzina-
mento e smaltimento .............101
17.1 Attivazione della protezione
antigelo.................................101
17.2 Rottamazione di un appa-
recchio dismesso .................101
18 Servizio di assistenza clienti.101
18.1 Codice prodotto (E-Nr.), codice di produzione (FD) e
numero progressivo (Z-Nr.)..102
19 Dati tecnici..............................102
19.1 Informazioni sul software li-
bero e open source..............102
20 Dichiarazione di conformità ..103
72
Page 73

Sicurezza it
1 Sicurezza
Osservare le seguenti avvertenze di sicurezza.
1.1 Avvertenze generali
¡ Leggere attentamente le presenti istruzioni.
¡ Conservare le istruzioni e le informazioni sul prodotto per il suc-
cessivo utilizzo o per il futuro proprietario.
¡ Non collegare l'apparecchio se ha subito danni durante il tra-
sporto.
1.2 Utilizzo conforme all'uso previsto
Utilizzare l'apparecchio soltanto:
¡ per preparare bevande calde.
¡ in case private e in locali chiusi in ambito domestico;
¡ fino a un'altitudine di massimo 2000m sul livello del mare.
1.3 Limitazione di utilizzo
Questo apparecchio può essere utilizzato da bambini di età pari o
superiore a 8 anni e da persone con ridotte facoltà fisiche, sensoriali o mentali o prive di sufficiente esperienza e/o conoscenza se
sorvegliati o già istruiti in merito all'utilizzo sicuro dell'apparecchio
e se hanno compreso i rischi da esso derivanti.
I bambini non devono giocare con l'apparecchio.
La pulizia e la manutenzione di competenza dell’utente non devono essere eseguite da bambini, a meno che non abbiano un’età
di 8 anni o superiore e non siano sorvegliati.
Tenere lontano dall'apparecchio e dal cavo di alimentazione i
bambini di età inferiore agli 8 anni.
73
Page 74

it Sicurezza
1.4 Installazione sicura
AVVERTENZA‒Pericolo di scosse elettriche!
Le installazioni effettuate in modo non appropriato costituiscono
un pericolo.
▶ Collegare e utilizzare l’apparecchio solo in conformità con i dati
indicati sulla targhetta identificativa.
▶ Utilizzare sempre il cavo di collegamento, fornito in dotazione,
del nuovo apparecchio.
▶ Collegare l'apparecchio a una rete a corrente alternata soltanto
con una presa con messa a terra installata a norma.
▶ Ilsistema delconduttore diprotezione dell’impianto elettrico do-
mestico deve essere installato anorma.
Un apparecchio o un cavo di alimentazione danneggiati costituiscono un pericolo.
▶ Non mettere mai in funzione un apparecchio danneggiato.
▶ Non utilizzare mai un apparecchio con la superficie danneggia-
ta.
▶ Non tirare mai il cavo di collegamento alla rete elettrica per
staccare l'apparecchio dalla rete elettrica. Staccare sempre la
spina del cavo di alimentazione.
▶ Se l'apparecchio o il cavo di alimentazione è danneggiato, stac-
care subito la spina di alimentazione del cavo di alimentazione
e spegnere il fusibile nella scatola dei fusibili.
▶ Rivolgersi al servizio di assistenza clienti. →Pagina 101
Gli interventi di riparazione effettuati in modo non appropriato rappresentano una fonte di pericolo.
▶ Solo il personale adeguatamente specializzato e formato può
eseguire riparazioni sull'apparecchio.
▶ Per la riparazione dell'apparecchio possono essere impiegati
soltanto pezzi di ricambio originali.
▶ Se il cavo di collegamento alla rete dell'apparecchio viene dan-
neggiato, deve essere sostituito con un cavo di collegamento
speciale, reperibile presso il produttore o il relativo servizio di
assistenza clienti.
74
Page 75
Sicurezza it
1.5 Utilizzo sicuro
AVVERTENZA‒Pericolo di soffocamento!
I bambini potrebbero mettersi in testa il materiale di imballaggio o
avvolgersi nello stesso, rimanendo soffocati.
▶ Tenere lontano il materiale di imballaggio dai bambini.
▶ Vietare ai bambini di giocare con materiali d’imballaggio.
I bambini possono inspirare o ingoiare le parti piccole, rimanendo
soffocati.
▶ Tenere i bambini lontano dalle parti piccole.
▶ Non lasciare che i bambini giochino con le parti piccole.
AVVERTENZA‒Pericolo di scosse elettriche!
L'infiltrazione di umidità può provocare una scarica elettrica.
▶ Non immergere mai l'apparecchio o il cavo di alimentazione
nell'acqua.
▶ Il connettore dell'apparecchio non deve venire a contatto con li-
quidi.
▶ Utilizzare l'apparecchio esclusivamente in luoghi chiusi.
▶ Non esporre mai l'apparecchio a calore e umidità eccessivi.
▶ Non lavare l'apparecchio con pulitori a vapore o idropulitrici.
AVVERTENZA‒Pericolo di incendio!
L'apparecchio diventa molto caldo.
▶ Aerare sufficientemente l'apparecchio.
▶ Non far funzionare mai l'apparecchio con l'anta del mobile chiu-
sa.
È pericoloso utilizzare un cavo di alimentazione con una prolunga
e un adattatore non ammesso.
▶ Non utilizzare cavi di prolunga o prese multiple.
▶ Utilizzare esclusivamente gli adattatori e i cavi di alimentazione
approvati dal produttore.
▶ Se il cavo di alimentazione è troppo corto e non è disponibile
un cavo di alimentazione più lungo, contattare un elettricista per
modificare l'installazione domestica.
75
Page 76

it Sicurezza
AVVERTENZA‒Pericolo di ustioni!
Alcune parti dell'apparecchio diventano molto calde.
▶ Non toccare mai le parti calde dell'apparecchio.
▶ Dopo l'uso lasciar raffreddare le parti calde dell'apparecchio pri-
ma di toccarle.
AVVERTENZA‒Pericolo di scottature!
Appena erogate, le bevande sono bollenti.
▶ Eventualmente lasciar raffreddare le bevande.
▶ Evitare il contatto della pelle con i liquidi e i vapori che fuorie-
scono.
L'avvio a distanza involontario tramite l'app Home Connect può
causare ustioni a terzi.
▶ Durante l'erogazione della bevanda non toccare l'erogatore del
caffè.
▶ Tenere le persone, in particolare i bambini, lontani dall’apparec-
chio.
AVVERTENZA‒Pericolo di lesioni!
Un utilizzo non corretto dell'apparecchio può mettere in pericolo
l'utente.
▶ Per evitare lesioni, utilizzare l'apparecchio soltanto conforme-
mente all'uso previsto.
Pericolo che le dita rimangano incastrate durante la chiusura dello
sportello dell'apparecchio.
▶ Prestare attenzione alle dita quando si chiude lo sportello
dell'apparecchio.
Il macinacaffè ruota.
▶ Non introdurre mai le mani nel macinacaffè.
76
Page 77

Sicurezza it
AVVERTENZA‒Pericolo: magnetismo!
Attenzione campi magnetici
Attenzione per le persone con pacemaker
L'apparecchio contiene magneti permanenti che possono interferire con gli impianti elettronici, quali ades. pacemaker o pompe di
insulina.
▶ I portatori di impianti elettronici devono mantenersi a una distan-
za minima di 10cm dall'apparecchio e dal suo sportello.
▶ Mantenere una distanza minima di 10cm anche dal serbatoio
d'acqua, dal contenitore per latte, dal contenitore per i fondi di
caffè, dal coperchio dell'erogatore bevande, dal distributore bevande, dall'erogatore bevande, dal supporto del sistema per il
latte, dalla copertura del vano di infusione e dall'unità di infusione.
AVVERTENZA‒Pericolo di danni alla salute!
La sporcizia sull'apparecchio può nuocere alla salute.
▶ Osservare le istruzioni per la pulizia dell'apparecchio per assicu-
rare l'igiene.
77
Page 78

it di danni materiali
A
di danni materiali
2 Prevenzione
di danni materiali
di danni materiali
ATTENZIONE!
Pericolo di danni all'apparecchio.
Una messa in funzione non corretta
può provocare danni all'apparecchio.
▶ tilizzare il dispositivo solo in am-
bienti non soggetti a gelo.
▶ Se l'apparecchio è stato trasporta-
to o immagazzinato al di sotto di
0°C, prima di metterlo in funzione
attendere 3ore a temperatura ambiente.
▶ Dopo ogni collegamento attendere
ca.5secondi.
Il montaggio non conforme può causare danni materiali.
▶ Osservare le istruzioni per il mon-
taggio dell'apparecchio soprastan-
te o sottostante.
▶ In caso di montaggio sopra uno
scaldavivande è necessaria un’al-
tezza della nicchia di 590mm.
I mobili non fissati possono ribaltarsi.
▶ Fissare il mobile alla parete con un
angolare disponibile in commercio.
3.2 Risparmio energetico
Osservando queste avvertenze l'apparecchio consuma meno energia
elettrica.
Impostare lo spegnimento automatico al valore più piccolo.
a
Se l'apparecchio non viene utilizzato, si spegne prima.
→"Impostazioni di base", Pagina
90
Non interrompere l'erogazione della
bevanda prima del tempo.
a
La quantità riscaldata di acqua o
latte viene utilizzata in modo ottimale.
Decalcificare regolarmente l'apparecchio.
a
I depositi di calcare aumentano il
consumo di energia.
4 Installazione e allaccia-
mento
3 Tutela dell'ambiente e
risparmio
3.1 Smaltimento dell’imbal-
laggio
I materiali dell'imballaggio sono rispettosi dell'ambiente e possono essere riutilizzati.
▶ Smaltire lesingole parti distinta-
mente secondo iltipo dimateriale.
78
4.1 Contenuto della confezione
Dopo il disimballaggio controllare
che tutti i componenti siano presenti
e che non presentino danni dovuti al
trasporto.
Nota:A seconda del tipo di apparecchio sono forniti diversi accessori.
Questo accessorio è caratterizzato
da un telaio tratteggiato.
→Fig.
1
Macchina automatica da caffè
1
In funzione dell'allestimento
dell'apparecchio
Page 79

Conoscere l'apparecchio it
B
C
D
E
F
G
H
I
J
1
2
3
4
5
6
7
8
9
10
11
12
13
14
Contenitore del latte
Tubicino del latte e tubicino
aspirazione
Istruzioni per il montaggio
Pastiglia detergente
Pastiglia decalcificante
Filtro dell'acqua
Strisce per la misurazione del-
la durezza dell’acqua
Istruzioni per l'uso
Panno in microfibra
1
In funzione dell'allestimento
dell'apparecchio
1
1
1
4.2 Montaggio e allacciamento dell'apparecchio
Le istruzioni per il montaggio descrivono diversi modelli che possono differire in termini di dotazione e di
montaggio.
Nota:Osservare le informazioni relative alla sicurezza →Pagina 73 e alla
prevenzione di danni materiali
→Pagina 78.
▶ Montare e collegare l'apparecchio
conformemente alle istruzioni per il
montaggio contenute nella confezione.
5 Conoscere l'apparec-
chio
5.1 Apparecchio
Di seguito è riportata una panoramica dei componenti dell'apparecchio.
Nota:A seconda del modello è possibile che vi siano alcune differenze
per quanto concerne colori e vari dettagli.
Vista dall'esterno
→Fig.
Vista dall'interno
→Fig.
2
Piano d'appoggio, removibile
Illuminazione
Pannello di comando
Erogatore bevanda, regolabile
in altezza
Sportello dell'apparecchio
Distributore bevande
Coperchio dell'erogatore be-
vande
3
Vaschetta di raccolta
Targhetta identificativa
4.3 Collegamento elettrico dell'apparecchio
1. Collegare la spina del cavo di al-
lacciamento alla rete all'apparecchio.
2. Inserire la spina del cavo di allac-
ciamento alla rete dell'apparecchio
a una presa vicina.
3. Controllare il corretto posiziona-
mento della spina.
Serbatoio d'acqua con coperchio
Interruttore principale
Cassetto accessori
Contenitore per caffè in grani
con coperchio
Impostazione del grado di
macinatura
79
Page 80

it Conoscere l'apparecchio
15
16
17
18
19
20
21
22
23
Supporto, sistema per il latte,
magnetico
Copertura del vano di infusione
Unità di infusione
Contenitore del latte
Sistema latte
Piano d'appoggio per il reci-
piente del latte, rimovibile
Contenitore fondi di caffè
Vaschetta raccogligocce
Coperchio del raccogli gocce
5.2 Pannello di comando
Il pannello di comando consente di
impostare tutte le funzioni dell'apparecchio e di ottenere informazioni sullo stato di esercizio.
Accensione o spegnimento dell'apparecchio.
¡ Uscire dalle imposta-
zioni menu.
¡ Tornare indietro al me-
nu Start.
Avviare o arrestare il
programma.
Preferiti Selezionare le bevande
salvate con le impostazioni personali. →Pagina
86
Classici Selezionare le bevande
standard.
Coffee
World
Cura e
manutenzione
Selezionare le bevande
base, che sono ampliabili in collegamento con
Home Connect.
Richiamare i programmi
di servizio.
Impostazioni
Scelta rapida nella selezione delle
bevande
Informazioni
Impostazioni bevanda
Apertura o chiusura delle impostazioni.
Scelta rapida direttamente in "Preferiti"
Scelta rapida direttamente in "Classici"
Scelta rapida direttamente in "Coffee World"
Servizio di assistenza
clienti
L'apparecchio è collegato a HomeConnect.
L'apparecchio non è collegato a HomeConnect.
L'apparecchio non dispone di alcun collegamento al server.
La funzione Playlist è attivata nell'app HomeConnect.
Controllare il contenitore
del latte.
Versare i chicchi.
Riempimento acqua.
"Modalità demo" è attiva-
ta.
Quantità
Intensità
Aroma
Contenuto di latte
Temperatura
80
Page 81

Accessori it
Funzionamento
Indietro nel menu.
Aggiungi ai preferiti.
Eliminazione di un Prefe-
rito.
Erogazione di due tazze.
Scelta rapida
Aprire la scelta rapida.
Attivare o disattivare la
sicurezza bambini.
Attivare o disattivare il
WiFi.
6 Accessori
Utilizzare gli accessori originali in quanto prodotti appositamente per questo
apparecchio.
Accessori Rivenditori Servizio di assi-
stenza clienti
Pastiglie detergenti TCZ8001A 00312096
Pastiglie decalcificanti TCZ8002A 00312093
Filtro dell'acqua TCZ7003 00575491
Panno in microfibra - 00460770
Kit di pulizia TCZ8004A 00312107
Limitazione dell'angolo di apertura
92°
- 10020041
utilizzo
7 Prima del primo utilizzo
utilizzo
Preparare l'apparecchio per l'uso.
7.1 Preparazione e pulizia dell'apparecchio
Pulire l'apparecchio e i singoli componenti. Seguire la guida per immagini all'inizio di queste istruzioni.
ATTENZIONE!
Il caffè in chicchi non adatti può intasare il macinacaffè.
▶ Utilizzare esclusivamente miscele
di caffè tostato in chicchi per
espresso o per macchine completamente automatiche.
▶ Non utilizzare chicchi di caffè glas-
sati.
▶ Non utilizzare chicchi di caffè cara-
mellati.
▶ Non utilizzare chicchi di caffè trat-
tati con additivi contenenti zucchero.
▶ Non riempire con caffè in polvere.
→Fig. 4-
23
Nota:Riempire quotidianamente il
serbatoio dell'acqua con acqua fresca fredda non gassata.
81
Page 82

it utilizzo
Consiglio:Per mantenere al meglio
la qualità conservare i chicchi di caffè in un contenitore chiuso e al fresco.
I chicchi di caffè possono essere
conservati per diversi giorni nel contenitore dei chicchi di caffè senza
perdere l'aroma.
7.2 Rilevare la durezza dell’acqua
L’impostazione corretta della durezza
dell’acqua è importante affinché l’apparecchio possa indicare per tempo
che è necessario eseguire la decalcificazione. È possibile determinare la
durezza dell'acqua con la striscia di
test acclusa oppure ci si può rivolgere alla società locale di distribuzione
dell'acqua.
1. Immergere brevemente la striscia
di test in acqua del rubinetto fresca.
2. Far sgocciolare.
3. Dopo 1minuto leggere la durezza
dell'acqua sulla striscia di test.
La tabella mostra i livelli assegnati
in base ai gradi di durezza dell'acqua:
Livel-loDurezza
tedesca in
°dH
1 1-7 < 1,3
2 8-14 1,3-2,5
3 15-21 2,5-3,8
1
4
1
22-30 > 3,8
Impostazione di fabbrica
Nota:Se l'abitazione è dotata di un
impianto per addolcire l'acqua, è
possibile impostare "Impianto addolcitore".
Durezza totale in mmol/l
Consiglio:Le impostazioni possono
essere modificate in qualsiasi momento.
→"Impostazioni di base", Pagina 90
7.3 Filtro dell'acqua
1
Con un filtro dell'acqua si riducono i
depositi di calcare e le impurità
nell'acqua.
Inserimento del filtro dell'acqua
ATTENZIONE!
Possibili danni all'apparecchio dovuti
al calcare.
▶ Sostituire il filtro dell'acqua quando
richiesto.
▶ Sostituire il filtro dell'acqua al mas-
simo dopo 2mesi.
▶ Osservare i messaggi sul display.
1. Selezionare "Cura e manutenzio-
ne".
2. Selezionare "Filtro INTENZA" e se-
guire le istruzioni sul display.
Sostituzione o rimozione del filtro dell'acqua
L'apparecchio può essere utilizzato
anche senza filtro dell'acqua.
1. Selezionare "Cura e manutenzio-
ne".
2. Selezionare "Filtro INTENZA".
3. Selezionare "Sostituisci" o "Rimuo-
vi" e seguire le istruzioni sul display.
Consigli
¡ Sostituire il filtro dell'acqua anche
per motivi igienici.
¡ Un filtro dell'acqua consente di ri-
durre la frequenza di decalcificazione dell'apparecchio.
¡ Usando un filtro dell'acqua si ottie-
ne una bevanda dal gusto più pieno.
1
In funzione dell'allestimento dell'apparecchio
82
Page 83

di base it
¡ Se l'apparecchio non è stato utiliz-
zato per un lungo periodo (ad es.
vacanza), prima di utilizzarlo sciacquare il filtro dell'acqua inserito
erogando una tazza di acqua calda.
¡ Il filtro dell'acqua è reperibile pres-
so i rivenditori oppure può essere
richiesto al servizio di assistenza
clienti.
→"Accessori", Pagina 81
7.4 Procedura per la prima messa in funzione
Dopo l'allacciamento alla corrente effettuare le impostazioni per la prima
messa in funzione dell'apparecchio.
La prima messa in funzione compare
solo alla prima accensione.
1. Aprire lo sportello dell’apparec-
chio.
2. Posizionare l'interruttore di rete su
.
→Fig.
3. Chiudere lo sportello dell'apparec-
chio.
4. Accendere l'apparecchio con e
attendere che abbia effettuato la
pulizia.
5. Seguire le istruzioni sul display.
a Il display guida attraverso l’esecu-
zione del programma.
Consiglio:Per visualizzare brevemente le informazioni premere
Note
¡ Per configurare HomeConnect se-
guire le istruzioni fornite nell'app
HomeConnect.
→"Configurazione di HomeCon-
nect", Pagina 88
¡ Quando è selezionato "Modalità
demo", funzionano solo le indicazioni sul display. Non è possibile
erogare bevande o eseguire un
programma.
24
.
7.5 Avvertenze generali
Seguire le istruzioni per utilizzare l'apparecchio in modo ottimale.
Note
¡ L’apparecchio è programmato
all’origine con regolazioni standard
per un funzionamento ottimale.
¡ Ogni volta che viene erogata una
bevanda la ventola integrata si attiva, per poi spegnersi ca. 5-7minuti dopo l'erogazione della bevanda.
¡ Il macinacaffè è impostato in fab-
brica per un funzionamento ottimale. Se il caffè viene erogato solo a
gocce o è troppo leggero e con
troppa poca crema, è possibile
modificare il grado di macinatura.
→"Regolazione del grado di maci-
natura", Pagina 85
¡ Se l'apparecchio non viene utilizza-
to per un determinato lasso di tempo, si spegne automaticamente. È
possibile modificare la durata nelle
impostazioni di base. →Pagina
90 È possibile modificare la durata nelle impostazioni di base.
¡ La prima bevanda non ha ancora
l'aroma pieno se:
– Si utilizza l'apparecchio per la
prima volta.
– È stato eseguito un programma
di servizio.
– L'apparecchio non è stato utiliz-
zato per un lungo periodo.
Non bere la bevanda.
di base
8 Comandi di base
di base
8.1 Accensione o spegnimento dell'apparecchio
Note
¡ Durante il funzionamento non azio-
nare l’interruttore di rete.
83
Page 84

it di base
¡ Prima di spegnere l'interruttore di
rete, spegnere l'apparecchio con
. Solo così l'apparecchio esegue
automaticamente il risciacquo.
▶ Premere .
All'accensione, il display mostra il
logo. All'accensione e allo spegnimento, l'apparecchio esegue automaticamente un risciacquo. Al momento dello spegnimento, l'apparecchio emette vapore per la pulizia nel raccogli gocce. Se, all'accensione, l'apparecchio è ancora
caldo o se, prima dello spegnimento, non è stata erogata nessuna bevanda, l'apparecchio non
esegue il risciacquo.
8.2 Erogazione delle bevande
Di seguito è descritta la procedura
per preparare una bevanda a scelta.
AVVERTENZA
Pericolo di scottature!
Appena erogate, le bevande sono
bollenti.
▶ Eventualmente lasciar raffreddare
le bevande.
▶ Evitare il contatto della pelle con i
liquidi e i vapori che fuoriescono.
Note
¡ In alcune impostazioni il caffè vie-
ne preparato in più fasi. Attendere
fino a quando la procedura è completamente conclusa.
¡ Per erogare una bevanda con lat-
te, collegare sempre un contenitore riempito di latte con il tubicino
del latte e il tubicino aspirazione.
¡ Il contenitore del latte è stato svi-
luppato appositamente per questo
apparecchio. Il contenitore del latte
è destinato esclusivamente alla
conservazione del latte in ambito
domestico e nel frigorifero.
¡ Se il sistema per il latte non viene
pulito, insieme all'acqua calda possono essere erogate piccole quantità di latte.
8.3 DoubleShot e TripleShot
L'apparecchio macina il caffè due o
tre volte.
Per fare in modo che vengano rilasciati solo gli aromi gustosi e ben digeribili, i chicchi di caffè vengono
nuovamente macinati e infusi.
Un’infusione prolungata produce un
caffè più amaro e con aromi indesiderati, che ne compromettono sapore e digeribilità.
Nota:Le funzioni "DoubleShot" e "TripleShot" dipendono dall'intensità e
dal formato della bevanda selezionati.
8.4 Erogazione di bevande al caffè con latte
Di seguito un esempio di preparazione di un Latte Macchiato.
AVVERTENZA
Pericolo di ustioni!
Il sistema per il latte diventa molto
caldo.
▶ Non toccare mai il sistema per il
latte caldo.
▶ Far raffreddare il sistema per il lat-
te caldo prima di toccarlo.
Requisiti
¡ Il contenitore per latte è inserito.
¡ Il sistema per il latte è collegato al
distributore bevande.
¡ Il contenitore per latte è riempito
con sufficiente latte.
1. Mettere un bicchiere sotto l'eroga-
tore bevande.
2. Selezionare "Classici" e premere
"Classici".
84
Page 85

Macinacaffè it
3. Selezionare "Latte macchiato" e
premere "Latte macchiato".
4. Impostate i parametri bevanda.
‒ Per modificare la quantità desi-
derata , premere i segmenti.
‒ Per modificare l'intensità, preme-
re ed impostare tramite i segmenti.
‒ Per modificare la quantità di lat-
te, premere ed impostare tramite i segmenti.
5. Premere e attendere finché la
procedura non è conclusa.
‒ Per arrestare completamente
l'erogazione della bevanda, premere
‒ Per arrestare la fase di erogazio-
.
ne in corso, premere "Salta".
Note
¡ Se non si modifica alcuna imposta-
zione per ca. 30secondi, l'apparecchio chiude la modalità di impostazione.
¡ L'apparecchio salva le impostazio-
ni automaticamente.
Consigli
¡ Prima dell'erogazione si possono
preriscaldare le tazze anche con
acqua calda.
¡ È possibile utilizzare anche bevan-
de vegetali al posto del latte, ad
esempio latte di soia.
¡ La qualità della schiuma di latte di-
pende dal tipo utilizzato di latte o
bevanda vegetale.
8.5 Preparazione di due tazze contemporaneamente
A seconda della bevanda, è possibile
preparare 2 tazze contemporaneamente.
Nota:Se sono attive le funzioni "DoubleShot" o "TripleShot", la funzione di
preparazione di due tazze contemporaneamente non è possibile.
1. Selezionare la bevanda desiderata.
2. Premere
.
a Il display mostra l'impostazione .
3. Posizionare due tazze a sinistra e
a destra sotto l'erogatore bevande.
4. Premere
.
La bevanda viene preparata in 2
fasi. I chicchi vengono macinati in
2 fasi.
a La bevanda passa in infusione e
scende quindi nelle tazze.
5. Attendere fino a quando la proce-
dura non è conclusa.
9 Macinacaffè
L'apparecchio è dotato di un macinacaffè regolabile che permette di personalizzare il grado di macinatura dei
chicchi di caffè.
9.1 Regolazione del grado di macinatura
▶ Regolare il grado di macinatura
con il cursore tra molto fine
molto grosso .
→Fig.
25
Modificare appena l'impostazione
del grado di macinatura.
La regolazione del grado di macinatura diventa effettiva soltanto dopo la seconda tazza.
Consiglio:Se il caffè viene erogato
solo a gocce, impostare un grado di
macinatura più grosso.
Se il caffè è troppo leggero e ha troppa poca crema, impostare un grado
di macinatura più fine.
e
85
Page 86
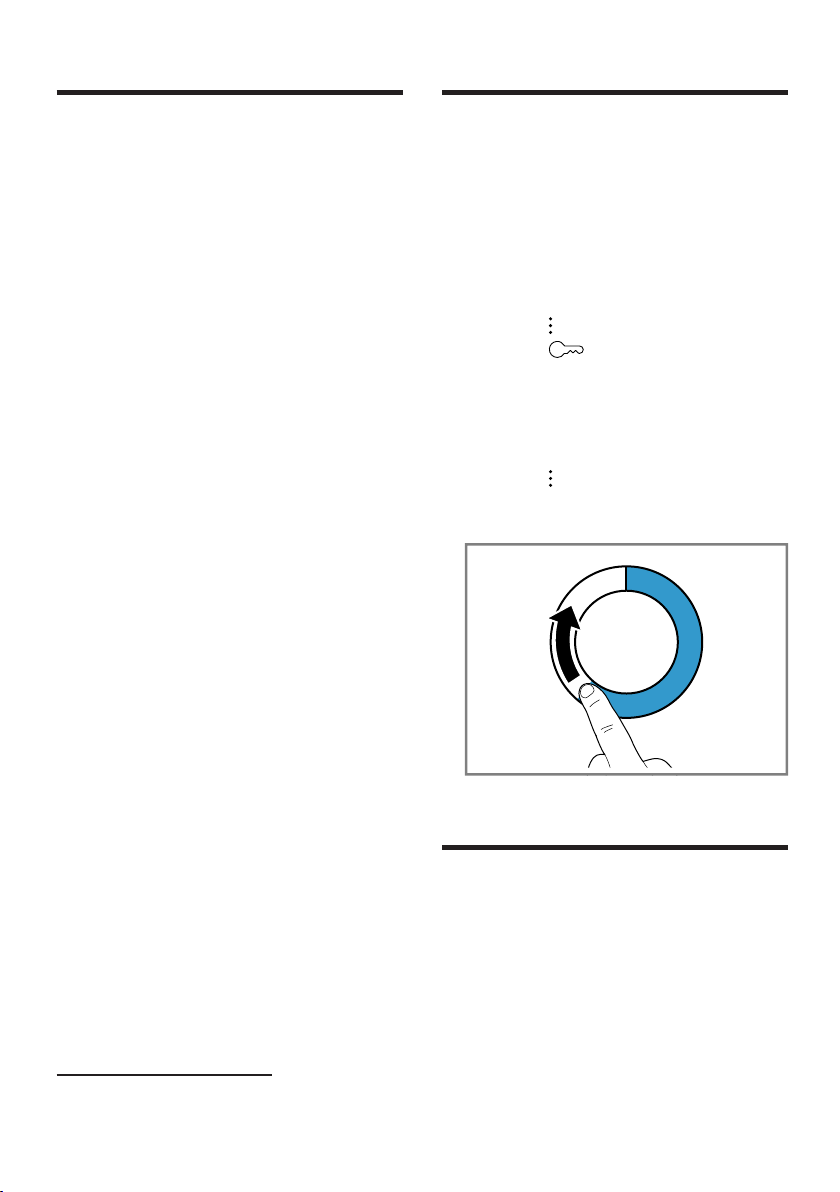
it Piano d'appoggio contenitore per latte
10 Piano d'appoggio con-
tenitore per latte
L'apparecchio riconosce se sul piano
d'appoggio è presente un contenitore
per latte.
10.1 Utilizzo del piano d'appoggio del contenitore
per latte
1. Collegare il contenitore per latte o
il cartone del latte e collocarlo sul
suo piano d’appoggio.
2. Avviare l'erogazione.
Nota:L'erogazione non è possibile
se compare il messaggio "Inserire il
contenitore del latte.".
10.2 Utilizzo del proprio contenitore del latte
Alcuni modelli di macchine del caffè
consentono l'utilizzo del proprio contenitore del latte.
1. Predisporre il proprio contenitore
del latte.
2. Tarare il proprio contenitore del lat-
te.
→"Panoramica Impostazioni",
Pagina 90
In base al peso, l'apparecchio riconosce la quantità di latte nel contenitore o nel cartone. Se non vi è
abbastanza latte nel contenitore,
viene visualizzato un messaggio.
Nota:Se si utilizza un contenitore
standard o un cartone del latte, l'apparecchio lo riconosce automaticamente.
1
11 Sicurezza bambini
Esiste la possibilità di bloccare l'apparecchio per proteggere i bambini
da ustioni e scottature.
11.1 Attivazione della sicurezza bambini
Requisito:L'apparecchio è acceso.
1. Premere
2. Premere .
a La sicurezza bambini è attivata.
.
11.2 Disattivazione sicurezza bambini
1. Premere
2. Muovere il dito lungo l'anello fino
al suo riempimento.
a La sicurezza bambini è disattivata.
.
12 Preferiti
Salvare le bevande singole nei Preferiti per un'erogazione rapida.
Un preferito contiene una bevanda
con impostazioni personali. Le impostazioni possono essere modificate in
qualsiasi momento.
1
In funzione dell'allestimento dell'apparecchio
86
Page 87

HomeConnect it
Nota:Per uscire dalle impostazioni,
premere o avviare l'erogazione bevanda.
12.1 Creazione dei Preferiti dal menu dei Preferiti
1. Premere "Preferiti".
2. Premere
3. Selezionare una bevanda.
4. Impostate i parametri bevanda.
5. Premere su .
6. Immettere il nome.
7. Premere "Salva".
.
12.2 Creare i Preferiti da Classici o Coffee World
1. Selezionare una bevanda da "Clas-
sici" o "Coffee World".
2. Impostate i parametri bevanda.
3. Premere
4. Immettere il nome.
5. Premere "Salva".
.
12.3 Modifica di un Preferito
1. Premere "Preferiti".
2. Selezionare un Preferito.
3. Salvare le modifiche.
4. Premere su
5. Premere "Salva".
.
12.4 Eliminazione di un Preferito
1. Premere "Preferiti".
2. Selezionare un Preferito.
3. Premere
4. Premere "Cancella".
.
12.5 Ordinamento dei Preferiti
La sequenza dei Preferiti può essere
modificata.
1. Premere "Preferiti".
2. Selezionare un Preferito.
3. Tenere premuto per almeno 3se-
condi il Preferito selezionato.
a Il display riporta tutti i Preferiti, è
possibile spostare il Preferito con il
dito.
a La nuova sequenza viene memo-
rizzata automaticamente.
Consiglio:I Preferiti possono essere
creati, modificati, cancellati o classificati anche tramite la app HomeConnect.
HomeConnect
13 HomeConnect
HomeConnect
L'apparecchio è collegabile in rete.
Collegare l'apparecchio a un terminale mobile per gestire le funzioni con
l'app HomeConnect, per configurare
le impostazioni di base o per monitorare lo stato di esercizio attuale.
I servizi HomeConnect non sono disponibili in tutti i Paesi. La disponibilità della funzione HomeConnect dipende dalla disponibilità dei servizi
HomeConnect nel proprio Paese. Ulteriori informazioni al riguardo sono
disponibili su: www.home-connect.com.
Per poter utilizzare HomeConnect
stabilire innanzitutto il collegamento
alla rete domestica WLAN (Wi-Fi1) e
all'app HomeConnect.
1
Wi-Fi è un marchio registrato di Wi-Fi Alliance.
87
Page 88
it HomeConnect
L'app HomeConnect guiderà attraverso l'intera procedura di accesso.
Seguire le istruzioni indicate all'interno dell'app HomeConnect per configurare le impostazioni.
Consiglio:Osservare anche le avvertenze presenti nell'app HomeConnect.
Note
¡ Osservare le avvertenze di sicurez-
za delle presenti istruzioni per l'uso
e accertarsi che vengano rispettate
quando l'apparecchio viene utilizzato mediante l'app HomeConnect.
→"Sicurezza", Pagina 73
¡ I comandi impartiti direttamente
sull'apparecchio hanno sempre la
priorità. Quando l'apparecchio viene comandato direttamente, i comandi tramite l'app HomeConnect
non sono disponibili.
13.1 Configurazione dell'app
HomeConnect
1. Installare l'app HomeConnect sul
dispositivo mobile.
13.2 Configurazione di HomeConnect
Requisiti
¡ Si ha un terminale mobile con si-
stema operativo iOS o Android, ad
es. uno smartphone.
¡ Il terminale mobile e l'apparecchio
si trovano nel raggio dal segnale
WLAN della vostra rete domestica.
¡ L'app HomeConnect è configurata
sul dispositivo mobile.
1. Aprire l'app HomeConnect e fare
la scansione del codice QR qui di
seguito.
2. Seguire le istruzioni nell'app Ho-
meConnect.
13.3 Impostazioni HomeConnect
Adattare HomeConnect alle proprie
1
2. Avviare l'app HomeConnect e
configurare l'accesso a HomeConnect.
L'app HomeConnect guiderà attraverso l'intera procedura di accesso.
1
Apple App Store e il logo Apple App Store sono marchi registrati di Apple
Inc. Google Play e il logo Google Play sono marchi registrati di Google LLC.
88
esigenze.
Le impostazioni HomeConnect si trovano nelle impostazioni di base
dell'apparecchio. Il fatto che HomeConnect sia configurato o meno
e che l'apparecchio sia collegato alla
rete domestica determina quali impostazioni vengono visualizzate sul display.
Page 89
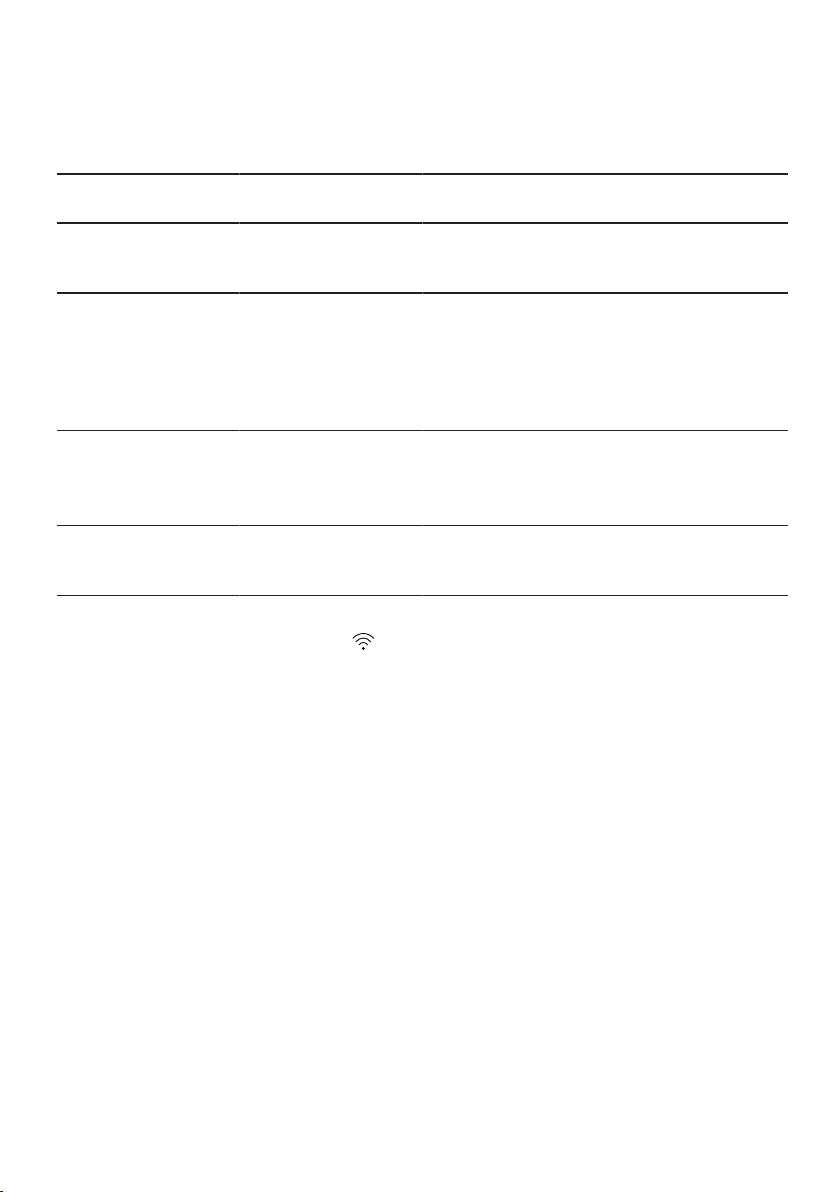
HomeConnect it
Panoramica delle impostazioni Home Connect
Qui viene riportata una panoramica delle impostazioni "Home Connect" e delle
impostazioni di rete.
Impostazione di
base
HomeConnect
Assistente
Wi-Fi On
Avvio a distanza On
Aggiornamento
software
Nota:Se "Wi-Fi" e l'avvio a distanza
sono attivi, sul display compare
Selezione Descrizione
Avvio
Scollegamento
dalla rete
Off
Off
- Nota:Questa impostazione è disponi-
.
13.4 Ricerca guasti remota
Il servizio di assistenza clienti può accedere all'apparecchio mediante la ricerca guasti remota, se lo si richiede
espressamente al servizio di assistenza, se l'apparecchio è collegato
al server HomeConnect e se la funzione Ricerca guasti remota è disponibile nel Paese in cui si utilizza l'apparecchio.
Consiglio:Ulteriori informazioni e avvertenze sulla disponibilità della funzione Ricerca guasti remota nel Paese desiderato sono contenute
nell'area Servizio/Assistenza del sito
web locale: www.home-connect.com.
Aggiunta di un dispositivo mobile.
Scollegamento dalla rete elettrica.
Disinserire il modulo radio in caso di
assenza prolungata o per risparmiare
energia.
Nota:L'apparecchio, collegato alla rete e in modalità stand-by, consuma al
max. 2W.
Attivare e disattivare l'avvio a distanza
dell'apparecchio.
Nota:L'app "Home Connect" consente solo la disattivazione.
bile soltanto con un aggiornamento
del software.
13.5 Protezione dei dati
Seguire le indicazioni sulla protezione
dei dati.
Con il primo collegamento
dell'apparecchio a una rete
domestica connessa a Internet,
l'apparecchio trasmette le seguenti
categorie di dati al server
HomeConnect (prima registrazione):
¡ Identificativo univoco dell'apparec-
chio (costituito dai codici dell'apparecchio e dall'indirizzo MAC del
modulo di comunicazione Wi-Fi installato).
¡ Certificato di sicurezza del modulo
di comunicazione Wi-Fi (per la protezione informatica della connessione).
¡ La versione attuale del software e
dell'hardware dell'elettrodomestico.
¡ Stato di un eventuale ripristino del-
le impostazioni di fabbrica.
89
Page 90

it Impostazioni di base
La prima registrazione prepara l'ap-
14.1 Modifica le impostazioni
parecchio per l'utilizzo delle funzionalità HomeConnect ed è necessaria
soltanto nel momento in cui si desidera utilizzare le funzionalità HomeConnect per la prima volta.
Nota:Osservare che le funzionalità
HomeConnect sono utilizzabili solo
in abbinamento all'app HomeConnect. Le informazioni sulla tutela dei
dati possono essere richiamate
nell'app HomeConnect.
1. Selezionare "Impostazioni".
a Sul display viene visualizzato l'elen-
co delle impostazioni.
2. Cambiare l'impostazione desidera-
ta.
a L'apparecchio salva l'impostazione
automaticamente.
3. Per tornare indietro nel menu, pre-
mere
4. Per uscire dalle impostazioni, pre-
.
mere .
14 Impostazioni di base
Consiglio:Per visualizzare breve-
mente le informazioni premere .
È possibile settare le impostazioni di
base dell'apparecchio in base alle
proprie esigenze e attivare funzioni
supplementari.
14.2 Panoramica Impostazioni
Qui si trova una panoramica di "Impostazioni".
Lingua Impostare la lingua.
HomeConnect HomeConnect Assisten-
te
Ora Impostare l'ora o visua-
Impostazioni display Luminosità Regolare i livelli di lumi-
Spegnimento notturno Spegnimento notturno e
Indicatore dell'ora Spegnere e riaccendere
Ora Impostazione della visua-
1
In funzione dell'allestimento dell'apparecchio
→"Configurazione di Ho-
meConnect", Pagina 88
lizzarla automaticamente
tramite HomeConnect.
nosità.
riaccensione.
l'indicatore dell'ora dopo
lo spegnimento dell'apparecchio.
lizzazione dell'ora.
90
Page 91

Impostazioni di base it
Regolazione ¡ Impostare l'allinea-
mento orizzontale o
verticale del display.
¡ Impostare l'ottimizza-
zione e il centraggio
della visualizzazione
del display rispetto
all'angolo di visione.
Toni Tono tasti Spegnere e riaccendere
il tono.
Volume Impostare il volume in in-
tervalli.
Segnale acustico Spegnere e riaccendere
il tono.
Melodia di avvio Spegnere e riaccendere
il tono all'avvio dell'apparecchio.
Impostazioni bevande Temperatura di infusione Impostare la temperatura
di infusione.
Sequenza latte Impostare la sequenza
latte/caffè.
Pausa latte macchiato Impostare la pausa tra il
latte e il caffè.
Impostazioni dell'apparecchio
Illuminazione Regolare il livello di in-
tensità dell'illuminazione.
Disattivazione automati-caImpostare la durata do-
po la quale l'apparecchio
si spegne.
Durezza acqua Impostare la durezza
dell'acqua.
Contenitore per latte
1
Impostare il cartone per
latte o il proprio contenitore per latte.
Nota:Se si utilizza un
contenitore per latte
standard, l'apparecchio
lo riconosce automaticamente.
Personalizzazione Categoria di avvio Impostare la visualizza-
zione del menu dopo
l'accensione, ades.
"Classici".
1
In funzione dell'allestimento dell'apparecchio
91
Page 92
it Pulizia e cura
Impostazioni di fabbrica Ripristinare le imposta-
zioni di fabbrica?
Modalità demo Modalità operativa a fini
dimostrativi
Ripristinare le impostazioni di fabbrica.
Attivare o disattivare
"Modalità demo".
Informazioni apparecchio Contatore bevande Visualizzare il numero
delle bevande erogate.
Informazioni per la pulizia
Visualizzazione della durata fino alla prossima
sostituzione del filtro
dell'acqua o all'avvio di
un programma di servizio.
Informazioni sulla versio-neVisualizzazione di infor-
mazioni sull'apparecchio.
Informazioni di rete Visualizzare le informa-
zioni di rete.
1
In funzione dell'allestimento dell'apparecchio
15 Pulizia e cura
Per mantenere a lungo l'apparecchio in buone condizioni, sottoporlo a una cura e a una manutenzione scrupolose.
15.1 Idoneità per il lavaggio in lavastoviglie
Qui si trova una panoramica dei componenti lavabili in lavastoviglie.
ATTENZIONE!
Alcuni componenti sono termosensibili e possono essere danneggiati se
vengono lavati in lavastoviglie.
▶ Osservare le istruzioni per l'uso
▶ Lavare in lavastoviglie soltanto i
componenti idonei.
▶ Utilizzare soltanto programmi che
non riscaldano i componenti oltre
60°C.
della lavastoviglie.
Adatti:
¡ Raccogli gocce
¡ Coperchio del raccogli gocce
¡ Contenitore dei fondi di caffè
¡ Vaschetta di raccolta
¡ Contenitore per latte con coper-
chio e fondo
¡ Piano d'appoggio del contenitore
per latte
¡ Distributore bevande
92
Non adatti:
¡ Serbatoio dell’acqua
¡ Coperchio del serbatoio dell’acqua
¡ Unità di infusione
¡ Coperchio dell'erogatore bevande
¡ Copertura del vano di infusione
¡ Cassetto accessori
¡ Contenitore dei chicchi di caffè
¡ Coperchio del contenitore dei chic-
chi di caffè
Page 93
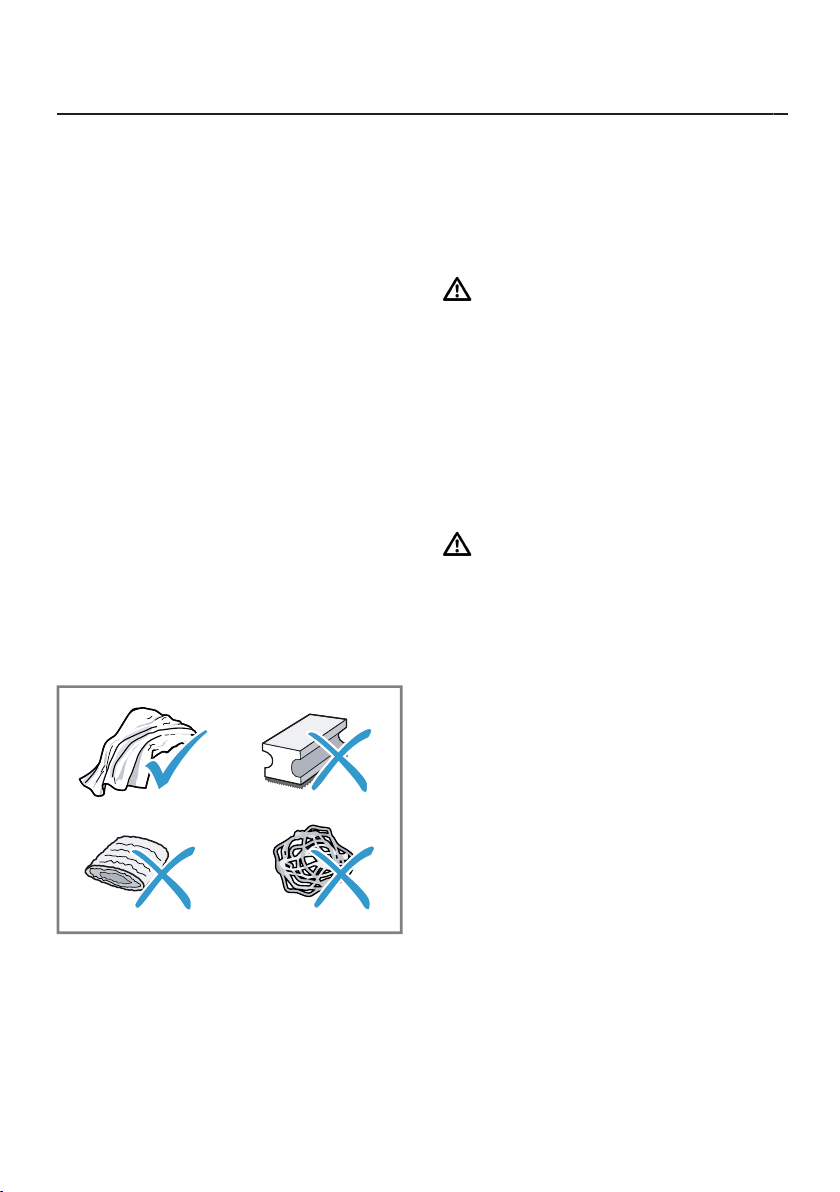
¡ Sistema per il latte
Pulizia e cura it
15.2 Detersivi
Utilizzare solo detergenti adatti.
ATTENZIONE!
I detersivi non appropriati possono
danneggiare le superfici dell'apparecchio.
▶ Non usare prodotti corrosivi o
abrasivi.
▶ Non impiegare detergenti a base
di alcol.
▶ Non utilizzare spugnette dure o
abrasive.
Detergenti e decalcificanti non adatti
possono danneggiare l'apparecchio.
▶ Per decalcificare non usare acido
citrico puro, aceto o sostanze a
base di aceto.
▶ Non utilizzare decalcificanti conte-
nenti acido fosforico.
▶ Utilizzare solo pastiglie decalcifi-
canti e pastiglie detergenti svilup-
pate appositamente per l'apparec-
chio.
→"Accessori", Pagina 81
¡ Rimuovere sempre subito i residui
di calcare, caffè, latte, soluzioni di
lavaggio e decalcificazione per evitare la formazione di corrosione.
15.3 Pulizia dell’apparecchio
AVVERTENZA
Pericolo di scosse elettriche!
L'infiltrazione di umidità può provocare una scarica elettrica.
▶ Non immergere mai l'apparecchio
o il cavo di alimentazione nell'acqua.
▶ Il connettore dell'apparecchio non
deve venire a contatto con liquidi.
▶ Non lavare l'apparecchio con puli-
tori a vapore o idropulitrici.
AVVERTENZA
Pericolo di ustioni!
Alcune parti dell'apparecchio diventano molto calde.
▶ Non toccare mai le parti calde
dell'apparecchio.
▶ Dopo l'uso lasciar raffreddare le
parti calde dell'apparecchio prima
di toccarle.
Consigli
¡ Lavare a fondo i panni in spugna
nuovi per rimuovere gli eventuali
sali presenti che possono causare
ruggine sulle superfici in acciaio
inossidabile.
1. Pulire il corpo, le superfici lucide e
il pannello di comando con il panno in microfibra fornito.
2. Dopo l'erogazione, pulire l'erogato-
re bevande con un panno morbido
umido.
3. Lavare il serbatoio dell'acqua con
acqua pulita e fresca.
4. Se l'apparecchio non è stato usato
per un lungo periodo di tempo, ad
es. durante una vacanza, lavarlo
completamente, incluse le parti
mobili come l'unità di infusione o il
serbatoio dell'acqua.
93
Page 94

it Pulizia e cura
Nota:L'apparecchio esegue automa-
ticamente un risciacquo quando viene acceso a freddo o spento dopo
l'erogazione del caffè. Il sistema si
pulisce così da solo.
15.4 Lavaggio del raccogli-
gocce e del contenitore
dei fondi di caffè
Svuotare e lavare il raccogligocce e il
contenitore dei fondi di caffè tutti i
giorni per evitare la formazione di depositi. Seguire la guida per immagini
all'inizio delle istruzioni.
→Fig. 26-
28
15.5 Pulizia del contenitore
per latte
Per motivi di igiene il contenitore per
latte deve essere lavato regolarmente. È possibile lavare il contenitore
per latte in lavastoviglie. Seguire la
guida per immagini all'inizio delle
istruzioni.
→Fig. 19-
22
15.6 Programmi di servizio
Per inserire o rimuovere un filtro
dell'acqua o lavare a fondo l'apparecchio, utilizzare i programmi di servizio. L'apparecchio segnala quando è
necessario eseguire un programma
di servizio, ades. la pulizia.
ATTENZIONE!
Pericolo di danni all'apparecchio a
causa di una pulizia e di una decalcificazione non eseguite correttamente
o non eseguite per tempo.
▶ Eseguire subito il processo di de-
calcificazione seguendo le istruzio-
ni.
▶ Inserire nel cestello dell'unità di in-
fusione solo pastiglie detergenti.
▶ Non mettere pastiglie decalcificanti
o altre sostanze nel cestello
dell'unità di infusione.
Note
¡ Il display indica l'avanzamento del-
la procedura.
¡ Se l'apparecchio è bloccato, è
possibile riutilizzarlo soltanto al termine del processo di decalcificazione.
Consiglio:Oltre al programma di risciacquo automatico, togliere e lavare l'unità di infusione ad intervalli regolari.
Utilizzo dei programmi di servizio
1. Selezionare "Cura e manutenzio-
ne".
2. Premere "Cura e manutenzione".
a Viene visualizzato un elenco sul di-
splay.
3. Premere sul programma desidera-
to.
a Il display guida attraverso l’esecu-
zione del programma.
Panoramica dei programmi di servizio
Qui si trova una panoramica dei programmi di servizio.
Nota:La schermata iniziale mostra le
erogazioni di bevande restanti prima
dell'esecuzione del programma e la
durata.
Filtro INTEN-ZAInserire, sostituire o
togliere il filtro
dell'acqua.
Pulizia sistema del latte
Lavare automaticamente il sistema del
latte.
calc'nClean Combinare la pulizia
e la decalcificazione.
Liberare i condotti
dai residui di calcare
e di caffè.
94
Page 95

Pulizia e cura it
Pulizia Liberare i condotti
dai residui di caffè.
Decalcificazione
Liberare i condotti
dai residui di calcare.
Protezione
antigelo
Svuotare i condotti
per proteggere l'apparecchio durante il
trasporto o l'immagazzinamento.
Pulizia unità
di infusione
Il display indica, passo dopo passo, la
pulizia ottimale
dell'unità di infusione.
Pulizia sistema bevande
Il display indica, passo dopo passo, la
pulizia ottimale
dell'erogatore.
Se un programma di
servizio si interrompe, ades. a causa di
un'interruzione di
corrente, l'apparecchio esegue automaticamente il risciacquo. Dopodiché l'apparecchio è di nuovo
pronto per il funzionamento.
Consigli
¡ Quando si avviano i programmi
"Decalcificazione" oppure
"calc'nClean", tenere a disposizione un recipiente con una capacità
di almeno 0,5l.
¡ Se si utilizza un filtro dell'acqua, si
allunga l'intervallo di esecuzione di
un programma di servizio.
¡ Si possono combinare "Decalcifi-
cazione" e "Pulizia" con il programma di servizio "calc'nClean".
95
Page 96

it Sistemazione guasti
16 Sistemazione guasti
I guasti minori possono essere sistemati autonomamente dall'utente. Utilizzare
le informazioni per la sistemazione dei guasti prima di contattare il servizio di
assistenza clienti. In questo modo si evitano costi non necessari.
AVVERTENZA
Pericolo di scosse elettriche!
Gli interventi di riparazione effettuati in modo non appropriato rappresentano
una fonte di pericolo.
▶ Solo il personale adeguatamente specializzato e formato può eseguire ripa-
razioni sull'apparecchio.
▶ Per la riparazione dell'apparecchio possono essere impiegati soltanto pezzi
di ricambio originali.
▶ Se il cavo di collegamento alla rete dell'apparecchio viene danneggiato, de-
ve essere sostituito con un cavo di collegamento speciale, reperibile presso
il produttore o il relativo servizio di assistenza clienti.
Anomalia Causa e ricerca guasti
HomeConnect non
funziona correttamente.
L'apparecchio eroga
solo acqua, non caffè.
L'apparecchio non
eroga schiuma di latte.
Sono possibili diverse cause scatenanti.
▶ Accedere a www.home-connect.com.
L'apparecchio non rileva un serbatoio dei chicchi di
caffè vuoto.
▶ Aggiungere chicchi di caffè.
Il vano del caffè sull'unità di infusione è bloccato.
▶ Pulire l'unità di infusione.
I chicchi sono troppo oleosi e non scendono nel macinacaffè.
▶ Battere leggermente sul contenitore dei chicchi di
caffè.
▶ Cambiare tipo di caffè.
▶ Non utilizzare chicchi oleosi.
▶ Pulire il contenitore dei chicchi di caffè con un pan-
no umido.
Unità di infusione non inserita correttamente.
1. Controllare che l'unità di infusione sia inserita cor-
rettamente e bloccata saldamente.
2. Spingere la leva rossa in alto verso sinistra.
3. Inserire la copertura del vano di infusione.
Il sistema per il latte è sporco.
▶ Lavare il sistema per il latte in lavastoviglie.
Il tubo del latte non si immerge nel latte.
96
Page 97

Anomalia Causa e ricerca guasti
L'apparecchio non
eroga schiuma di latte.
Il sistema per il latte
non aspira il latte.
▶ Utilizzare più latte.
▶ Controllare se il tubo del latte è immerso nel latte.
L'apparecchio presenta forti calcificazioni.
▶ Decalcificare l'apparecchio.
Il sistema per il latte non è montato correttamente.
▶ Montare correttamente il sistema per il latte.
Il tubo del latte non si immerge nel latte.
▶ Utilizzare più latte.
▶ Controllare se il tubo del latte è immerso nel latte.
Schiuma latte eccessivamente fredda.
L'apparecchio non
eroga acqua calda.
L'apparecchio non
eroga bevande.
Latte eccessivamente freddo.
▶ Utilizzare latte tiepido.
Distributore bevande sporco.
▶ Lavare il distributore bevande nella lavastoviglie.
Aria nel filtro dell'acqua.
1. Immergere in acqua il filtro dell'acqua, con l'apertu-
ra verso l'alto, finché non escono più bolle.
2. Ricollocare il filtro.
▶ Tenendolo diritto, spingere con decisione il filtro
dell’acqua nel collegamento del serbatoio.
I residui del decalcificante intasano il serbatoio dell'acqua.
1. Togliere il serbatoio dell'acqua.
2. Pulire a fondo il serbatoio dell'acqua.
Presenza di gocce
d’acqua sul fondo interno dell’apparecchio.
La vaschetta raccogligocce è stata estratta troppo
presto.
▶ Attendere alcuni secondi prima di estrarre la va-
schetta raccogligocce dopo l’ultima erogazione di
una bevanda.
Non si riesce ad
estrarre l'unità di infusione.
Il macinacaffè non gira.
Il blocco non si sgancia, unità di infusione bloccata.
▶ Spegnere l'apparecchio e riaccenderlo dopo 3mi-
nuti.
L'apparecchio è troppo caldo.
1. Scollegare l’apparecchio dalla rete.
2. Attendere 1ora per lasciar raffreddare l'apparec-
chio.
Sistemazione guasti it
97
Page 98

it Sistemazione guasti
Anomalia Causa e ricerca guasti
Il macinacaffè non
macina chicchi anche
se il contenitore dei
chicchi di caffè è pieno.
I chicchi sono troppo oleosi e non scendono nel macinacaffè.
▶ Battere leggermente sul contenitore dei chicchi di
caffè.
▶ Cambiare tipo di caffè.
▶ Non utilizzare chicchi oleosi.
▶ Pulire il contenitore dei chicchi di caffè con un pan-
no umido.
Forti differenze nella
qualità del caffè o del-
L’apparecchio presenta incrostazioni di calcare.
▶ Decalcificare l'apparecchio.
la schiuma di latte.
Qualità variabile della
schiuma di latte.
La qualità della schiuma di latte dipende dal tipo utilizzato di latte o bevanda vegetale.
▶ Ottimizzare il risultato scegliendo un tipo adatto di
latte o bevanda vegetale.
Il caffè non viene erogato o esce soltanto a
gocce.
La quantità impostata
non viene raggiunta.
Il grado di macinatura impostato è troppo fine.
▶ Regolare un grado di macinatura più grosso.
L'apparecchio presenta forti calcificazioni.
▶ Decalcificare l'apparecchio.
Aria nel filtro dell'acqua.
1. Immergere in acqua il filtro dell'acqua, con l'apertu-
ra verso l'alto, finché non escono più bolle.
2. Ricollocare il filtro.
Apparecchio sporco.
▶ Pulire l'unità di infusione.
▶ Decalcificare e pulire l'apparecchio.
Il caffè non ha alcuna
“crema”.
Il tipo di caffè non è ottimale.
▶ Utilizzare un tipo di caffè che contenga una mag-
giore percentuale di chicchi Robusta.
▶ Utilizzare chicchi con una tostatura più scura.
I chicchi di caffè non sono più freschi di tostatura.
▶ Utilizzare chicchi freschi.
Il grado di macinatura non è adeguato per i chicchi di
caffè.
▶ Regolare un grado di macinatura più fine.
Il caffè è troppo "acido".
Il grado di macinatura impostato è troppo grosso.
▶ Regolare un grado di macinatura più fine.
Il tipo di caffè non è ottimale.
▶ Utilizzare un tipo di caffè che contenga una mag-
giore percentuale di chicchi Robusta.
98
Page 99

Anomalia Causa e ricerca guasti
Il caffè è troppo "aci-
▶ Utilizzare chicchi con una tostatura più scura.
do".
Il caffè è troppo "ama-
ro".
Il grado di macinatura impostato è troppo fine.
▶ Regolare un grado di macinatura più grosso.
Il tipo di caffè non è ottimale.
▶ Cambiare tipo di caffè.
Il caffè ha un gusto di
"bruciato".
Il grado di macinatura impostato è troppo fine.
▶ Regolare un grado di macinatura più grosso.
Il tipo di caffè non è ottimale.
▶ Cambiare tipo di caffè.
È impostata una temperatura del caffè troppo alta.
▶ Regolare una temperatura del caffè più bassa.
I fondi di caffè non sono compatti e sono
troppo bagnati.
Il grado di macinatura non è impostato in modo ottimale.
▶ Regolare un grado di macinatura più grosso o più
fine.
I chicchi sono troppo oleosi.
▶ Utilizzare un altro tipo di chicchi.
Sul display viene visualizzato il messaggio "Inserire l'unità di
infusione.".
Sul display viene visualizzato il messaggio "Riempire il serbatoio dell'acqua." anche
se il serbatoio dell'acqua è pieno.
La copertura non è inserita correttamente.
1. Controllare che l'unità di infusione sia inserita cor-
rettamente e bloccata saldamente.
2. Spingere la leva rossa in alto verso sinistra.
3. Inserire la copertura del vano di infusione.
Il serbatoio dell'acqua non è inserito correttamente.
▶ Inserire correttamente il serbatoio dell'acqua.
Acqua gassata nel serbatoio dell'acqua.
▶ Riempire il serbatoio dell'acqua con acqua del rubi-
netto fresca.
Il galleggiante nel serbatoio dell'acqua è bloccato.
1. Togliere il serbatoio dell'acqua.
2. Pulire a fondo il serbatoio dell'acqua.
Il filtro dell'acqua nuovo non è stato lavato secondo le
istruzioni.
1. Lavare il filtro dell'acqua secondo le istruzioni.
2. Mettere in funzione il filtro dell'acqua.
Aria nel filtro dell'acqua.
1. Immergere in acqua il filtro dell'acqua, con l'apertu-
ra verso l'alto, finché non escono più bolle.
2. Ricollocare il filtro.
Sistemazione guasti it
99
Page 100
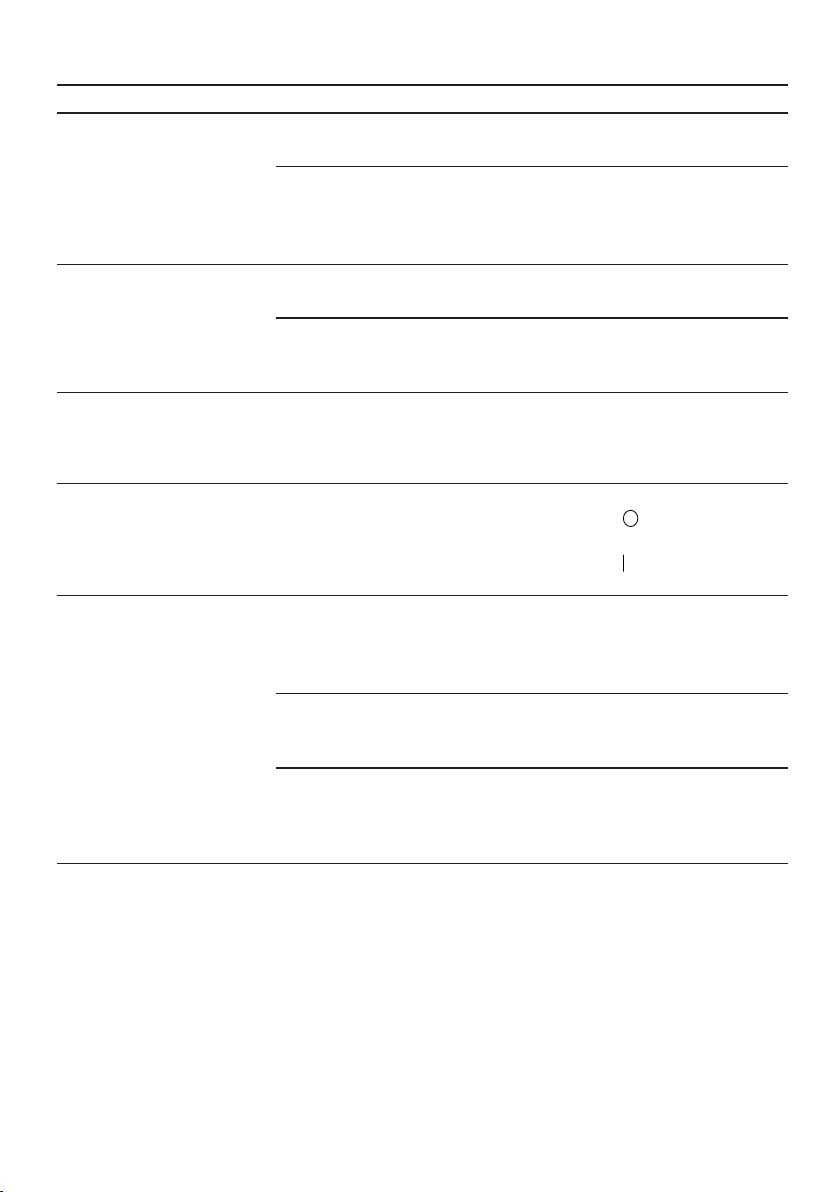
it Sistemazione guasti
Anomalia Causa e ricerca guasti
Sul display viene visualizzato il messaggio "Riempire il serbatoio dell'acqua." anche
se il serbatoio dell'acqua è pieno.
Sul display viene visualizzato il messaggio "E61: Pulire l’unità
di infusione.".
Sul display viene visualizzato il messag-
Il filtro dell'acqua è vecchio.
▶ Inserire un nuovo filtro dell'acqua.
I depositi di calcare nel serbatoio d'acqua intasano il
sistema.
1. Pulire a fondo il serbatoio dell'acqua.
2. Avviare il programma di decalcificazione.
L'unità di infusione è sporca.
▶ Pulire l'unità di infusione.
Il meccanismo dell’unità di infusione si muove con fatica.
▶ Pulire l'unità di infusione.
Problemi di alimentazione elettrica.
▶ Far funzionare l'apparecchio solo a 220-240V.
gio che indica una
tensione errata.
Sul display viene visualizzato il messaggio che richiede di
riavviare l'apparec-
L'apparecchio presenta un guasto.
1. Posizionare l'interruttore di rete su
60secondi.
2. Posizionare l'interruttore di rete su .
chio.
Sul display viene vi-
sualizzato molto frequentemente il messaggio calc'nClean.
L'acqua decalcificata contiene ancora piccole quantità
di calcare.
1. Inserire un nuovo filtro dell'acqua.
2. Impostare la durezza dell'acqua di conseguenza.
Decalcificante errato o insufficiente.
▶ Per decalcificare usare esclusivamente pastiglie
adatte.
Programma di servizio non completamente eseguito.
▶ Avviare il programma di servizio "Lavaggio speciale
Fase /".
→"Programmi di servizio", Pagina 94
e attendere
100
 Loading...