

Bosch 4000, 0601476139 Owner’s Manual

_MPORTANT °°
Read Before Using
Operating/Safety instructions
Consignes de fonctionnement/s_curit_.
lnstrucciones de funcionamiento y seguridad
Life avant usage
Leer antes de usar
Consumer information
Renseignement des consommateurs
informaci6n para eMconsumidor
Toll Free Number: AppeM gratuit : Nu'mero de teM6fono gratuito:
1-877-BOSCHg9 {1-877-267-2499)
For English
See page 2
PaHez-vous fran(;ais?
Voir page 8
_,HabMa espaSoM?
Vet pagina 14

General Safety Rules
"READ ALL INSTRUCTIONS" Failure to fellow the safety rules listed below and other basic safety precautions
may result in serious personal injury.
KEEP CHILDREN AWAY
Do not let visitors contact toot or extension cord. All visitors
should be kept away from work area.
KEEP WORK AREAS CLEAN
Cluttered areas and benches invite accidents.
MAKE WORKSHOP CHILD-PROOF
With padlocks, master switches.
AVOID DANGEROUS ENVIRONMENTS
Don't use power tools in damp or wet locations. Keep work
area well lit. Do not expose power tools to rain. Do not use
tool in presence of flammable liquids or gases.
AVOID ACCIDENTAL STARTING
Make sure the switch is in the "OFF" position before
plugging in tool.
NEVER STAND ON TOOL OR ITS STAND
Serious injury could occur if the tool is tipped or if the
cutting tooI is accidentally contacted. Do not store materials
on or near the tool such that it is necessary to stand on the
tool or its stand to reach them.
CHECK DAMAGED PARTS
Before further use of the tool, a guard or other part that is
damaged should be carefully checked to ensure that it will
operate properly and perform its intended function. Check
for alignment of moving parts, mounting and any other con-
ditions that may affect its operation. A guard or other part
that is damaged should be properly replaced.
Personal Safety
KNOW YOUR POWER TOOL
Read and understand the owner's manual and labels affixed
to the tool. Learn its application and limitations as well as
the specific potential hazards peculiar to this tool.
DON'T OVERREACH
Keep proper footing and balance at all times.
STAY ALERT
Watch what you are doing. Use common sense. Do not op-
erate tool when you are tired. Do not operate while under
medication or while using alcohol or other drug.
DRESS PROPERLY
Do not wear loose clothing or iewelry. They can be caught
in moving parts. Rubber gloves and non-skid footwear are
recommended when working outdoors. Wear protective hair
covering to contain long hair.
USE SAFETY GOGGLES
Also face or dust mask if cutting operation is dusty, and ear
plugs during extended periods of operation.
GUARD AGAINST ELECTRIC SHOCK
Prevent body contact with grounded surfaces. For example:
pipes, radiators, ranges, refrigerator enclosures.
AII repairs, electrical or mechanical, should
be attempted only by trained repairmen.
Contact the nearest Bosch Factory Service Center,
Authorized Service Station or other competent repair
service.
Use only Bosch replacement parts; any
others may create a hazard.
Use only accessories that are
recommended by the manufacturer for
your model. Accessories that may be suitable for one
tool, may become hazardous when used on another tool.
Tool Use
DON'T FORCE TOOL
It will do the job better and safer at the rate for which it was
designed.
USE THE RIGHT TOOL
Don't force small tool or attachment to do the job of a
heavy-duty tool Don't use tool for purpose not intended --
for example; don't use circular saw for cutting tree limbs or
logs.
DISCONNECT TOOL FROM POWER SOURCE
When not in use, before servicing, when changing blades,
bits, cutters, etc.
KEEP GUARDS mNPLACE
In working order, and in proper adjustment and alignment.
REMOVE ADJUSTING KEYS AND WRENCHES
When not in use, before servicing, when changing blades,
bits, cutters, etc.
"SAVE THESE iNSTRUCTiONS"
SECURE WORK
Use clamps or a vise to hold work. It's safer than using your
hand and it frees both hands to operate the tool.
DIRECTION OF FEED
Feed work into a blade or cutter against the direction of
rotation of the blade or cutter only.
NEVER LEAVE TOOL RUNNING UNATTENDED
Turn power off. Don't leave tool until it comes to a complete
stop.
2.
Additional Safety Rules
Tool Care
DO NOT ALTER OR MISUSE TOOL
These tools are precision built. Any alteration or modification
not specified is misuse and may result in dangerous con-
ditions.
AVOID GASEOUS AREAS
Do not operate electric tools in gaseous or explosive atmo-
spheres. Motors in these tools normally spark, and may re-
sult in a dangerous condition.
MAINTAIN TOOLS WITH CARE
Keep tools sharp and clean for better and safer perfor-
mance. Follow instructions for lubricating and changing ac-
cessories. Inspect tool cords periodically and if damaged,
have repaired by authorized service facility. Inspect ex-
tension cords periodically and replace if damaged. Keep
handles dry, clean and free from oil and grease.
Before connecting the tool to a power
source (receptacle, outlet, etc.), be sure
voltage supplied is the same as that specified on the
nameplate of the tool A power source with voltage greater
than that specified for the tooi can result in serious injury to
the user -- as well as damage to the tool. If in doubt, DO
NOT PLUG IN THE TOOL. Using a power source with
voltage less than the nameplate rating is harmful to the
motor.
For your own safety, do not operate your
table saw until it is completely assembled
and installed according to the instructions ... and until you
have read and understood the following:
1 General Safety Rules .................. 2-5
2 Double Insulated Tools .................. 5
3 Getting To Know Your Table Saw .......... 20-23
4. Assembly ....................... 32-35
5. Basic Table Saw Operation ............. 38-53
6. Maintaining Your Table Saw ............. 52-55
7. STABILITY OF SAW
Your table saw MUST BE BOLTED securely to a stand or
workbench. In addition, if there is any tendency for the table
saw to tip over or move during certain operations such as
cutting long, heavy boards, use an auxiliary support.
8. LOCATION
Use the table saw in a well lit area and on a level surface,
clean and smooth enough to reduce the risk of trips and
falls. Use it where neither the operator nor the casual
observer is forced to stand in line with the blade.
9, KICKBACK
Kickbacks can cause serious injury: A "KICKBACK" occurs
when a part of the workpiece binds between the sawblade
and the rip fence or other fixed object. Workpiece binding
the blade due to misalignment, can also cause kickback.
During kickback, workpiece rises from table and is thrown
toward the operator. Keep your face and body to one side
of the sawblade, out of line with a possible "KICKBACK".
KICKBACKS AND POSSIBLE INJURY
CAN USUALLY BE AVOIDED BY:
a° Maintaining the rip fence parallel to the sawblade.
b° Keeping the sawblade sharp. Replacing or sharpening
anti-kickback pawls when points become dull.
c° Keeping sawbtade guard, spreader and anti-kickback
pawls in place and operating properly. The spreader must
be in alignment with the sawblade and the pawls must stop
a kickback once it has started. Check their action before
ripping.
d° NOT ripping workpiece that is twisted or warped or does
not have a straight edge to guide along the rip fence.
e° NOT releasing work until you have pushed it all the way
past the sawblade.
f° Using a Push Stick for ripping widths of 2" to 6" and an
auxiliary fence and Push Block for ripping widths narrower
than 2" (See "Basic Saw Operation Using The Rip Fence"
section Pages 44-47).
g° NOT confining the cut-off piece when ripping or cross-
cutting.
h° When ripping, apply the feed force to the section of the
workpiece between the sawblade and the rip fence. Use
Push Stick or Push Block when appropriate (See item f.
above).
10. PROTECTION: Eyes, hands, face, ears and body.
TO AVOID BEING PULLED INTO
THE SPINNING TOOL,
DO NOT WEAR: Loose Fitting Gloves
Loose Clothing
Necktie, Jewelry
DO: TIE BACK LONG HAIR
ROLL LONG SLEEVES ABOVE ELBOWS
a° If any part of your saw is missing, malfunctioning, has
been damaged or broken ... such as the motor switch, or
other operating control, a safety device or the power cord
... cease operating immediately until the particular part is
properly repaired or replaced.
b° Wear safety goggles and a face shield if operation is
dusty. Wear ear plugs or muffs during extended periods of
operation. Small loose pieces of wood or other obiects that
contact the rear of the revolving blade can be thrown back
at the operator at excessive speed. This can usually be
avoided by keeping the guard and spreader in place for all
"THRU-SAWING" operations (sawing entirely thru the work)
AND by removing all loose pieces from the table with a long
stick of wood IMMEDIATELY after they are cut off.
c° Use extra caution when the guard assembly is removed
for resawing, dadoing, rabbeting or molding -- replace the
guard as soon as that operation is completed.
d° NEVER turn the saw "ON" before clearing the table of all
tools, wood scraps, etc, except the workpiece and related
feed or support devices for the operation planned.
3.

Additional
Safety Rules
e° NEVER place your face or body in line with the cutting
tool.
® NEVER place your fingers and hands in the path of the
sawblade or ether cutting tool.
NEVER reach in back of the cutting tool with either hand
to hold down or support the workpiece, remove wood
scraps, or for any other reason. Avoid awkward operations
and hand positions where sudden slip couId cause fingers
or hand to move into a sawblade or other cutting tool.
® DO NOT perform any operation "FREEHAND" -- always
use either the rip fence or the miter gauge to position and
guide the work.
® NEVER use the rip fence when crosscutting or the miter
gauge when ripping. DO NOT use the rip fence as a length
stop.
®NEVER hold onto or touch the "free end" of the workpiece
or a "free piece" that is cut off, while power is "ON" and/or
the sawbtade is rotating.
®Shut "OFF" the saw and disconnect the power cord when
removing the table insert, changing the cutting toot,
removing or replacing the blade guard, or making
adjustments.
®Provide adequate support to the rear and sides of the saw
table for wider or long workpiece&
®Plastic and composition (like hardboard) materials may be
cut on your saw. However, since these are usually quite
hard and slippery, the anti-kickback pawIs may not stop a
kickback. Therefore, be especially attentive to following
proper set-up and cutting procedures for ripping. Do not
stand, or permit anyone else to stand, in line with a potential
kickback.
f° If you stall or iam the sawbIade in the workpiece, turn saw
"OFF", remove the workpiece from the sawblade, and
check to see if the sawbtade is parallel to the table slots or
grooves and if the spreader is in proper alignment with the
sawblade. If ripping at the time, check to see if rip fence is
parallel with the sawbiade. Readiust as indicated.
g° NEVER gang crosscut -- lining up more than one work-
piece in front of the blade (stacked vertically, or horizontally
outward on the table) and then pushing thru sawblade. The
blade could pick up one or more pieces and cause a
binding or loss of control and possible iniury.
h° DO NOT remove small pieces of cut-off material that may
become trapped inside the blade guard while the saw is
running. This could endanger your hands or cause a kick-
back. Turn saw "OFF" and wait until blade stops.
11, KNOW YOUR CUTTING TOOLS
Dull, gummy or improperly sharpened or set cutting tools
can cause material to stick, iam, stall the saw, or kickback
at the operator. Minimize potential injury by proper cutting
toot and machine maintenance. NEVER ATTEMPT TO FREE
A STALLED SAWBLADE WITHOUT FIRST TURNING THE
SAW OFF.
a° NEVER use grinding wheels, abrasive cut-off wheels, fric-
tion wheels (metal slitting blades) wire wheels or buffing
wheels.
b° USE ONLY RECOMMENDED ACCESSORIES.
c° Crosscutting operations are more conveniently worked
and with greater safety if an auxiliary wood facing is
attached to the miter gauge. (See Page 22 & 23).
d. Make sure the top of the cutting tool rotates toward you
when standing in normal operating position. Also make sure
the cutting tool, arbor collars and arbor nut are installed pro-
periy. Keep the cutting tool as low as possible for the oper-
ation being performed. Keep all guards in place whenever
possible.
Do not use any blade or other cutting tool marked for an
operating speed less than 4800 R.P.M. Never use a cutting
tool larger in diameter than the diameter for which the saw
was designed. For greatest safety and efficiency when rip-
ping, use the maximum diameter blade for which the saw is
designed, since under these conditions the spreader is
nearest the blade.
e° Make sure the table insert is flush or slightly below the
table surface on all sides except for rear side. NEVER oper-
ate the saw unless the proper insert is installed.
_WARNING
NOTE AND FOLLOW SAFETY iNSTRUCTIONS THAT APPEAR
ON THE FRONT OF YOUR TABLE SAW.
4.
Additional Safety Rutes
12, THINK SAFETY
SAFETY iS A COMBiNATiON OF OPERATOR COMMON
SENSE AND ALERTNESS AT ALL TIMES WHEN THE
TABLE SAW iS BEING USED.
Do not allow familiarity (gained from fre-
quent use of your table saw) to become
commonplace. Always remember that a careless fraction of
a second is sufficient to inflict severe injury.
The operation of any
power tooI can result in
foreign objects being
thrown into the eyes,
which can result in severe
eye damage. Always wear
safety goggles that comply
with ANSi Z87.1 (shown
on package) before
commencing power tool operation.
Some dust created by power sanding,
sawing, grinding, drilling, and other
construction activities contains chemicals known to
cause cancer, birth defects or other reproductive
harm, Some exampmes of these chemicals are:
Lead from Iead-based paints,
Crystalline silica from bricks and cement and other
masonry products, and
Arsenic and chromium from chemically treated lumber.
Your risk from these exposures varies, depending on how
often you do this type of work. To reduce your exposure
to these chemicals: work in a well ventilated area, and
work with approved safety equipment, such as those dust
masks that are specially designed to filter out microscopic
particles.
Double Insulated Tools
Double insulation [] is a design concept used in electric
power tools which eliminates the need for the three wire
grounded power cord and grounded power supply system.
It is a recognized and approved system by Undewvriter's
Laboratories, CSA and Federal OSHA authorities.
IMPORTANT: Servicing of a tool with double insulation re-
quires care and knowledge of the system and should be
performed only by a qualified service technician.
Extension Cords
Replace damaged cords immediately.
Use of damaged cords can shock, burn
or electrocute.
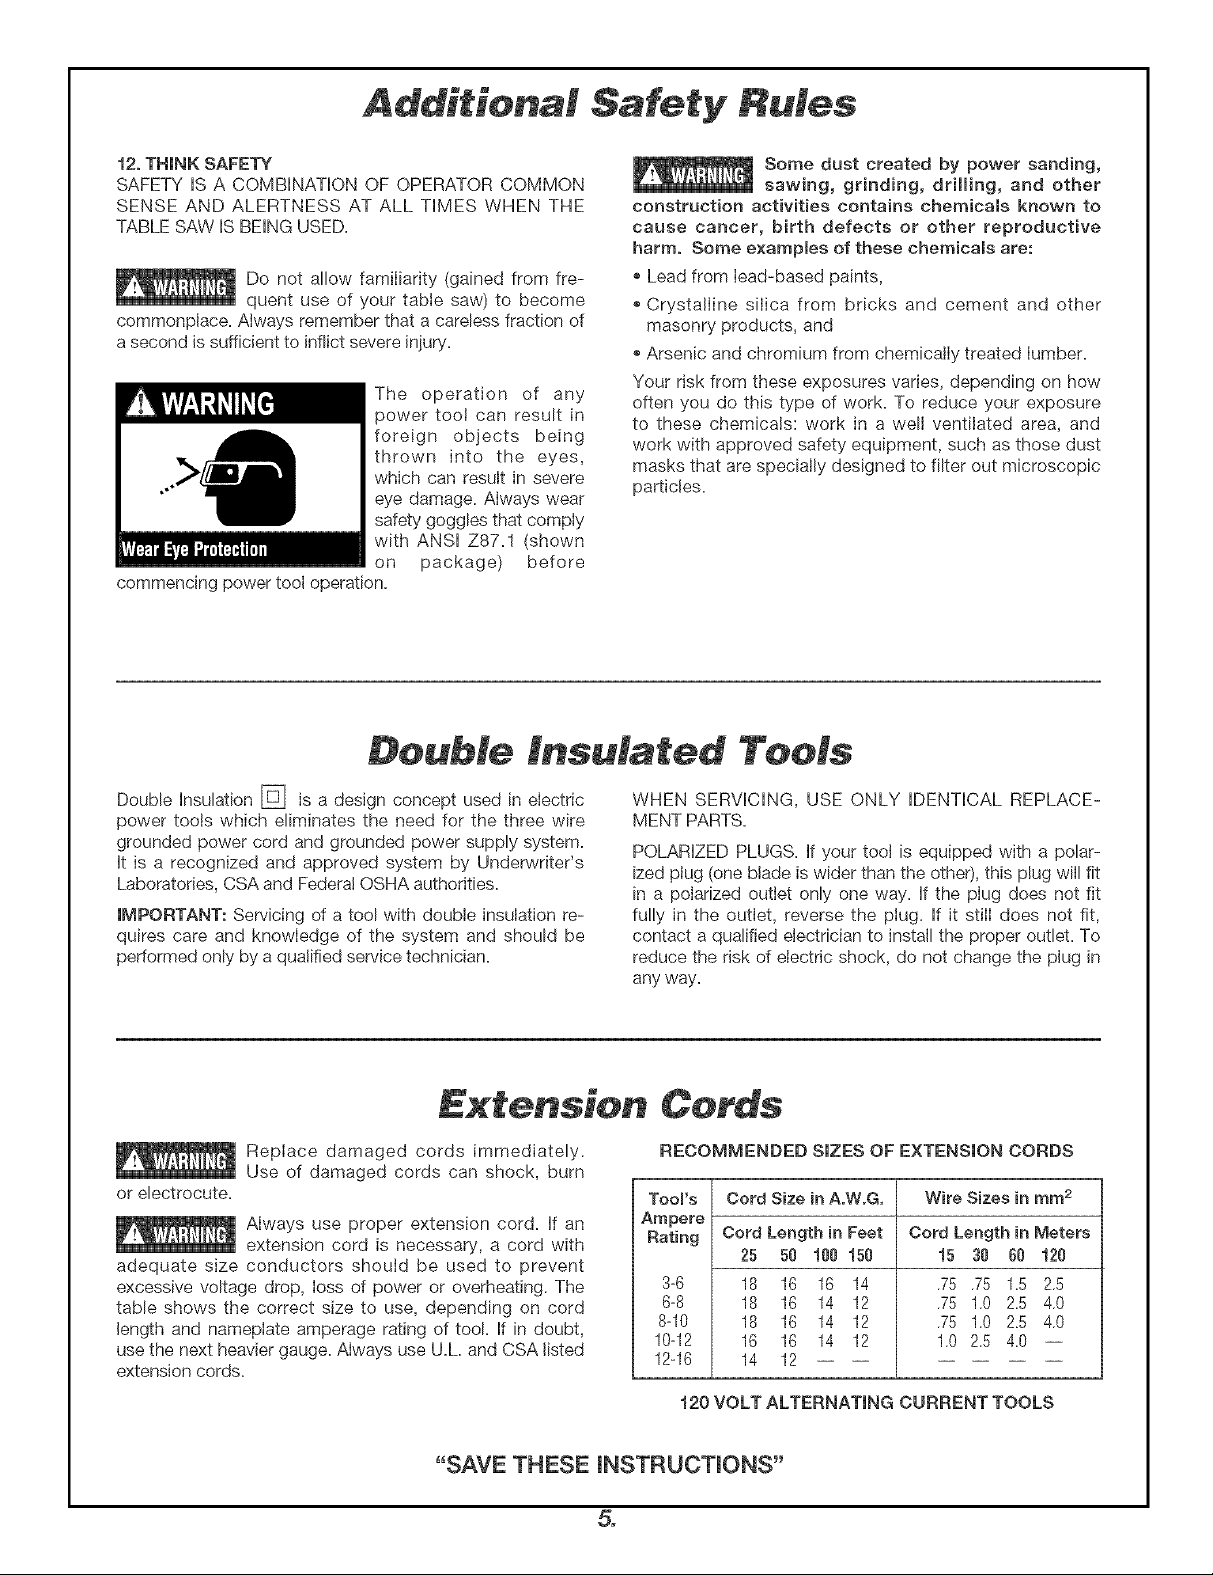
Always use proper extension cord. if an
extension cord is necessary, a cord with
adequate size conductors should be used to prevent
excessive voltage drop, Ioss of power or overheating. The
table shows the correct size to use, depending on cord
length and nameplate amperage rating of tool if in doubt,
use the next heavier gauge. Always use U.L and CSA listed
extension cords.
WHEN SERVICING, USE ONLY IDENTICAL REPLACE-
MENT PARTS.
POLARIZED PLUGS. If your tool is equipped with a polar-
ized plug (one blade is wider than the other), this plug will fit
in a polarized outiet only one way. If the plug does not fit
fully in the outlet, reverse the plug. If it still does not fit,
contact a qualified electrician to install the proper outlet. To
reduce the risk of electric shock, do not change the plug in
any way.
RECOMMENDED SIZES OF EXTENSION CORDS
Tool's Cord Size in AoW.G, Wire Sizes in mm 2
Ampere
Rating
8-10 18 16 14 12
10-12 16 16 14 12
12-16 14 12
Cord Length in Feet
25 50 100 150
3-6 18 16 16 14
6-8 18 16 14 12
120 VOLT ALTERNATING CURRENT TOOLS
Cord Length in Meters
15 30 60 120
.75 .75 1.5 2.5
.75 1.0 2.5 4.0
.75 1.0 2.5 4.0
1.0 2.5 4.0 --
"SAVE THESE mNSTRUCTmONS"
5.

Table of Con,en,s
Page
General Safety Rules .................. 2
Additiona! Safety Rules ................ 3-5
Double Insulated Tools & Extension Cords ........ 5
Table of Contents ................... 6
Glossary of Terms ................... 7
Tools Needed For Assembly .............. 7
Getting To Know Your Table Saw .......... 20-23
Power Switch ................... 20-23
Table ....................... 20-23
Base ....................... 20-23
Blade Tilt Lock Handle ............... 20-23
Table Extension .................. 20-23
Table Extension Lock Handle ............ 20-23
Elevation Wheel .................. 20-23
Blade Tilt Scale .................. 20-23
Rip Fence Scale .................. 20-23
Miter Gauge Scale ................. 20-23
Rip Fence Storage ................. 20-23
Pre-Cut Locater .................. 20-23
Miter Gauge Storage ................ 20-23
Blade, Wrench, & Carrying Case .......... 20-23
Hex Wrench & Storage ............... 20-23
Cord Wrap .................... 20-23
Vacuum Hook-Up ................. 20-23
Rip Fence ..................... 20-23
Blade Guard .................... 22-23
Table Insert .................... 22-23
Miter Gauge .................... 22-23
Unpacking and Checking Contents ......... 24-25
Table of Loose Parts ................ 24-25
Operating Adjustments ............... 26-31
Blade Tilting Control ................ 26-27
Adjusting 90 & 45 Degree Positive Stops ...... 26-27
Adjusting Blade Parallel
to the Miter Gauge Slot .............. 28-29
Adjusting Table Extension ............. 28-29
Page
Table Pointer Adiustment ............. 28-29
Aligning Rip Fence ................. 30-31
Rip Fence Pointer Adjustment ........... 30-31
Miter Gauge Adiustment .............. 30-31
Assembly ..................... 32-35
Attaching Blade Guard ............... 32-33
Changing The Blade ................ 34-35
Attaching The Rip Fence .............. 34-35
Mounting The Table Saw .............. 86-37
Mounting Table Saw to Workbench ......... 86-37
Basic Table Saw Operation ............. 36-52
Safety Power Switch ................ 36-37
Pre-Cut Locater .................. 38-39
Using Rip Fence Pointer .............. 38-39
Using Table Pointer ................ 38-39
Work Helpers ................... 40-41
Using the Miter Gauge ............... 40-41
Crosscutting .................... 42-43
Repetitive Cutting ................. 42-43
Miter Cutting ................... 44-45
Bevel Crosscutting ................. 44-45
Compound Miter Cutting .............. 44-45
Using the Rip Fence ................ 44-47
Ripping ...................... 46-49
Resawing ..................... 48-49
Making a Featherboard .............. 48-49
Using Featherboards ................ 50-51
Non Thru-Sawing ................. 50-51
Rabbeting ..................... 50-51
Dadoing ...................... 50-53
Molding Cutting .................. 50-53
Maintaining Your Table Saw ............ 52-53
Lubrication .................... 54-55
Accessories .................... 54-55
Trouble Shooting ................. 56-57
6.
Glossa of Terms
WORKPIECE
The item on which the cutting operation is being performed.
The surfaces of a workpiece are commonly referred to as
faces, ends and edges.
ANTI-KICKBACK PAWLS
Device which, when properly maintained, is designed to
stop the workpiece from being kicked back at the operator
during operation.
ARBOR
The shaft on which a cutting tool is mounted.
CROSSCUT
A cutting or shaping operation made across the width of the
workpiece cutting the workpiece to length.
DADO
A non-through cut which produces a square sided notch or
trough in the workpiece.
FEATHERBOARD
A device which can help guide workpieces during rip type
operation by keeping workpiece in contact with the rip
fence. Htalso helps prevent kickback.
FREEHAND
Performing a cut without a fence, miter gauge, fixture, hold
down or other proper device to keep the workpiece from
twisting during the cut.
GUM
A sticky, sap-based residue from wood products. After it
has hardened, it is referred to as "RESIN".
HEEL
Misalignment of the blade which causes the trailing or out-
feed side of the blade to contact the cut surface of the
workplece. Heel can cause kickback, binding, excessive
force, burning of the workpiece or splintering. In general,
heel creates a poor quality cut and can be a safety hazard.
KERF
The space in the workpiece where the material was removed
by the blade.
KICKBACK
An uncontrolled grabbing and throwing of the workpiece
back toward the front of the saw during a rip type operation.
LEADING END
The end of the workpiece which, during a rip type operation,
is pushed into the cutting tool first.
MOLDING
A non-through cut which produces a speciat shape in the
workpiece used for ioining or decoration.
NON THRU-SAWlNG
Any cutting operation where the blade does not extend
through the workplece.
PUSH STICK
A device used to feed the workpiece through the saw during
narrow ripping-type operation and helps keep the operator's
hands well away from the blade. Use the Push Stick for rip
widths less than 6 inches and more than 2 inches.
PUSH BLOCK
A device used for ripping-type operations too narrow to
allow use of a Push Stick. Use a Push Block for rip widths
less than 2 inches.
RABBET
A n_chinthe edge of a workpiece. Also called an edge
dado.
RIPPING
A cutting operation along the length of the workpiece
cutting the workpiece to width.
REVOLUTIONS PER MINUTE (R°P°M°)
The number of turns completed by a spinning object in one
minute.
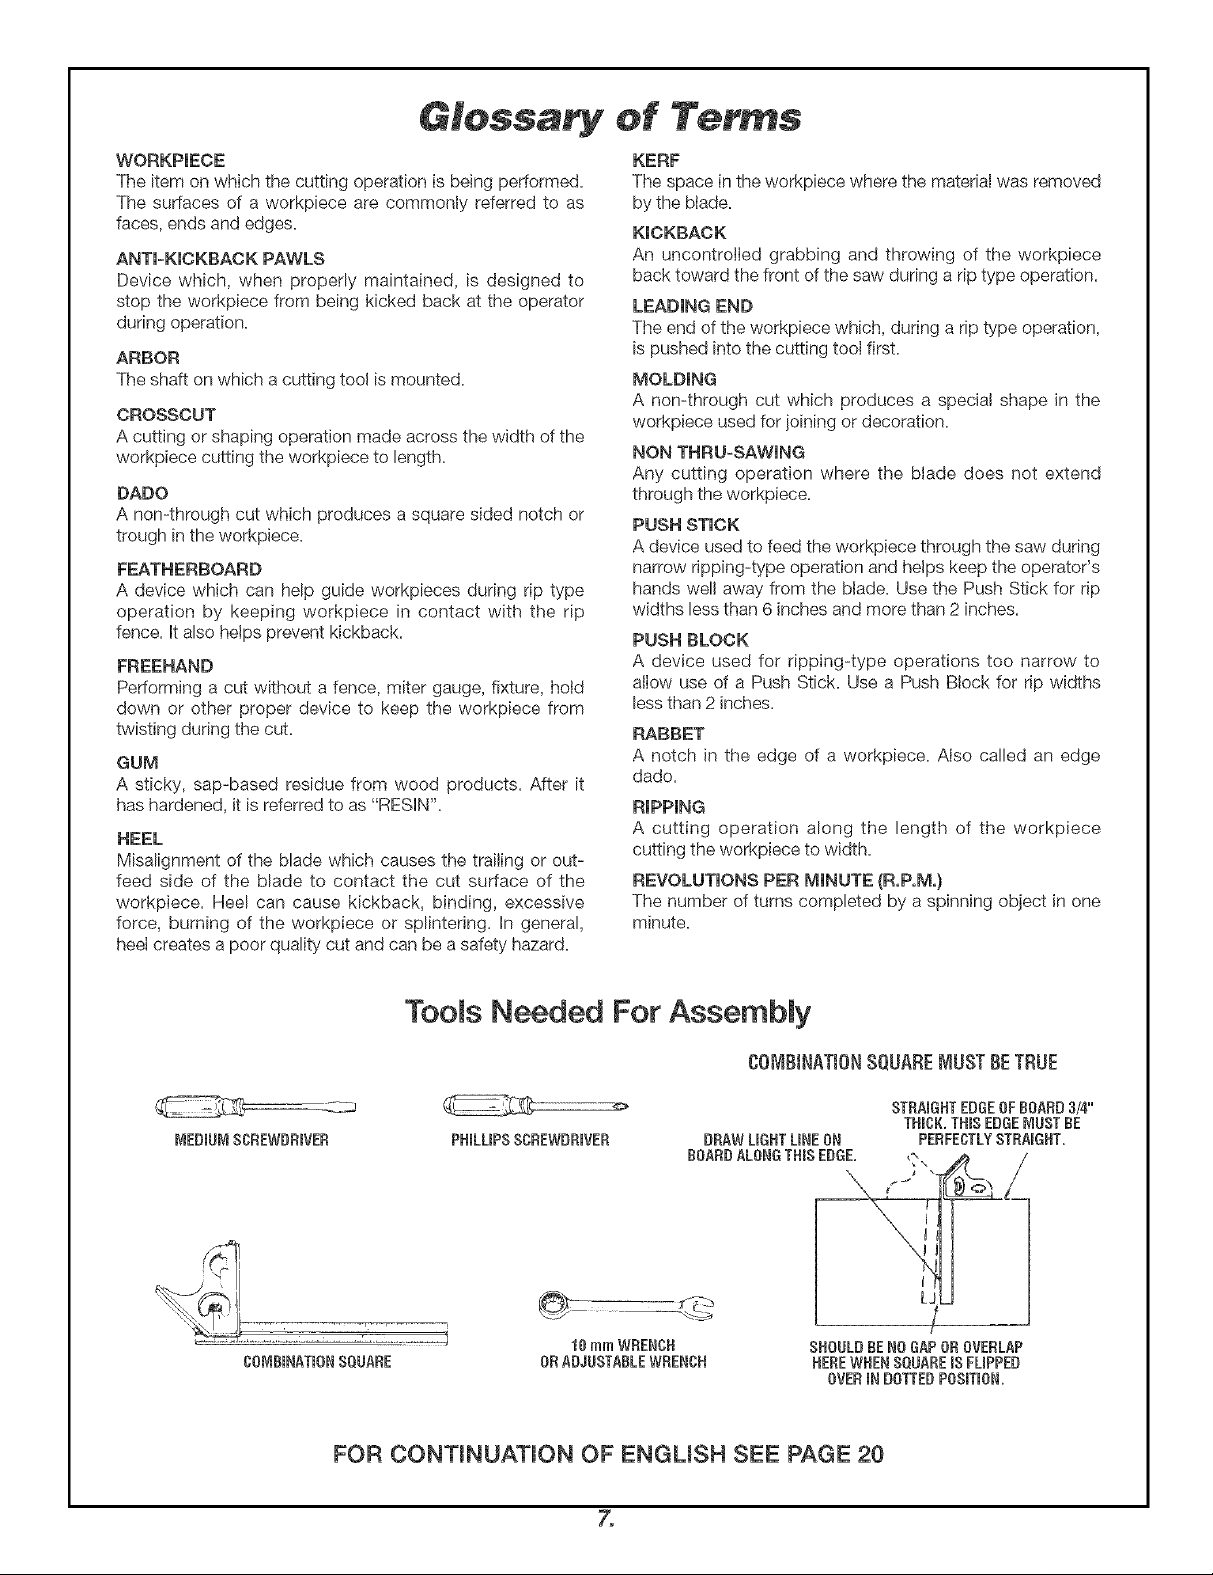
TooJs Needed For AssembJy
COMBINATIONSQUARE WIUSTBETRUE
FOR CONTmNUATmON OF ENGUSH SEE PAGE 20
7.
Consignes g m rales de s cuHt
<<LIRETOUTESLES INSTRUCT!ONS>>L'utilisateur quJn6gligerait de suivre les consignes de s6curit_6nonc6es
ci-dessousetdeprendred'autres precautionsd6mentairesrisqueraitdesubir degravesblessures.
ZonedetravaiM
NELAISSEZPASLESENFANTSS'APPROCHER
Ne laissezaucune personneentrer en contactavec routil ou le cor-
don de rallonge.Tout visiteur doit setenir _ une distancesuffisante
dela zonedetravail
ASSUREZ=VOUSQUEVOTREZONEDETRAVAILESTBiEN
DEGAGEE
Deslieuxetdes_tablisencombr6smultiplientles risquesd'accident
FABTESENSORTEQNEVOTREATELIERNEPRESENTEAUCUN
DANGERPOURLESENFANTS
eninstallantdescadenasetdes interrupteursg_n6raux.
NETRAVAILLEZPASDANSUNENVIRONNE_IENTDANGEREUX
Un outil61ectriquenedoitjamais _treemploy_dartsunendroit humi-
deou mouill6,rli _treexpos6Alapluie. Eclairezbien leslieux o3vous
travaillez.N'utilisezpas I'outil en presencede liquides ou degaz in-
flammables.
S curit deM'utiMisateur
FA_']IUARISEZ-VOUSAVECVOTREOUTIL
Lisezattentivementle rnanuelde rutilisateur et les _tiquettescoll6es
sur !'outil, afin de bien les comprendre. Vous devezconnaTtreaussi
bien lespossibilit6set les limitesde I'outil queles dangers6ventuels
pr6cisqu'il pr_sente.
GARDEZTOU,JOURSVOTREEQUHLIDRE
Assurez-vousque vous ne risquez pas detr6bucher ou de perdre
rdquilibre.
RESTEZSURVOSGARDES
GardeztoujoLIrSlesyeux sur votretravail.Faitespreuvede bonsens.
N'utilisez pas !'outil quandvous 8teefatigu6_ni si vous 8tes sous
reffet d'un m_dicament,deralcoo! ou d'uneautredrogue.
PORTEZDESV_:TEIVIENTSAPPROPRIES
Evitezde po!ter des v_tements flottants ou des biioux qui risque-
raient d'6tre happ_s par des pi_ces rnobiles. Le port de gants en
caoutchouc et de chaussures _ semelle antid_rapanteest recom-
mand_si vous travaillez AI'extCrieur.Portezunecoiffure de protec-
tion sivous avezlescheveuxlongs.
PORTEZDESLUNETTESDES_:CURITI_:
Portez@alementun masquefacial ou un masqueantipoussiCressi
roperation de coupe produit de la poussi_re,ainsique des prot_ge-
oreillesIors detra_,,auxdeIonguedur_e.
PROT_:GEZ-VOUSCONTRELESCROCSItLECTRmQUES
Evitezd'entreren contactavecles surfacesrnisesAlaterre,tellesque
tuyaux, radiateurs_cuisini_reset r_frig_rateurs_quandvous utilisez
routiL
DEDRANCREZLESOUTILS
Quand ils ne servent pas; avant rentretien ; avant de changer les
lames,lesforets, lescouteaux_etc.
LAISSEZENPLACELESCARTERSDEPROTECTION
IIsdoivent_treenbon_tat,bJenr_gl_setbienalign_s.
<<CONSERVEZDESiNSTRUCTiONS,,
ENLEVEZLESDLESDEREGLAGEETSERRAGE
Quand ils ne servent pas avant I'entretien avant de changer les
lames,lesforets, lescouteaux,etc.
ttV_TEZLES_I_SESEN_IARCREACC_DENTELLES
Assurez-vousque rinterrupteur est en position <<ARRI_T>,quand
vous branchezI'outil.
NEMONTE .]A_A_SSURL'OUT_LNISURSONSOCLE
L'utilisateurs'expose_ degravesbtessuress'il renverseroutil ou s'il
entre en contact avecI'outil de coupe. Nepas entreposerdesobiets
quelconques_sur I'outil ou pros de cetui-ci_defaqon_ ce qu'il faille
rnontersur routil ou sur sonsode pour lesatteindre.
EXA_INEZLESP_ECESENDOWIIVIAGI_ES
Avant de poursuivre votre travail, examinez soigneusement toute
pieceendommag_eafindev_rifier si etlefonctionnetouiours correc-
tement et qu'eHeremplit la fonction voulue. V_rifiezque les pi_ces
mobilessont correctementalign6eset bienassujutties,et rern_diez
tout autreprob!_rnequi risqueraitd'affecterson fonctionnement.Un
carter de s_curit_ ou toute autre piece qui serait en mauvais _tat
doivent_trerCpards.
Les r_parations 81ectriquesou m6cani-
quesne doivent8tre enterprises quepar
destechniciensqualifies.Adressez-vous&votreCentrede serviceen
usine Boschle plus proche,& uneStation-serviceBoschagr_e ou
un autreserviceder_parationcornp_tent.
N'utilisez que des pi_ces de rechange
Bosch;tout autretype de piecerisquerait
depresenterun danger.
N'utilisez que des accessoires que le
fabricant recornmande pour votre
rnod_le d'outil. Certains accessoires peuvent convenir _ un outil,
rnaJs8tre dangereuxavecun autre.
Uti isatio de 'outi
N'I_']POSEZPASDECONTRAiNTESEXCESSIVESAL'OUT_L
IIsera plusefficaceetplus sOrsivous le faitesfonctionner au r_girne
pour lequelil a8tdcon_u.
E_IPLOYEZL'OUT_LQUICONV_ENT
N'ernployezpas Lmoutil OUun aceessoirede capacit_ r_duite pour
faire un travail exigeant un outil de grande puissance. N'utilisez
pas I'outil pour des travaux autres que ceux pour lesquelsil a _t_
con_u.Patexernple,n'utilisezpasunescie circulairepourcouper des
branchesd'arbreou desrondins.
ASSWETT_SSEZDIENLAPI_:CESURLAQUELLEVOUSTRAVAILLEZ
Maintenez-laen placeavecdes serre-jointsou un _tau. Vouscourrez
rnoinsde risquesqu'en latenant _la main,et garderezainsiles deux
rnainslibrespour actionnerI'outil.
DiRECTiONDECOUPE
Faitesavancerrouvragecontre unelameou autreoutil de coupe uni-
quement dansla direction oppos_eau sens de rotationde ces der-
niers.
NEVOUSELO_GNEZJA_IAISDEL'OUT_LSANSL'ARRETER
Coupezle contact et nevous _loignezpas a_,,antque I'outil air com-
pl_ternentcess6defonctionner.
&
Entretiende M'outiM
NEMODIFIEZPASL'OUTILETNELESOUrV1ETTEZPAS._UN
USAGEASUSIF
Cetoutil a 6t_ fabriqu6 selon des crit_res de [`lautepr@ision. Toute
modificationoutransformation nonpr@ueconstitue unusageabusif
et risquedeprdsenterundanger.
t_VmTEZLESENDROBTSA L'ATMOSPH_:RESONTA_IINC-EPAR
DESGAZ
N'employezpasd'outils _lectriquesdansLineatmospheregazeuseou
explosive. Les moteurs de ces outils produisent norrnalement des
6tincelbsqui risquerabnt depresenterun danger.
PRENEZSOlNDEVOSOUTBLSETENTRETENEZ=LESSIEN
En les gardantbienaffl_tdset propres, vous en obtbndrez le rende-
ment rnaximum dans des conditions optimales de sGcuritG.Suivez
les instructionspour legraissageou B poseet b dGmontagedesac-
cessoires.Inspectezlescordons d'alimentation_interva!lesr@uliers
et, s'ils sent endornmagGs,faites-les r@arer _ un centre de service
apr_s-venteautori@. Inspectezp_riodiquementles cordons de ral-
lense et remplacez ceux qui ont 6t6 endommagGs. Gardez les
poign@s des outils s_ches, propres et exernptes de toute trace
d'huib ou degraJsse.
Avant de raccorder votre outil _ une
sourcedecourant(prisedecourant,etc.),
assurez-vousquela tension est bienla rn_mequecelle indiqu@sur
la plaqued'identificationdeI'outil. Le branchernentd'un outil SEn"une
source de courantayantunetension supGfieure_.celle prescritepar
le fabricant pr_sente des risques de dornrnagescorporels graves
pour rutilisateur etpeutcauserdes d@_ts b.I'outil. Encas de doute,
NEBRANCHEZPASL'OUTILSURUNEPRISEDECOURANT.L'utili-
sation d'une source de courant ayant une tension infGrieure_ celle
indiqu@sur la plaqued'identificationpeut endornmagerle moteur.
Pour votre sGcuritG,ne rnettez pas en
marche votre perceuse avant de !'avoir
compBtementassembl@et install_ecorfforrnGmentaux instruction
... etd'avoir luet compile leschapitressuivants:
1.Consignesg@Grabsdes@urit6 ............... 8-11
2.Outils _double isolation..................... 11
3. Familiarisez-vousavecvotrescie &table .......... 20-23
4.Assemblage ......................... 32-35
5. Utilisationdela scie_table ................. 36-53
6. Entretien........................... 52-55
7. STAStLITEDELASCBE
VotrescieDOlT ETRESOLIDEMENTBOULONNEEsur un support ou
6tabli.Enoutre, si ellea la rnoindretendance& basculerou _bouger
IorsdecertainesopGrationstellesquela coupede Iongueset Iourdes
planches,utilisezunsupportauxiliaire.
8. LiEUD'UTmLISATtON
Utilisez la scie dans un endroit bien _clair6et installez-lasur une
surface pBne, propre et suffisamment dGgag_epour que vous ne
risquiezpasdetr_bucher ou detomber. Choisissezun endroit assez
grandpour querutilisateurcommeI'observateurnesoientpasfor@s
desetenir dansI'axelongitudinaldela lame.
9. RESOND
Un rebond 6ventuel peut causer de graves blessures. Un <<RE-
BOND>,seproduit Iorsqu'unepartiede rouvrage secoince entre la
larneet le guidede refenteou autre objetfixe. Un rebondpeutaussi
avoirlieu si la lame secoincedans I'ouvrageenraisond'un mauvais
alignement.Lors d'un rebond, rouvrage est soulev_ de la table de
coupeetprojet6en directionde I'utilisateur.Tenez-vous(votrevisage
y compris) de cOt_pat rapport_ la lameafin de ne pasvous trouver
sur latrajectoirede I'ouvrageencasde _<REBO[`,ID,>.
ONPEUTGI_NCRALEI_IENT!tVITERLESRESONDSET
D'EVENTSELLESSLESSURESENPRENANTLESPRECAUTIONS
SUIVANTES:
a. Veiller_ce queb guidede refentesoit paralBlebla lame.
b. Garderla lame bienaR_t@ RemplacerouaffQterbs taquets anti-
rebond!orsqu'ilssent_mouss_s.
e. Laisseren placeb protege-lame,les@arateur et lestaquets anti-
rebond etveiller_ ce qu'ils jouent correctementbur r6b. Le s@ara-
teur doit8trealign8avecla lameet lestaquets doiventcoupercourt ;_
tout rebond _ventuel.V_rifier s'ib fonctionnent avantde pro@der
toute coupeenlong.
d. ['dEPASfaire de coupeen long sur unepiecevoil_eou gondol@
ou qui ne cornporte pas de bordure rectiligne pouvant glisser con-
venabbment centreb guidederefente.
e. NEPAS reBcher la pression exer@esur I'ouvrageavantd'a_,,oir
pouss_cedernbr comp!Stementhersdela lame.
f. Utiliserune baguette-poussoirpour lacoupeen longde piscesde 2
6po delargeuret un guidedecoupeauxiliareet unpBteau-poussoir
pour la coupeenlong de pi_cesd'une largeurinf_rieure_2 po (voir
_<Utilisationdelascb avecleguidede refente,nauxpages44-47).
g. NE PAS LAISSERentre la lame et b guide de coupe la partie
venantd'Gt!ecoupGe(coupeen longou ell travers).
h. Pour B coupe en long faire avancerI'ouvrage en appliquant la
pression sur la section de cederniersituGeentre la lame et leguide
de refente.Lecas6ch_ant,se servird'une baguette-poussoirou d'un
pbteau-poussoir(voir _<f >,,ci-dessus).
18. PROTECTION:Yeux,mains,visage,oreilbs et restedu corps.
POURNEPASETRENAPPt_PAR
L'OUTILDECOUPE...
NEPASPORTERDE:
ATTACREZLESCNEVEUXLONGS
ROULEZLES[_IANCRESLONGUESJUSQU'AU@ESSUS
DESCOUSES
a. Si unepiecequelconquede lascie rnanque,nefonctionnepas,est
endomrnag_eou cass_e(p. ex., interrupteur du moteur_autrecom-
rnande_dispositif de @curit_ ou c_bb d'aBnentation}, cessezd'uti-
liser I'outil jusqu'_ ce que la piece en question soit correctement
r@ar_eou remplac@.
b. Portezdes lunettes de s6curit_ et un masque facial si la coupe
produit beaucoupde sciure. Portez un serre-t6teantibruit ou des
bouchons d'oreilles Iors d'op_rations de Iongue dur6e. Des frag-
rnents de bois ou d'autres objets de petite taille qui entreraienten
contact avecI'arri6rede la lameen rnouvementpourraient6tre vio-
bmment projet_s en direction de !'utilisateur.On peutg@_rabment
@iter ce genre d'incidenten rnaintenanten place le protSge-lameet
b s@arateur pour toutes lesopSrationsde coupede rouvrage <<DE
PARTENPART>,(d'un bord _ !'autre) ETenfaisanttornber tousles
fragmentsde rnat_riaudeB table decoupe_ raide d'un b£on, DES
qu'ib se @tachent.
e. Faitestr_s attention Iorsquevous ex@utezdesoperationsn_ces-
sitant le @montage du protege-lame tels que les coupes de @-
doubbment, le rainurageet rex@ution de feuilluresou dernoulures,
etremettezb protege-Braeen placedSsque roperationesttermin_e.
d. NernettezJAMAIS la scb en rnarcheavant d'avoird@a@ latable
de coupedetous outils,fragments debob, etc. pouvants'ytrouver,
exceptionfaitede rouvrage etdesaccessoiresdevantservir_b faire
avancerou_ b soutenirpendantreparationpr@ue.
gaits det_epgraedetailb
vetemeetsfbttaets
e_avate,bijeux
9.
e. Nevous tenezJAMAIS (votre visagey compris) dans I'axe Iols-
gitudina!deroutil de coupe.
+Ne rnettezJAMAIS vos doigts ou mains dans une position te!le
qu'ils risquent de se faire happerpar la lame ou tout autre outil de
coupe.
NetendezJAMAIS le braspar-dessusroutil decoupeafin de rnain-
tenir ou soutenir rouvrage, de retirer desfragments de bois ou pour
toute autre raison. Evitezles operations et positions d_licatespou-
vantfairequevos doigtsou rnains entrent en contactaveclalameou
routil decoupes'ils venaient&glisser.
oNe travaillezJAMAIS <<A MAIN LEVEE>,-- servez-voustoujours
soit du guide de refente, soit du guide de coupe angulaire pour
positionneretguider I'ouvrage.
N'utilisez JAMAIS le guide de refente pour pratiquer des coupes
transversales, nile guide de coupe angulaire pour exCcuter des
coupesenlong. N'utilisez PASleguide de refentecornrnebutte Ion-
gitudinale.
Netenezni ne touchezJAMAIS <<I'extr_mit6libre ,>de rouvrage,ni
aucunmorceaudeboisvenantd'CtrecoupC,alorsquelamachineest
en rnarcheou quela lametourne.
oArrCtezla rnachineet dCbranchezle cordon d'aJirnentationavant
d'enleverI'_!Cmentamovible de latable de coupe,de changer I'outil
de coupe, de retirer ou de remettre en placele protege-lame,ou de
procCder&tout rCglage.
En casde dCcoupagede Ionguespi@cesou de piCcesplus larges
que la table de coupe, pr_voyezdes supports _ I'arriCreet sur les
c0tCsdela scie.
Votresciepeatcouperle plastiqueetles matCriauxcomposites(tels
queles panneauxdefibres comprirn_es).Toutefois,8tantdonn6que
cesmatCriauxsont engCn_raltrCs dursetglissants, ilsepeut queles
taquets anti-rebond ne remplissent pas lear office. Par consCquent,
veillez_ vous conformer absolument& la rnarche& suivre pour les
coupesen long,aussi bienen ce qui concerneles pr_paratifsquela
coupeproprernentdite.Nevous tenezpas, etne laissezpersonnese
tenirdans !'axed'un rebond_ventuel.
f. Si la lamese coincedansrouvrage mettezrinterrupteur de la scie
en position <<ARRET,>,d_gagezI'ouvrage et assurez-vous que la
lameest parall_leaux fentes ou rainuresde latable et que le s@pa-
rateur est bien align@avecla lame.Si la chose se produit au cours
d'une op@rationde coupe en long v#rifiez si le guide de refenteest
parallCle_ la lame. Le cas 6chCant,faites les rCglages selon les
instructions.
g. NefaitesJAMAISde coupeparlots (c'est-&-direalignerplusd'une
piCceenface dela lame verticalementou horizontalementet pous-
ser letout contre la lame). La larnepourrait se coincerdans uneou
plus d'une piCceet provoquerune pertede contr01eet d'_ventuelles
blessures.
h. NE DEGAGEZPAS de fragments de rnatariau pouvant atre em-
pfisonnCsdans le prot@ge-lamependantque la scie est en marche.
Vous risqueriezde vous blesserles rnains ou de provoquer un re-
bond. Mettezrinterrupteur en position <<ARRET,>etattendezque la
lames'immobilise.
11. FAMIUARISEZ=VOUSAVECVOSOUTILSDECOUPE
Si routil de coupe est 6rnouss_, encrass_,rnal aiguis_ ou real in-
stallC,rouvrage risquedeprovoquer un grippage decoincer la lame
ou de bloquer la machine,ou encorede donner lieu _ un rebond en
direction de rutilisateur. Limitezles risquesde blessuresen entrete-
nantcorrectementI'outil decoupeetla machine.NETENTEZJAMAIS
DE DEGAGER UNE LAME QUI S'EST BLOQUEE SANS AVOIR
D'ABORDMIS L'INTERRUPTEURENPOSITION<<ARRET,>.
a. Nevous servezJAMAIS de rneules de disques abrasifs de d_-
coupage,de roues defriction (fraises-scies),de brosses m_talliques
ou dedisquesde polissage.
b. N'UTIL]SEZQUEDESACCESSOIRESRECOMMANDES.
e. Les coupes transversales seront plus aisles et la sCcuritQsera
rneilleure si vous rnontezune planche de guidage auxiliaire sur le
guidedecoupeangulaire(voir pages22 et23).
d. Assurez-vousque la partiesup_rieurede I'outil de coupetourne
dansvotre direction Iorsquevoas vous tenez en position de coupe.
Wrifiez 6galementsi I'outilde coupe, lescolliers de rarbreet rCcrou
de fixationsont correcternentinstall_s.MaintenezI'outil de coupele
plus bas possible pour !'operation envisag_e.Dans la mesure du
possible,laissezen placetousles 6l_mentsde protection.
oN'utilisezaucunelameou aucunautretyped'outil de coupecongus
pour unevitessede rotation infCrieure& 4800tr-rnn. N'utiliseziamais
un outil de couped'un diamCtresup_rieurau diam_trernaximum en
fonction duque!la scie a 6t_congue.Pourune efficacit_et unes_cu-
rit6 maximums Iors d'op_rations de coupe en long servez-vous
d'unelame du diamCtrernaximumautoris_;ainsi, le sCparateursera
tout prCsde lalame.
e. Assurezwous que I'_lCment arnovible de la table de coupe est
exactement& rfiveauavec la table ou ICg_rernenten retrait par rap-
port QcettederniCresurtousles cOtCsmis & part rarri_re. N'utilisez
JAMAISlasciesans queI'6l_mentappropri6soiten place.
USEZ ETSUIVEZLES CONSIGNESDESECU_ITEFIGURANTA L'AVANTDEVOT_E SCIEDETABLE.
10.
12.LASECURITY:AVANTTOUT
POURASSURERSA SEOURITE,UUTILISATEURDOlTFAIRE
PREUVEDEBONSENSETDEPRUDENCEPENDANTTOUTLE
TEMPSOUILSESERTDELASCIEADI_COUPER,
Nelaissezpas rbabitude (d_coulantd'un
usagefr6quent de votre scie) endormir
votre vigilance. N'ouNiez jamais qu'une fraction de seconds d'in-
attentionpeutentraTnerdegravesblessures.
Lesoutils61ectriquespeuvent
projeterdescorps6trangers
dans les yeux de leur
utilisateur et lui infliger de
graves blessuresoculaires.
Porteztoujoursdeslunettes
de s_curit6 r_pondant aux
norrnesANS! Z87.1 (cette
caract6ristiqueestindiqu_e
surFemballage)avantd'utiliserunoutil_lectrique.
DouMe isolation
Los travau× _ mamashine ternque
pen£age,ssiage, meumage,pergageet
autres travaux du b_timent peuvent sr_er des peussi_res
sentenant des preduitsshimiques qui sent des causes resennues
de cancer,de mamfermatiensengdnitameeu d'autres preN_mes
repredustifs. Cespreduitsshimiques sent, par exelapme:
, Leplomb provenantdes peintures& basedep!omb,
, Les cristaux de silices provenant des briques et du ciment et
d'autres produits dema£onnerie,et
, L'arsenicet lechrome provenantdesbois traitSschimiquement
Leniveaude risquedO&cette expositionvarie avecla frSquencede
ces types de travaux. Pour r_duire Fexposition & ces produits
chimiques il faut travailler dans un lieu bien ventil_ et porter un
8quipement de s6curit_ appropri8 tel que certains rnasques
poussi_re congus spScialement pour filtrer les particules
microscopiques.
La double isolation[] est utilis_edarts les outils 81ectriquespour
_liminer lebesoin decordon d'alimentationtrois ills, dent la prise de
tene, et de dispositif d'alimentation_ prisede terre. Ells est homo-
Iogu6epar rUnderwriter'sLaboratories,I'ACNORetFOSHA.
IMPORTANT: L'entretiend'un outil &double isolation exigela con-
naisancedu syst_rneetla compStenced'untechrficienqualifi6
Remplacezimm_diatementtoutu rallon-
ge endommag_e. L'utilisation de ra!-
Ionges endommag6esrisquede provoquer un choc _lectrique,des
brOluresou I'6lectrocution.
Toujours Litiliserunerallongeappropri6e.
Encasde besoind'une ra!longe utilisez
un cordon de calibresatisfaisantpour 6viter touts chute detension,
perte de courant ou surchauffe.Letableauci-contre indiquele calibre
des rallonges recommand_esen fonction de leur Iongueur et de
Hntensit_indiqu_esurla plaquedu constructeurde routil. Encasde
doute, optez pour lu prochain calibre inf6rieur.Utiliseztoujours des
rallongeshomologu6espar rU.L etI'ACNOR.
ENCASD'ENTRETIEN,N'UTILISEZQUEDESPIECESDERECHANGE
IDENTIQUES.
FICHESPOLARISEES.Si votre outil est _quip6d'une fiche polaris_e
(unelameplus large queFautru)ells nes'enfiche qued'une mani_re
densune prisepolaris6e.Sila fiche n'entrepas_fond dans la prise,
tournez-lad'un demi4our. Si e!lerefuseencored'entrer,dernanduz
un81ectricienqualifi_d'installer uneprise appropri_e.Pour r_duirele
isque dechocs_lectriques,nernodifiezlafiched'aucunefa_on.
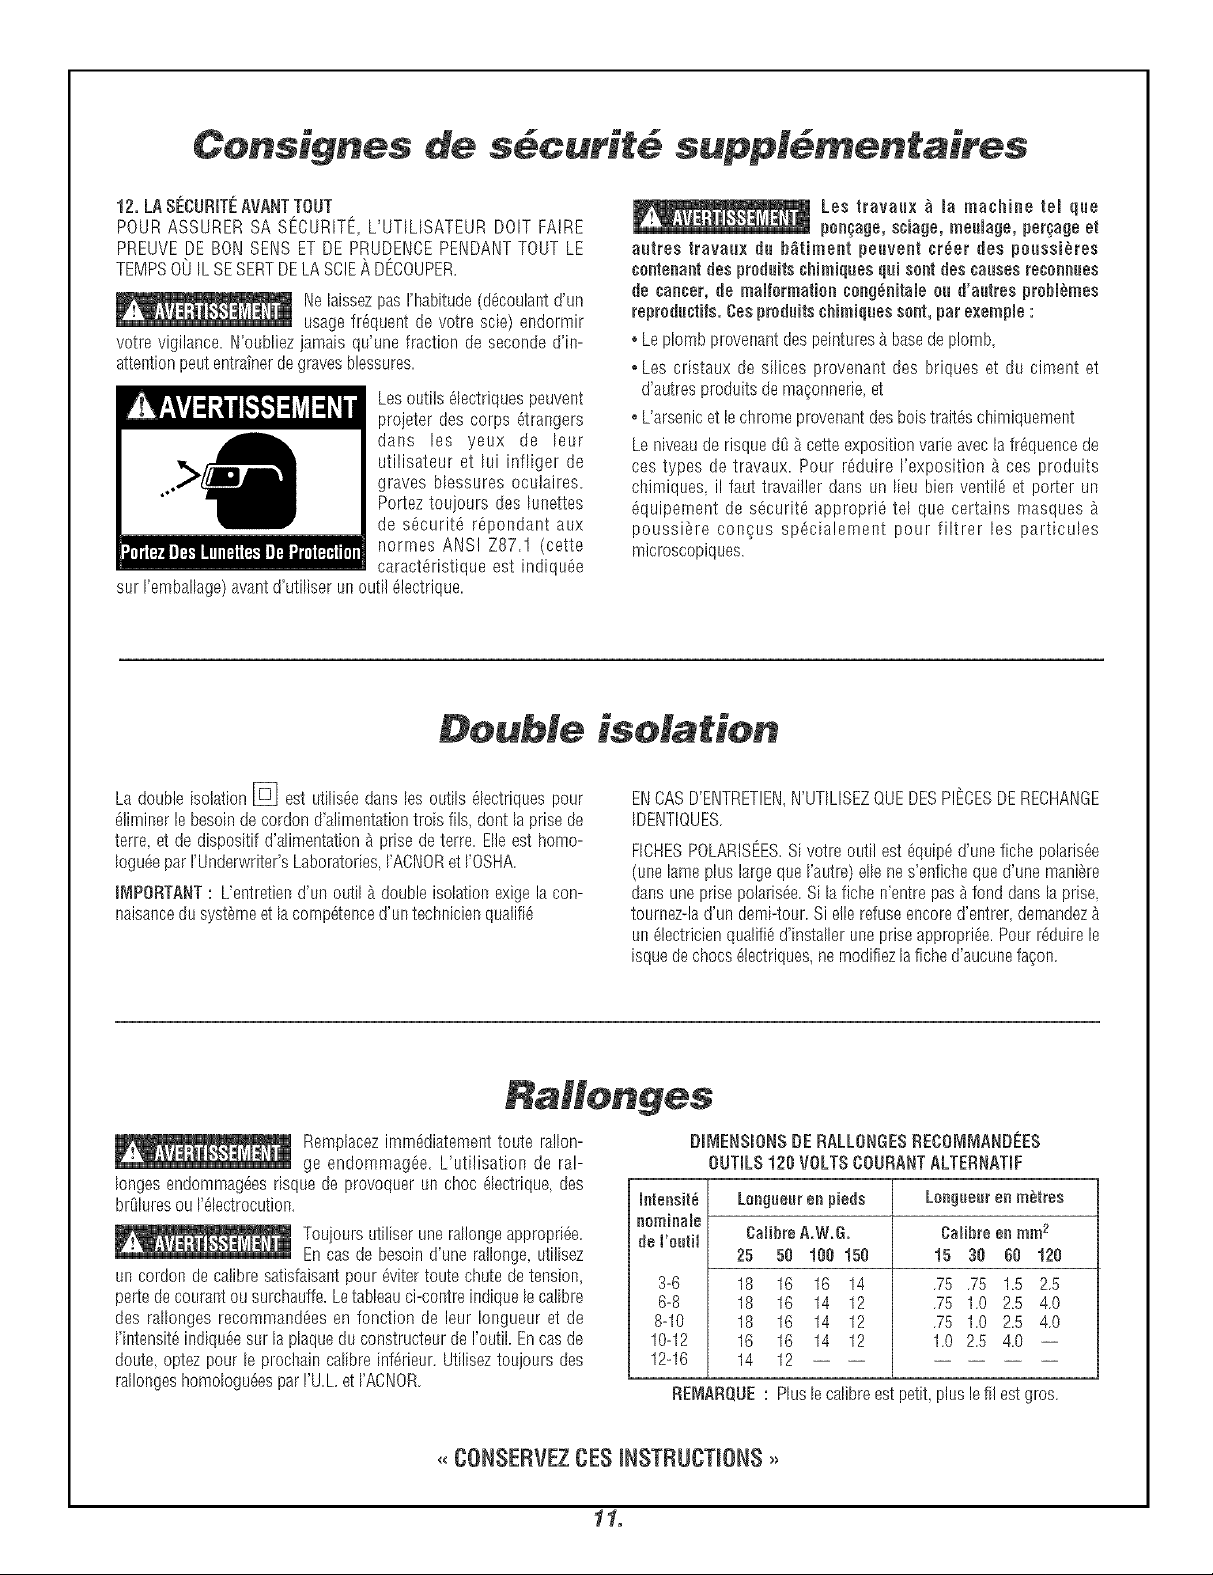
D_IENSIONSDERALLONGESRECO_I[_ANDEES
OUTILS120VOLTSCOURANTALTERNATIF
Inieasiid Le_gueareu pieds
uerniuale
de re_tii CalibreA.W.&
25 58 188 158
3-6 18 16 16 14
6-8 18 16 14 12
8-10 18 16 14 12
10-12 16 16 14 12
12-16 14 12
REI_ARQUE: Plus lecalibre estpetit, pluslefil estgros.
Lengueuren metres
Calibreeu mm2
15 38 60 120
.75 .75 1.5 2.5
.75 1.0 2.5 4.0
.75 1.0 2.5 4.0
1.0 2.5 4.0 --
<<CONSERVE CESiNSTRUCTiONS,,
11.
Table des mati res
Page
Consignesg6nSralesdesScurit_ ................ 8
Consignesde s_curit6suppl6mentaires ........... 9-11
Doubleisolation et rallonges ................. 11
Tabledes rnati_res ...................... 12
Lexique ........................... 13
Outilsn_cessaires_ rassemblage ............... 13
Farniliarisez-vousavecvotre sciedetable .......... 20-23
Interrupteur ....................... 20-23
Tabledecoupe ...................... 20-23
Socle .......................... 20-23
PoignSedeverrouillagedu dispositifd'inclinaison
dela lame ........................ 20-23
Rallongedetable ..................... 20-23
Poign6edeverrouillagedela rallongedetable ....... 20-23
Volantder_glagedehauteur ............... 20-23
Echelled'inclinaisondela lame .............. 20-23
Echelleder_glagedela positiondu guidede refente ..... 20-23
Echelleder_glagedela positiondu guidedecoupeangulaire 20-23
Compartimentde rangementduguidede refente ...... 20-23
Rep_redesciage ..................... 20-23
Compartimentde rangementduguidede coupeangulaire . .20-23
Lame cl6 etcoffretde transport .............. 20-23
CI6hexagonaleet rangement ............... 20-23
Rangementdu cordon .................. 20-23
Raccordd'aspiration ................... 20-23
Guidede refente ..................... 20-23
Prot_ge-larne....................... 22-23
EI6mentamovibledelatable decoupe ........... 22-23
Guidede coupeangulaJre ................. 22-23
Ouverturederemballageetv6rificationducontenu ..... 24-25
LJstedespi_cesfournies ................. 24-25
R_glages ......................... 26-3!
R_glagede rinclinaisonde lalame ............. 26-27
R_glagedes buttes fixes _90° etA45 ........... 26-27
R_glagedu parall_lismede lalame ............. 28-29
R_glagede larallongedetable ............... 28-29
Page
R6glagede rindicateurde latable ............. 28-29
Alignementdu guidederefente .............. 30-31
R6glagede rindicateurdu guidederefente ......... 30-31
R6glagedu guide decoupeangulaire ............ 30-31
Assemblage ....................... 32-35
Montagedu protege-lame ................. 32-33
Changementde la lame .................. 34-35
Montagedu guidede refente ................ 34-35
hlstallationdela sciedetable ............... 36-37
hsstallationdela sciedetablesur un6tabli ......... 36-37
Utilisationde la sciede table ................ 36-52
h_terrupteurde s_curit6 .................. 36-37
RepUtedesciage ..................... 38-39
Utilisationde Hndicateurduguide derefente ........ 38-39
Utilisationde rindicateur delatable ............ 38-39
Accessoiresdesciage ................... 40-41
Utilisationdu guidedecoupe angulaire ........... 40-41
Coupetransversale .................... 42-43
Coupe_ r6p_tition .................... 42-43
Coupeangulaire ..................... 44-45
Coupetransversalebiseaut6e ............... 44-45
CoupeangulairebJseaut_e................. 44-45
Utilisationdu guidederefente ............... 44-47
Coupeenlong ...................... 46-49
Coupeded6doublement .................. 48-49
Fabricationd'uneplanche_ilanguettes ........... 48-49
Utilisationdes planches_ilanguettes ............ 50-51
Coupepartielle ...................... 50-5!
Feuillures ........................ 50-51
Rainures ......................... 50-53
Moulures ........................ 50-53
Entretiendela sciedetable ................ 52-53
Lubrification ....................... 54-55
Accessoires ....................... 54-55
Guidede diagnostic .................... 56-57
12.
OUVRAGE
Piece subissant rop_ration de coupe. Les diff_rentes surfaces de
rouvragesont comrnun_rnentappel_esfaces,extr_rnit_setbords.
TAQUETSANTFREBOND
Syst_rnequi, Iorsqu'il est correcternententretenu sert _ emp_cher
queFouvragenesoitprojet_endirectiondeVutilisateur.
ARBRE
Axesur{eque{est rnont_Vouti{de coupe.
COUPE TRANSVERSALE
OpCrationde coupe ou de raise en forlne faite dans le sens de la
largeurdeI'ouvrage(raisedeI'ouvrage&la Iongueurvoulue).
RAINURE
Coupepartielleproduisant uneeotailleou gorgedesectioncarrCe.
PLANCHEA LANGUETTES
Accessoirecontribual_t_ guider rouvrage pendantlesoperations de
coupe en long; maintient I'ouvrage en contact avec le guide de
refenteetcontribue_ prCvenirlesrebonds.
COUPE,_ MAiNLEVEE
Coupeex_cut_esans Vaided'une butCe,d'un guide orientable_d'un
dispositif defixationou de retenue,nid'aucunautresystCmevisant
empCcherVouvragedesedCplacerpendantlacoupe.
GOMME
D_pOtg!utineux provenantde la s_vedes produits _ base de bois;
unefois durcie,se nomrne<<RESINE,>.
DEVIATION
Mauvaisalignementde lalame faisantque sa partiearri_re entreen
contact avec la surface de !'ouvrage venant d'Ctre coupCe. Cette
dCviationpeut entraTnerdesrebonds ou le blocagede la rnachine,
faireforcer le moteur, provoquer un 6chauffementexcessif de Fou-
vrage ou faire que rouvrage se fende. D'une maniCregCnCraleune
dCviationdela lameempCchede r_aliserdescoupespropreset peut
donnerlieu_ dessituationsdangereuses.
TRAITDE SOmE
EntaiHepratiquCepar la {amelots d'une opCrationde coupede part
en part ou entaillelaissCepat la lame Iors d'une opCrationde coupe
partielle.
VOlE
%aisseur du trait de scie, correspond & I'_paisseur de rnatiCre
enlev_epar lalame.
EXTRItMITEAVANT
ExtrCmit6de rouvragequi entre lapremiere en contactavecla lame
Iorsd'uneopCrationdecoupe en long.
MOULURE
Coupepartielle de profil particulier servant _ Vassemblageou _ la
d_coration.
COUPE PARTmELLE
Toute opCrationde coupe Iors de {aqueHela lame ne traverse pas
complCtementVouvrage.
BAGUETTE=POUSSO_R
Accessoire servant _ Mire avancer I'ouwage contre la lame Iors
d'opCrationsde coupeen long de pi_ces8troites de fagon _ ceque
les rnains de I'utilisateur demeurent _ bonnedistance de la lame.
Servez-vousdela baguette-poussoirIorsquela largeurde la piCce
refendrese situe entre2 et6 pouces.
PLATEAU=POUSSOIR
Accessoireutilis_lore d'op_rationsde coupeen long de pi_cestrop
_troites pour queI'on puisse utiliser une baguette-poussoir.Servez-
vous d'un plateau-poussoirIorsquela largeurde la piece_ refendre
estiMCrieureA2 pouces.
FEUILLURE
Entai{{epratiqu_esur le bordde Fouvrage.On I'appel{eparfois rainure
debord.
COUPEENLONG
CoupepratiquCedansle sens de laIongueur deVouwage(coupe de
Fouwage_la largeurvoulue).
TOURS:MINUTE(TR=MN)
Nombre de r_vo{utionsaccomplies par un ob]et rotatif en Vespace
d'unerninute.
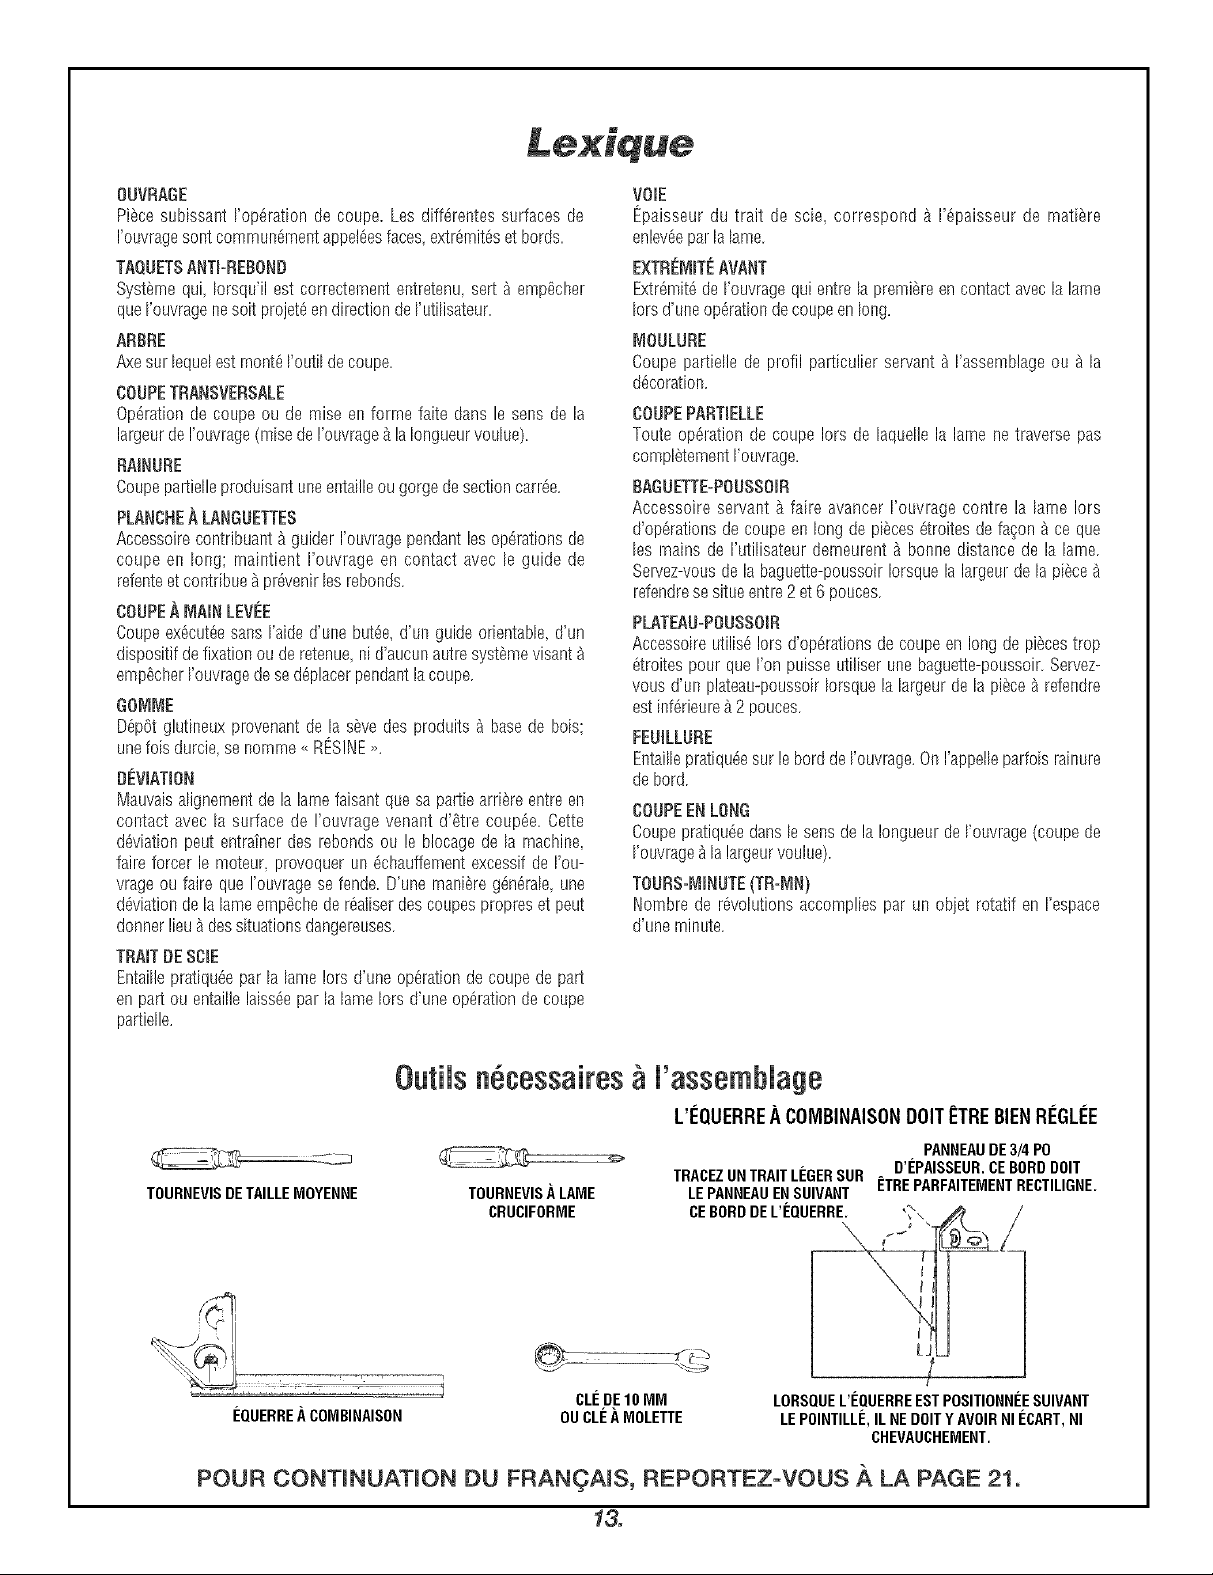
Outi s n cessaires 'assemb age
L'I_QUERREA COMBINAISON DOIT ETREBIENREGLI_E
TRACEZUNTRAITLINGERSUR D'I_PAISSEUR.CEBORDDOlT
TOURNEVISDETAILLEMOYENNE
I_QUERRE._COMBINAISON
TOURNEVIS._LAME
CRUCIFORME
CLI_DE10MM
OUCLI_._MOLETTE
POUR CONTINUATION DU FRAN(_,AJS, REPORTEZ-VOUS A LA PAGE 21.
13.
LEPANNEAUENSUIVANT f:TREPARFAITEMENTRECTILIGNE.
CEBORDDEL'I_QUERRE" *_\ _Z
LORSQUEL'I_QUERREESTPOSITIONNI_ESUIVANT
LEPOINTILLI_,ILNEDOlTYAVOIRNII_CART,NI
CHEVAUCHEMENT.
PANNEAUDE3/4PO
[.
l

Normas generales de seguridad
"LEA TODASLAS INSTRUCCIONES'.E! incumplirniento de las normas de seguridad indicadasa continuaci6ny otras
precaucionesdeseguridadb_sicaspuededar Iugaralesionespersonalesgraves.
Area detraba]o
{vIANTENGAALEJADOSA LOS NINOS
No permita que los visitantestoquen la herramier_tao el cordon de
extensiDn.Todos los visitantes deben mantenersealejadosdel _rea
detrabajo.
MANTENGA LIMPIASLAS AREAS DETRABAJO
Las _reasy mesasdesordenadasinvitan a que se produzcanacci-
dentes.
HAGA EL TALLERA PRUEBA DE NINOS
Concar_dadoseinterruptoresmaestros.
EV_TELOSENTORNOSPELIGROSOS
No utilice herrarnientasmec_nicasen lugareshtimedos o mojados.
Mantengael _.reade trabaio bien iluminada.No expongalas herra-
mientas mec_nicasa la Iluvia. No utilice la herramientaen presencia
deliquidos ogasesinflamables.
SeguridadpersonaM
CONOZDASUNERRAMIENTAMECANICA
Leay entienda el manual del usuario y las etiquetas puestas en la
herramienta.Aprendalasaplicacionesy loslimites,asi coredlospelf
gros potencialesespecificosqueson propios deestaherrarnienta.
NOINTENTEALDANZARDE_'IASIADOLEJOS
MantengaunaposiciCny uoequilibrioadecuadosentodd rnomento.
I_IANTENGASEALERTA
Fijeseen Io queestC.haciendo.Use el sentido comOn.No utilice la
herramientacuandoest_car_sado.No lausecuandoseencuentreba-
io lainfiuenciademedicarnentosoaltomar alcoholuotras drogas.
VISTASEADECUADAMENTE
No seponga ropaholgada niioyas.Puedenquedaratrapadasen las
piezasm6viles. Se recomienda!;guantesde cauchoy calzado anti-
deslizantecuandose trabaia a la intemperie. Usecubiertas protec-
torasparaetpe!oa fin desuietarel pe!olargo.
USEGAFASDESEGURIDAD
Usetambi_nunacaretaouna m_scaracontraelpolvo si laoperaciDn
generapolvo, y protecci6nen losDidoscuandouselas herramientas
mec_rficasrnuchorato.
PROTEJASECONTRALASSACUDIDASELECTRtCAS
Eviteel cootacto del cuerpocon las superficiesconectadasa tierra.
Pot eiernplo:tuberias, radiadores,cocinasy refrigeradores.
DESCONECTELASNERRA_IIENTASDELA FUENTEDEENERGIA
Cuandono se est_nutilizando,antes del serviciode aiustesy repa-
raciones,alcambiar hoias,brocas,cortadores,etc.
MANTENGAPUESTOSLOSPROTECTORES
Enbuenascondicionesdefuncionamientoy con el aiustey laalinea-
ciCnadecuados.
QUITELASLLAVESDEAJUSTEY LASLLAVESDETUERCA
Cuandono se estCnutilizando,antesdel servicio de aiustesy repa-
raciooes,alcarnbiarhoias,brocas,cortadores,etc.
EVBTEELARRANQUEACCIDENTAL
Aseg_resede que el interruptor est_ en la posiciCn 'OFF" (desco-
nectado)a!_tesdeenchufarla herramienta.
NUNCASESUBAA LANERRA_dmENTANIA SUSOPORTE
Depodrian producir lesionesgravessi la herramientase inclinao si
setoca accidentalmentela herrarnientade corte. No guarde rnate-
riales sobre la herramientani cema de _sta detal manera quesea
necesariosubirsea la herrarnientao asu soporteparaIlegaraellos.
REVISELASPmEZASDA_]ADAS
Antesdevolver a utilizarla herramienta una protecci6nu otra pieza
que est_ da_adadeber_ revisarsecuidadosamenteparaasegurarse
de quefuncionarAadecuadamentey de que realizarAla funci6n para
la cualestAdise_ada.VerifiquelaalineaciCnde las piezasm6viles,el
rnontaje y cualquier otra situaciOn qLlepueda afectar su funcio-
namiento.Unprotector ocualquier otrapiezaquepresentadaiios se
debesustituir adecuadamente.
Todas las reparaciones, el_ctricas o mec_-
nicas, deben ser realizadasOnicarnentepor
t_cnicos de reparaci6n capacitados. P6ngase en contacto con el
Centrodeservicio def_bricaBosch rn_spr6ximo, con la Estaci6nde
servicio Boschautorizadao con otro servicio de reparacionescom-
petente.
Utilice piezasde repuestoBosch tinicamente;
cualquierotra puedeconstituir un peligro.
Utilice tinicamente accesorios qoe est_o
recomendados por el fabricante de su
rnodelo. Los accesorios que pueden ser adecuados para una
herramientapuedenvolverse peligrosos cuando se utilizalsen otra
herrarnienta.
Uti izadDBde herramieBta
NOFUERCELANERRANI_ENTA
La herramientahar_e!trabajo rnejory con mAsseguridadala capa-
cidadparalacualfue dise_ada.
UTILIDELARERRA_IENTAADECUADA
No fuerce u_a herrarnientapequeiiaoun accesoriopequefio a rea-
lizarel trabajo de una herramientapesada.Noutilice la herramienta
para fEmcionespara lascuales no fue dise_ada-- por ejemplo, no
useunasierracircularparacortar rarnaso troncosdedrboles.
FIJELAPIEZADETRABAJO
Utiliceabrazaderaso untornillo de carpinteroparasujetarla piezade
trabajo cuando esto resulte pr_ctico. Es mAsseguro que utilizar la
rnanoy dejalibresarnbasmanosparamaneiarla herrarnienta.
DIRECCIONDEAVANDE
Hagaavanzarla piezadetrabaio por unahoja o cortadoren contra
de!sentidoderotaciCndela hoiao cortadorOnicamente.
NUNDADEJELAHERRAI_ENTAFUNDiONANDODESATENDIDA
Apaguelaherramienta.No deielaherramientahastaque_stase haya
detenidopot completo.
"CONSERVEESTASINSTRUCCIONES"
14.
Cuidadode [aherram[enta
NO ALTERE NiRAGA USO INCORRECTODE LARERRAMIENTA
Estas herramieetasest_n fabricadascon precisiGn.Cualquier a[te-
raciGno modificaciGnnoespecificadaconstituye un useincorrecto y
puededarlugarasituacionespetigrosas.
EV_TELASAREASDEGASES
No utilice herramientaselGctficasen una atmGsferagaseosao ex-
plosiva. Los motores de estas herrarnientasnormalrnenteproducen
chispasy puedendar lugar unasituaciGnpdigrosa.
MANTENGA LAS RERRA_IIENTASCONCUIDAO0
Conserve las herramieetas afi[adas y {in,pies pare que funcionee
meier y con m_s seguridad.Siga las instrucciones pare lubricar y
cambiarlos accesorios.InspeccioneperiGdicamentelos cordonesde
las herramientasy si est_.ndecades hAgalosrepararper un centre
de servicio autorizado.InspeccioneperiGdicamentelos cordones de
extensiGny sustitOyalossi estdndecades. Manteega los mangos
secos,!impiosy libres deaceiteygrasa.
Antesde conectar laherramientaa Lmafueete
de energia(cajatomacorriente,tomacorriente,
etc.), asegt_resede que el voItajesuministrado es el mismo queel
quese indicaen laplacedd fabricantedela herramienta.Unafuente
deenergiacon unvoItajesuperioral especificadopare laherrarnieeta
puede ocasionar graves lesionesal usuario, as[ come da_os ala
herramienta. Ee case de duda, NO ENCHUFELA HERRAMIENTA.
La utiIizaciOnde una fuente de energia con LmvoItaie inferior a la
capacidadnominal indicadaen laplaca dd fabricante es periudicial
paraelmotor.
Parasupropia seguridadno hagafuncionarla
sierra de mesa haste que _sta se encuentra
completameetemontadaeinstaIadaconforme alas instrucciones...
y hastaque hayalefdoy eetendidoIosiguiente:
1. Norrnasgeneralesdeseguridad................. 14
2. Herramientascon aislamientodoble .............. 17
3. FarniliarizaciGncon lasierrade rnesa ............ 20-23
4. EnsambIaie.......................... 32-35
5. Funcionarnieetob_sicode lasierradernesa ........ 36-53
6. Mantenimientodelasierrade rnesa............. 52-55
7. ESTABILIDADBE LAS_ERRA
La sierra de rnesa DEBEESTARATORNILLADAfirmemente a Lma
base o baeco de trabajo. Adem_s, si la sierra de mesa tiende a
incIinarseomoverseduranteciertasoperacionestalescorno e!corte
detaNaslargasy pesadas,utiliceunsoporteauxiliar.
8. UBiCAOBON
UtiIicelasierra de rnesaen un _reabien iluminadasobre ulnasuper-
ficie nivelada,suficienternentelirnpia y lisa para reducirel riesgo de
tropezonesy caidas. UtiIiceIadonde ni el operadorni el observador
casualseveanforzadosa situarseenlineaconla hoja.
9. RETROCESO
El retroceso puede causal lesiones graves: Se produce 'RETRO-
CESO"cuandouna partedela piezadetrabaiose atascaentre la hoja
de la sierray eltope gu[a paracortaral hilo u otro objeto fijo. Elque
la piezadetrabajo seatasqueen lahojadebidoa una maIaalineaciGn
tarnbi_n puedecausal retroceso. Duraeteel retroceso, la pieza de
trabajose eleva respectoala mesa y saledespedidahacia el ope-
rador. Mantengala cara y e! cuerpoa un lade de la hoja de sierra,
fuerade lineacon un posiNe 'RETROCESO'.
LOSRETROCESOSY LASPOSIBLESLESIONESNOR[v1ALI_IENTESE
PUEDENEVtTAR:
a. Manteeiendoel tope-gu[apara cotter al hilo paraleloala hoia de
sierra.
b. Manteniendoafiladala hoia de sierra. Cambiandoo afilando los
trinquetes antirretrocesocuandolaspuntassedesafilen.
¢. r,Jlanteniendoe!protector de la hoia desierra, el separadory los
trinquetes antirretrocesoen su sitio y fLmcionandoadecuadarnente.
E[separadordebeester alineadocon[a hoiadesierray los trinquetes
debendeteeere[ retrocesounavezque 6stehayacornenzado.Com-
pruebeel funcionamientode_stosantesde cortar al bile.
d. NOcortando a[ hi[o ulnapiezade trabaioque est_torcida o com-
badao queno tenga una reglarecta pareguiar a Io largo de! tope-
gu[aparecortar albile.
e. NOsoItando la piezade trabajo hasta que haya side empujada
hastapasarcornpletamentela hojadesierra.
f. UtiIizandounpalede empujarparacortaral hiloanchosde2"a6"y
un tope-guiaauxiliar y un bloquede empujar para coltar al hilo an-
chos mAsde menosde2"(vea lasecciOn"FuncionamientobAsicode
la sierrautiIizandoeltope-guiaparacottera!hiW', p_ginas44-47).
g. NO coefinandola piezacortada al cortar al bile oal cotter trans-
versa[merlte.
h. AIcoltar al hilo apIiquelafuerzadeavanceala secciOndela pieza
detrabaioentreh hojade sierray el tope-galaparecotter al hilo. Uti-
lice un pale de empujar o ulsbloque de empujar cuaedo seaade-
cuado(veael itemf. m_sarriba).
18. PROTECCION:Ojos,rnanos,care,oidosy cuerpo.
PARAEVITARSERARRASTRADORACIA
LAHERRA[vllENTAQUEGIRA,
NOUSE:
SUJETESEELPELOLARGODETRASRE LACABEZA
SUBASELASIVIANGASLARGASPORENCOMIADELOSCODOS
a. Si cuaIquierpiezadelasierrafalta, funcionamal,haside daFiadao
rote ... tal comeel interrupter del motor u otro control de funciona-
rniento, un dispositivo de seguridad o e! cordGnde energ[a... deje
de utilizar la herramieeta {nmediatamentehaste que la pieza espe-
cifica serepareosustituyaadecuadamente.
b. Use galas de seguridady m;iscaras{ la operaciGngenerapolvo.
Use protectorespare los oidos u orejeras durante los periodos de
funcioeamiento prolongados.Pequeiios pedazosde maderasuettos
u otros objetos que hacencontacto con la parteposterior de la hoja
quegira puedensaIir despedidoshaciae! operadora una veIocidad
excesiva.Normalmenteesto se puedeevitar rnanteniendoe[ protec-
tor delahojay el separadorensu sitio paratodas lasoperacioeesde
'ASERRADOPASANTE"(aserradoatravesandopercomplete lapieza
detrabajo) Y retirandode la mesaredes los pedazossueltoscon un
pale de rnadera largo INMEDIATAMENTE despu_s de que son
cortados.
¢. Utilice precauciGnadicionai cuando se quita el ensambIaiedel
protectorparareaserrar,cortar mortajas,cortarrebajoso rnoldear--
vuelva a colocar el protector ee cuanto se termine de realizar la
operaciGn.
d. NUNCAenciendala sierra (posiciGn'ON") antes de retirar de la
rnesatodas las herramieetas,desechosde madera etc., exceptola
piezadetrabajoy los dispositivos deavanceo soporterelacionados
paralaoperaciGnplaneada.
Guantes{milequedee heJgades
RepaheJgada
Cerbata,jeyas
15.

e. NUNCAsit0e la cara o e! cuerpo en lineacon la herramientade
corte.
,, NUNCAponga los dedosni las rnanosen la trayectoriade la hoja
desierranide ningunaotraherramientadecorte.
• r,IUNCAponga ningunade las rnanosdetrAsde la herramientade
corte parasujetar o soportar la piezade trabajo,retirar desechosde
maderaopor ningunaotraraz6n.Evitelasoperacionesextrafiasy las
posicionesdificilesde lasrnanosenlascualesun resbal6nrepentino
podria hacerque los dedoso la rnanose movieran hastaentrar en
contactocon la hojadesierrauotra herramientadecorte.
,, NO realice ninguna operaci6n A PULSO"-- utilice siempre e!
tope-galaparacortar alhilo oel calibrede ingletespara posicionary
guiarla piezadetrabajo.
- NUNCAutilice el tope-guia para cortar al hilo al realizar cortes
transversalesni el calibre de ingletes al cortar al hilo. NO utilice el
tope-guiaparacortar alhilo comotope de Iongitud.
,, NUNCAagarre nitoque el ' extremolibre" de la piezadetrabajo o
'un pedazolibre" que se ha cortado mientras la herramienta estd
encendiday/o la hojadesierraest_girando.
- Apaguela sierra y desconecte e! cord6n de energia al quJtarel
accesoriode inserci6n de la rnesa carnbiarla herrarnientade corte,
quitar ocambiarelprotector delahoja,o realizarajustes.
- Proporcione un soporte adecuado para la parteposterior y los
lados dela rnesade sierrapara piezasdetrabajo rn_sanchas o rnAs
largas.
,, E! pl4stico y los materialesde composiciOn (como el tablero de
aglomerado) se pueden cortar con la sierra. Sin embargo como
6stos suden ser bastanteduros y resbaladizos,es posible quelos
trinquetes antirretroceso no puedan detener el retroceso. Por Io
tanto, preste atenci6n especial a seguir los procedimientos ade-
cuadosde preparaci6ny cortepararealizarcortesal hilo.No sesitOe,
ni perrnitaque nadiesesitQe,en lineacon un posibleretroceso.
f. Si la hojade cortesedetieneo traba enlapiezadetrabajo apague
la sierra retirela piezadetrabaio dela hoja de sierray compruebesi
la hoja de sierra seencuentra paralelaalas ranuraso acanaladuras
de la mesa y si el separadorse encuentraalineado adecuadamente
con la hoja de sierra. Si en ese momento est_ cortando al hilo,
compruebesi el tope-guia paracortar al hilo se encuentraparaleloa
la hojadesierra•ReajQstelotal como seindica.
g. NUNCAhagaagrupacionestransversalmenteal corte-- alineando
mAsde un piezadetrabajofrente a la hoja (apiladasvertical u hori-
zontahnente haciaafuera sobre la mesa) y empuj_ndolas luego a
trav6s de la hoia desierra. La hojapodr[aengancharunao m_s pie-
zasy causarunatascoo p6rdidadecontroly posibleslesiones.
h. NO retire pedazos peque_os de material cortado que puedan
quedar atrapadosdentro del protector de la hoja mientras la sierra
estd en marcha. Esto podria poner en peligro las manos o causar
retroceso.APAGUEla sierray esperehastaquela hoiasedetenga.
11. CONOZCASUSNERRANImENTASDECORTE
Las herramientasde corte desafiladas,gomosaso inadecuadamente
afiladaso triscadas puedenhacer queel material se adhiera,trabe,
detengala sierra o experimente retrocesohacia el operador. Mini-
rnicelos posibtespeligrosmedianteelmantenirnientoadecuadode la
herrarnientade cortey la mAquina.NUNCAINTENTELBERAR UNA
HOJADESIERRADETENIDASINAPAGARLASIERRAPR![/,4ERO.
a. NUNCA utilice ruedas de amolar, ruedas abrasivas de corte,
ruedasdefricci6n (hojas decortar metal entiras), ruedascon rayos
dealambreo ruedasdebru_in
h. UTILICEUNICAMENTEACCESOR!OSRECOMENDADOS.
e. Las operacionesde corte transversalse realizande rnanerarn_s
convenientey con mayor seguridad si se coloca un refrentado de
rnaderaauxiliarenelcalibredeingletes.(YealaspAginas22 y 23.)
d. AsegQresede que laparte superiorde la herramientade cortegira
haciaustedcuando seencuentrasituado en unaposici6n normal de
operaci6n.AsegOresetarnbi6nde que la herramientade corte, los
collarines del eje portaherrarnienta y la tuerca de! eje portaherra-
rnientaestAninstaladosadecuadarnente•Mantengalaherramientade
corte tan ba]a como sea posible para la operaciOn que se est_
realizando. Mantengatodos los protectores co!ocados en su sitio
siempreque seaposible.
® No utilice ningunahoja u otra herramientade corte rnarcadapara
unave!ocidaddefuncionamientoinferiora 4800 R.P.M.Nuncautilice
unaherramientade corte con un di4metrosuperior al diArnetropara
el cua!se dise_6la sierra.Param_ximaseguridady eficaciaal cortar
a! hilo utilice la hoja de di_,metromAximoparala cual se diseii6 la
sierra,ya que baioestas condicioneselseparadorse encuentrarn_s
pr6ximoa lahoja.
e. AsegOresede que el accesorio de inserci6n de la mesa se en-
cuentrala rascon la superficiede la mesao ligeramentepor debajo
de dicha superficieen todos los lados exceptoel posterior. NUNCA
haga funcionar la sierra a menos que el accesorio de inserci6n
adecuadoseencuentreinstalado.
OBSERVEY S_GALASINSTRUCCIONESDE SEGURIDADQUEAPARECENEN LAPARTE
DELANTERADELASIERRA DE MESA.
12.PNENSEENLASE[_URIDAD
LASEGURIDADESUNACOMBINACIONDESENTIDOCOMUNPOR
PARTEDELOPERADORY DEESTARALERTAENTODOMOMENTO
CUANDOSEESTAUTILIZANDOLASIERRADEMESA,
Nodejeque eltrabajardemaneraconfiada
debidoala familiarizaciCnconlaberramienta
(adquiridaconelusefrecuentedelasierradernesa)seconviertaen
algobabitual.RecuerdesiemprequaundescuidodeunafracciCnde
segundoessufieienteparacauserlesionesgraves.
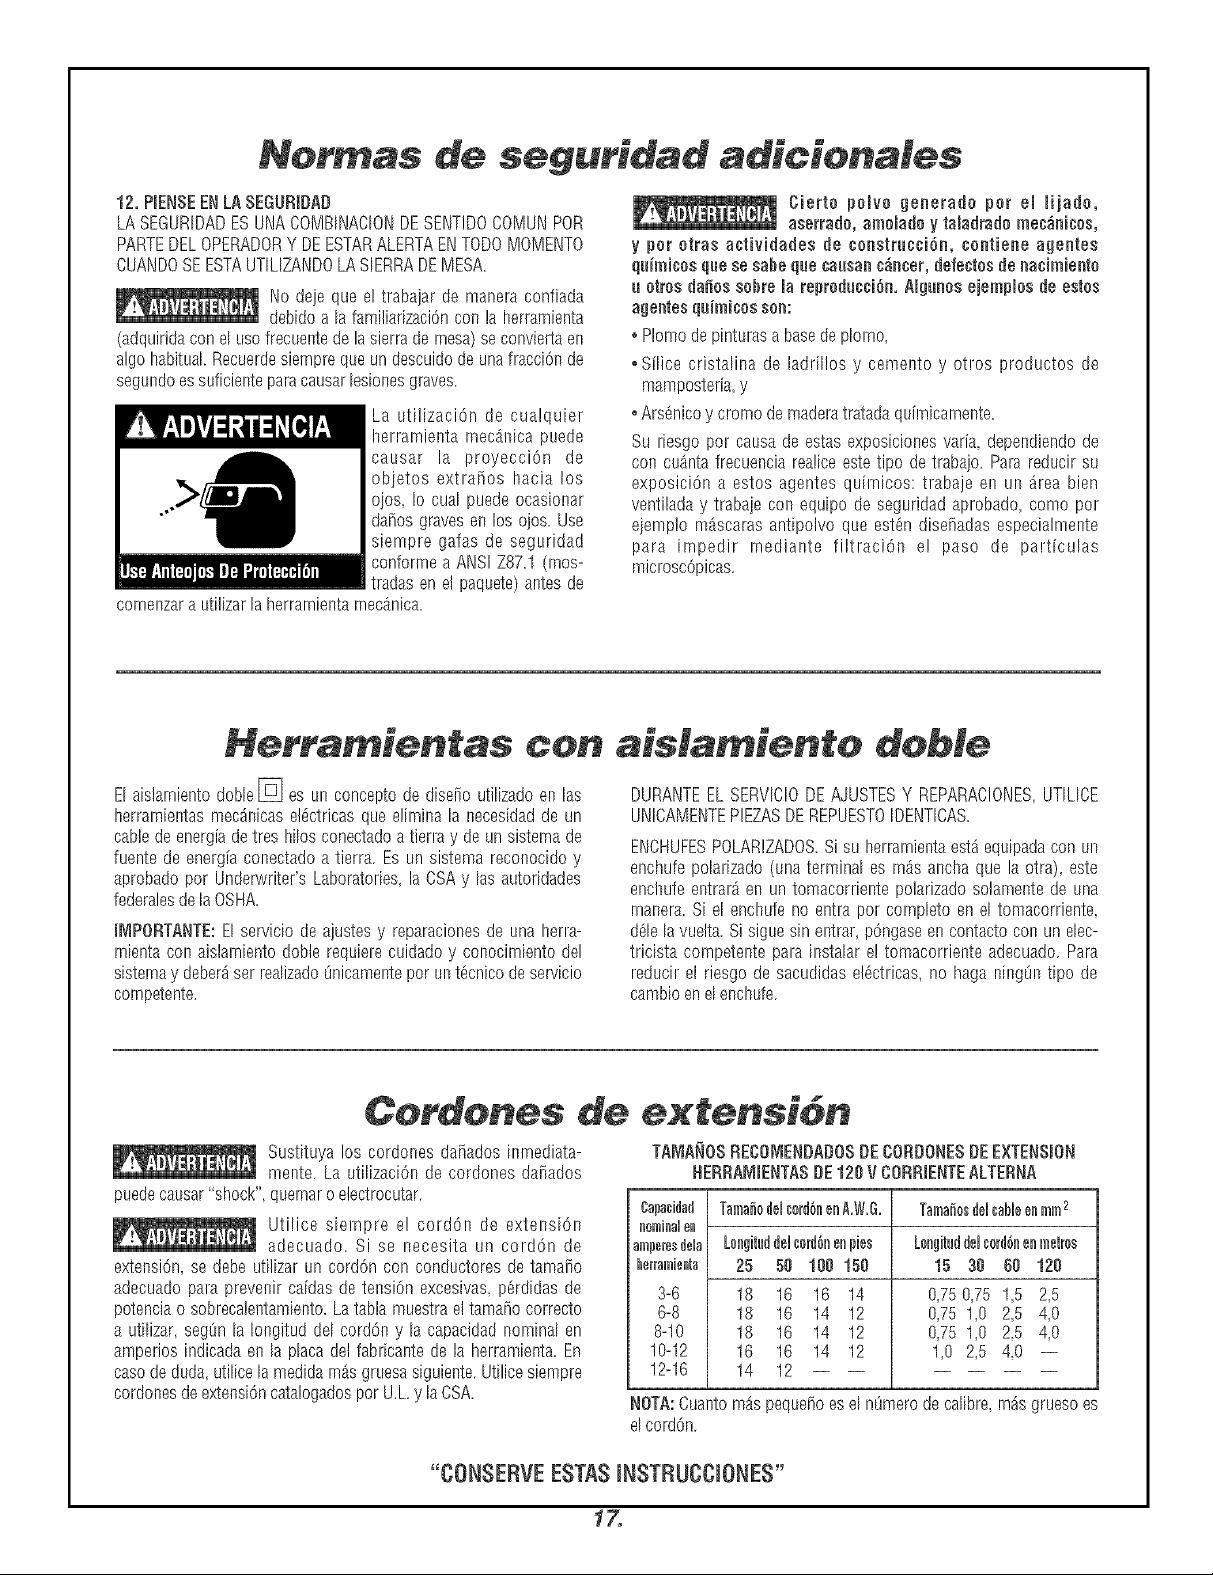
La utilizaciCn de cualquier
berramienta rnecanica puede
causar la proyecciOn de
obietos extra_os hacia los
oios, Io cual puede ocasionar
da_osgraves en los ojos. Use
siempre gafas de seguridad
conforrnea ANSI Z87.1 (rnos-
tradas en el paquete)antesde
cornenzara utilizarla herrarnientarnecanica.
Cierte pemve geaerade per emIHade,
aserrada, amaJadoy taJadrademec_aicas,
y per okras actividades de ¢anstrucsida, ¢nntiene agnntes
quimicns qua se sabe qua¢ausan¢_neer,defnetnsde naeiminntn
u etros daOnssnbre marepreducciCn. AIgunos Nempmesde estes
agnntes qaimisns son:
. Plumedepinturasa basedeplomo,
. Silica cristalina de ladrfl!os y cemento y otros productos de
mamposteria,y
oArs_nicoy creme dereaderstratadaquirnicarnente.
Su riesgo per causa de estas exposiciones varia, dependiendo de
con cuanta frecuencia realiceeste tipu de trabajo. Para reduch su
exposiciCn a estos agentes quimicos: trabaje en un area bien
ventilada y trabaje con equipo de seguridad aprobadu, come per
ejemp!o mascaras antipolvo que est_n dise_adas especialmente
pare impedir mediante filtraciCn e! paso de part[culas
microscOpicas.
El aMamiento done [] es un conceptode diseiio utilizadoen las
berrarnientasmecanicaseldctricasqua elirnina la necesidadde un
cablede energiade tres bilos conectadoatierra y de un sisternade
fuente de energ[a conectadoa tierra. Es un sistema reconocidoy
aprobadoper Underwriter's Laboratories, la CSAy lasautufidades
federalesdela OSHA.
_MPORTANTE:El servicio de ajustes y reparacionesde una berra-
rnientacon aislamiento done requiere cuidado y conocimiento del
sisternay debarsser realizadoOnicamenteper unt_cnico deservicio
competente.
Cordones de extensi6n
Sustituya los cordones daHadosinrnediata-
manta, La utflizaciOn de cordones daiiados
puedecausar"shock", quernaroelectrocutar.
Utilice siernpre e! cordCn de extensiCn
adecuado. Si se necesita un cordCn de
extensiCn,se debe utilizar un cordCncon conductores detamaOo
adecuado pareprevenir caidasde tensiCn excesivas, p_rdidas de
potenciao sobrecalentamiento.Latabla muestrael tamaHocorrecto
a utilizer segQnla Iongitud del cordCn y la capacidadnominal en
amperios indicadaen laplaca del fabricante de la herramienta. En
casededude utilice lamedidarnasgruesa siguiente.Utilicesiempre
cordonesde extensiCncatalogadosperU.L ylaCSA.
DURANTEELSERVICIODE AJUSTESY REPARAC!ONES,UTILICE
UNICAMENTEPIEZASDEREPUESTOIDENTICAS.
ENCHUFESPOLARIZADOS.Si su berrarnientaesta equipadacon un
enchufepolarizado (una terminal es rnas ancha qua la otra), este
encbufeentrara en un tomacorfiente polarizado solamente de una
rnanera.Si el encbufe no entre per complete en el tomacorriente,
dClelavuelta.Si siguesin entrar, pCngaseen contacto con un dec-
tricista competente para instalar e! tomacorriente adecuado. Para
reducir el riesgo de sacudidase!Cctricas,no haga ning@ tipo de
cambioenel enchufe.
TAI_IA_JOSRECO[VIENDADOSDECORDONESDEEXTENSmON
HERRA_IHENTASDE120V CORRIENTEALTERNA
Oapaddad
nominal en
amperesddaLongituddeleordCnenpies
herramienta 25 50 180 150
3_6 18 16 16 14
6_8 18 16 14 12
8-10 18 16 14 12
10-12 16 16 14 12
12-16 14 12
TamaleddcerdCaeaA.W.& Tamalesddcableeamm2
Loagi_ddd¢ordCaeametros
15 30 60 120
0,750,75 1,5 2,5
0,75 1,0 2,5 4,0
0,75 1,0 2,5 4,0
1,0 2,5 4,0 --
NOTA:Cuantomaspeque_oeselnOmerodecalibre,rnasgruesoes
elcordCn.
"CONSERVEESTASJNSTRUCCJONES"
17.
P4gina
Normasgeneralesde seguridad ................ 14
Normasdeseguridadadicionales ............. 15-17
Herrarnientascon aislamientodobley cordones de
extensi6n .......................... 17
Indice ............................ 18
GIosariodet6rminos ..................... 19
Herrarnientasnecesariasparael ensamblaje .......... 19
FarniliarizaciOnconla sierrade rnesa ............ 20-23
Interruptordeencendido ................. 20-23
Mesa .......................... 20-23
Base ........................... 20-23
Mangodefijac[6ndela [nclinaci6ndelahoja ........ 20-23
Extens[6ndela rnesa ................... 20-23
Mangodef[jac[Ondela extens[6nde lamesa ........ 20-23
Ruedadeelevaci6n .................... 20-23
Escaladeincl[naciOndelahoja ............... 20-23
Escaladeltope-guia paracortara!h[Io ........... 20-23
Escaladelcalibre de ingletes ................ 20-23
Areaparaguardarel tope-gufaparacortaral hilo ...... 20-23
Ubfcadordeprecorte ................... 20-23
Areaparaguardarel calibrede ingletes ........... 20-23
Hoja>!lavedetuemay estuchedetransporte ........ 20-23
Lhve hexagonaly8readeaknacenarniento ......... 20-23
Enrolladordel cord6n ................... 20-23
Conexi6ndeasp[raci6n .................. 20-23
Tope-gufaparacortar alhilo ................ 20-23
Protectorde la hoja .................... 22-23
Accesofiode [nserciOndela mesa ............. 22-23
Calibrede ingletes .................... 22-23
Desempaquetadoy cornprobaci6ndelcontenido ...... 24-25
Tabladep[ezassueltas .................. 24-25
Ajustesdefunc[onamiento................. 26-31
6ontrol de[nclinaci6nde laboja .............. 26-27
Ajustedelostopes positivosde90 y 45 grados ....... 26-27
Ajustedelahojaparatelaa la ranuradel calibrede ingletes . .28-29
Ajustedelaextensi6nde la rnesa ............. 28-29
Pigina
Ajustedelindicadordelarnesa .............. 28-29
Alineaci6ndeltope-galaparacortaral h[Io ......... 30-3!
Ajustedelindicadordeltope-gufaparacortaralh[Io ..... 30-31
Ajustedelcalibredeingletes................ 30-31
Ensamblaje........................ 32-35
Colocaci6nde!protectordela hoja ............. 32-33
Cambiodelahoja ..................... 34-35
Colocaci6ndeltope-gufaparacortaralhilo ......... 34-35
Montajedelasierrademesa................ 36-37
Montajedelasierrademesaenunbancodetrabajo..... 36-37
Funcionam[entob_s[codelasierrademesa......... 36-52
h_terruptordeencendidodeseguridad........... 36-37
Ubicadordeprecolte ................... 38-39
Utilizaci6nde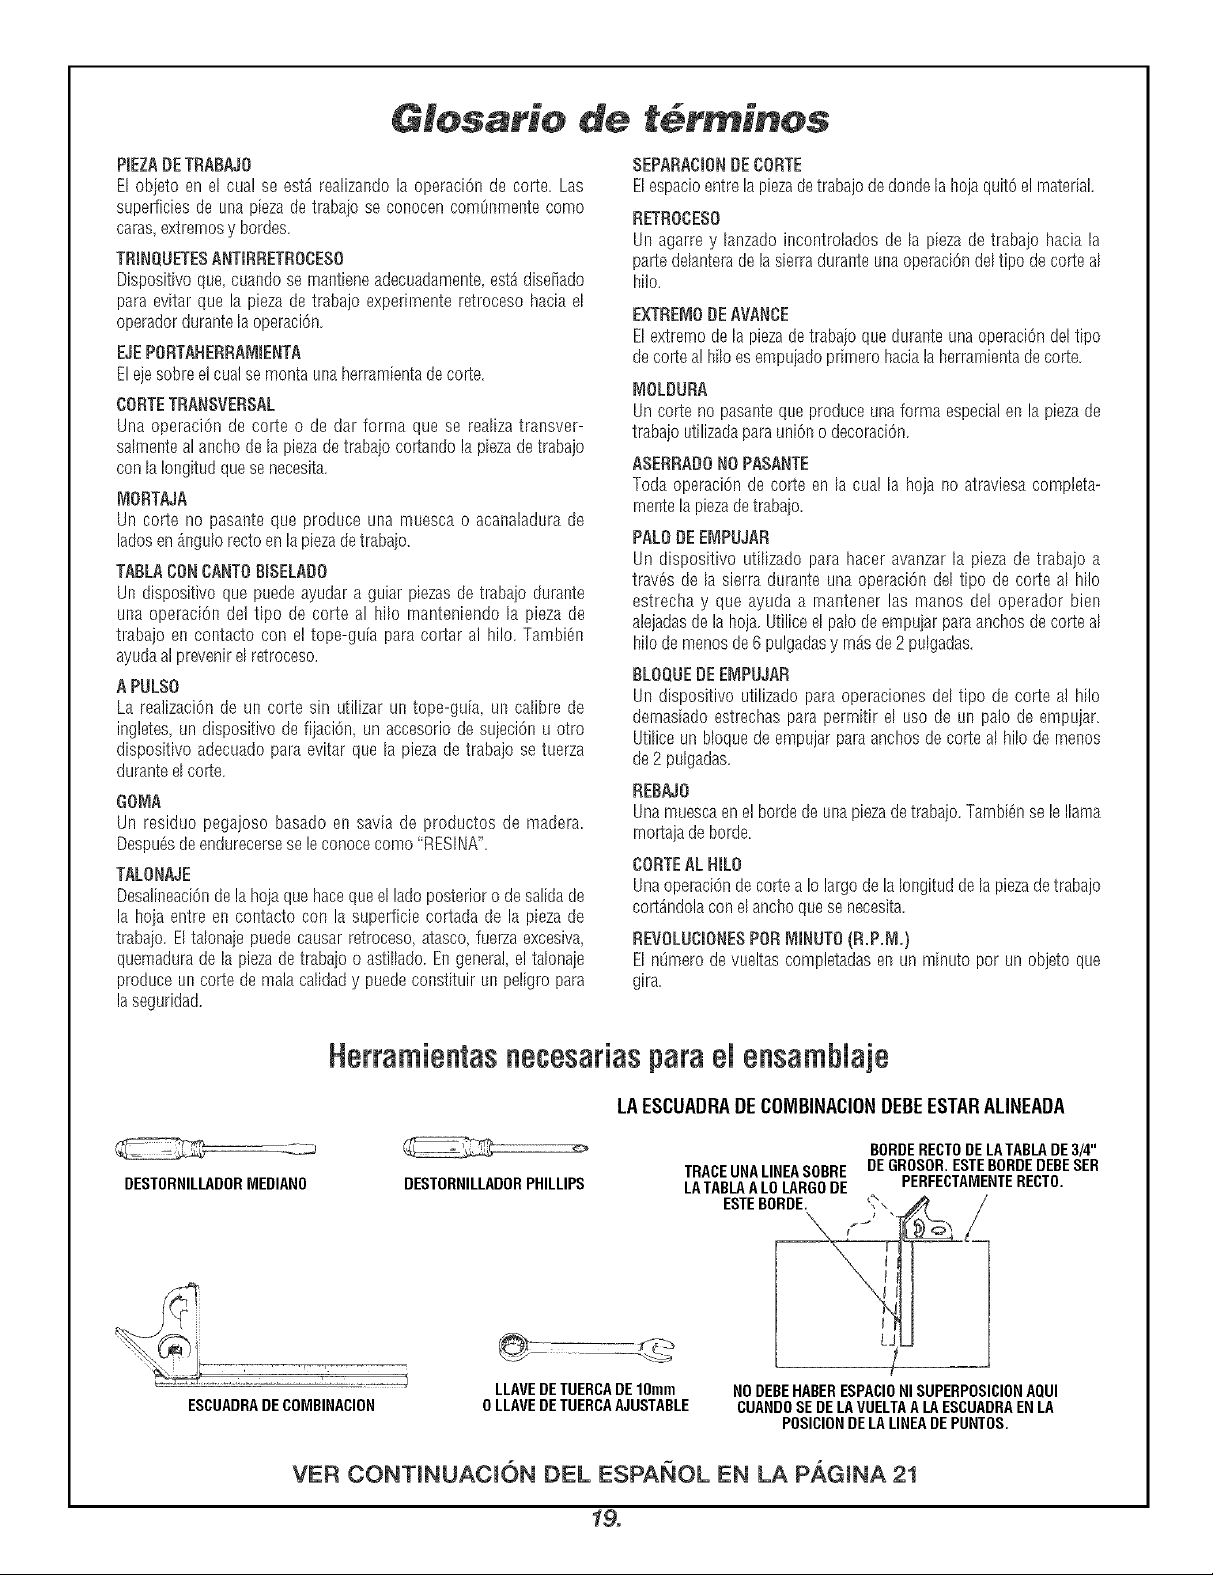
GiosaHo de t rminos
PIEZABETRABAJO
EIobieto en el cua! se est_ reaIizando la operaciOnde corte. Las
supeliicies de una pieza detrabaio se conocen comt]nrnentecomo
caras,extFernosy bordes.
TRmNQUETESANTIRRETROCESO
Dispositivoque,cuando se mantieneadecuadamente,estddiseiiado
para evitar que la piezade trabajo experirnenteretFocesohaciael
operadordurantelaoperaci6n.
EJEPORTARERRA_ImENTA
Elejesobreelcualsemonta unaherramientadecorte.
CORTETRANSVERSAL
Una operaciOn de corte o de dar forrna que se realizatransver-
saImenteal anchode lapiezadetrabaio cortando la piezadetrabajo
con laIongitudquesenecesita.
IVIORTAJA
Un corte no pasante que produce una muesca o acanaladurade
ladosenAngulorectoenlapiezadetraba]o.
TABLACONCANTOBISELADO
Un dispositivo que puedeayudara guiar piezasdetraba]o durante
una operaciOn dei tipo de corte al hilo manteniendo la pieza de
trabajo en contacto con el tope-gala para cortar al hilo. Tambi_n
ayudaal prevenirelretroceso.
APULSO
La realizaci6n de un corte sin utilizar un tope-gu[a, un calibre de
ingletes,un dispositivo de fijaci6n, un accesoriode sujeci6n u otro
dispositivo adecuadopara evitar que la piezade trabajo se tuerza
duranteelcorte.
OOIVIA
Un residuo pegajoso basado en savia de productos de madera
Despu6sdeendurecerseseleconocecomo ' RESINA'.
TALONAJE
DesalineaciOndela ho]aque hacequee[lado posterioro desalidade
la ho]a entre en contacto con la superficie cortada de la piezade
trabaio. EItalona]e puedecausarretroceso, atasco,fuerza excesiva,
quemadurade la piezade traba]oo astiIIado.En general,e!talona]e
produce un corte de malacalidady puedeconstituir un peligro para
la seguridad.
SEPARACIONDECORTE
Elespacioentrelapiezadetrabajo dedondela hojaquit6e! material.
RETROCESO
Un agarre y lanzadoincontrolados de la pieza de trabajo haciala
partedelanteradela sierraduranteunaoperaci0ndeltipo de corteal
hflo.
EXTREt_dODEAVANCE
EIextremode la piezadetrabaioque durante una operaci6ndel tipo
decortea!hilo esempuiadopfirnero hacialaherramientadecorte.
WJOLDURA
Un corte no pasantequeproduce unaforma especialen la piezade
traba]o utilizadaparauni6n odecoraci6n.
ASERRADONOPASANTE
Toda operaci6n de corte en la cua! la hoja no atraviesacompteta-
rnentela piezadetrabaio.
PALO DE EMPUJAR
Un dispositivo utiIizado para hacer avanzar la pieza de trabajo a
trav_s de la sierra durante una operaci6n del tipo de corte al hilo
estrecha y que ayuda a rnantener las manos del operador bien
alejadasde la hoja. Utiliceelpalodeempu]ar paraanchosde corteal
hilode menosde6 pulgadasy rnAsde2 pulgadas.
BLOQOEDEEIVIPWAR
Un dispositivo utiIizado para operaciones del tipo de corte al hilo
demasiado estrechaspara permitir el uso de un palo de empujar.
UtiIice un bloquede empujar paraanchosde corte al hilo de rnenos
de2 pulgadas.
REBA30
Unamuescaen el bordede unapiezade traba]o.Tarnbi_nsele llama
rnortajadeborde.
CORTEALRILO
UnaopeFaci6nde cortea !o largodela[ongitud delapiezadetrabajo
cort_ndolacon el anchoquesenecesita.
REVOLUCmONESPORMINUTO(R.P,_I,)
El nOmerode vueltascompletadasen un minuto por un objetoque
gira.
DESTORNILLADORMEDIANO
ESCUADRADECOMBINACION
VER CONTINUACI6N DEL ESPANOL EN LA PAGINA 21
Herram[entasnecesar[asparaeMensambMaje
LAESCUADRADECOMBINACIONDEBEESTARALINEADA
BORDERECTODELATABLADE3/4"
DESTORHILLADORPHILLIPS
LLAVEDETUERCADElOmm
0LLAVEDETUERCAAJUSTABLE
TRACEUHALIHEASOBRE
LATABLAALOLARGODE
ESTEBORDE. F__
NODEBEHABERESPACIONI SUPERPOSICIONAQUI
CUAHDOSEDELAVUELTAA LAESCUADRAENLA
POSICIOHDE LALIHEADEPUNTOS.
19.
DEGROSOR.ESTEBORDEDEBESER
PERFECTAMENTERECTO.
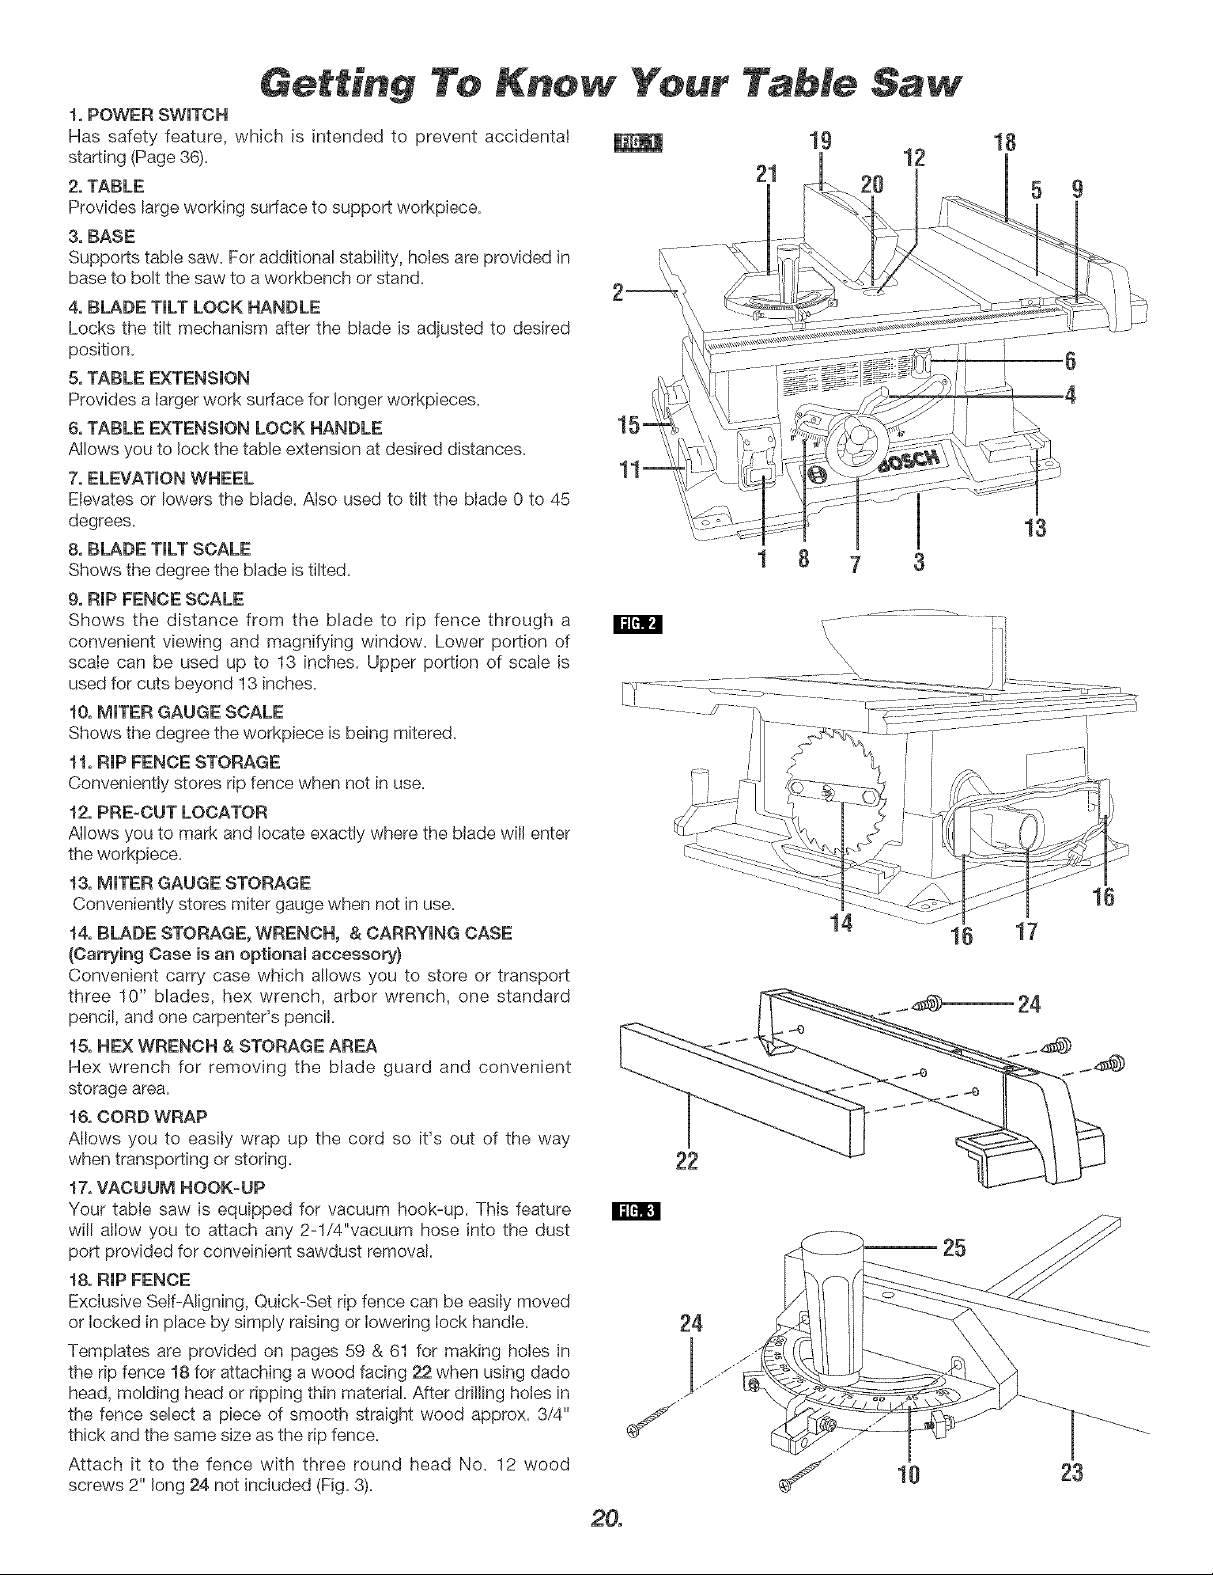
Getting To Know Your Table
1. POWER SWITCH
Has safety feature, which is intended to prevent accidental
starting (Page 36).
2. TABLE
Provides large working surface to support workpiece.
3. BASE
Supports table saw. For additional stab[I[ty, holes are provided in
base to bolt the saw to a workbench or stand.
4. BLADE TILT LOCK HANDLE
Locks the tilt mechanism after the blade is adjusted to desired
position.
5. TABLE EXTENSION
Provides a iarger work sun'ace for longer workp[eces.
6. TABLE EXTENSION LOCK HANDLE
Allows you to lock the table extension at desired distances.
7, ELEVATION WHEEL
Elevates or lowers the blade. Also used to tilt the blade 0 to 45
degrees.
8. BLADE TILT SCALE
Shows the degree the blade is tilted=
9. RIP FENCE SCALE
Shows the distance from the blade to rip fence through a
convenient viewing and magnifying window. Lower portion of
scale can be used up to 13 inches. Upper portion of scale is
used for cuts beyond 13 inches.
10. MITER GAUGE SCALE
Shows the degree the workpiece is being mitered.
11. RiP FENCE STORAGE
Conveniently stores rip fence when not in use.
12. PRE=CUT LOCATOR
Allows you to mark and locate exactly where the blade wllI enter
the workpiece.
13. MINTERGAUGE STORAGE
Conveniently stores miter gauge when not in use=
14. BLADE STORAGE, WRENCH, & CARRYING CASE
(Carrying Case is an optionam accessory}
Convenient carry case which allows you to store or transport
three 10" blades, hex wrench, arbor wrench, one standard
pencil, and one carpenter's pencil.
15, HEX WRENCH & STORAGE AREA
Hex wrench for removing the blade guard and convenient
storage area.
16. CORD WRAP
AIIows you to easily wrap up the cord so it's out of the way
when transporting or storing.
17. VACUUM HOOK=UP
Your table saw is equipped for vacuum hook-up. This feature
will allow you to attach any 2-1/4"vacuum hose into the dust
port provided for conveinient sawdust removal.
18. RiP FENCE
Exciusive Self-Aligning, Quick-Set rip fence can be easily moved
or locked in place by simply raising or lowering Iock handle.
Templates are provided on pages 59 & 61 for making holes in
the rip fence 18 for attaching a wood facing 22 when using dado
head, molding head or ripping thin material After drilling holes in
the fence select a piece of smooth straight wood approx. 3/4" _j
thick and the same size as the rip fence.
Attach it to the fence with three round head No. 12 wood
screws 2" long 24 not included (Fig. 3).
20.
_Y
19
12
21
13
1 8 7 3
i
14
15
17
24
25
24
23
 Loading...