

Page 1
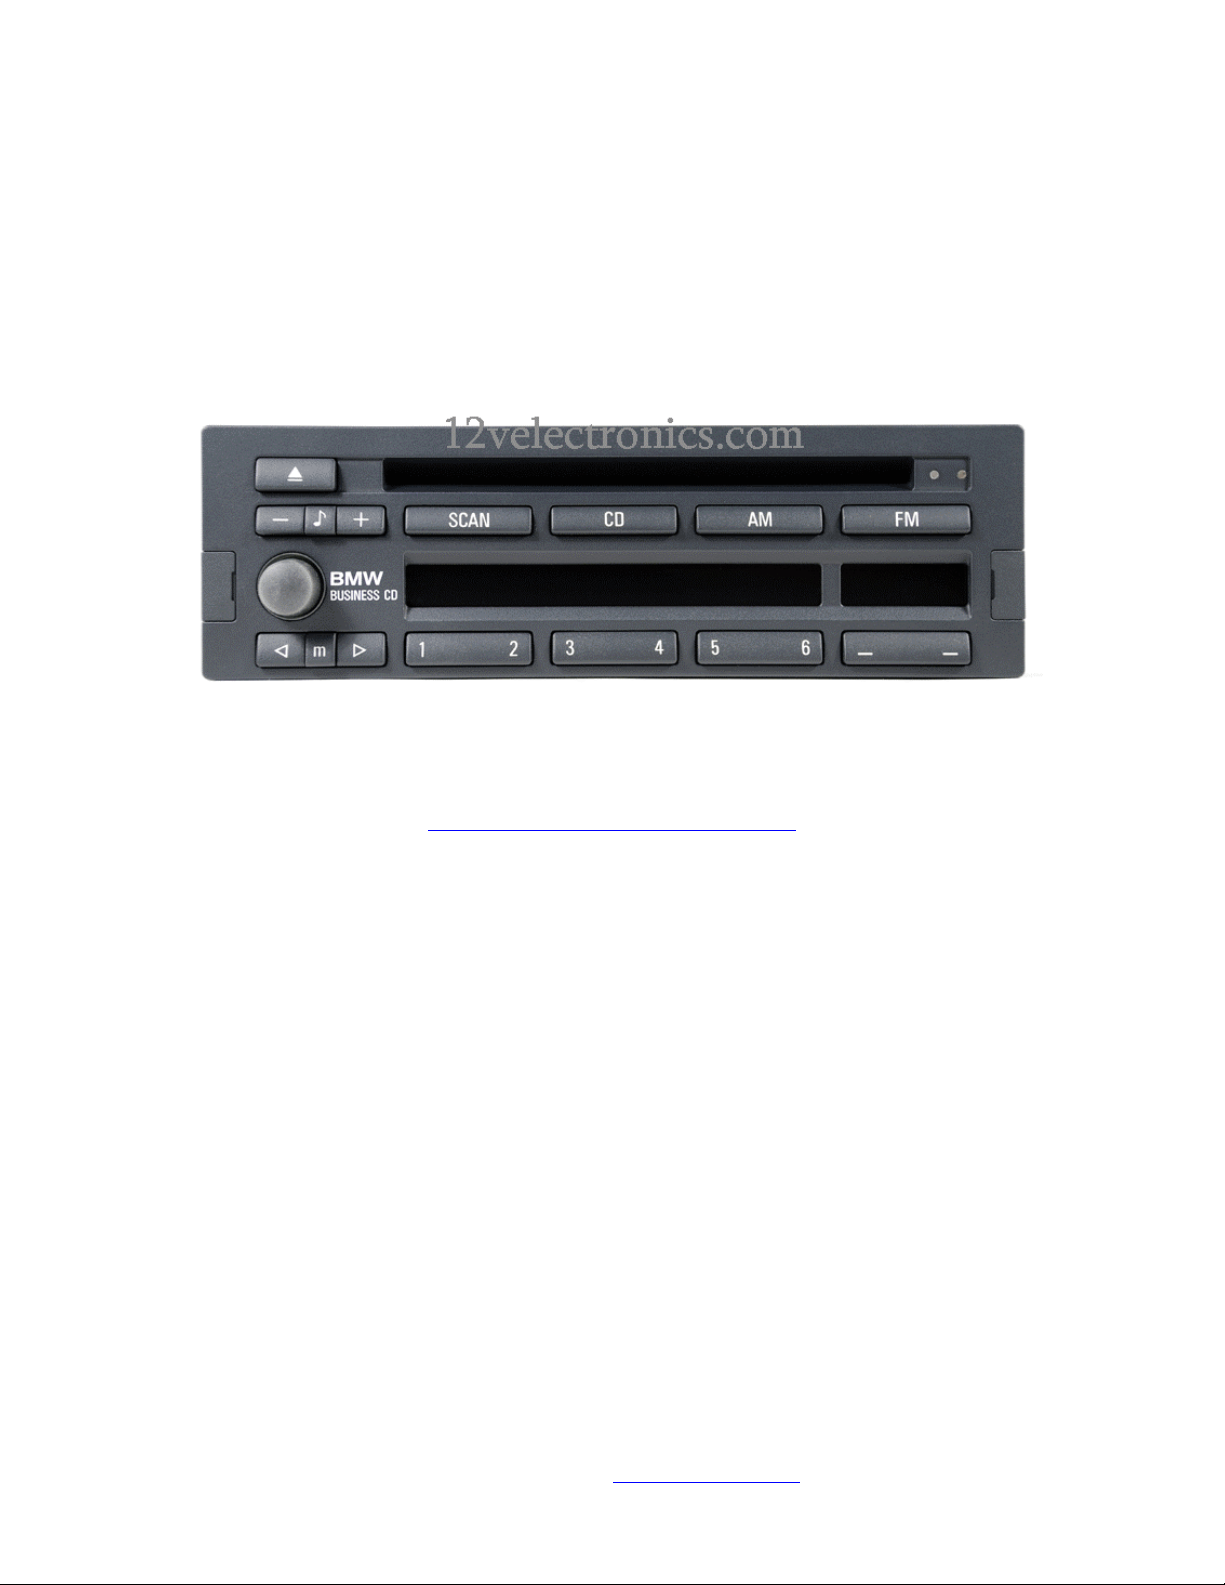
BMW CD43 USERS MANUAL
Thank you for purchasing your BMW CD43 radio from
www.12velectronics.com
This users manual explains the basic functions and care of
your new radio. The radio has some self-explanatory screen
displays and may not have every step required listed in this
manual.
This manual is believed to be correct at the time of printing, however model variances
and vehicle accessories installed may cause some discrepancies with this guide, therefore
please use this for reference only and consult the vehicles owners manual and any other
warnings that may exist. This radio is to be installed by a certified BMW technician. You
agree to hold 12v Electronics and its related companies harmless from any legal claims
resulting from installation of the radio and use of this users manual.
2007 12v Electronics
This manual and its contents may not be copied or reproduced without permission from 12v Electronics. For more
information please email: [email protected]
Page 2
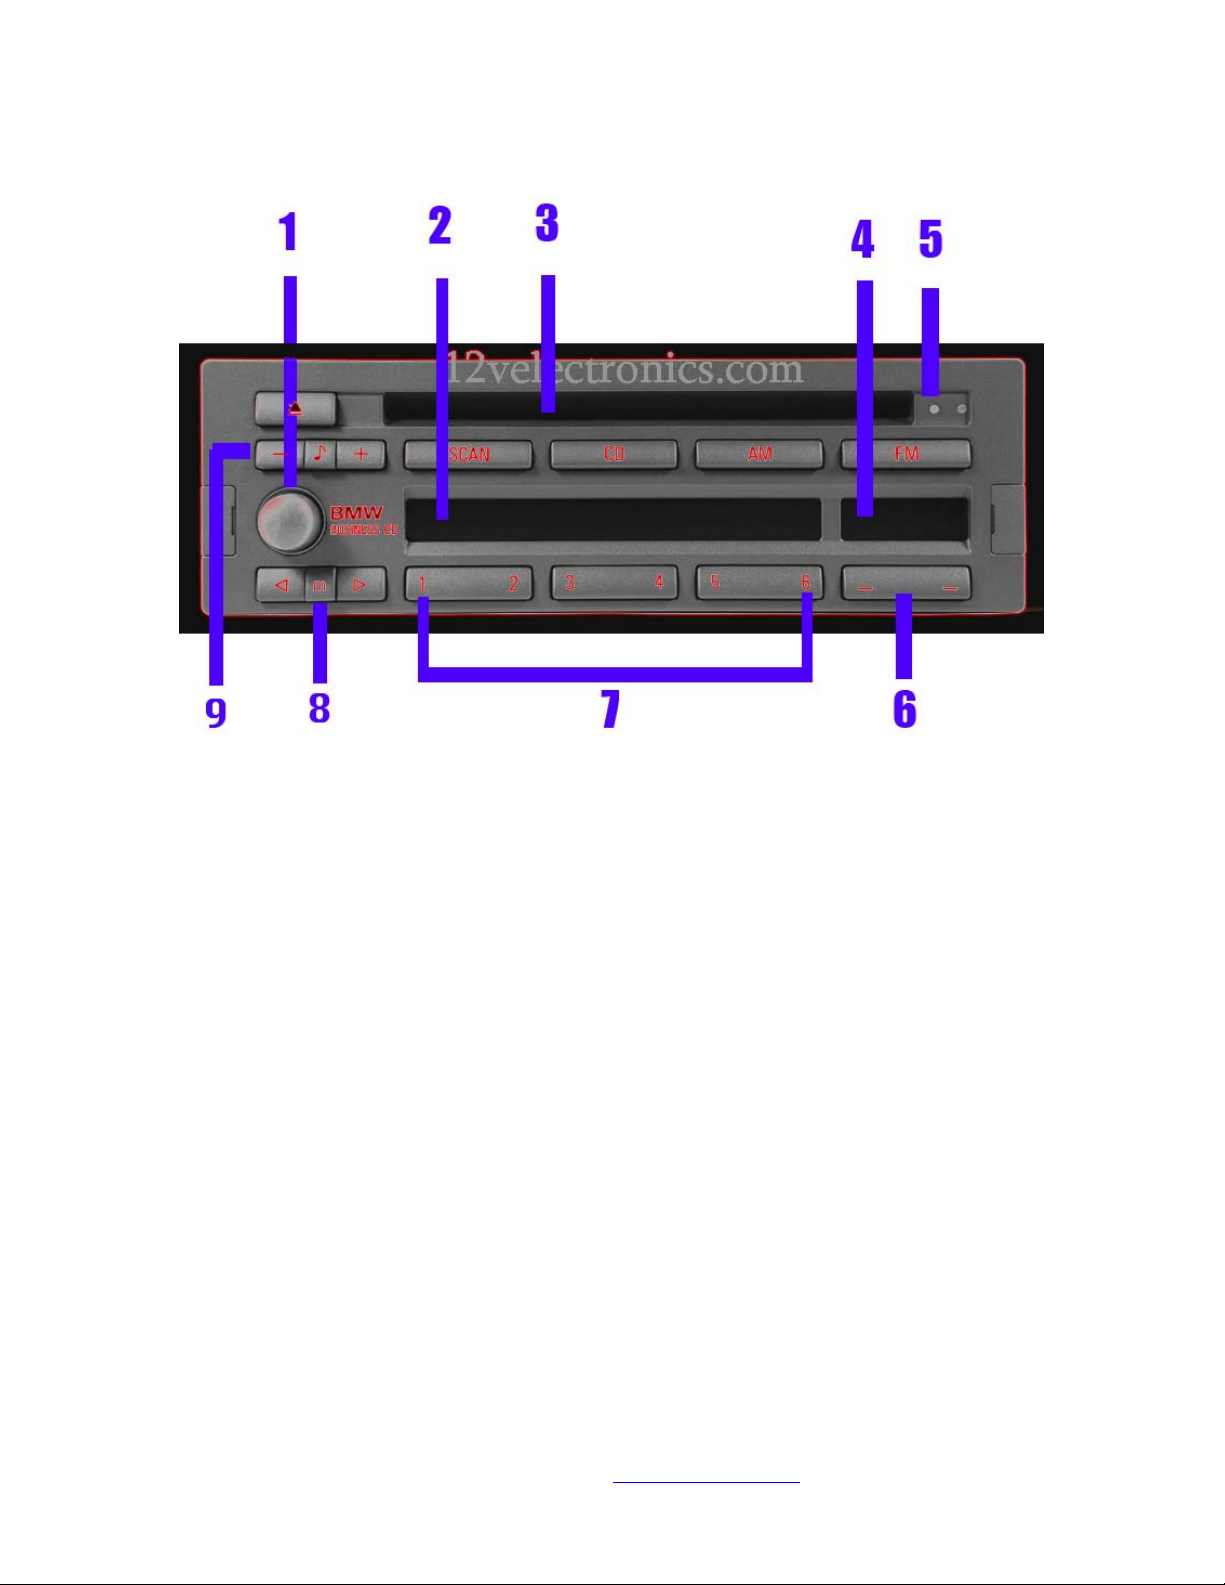
Figure 1
1. Power and volume adjustment. Push for power on/off and rotate for volume.
2. Display for frequency band, RDS station CD functions, and audio adjustments.
3. CD slot for internal deck
4. Display of variable key functions. The selections options change depending on the
operating mode.
5. Indicator lamp for the anti-theft protection
6. Function key for the radio and CD modes
7. Radio presets and direct CD selection for CD changer operation. (optional)
8. Manual station selection / Track search (CD operation)
9. Audio adjustments (bass, treble, balance and fader)
2007 12v Electronics
This manual and its contents may not be copied or reproduced without permission from 12v Electronics. For more
information please email: [email protected]
Page 3
Anti-Theft protection
The unit is protected by a code. For US operation please use the 5 digit code supplied
on the code card. If the 4 digit Europe code is used the radio will not tune into
stations properly. To use this unit in Europe, additional programming steps may be
required.
Store the code card in a secure location outside of the vehicle. You may be required
to re-enter the code after servicing your vehicle or when the battery is disconnected.
The LED (figure 1 #5) will flash when the ignition is switched off.
You can apply the security stickers to the vehicles door windows for additional theft
protection.
Entering the code number:
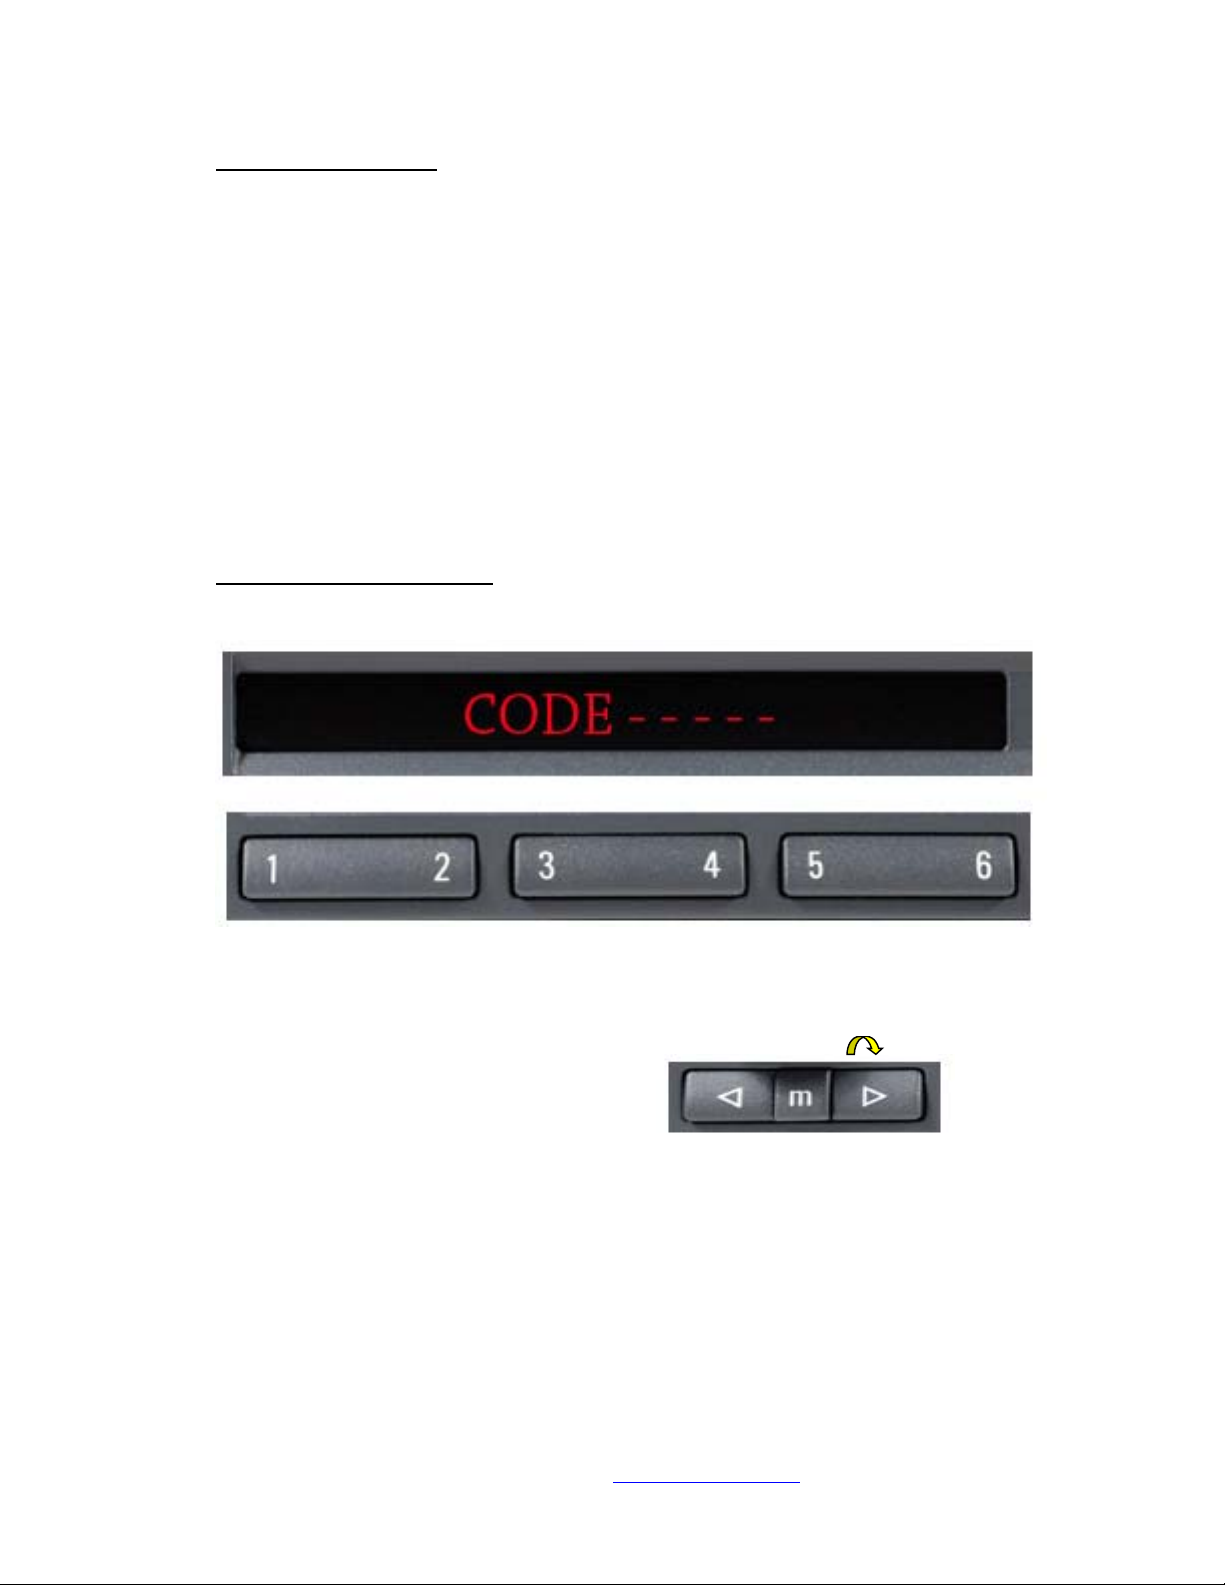
When power is supplied to the unit the display should look like this:
Use the station preset keys 1-6 (figure 1 # 7) to enter the 5 digit code. For example, if
the code is 63251, press 6 key followed by the 3,2,5 & 1 key.
When the entire code has been entered press: (figure 1
# 8)to the right to confirm. (right arrow)
2007 12v Electronics
This manual and its contents may not be copied or reproduced without permission from 12v Electronics. For more
information please email: [email protected]
Page 4

If the code is entered incorrectly more than 3 times, the unit will not allow another
code to be entered. The display will show:
If this happens you must leave the vehicles ignition and radio on for 1 hour. After 1
hour you may re-enter the proper code.
RADIO OPERATION
Each touch of the FM or the AM button will switch between the available bands and
AUTOSTORE memory areas.
RDS Display:
RDS (Radio Broadcast Data System) allows display of station information on the
radio. When RDS information is available it will allow you to access station
information and program type (PTY). Note: Not all stations broadcast this data and
RDS data is only possible under favorable reception conditions.
To activate RDS, press the left button under the RDS option. The radio program type
will be displayed for a few seconds.
2007 12v Electronics
This manual and its contents may not be copied or reproduced without permission from 12v Electronics. For more
information please email: [email protected]
Page 5

Station keys
There are 18 storage positions for FM stations and 12 for AM stations. These keys
also function as a direct CD selection when this radio is used with the optional CD
changer.
To program a station to a preset button, tune to the station and hold the preset button
you would like to store the station for approx. 3 seconds. Repeat for other presets.
Station or Title search
These keys are used for radio tuning and CD search operation.
Radio Mode:
Each press of the search mode keys change increases or decreases the channel
frequency.
CD Mode:
Each press of the search mode keys will fast-forward or rewind the current track of
the CD.
The Scan function will search the available stations about every 10 seconds. Press to
turn on the Scan on or off.
2007 12v Electronics
This manual and its contents may not be copied or reproduced without permission from 12v Electronics. For more
information please email: [email protected]
Page 6

Random CD (shuffle) Mode
Press the left key to turn the random play mode on/off.
Use this button to switch the CD on and also switch between the CD player and the
optional CD changer.
Audio adjustment
Pressing the center button selects the bass, treble balance and fader adjustments. The
+, - buttons adjust the levels.
To reset all levels to center press the center button for more than 2 seconds. The
display will show:
2007 12v Electronics
This manual and its contents may not be copied or reproduced without permission from 12v Electronics. For more
information please email: [email protected]
Page 7

To mute the volume press the left key when this is in the display. To turn off the mute
press the left key again.
Telephone operation
When a factory installed BMW telephone is connected to this radio the radio will
automatically mute when a call is received or placed. The radio will display:
Care
For cleaning use a cloth very lightly moistened with water. The display will be
damaged with use of any chemicals or cleaners. DO NOT USE PROTECTANTS
LIKE ARMOR ALL™ OR OTHER BRANDS ON THE DISPLAY.
Connections
2007 12v Electronics
This manual and its contents may not be copied or reproduced without permission from 12v Electronics. For more
information please email: [email protected]
Page 8

Figure 2
1. Main antenna connection
2. Diversity antenna connection
3. Connection for CD changer AI
4. Connector for:
Pin#
1. L/F+
2. R/F+
3. L/R+
4. Telephone mute
5. IGN+
6. R/R+
7. I-Bus
8. L/F-
9. +12v constant
10. VSS
11. R/F-
12. L/R-
13. ILL
14. R/R-
15. GND
16. REMOTE
17. N/A
5. 10 amp fuse
2007 12v Electronics
This manual and its contents may not be copied or reproduced without permission from 12v Electronics. For more
information please email: [email protected]
Page 9

Troubleshooting
NO DISCS: CD changer magazine empty
NO MAGAZINE: No CD changer magazine present
CD CHECK: Reading CD’s. Please wait until finished
HIGH TEMP: The operating temperature of the radio is too high. Once normal
operating temperature is reached, play will resume automatically
CD: A CD has been inserted into the internal deck
NO DISC: There is no CD in the internal deck
CD ERROR: An error occurred while the CD was being read. Check CD for proper
insertion and condition
2007 12v Electronics
This manual and its contents may not be copied or reproduced without permission from 12v Electronics. For more
information please email: [email protected]
 Loading...