Blue Sky SC30 User Manual

SUN CHARGER 30
12VDC 30AMP PULSE WIDTH MODULATED PHOTOVOLTAIC CHARGE CONTROLLER
INSTALLATION AND OPERATION
MANUAL
THIS MANUAL INCLUDES IMPORTANT SAFETY INSTRUCTIONS FOR MODEL SC30
SAVE THESE INSTRUCTIONS.
© Blue Sky Energy, Inc. 2012 |
430-0031 B |

Blue Sky Energy – Sun Charger 30 |
|
|
TABLE OF CONTENTS |
|
|
IMPORTANT SAFETY INSTRUCTIONS ................................................................................................................................ |
2 |
|
PRODUCT DESCRIPTION...................................................................................................................................................... |
3 |
|
Part Numbers and Options..................................................................................................................................... |
3 |
|
OPERATION ......................................................................................................................................................................... |
|
3 |
Charge Status Indication ........................................................................................................................................ |
3 |
|
Digital Display......................................................................................................................................................... |
|
3 |
Solar Charge Amp-Hour Counter ........................................................................................................................... |
3 |
|
Battery Level Graphic............................................................................................................................................. |
4 |
|
3-Stage Charge Control ......................................................................................................................................... |
4 |
|
|
Bulk Charge ................................................................................................................................... |
4 |
|
Absorption Charge ......................................................................................................................... |
4 |
|
Float Charge .................................................................................................................................. |
..4 |
Two Stage Charge Control..................................................................................................................................... |
5 |
|
Optional Temperature Compensation .................................................................................................................... |
5 |
|
Equalization............................................................................................................................................................ |
|
5 |
30 Amp Current Limit ............................................................................................................................................. |
6 |
|
Maximum Setpoint Voltage Limit............................................................................................................................ |
5 |
|
Pulse Width Modulation.......................................................................................................................................... |
6 |
|
Panel Temperature and Thermal Protection .......................................................................................................... |
6 |
|
Multiple Charge Controllers On The IPN Network.................................................................................................. |
5 |
|
INSTALLATION....................................................................................................................................................................... |
|
6 |
Selecting PV Modules ............................................................................................................................................ |
6 |
|
Electrostatic Handling Precautions......................................................................................................................... |
6 |
|
Charge Parameter Settings.................................................................................................................................... |
7 |
|
|
As Shipped Factory Default Settings ............................................................................................. |
7 |
|
Changing Charge Parameter Settings ........................................................................................... |
7 |
|
Restoring As Shipped Factory Default Settings............................................................................. |
8 |
Battery and PV Wiring ............................................................................................................................................ |
8 |
|
Optional Battery Temperature Sensor.................................................................................................................... |
..8 |
|
Battery & PV Power Connect/Disconnect Order .................................................................................................... |
9 |
|
Mounting................................................................................................................................................................. |
|
9 |
TROUBLESHOOTING GUIDE................................................................................................................................................ |
10 |
|
SPECIFICATIONS................................................................................................................................................................... |
|
11 |
FIVE YEAR LIMITED WARRANTY......................................................................................................................................... |
11 |
|
TABLES AND FIGURES |
|
|
Table 1 |
Charge Status ................................................................................................................................ |
3 |
Table 2 |
Charge Parameter Settings............................................................................................................ |
..7 |
Table 3 |
Maximum Conductor Pair Length – 3% Voltage Drop ................................................................... |
..8 |
Figure 1 |
Front Panel Operation & Indicators................................................................................................ |
4 |
Figure 2 |
Factory Charge Voltage Setpoints -vs.- Battery Temperature ....................................................... |
5 |
Figure 3 |
Wiring Diagram .............................................................................................................................. |
8 |
Figure 4 |
Detailed Dimensional Drawing ....................................................................................................... |
9 |
1

Installation and Operation Manual
IMPORTANT SAFETY INSTRUCTIONS
This manual contains important instructions for Model SC30
SAVE THESE INSTRUCTIONS
1.Refer installation and servicing to qualified service personnel. Incorrect installation or use may result in risk of electric shock or fire. No user serviceable parts in this unit.
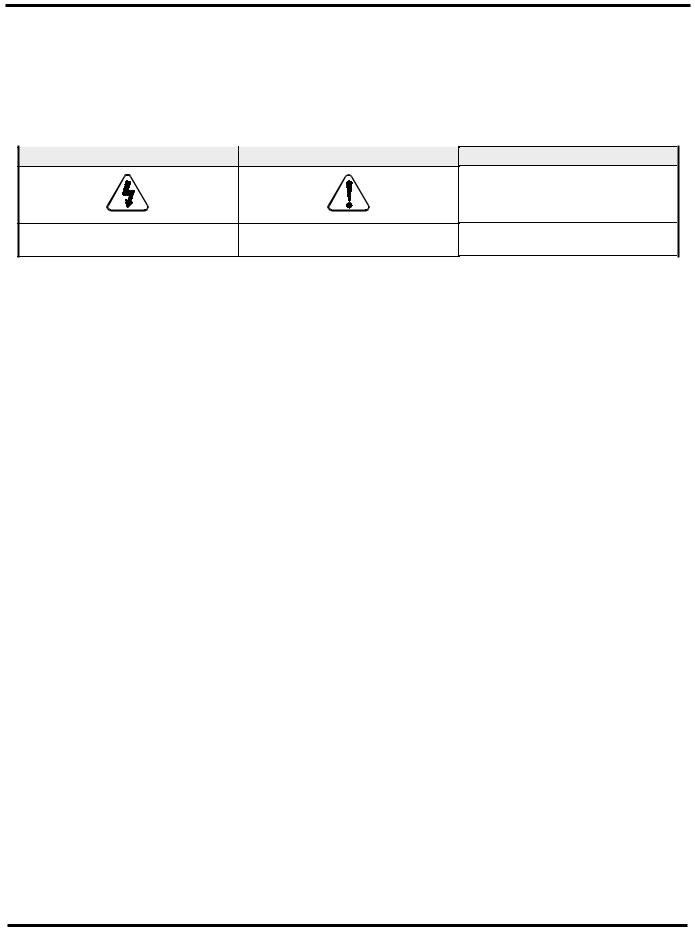
2.To reduce the risk of electric shock, fire or personal injury, the following symbols are placed throughout this manual to indicate dangerous conditions, or important safety or operational instructions.
WARNING |
CAUTION |
IMPORTANT |
|
|
) |
Indicates dangerous conditions or electric |
Indicates items critical to safe installation or |
Follow these instructions closely for proper |
shock potential. Use extreme caution. |
operation of the unit. |
operation of the unit |
3.PERSONAL PRECAUTIONS
a)Working in the vicinity of lead-acid batteries is dangerous. Batteries produce explosive gasses during normal operation.
b)To reduce risk of battery explosion, follow these instructions and those published by battery manufacturer and manufacturer of any equipment you intend to use in vicinity of battery.
c)Someone should be within range of your voice or close enough to come to your aid when you work near a lead-acid battery.
d)Have plenty of fresh water and soap nearby in case battery acid contacts skin, clothing or eyes.
e)Wear complete eye protection and clothing protection. Avoid touching eyes while working near battery.
f)If battery acid contacts skin or clothing, wash immediately with soap and water. If acid enters eye, immediately flood eye with running cold water for at least 15 minutes and get medical attention immediately.
g)NEVER SMOKE or allow a spark or flame in vicinity of battery.
h)Be extra cautious to reduce risk of dropping metal tool onto battery. It might spark or short circuit battery or other electrical part that may cause explosion.
i)Remove personal metal items such as rings, bracelets and watches when working with a lead-acid battery. A lead-acid battery can produce a short circuit current high enough to weld a ring or the like to metal, causing a severe burn.
j)Remove all sources of power, photovoltaic and battery before servicing or installing.
4.CHARGER LOCATION & INSTALLATION
a)This unit is designed to charge 12 volt (6 cell) flooded or sealed type lead-acid chemistry batteries within the range of 20 to 2,000 amp-hours. Follow battery manufacturers charging recommendations when considering this unit for use with other battery chemistry.
b)This unit employs components that tend to produce arcs or sparks. NEVER install in battery compartment or in the presence of explosive gases.
c)This unit must be installed and wired in accordance with National Electrical Code, ANSI/NFPA 70.
d)Over current protection for the battery must be provided externally. To reduce the risk of fire, connect to a circuit provided with 40 amperes maximum branch-circuit over current protection in accordance with National Electrical Code, ANSI/NFPA 70.
e)Insure that charge parameters are properly configured for the battery being charged as recommended by the battery manufacturer.
f)This unit is not water tight. Do not expose to rain, snow or excessive moisture.
g)Insure all terminating connections are clean and tight. Tighten Battery and PV compression terminals to 4.4 in-lb (0.5 nm) and battery temperature sensor compression terminals to 2.1 in-lb (0.24 nm).
h)Do not connect to a PV array capable of producing greater than 27 amps of short circuit current ISC, or 24 volts open circuit voltage VOC @ STC.
5.PREPARING TO CHARGE
a)Never charge a frozen battery.
b)Be sure battery is mounted in a well ventilated compartment.
c)Add distilled water in each cell of a lead-acid battery until battery acid reaches level specified by battery manufacturer.
2

Blue Sky Energy – Sun Charger 30
PRODUCT DESCRIPTION
The Sun Charger 30 is a 30 amp 12 volt Pulse Width Modulated (PWM) photovoltaic (PV) battery charge controller. The SC30’s sophisticated 3-stage plus equalization charge control system improves battery performance and life while minimizing battery maintenance. The unit is electronically protected against voltage transients, over temperature, over current, short circuit, swapped battery & PV, and reverse battery & PV polarity. A current limit feature minimizes the likelihood of overload by limiting average output current to 30 amps maximum during periods of unusually high PV power production.
A very low power LED display is provided to monitor battery voltage and PV charge current. The display system also includes a resettable amp-hour counter which computes total PV amp-hours produced.
PART NUMBERS AND OPTIONS
•SC30 ................... |
Sun Charger 30 solar charge controller |
•930-0022-20 ..................... |
Optional battery temperature sensor |
•SC30-LVD........... |
SC30 with Load & Lighting control drive signal |
•720-0011-01 ..................... |
Optional wall mounting box, black powder coated |
|
(-LVD version by special order only, contact factory) |
|
|
OPERATION
Basic charge control operations are fully automatic and require no operator intervention. When sufficient PV power is available the SC30 will switch to a Charge ON state and begin charging the battery. The particular charge mode the SC30 will operate in will vary depending on the needs of the battery and 12 volt electrical system, and available PV charge current. When insufficient PV current is available to charge the battery the SC30 will switch to a Charge Off state. At night when the SC30 is in a Charge Off state the PV array is disconnected from the battery to prevent unwanted current drain. There is a 5 second turn-on delay, and a 30 second turn-off delay.
)same as actual battery voltage within a few 10ths of a volt for proper operation. A battery must be connected with a minimum voltage of 9 volts for the unit to operate. Note that the front panel serves as a heatsink for power control devices and may become quite warm during normal operation.¾ The SC30 operates on battery power, not PV power. Insure that voltage on the battery terminals of the SC30 is always the
¾ CAUTION: Do not disconnect the battery while the SC30 is in a Charge ON state. A healthy battery is a key component of PWM charge voltage control and provides charge voltage filtering. Sudden removal of the battery while the SC30 is charging will produce voltage spikes at the SC30’s battery terminals which may damage 12 volt appliances still connected to the SC30.
IF THE BATTERY MUST BE DISCONNECTED, REMOVE PV POWER FIRST.
CHARGE STATUS INDICATION
Present charge status of the SC30 is indicated using two charge status LED’s, Absorption & Float. If net battery charge current is greater than about 3 to 5 amps per 100 amp-hours of battery capacity the charge status indicator can provide a rough indication of battery state of charge.
CHARGE STATUS
|
|
CHARGE STATUS LED’s |
|
CHARGE MODE |
APPROXIMATE CHARGE LEVEL |
|||||
|
|
|||||||||
|
|
ABSORPTION |
& |
FLOAT OFF |
|
CHARGE OFF |
|
|
|
|
|
|
|
|
|
|
|||||
|
|
ABSORPTION |
& |
FLOAT ON |
|
BULK |
|
<70% FULL |
||
|
|
ABSORPTION ON |
– |
FLOAT OFF |
|
ABSORPTION |
|
70% - 95% FULL |
||
|
|
ABSORPTION OFF |
– |
FLOAT ON |
|
FLOAT |
|
FULLY CHARGED |
||
|
|
ABSORPTION |
& |
FLOAT |
|
EQUALIZE |
|
|
|
|
|
|
ALTERNATELY BLINKING |
|
|
|
|
||||
|
|
|
|
|
|
|
||||
DIGITAL DISPLAY |
|
|
|
|
TABLE 1 |
|
|
|
||
|
|
|
|
|
|
|
|
|||
When the SC30 first boots and completes self-test, the VOLT/AMP display mode is active. This mode displays Battery Voltage continuously if the SC30 is in a Charge Off state, or alternates between Battery Voltage & Output Charge Current if the SC30 is in a Charge On state. The AMPS indicator in the upper left of the display will be on whenever current is displayed. To provide good readability during the day yet minimize the likelihood of the display being objectionably bright at night an automatic night time dimming feature is provided which dims the display when the SC30 is in a Charge Off state.
Other display modes may be selected using the Display Select push-button. Each brief press of Display Select selects the next display mode as shown on the front panel graphic of Figure 1. VOLT shows Battery Voltage, AMP shows Output Charge Current, and AMP-HRS shows total PV Amp-Hours produced since the amp-hour counter was last cleared. One more brief press after AMP-HRS turns the display off completely. Each brief press of Display Select moves to the next display mode in a continuous loop as shown on the front panel graphic. Note that the Amp-Hours are shown in whole numbers without a decimal point.
SOLAR CHARGE AMP-HOUR COUNTER
The battery essentially serves as a “storage tank”, with the battery storing electrical energy in units referred to as amp-hours. Amp-hours are computed by multiplying current in amps X time in hours. For example 20 amp-hours may be a current of 10 amps flowing for 2 hours, or may be 1 amp flowing for 20 hours. The battery receives and stores amp-hours when being charged, and then delivers those stored amp-hours when being discharged. As a broad approximation typical lead-acid batteries including GEL and AGM are about 95% efficient in absorbing charge amp-hours.
3
 Loading...