

Page 1
Operating Manual
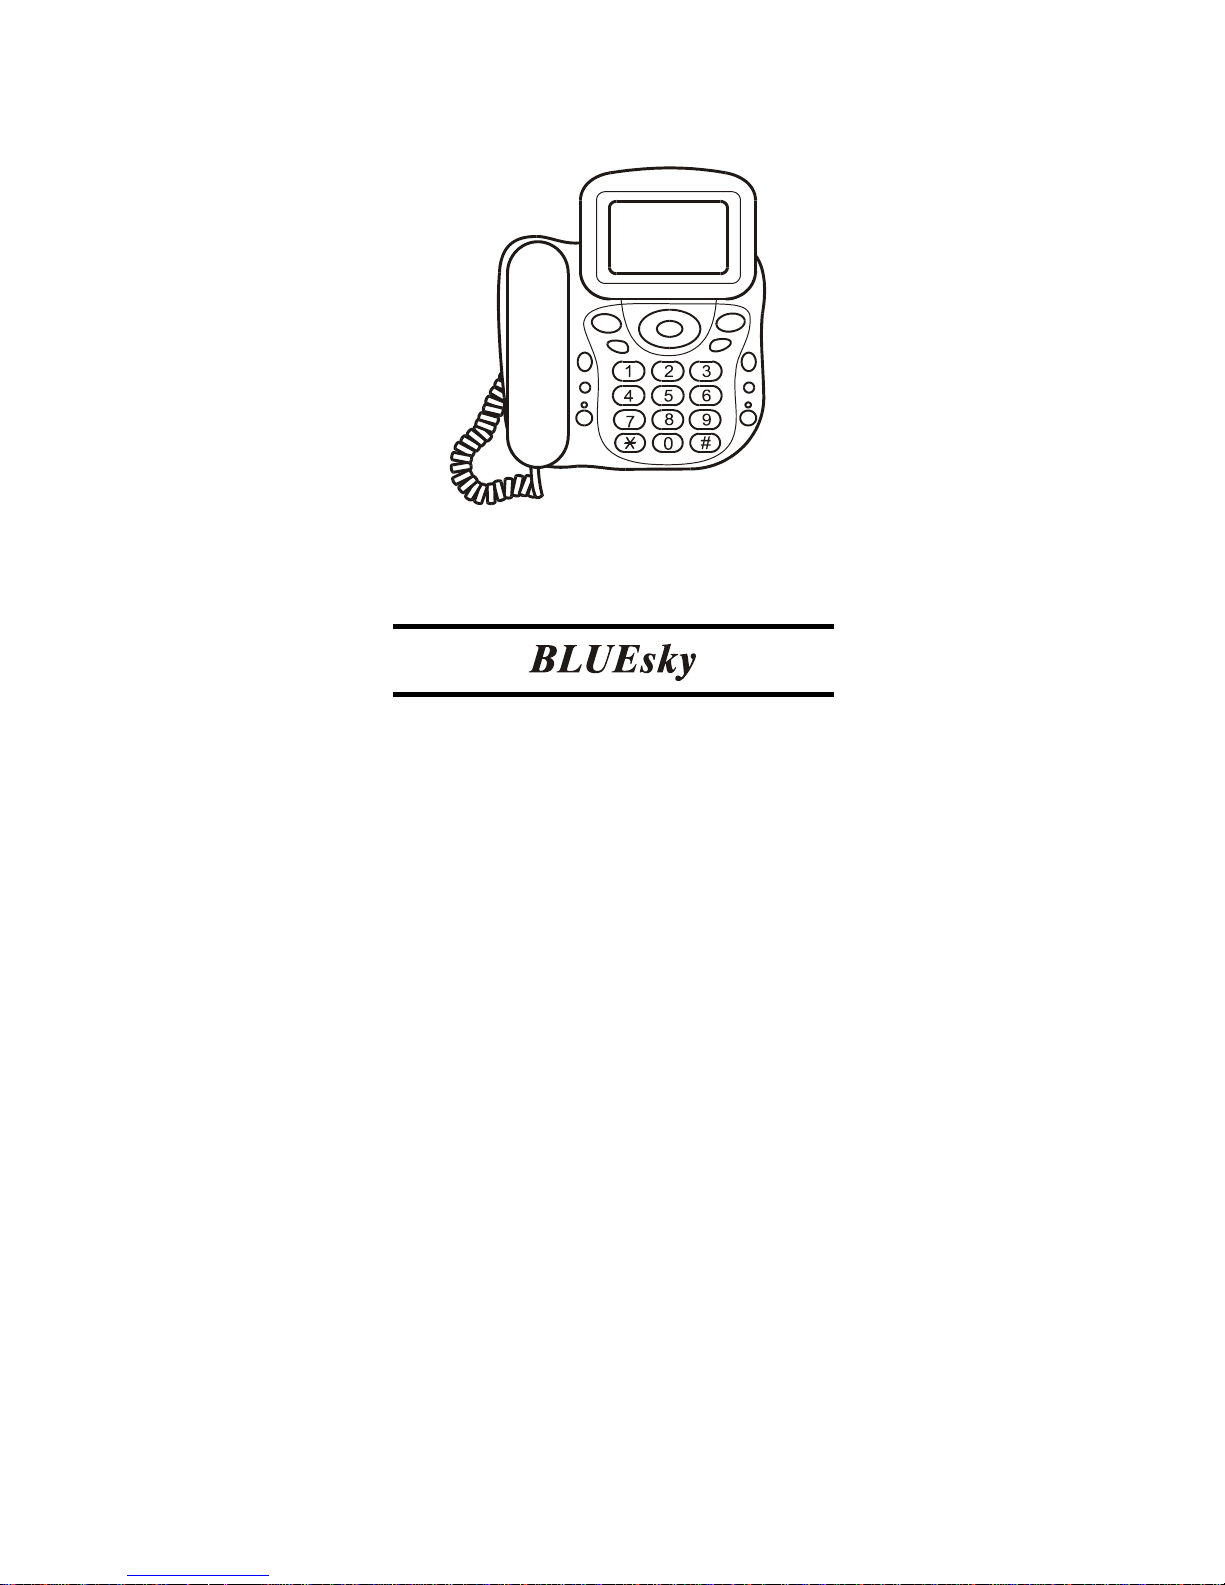
CT-179
Caller ID Phone
Page 2
2
Features:
1. Works with FSK/DTMF systems
2. New Call, Repeat Call display
3. 40 memory for incoming call
4. 10 memory for outgoing call
5. Last number redial, flash, hold music
6. Call back from memory
7. 12 polyphonic melody and 4 ringing melody selection
8. Ring and hands free dialing volume adjustable
9. LCD contrast adjustable
10. Anti-fraud dialing
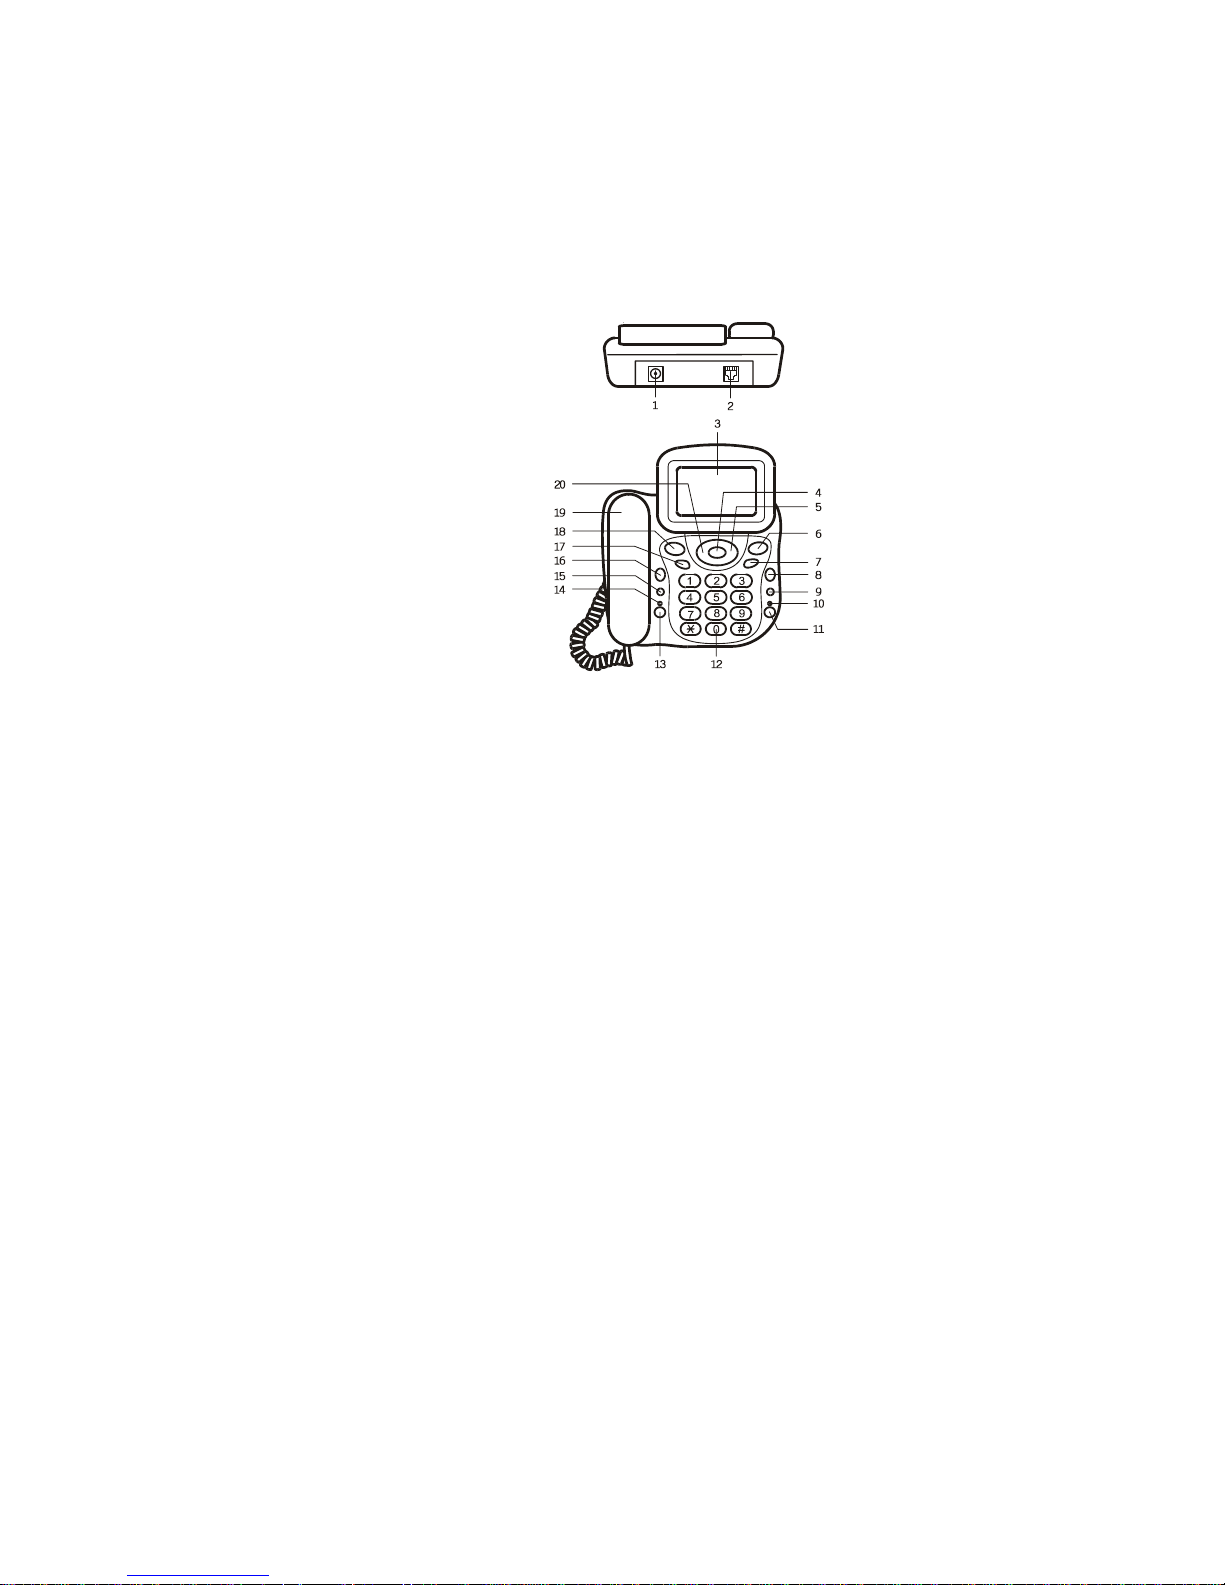
Legend:
1. DC SOCKET
2. LINE IN
3. LCD
4. SET
5. DOWN
6. DIAL CHECK
7. LCD CONTRAST
8. REDIAL
9. FLASH/RING
10. IN USE
11. HANDS FREE
12. KEYPAD
13. HOLD
14. RING INDICATER
15. PAUSE
16. CALL BACK
17. DELETE
18. VOLUME
19. HANDSET
20. UP
Page 3
3
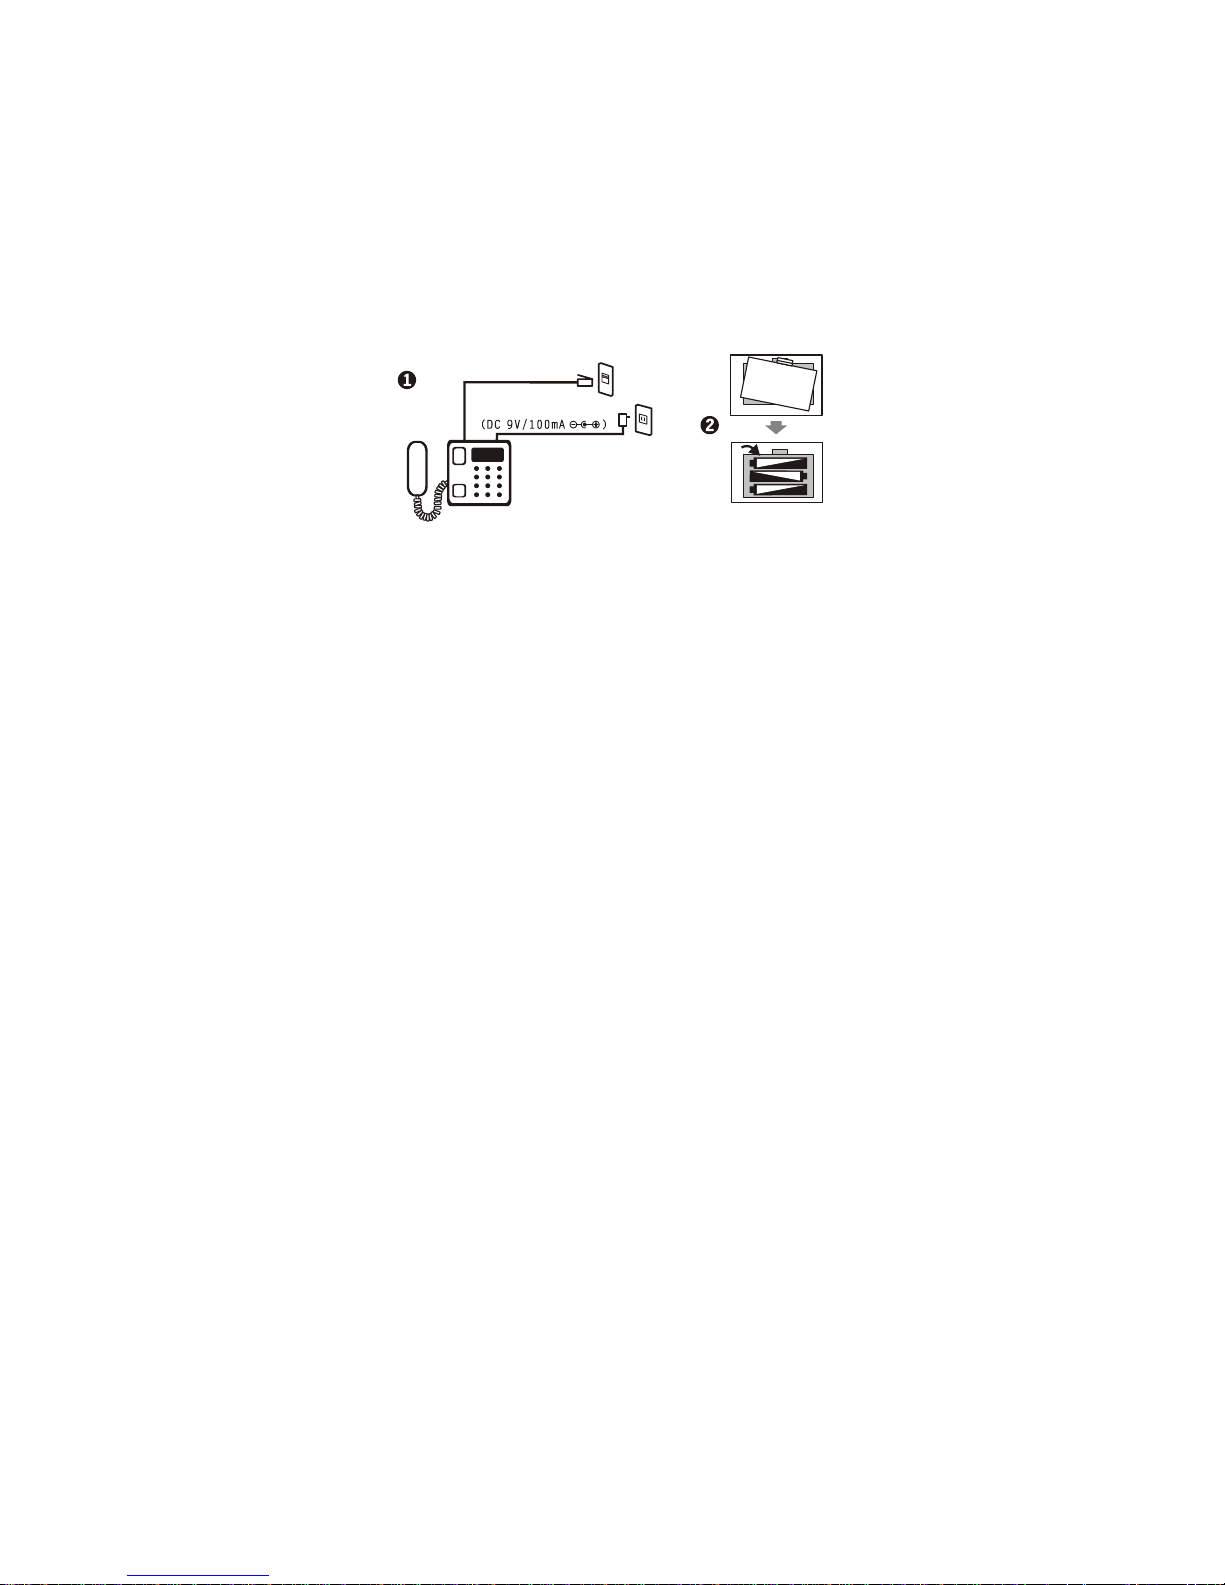
Installation:
You may provide power to the CT-179 with the use of AA
batteries.
To install batteries:
Turn the unit over. Remove the battery compartment cover. Insert
3 AA batteries following the polarity diagram. Replace the battery
compartment cover.
Choose the telephone outlet in your home or office where you
wish to connect the unit. Plug the supplied telephone line to the
telephone outlet. Connect the other end of the telephone line to
the unit.
Plug one end of the supplied coil cable into the outlet of handset.
Connect the other end to the unit.
battery
telephone line
NOTE: You should replace the new battery if the LCD can not be
adjusted to a suitable reading or the function key can’t work well.
If the unit is not properly featured, you need to remove battery and
telephone line then, re-connect 10 minutes later. To avoid shock,
unplug telephone line before replacing battery.
Page 4

4
Setup:
1.Setup time and date:
Press SET key when the unit is in standby mode. The SET
1dATE will be displayed. Press SET key again. The LCD should
be flickering on 20XX,. Press Up or DOWN key to set year.
Press SET. Month should be flickering. Press UP or DOWN key
to set month. Press SET to move to date. Press UP or DOWN to
set date etc., Unit will respond with SET 2 CodE when date and
time are set. Press DELETE after finishing setting.
2. Setup area code:
The LCD will display SET 2 CodE after finishing the time and
date setting or press SET key then press UP key to enter SET 2
CodE mode when unit is in standby mode. Press SET again.
The LCD will display CodE 1. Press SET key, then press the UP
and DOWN keys to select the area code. Press SET key to
confirm the area code is set.
NOTE: The area code is associated with the place where the
unit is connected. For example: If the unit was used in Taipei,
you can set the area code 02 or 2 to be deleted while the unit
receive a local call and will recall from the call memory.
3.Setup long distance area code:
The setup is the same as you set up for local area code when
the unit is in SET 3 CodE.
4. Setup flash time:
The LCD will display SET4 FLASH after long distance area code
was set or Press SET key, then press UP key repeatedly until
the SET4 FLASH is displayed. Press SET key to observe
currently set flash time. Press UP or DOWN key to select. Press
SET key to confirm the selection. Press DELETE after finishing
setting.
Page 5

5
The unit supplies with 90ms, 120ms, 180ms, 300ms, 600ms and
1000ms flash duration. Set the flash time to 600ms if you have
applied for call waiting service.
5. Anti-fraud dialing:
Press SET key, then press UP key repeatedly until the LCD
display SET 7 ALAr. Press SET key the LCD will display ALAr
OFF . Press UP or DOWN key to turn on/off the alarm function.
Press SET to confirm the setting. Press DELETE after finishing
setting. The unit will alarm while fraud dialing is detected.
6. Ringing volume:
In standby mode, press VOLUME key to select the ringing
volume.
7. Hands free dialing volume:
In standby mode, press HANDSFREE key. Press VOLUME key
repeatedly to select volume while hearing dialing tone. Press
HANDSFREE key again to confirm the setting.
8. LCD contrast control:
With the unit in standby mode, press LCD key to adjust the LCD
brightness. The unit provides 5 level of brightness.
9. Ringing melody selection:
Press the FLASH/RING key repeatedly to select the melody
while the unit is in standby mode. The unit provides12
polyphonic melodies and 4 ringing melodies. You also can
switch off the melody (The LCD will display RING OFF). rIng 01
to rIng 12 are for 12 polyphonic melodies. RIng A is for
automatic melody selection. rIng 14 to rIng 17 are for ringing
melodies.
Page 6

6
Operating:
1.To receive a call:
With the use of Caller ID available from your local telephone
company , you can see the telephone number of the calling party .
Also, the LCD can display the time, date, call count, new call
and repeat call. You may select whether answer the call.
2.To make a phone call:
Pick up the handset or press HANDFREE key. Press desired
number while hearing a dialing tone. The LCD will display the
number dialed. The LCD will revert to call duration in 12
seconds when the dialed number is connected. After finishing
calls all data will be stored. Then the LCD will revert to time
stamp mode. When last desired number is busy you may press
REDIAL key to redial the number.
3. Incoming call – review, redial, and delete:
When the unit receives a call, the last incoming call number,
time, date, call count, new call and repeat will be displayed
on the LCD. The LCD also displays ----P----, ----O---- to
indicate the number is privacy or out or area.
If data is not correctly detected, the LCD will display ERROR.
NOTE: In FSK system, time and date as sent by the
telephone company is recorded as the time stamp for
incoming call, not the time and date as programmed into the
unit. Time and date function is not available in TDMF system.
To review an incoming call and call back: Press UP or
DOWN keys to review the inbound number. Press REDIAL
key when the desired number is selected. Press REDIAL key
twice. The unit will automatically add 0 as the mobile phone
or long distance call prefix.
To delete the incoming call data: Press UP or DOWN key
to select the number when the unit is in standby mode. Press
DELETE key for 5 seconds when desired selection is on
screen.
Page 7

7
4.Outgoing Call—review, redial, and delete
The unit can store up to 10 sets of dialed number associated
with call count and time stamps. The new number will replace
the oldest one as the unit stores more than 10 outgoing calls.
To review and redial an outgoing call: Press DIAL CHECK
key repeatedly to select the desired number. Press REDIAL
key. The number will be automatically dialed out. The unit will
display –END—when all numbers are reviewed.
To delete outgoing call number from memory: Press the
DIAL CHECK key to select the number when the unit is in
standby mode. Press DELETE key when the selected
number is on screen.
5. Last Number Redial:
If you get a busy tone and you want to redial the same number,
press FLASH/RING key then press REDIAL key. The unit will
automatically redial the last number.
6. Flash time:
Momentarily hangs up the phone to access custom calling
features provided by your presetting flash duration.
NOTE: The flash duration should be set at 600ms or up for th e
use. (Please refer to page 4 & 5)
7. Hold on music:
Press HOLD key before hanging up the handset. Thus the
caller can hear music from the phone. Pick up the handset for
continuous talking.
8. Preview the Dialed Number:
Press the desired number when the unit is in standby mode.
Press REDIAL key or DELETE key to dial the number or delete
the number dialed.
Page 8

8
Frequently Asked Questions:
I can not hear ring tone, what’s wrong?
The C/O line is not well connected to the unit. Please check and
make a reliable connection.
The ring sounds so low, why?
There is a ring selector on the rear of the unit. Switch it to the H
position for higher ring volume.
When I am using the phone I hear noise, what’s wrong?
It is due to poor connection between C/O line and the unit. Ensure
the C/O line, Connection box and plugs are in good condition and
are well connected.
All of my incoming calls are ending after the first ring, but the
outgoing call is working well. What’s wrong?
You have to check whether the connection box dropped into water.
Ensure all extensions are in good condition.
I am not seeing the telephone number of calling party on the
LCD, why?
In order to receive the telephone number of the calling party, you
must have Caller ID service. Check with your local telephone
company regarding available and cost. If you are sure the service
is provided by telephone company, please press * twice to check
the function again.
The LCD can not display the data properly, what’s wrong?
Ensure that batteries have continuous power. If battery is ok,
remove the battery and disconnect the unit to C/O line for 10
minutes. Replace batteries and connect the line again.
The Data displayed on the LCD is not clear, why?
This can be due to poor quality battery. Replace batteries, if these
batteries do not work. Adjust the LCD contrast to the proper level.
 Loading...