

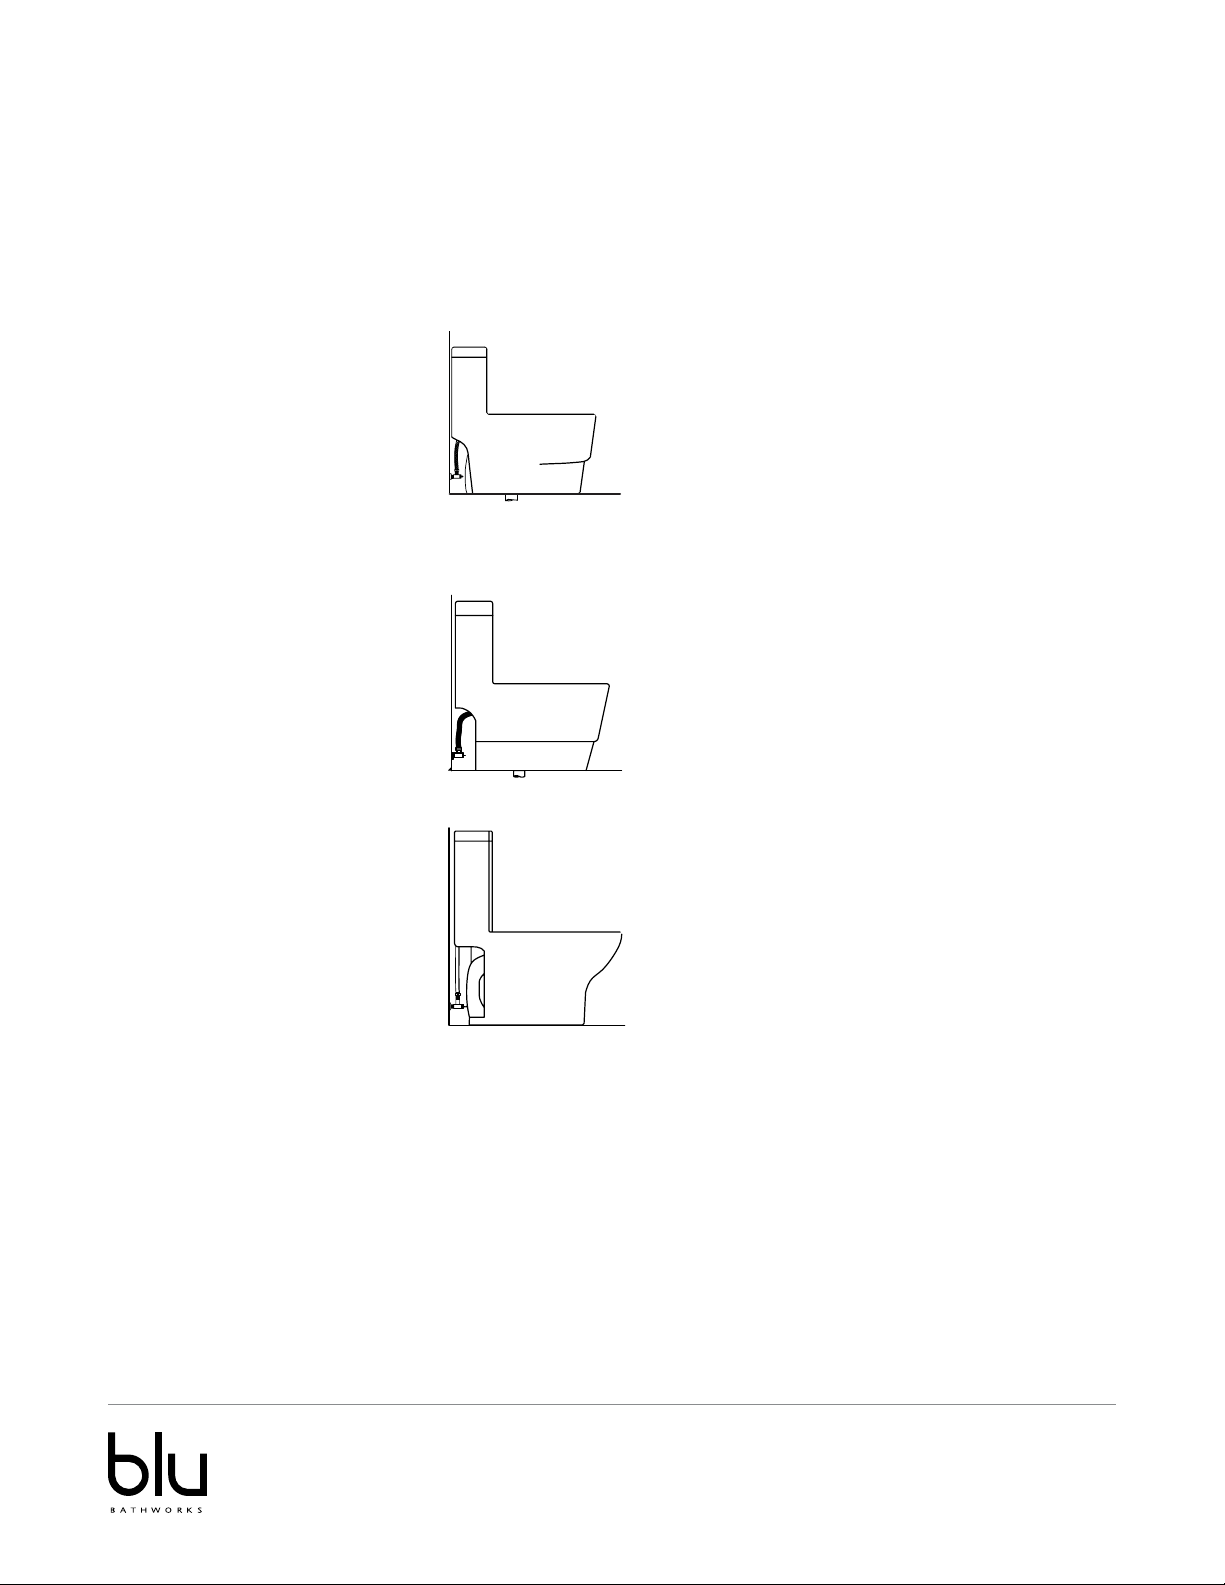
Freestanding Toilets
®
Installation Guide
LF1062
LF1269
LF8004
2014-01
1 866 907 0122 blubathworks.com

®
Installation Requirements
Please read the instructions carefully so as to avoid any damage to the fixture.
1. To ensure this product is installed properly, you must read and follow these guidelines.
2. The owner/user of the product must keep this information for future reference.
3. Consult local building codes to make sure the installation complies with standards.
4. Remove the unit from its packaging. Before disposing of it, inspect the unit to make sure its in good shape. Should
inspection reveal any damage or defect in the finish, contact your distributor. The warranty does not cover damages
or defects in the finish once it has been installed. Blu Bathworks’ responsibility for shipping damages ceases upon
delivery of the product in good order to the carrier. All complaints regarding damage due to transport must be made
directly to the carrier.
5. Place the unit in the bathroom before you start working. Conserve all nuts and bolts.
6. To protect the unit during installation, we recommend that you lay a piece of cardboard on the bottom.
7. If the unit is covered with polyethylene protective film, do not remove until installation is complete to grant maximum
protection. However, remove film where any two surfaces will be in permanent contact.
8. Verify that all dimensions on the plan are the same as the ones of the unit.
9. All installations must conform to local and national plumbing, building and fire codes.
10. Inspect this product to assure you have all parts required for proper installation.
Attention
DO NOT USE IN-TANK BOWLCLEANERS.
The use of high concentration of chlorine or chlorine-related products can seriously damage fittings in the tank. This
damage can cause leakage and property damage. Blu shall not be responsible or liable for any tank fitting failure or
damage caused by the use of in-tank bowl cleaners.
Operation (Note to Owner)
You have chosen a Blu product that is superior in quality and craftsmanship. Our toilet flushing systems are the best in
the industry. To ensure that your toilet is performing correctly, always flush the toilet with a full stroke of the trip lever to
activate the flushing cycle. A full stroke will guarantee that you are flushing with the power of a Blu.
Cleaners for Fittings and Accessories
To avoid damaging the surface and working components of the fittings, certain precautions must
be taken in terms of usage and subsequent cleaning as many cleaning agents contain acids for
general cleaning and removing calcium deposits. When caring for your fittings and accessories,
please note the following:
- Only apply cleaners which are expressly intended for the use
- Never use any cleaner containing hydrochloric acid, formic acid or acetic acid on or near the fitting, as they can
cause considerable damage even with just one application
- Do not use cleaners containing phosphoric acid
- Do not use cleaners containing chlorine bleach solutions
- Never mix or combine cleaning agents
- Abrasive cleaners and unsuitable scouring agents such as scouring pads.
2014-01
1 866 907 0122 blubathworks.com
1

®
Installation Notes
Important! The rough-in must be a minimum of 12” (305mm) or more from the base of the wall or baseboard. The toilet
will not fit correctly if there is less than 12” (305mm) of clear space between the base of the wall or baseboard and the
centerline ofthe outlet. Install or relocate the supply and outlet as necessary to conform to rough-in dimensions. If a
baseboard causes the rough-in to be less than 12” (305mm), it must be cut or removed to allow space for the toilet.
Install this product according to the installation guide. Our products must be installed by certified professionals only and
according to our installation guide as well as federal, provincial / state and local building codes and regulations.
Technical Support Assistance
If further assistance is required, please contact:
Product Support at 1.866.907.0122 (09:00 – 17:00hrs PST) or email technical@blubathworks.com
North America
Blu Bathworks Inc.
188 Smithe Street,Vancouver, BC, Canada, V6B 6A9
T +1.604.299.0122 F +1.604.299.0125
2014-01
1 866 907 0122 blubathworks.com
2

®
Before Installation
TOOLS NEEDED:
– 12” Pipe Wrench
– 10” Adjustable Wrench
– Carpenter’s Level
– Tape Measure
– Pliers
– Screwdriver
– Putty Knife
– Drill
1
⁄64” drill bit for wood floor installation
– 1
5
⁄16” drill bit for concrete/tile installation
–
MATERIALS REQUIRED:
– Flexible Supply Tube / Connector
– Supply Stop Valve
– Mounting (T) Bolts & Nuts (2pc)
– Wax Ring / Seal
PACKAGE CONTENTS:
Item Description Quantity
1 Bowl w/ lid (vitreous china) 1
2 Cover Plate 1
4 Top Mount Bolt Set (for seat) 1
5 UniFit Rough-In
a. Toilet Mounting Bolt (T-Bolt) 2
b. T-Bold Washer 2
c. T-Bolt Nut 4
d. Mounting Screw w/ washer 4
e. Anchor 2
f. PVC Outlet Connection 2
2014-01
1 866 907 0122 blubathworks.com
3
®
Installation Instructions for Freestanding Toilets
Piping Check & Rough-In
1
In order for your new Blu toilet to fit correctly, the distance between the finished wall to the center of the closet flange must
be at least 12”. This measurement is called the rough-In. The water supply must be approximately 8” or 10” to the left
(facing the bowl) from the center line of the closet flange and approximately 4½” above the floor.
Remove Existing Toilet (if necessary)
2
• Turn off water supply. Flush the toilet, remove any remaining water
from tank and bowl.
• Disconnect water connector. Remove tank and bowl.
• Remove old wax seal and mounting bolts.
• Mounting surface must be clean and level before new toilet is installed
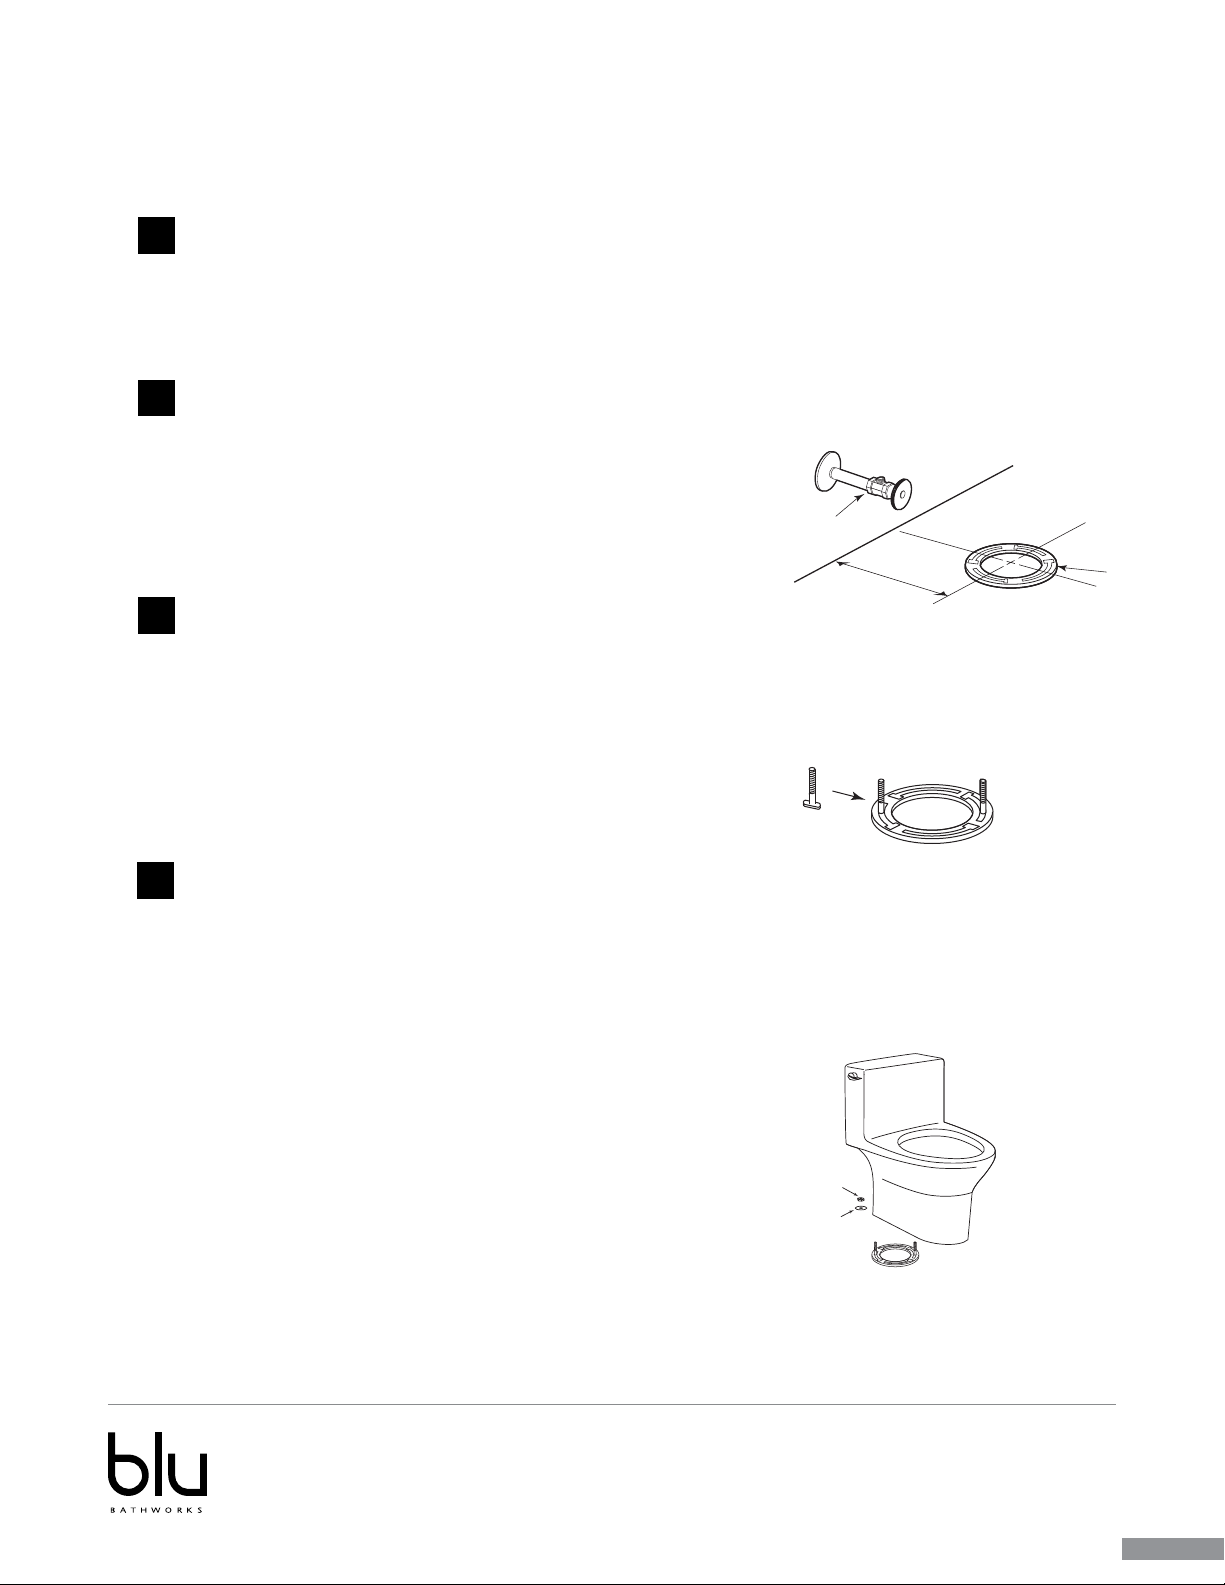
Installing Toilet Mounting Bolts
3
• Clean any debris out of the closet flange and then install new
mounting bolts (not supplied) into the slots of the closet flange
(see Fig. 2).
• The head of the bolt should be inserted into the slot with its
threads facing upward (see Fig. 2).
Fig. 1
Supply
Valve
Fig. 2
Finished Wall
‘RI’
C/L
Closet
Flange
Toilet Bowl Installation
4
• Carefully turn the toilet upside down onto some padding.
• Firmly press a new bowl wax ring (not supplied) onto the circular
recess around the toilet bowl’s horn (see Fig. 3).
• Turn the toilet upright and gently lower into position over the closet
flange.
• With toilet properly aligned, press firmly on both sides of toilet rim to
set the bowl wax ring.
• Insert the washer and thread nuts onto the bolts and hand tighten.
• Then tighten the bolts an additional ½ turn.
• Install caps on washers (if necessarary). Smooth off the bead of
sealant around the base & remove excess sealant.
WARNING: DO NOT OVERTIGHTEN. Overtightening may cause
damage to china or plastic parts.
Fig. 3
Nut
Washer
2014-01
1 866 907 0122 blubathworks.com
4
 Loading...