

Page 1
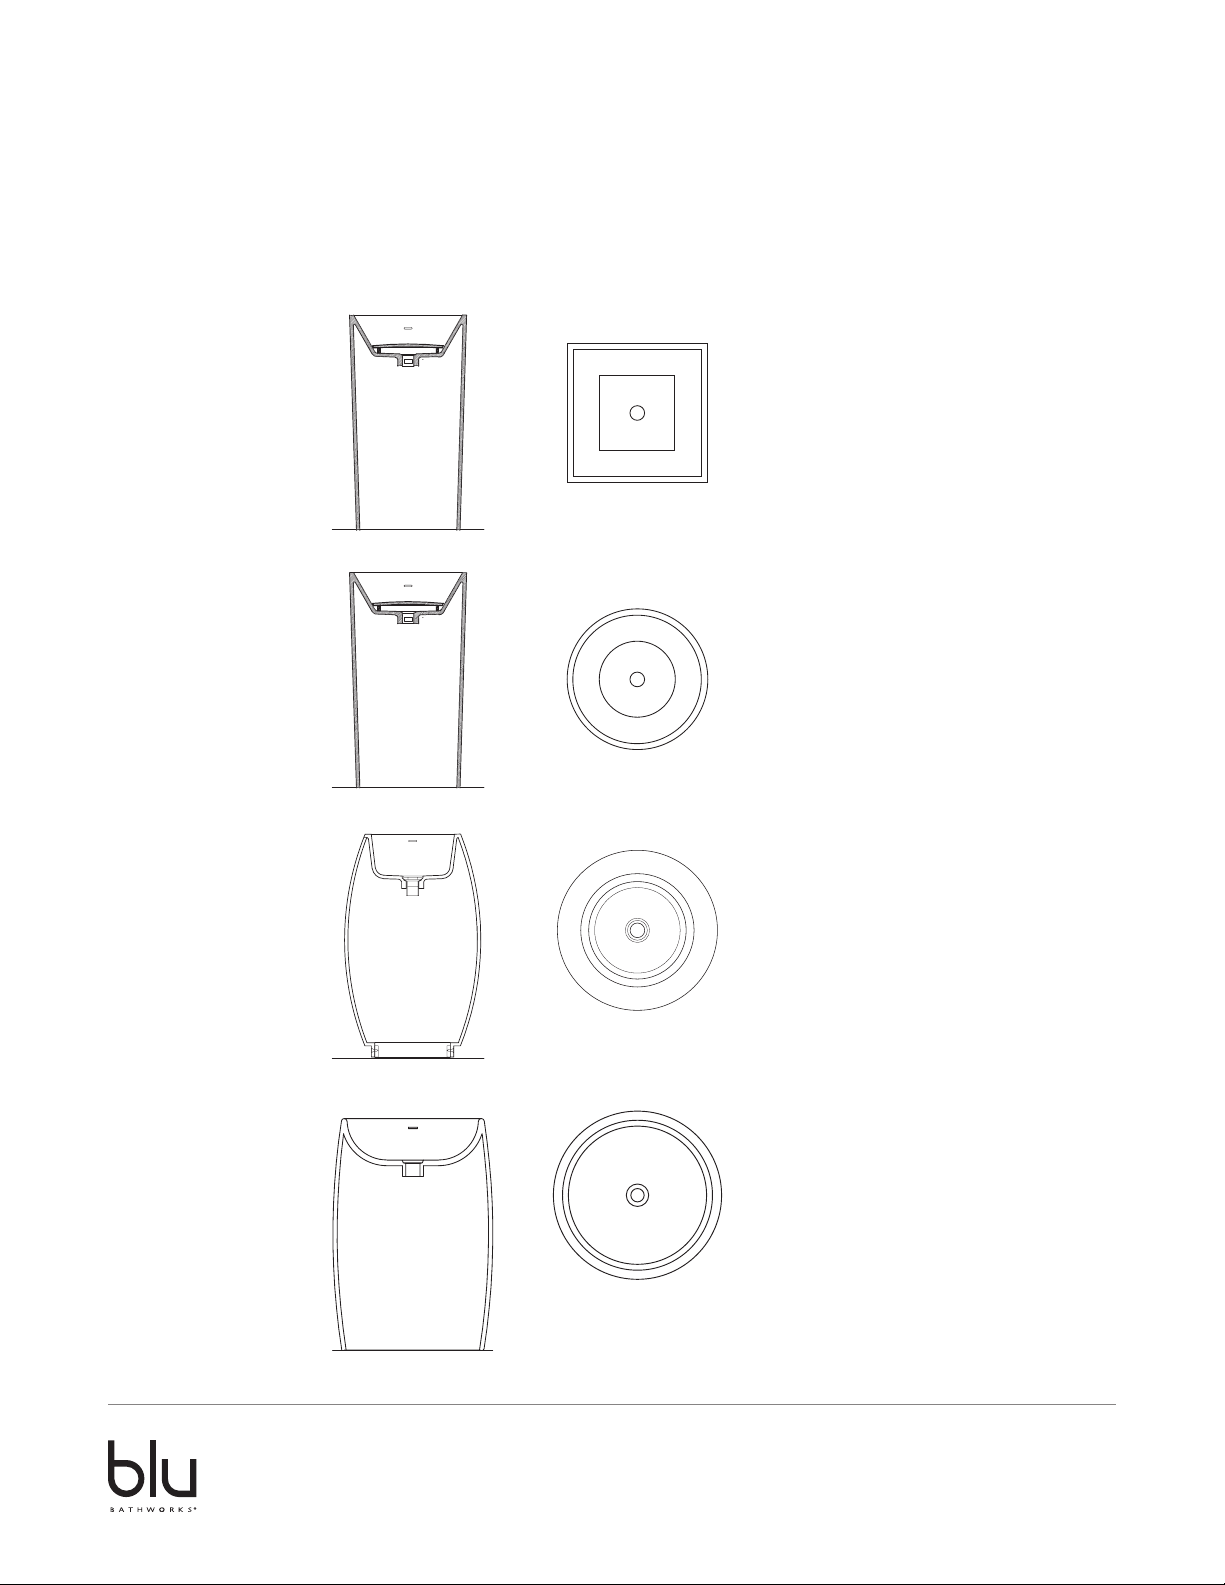
blu·stone™ freestanding basin
Installation Guide
SA0504
SA0505
SA0506
SA0507
2015-02
1 866 907 0122 blubathworks.com
Page 2

Attention — Before Installation
- We recommend that the installation be done by a minimum of 2 people as a security precaution. Also make sure
to adopt the proper posture when lifting the basin.
- Adhere to all local building and plumbing codes. The diagrams in this guide are not construction plans. They are
visual aids.
- For best results, the floor must be level and the wall must be square with the floor.
Installation Requirements
Please read the instructions carefully so as to avoid any damage to the fixture.
1. To ensure this product is installed properly, you must read and follow these guidelines.
2. The owner/user of the product must keep this information for future reference.
3. Consult local building codes to make sure the installation complies with standards.
4. Remove the unit from its packaging. Before disposing of it, inspect the unit to make sure its in good shape. Should
inspection reveal any damage or defect in the finish, contact your distributor. The warranty does not cover damages
or defects in the finish once it has been installed. Blu Bathworks’ responsibility for shipping damages ceases upon
delivery of the product in good order to the carrier. All complaints regarding damage due to transport must be made
directly to the carrier.
5. Place the unit in the bathroom before you start working. Conserve all nuts and bolts.
6. To protect the unit during installation, we recommend that you lay a piece of cardboard on the bottom.
7. If the unit is covered with polyethylene protective film, do not remove until installation is complete to grant maximum
protection. However, remove film where any two surfaces will be in permanent contact.
8. Verify that all dimensions on the plan are the same as the ones of the unit.
Installation Notes
Important! Install this product according to the installation guide. Product does have an overflow. Spout must provide a
minimum of 5” reach for adequate clearance into basin. Our products must be installed by certified professionals only
and according to our installation guide as well as federal, provincial / state and local building codes and regulations.
Technical Support Assistance
If further assistance is required, please contact:
Product Support at 1.866.907.0122 (09:00 – 17:00hrs PST) or email [email protected]
North America
Blu Bathworks Inc.
188 Smithe Street,Vancouver, BC, Canada, V6B 6A9
T +1.604.299.0122 F +1.604.299.0125
Please refer to blubathworks.com for warranty, terms & conditions under warranty & procedure for warranty service.
2015-02
1 866 907 0122 blubathworks.com
1
Page 3

Installation for Freestanding Basins
PREPARATION
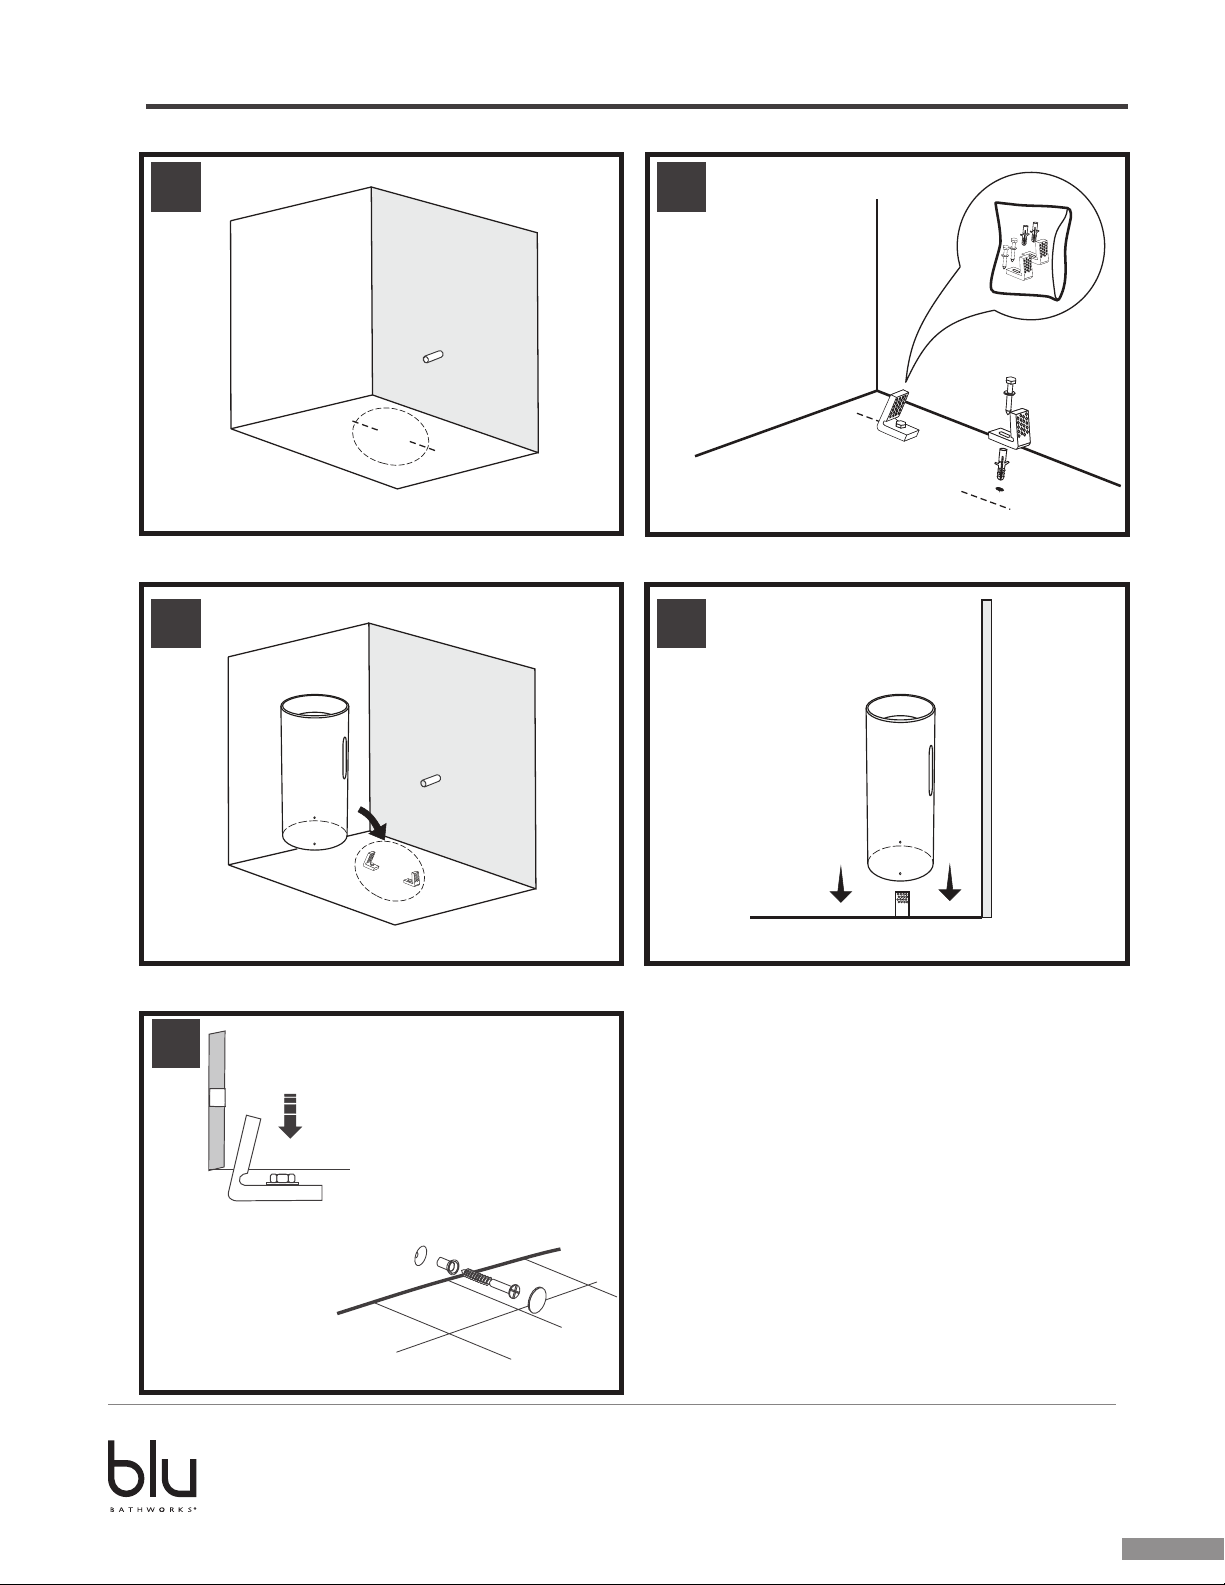
1. Place pedestal into installed position. Ensure product is level when placed and mounting holes are located at the
sides.
2. Carefully mark the mounting hole locations for the pedestal onto the floor with a non-permanent marker.
3. To help recall the pedestal position, trace a line along the base of the pedestal.
4. Carefully remove the pedestal.
PEDESTAL INSTALLATION
5. Drill pilot holes for the floor mounting brackets 1⁄2” (12mm) inside the line.
6. Install the pedestal mounting hardware provided. Place a metal washer onto the bolts and insert the bolts through the
mounting brackets into the floor securely. Fig 1.
7. Return the pedestal into position with the mark on the floor.
8. Install the pedestal bracket to floor using the two supplied screws. Fig 2.
WARNING: DO NOT OVERTIGHTEN. Overtightening may damage the products and cause personal injury and/or
property damage.
2
Min 2" (51mm)
Max 3” (76mm)
from finished wall
All dimensions based on
recommended 3” gap between
finished wall – actual distance
based on spout length to be
confirmed by installer
1
11"
Rear
ؼ"
cut-out
for drain
¾" Mounting holes
Floor mounting
brackets
Line of basin
½"
(12mm)
1½"
(35mm)
Ø(8mm)
2015-02
1 866 907 0122 blubathworks.com
2
Page 4
1 2
3 4
FAUCET AND DRAIN CONNECTIONS
5
(NOT SUPPLIED)
1. Connect the water supply to the faucet according to faucet
instructions.
2. Connect and tighten the trap to the drain.
3. Turn ON the water supplies to the faucet.
4. Purge air from the HOT & COLD water by running the water
for a few seconds.
5. Fill the lavatory with water.
6. Check for leaks at the water supply and drain connections.
2015-02
1 866 907 0122 blubathworks.com
3
Page 5

wher e w a t er meets modern
®
®
wher e w a t er meets modern
®
®
blu·stone™ cleaning & repair guide
blu·stone™ is Blu Bathworks’ signature eco-friendly stone collection; a durable, low maintenance and hygienic material that is high
pressure injection molded, non-porous and anti-microbial. blu·stone
to clean: after each use, simply wipe with a soft cloth to remove any surface dirt.
routine care
™
products are stain, scratch and impact resistant, and easy
• Never expose blu·stone™ to petroleum based products, such as paint removers, oven cleaners or other solvents
(Note: personal hygiene products and cosmetics will NOT damage the surface)
• We recommend that stains are removed within 24 hours
• Do not directly cut on the blu·stone
• Blu Bathworks does not recommend exceeding US/ Canada maximum hot water temperature regulations of 150ºF/65ºC,
™
surface
respectively. Exceeding stated temperatures could result in damage to blu·stone
™
products
standard cleaning
For standard cleaning of both gloss and matte nishes, we recommend using widely available cleaning products such
as Mr. Clean, Fantastik, VIM, CIF etc. Matte nished products may occasionally require a mildly abrasive product.
blu·stone
™
matte finish:
• For more difcult stains, use a mildly abrasive cream cleanser such as Soft Scrub, Comet Soft Cleanser, CIF or VIM
blu·stone
™
gloss finish:
• Do not use abrasive products or cream cleansers
scratched or damaged surfaces
blu·stone™ matte finish:
• Ensure there is no surface dirt by ushing with water
• Rub the 600-grit sanding block, provided, in a gentle circular motion
• Higher grit sandpaper may be required to blend the repaired area to match the existing product nish
blu·stone
• Ensure there is no surface dirt by ushing with water
• We recommend sanding the area starting with 600, 800 and 1200-grit sandpaper: begin with the lower number (coarser)
grit followed with each higher number (ner) in ascending order
• Finish by polishing the surface using a cloth and white polishing compound for automobiles
™
gloss finish:
repairs
For more extensive repairs, send a photograph of your blu·stone™ product to Blu Customer Service
([email protected]), who will inform you as to the most appropriate methods to use.
limited warranty
Blu Bathworks’ (“Blu”) warranty on blu·stone™ products covers all defects in materials and manufacturing for a period of ve (5)
years from the date of purchase. This limited warranty, starting on the original purchase date, is only offered to the original
purchaser who acquires the product directly from Blu or from its authorized dealers. This limited warranty does not apply to cases
in which a product was incorrectly installed, nor to damage due to negligence, misuse, thermal shocks, cigarettes, ames, natural
catastrophes or other accidents. Blu is not responsible for costs and claims that may arise from purchase of a product unsuited to
the structure of the existing building. Any transformation or alteration made to a Blu product automatically voids the warranty.
Blu’s warranty is limited to repair or replacement (with a product of equal value), provided the claim is made to an authorized dealer
or directly to Blu, within the warranty period. Labor costs and any other expenses entailed by replacement of a Blu product are not
covered by the warranty.
2015-02
1 866 907 0122 blubathworks.com
4
 Loading...