

Page 1

Taurus Series
Multimedia Players
Quick Start Guide
Version:
V1.0.0
Doc. ID:
NS120100144
Page 2
Taurus Series Multimedia Players
Quick Start Guide
www.novastar.tech
V1.0.0
i
Version
Release Date
Description
V1.0.0
2017-07-20
First release.
Change History
Page 3

Taurus Series Multimedia Players
Quick Start Guide
www.novastar.tech
V1.0.0
ii
Table of Contents
Change History ................................................................................................................... i
Table of Contents................................................................................................................ i
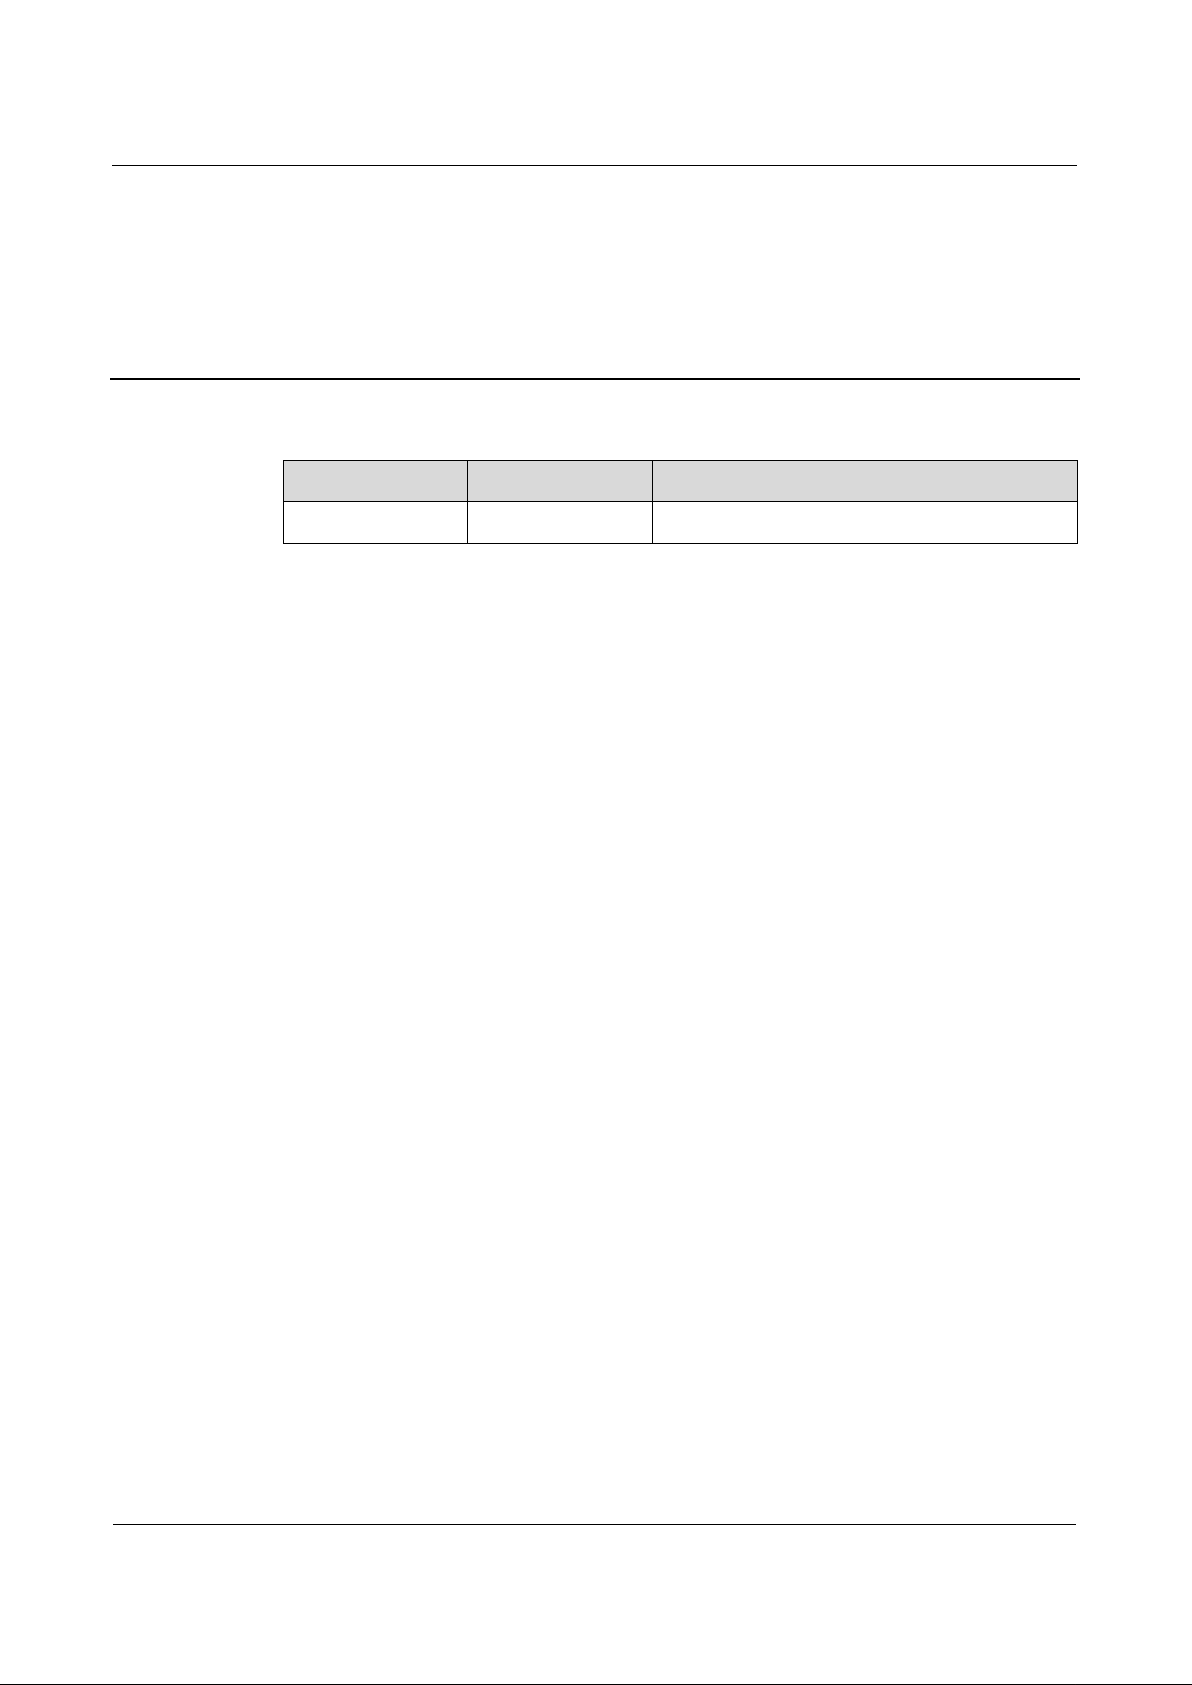
1 Overview .......................................................................................................................... 1
1.1 Scenario ....................................................................................................................................................... 1
1.2 Procedures .................................................................................................................................................. 1
2 Preparation ...................................................................................................................... 2
2.1 Getting and Installing Software .................................................................................................................... 2
2.2 Getting Documents ...................................................................................................................................... 3
2.3 Getting Required Account Information ........................................................................................................ 3
3 Taurus Connections ....................................................................................................... 4
3.1 Connecting via Ethernet Cable .................................................................................................................... 4
3.2 Connecting via Local Area Network (LAN) .................................................................................................. 4
3.3 Connecting via Wi-Fi.................................................................................................................................... 5
3.3.1 Wi-Fi AP Mode .......................................................................................................................................... 5
3.3.2 WiFi Sta Mode .......................................................................................................................................... 6
3.3.3 WiFi AP+Sta Mode ................................................................................................................................... 6
4 Receiving Card Parameter Configuration ..................................................................... 8
4.1 Loading Configuration File or Configuring the Parameters Manually Through NovaLCT-Taurus .............. 8
4.2 Loading the Configuration File Through ViPlex Handy ............................................................................... 9
5 Screen Configuration ................................................................................................... 10
5.1 Configuring a Screen Through ViPlex Handy ............................................................................................ 10
6 General Operations....................................................................................................... 11
6.1 Taurus Login with ViPlex Handy (Android and iOS) .................................................................................. 11
6.2 Taurus Login with ViPlex Express (Windows) ........................................................................................... 11
Page 4
Taurus Series Multimedia Players
Quick Start Guide
www.novastar.tech
V1.0.0
1
1.1 Scenario
This document introduces a quick way to use Taurus series multimedia players and
provides instructions for the first-timer.
1.2 Procedures
1 Overview
Page 5
Taurus Series Multimedia Players
Quick Start Guide
www.novastar.tech
V1.0.0
2
2.1 Getting and Installing Software
Item
Description
How to get
How to install
ViPlex Handy
It is a LAN-based
display
management
software, including
the one applicable
to Android and iOS
operating systems,
is mainly used for
display
management as
well as solution
editing and
publishing.
Scan the following
OR code to download
and install the APP.
Use the App Store on
your iPhone to get
ViPlex Handy for iOS.
Software
installation is
the same as
other
applications.
ViPlex Express
It is a LAN-based
display
management
software applicable
to the Windows
operating system,
and is mainly used
for display
management as
well as solution
editing and
publishing.
Visit
www.novastar.tech,
download and install
the required software.
NovaLCT-Taurus
Screen
configuration
software, which only
supports Windows
and is mainly used
for adjusting
screens to the
optimal display
status.
Visit
www.novastar.tech,
download and install
the required software.
2 Preparation
Page 6
Taurus Series Multimedia Players
Quick Start Guide
www.novastar.tech
V1.0.0
3
2.2 Getting Documents
Item
Description
How to get
Taurus Series
Multimedia Players
Product
Description-V1.0.0
Describing application
scenarios, features, safety
instructions, hardware
structure, software structure
and specifications of Taurus
series products.
Visit www.novastar.tech to
download the required
documents.
Item
Account Name
Default Password
Connect Taurus WiFi AP
AP+ last 8 digits of the SN,
For example: AP10000033
12345678
Log into the Taurus
admin
123456
2.3 Getting Required Account Information
Page 7
Taurus Series Multimedia Players
Quick Start Guide
www.novastar.tech
V1.0.0
4
3 Taurus Connections
In this chapter, the picture of T6 is taken as an example to introduce the Taurus series
products.
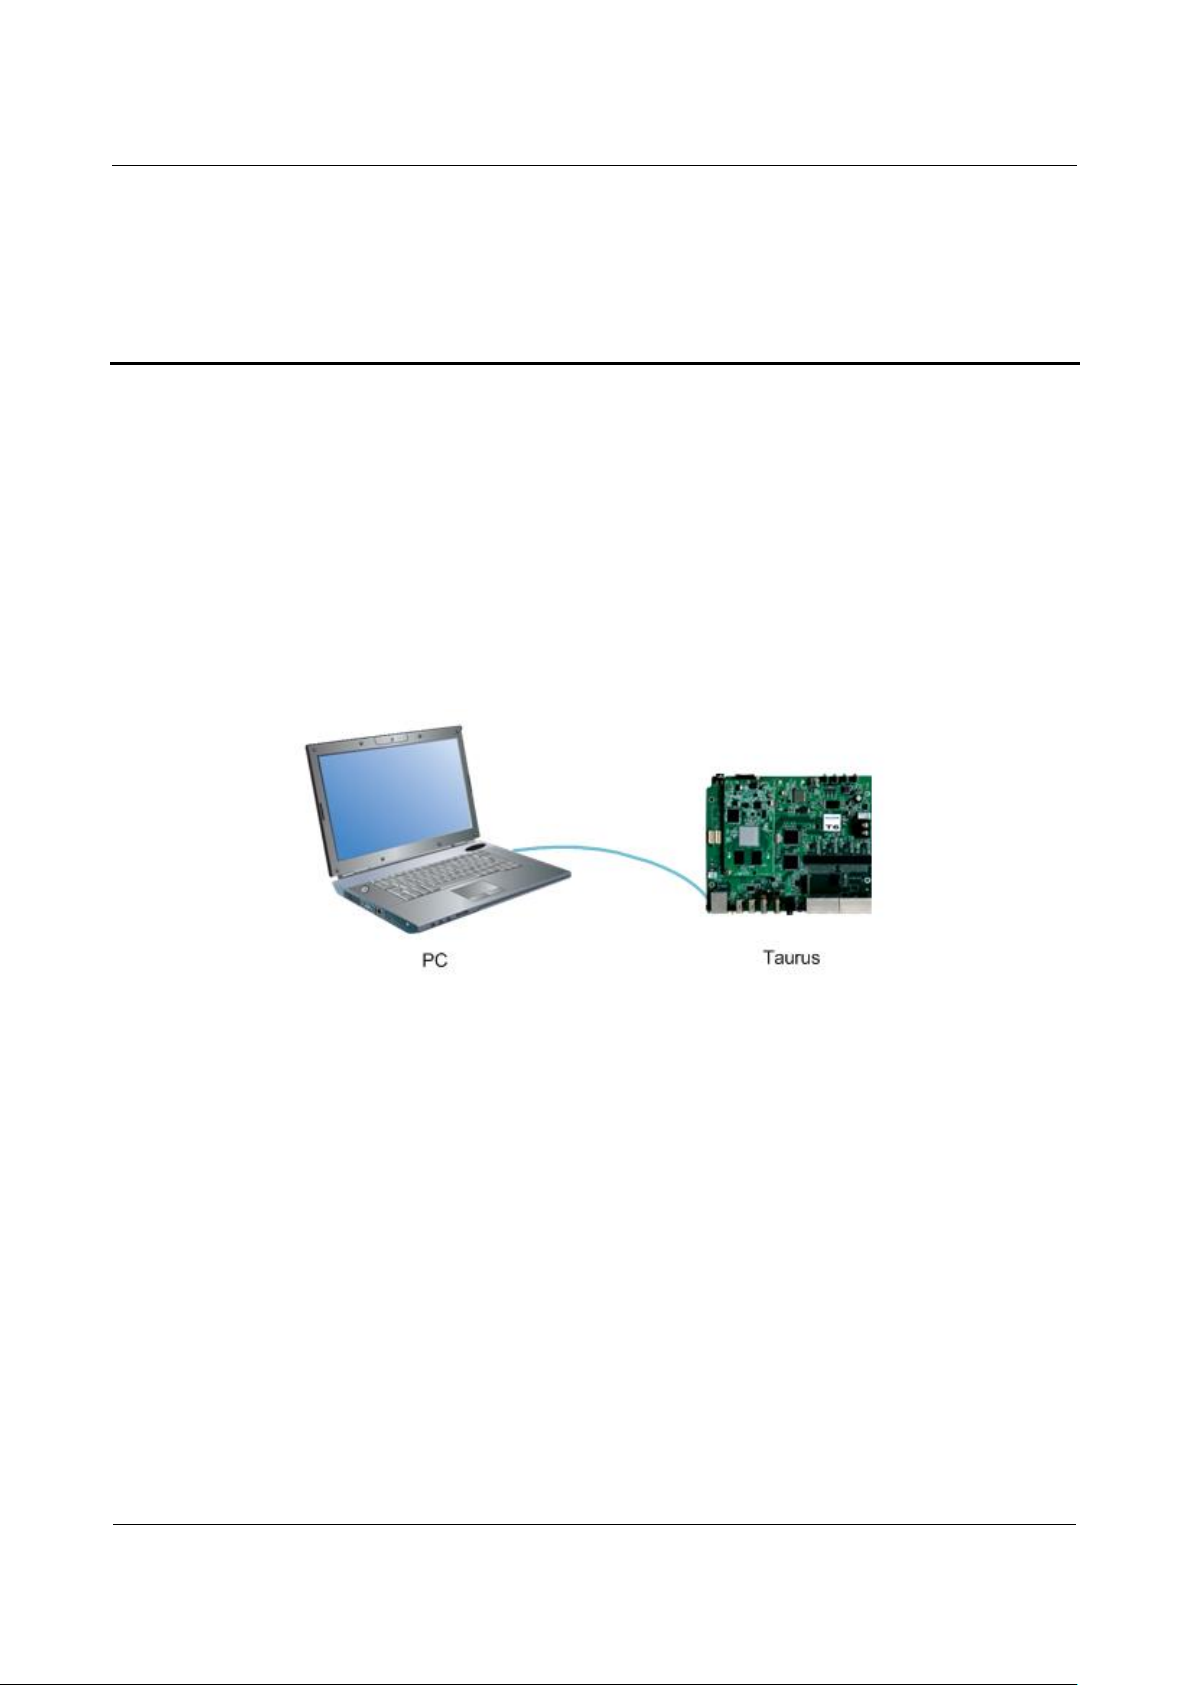
3.1 Connecting via Ethernet Cable
Network Diagram
Users can access the Taurus directly when it is connected via the Ethernet cable.
Configuration
Step 1 Refer to “6 General Operations” to log in to the Taurus.
Step 2 Turn off DHCP and set static IP address for the Taurus.
ViPlex Handy: Select Network Setting, Wired Network Setting in the Screen
management page.
ViPlex Express: Select Screen Control, Network configuration.
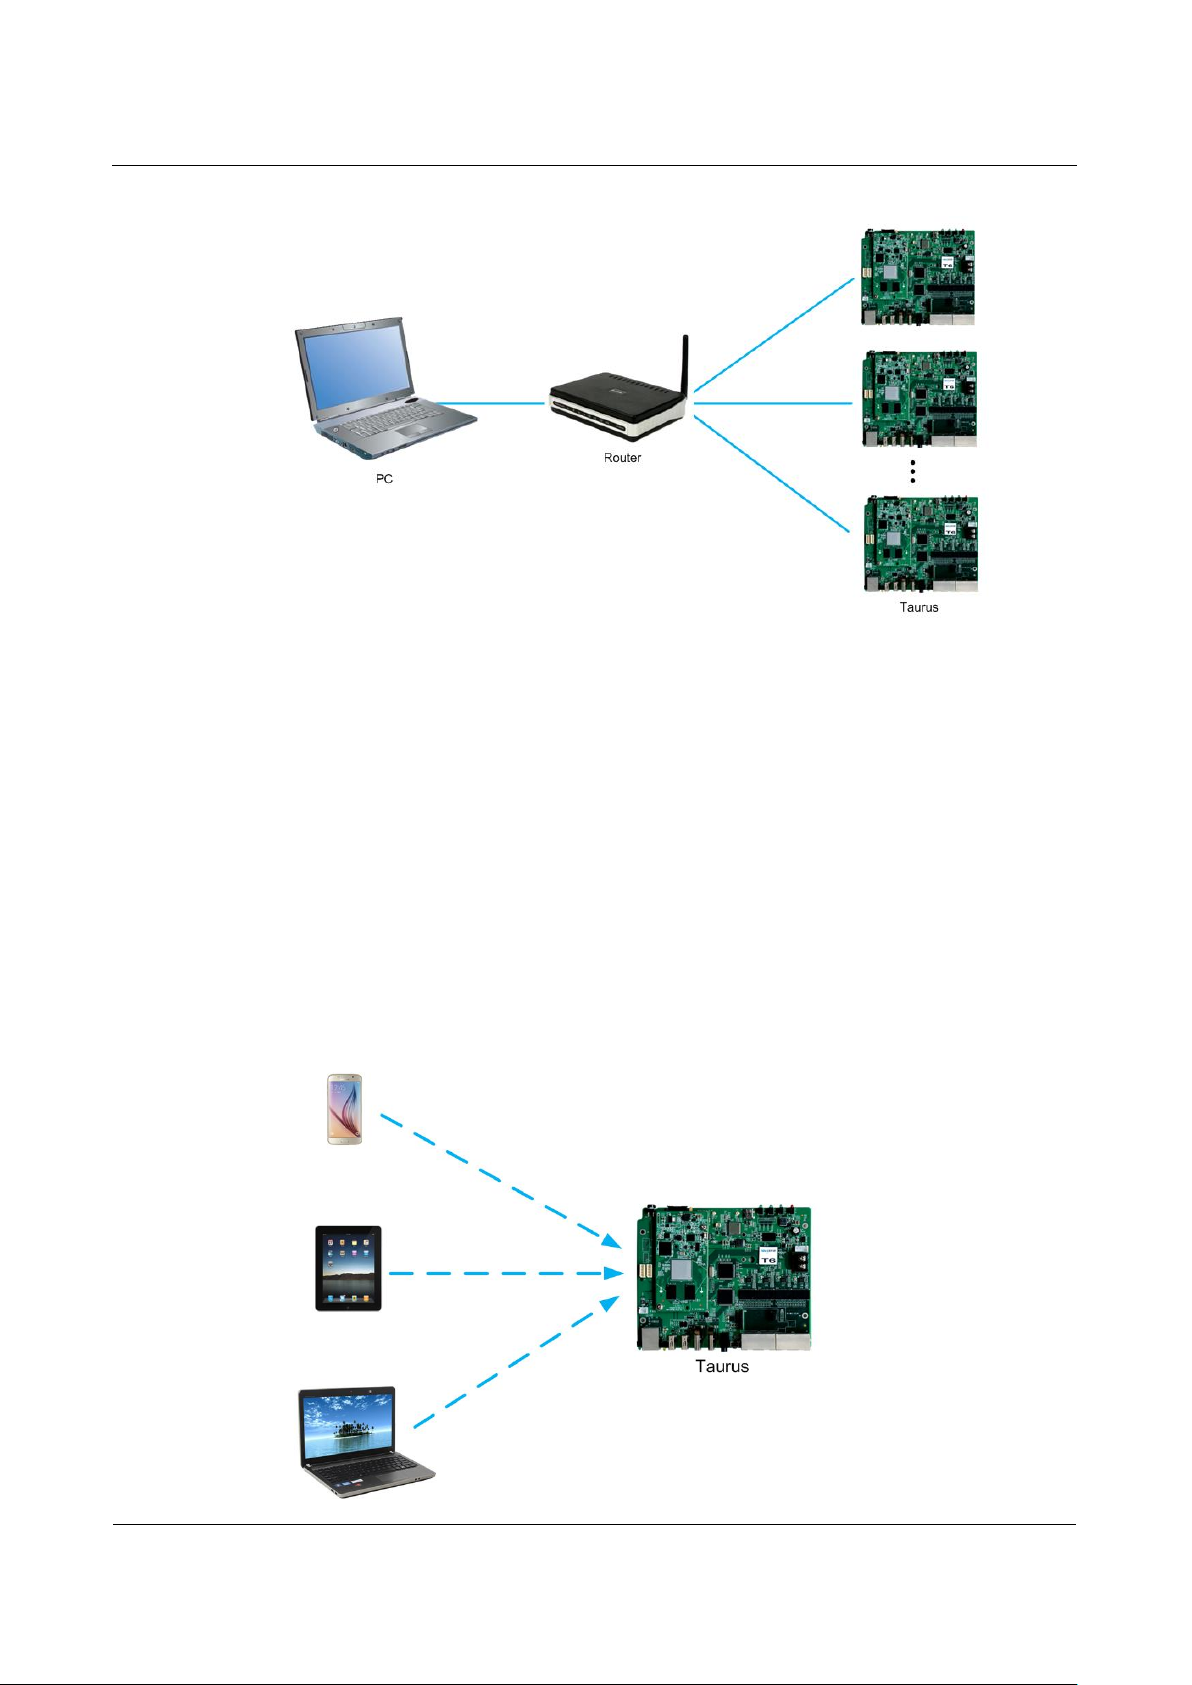
3.2 Connecting via Local Area Network (LAN)
Network Diagram
Users can access the Taurus through LAN when it is connected via LAN.
Page 8
Taurus Series Multimedia Players
Quick Start Guide
www.novastar.tech
V1.0.0
5
Configuration
No need for configuration.
3.3 Connecting via Wi-Fi
The Taurus series products have dual WiFi function which can provide Wi-Fi hotspot
as well as serve as WiFi Station at the same time.
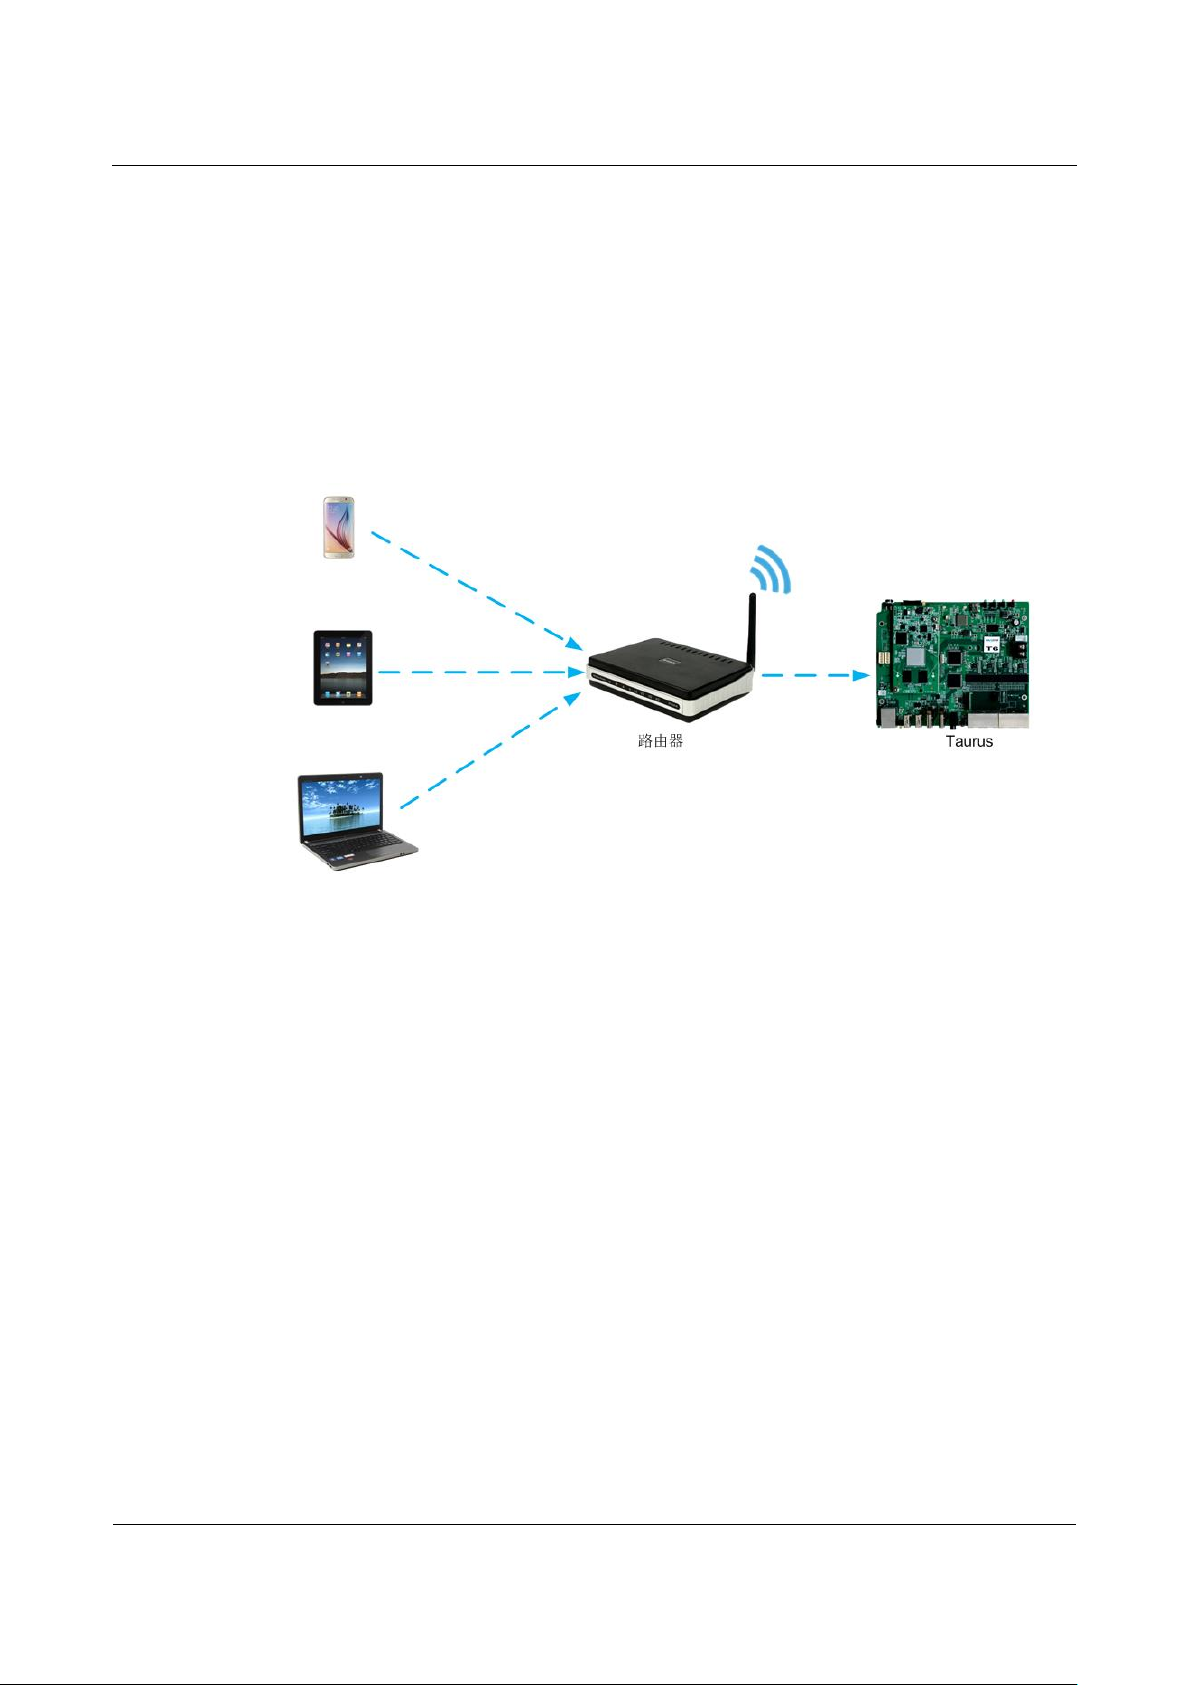
3.3.1 Wi-Fi AP Mode
Network Diagram
Users can access the Taurus directly when it is connected via WiFi AP.
Page 9
Taurus Series Multimedia Players
Quick Start Guide
www.novastar.tech
V1.0.0
6
Configuration
No need for configuration. Please connect the WiFi AP of the Taurus. SSID is “AP +
last 8 digits of the SN”, for example, “AP10000033”.
3.3.2 WiFi Sta Mode
Network Diagram
Users can access Taurus through external router when it is connected via WiFi Sta.
Configuration
Step 1 Refer to “6 General Operations” to log in to the Taurus.
Step 2 Turn on Wi-Fi Sta mode. Click the Wi-Fi name of the external router and then enter
the password of the Wi-Fi.
ViPlex Handy: Select Network Setting, WiFi Setting in the Screen
management page.
ViPlex Express: Select Screen Control, Network configuration.
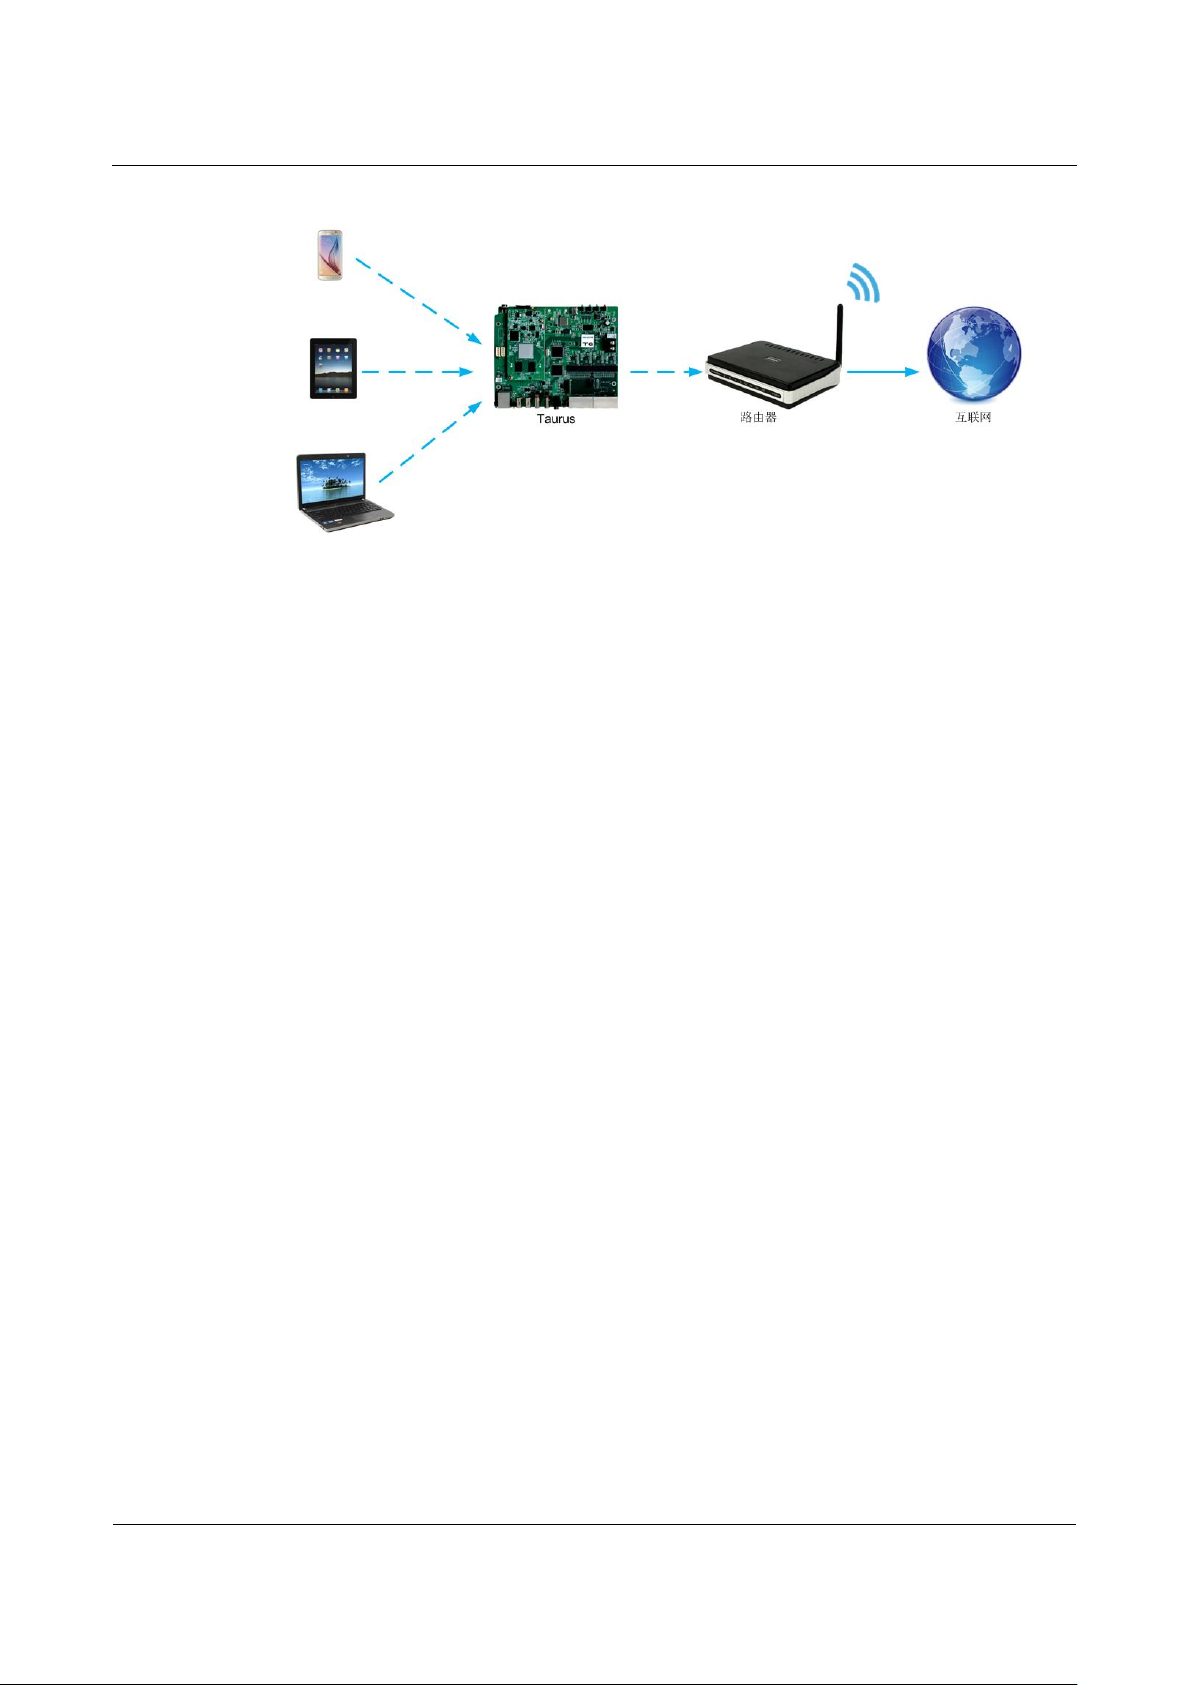
3.3.3 WiFi AP+Sta Mode
Network Diagram
By using WiFi AP+Sta connection, users can directly access the Taurus or access the
Internet through bridging connection.
Page 10
Taurus Series Multimedia Players
Quick Start Guide
www.novastar.tech
V1.0.0
7
Configuration
Step 1 Refer to “6 General Operations” to log in to the Taurus.
Step 2 Turn on Wi-Fi Sta mode. Click the Wi-Fi name of the external router and then enter
the password of the Wi-Fi.
ViPlex Handy: Select Network Setting, WiFi Setting in the Screen
management page.
ViPlex Express: Select Screen Control, Network configuration.
Related Information
The Taurus can be connected to the Internet through following three ways. The
priority order of the three ways is from high to low.
Wired network
WiFi Sta
4G network
Models of the Taurus must have 4G module while using 4G network. Users can enter
following relevant menus to turn on the mobile network:
ViPlex Handy: Select Network Setting, Mobile Data Setting in the Screen
management page.
ViPlex Express: Select Screen Control, Network configuration.
Page 11

Taurus Series Multimedia Players
Quick Start Guide
www.novastar.tech
V1.0.0
8
4 Receiving Card Parameter Confi
guration
If receiving card parameters are already configured, please skip this chapter and
perform the operations in “5 Screen Configuration”.
4.1 Loading Configuration File or Configuring the
Parameters Manually Through NovaLCT-Taurus
Step 1 Start NovaLCT-Taurus.
Step 2 Select System, Search All Display.
System will display the screen information list.
Step 3 Click screen information and click Connect System.
The gray button on the page will become normal.
Step 4 Select User, Advanced login.
Step 5 Enter password and click Login.
Default password is “admin”.
Step 6 Click to enter the Screen Config page.
Step 7 Confirm whether the local PC has the required receiving card configuration file.
Yes. Please perform Load Configuration File.
No. Please perform Manual Configuration.
Loading Configuration File
Step 1 Select Cascading scan board and Load Configuration File. Click Browse to
choose a configuration file from the local PC.
Step 2 Click Next to load the configuration file.
Manual Configuration
Step 1 Select Cascading scan board and click Next.
Step 2 Configure receiving card parameters based on actual conditions.
Page 12

Taurus Series Multimedia Players
Quick Start Guide
www.novastar.tech
V1.0.0
9
Step 3 Click Send To HW.
Step 4 Set parameters based on actual conditions and click Send.
Step 5 Adjust parameters until the screen displays normally and then click Save to Screen.
Step 6 (Optional) Click Save Config File to back up the receiving card configuration file to
the local PC.
4.2 Loading the Configuration File Through ViPlex Handy
Step 1 Save the receiving card configuration file to mobile phone.
Step 2 Refer to “6 General Operations” to log in to the Taurus.
Step 3 Click screen name to enter the Screen management page.
Step 4 Select Screen Setting, Receiving card configuration to enter the Receiving card
configuration page.
Step 5 Select the receiving card configuration file and click Send.
Page 13

Taurus Series Multimedia Players
Quick Start Guide
www.novastar.tech
V1.0.0
10
5 Screen Configuration
5.1 Configuring a Screen Through ViPlex Handy
Step 1 Refer to “6 General Operations” to log in to the Taurus.
Step 2 Click screen name to enter the Screen management page.
Step 3 Select Screen Setting, Screen configuration to enter the Screen configuration
page.
Step 4 Configure screen information based on actual conditions and click OK.
Page 14

Taurus Series Multimedia Players
Quick Start Guide
www.novastar.tech
V1.0.0
11
6 General Operations
6.1 Taurus Login with ViPlex Handy (Android and iOS)
Before You Begin
Acquire the SSID and password of Wi-Fi AP of Taurus series products. SSID is
default to be composed of AP and the last 8 numbers of SN, and the password is
default as “12345678”.
Acquire the login password of user “admin” of which the default password is
“123456”.
Operating Procedures
ViPlex Handy can connect numerous Taurus series products.
Step 1 Connect Wi-Fi AP of the Taurus series products.
Step 2 Start ViPlex Handy.
System can automatically detect the Taurus series products and refresh Screen list.
Users can also slide down Screen list to manually refresh the list.
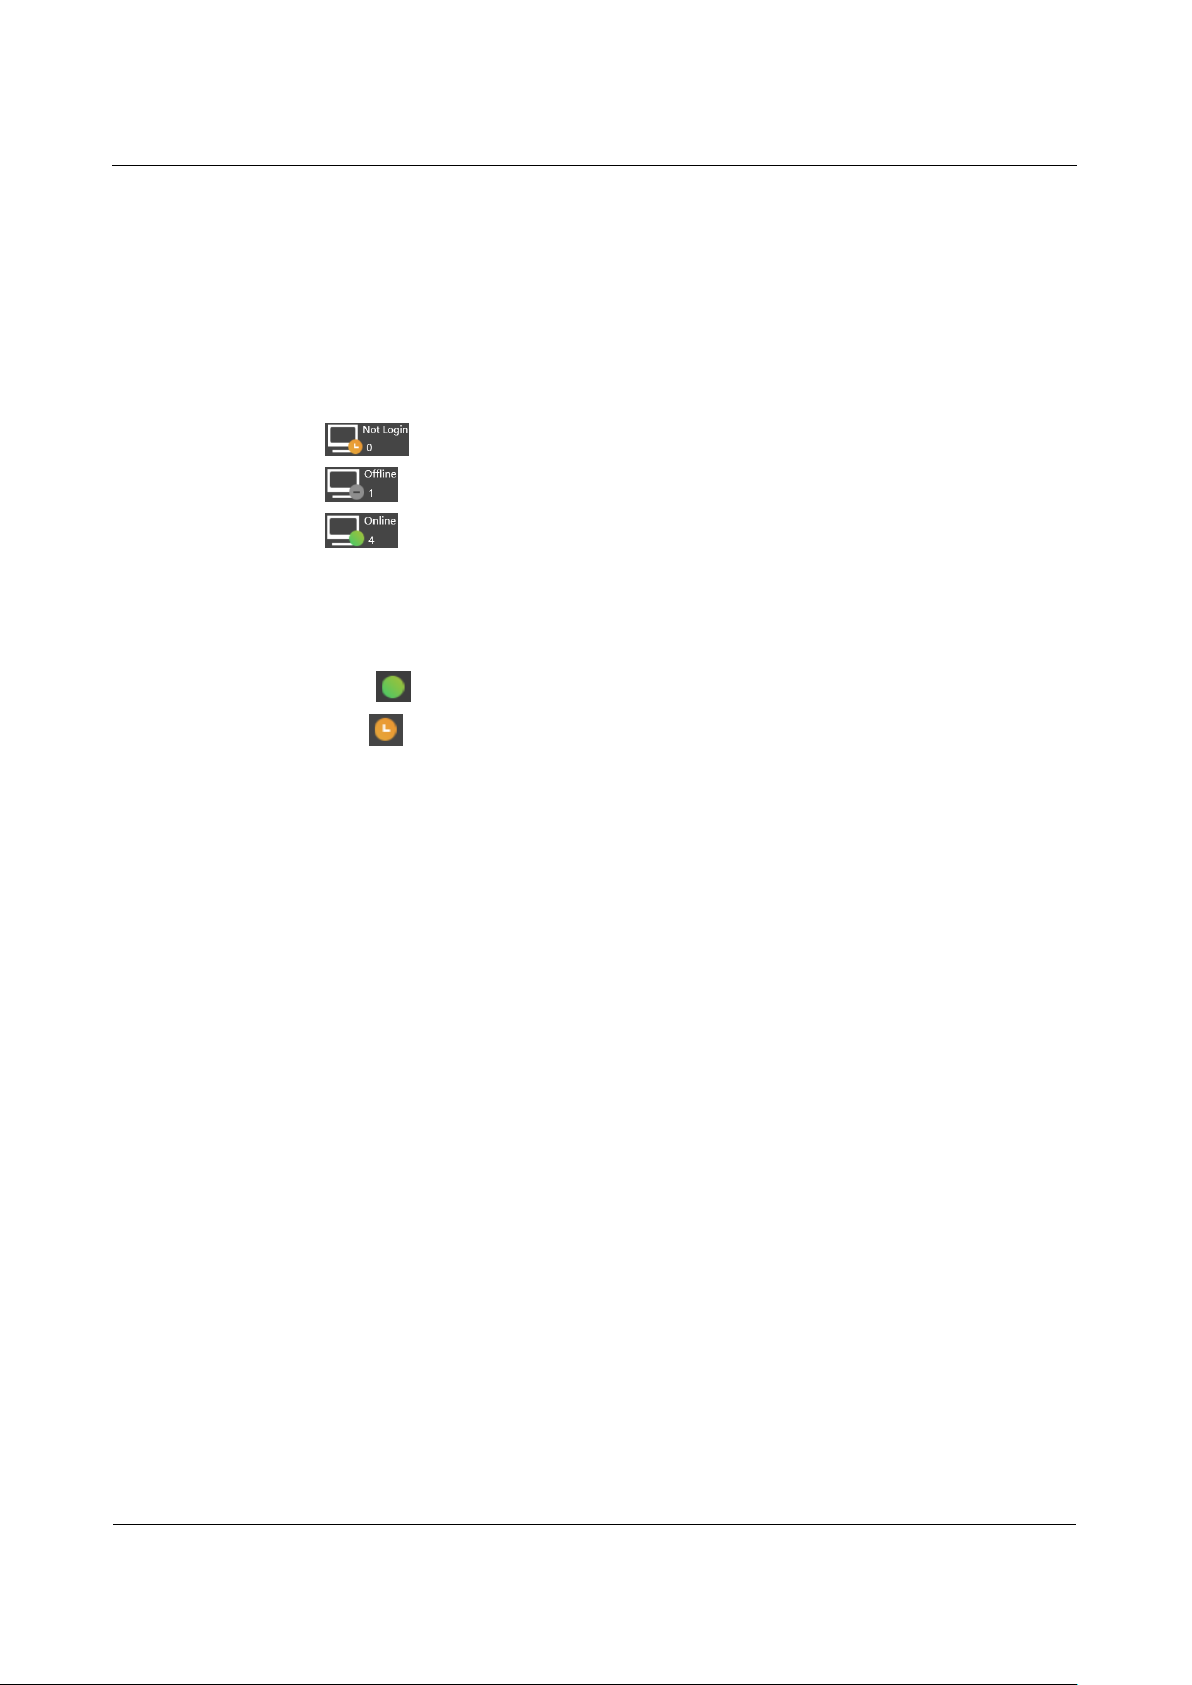
Step 3 Click Connect next to the screen name.
Step 4 Enter the user name and password and click Login.
: denotes that Taurus is online and you can log into it.
: denotes that Taurus is offline and you cannot log into it.
: denotes that Taurus login is successful.
6.2 Taurus Login with ViPlex Express (Windows)
Before You Begin
Acquire the SSID and password of Wi-Fi AP of Taurus series products. SSID is
default to be composed of AP and the last 8 numbers of SN, and the password is
default as “12345678”.
Acquire the login password of user “admin” of which the default password is
“123456”.
Page 15
Taurus Series Multimedia Players
Quick Start Guide
www.novastar.tech
V1.0.0
12
Operating Procedures
ViPlex Express can connect numerous Taurus series products.
Step 1 Connect Wi-Fi AP of the Taurus series products.
Step 2 Start the ViPlex Express.
Step 3 Click Refresh and the screen list will be displayed on the page.
: denotes that Taurus is online and you can log into it.
: denotes that Taurus is offline and you cannot log into it.
: denotes that Taurus login is successful.
After the Taurus is found by ViPlex Express, the ViPlex express will try to log into to
the Taurus with the default account or the account used for last login.
Step 4 Taurus login is successful or not.
Yes. appears and no further operation is required.
No. appears and then perform Step 5.
Step 5 Click Connect on the right of the screen information.
Step 6 Enter the username and password, and click OK.
Page 16

Taurus Series
Multimedia Players
Application Solution
Version:
V1.0.0
Document Number:
NS120100150
Page 17

Taurus Series Multimedia Players
Application Solution
www.novastar.tech
V1.0.0
i
Version
Release Date
Description
V1.0.0
2017-07-20
The first version.
Change History
Page 18

Taurus Series Multimedia Players
Application Solution
www.novastar.tech
V1.0.0
ii
Table of Contents
Change History .................................................................................................................................. i
Table of Contents ............................................................................................................................ ii
1 Overview ......................................................................................................................................... 1
1.1 About This Solution...................................................................................................................................... 1
1.2 Characteristics of the Application Solution .................................................................................................. 1
1.2.1 Synchronous Playing ................................................................................................................................ 1
1.2.2 Smart Brightness Adjustment ................................................................................................................... 2
1.2.3 4G Module ................................................................................................................................................ 2
1.2.4 Cluster Management ................................................................................................................................ 3
1.3 Software Acquiring Method ......................................................................................................................... 3
2 AD Player and Mirror Screen Solution ..................................................................................... 5
2.1 Overview ...................................................................................................................................................... 5
2.2 Single Application ........................................................................................................................................ 7
2.2.1 Networking Diagram ................................................................................................................................. 7
2.2.2 Required Software .................................................................................................................................... 7
2.2.3 Relevant Configurations ........................................................................................................................... 7
2.3 Cluster Application ....................................................................................................................................... 8
2.3.1 Networking Diagram ................................................................................................................................. 8
2.3.2 Required Software .................................................................................................................................... 8
2.3.3 Required Hardware Devices ..................................................................................................................... 8
2.3.4 Relevant Configurations ........................................................................................................................... 9
2.4 Splicing ...................................................................................................................................................... 12
2.4.1 Networking Diagram ............................................................................................................................... 12
2.4.2 Required Software .................................................................................................................................. 13
2.4.3 Relevant Configuration ........................................................................................................................... 13
3 Post Screen Solution ................................................................................................................... 15
3.1 Overview .................................................................................................................................................... 15
3.2 Networking Diagram .................................................................................................................................. 17
3.3 Required Software ..................................................................................................................................... 17
3.4 Required Hardware Devices ...................................................................................................................... 17
3.5 Relevant Configuration .............................................................................................................................. 18
4 General Operations..................................................................................................................... 22
4.1 Taurus Login .............................................................................................................................................. 22
4.1.1 Taurus Login upon ViPlex Handy (Android and iOS) ............................................................................. 22
Page 19

Taurus Series Multimedia Players
Application Solution
www.novastar.tech
V1.0.0
iii
4.1.2 Taurus Login upon ViPlex Express (Windows) ...................................................................................... 23
Page 20

Taurus Series Multimedia Players
Application Solution
www.novastar.tech
V1.0.0
1
Object
Advantage
User
Improve advertisement and information broadcast
effects
Environment
Improve city image and make the city more colorful
Display
Improve visual experience
1.1 About This Solution
Taurus series products are the second-generation multimedia players developed by
NovaStar specially designed for the medium-small size LED full color displays, and
applicable to all kinds of display devices as well as many application scenes.
AD player, mirror screen and post screen are used here as examples to describe the
application solution of Taurus series products. Pictures of Taurus series products
used in networking diagram are taken from T6 model.
For more information of Taurus series products, please visit www.novastar.tech to
download relevant documents.
1 Overview
1.2 Characteristics of the Application Solution
1.2.1 Synchronous Playing
This function makes several displays play the same image at the same time with high
accuracy based on advanced synchronous playing and scheduling technologies.
The synchronous playing function could be enabled for different displays as long as
following three requirements are met:
The synchronous playing function has been enabled on the ViPlex or VNNOX.
The time of multiple Taurus products are synchronized.
Playing plans of multiple Taurus products are the same without random transition
or media.
Advantages of the synchronous playing function are shown in Table 1-1.
Table 1-1 Synchronous playing
Time could be synchronized through NTP and Lora modes from which the user could
select one as required:
Page 21

Taurus Series Multimedia Players
Application Solution
www.novastar.tech
V1.0.0
2
Object
Advantage
User
Reduce manual operations
Environment
Avoid light pollution
Display
Smarter
Object
Advantage
User
Solution transmission speed is fast without wiring
operation
Environment
-
NTP time synchronization: Taurus time synchronization is based on NTP server.
No hardware is required to be added, and time synchronization accuracy
depends on network speed. Consequently, network traffic will be consumed by
using 4G network.
Lora time synchronization: Master and slave devices are required to be set for
Taurus. Time of the slave device is synchronized with that of the master device
through Lora network, and therefore Lora device is required. This time
synchronization method is applicable to events with high time synchronization
requirement and does not consume network traffic, but its signal receiving
depends on the environment and is limited by distance.
1.2.2 Smart Brightness Adjustment
Smart brightness adjustment includes auto brightness adjustment and timing
brightness adjustment.
Auto brightness adjustment: Display brightness will automatically adjust
according to environment brightness.
Timing brightness adjustment: Display brightness will automatically adjust to a
specific value at a given point of time.
Taurus products have brightness sensor connectors. Connect the light sensor and set
smart brightness adjustment rules on ViPlex to enable the smart brightness
adjustment function.
Advantages of smart brightness adjustment are as shown in Table 1-2.
Table 1-2 Smart brightness adjustment
Taurus products support manual brightness adjustment as well.
1.2.3 4G Module
Taurus series products provide models of onboard 4G modules, and therefore 4G
network could be used for Internet connection.
When mobile data network is enabled on ViPlex and priority requirements for signal
selection are met, Taurus products with 4G module could connect to Internet.
Advantages of 4G module are as shown in Table 1-3.
Table 1-3 4G module
Page 22

Taurus Series Multimedia Players
Application Solution
www.novastar.tech
V1.0.0
3
Display
All Internet connection methods are available to
enable more application scenes
1.2.4 Cluster Management
Object
Advantage
User
Remotely and uniformly manage and monitor
numerous displays
Environment
Helpful for the development of the smart city
Display
Without limits on deployment position and quantity
Type
Description
Method
ViPlex Handy
It is a LAN-based display
management software, including the
one applicable to Android and iOS
operating systems, is mainly used for
display management as well as
solution editing and publishing.
Scan the following QR
code to download and
install the APP.
You can also download
the ViPlex Handy for iOS
from App Store.
ViPlex Express
It is a LAN-based display
management software applicable to
the Windows operating system, and
is mainly used for display
Visit www.novastar.tech,
download and install the
required software.
Display quantity increases fast following with the development of smart city and
commercial application, and cluster solution of NovaStar emerges to uniformly
manage and monitor numerous displays in different places.
VNNOX: A cloud publishing service used to realize display remote content
management and remote terminal control.
NovaiCare: A cloud monitoring service used to realize display remote monitoring.
VNNOX and NovaiCare could be accessed to remotely and uniformly manage
displays with PC, Pad or mobile phone as long as Internet is available.
Advantages of cluster management are as shown in Table 1-4.
Table 1-4 Cluster management
1.3 Software Acquiring Method
Table 1-5 Software acquiring methods
Page 23

Taurus Series Multimedia Players
Application Solution
www.novastar.tech
V1.0.0
4
management as well as solution
editing and publishing.
VNNOX
It is a safe cloud publishing service,
and is mainly used for solution
remote editing and publishing.
Visit www.vnnox.com for
register and login.
NovaiCare
It is a safe cloud monitoring service,
and is mainly used for display remote
monitoring.
Visit www.novaicare.com
for register and login.
Page 24

Taurus Series Multimedia Players
Application Solution
www.novastar.tech
V1.0.0
5
Characteristic
Description
Required Configuration
Support for
synchronous display
Application of advanced
synchronous playing and
dispatching technologies
realize high-accuracy
synchronous playing for the
same image on different
displays.
Enable the
synchronous playing
function on the ViPlex
or VNNOX.
Set time synchronizing
rules on the ViPlex or
VNNOX.
Support for smart
brightness adjustment
Automatic and timing
brightness adjustment could
reduce manual operation,
and brightness filtering
technology could help to
avoid brightness
interference to realize
stable display brightness.
Set smart brightness
adjustment rules on
ViPlex.
Support for splicing
playing
Both individual playing and
splicing playing are
available for multiple
displays.
Set splicing-related
parameters on ViPlex.
Support for selling
advertisements played
During the process of
solution scheduling, the
Edit solutions on VNNOX.
2 AD Player and Mirror Screen
2.1 Overview
AD player and mirror screen, the typical commercial display applications, are mainly
used for information publishing and advertisement display, and can be placed at the
shopping mall, hotel, office building, exhibition, bank, station and community.
There are two application modes for the mirror screen which is a mirror when the
display is turned off.
There are many application modes for the AD player and mirror screen, and only
typical applications are introduced in this chapter, including the single application,
cluster application and splicing application.
Solution
Characteristics of the AD player and mirror screen of NovaStar are as shown in Table
2-1.
Table 2-1 AD player and mirror screen
Page 25

Taurus Series Multimedia Players
Application Solution
www.novastar.tech
V1.0.0
6
in different time periods
user can divide time periods
as required to play the
specified list in every time
period.
Support for media
switching without
blackout
Blackout does not occur
during media switching
process.
No need to set.
Support for generating
play log
The Taurus products can
generate play log, and the
user can check and export
the log on VNNOX.
No need to set.
Taurus Series Multimedia Players
Page 26

Application Solution
www.novastar.tech
V1.0.0
7
2.2 Single Application
2.2.1 Networking Diagram
Taurus products provide Wi-Fi AP itself. After connecting to Wi-Fi AP with PC, Pad
and mobile phone, enter the username and password to log in to the Taurus.
2.2.2 Required Software
ViPlex Handy
ViPlex Express
2.2.3 Relevant Configurations
No need to set. Refer to 4.1 “Taurus Login” for specific operations to connect and log
in to the Taurus products.
Page 27

Taurus Series Multimedia Players
Application Solution
www.novastar.tech
V1.0.0
8
2.3 Cluster Application
Function
Required Hardware Device
Model
Synchronous
playing
When Lora time
synchronization is used, it is
required to purchase Lora
devices
E32-1W: Installed on the master
device.
E32-100: Installed on the slave
device.
Smart
brightness
adjustment
Light sensor
NS048D
2.3.1 Networking Diagram
VNNOX and NovaiCare could be accessed directly or by way of bridge connection.
When bridge connection is selected, following three methods for Internet connection
of Taurus products are available with priorities ranging from high to low:
Wired network
WiFi Sta
4G network
When the three methods are all enabled, Taurus products will select signals
automatically according to the priorities.
2.3.2 Required Software
ViPlex Handy
ViPlex Express
VNNOX
NovaiCare
2.3.3 Required Hardware Devices
Page 28

Taurus Series Multimedia Players
Application Solution
www.novastar.tech
V1.0.0
9
2.3.4 Relevant Configurations
Before You Begin
The login username and password for VNNOX, NovaiCare and NovaLCT-Taurus
are acquired.
Create solution(s) on VNNOX without random transition and random media of the
solution(s).
Create asynchronous players on VNNOX and associate the players with the
License.
Configurations required before monitoring have been done on NovaLCT-Taurus
and NovaiCare.
Refer to software online help for specific operations of VNNOX, NovaiCare and
NovaLCT-Taurus.
Acquiring Player authentication information
Authentication information is required when ViPlex binds the asynchronous player of
VNNOX.
Step 1 Visit http://www.vnnox.com, and click the Login button at the upper-right corner.
Step 2 Select the server node and click Ok.
Step 3 Enter the account name and password, and click Login.
Step 4 Select Organization Management, System Management from the pop-up menu of
in the upper right corner.
Step 5 Select the Player Authentication tab to view Server address, Certified user name
and Certified password.
For following settings, do not exit VNNOX after above operations.
Configuring ViPlex Handy (Android and iOS)
Step 1 Log in to the Taurus. Refer to 4.1.1 “Taurus Login upon ViPlex Handy (Android and
iOS)”.
Step 2 Click screen name to enter Screen management page.
Step 3 Set rules for smart brightness adjustment.
1. Select Screen Setting, Brightness control.
2. Click Brightness mode, select Smart, and click OK.
3. Click Smart adjustment parameters.
4. Click and select Auto brightness adjust to set time and duration for
automatic adjustment, and then click OK.
5. Click Auto adjustment parameters to set the corresponding relationship
between the environment brightness and display brightness, and then click OK.
6. Click and select schedule brightness adjust to set the timing adjustment
7. Click Send to send the smart brightness adjustment rules to the Taurus.
time and duration as well as display brightness value, and then click OK.
Page 29

Taurus Series Multimedia Players
Application Solution
www.novastar.tech
V1.0.0
10
Step 4 Set the connection method between the Internet and Taurus.
Priorities of wired network, Wi-Fi Sta and 4G network range from high to low. When
the three methods are all enabled, the Taurus will select signals automatically
according to the priorities.
Wired network: When static IP address is required, select Network Setting,
Wired Network Setting, turn DHCP off, enter the static IP address of the Taurus,
and click OK.
WiFi Sta: Select Network Setting, WiFi Setting, and turn WiFi on. Click the
Wi-Fi name of the external router and enter the Wi-Fi password, and click OK.
4G network: Select Network Setting, Mobile Data Setting, and turn Mobile
data on.
Step 5 Bind the asynchronous player.
1. Select Remote Management, Player Binding.
2. Set the VNNOX server and player authentication information.
3. Click Obtain and select a player from the drop-down box of Player.
4. Click OK after setting.
Step 6 If display remote monitoring is required, perform the following procedures. Otherwise,
ignore this step.
1. Select Remote Management, Remote Monitor.
2. Turn Remote Monitor on.
3. Select the service node of the NovaiCare from the drop-down box of Server.
4. Click the right side of Possessor line.
5. Enter the username for login NovaiCare in the pop-up dialog box, and click OK.
6. Click OK after setting.
Step 7 Repeat above steps to configure other Taurus products in cluster till all Taurus
products have been configured.
Configuring ViPlex Express (Windows)
Step 1 Log in Taurus and see detailed operations in 4.1.2 “Taurus Login upon ViPlex
Express (Windows)”.
Step 2 Select Screen Control.
Step 3 Set rules for smart brightness adjustment.
Currently not supported.
Step 4 Set the way to connect Taurus to the Internet.
The priority of wired network, Wi-Fi Sta and 4G network is from high to low. If all of the
three ways are enabled, the Taurus will choose signal automatically according to the
priority order.
1. Select Network configuration.
2. Select the target terminal in the terminal list and perform the following operations
according to actual needs.
Page 30

Taurus Series Multimedia Players
Application Solution
www.novastar.tech
V1.0.0
11
− Wired network: If it is required to set static IP address, turn off Dynamic
DHCP, enter the IP address information of the Taurus and then click Apply
in the Wired network configuration section.
− WiFi Sta: Turn on Wi-Fi in the Wi-Fi configuration section. Click the Wi-Fi
name of external router and then enter Wi-Fi password and click Apply.
− 4G network. Turn on Mobile network in the Mobile network configuration
section.
Step 5 Bind asynchronous players.
1. Select Server configuration.
2. Select the target terminal in the terminal list.
3. Configure player authentication information in Configure parameters for
connecting screens to VNNOX.
4. Click next to Player and select a player.
5. Click Apply.
Step 6 If you want to monitor displays remotely, please perform this step; otherwise, skip this
step.
1. Select Enable next to NovaiCare configuration in Configure parameters for
connecting screens to NovaiCare.
2. Configure NovaiCare server address and login user name.
3. Click Apply.
Step 7 Repeat above steps until all the Taurus products in the cluster are configured.
Configuring VNNOX
When setting timing rules and synchronous playing upon ViPlex, every Taurus
product is required to be set individually, and batch setting is available for setting
timing rules and synchronous playing upon VNNOX. When the public network is
available, VNNOX is recommended for batch configuration to reduce manual
operations.
Step 1 Set time synchronization rule.
1. Select Players Management, Time Synchronization from the pop-up menu of
2. Click NTP server configuration.
3. Click Add to configure NTP service information, and then click Save&Close.
4. Click New on the page of time synchronization task list.
5. Enter time synchronization task name and select time synchronization method,
and then click Next.
− NTP: Select a NTP server and then click Ok.
− LORA: Select a time synchronization standard device and then click Ok.
6. Click Add in the Players tab of the time synchronization task attribute page.
− NTP time synchronization: Select all the players in cluster and then click Ok.
− LORA time synchronization: Select all the slave players in Lora network and
in the upper right corner.
then click Ok.
Page 31

Taurus Series Multimedia Players
Application Solution
www.novastar.tech
V1.0.0
12
7. When the time synchronization method upon Lora network is selected, and NTP
server is used for the time synchronization standard device, click Configure tab
to set NTP to Yes, and select NTP server. Otherwise, ignore this step.
8. Click Save or Save&Close. Players added in the time synchronization task will
perform time synchronization according to rules defined in the task.
Step 2 If the same image is required to be played by different screens, perform the following
procedures. Otherwise, ignore this step.
1. Select Player Management, Players in the pop-up menu of in the upper
right corner.
2. Select asynchronous players corresponding to all Taurus series products
requiring enabling the synchronous playing function.
3. Click Real-time control and select open the synchronous broadcasting from
the drop-down box.
Step 3 Associate with solution(s).
1. Select Players Management, Players from the pop-up menu of in the upper
right corner.
2. Select a player and click Attribute, or click a player name.
3. Select a solution from the drop-down box of parameter associate solution.
4. Whether solution distribution type is Manual.
− Yes. Click Save&Close to return to the player list page. Perform term 5.
− No. Click Save or Save&Close. VNNOX will automatically distribute
solutions to corresponding Taurus products.
5. Select the target player, and click Update solution to manually distribute
solutions to corresponding Taurus products.
6. Repeat above steps to associate with solutions for other players in cluster till all
players have been configured.
2.4 Splicing
2.4.1 Networking Diagram
The following figure uses three displays splicing as an example to illustrate Taurus
connection.
Page 32

Taurus Series Multimedia Players
Application Solution
www.novastar.tech
V1.0.0
13
The Taurus product provides Wi-Fi AP itself. Connect to Wi-Fi AP of each Taurus
product through PC, Pad and mobile phone, and then enter the username and
password to log in to the Taurus.
2.4.2 Required Software
ViPlex Handy
ViPlex Express
2.4.3 Relevant Configuration
ViPlex Express doesn’t support following operations for the moment.
Configuring the first display
Step 1 Log in to the Taurus of the first display. Refer to 4.1.1 “Taurus Login upon ViPlex
Handy (Android and iOS)” for specific operations.
Step 2 Click screen name to enter the Screen management page.
Step 3 Select Video Control.
Step 4 Configure the required parameters.
Step 5 Click OK.
Mode: Manual
Source: inside
Offset X: 0
Offset Y: 0
Page 33

Taurus Series Multimedia Players
Application Solution
www.novastar.tech
V1.0.0
14
Configuring other displays
Step 1 Log in to the Taurus of the second display. Refer to 4.1.1 “Taurus Login upon ViPlex
Handy (Android and iOS)” for specific operations.
Step 2 Click screen name to enter Screen management page.
Step 3 Select Video Control.
Step 4 Configure the required parameters.
Horizontal splicing image is taken as an example here for illustration. In the event of
vertical splicing, the way for setting Offset Y is the same as that for setting Offset X.
Mode: Manual
Source: HDMI
Offset X:(The display serial number– 1)x The Image width. For example, when
the image width is 500px, it is required to be set as 500px for the second display
and 1000px for the third display.
Offset Y: 0
Step 5 Click OK.
Step 6 Repeat above steps to configure other Taurus products till all Taurus products have
been configured.
Page 34

Taurus Series Multimedia Players
Application Solution
www.novastar.tech
V1.0.0
15
Characteristics
Description
Require Configuration
Support synchronous
playing
Use advanced synchronous
playing and scheduling
technologies to make several
displays play the same image
at the same.
Enable the
synchronous playing
function on the ViPlex
or VNNOX.
Set time
synchronizing rules
on the ViPlex or
VNNOX.
Support for smart
brightness adjustment
Automatic and timing
brightness adjustment could
reduce manual operation,
and brightness filtering
technology could help to
avoid brightness interference
to realize stable display
brightness.
Set smart brightness
adjustment rules on
ViPlex.
Support for selling
advertisements played
in different time periods
During the process of solution
scheduling, the user can
divide time periods as
required to play the specified
list in every time period.
Edit solutions on
VNNOX.
Support for media
switching without
Blackout does not occur
during media switching
No need to set.
3.1 Overview
Post screens prevail on both sides of highways and roads following with the
development of the smart city. Smart post screen has distinct advantages compared
with the conventional post which features illumination and static advertisement only
and requires new manufacture and installation in case of advertisement replacement,
while the smart post provides functions including illumination, security monitoring,
environment monitoring, emergency call, charging pile and LED display which used
high-definition smart LED post screen for road leading, data release and advertising
promotion.
Post screens can be used without quantity limits, and the display contents can be
controlled individually or in batch based on cluster management method.
3 Post Screen Solution
Characteristics of the post screen of NovaStar are as shown in Table 3-1.
Table 3-1 Post screen
Page 35

Taurus Series Multimedia Players
Application Solution
www.novastar.tech
V1.0.0
16
blackout
process.
Support for generating
play log
Taurus products can
generate play log, and the
user can check and export
the log on VNNOX.
No need to set.
Support for remote
solution publishing
VNNOX is a safe cloud
publishing service which
enables remote content
management and remote
terminal control for the LED
display.
Visit www.vnnox.com for
register and login.
Support for remote
display monitoring on
NovaiCare
NovaiCare is a safe cloud
monitoring service which
enables remote monitoring
for the LED display.
Visit www.novaicare.com
for register and login.
Support for
environment monitoring
Onboard camera connector
can monitor the environment
surround the post screen.
No need to set.
Support for 4G module
Onboard 4G module can
connect Internet through 4G
network.
Turn on mobile data
network on ViPlex.
Page 36

Taurus Series Multimedia Players
Application Solution
www.novastar.tech
V1.0.0
17
3.2 Networking Diagram
Function
Required Hardware Device
Model
Synchronous
playing
When Lora time
synchronization is used, it is
required to purchase Lora
devices
E32-1W: Installed on the master
device.
E32-100: Installed on the slave
device.
Smart
brightness
adjustment
Light sensor
NS048D
VNNOX and NovaiCare could be accessed directly or by way of bridge connection to
centrally manage post screens.
Taurus products can connect to Internet through the wired network, Wi-Fi and 4G
network which is recommended for this solution.
3.3 Required Software
ViPlex Handy
ViPlex Express
VNNOX
NovaiCare
3.4 Required Hardware Devices
Page 37

Taurus Series Multimedia Players
Application Solution
www.novastar.tech
V1.0.0
18
3.5 Relevant Configuration
Before You Begin
Acquire the login username and password of VNNOX, NovaiCare and
NovaLCT-Taurus.
Create a solution on the VNNOX without random transition and random media.
Create an asynchronous player which associates with License on the VNNOX.
Complete configurations required to be done before monitor on NovaLCT-Taurus
and NovaiCare.
Refer to software online help for specific operations of VNNOX, NovaiCare and
NovaLCT-Taurus.
Acquiring player authentication information
Step 1 Visit http://www.vnnox.com and then click Login in the upper right corner.
Step 2 Select a server node and click Ok.
Step 3 Enter the account name and password and then click Login.
Step 4 Select Organization Management, System Management from the pop-up menu of
in the upper right corner.
Step 5 Select the Player Authentication tab to view Server address, Certified user name
and Certified password.
For following settings, do not exit VNNOX after above operations.
Configuring ViPlex Handy (Android and iOS)
Following operations are required for every display in cluster.
Step 1 Log in to the Taurus. Refer to 4.1.1 “Taurus Login upon ViPlex Handy (Android and
iOS)” for specific operations.
Step 2 Click the screen name to enter the Screen management page.
Step 3 Set rules for smart brightness adjustment.
1. Select Screen Setting, Brightness control.
2. Click Brightness mode to select Smart, and then click OK.
3. Click Smart adjustment parameters.
4. Click and select Auto brightness adjust to set automatic adjustment time
and duration, and then click OK.
5. Click Auto adjustment parameters to set the corresponding relationship
between the environment brightness and display brightness, and then click OK.
6. Click and select schedule brightness adjust to set timing adjustment time
and duration, and then click OK.
7. Click Send to send rules for smart brightness adjustment to the Taurus.
Step 4 Set Internet connection mode for the Taurus.
1. Select Network Setting, Mobile Data Setting.
Page 38

Taurus Series Multimedia Players
Application Solution
www.novastar.tech
V1.0.0
19
2. Turn Mobile data on.
Step 5 Bind the asynchronous player.
1. Select Remote Management, Player Binding.
2. Set the VNNOX server and player authentication information.
3. Click Obtain and select a player from the dropdown box of Player.
4. Click OK after setting.
Step 6 If display remote monitoring is required, perform the following procedures. Otherwise,
ignore this step.
1. Select Remote Management, Remote Monitor.
2. Turn Remote Monitor on.
3. Select the service node of NovaiCare from the dropdown box of Server.
4. Click the right side of Possessor line.
5. Enter the login username of NovaiCare in the pop-up dialog box, and click OK.
6. Click OK after setting.
Step 7 Repeat above steps to configure other Taurus products in cluster till all Taurus
products have been configured.
Configuring ViPlex Express (Windows)
Step 1 Log in Taurus and see detailed operations in 4.1.2 “Taurus Login upon ViPlex
Express (Windows)”.
Step 2 Select Screen Control.
Step 3 Set rules for smart brightness adjustment.
Currently not supported.
Step 4 Set the way to connect Taurus to the Internet.
1. Select Network configuration.
2. Select the target terminal in the terminal list.
3. Turn on Mobile network in the Mobile network configuration section.
Step 5 Bind asynchronous players.
1. Select Server configuration.
2. Select the target terminal in the terminal list.
3. Configure player authentication information in Configure parameters for
connecting screens to VNNOX.
4. Click next to Player and select a player.
5. Click Apply.
Step 6 If you want to monitor displays remotely, please perform this step; otherwise, skip this
step.
1. Select Enable next to NovaiCare configuration in Configure parameters for
2. Configure NovaiCare server address and login user name.
3. Click Apply.
connecting screens to NovaiCare.
Page 39

Taurus Series Multimedia Players
Application Solution
www.novastar.tech
V1.0.0
20
Step 7 Repeat above steps until all the Taurus products in the cluster are configured.
Configuring VNNOX
When setting timing rules and synchronous playing upon ViPlex, every Taurus
product is required to be set individually, and batch setting is available for setting
timing rules and synchronous playing upon VNNOX. When the public network is
available, VNNOX is recommended for batch configuration to reduce manual
operations.
Step 1 Set time synchronization mode.
1. Select Players Management, Time Synchronization from the pop-up menu of
2. Click NTP server configuration.
3. Click Add to configure NTP service information, and then click Save&Close.
4. Click New on the page of time synchronization task list.
5. Enter time synchronization task name and select time synchronization method,
and then click Next.
− NTP: Select the NTP server and then click Ok.
− LORA: Select a time synchronization standard device and then click Ok.
6. Click Add in the Players tab of the time synchronization task attribute page.
− NTP time synchronization: Click all the players in cluster and then click Ok.
− LORA time synchronization: Click all the slave players in Lora network and
7. When the time synchronization method upon Lora network is selected, and NTP
server is used for the time synchronization standard device, click Configure tab
to set NTP to Yes, and select NTP server. Otherwise, ignore this step.
8. Click Save or Save&Close. Players added in the time synchronization task will
perform time synchronization according to rules defined in the task.
in the upper right corner.
then click Ok.
Step 2 If the same image is required to be played by different screens, perform the following
procedures. Otherwise, ignore this step.
1. Select Player Management, Players in the pop-up menu of in the upper
right corner.
2. Select asynchronous players corresponding to all Taurus series products
requiring enabling the synchronous playing function.
3. Click Real-time control and select open the synchronous broadcasting from
the drop-down box.
Step 3 Associate with solution(s).
1. Select Players Management, Players from the pop-up menu of in the upper
right corner.
2. Select a player and click Attribute, or click a player name.
3. Select a solution from the drop-down box of parameter associate solution.
4. Whether solution distribution type is Manual.
− Yes. Click Save&Close to return to the player list page, and perform term5.
− No. Click Save or Save&Close. VNNOX will automatically distribute
solutions to corresponding Taurus products.
Page 40

Taurus Series Multimedia Players
Application Solution
www.novastar.tech
V1.0.0
21
5. Select the target player, and click Update solution to manually distribute
solutions to corresponding Taurus products.
6. Repeat above steps to associate with solutions for other players in cluster till all
players have been configured.
Page 41

Taurus Series Multimedia Players
Application Solution
www.novastar.tech
V1.0.0
22
4 General Operations
4.1 Taurus Login
Taurus series products feature Wi-Fi AP function. This chapter takes Wi-Fi AP
connection as an example to introduce the Taurus login method.
Other connection methods require hardware or software configuration. Refer to
Taurus Series Multimedia Players Quick Start Guide for specific operations.
4.1.1 Taurus Login upon ViPlex Handy (Android and iOS)
Before You Begin
Acquire the SSID and password of Wi-Fi AP of the Taurus. SSID is default to be
composed of AP and the last 8 numbers of SN, and the password is default as
“12345678”.
Acquire the login password of user “admin” of which the default password is
“123456”.
Operating procedures
ViPlex Handy can connect numerous Taurus products.
Step 1 Connect Wi-Fi AP of the Taurus series products.
Step 2 Start ViPlex Handy.
System can automatically detect the Taurus series products and refresh Screen list.
Users can also slide down Screen list to manually refresh the list.
Step 3 Click Connect behind the screen name.
: denotes that Taurus is online and you can log into it.
: denotes that Taurus is offline and you cannot log into it.
: denotes that Taurus login is successful.
Step 4 Enter username and password, and click Login.
Page 42

Taurus Series Multimedia Players
Application Solution
www.novastar.tech
V1.0.0
23
4.1.2 Taurus Login upon ViPlex Express (Windows)
Before You Begin
Acquire the SSID and password of Wi-Fi AP of the Taurus. SSID is default to be
composed of AP and the last 8 numbers of SN, and the password is default as
“12345678”.
Acquire the login password of user “admin” of which the default password is
“123456”.
Operating procedures
The ViPlex Express can connect numerous Taurus products.
Step 1 Connect the Wi-Fi AP of Taurus series products.
Step 2 Start the ViPlex Express.
Step 3 Click Refresh and the screen list will be displayed on the page.
: denotes that Taurus is online and you can log into it.
: denotes that Taurus is offline and you cannot log into it.
: denotes that Taurus login is successful.
After the Taurus is found by ViPlex Express, the ViPlex express will try to log into to
the Taurus with the default account or the account used for last login.
Step 4 Taurus login is successful or not.
Yes. appears and no further operation is required.
No. appears and then perform Step 5.
Step 5 Click Connect on the right of the screen information.
Step 6 Enter the username and password, and click OK.
Page 43

Taurus Series
Multimedia Players
Implementation
Instruction of the
Synchronous
Playing Solution
Version:
V1.0.0
Doc. Number:
NS120100152
Page 44

Taurus Series Multimedia Players
Implementation Instruction of the Synchronous
Playing Solution
www.novastar.tech
V1.0.0
i
Version
Release Date
Description
V1.0.0
2017-07-20
The first version
Change History
Page 45

Taurus Series Multimedia Players
Implementation Instruction of the Synchronous
Playing Solution
www.novastar.tech
V1.0.0
ii
Table of Contents
Change History .................................................................................................................................. i
Table of Contents ............................................................................................................................ ii
1 Overview ......................................................................................................................................... 1
1.1 About This Solution...................................................................................................................................... 1
1.2 Synchronous Playing Conditions ................................................................................................................. 1
1.3 Time Synchronization .................................................................................................................................. 1
1.4 Lora Time Synchronization .......................................................................................................................... 2
1.5 Required Softwares ..................................................................................................................................... 2
1.6 Required Hardware Devices ........................................................................................................................ 3
2 Implementation of NTP Synchronization Plan ...................................................................... 4
2.1 NTP Time Synchronization in the LAN ........................................................................................................ 4
2.1.1 NTP Server Configuration ........................................................................................................................ 4
2.1.2 Taurus Configuration ................................................................................................................................ 4
2.2 NTP Time Synchronization in the Public Network ....................................................................................... 5
3 Implementation of Lora Time Synchronization Plan ............................................................ 7
3.1 Lora Device Installation ............................................................................................................................... 7
3.2 Taurus Configuration ................................................................................................................................... 9
3.2.1 Configuration with ViPlex Handy (Android and iOS) ................................................................................ 9
3.2.2 Configuration with ViPlex Express (Windows) ......................................................................................... 9
3.2.3 Configuration with VNNOX ..................................................................................................................... 10
4 General Operations..................................................................................................................... 11
4.1 Taurus Login .............................................................................................................................................. 11
4.1.1 Taurus Login with ViPlex Handy (Android and iOS) ............................................................................... 11
4.1.2 Taurus Login with ViPlex Express (Windows) ........................................................................................ 12
Page 46

Taurus Series Multimedia Players
Implementation Instruction of the Synchronous
Playing Solution
www.novastar.tech
V1.0.0
1
1.1 About This Solution
Taurus series multimedia players support the synchronous playing function for
multiple displays in asynchronous mode. This document is intended to instruct on-site
workers and technicians to complete configurations related to the synchronous
playing function.
1.2 Synchronous Playing Conditions
1 Overview
All following conditions are required to be met for synchronous playing:
The player supports the synchronous playing function.
The Taurus series multimedia player, launched by NovaStar, perfectly supports
the synchronous playing function, uses advanced synchronous playing
technology and scheduling technology to perform automatic calibration and
synchronization in the playing process of each media based on time.
Enable the synchronous playing function.
Taurus series products feature the perfect software supporting program, and the
user could enable the synchronous playing function through the ViPlex or
VNNOX cloud publishing system.
Time synchronization of Taurus series products
Playing and scheduling technologies are based on time, and therefore time
synchronization should be ensured for synchronous playing. Taurus series
products support NTP and Lora time synchronization methods either of which can
be selected as required.
Feature the same playing plan without random transition or media.
Playing plans sent to multiple Taurus series products must be the same without
random transition or media.
1.3 Time Synchronization
When NTP time synchronization is used, time synchronization of the Taurus series
products will be performed with NTP server as the time standard in LAN or Internet.
Advantages
Use network time synchronization technology without additional hardware.
Page 47

Taurus Series Multimedia Players
Implementation Instruction of the Synchronous
Playing Solution
www.novastar.tech
V1.0.0
2
Type
Description
Method
ViPlex Handy
It is a LAN-based display
management software, including the
one applicable to Android and iOS
operating systems, is mainly used for
display management as well as
solution editing and publishing.
Scan the following OR
code to download and
install the APP.
You can also download
the ViPlex Handy for iOS
Time synchronization accuracy depends on the Internet speed, and therefore
applicable to the case with low time synchronization requirement. It is
recommended to use such technology in LAN or good 4G network.
Disadvantages
Time synchronization depends on the Internet conditions and speed.
Additional 2GB network traffic will be consumed per month by a single terminal
when 4G network is used.
1.4 Lora Time Synchronization
When NTP time synchronization is used, master and slave devices are required to be
set for Taurus series products. Time of the slave device is synchronized with that of
the master device through Lora network.
Advantages
It is independent of network environment with good time synchronization
performance and applicable to the case with high time synchronization
requirement.
No network traffic will be consumed.
Time synchronization is available for the groups of the Taurus series products.
Disadvantages
The Lora device should be purchased.
There are limits on distance, and configurations should be performed based on
the specific conditions to ensure that radio-frequency signal can be received.
1.5 Required Softwares
Table 1-1 Software acquiring methods
Page 48

Taurus Series Multimedia Players
Implementation Instruction of the Synchronous
Playing Solution
www.novastar.tech
V1.0.0
3
from App Store.
ViPlexExpress
It is a LAN-based display
management software applicable to
the Windows operating system, and
is mainly used for display
management as well as solution
editing and publishing.
Visit www.novastar.tech,
download and install the
required software.
VNNOX
It is a safe cloud publishing service,
and is mainly used for solution
remote editing and publishing.
Visit www.vnnox.com for
register and login.
1.6 Required Hardware Devices
Required Hardware Devices
Model
Lora devices
E32-1W: Installed on the master device.
E32-100: Installed on the slave device.
When Lora time synchronization is used, it is required to purchase Lora devices, as
shown in Table 1-2.
Table 1-2 Required hardware devices
Page 49

Taurus Series Multimedia Players
Implementation Instruction of the Synchronous
Playing Solution
www.novastar.tech
V1.0.0
4
2 Implementation of NTP
Synchronization Plan
Taurus series multimedia players support NTP time synchronization in the LAN or
public network for which configured NTP server and the world-wide used NTP server
independent of configuration are required respectively.
2.1 NTP Time Synchronization in the LAN
2.1.1 NTP Server Configuration
Configure the NTP server in the LAN and record the domain name or IP address.
The Personal Computer (PC) can be set with the NTP server by default. Refer to
http://note.youdao.com/share/?id=2efee9a613935113fa0f9a874b89047f&type=note#/
for details.
2.1.2 Taurus Configuration
Taurus series products can be configured with ViPlex only in the LAN. ViPlex includes
ViPlex Handy and ViPlex Express. The user can choose one as required.
2.1.2.1 Configuration with ViPlex Handy (Android and iOS)
Step 1 Log in to the Taurus, and refer to 4.1.1 “Taurus Login with ViPlex Handy (Android and
iOS)” for specific operations.
Step 2 Click the screen name to enter the Screen management page.
Step 3 Enable the synchronous playing function.
1. Select Advanced Setting, Advanced features.
2. Turn Sync_play on.
Step 4 Return to Advanced Setting page.
Step 5 Configure NTP time synchronization.
1. Select Correct Time.
2. Click Time mode, select NTP, and click OK.
3. Click Server.
4. Turn Time Auto-sync on.
Page 50

Taurus Series Multimedia Players
Implementation Instruction of the Synchronous
Playing Solution
www.novastar.tech
V1.0.0
5
5. Click New, enter the name and visit the address of the NTP server, and then click
OK. The visit address must be the same as the configured domain name or IP
address.
6. Click OK.
Step 6 Repeat above steps to configure other Taurus series products requiring synchronous
playing till all Taurus series products have been configured.
2.1.2.2 Configuration with ViPlex Express (Windows)
Step 1 Log in to the Taurus. Refer to 4.1.2 “Taurus Login with ViPlex Express (Windows)” for
specific operations.
Step 2 Enable the synchronous playing function.
1. Select Screen Control.
2. Select Play management.
3. Select the target terminal in the terminal list, and select Startup next to
Synchronous Playing.
4. Click Yes in the pop-up dialog box.
5. Close the Play management window.
Step 3 Configure NTP time synchronization.
Currently not supported.
Step 4 Repeat above steps to configure other Taurus series products requiring synchronous
playing till all Taurus series products have been configured.
2.2 NTP Time Synchronization in the Public Network
Configure each Taurus series product respectively when the synchronous playing and
settings are enabled with ViPlex. Batch configuration could be available based on
VNNOX. In the public network, VNNOX is recommended to reduce manual
operations.
Before You Begin
Bind the asynchronous player of VNNOX through ViPlex.
Operating Procedures
Step 1 Visit http://www.vnnox.com and click Login in the upper right corner.
Step 2 Select the server node and click Ok.
Step 3 Enter the account name and password, and click Login.
Step 4 Enable the synchronous playing function in batch.
1. Select Player Management, Players in the pop-up menu of in the upper
right corner.
2. Select asynchronous players corresponding to all Taurus series products
requiring enabling the synchronous playing function.
Page 51

Taurus Series Multimedia Players
Implementation Instruction of the Synchronous
Playing Solution
www.novastar.tech
V1.0.0
6
3. Click Real-time control and select open the synchronous broadcasting from
the drop-down box.
Step 5 Configure NTP time synchronization.
1. Select Players Management, Time Synchronization in the pop-up menu of
in the upper right corner.
2. Click New in the page of time synchronization task.
3. Enter the time synchronization task name, select NTP as the type of the time
synchronization task, and then click Next.
4. Select China or America as required, and click Ok.
5. Click Add in the Players tab of the time synchronization task attribute page.
6. Select asynchronous players corresponding to all Taurus series products
requiring enabling the synchronous playing function, and click Ok.
7. Click Save or Save&Close.
Page 52

Taurus Series Multimedia Players
Implementation Instruction of the Synchronous
Playing Solution
www.novastar.tech
V1.0.0
7
3 Implementation of Lora Time
Synchronization Plan
Lora time synchronization requires setting one Taurus in Lora network as the master
device and others as the slave devices. Only the master device is used as the
standard time instead of loading the display, and the slave device is used for loading
the display.
Time synchronization of the slave device is based on that of the master device. Range
of the time synchronization is limited. Taurus supports NTP-standardized time
synchronization for the master device. If the same NTP server is configured for the
master devices of different Lora networks and the networks are normal, large-scale
time synchronization can be enabled.
One Taurus series product requires one Lora device. The Taurus and Lora device of
E32-100 and E32-1W models should be purchased before the project
implementation.
3.1 Lora Device Installation
The Lora device of E32-1W model is installed on the master device, and the Lora
device of E32-100 model is installed on the slave device.
Step 1 Make sure to power off the Taurus.
Step 2 Connect the antenna to the Lora device.
Figure 3-1 Lora Device
Page 53

Taurus Series Multimedia Players
Implementation Instruction of the Synchronous
Playing Solution
www.novastar.tech
V1.0.0
8
Figure 3-2 Antenna
Step 3 Install the Lora device on the Taurus. Figure 3-3 and Figure 3-4 show the Taurus of
T3 model and T6 model installed with Lora devices.
Figure 3-3 Install the Lora Device on Taurus of T3 model
Figure 3-4 Install the Lora Device on Taurus of T6 Model
Page 54

Taurus Series Multimedia Players
Implementation Instruction of the Synchronous
Playing Solution
www.novastar.tech
V1.0.0
9
3.2 Taurus Configuration
When the public network is not available, the ViPlex, including ViPlex Handy and
ViPlex Express, is applied to configure the Taurus, and the user could choose one as
required.
When the public network is available, VNNOX is recommended for batch
configuration to reduce manual operations.
3.2.1 Configuration with ViPlex Handy (Android and iOS)
Step 1 Log in to the Taurus. Refer to 4.1.1 “Taurus Login with ViPlex Handy (Android and
iOS)”.
Step 2 Click the screen name to enter the Screen management page.
Step 3 Enable the synchronous playing function. Please ignore this operation for the master
device.
1. Select Advanced Setting, Advanced features.
2. Turn Sync_play on.
Step 4 Return to the Advanced Setting page.
Step 5 Configure Lora time synchronization.
1. Select Correct Time.
2. Click Time mode, select Lora, and click OK.
3. Click Time parameter.
− Group ID: Use the same organization ID for the Taurus required enabling the
time synchronization function to make such Taurus series products divide
into the same Lora network.
− Device type: Set the current Taurus as the master or slave device, and only
one master device can exist in one organization. The slave device performs
time synchronization through Lora network with the master device as time
standard.
− Time Auto-sync: When time synchronization of the master device is desired
to be performed using the NTP server as the standard, automatic time
synchronization function should be enabled, and NTP server address should
be set.
4. Click OK after the configuration.
Step 6 Repeat above steps to configure other Taurus series products requiring synchronous
playing till all Taurus series products have been configured.
3.2.2 Configuration with ViPlex Express (Windows)
Step 1 Log in to the Taurus, and refer to 4.1.2 “Taurus Login with ViPlex Express (Windows)”
for specific operations.
Step 2 Enable the synchronous playing function. Please ignore this operation for the master
device.
1. Select Screen Control.
2. Select Play management.
Page 55

Taurus Series Multimedia Players
Implementation Instruction of the Synchronous
Playing Solution
www.novastar.tech
V1.0.0
10
3. Select the target terminal in the terminal list, and select Startup next to
Synchronous Playing.
4. Click Yes in the pop-up dialog box.
5. Close the Play management window.
Step 3 Configure NTP time synchronization.
Currently not supported.
Step 4 Repeat above steps to configure other Taurus series products requiring synchronous
playing till all Taurus series products have been configured.
3.2.3 Configuration with VNNOX
Before You Begin
Bind the asynchronous player of VNNOX with ViPlex.
Operating Procedures
Step 1 Visit http://www.vnnox.com and click Login in the upper right corner.
Step 2 Select the server node and click Ok.
Step 3 Enter the account name and password, and click Login.
Step 4 Enable the synchronous playing function in batch.
1. Select Player Management, Players in the pop-up menu of in the upper
right corner.
2. Select asynchronous players corresponding to all Taurus series products
requiring enabling the synchronous play function which is not required for the
master device.
3. Click Real-time control and select open the synchronous broadcasting from
the drop-down box.
Step 5 Configure Lora time synchronization.
1. Select Players Management, Time Synchronization in the pop-up menu of
in the upper right corner.
2. Click New in the page of time synchronization task.
3. Enter the time synchronization task name, select Lora as the type of the time
synchronization task, and then click Next.
4. Select a standard device for time synchronization, and then click Ok.
5. Click Add in the Players tab of the time synchronization task attribute page.
6. Select asynchronous players corresponding to all slave devices requiring
enabling the synchronous play function, and click Ok.
7. When NTP server time synchronization is required, select the Configure tab, set
NTP to Yes, and select the NTP server. Otherwise, ignore this step.
8. Click Save or Save&Close.
Page 56

Taurus Series Multimedia Players
Implementation Instruction of the Synchronous
Playing Solution
www.novastar.tech
V1.0.0
11
4 General Operations
4.1 Taurus Login
Taurus series products feature the Wi-Fi AP function which is taken as the example by
this chapter to introduce Taurus Login methods.
Other connection methods require hardware or software configuration. Refer to
“Taurus Series Multimedia Players Quick Start Guide”.
4.1.1 Taurus Login with ViPlex Handy (Android and iOS)
Before You Begin
Acquire the SSID and password of Wi-Fi AP of Taurus series products. SSID is
default to be composed of AP and the last 8 numbers of SN, and the password is
default as “12345678”.
Acquire the login password of user “admin” of which the default password is
“123456”.
Operating Procedures
ViPlex Handy can connect numerous Taurus series products.
Step 1 Connect Wi-Fi AP of the Taurus series products.
Step 2 Start ViPlex Handy.
System can automatically detect the Taurus series products and refresh Screen list.
Users can also slide down Screen list to manually refresh the list.
Step 3 Click Connect next to the screen name.
: denotes that Taurus is online and you can log into it.
: denotes that Taurus is offline and you cannot log into it.
: denotes that Taurus login is successful.
Step 4 Enter the user name and password and click Login.
Page 57

Taurus Series Multimedia Players
Implementation Instruction of the Synchronous
Playing Solution
www.novastar.tech
V1.0.0
12
4.1.2 Taurus Login with ViPlex Express (Windows)
Before You Begin
Acquire the SSID and password of Wi-Fi AP of Taurus series products. SSID is
default to be composed of AP and the last 8 numbers of SN, and the password is
default as “12345678”.
Acquire the login password of user “admin” of which the default password is
“123456”.
Operating Procedures
ViPlex Express can connect numerous Taurus series products.
Step 1 Connect Wi-Fi AP of the Taurus series products.
Step 2 Start the ViPlex Express.
Step 3 Click Refresh and the screen list will be displayed on the page.
: denotes that Taurus is online and you can log into it.
: denotes that Taurus is offline and you cannot log into it.
: denotes that Taurus login is successful.
After the Taurus is found by ViPlex Express, the ViPlex express will try to log into to
the Taurus with the default account or the account used for last login.
Step 4 Taurus login is successful or not.
Yes. appears and no further operation is required.
No. appears and then perform Step 5.
Step 5 Click Connect on the right of the screen information.
Step 6 Enter the username and password, and click OK.
Page 58

ViPlex Express
LAN-Based Screen Management Software
User Guide
Version:
V1.0.0
Document Number:
NS120100148
Page 59

ViPlex Express LAN-Based Screen Management Software
User Guide
www.novastar.tech
V1.0.0
i
Version
Release Date
Description
V1.0.0
2017-07-20
First release.
Change History
Page 60

ViPlex Express LAN-Based Screen Management Software
User Guide
www.novastar.tech
V1.0.0
ii
Table of Contents
Change History .................................................................................................................................. i
Table of Contents ............................................................................................................................ ii
1 ViPlex Express Introduction ....................................................................................................... 1
2 Installation of ViPlex Express..................................................................................................... 1
3 Login of Taurus ............................................................................................................................. 2
4 Program Management .................................................................................................................. 3
5 Screen Control ............................................................................................................................... 5
5.1 General Function ......................................................................................................................................... 5
5.2 Play Management ........................................................................................................................................ 5
5.3 Server Configuration .................................................................................................................................... 6
5.4 Network Configuration ................................................................................................................................. 6
5.5 Screen on/off ............................................................................................................................................... 7
5.6 Screen Upgrade ........................................................................................................................................... 8
5.7 Monitor ......................................................................................................................................................... 8
5.8 Screen Information ...................................................................................................................................... 8
6 System Settings ............................................................................................................................. 9
Page 61

ViPlex Express LAN-Based Screen Management Software
User Guide
www.novastar.tech
V1.0.0
1
1 ViPlex Express Introduction
Designed for Windows PC, ViPlex Express is the client software of the Taurus series
multimedia players and mainly used for managing screens, editing and publishing
programs.
Advantages:
Friendly user interface: UI design takes full account of users’ habits.
Ease of use: The Taurus series players can be connected wirelessly and
accessed easily.
Synchronous playing: Capable of playing the same content on different screens
synchronously.
Dual Wi-Fi function: Capable of setting Wi-Fi AP mode and Wi-Fi Sta mode.
4G connection: Capable of setting mobile data network of the Taurus with 4G
module.
Terminal binding: The Taurus series players can be easily bound to the cloud-
based publishing system VNNOX and the cloud-based monitoring system
NovaiCare.
2 Installation of ViPlex Express
Before You Begin
Get the installation package of ViPlex Express.
How to get: Visit www.novastar.tech.
Install Framework 4.6.1 or above.
Operating Procedures
Step 1 Double click the installer “ViPlex Express V1.0.0 Setup.exe”.
Step 2 Click Next in the setup wizard.
Step 3 Select installation path and click Next.
Step 4 Select start menu folder and click Next.
Page 62

ViPlex Express LAN-Based Screen Management Software
User Guide
www.novastar.tech
V1.0.0
2
Step 5 Select additional tasks and click Next.
Item
Account Name
Default Password
Connect Taurus WiFi AP
AP+last 8 digits of the SN
For example: AP10000033
12345678
Log in Taurus
admin
123456
Step 6 Click Install.
Step 7 After the installation is done, select or deselect Run ViPlex Express and click
Finish.
Required Information
Get the actual values of the information in Table 3-1.
Table 3-1 Required information
3 Login of Taurus
Operating Procedures
ViPlex can connect multiple Taurus series products.
Step 1 Connect the Taurus series products via the Wi-Fi AP of the Taurus, external router or
Ethernet cable.
Step 2 Start ViPlex Express.
Step 3 Click Refresh, and the screen list appears.
After Taurus is found by ViPlex Express, ViPlex Express will attempt to log in the
Taurus automatically with the default account or the account used for last login.
Step 4 Automatic Login is successful or not.
Yes. is shown and the operation is finished.
No. is shown. Then go to Step 5
Step 5 Click Connect next to the screen information.
: Denotes that the Taurus is online and you can log in it.
: Denotes that the Taurus is offline and you cannot log in it.
: Denotes that logging in the Taurus is successful.
Step 6 Enter your user name and password, and then click OK.
Page 63

ViPlex Express LAN-Based Screen Management Software
User Guide
www.novastar.tech
V1.0.0
3
Related Operations
Media Type
Format
Text
N/A
Image
JPEG, BMP, GIF, PNG, WEBP
Audio
MPEG, WMA, WAV, OGG, FLAC, AAC, AMR, MIDI
Video
MPEG-1/2, MPEG-4, H.264/AVC, MVC, H.265/HEVC, Google
VP8, H.263, VC-1, Motion JPEG
Right click the screen information to see the related operations.
Logout: Log out of the Taurus.
Rename: Rename the Taurus.
Password Modification: Modify the password used for the user “admin” to log in
the Taurus.
Forget password: Delete the user name and password used for last login.
If the user enter the password of the user “admin” to log in Taurus, ViPlex Express
will automatically save the account information and the user can log in Taurus
automatically in future. In case of selecting forget password, the user will need to
enter the account information again while logging in Taurus in future.
4 Program Management
ViPlex Express supports the media formats shown in Table 4-1
Table 4-1 Media formats
Create Programs
Get the screen size before creating programs.
Step 1 Click New.
Step 2 Enter playlist name, screen width and height, and then click OK. The editing page of
the program appears, as shown in Figure 4-2. Each area of the page is explained in
Table 4-2.
Page 64

ViPlex Express LAN-Based Screen Management Software
User Guide
www.novastar.tech
V1.0.0
4
Figure 4-1 The editing page of a program
No.
Description
1
Editing area for creating, copying and deleting pages and adjusting
the order of pages. Pages are played according to the order from the
top to bottom.
2
Editing area of page media, for deleting media and adjust media
layout. Click to select the media before operation.
3
Editing area for editing widget properties and page properties.
Widgets are the media added in pages. Click to select a widget
before editing the widget properties.
4
Buttons for saving a program and save a program as another
program.
5
Setting button for setting the default duration of a program.
6
Buttons for adding media to a program page.
Table 4-2 Description of the editing page of a program
Step 3 After the program is edited, click to save.
Edit Programs
In the program list, select a program and click Edit to enter the editing page.
Publish Programs
A program can be published after media are added to the program.
Page 65

ViPlex Express LAN-Based Screen Management Software
User Guide
www.novastar.tech
V1.0.0
5
Only one program can be sent to terminals each time.
One program can be sent to multiple terminals simultaneously.
Step 1 Select a program in the program list and click Publish, or click next to the
program information.
Step 2 Click Refresh in the Playlist Release dialog box to show the information of terminals
which are logged in.
Step 3 Select one or more terminals and click Publish.
Step 4 When Progress shows 100%, click Done.
5 Screen Control
5.1 General Function
There is a Read back button in each of the functions of terminal control to read back
terminal inforamtion to ViPlex Express so that the latest date are shown in the
software.
5.2 Play Management
Manage the play mode, volume and content of terminals.
Turn on Synchronous Playing
Step 1 Select the target terminal in the terminal list.
Step 2 Select Startup next to Synchronous Playing.
Step 3 Click Yes in the pop-up dialog box.
Adjust Volume in Real Time
Drag the slider or enter a value to adjust volume. Volume can be adjusted only in
asynchronous mode.
Play/Stop Programs
Play a program: Move the mouse to the thumbnail of the program and click .
Stop a program: Move the mouse to the thumbnail of the program and click .
Page 66

ViPlex Express LAN-Based Screen Management Software
User Guide
www.novastar.tech
V1.0.0
6
Delete Programs
Select programs in the program thumbnail list and click Delete.
5.3 Server Configuration
Bind VNNOX Player and NovaiCare.
Bind VNNOX Player
Step 1 View player authentication information.
1. Visit http://www.vnnox.com and click Login at the top right of the page.
2. Select a server node and click Ok.
3. Enter your account name and password, and then click Login.
4. Select Organization Management, System Management in the pop-up menu
of at the top right of the page.
5. Select the Player Authentication tab and view server address, certified user
name and password.
Step 2 Select the target terminal in the terminal list.
Step 3 Configure player authentication information in Configure parameters for
connecting screens to VNNOX. The authentication information must be the same
as the information on VNNOX.
Step 4 Click next to Player and select a player.
Step 5 Click Apply.
Bind NovaiCare
Step 1 Select Enable next to NovaiCare configuration in Configure parameters for
connecting screens to NovaiCare.
Step 2 Configure NovaiCare server address and login user name.
Step 3 Click Apply.
5.4 Network Configuration
Configure current network, including wired network, Wi-Fi AP, Wi-Fi Sta and mobile
network.
Configure Wired Network
It is required to set static IP address for Taurus while connecting Taurus via Ethernet
cable. Set IP address according actual needs while connect Taurus to the Internet
via Ethernet cable,
Step 1 Select the target terminal in the terminal list.
Page 67

ViPlex Express LAN-Based Screen Management Software
User Guide
www.novastar.tech
V1.0.0
7
Step 2 In Wired network configuration, perform the following operations according to
actual needs.
Select Enable next to Dynamic DHCP to get IP address automatically.
Deselect Enable next to Dynamic DHCP and configure static IP address.
Step 3 Click Apply.
Configure Wi-Fi AP
The default SSID of terminal Wi-Fi AP is “AP + the last 8 digits of the SN” and the
default password is “12345678”.
Step 1 Enter the SSID and password of terminal Wi-Fi AP.
Step 2 Click Apply.
Configure Wi-Fi Sta
If the external router is connected to the Internet, terminals can access Internet via
the external router after Wi-Fi Sta is configured.
Step 1 Turn on Wi-Fi in Wi-Fi configuration.
Step 2 Double click the Wi-Fi information of the external router, enter password and then
click OK.
Configure Mobile Network
Terminals with 4G module can access Internet via mobile data.
Step 1 Insert 4G card into the slot.
Step 2 Turn on Mobile network.
5.5 Screen on/off
Restart terminals immediately and configure restart rules.
Restart Taurus
Step 1 Select the target terminal in the terminal list.
Step 2 Click Restart promptly.
Step 3 Click Confirm in the pop-up dialog box to restart the terminal immediately.
Configure Restart Rules
Step 1 Perform the following operations according to actual needs.
Create a rule: Click . Set the time and cycle to restart a terminal in the popup dialog box and then click OK.
Modify a rule: Select a rule and click to modify the time and cycle to restart
a terminal and then click OK.
Page 68

ViPlex Express LAN-Based Screen Management Software
User Guide
www.novastar.tech
V1.0.0
8
Delete rules: Select one or more rules and click . Then click Confirm in the
pop-up dialog box.
Clear rules: Click and then click Confirm in the pop-up dialog box.
Enable rules: In the rule list, turn on Sure to enable next to a rule.
Step 2 After the configuration is done, click Apply.
5.6 Screen Upgrade
Upgrade the application software and system software of terminals.
Note: Keep the power on during upgrade.
Upgrade Application Software
Step 1 Select Screen software.
Step 2 Select upgrade package path.
Step 3 Select one or more terminals in terminal information list and click Upgrade.
Upgrade System Software
Step 1 Select Screen system.
Step 2 Select upgrade package path.
Step 3 Select one or more terminals in terminal information list and then click Upgrade.
5.7 Monitor
View terminal hardware information and play screenshot. Hardware information
includes disk size, memory usage, CPU usage, CPU temperature and environment
brightness.
5.8 Screen Information
Show terminal IP address, system software version, application software version, etc.
Page 69

ViPlex Express LAN-Based Screen Management Software
User Guide
www.novastar.tech
V1.0.0
9
Menu
Description
Language
Set system language, including Chinese and English.
Setting
Set the save path of files, including the configuration files of
ViPlex Express, data, temporary files, etc.
About
Show the version of ViPlex Express and the official website of
NovaStar.
Help
View ViPlex Express User Guide.
6 System Settings
 Loading...