


Lucid DMX
|
|
Table of contents |
|
I Welcome to Lucid DMX |
1 |
||
II Installation |
4 |
||
1. |
1. |
Software |
3 |
2. |
2. |
USB - DMX Interface |
7 |
III Quick start guide |
10 |
||
1. |
1. |
Add fixtures |
9 |
2. |
2. |
Design the stage |
12 |
3. |
3. Make the program |
14 |
|
4. |
4. Play the show |
23 |
|
IV Setup and programming tools |
29 |
||
1. |
1. |
Add a generated effect |
28 |
2. |
2. |
Setup a LED matrix |
30 |
3. |
3. How to use the XY Moving Area |
33 |
|
4. |
4. How to use the RGB / CMY Color Picker |
37 |
|
5. |
5. |
Desktop's features |
39 |
6. |
6. |
Scene, Sequence and Cue features |
46 |
V Playback tools |
52 |
||
1. |
1. |
Cues and Sequences Playback |
51 |
2. |
2. |
Live Tools |
55 |
3. |
3. |
Live Desktop and Presets |
57 |
4. |
4. |
EasyRemote (tablet/smartphone control) |
60 |
VI Configuration tools |
65 |
||
1. |
1. How to open the Library editor |
64 |
|
2. |
2. General Settings |
65 |
|
|
2.1. 2.1 General |
65 |
|
|
2.2. 2.2 Desktop |
67 |
|
|
2.3. 2.3 Shortcuts |
70 |
|
3. |
3. |
DMX Output levels |
71 |
VII 180IQ features |
74 |
||
1. |
1. |
Setup and programming tools |
73 |
1.1. MIDI and DMX IN Links |
73 |
2. 2. Playback tools |
76 |
2.1. MIDI and Ports Triggers |
76 |
3. 3. Configuration tools |
77 |
3.1. Configure the StandAlone Mode |
77 |
3.2. How to configure the multi universes mode |
83 |
3.3. How to test the ports |
87 |
VIII FAQ - Troubleshooting |
90 |
IX Appendices |
92 |
1. DMX512 brief description |
91 |
Lucid DMX |
I Welcome to Lucid DMX |
I Welcome to Lucid DMX
Thank you for your interest in the
Lucid DMX
lighting control software.
Throughout this manual you will find useful information that will help you get the most from your lighting fixtures using our software.
You will find the following sections in this manual:
Installation
How to install the software and USB-DMX interface
Quick Start Guide
Explains the most basic concepts in the software, to allow you to get your lighting fixtures working in no time.
Setup and Programming Tools
A comprehensive look at all setup and programming tools.
Playback Tools
Explains all tools used for live playback of your lighting shows.
Configuration Tools
Everything from DMX output to modifying fixture libraries/profiles
180IQ Edition Features
Tools that are exclusive of the 180IQ version of our software
FAQ – Troubleshooting
Any question, start here.
Appendices
Introduction to DMX, useful accessories, etc.
If you already purchased one of our Lucid DMX packages, you will find it contains: 1 USB-DMX interface, 1 installation CD, and 1 USB cable.
Once again, thank you for your interest in the Lucid DMX software… enjoy!
Page 1

Lucid DMX |
I Welcome to Lucid DMX |
Page 2
Lucid DMX |
II Installation |
II Installation
1. 1. Software
You can install the Lucid DMX software from the installation CD included in the Lucid DMX package, or by downloading the latest installation file from the website's product page (if this is your case, ignore
the next paragraph).
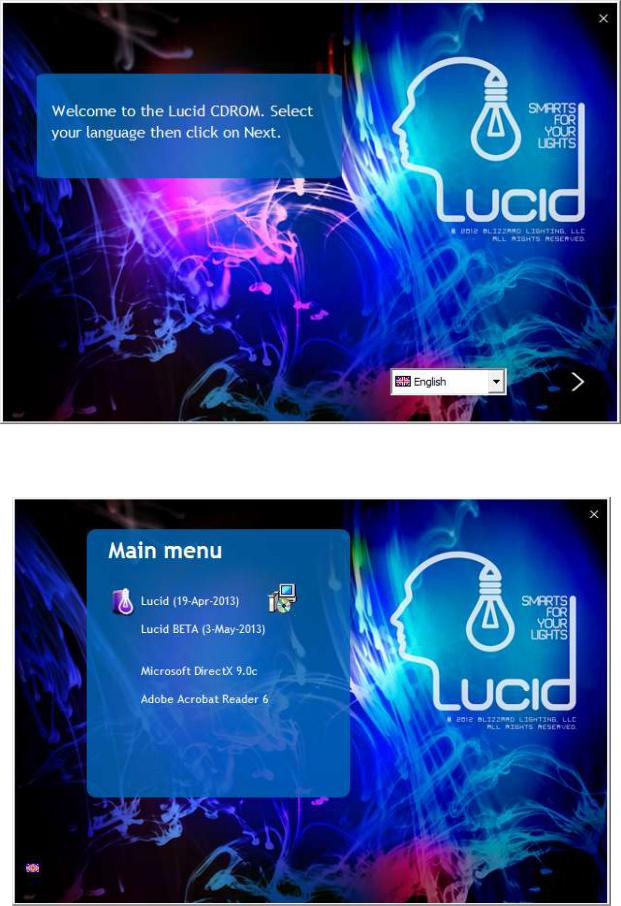
Insert the installation CD in your computer. Once the installation screen is open, select your language and click NEXT.
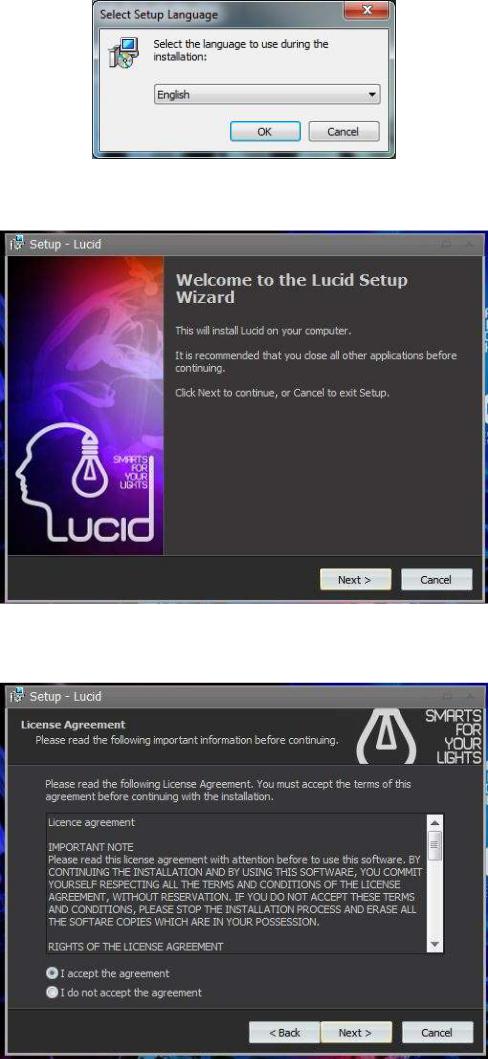
You must accept the license agreement. Finally, on the following screen, click on the INSTALL icon.
Page 3
Lucid DMX |
II Installation |
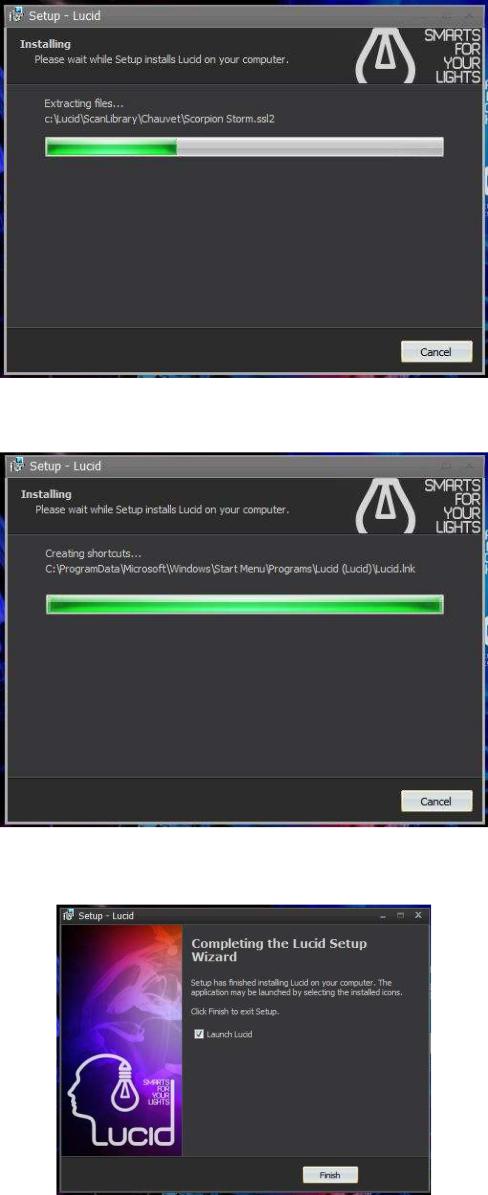
Select the installation Language.
Click Next.
Accept the License Agreement, then click Next.
Select the Lucid DMX's destination folder on your hard drive. Then click Next.
Page 4

Lucid DMX |
II Installation |
Select the name for the Start menu folder, then click Next.
If you want to create a desktop icon click Next.
Page 5
Lucid DMX |
II Installation |
The Setup is now ready to begin installing the Lucid DMX software on your computer, click Install.
Wait while the Setup installs Lucid DMX.
You are done! Now, it is time to start playing with our software. Click Finish to launch Lucid DMX.
Page 6
Lucid DMX |
II Installation |
Enjoy!
2. 2. USB - DMX Interface
If you purchased a software package and received a USB to DMX interface, you will need to install the drivers for it. You can use the full software without the interface, but you will need this USB-DMX device if you want to control real lighting fixtures.
Windows will find the driver and will tell you the device is not validated, and will ask if you wish to continue. Although Microsoft does not have a numerical registry for this driver, there is no risk of incompatibility. Click "Install".
Page 7

Lucid DMX
You are done! But remember, the software detects the USB interface when it starts. This means that you must have the USB interface connected to your computer before you open the control software. Otherwise, there will be no communication between the software and the interface.
Page 8
II Installation
Lucid DMX |
III Quick start guide |
III Quick start guide
This section of the manual will show you in very few and simple steps how to add fixtures into the software, how to create lighting programs and shows, and how to play them.
1. 1. Add fixtures
Whether you purchased the electronic interface already or simply downloaded the free software from the internet, you probably have an idea of what type of lighting fixtures you want to control. Lucid DMX includes a library of about 3,000 profiles from lighting manufacturers from around the world.
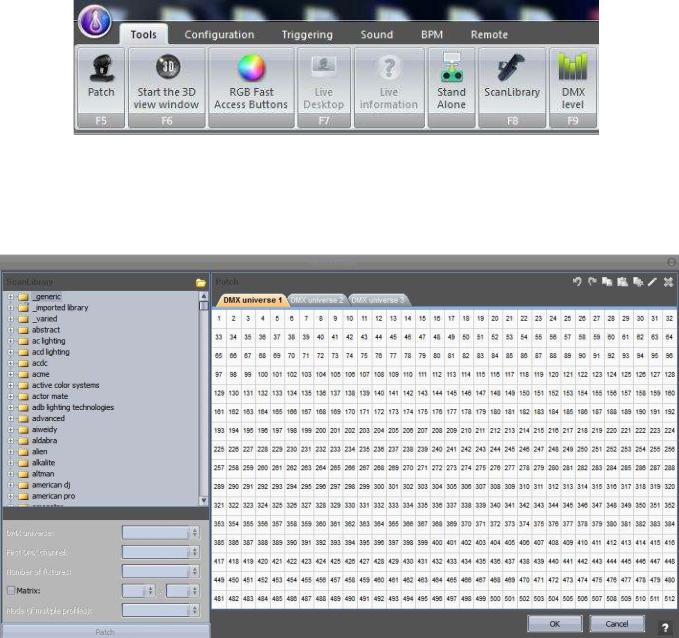
To add your fixtures into the software, click the
Patch
button inside the Tools tab.
The
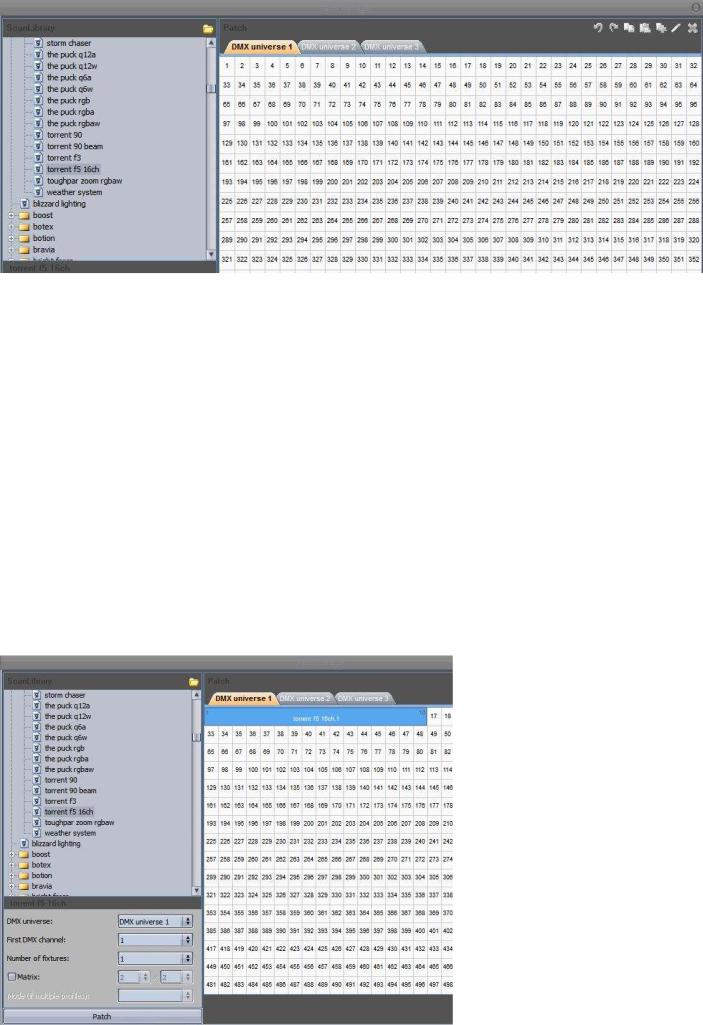
Patch Manager window appears.
First select the desired manufacturer on the folder list on the left, then select a particular lighting fixture
from this manufacturer. For example, we could select the "Blizzard Lighting" manufacturer folder, then the Torrent F5
Page 9
Lucid DMX |
III Quick start guide |
There are two ways to patch a fixture into the address map. The first is to drag and drop a particular profile from the list on the left into the address map. The second is to use the tools located at the bottom left-hand area of the Patch Manager window.
Let us try to Drag and Drop, for example. Left click and hold the "Torrent F5" item on the list,
do not release the mouse click while moving the cursor over the address map. Release the mouse click once you have chosen an appropriate DMX address.
You can modify the fixture's address whenever you want, just left click and hold on to the colored area that represents the fixture on the address map, do not release the mouse button while moving the cursor until you reach the desired address.
Continuing with our example, let us add more "Torrent F5" fixtures, except that now we will
not drag and drop the item from the list, but instead use the tools at the bottom-left hand area of the window.
Select the "Torrent F5" item from the list. As you do this, the tools in the bottom left area
will become enabled. Select the First DMX channel for your new fixture, in this case we can select 17. Select the Number of fixtures that you want to add, we can select 3, for example. To add the fixtures to the address map, click on the Patch button.
Page 10

Lucid DMX |
III Quick start guide |
You can now see 3 new fixtures in the address map.
Finally, click OK to accept the patch into the software. In your Desktop area you should see 1 icon to represent each of the 4 "Torrent F5" fixtures.
Page 11
Lucid DMX |
III Quick start guide |
2. 2. Design the stage
One of Lucid DMX's powerful features is the communication with the 3D view. You can design your stage in 3D and then import all the fixtures' positions along with a screenshot to Lucid DMX's Desktop.
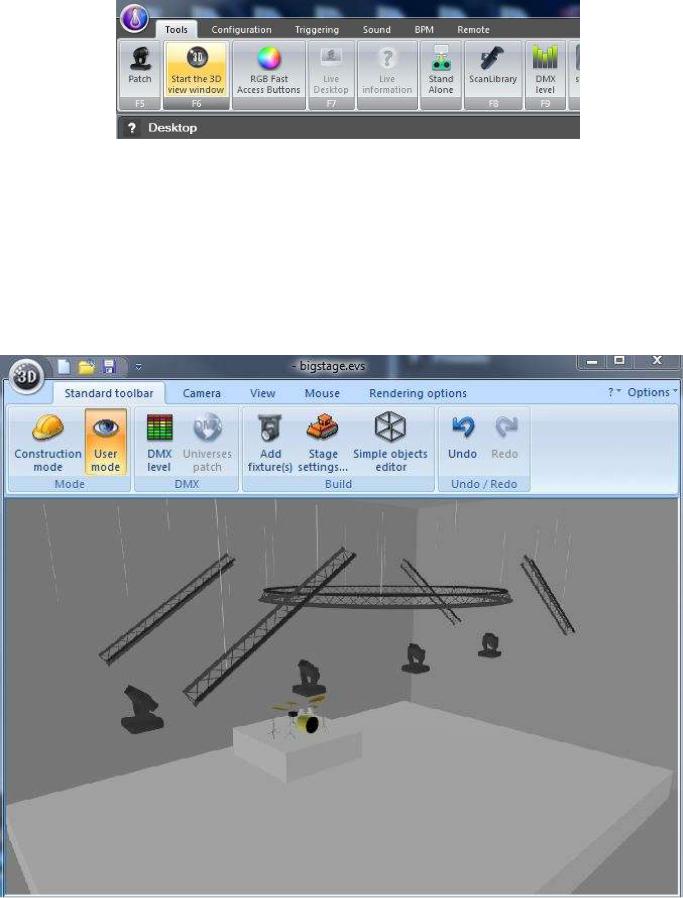
The first step is to create your 3D stage. To start the 3D view click on the "Start the 3D view window" button on the Tools tab.
The 3D view window appears, to create your stage, please refer to the
Easy View manual.
Page 12

Lucid DMX |
III Quick start guide |
To import the fixtures' positions and the screenshot, click on the ScreenShot button in the Tools tab (Warning! the 3D view must be opened). Click Yes to assign the positions. Then you can close the 3D View window.
Now we see a screenshot of the 3D view as the Desktop's background along with all the fixtures in their relevant positions.
Page 13
Lucid DMX |
III Quick start guide |
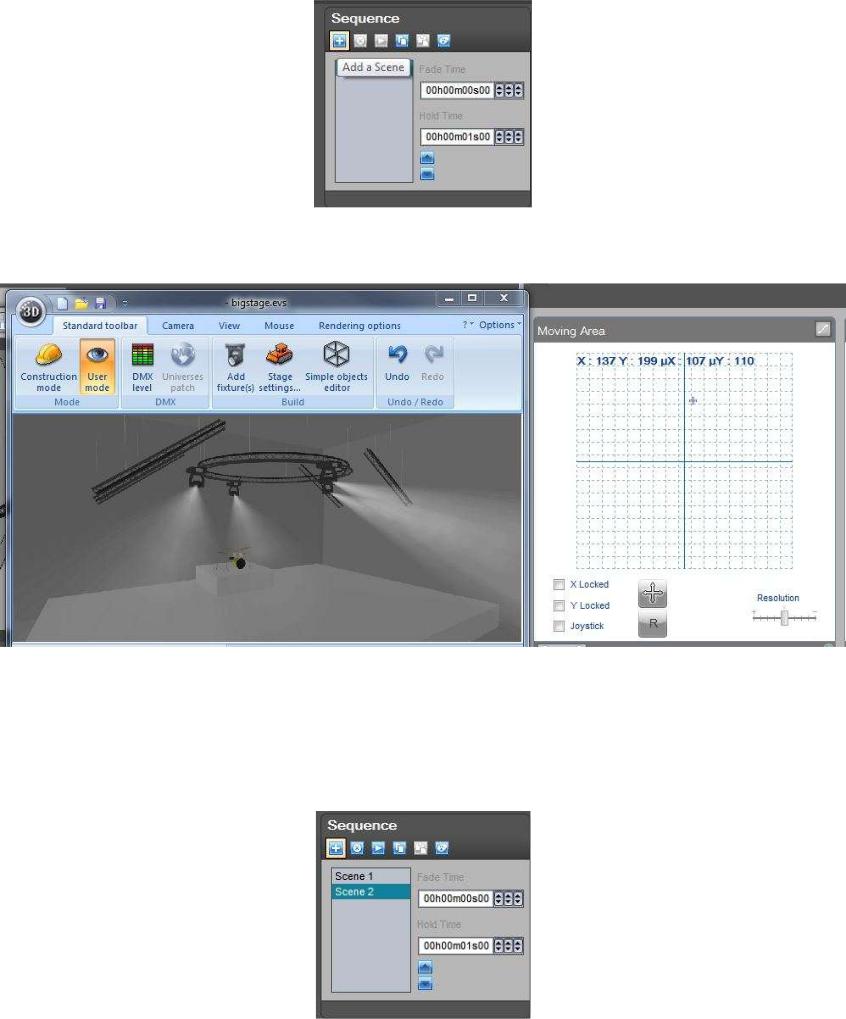
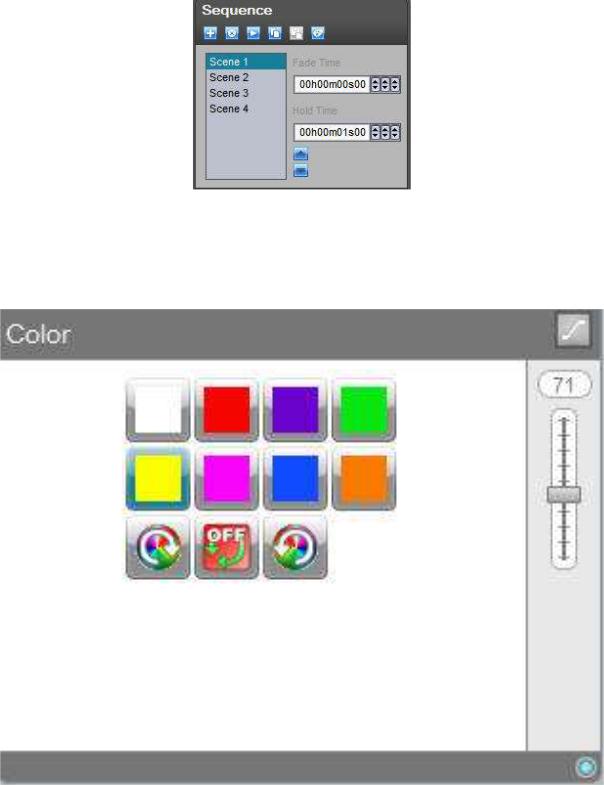
3. 3. Make the program
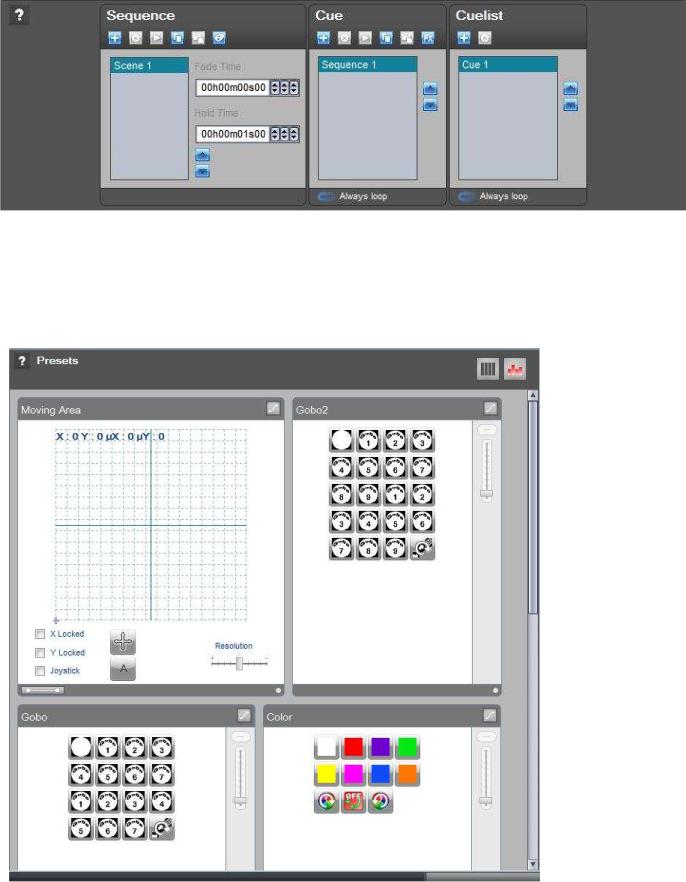
The Lucid DMX program architecture is composed of 4 parts. The first one, the basic element, is the Scene. Scenes can have a FADE time and a WAIT time. The parent element is the sequence, so within a sequence you have scenes. All the sequences are inside a Cue and all the cues are inside the
Cuelist. In fact your show is the Cuelist.
In live mode you'll be able to control the cues and sequences.
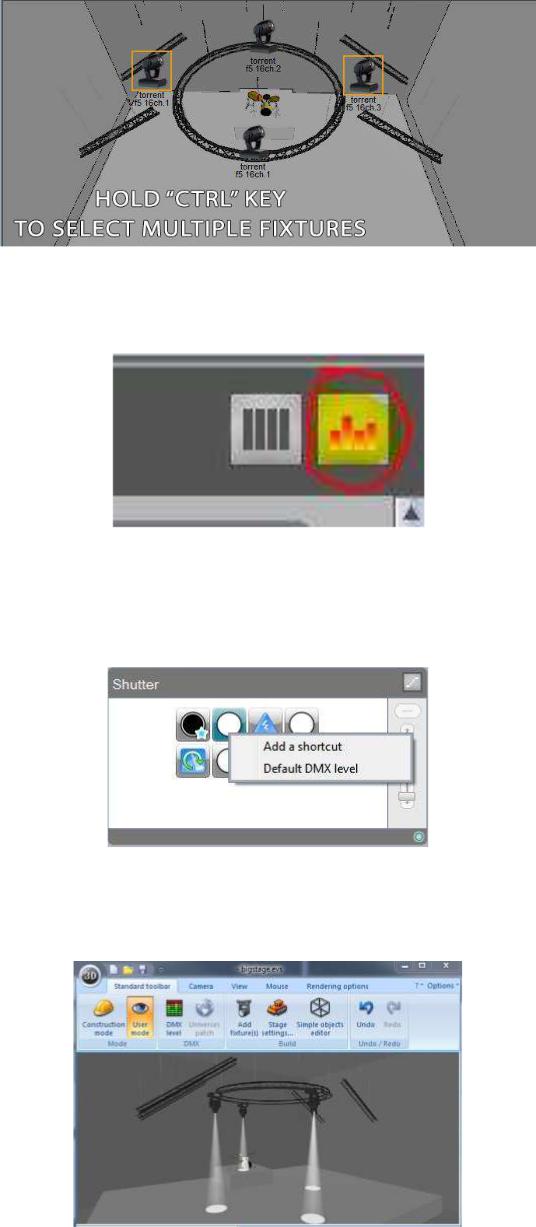
The preset viewer controls all the DMX channels of your fixtures. For each channel you can assign a new value which will be saved on the current scene.
Select the fixtures that you want to control. Hold the "Ctrl" key to make a multi-selection.
Page 14
Lucid DMX |
III Quick start guide |
If you want, you can set the DMX channels to the default value, values written inside the fixture profile.
If the default value is not good you can rewrite it, right click on the preset and select "Default DMX level".
You can now see a center white beam.
Page 15
Lucid DMX |
III Quick start guide |
To add a new scene, just click "Add".
Change the X and Y position.
Add a new scene.
Modify the position.
Page 16
Lucid DMX |
III Quick start guide |
Try your sequence, click the "Play" icon.
Stop the sequence.
Add a new sequence.
Page 17

Lucid DMX |
III Quick start guide |
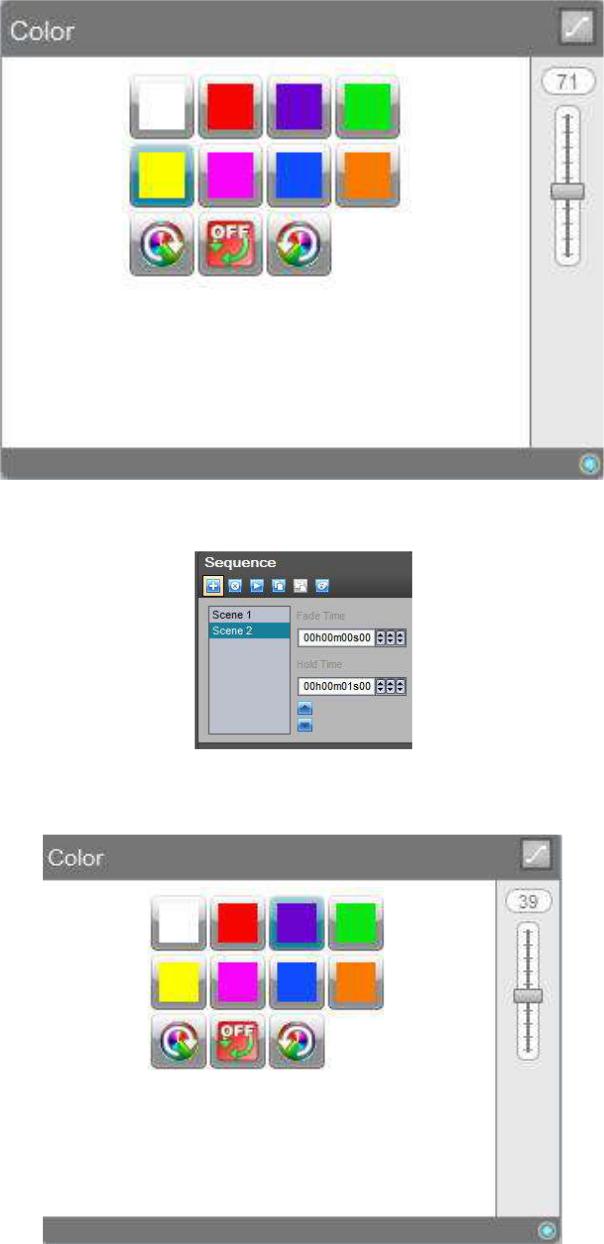
Now we want to make a color changing sequence.
We want this kind of result.
so change a color.
Page 18
Lucid DMX |
III Quick start guide |
Add a scene.
Select another color.
Page 19
Lucid DMX |
III Quick start guide |
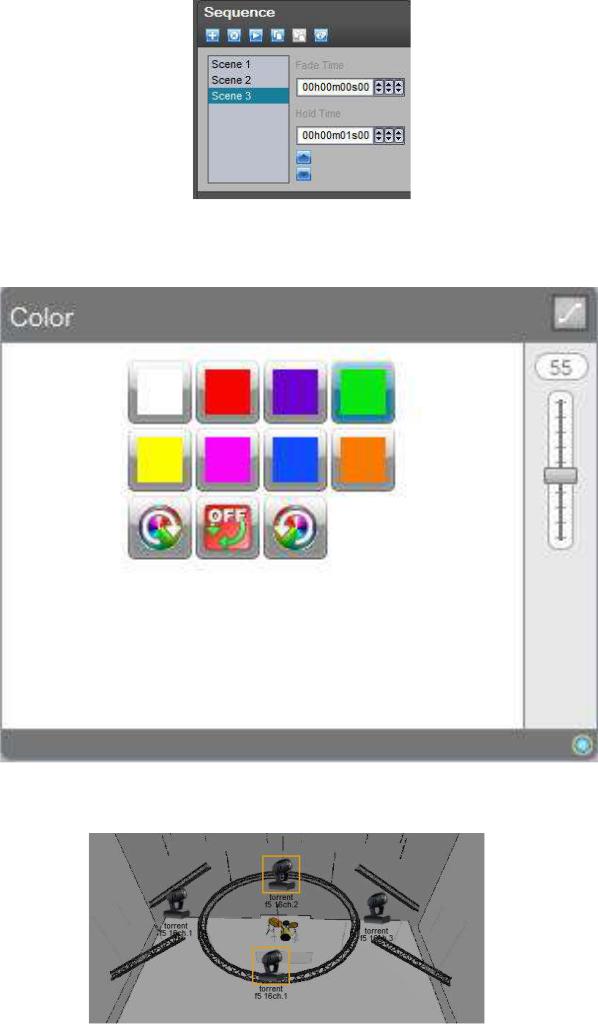
Add a new scene.
Change the color.
Change the selection.
Select the purple color.
Page 20
Lucid DMX |
III Quick start guide |
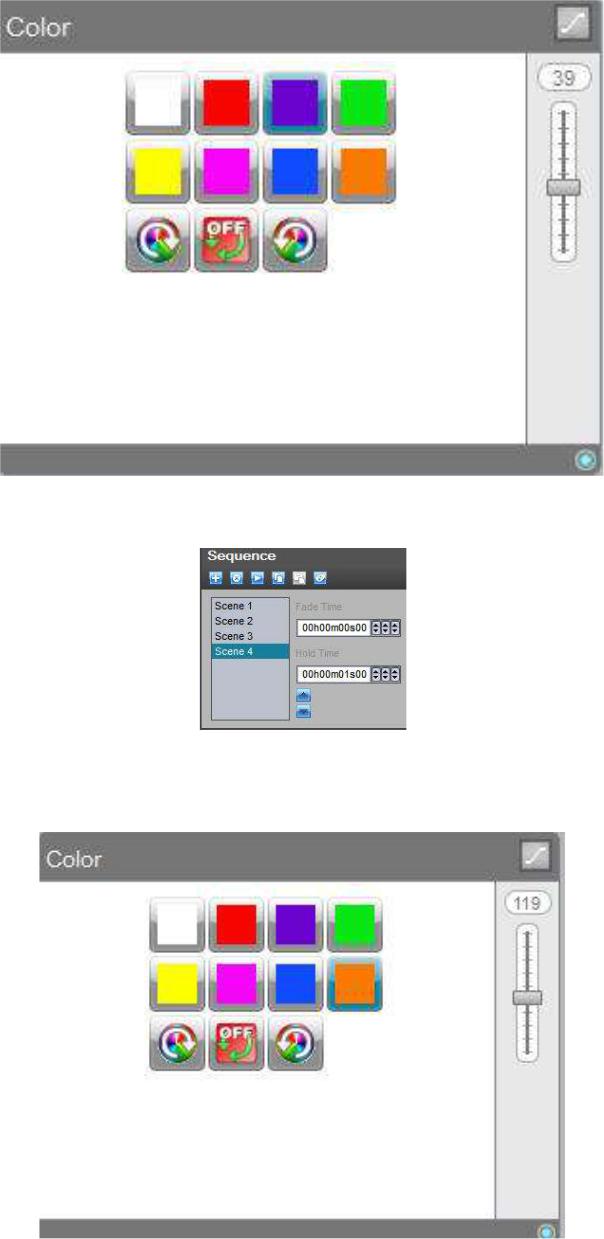
Select another scene.
Change the color.
Page 21
Lucid DMX |
III Quick start guide |
Select the first scene.
Change the color. Your show is now ready, go to the next section to find out how to playback your show!
Page 22
Lucid DMX |
III Quick start guide |
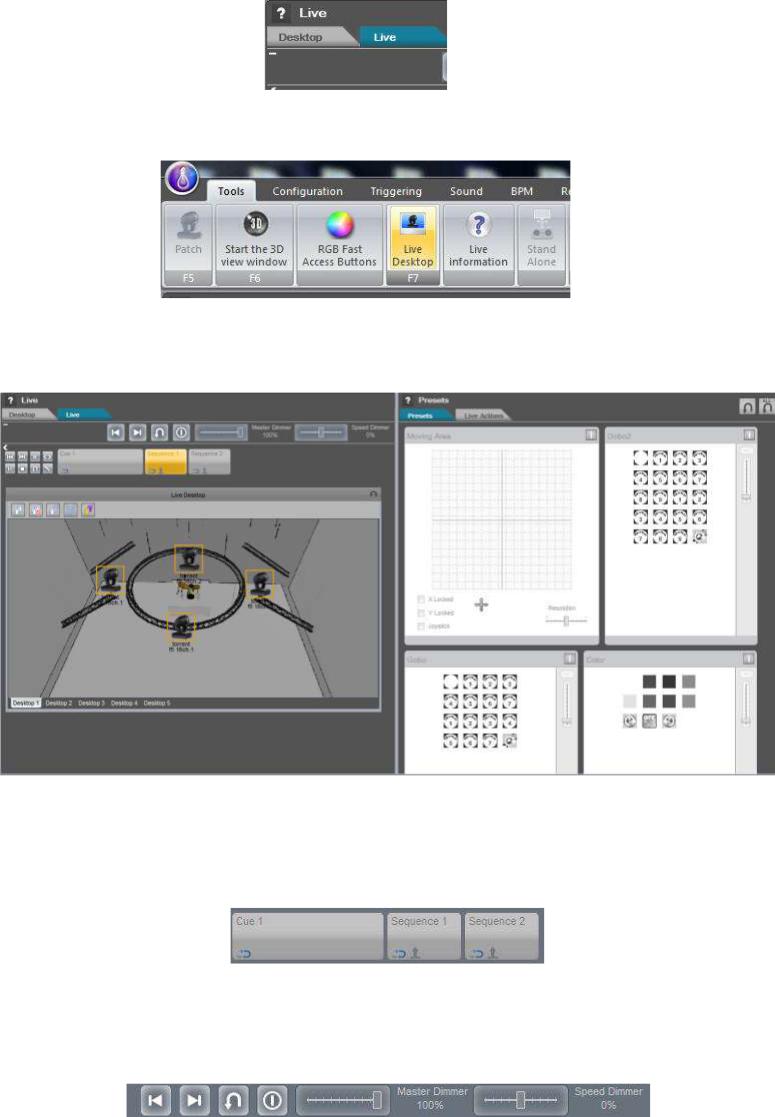
4. 4. Play the show
Select the "Live" tab.
Click "Live Desktop" to close the Live desktop window.
The Live mode is composed of two areas. The left area shows the Show architecture with the Cues and Sequences. The right area shows the fixtures' presets that can be controlled in Live mode.
The buttons represent Cues and Sequences. The first one is always a Cue, this is larger than the sequence buttons.
Use the toolbar to help you control your live show. The first item is a "Previous Sequence" function, the second a "Next Sequence" function, third a "Live Clear" function, fourth a "BlackOut" function, then the "Master Dimmer" and finally a "Speed Dimmer".
Page 23

Lucid DMX |
III Quick start guide |
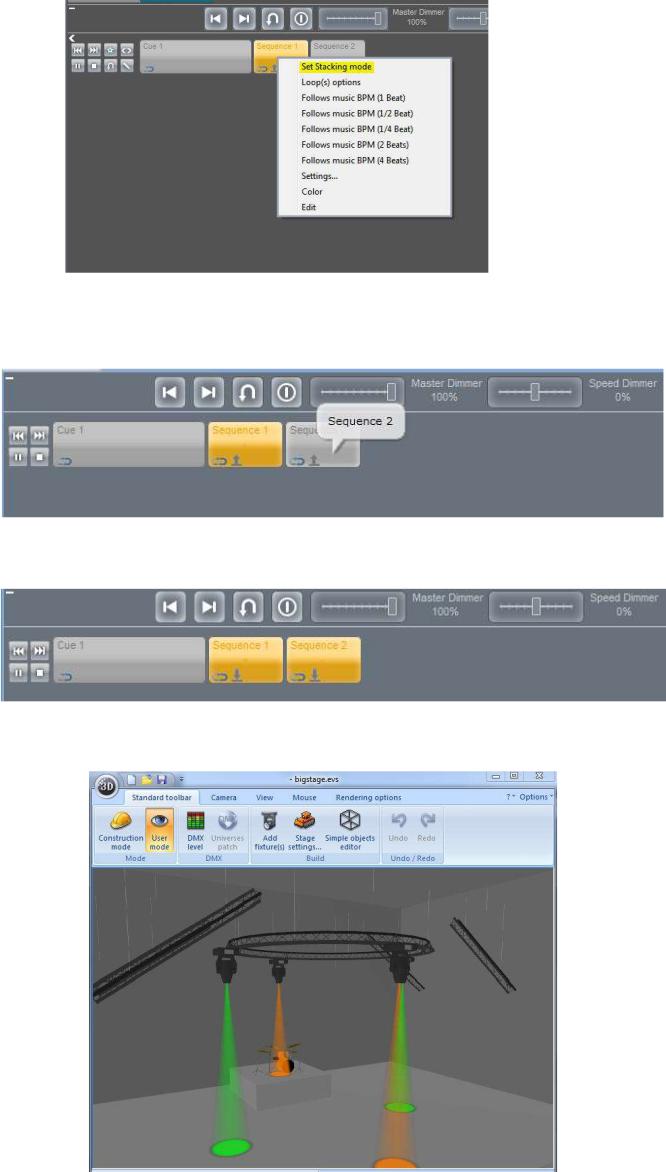
Try the first sequence, click "Sequence 1".
The Sequence 1 button is now Orange, this means that the sequence is being played back. Notice that a number 1 appears, this means that the sequence is the first playback sequence, if you click sequence 2, the number will be 2 ...
Open the 3D view to show the result.
Sequence 1, a movement sequence, is now playing.
Change the playing mode. Select the "Stacking mode". This mode will allow you to play different
Page 24
Lucid DMX |
III Quick start guide |
sequences at the same time and on the same cue. The other mode is the release mode, just one sequence can be played.
The Cue mode icon changes. Click on the Sequence 2 button.
The Sequence 2 is now enabled.
Now you can see a movement with a color change.
Page 25

Lucid DMX |
III Quick start guide |
Page 26
 Loading...